DIE-ver: 2D Pixel Dropper Game Using Unreal Engine and Piskel
by Inaff25252 in Design > Game Design
359 Views, 1 Favorites, 0 Comments
DIE-ver: 2D Pixel Dropper Game Using Unreal Engine and Piskel
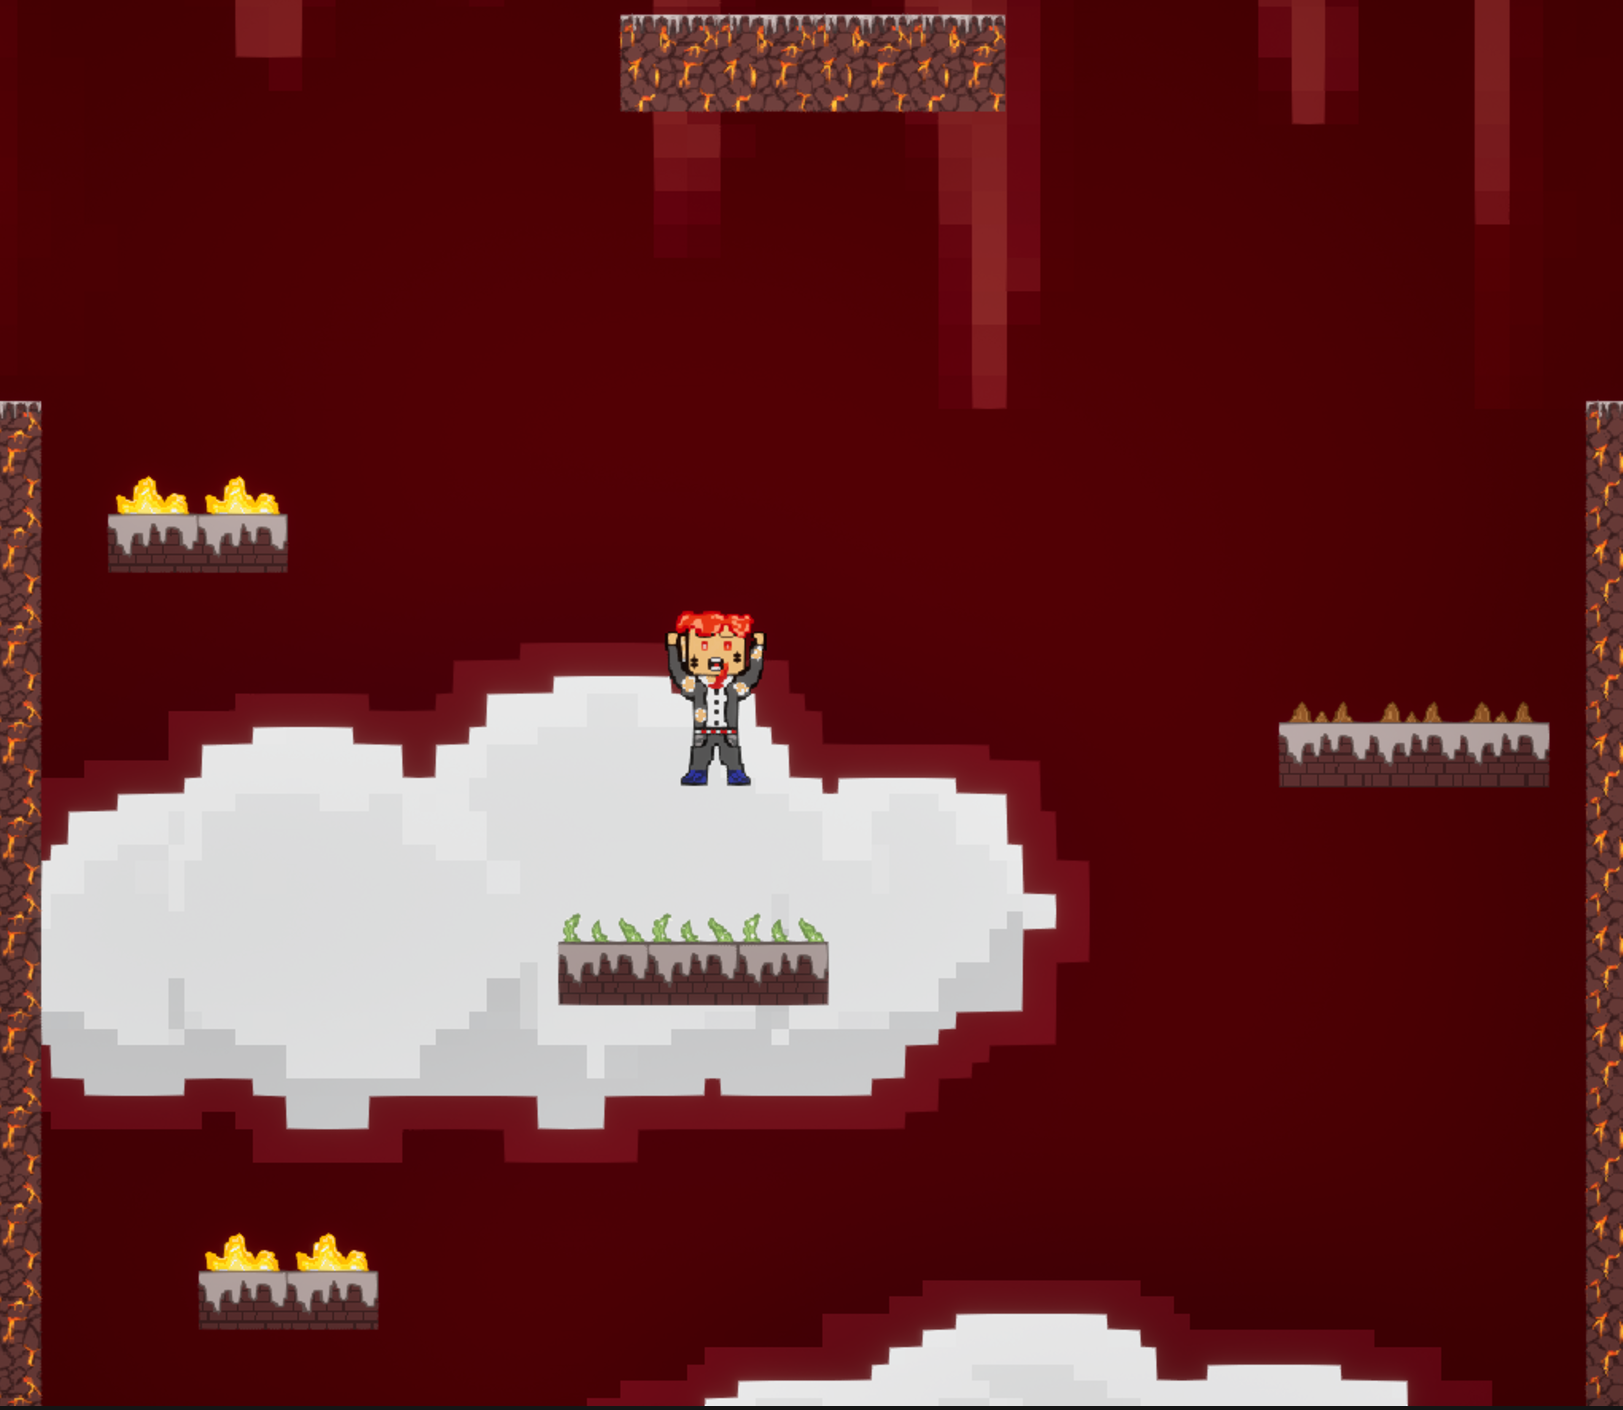
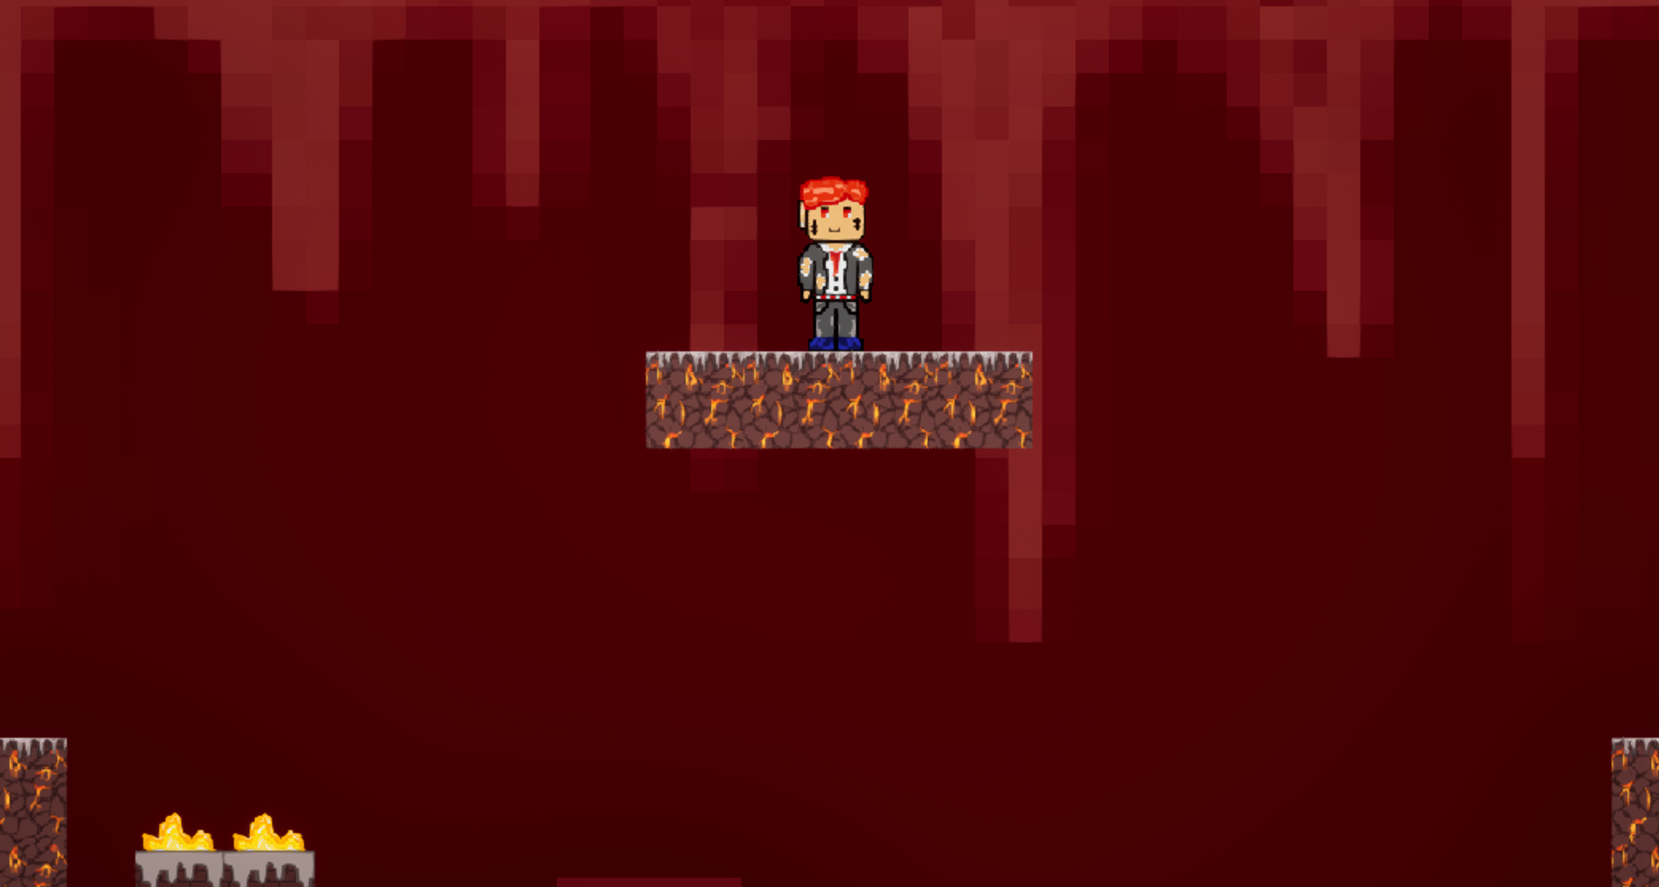
I collaborated with a classmate during our summer internship program in school (we are both sophmores). We made a video game using Unreal Engine and we split the work. She did the front end while I did the back end.
This is a guide on how to make a simple dropper game. Droppers are games where a player has to avoid hitting objects while falling in order to reach the bottom and win. If the player does hit the objects, they die and the game restarts.
This is why the name of our game is DIE-Ver, a mix of Diver and Die.
Supplies
-A Computer (I used Windows)
-Install Epic Games and then Unreal Engine using Epic Games.
-Piskel (or Photoshop/any pixel art app)
-Free assets download for backgrounds etc. (Optional)
Planning
Our first step was to plan what kind of a game we wanted to even make which ended up being a 2d pixel dropper. We then determined the theme and setting for it, which was a hellish, fiery theme. Because of this we named the game DIE-ver as if he was diving into hell.
Character Creation
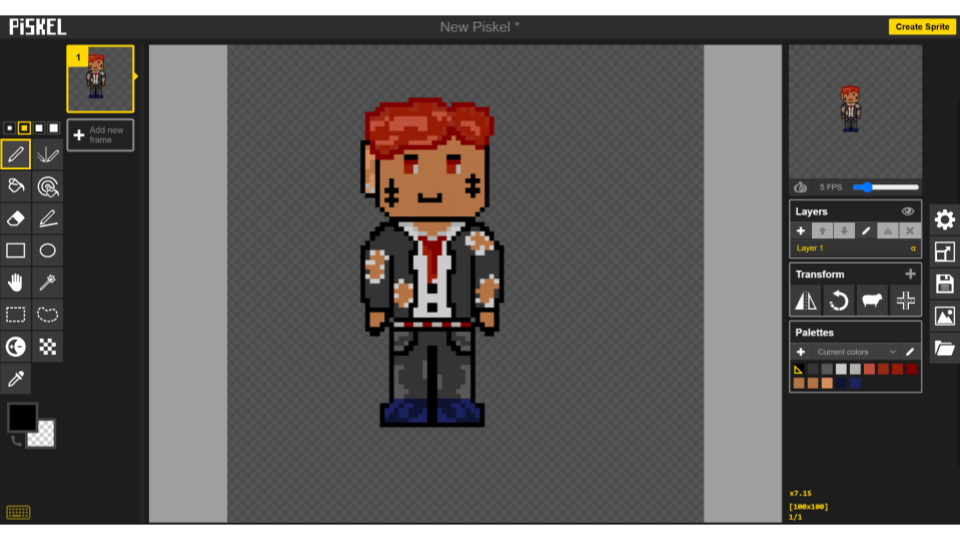
Once we determined the game, I designed the character and started to make him in Piskel, a 2d pixel art app I could use through my browser. I designed him with red hair to fit the hell theme as well as gave him scars and holes through his clothing to make his design more unique. The idea behind this is that as he is falling through hell, he has gotten injured and has had his clothes burnt through and ripped.
I started by making the general outline of the body and coloring in the outline from top to bottom. I chose the colors as I went and added highlights to various areas. The tools used most frequently were: pencil (P), bucket (B), and eraser (E). This was created on a 100 x 100 canvas.
Creating the Falling Animation
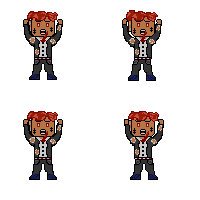
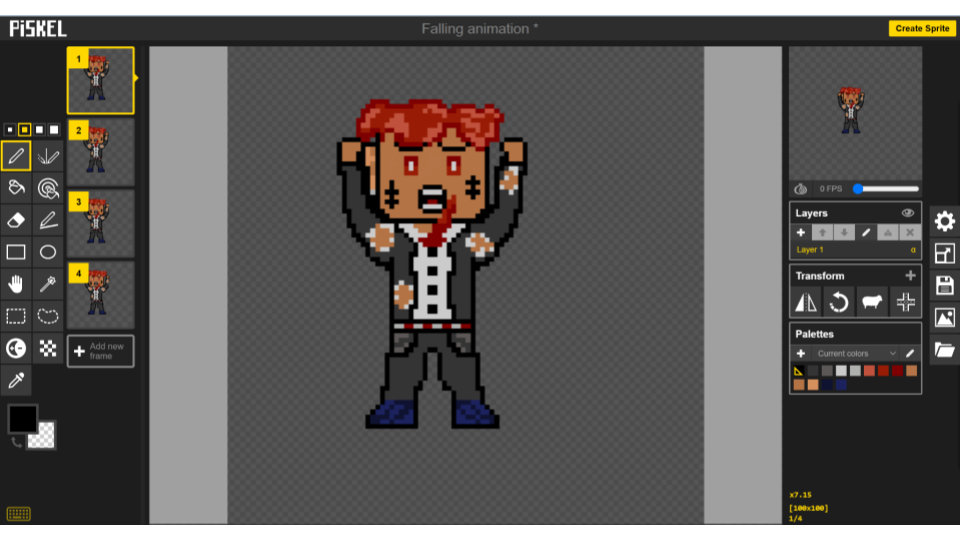
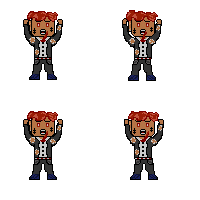
The next step was to create an animation for the character to play as he was falling through the game. My method for this was to keep the head and main body in the same place but shift the limbs, hair and tie to the left and right to make it look like he was actually falling.
(Make sure to use FRAMES not LAYERS)
To make the animation, turn on toggle onion skin right above it says Layers, which will allow you to see your last frame at a low opacity. This lets you change a little bit of each FRAME (left side) so that the sprite will be animated. Export the frames by going to settings, png spritesheet file export.
The first frame is the original falling frame then the 2nd is shifted one pixel to the left, the 3rd is also the original frame, and the 4th has it shifted a pixel to the right. When put together you get a fun animation of the character falling. You can see the animation by changing the FPS in the top right corner and opening a pop up to see the animation in a larger view. This was also made on a 100 x 100 canvas.
Downloads
Creating the Death Animation
.gif)
.png)
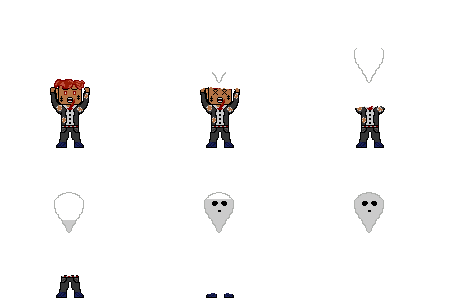
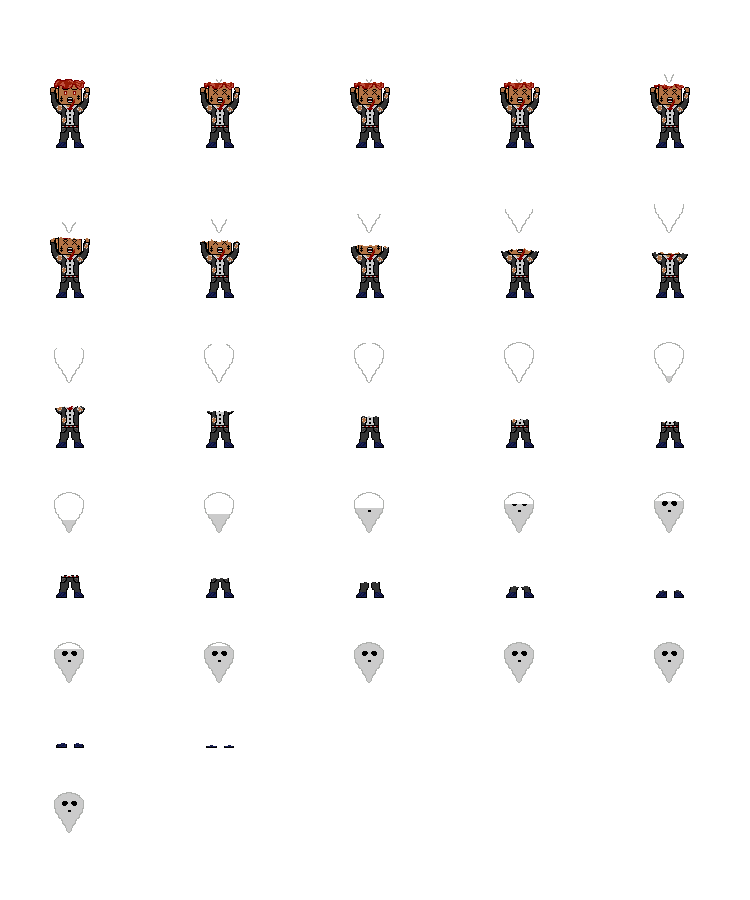
My next step was creating the death animation. When the player dies, his ghost fly out of his body. I made 26 frames for this animation and erased a little more of his body while adding more of the ghost in every frame. I did however, duplicate the second and last frames a few times so that the death portrayed by the eyes turning into X’s could be seen longer as well as the full ghost. It still flows very well in the full animation.
This is the exported sprite sheet.
Downloads
Making the Background Blocks
.png)
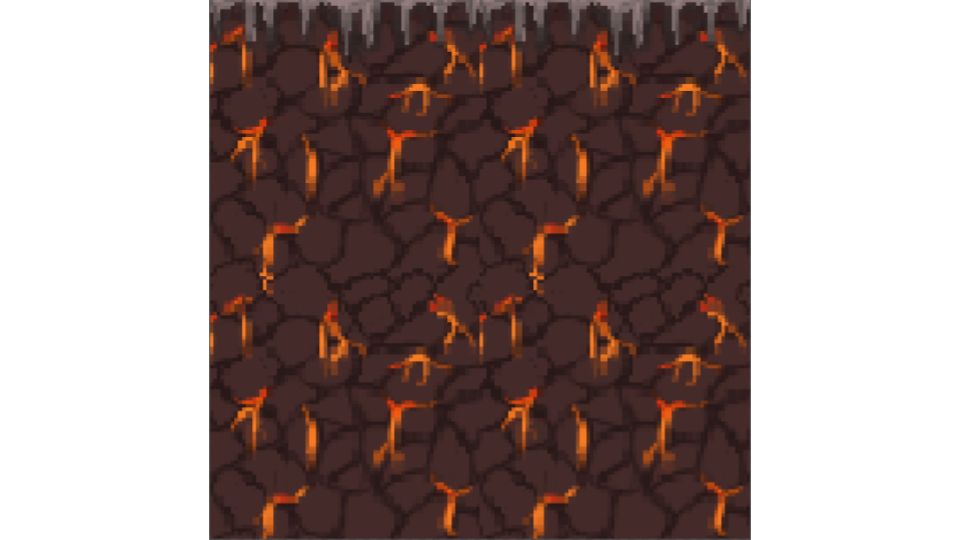
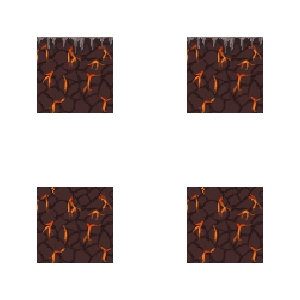
Step 4 was creating the blocks that are at the sides outlining the dropper. This took a while because the last time I had made something like this I was using photoshop and there were more tools available to help create the look I wanted but this time I used piskel and it was more meticulous to get the colors to be how I envisioned. I made one block and then adjusted it in 3 different ways to make them match up so they all look relatively similar but there are slight differences, as to make them fit together.
When you make these blocks, make sure to turn on grid in order to make things simpler once you use them in unreal, this is elaborated more in the next step.
Creating the Platforms
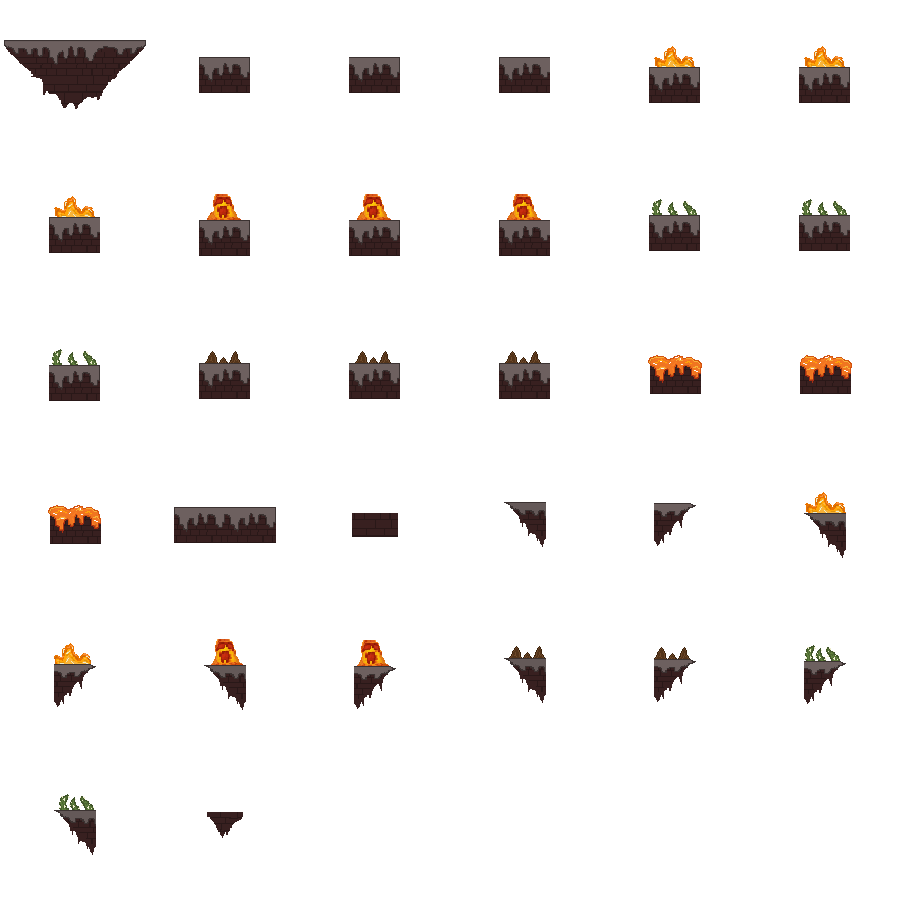
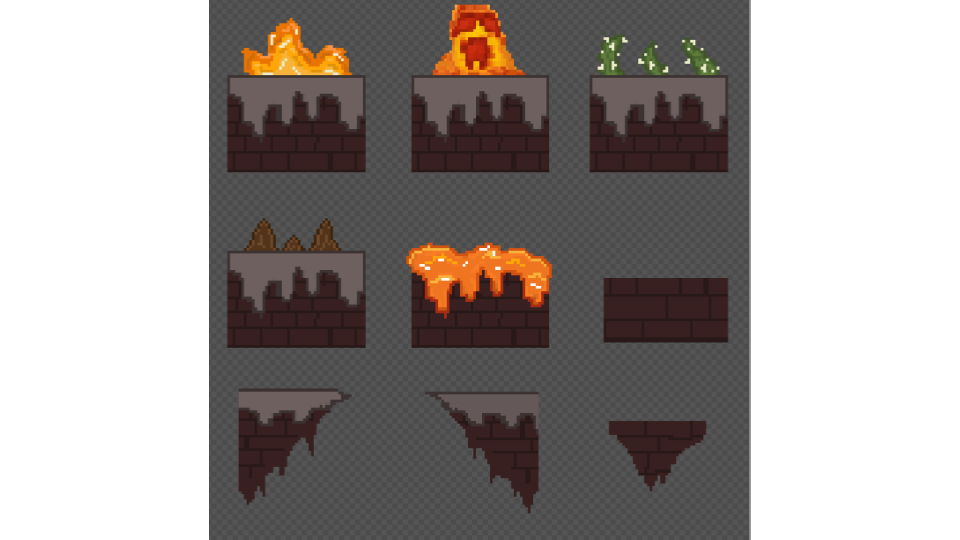
The next step was drawing the platforms. I first made the general block and chose the color scheme, you can choose any theme you want, be creative! Then I brainstormed ideas for different traps that could kill you if you were to fall on them in order to make the game more interesting.
The ideas I came up with were spikes, lava, thorny vines, fire and a lava monster. I made different variations of each trap and made it so that they could be attached to the left, right or just be left as standalone blocks. I also added the “traps” to the corner blocks to create an even larger variation. Unfortunately we were unable to use many of the blocks because they weren’t evenly spaced and couldn’t be properly selected in Unreal Engine.
Because we found out about this contest a bit too late I didn’t have the time to try to fix the issue so we just ran with what we were able to use. I did however research the issue and when you create this was supposed to use the grid available on piskel to make sure the various blocks it within the grid. Regardless, I created these platforms on 32 different frames on a 150 x 150 canvas. However, when you do it, you can create all the blocks on one frame, with each block occupying one grid square on a larger canvas.
Creating the Actual Background

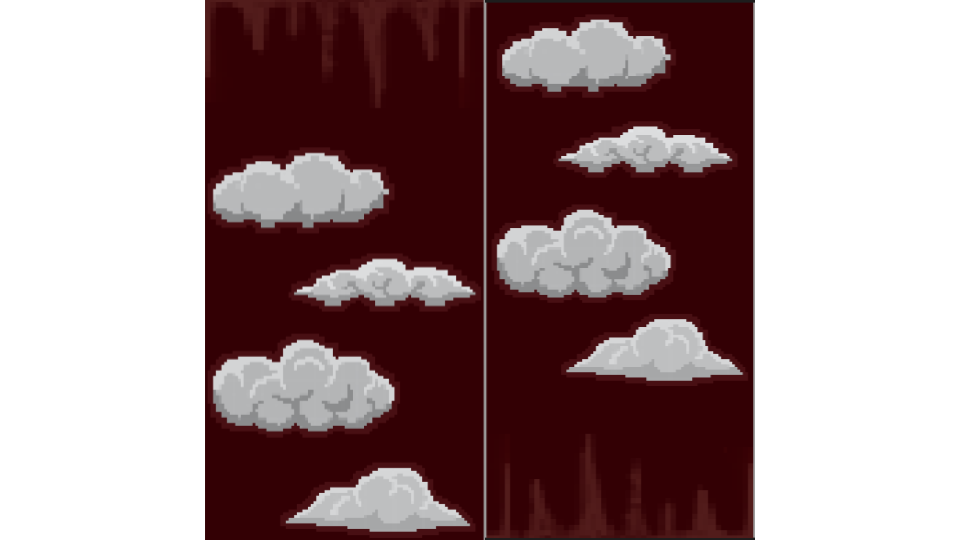
To create the background I started by looking up references and gathering ideas based on some work others have made. I settled on stalactites and clouds. The background and the clouds are mostly just one color, that was done using the bucket tool.
For the stalactites, I first drew them up top and copied them into a different piskel file to rotate them. After rotating it, I simply copied and pasted them to the bottom of the canvas.
This canvas was 100 pixels in width and 400 in height because the game should be way longer than it is wide, as the gameplay is about falling, not walking.
Starting the Unreal Part
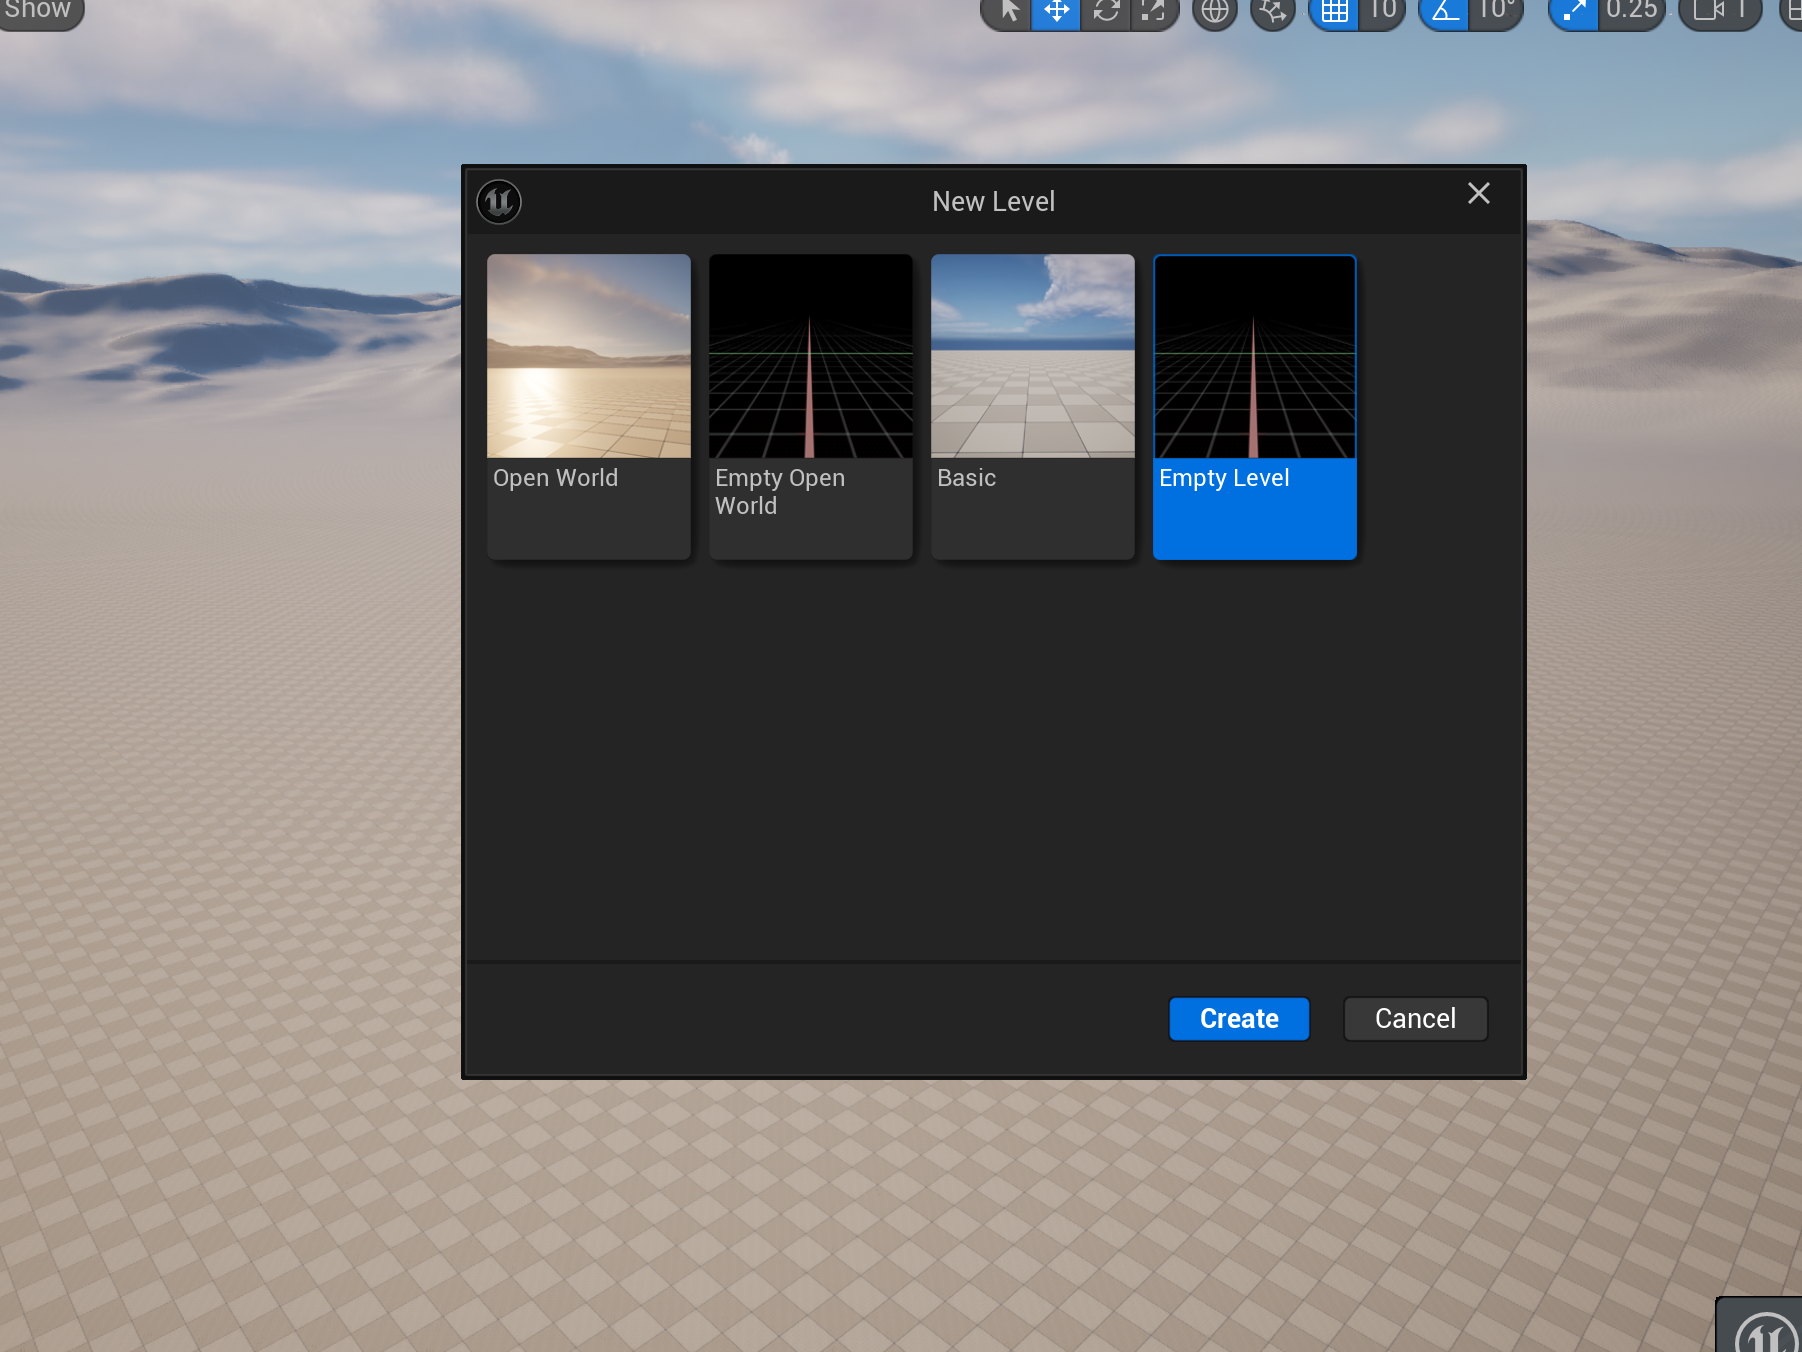
Once you have installed both epic games and then unreal engine, you open up a blank project. Then go to file and click on new level, select the empty level at the right.
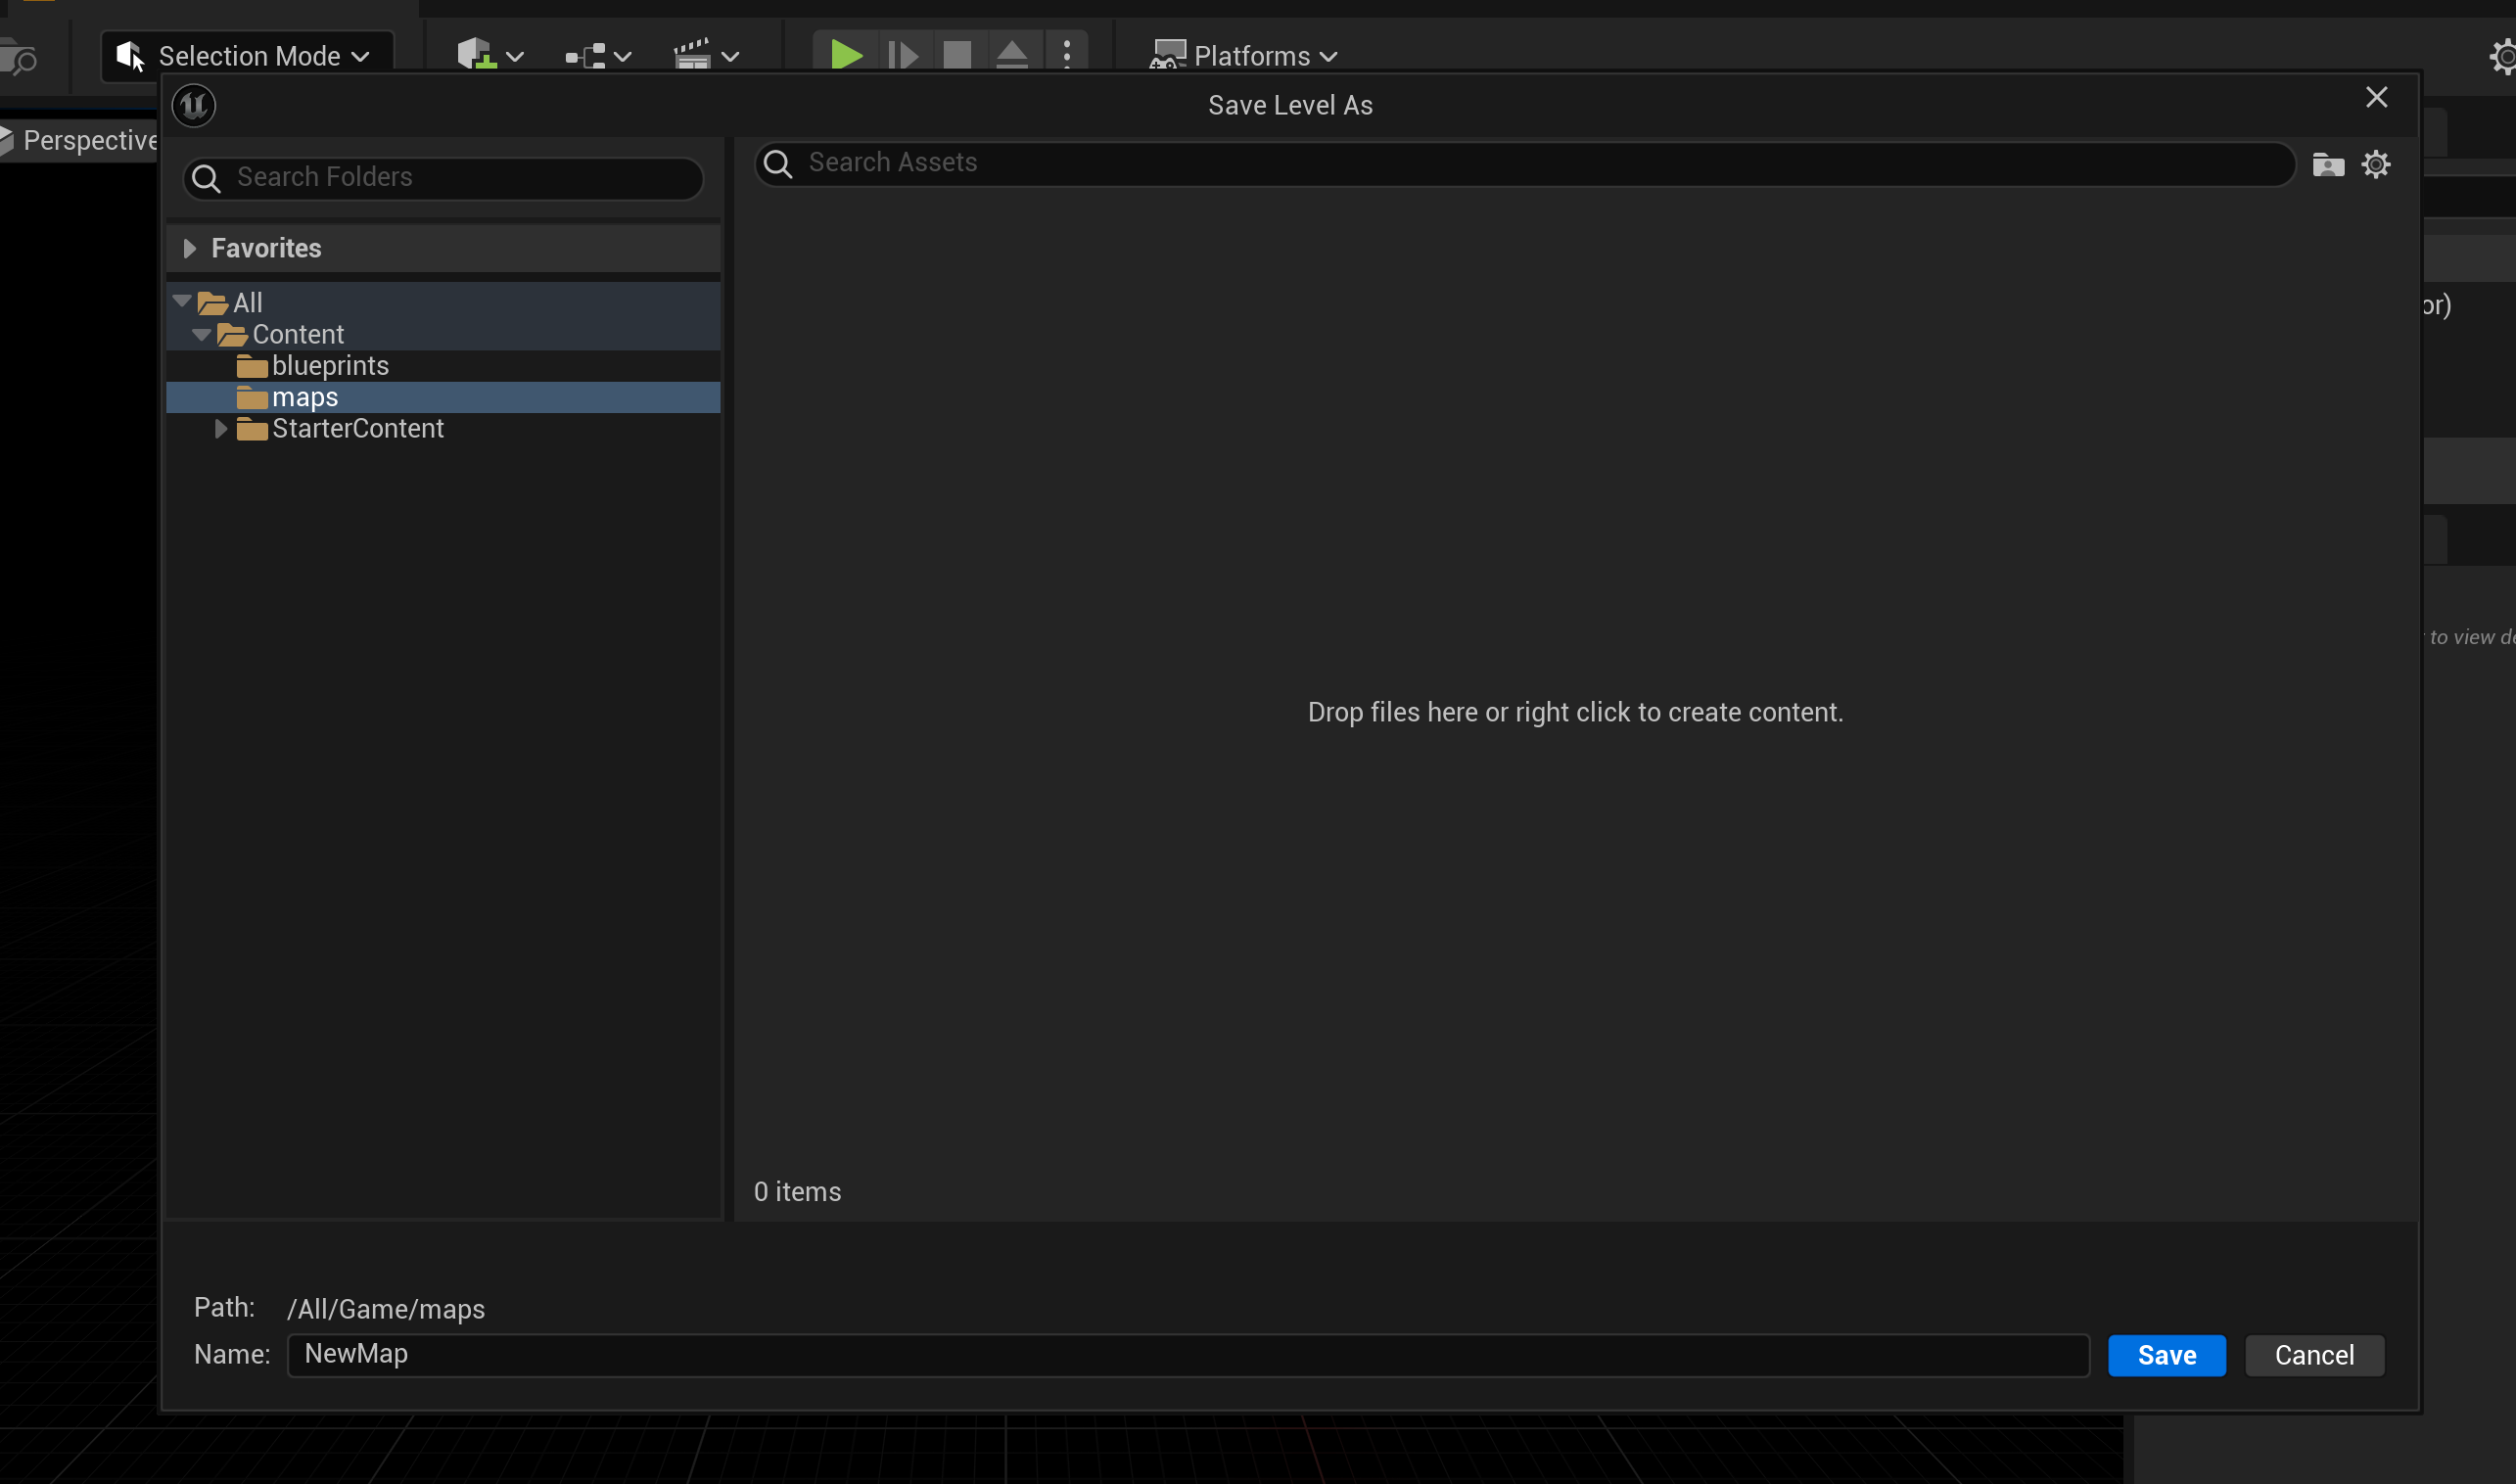
Hit ctr + spacebar to see your content browser that contains your project files. In the Content folder add one called Maps. Click on file once more and save current level inside that Maps folder.
Make another folder called blueprint, we will use that later.
Then make a folder called PNGS in the Content folder, now you can start importing pngs exported from your pixel art app. Select all the pngs, right click and hover over sprite actions. Click on apply 2d paper texture settings.
Background Sprite
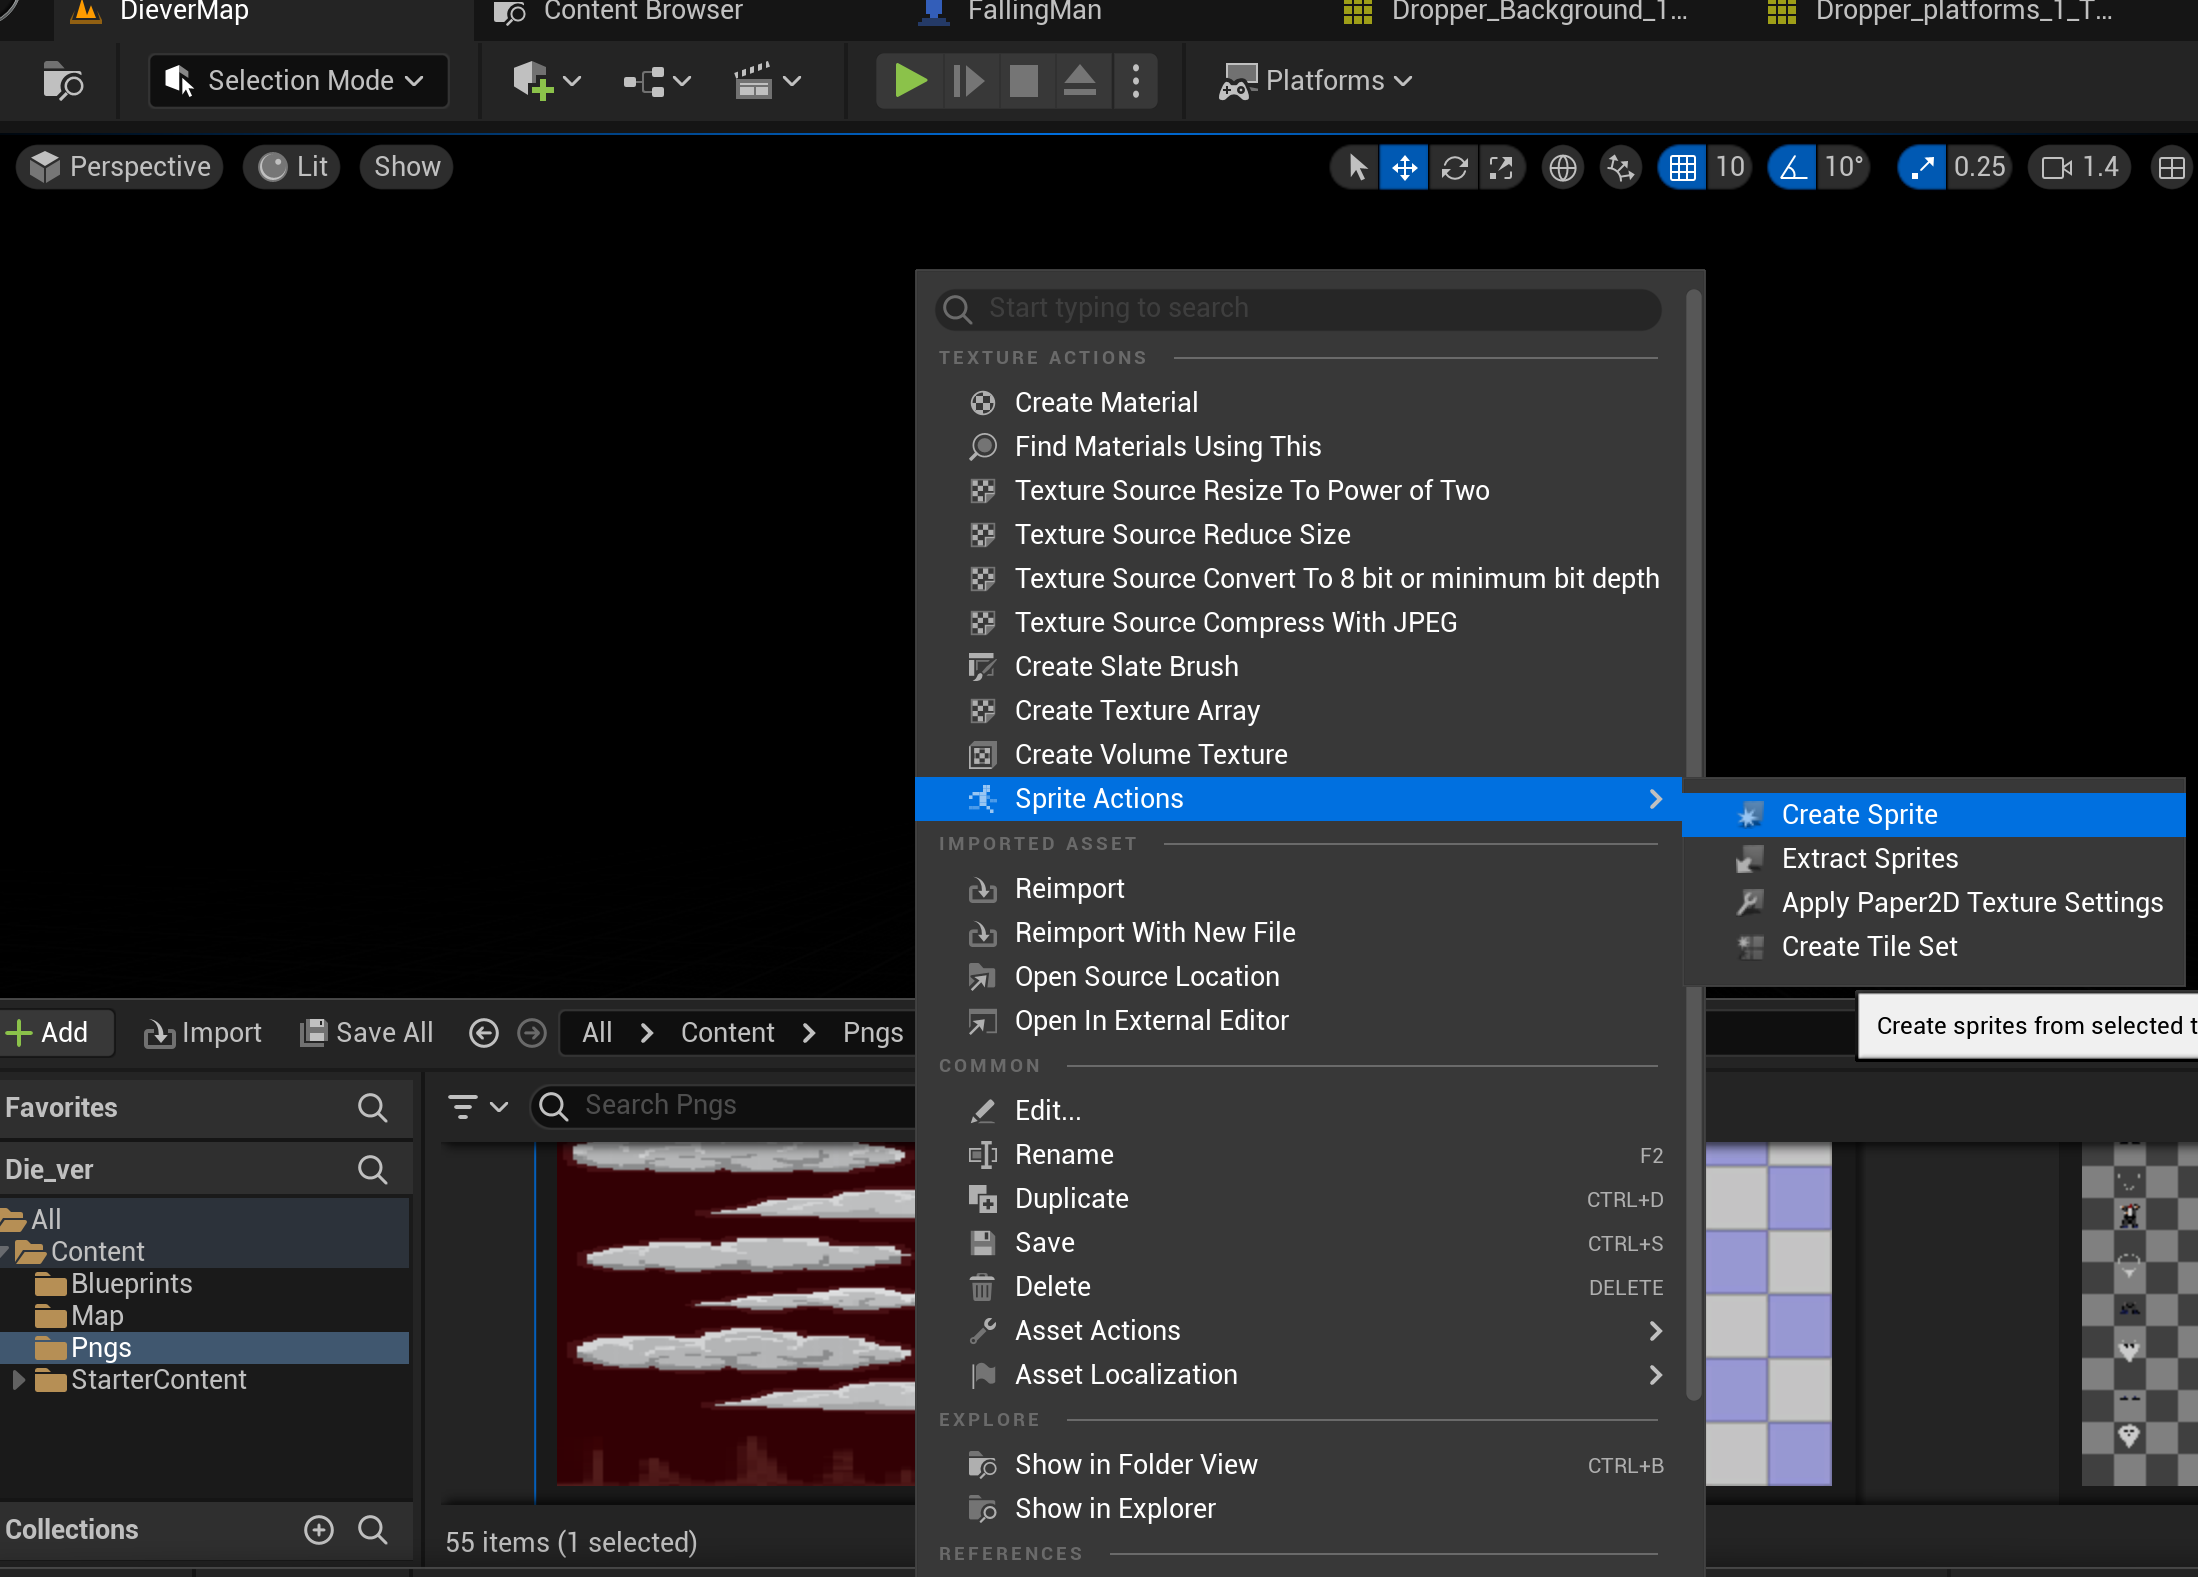
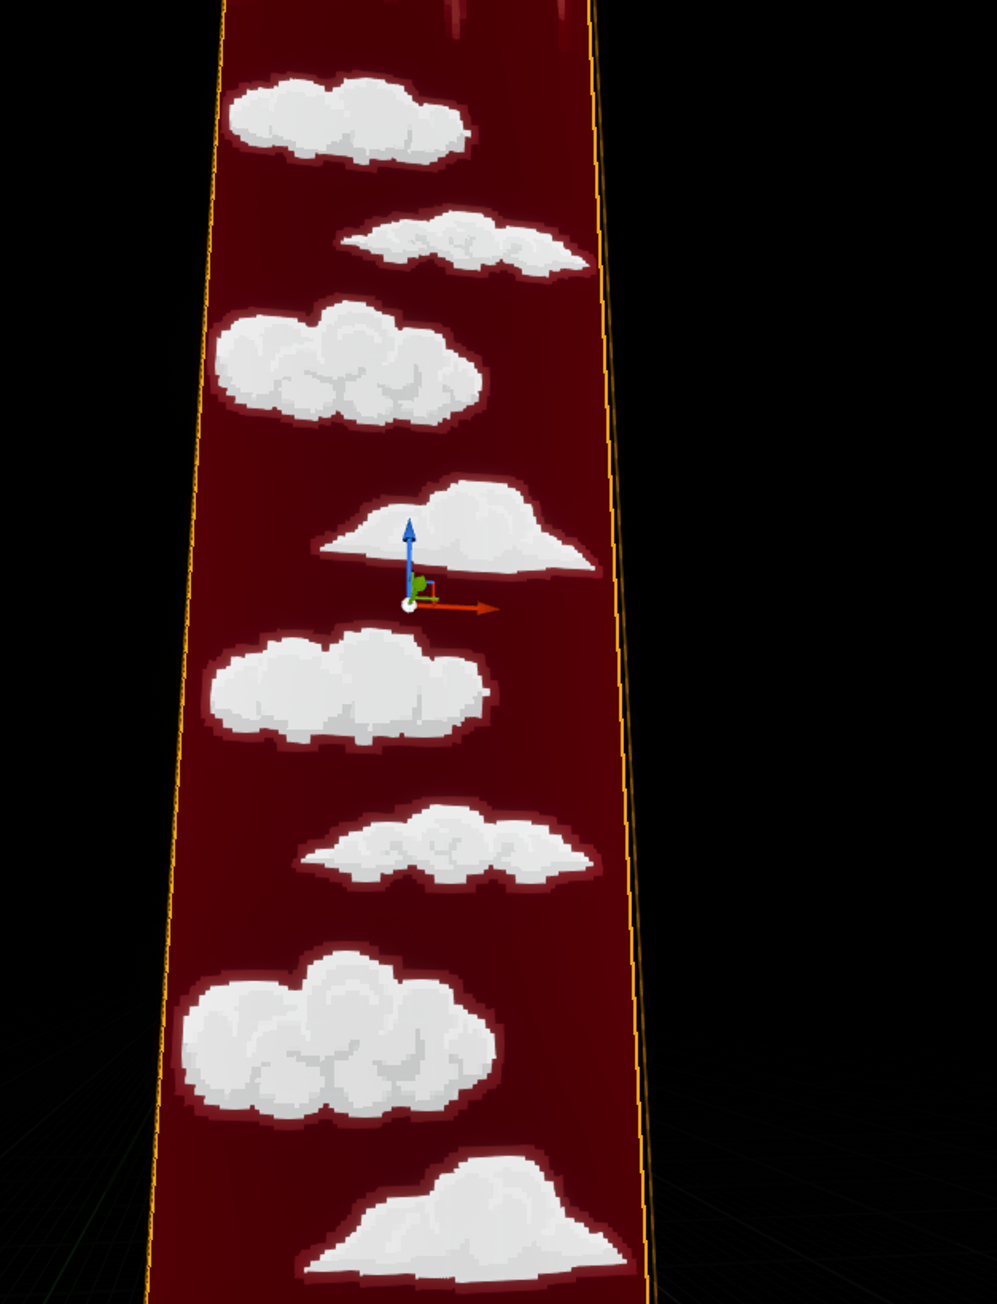
Go to your background and right click. Hover over sprite actions and click create sprite. Now you can drag this sprite into the blank workspace. You might need to scroll around to see the background as it is 2D. Set all the sprite xyz axis to 0.
Tile Set
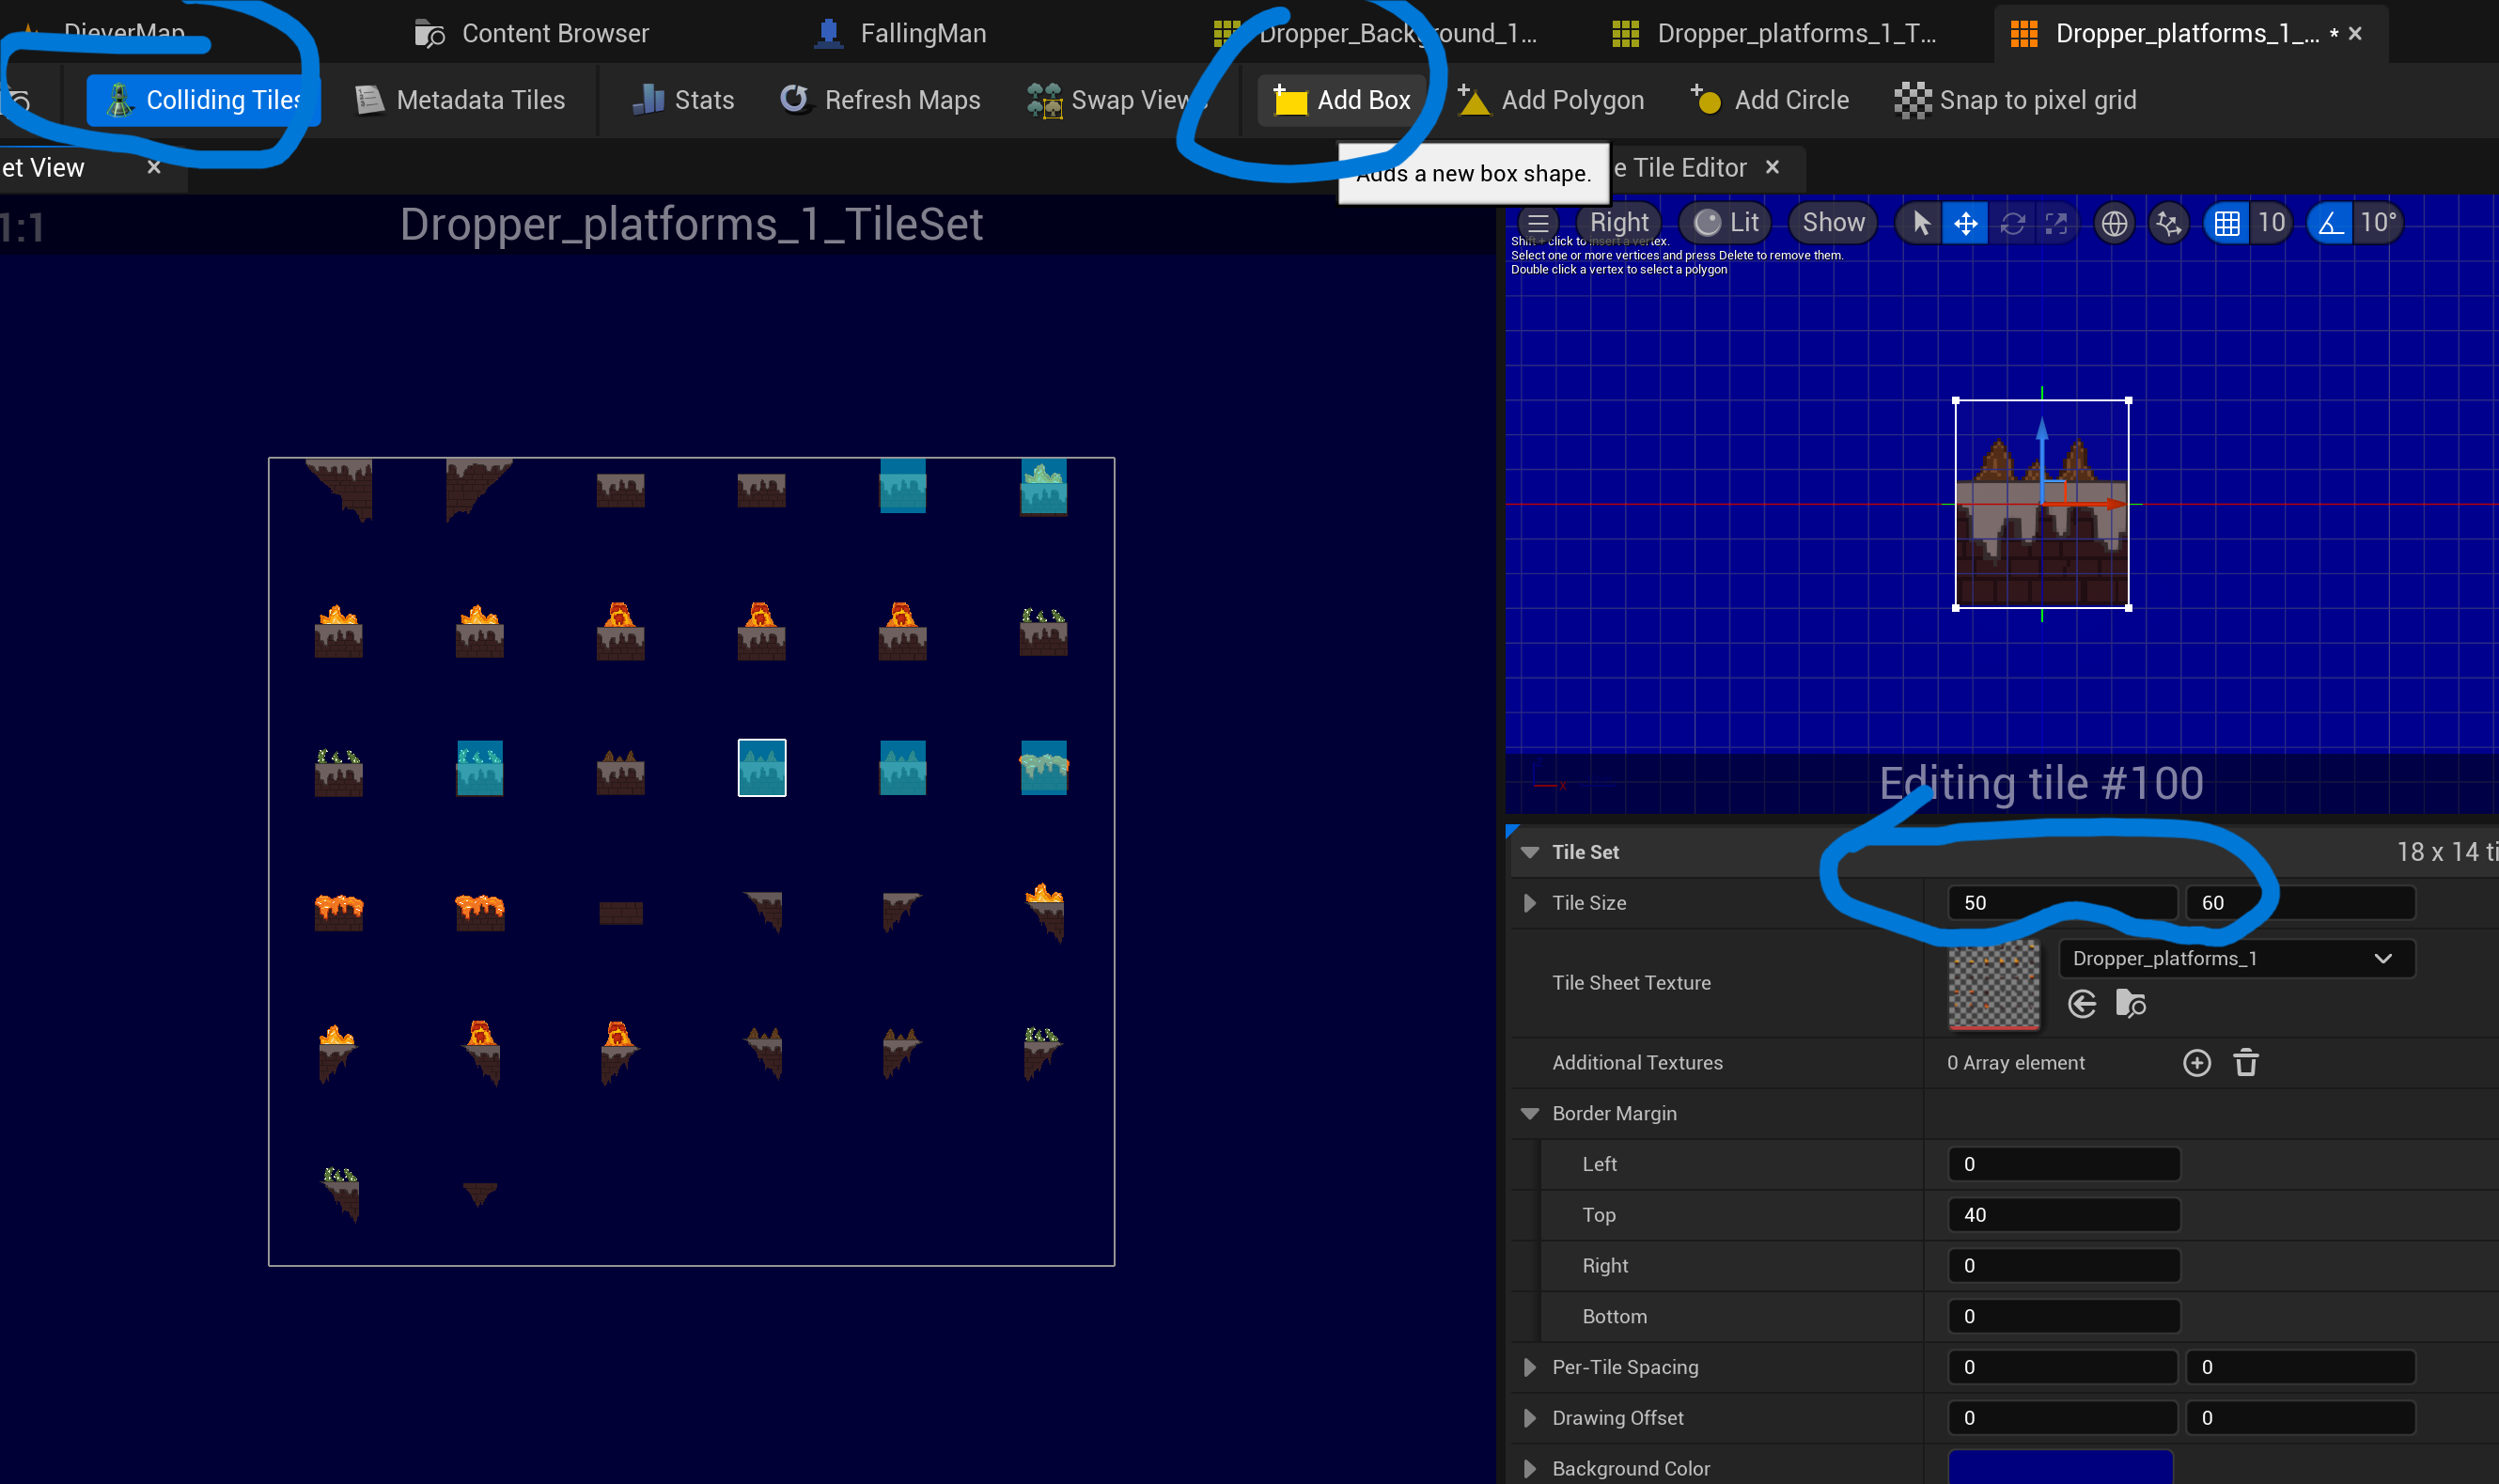
Go to your png of the blocks you will use to build the level. This should be on one sheet with all the different blocks on it. Right click, hover over sprite actions and click create Tile set, adjust tile size on the right depending on how large your blocks are (we used 75 x 75).
You can cut off the empty border by adjusting border margins but as long as you used the grid method, this step is unnecessary. Then click on one of the blocks and apply a box to it. Repeat with all the blocks. To see the ones you applied a box to already, press colliding tiles on the top left. You can adjust individual collisions in the enlarged window if needed.
Tile Map
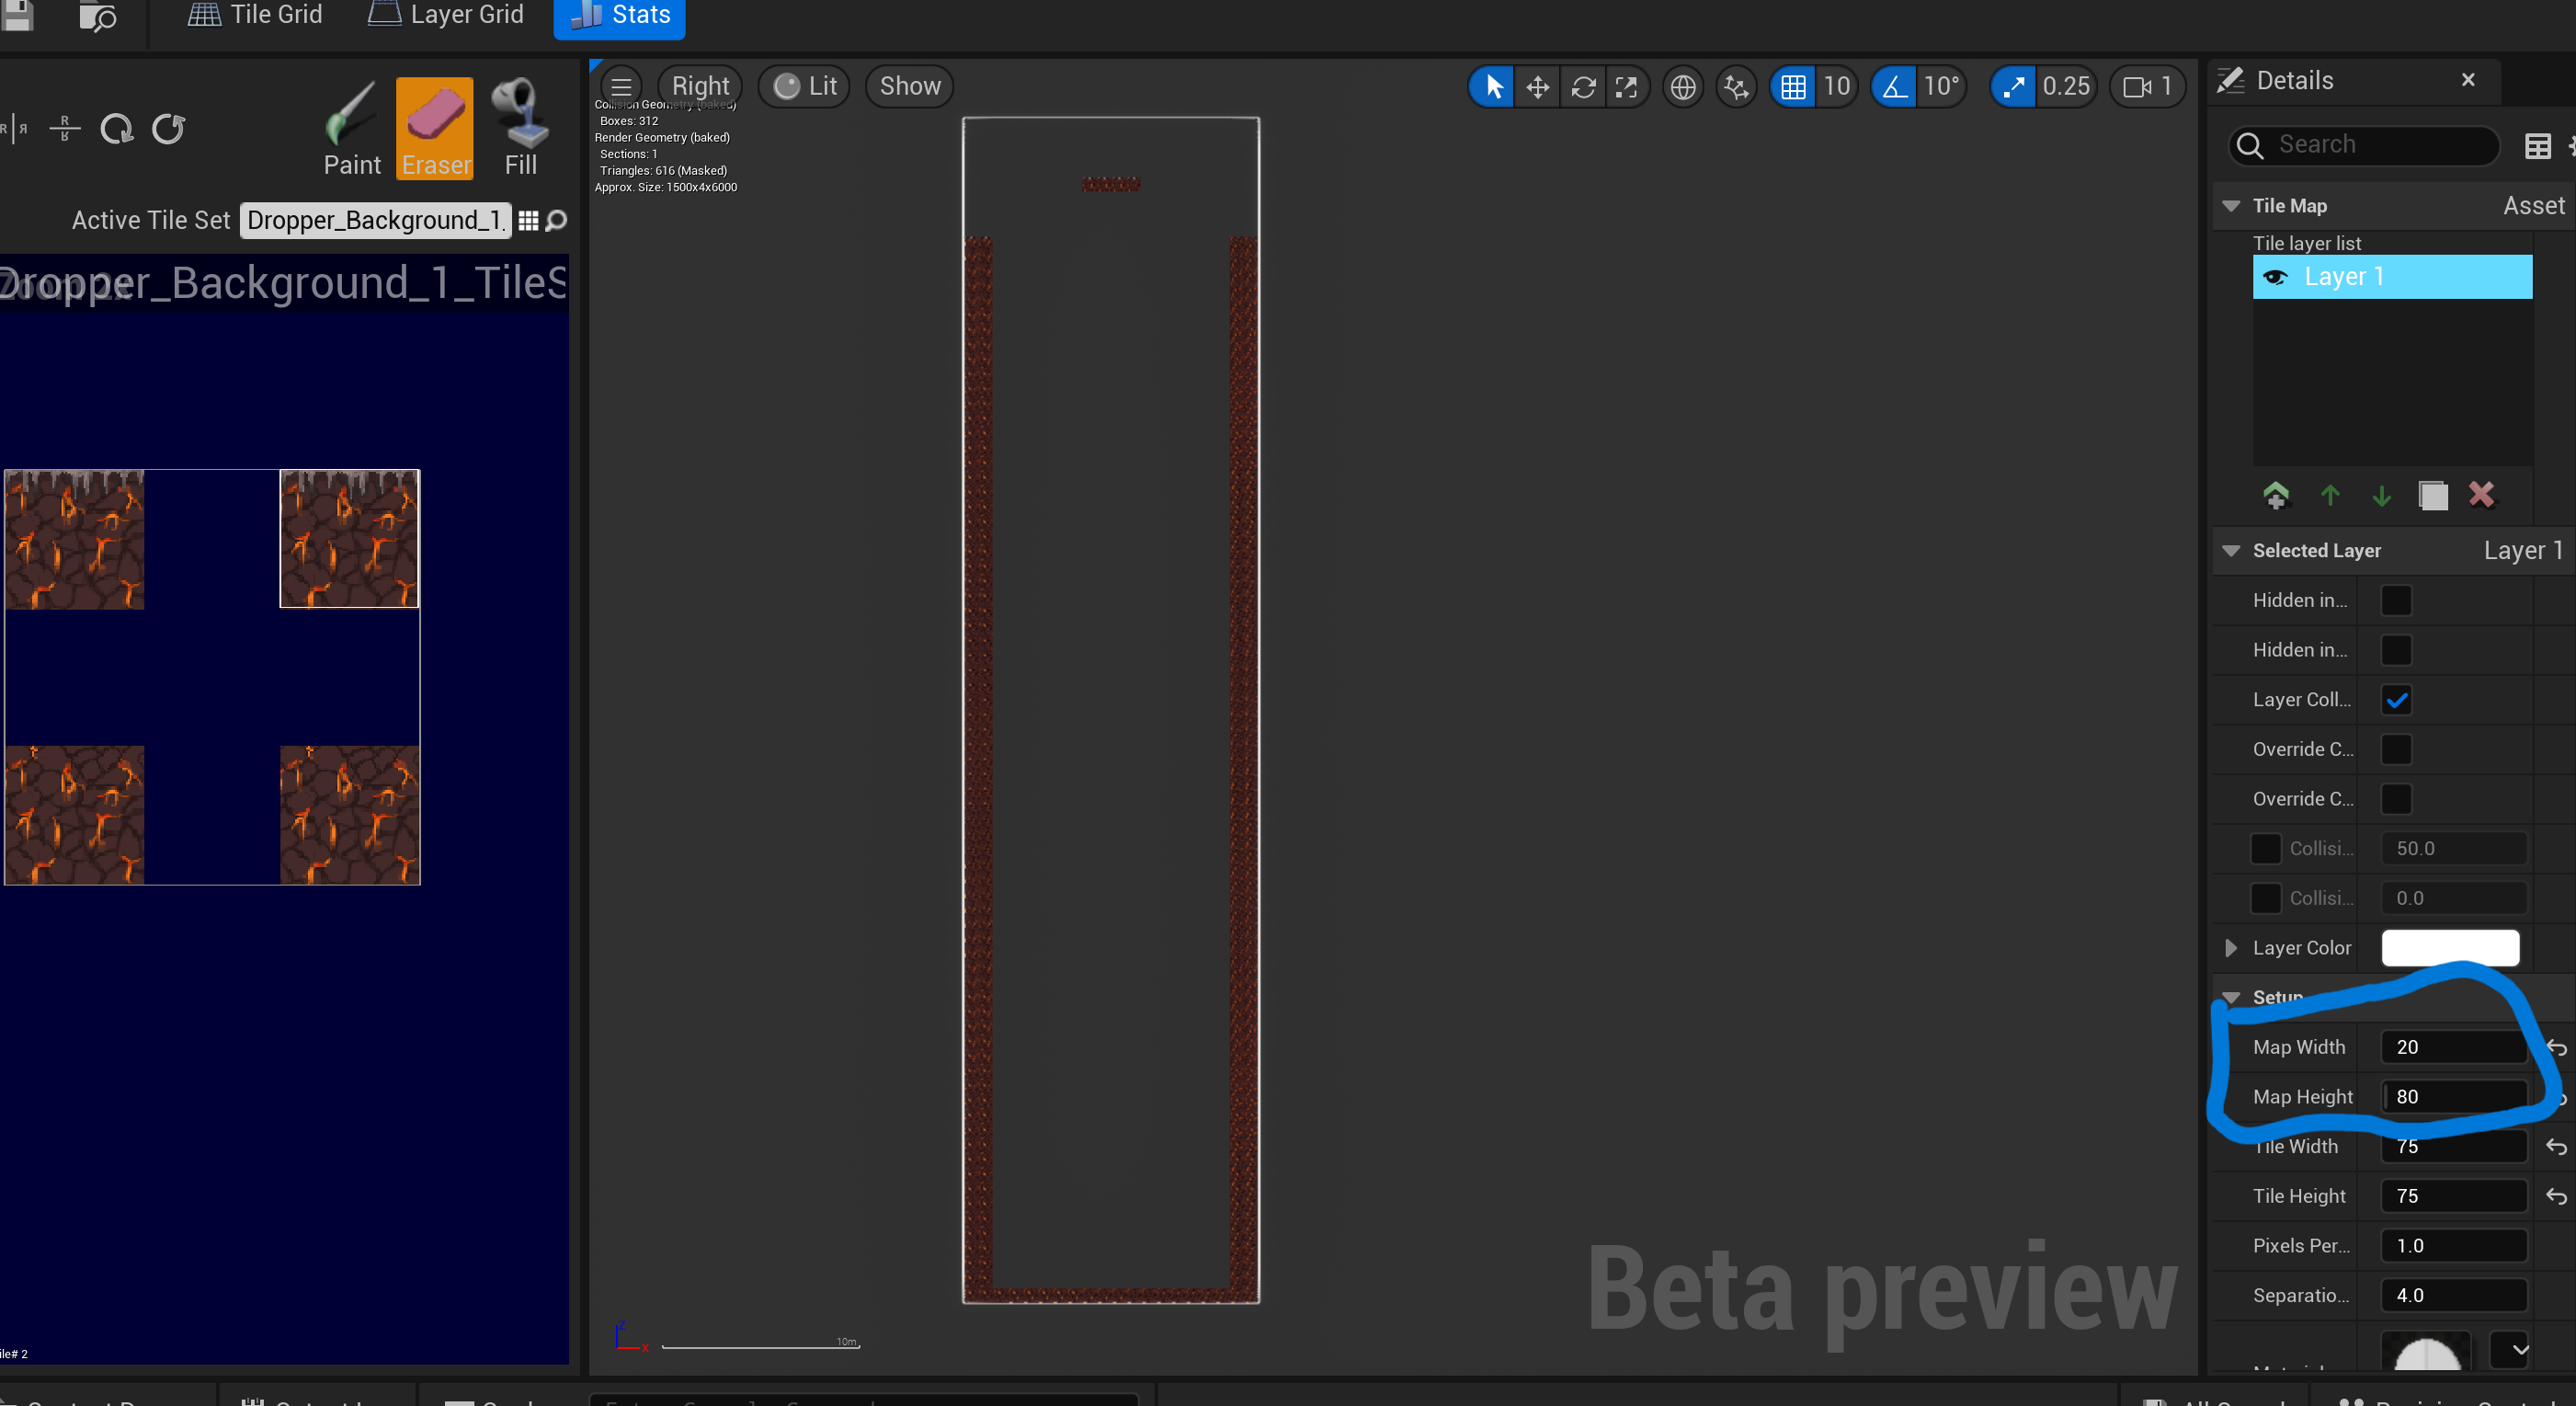
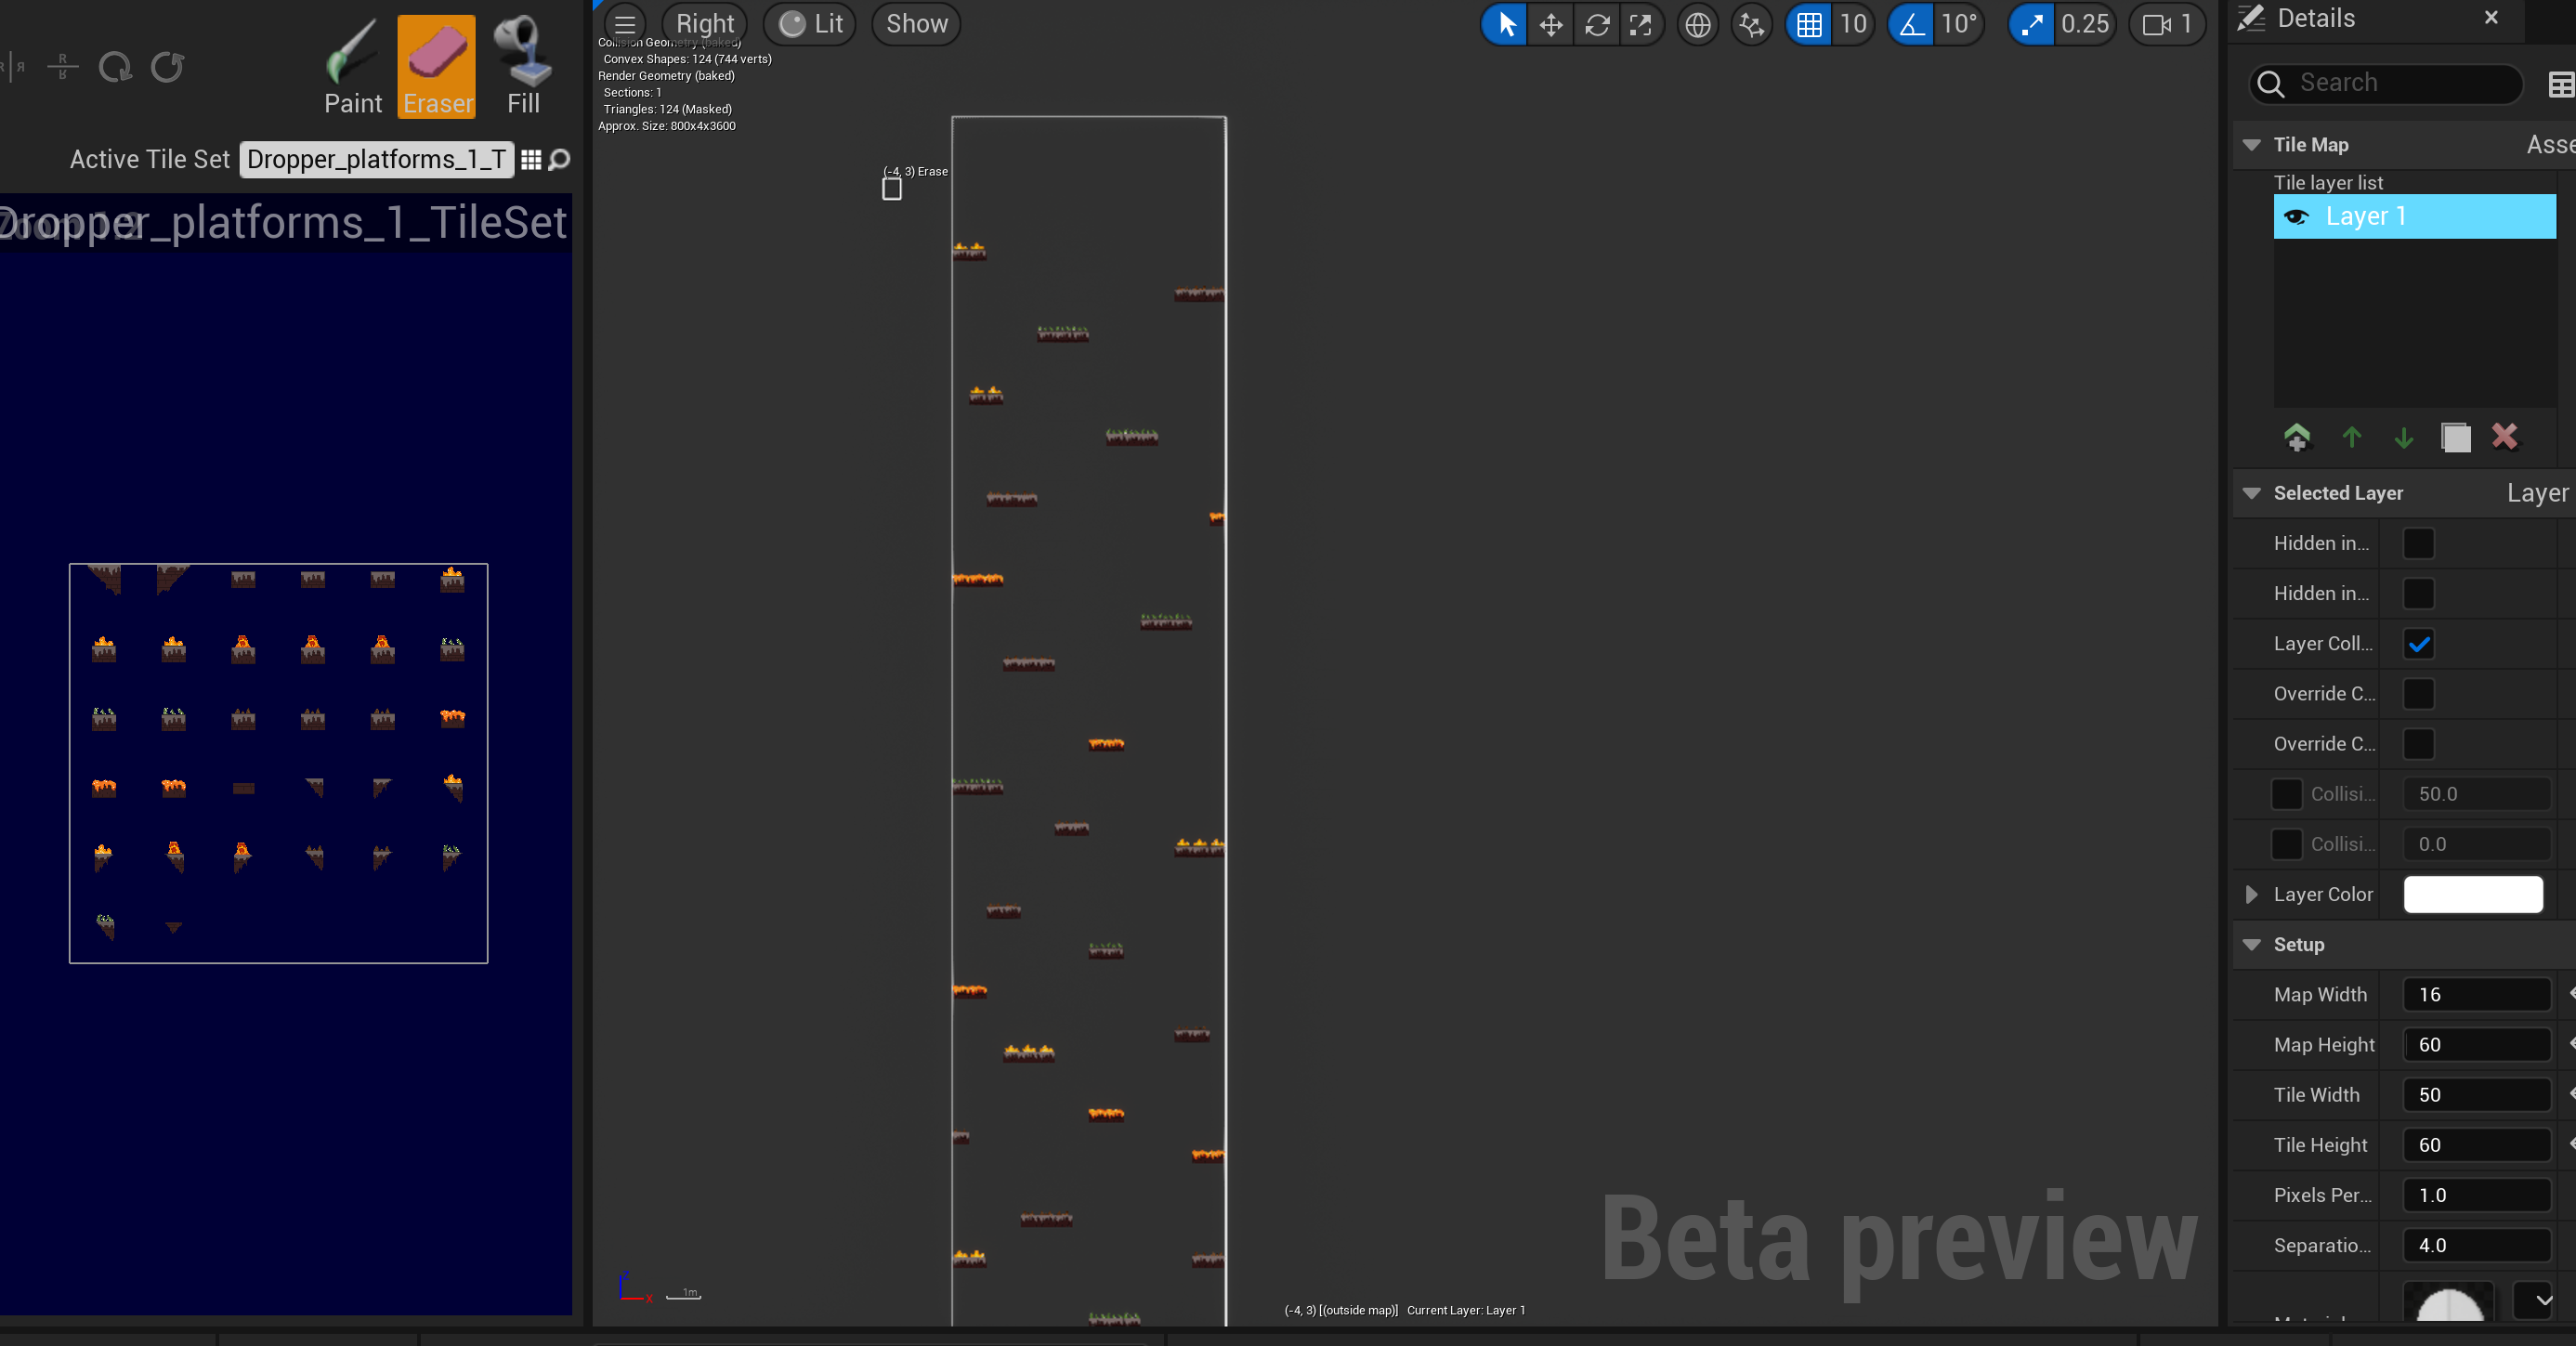
Now go back to the files and right click on the tile set. Click create tile map. To change how big you want the environment to be, change map width and length. Since the map will be longer than it is wide, I made the width 20 and the length 80. Now you can make a floating platform at the top where our player will start, and two walls on the left and right, as well as an ending area. We will make the obstacles on another layer later.
When making the obstacles, I used a different tile map for it. The grid is 16 x 60 and randomly put down the obstacles from the obstacle tile set (right click the tile set and click create tile map).
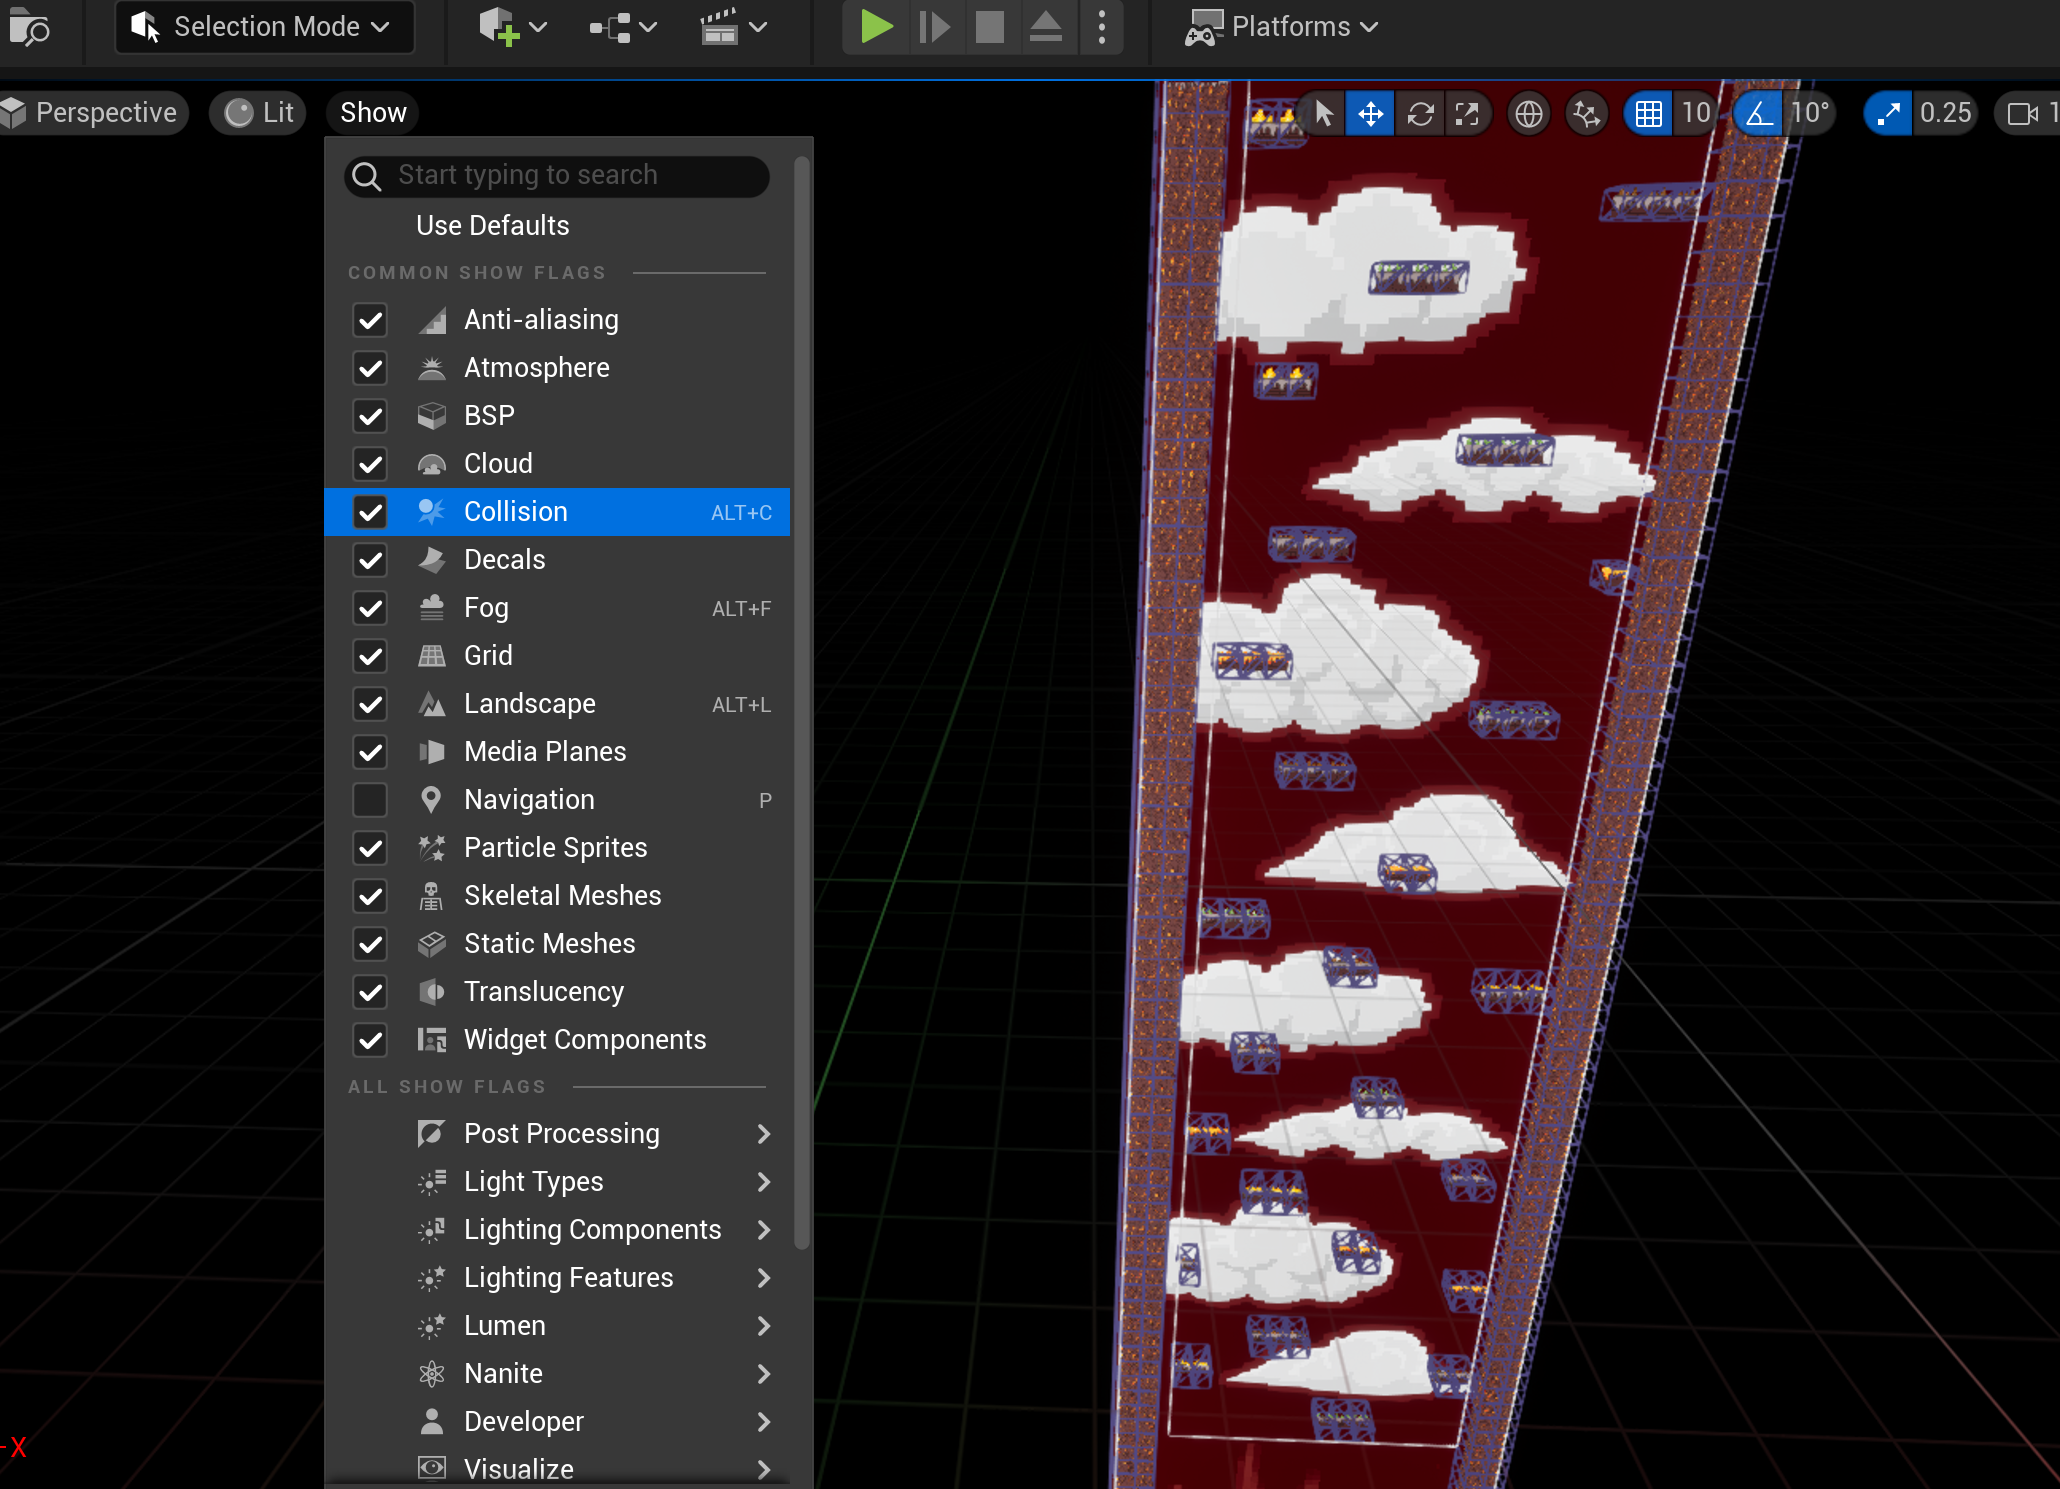
You can drag the tile maps onto the workspace and adjust it to the background so they align. Move the background back a little until it doesn't overlap with the tile maps. Click play to see how they align, and esc to escape the view. Also, click show, and select collisions to see the 3d useable area of the 2d sprite.
Playable Character
If the pngs of the sprite sheet are separated already for you, you can skip this incoming step:
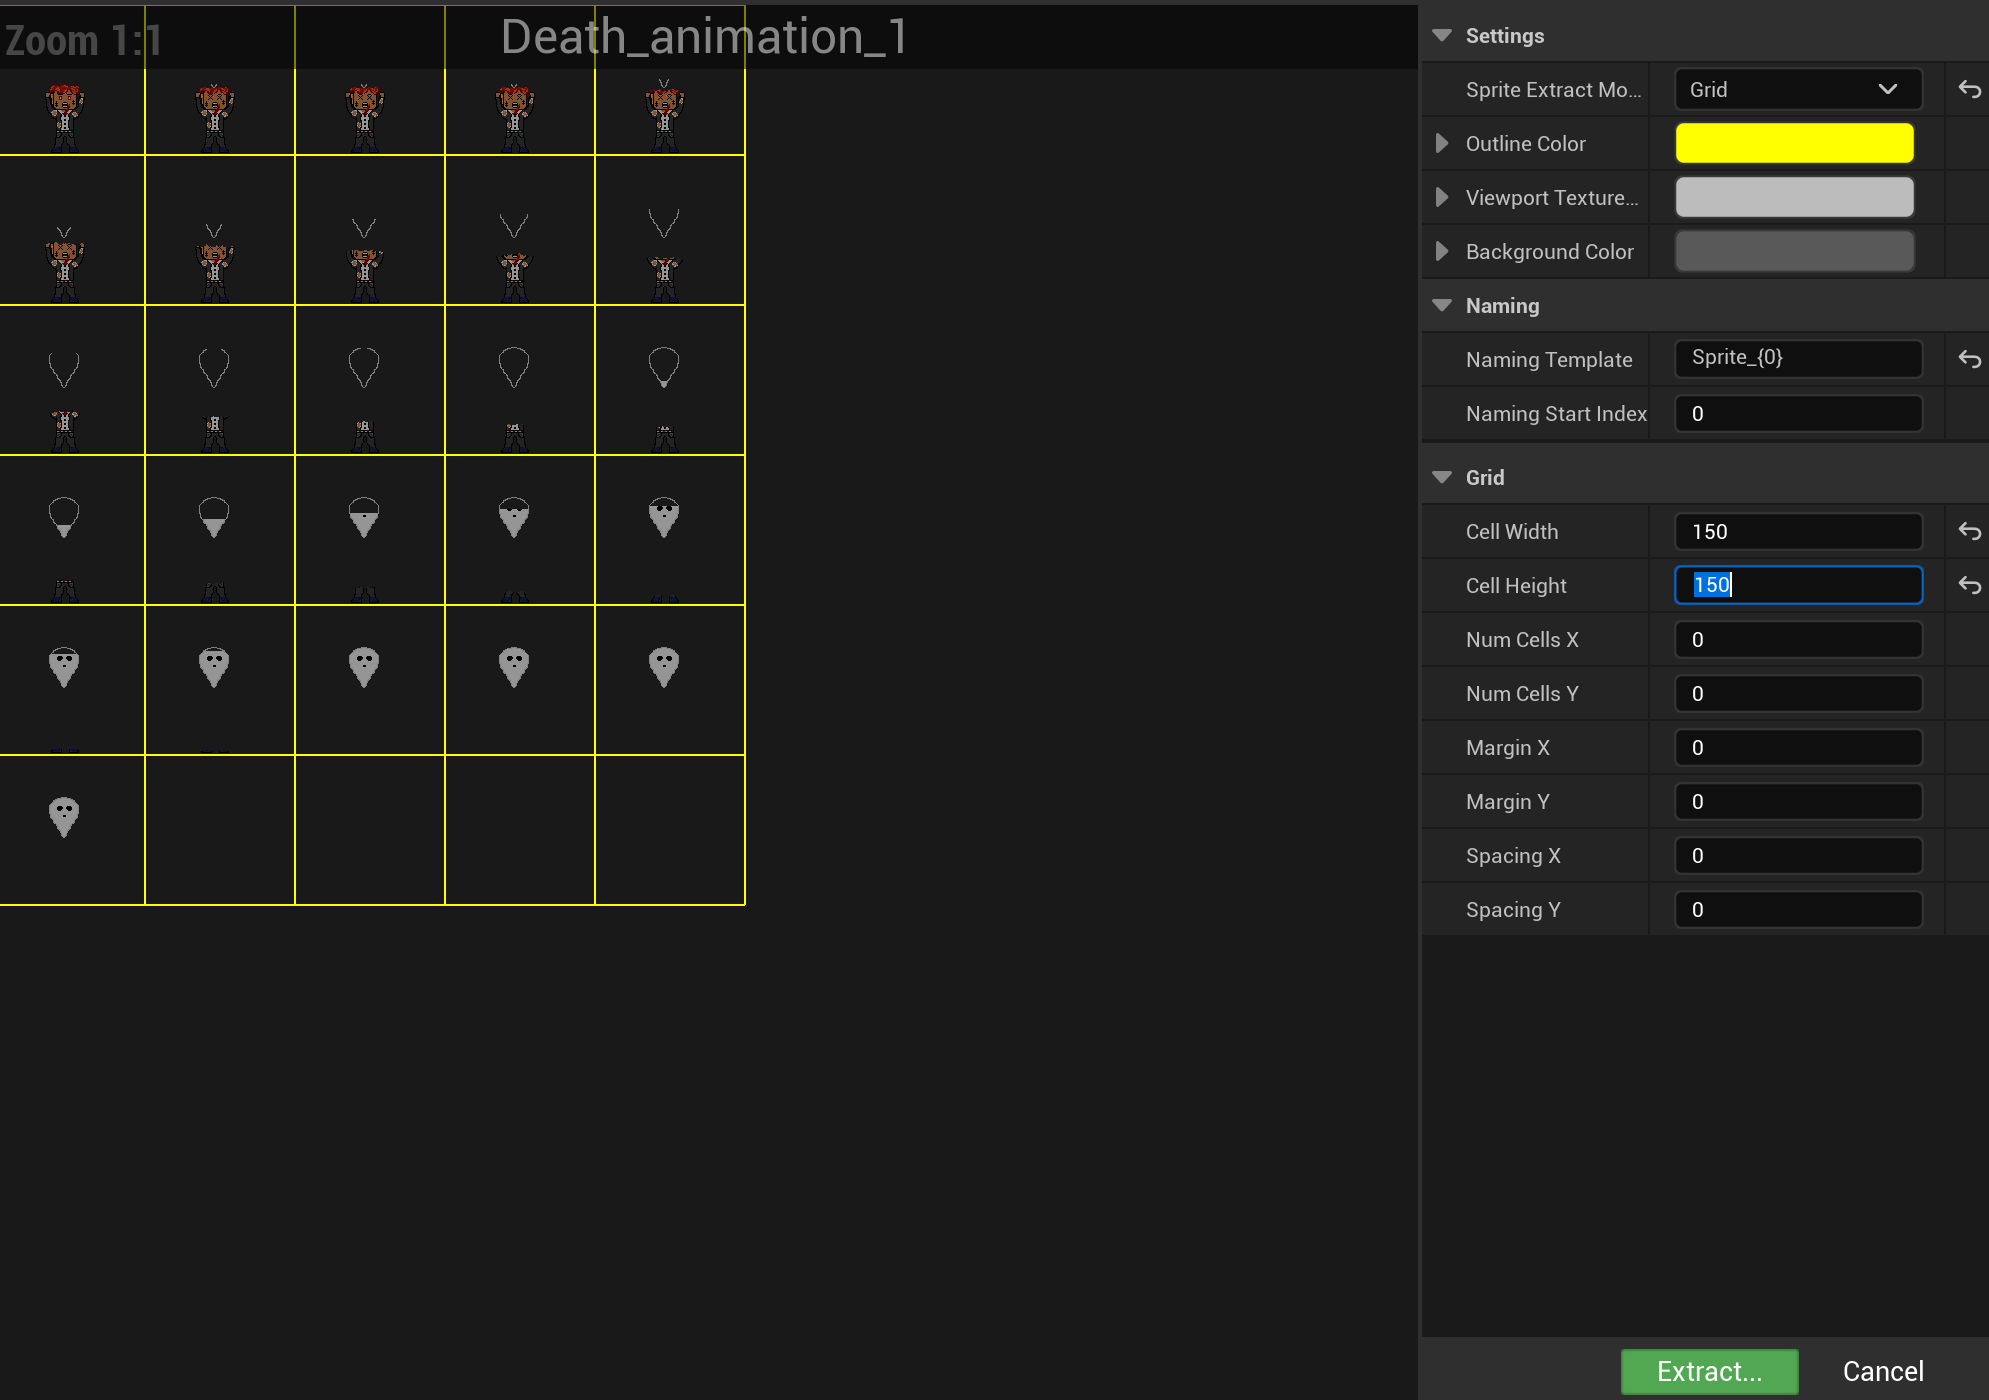
If you are using a sprite sheet, you have to hover over sprite actions and click extract sprites. Change from auto to grid, and divide whatever the original numbers there are for cell width and height by the number of columns and rows respectively. Click extract.
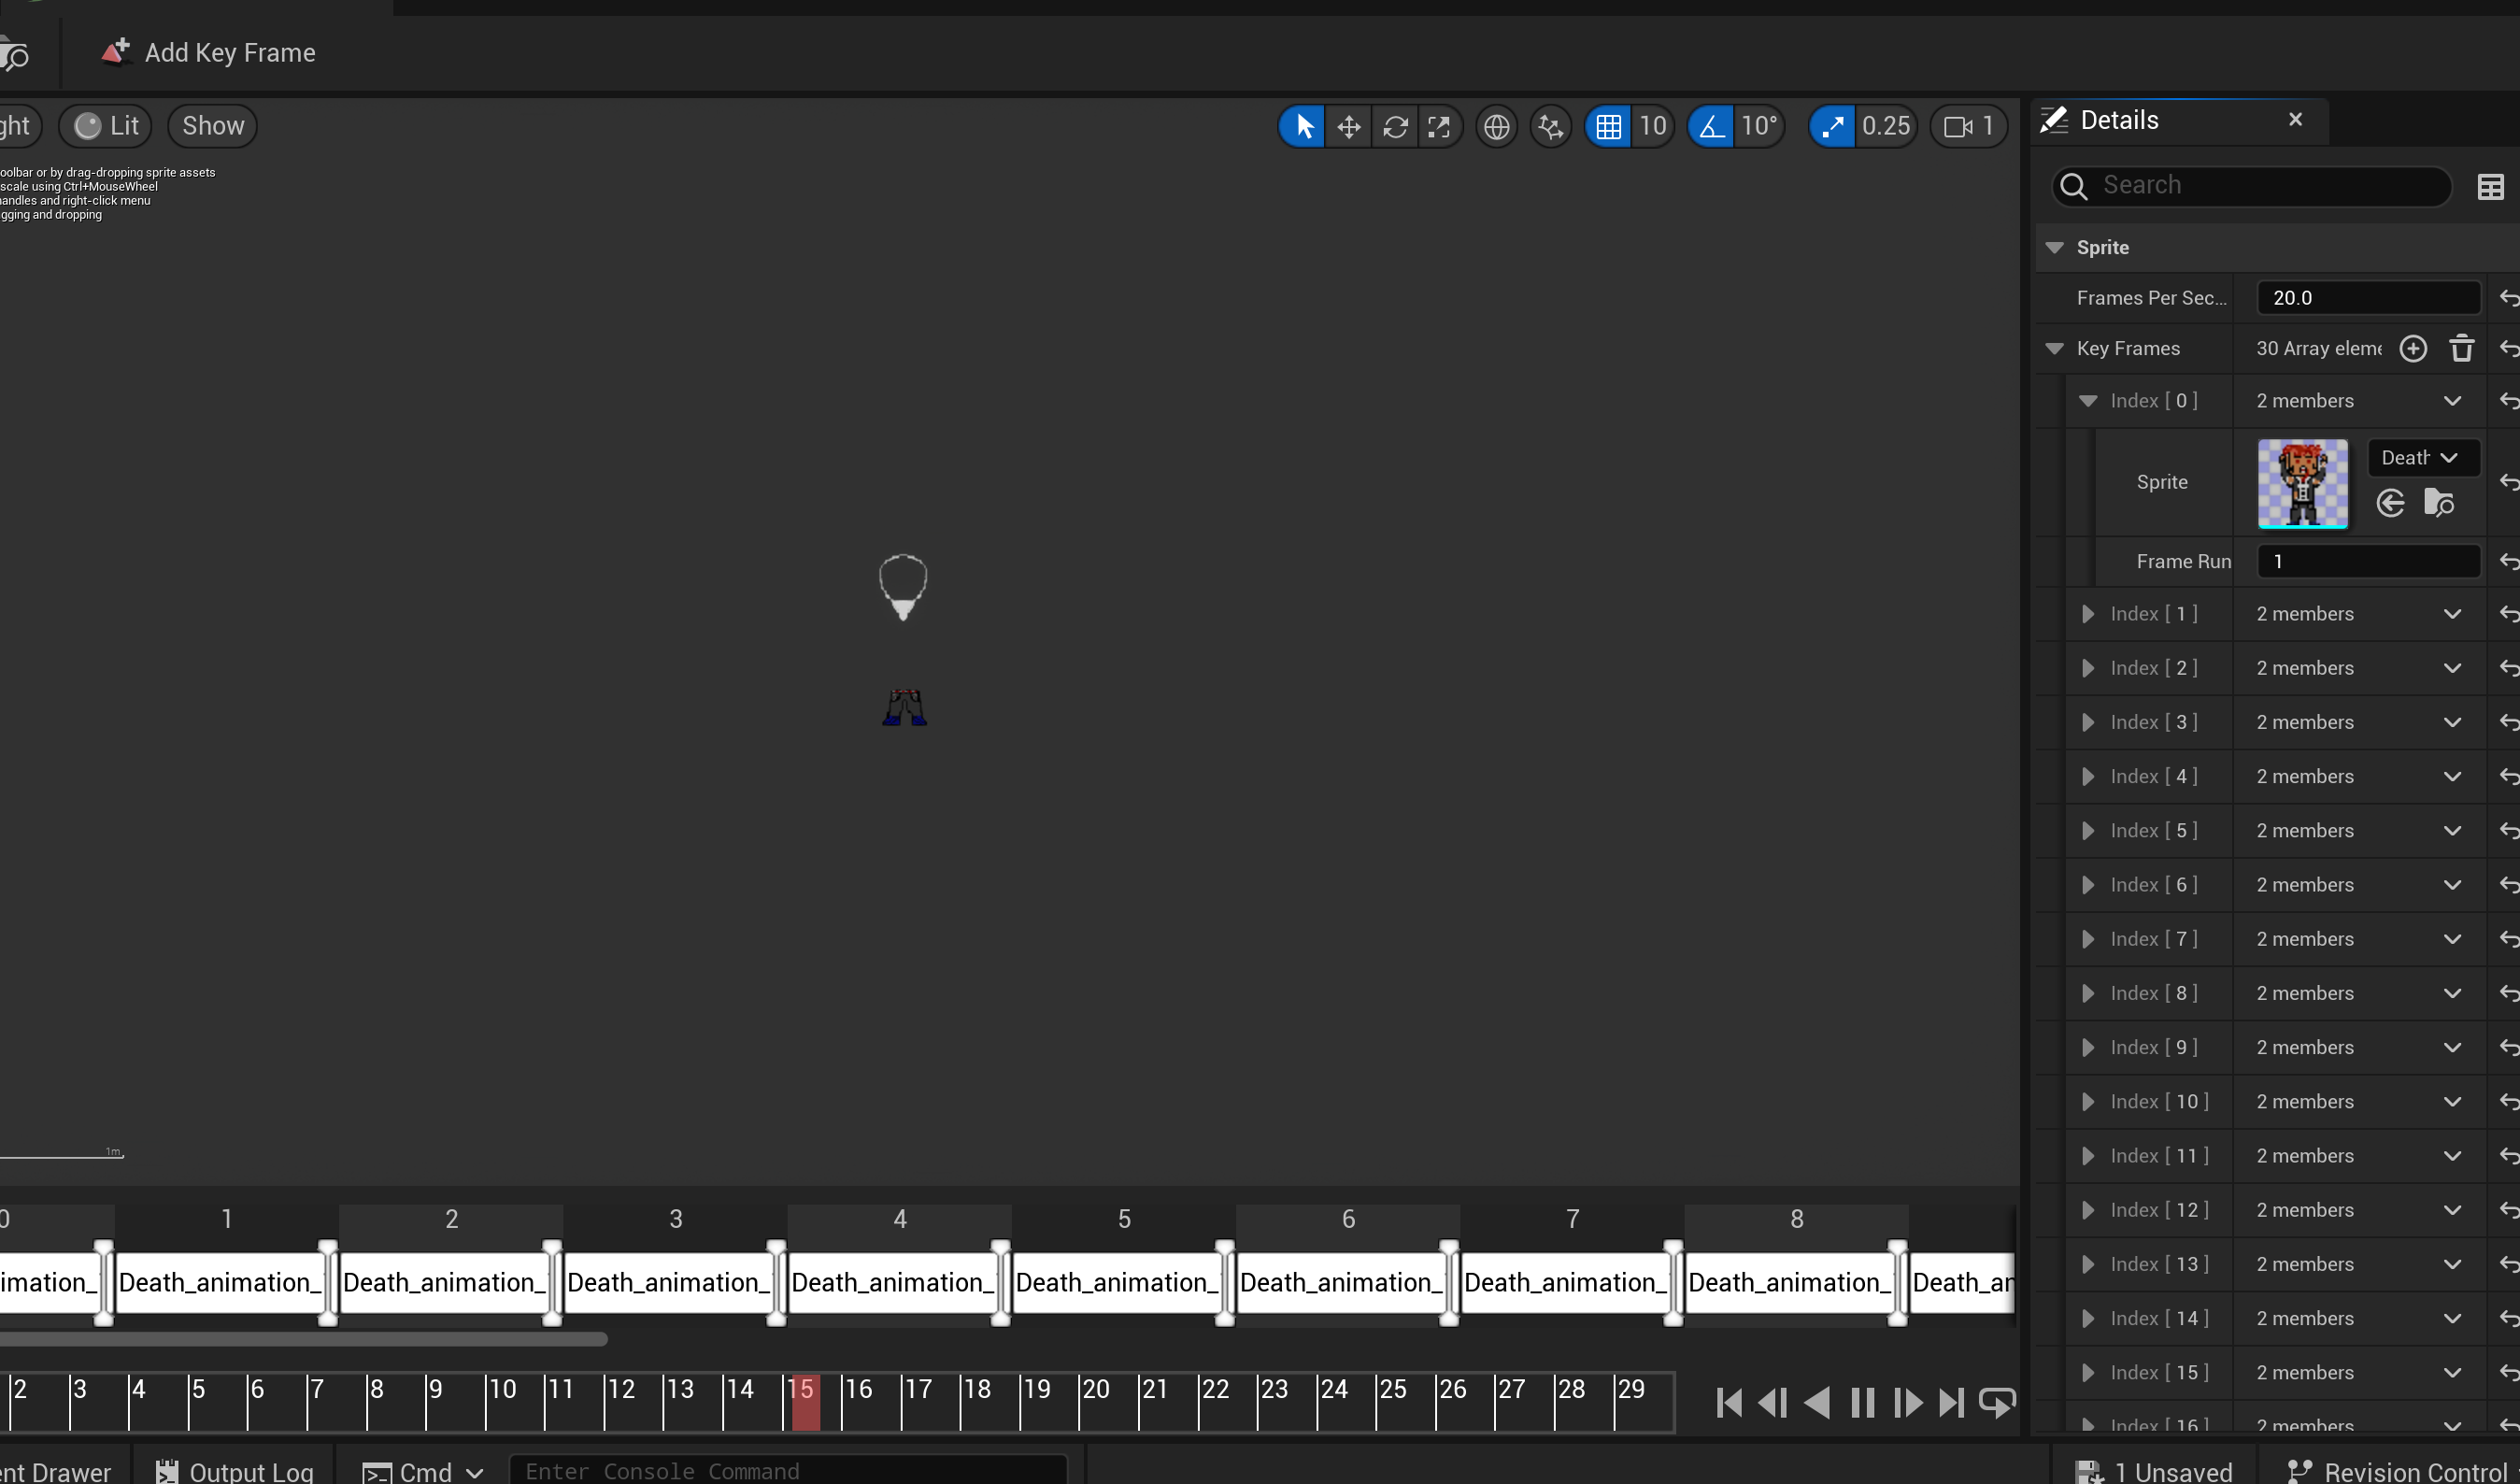
Now, select all the pngs that belong to wanted animation, then select create flipbook. Click into the flipbook and then you can increase the fps to make the animation smoother. Do this for the death, falling and standing animation, even if the standing "animation" is only one frame.
Blueprints
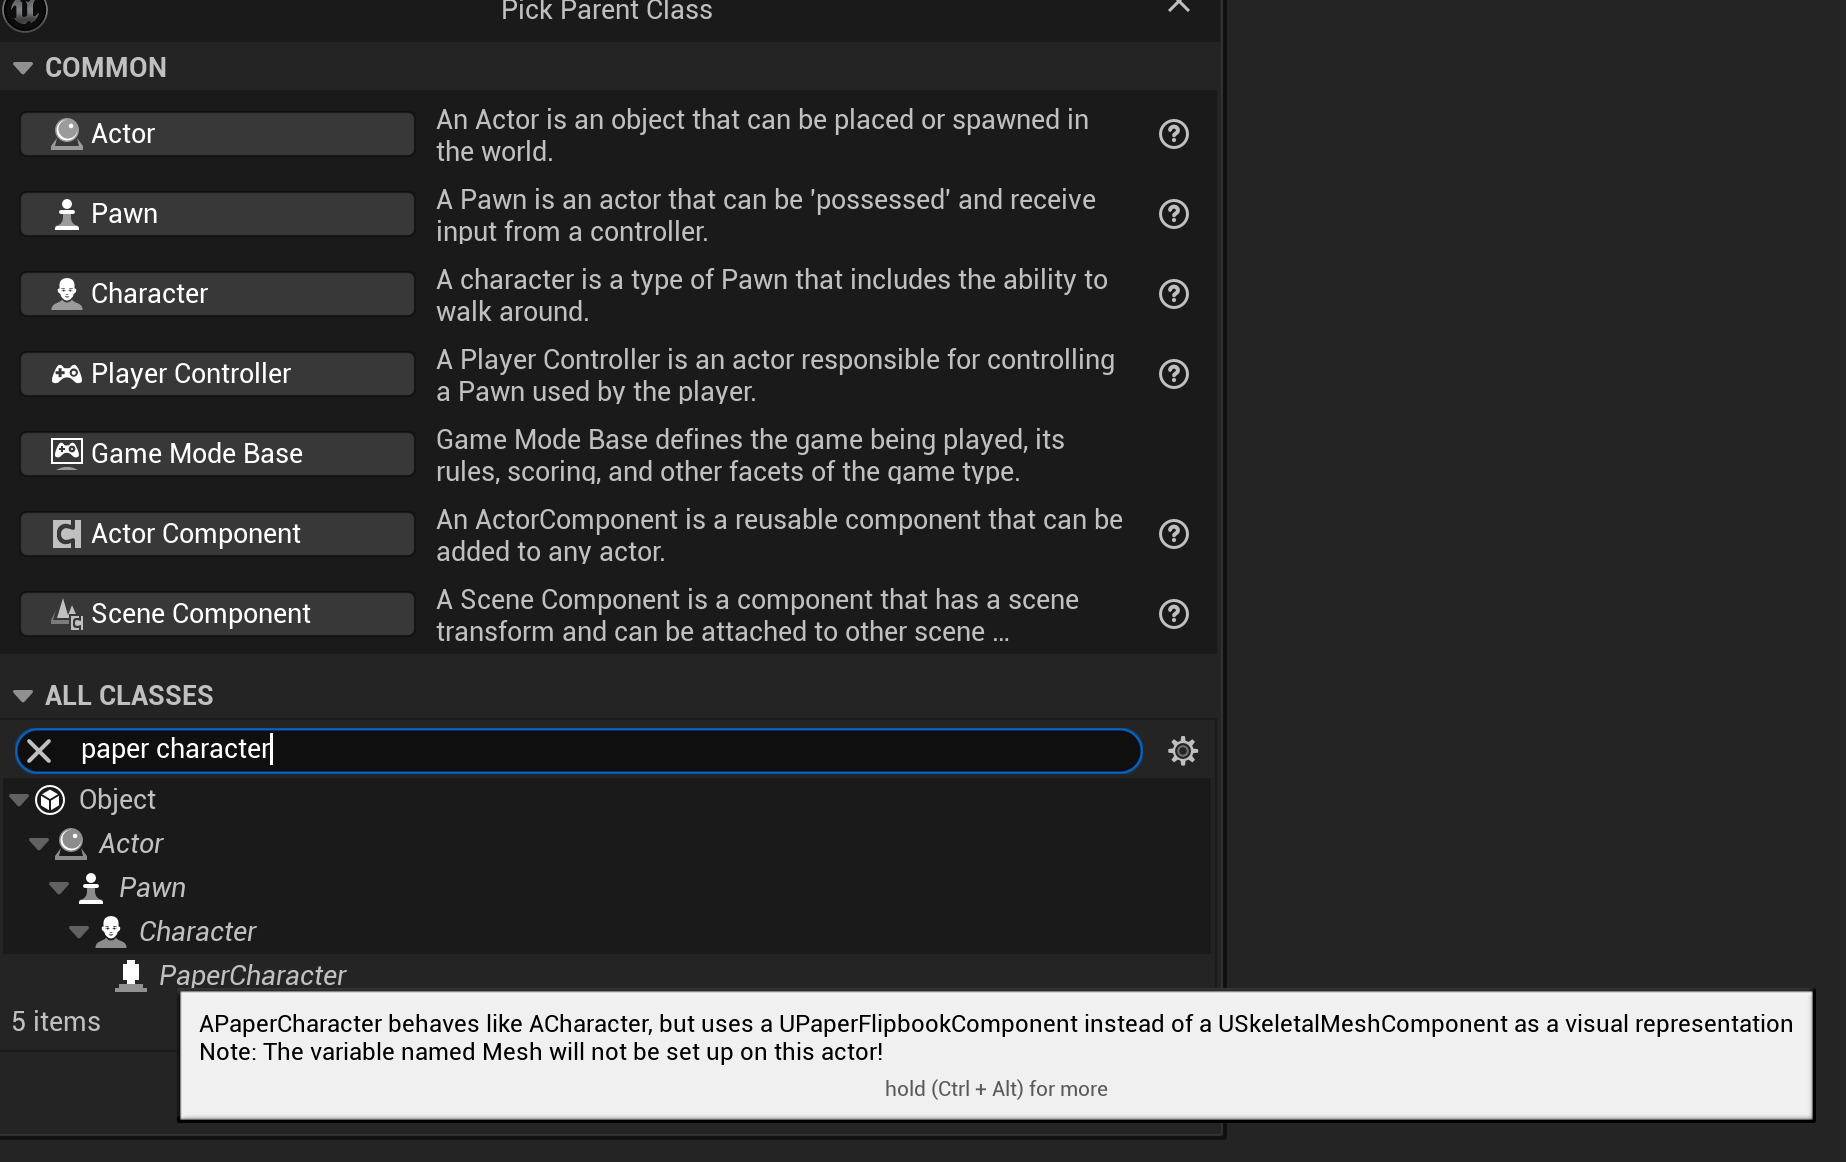

We need two blueprints in the blueprint folder. Right click and then create a paper character class (search it up) and a game mode base class (already in the common blueprint classes). Give them a unique name that you can remember.
Click into the paper character blueprint, select the source flipbook as the standing flipbook. Change the capsule size by changing half height and radius.
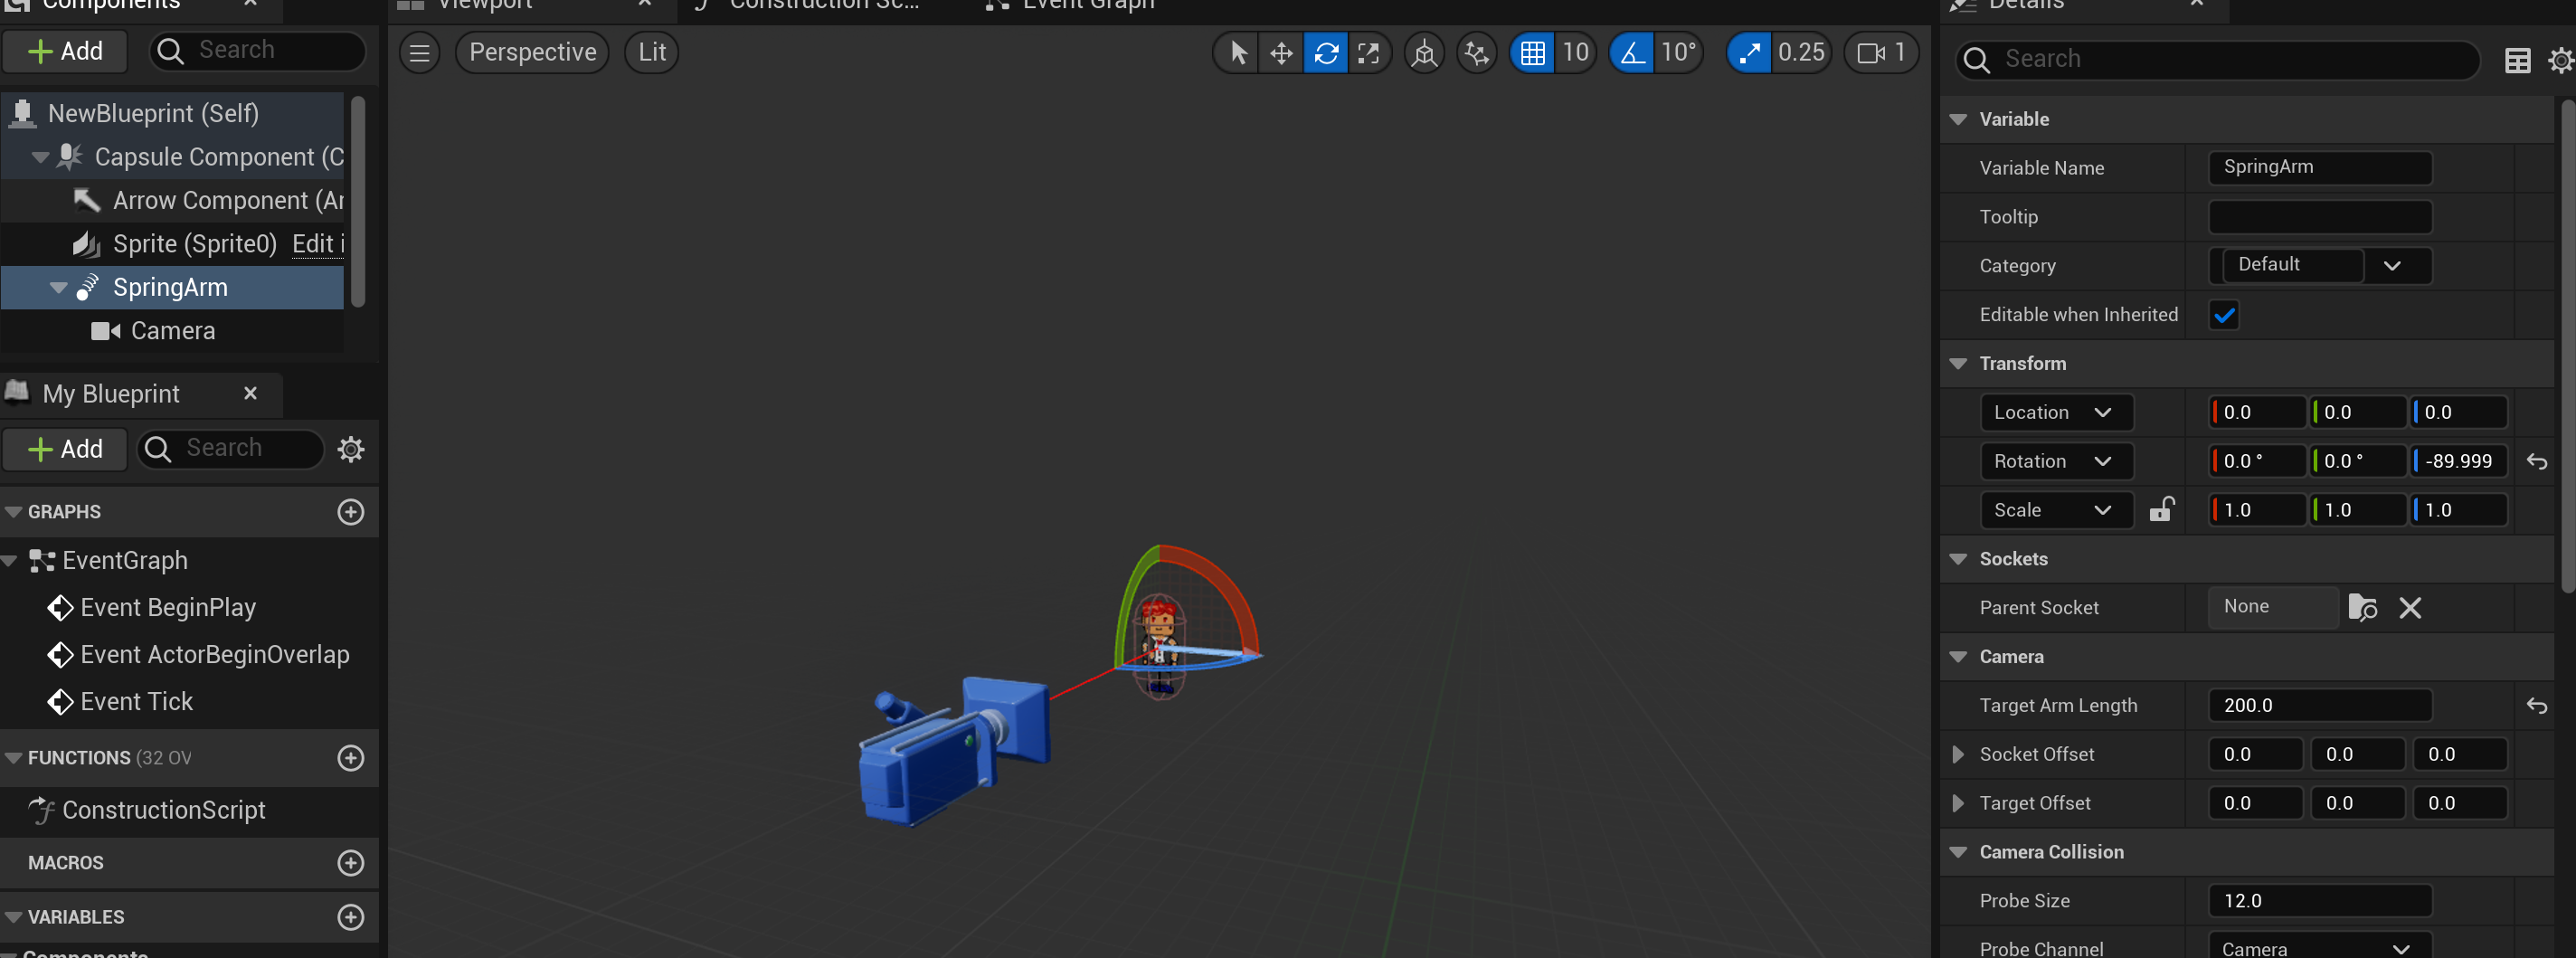
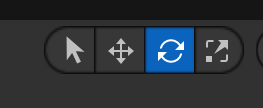
Now click on the capsule tab on the left and add a spring arm, then on the spring arm add a camera. Click on the spring arm and shorten the length to 200. Change to rotation and rotate (still on the spring arm tab) -90 degrees until the camera is in front of the sprite.
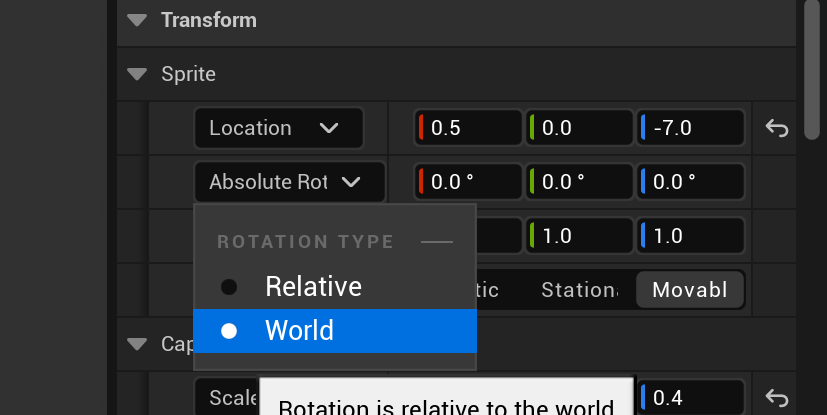
Click on the main self tab and change rotation from relative to world.
Now you can drag the character blueprint into the workspace. Put the capsule on the top platform.
Player Start

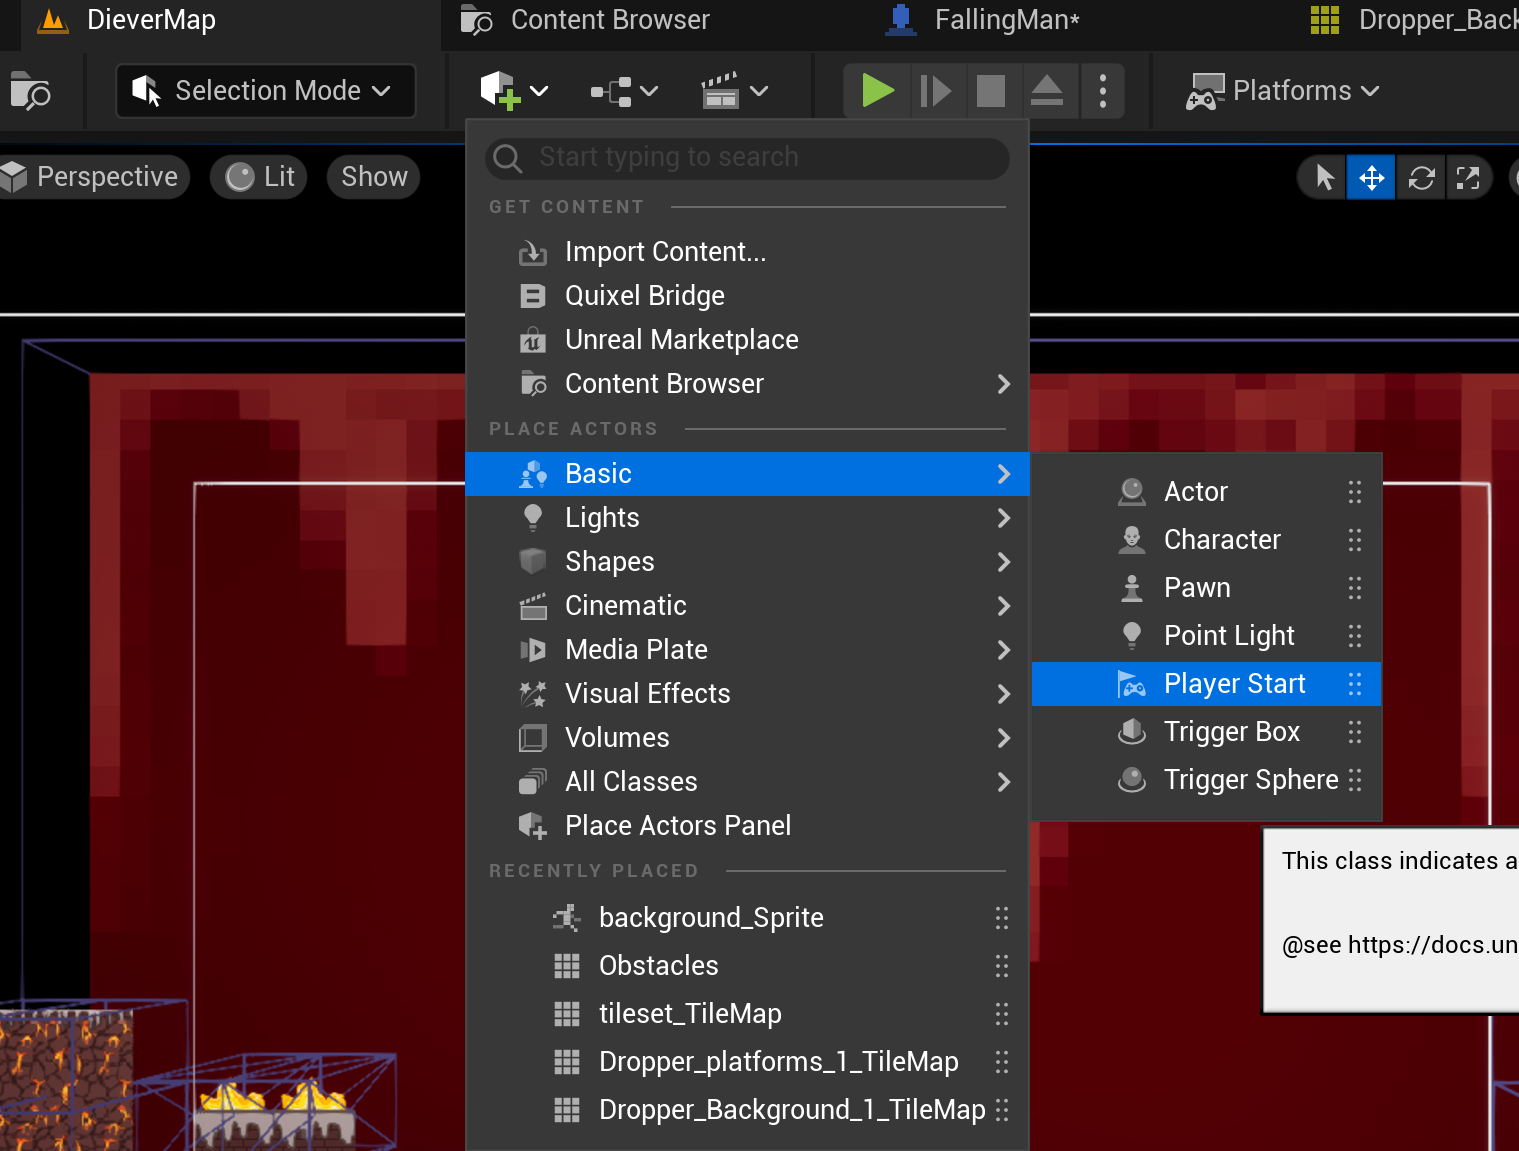
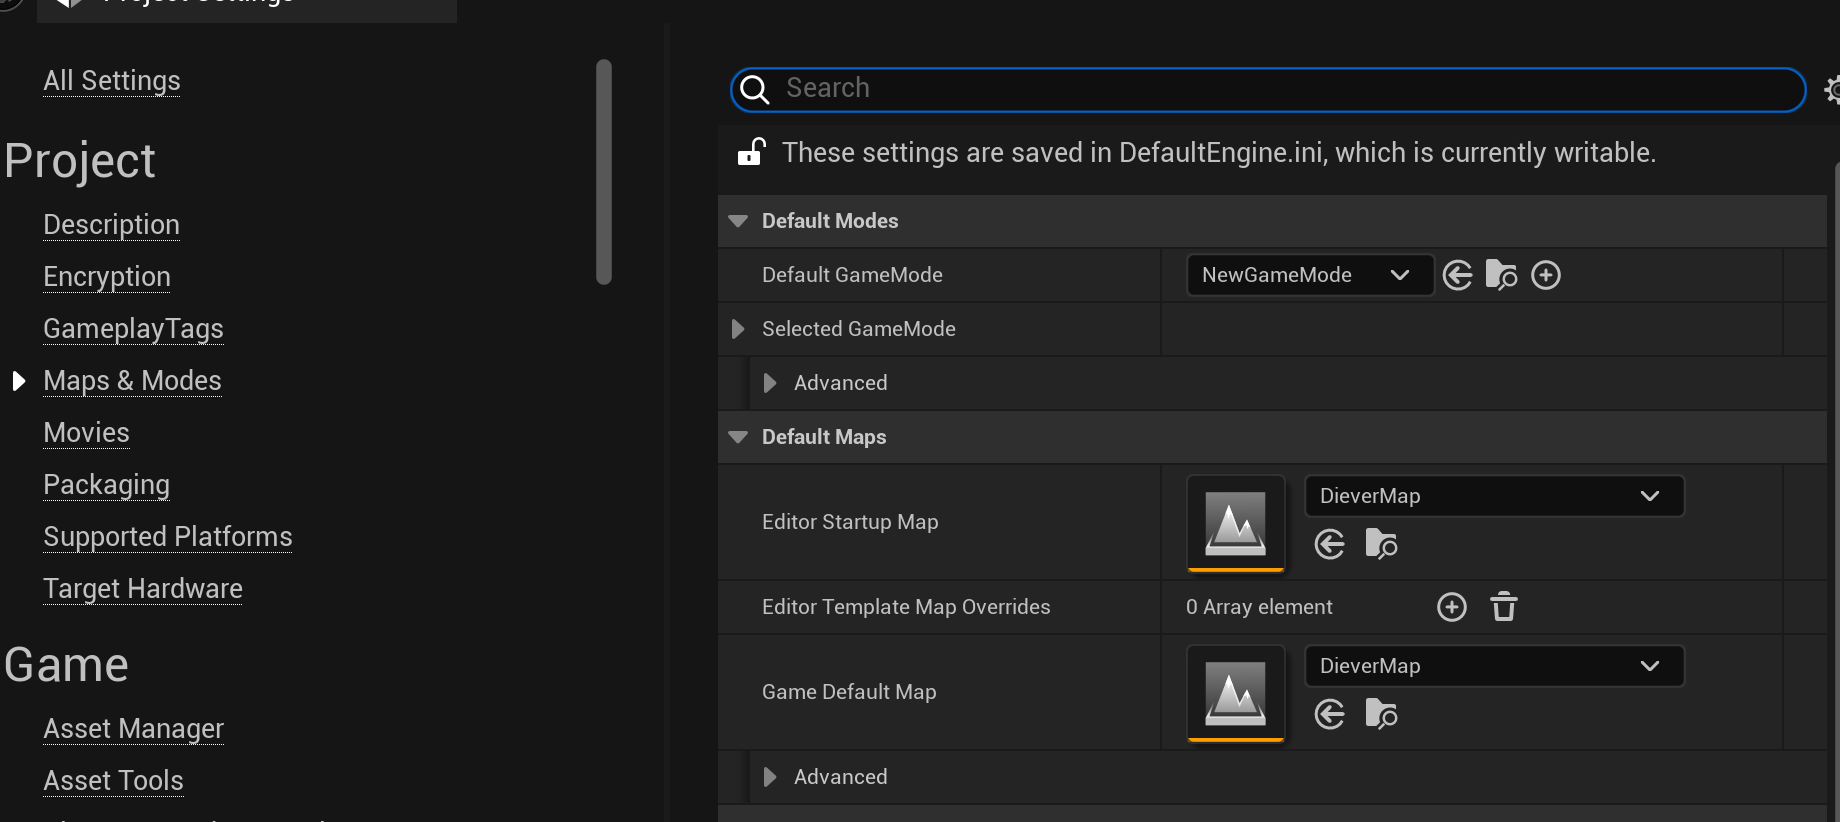
Now double click on the game mode base blueprint, and the only thing to change is select the paper character blueprint for the default pawn class.
Go to edit, project settings and change these settings. In maps and modes, change default game mode to the game mode base blueprint you made. Change editor startup map and game default map to your map that you saved in the very beginning in the Maps folder. When we open this project now, this level will automatically open.
Click out and delete the sprite that we dragged unto the workplace, we will replace that will a Player Start which is taken from the cube with the plus next to it. Adjust the size and placement to match where our paper character blueprint capsule used to be. You can adjust the capsule (sprite can clip outside the capsule, that is fine) in the character blueprint so that when you press play, the sprite is standing on the ground.
Lighting & Camera

Still in edit > project settings search Auto exposure and turn it off. Then search Anti aliasing and select fxaa. Lastly search motion blur and turn it off.
Go to character blueprint and search for Max EV100 (exposure), turn it on and make it a lower number, or until it looks as you desire.
Movement

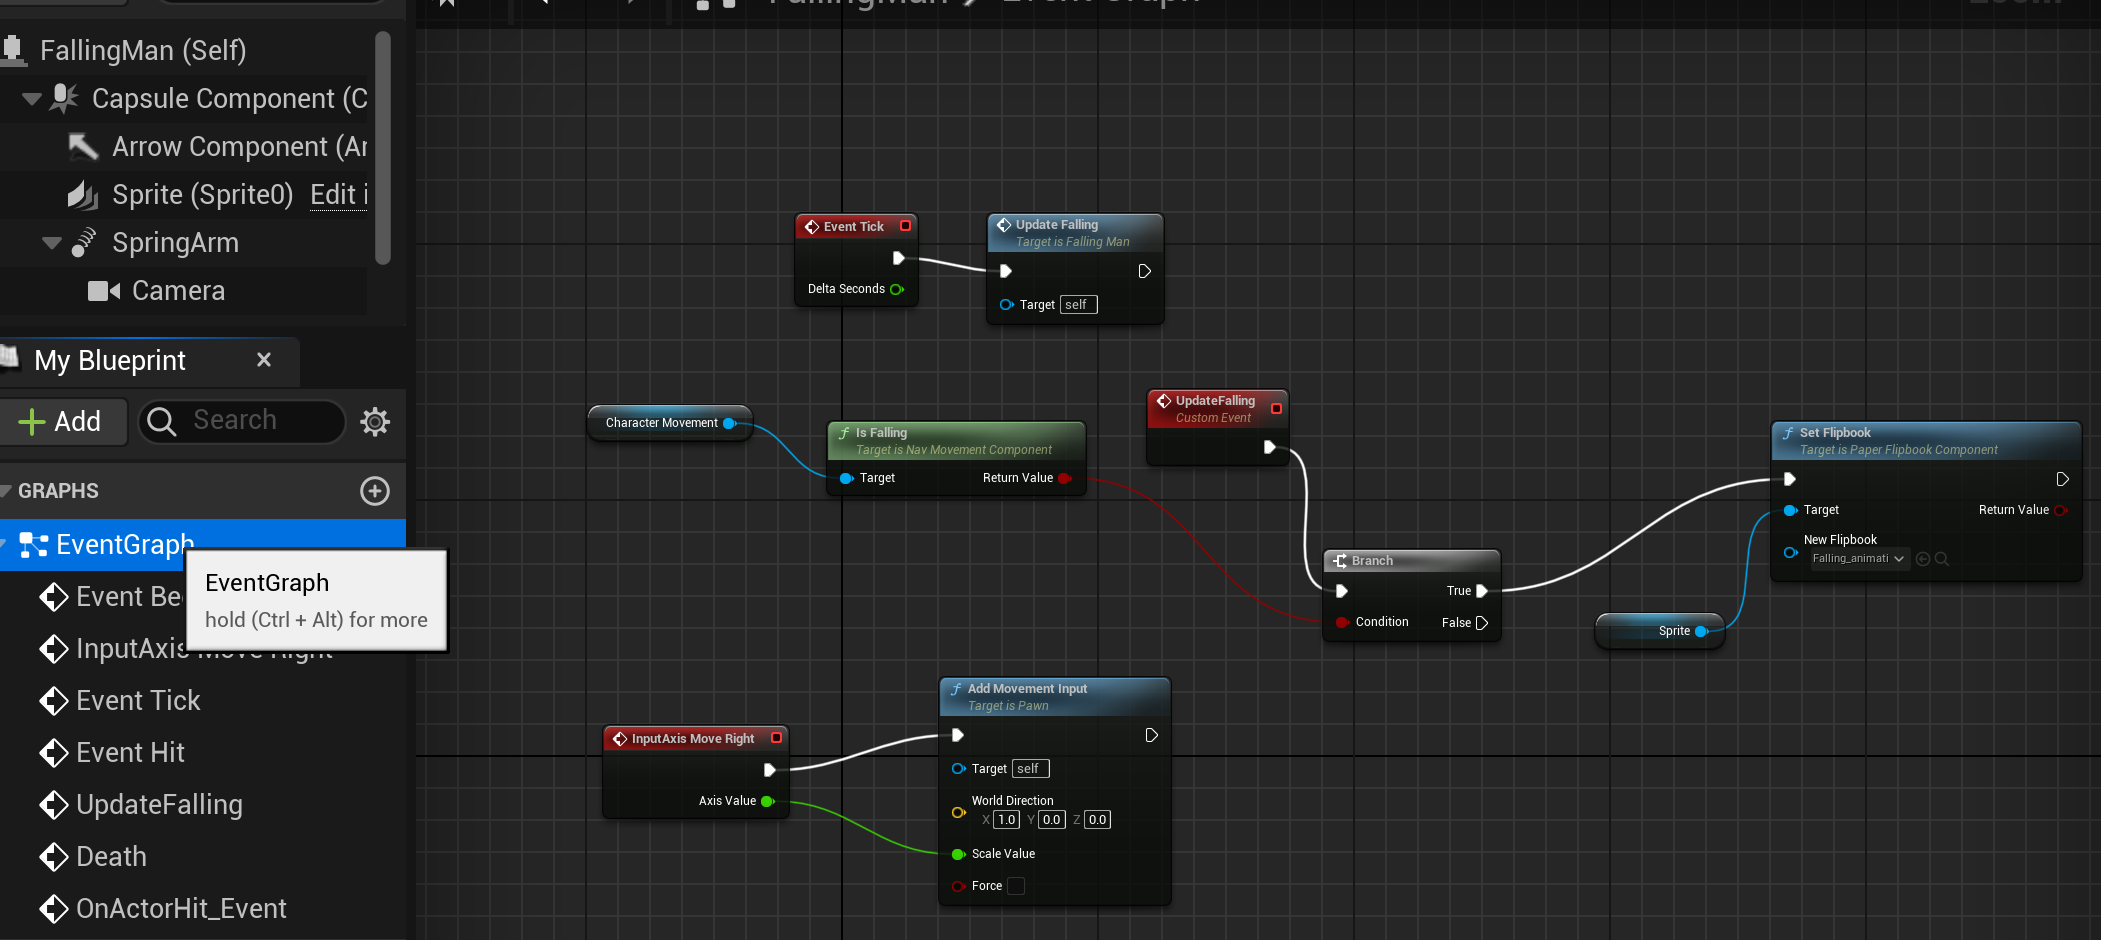
Now we set up controls that lets us play the sprite.
In edit > project settings, go to input and add an axis mapping and call it move right. Add 4 keyboard inputs. D and Right keys have a scale of 1, while A and Left has a scale of -1 (the opposite direction of right's scale of 1)
Then go to the character blueprint and click on the event graph there. Add the nodes there by right clicking and searching those names. This is also how you get the character animation to change to falling when the sprite is falling.
The node called update falling is a custom event, to make it just search custom event and name it an appropriate name. Then search the node's name up after making that custom event and connect it to the event tick node. To connect the nodes, just click and drag the lines and connect the same spots you see in the image.
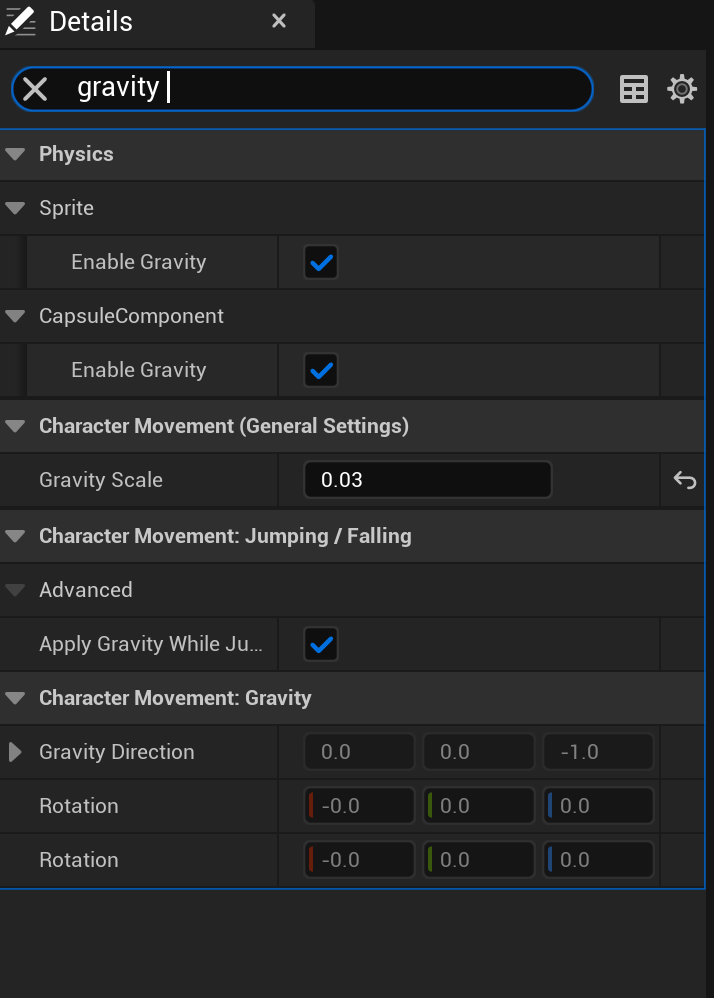
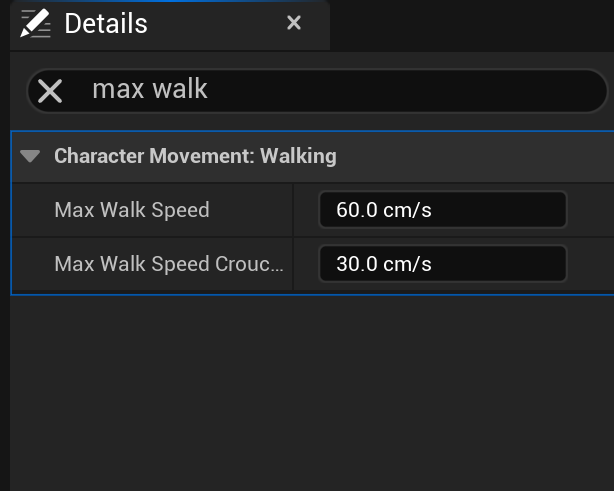
To slow down the character's falling speed, click on the blueprint self tab and search for gravity, then lower the gravity scale. Then search for max walk speed and lower that too.
Complete Event Graph for Death
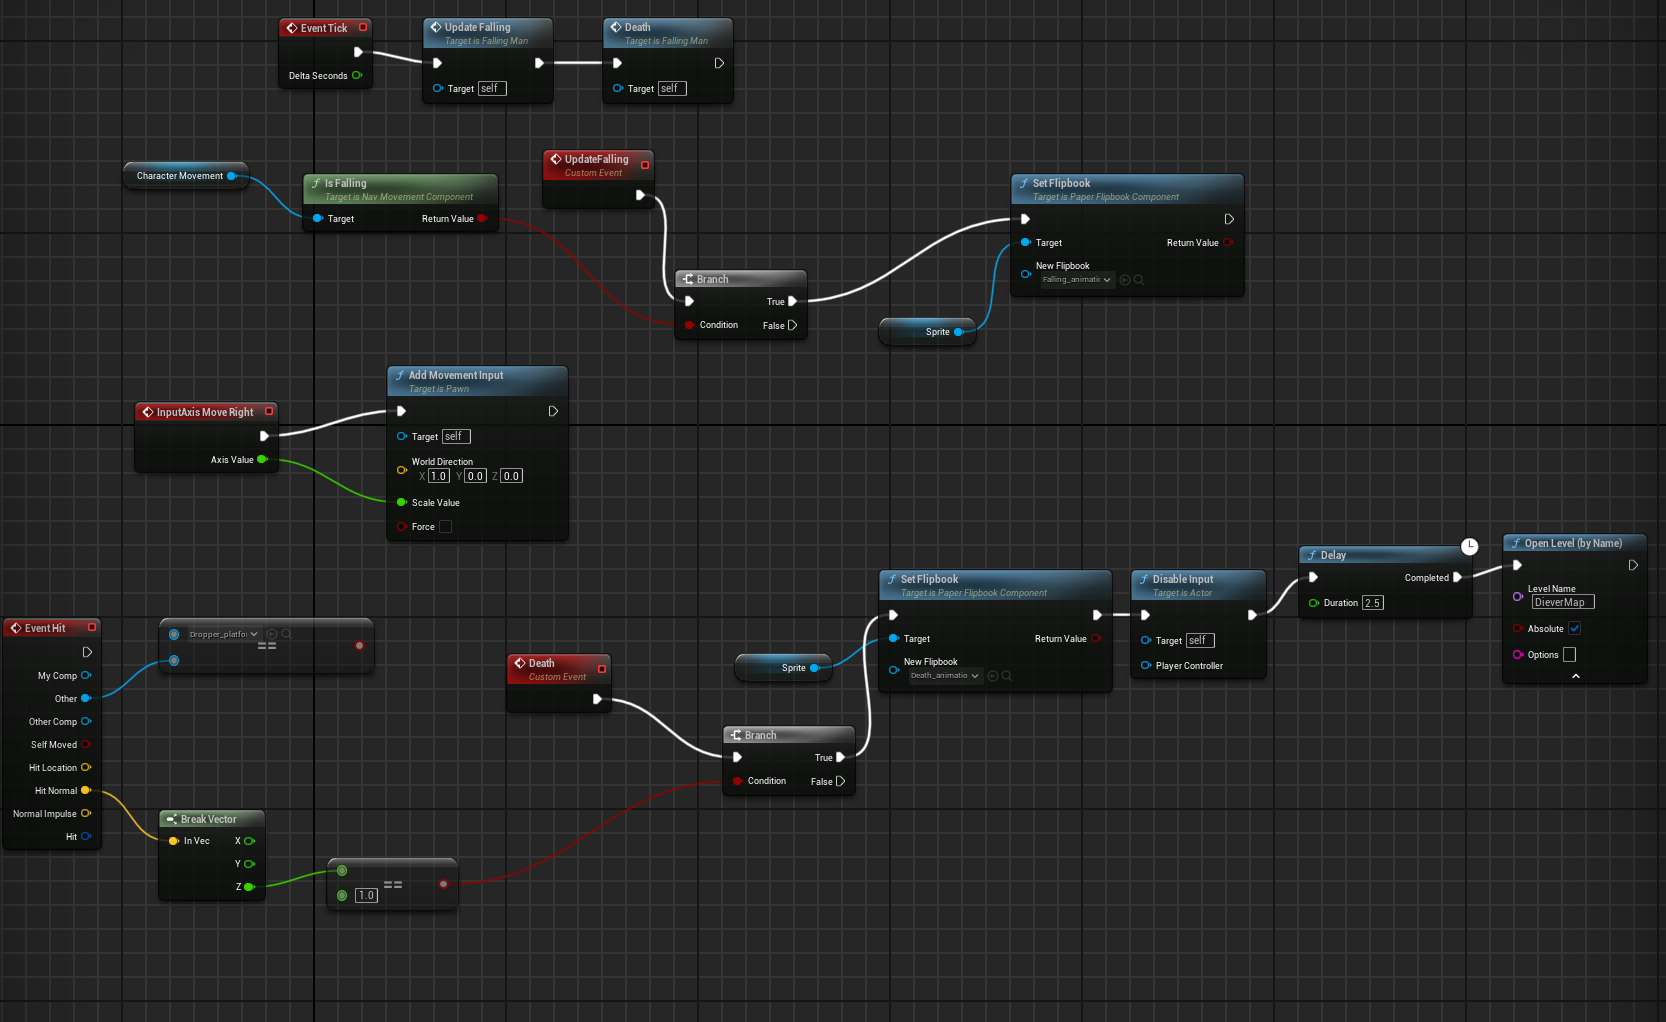
This is the finished event graph for the game, the new nodes added cause the sprite to die if they hit a tile only from the top. The nodes after the set flipbook to death animation disable user input to move, and delays for a little before restarting the level. The red node called death is also a custom event, and after you make it, you right click and search up "death" to connect that call function to the event tick.
The only part that is still not perfect is when the character reaches the bottom, the game still restarts since the sprite dies. But once you reach the bottom that is basically how you win the game.
Finished Product Game Play
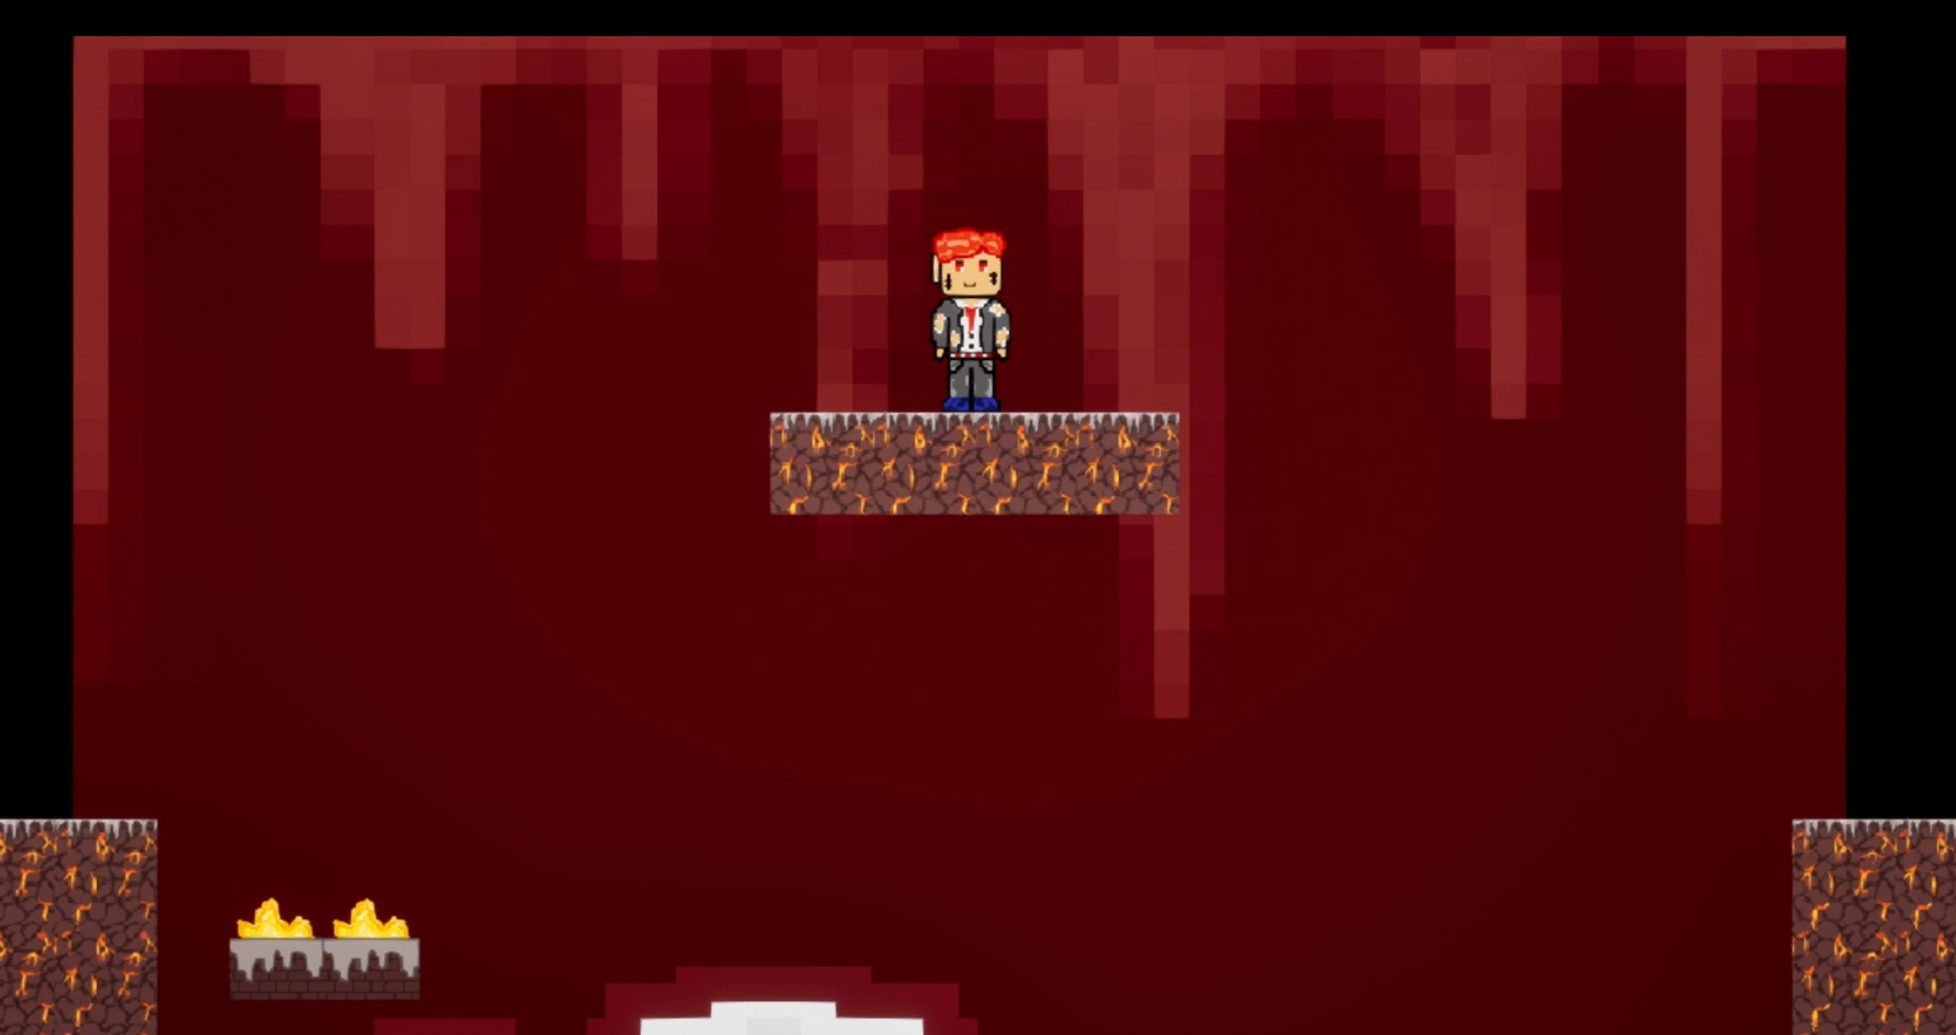
When running the game, in order to move the player, click once first to start the controls and play from there!!