Varying the Boiling Temperature of Water With a Vacuum Pump
by NielsDEF in Teachers > Science
569 Views, 1 Favorites, 0 Comments
Varying the Boiling Temperature of Water With a Vacuum Pump
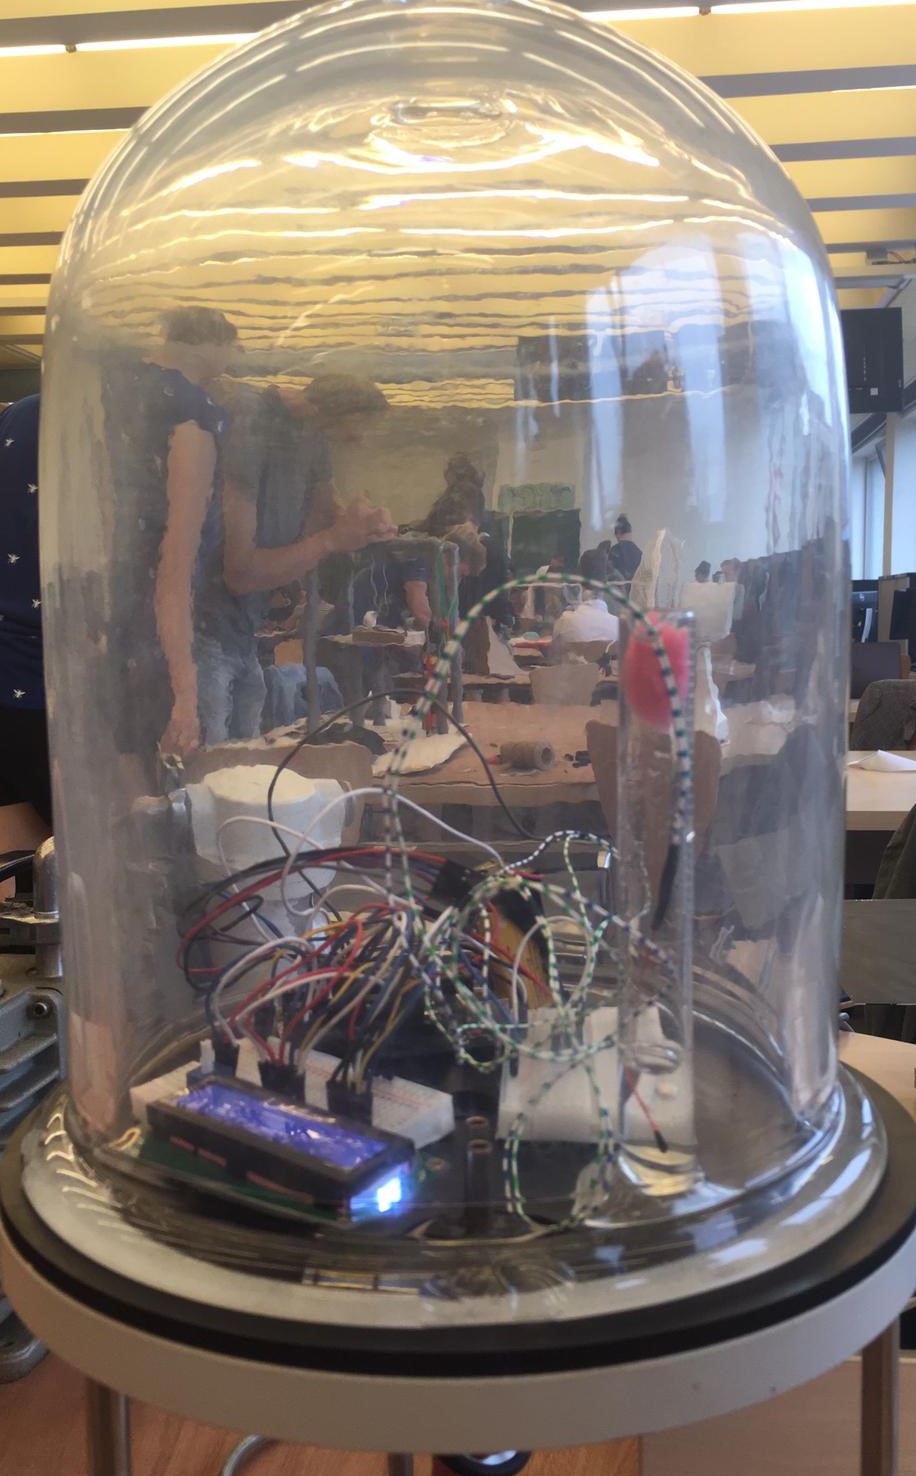
The goal of this project is to make the boiling point of water visible when there is an under pressure. For this project we will be using varying pieces of electronics and we will explain how everything is assembled and tested. The Instructable will be divided into two parts, in the first part we will explain how all the electronic parts are assembled and in the second part we will dive more deeply in the rest of the construction.
Supplies
For the main construction:
· Vacuum pump
· Vacuum pump plate
· Bell jar
· Pressure hose (probably comes with the vacuum pump)
· Graduated cylinder (or anything else that can hold water)
· Sponge
· Thermometer
For the sensor construction:
· Arduino Uno
· Breadboard big (or 2 small ones)
· Breadboard jumper cables male-male (make sure you have plenty!)
· Breadboard jumper cables male-female
· 9V battery
· 9V battery snap connector
· BMP280 Barometric Pressure Sensor
· LCD screen
· Resistors (10,000 Ohm)
· Thermistor
· Potentiometer
Connecting Your Circuit
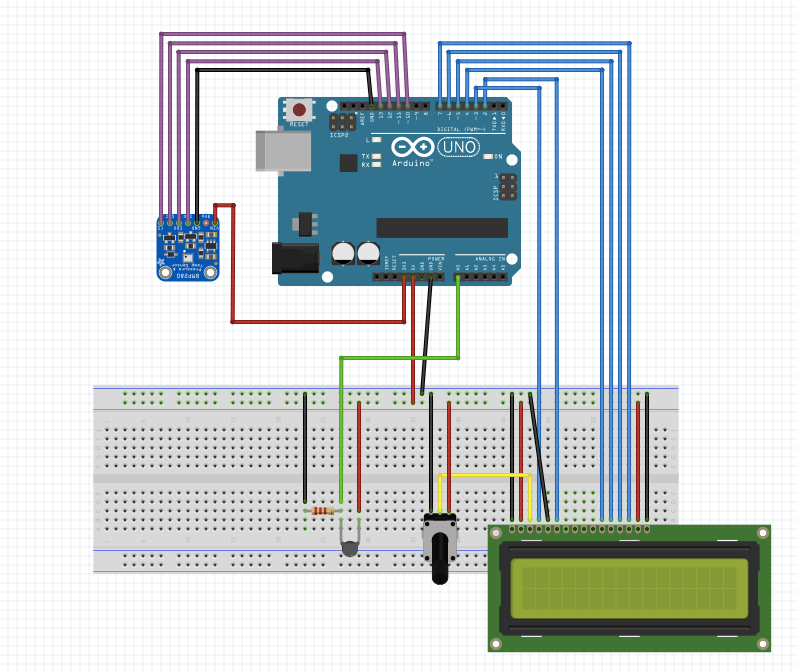
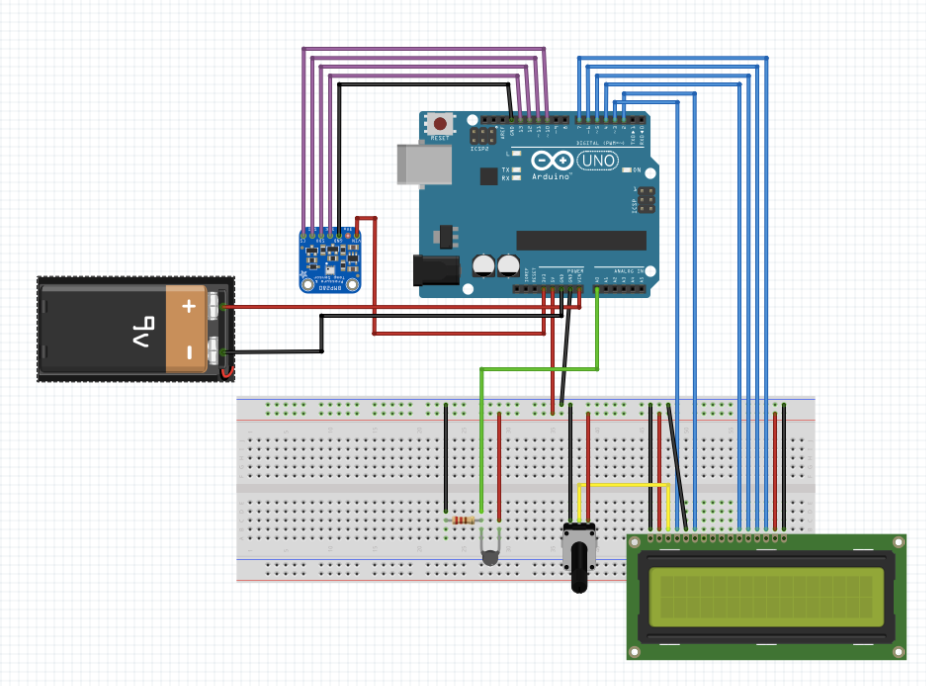
Before you start to build the circuit as shown above NEVER connect your Arduino to two power outlets at the same time! So do not connect the battery to your circuit while it is USB connected to your laptop for instance. This can result in a dead Arduino. I would recommend to connect the battery only right before you want to test your construction in the bell jar.
The next step is to begin constructing the circuit that will allow you to measure temperature, pressure and altitude using the thermistor and the BMP280 sensor. We are also connecting a LCD screen and a battery so this whole construction is not tethered to a laptop or anything when we place it in the bell jar. I would recommend checking if you connected everything right before you start uploading the Arduino software.
Calibrating the Thermistor
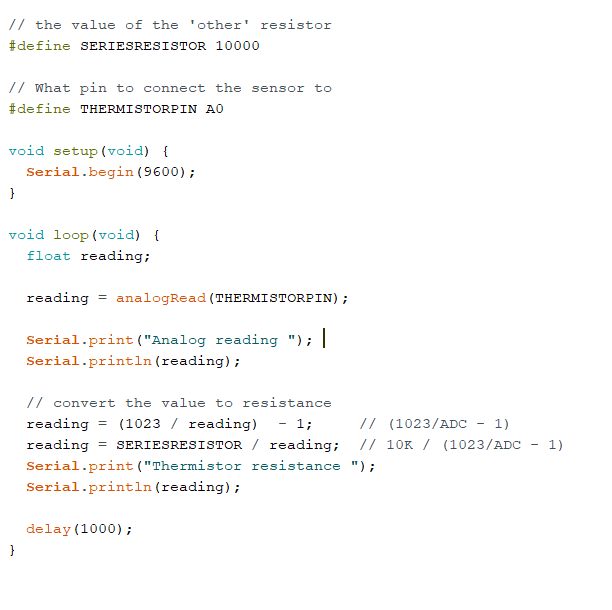
Before you can start using the Arduino construction you need to calibrate your Thermistor. With the above code we can start reading the values of resistance the Arduino measures. You will only need this code for this step. You can find the final code in the next step.
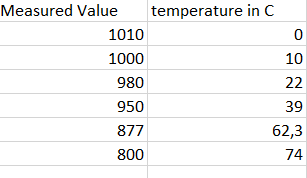
Right now, your Arduino is not producing temperature values. we need to calibrate it, which means taking a series of measurements with the Arduino at various temperatures, while simultaneously recording the temperatures at each measurement. In this way, we can create a chart that has measured values on the left and temperatures on the right. From this chart we will be able to come up with an equation that will allow us to automatically convert between the measurement and degrees.
In order to take your calibration data, you will need to put a beaker full of water on a hot plate and turn it on. Place a thermometer in the water and watch as the temperature rises. When the temperature reaches 18 degrees Celsius, place your thermistor in the water as well and turn on your Arduino so that you can read the serial monitor.
When the temperature on your thermometer reads 20 degrees Celsius, write down that temperature. Next to it, write down the measured reading that your Arduino is putting on the serial monitor. When the thermometer reads 21 degrees Celsius, repeat this. Continue repeating it until you have several measurements. You should now have a series of measured values, with each corresponding to a specific temperature. Enter these into an Excel spreadsheet like in the photo above.
Now that all of your data is in Excel, we will use it to create a calibration curve and generate an equation that will allow us to convert between the measurement and temperature values.
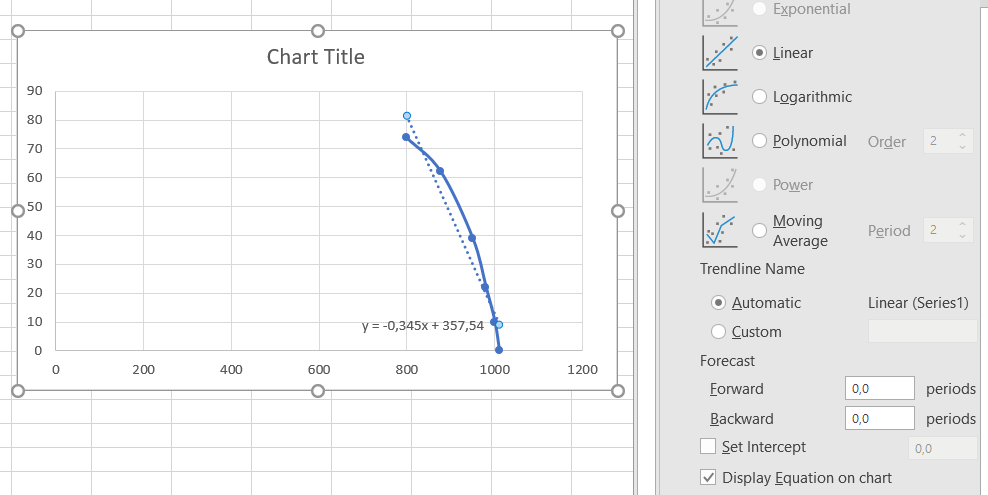
In Excel, highlight your data (make sure the measured values are on the left) and select "Insert" on the toolbar at the top, then click "Scatter or Bubble Chart" from the Charts section. A graph should pop up with a series of dots on it. Double-check that the Y-axis represents temperature values and the X-axis represents measured values. Right-click on one of the data points and select "Format Trendline". A dialogue box will appear. Under "Trendline options", select "Linear", and then at the bottom select the box that says "Display Equation on chart". Your chart should now look like the one in the photo above. Write down that equation, as that is what you are going to program into your Arduino to make it convert the measurement to temperature automatically.
Downloads
Programming Your Arduino
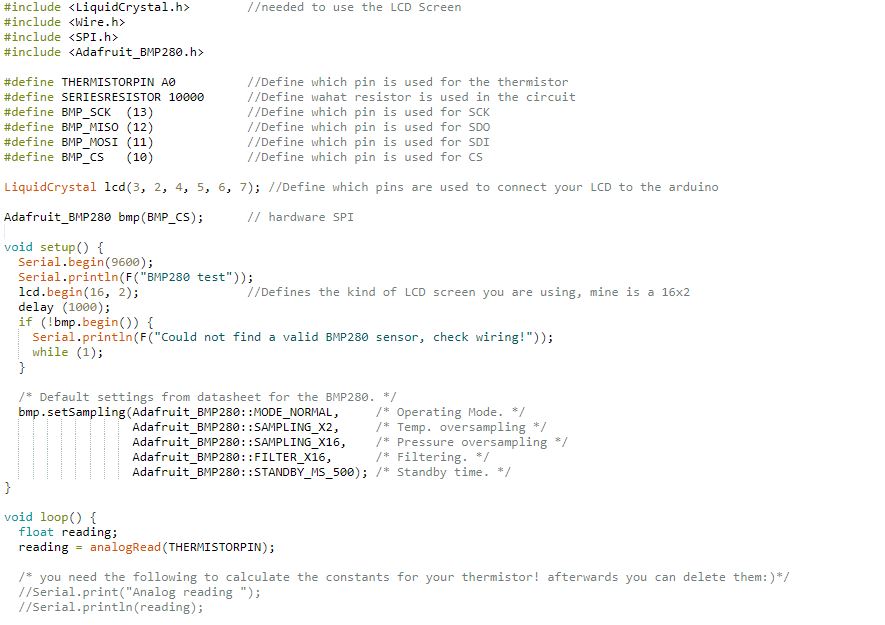
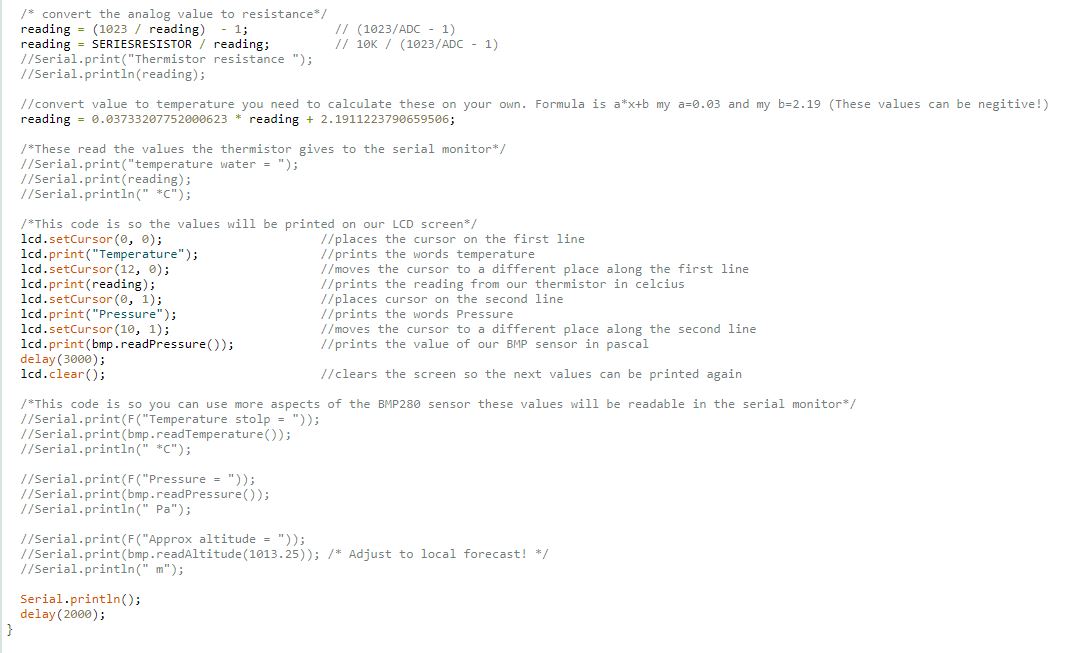
The next step is to program your Arduino so that you can start taking measurements.
The code is added as a document so no need to type everything yourself. In the last step you already calculated the constants for the thermistor, you need to change the values so they fit with your thermistor.
At the moment i commented all things that should print to the serial monitor as we won't need that for this project. but if you would like to use it you can just delete the "//" in front of the 'Serialprint' and it will work perfectly.
Downloads
Building the Construction
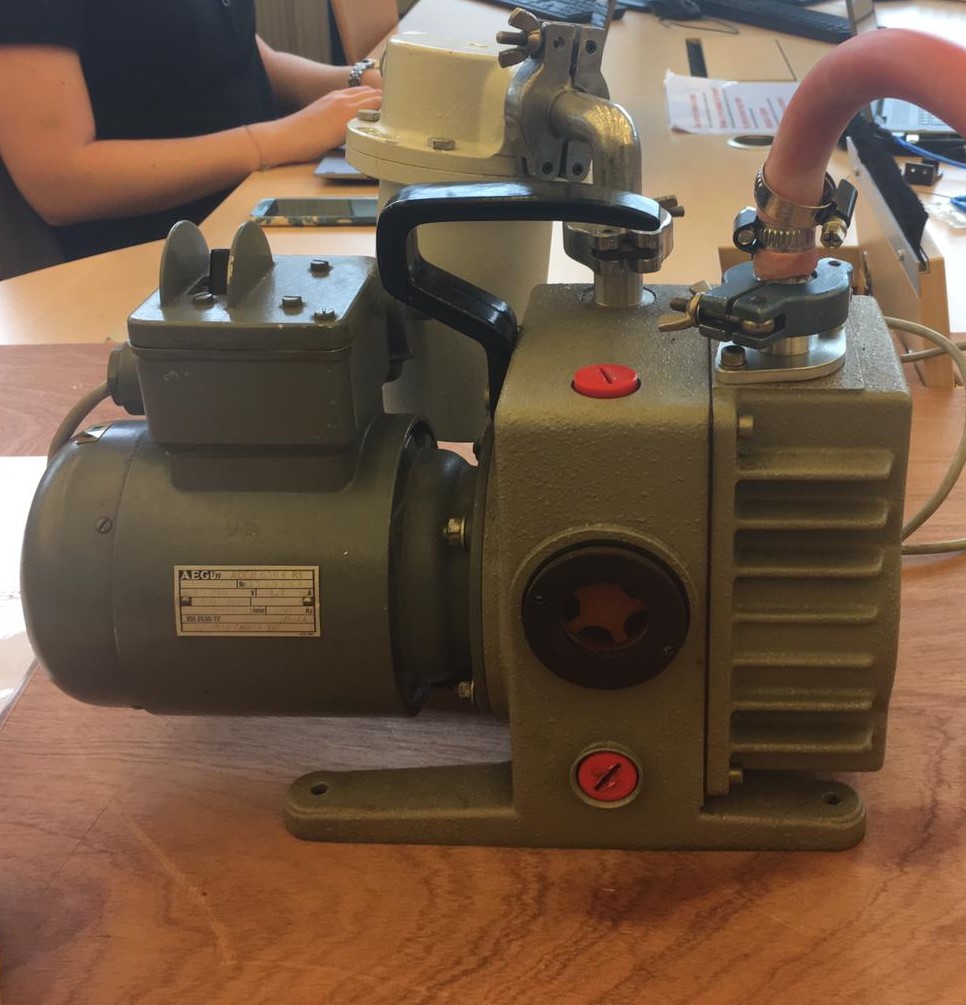
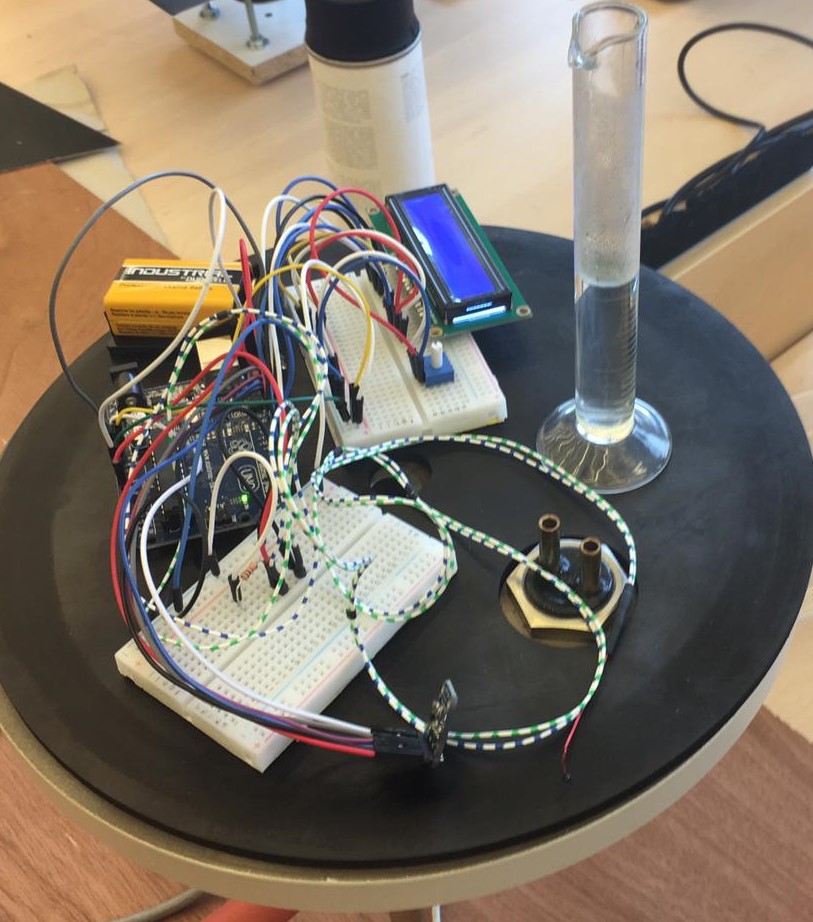
Now that the Arduino and the sensors are ready to work it is time to build the rest of the construction. Every vacuum pump is a little different but the steps will stay mostly the same.
First make sure the hose it connected to the vacuum pump then connect the other end of the same hose to the vacuum pump plate. Make sure everything is connected airtight, otherwise it won't work.
Now you can place your Arduino and sensors on the vacuum pump plate. Make sure nothing covers the hole in the middle where the hose is connected to.
Add a few milliliter of water in your graduated cylinder and put your thermistor in the water. Cover the top of the graduated cylinder with a piece of a sponge, this will catch any evaporating water and keep the thermistor in place.
Testing and Experimenting
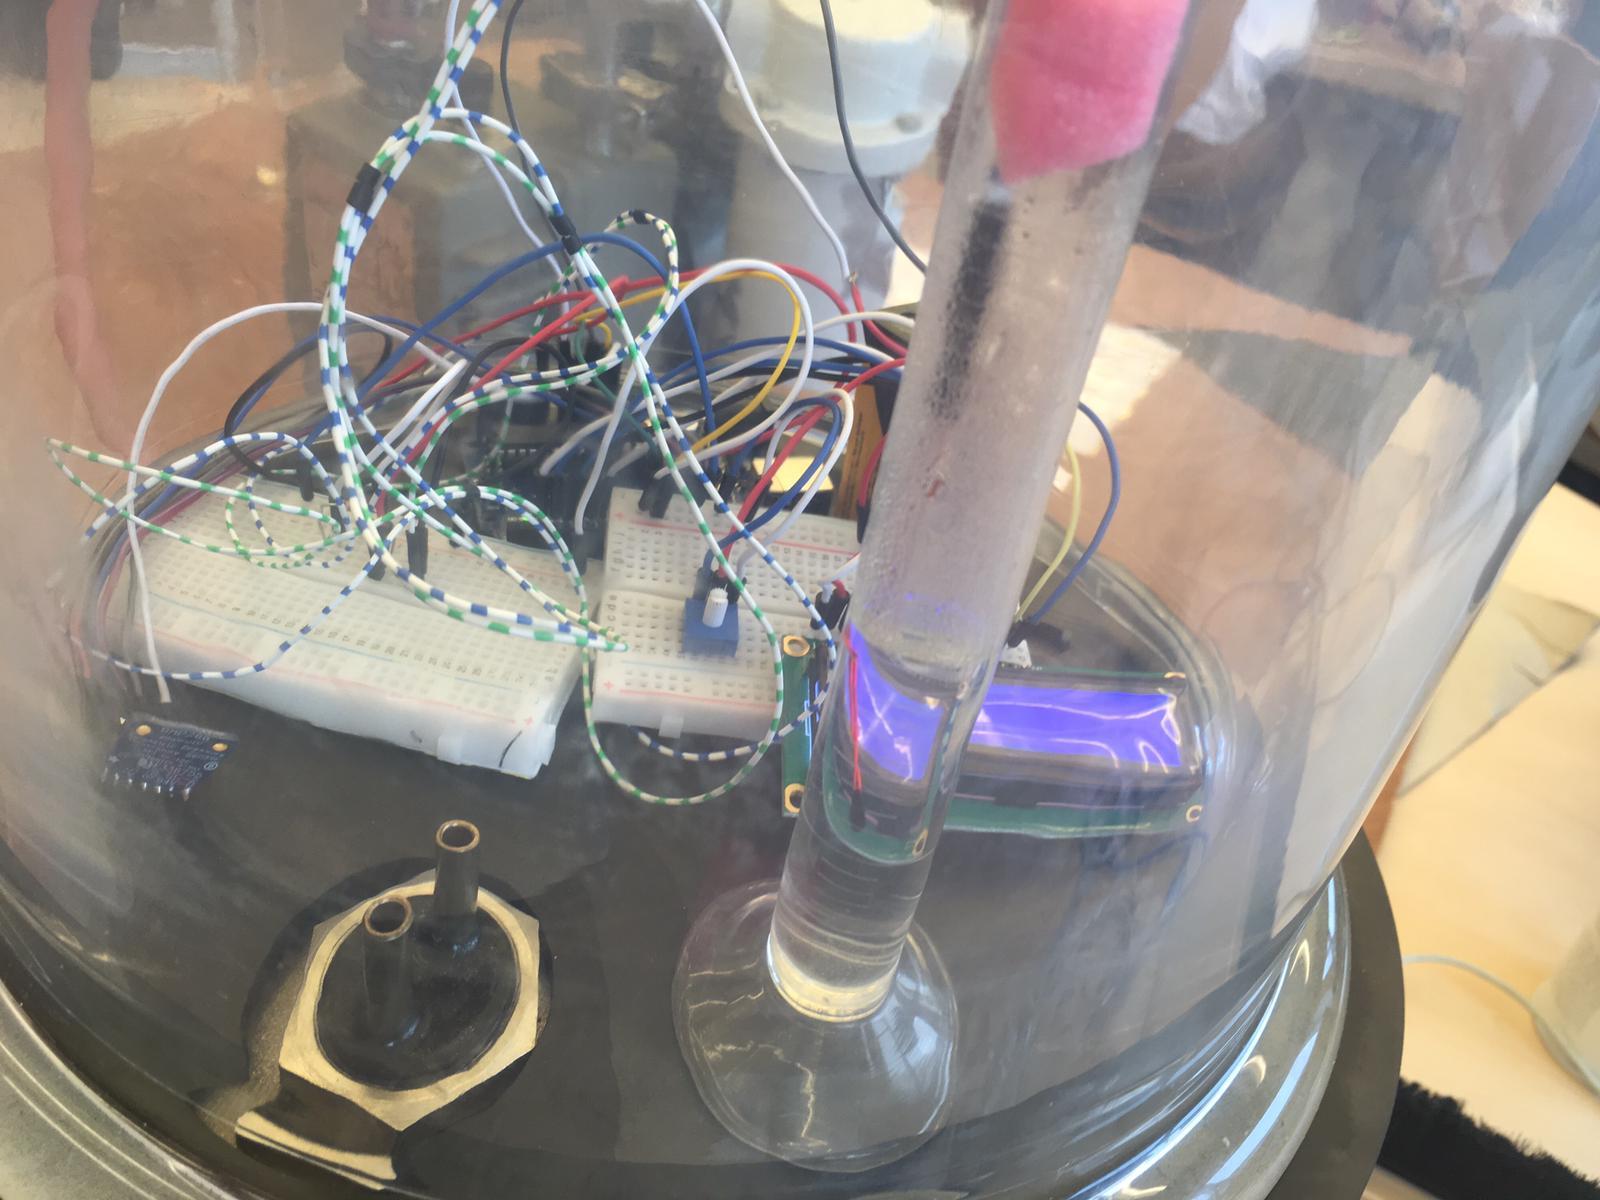
Put the bell jar over your construction and you're done! you can start the vacuum pump now and do some experiments with this construction. You can read the temperature and pressure from the LCD screen and you can watch the water to see little bubbles forming as the pressure drops!