D4E1 - Redesign - Spinning Jug
by WannesL1 in Living > Toys & Games
120 Views, 2 Favorites, 0 Comments
D4E1 - Redesign - Spinning Jug


The aim of the SpinningJug is to create an innovative tool that enables people with disabilities to participate in juggling activities in a simple, safe, and accessible manner. This is achieved by modifying the traditional juggling ring and incorporating a mechanism that significantly enhances ease of use and accessibility.
A product designed for Woesh in collaboration with Howest IPO students.
Woesh is a close-knit community where everyone can grow in, with, and through circus.
Our mission is to spread the circus spirit as widely as possible in a sustainable and caring way.
For 20 years, Woesh has been organizing circus classes, camps, and projects. Circus pedagogy is used to promote the individual, social, motor, and creative development of children, young people, and adults. The motto remains: Circus is for everyone!
Designed by Michael Moyson, Markus Duffuë & Wannes Leuridan
#D4E1 #WOESH #IPO #Howest #circus
Link to youtube video for Woesh: https://www.youtube.com/watch?v=xivV8Izdj-4
Usage Manual
Posture and Positioning:
- Stand upright with enough space around you.
- Hold the telescopic handle firmly.
Movement:
- Make a gentle, circular motion with the stick to make the ring spin.
- The ball joint provides extra freedom, allowing the ring to spin smoothly without much force.
Adjusting the Stick:
- Extend or shorten the stick as needed to achieve a comfortable length.
Supplies

Necessary components:
- Juggle ring
- 608zz ball bearing
- 2x 3D cover brackets
- 2x Countersunk Head Screw ISO 10642 - M4 x 12
- 2x Hexagon Regular Nut ISO 4032 M4
- M8 threaded rod, 55 mm
- 1x nylon nut M8
- 1x Hexagon Regular Nut ISO 4032 M8
- 3D printed sphere (ABS) with thread
- 3D printed ball housing + screw cap (ABS)
- Telescopic broom handle
Necessary tools:
- Step drill bit up to 22 mm
- Drill
- 4 mm wood/metal drill bit
- Metalsaw
- Adjustable pliers
- Phillips screwdriver
- Loctite Threadlocker Red
- Super glue
- 2x open-end wrenches 13
Mounting the Bearing on the Ring
.jpeg)


.jpeg)

.jpeg)
Instructions:
Drill the Center Hole:
- Use the step drill bit to drill a hole in the center of the juggle ring, expanding it to 22 mm in diameter.
Temporary Mounting:
- Temporarily mount the ball bearing and one cover plate on the ring.
Mark the Centers:
- Mark the centers of the two holes in the cover plate onto the ring.
Drill the Holes:
- Remove the bearing and cover plate.
- Drill through the marked centers using a 5 mm drill bit.
Final Assembly:
- Re-mount the ball bearing and both cover plates onto the ring, aligning the holes.
- Insert the M4 countersunk bolts through the cover plates, bearing, and the ring.
- Thread the M4 nuts onto the bolts and apply Loctite Threadlocker Red to the threads.
- Tighten the bolts and nuts securely using the Phillips screwdriver and adjustable pliers.
Check the Assembly:
- Ensure the bearing rotates smoothly and is securely mounted without any wobble or play.
This completes the mounting of the bearing on the juggle ring.
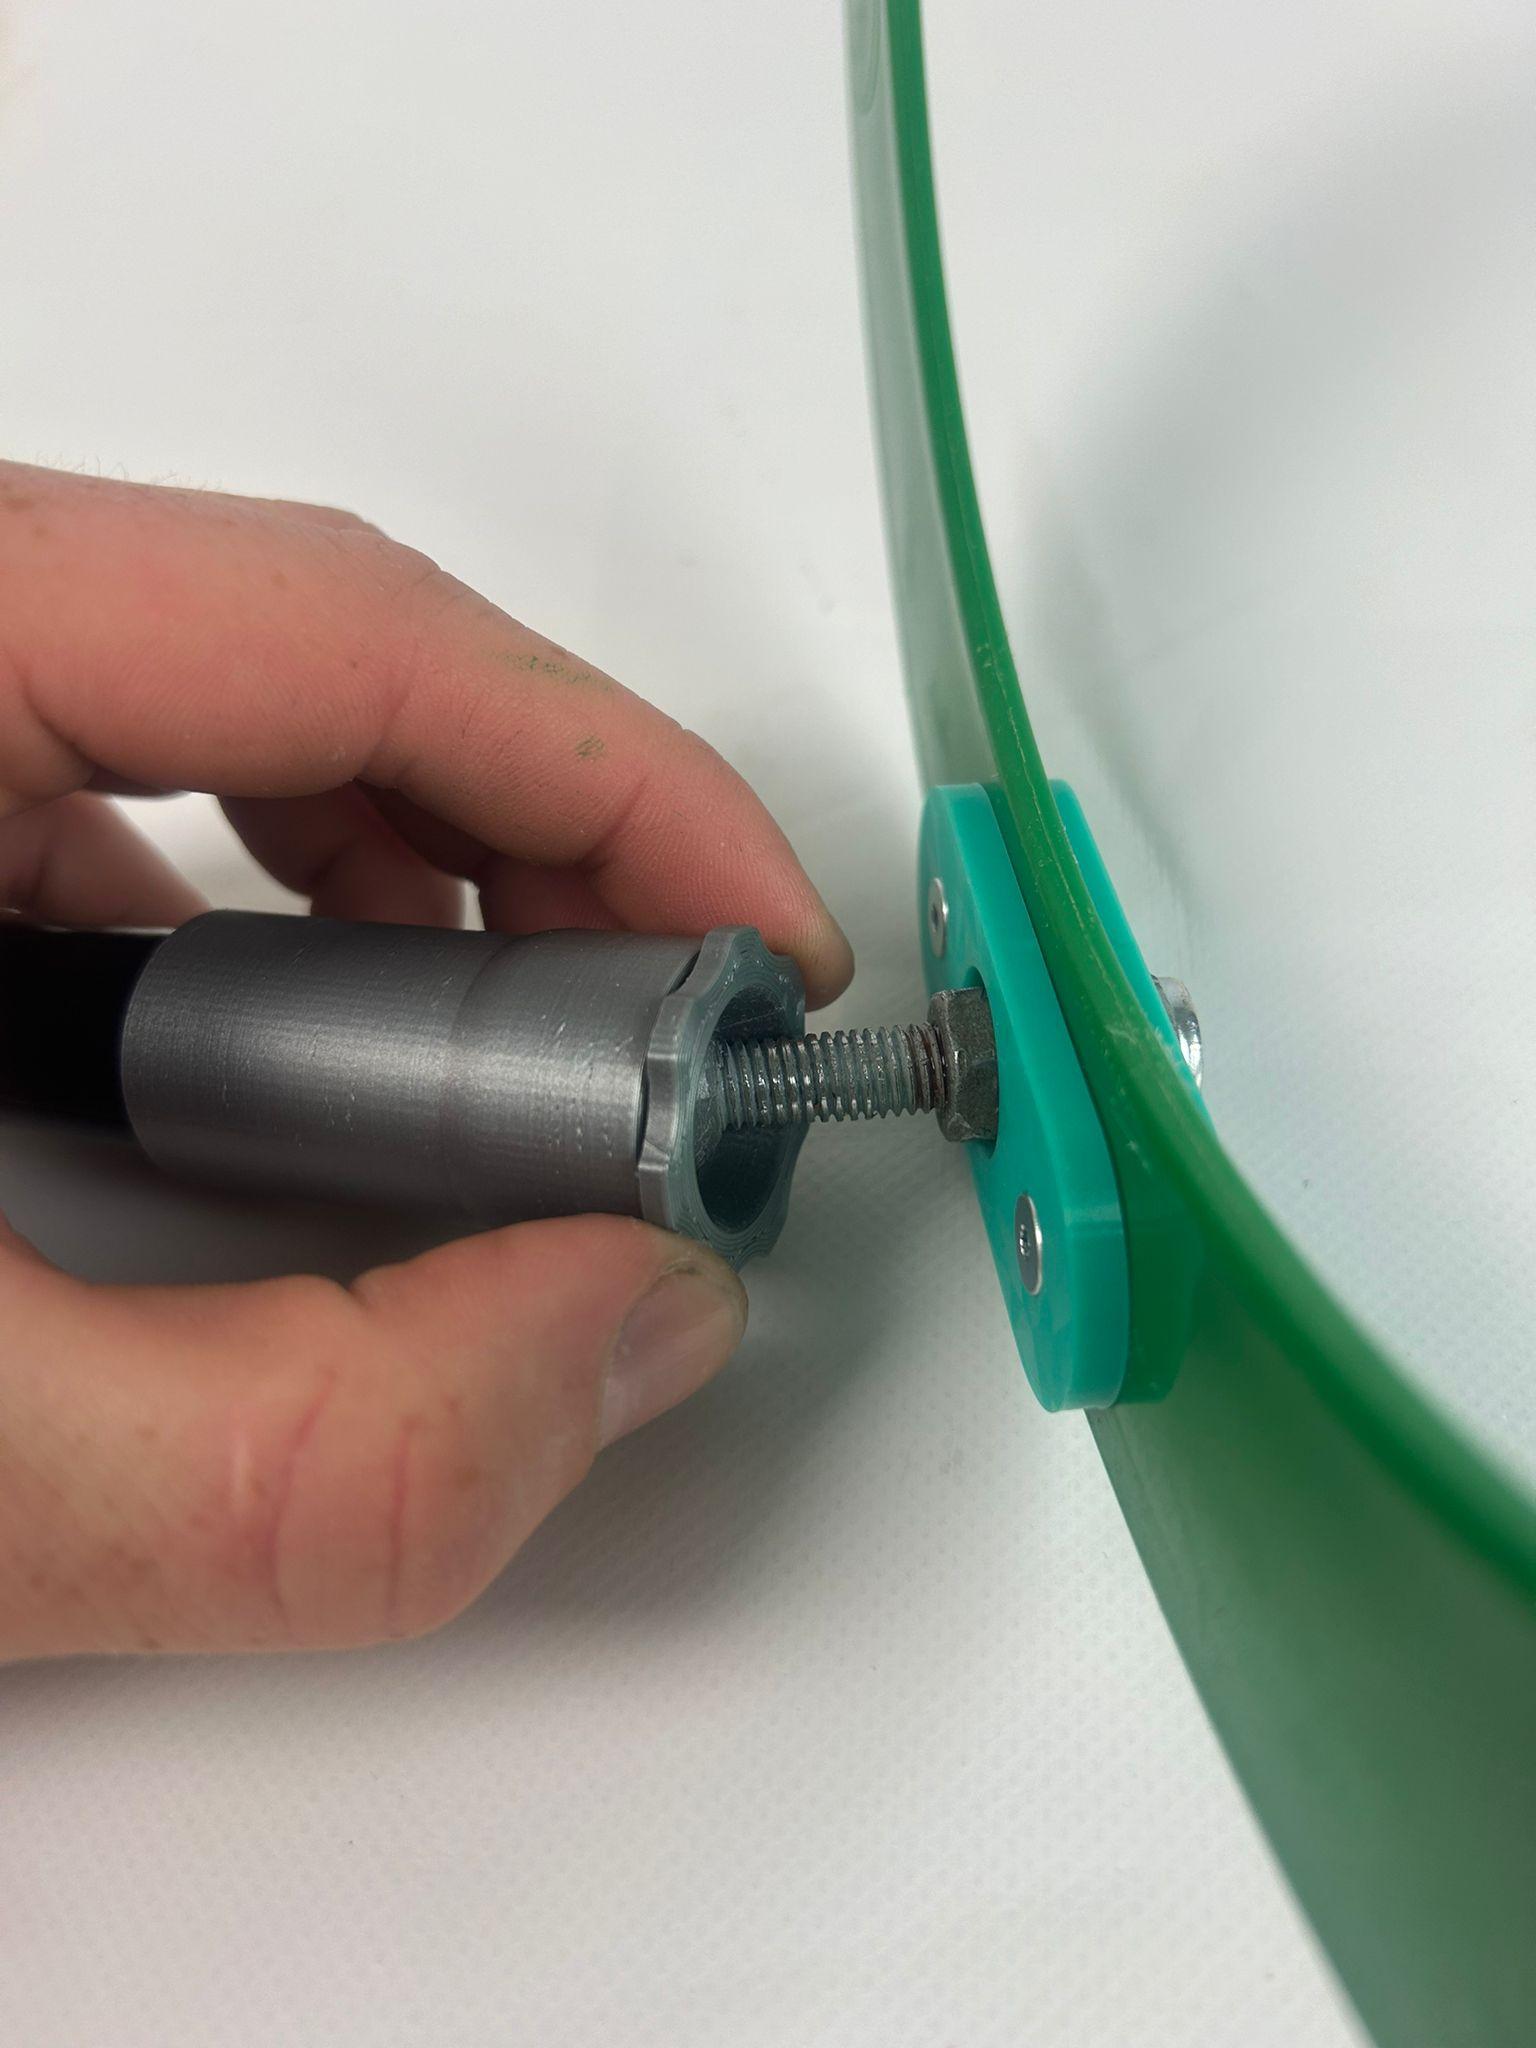
Mounting the Ball and Housing


.jpeg)


.jpeg)

Instructions:
Attach the Sphere to the Threaded Rod:
- Screw the 3D printed sphere onto one end of the M8 threaded rod.
- Apply a small amount of super glue to the threads before fully tightening the sphere to ensure a secure fit.
Position the Nut:
- Thread the M8 nut onto the threaded rod until it is positioned 17 mm away from the sphere.
- Add some loctite/super glue to the nut so it stays in place.
Prepare the Screw Cap:
- Slide the screw cap with the thread over the threaded rod, ensuring it is positioned away from the sphere.
Insert the Threaded Rod through the Bearing:
- Pass the threaded rod (with the sphere and first nut already attached) through the mounted ball bearing on the juggle ring.
Secure with the Second Nylon Nut:
- Thread the second M8 nylon nut onto the end of the threaded rod protruding from the other side of the bearing.
- Tighten both nylon nuts securely using two open-end wrenches to ensure the assembly is firmly in place.
Final Adjustment:
- Ensure that the screw cap and housing are properly aligned and secure.
- Double-check that all components are tight and that the sphere and housing rotate smoothly without any looseness.
This completes the mounting of the ball and housing assembly.
Downloads
Mounting the Telescopic Handle on the Ring

.jpeg)


.jpeg)

Instructions:
Disassemble the Broom Handle:
- Disassemble the telescopic broom handle by separating the inner and outer sections.
Shorten the Handle Sections:
- Use a hacksaw to cut both the outer and inner steel sections of the handle to 450 mm each.
Prepare the Ball Housing:
- Apply a small amount of super glue inside the housing of the 3D printed ball.
Insert the Handle:
- Insert the shortened broom handle into the glued housing of the ball.
- Ensure that the handle is pushed in firmly and held in place until the glue sets.
Final Check:
- Make sure the handle is securely attached to the housing and that there is no movement or wobble.
This completes the mounting of the telescopic handle on the ring.
Final Assembly by Woesh


.jpeg)
.jpeg)
Instructions:
Combine the Assembled Components:
- Take the assembled ring with the bearing and 3D printed sphere (from Steps 2 & 3).
- Take the shortened broom handle with the 3D printed housing (from Step 4).
Fit the Sphere into the Housing:
- Align the 3D printed sphere attached to the ring with the 3D printed housing on the shortened broom handle.
Secure the Sphere in the Housing:
- Insert the sphere into the housing.
- Screw the screw cap onto the housing to secure the sphere in place.
Final Check:
- Ensure that the screw cap is tightly secured and that the sphere is firmly held within the housing.
- Verify that the handle and ring assembly operate smoothly without any looseness or play.
This completes the final assembly of the Woesh Juggle Ring.
Playtime

Designed by Michael Moyson, Markus Duffuë & Wannes Leuridan in an IPO atelier for Woesh circusatelier
#D4E1 #WOESH #IPO #Howest #circus