Cykill – a Bike Powered Gaming Console
by Fuzzy-Wobble in Circuits > Arduino
12564 Views, 85 Favorites, 0 Comments
Cykill – a Bike Powered Gaming Console

.jpg)


If you are eager to get fit but can't find the time or motivation – hack any console in this (possibly regrettable) way for fast results!
Cykill has been said to be America's BEST CHANCE at tackling child obesity.

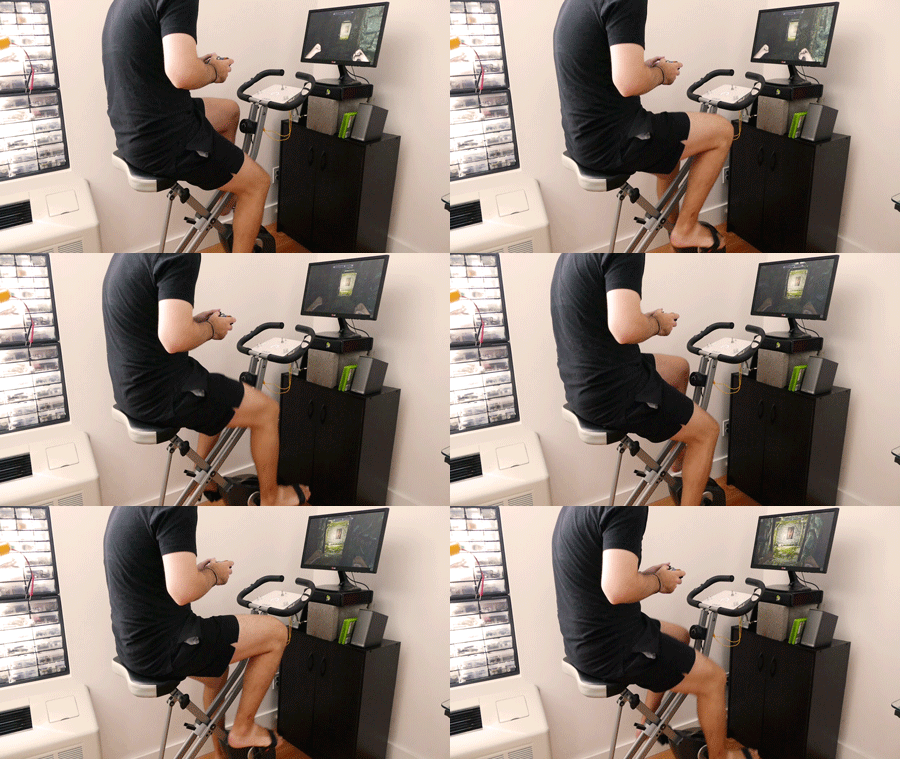
The only way the gaming console will power on, is if you pedal the bike. Fail to pedal fast enough and Cykill will kill the power to your console. ☢ Possibilities of hard drive corruption ☢ Which should be enough motivation to keep you pedaling. (But don't worry, if you are concerned about wrecking your console's hard drive you can do the exact same hack to the tv/monitor instead)
It is a super super super super easy hack! Anyone can do it! All the work was in the code and that is already written for you ;)
~ ~ ~
HYPE HYPE HYPE HYPE!
Viral on Imgur >200k views: http://imgur.com/gallery/DApgx
Originally released Sept 2016 as a publication on IDEO : https://www.ideo.com/blog/how-to-tackle-obesity-in-your-spare-time
Project of the week on Maker Lab: https://youtu.be/tbQYnxVY6EM?t=59s
Hackster.io: https://blog.hackster.io/the-cykill-exercise-bike-powered-gaming-console-3b89b6c3a272
Arduino Blog: https://blog.arduino.cc/2017/07/27/get-into-shape-as-you-game-with-cykill/
What You Need


- Cheap Exercise Bike – I got this one for only 130$.
- Arduino x1
- Potentiometer x2
- Knobs x2
- Power Switch Tail x1
- Toggle Switch x2
- Neo Pixel LED Ring x1
- Neo Pixel LED Bar x2
- Laser Cutter & Acrylic (Optional. I used this acrylic for easy etching.)
- Very Very Strong Super Glue
- Typical Stuff: Wires, Solder, Resistors, Etc
Intercept Signal From Bike Wheel

With most cheap exercise bikes you will find two wires traveling from the front bike wheel into the interface. We need to intercept those wires. So cut them! Then connect them to your circuit. In the photo you will see I just used simple jumper cables.
Remove Existing Interface

Just tear it off. We don't need it. All we need are those two wires.
Create Your Interface


.jpg)
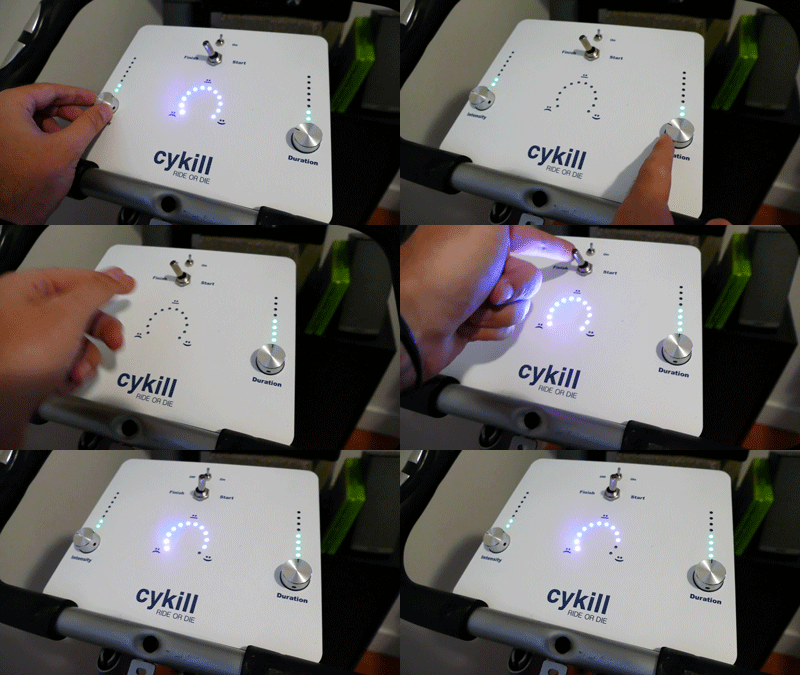
The Interface includes:
- Toggle button for Arduino on/off.
- Toggle button for workout start/finish.
- Potentiometer knob and LED bar for intensity.
- Potentiometer knob and LED bar for duration.
- LED ring to monitor speed.
My laser cut files are attached.
Even cardboard will work if you want something quick and scrappy.
Build the Circuit


Neo Pixel LED Ring:
Neo Pixel LED Ring, Data __ ARDUINO PIN 2
Neo Pixel LED Ring, Gnd __ ARDUINO GROUND
Intensity:
Neo Pixel LED Bar, Data __ ARDUINO PIN 9
Neo Pixel LED Bar, Gnd __ ARDUINO GROUND
Intensity Potentiometer Signal __ ARDUINO PIN A0
Intensity Potentiometer Power __ ARDUINO POWER +5V
Intensity Potentiometer Gnd __ ARDUINO POWER GROUND
Duration:
Neo Pixel LED Bar, Data __ ARDUINO PIN 10
Neo Pixel LED Bar, Gnd __ ARDUINO GROUND
Duration Potentiometer Signal __ ARDUINO PIN A1
Duration Potentiometer Power __ ARDUINO POWER +5V
Duration Potentiometer Gnd __ ARDUINO POWER GROUND
Power Switch Tail:
Power Switch Tail Pin 3 __ ARDUINO PIN 13
Power Switch Tail Pin 2 __ ARDUINO GROUND
Toggle Switch Start/Finish Workout:
Toggle Lead A __ ARDUINO PIN 8
Toggle Lead B __ ARDUINO GROUND
Bike Pins:
Bike Pin 1 __ ARDUINO POWER +5V
Bike Pin 2 __ ARDUINO PIN A2 (add resistor shown in diagram)
Toggle Switch On/Off Arduino:
Splice the ground connection of the Arduino power adapter, and connect ground to both leads on this toggle switch. (Alternatively, you can just always leave the Aduino powered on if you want to skip this)
Eliminate Temptation


It's time for commitment.
Cover the female end of the Power Switch Tail with glue. Plug the male end of the gaming console power cable into the Power Switch Tail.
Do the same with the gaming console power cable where it plugs into the console.
If your glue is strong enough, temptation should be eliminated.
Upload the Code

Code is on github – https://github.com/FuzzyWobble/cykill
Code has five states:
- startup (initialization)
- input (dial workout)
- running (workout running)
- game over (console shutdown)
- done (workout complete)
You may need to make some edits to the "level_reduction" variable depending on the speed of your Microprocessor.
Done!
Congratulations! You completed the Cykill hack!