Cute Toothless Dragon 3d Printed Figure
by Abby_B in Design > Digital Graphics
772 Views, 2 Favorites, 0 Comments
Cute Toothless Dragon 3d Printed Figure
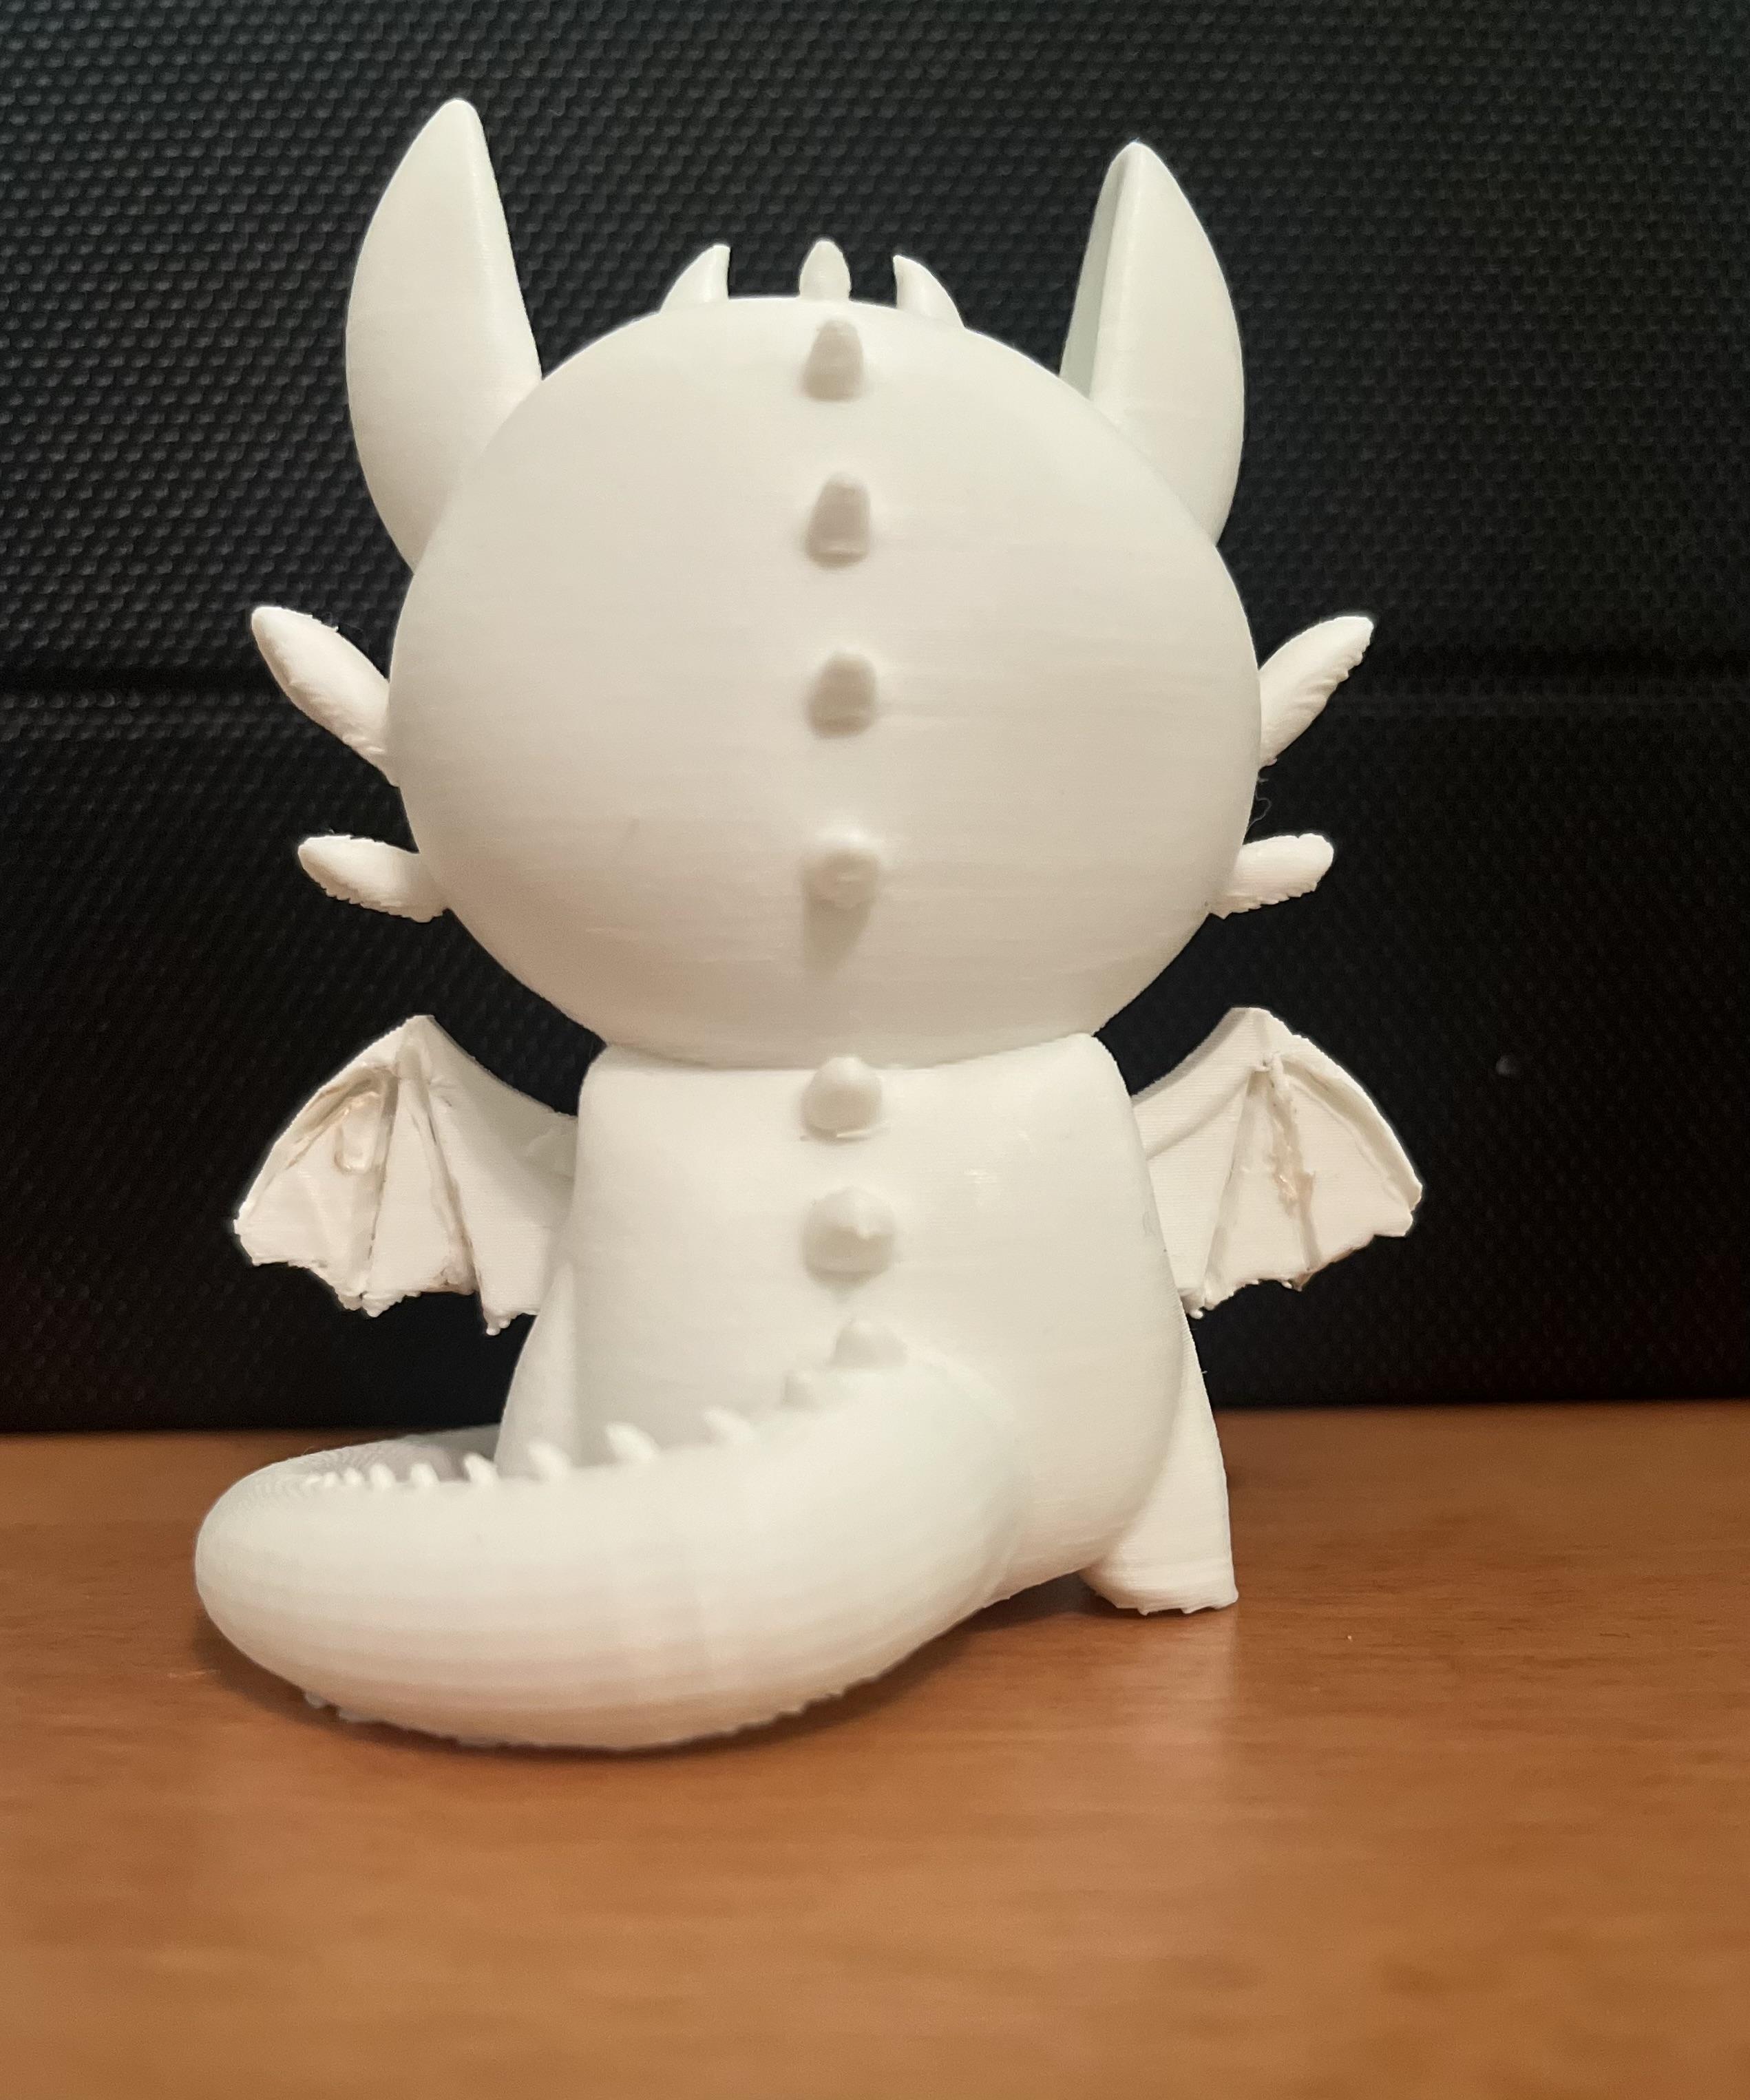
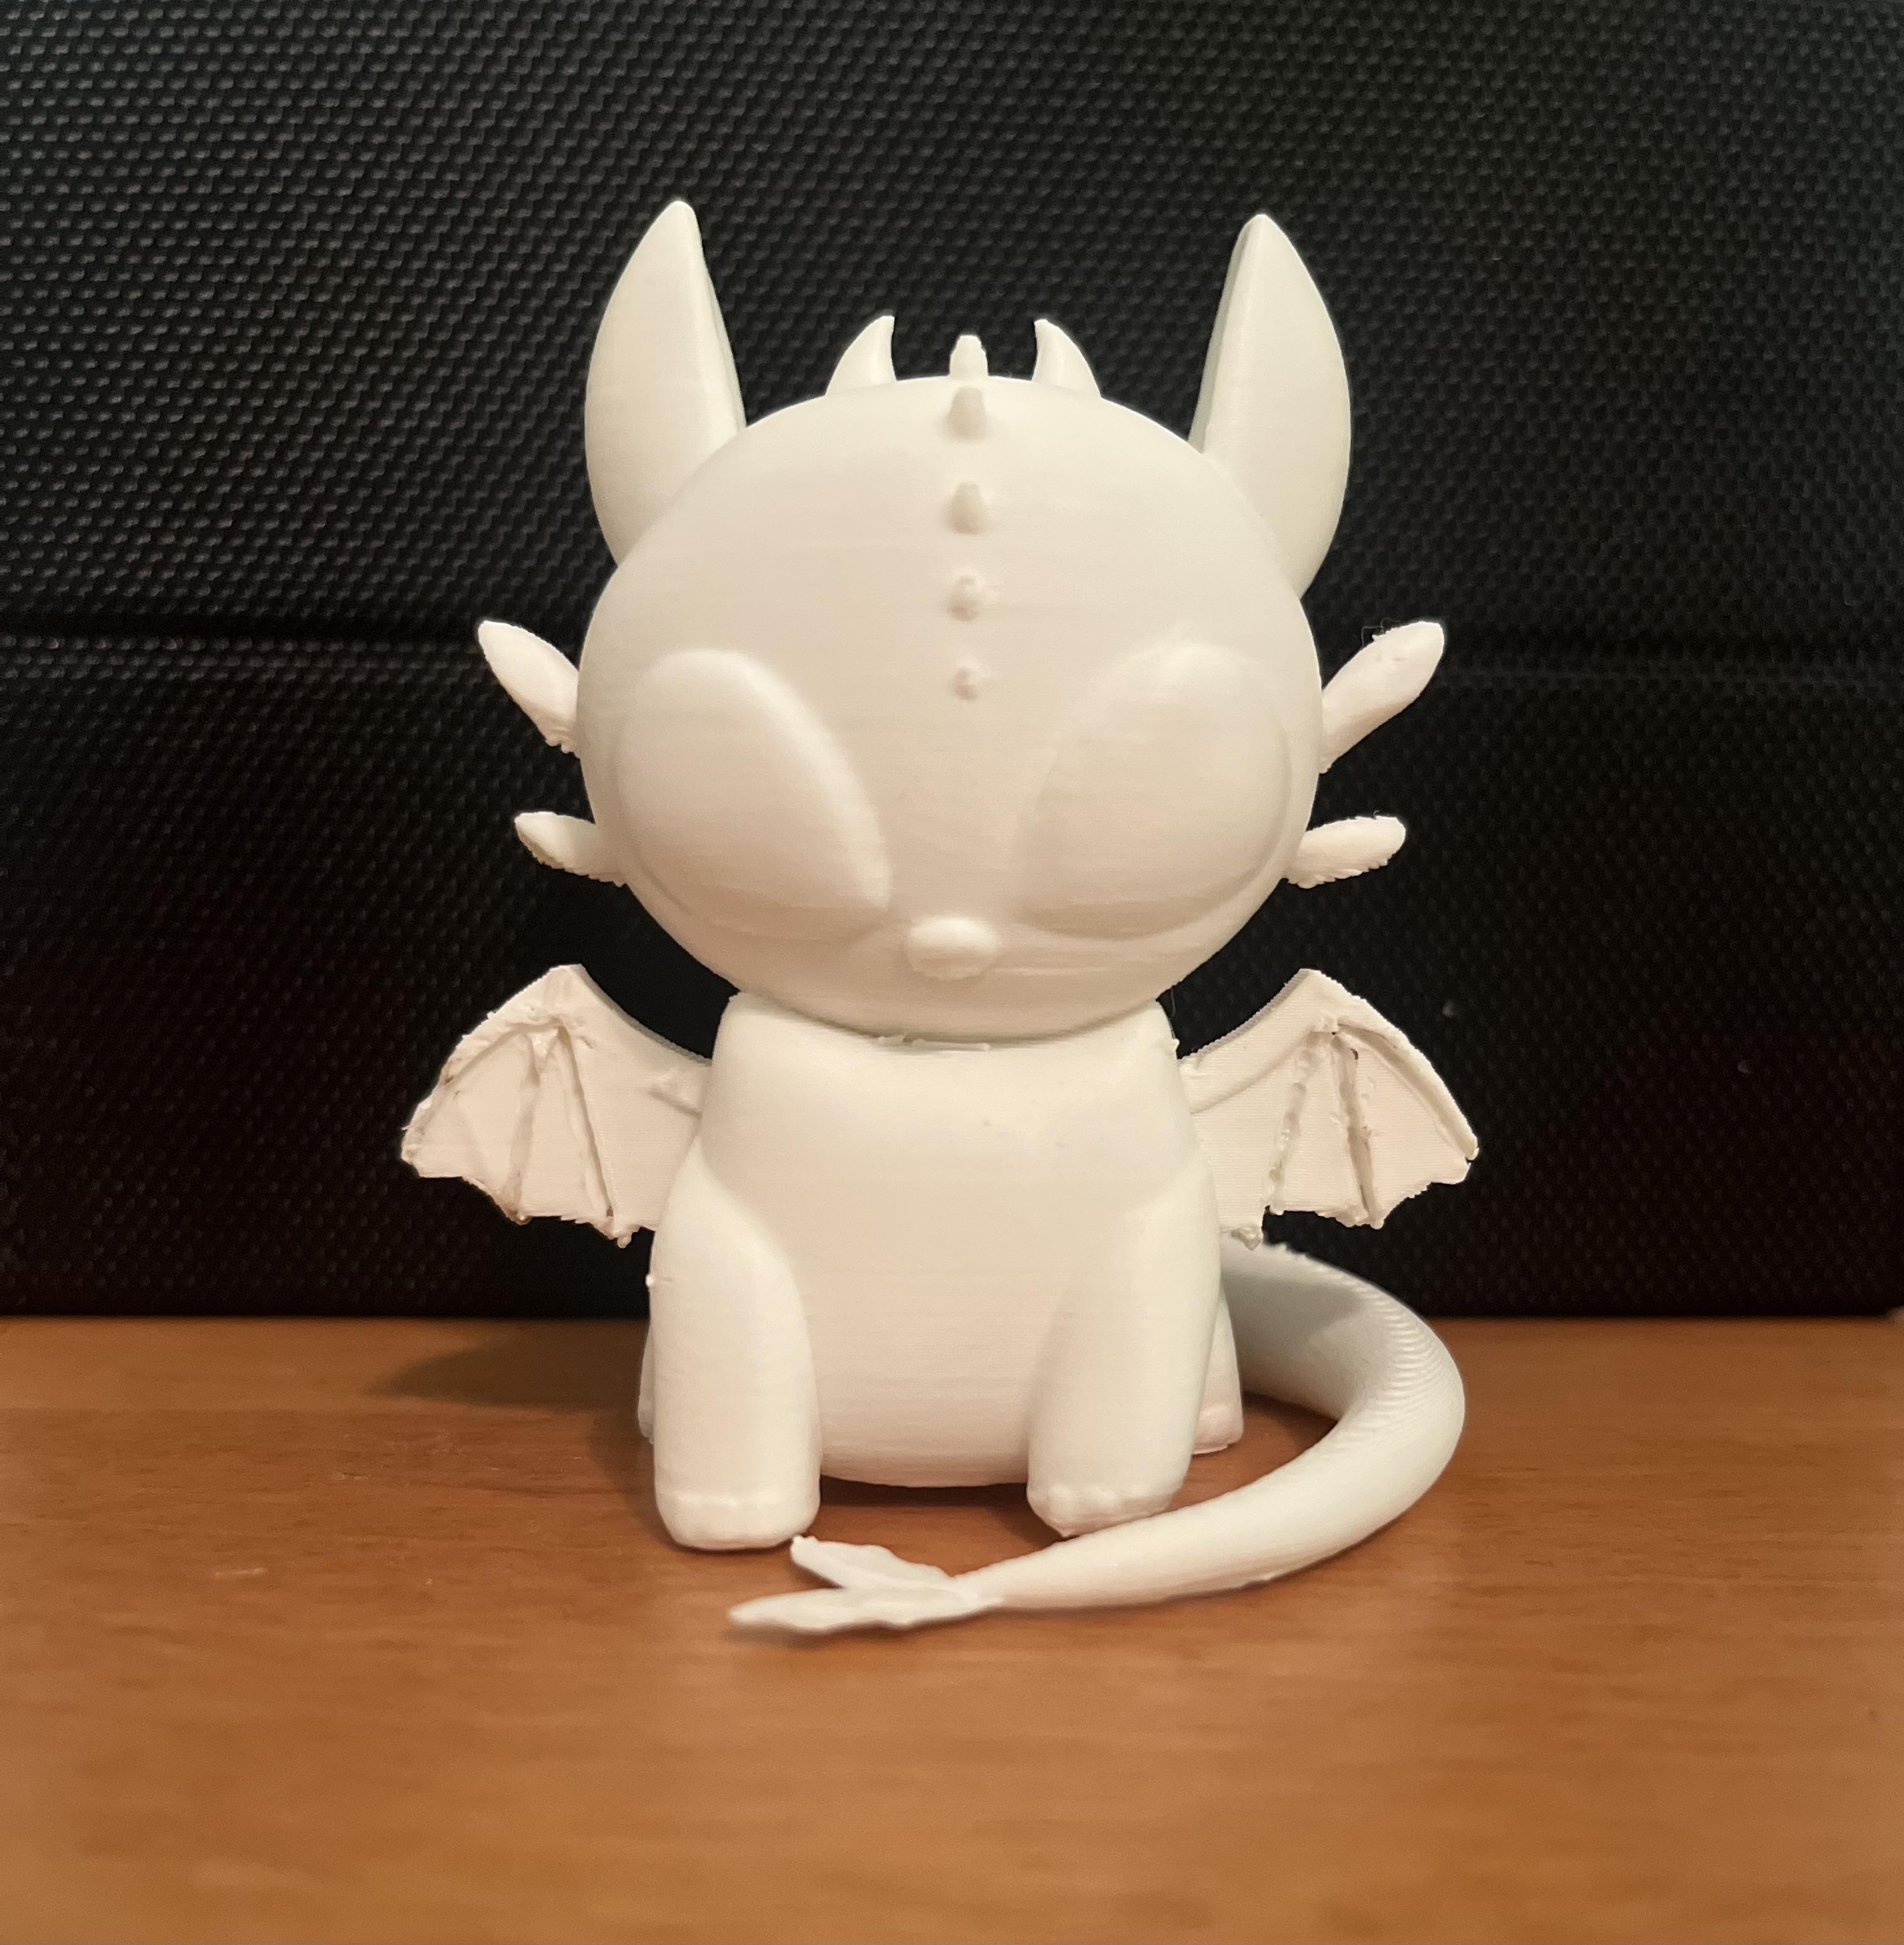
I have been a big fan of How to Train Your Dragon since I was a kid and I thought it would be really cool to make a figure on my own! Why buy something if you can make it, am I right? Since I'm still roughly a beginner at blender I decided instead of making a fully detailed figure of toothless, I'll just make a cute chibi version, so that's what I set out to do. These are the steps I followed and I hope you may try this yourself if you find it interesting!
Supplies
These are all the supplies I used!
- Any 3d modeling software (I used Blender)
- Photo reference(s)
- 3d printer & 3d printing material
Find References
My first step was to find references for what kind of Toothless (from How to Train your Dragon) I wanted to make, and because I'm still fairly new to Blender I decided to make a simpler chibi version so I found a 2d picture reference I could import into Blender. I also surfed the internet to find different angles that could help me sculpt the shapes.
Import Reference Into Blender
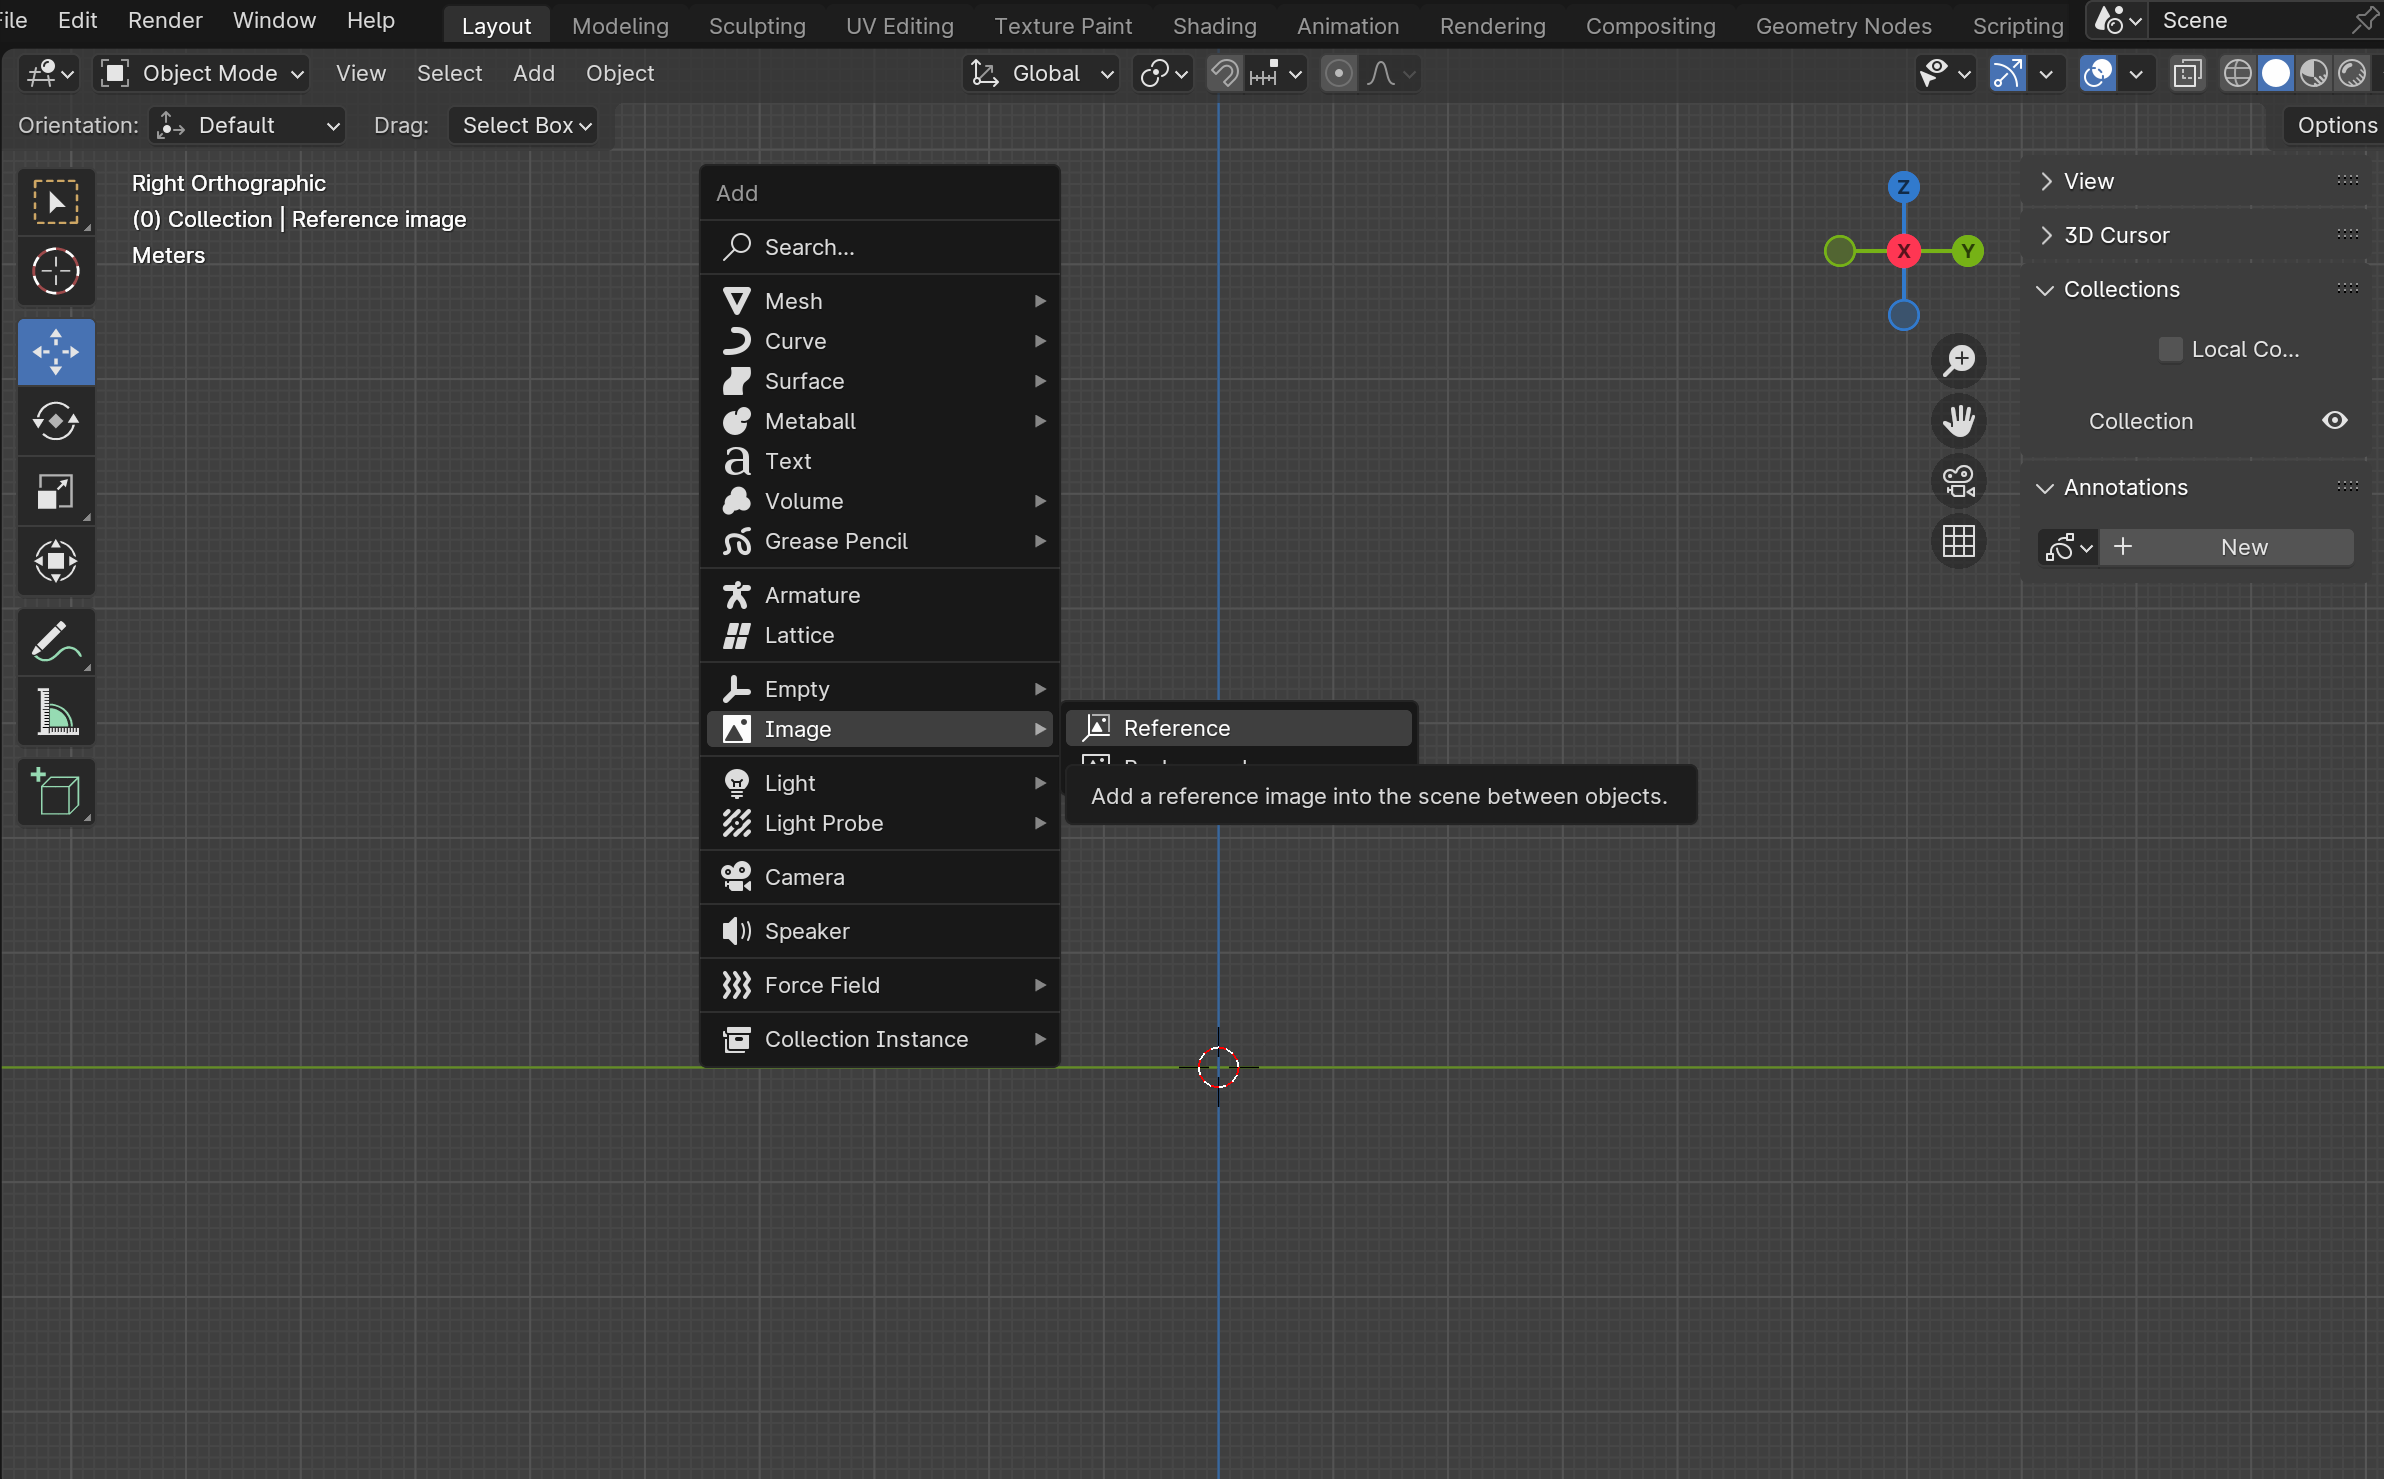
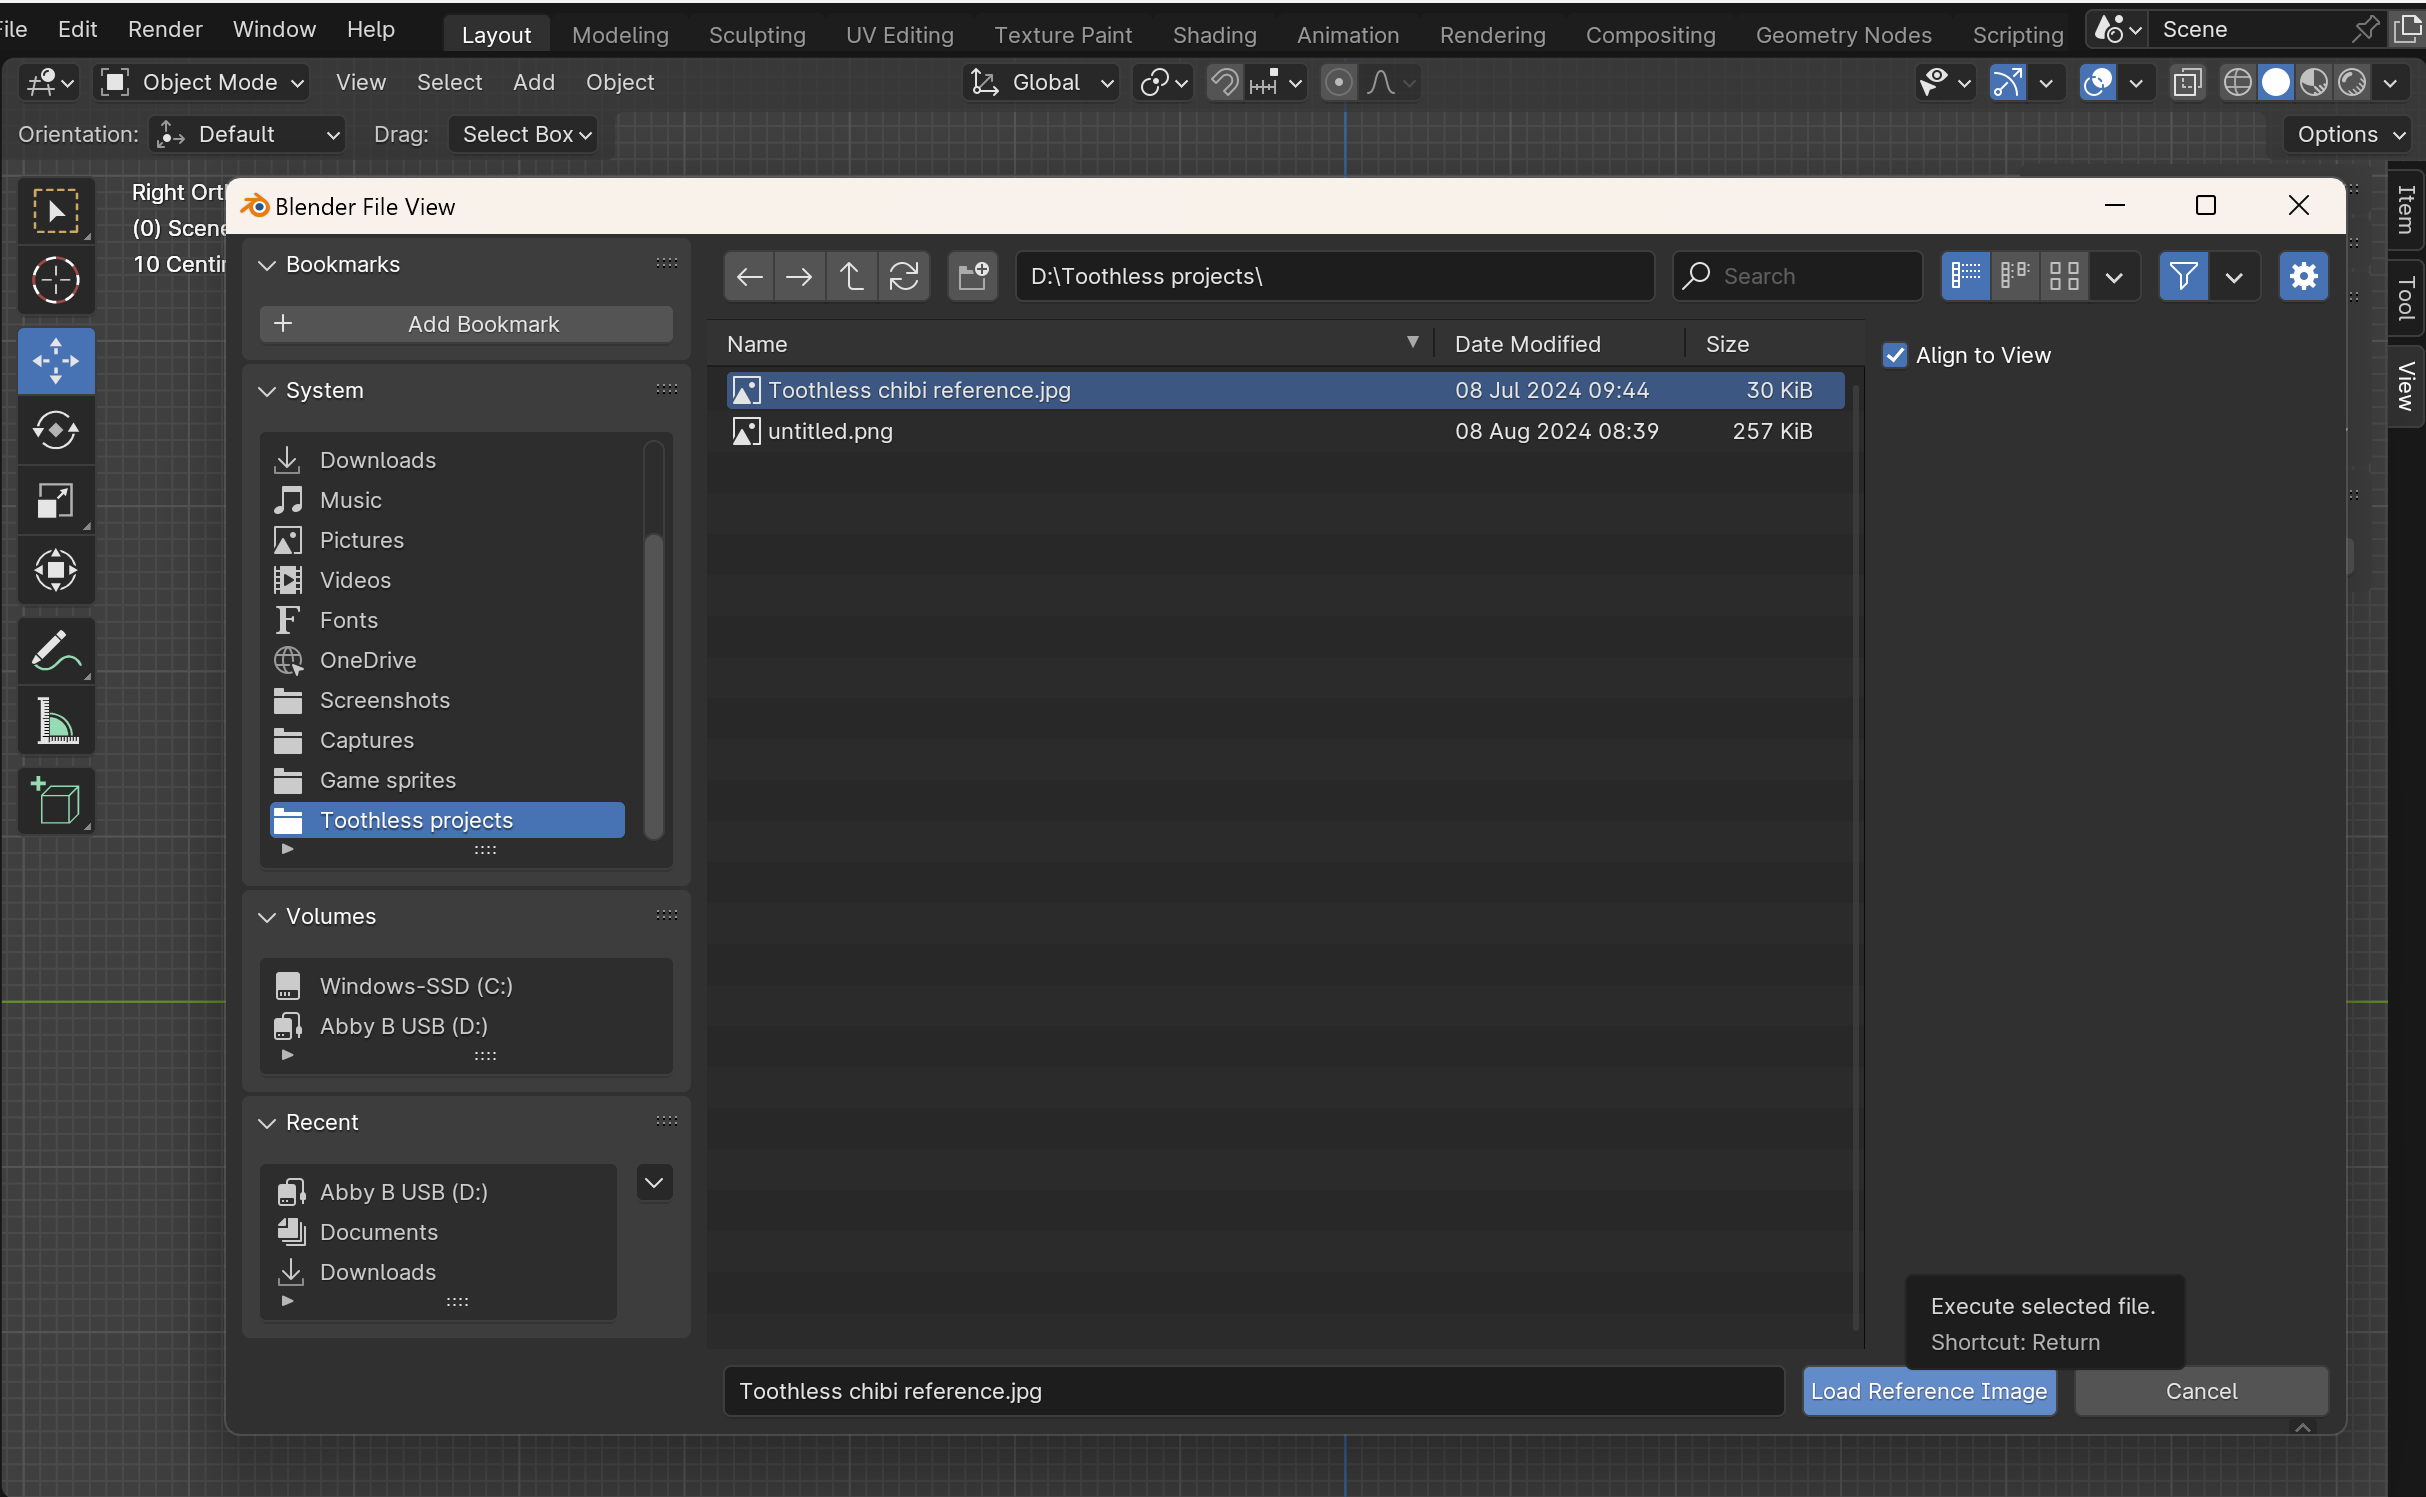
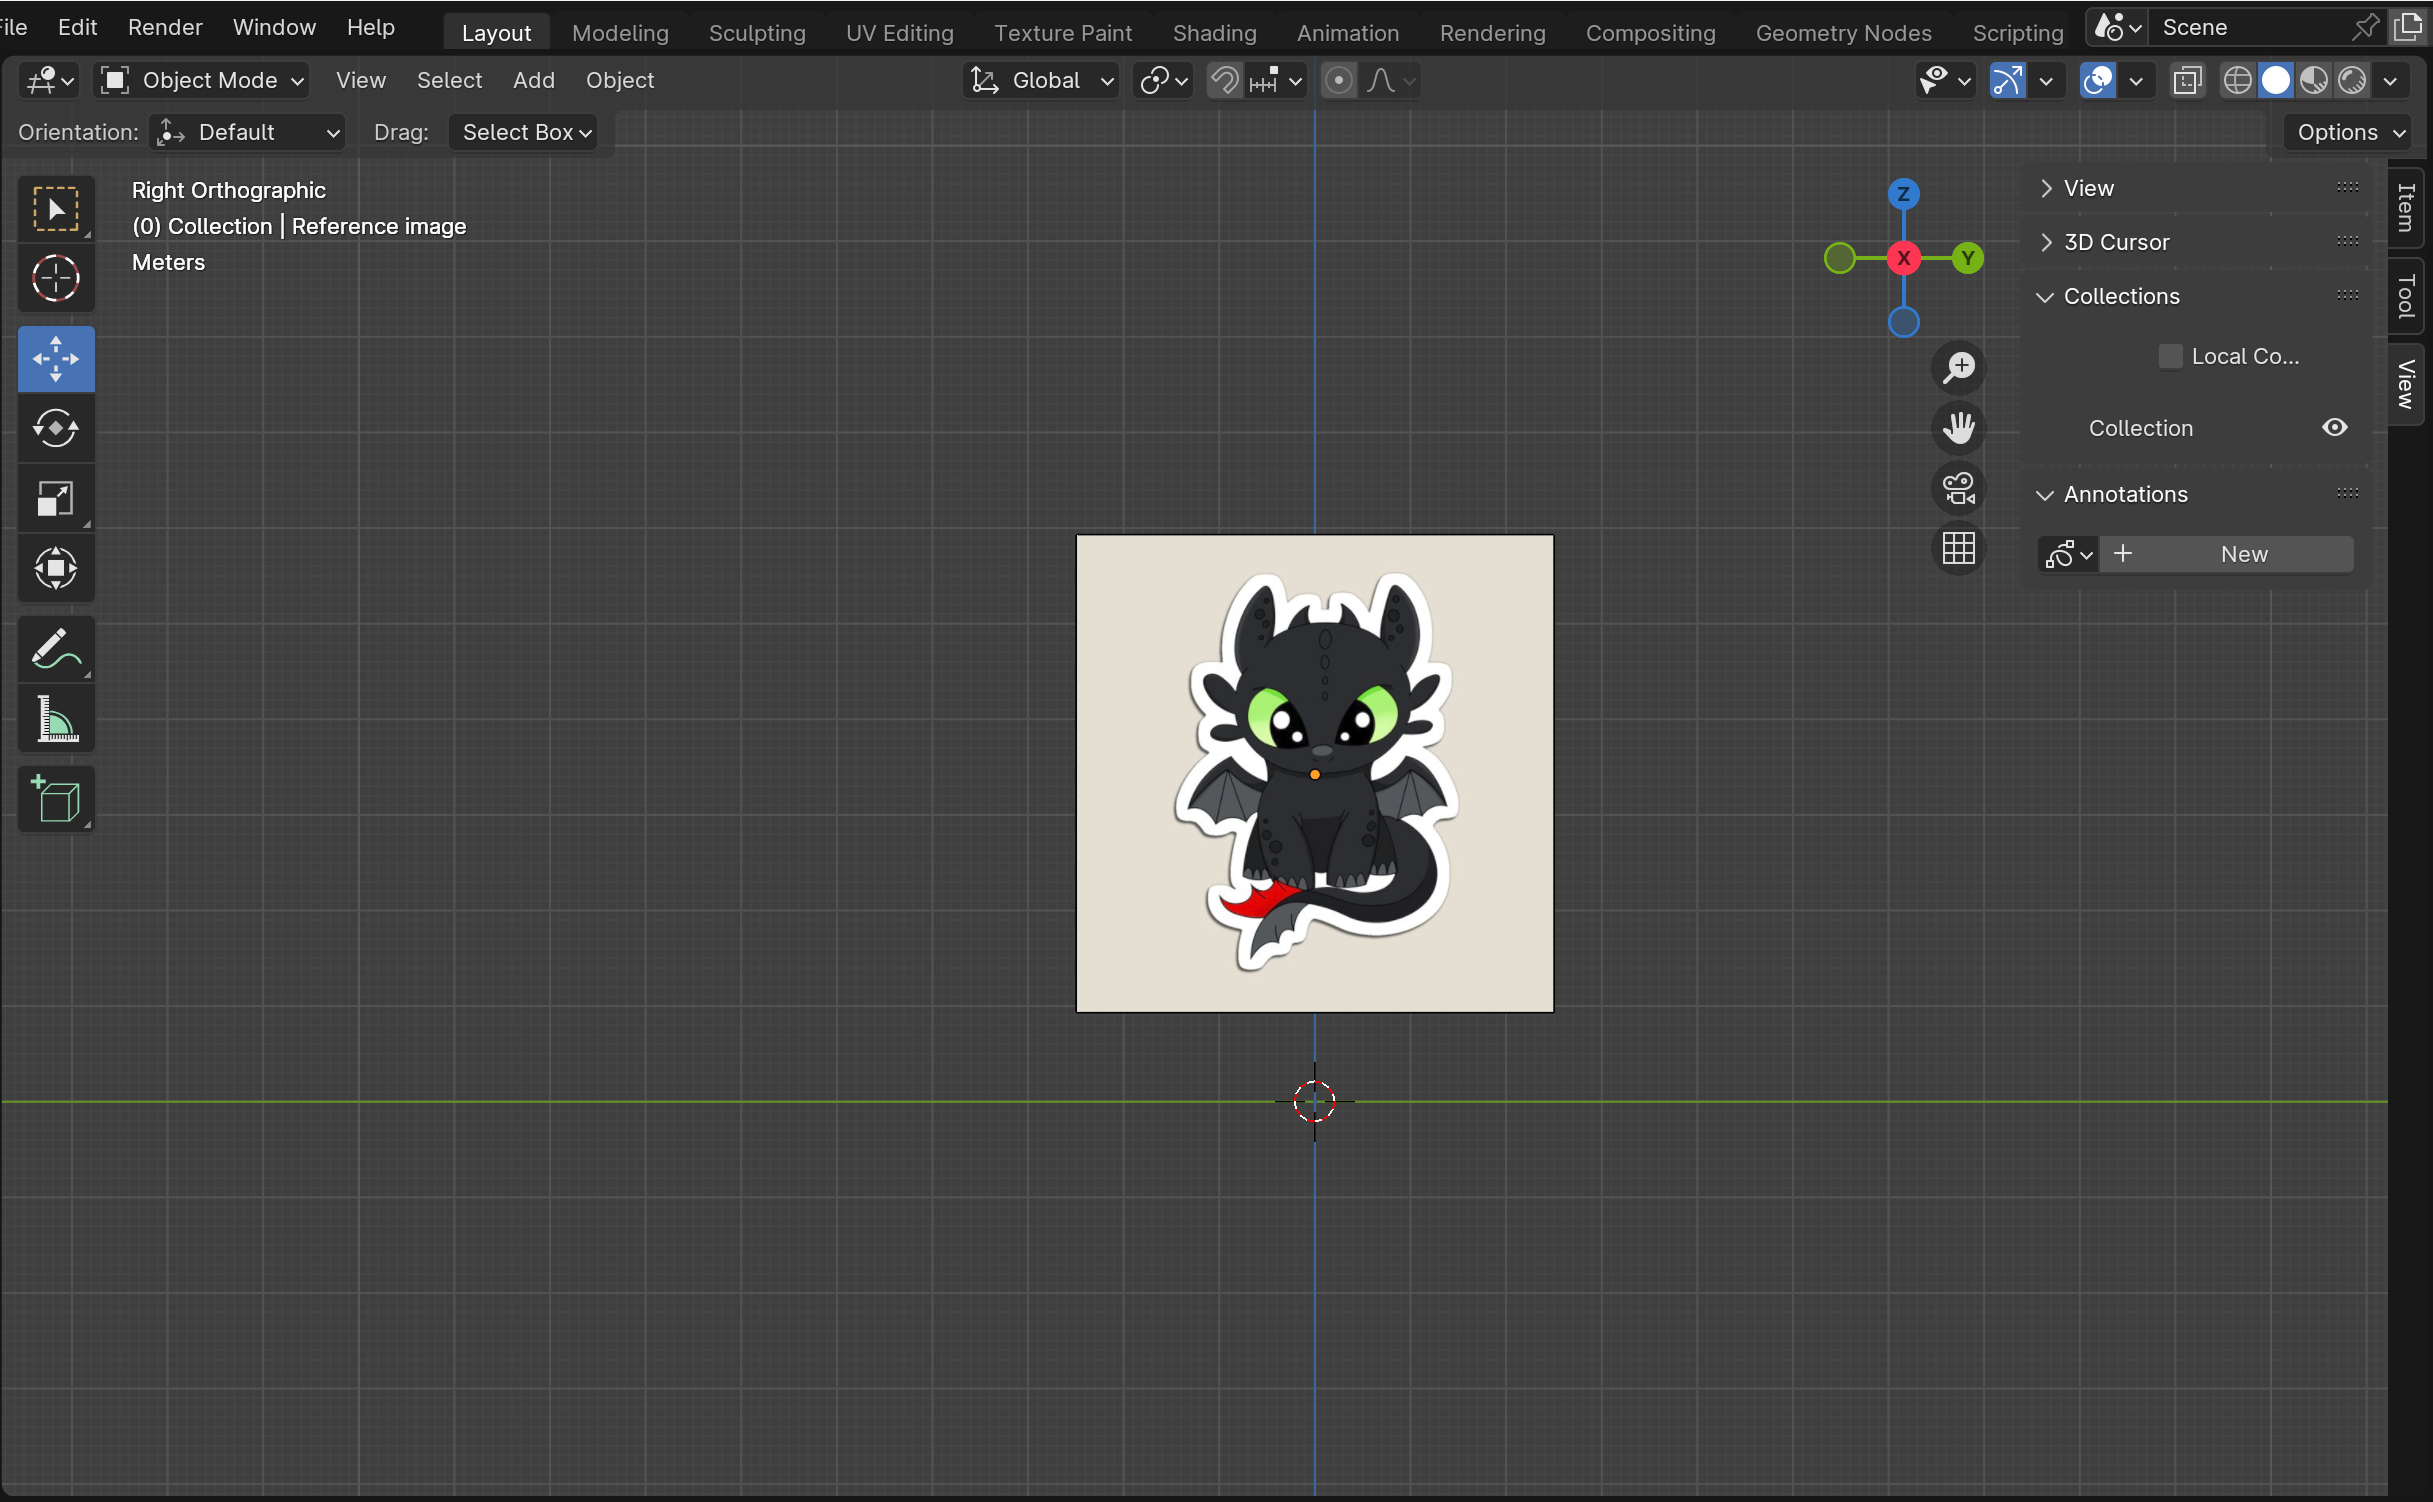
I first found the reference I liked off of google and imported it into Blender by first entering the x-axis view, which you can do by just clicking x on the axis in the right hand corner of the screen, to make sure the image is perfectly aligned on the x-axis. Then you add (Shift+A) and go to image and click reference, then choose the reference you want to upload.
Sculpt the Head
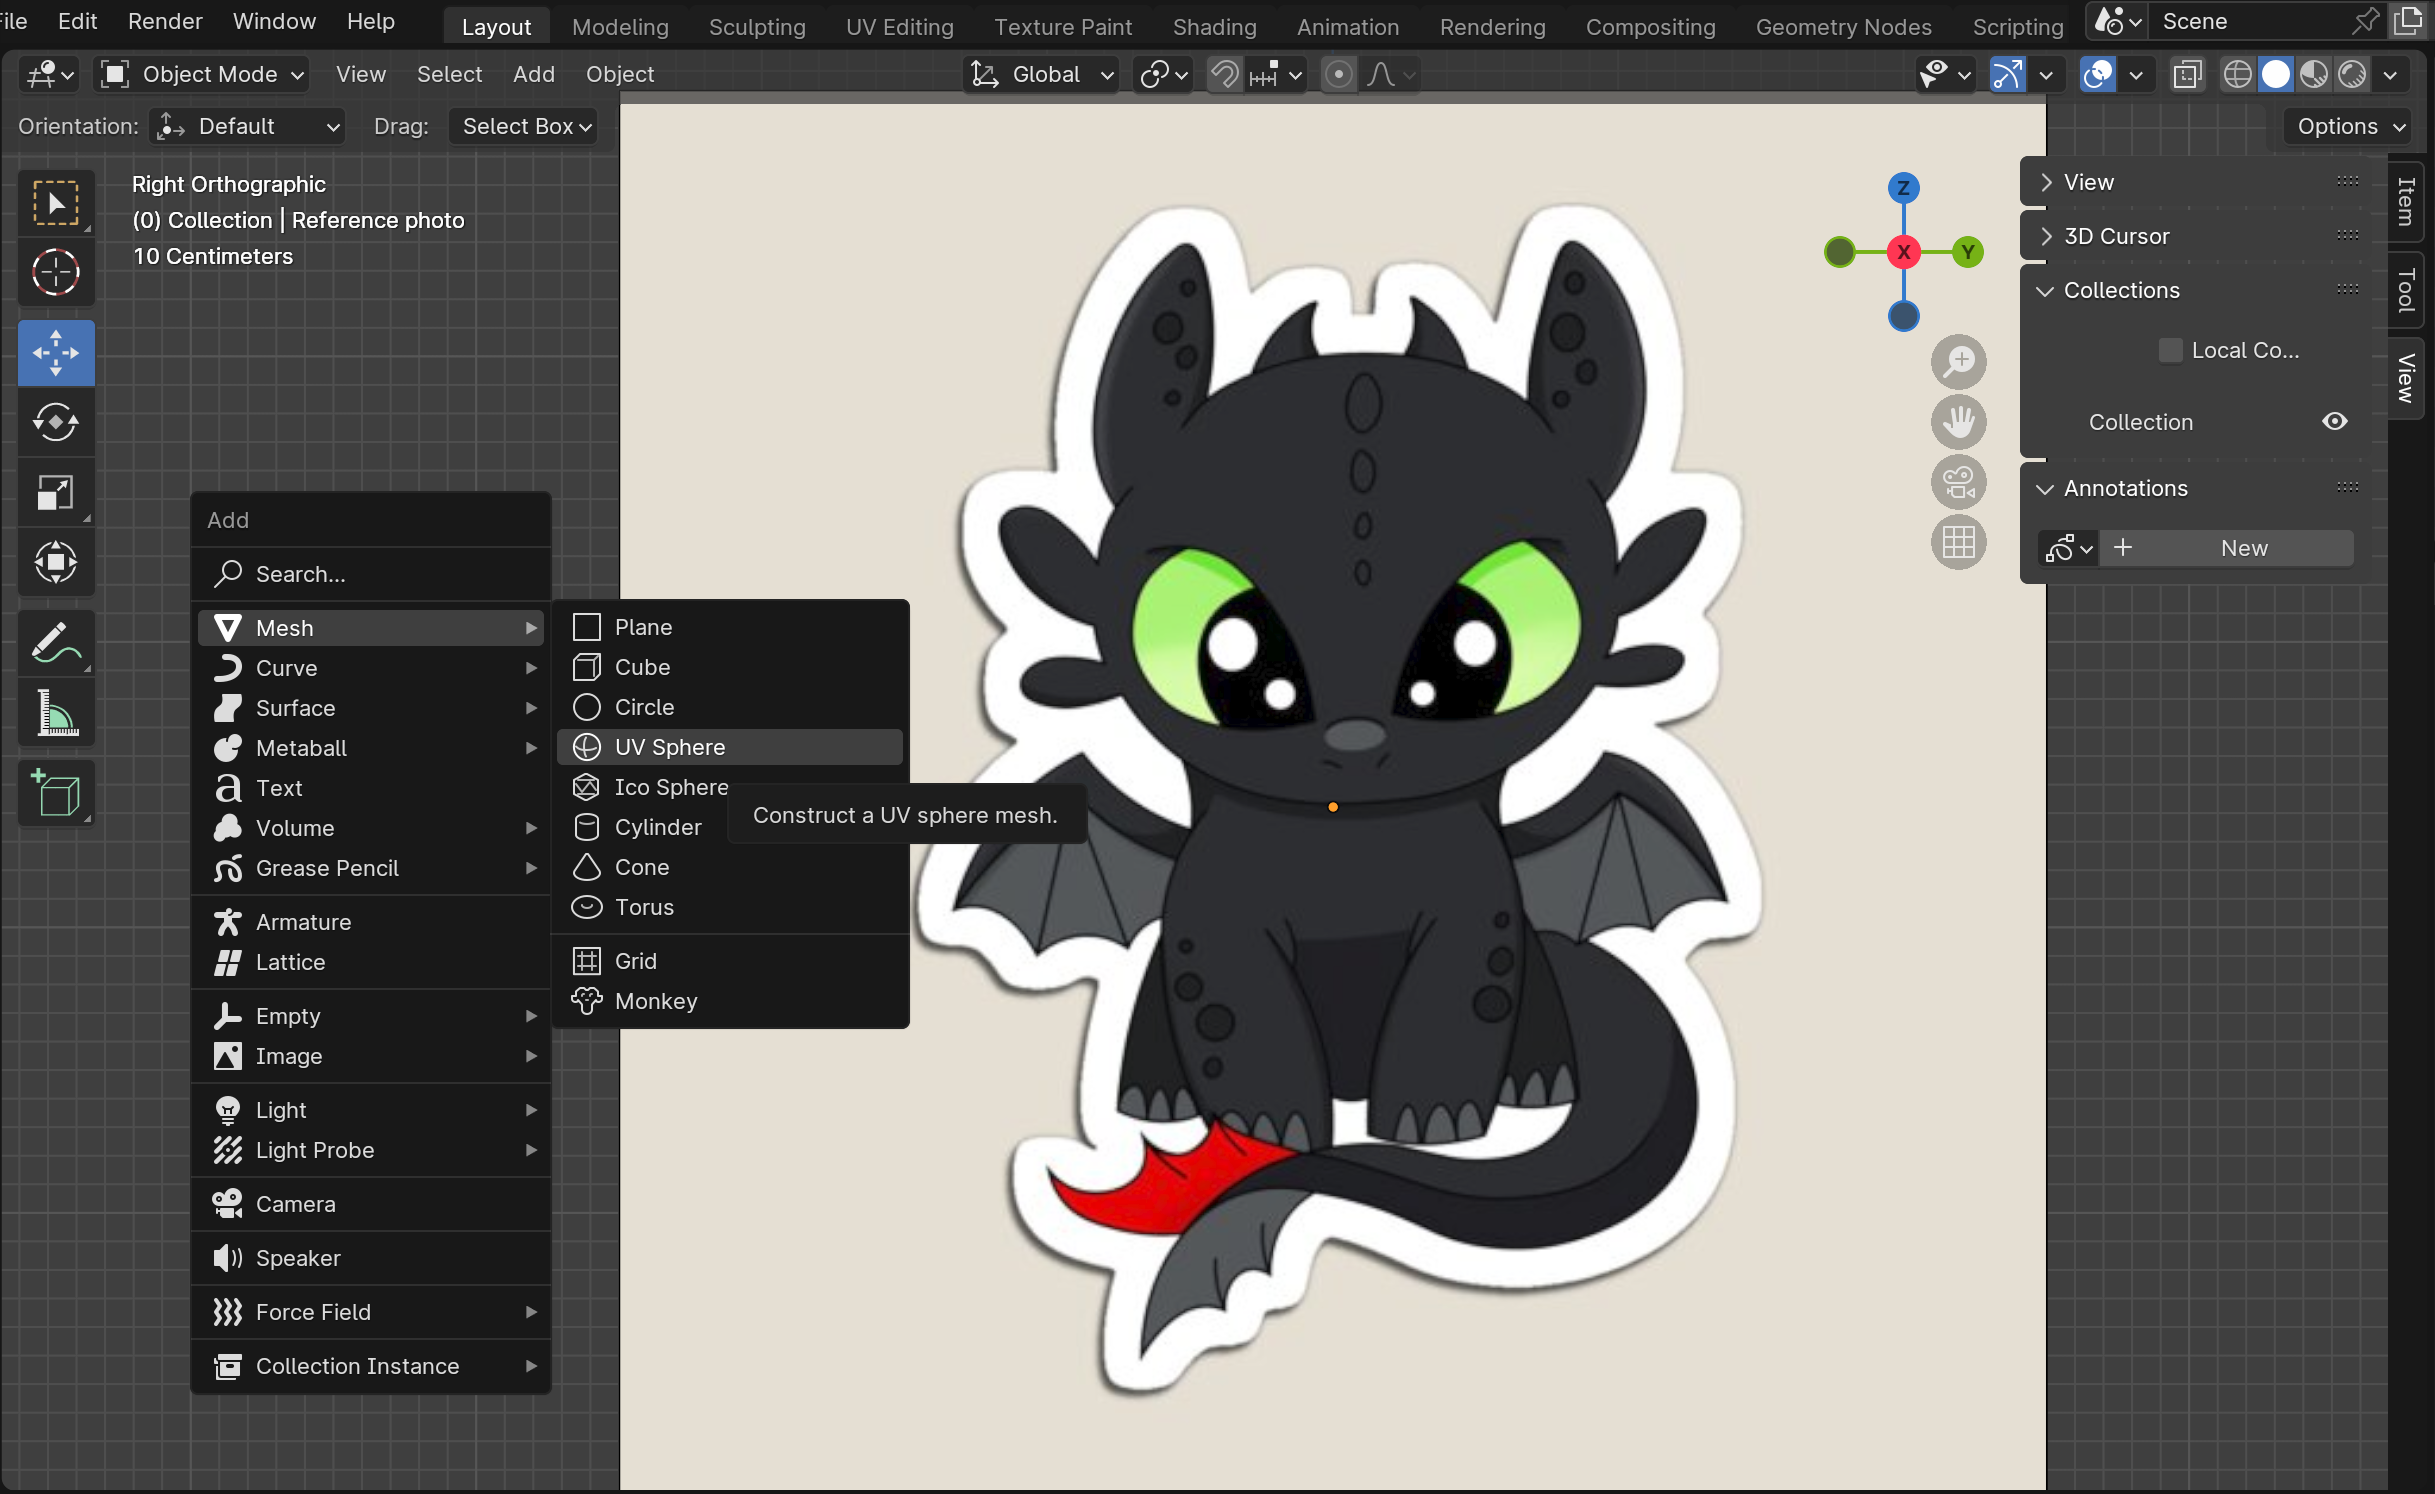
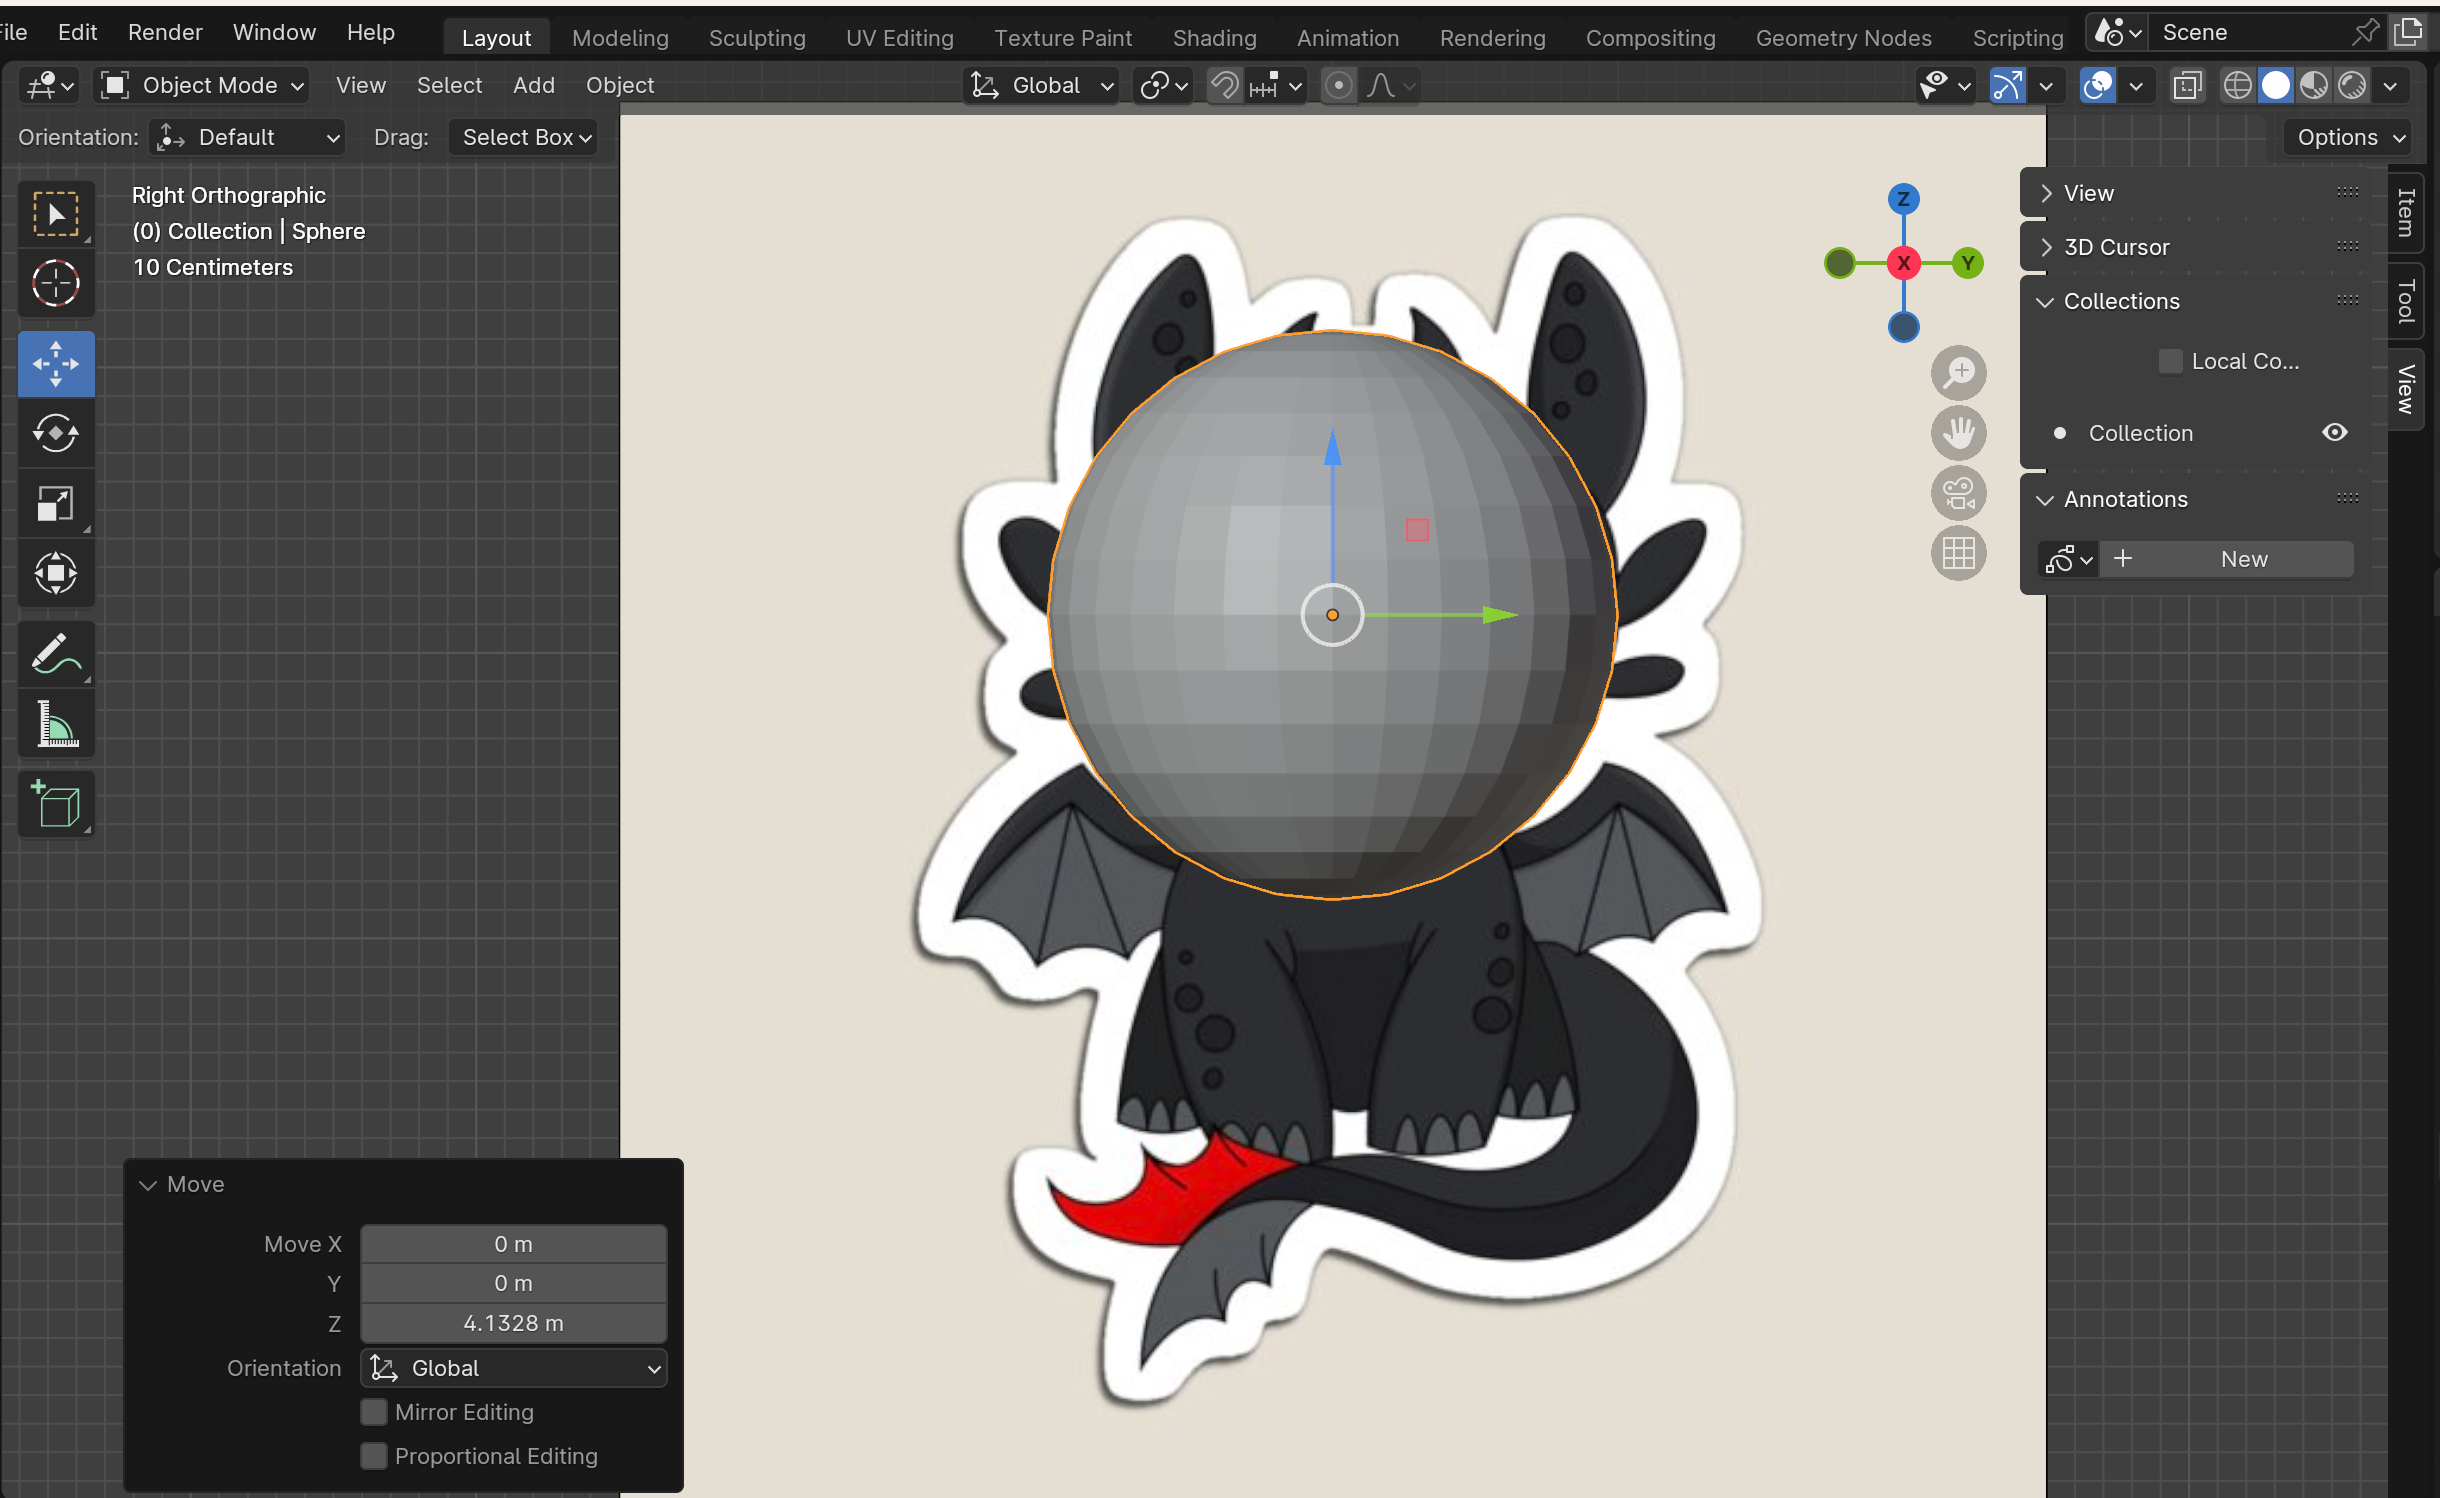
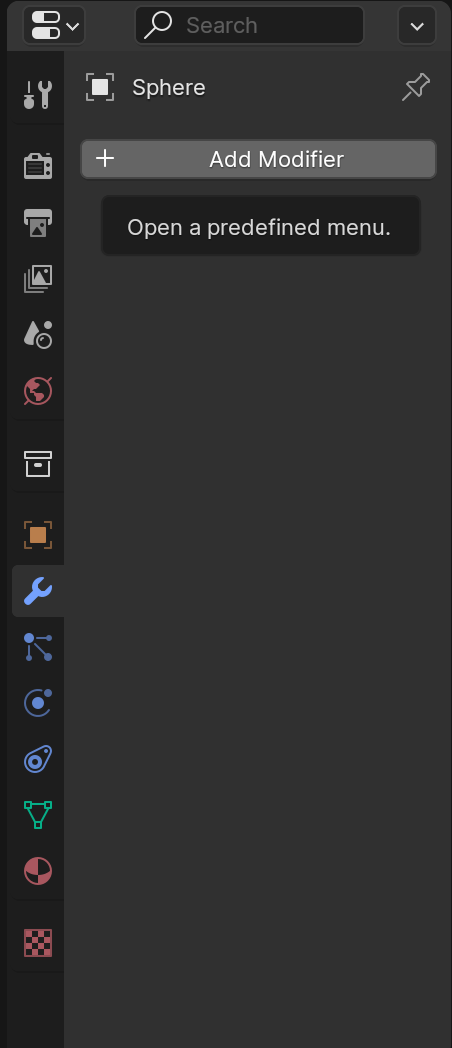
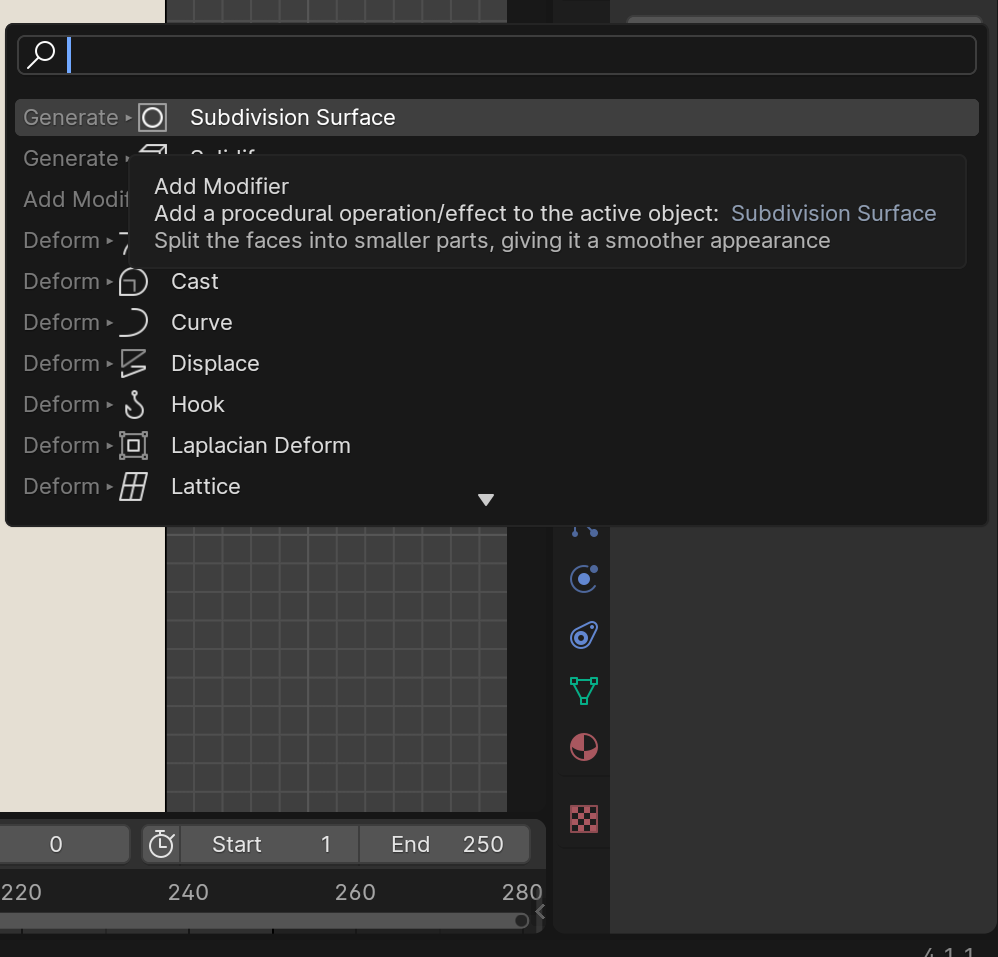
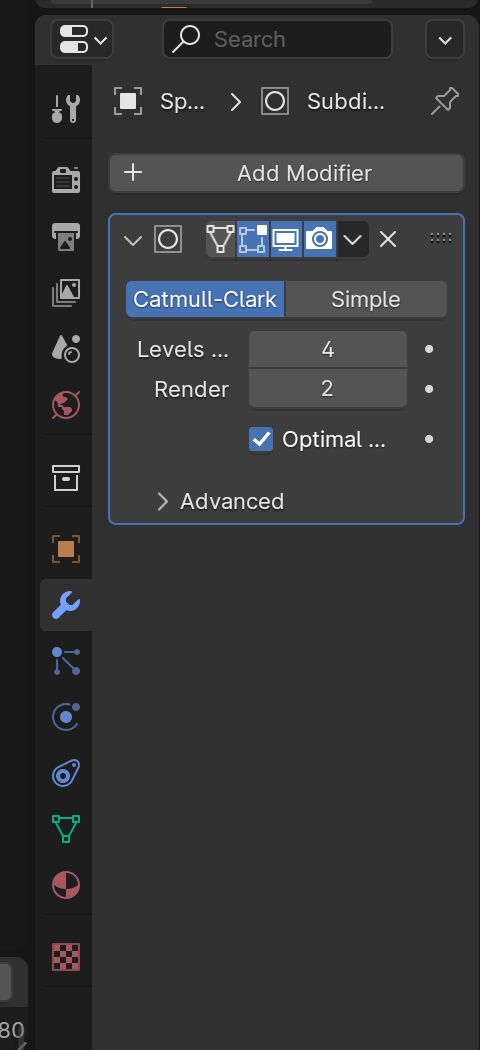
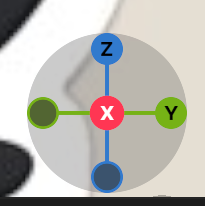
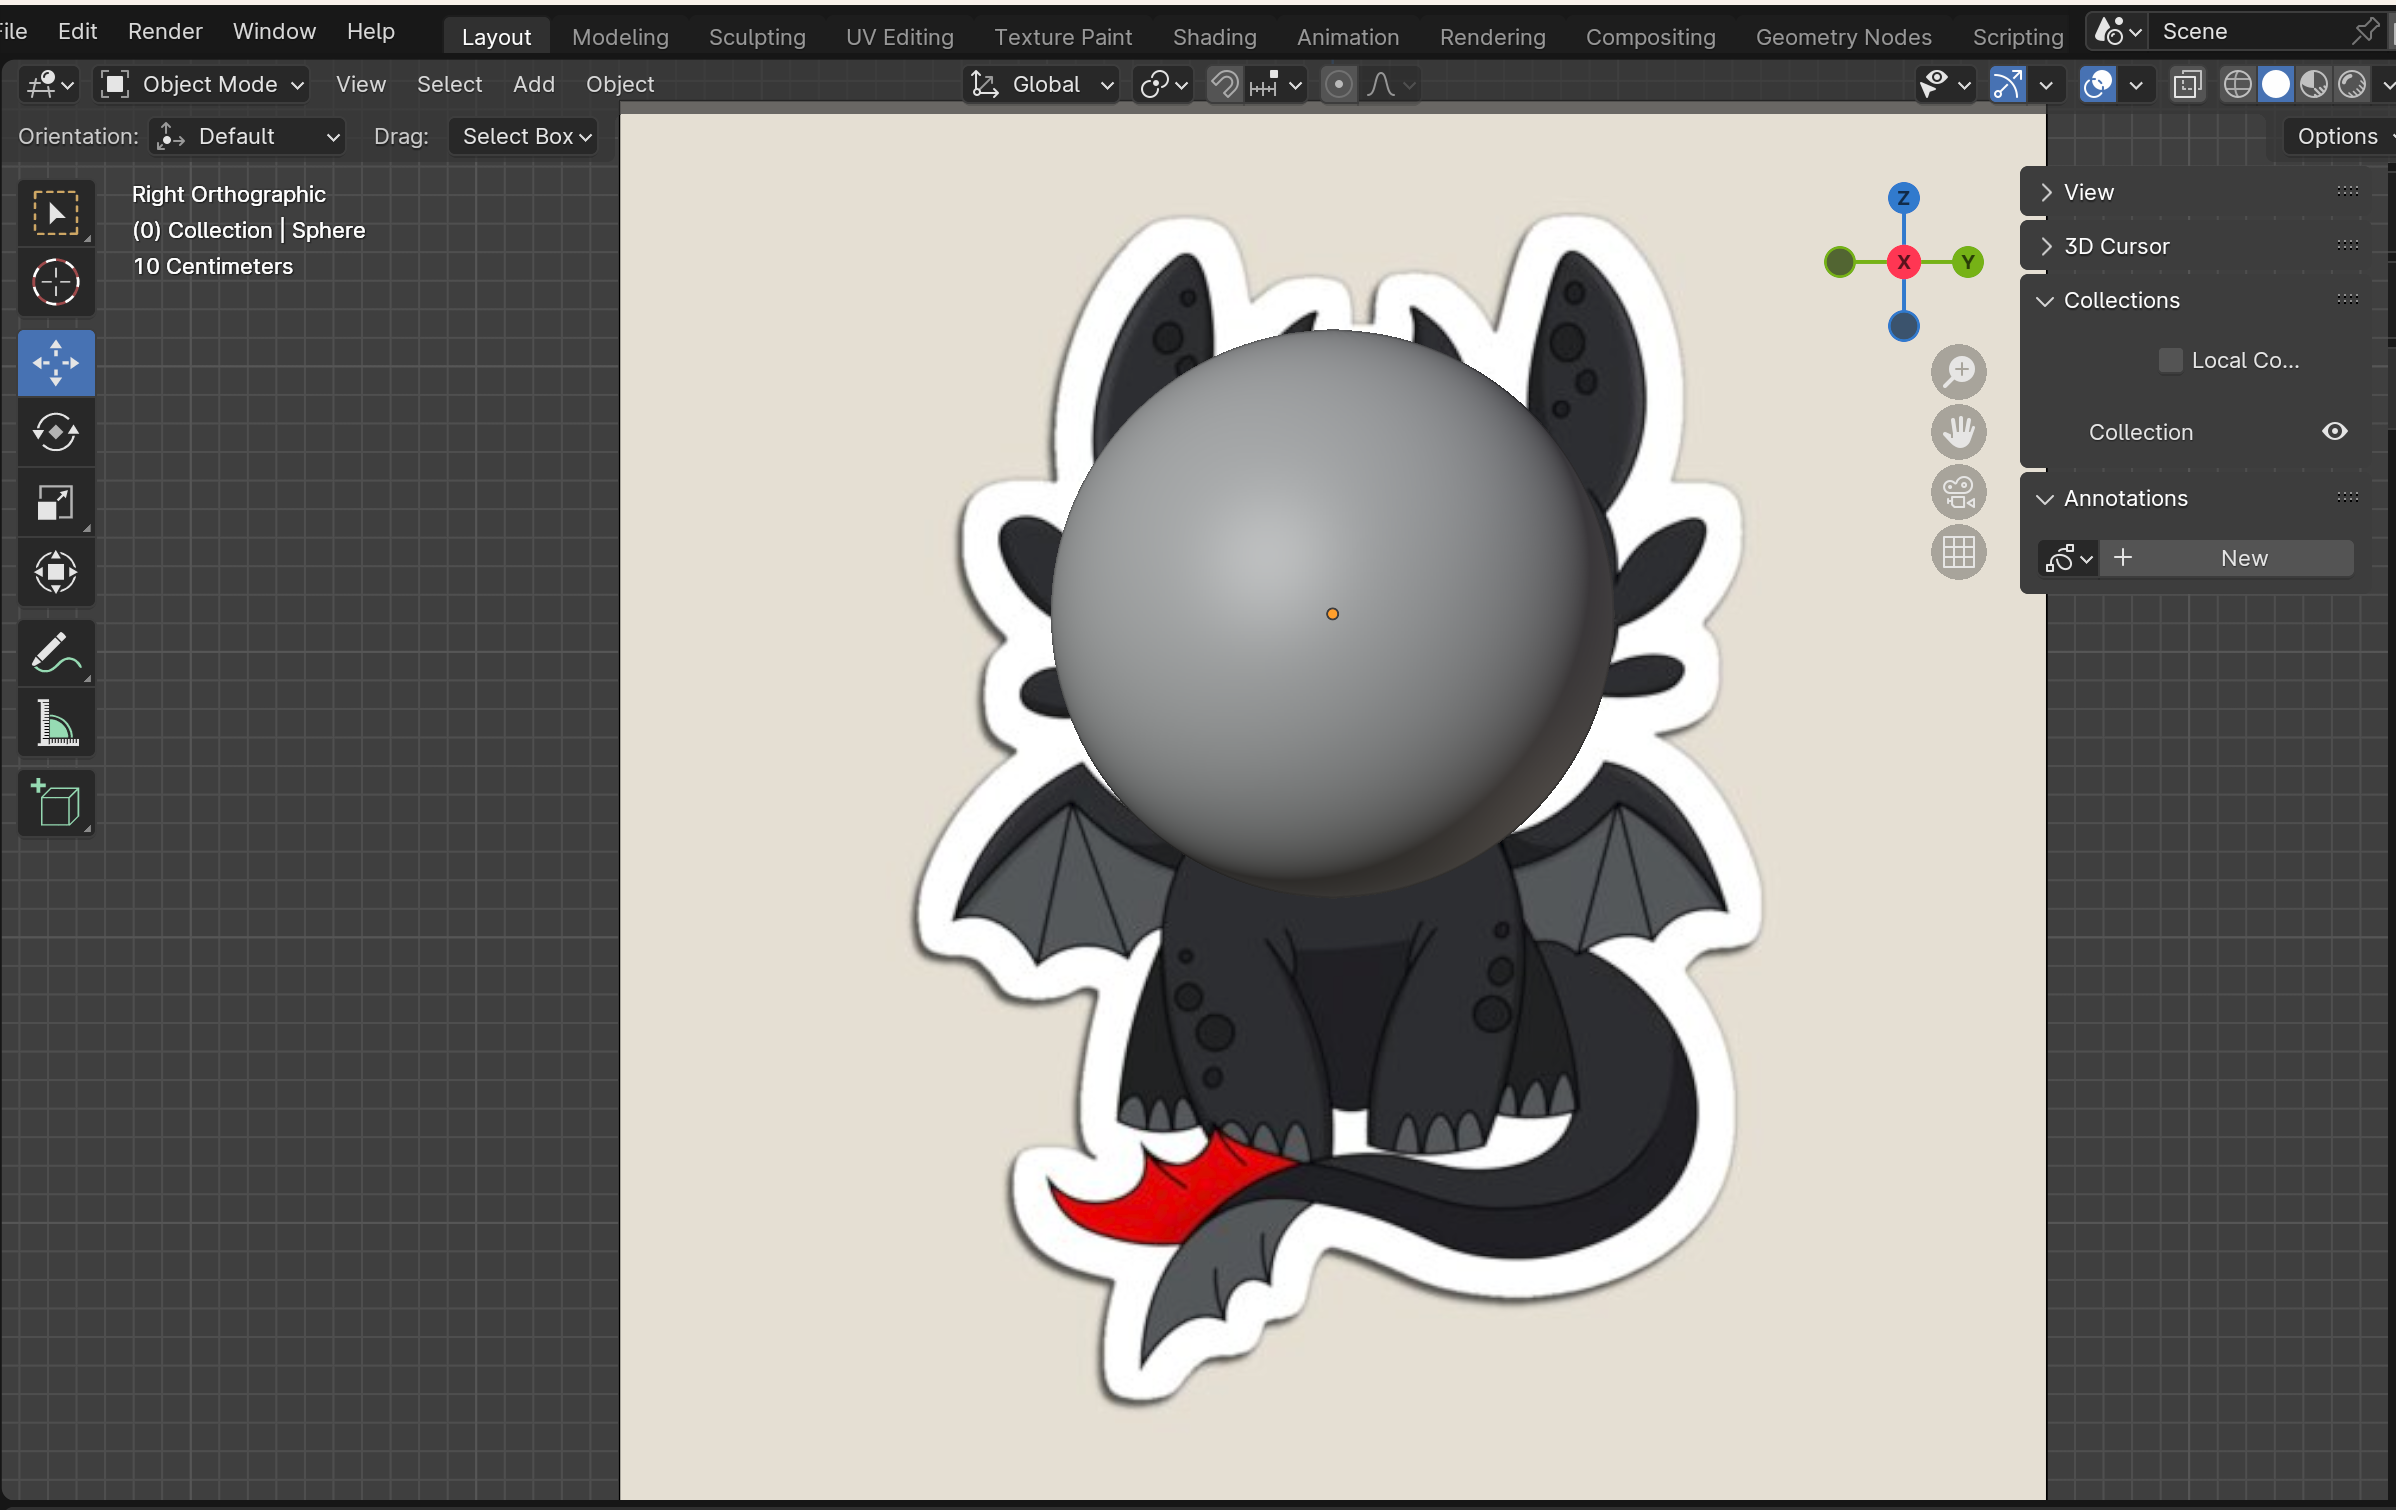
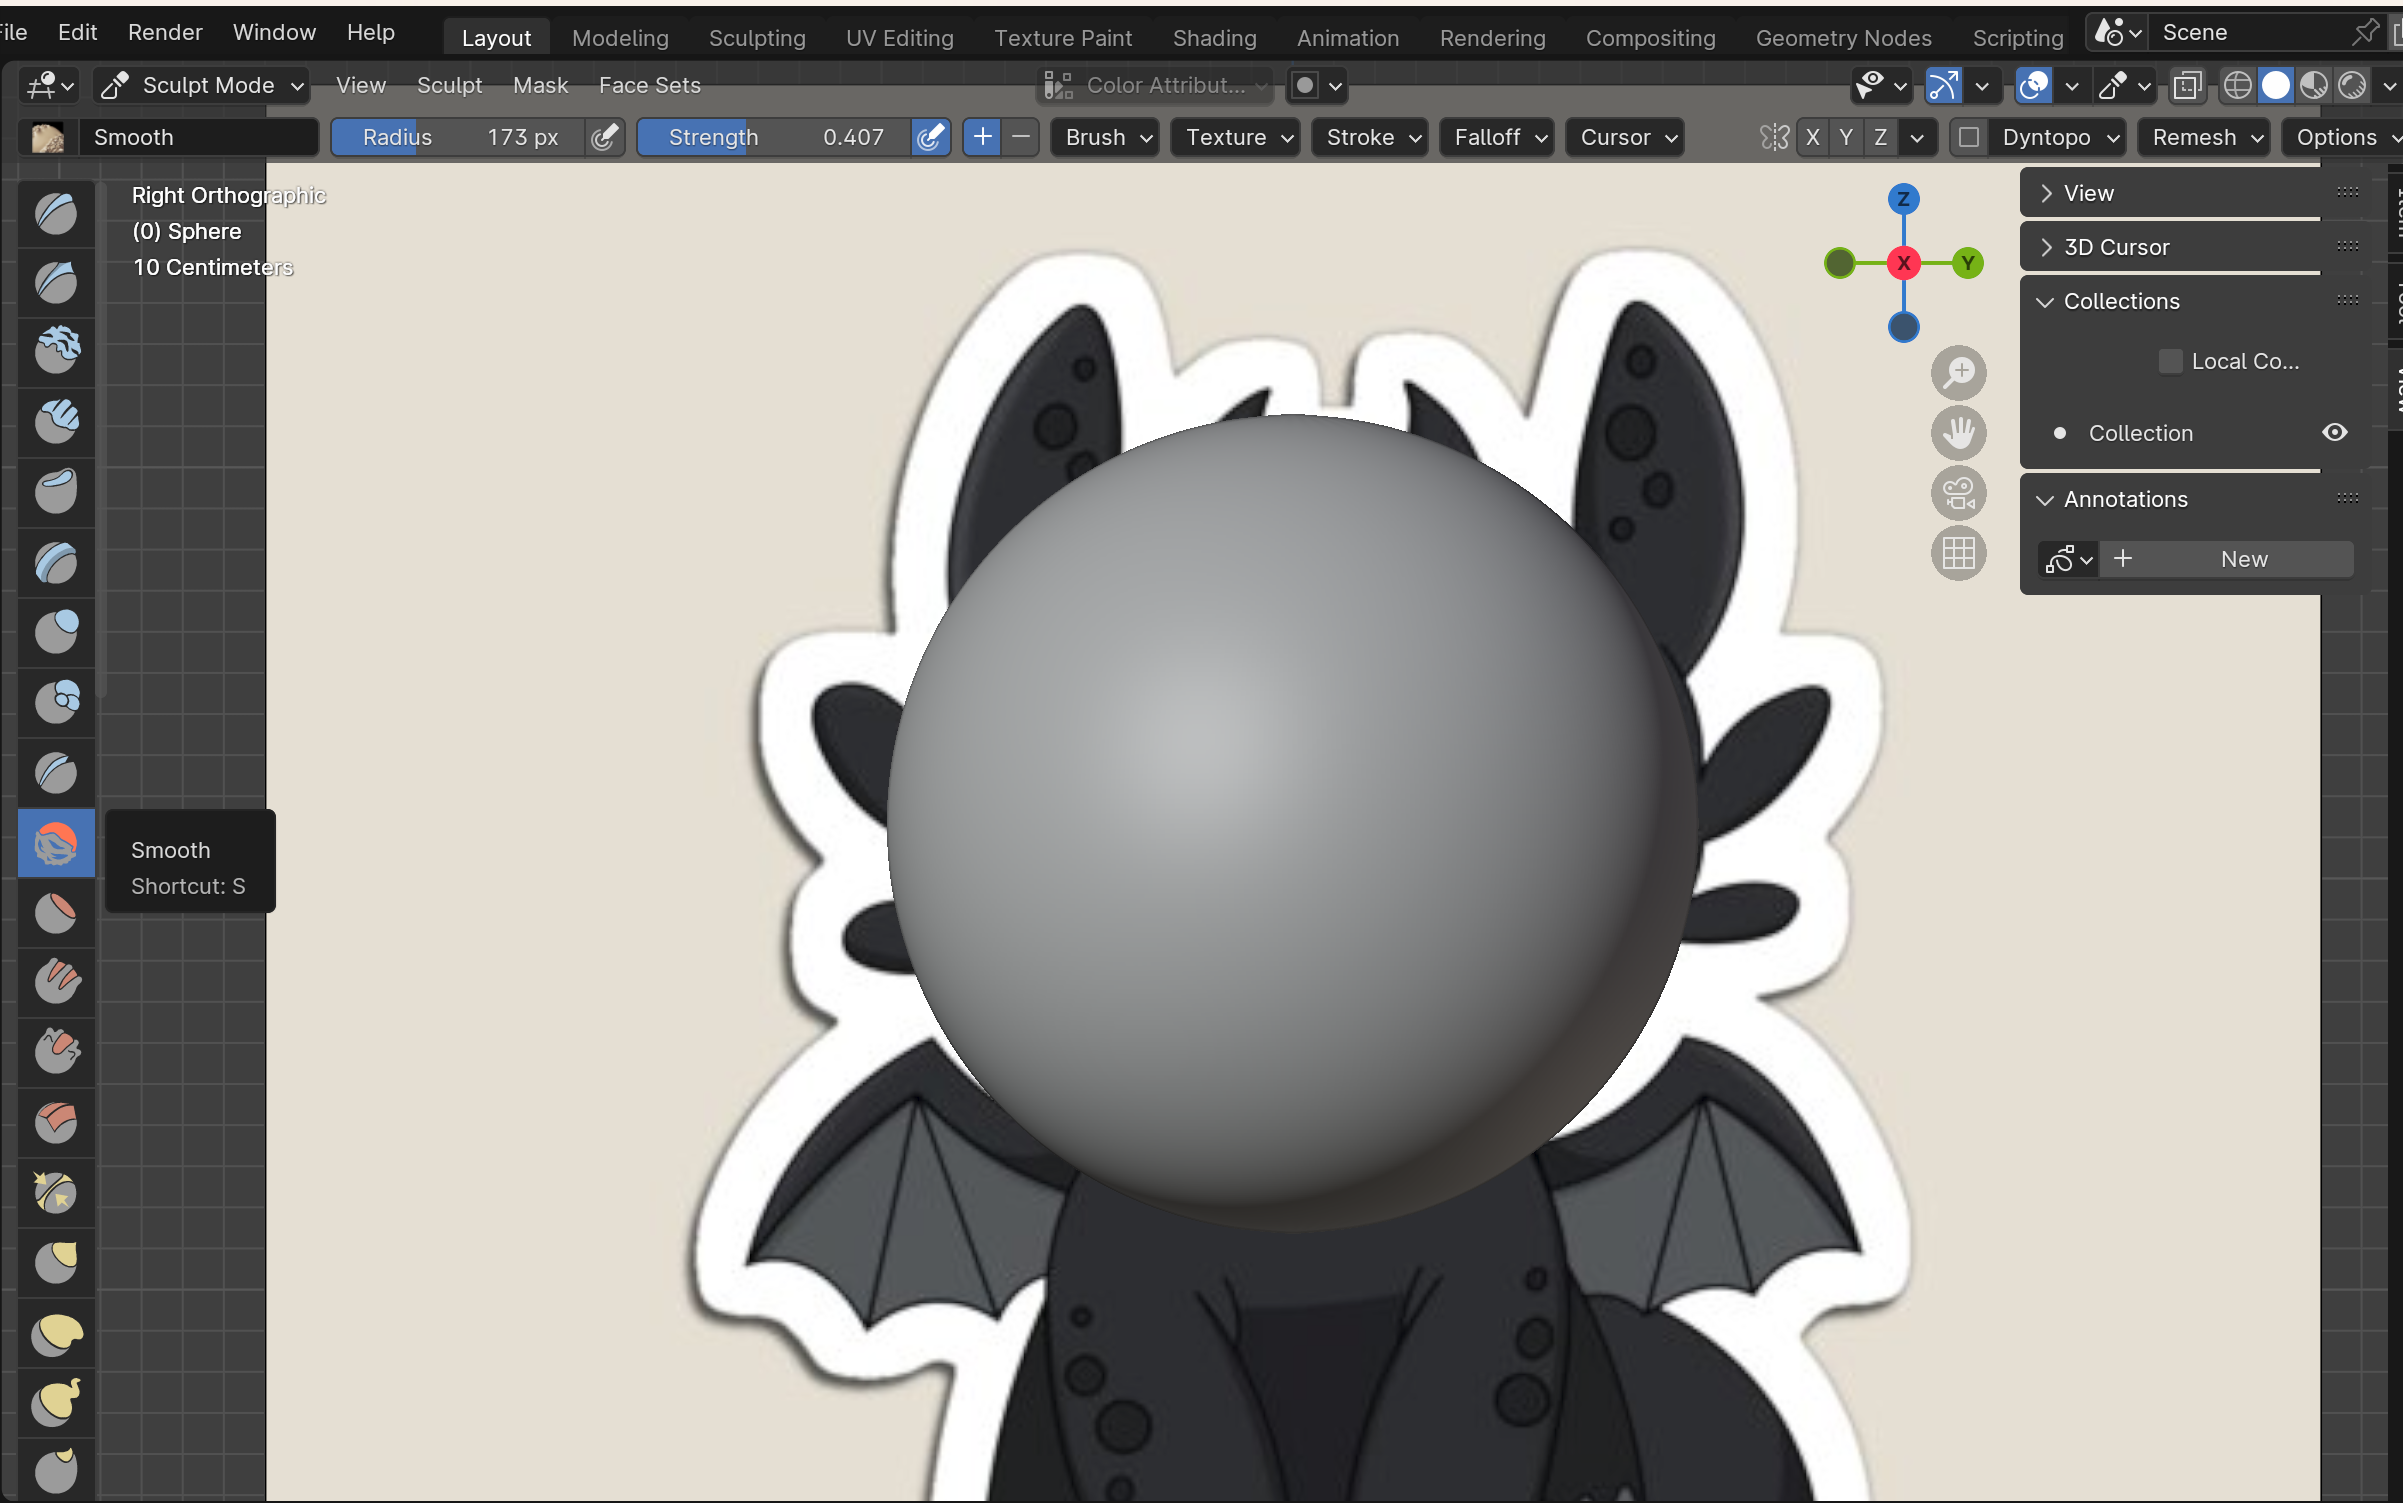
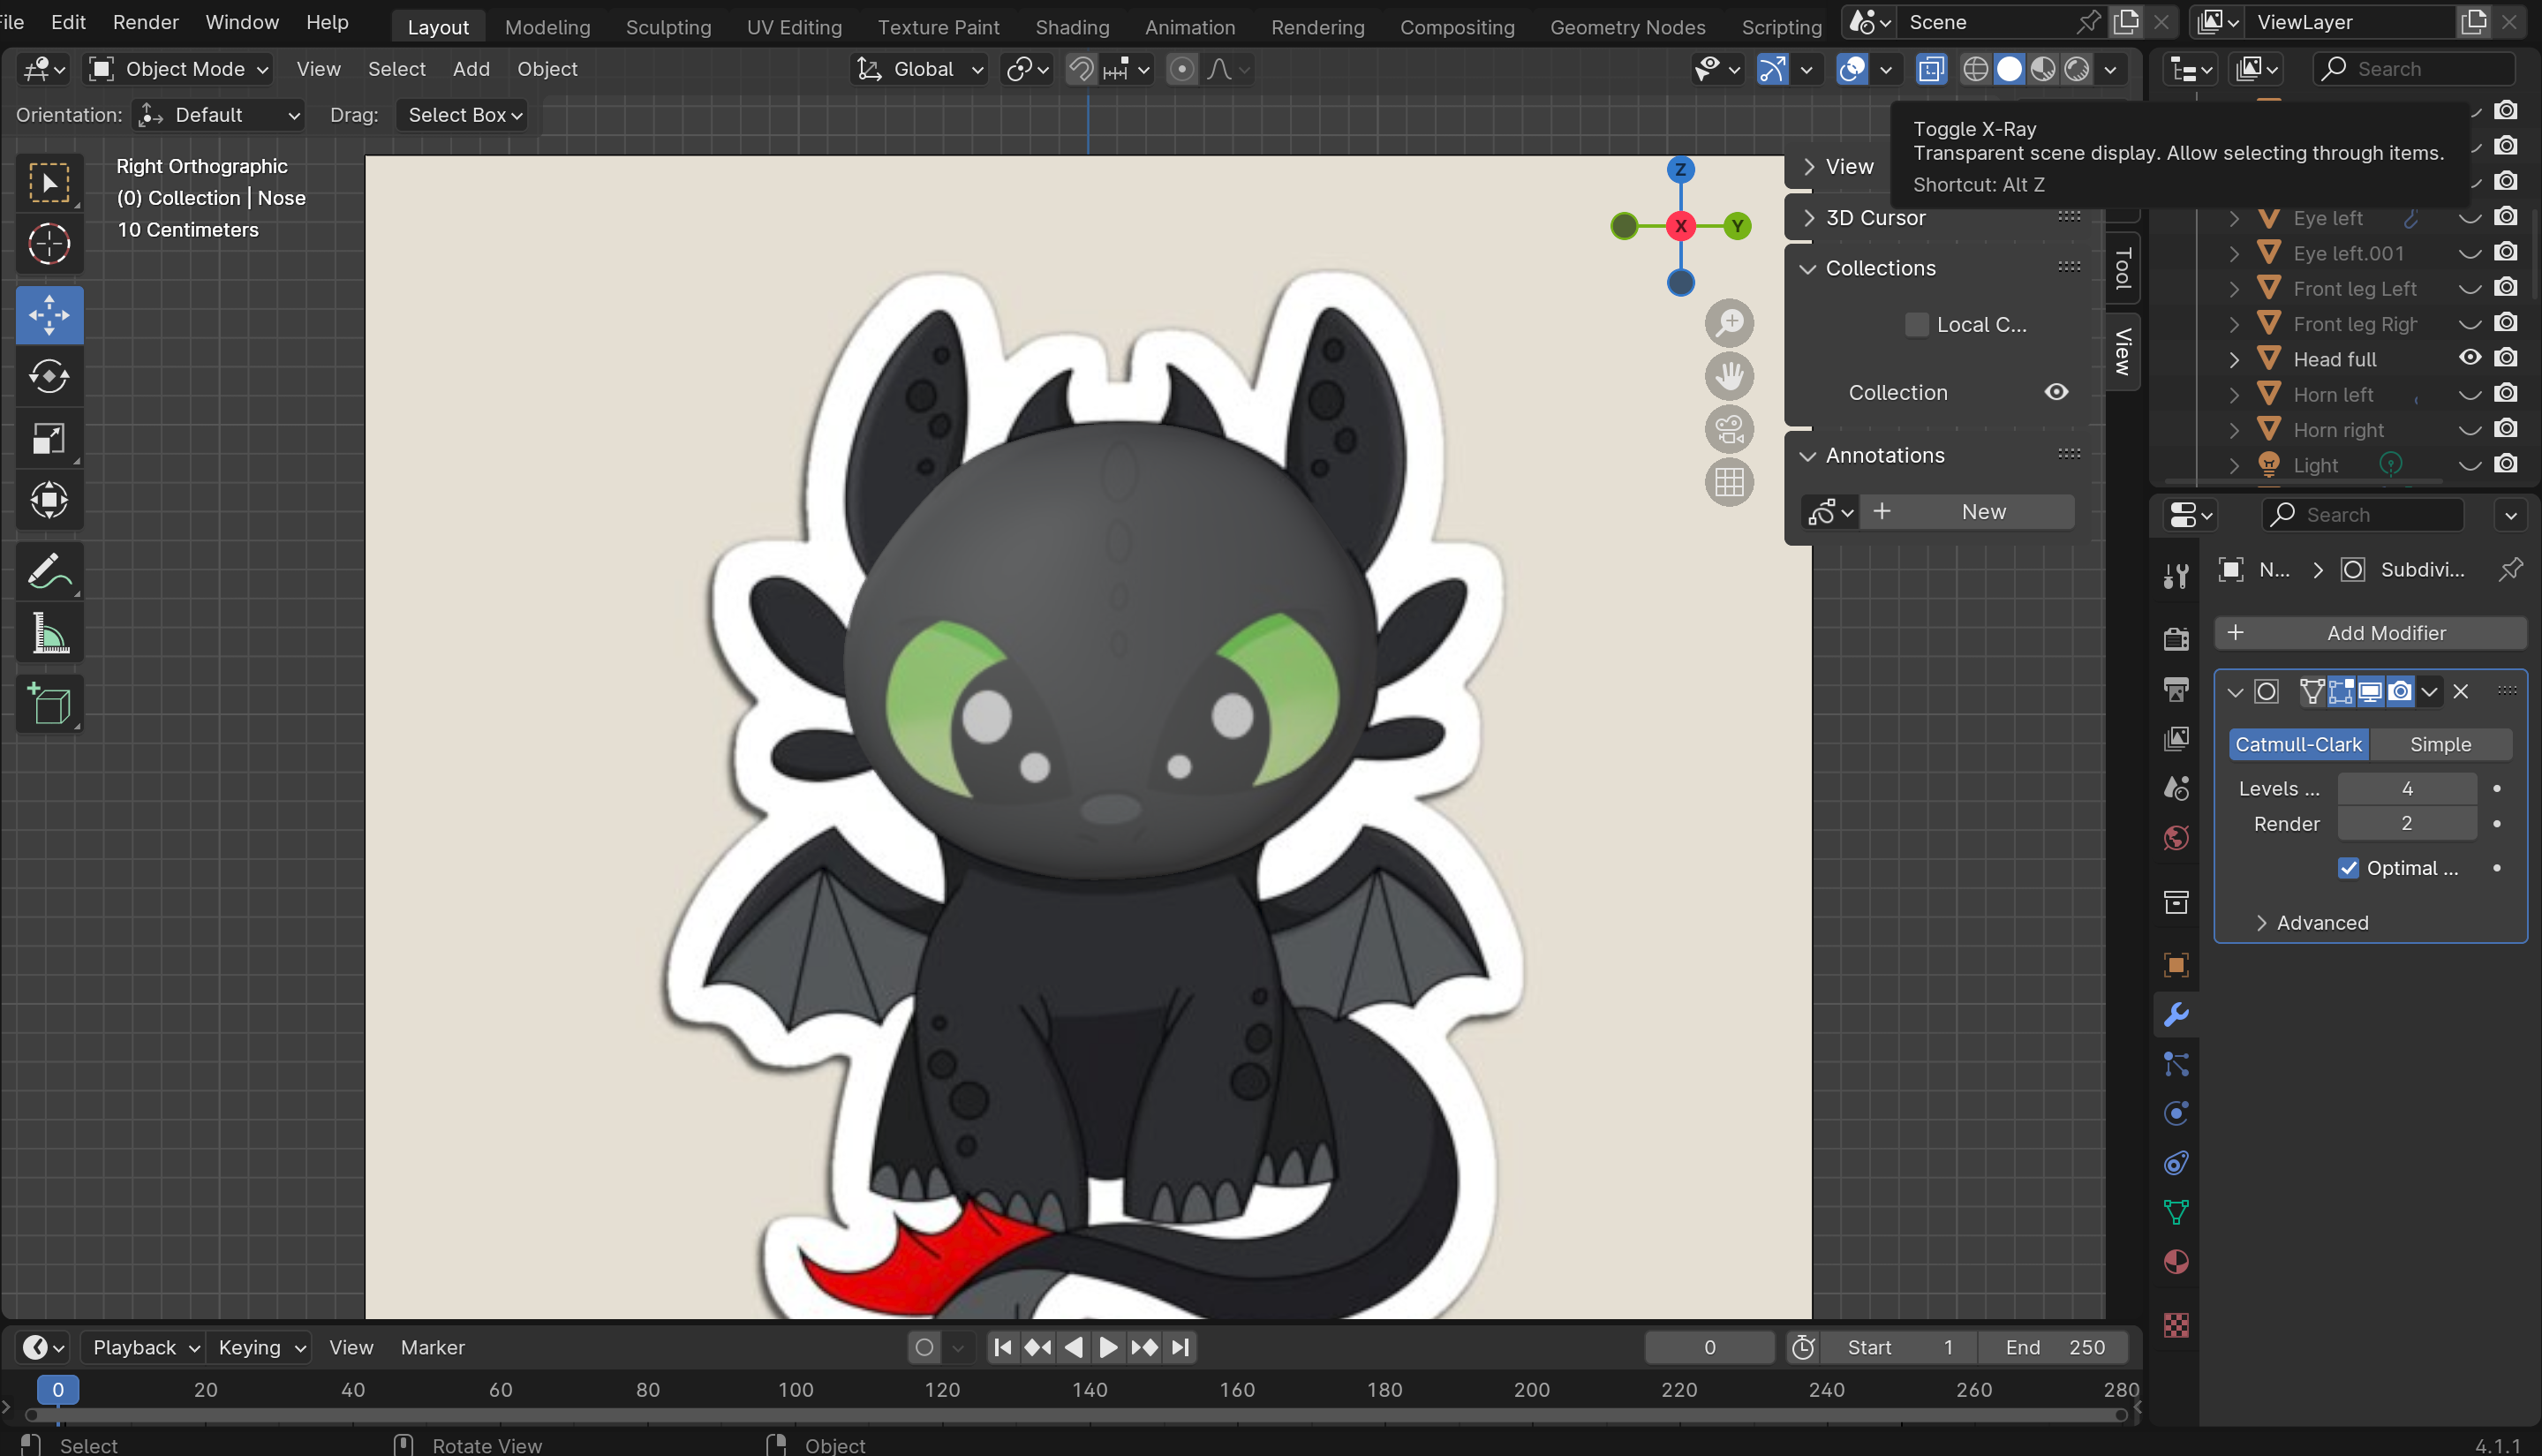
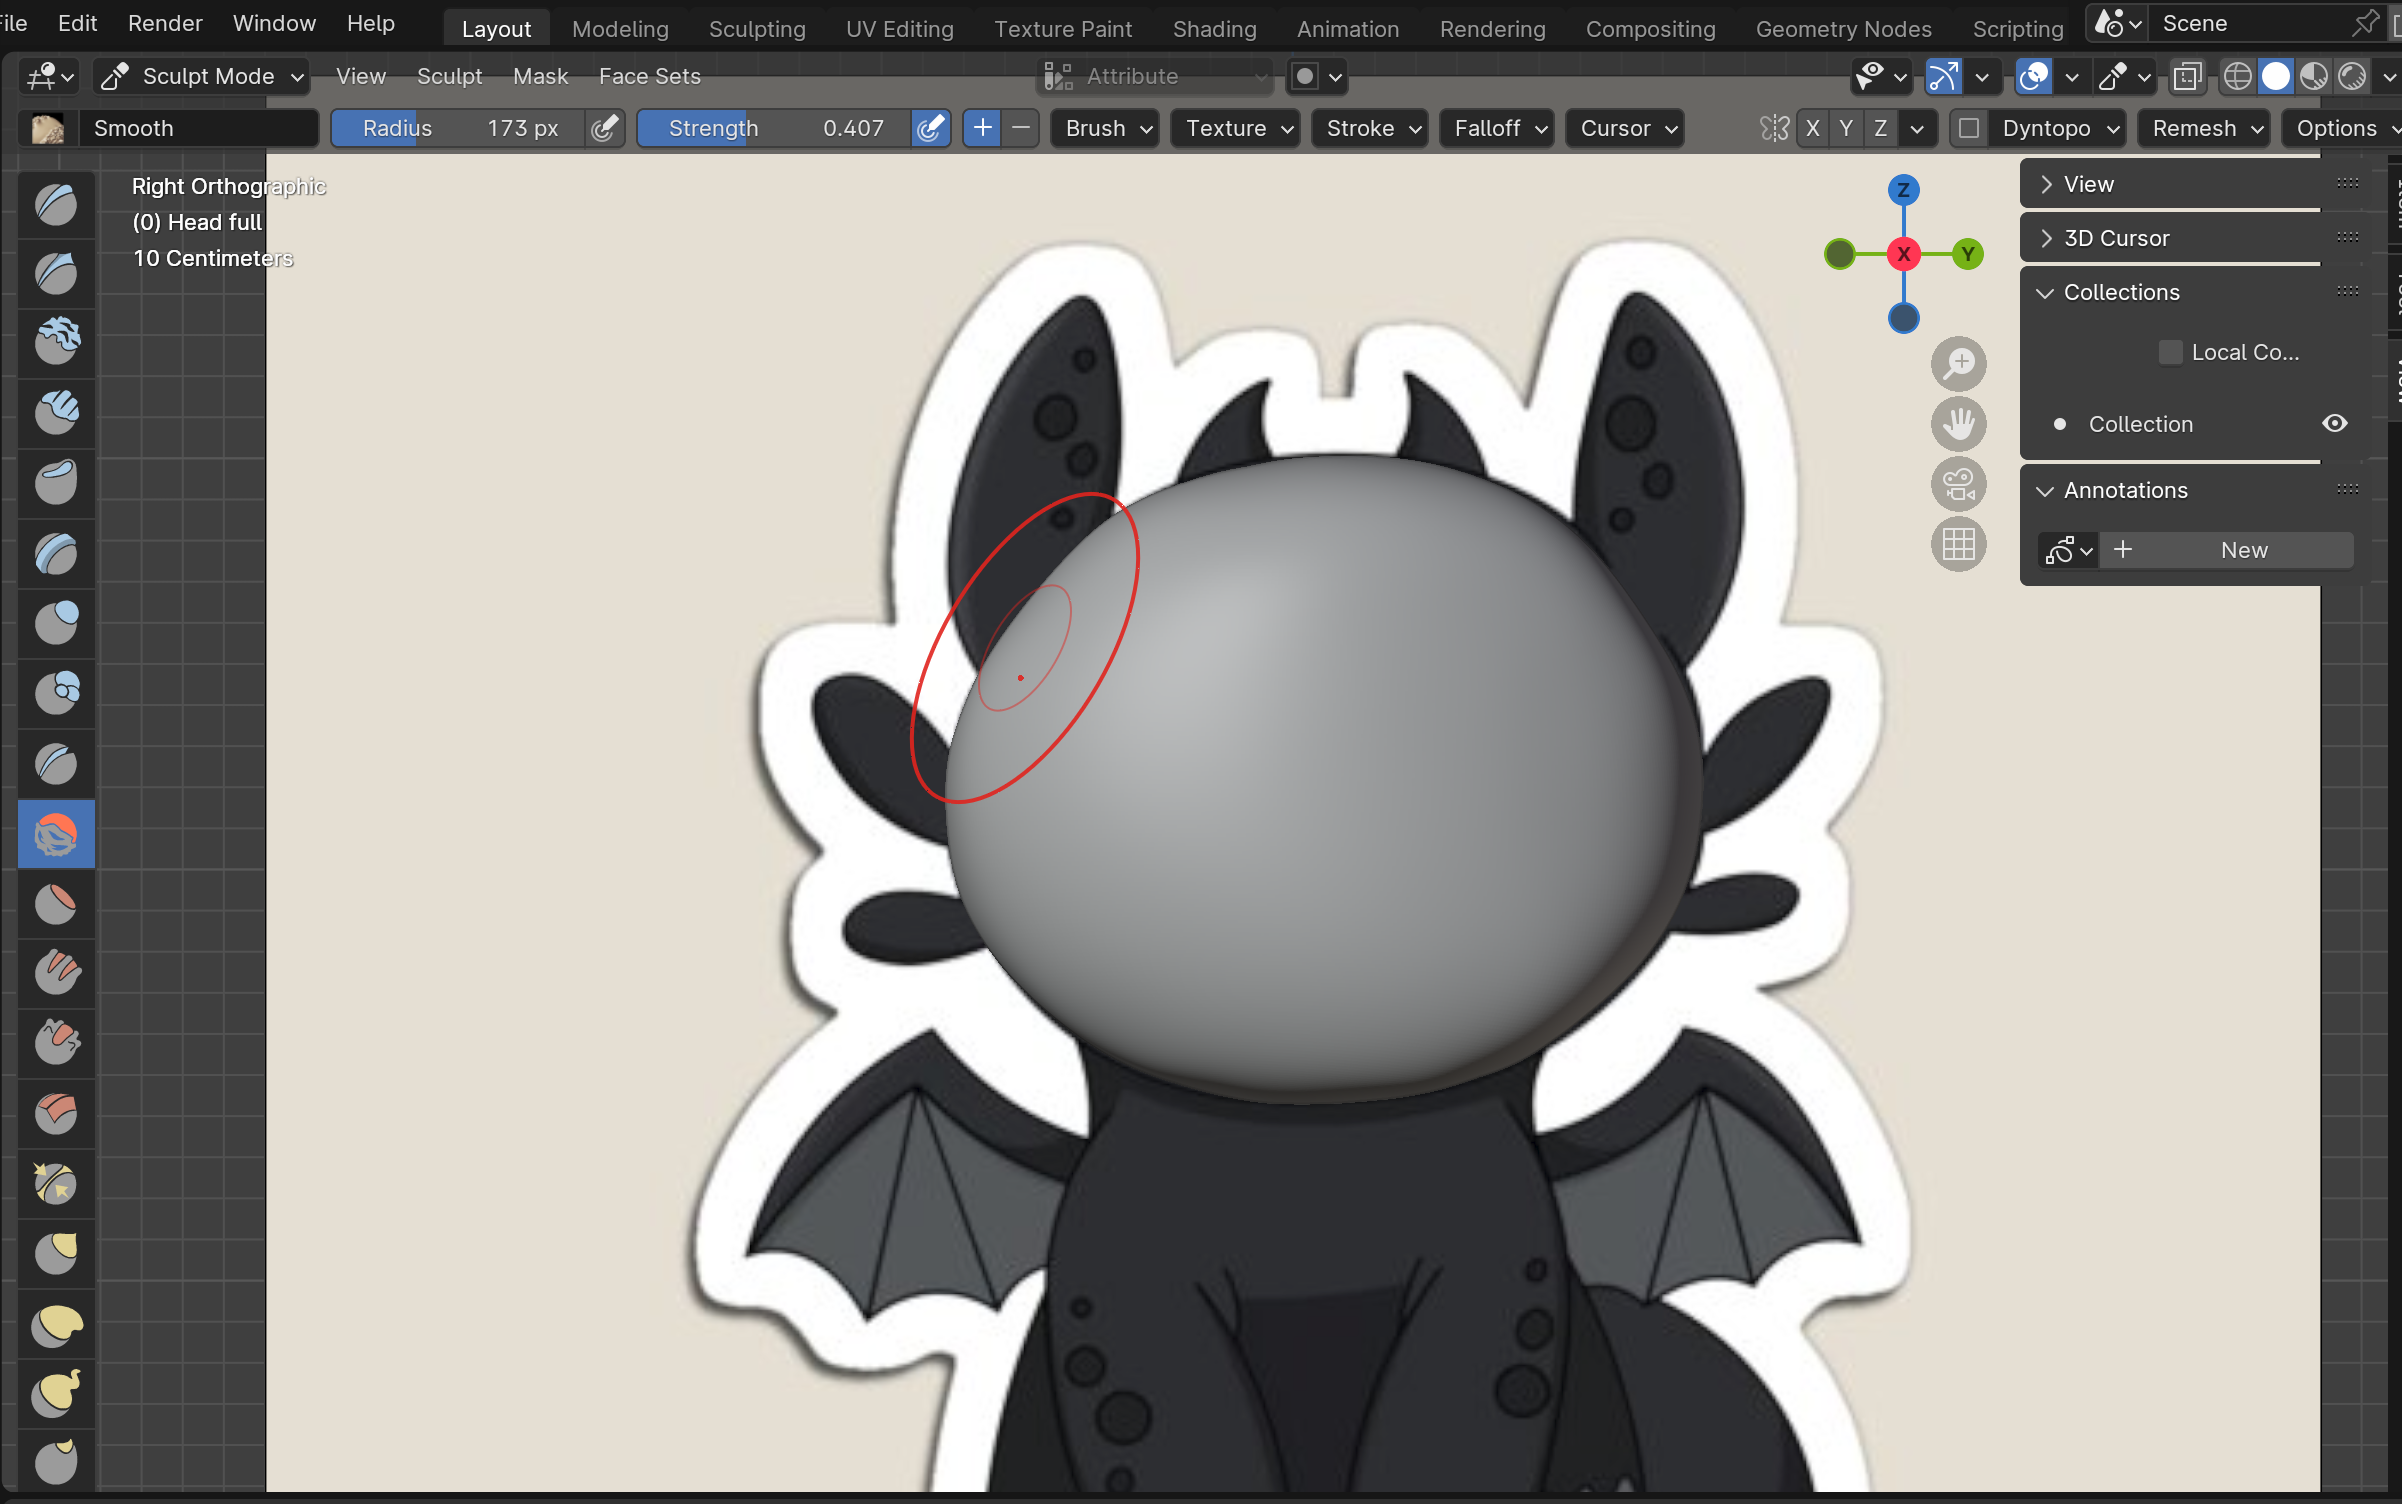
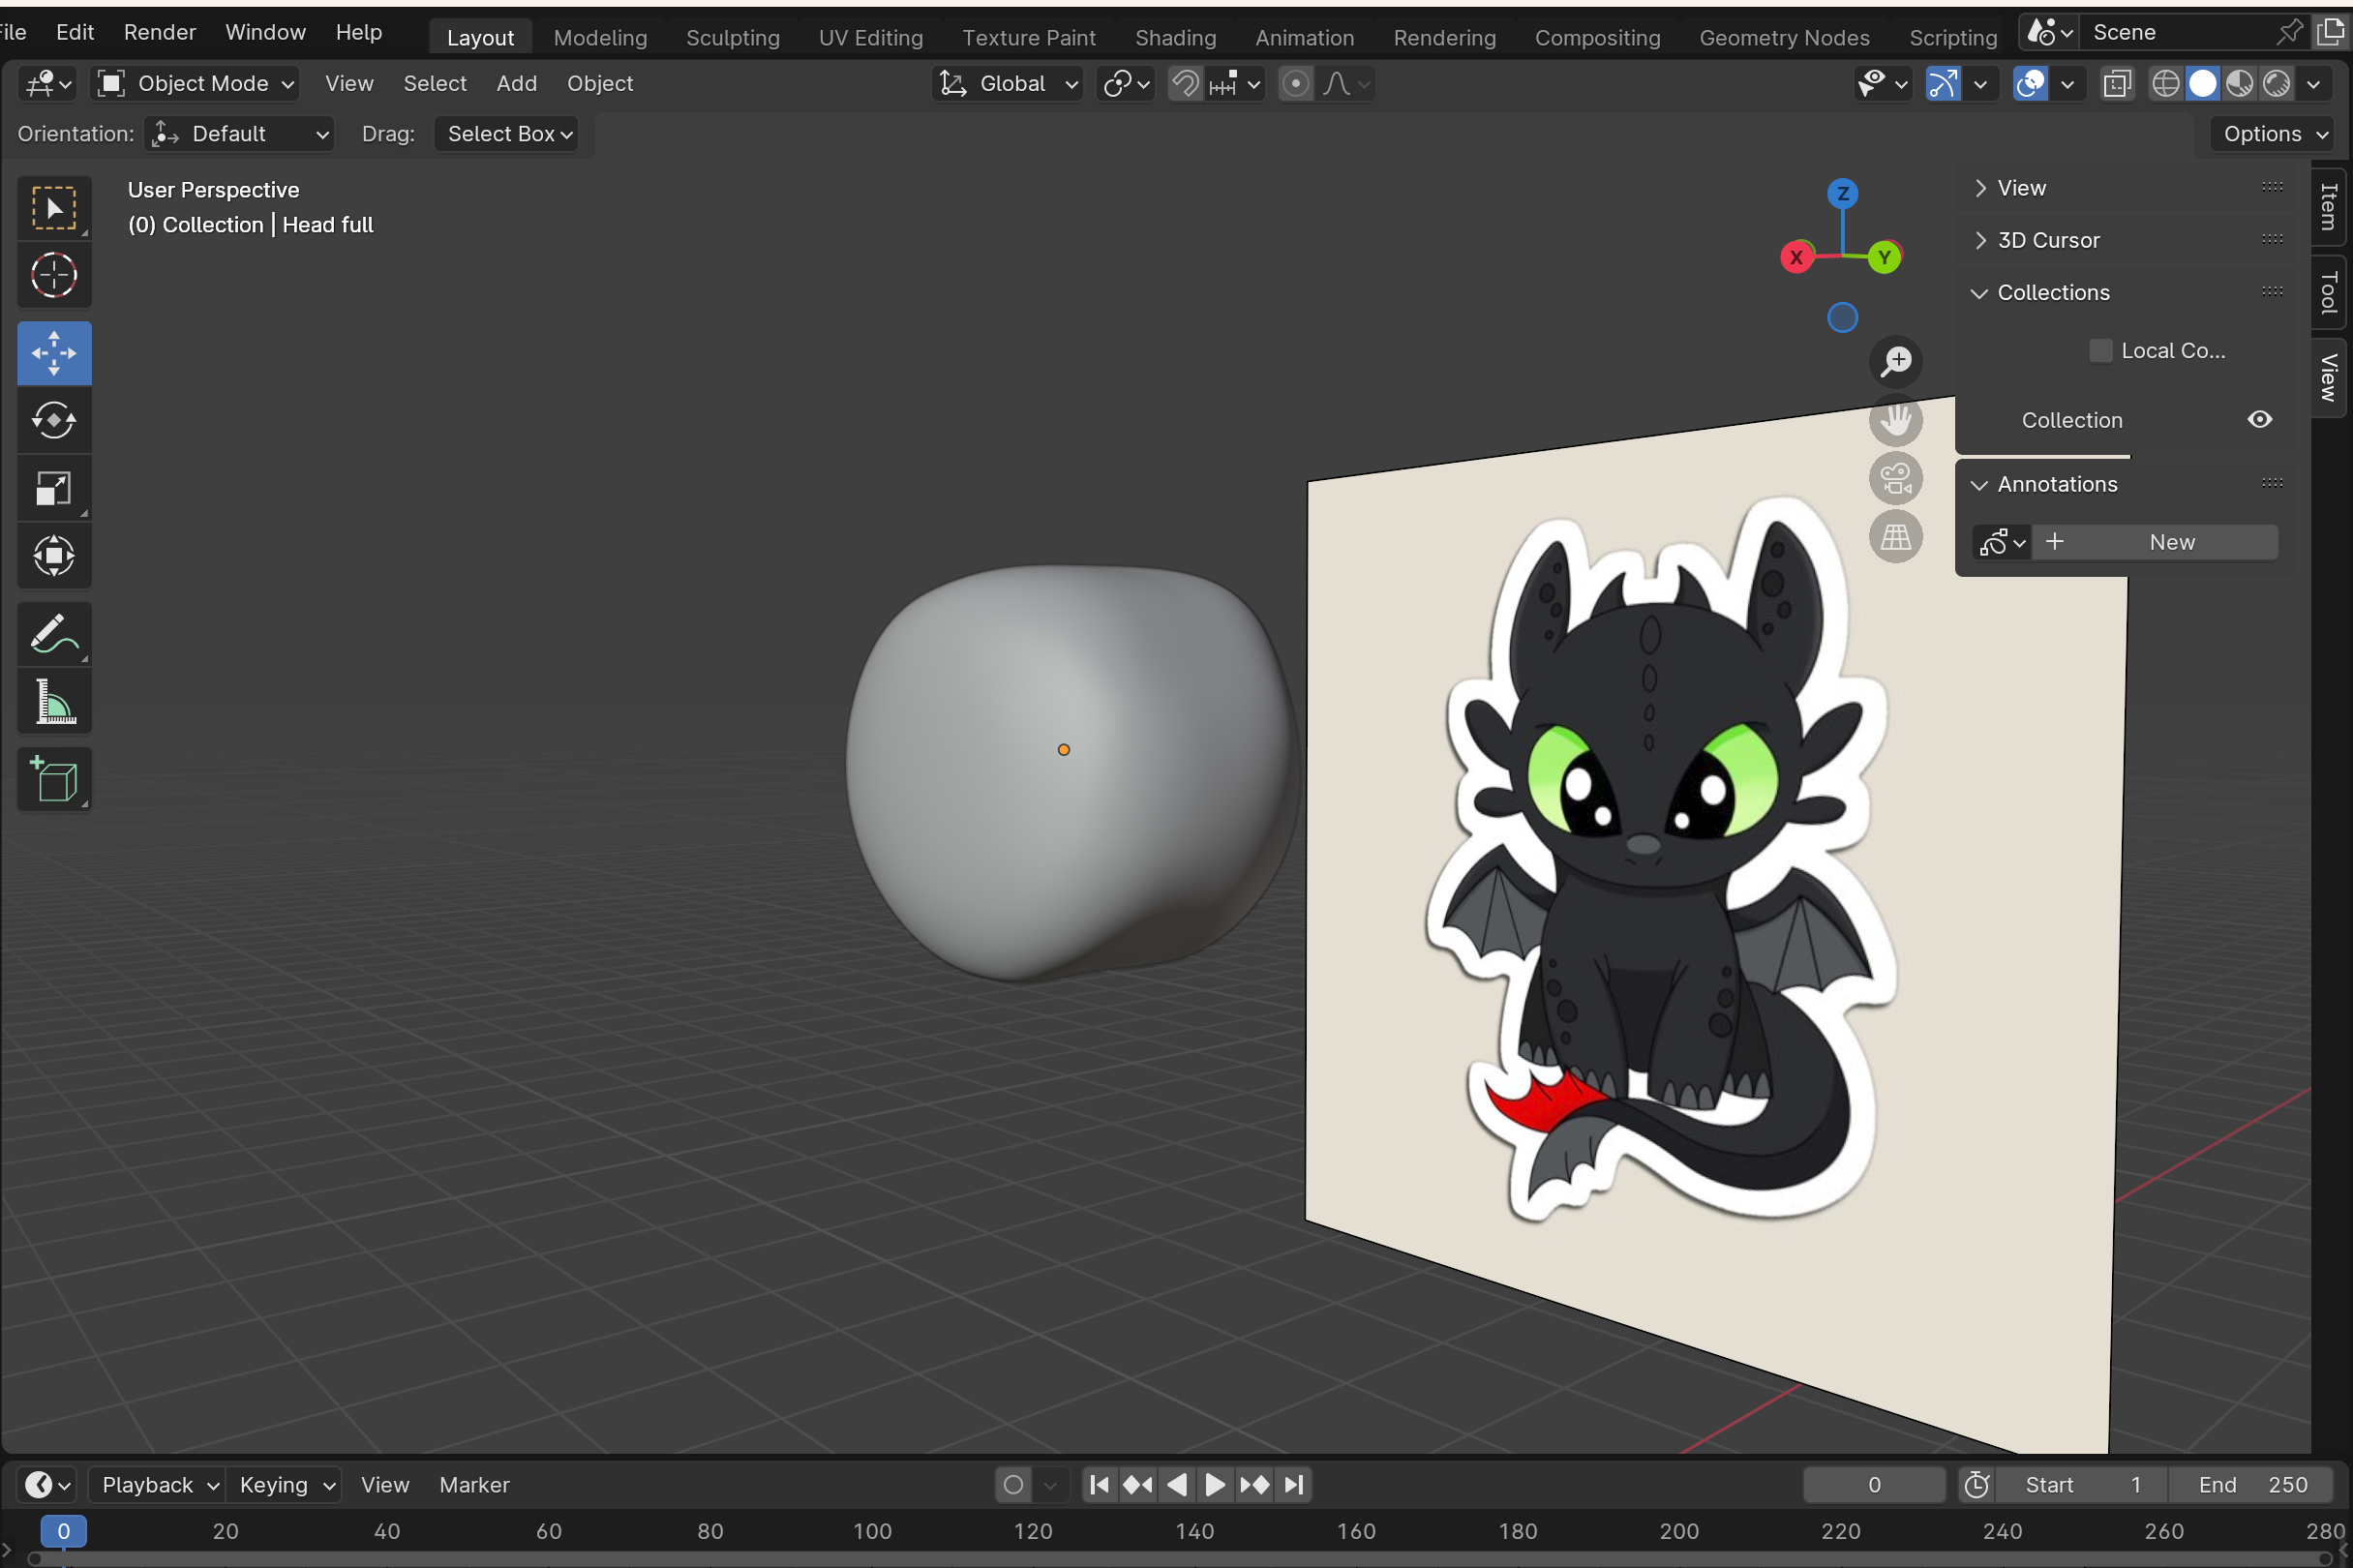
To sculpt the head you start by adding (Shift+A) a sphere through the mesh option and "UV sphere" and moving it on the Z-axis (G to move, Z for the z-axis). I also applied the subdivision surface modifier, which is technically optional but it makes the sphere smoother. 4 seemed to be the perfect number of levels for me. Also make sure to scale (S) the head to the correct size. Toggling X-ray (Alt+Z) also makes this process a lot easier since it allows you to see the shape of the head on the reference photo through the object itself. I also entered the X-axis view (shown in photos) to ensure I was evenly sculpting. The next step to sculpting the head is entering sculpt mode which you can do through the dropdown in the top left that in the first images is labeled "object mode." Modes can also be switched by pressing control+tab and selecting the mode with your mouse or its corresponding number. Once you click that you select sculpt mode and select the smooth tool, either by clicking or pressing the S key on your keyboard. You may use whatever tools you like and experiment with them but I found myself using the Smooth tool the most. Elastic deform also came in handy, as well as the Flatten tool at times. All of these tools may be selected on the left hand side when in Sculpt Mode. You may change the size of your cursor using F and moving your mouse until you reach your desired size. The first thing I did was flatten the sphere to a size I thought worked well while centered on the y-axis, to make sure it would be even throughout. I would say after flattening the head to your desired size, you should do all your sculpting while centered on the x-axis to create the shape of the head in proportion to the reference image.
!!!! MAKE SURE TO NAME YOUR OBJECTS AS YOU CREATE THEM TO NOT LOSE TRACK OF ANYTHING !!!!
Sculpting the Horns/Ears
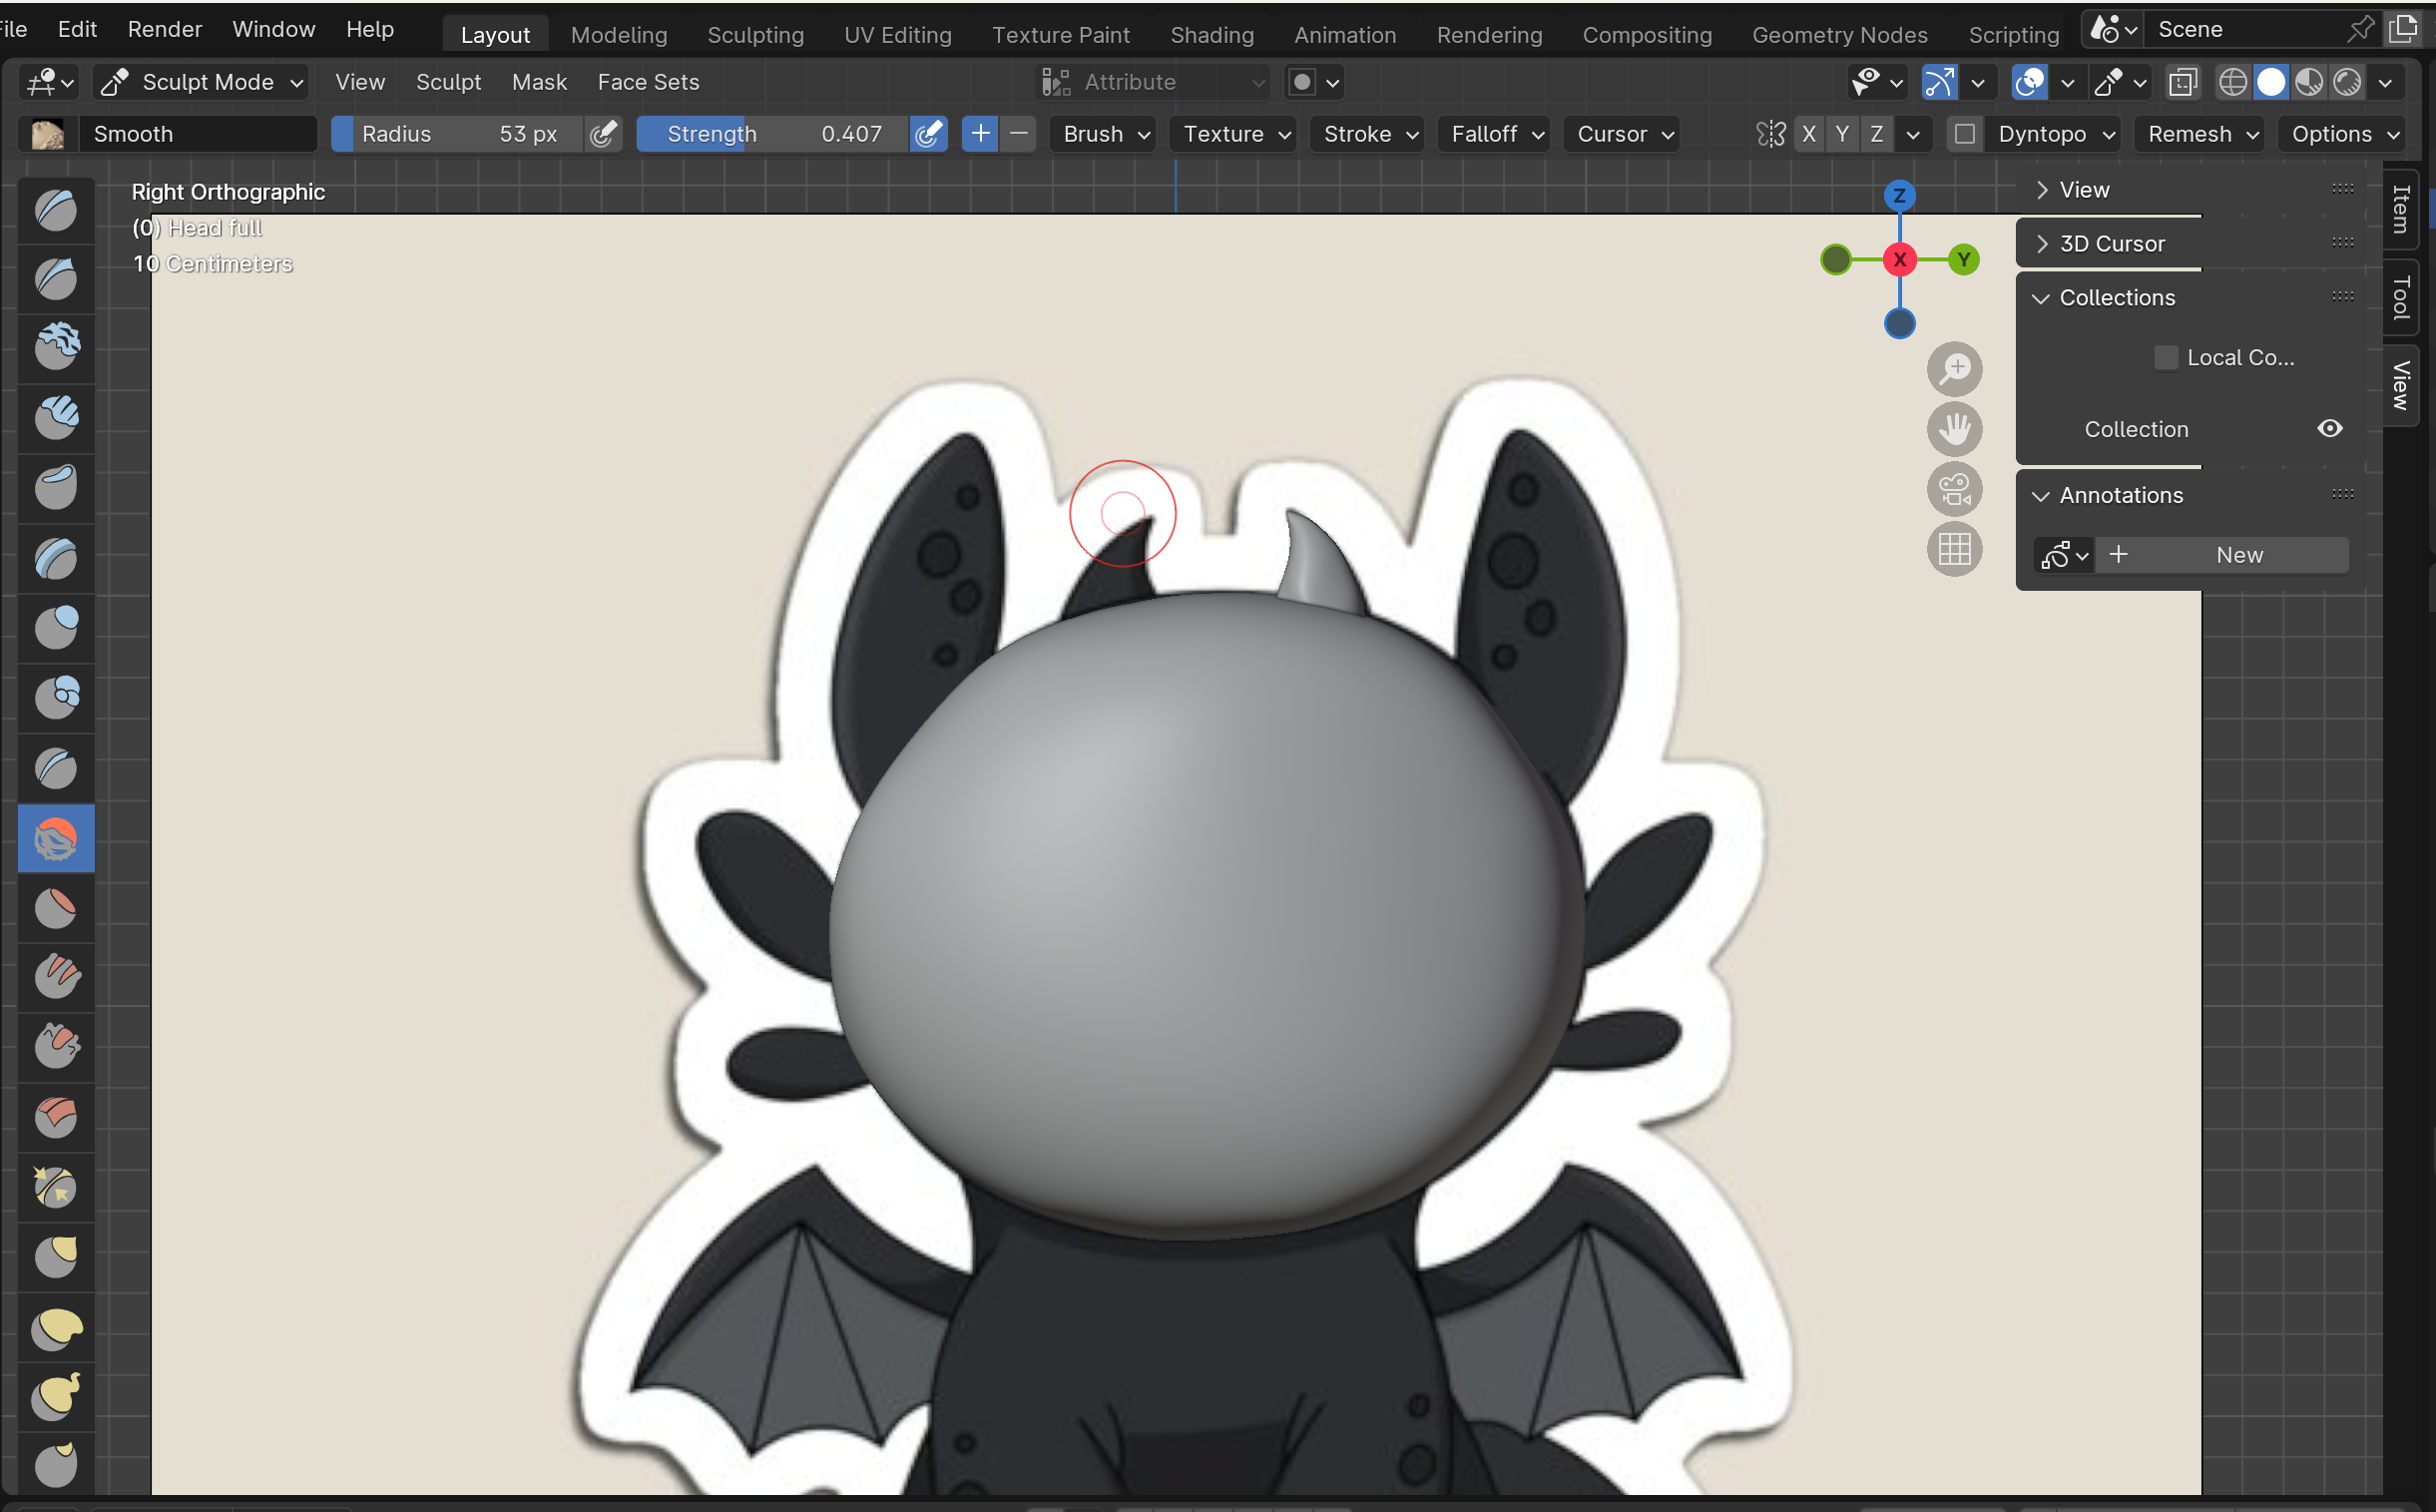
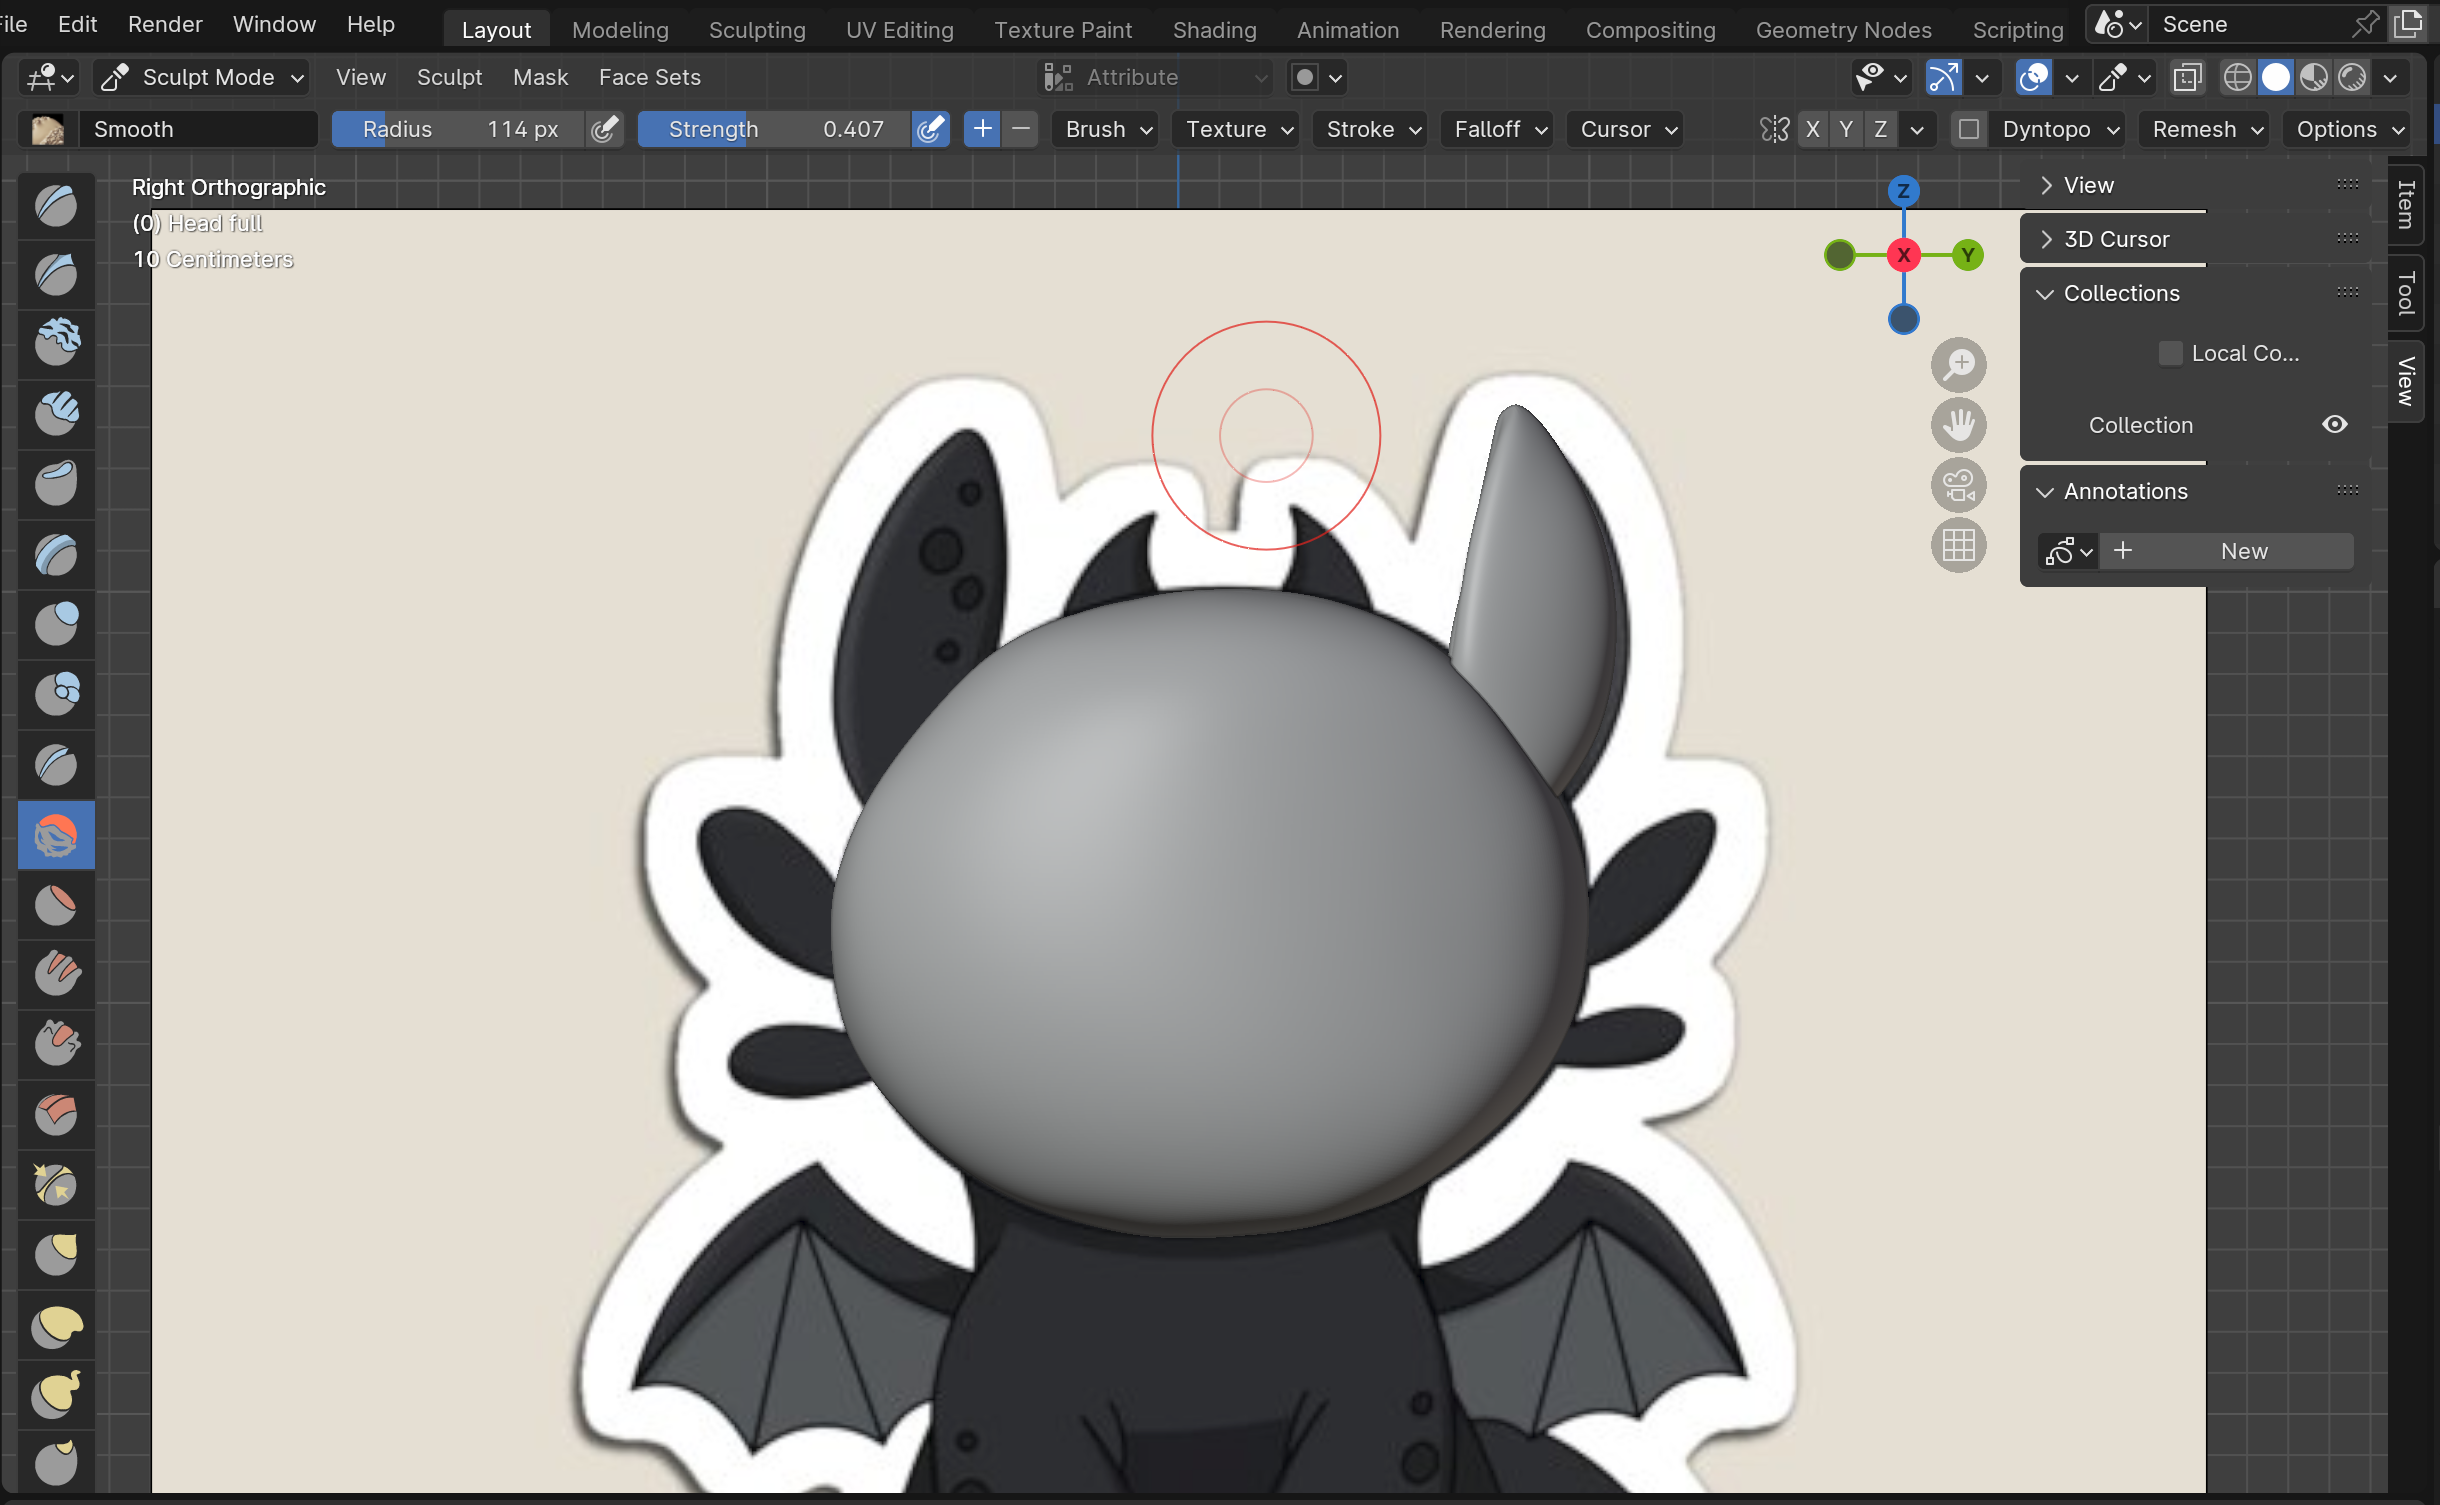
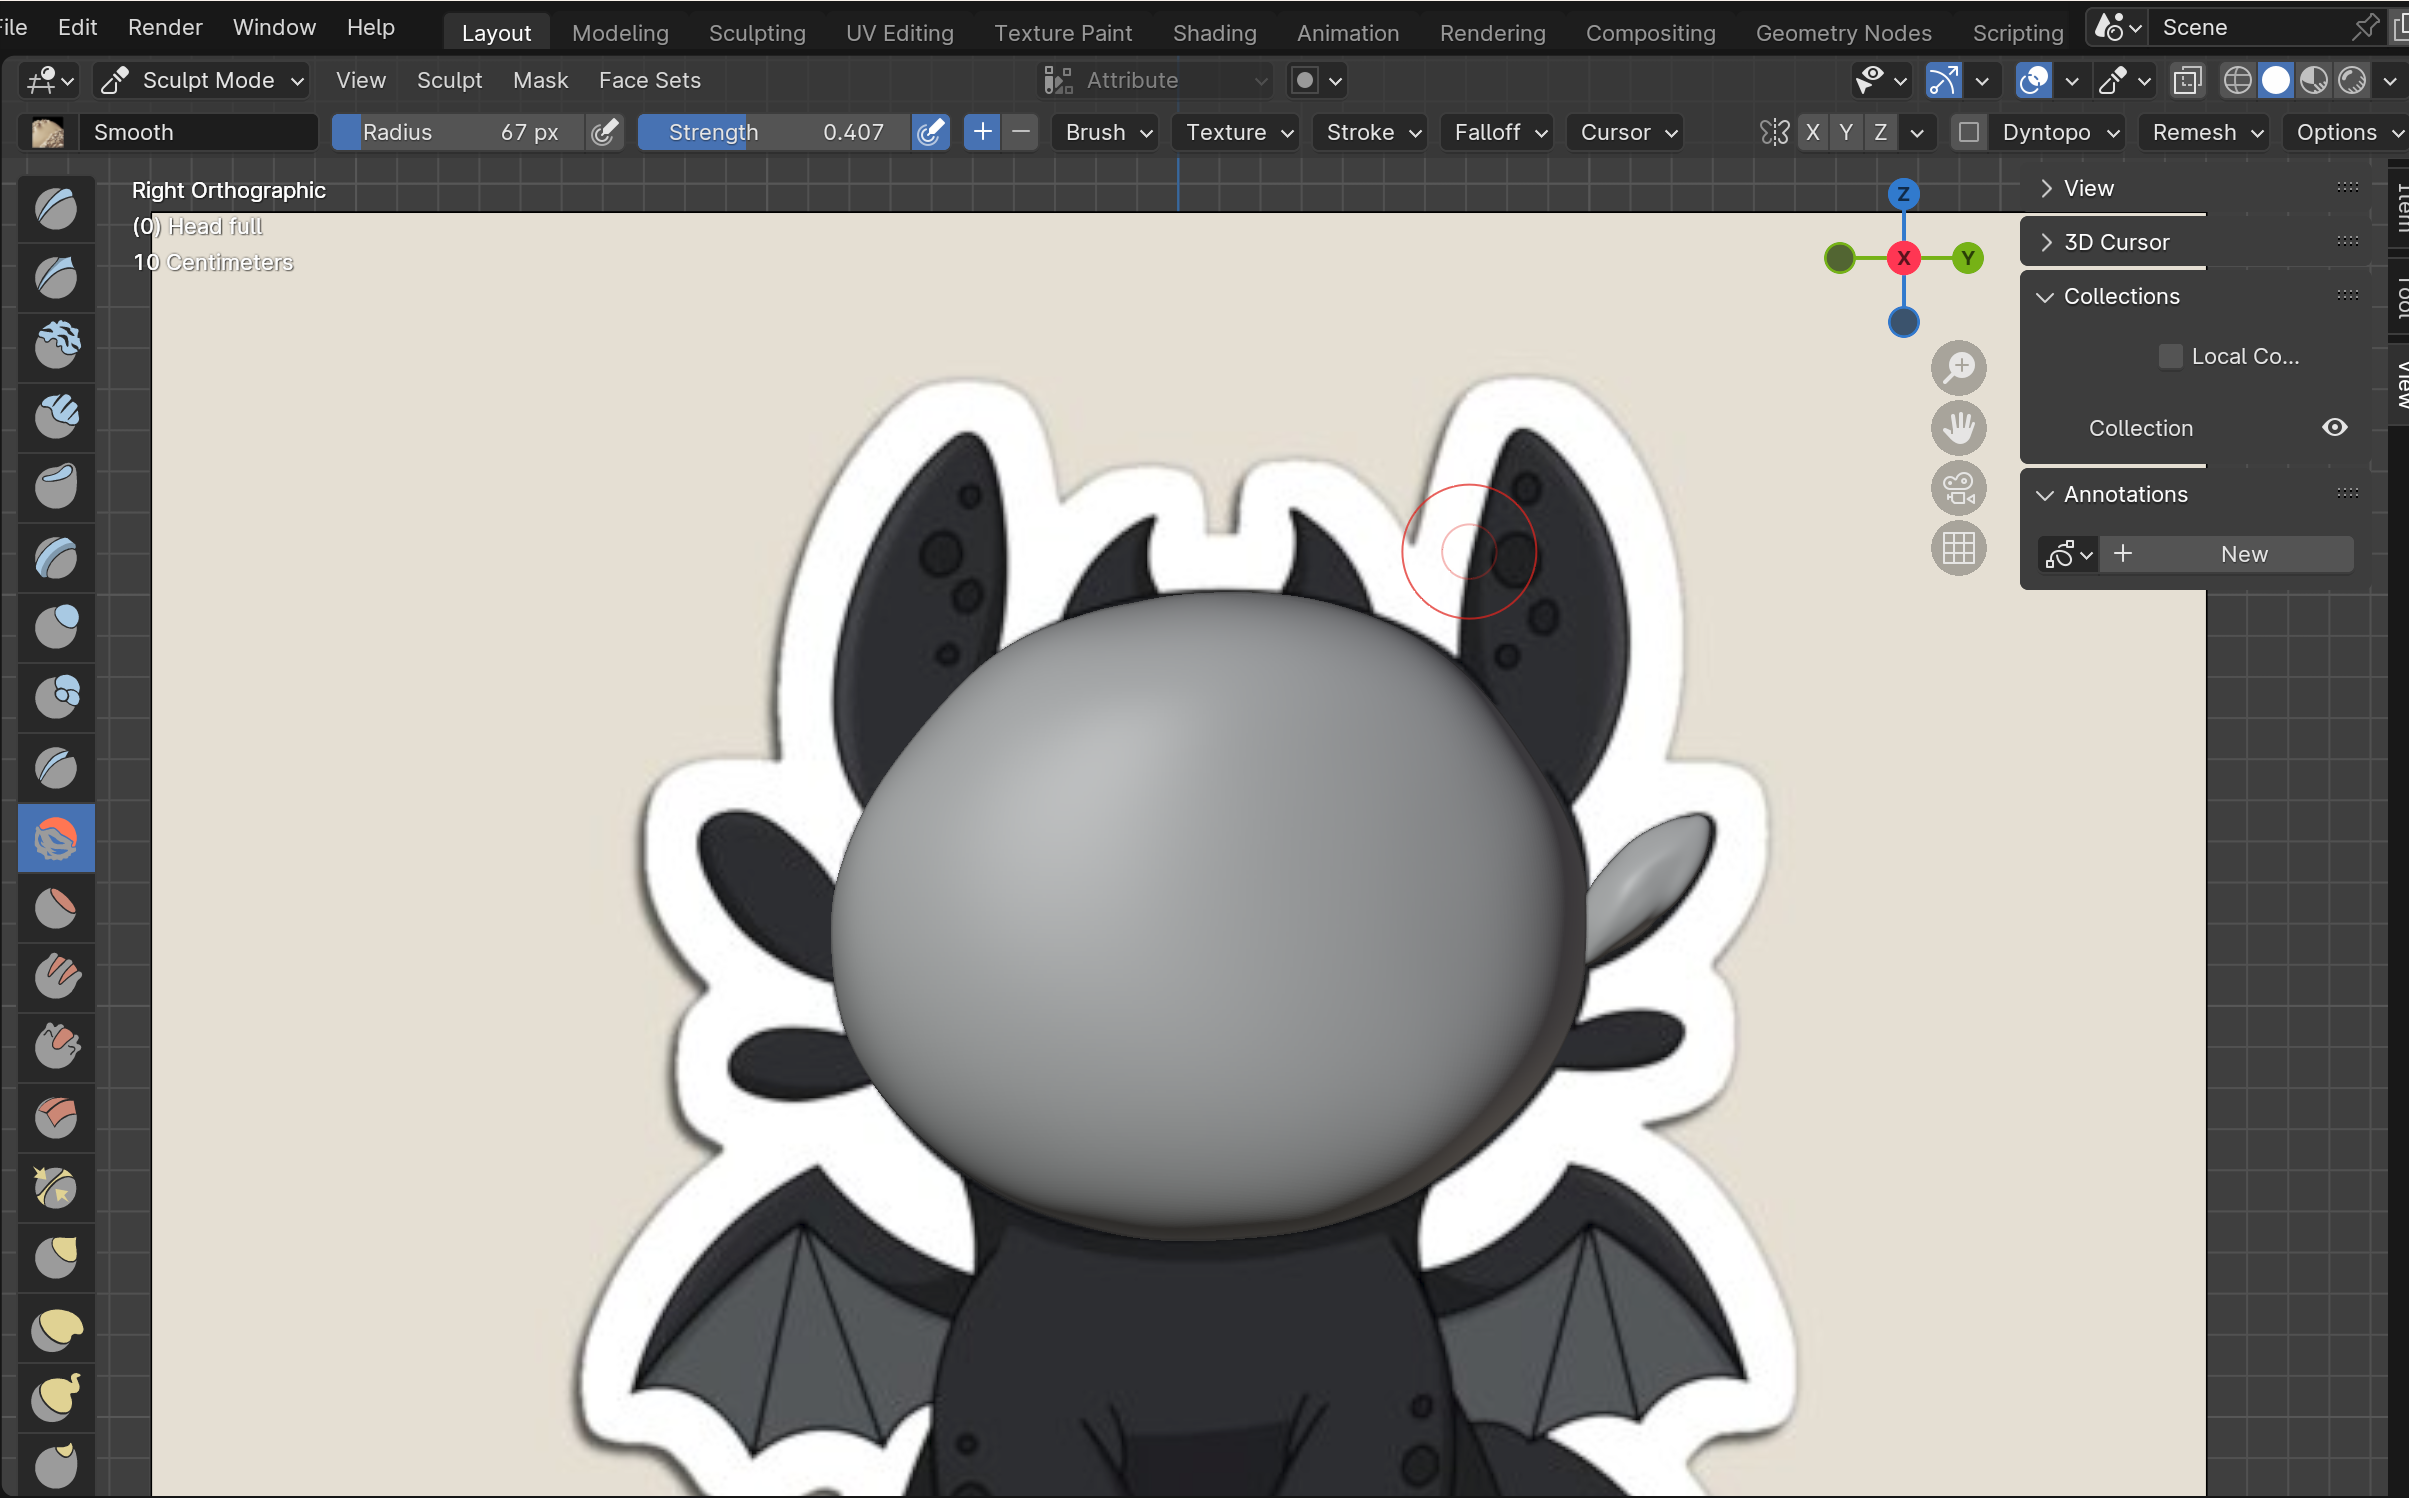
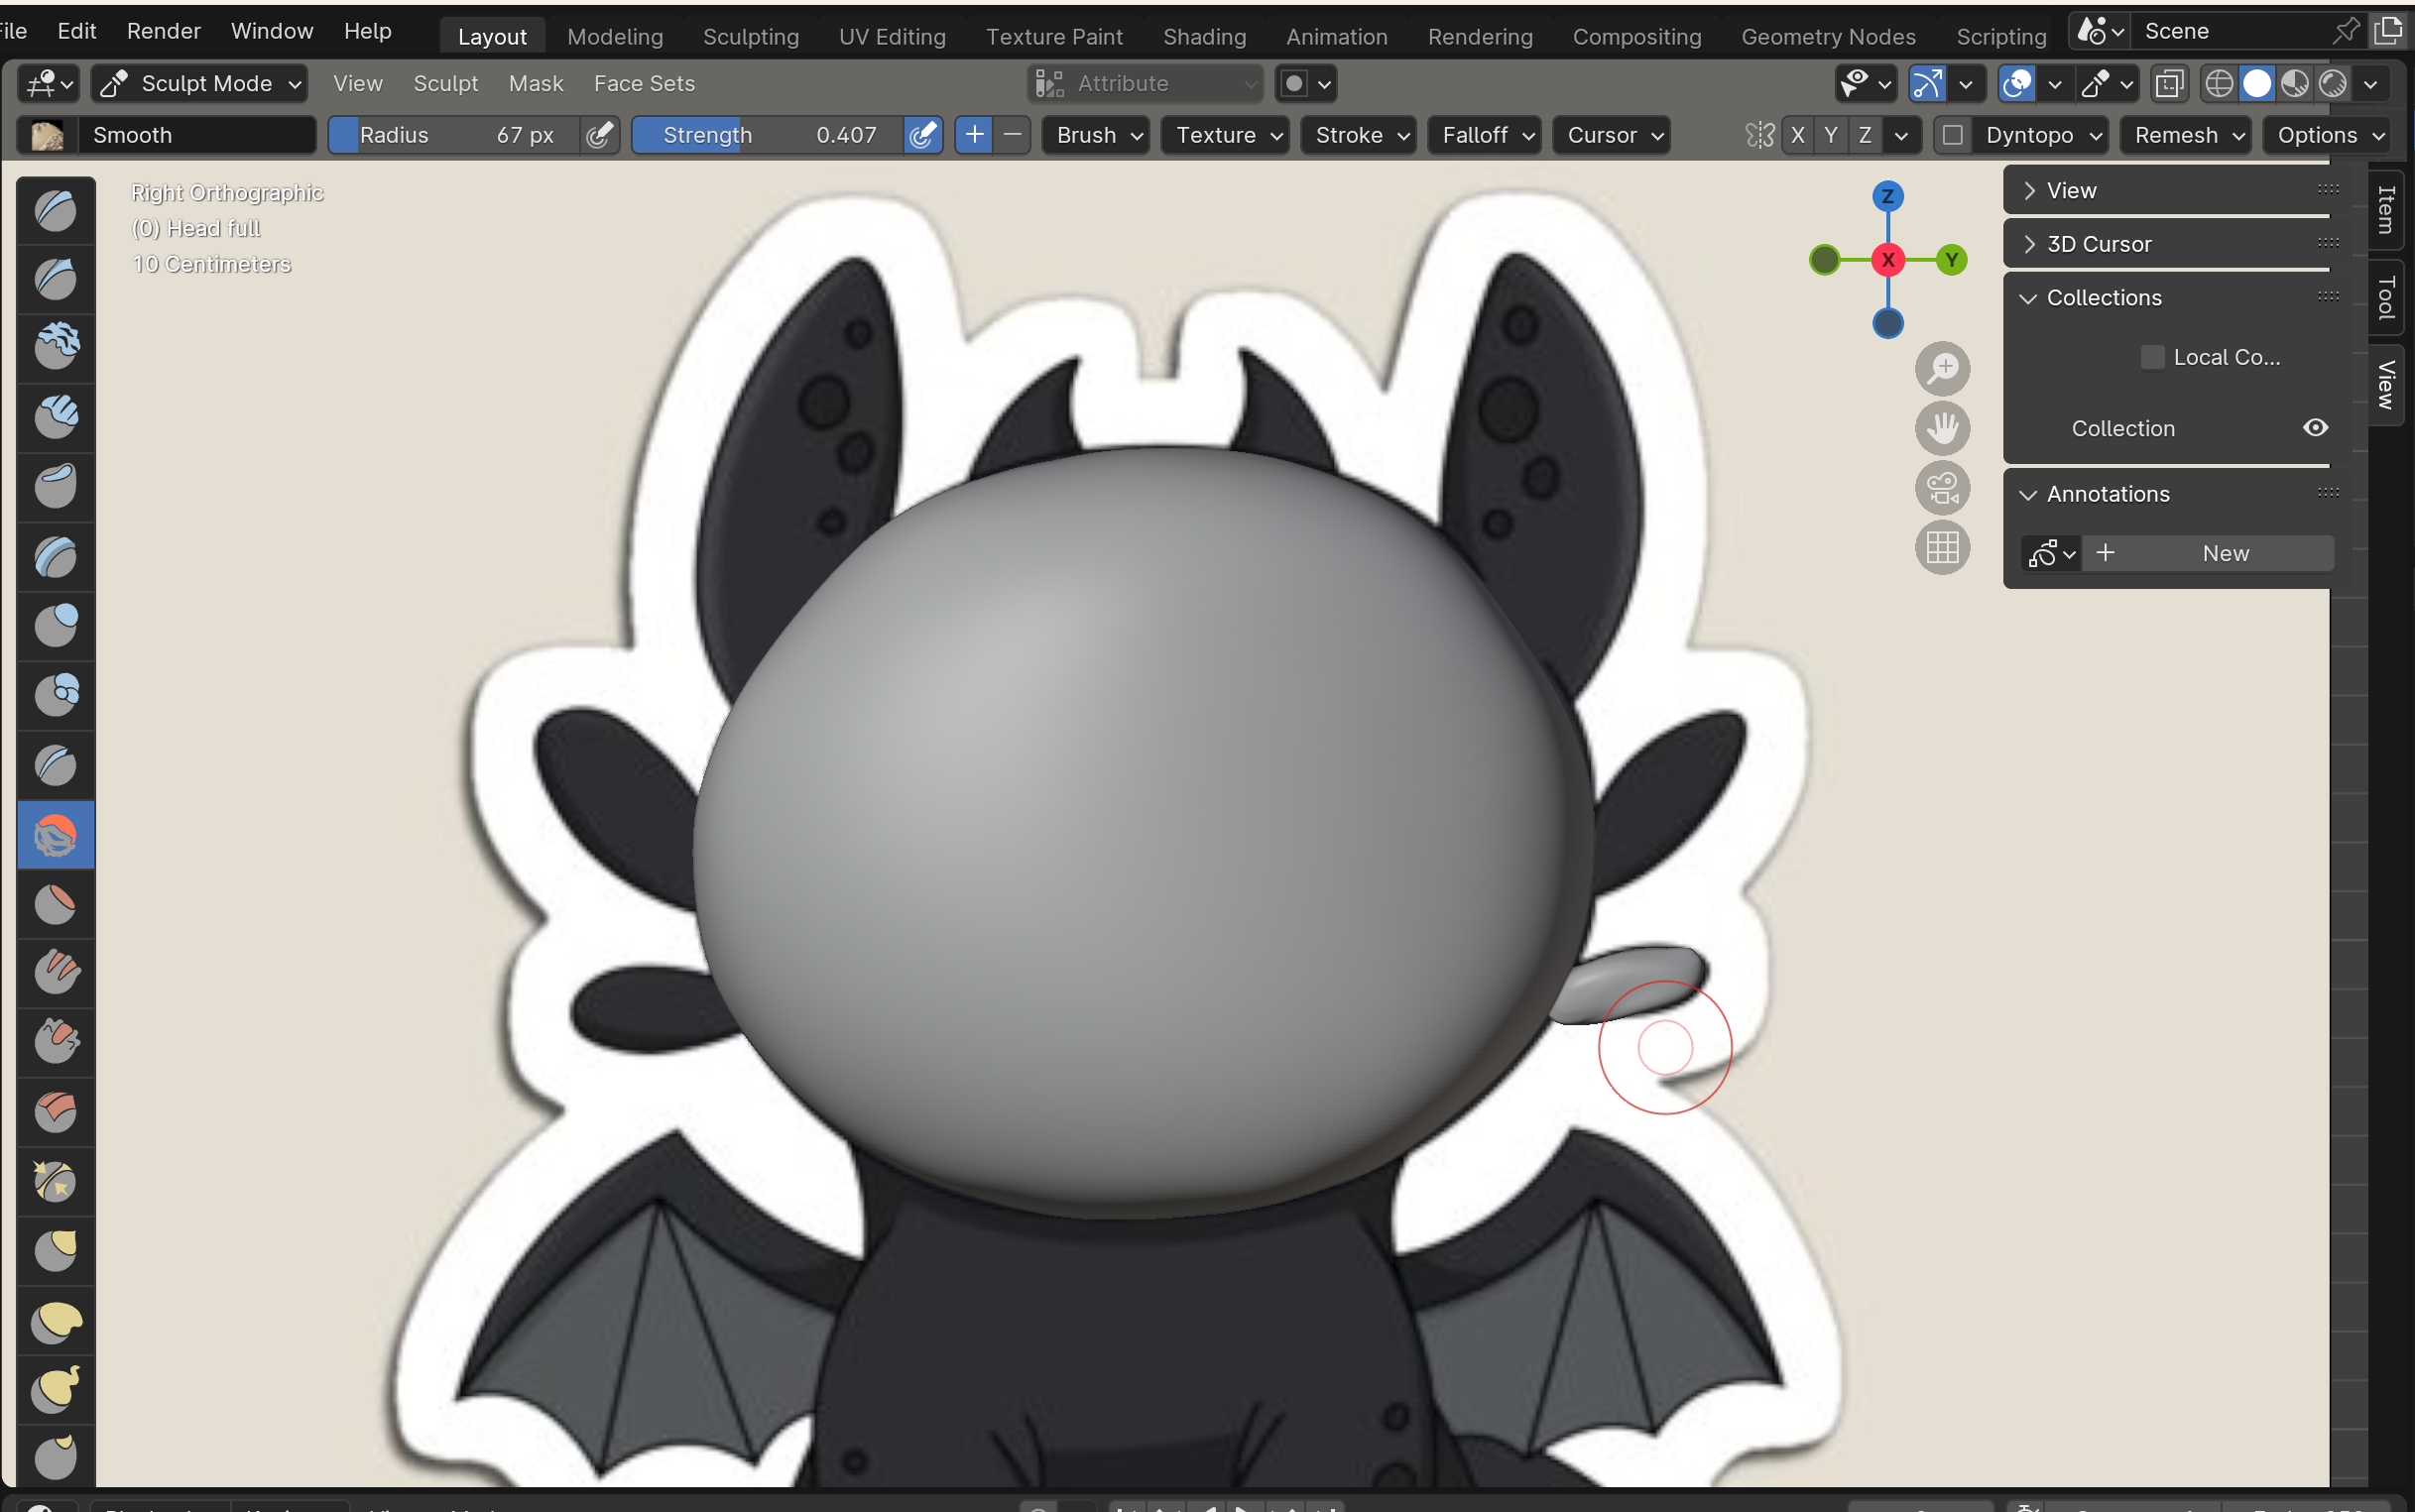
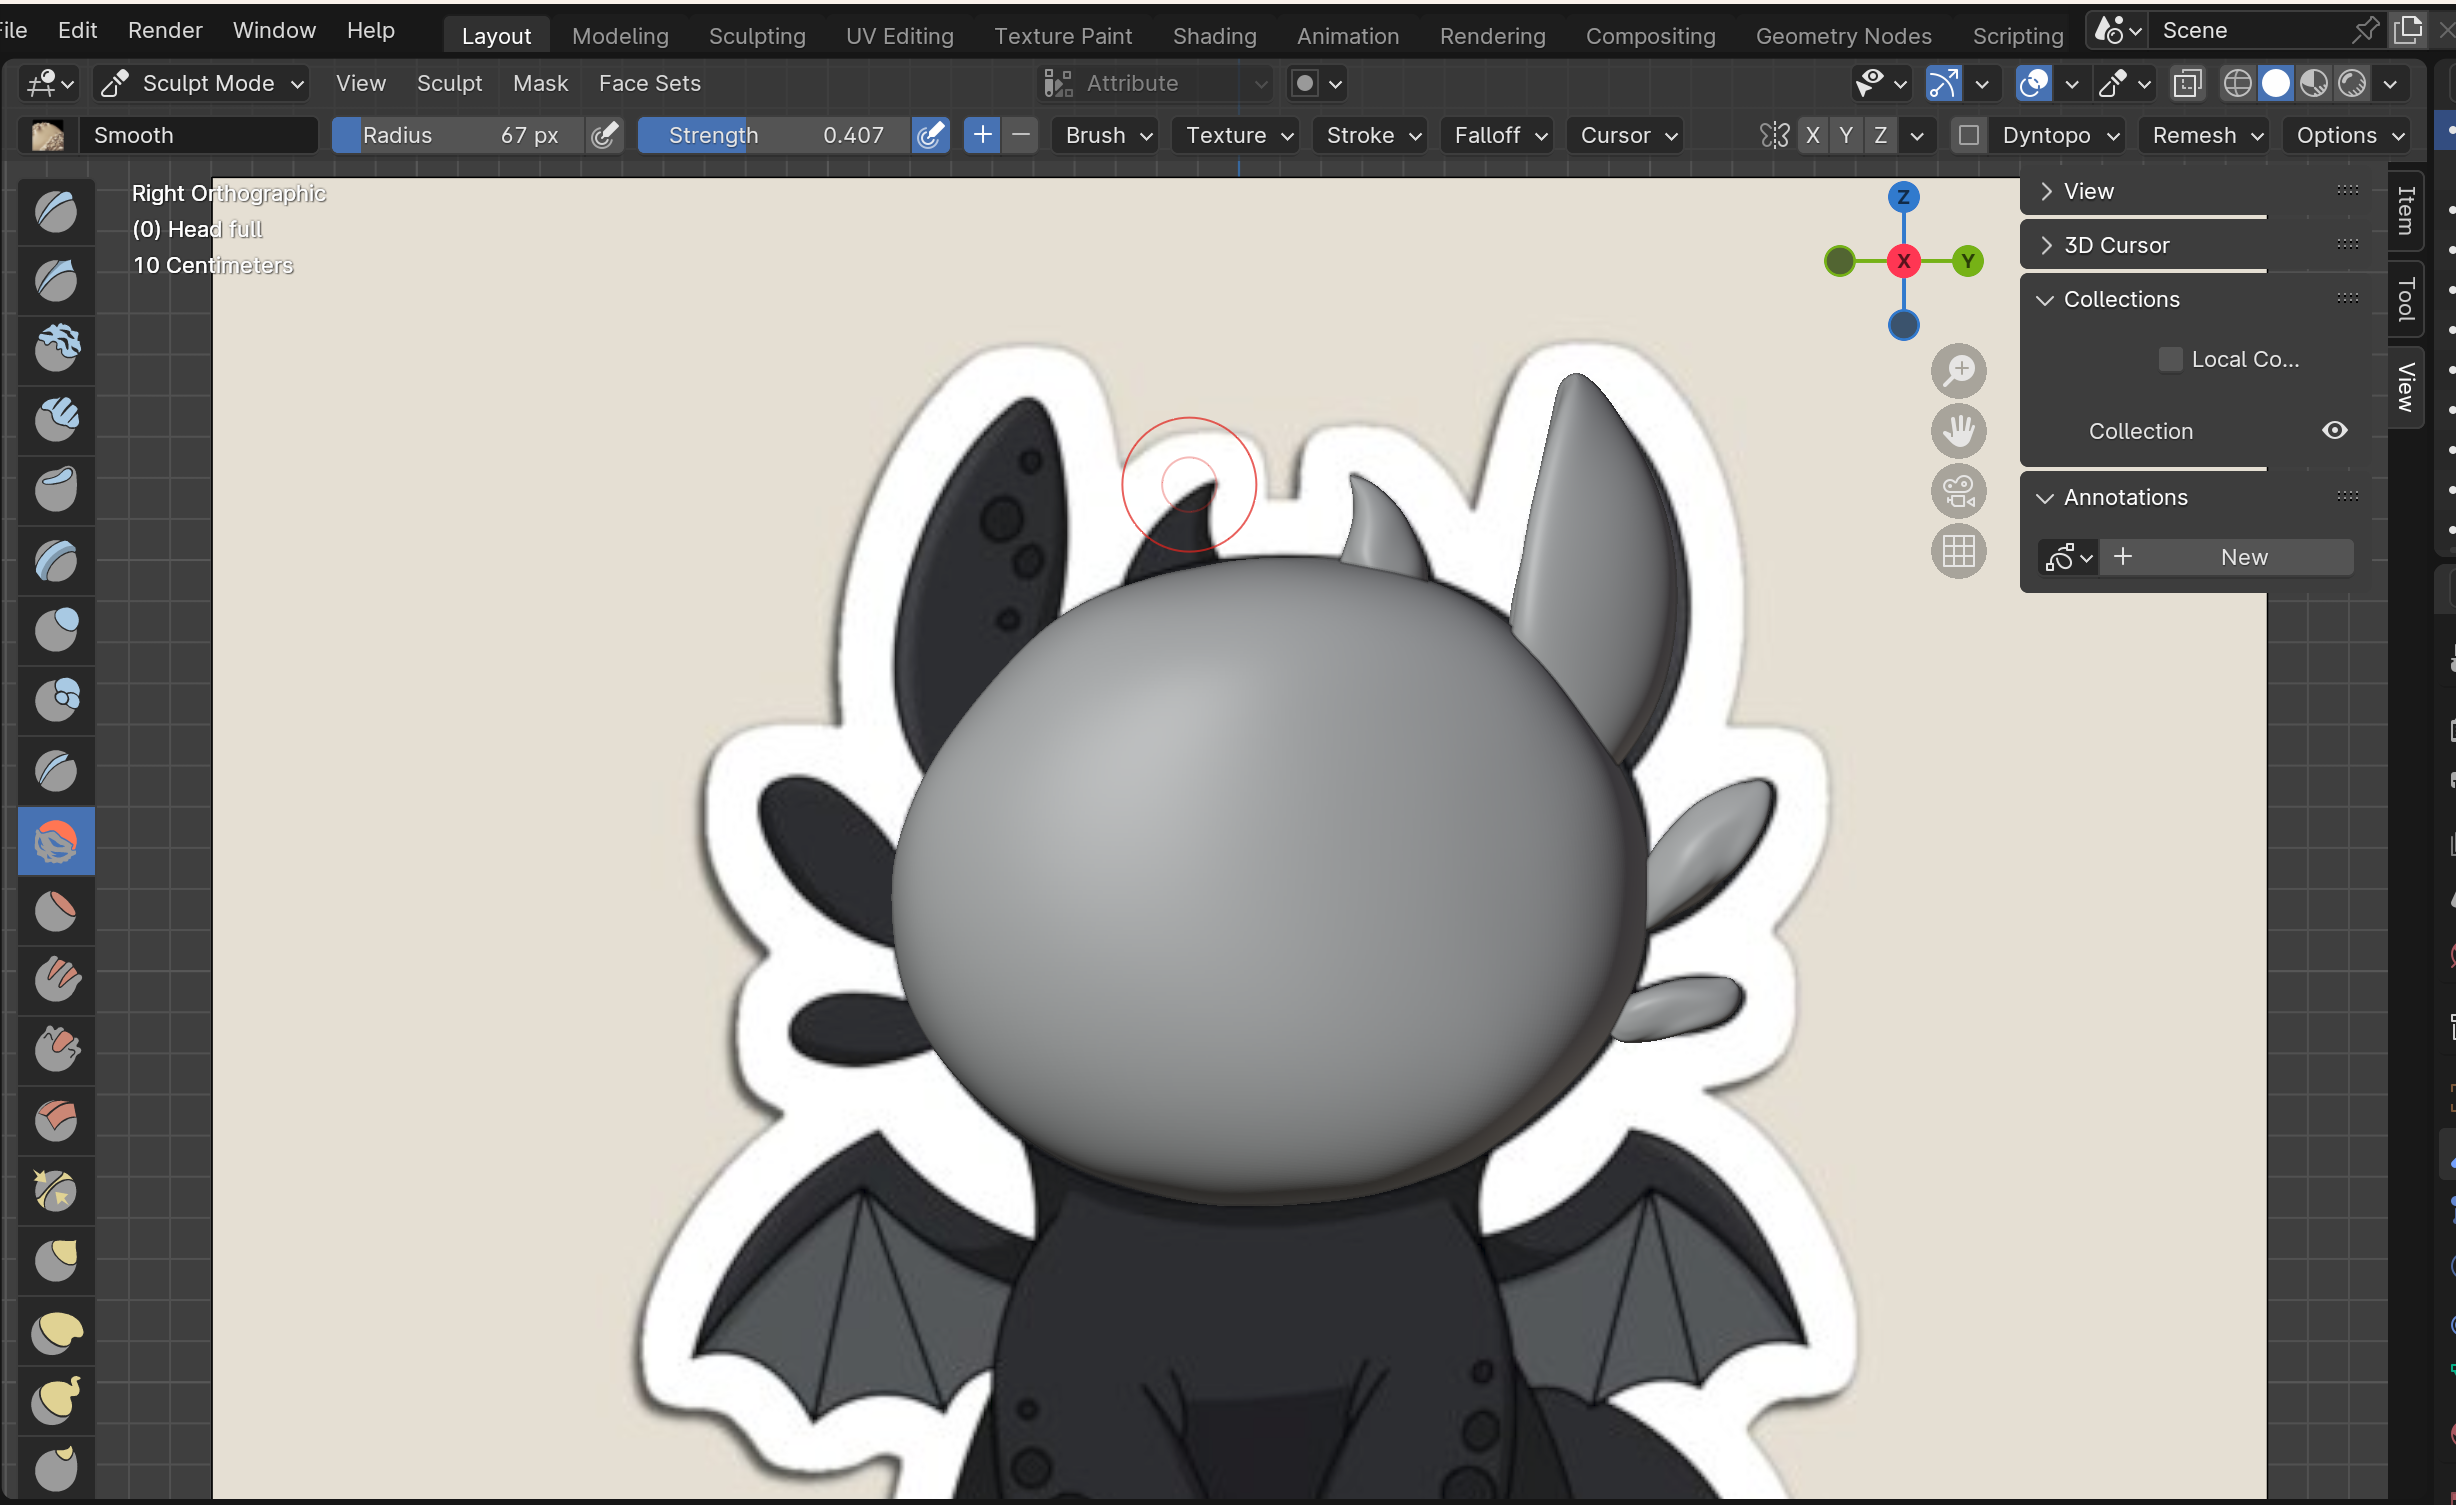
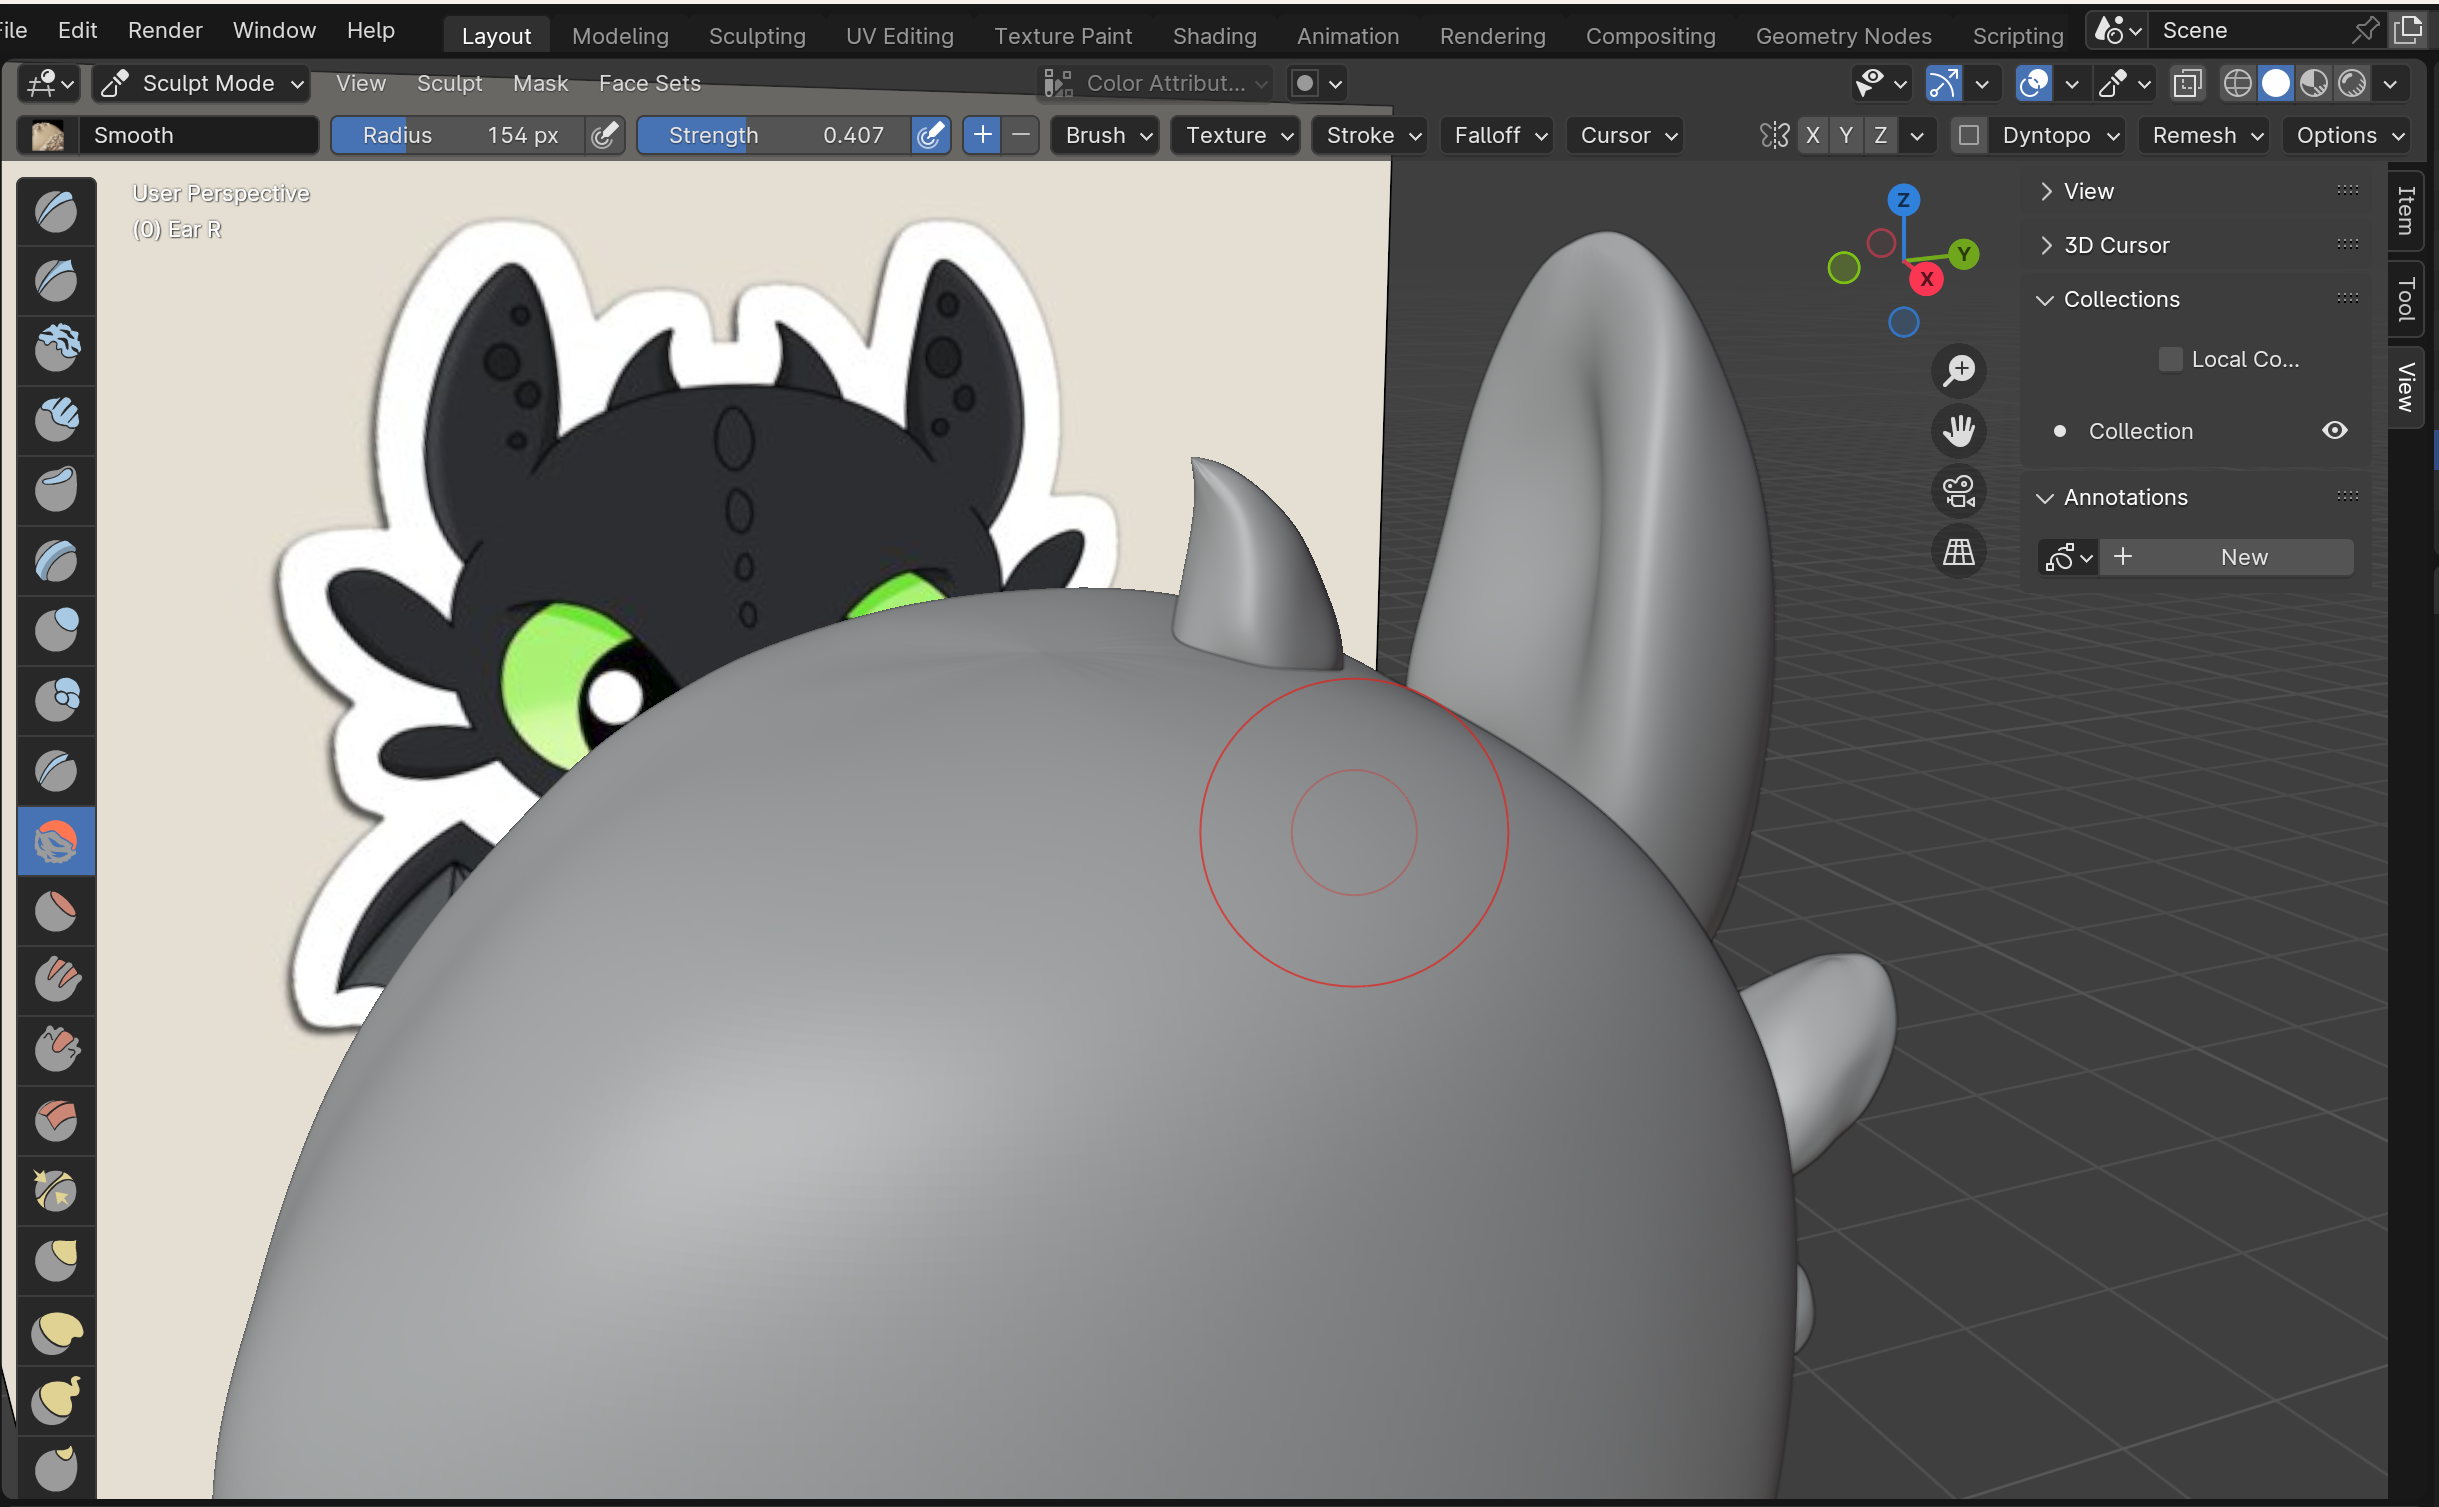
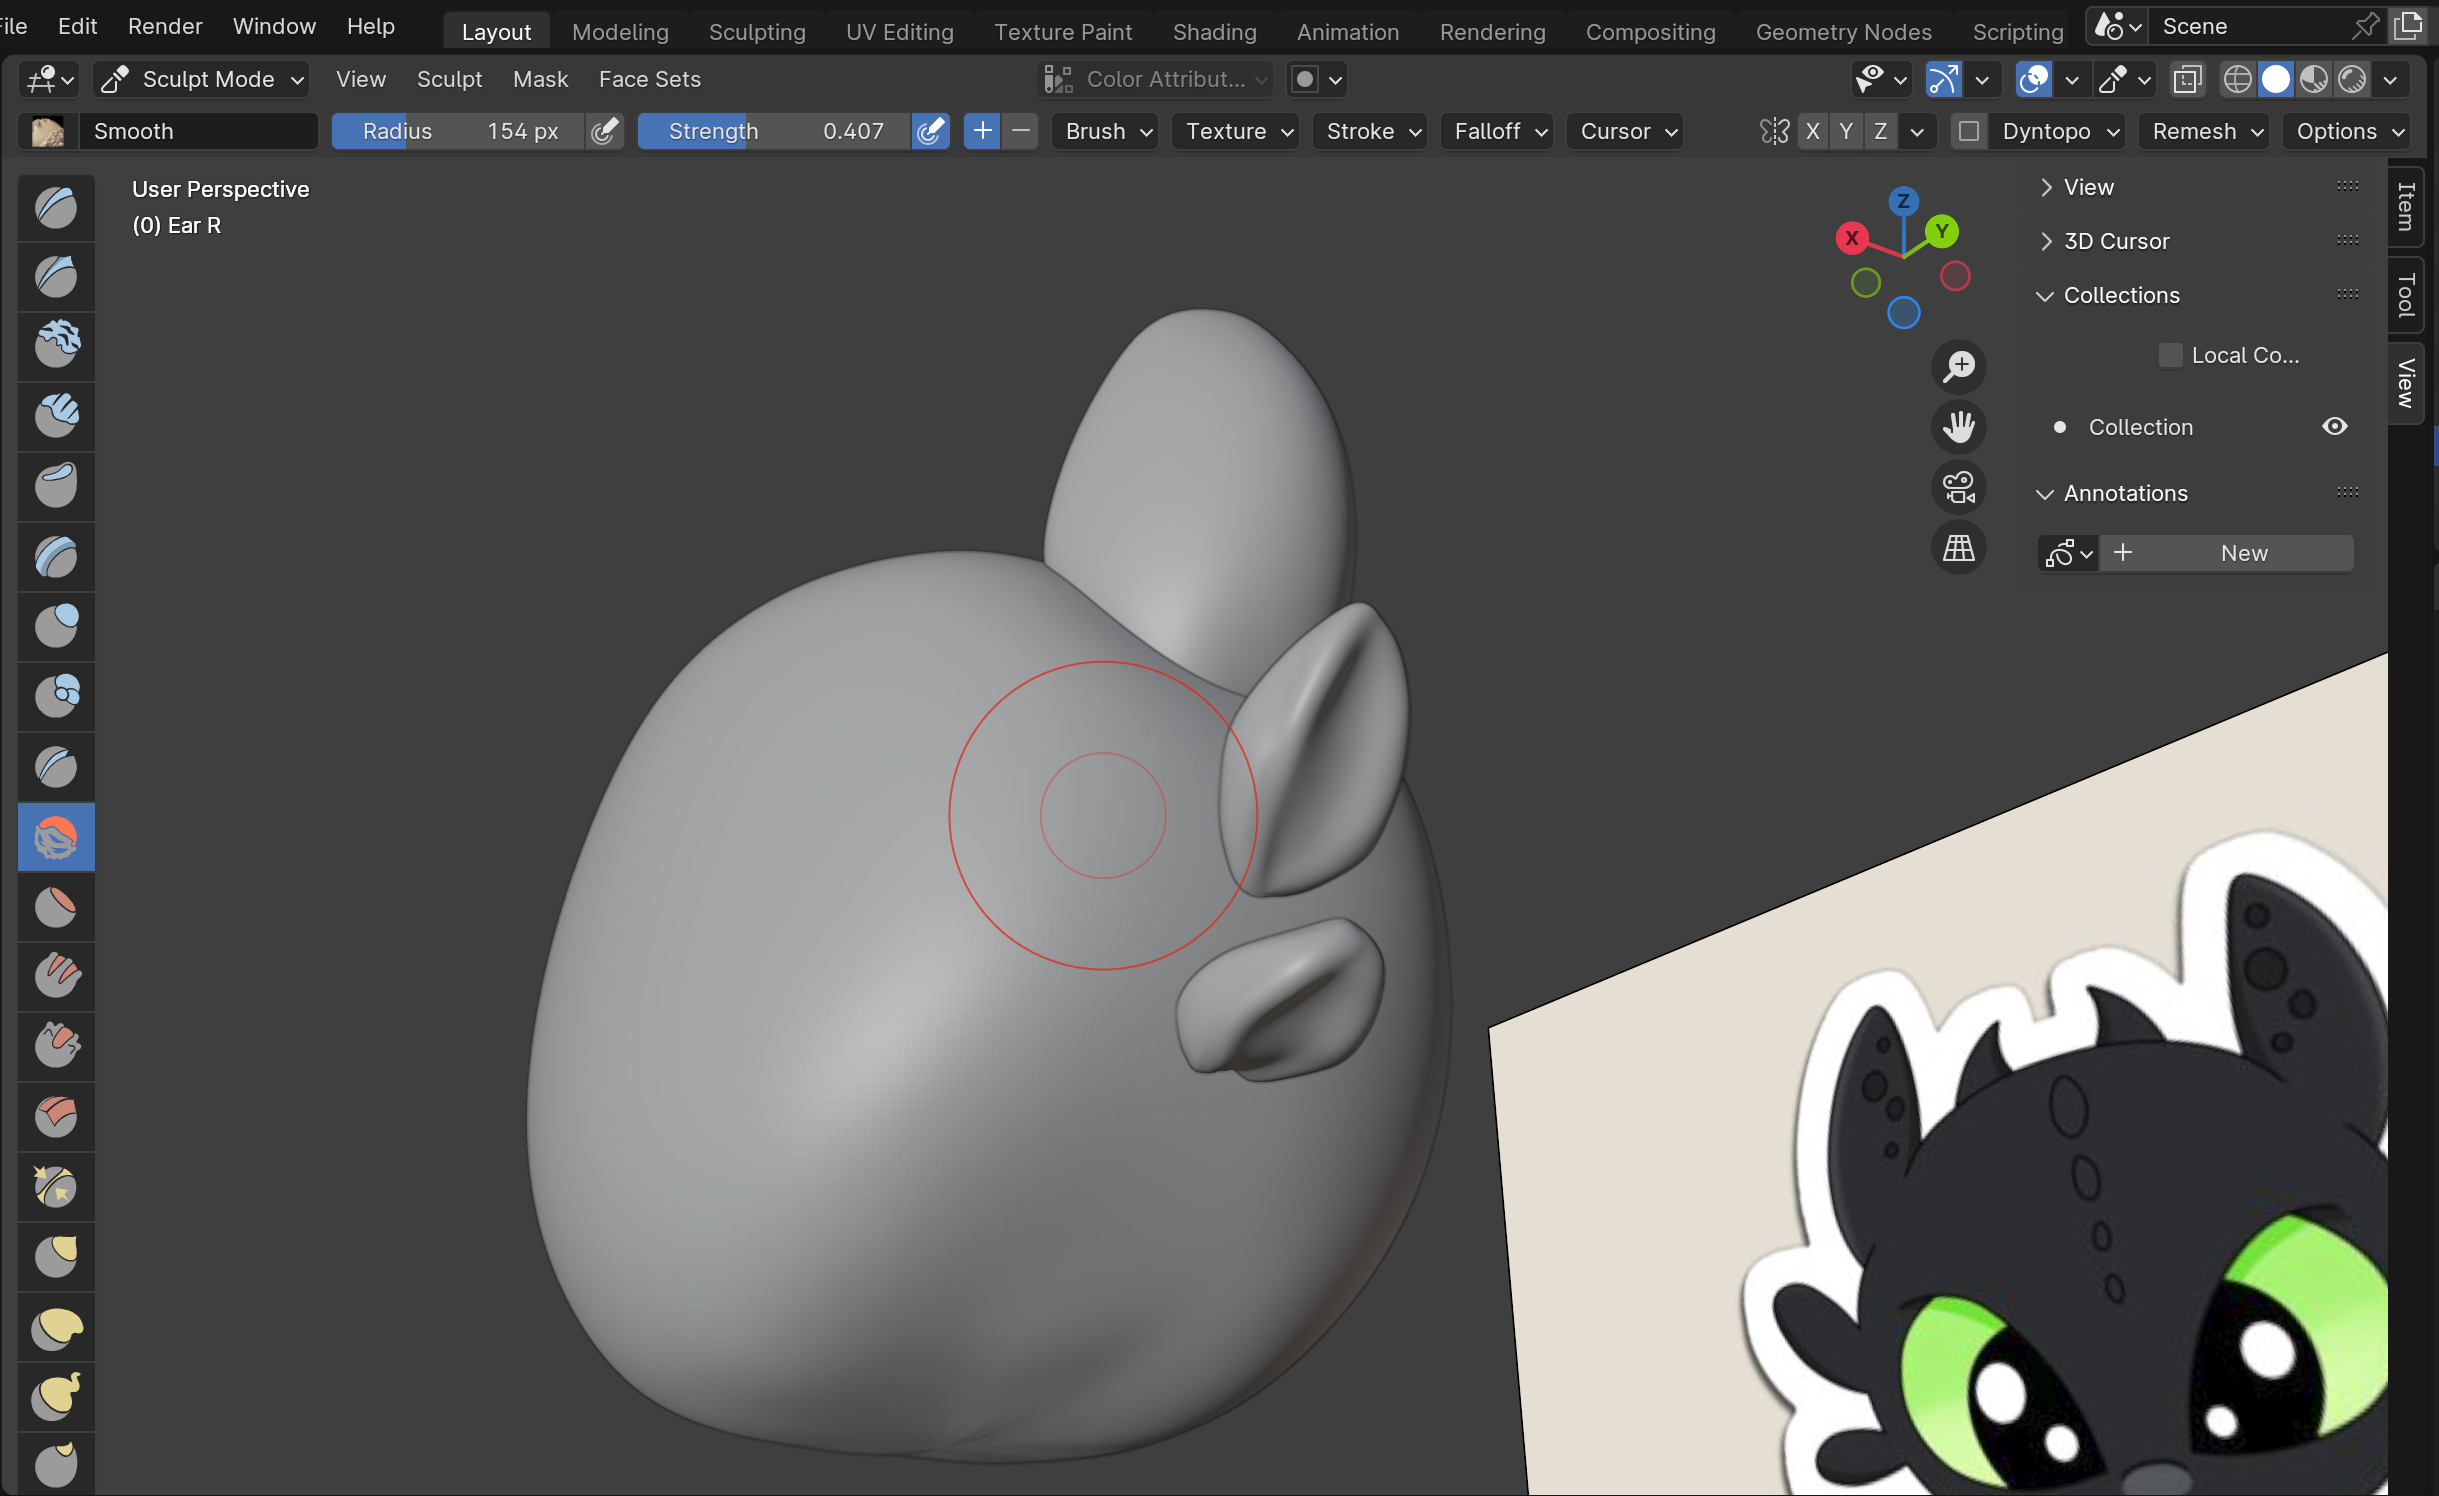
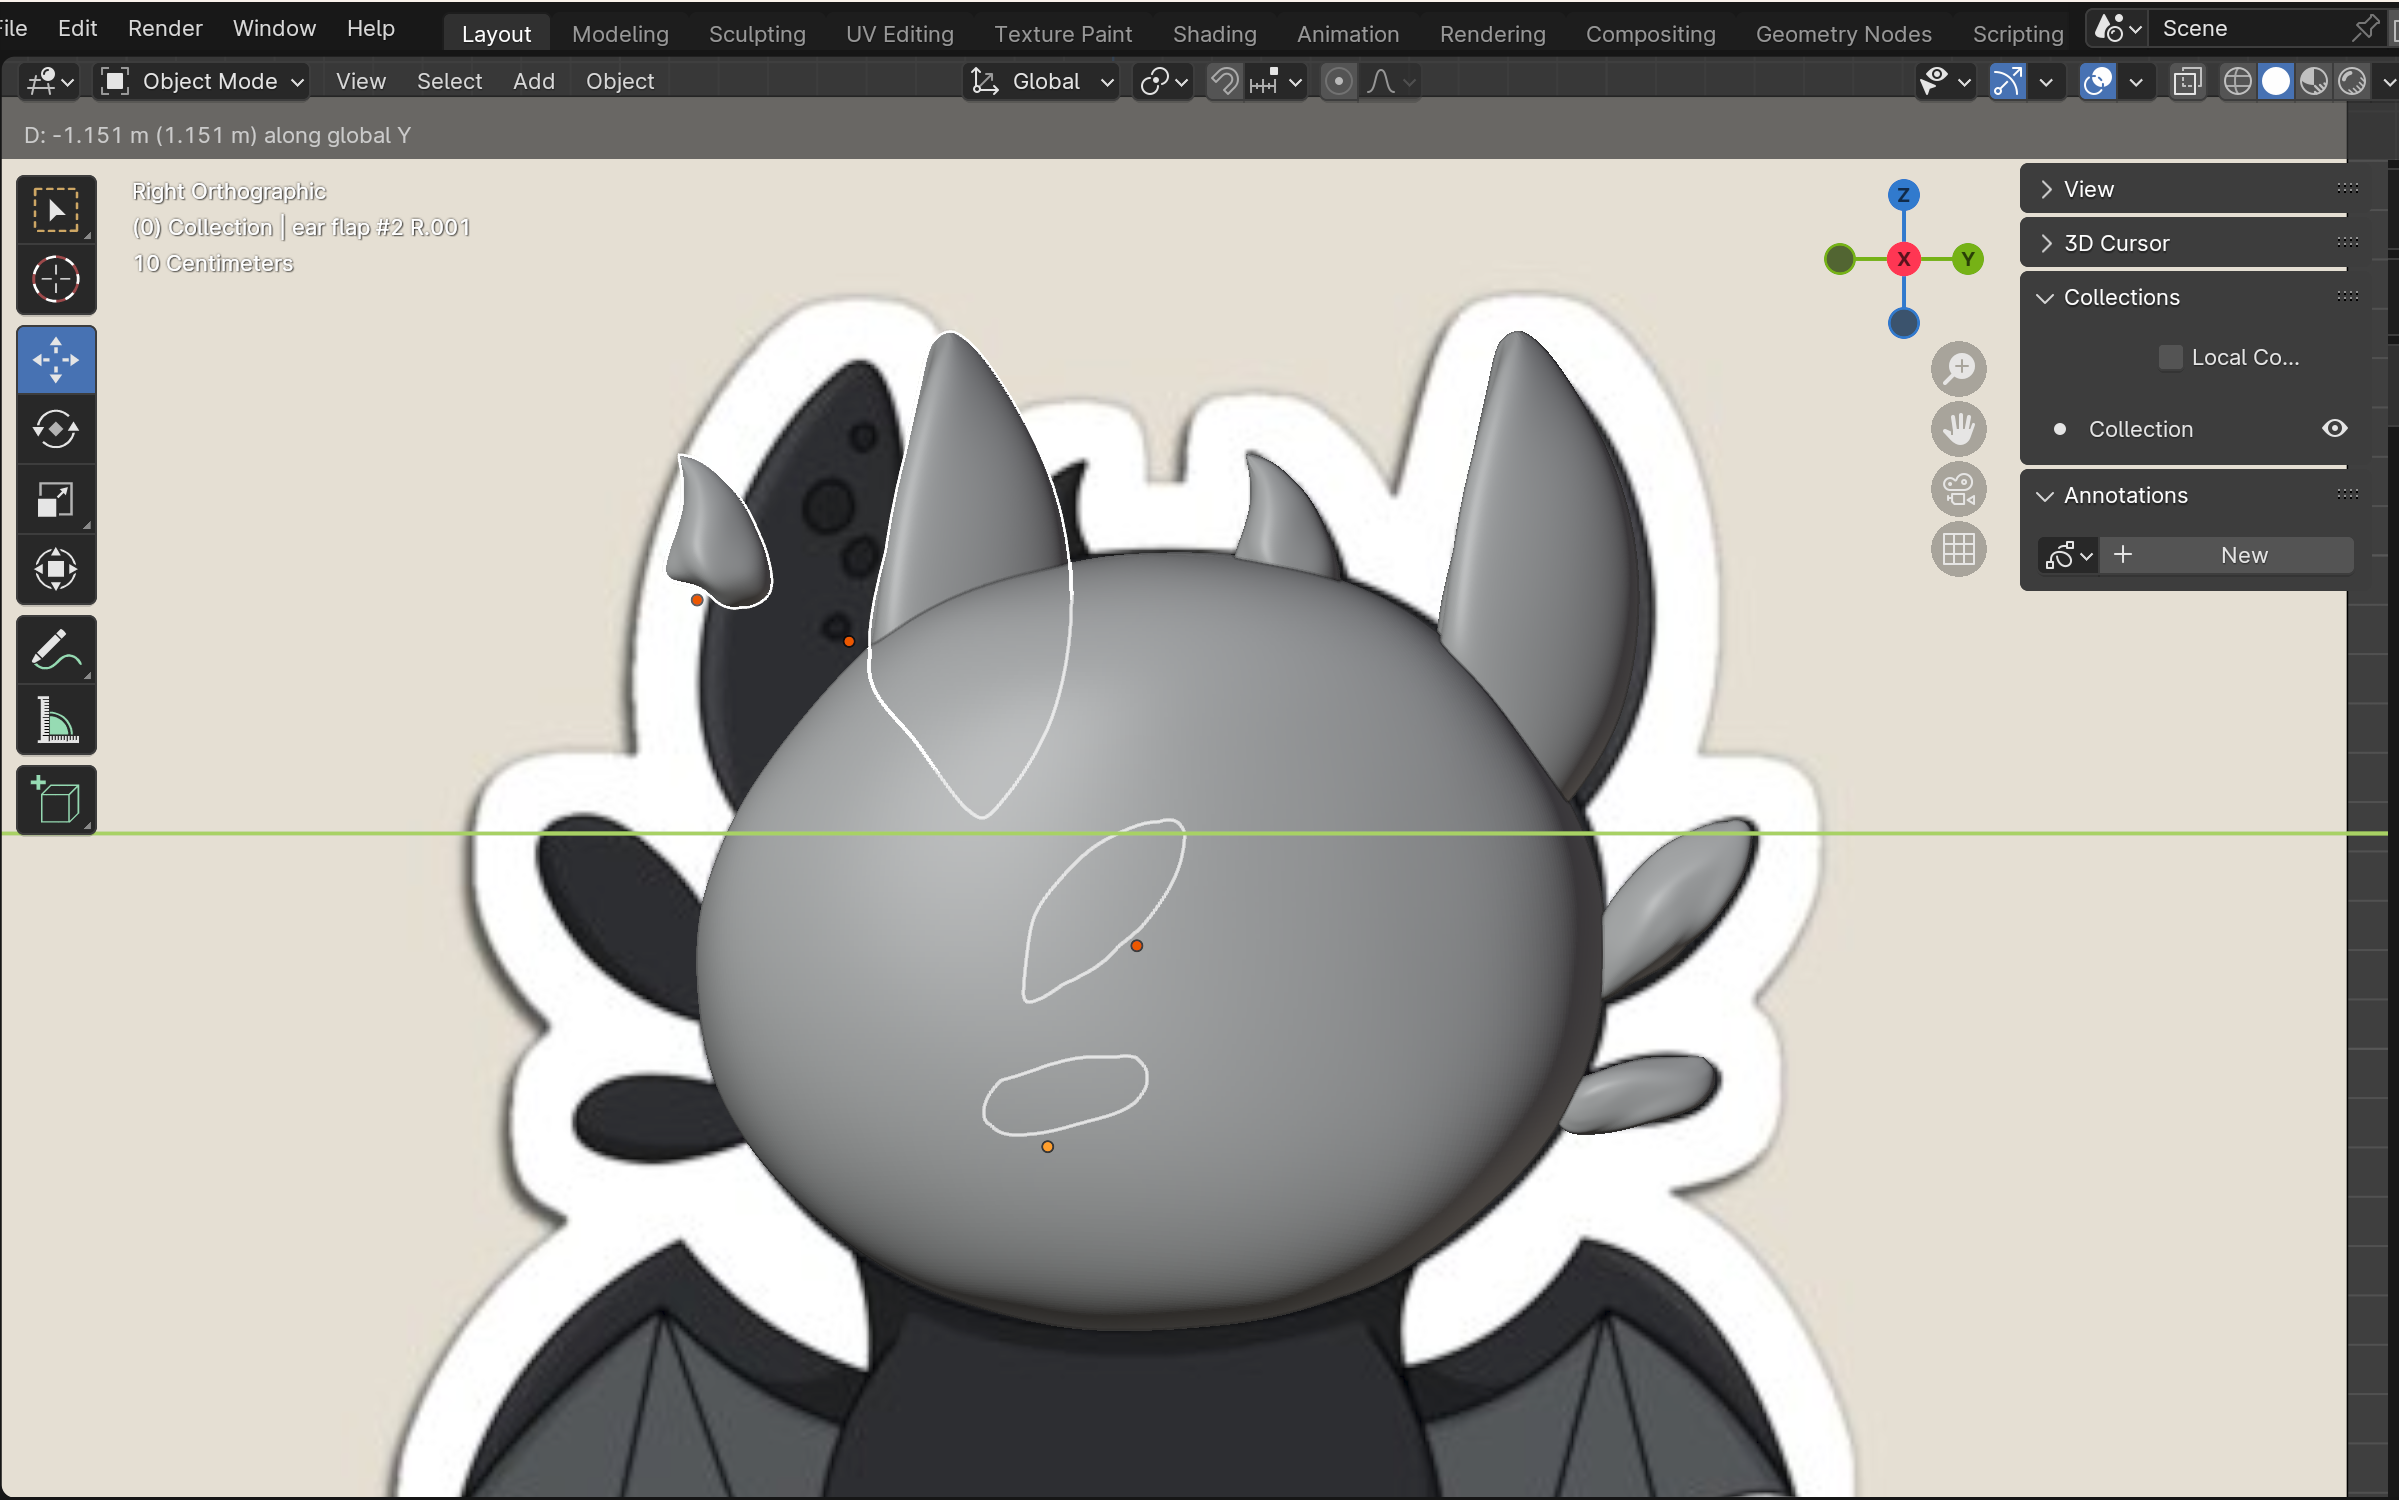
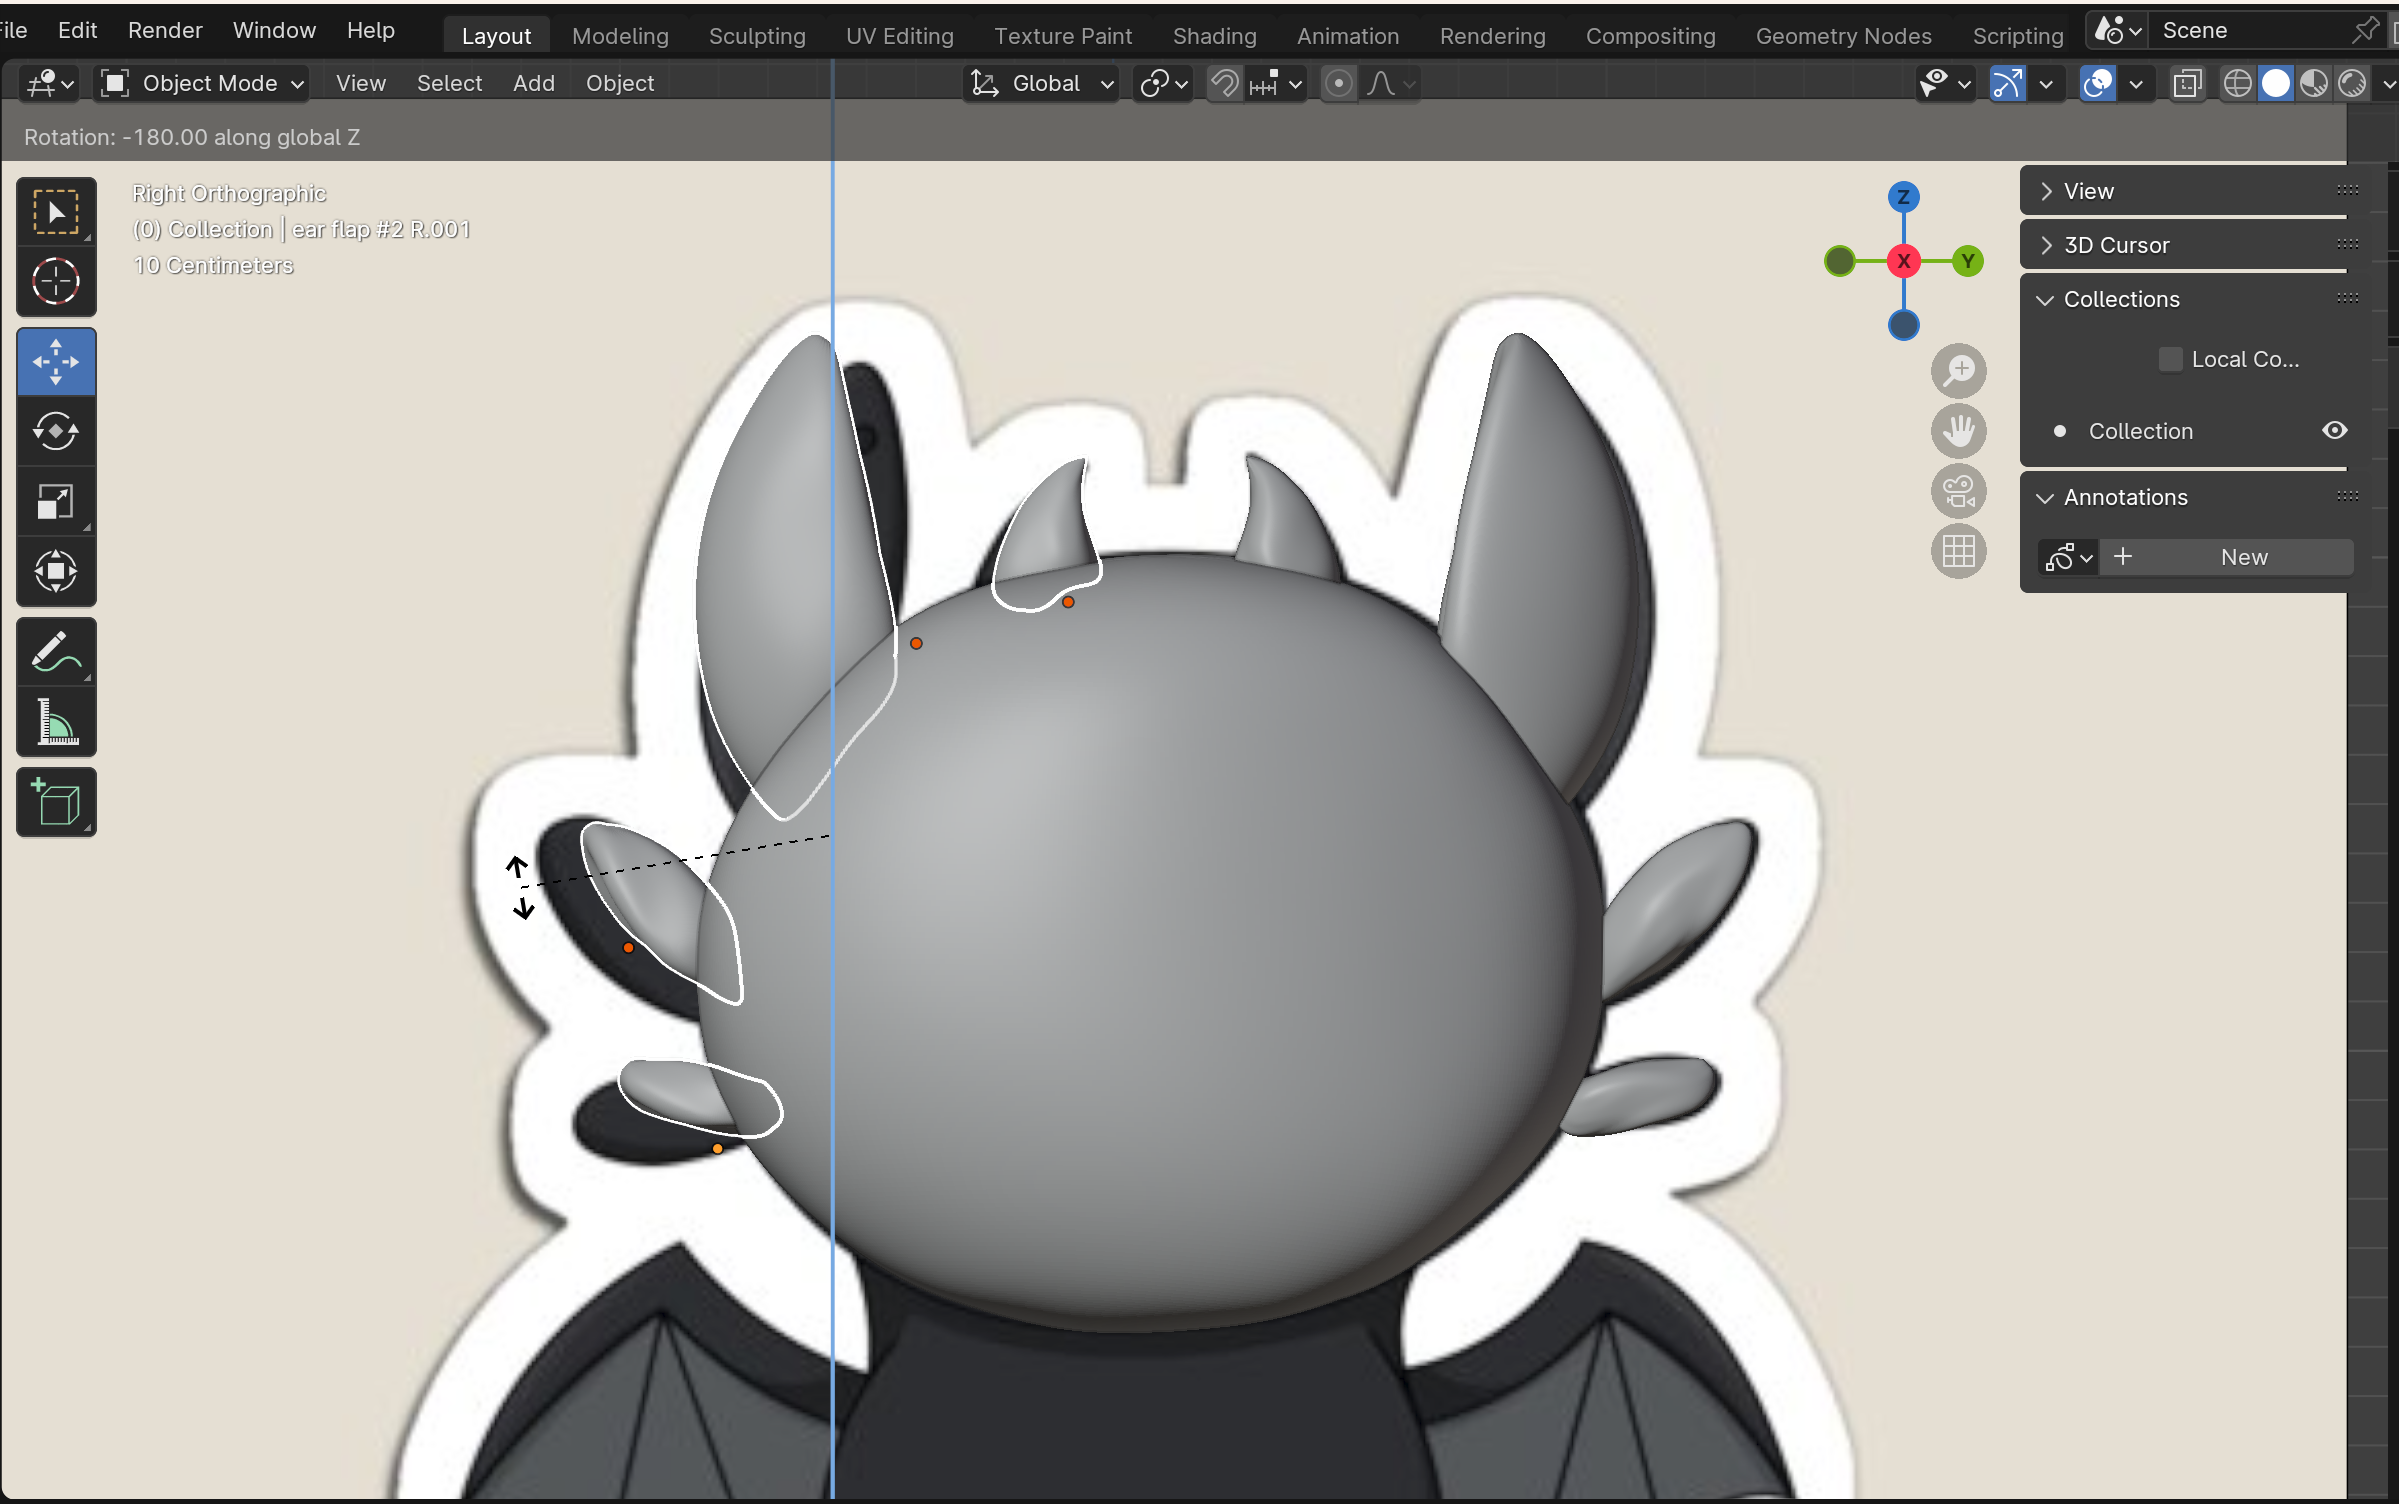
The same thing with the head, you start by adding (Shitft+A) a sphere, applying the subdivision modifier and scaling the sphere to fit the size necessary to sculpt. For the ears and horns, I again toggled X-ray and sculpted the general shape centered on the x-axis and then exited the x-axis view to create the creases of the ears. For this step I used about the same tools as previously: Smooth, Flatten, Elastic Deform and a bit of the grab tool (G). I then followed these same steps to sculpt the other two "earflaps" and the horn. As you can see I only started by creating the right side, so to do the same thing on the other side I selected and duplicated (Shift+D) all the parts I had just made, then moved the duplicated pieces along the y-axis (Press the Y-key right after duplicating). After moving them to the left I rotated (R) them a full 180 degrees along the Z-axis (Z) and to be more precise with the rotation you can press the Ctrl key to move in 5 unit intervals as you rotate. As can be seen in the image, the mirroring will not look perfect so if you'd like you can adjust anything you may like, but keep in mind the image itself is not perfectly mirrored. I would also like to mention that there is a mirror command that I believe could be used from the beginning to make everything perfectly mirrored after only working on one side but I personally do not know how to use it. (Now I finally know. You duplicate the object and mirror it with Ctrl+M)
!!!! MAKE SURE TO NAME YOUR OBJECTS AS YOU CREATE THEM TO NOT LOSE TRACK OF ANYTHING !!!!
Sculpting the Body
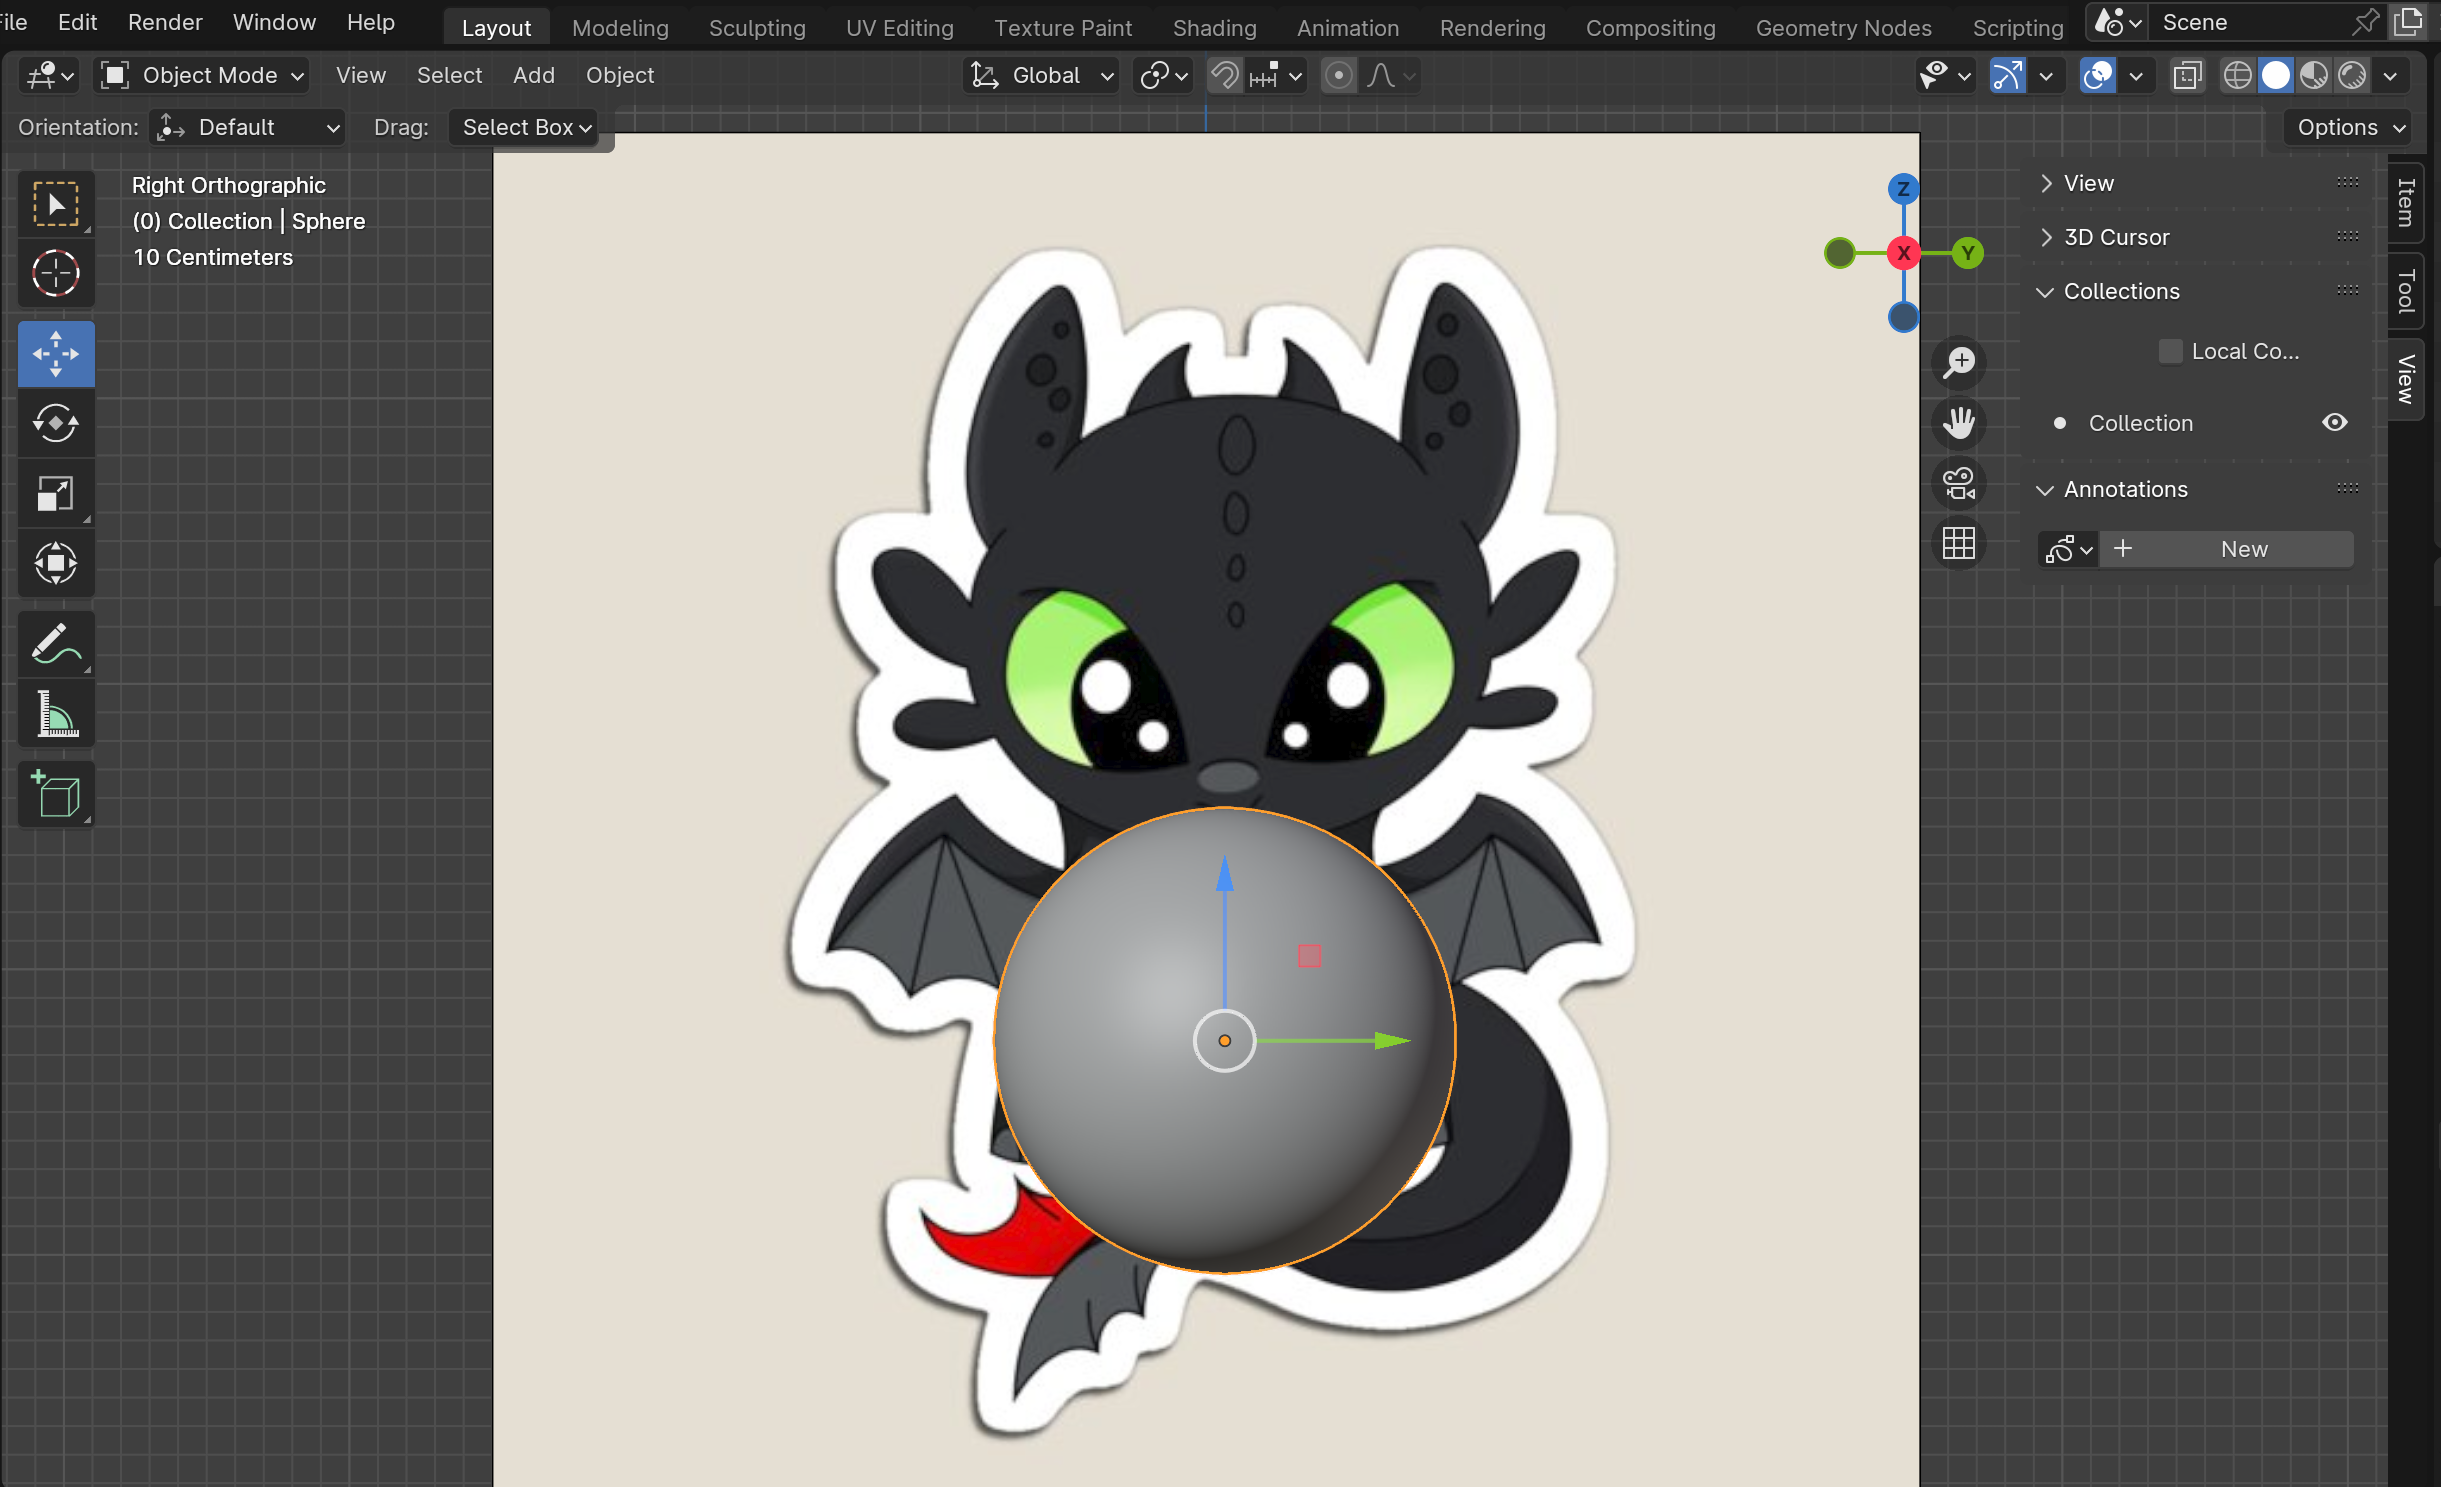
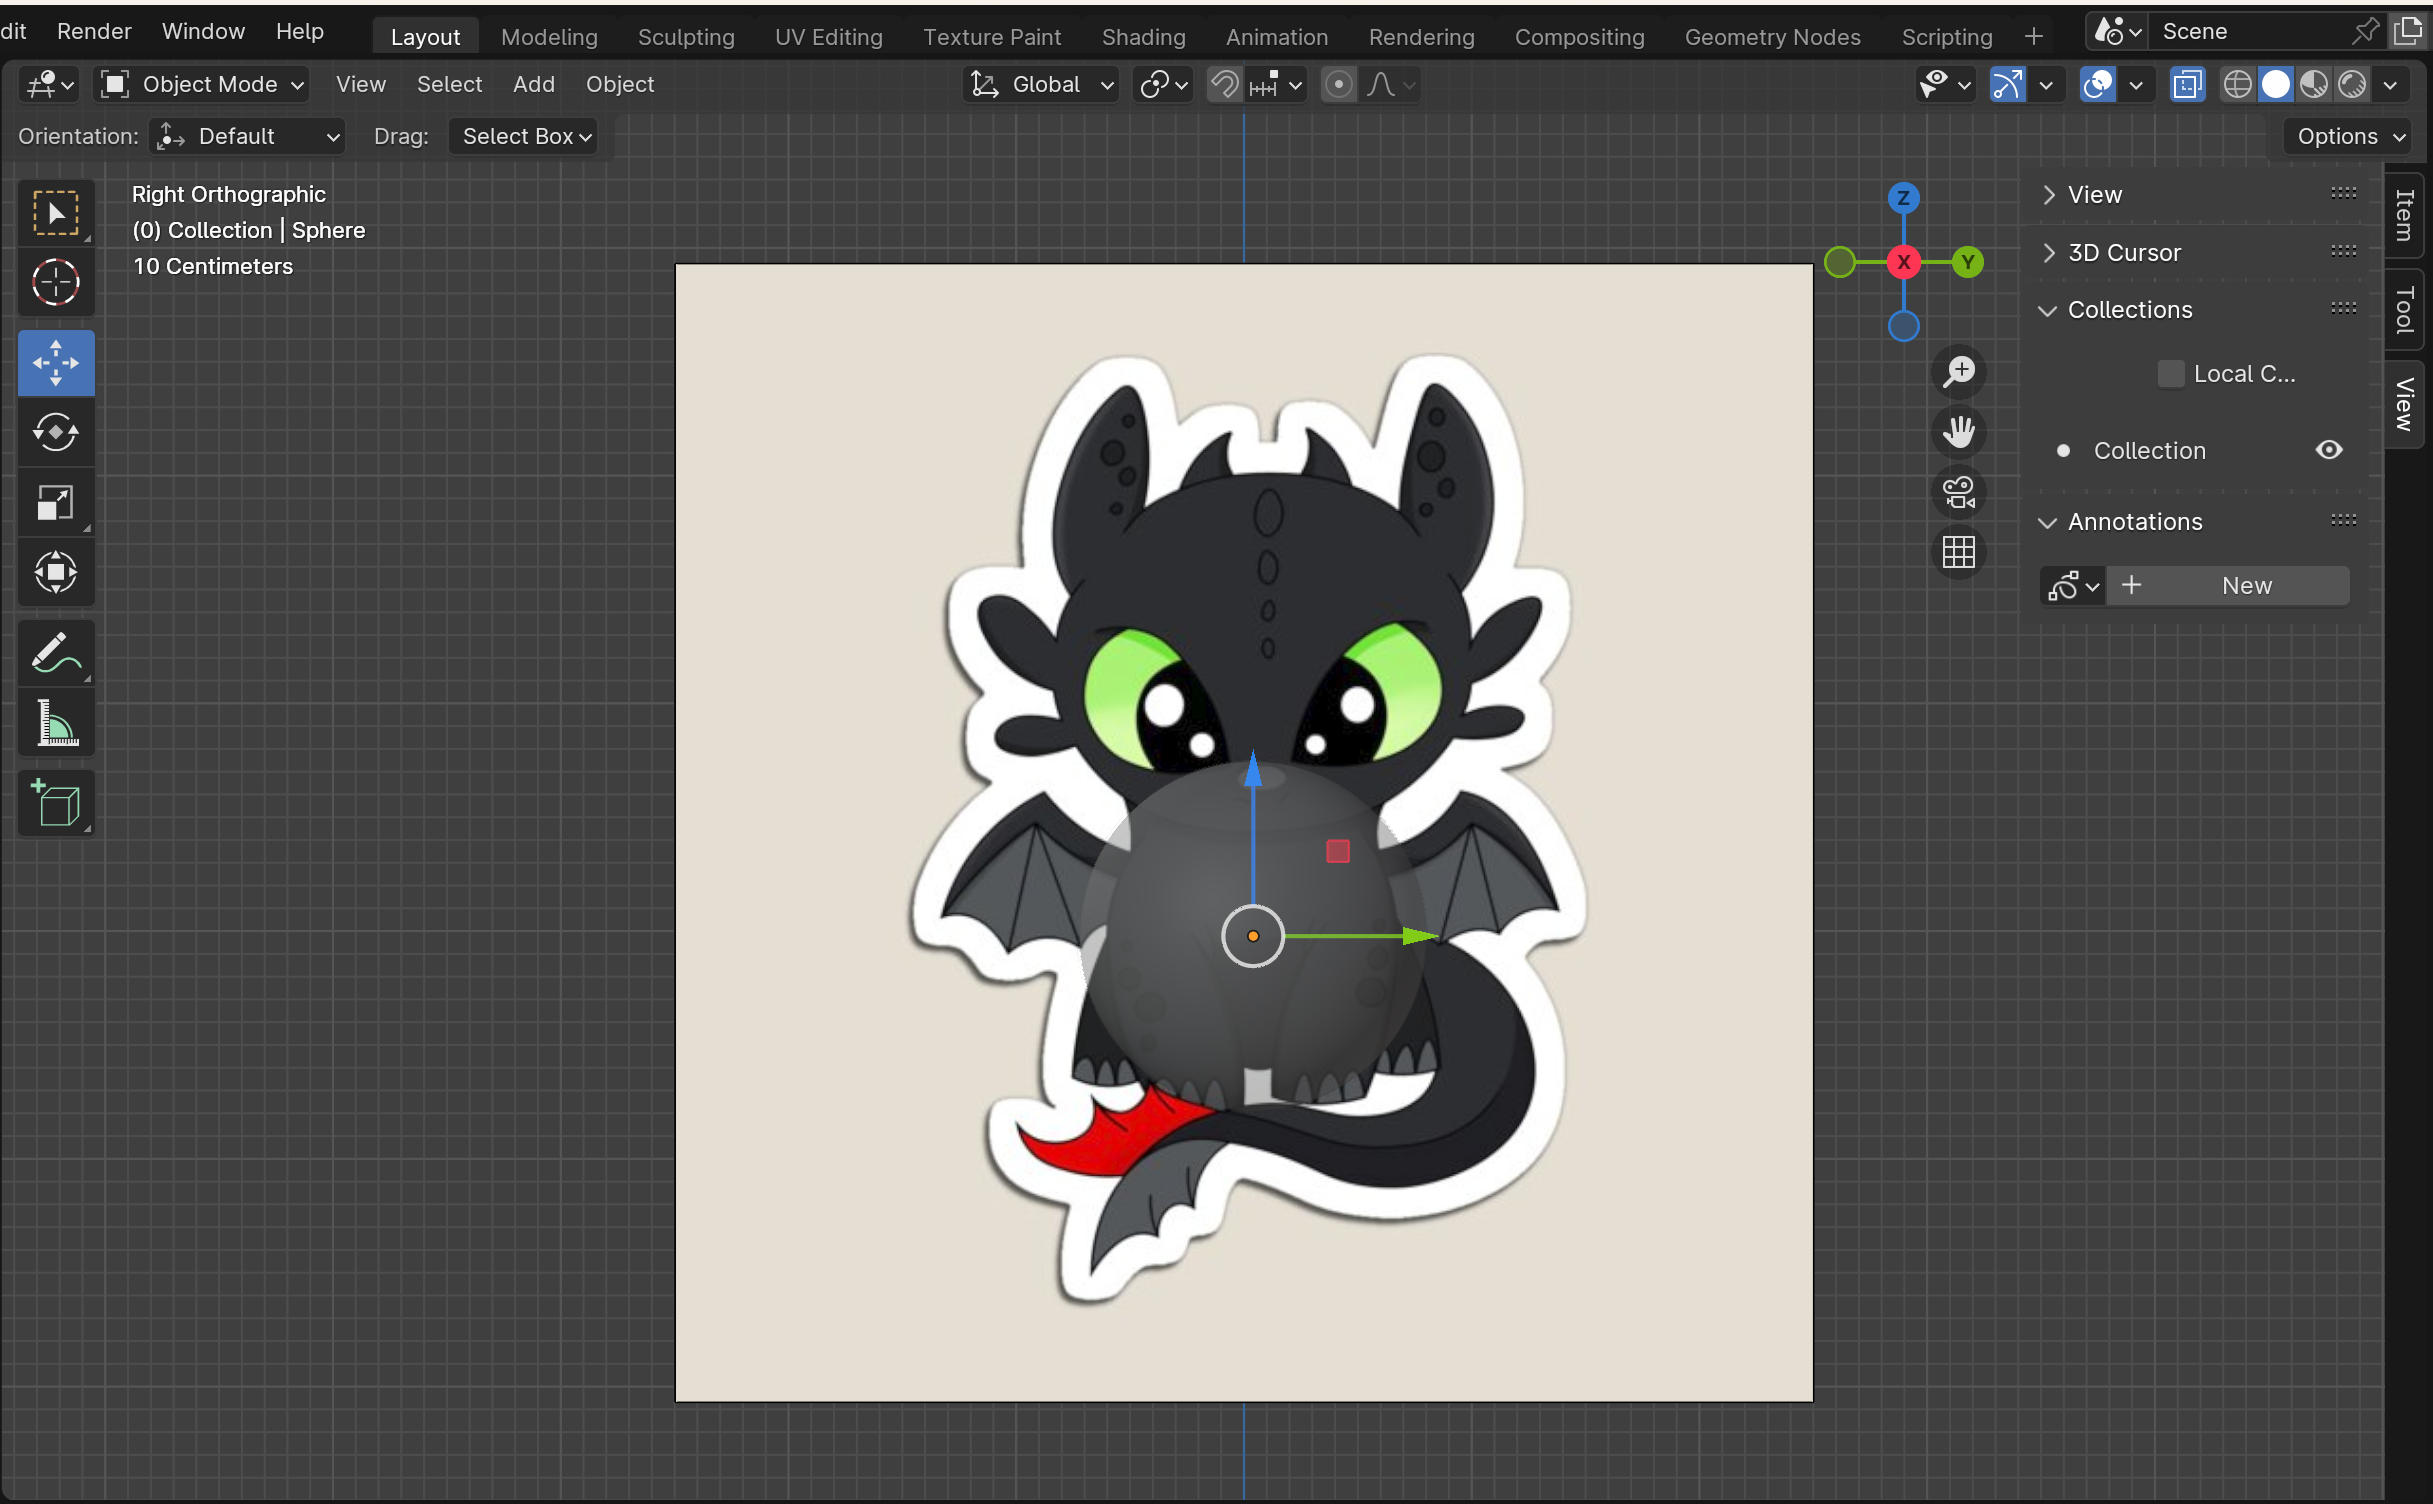
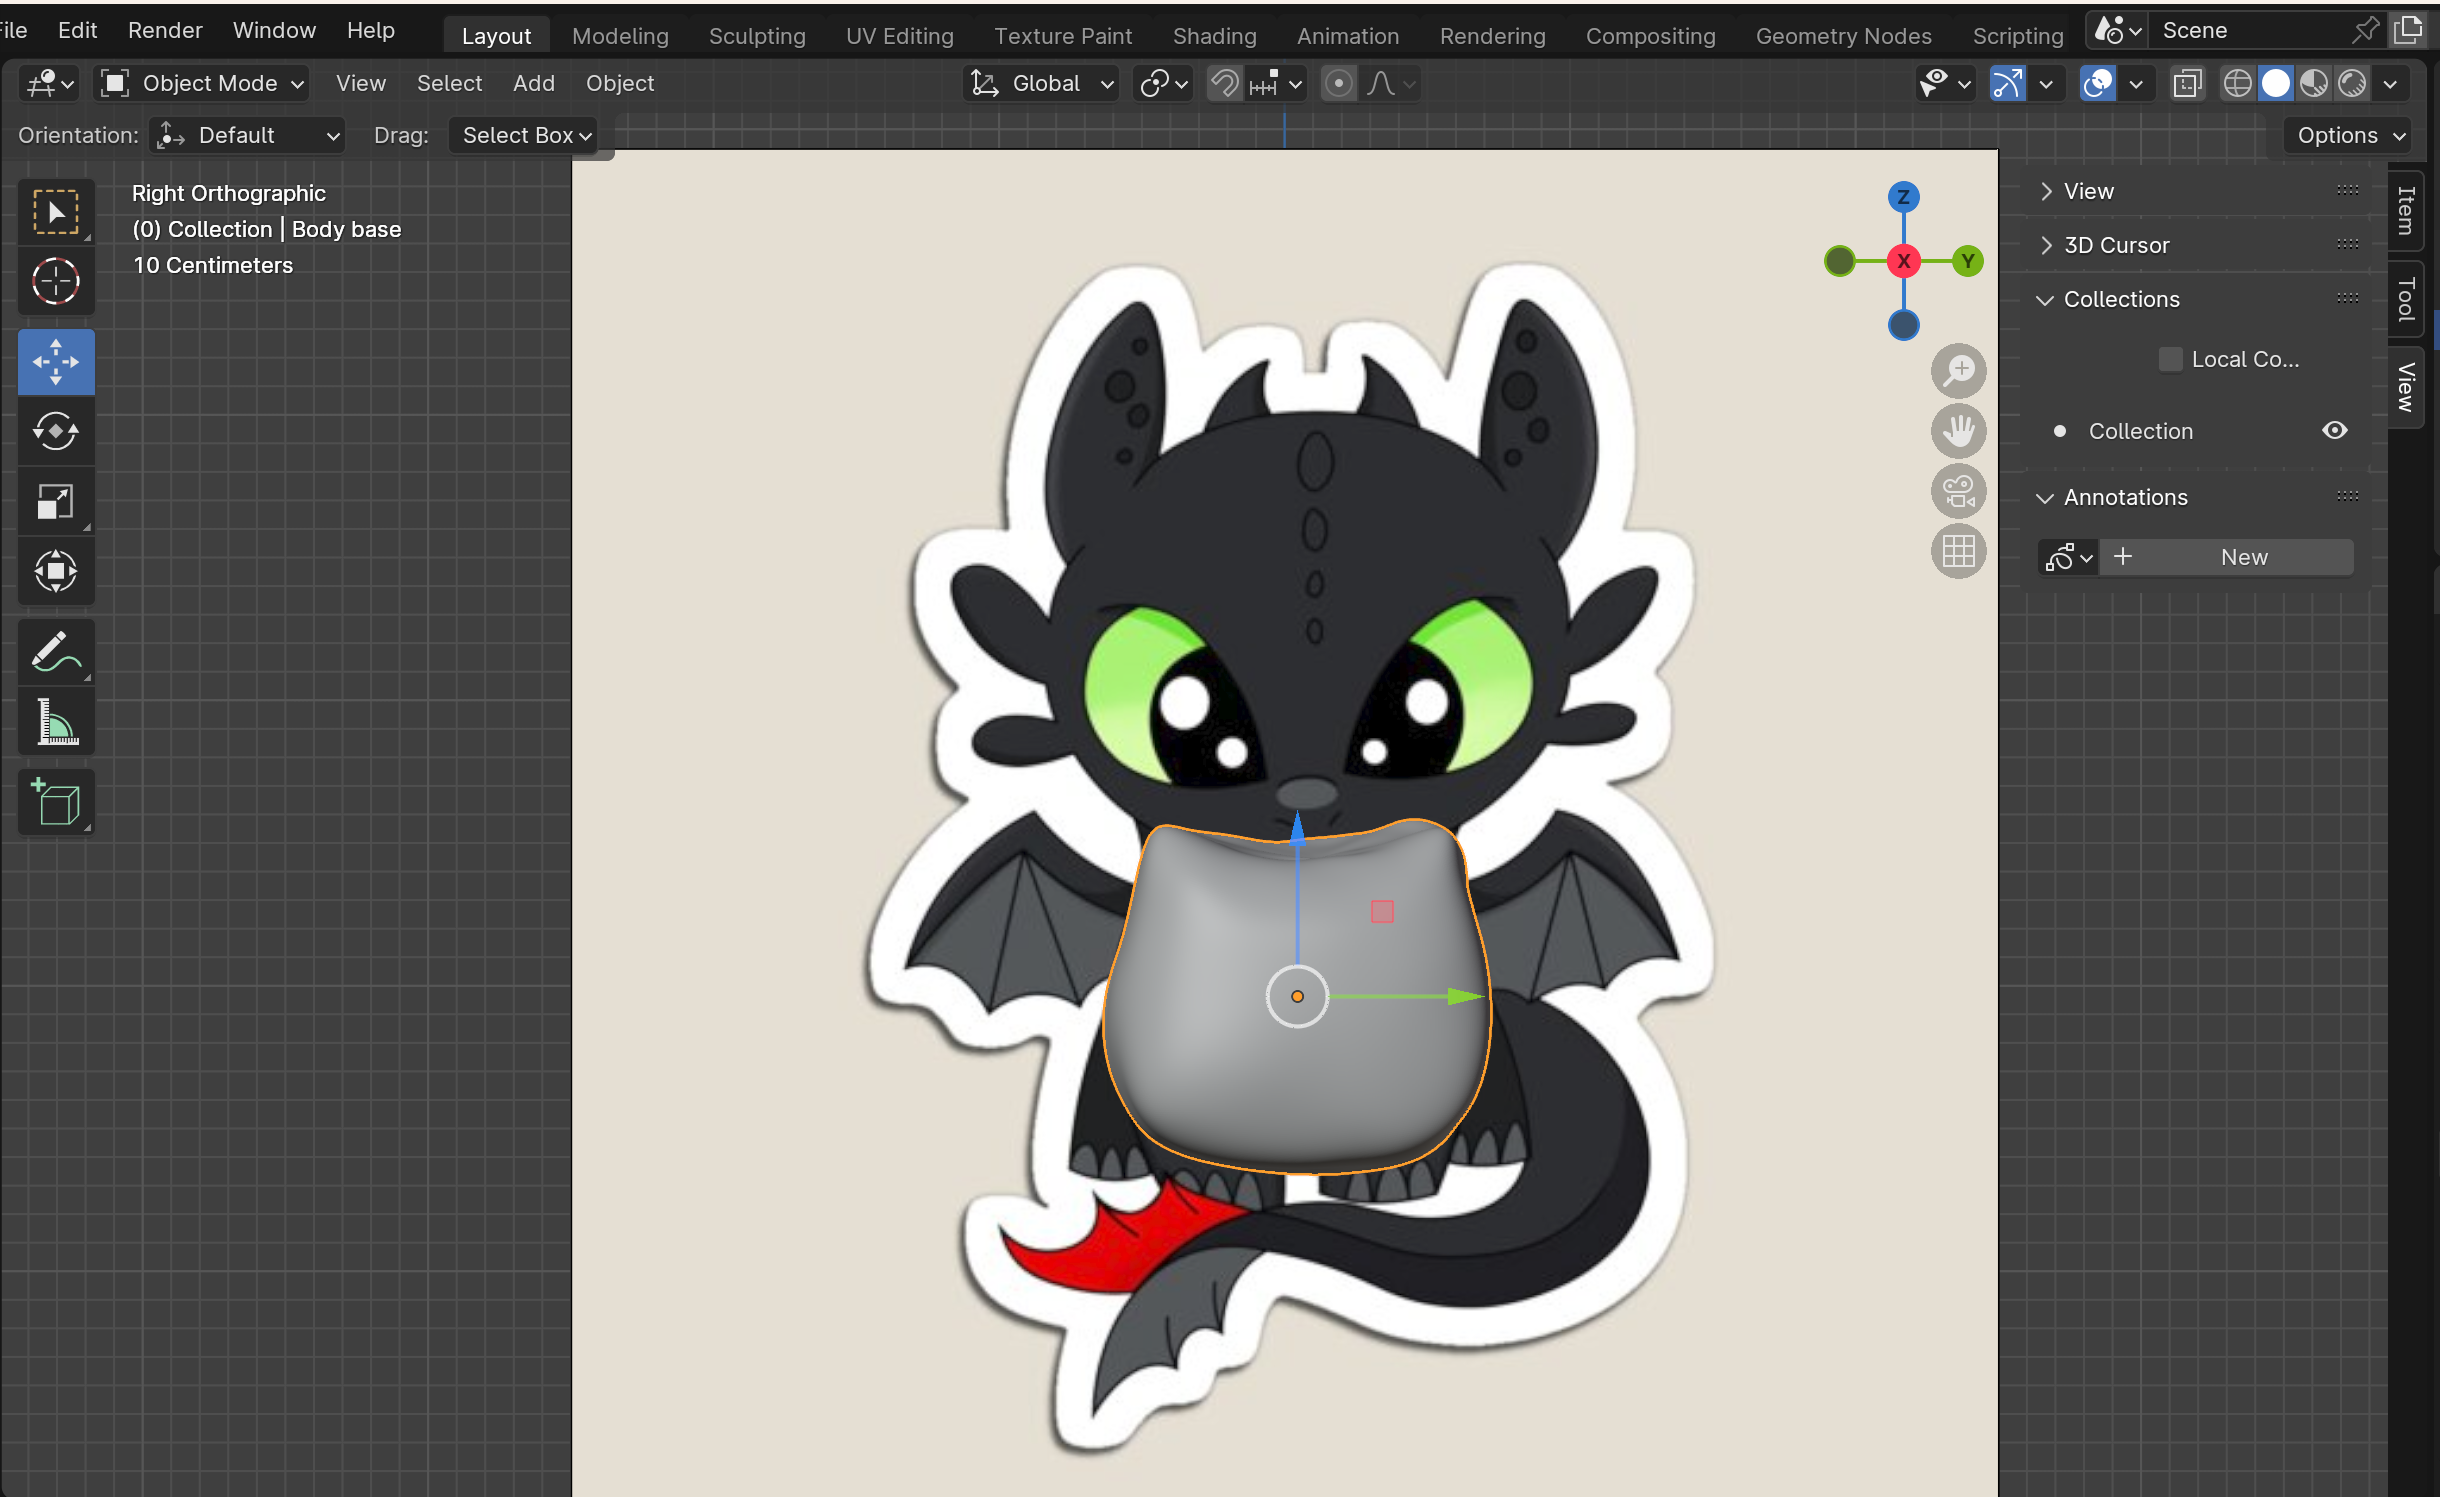
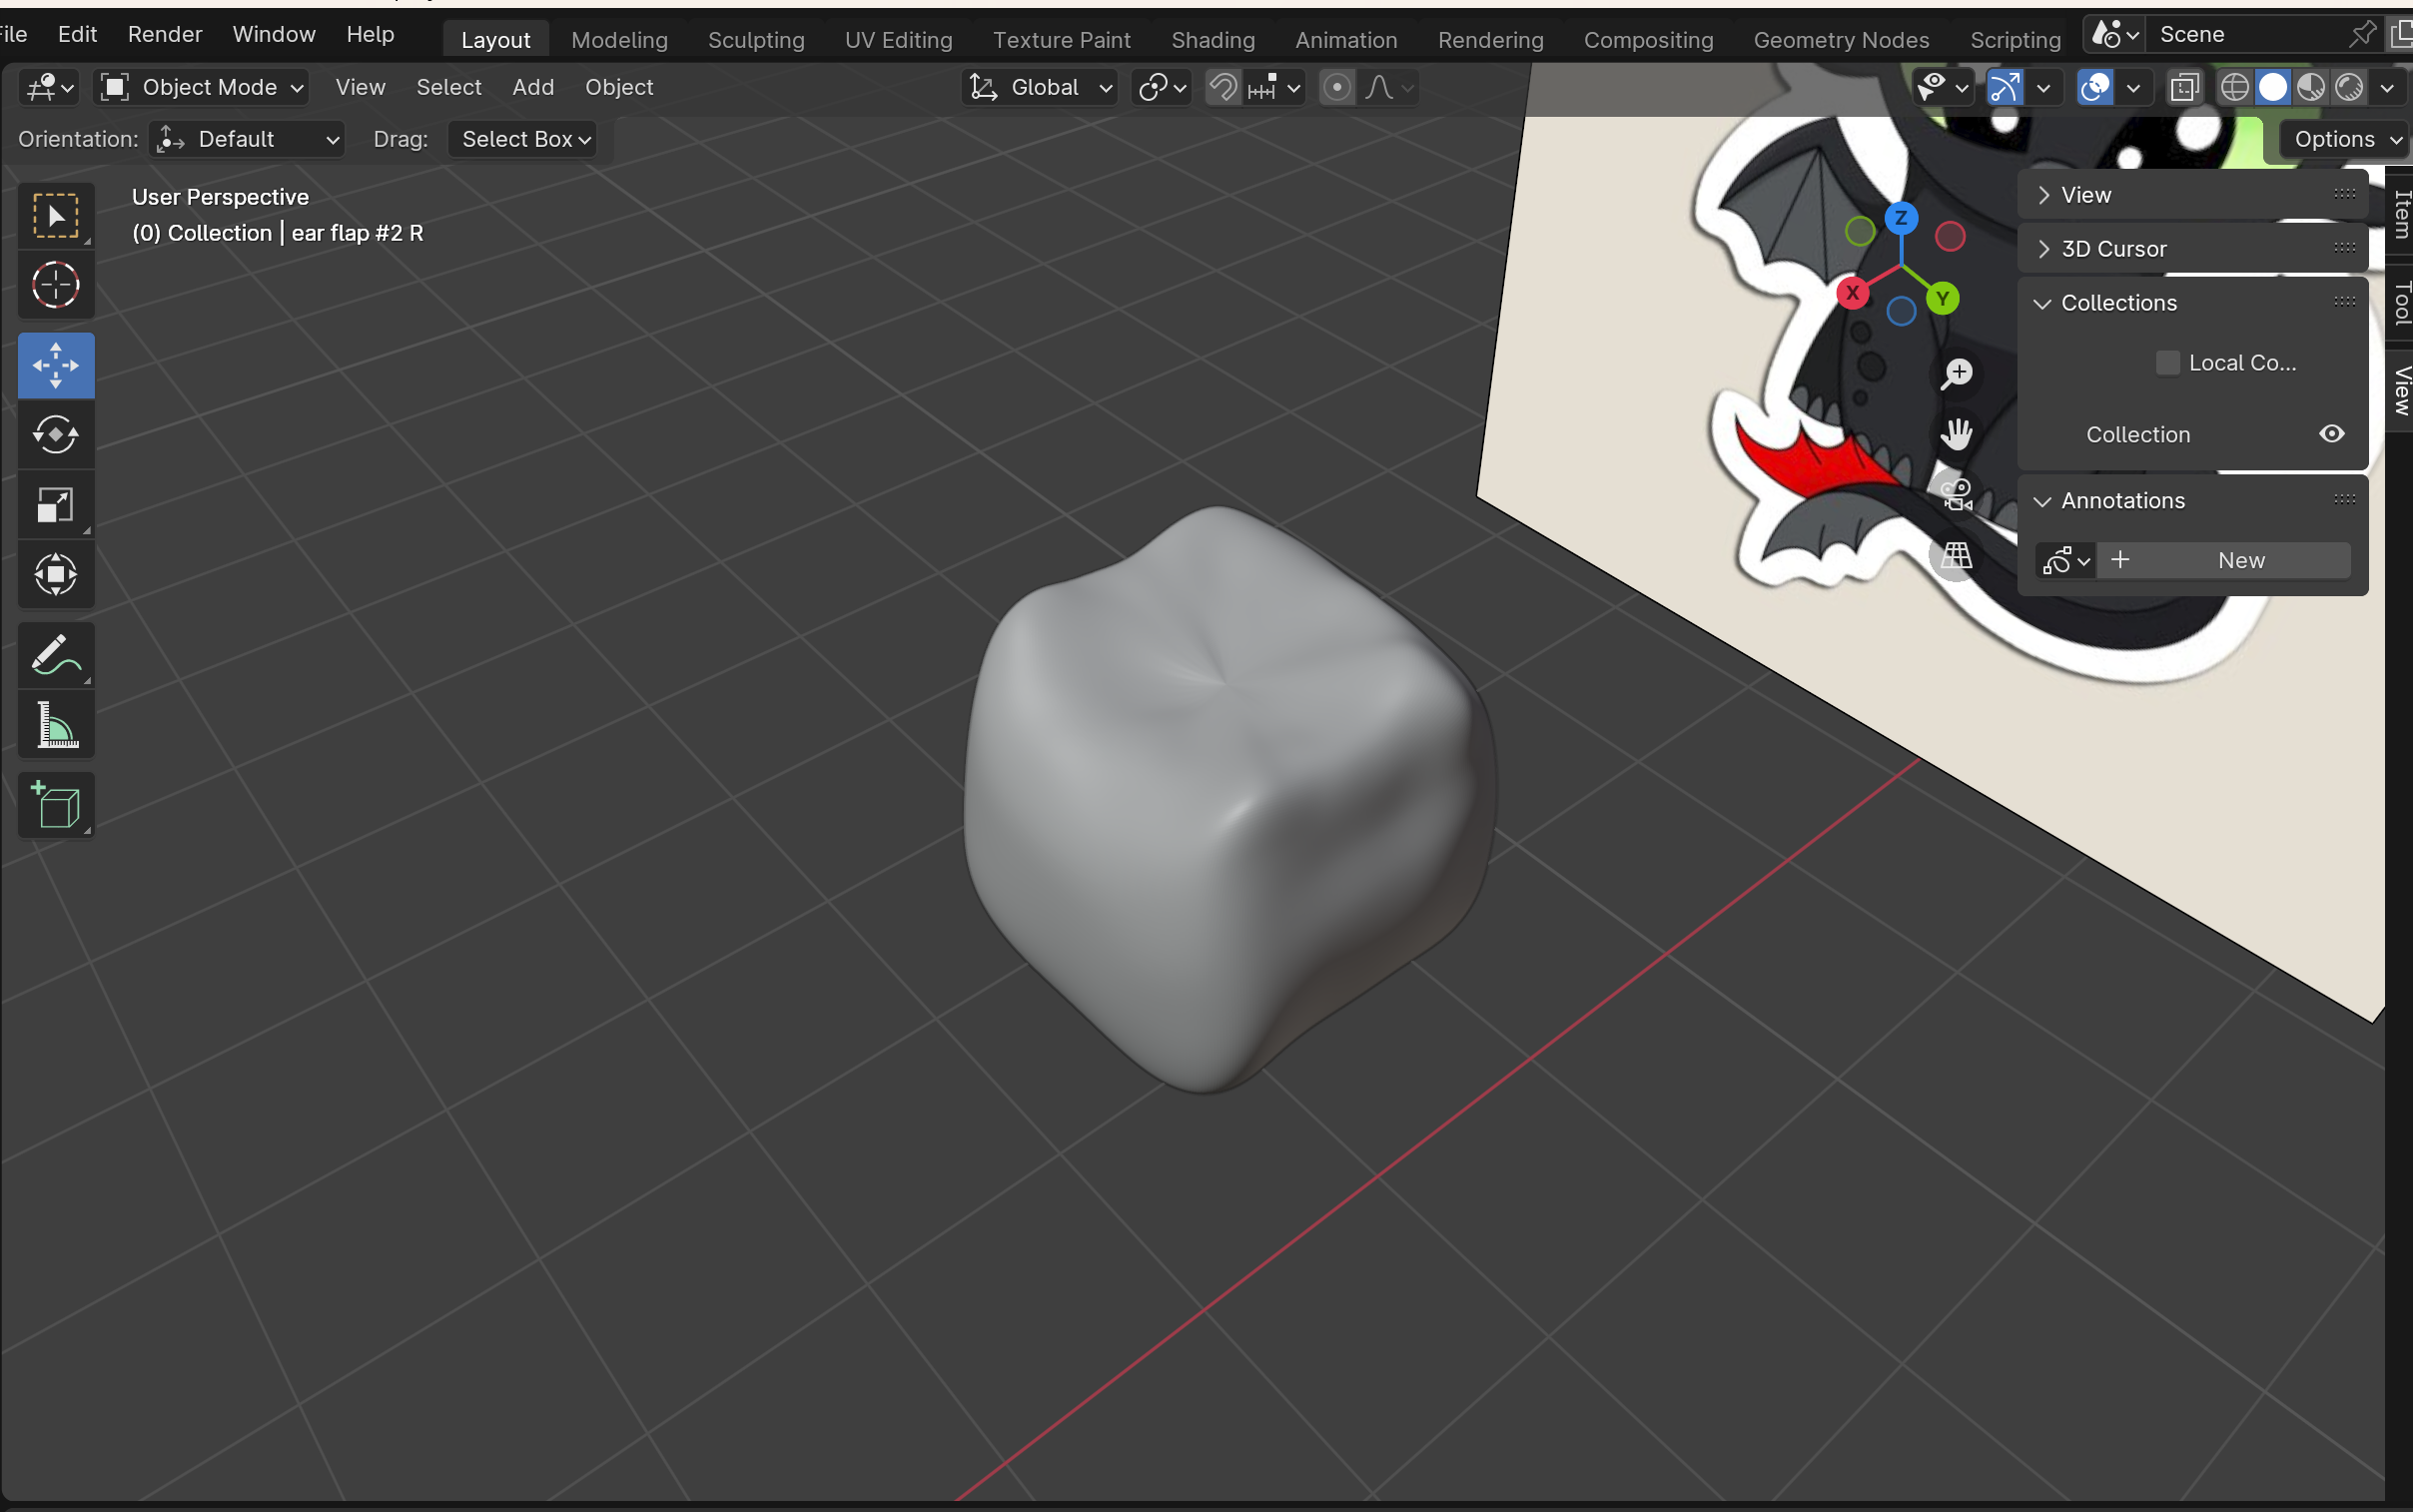
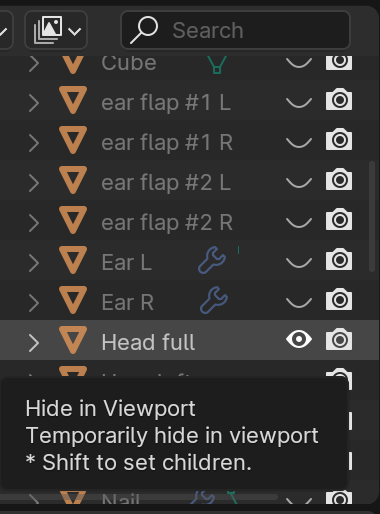
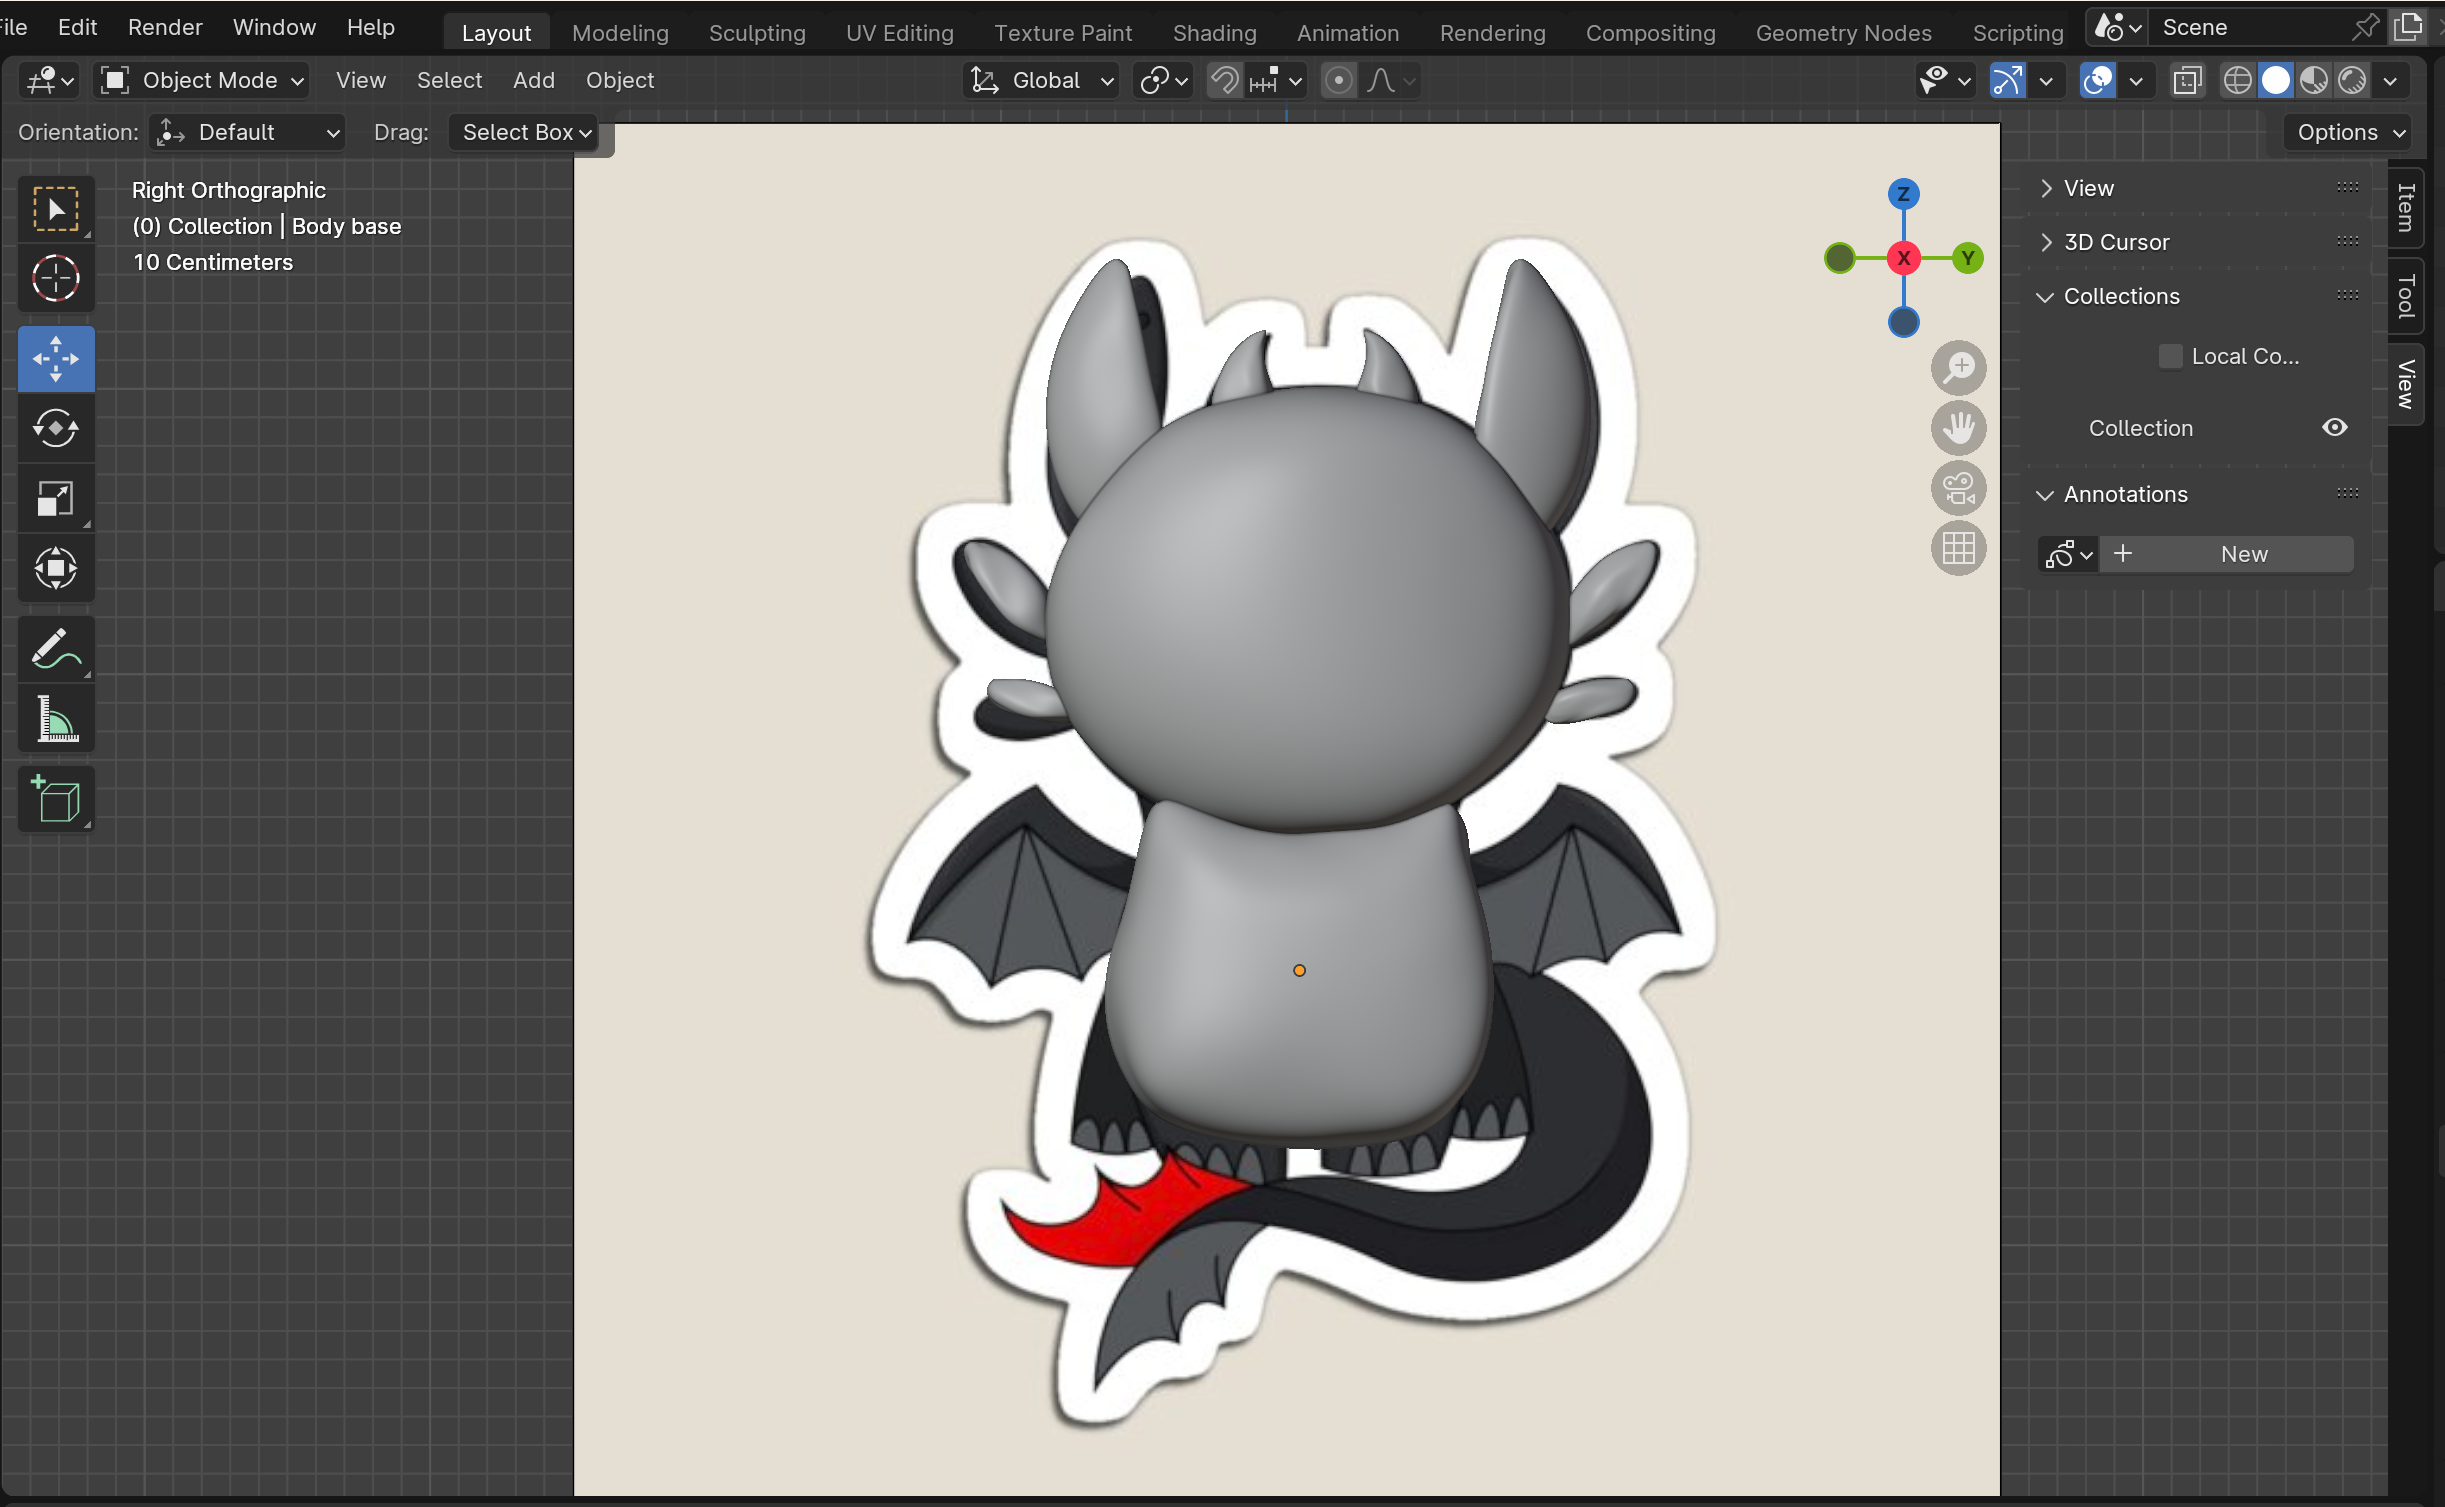
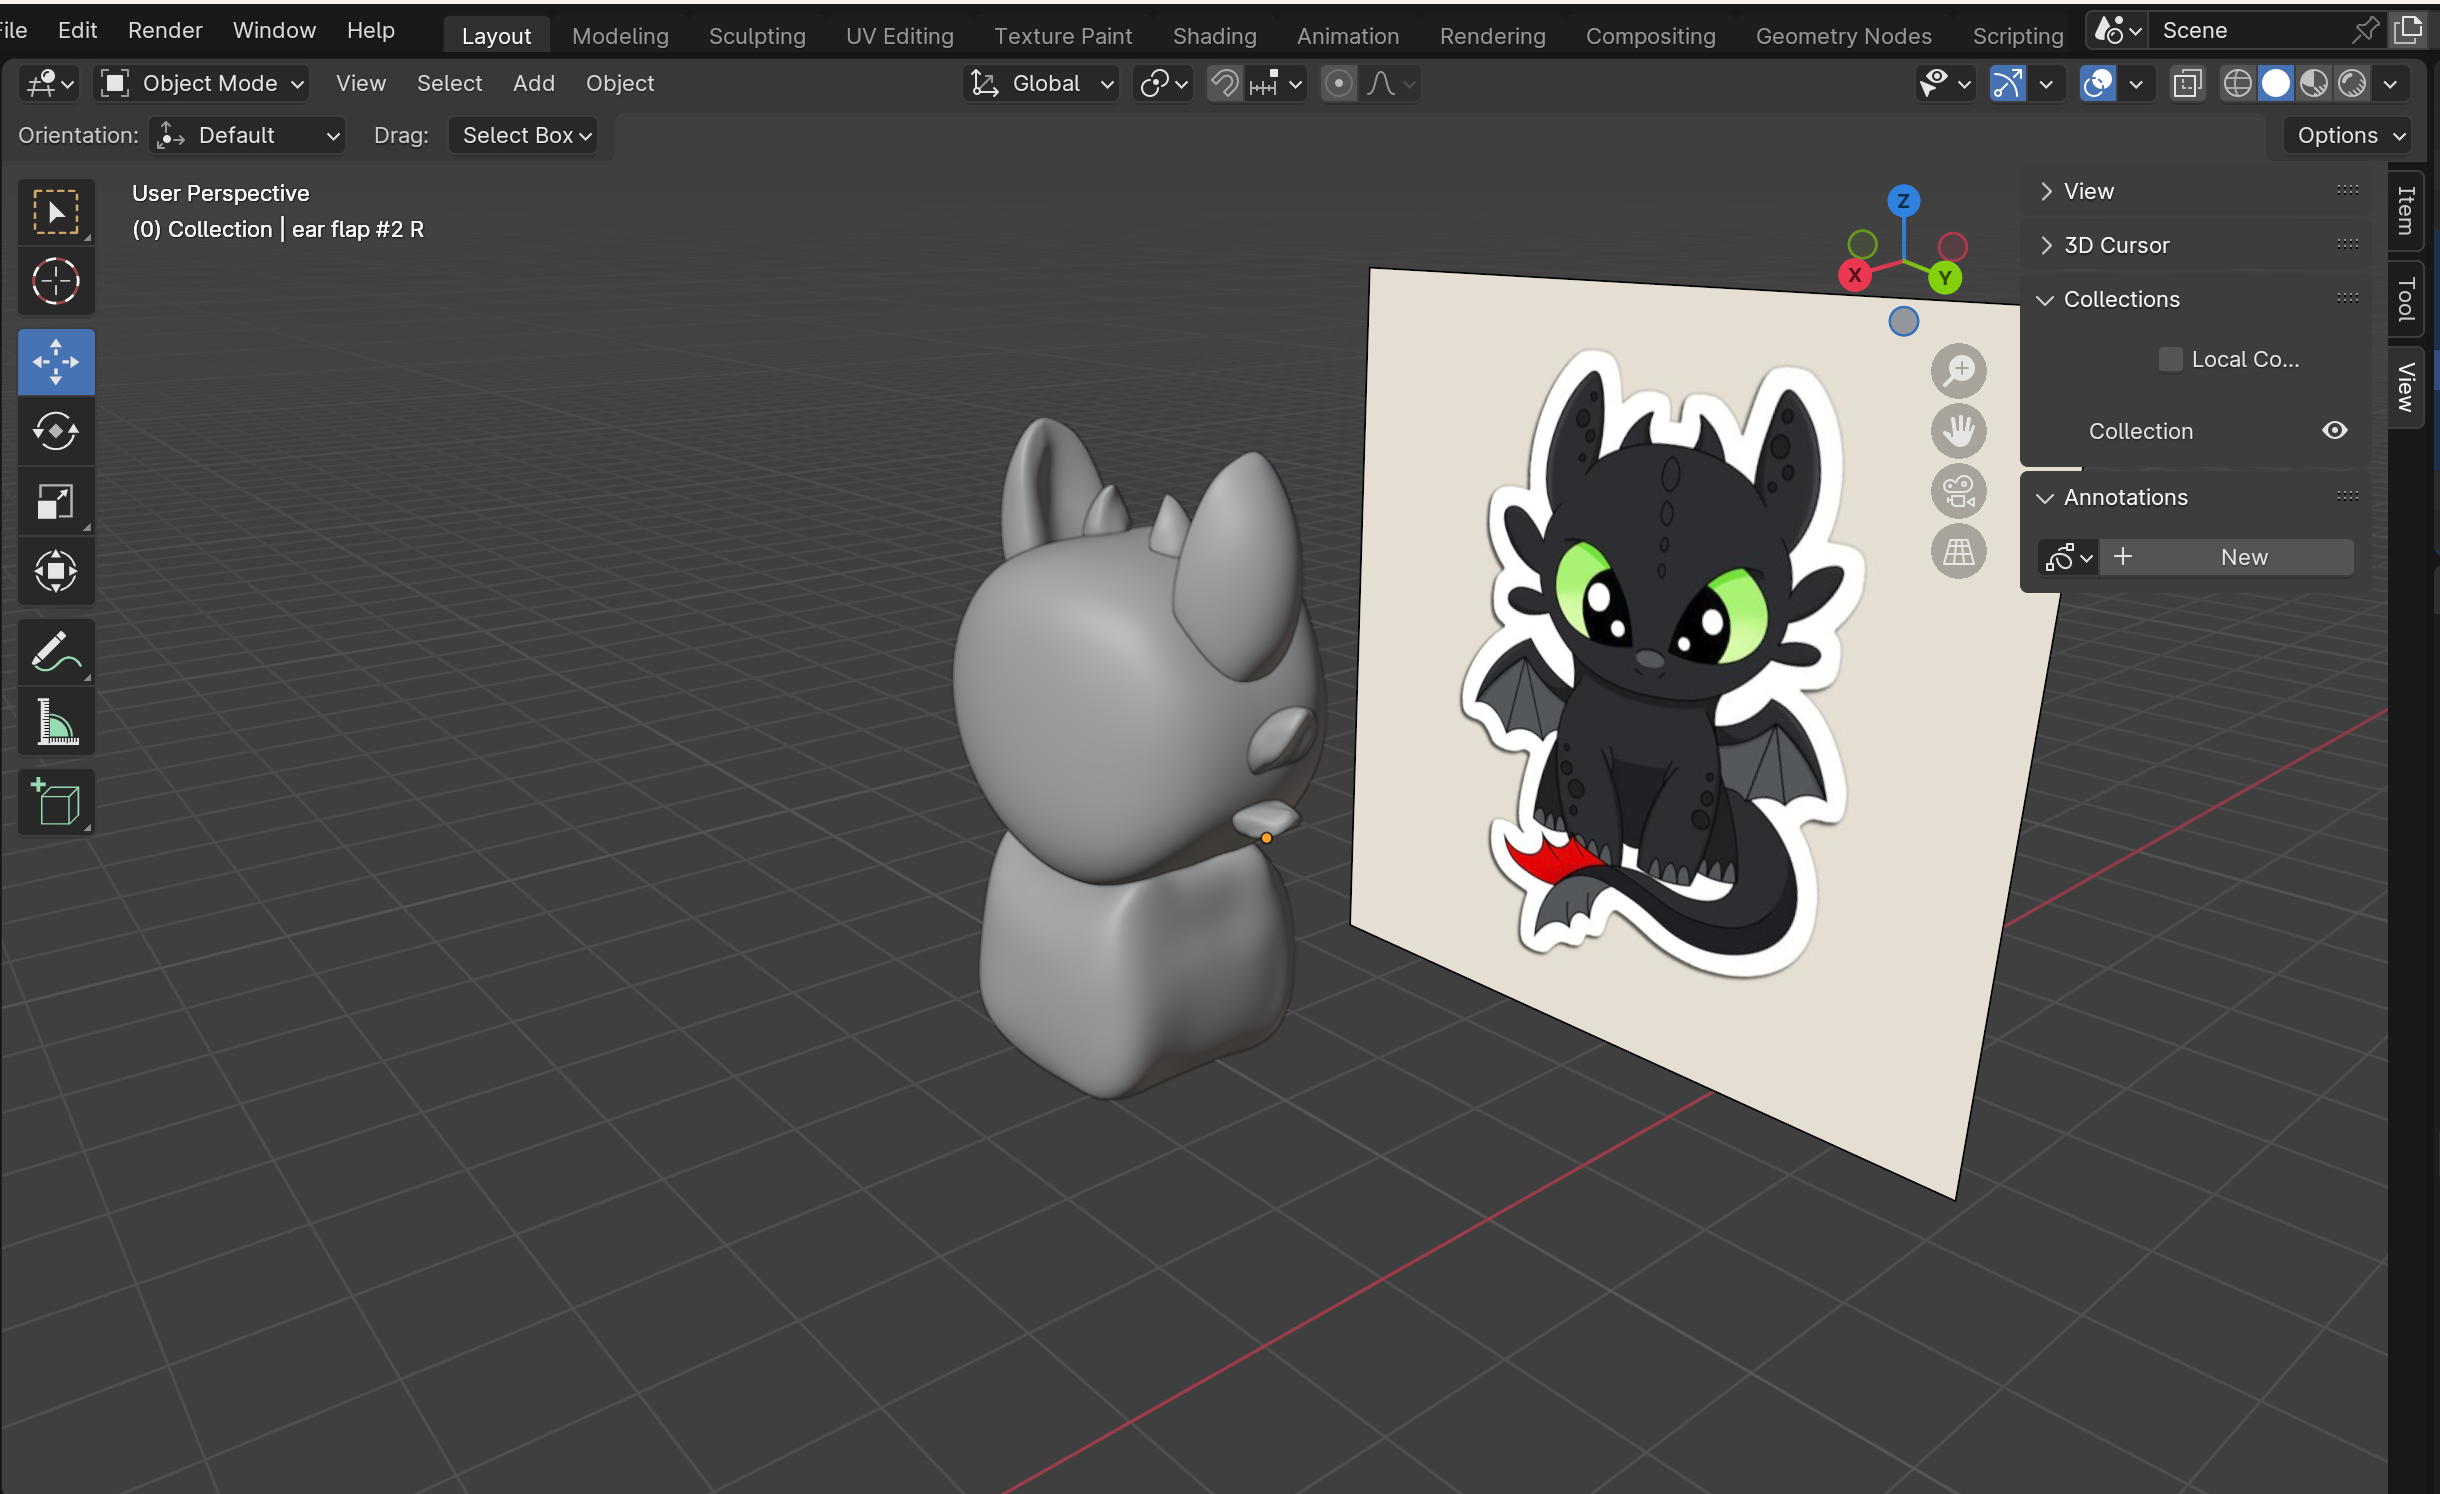
In the beginning, I would suggest hiding (H) the head and ears/horns that we just made by shift-selecting them and clicking H. As with the previous steps however, begin by adding (Shift+A) a sphere, moving it to match the location of the body on the image, scaling the sphere, applying the subdivision modifier and toggle X-ray. Then again enter sculpt mode and sculpt to the shape of the body shown in the reference image. Once you have a shape that roughly matches, you can make the Head visible again by clicking the eye to the right of the object in the object list on the top right corner of the screen. Then once the head's visible, sculpt the body to connect to the head. You will probably end up using the elastic deform and grab (G) tools. Once the head's attached you can also enter the y-axis and adjust the body to be around the same width as the head.
Sculpting the Front Legs
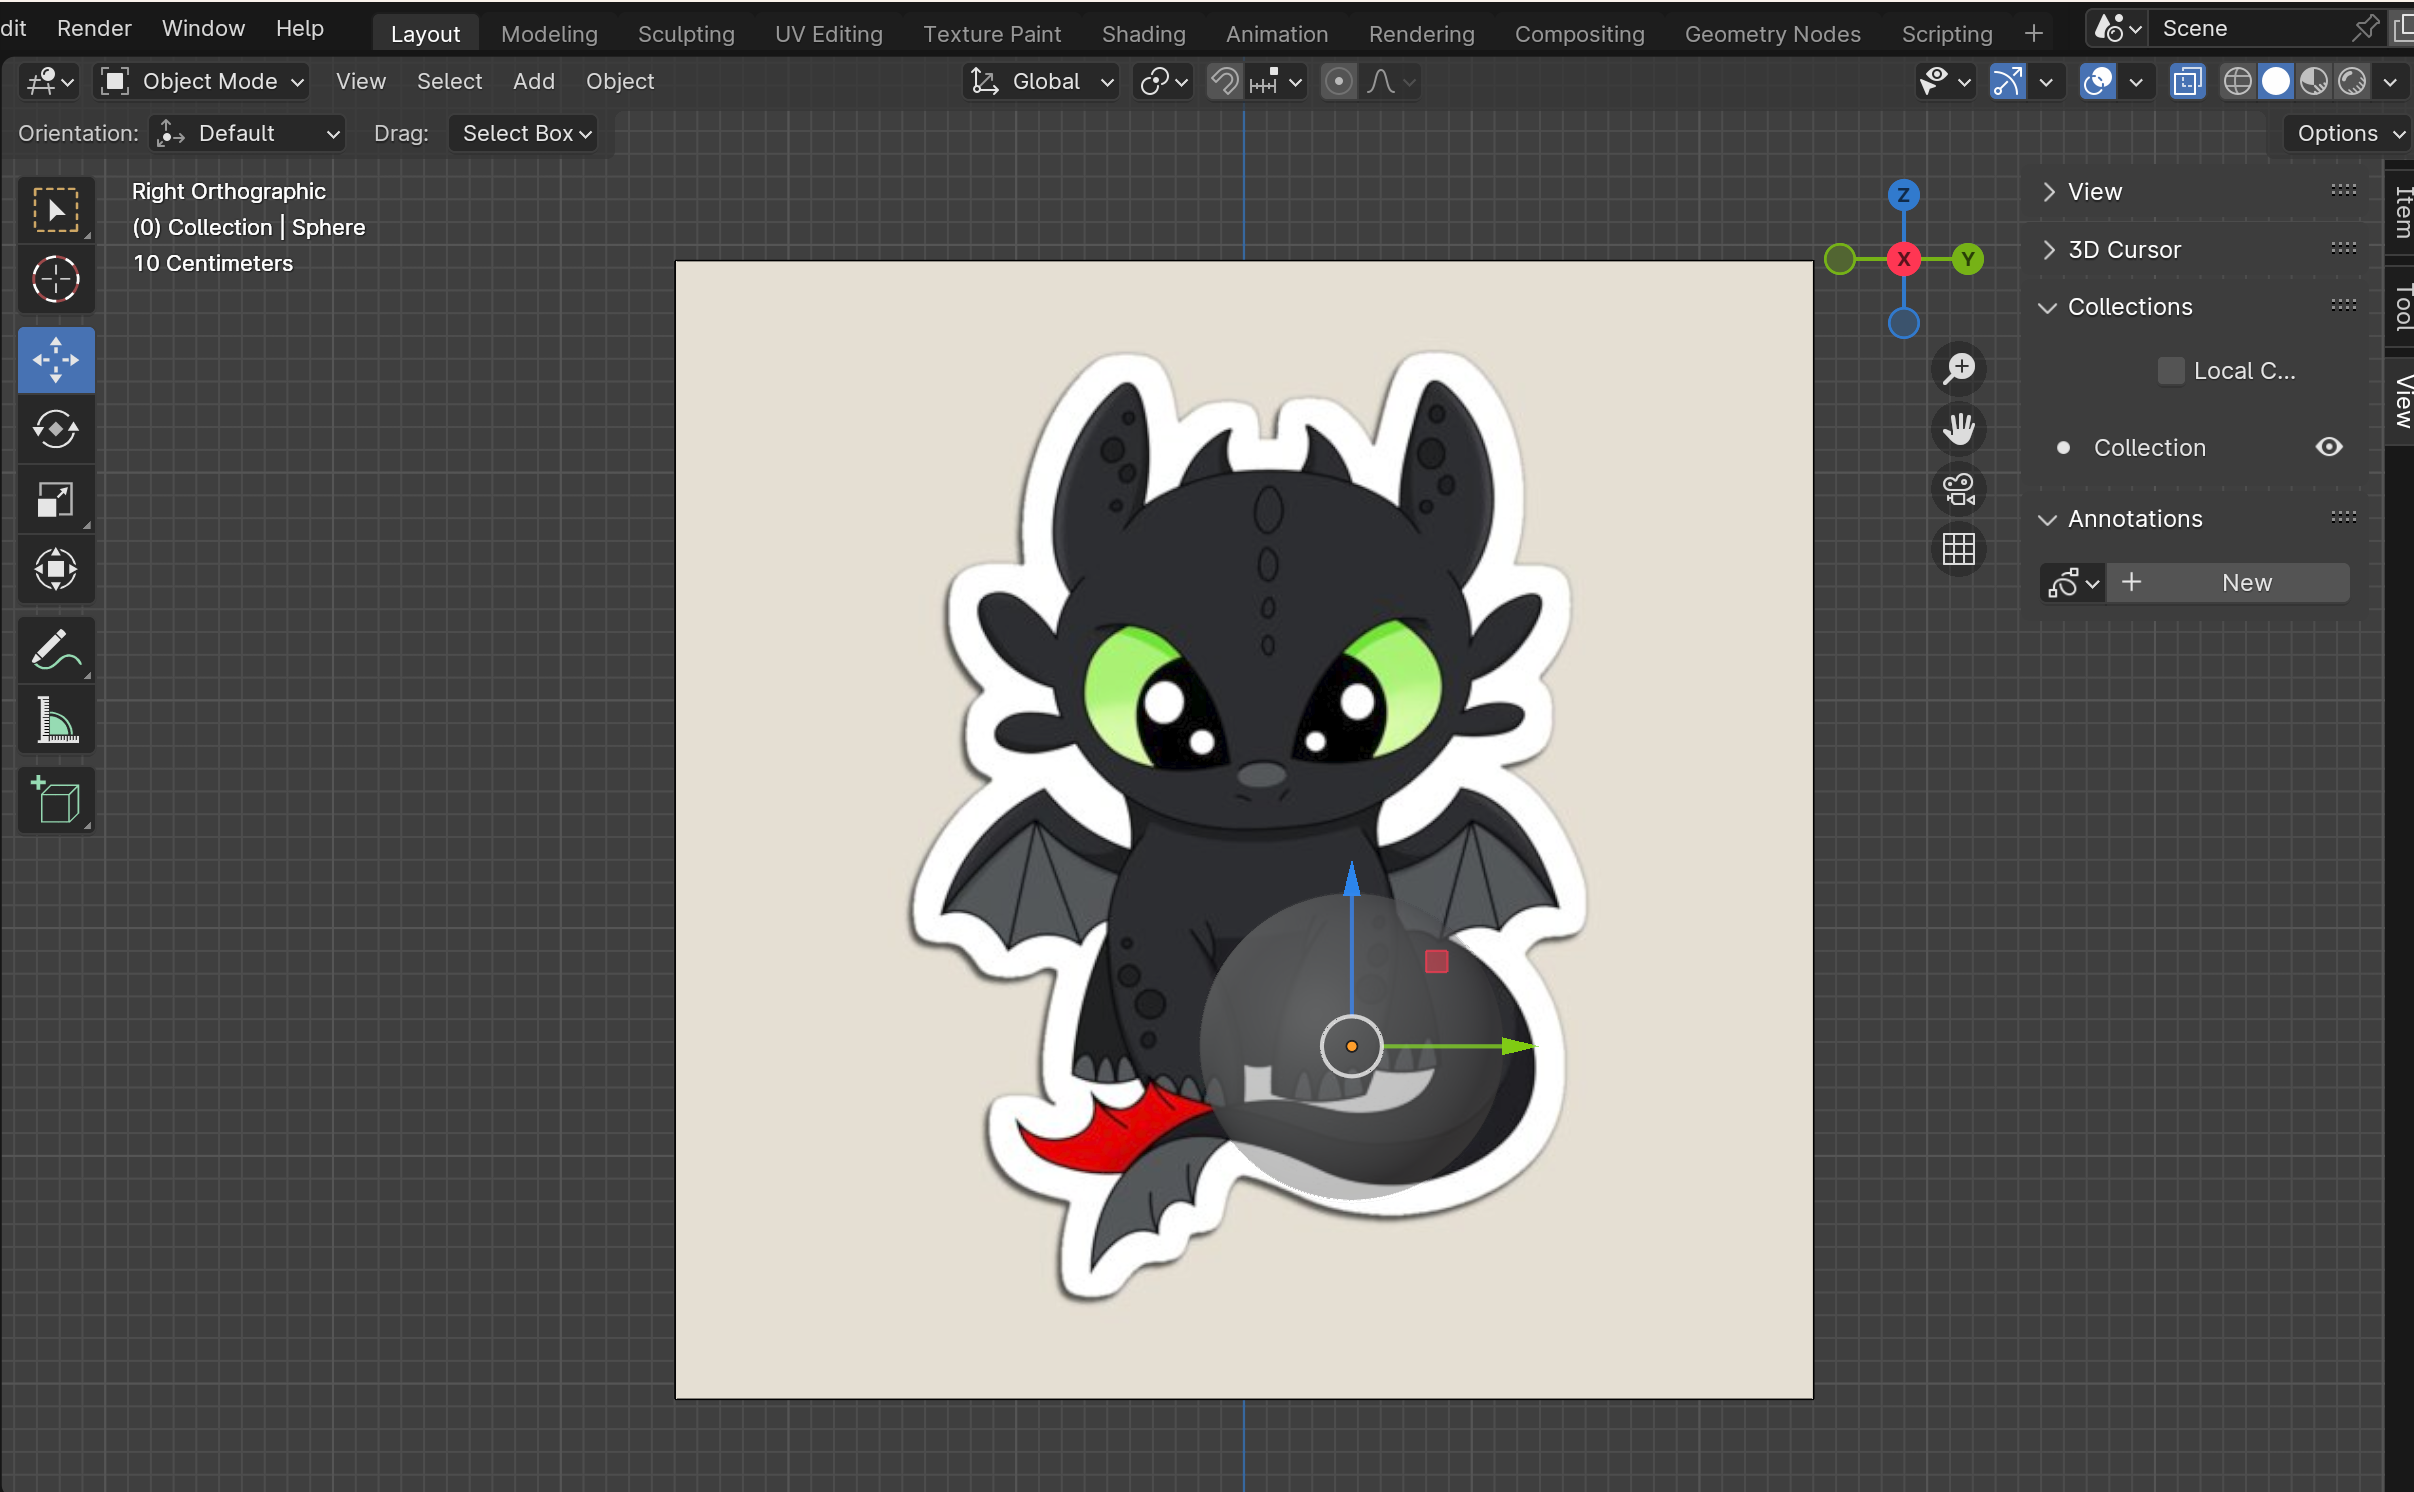
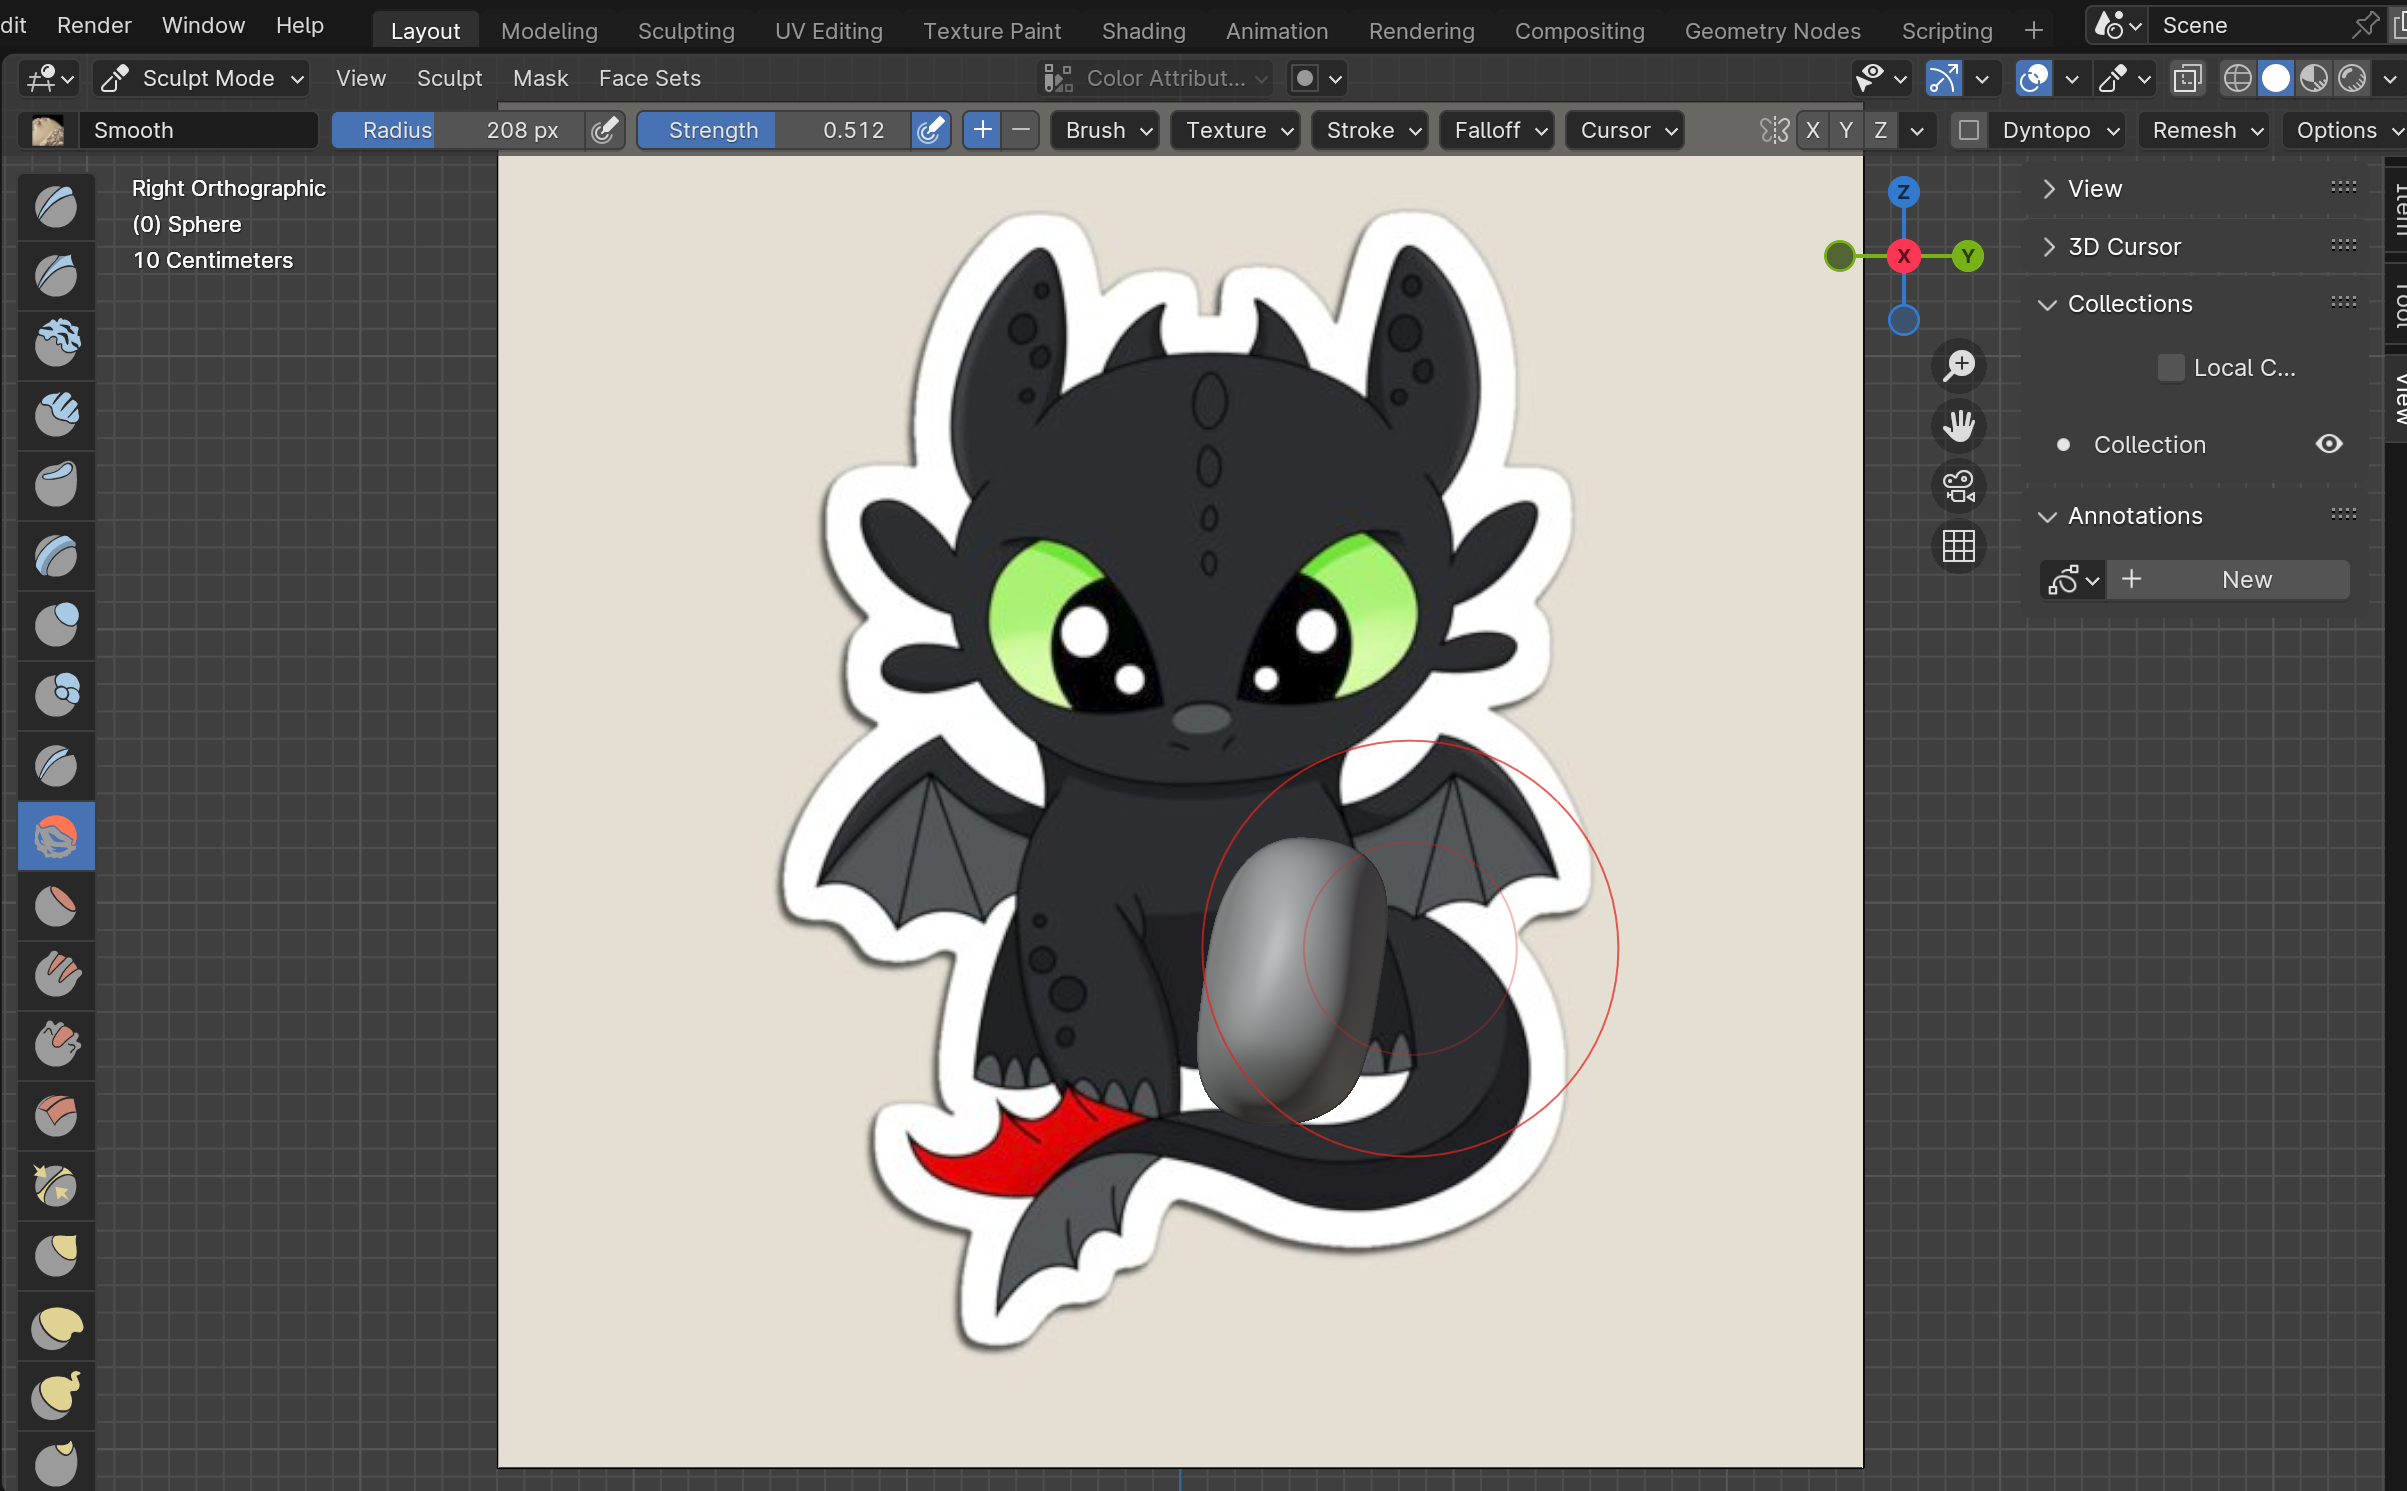
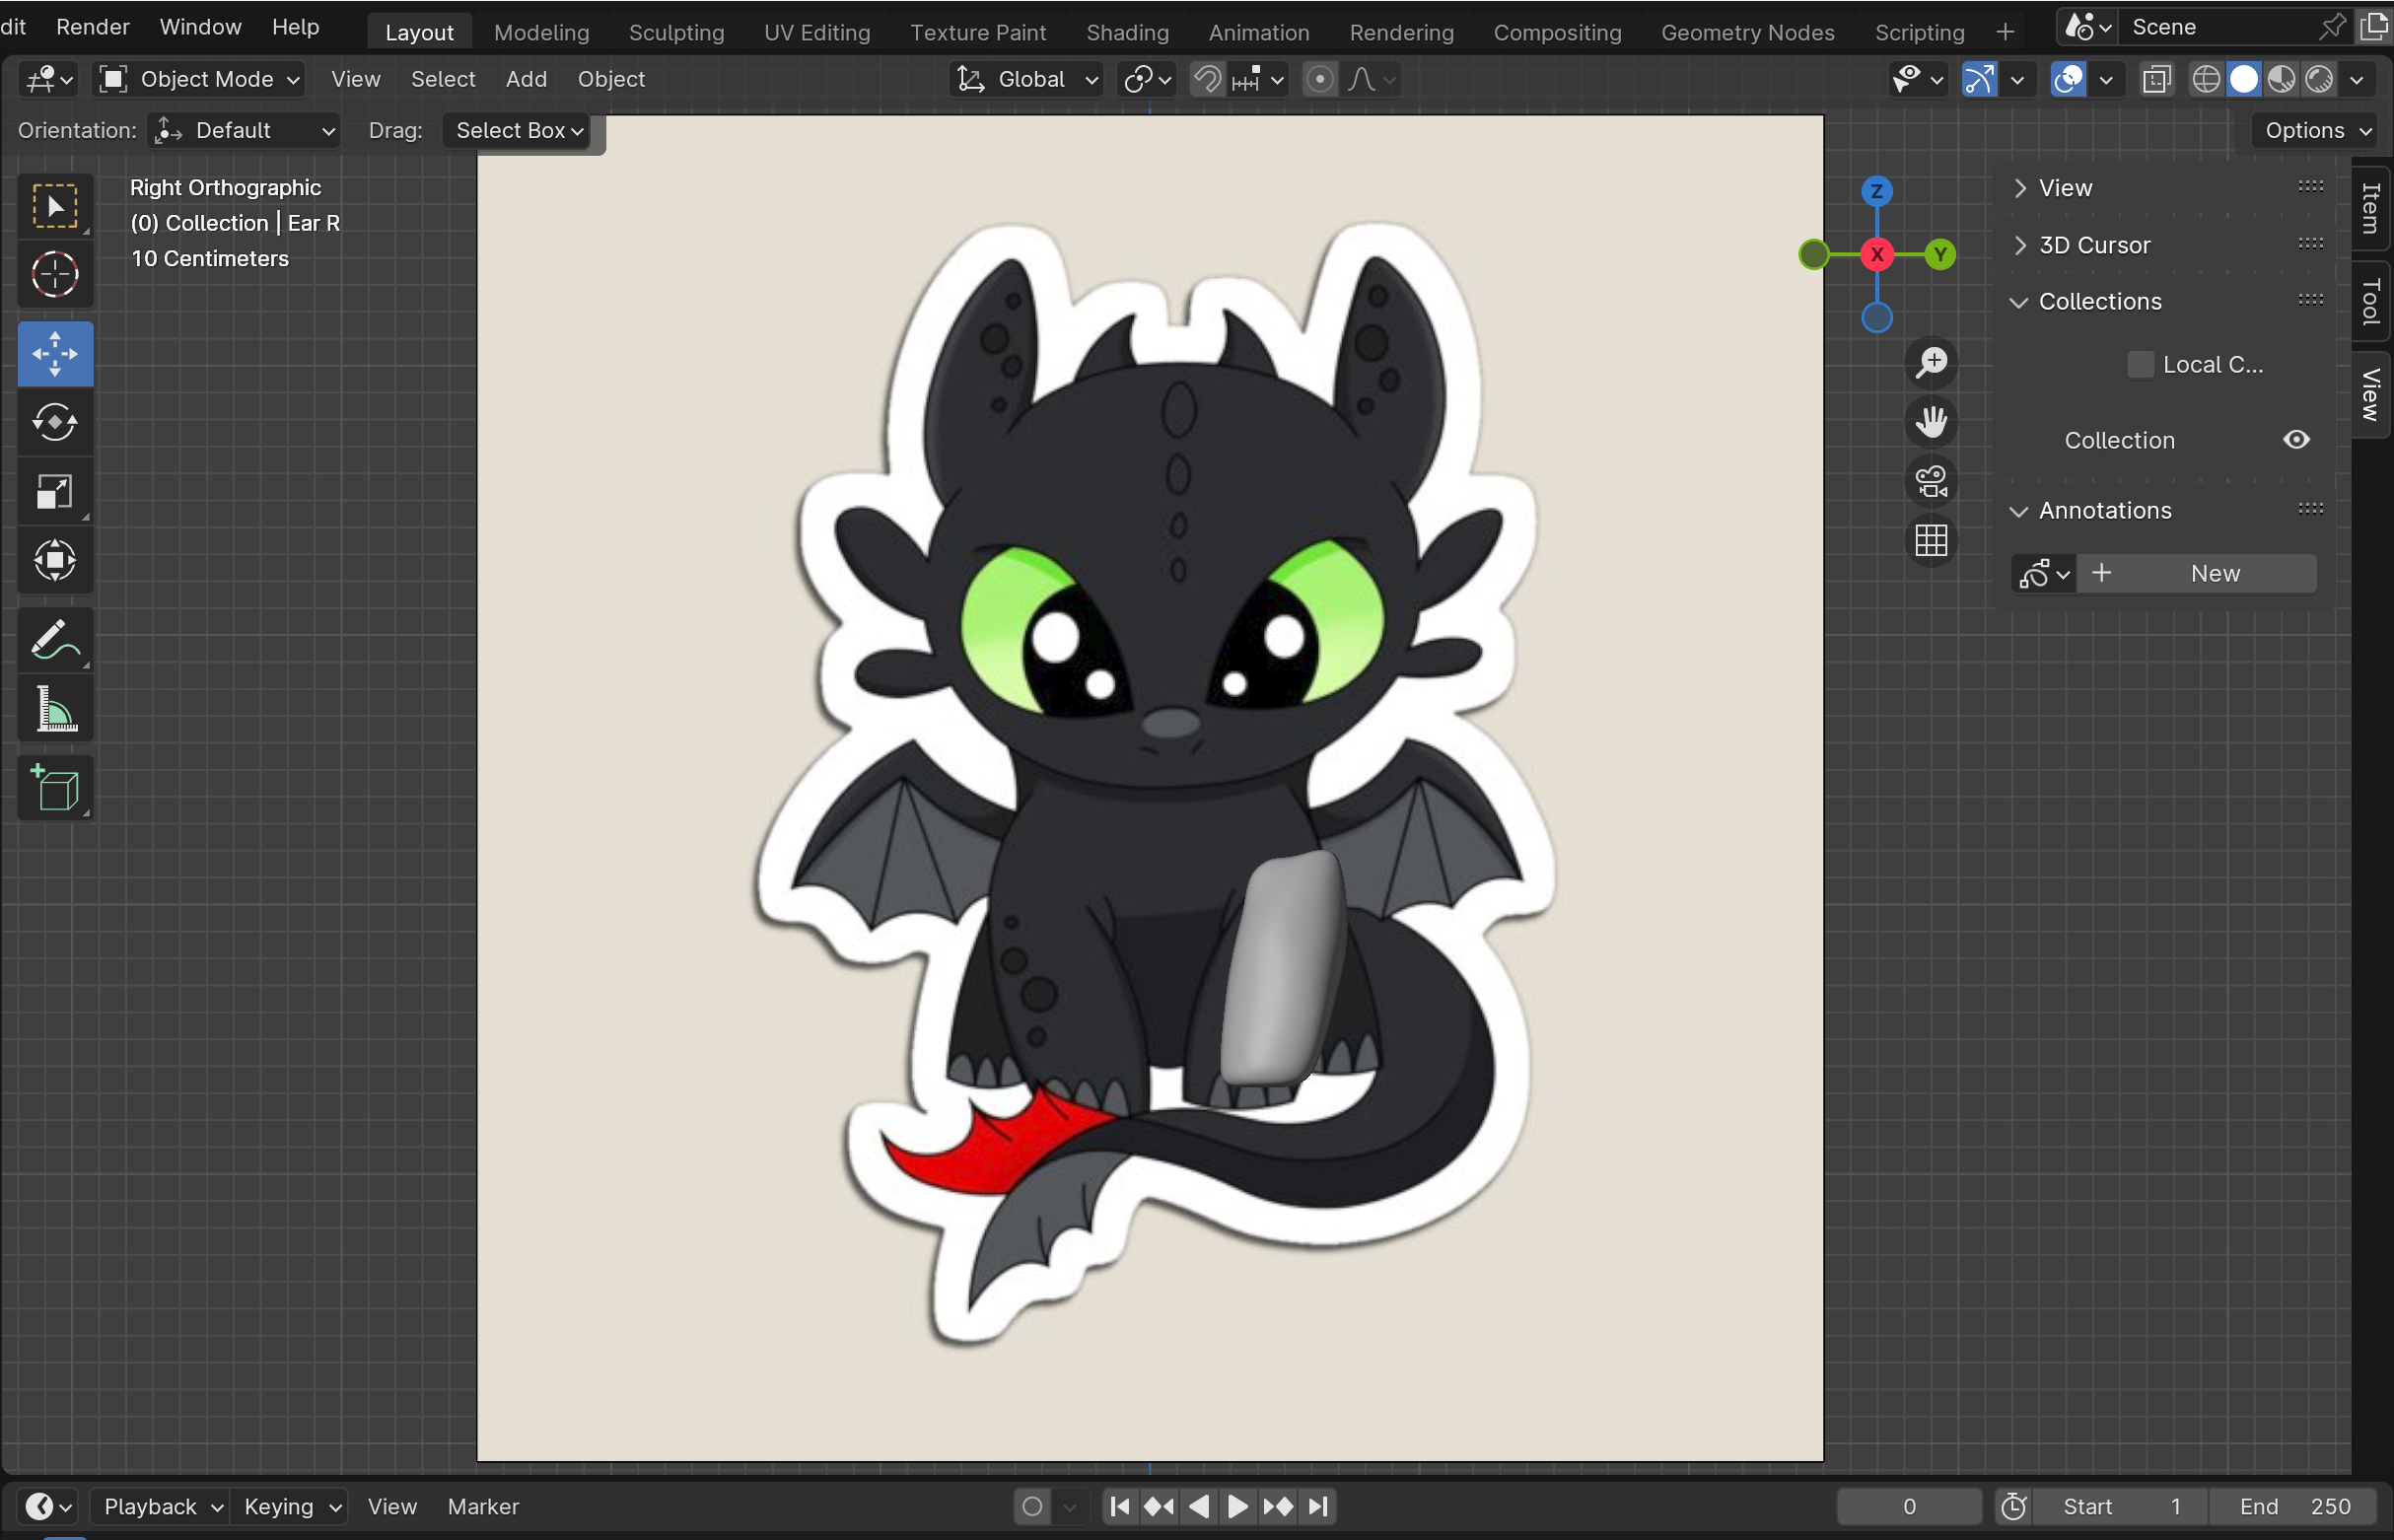
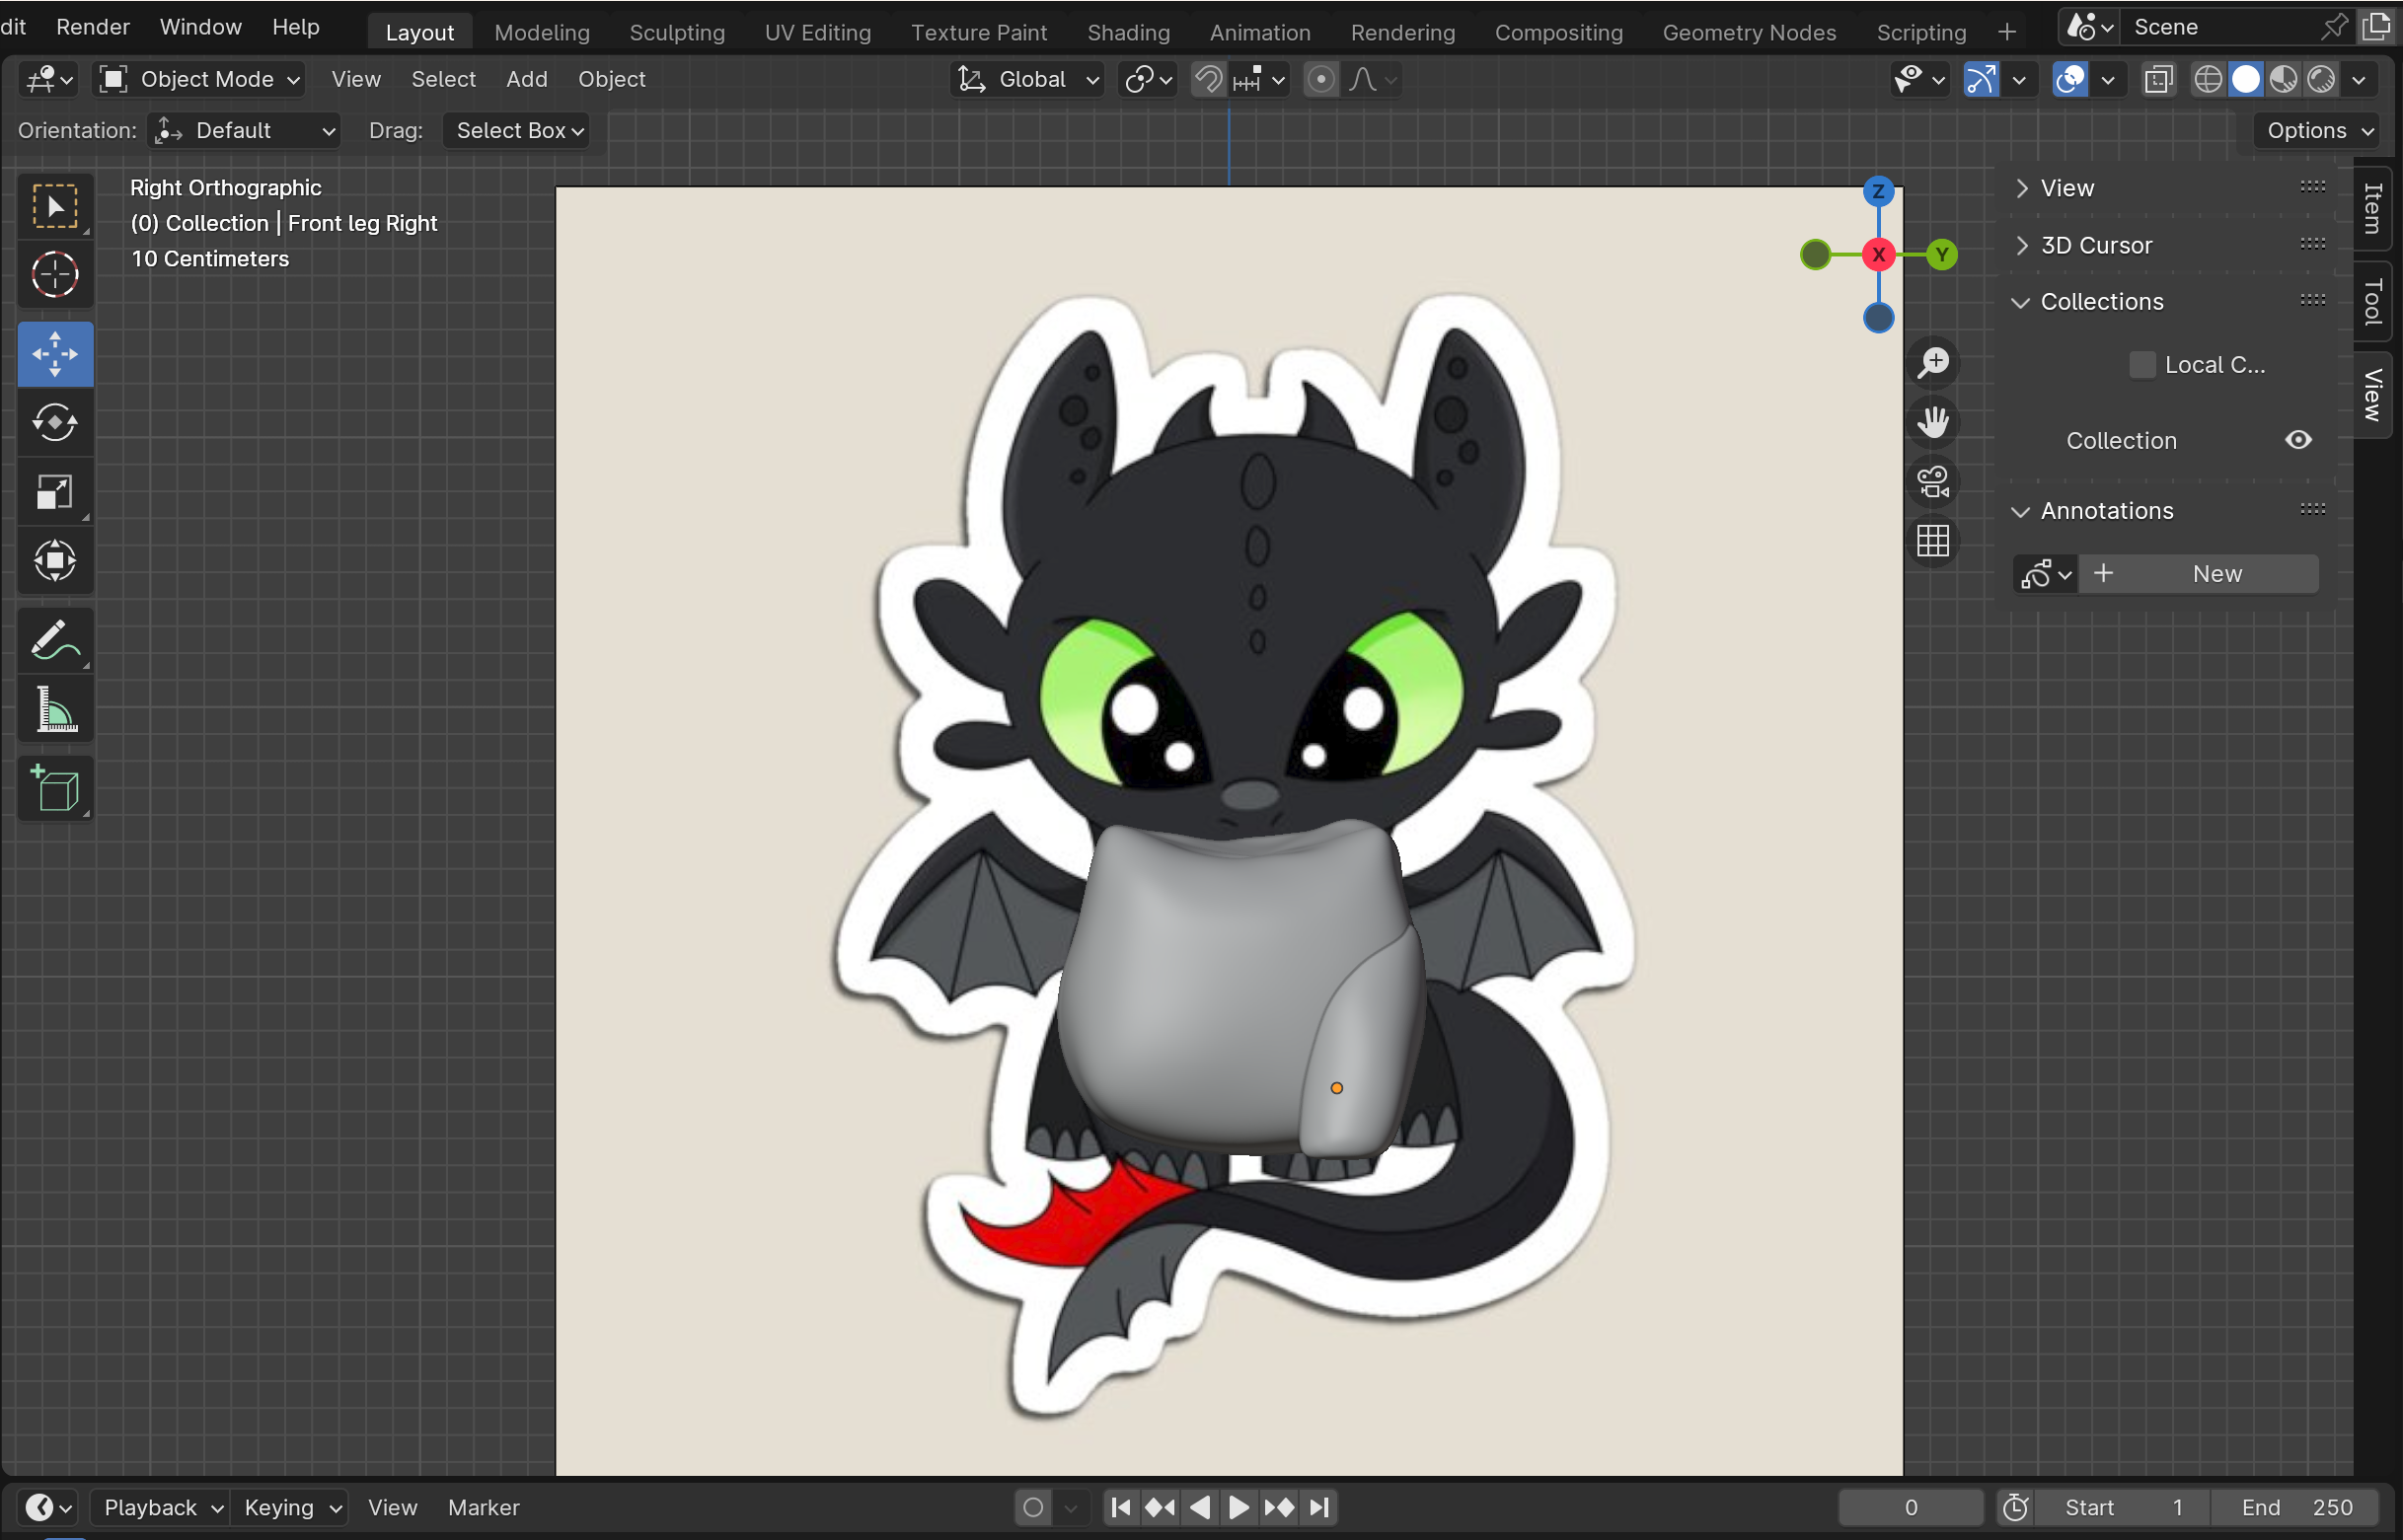
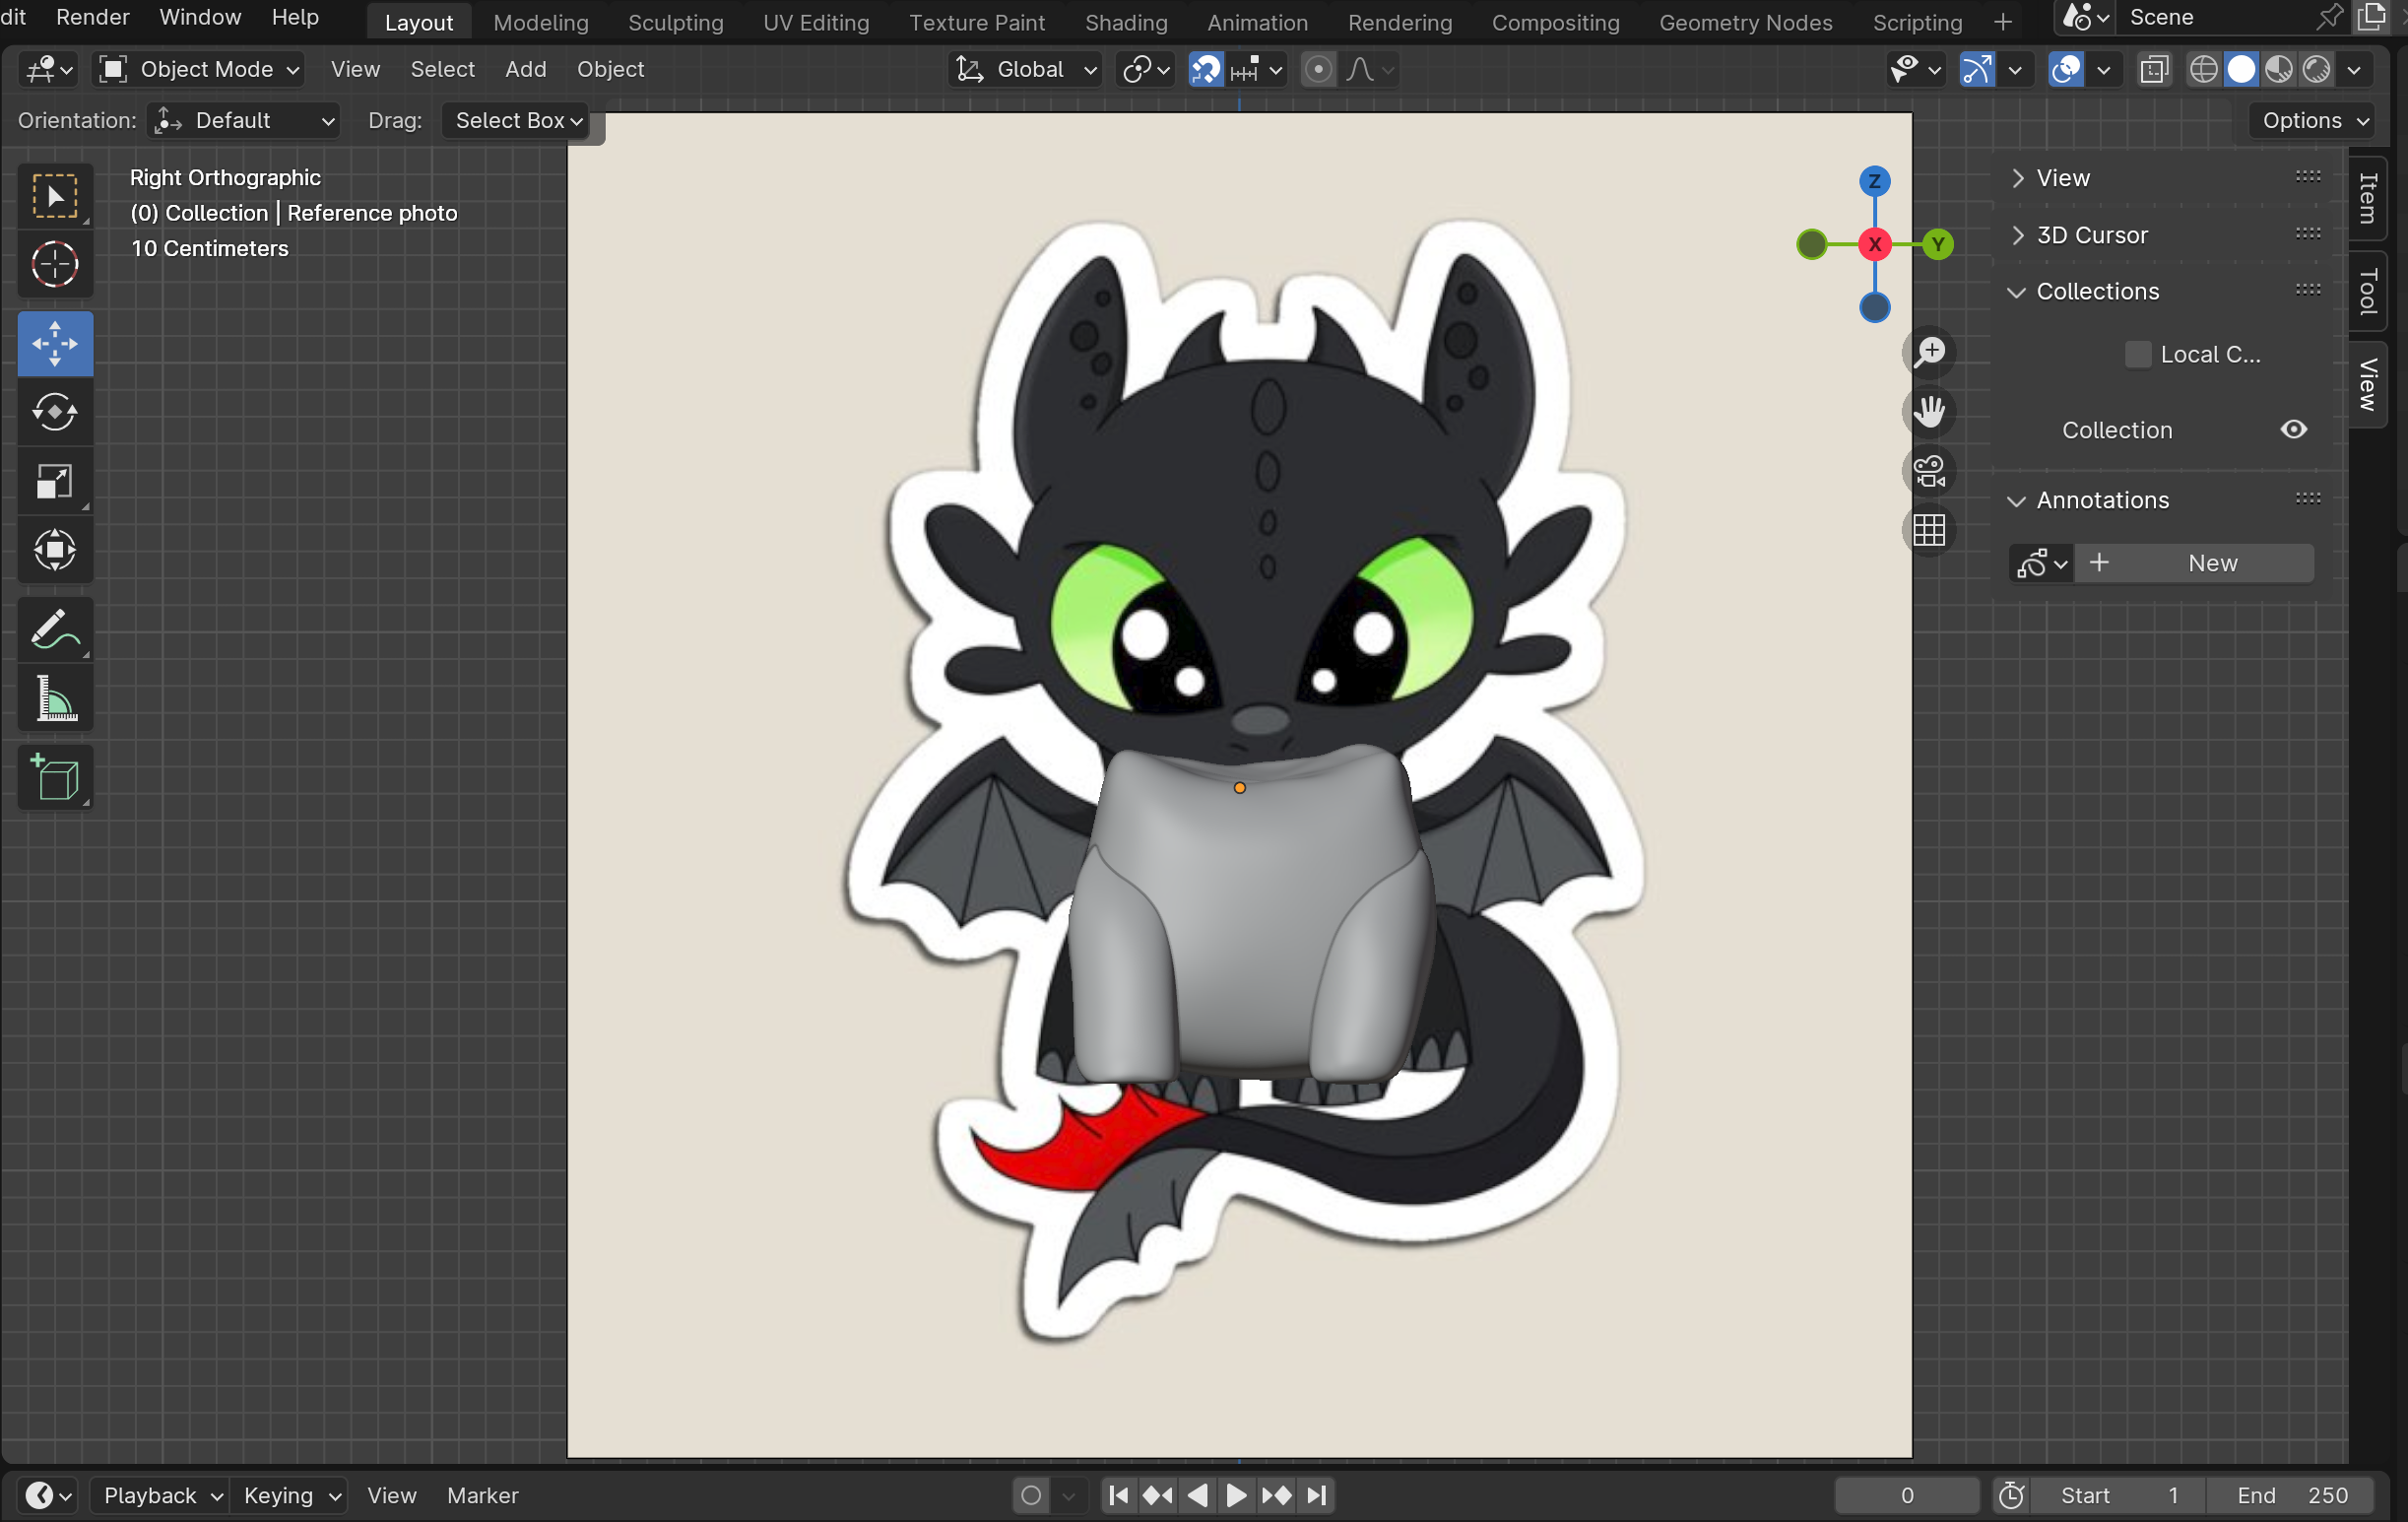
To sculpt the leg I would again suggest hiding (H) everything and entering the X-axis view, as it just makes the process easier. Then add another sphere that we're going to subdivide and scale down (We're gonna keep adding spheres don't worry, almost everything here is made of spheres) and re-enter sculpt mode. From here we're going to slim down the sides using the smooth tool. I personally didn't follow the exact guidelines because I thought it looked better when the legs were a bit thinner, although at this point it's up to personal preference. Nothing I've done needs to be replicated exactly, it's all about what you think looks best. I digress, I "perfected" the leg by finishing up the sculpt of my base shape and unhiding the Body by clicking the eye to the right of the object in the object list and molding the shape around the body to let it look more naturally attached. I then repeated this whole process for the other leg rather than duplicating and mirroring (or at least what my version of mirroring was), but I'm sure mirroring would work as well and save time.
!!!! MAKE SURE TO NAME YOUR OBJECTS AS YOU CREATE THEM TO NOT LOSE TRACK OF ANYTHING !!!!
Sculpting the Back Legs
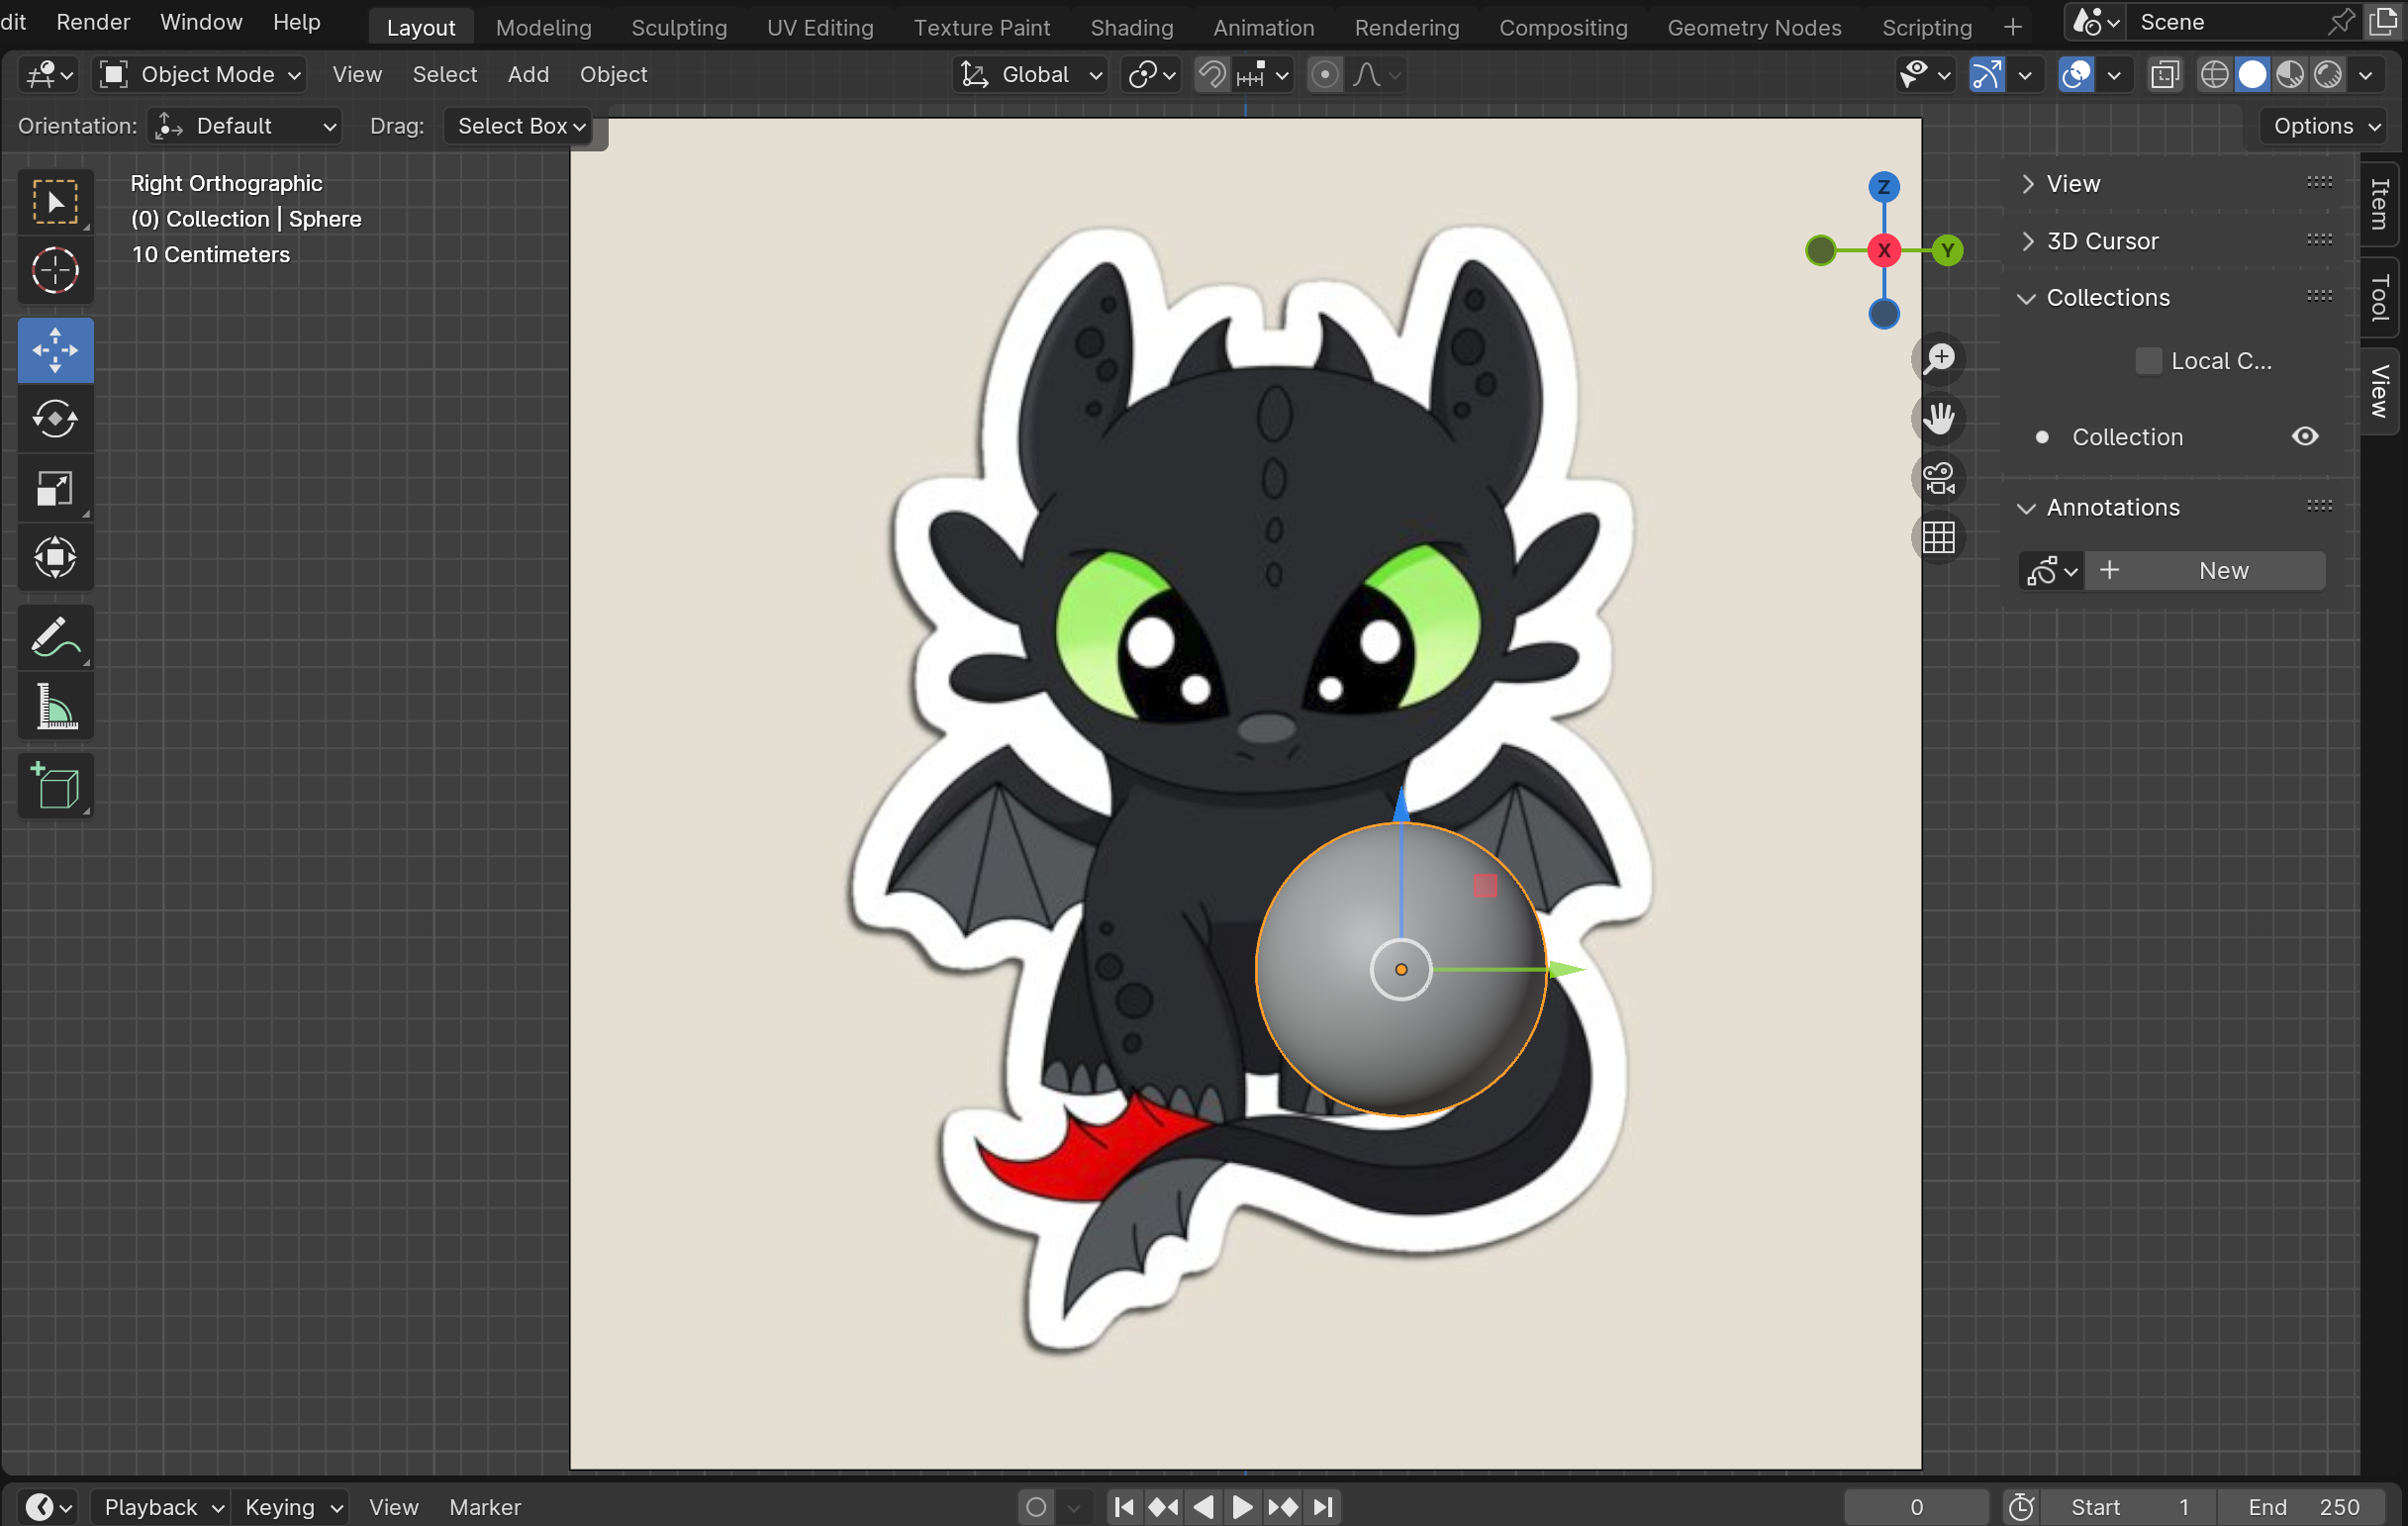
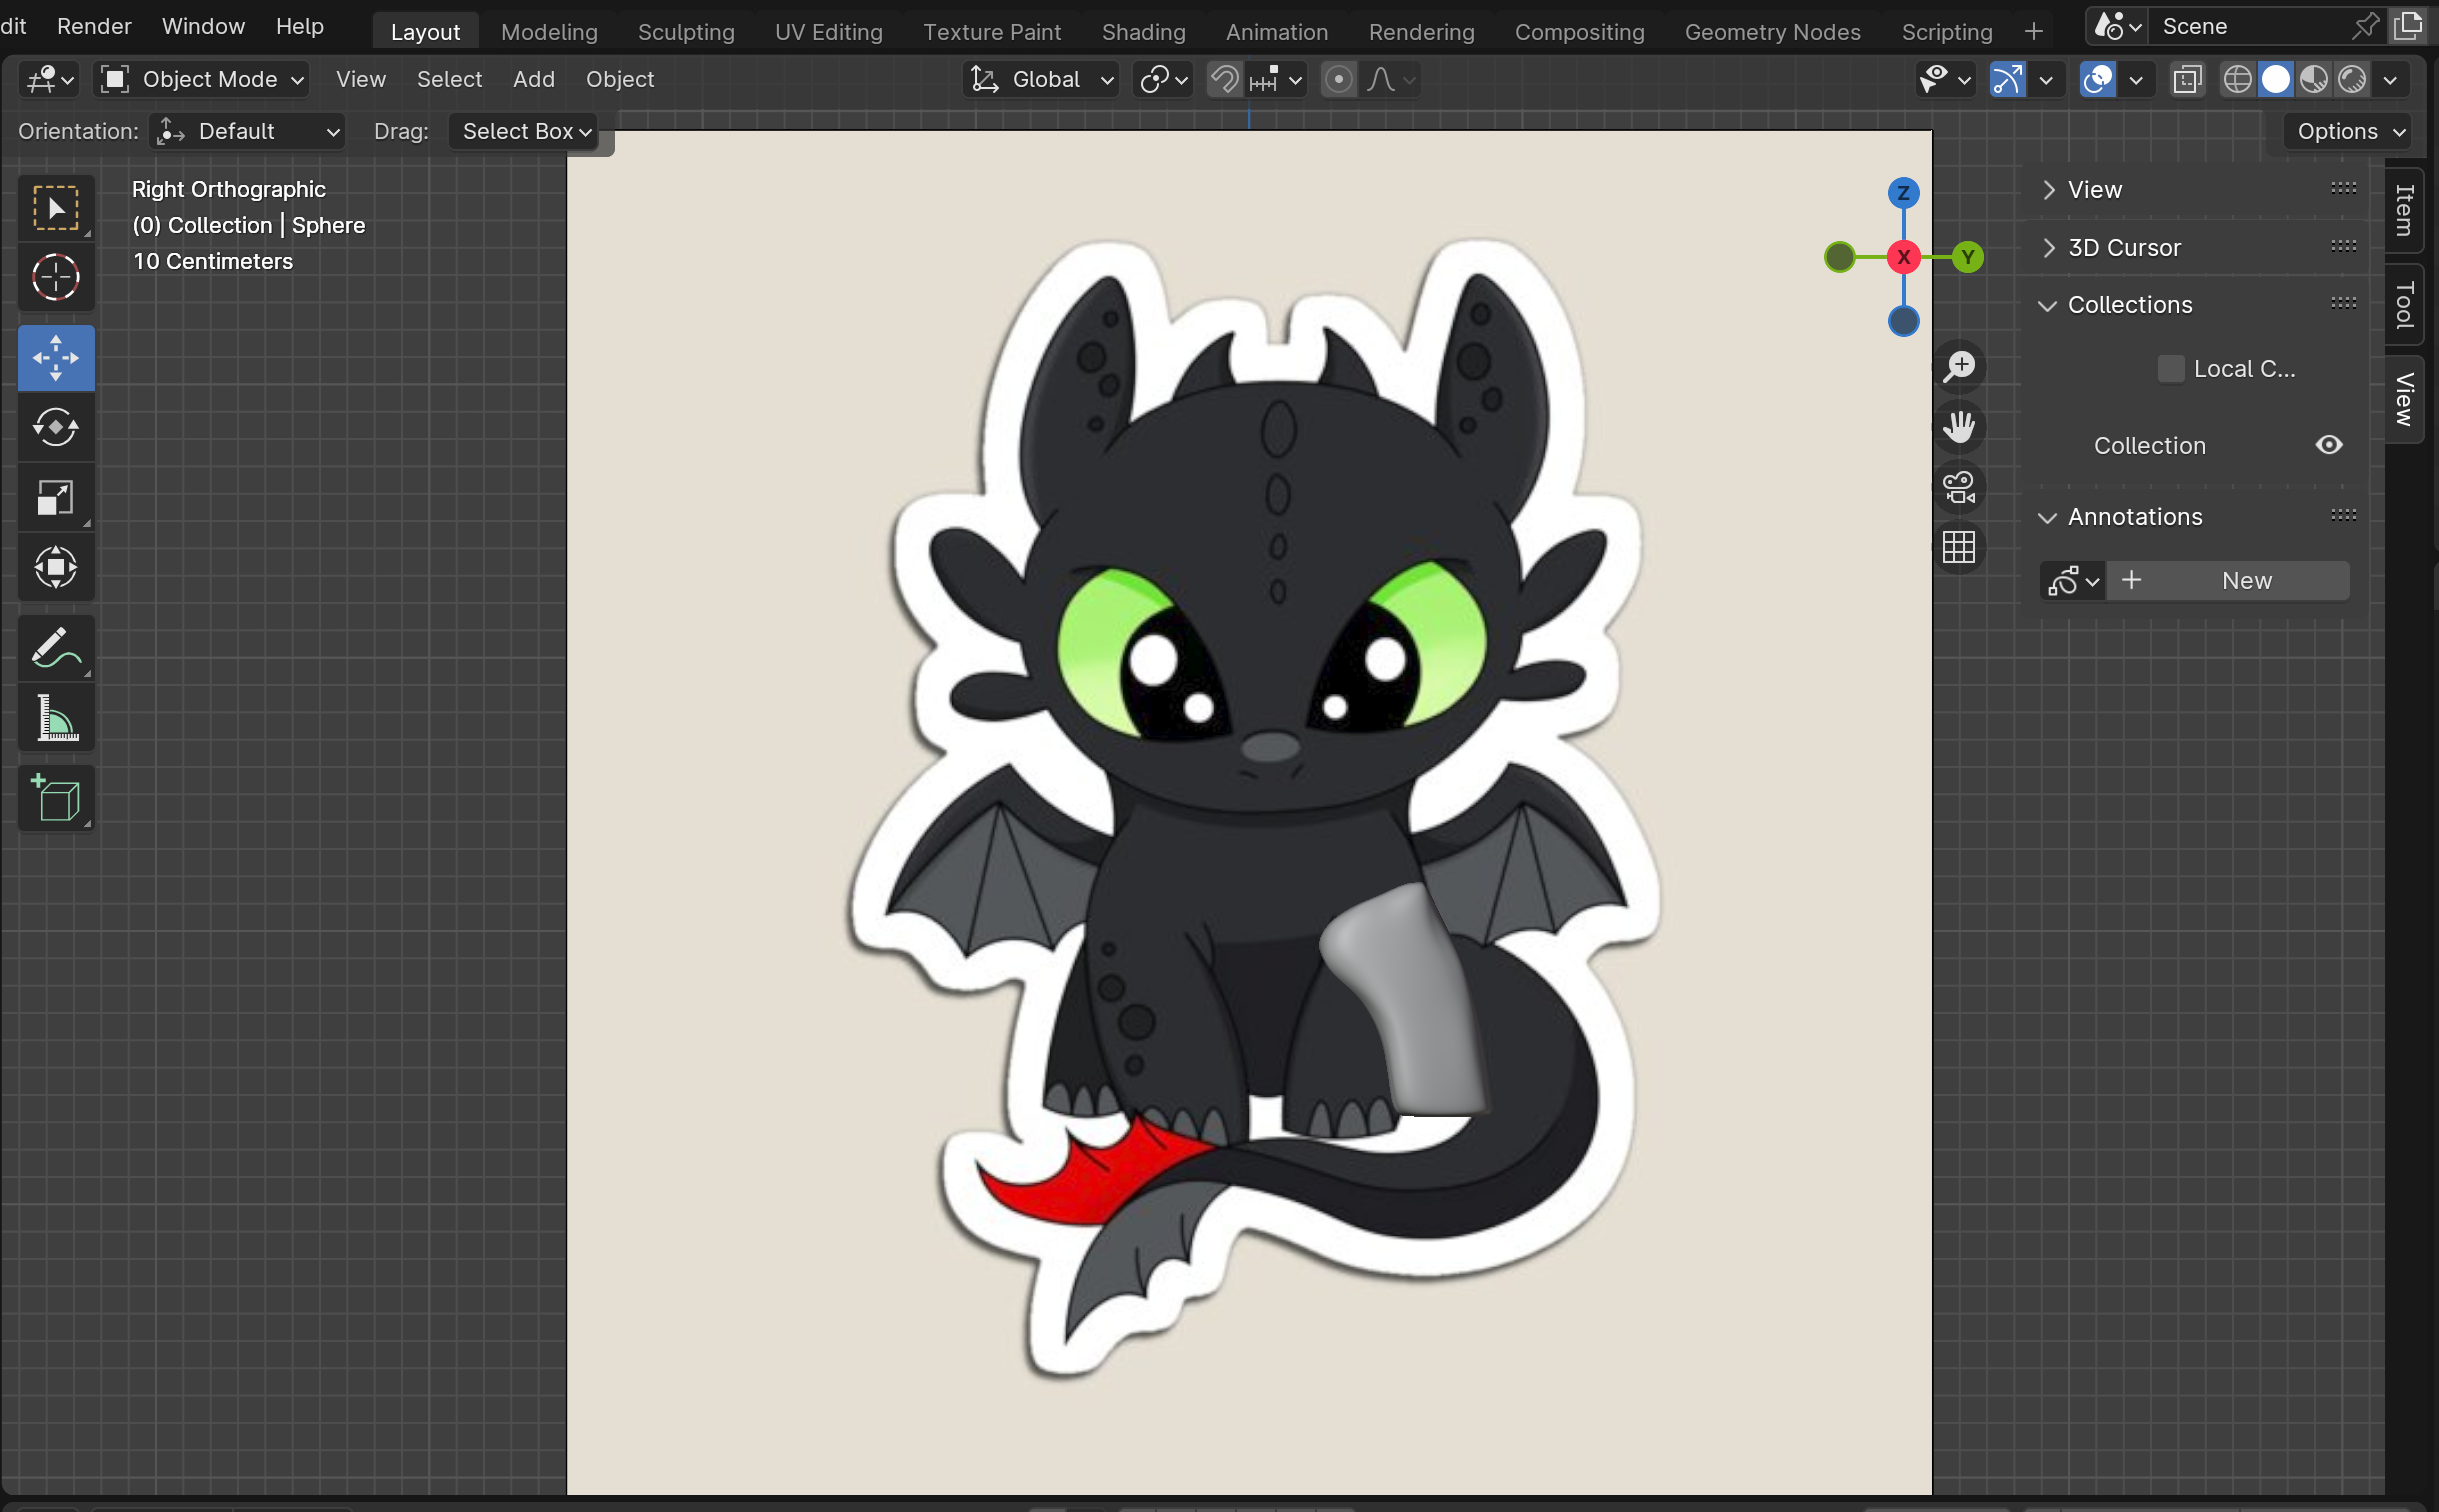
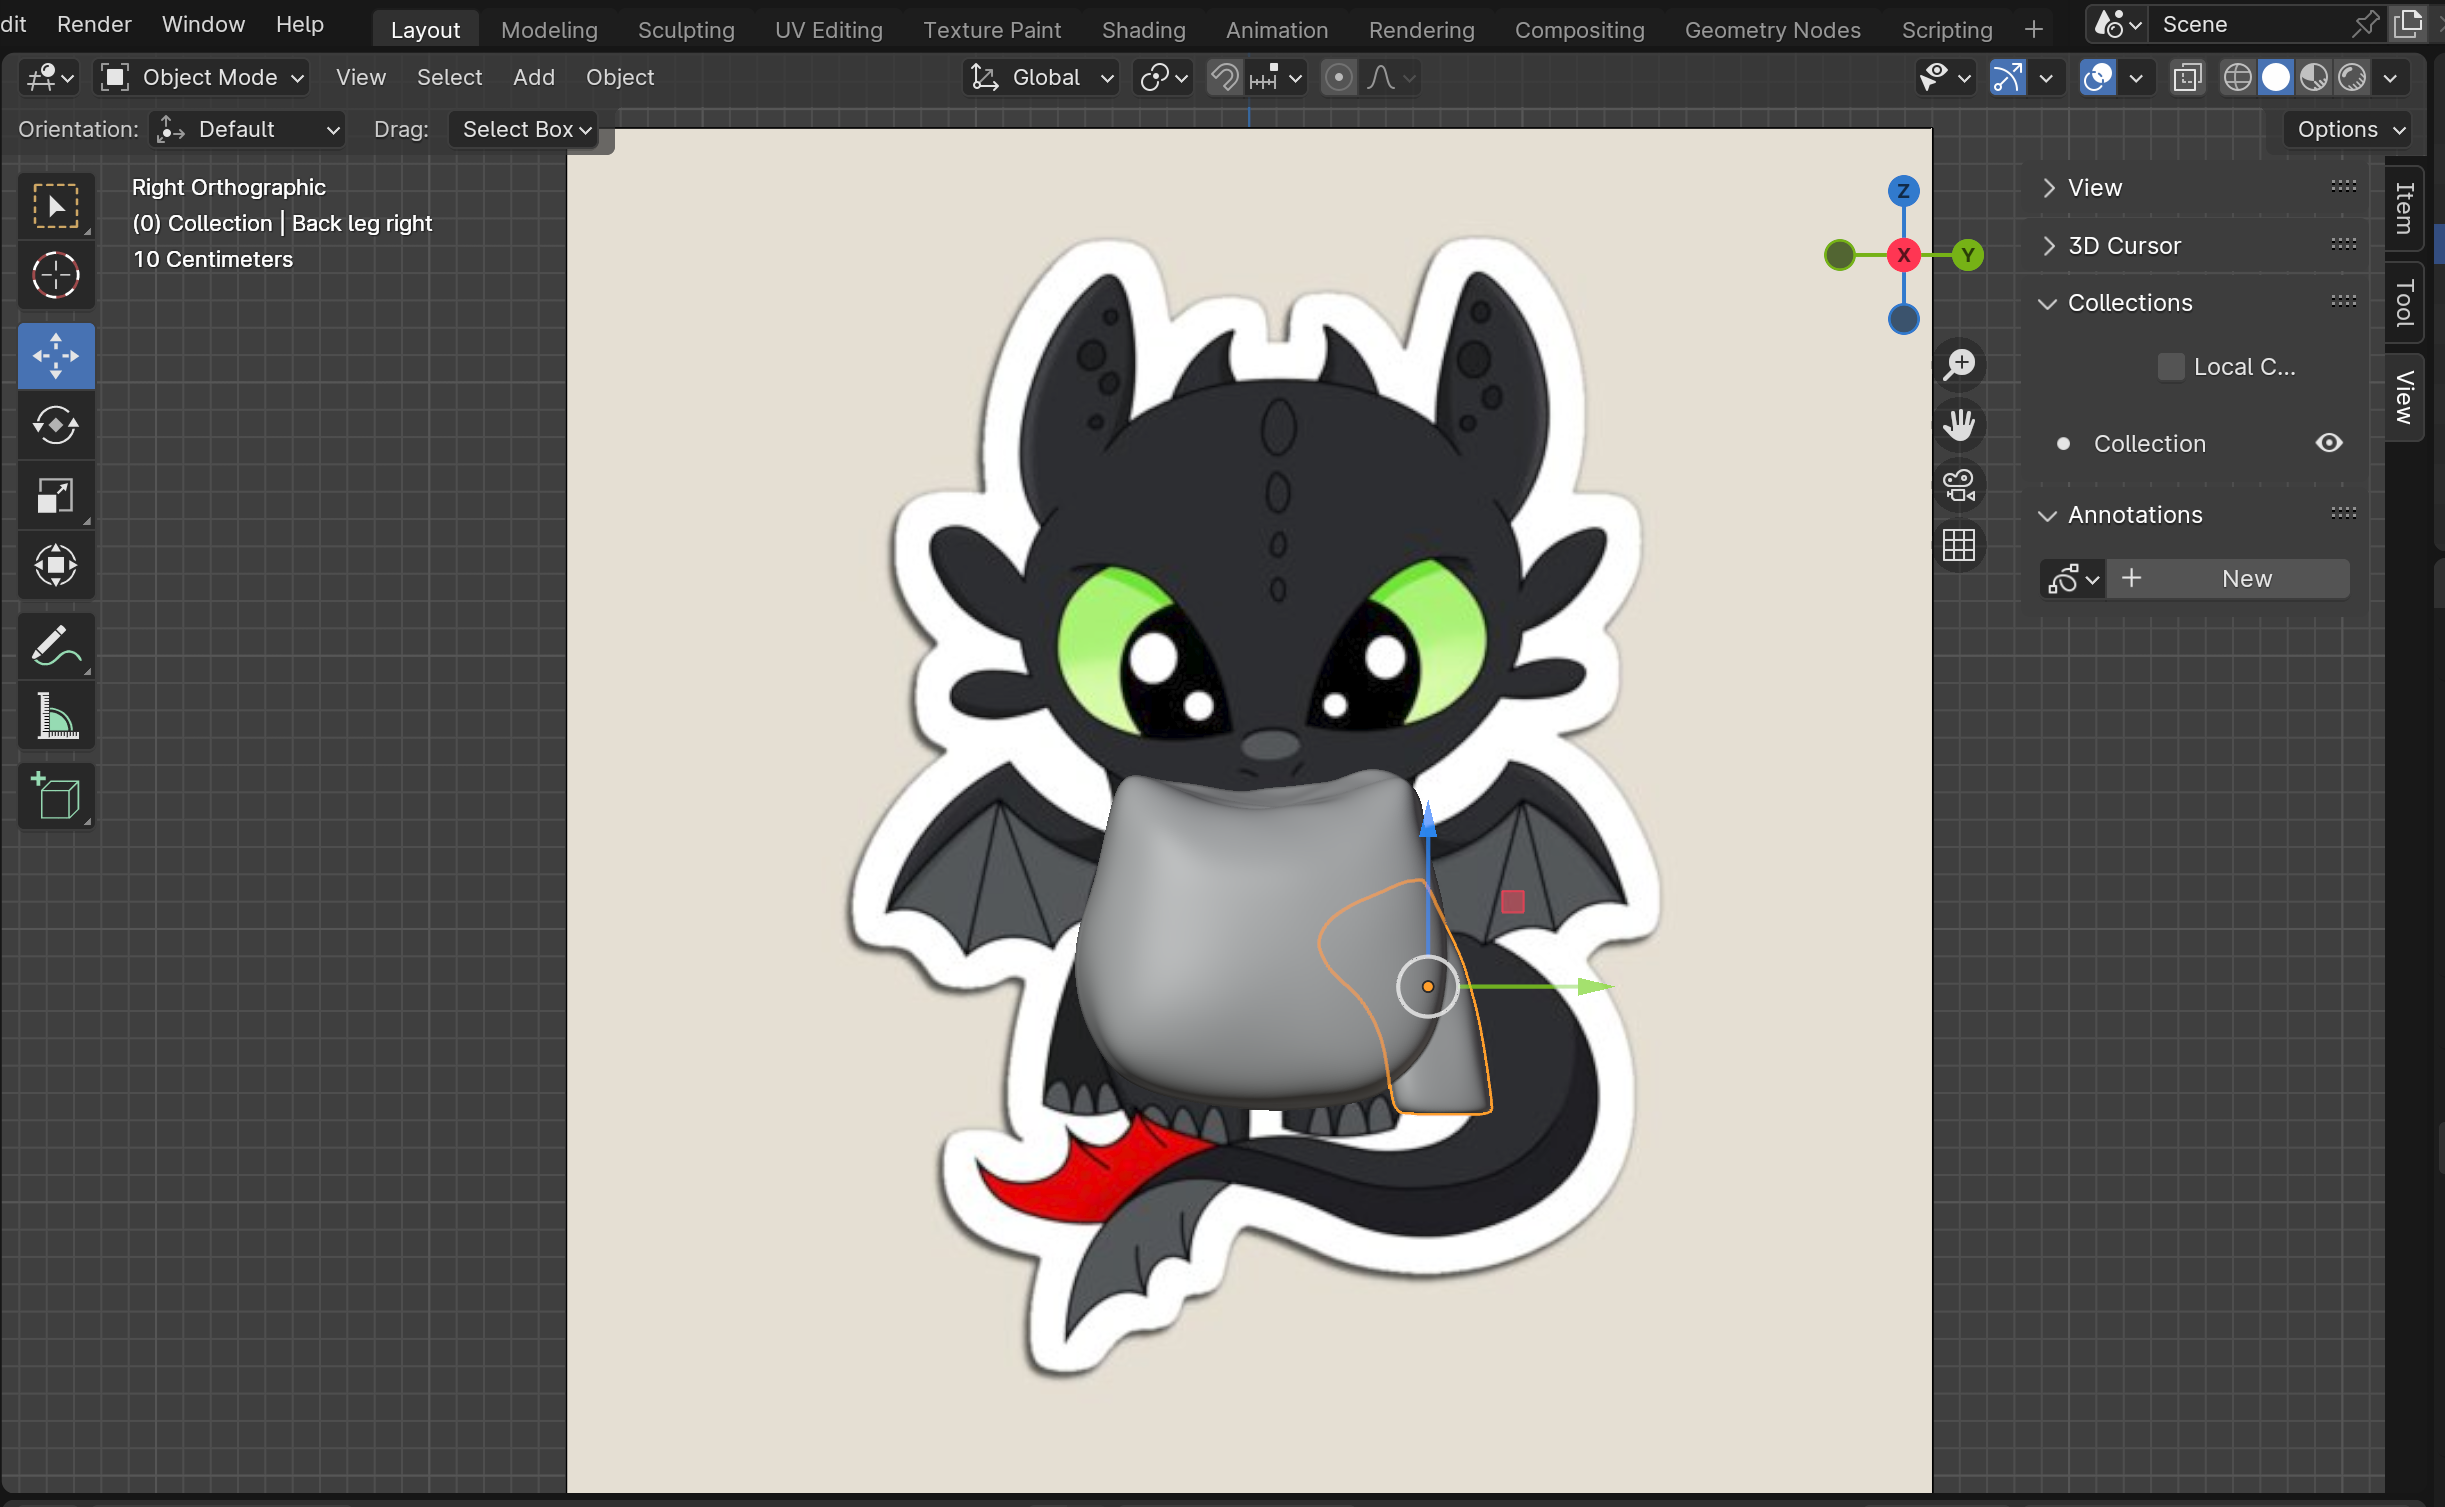
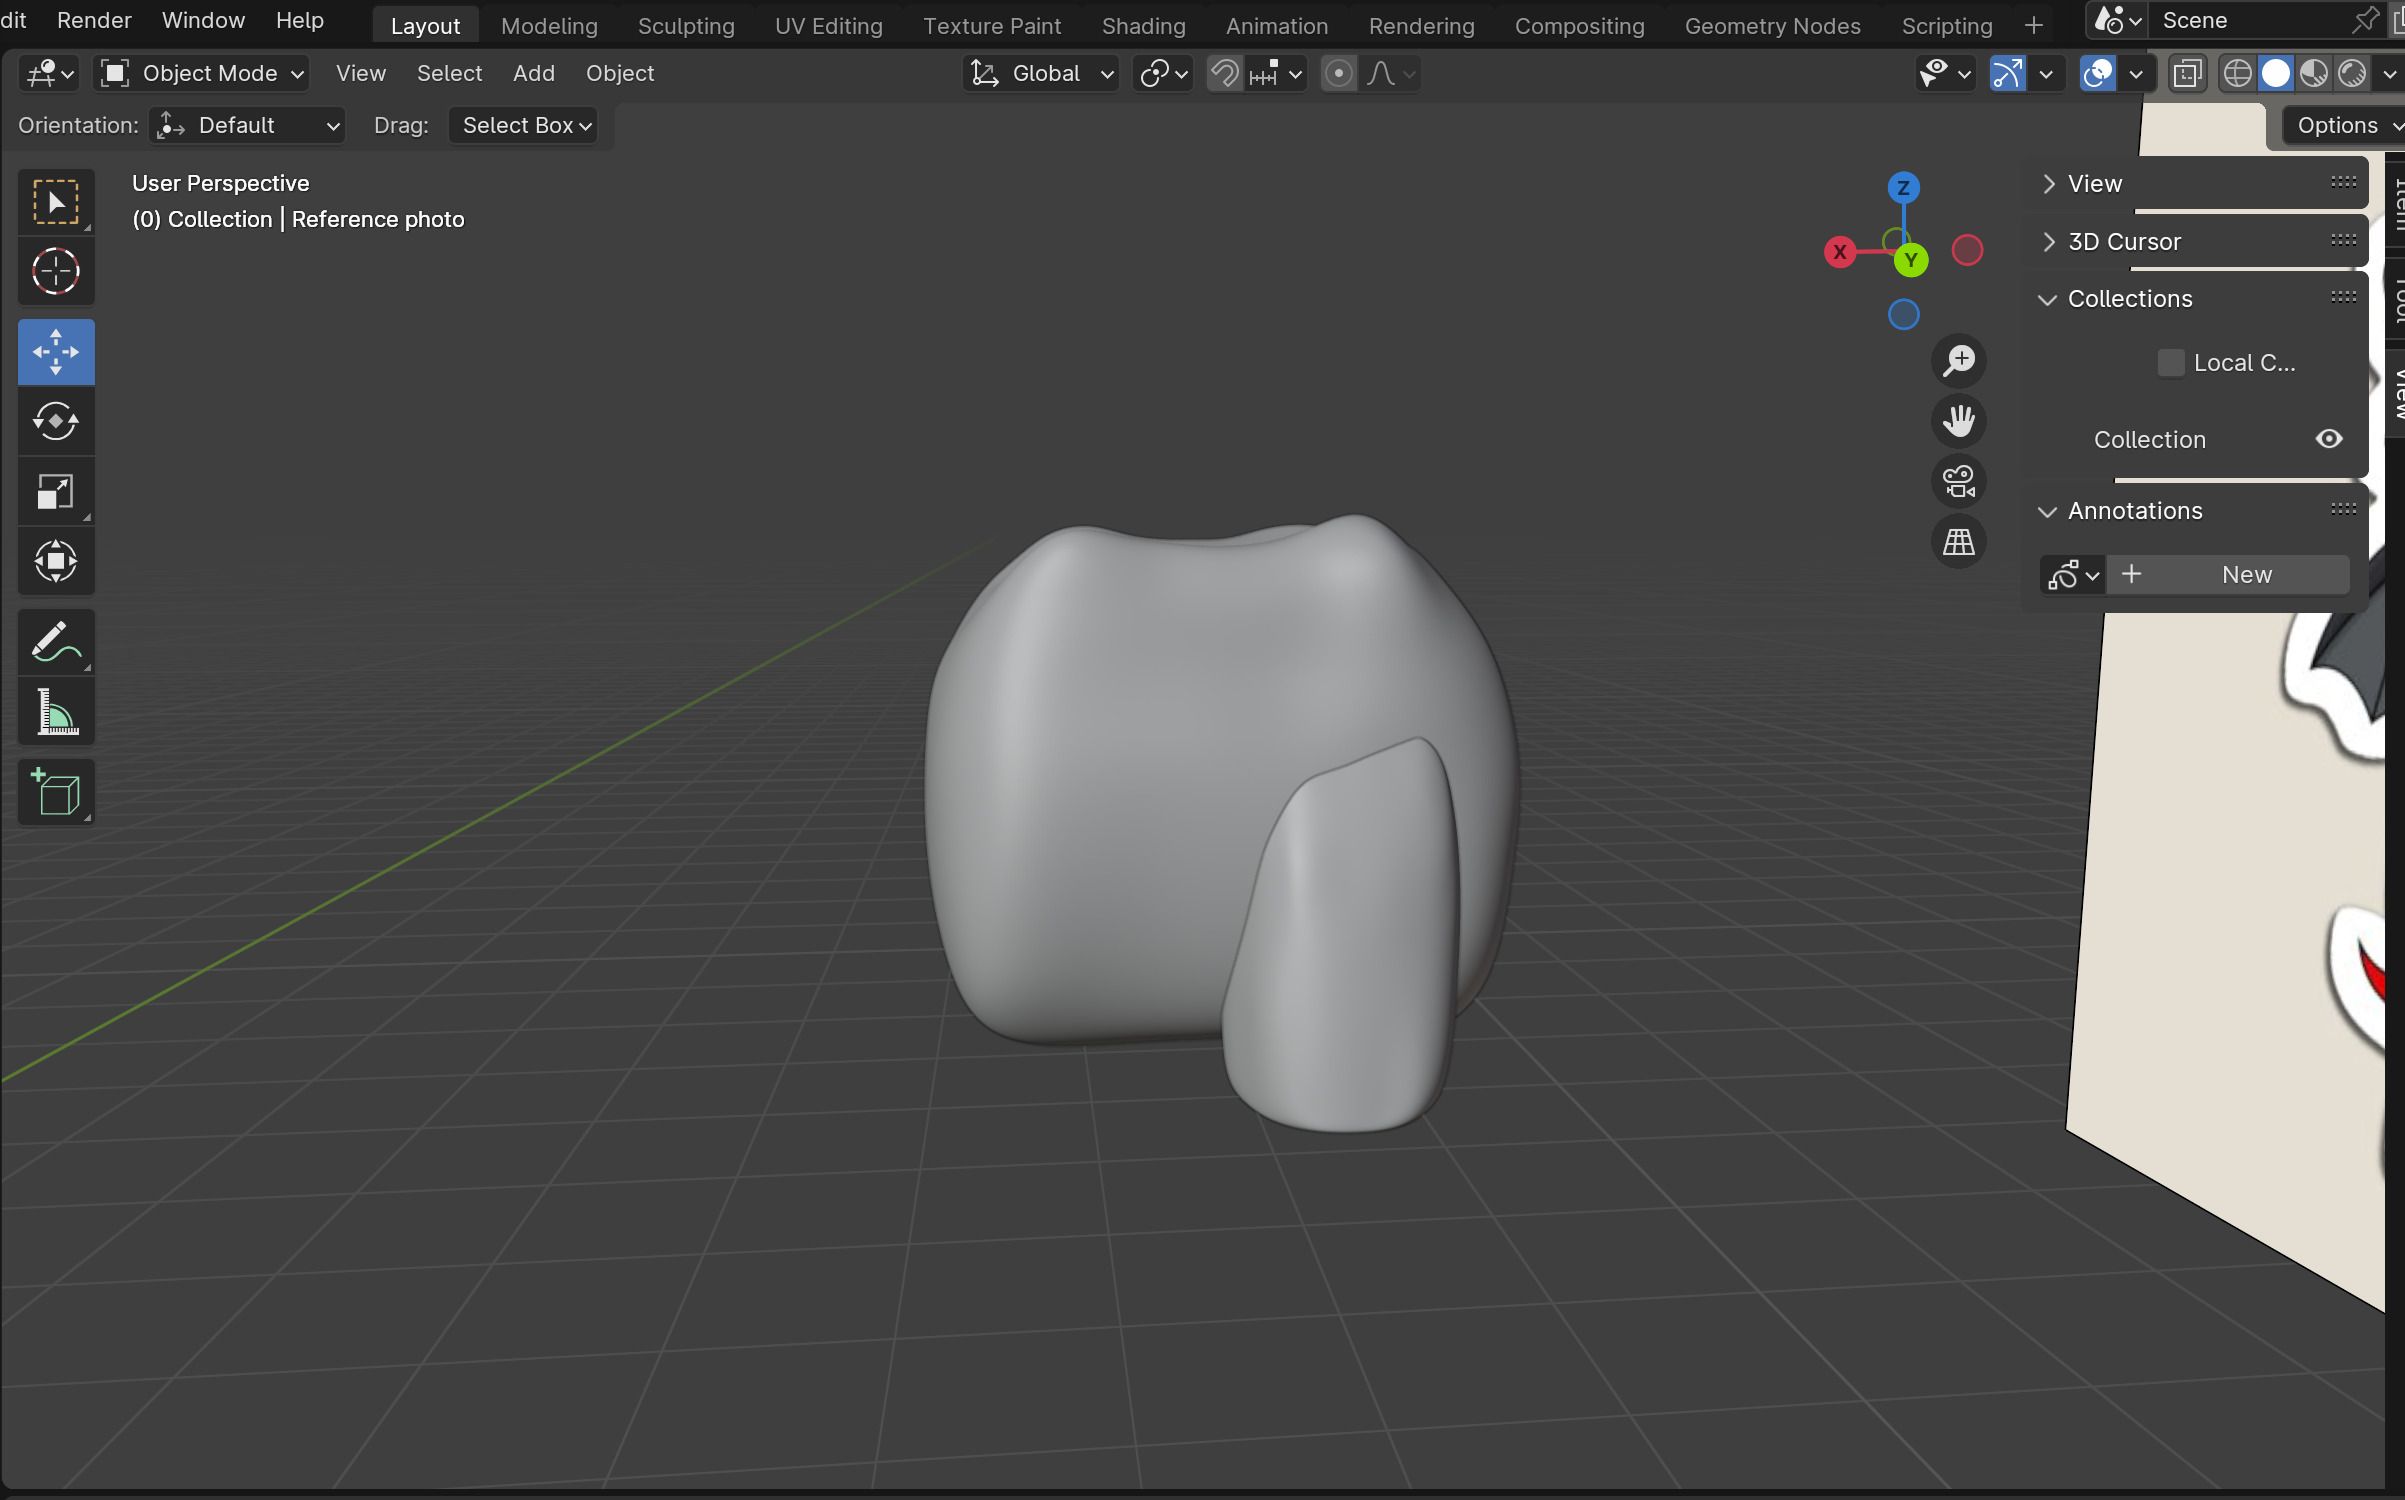
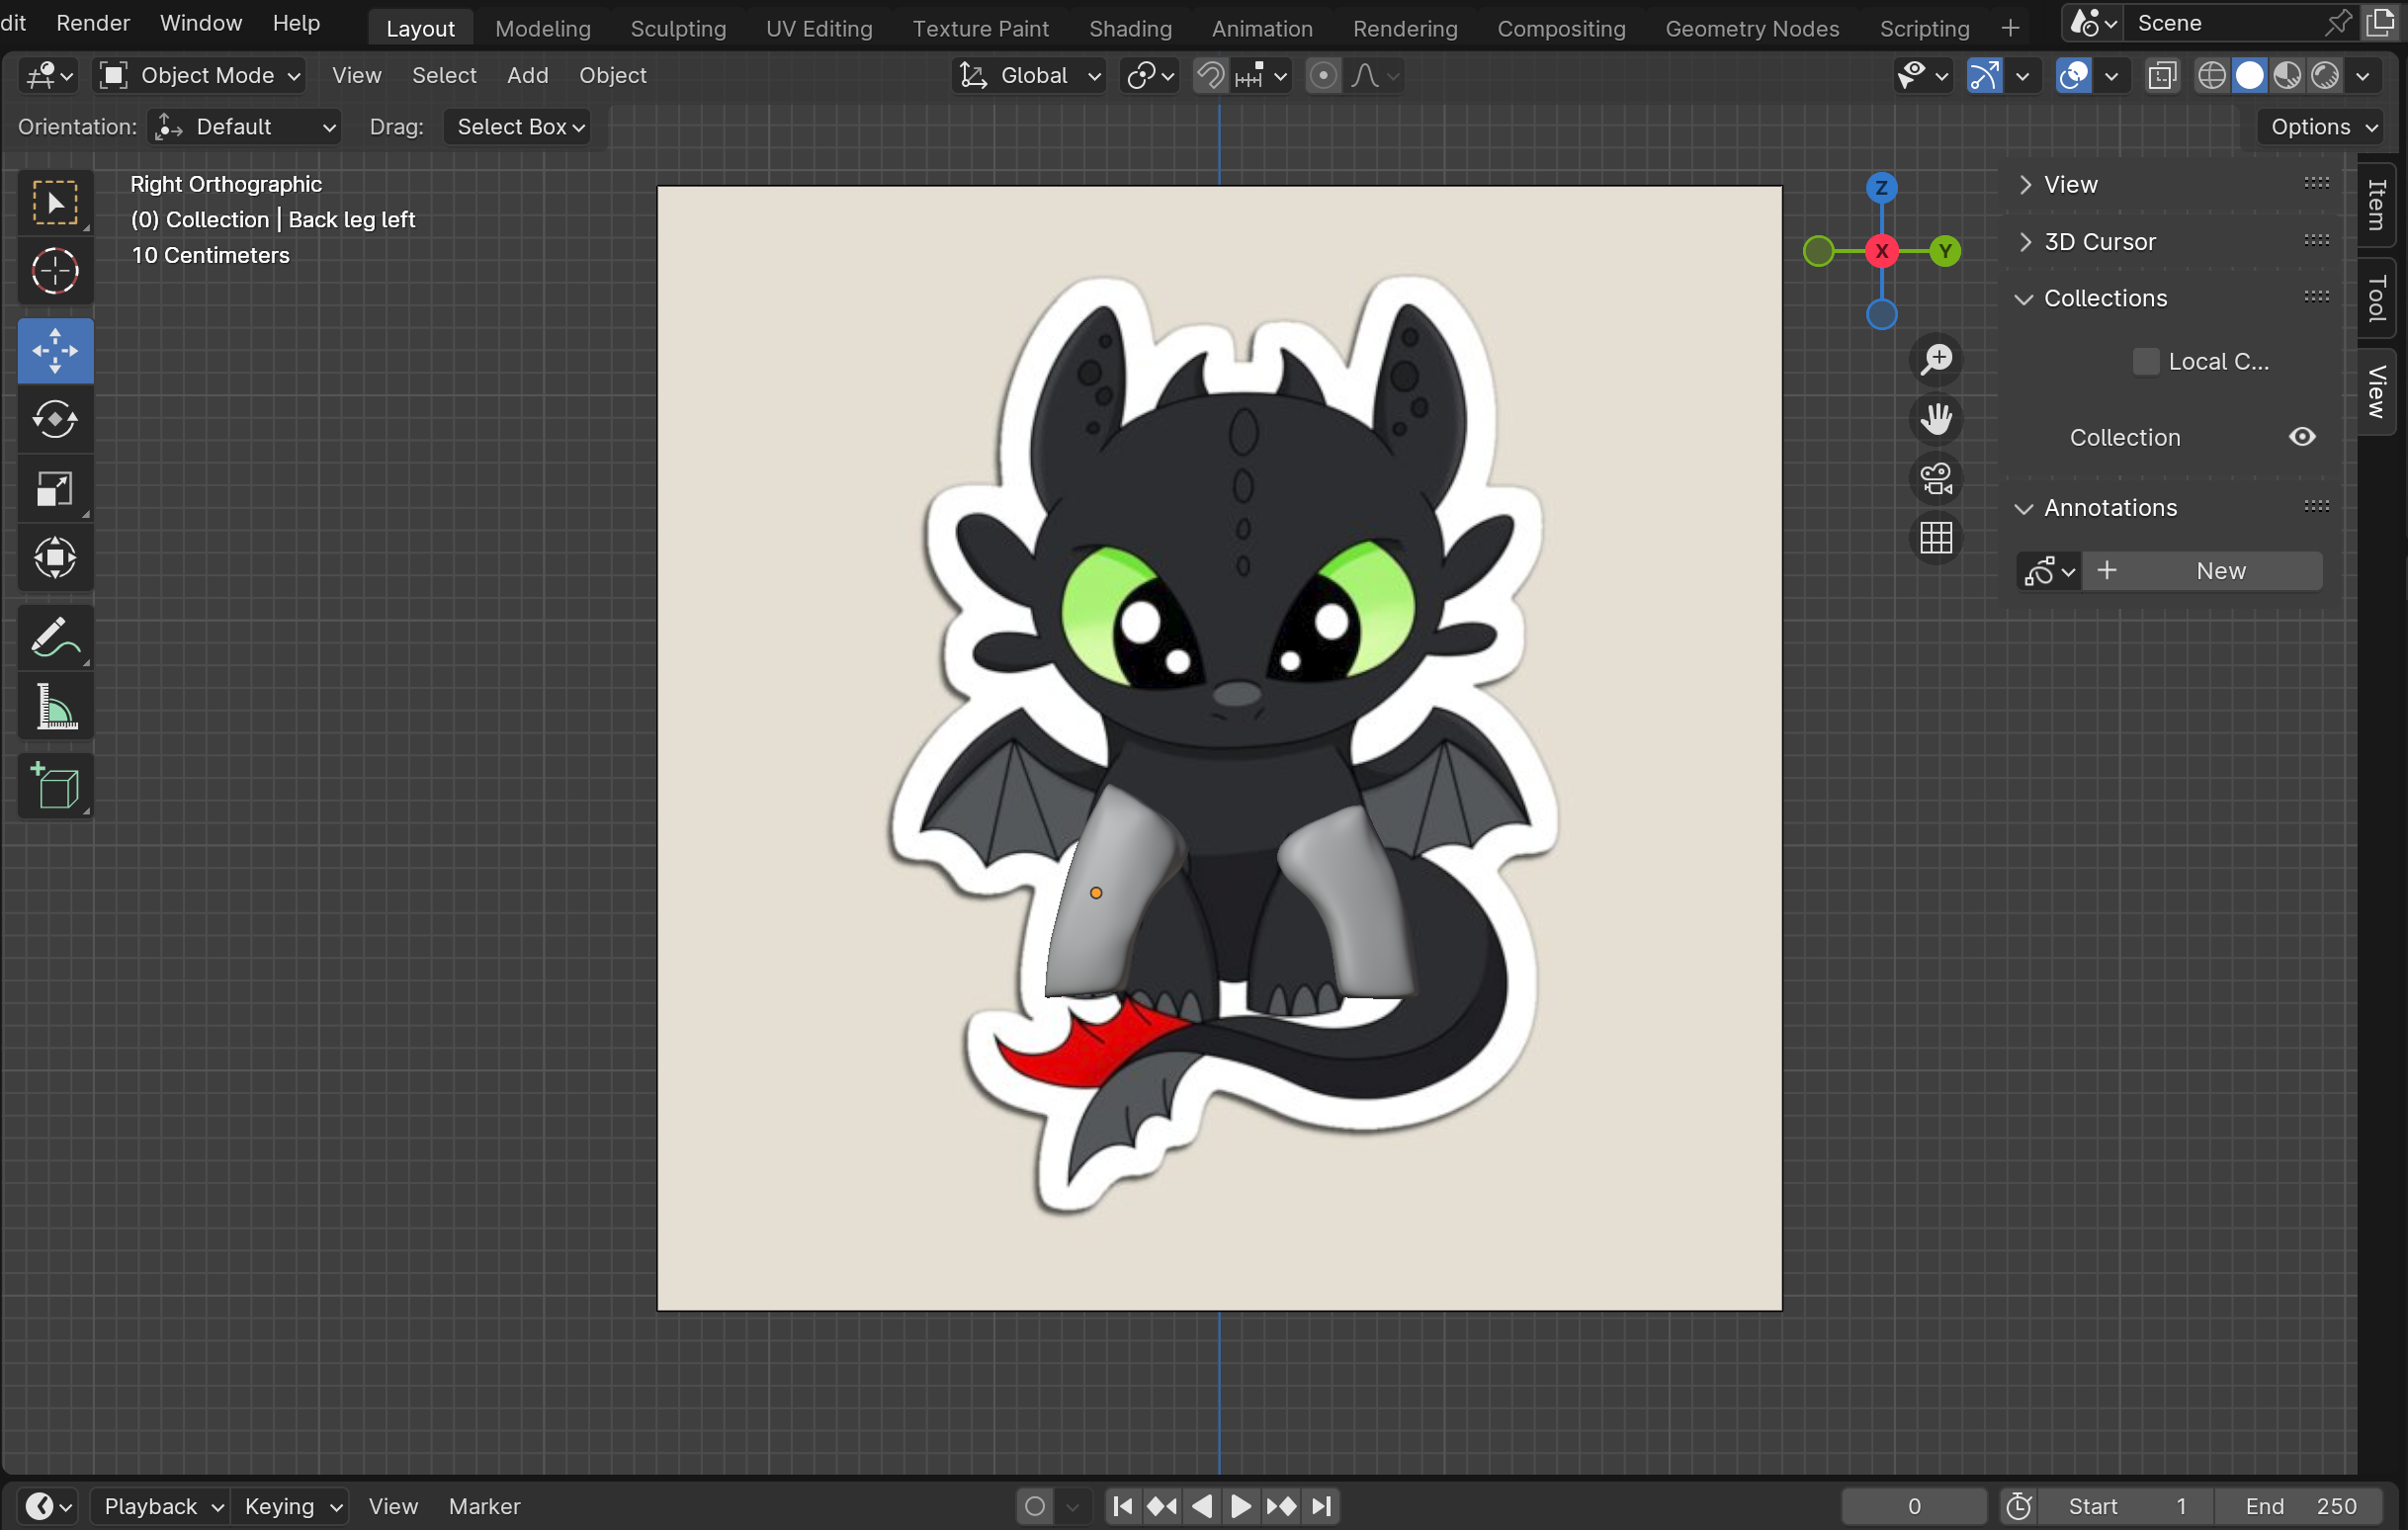
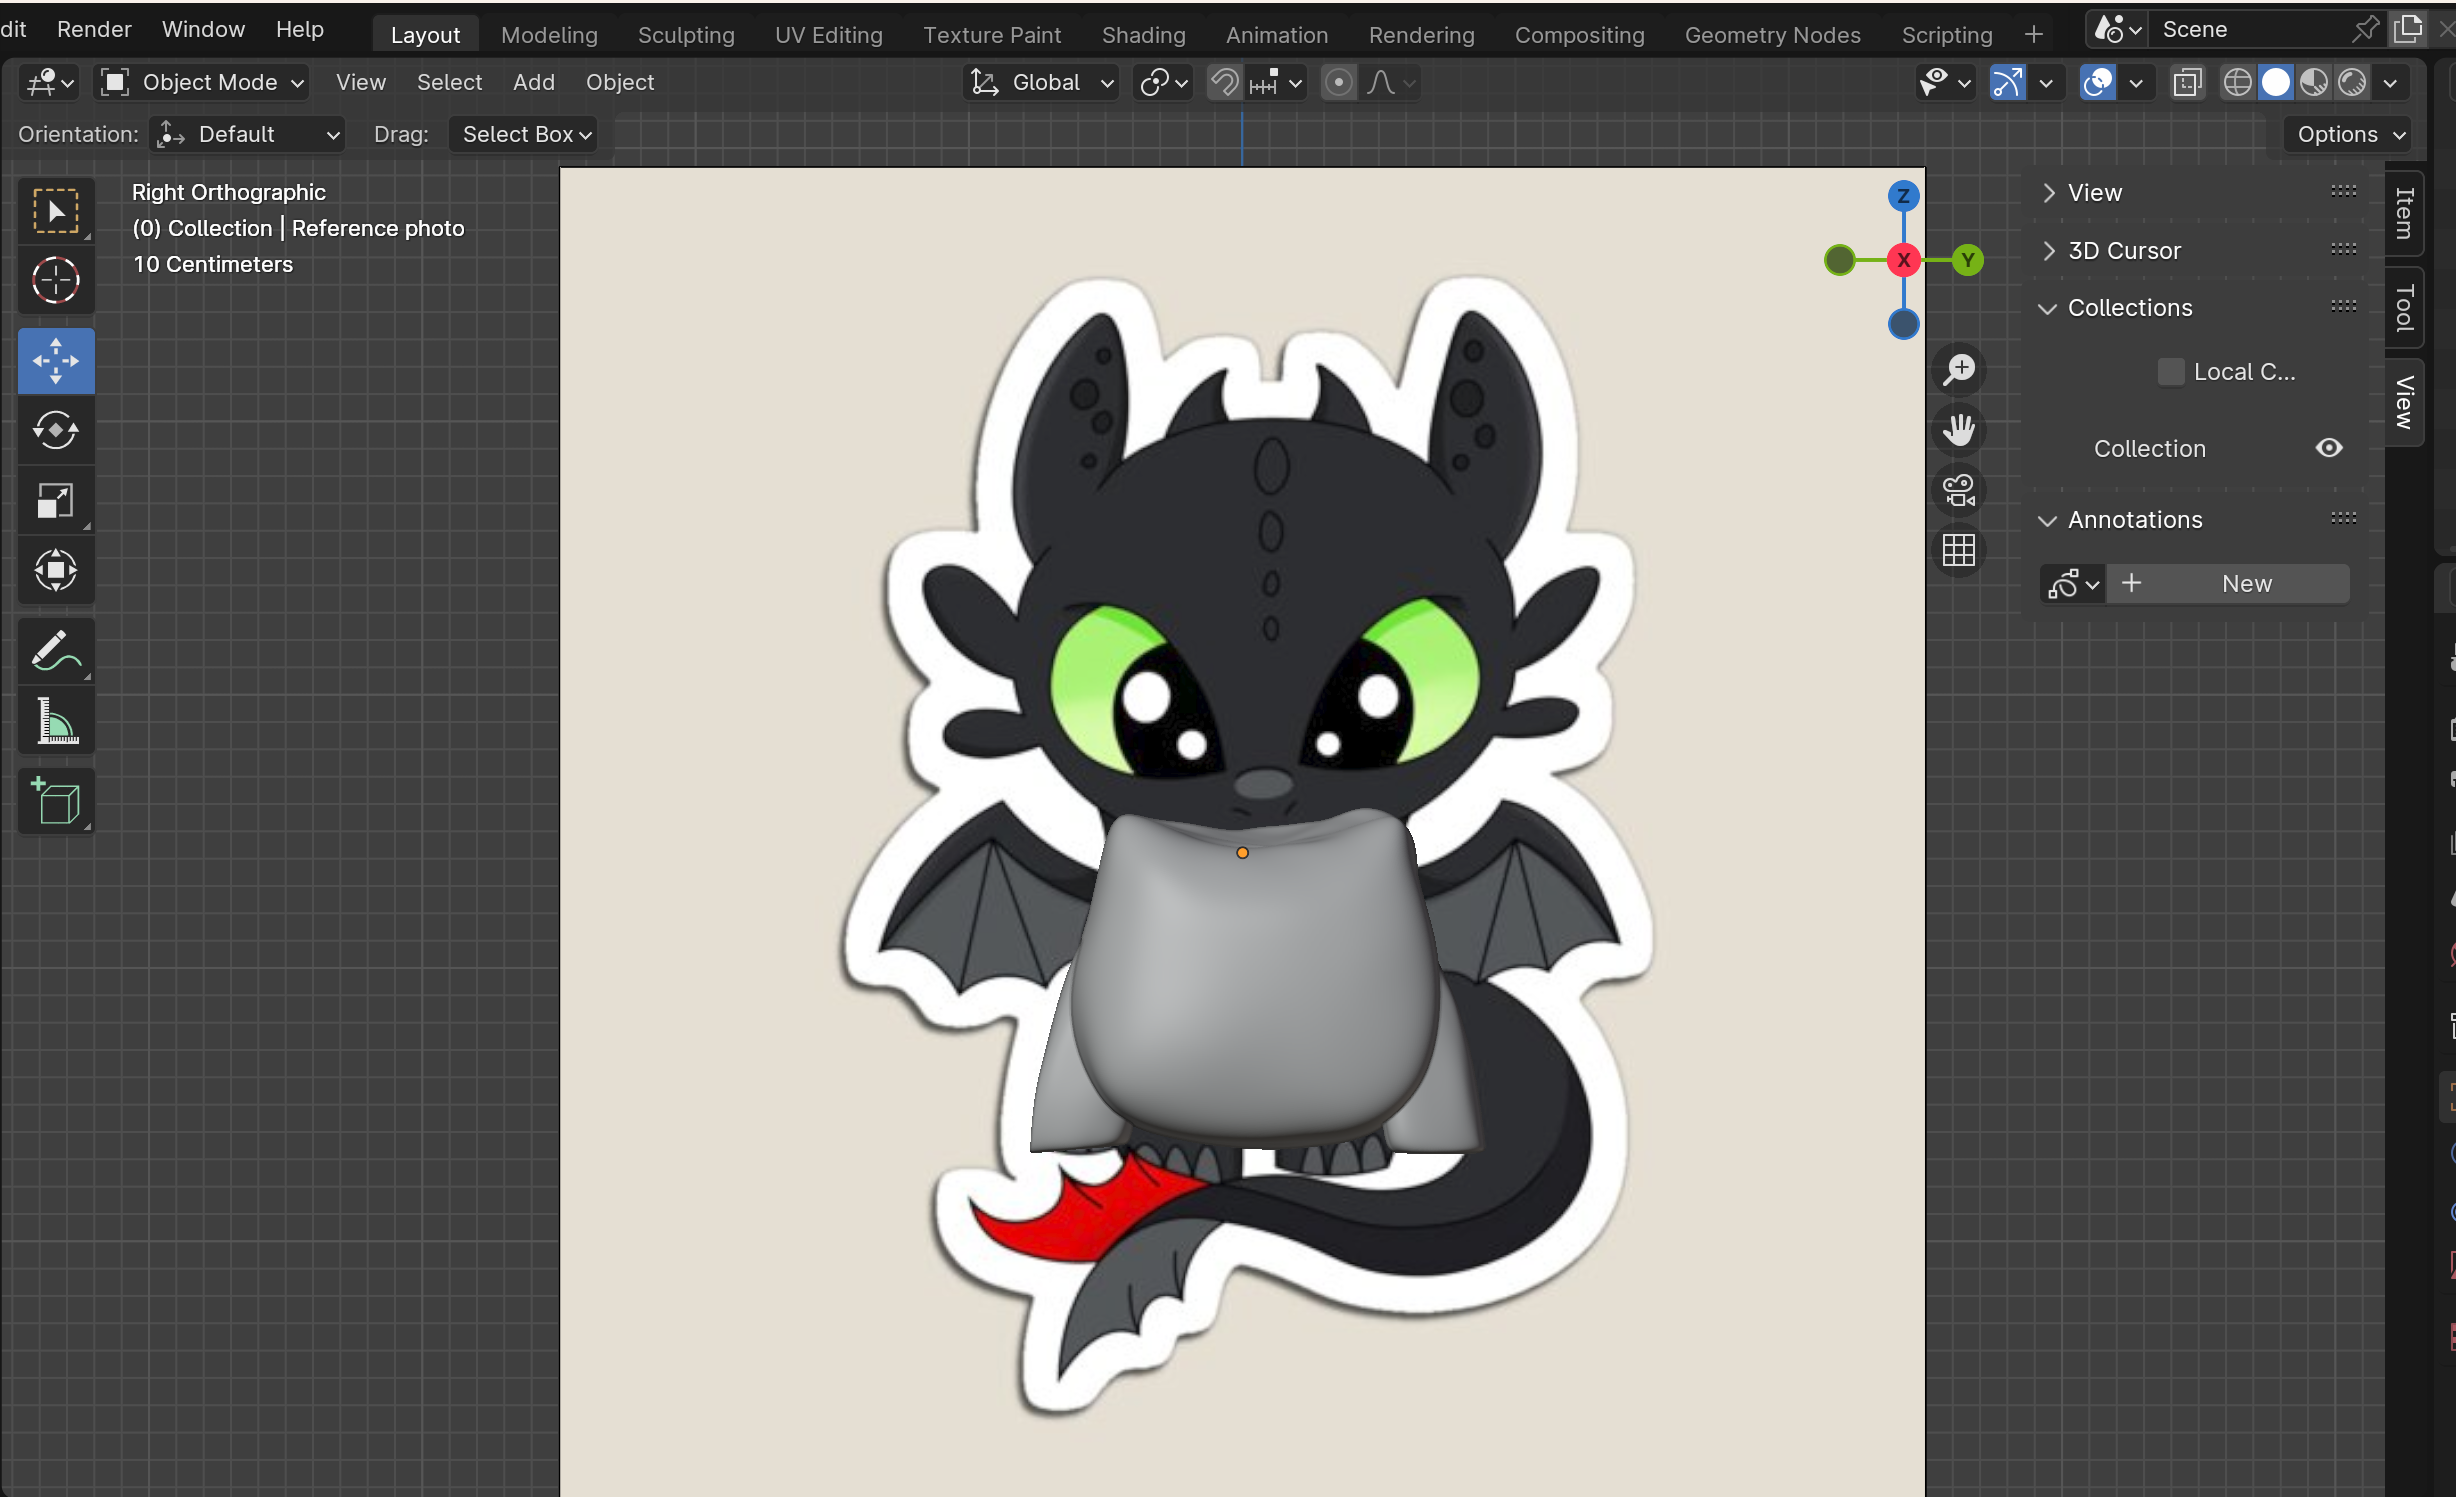
As per usual we're going to hide the currently unnecessary objects, enter the X-axis view, add a sphere, scale it, subdivide it and enter sculpt mode. We're gonna keep using the tools we usually do: Smooth, Elastic Deform, Flatten, and Grab. After this, unhide the body (the eye to the right of the object name) and adjust/mold from there. Once you like how it looks from the side, repeat the same process on the other side, or duplicate (Shift+D) and mirror (M) along the y-axis (Y) (I wish I knew how to mirror at the time). Either way, once you repeat the process or mirror, just adjust the legs until they look good.
!!!! MAKE SURE TO NAME YOUR OBJECTS AS YOU CREATE THEM TO NOT LOSE TRACK OF ANYTHING !!!!
Making the Wings
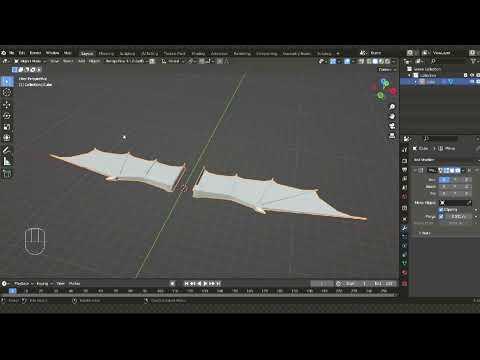
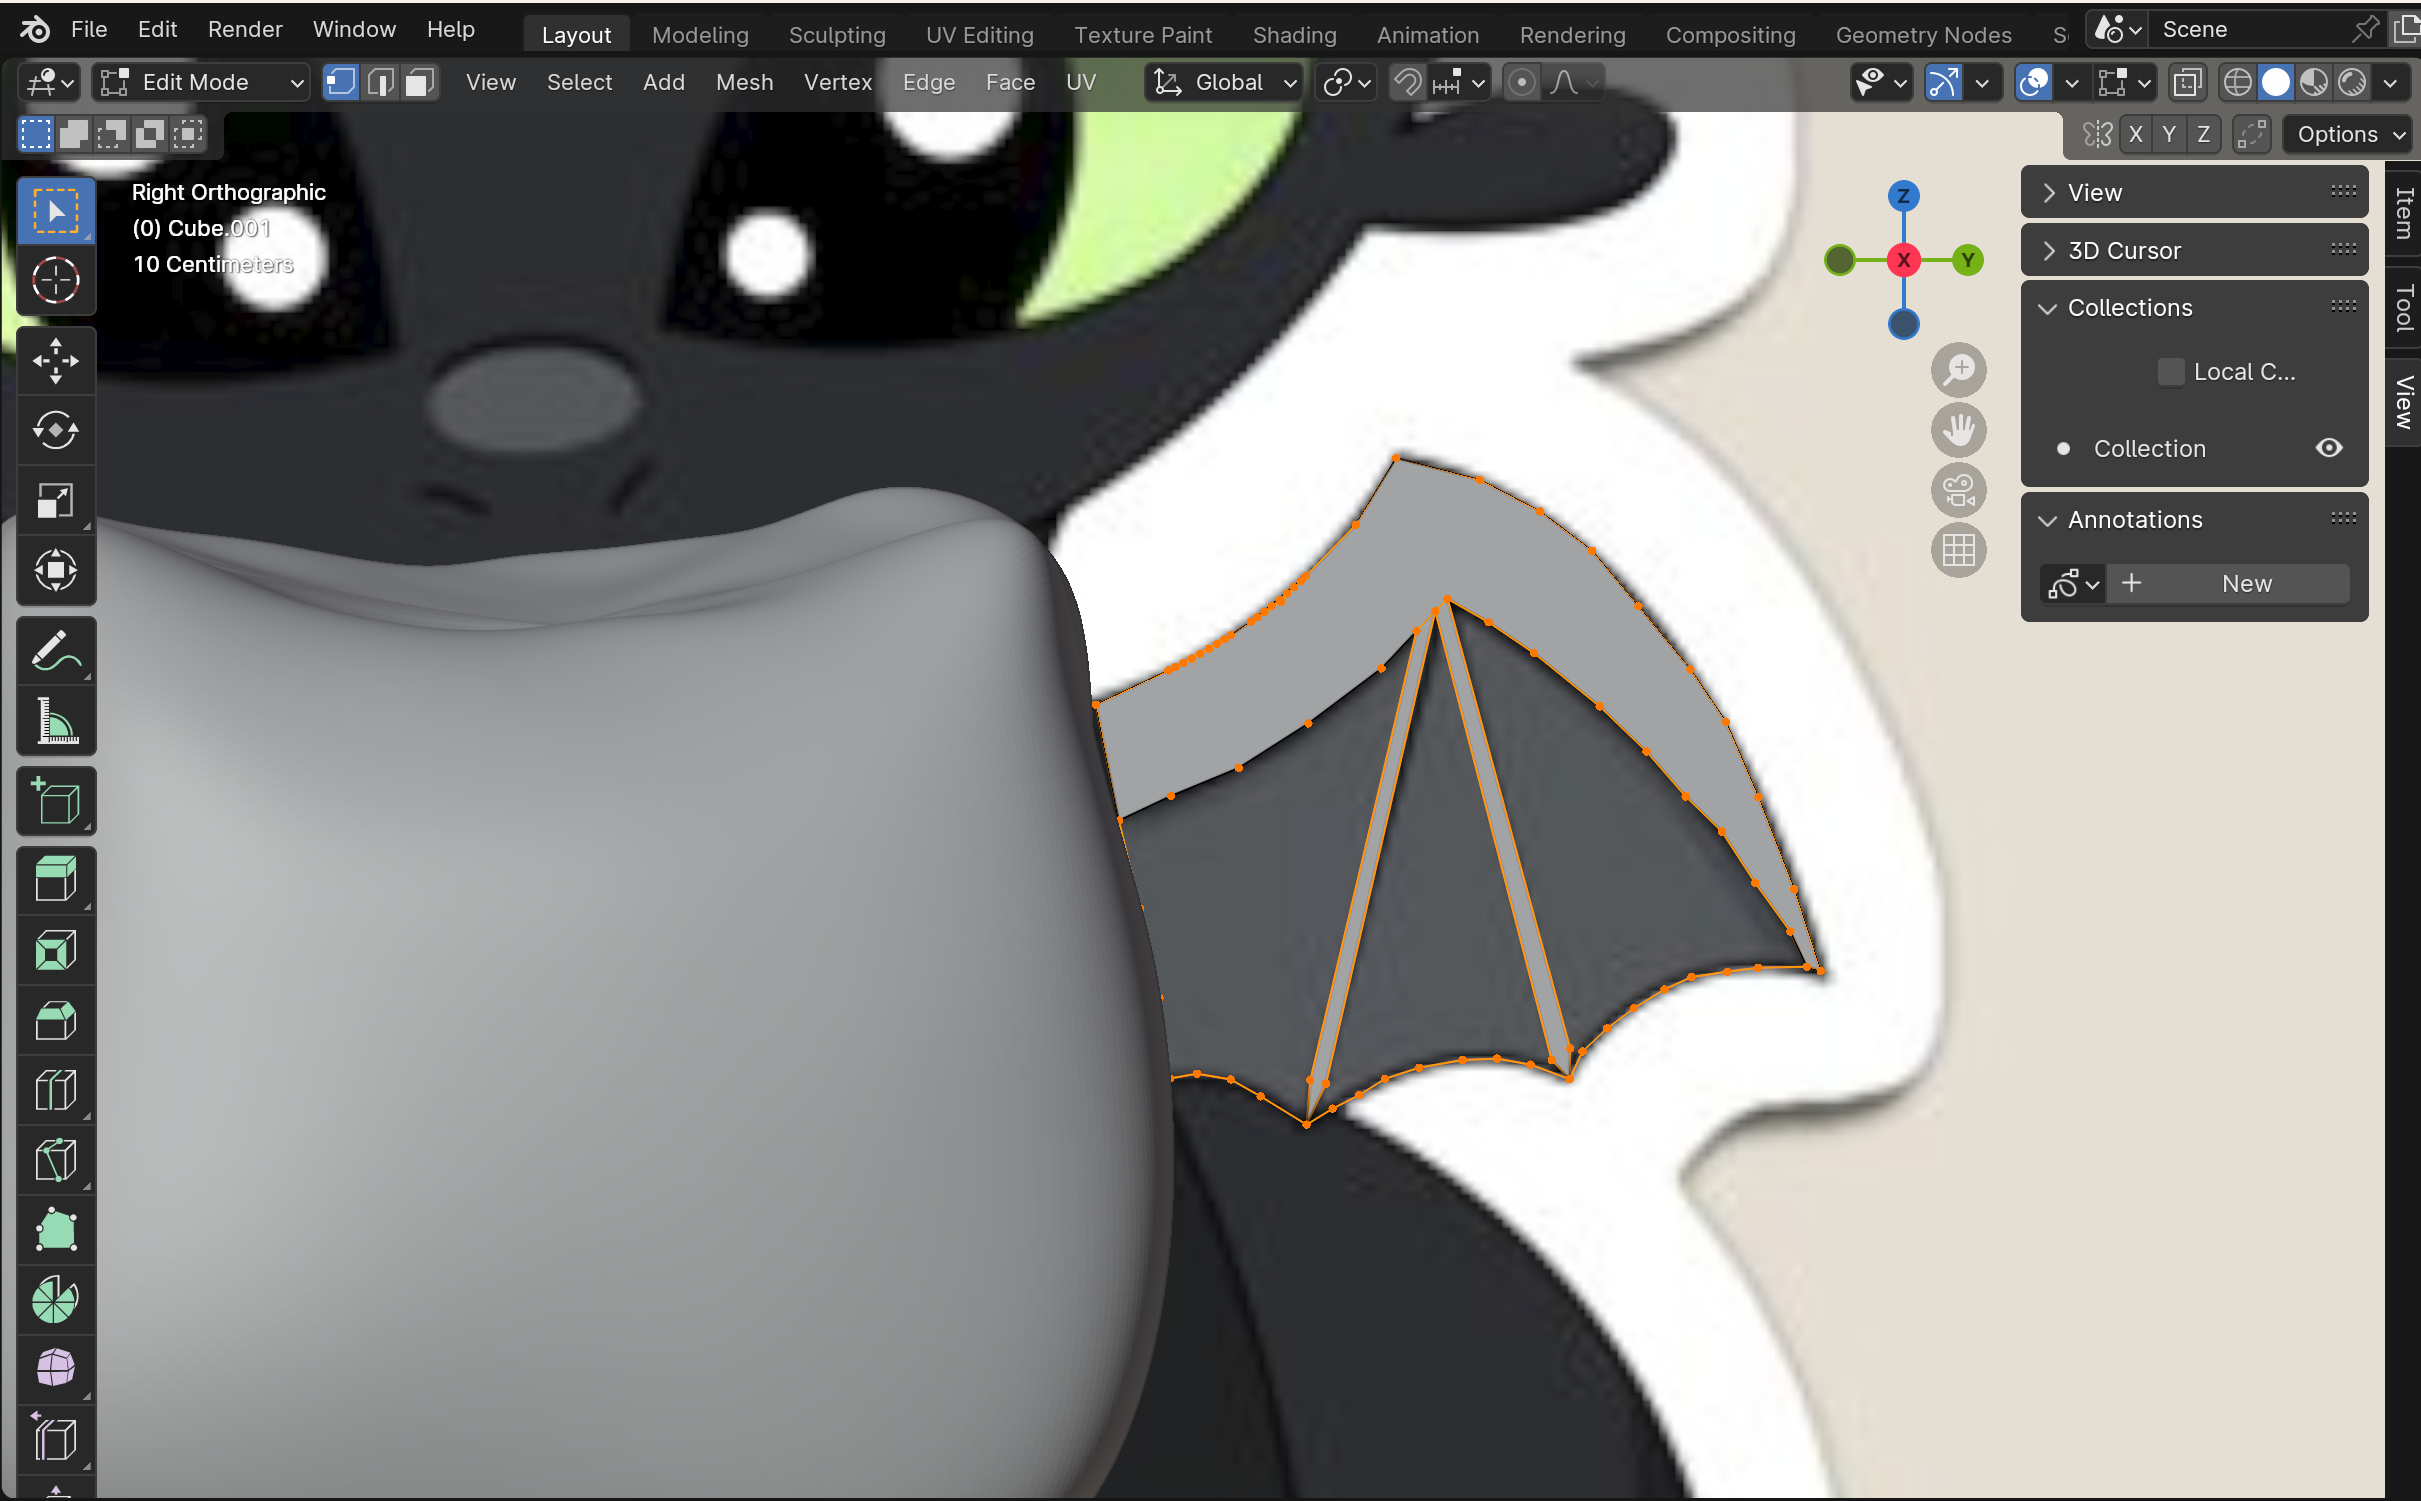
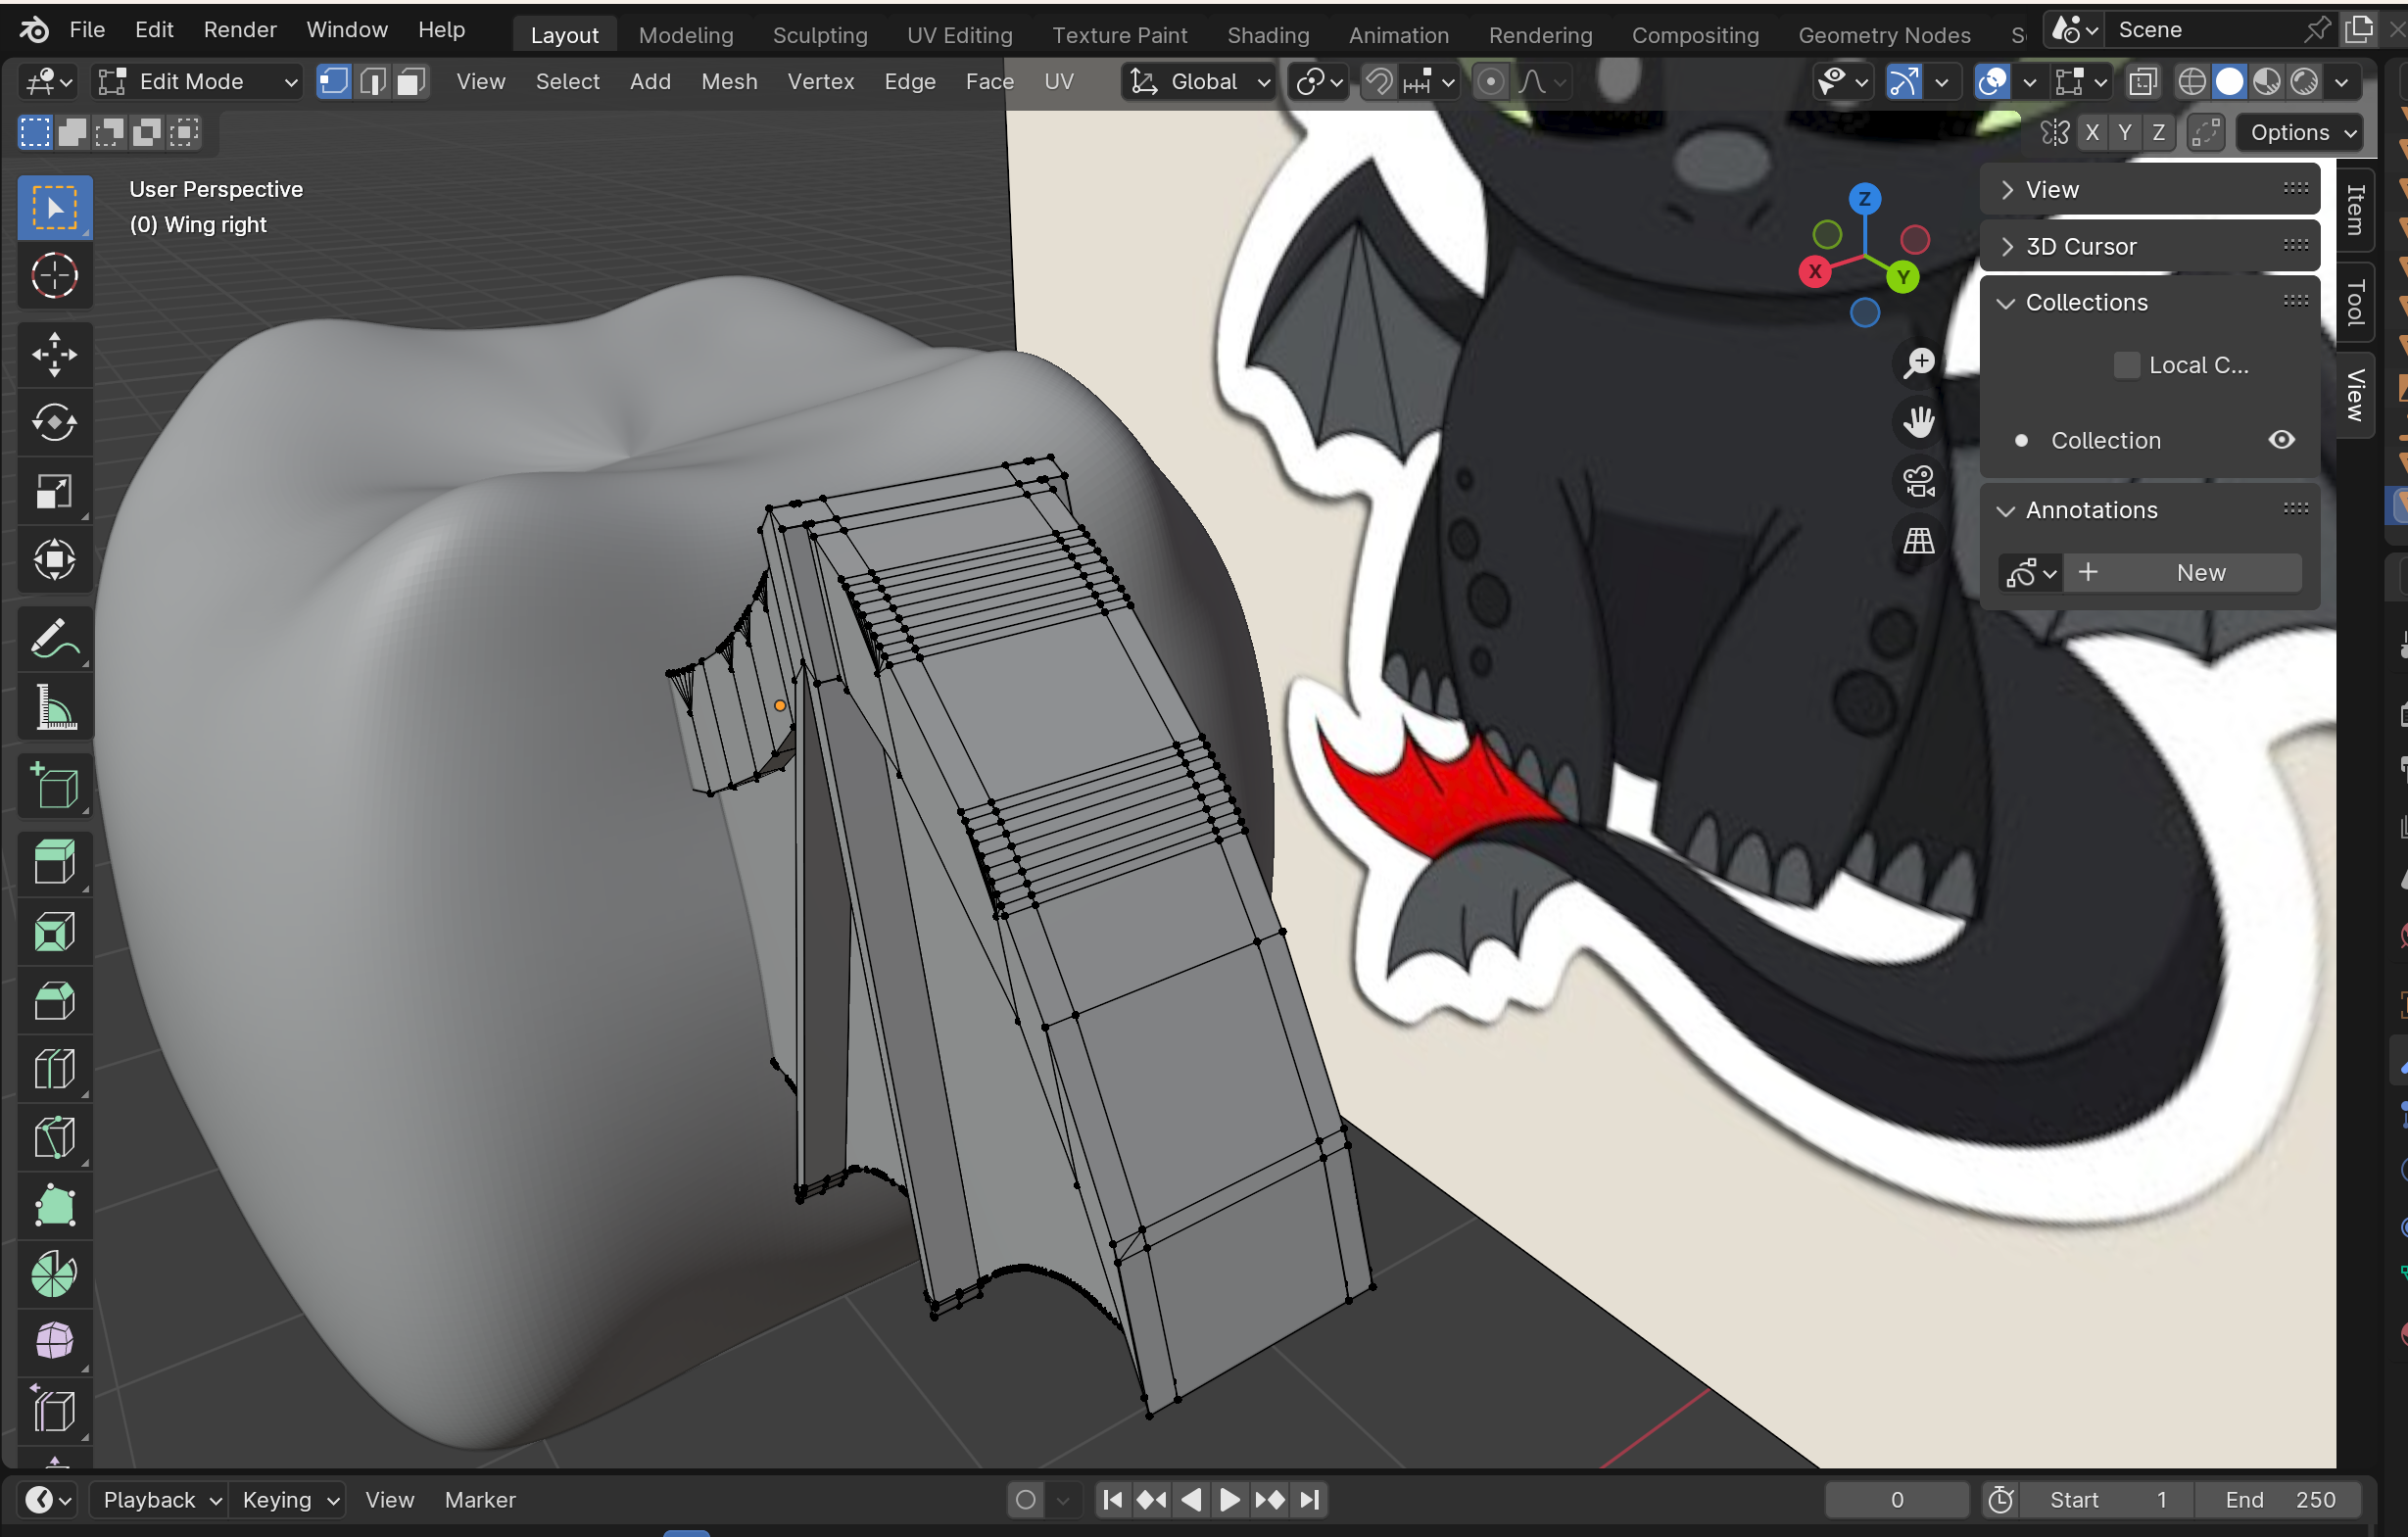
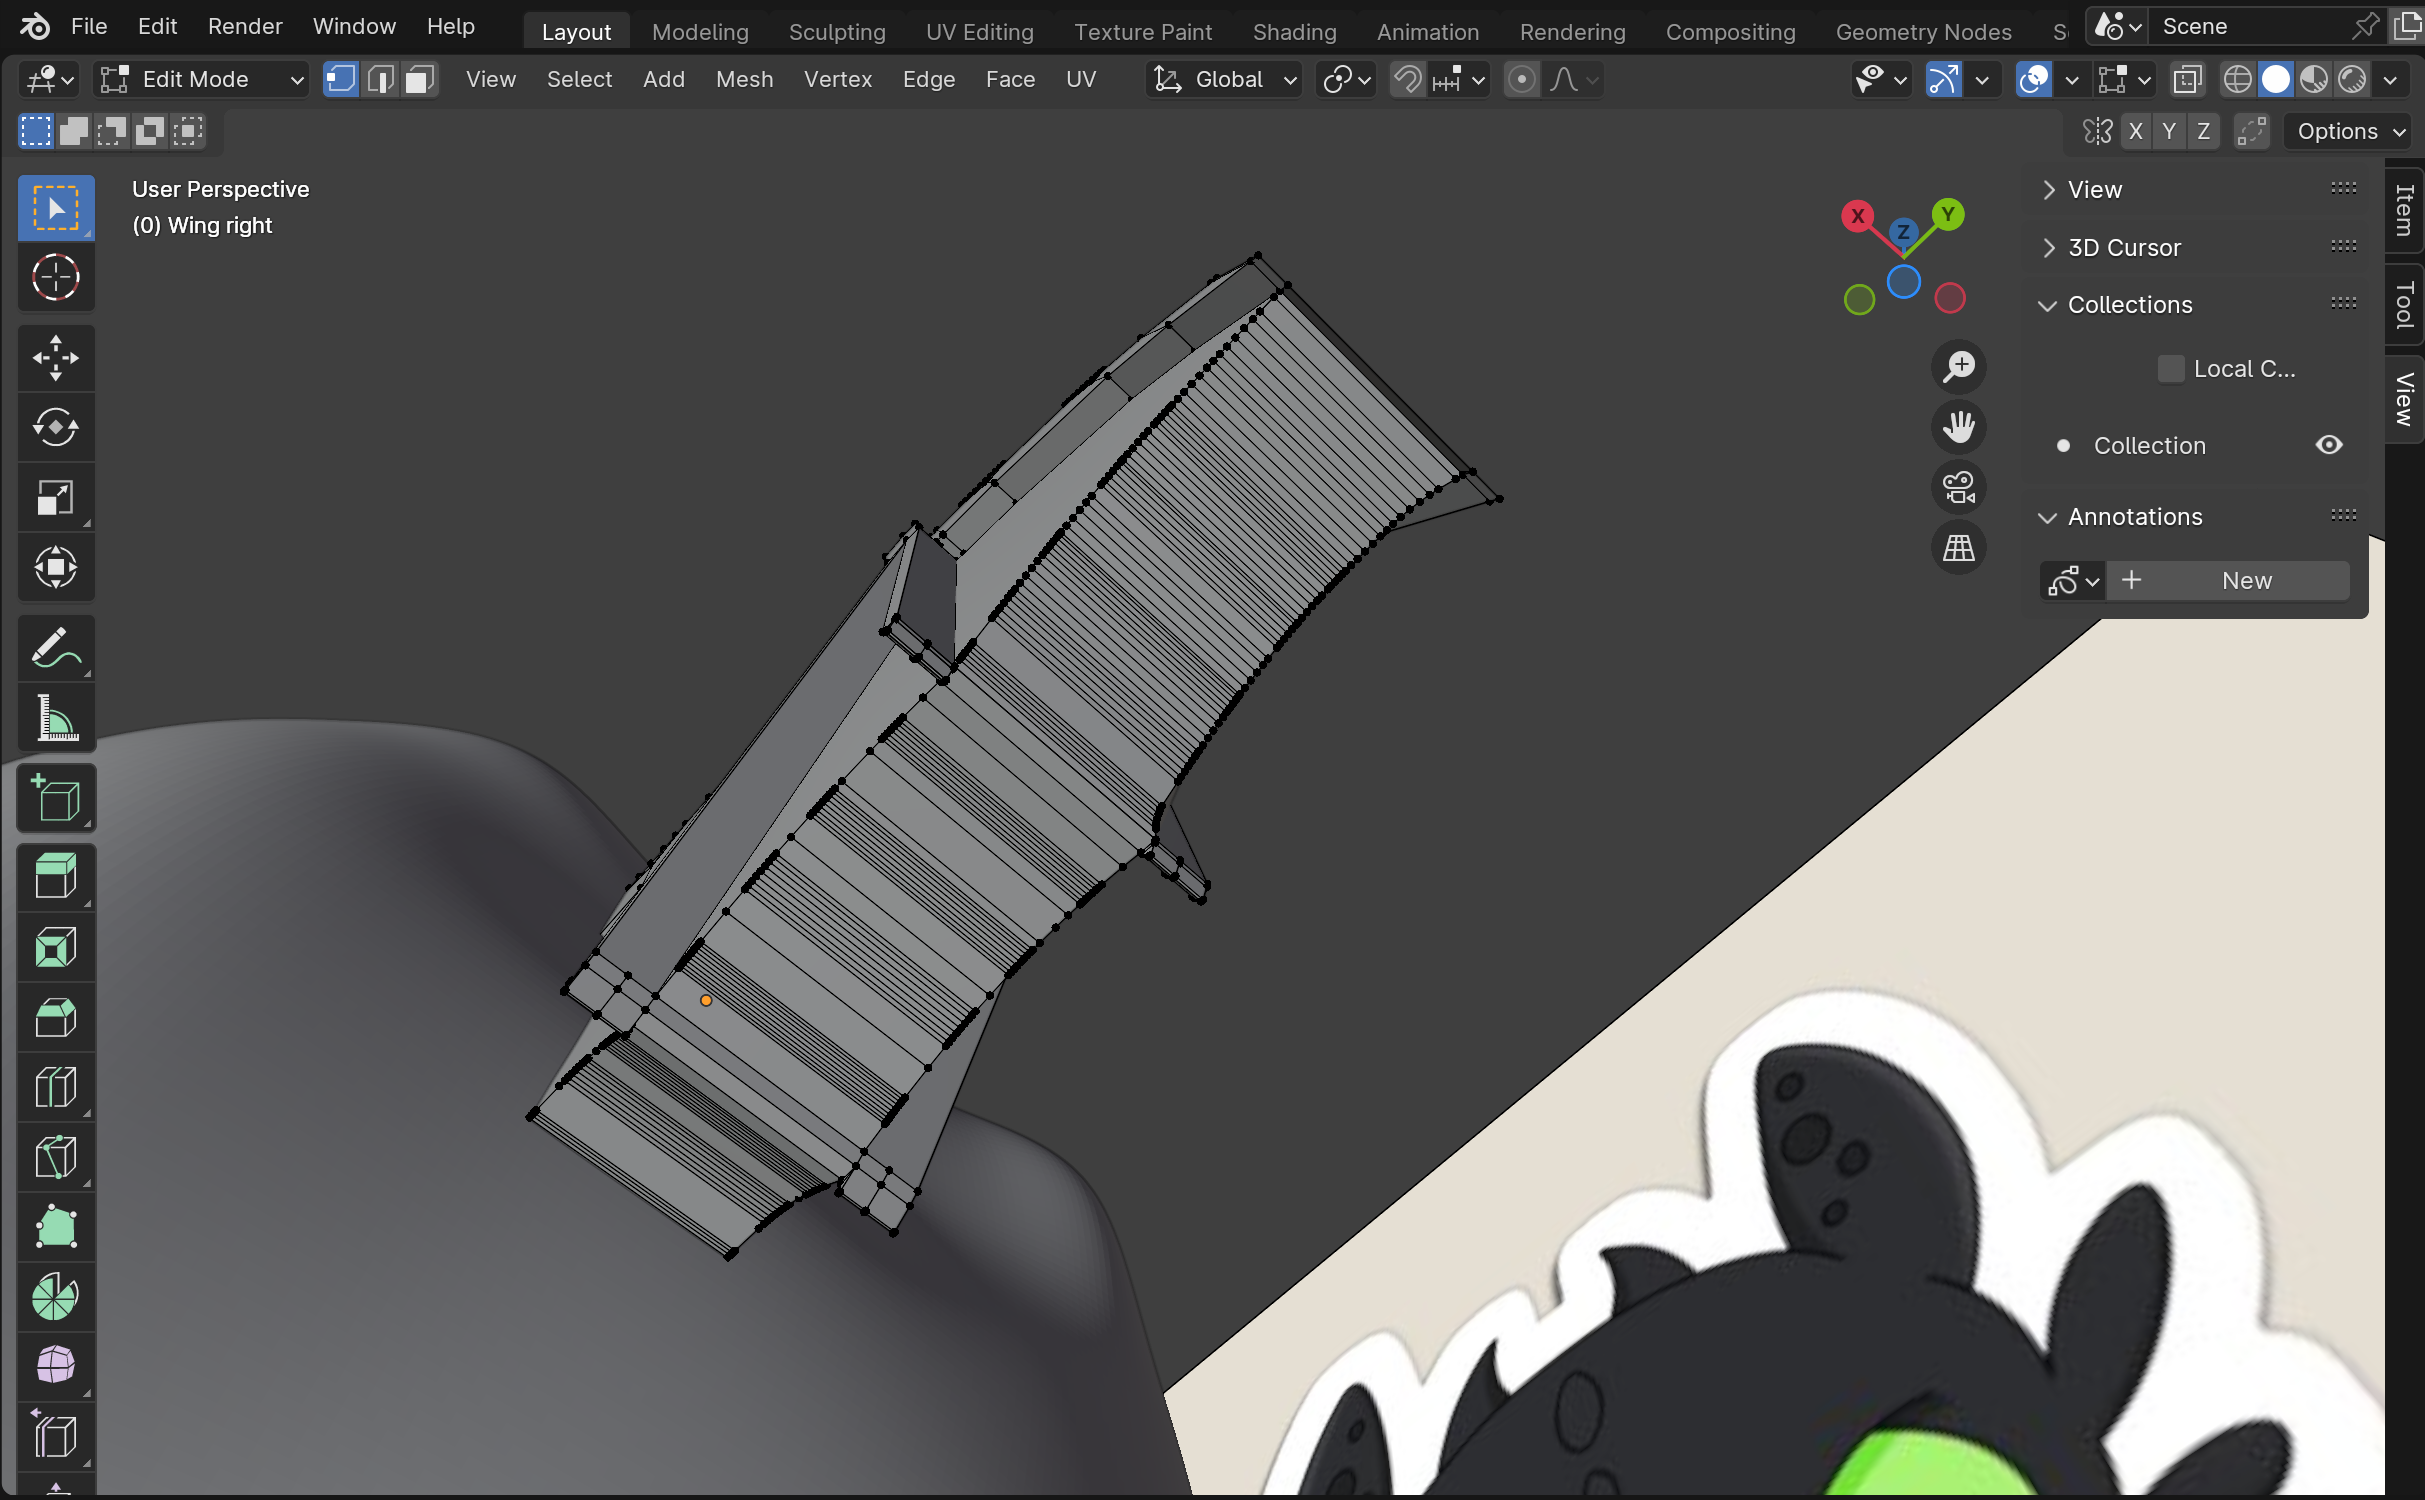
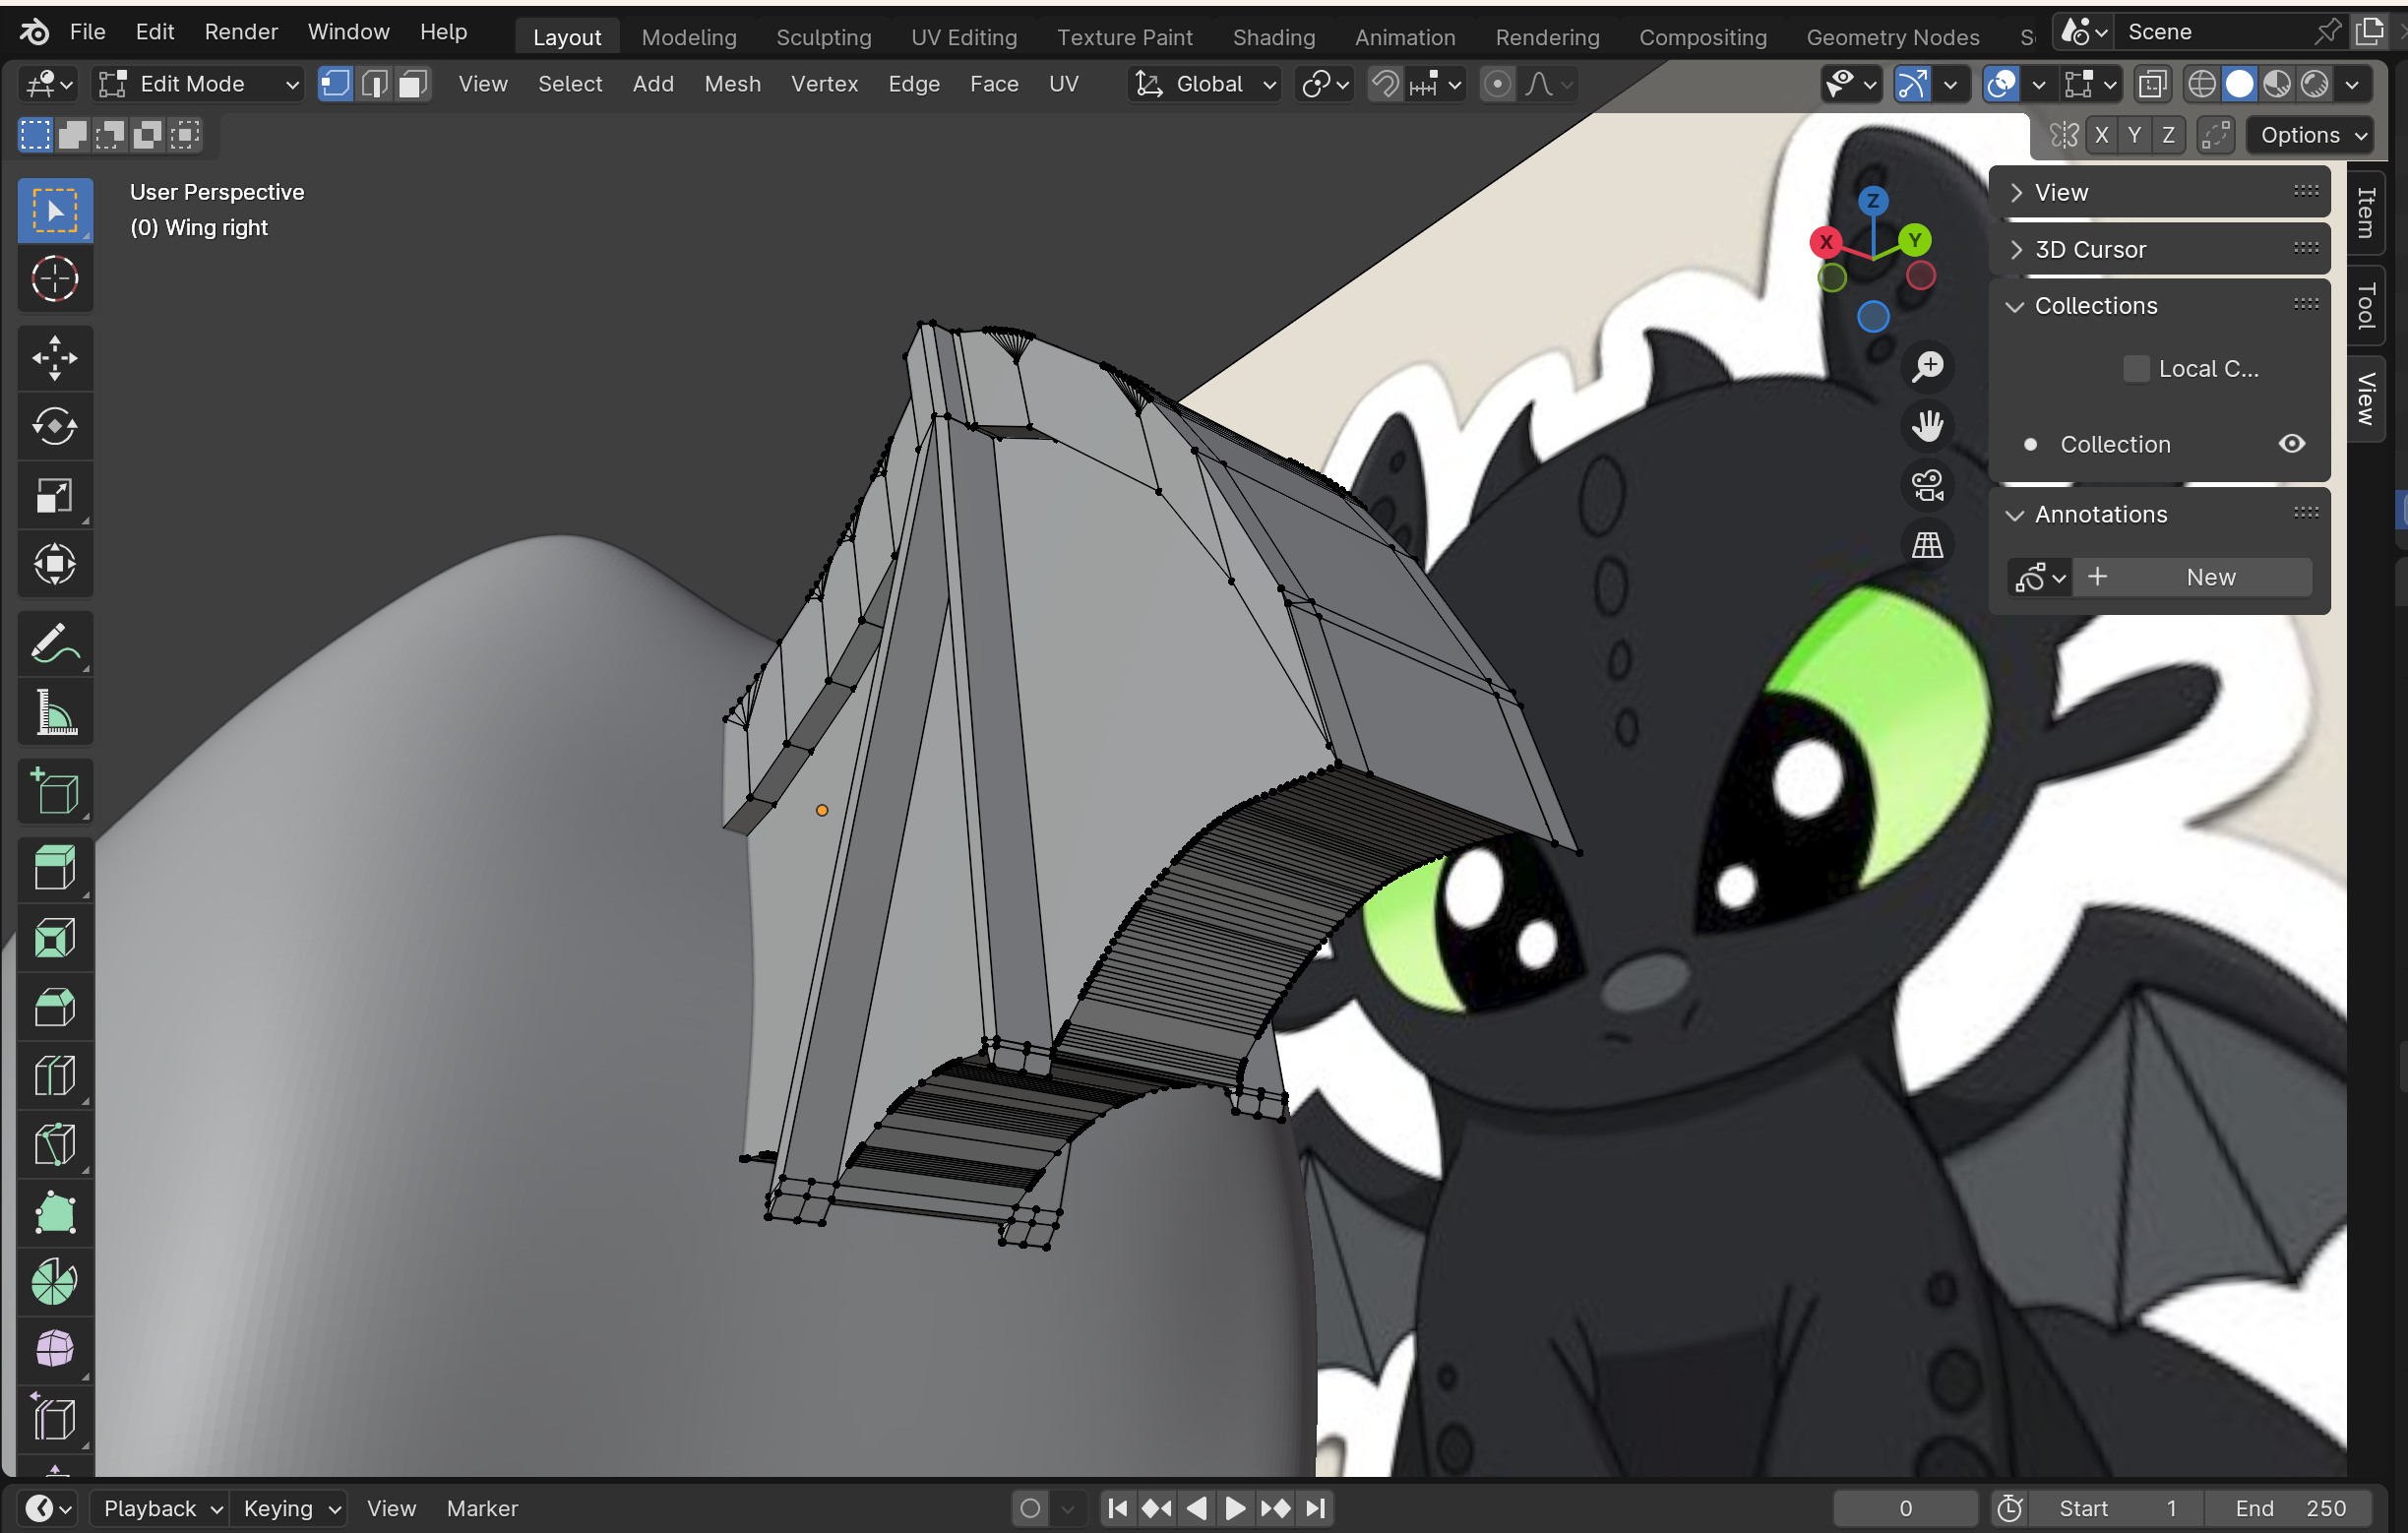
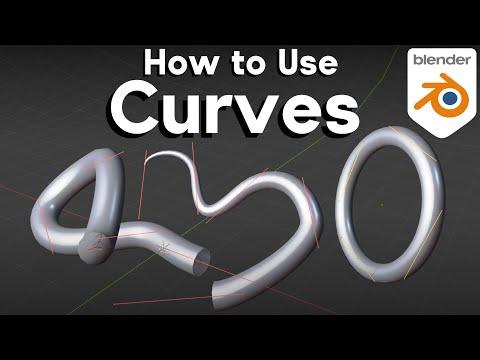
I used the video above to help me.
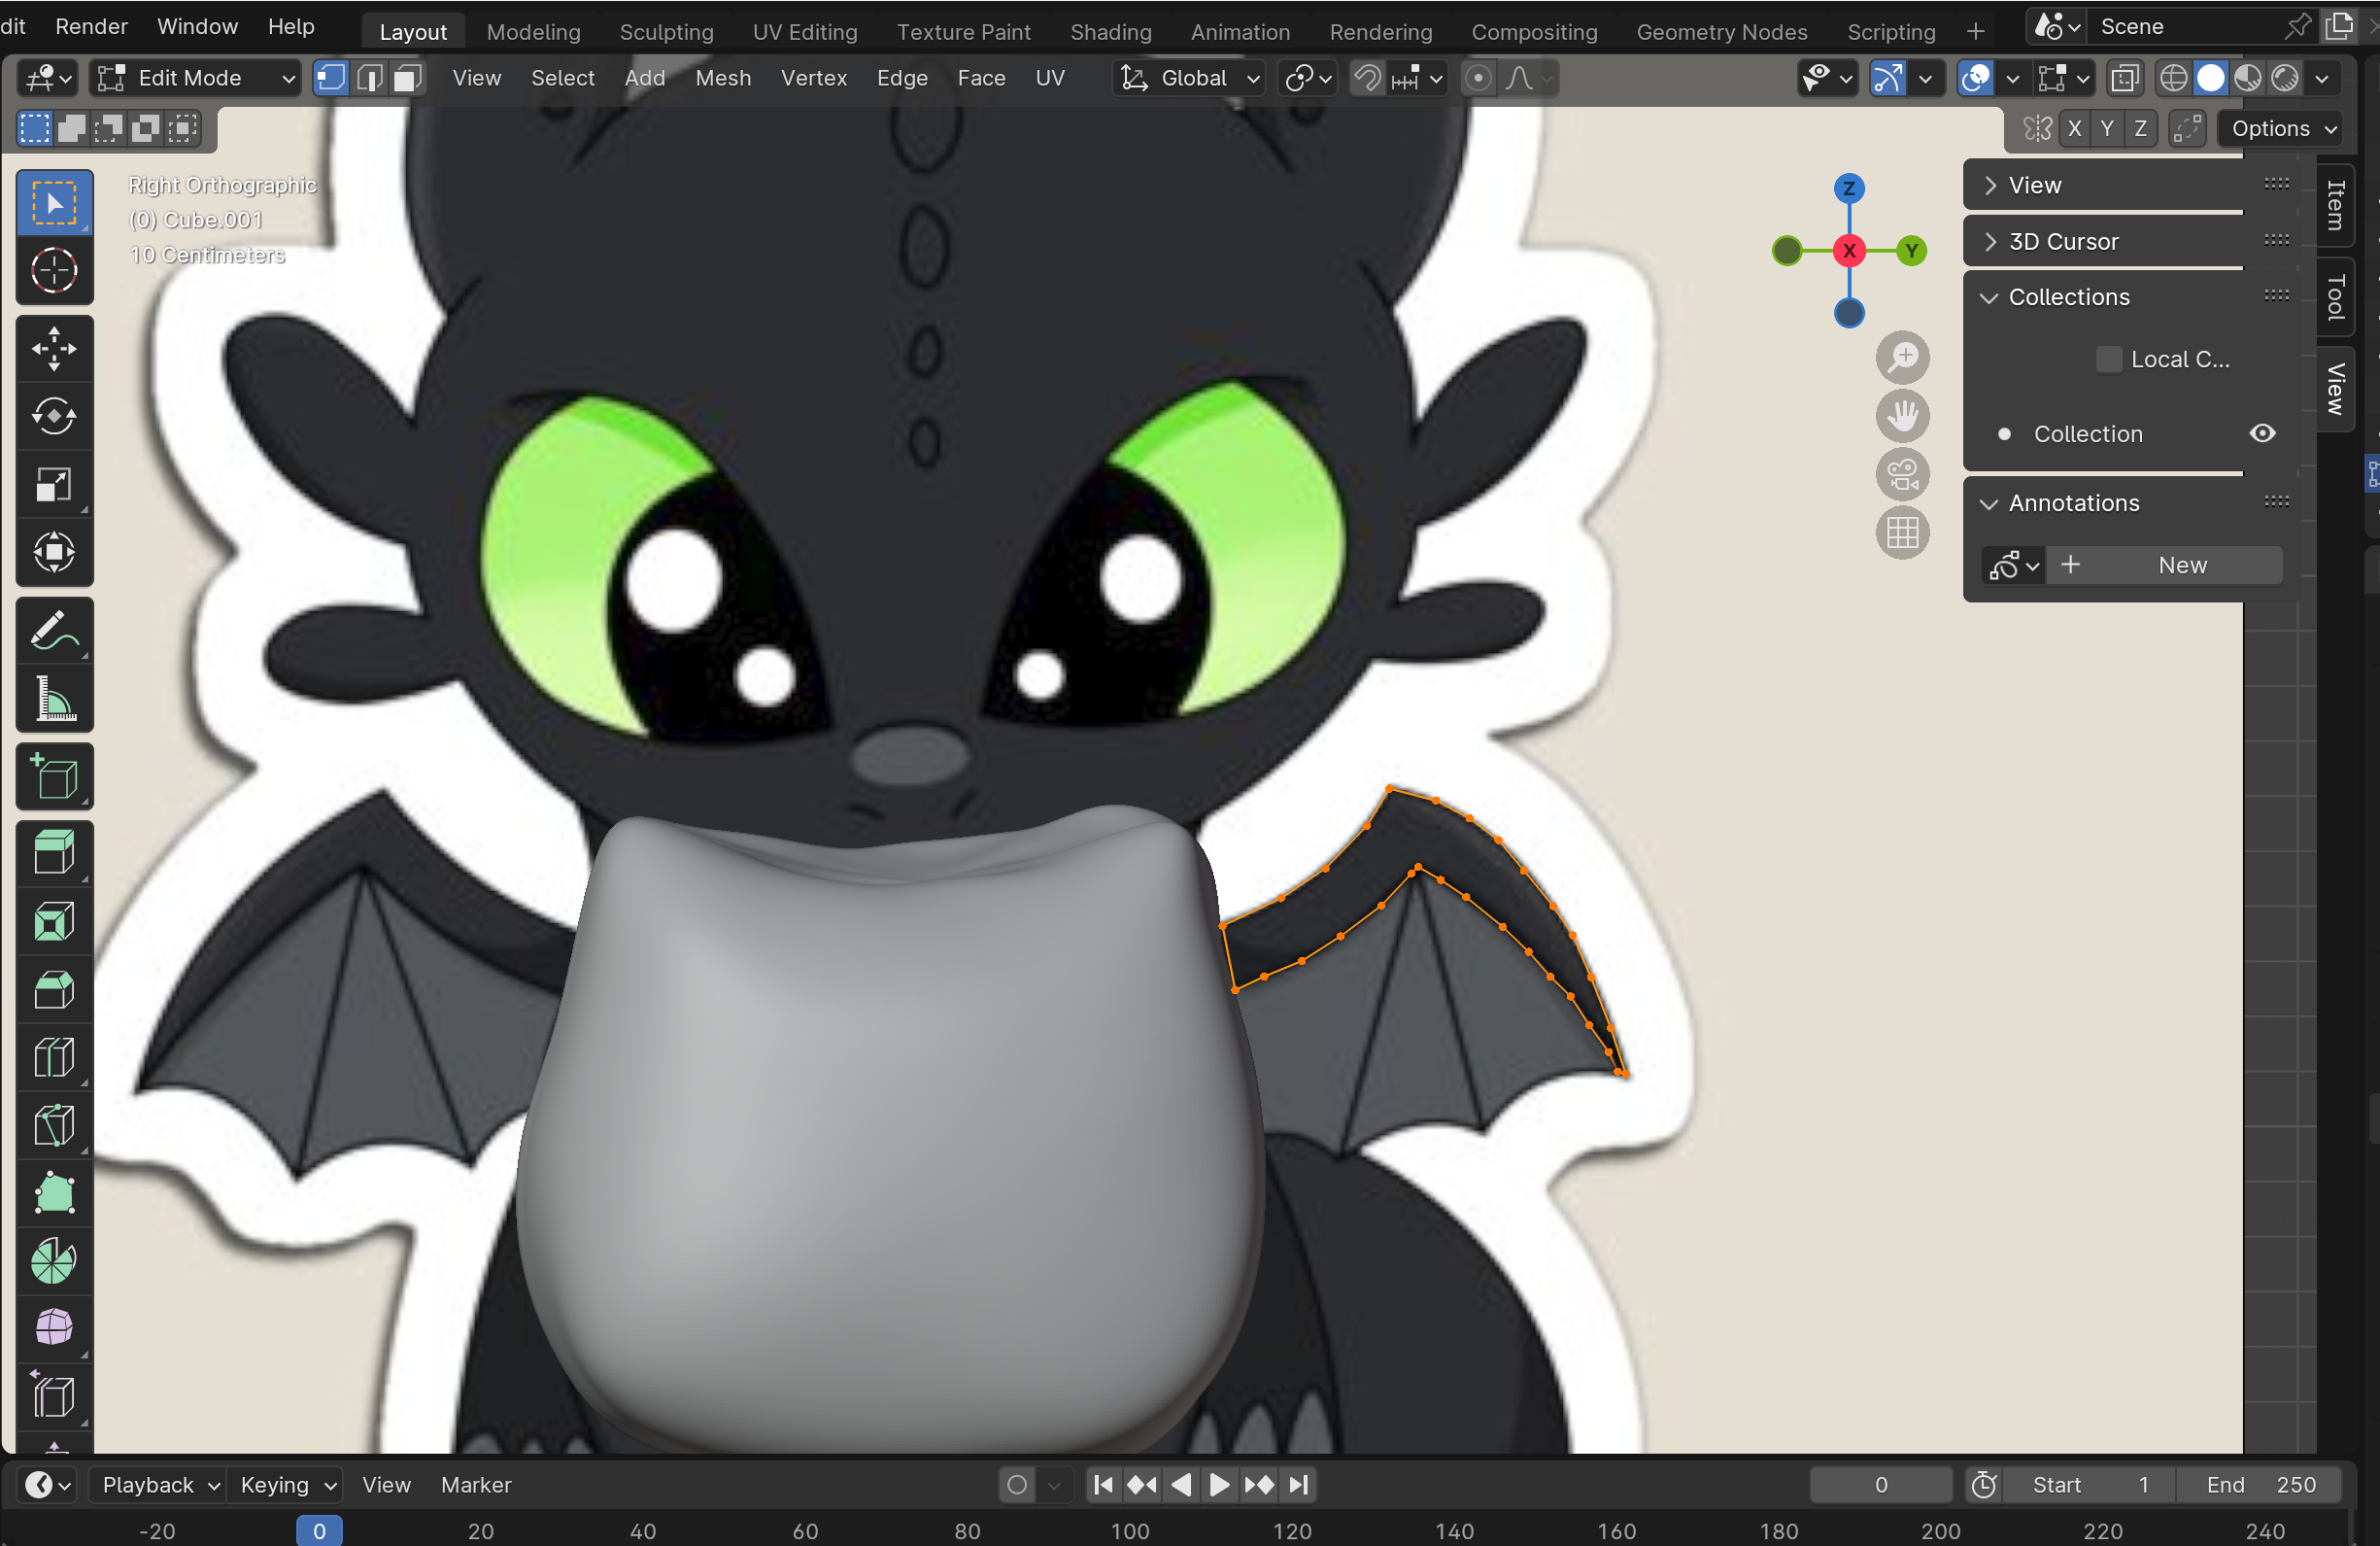
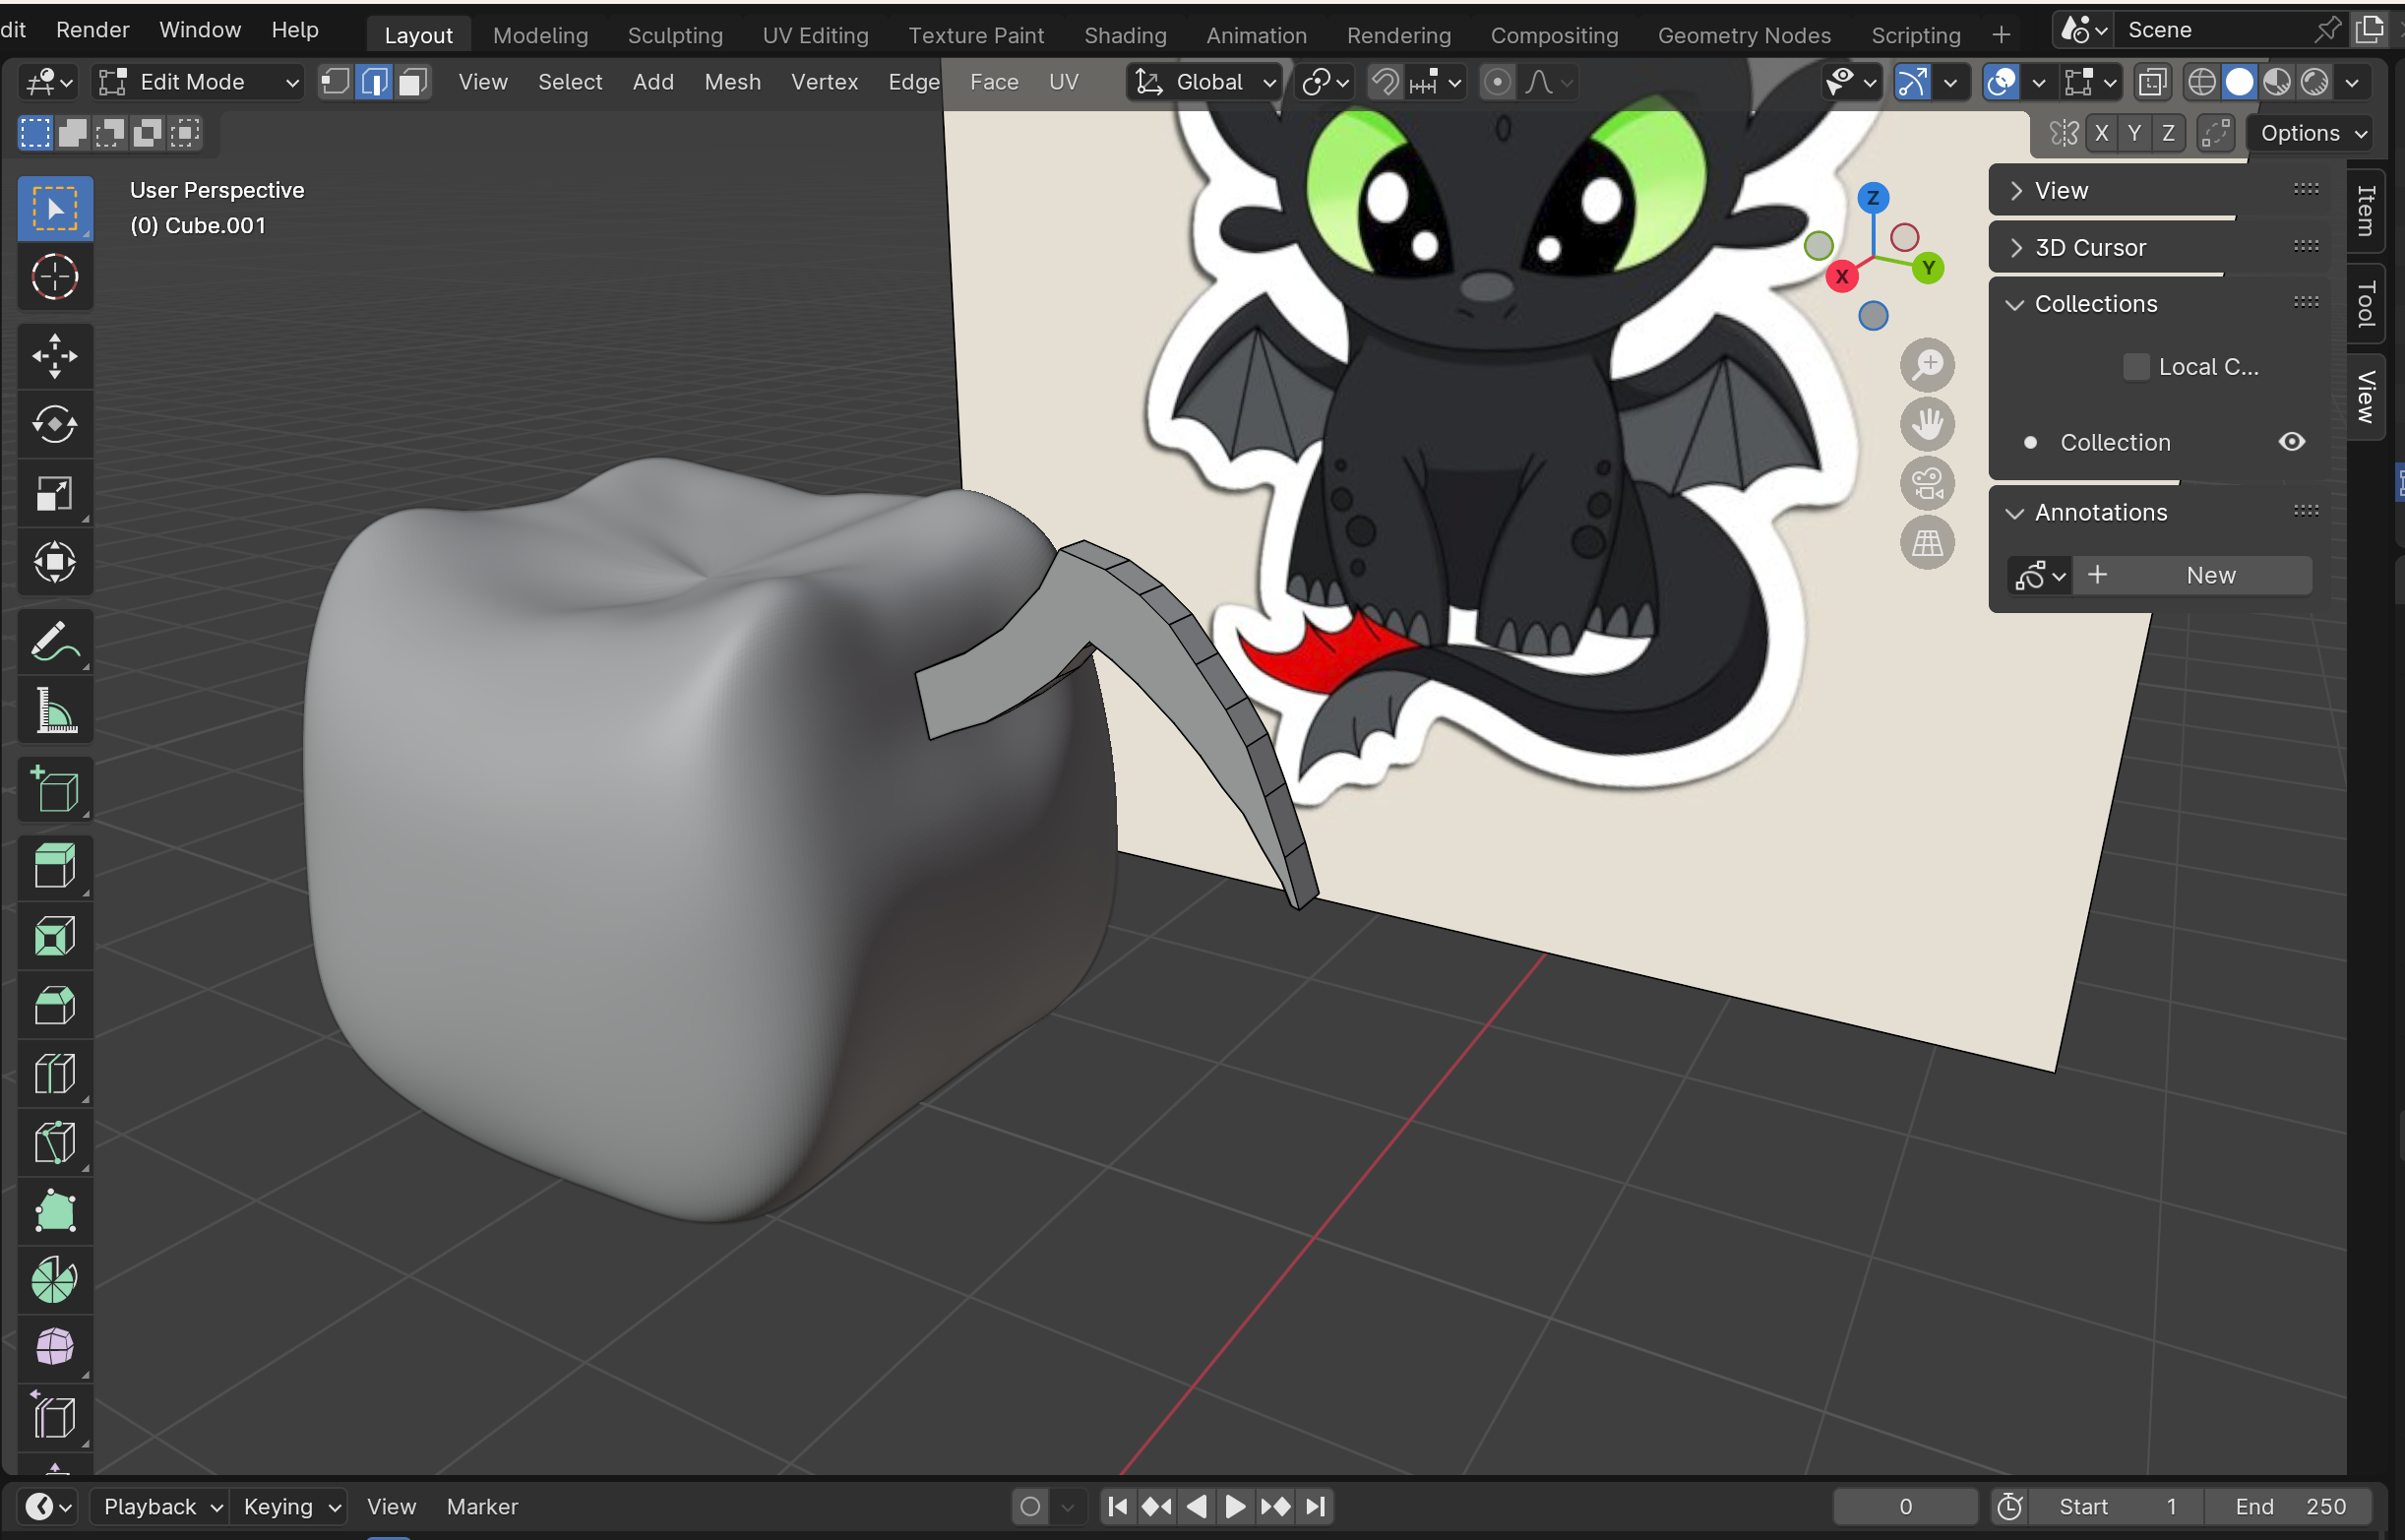
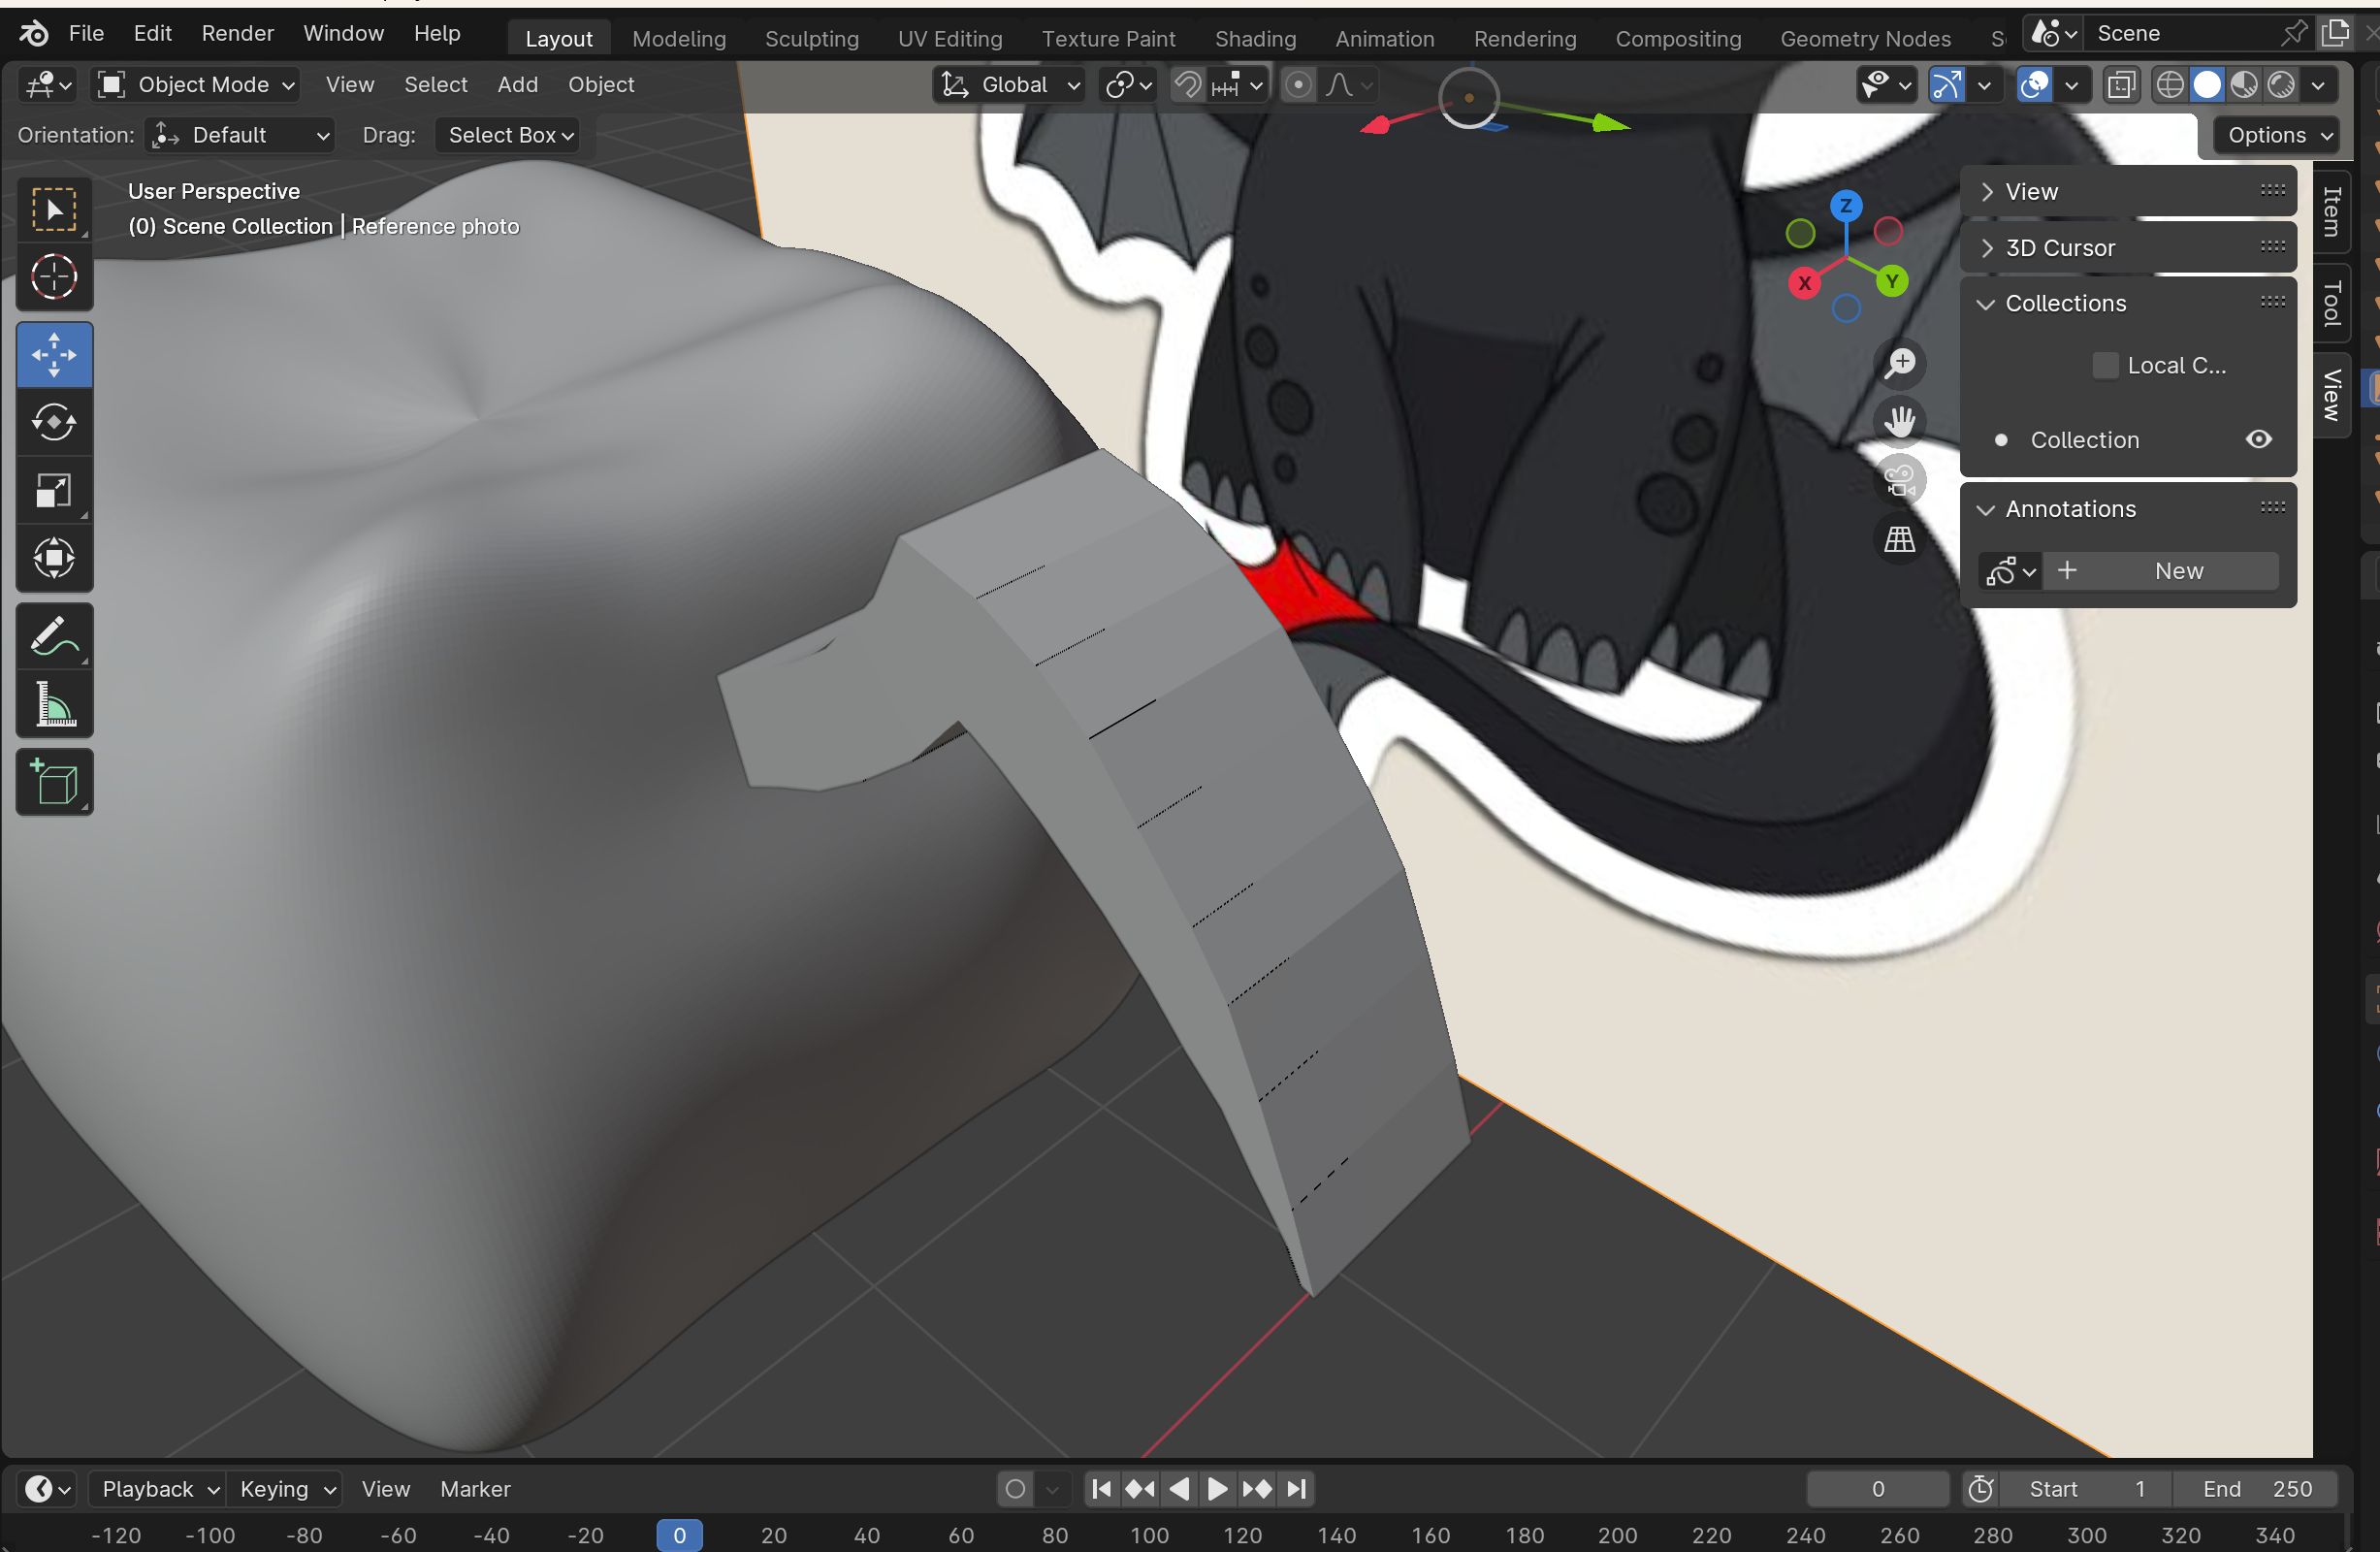
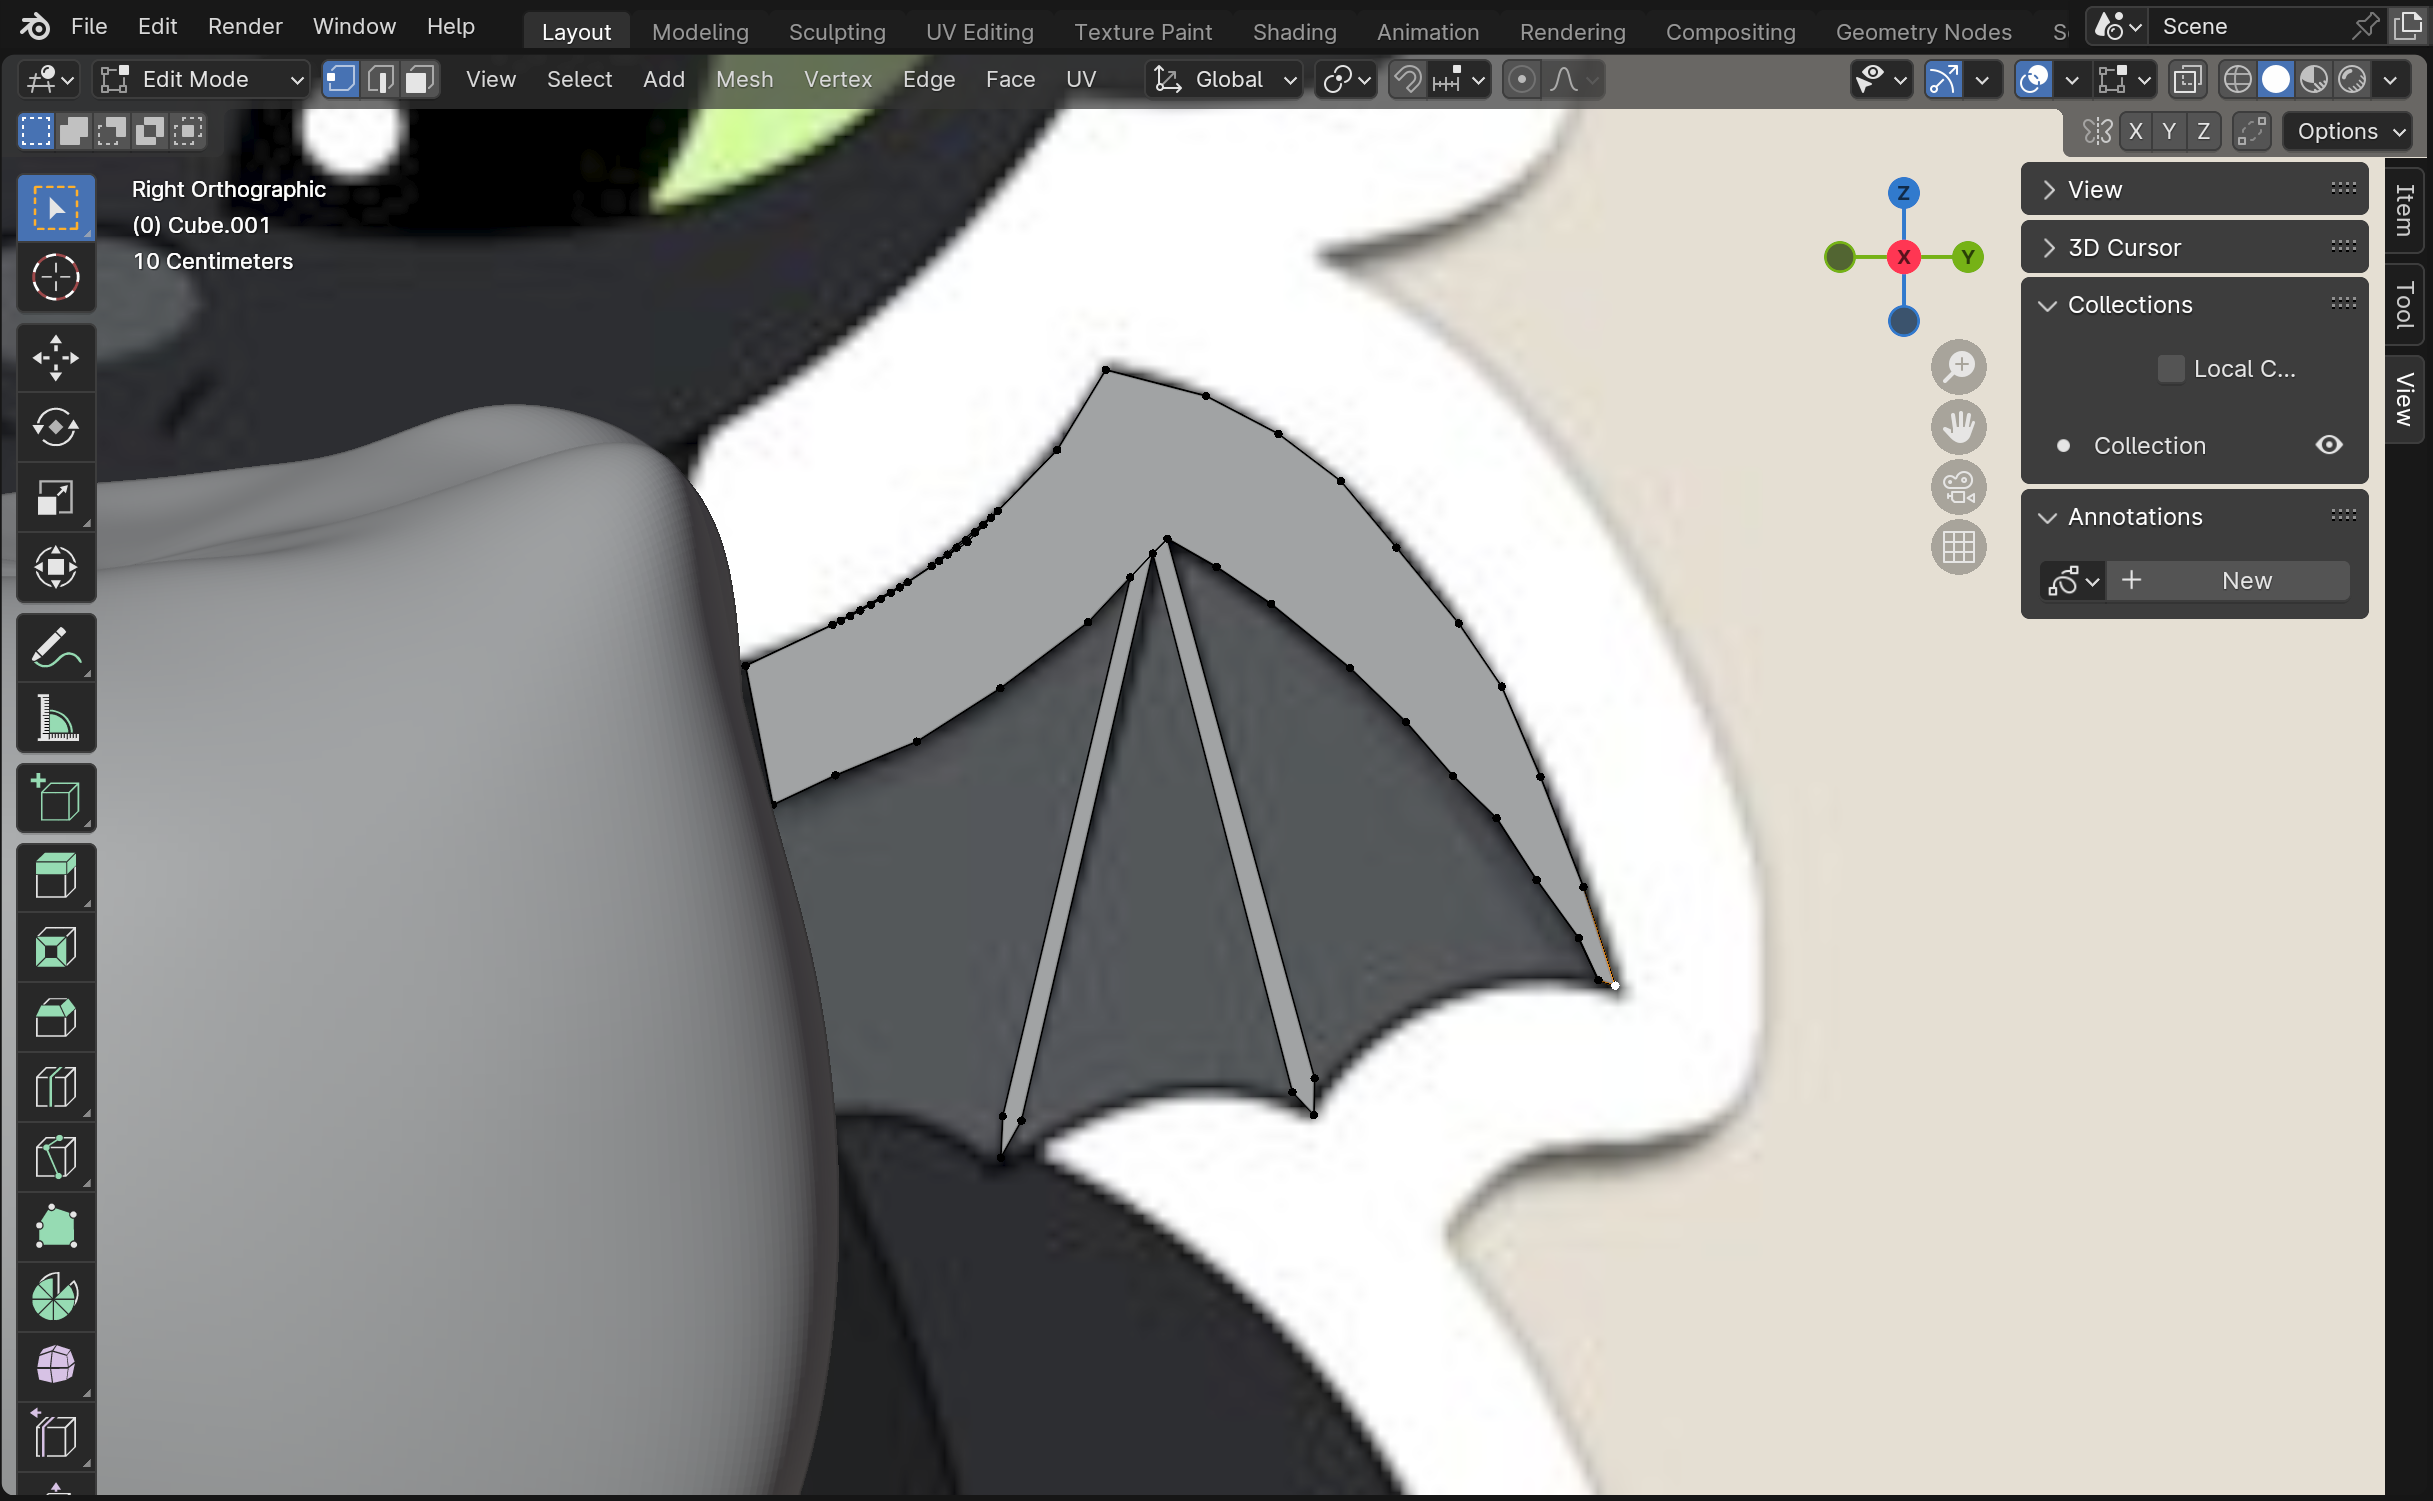
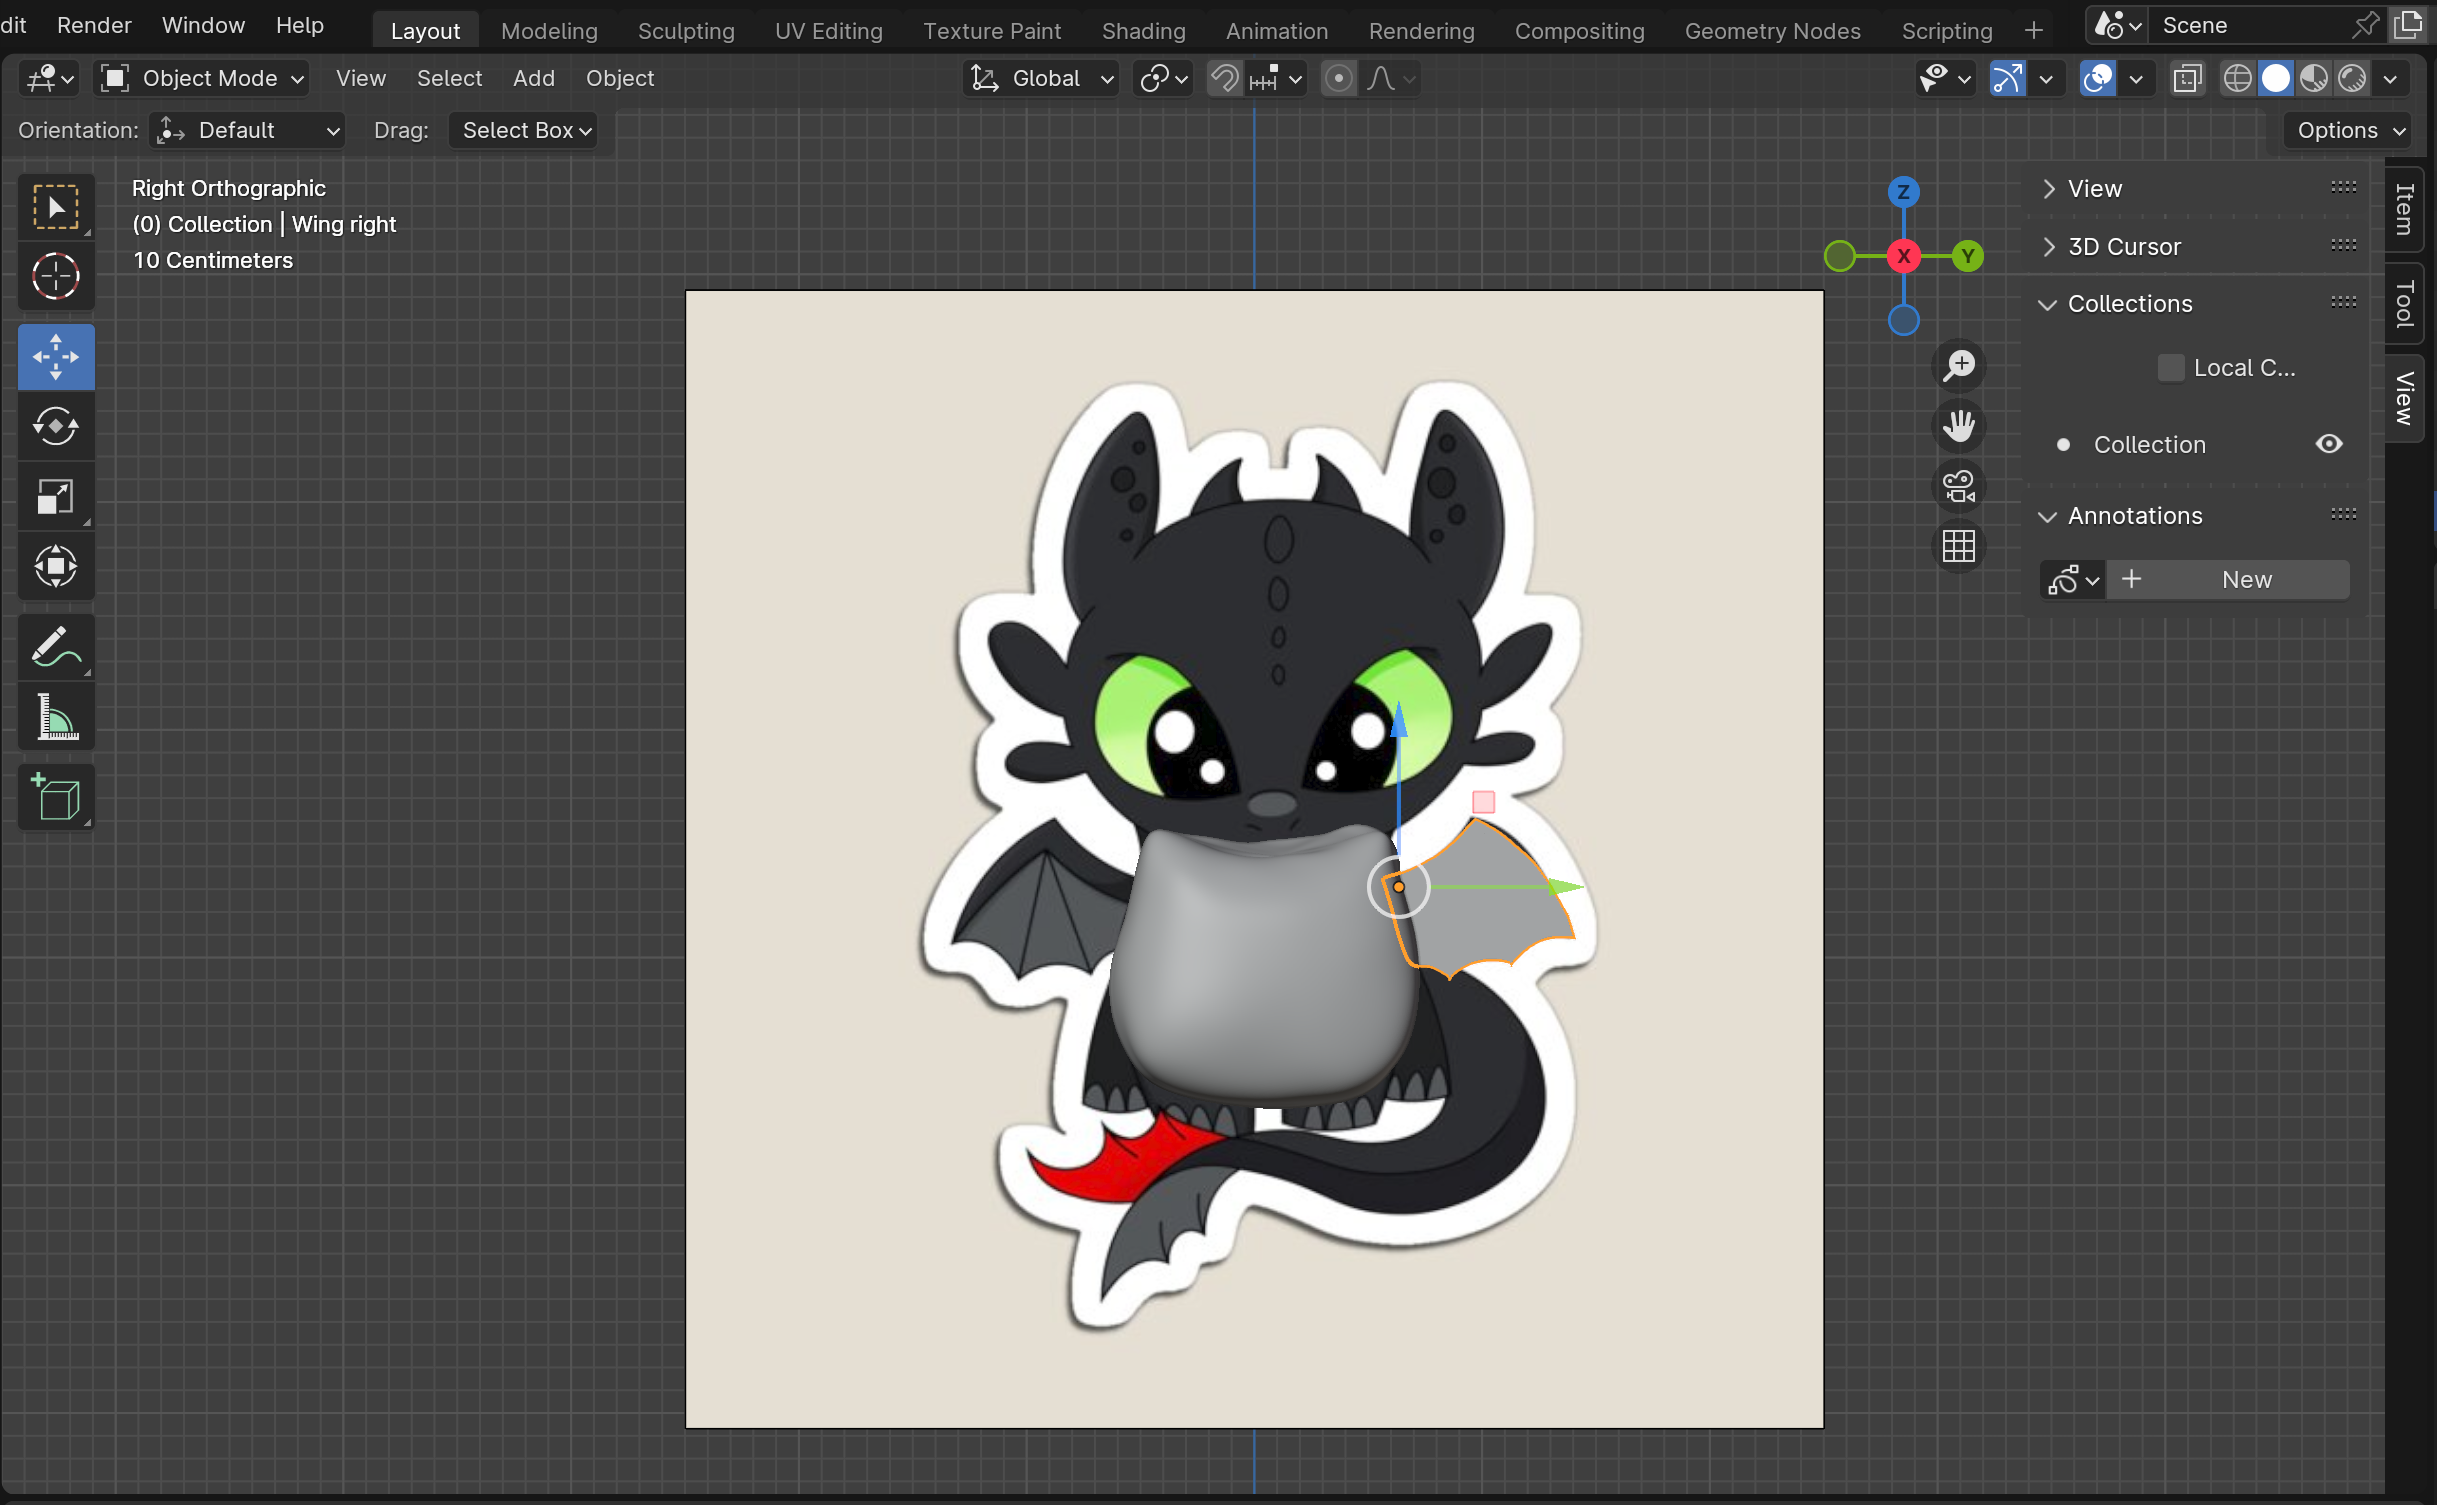
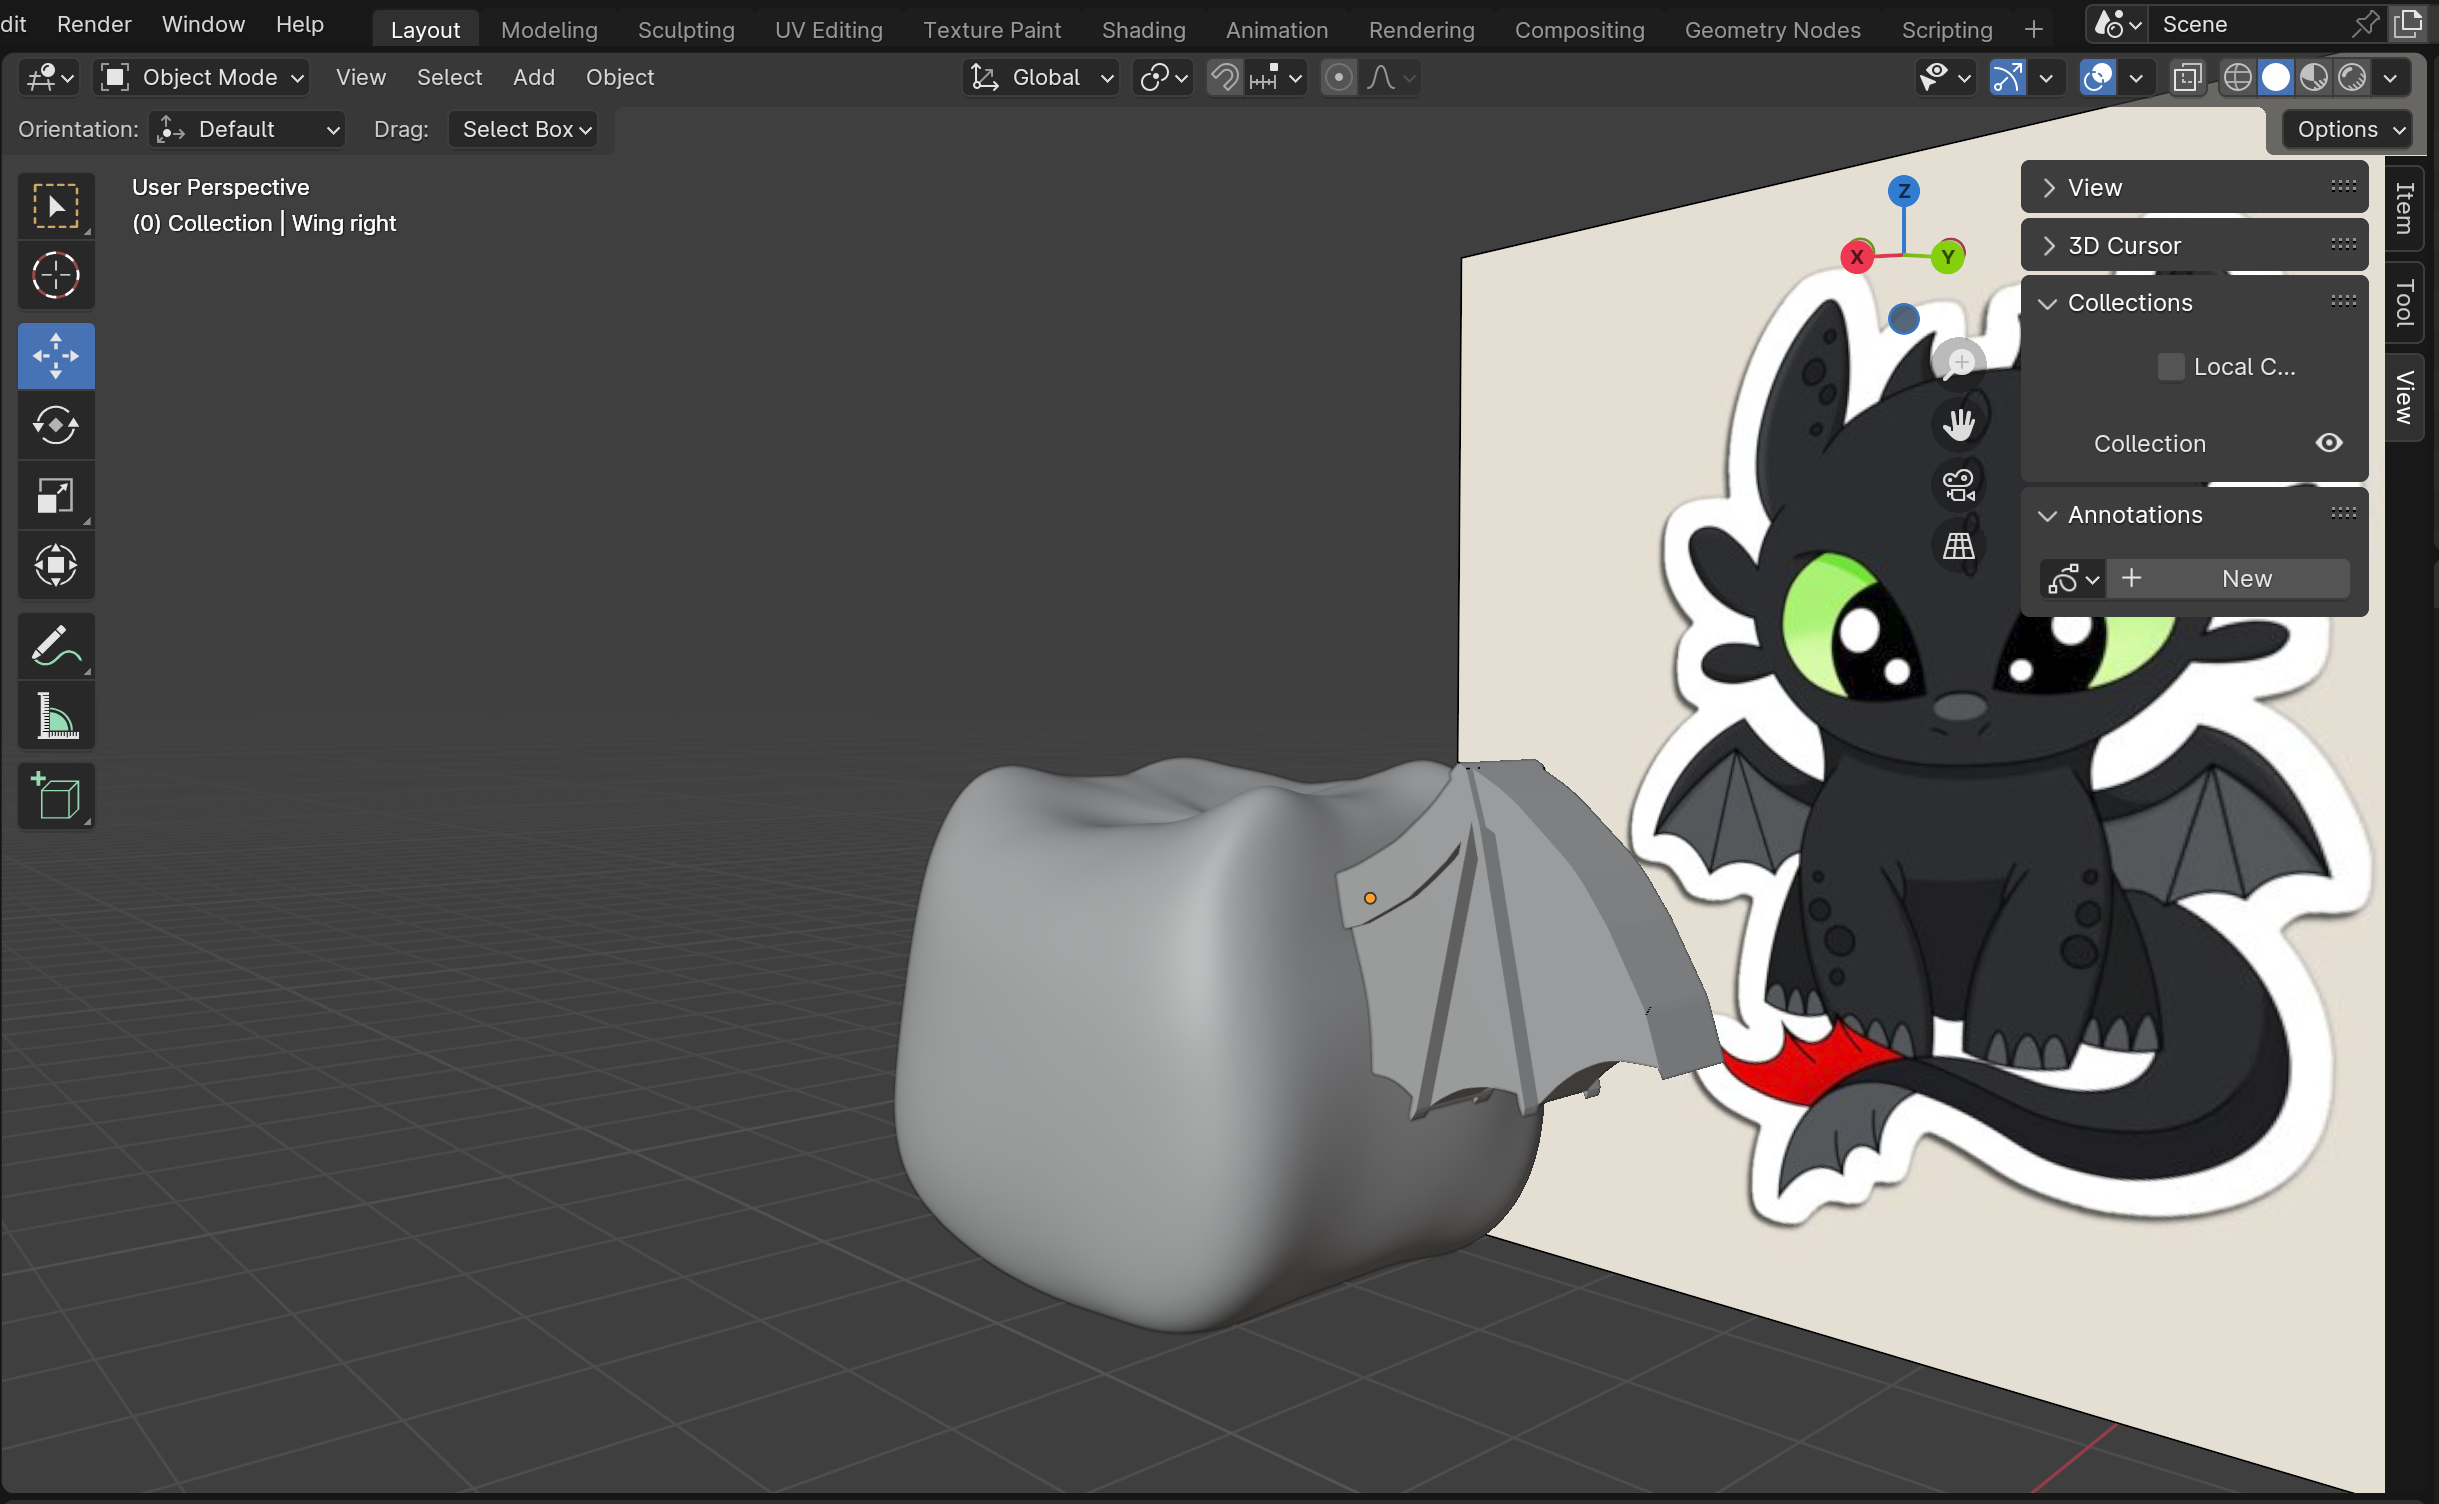
For the wings I essentially sculpted them with drawn vertices. This means I outlined the wings on the reference with vertices, centered on the X-axis. The way I added a vertex without it having been a part of a separate object was I added a cube and deleted all but one vertex. I then worked off of that in edit mode, tracing the wing by extruding (E) vertices and adding faces. After making a solid object of the frame for the wing, I adjusted the width by selecting one side of edges and moving (G) them along the x-axis (X). Once I reached my desired width, I started to Bevel, which creates more segments and makes things rounded. To Bevel, you select the edges you desire to Bevel and click Ctrl+B. Make sure you're doing segment by segment though, as that's how bevel will work best. Once done beveling, it's time make the actual wings (the part that actually enables flight at least). For this I also drew the vertices and traced the image while centered on the X-axis. I again added face and beveled. After make the flat base of the wing I created the extruded portions of the wing. I just slightly extruded the bone segments of the wing as evenly as I could on both sides. Once done with the right wing, just duplicate (Shift+D), mirror (Ctrl+M) and attach the wing to the body in the right spot.
EXTRA NOTES:
These could help when making the outline for the wings and the bones of the wings.
- To snap vertices together, is the B key
- To merge vertices together, is the M key, typically "at center" especially if they are already snapped together
!!!! MAKE SURE TO NAME YOUR OBJECTS AS YOU CREATE THEM TO NOT LOSE TRACK OF ANYTHING !!!!
Making the Base of the Tail
)
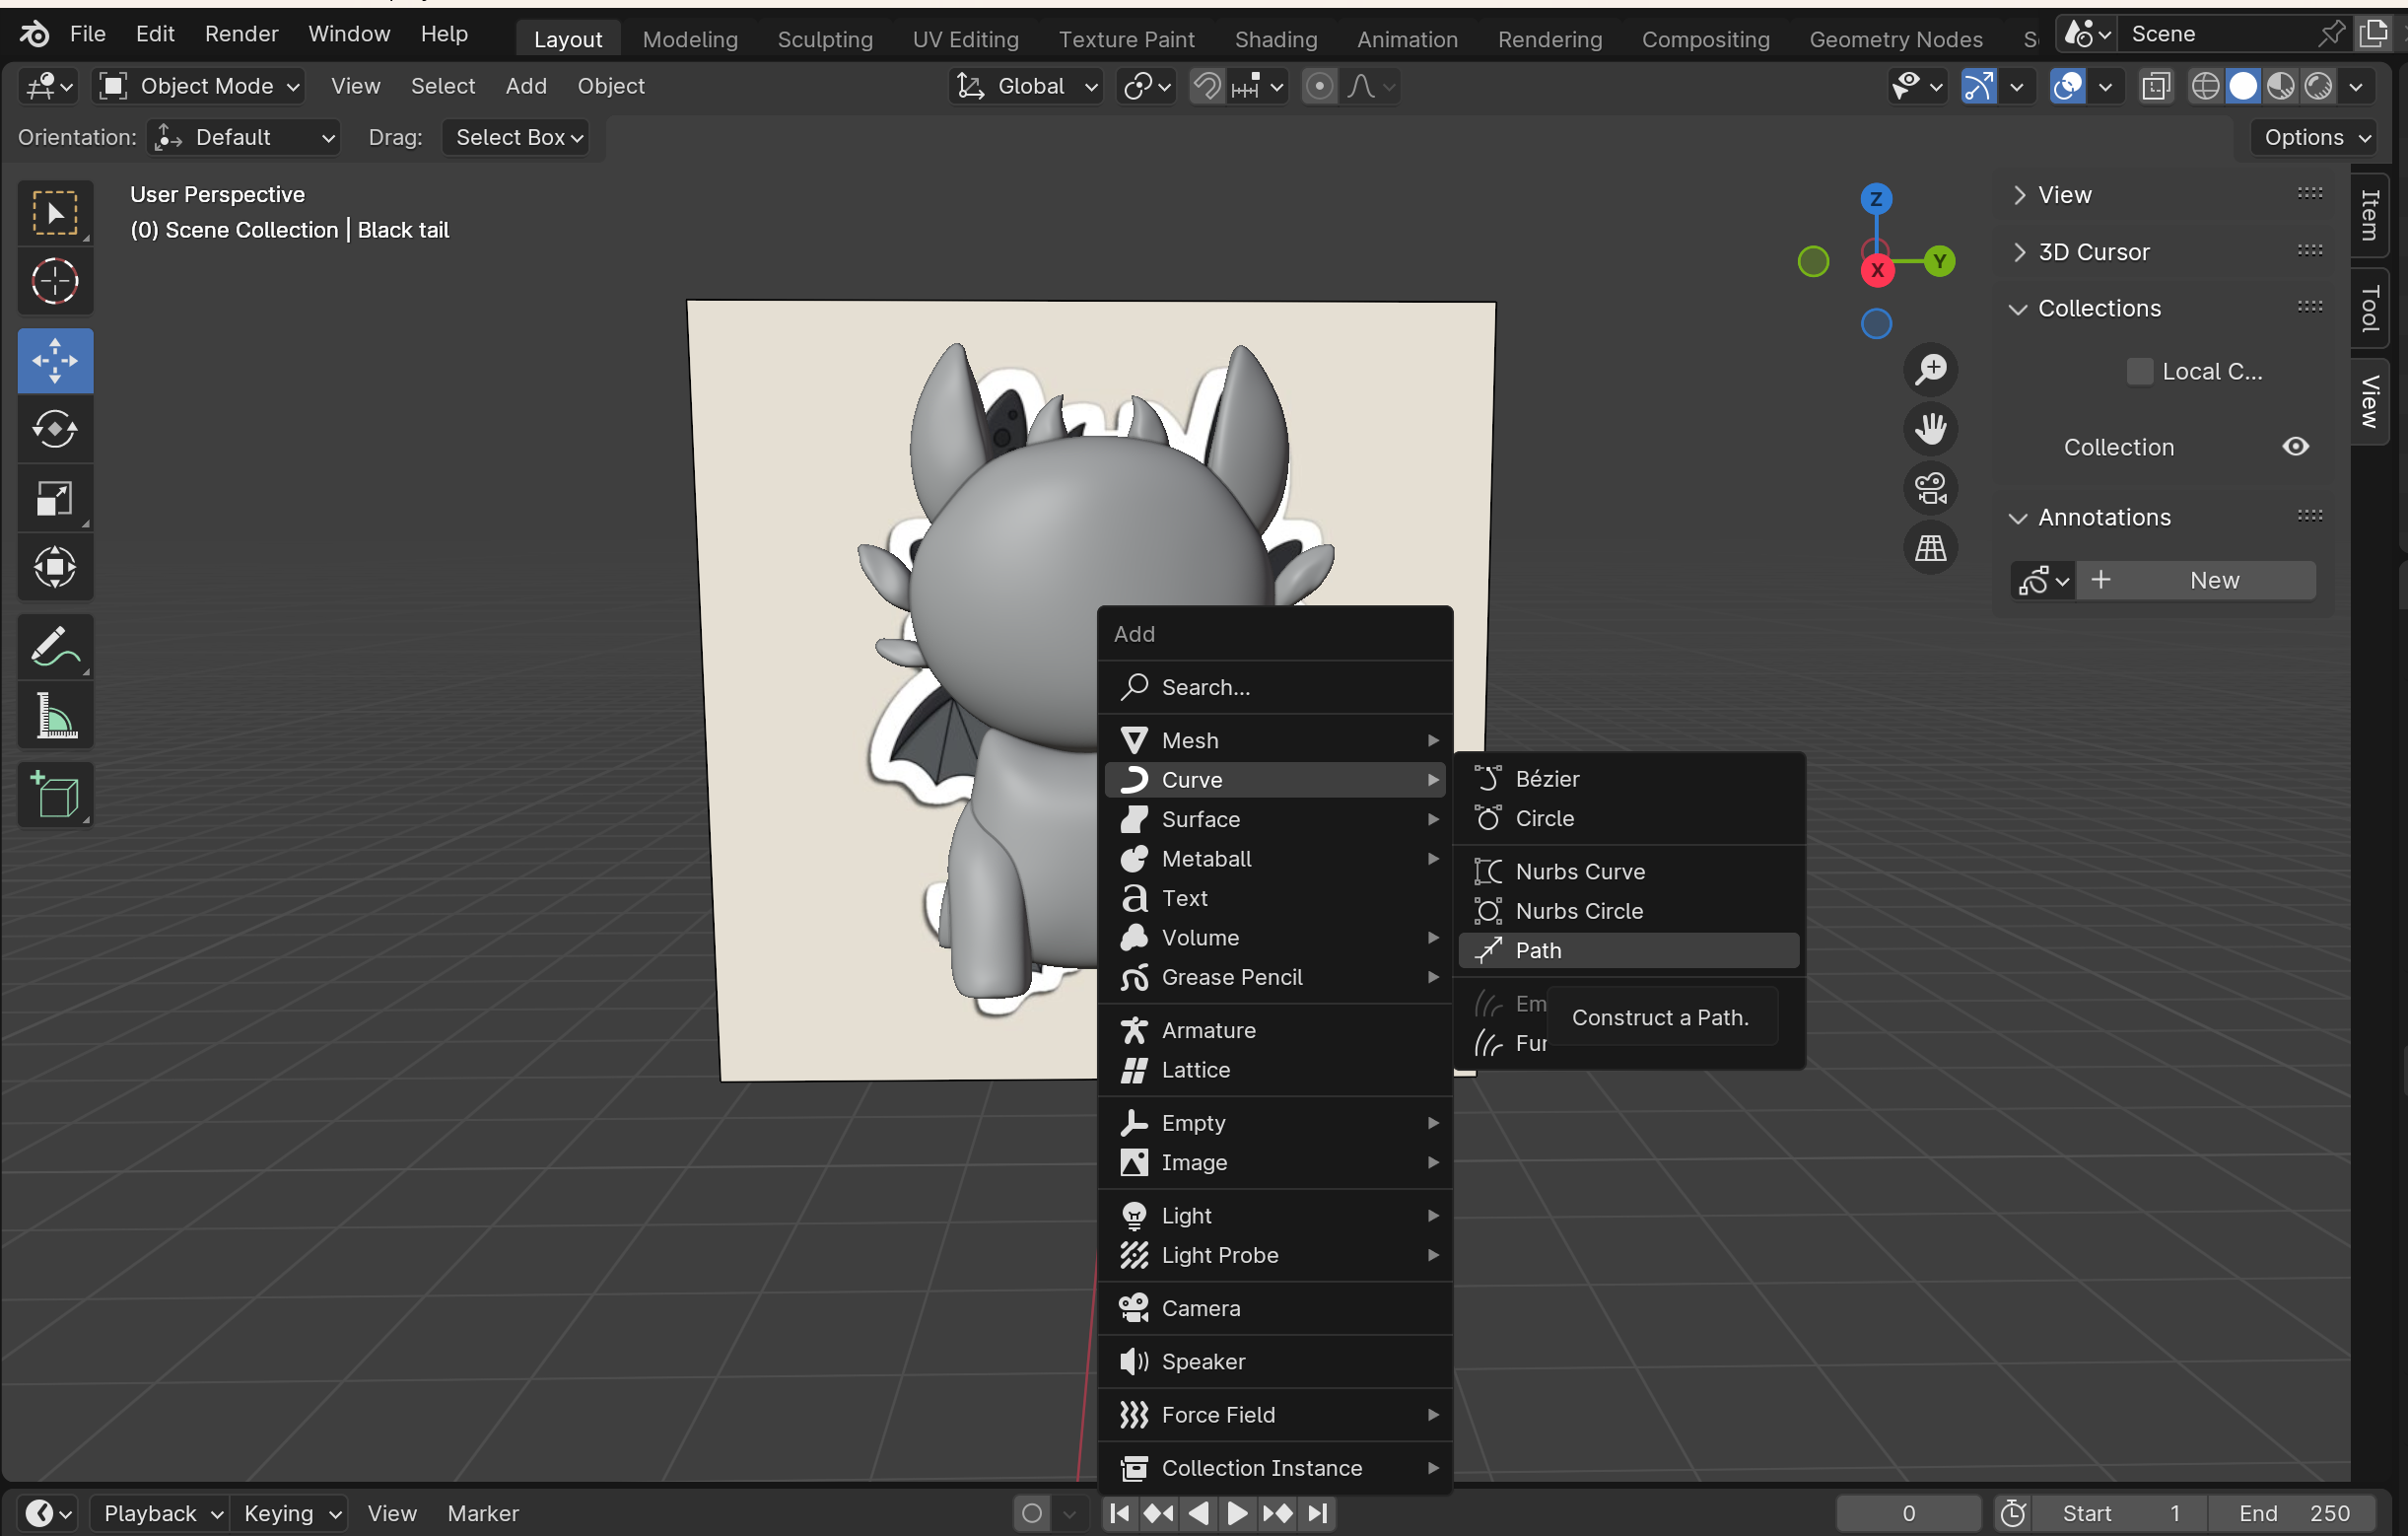
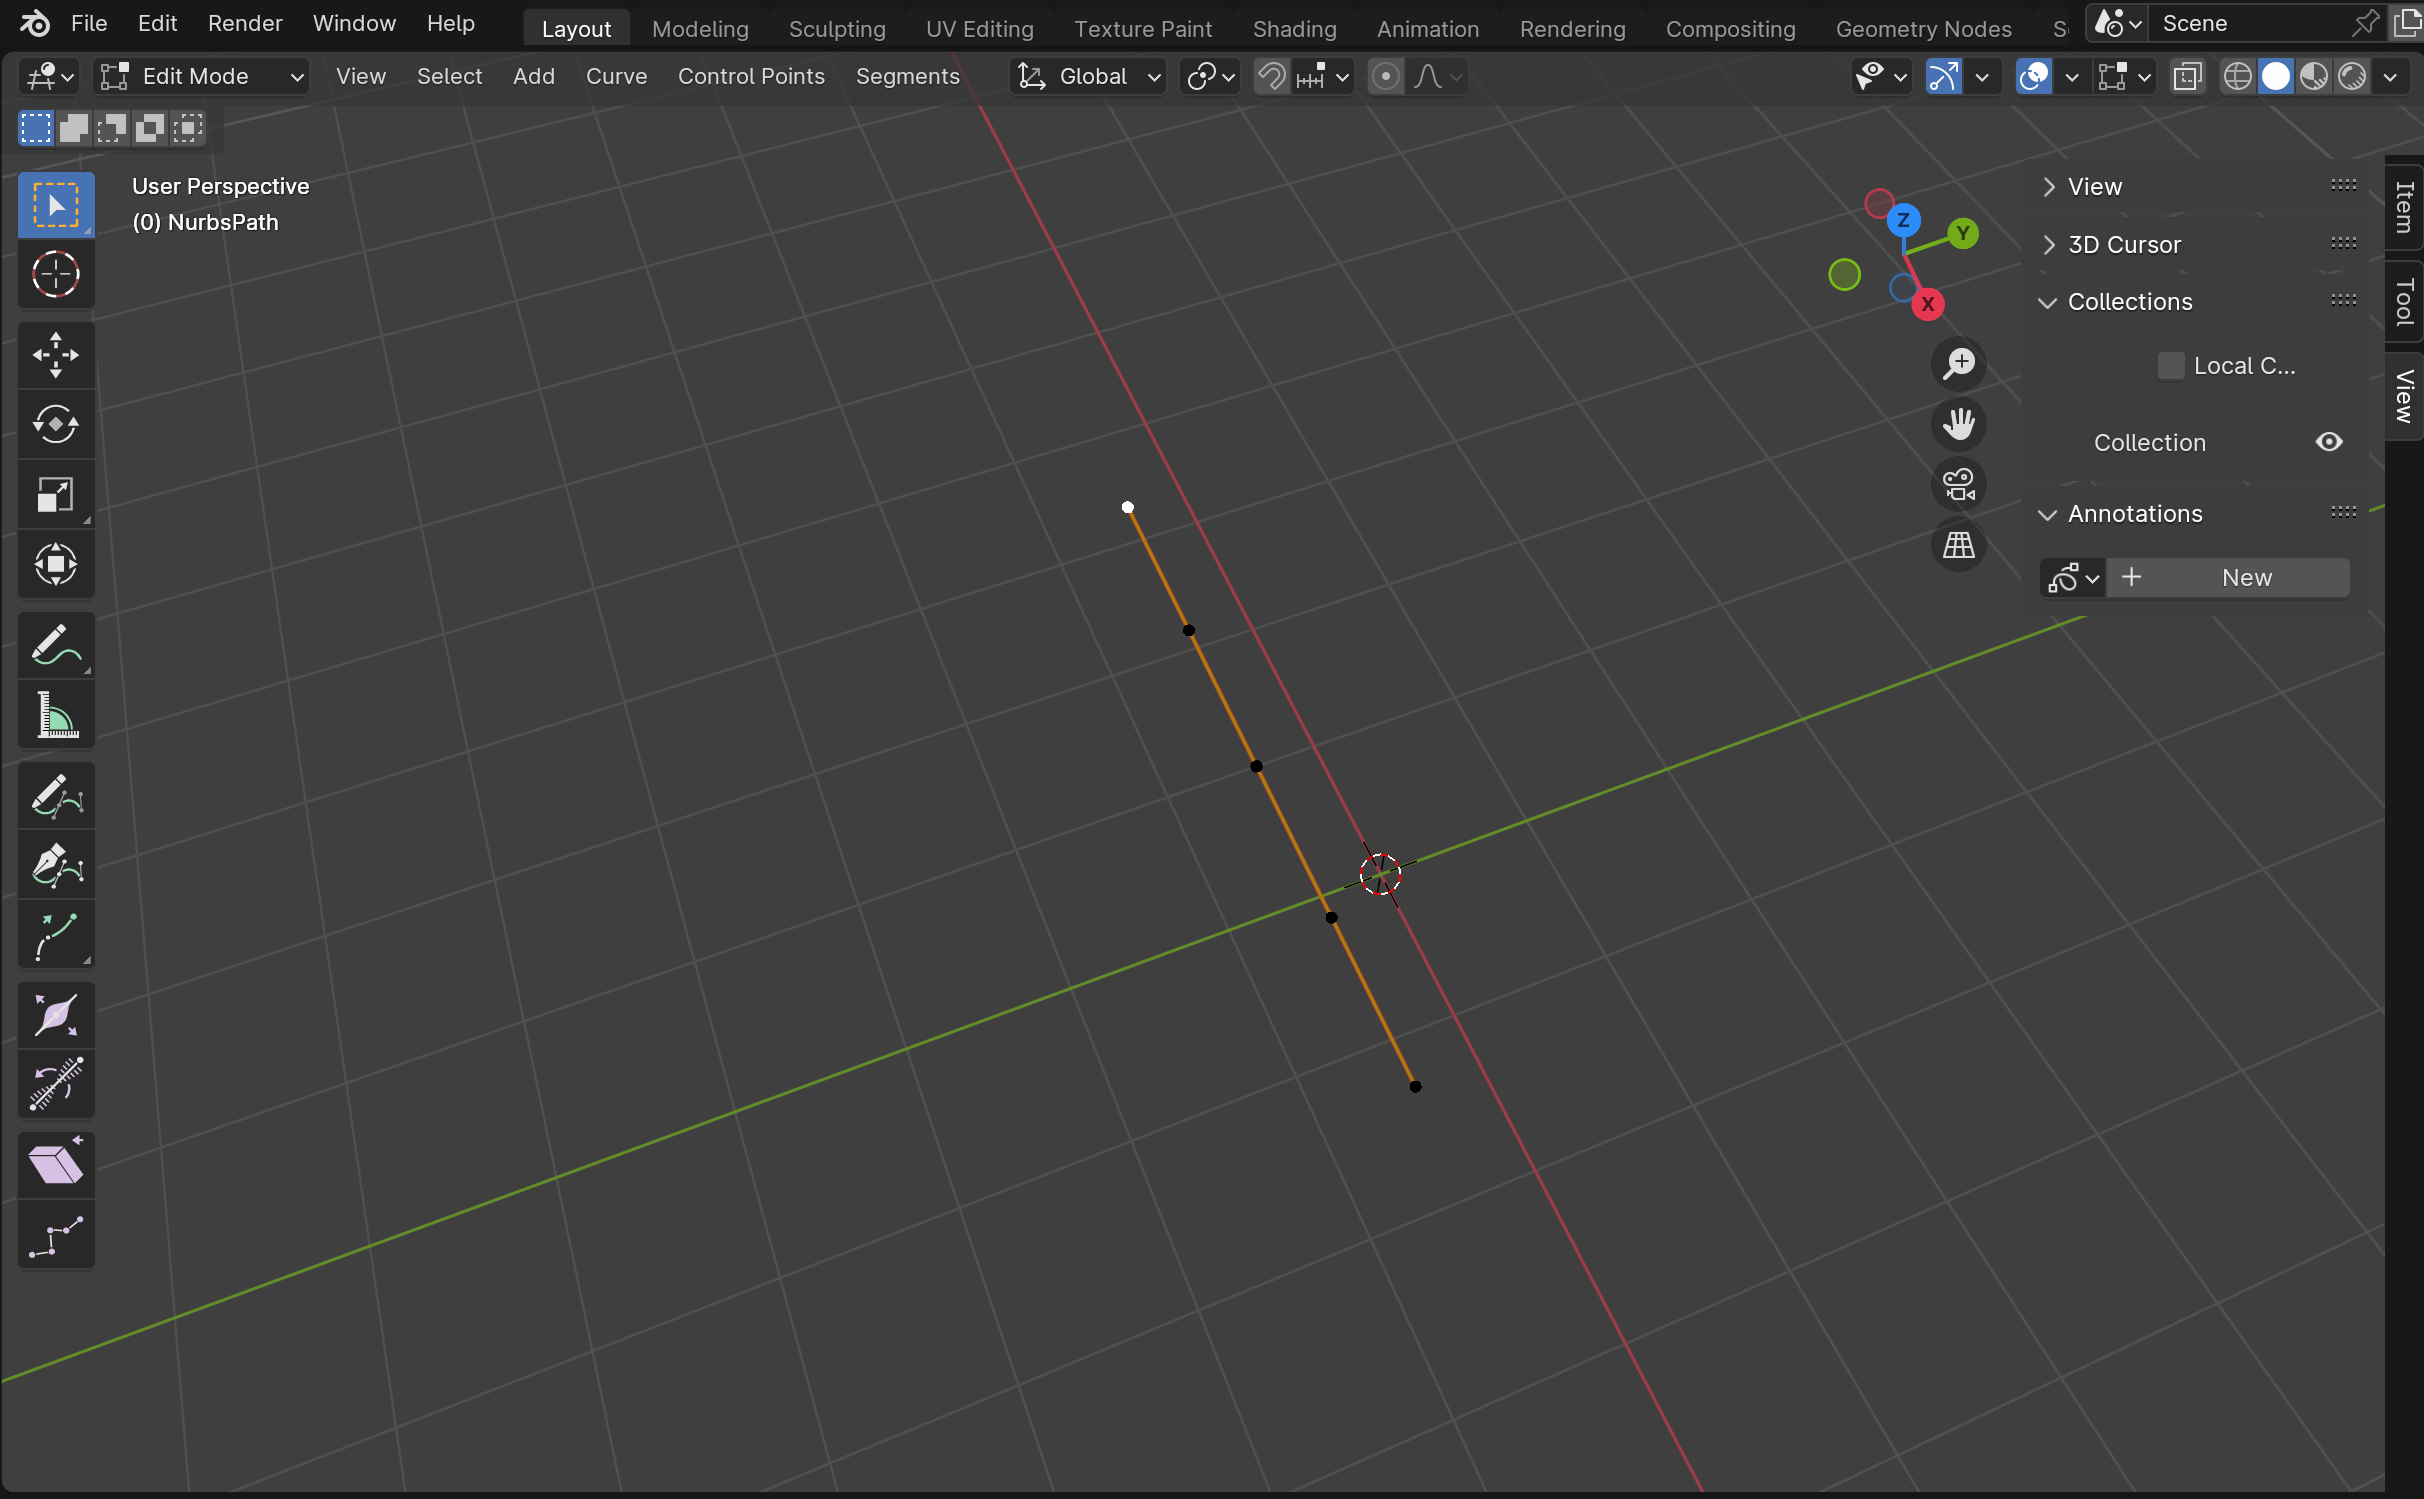
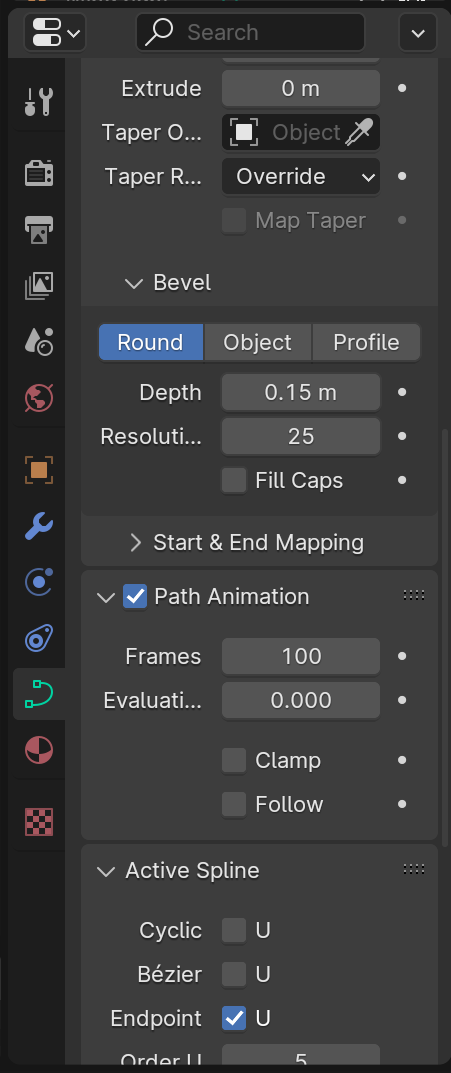
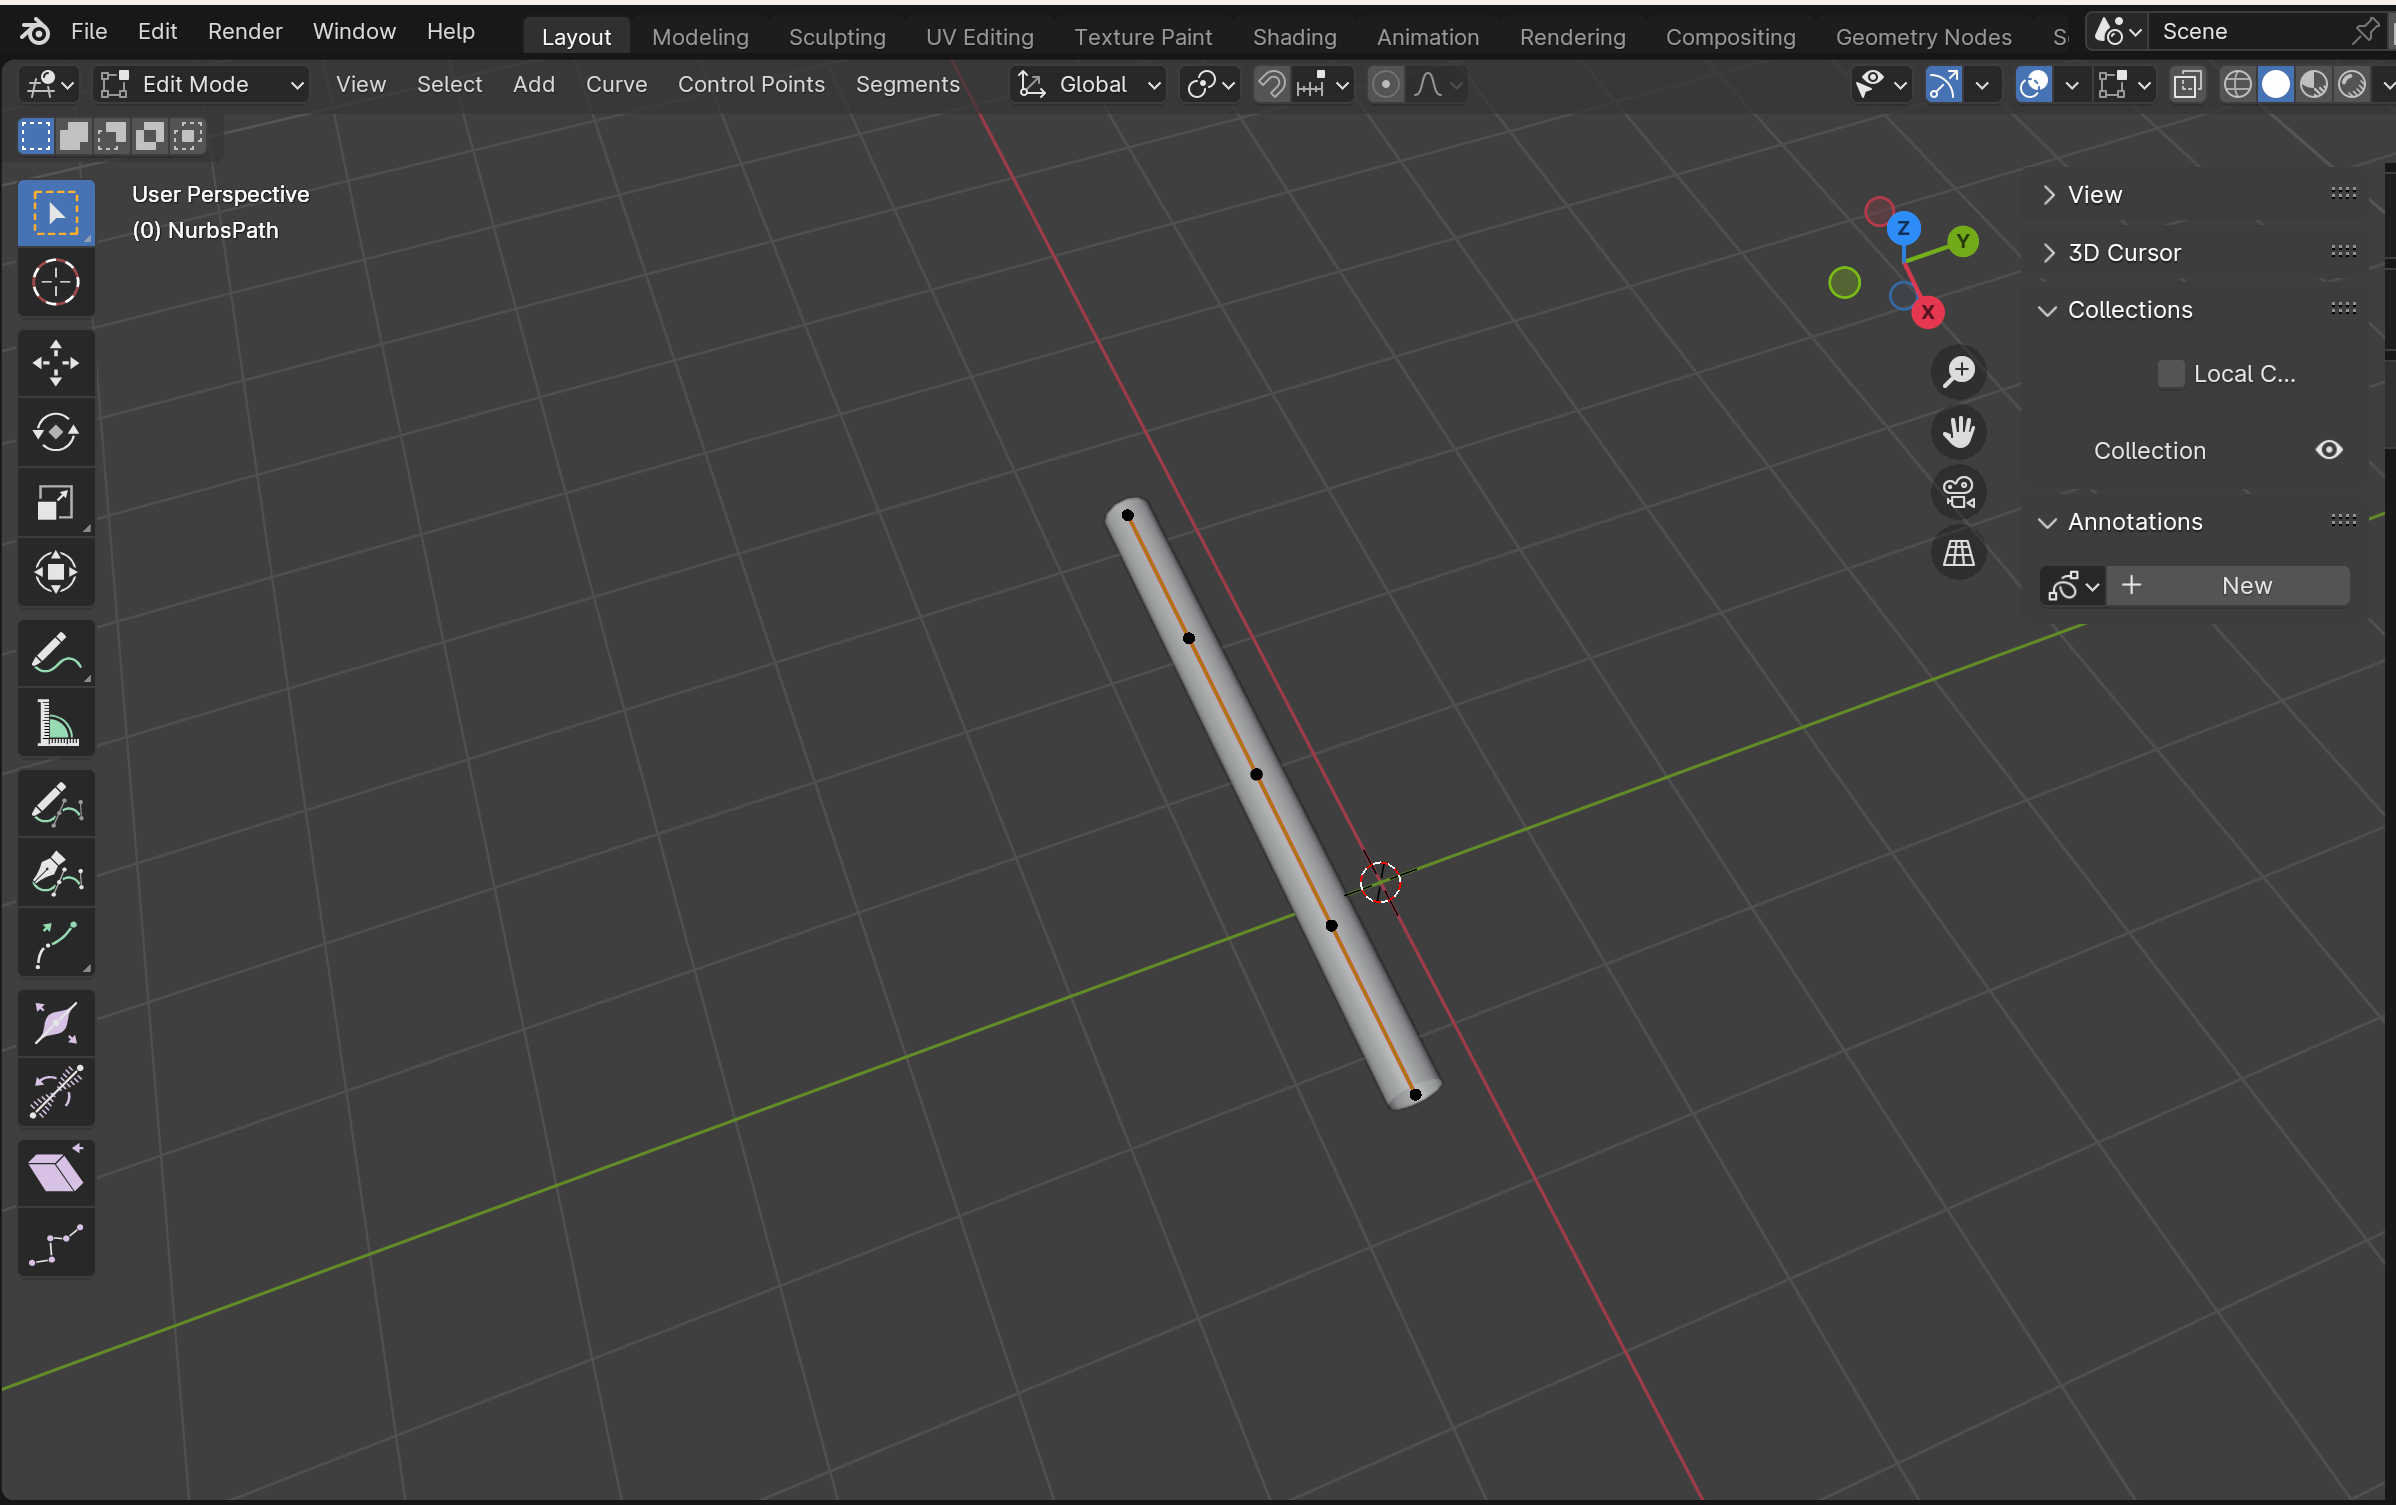
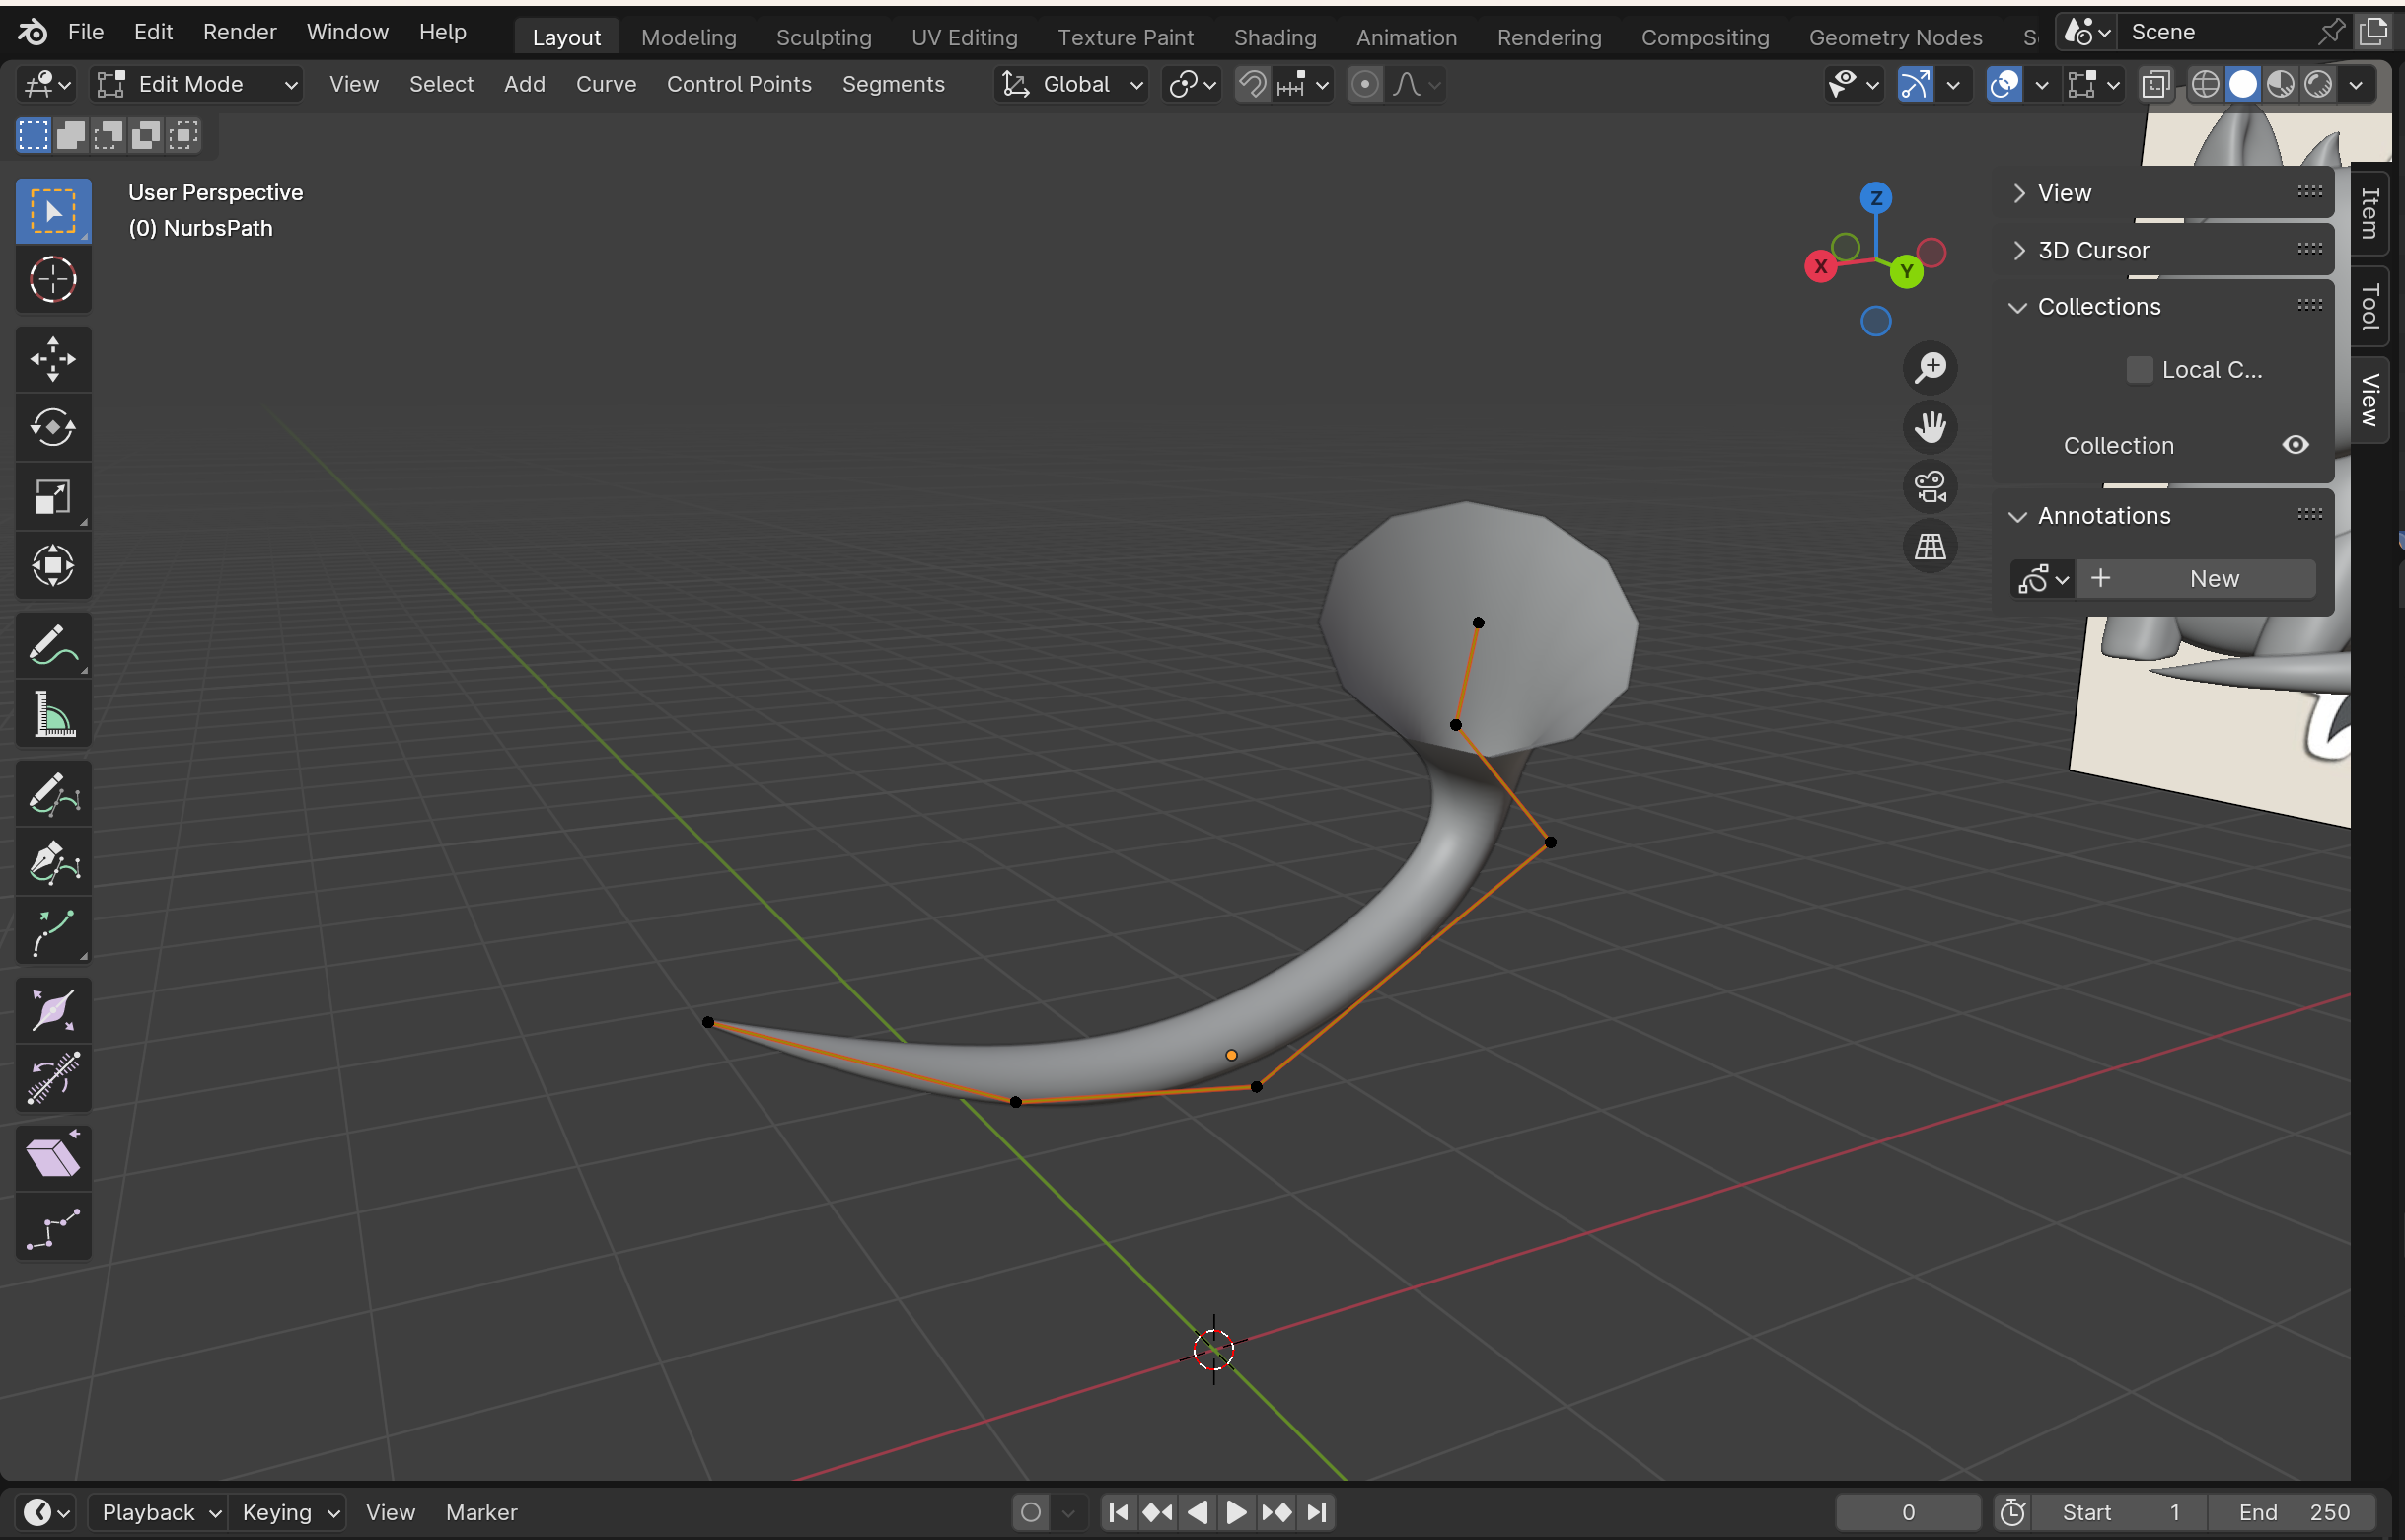
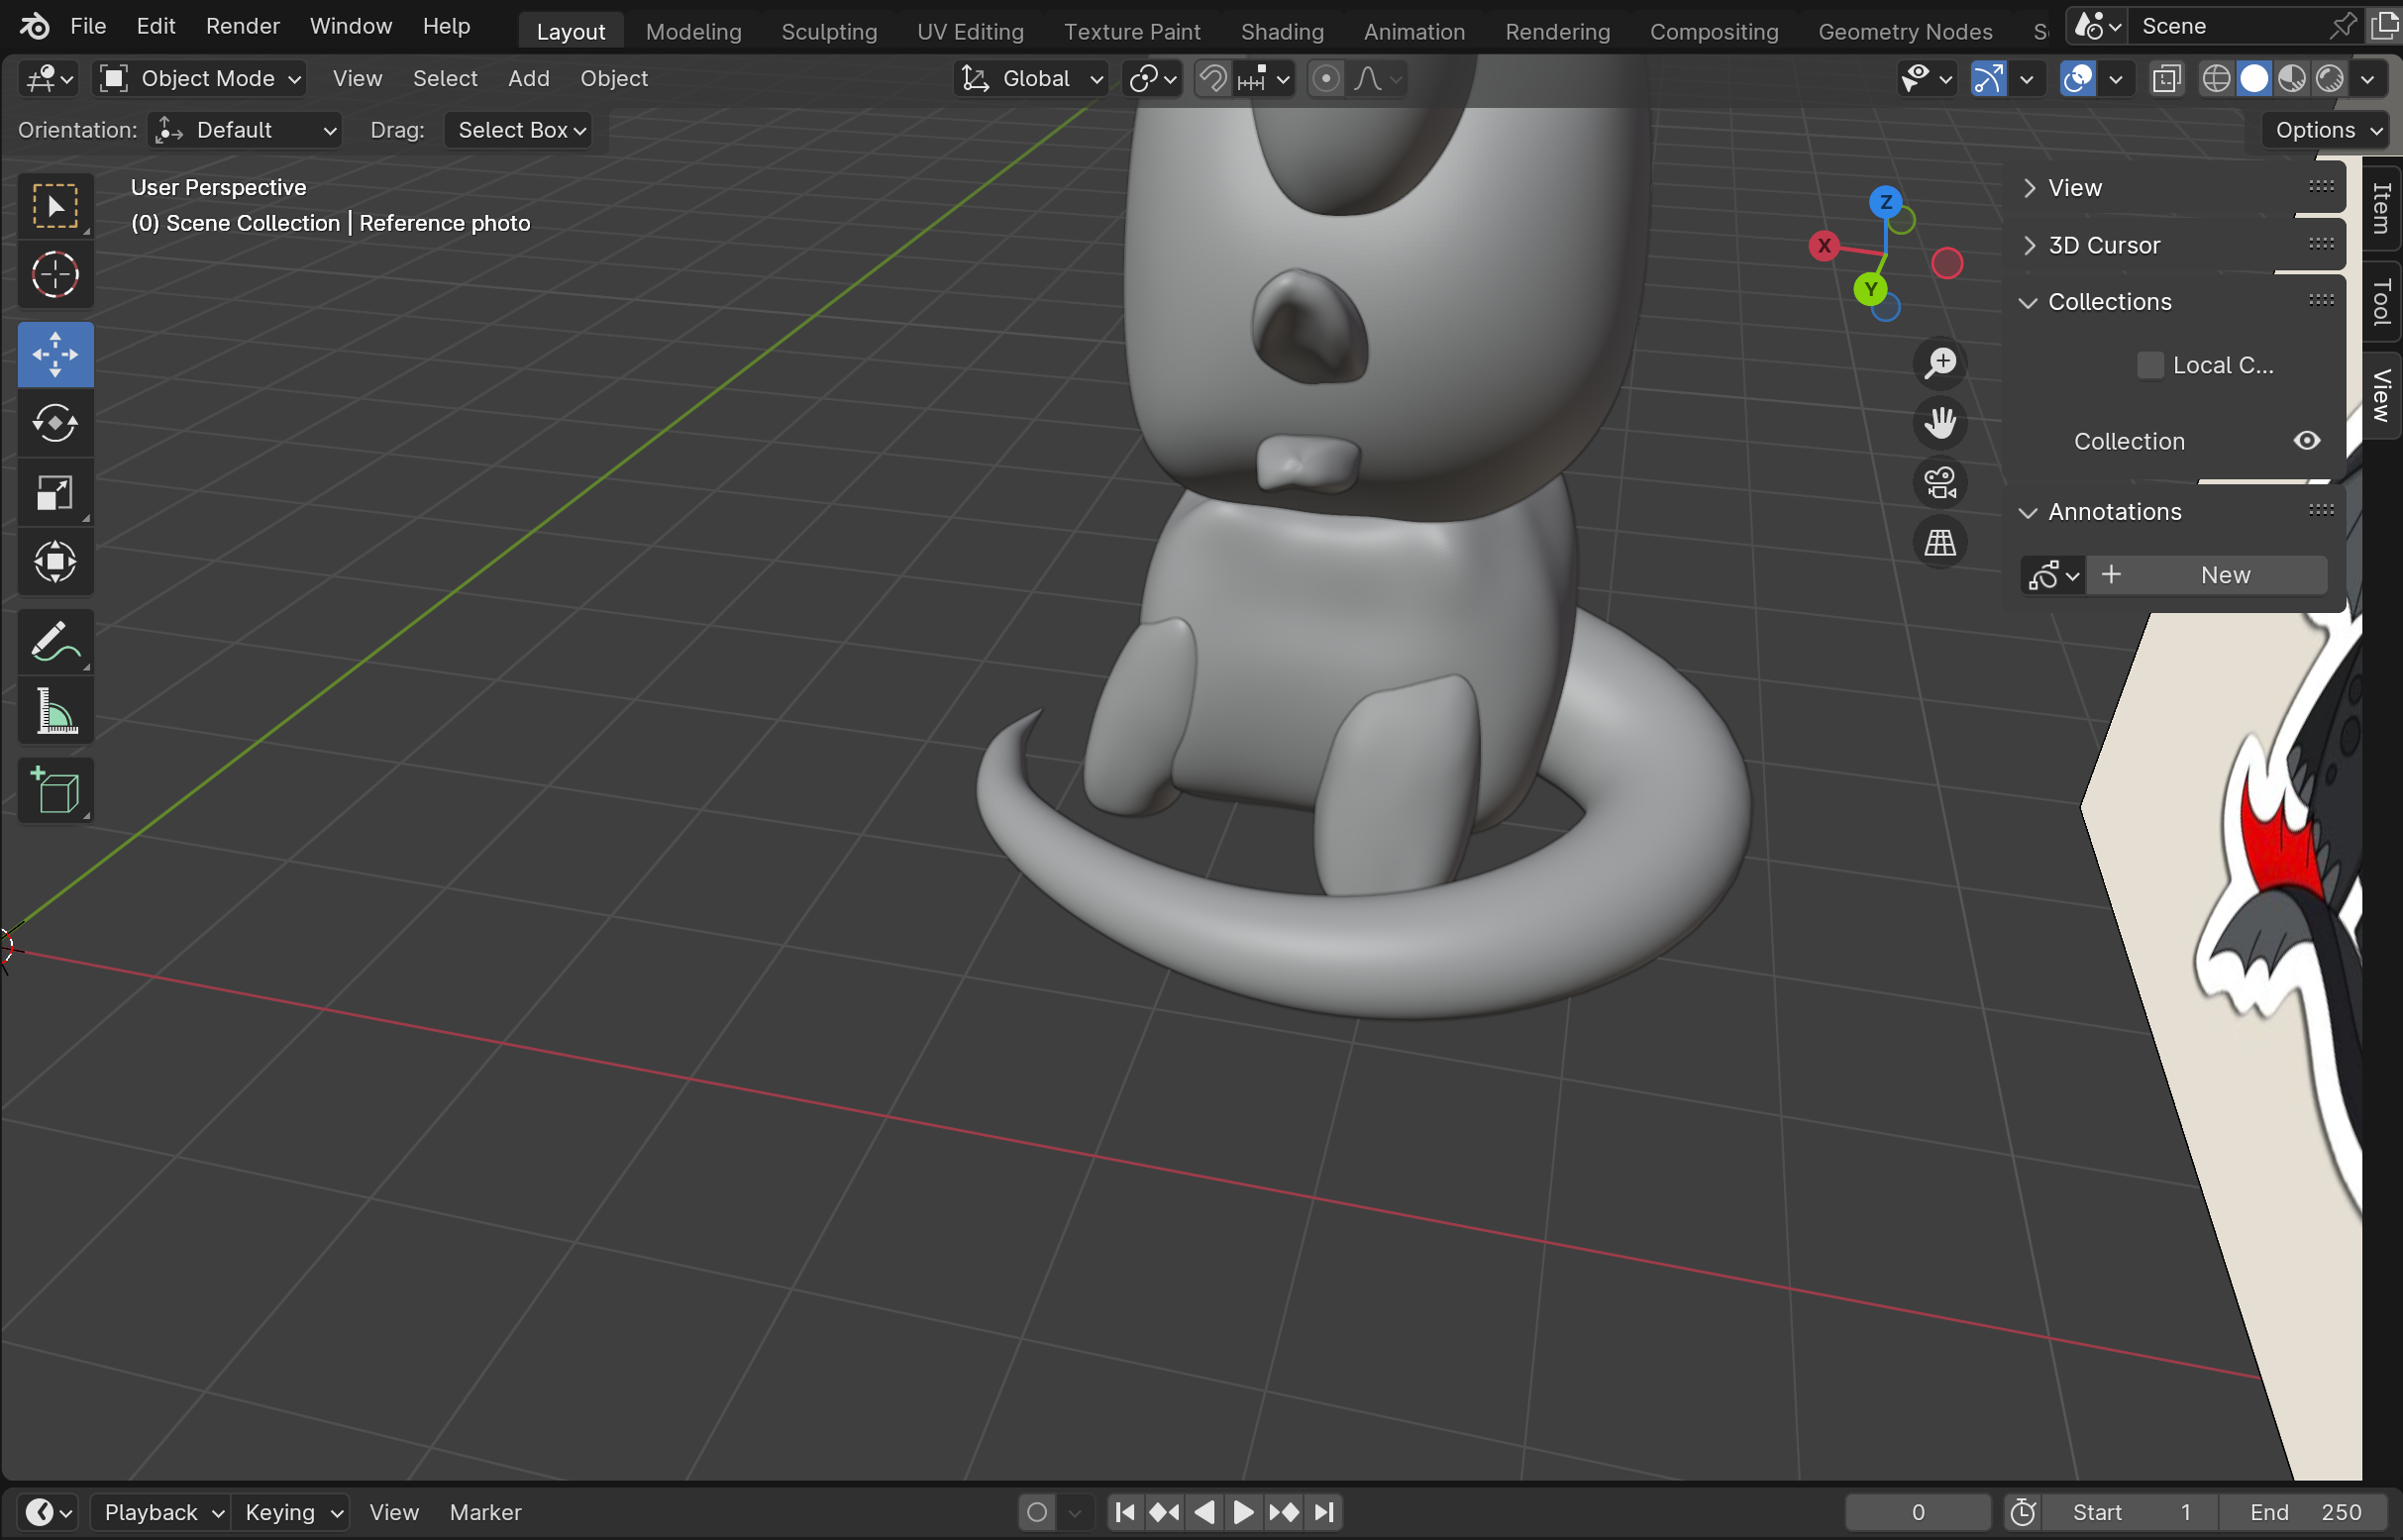
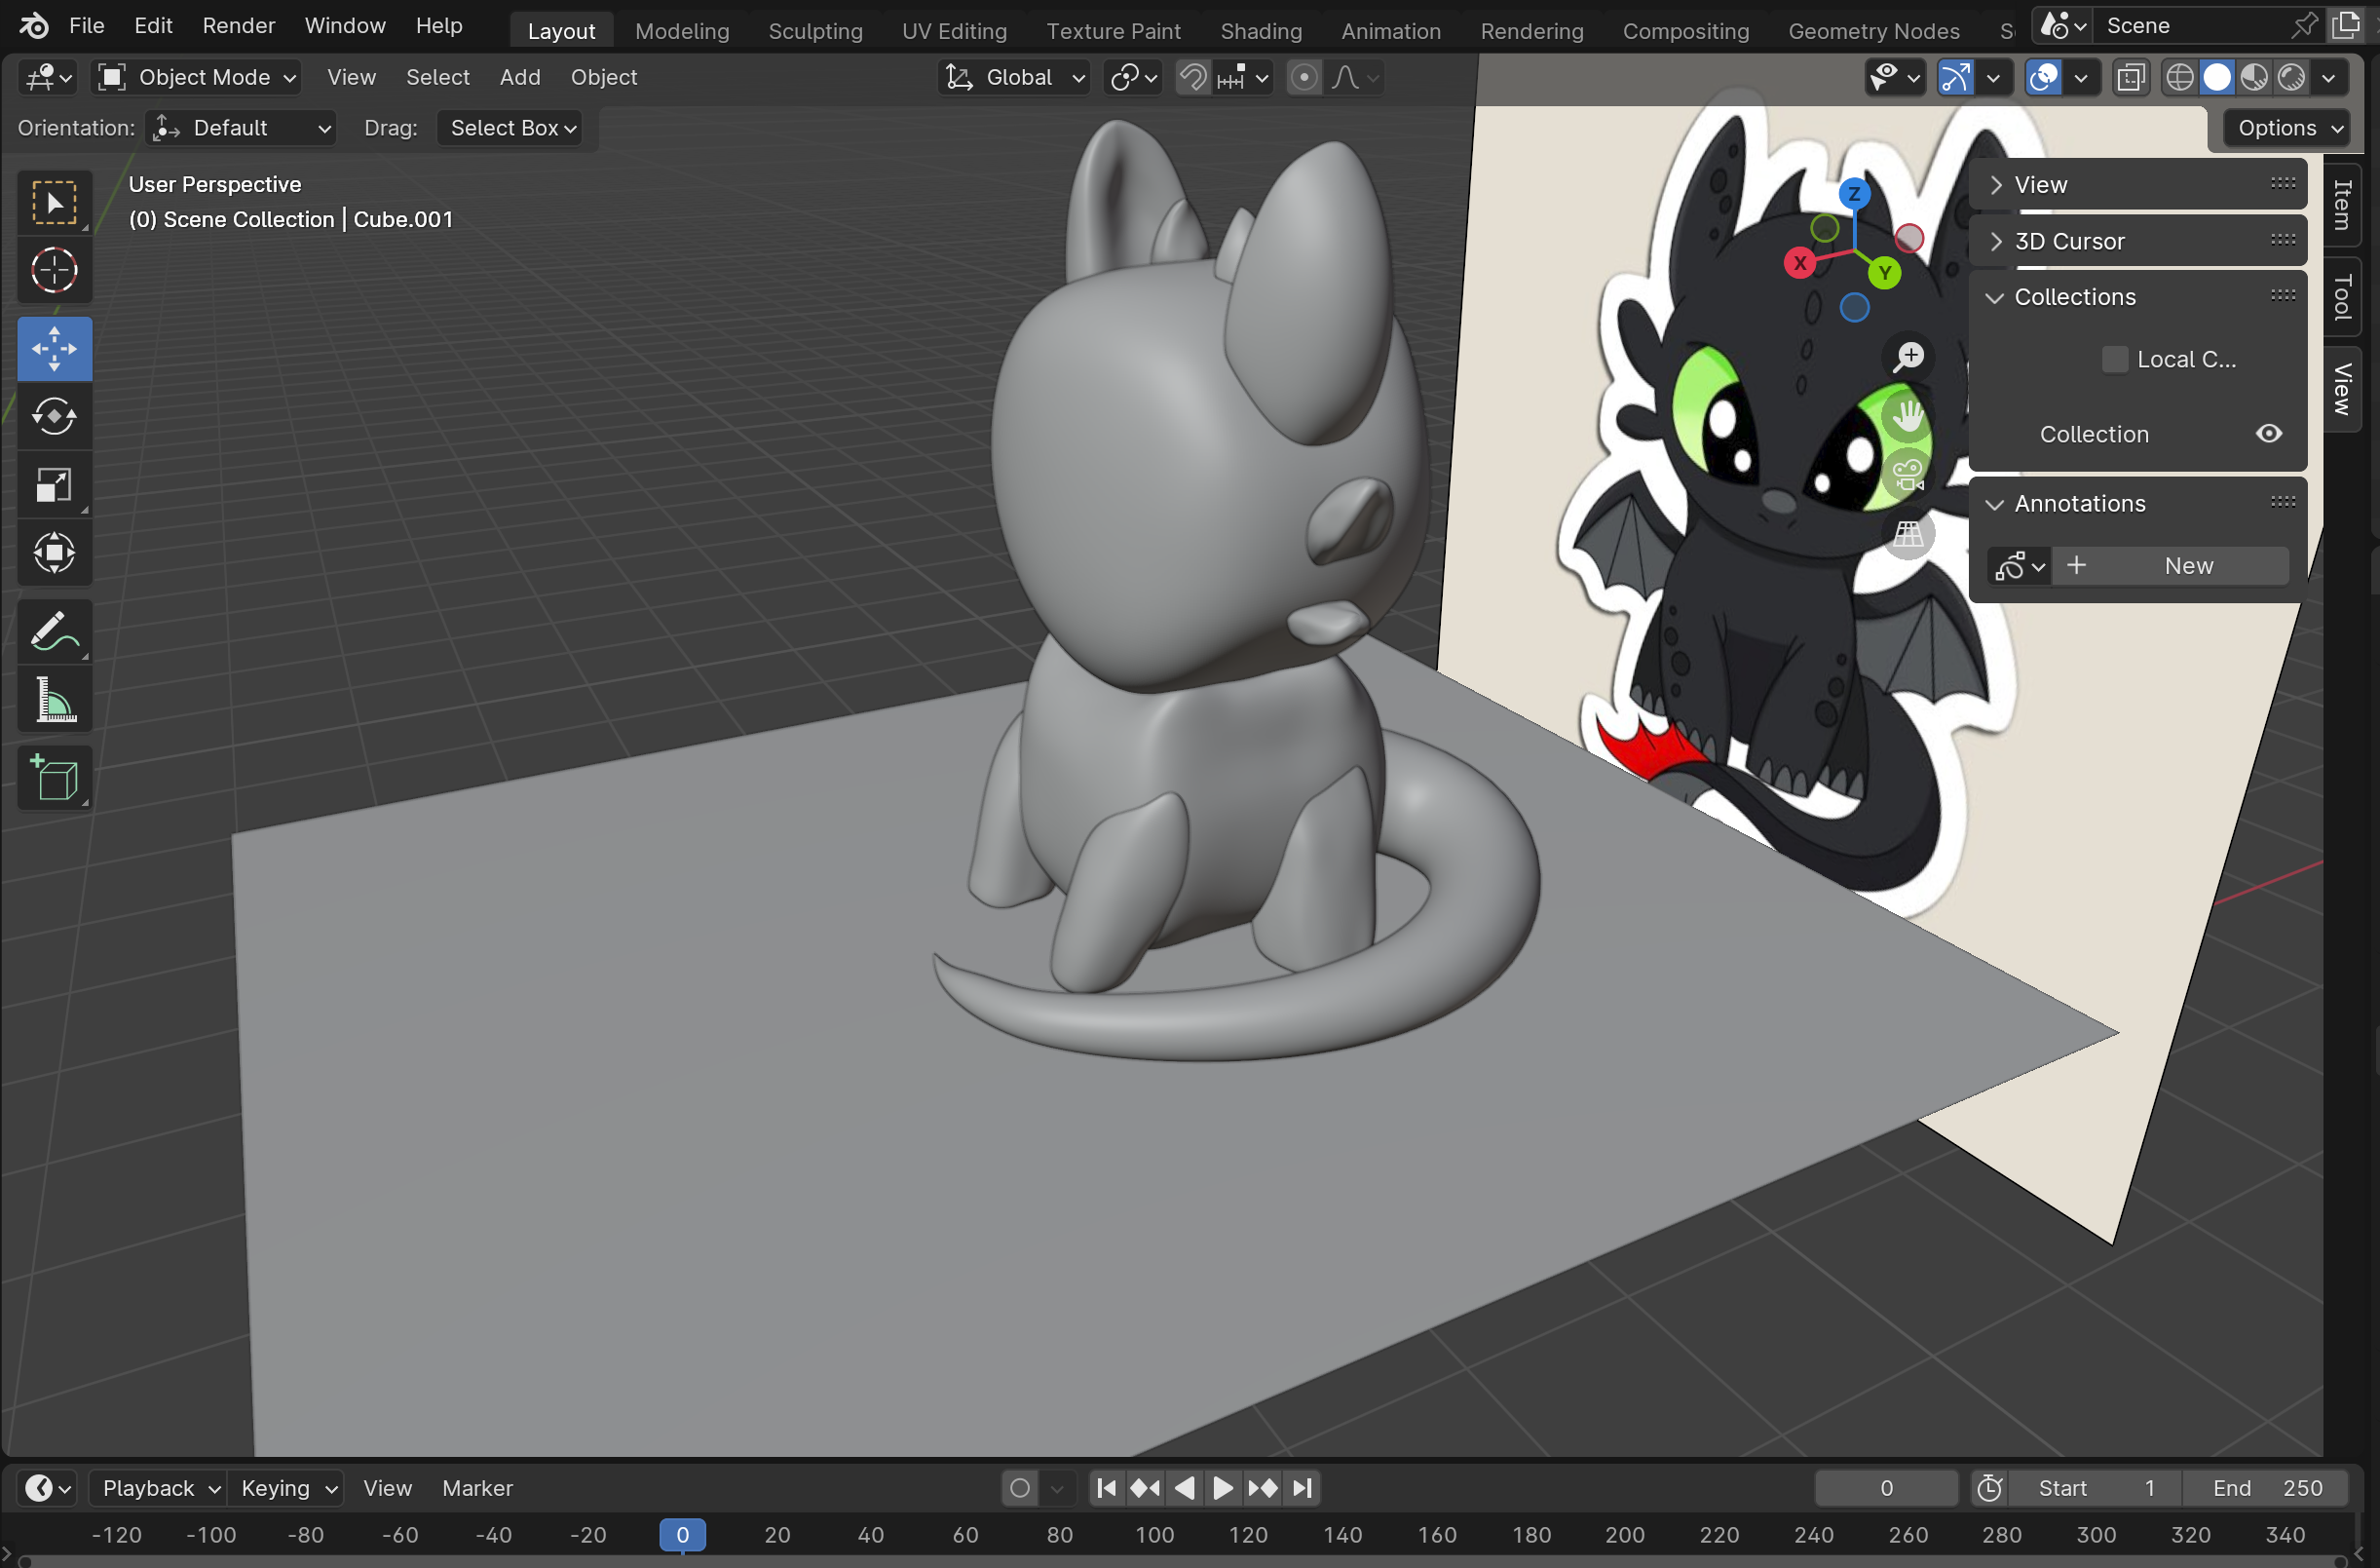
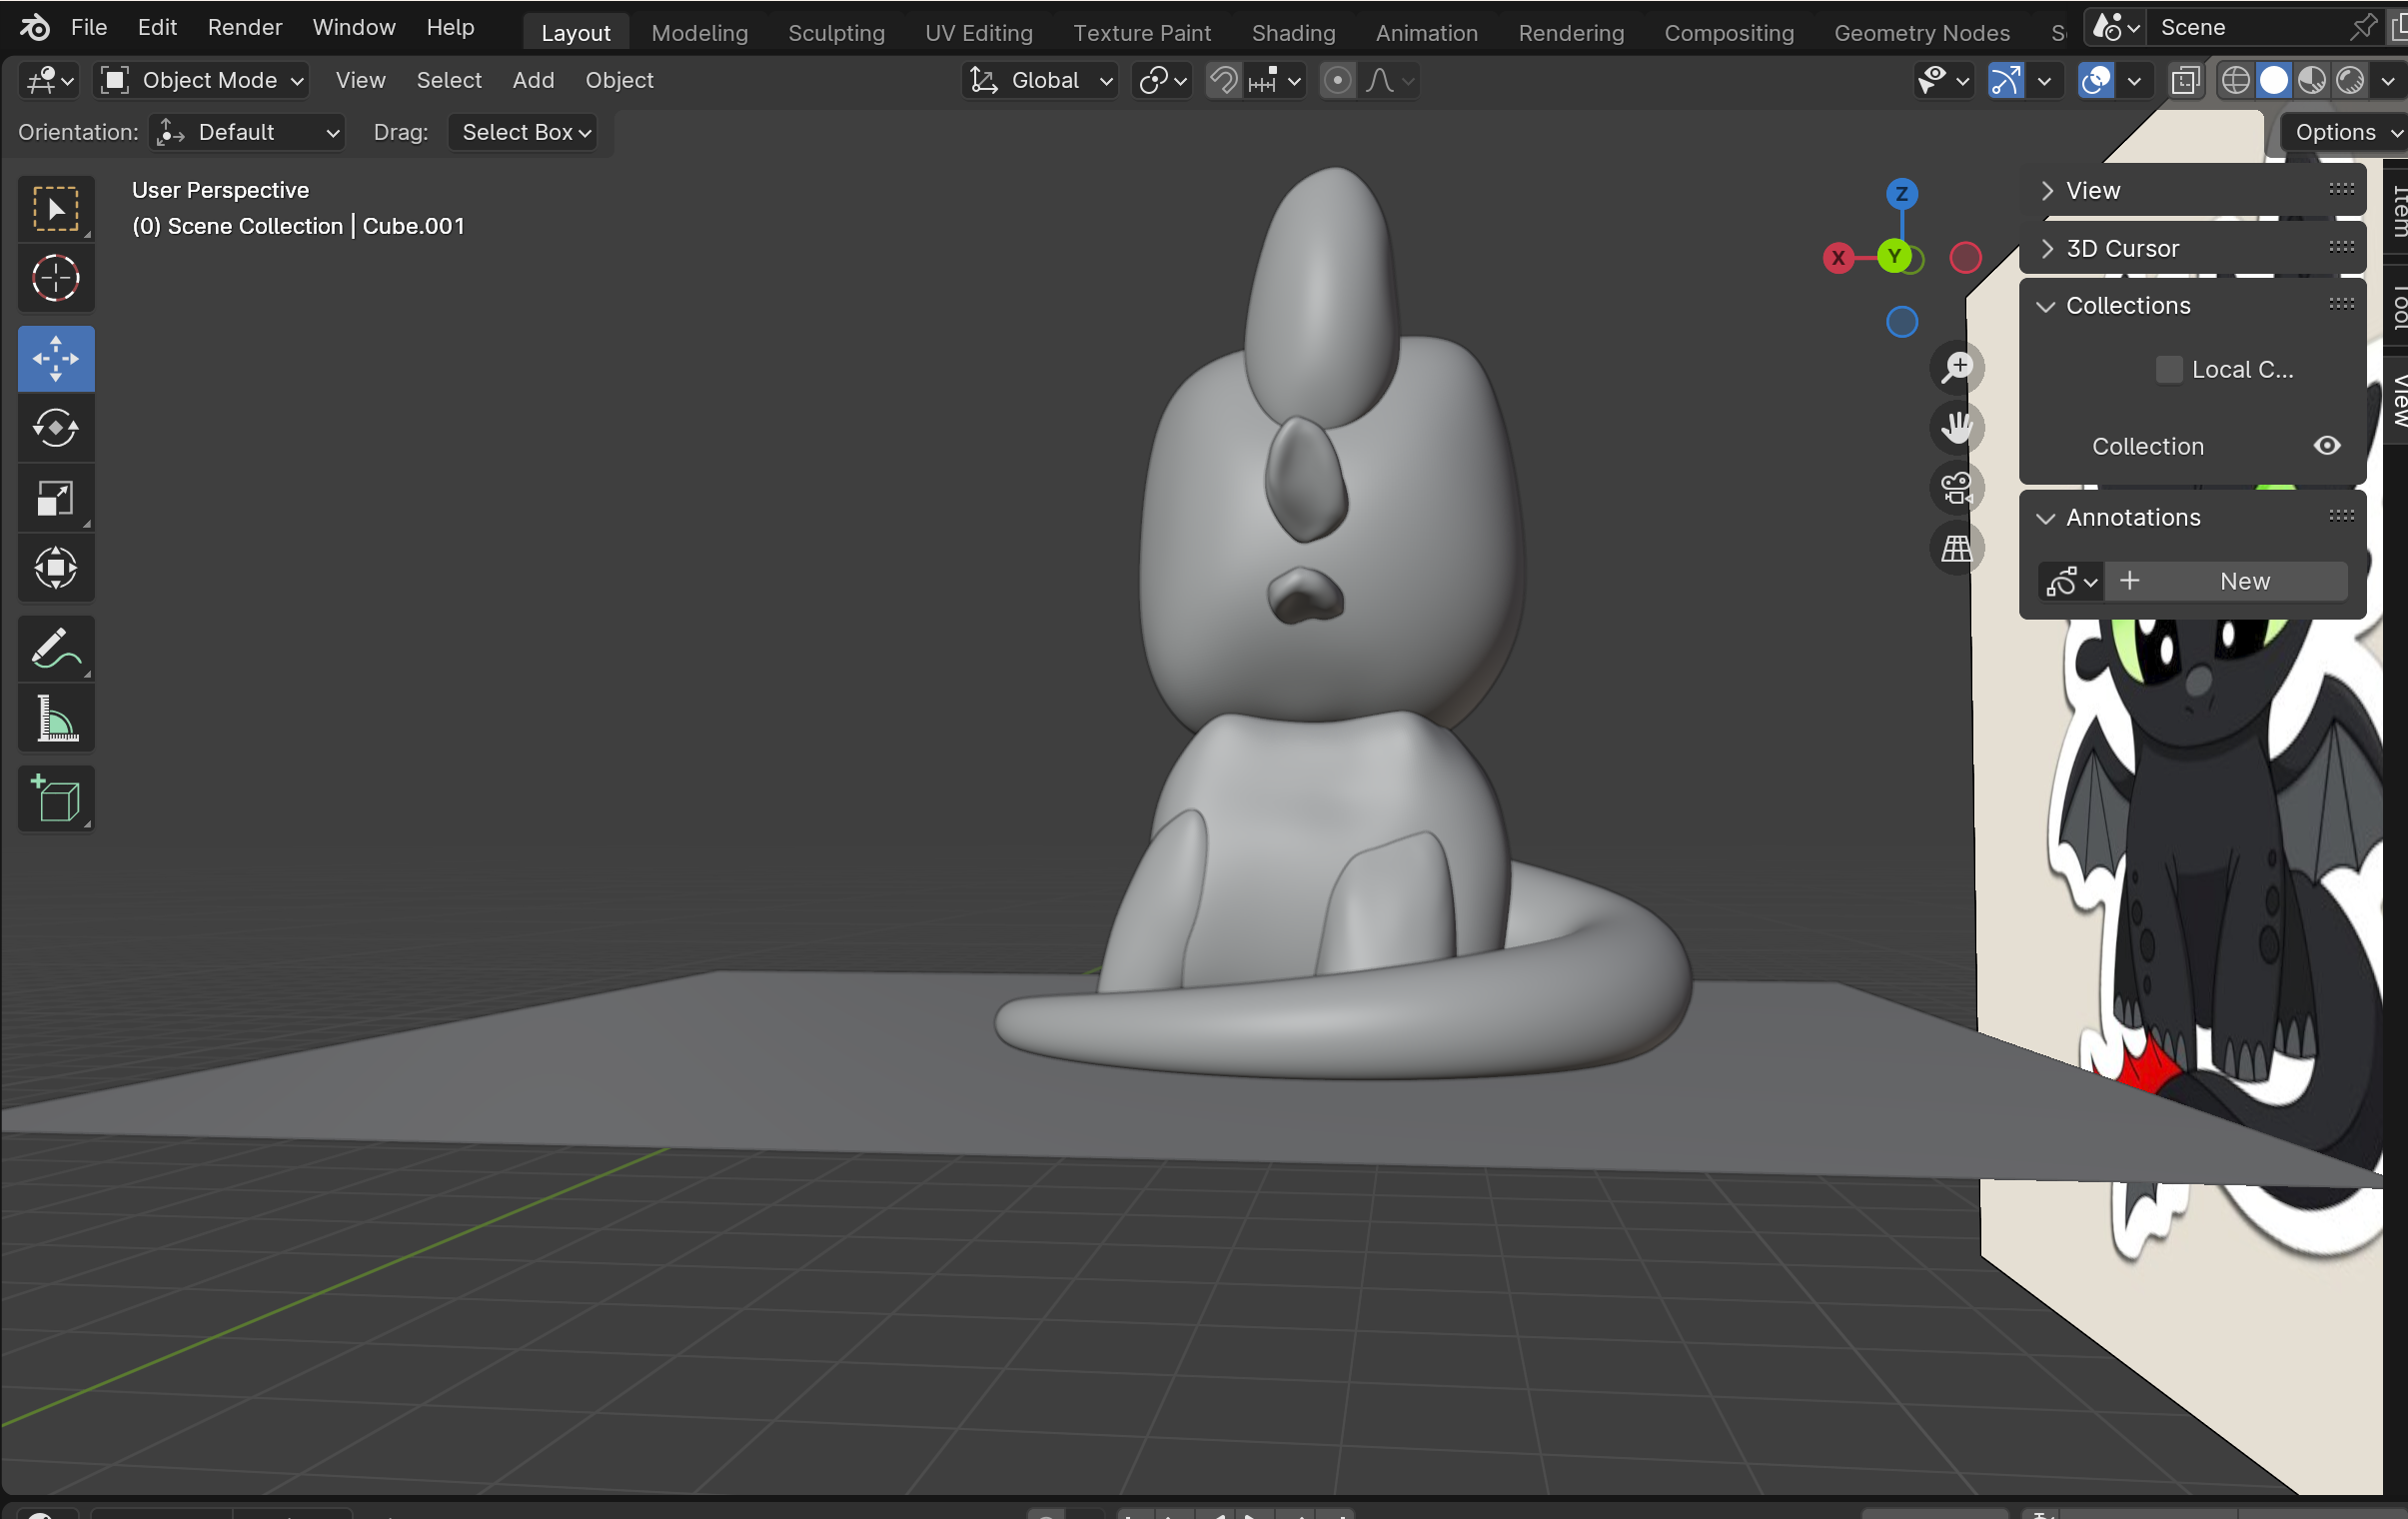
For the tail I did use a video to give me an idea of how to work on it because I was completely new to curves. I used a “path curve” and adjusted the vertices to change how the tail was shaped. I also changed the different widths/thicknesses of the tail by clicking specific vertices and scaling (Alt+S for curves) them to match a more realistic shape of the tail. I also added a plane that I placed underneath the feet so I could make sure the tail laid on the floor evenly, to ensure the figure would be able to stand when printed.
!!!! MAKE SURE TO NAME YOUR OBJECTS AS YOU CREATE THEM TO NOT LOSE TRACK OF ANYTHING !!!!
Sculpting the Fins of the Tail?
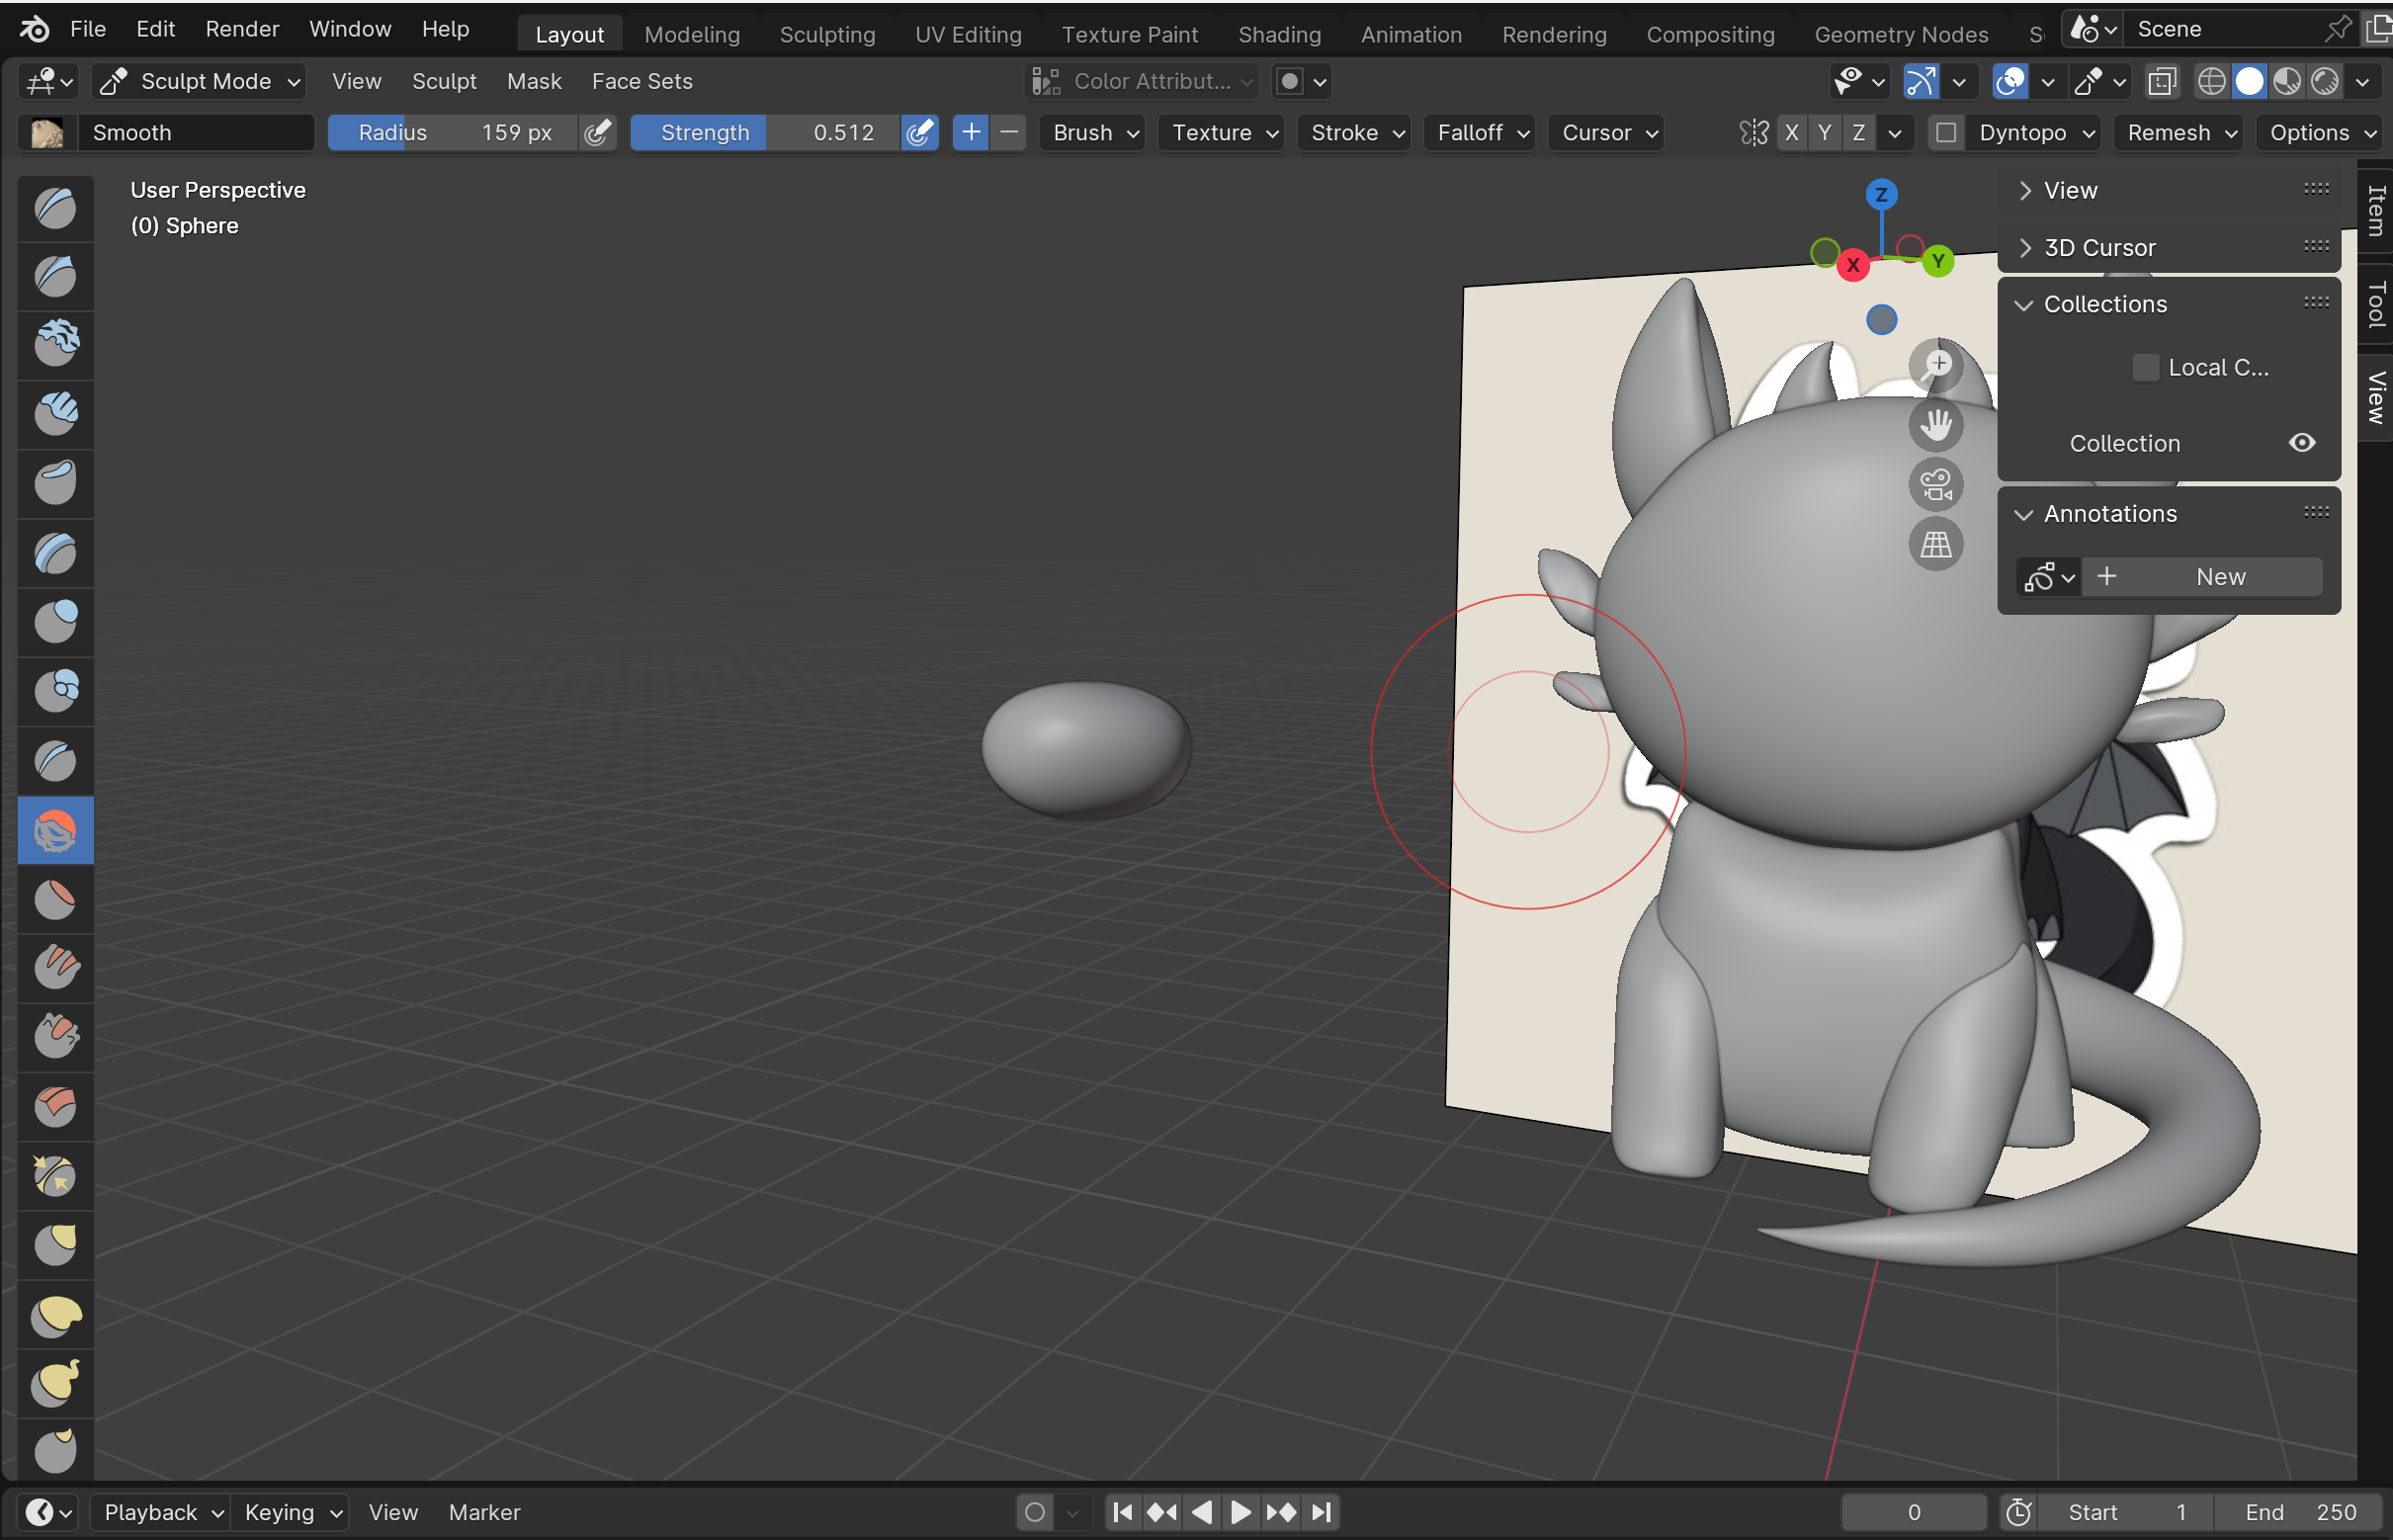
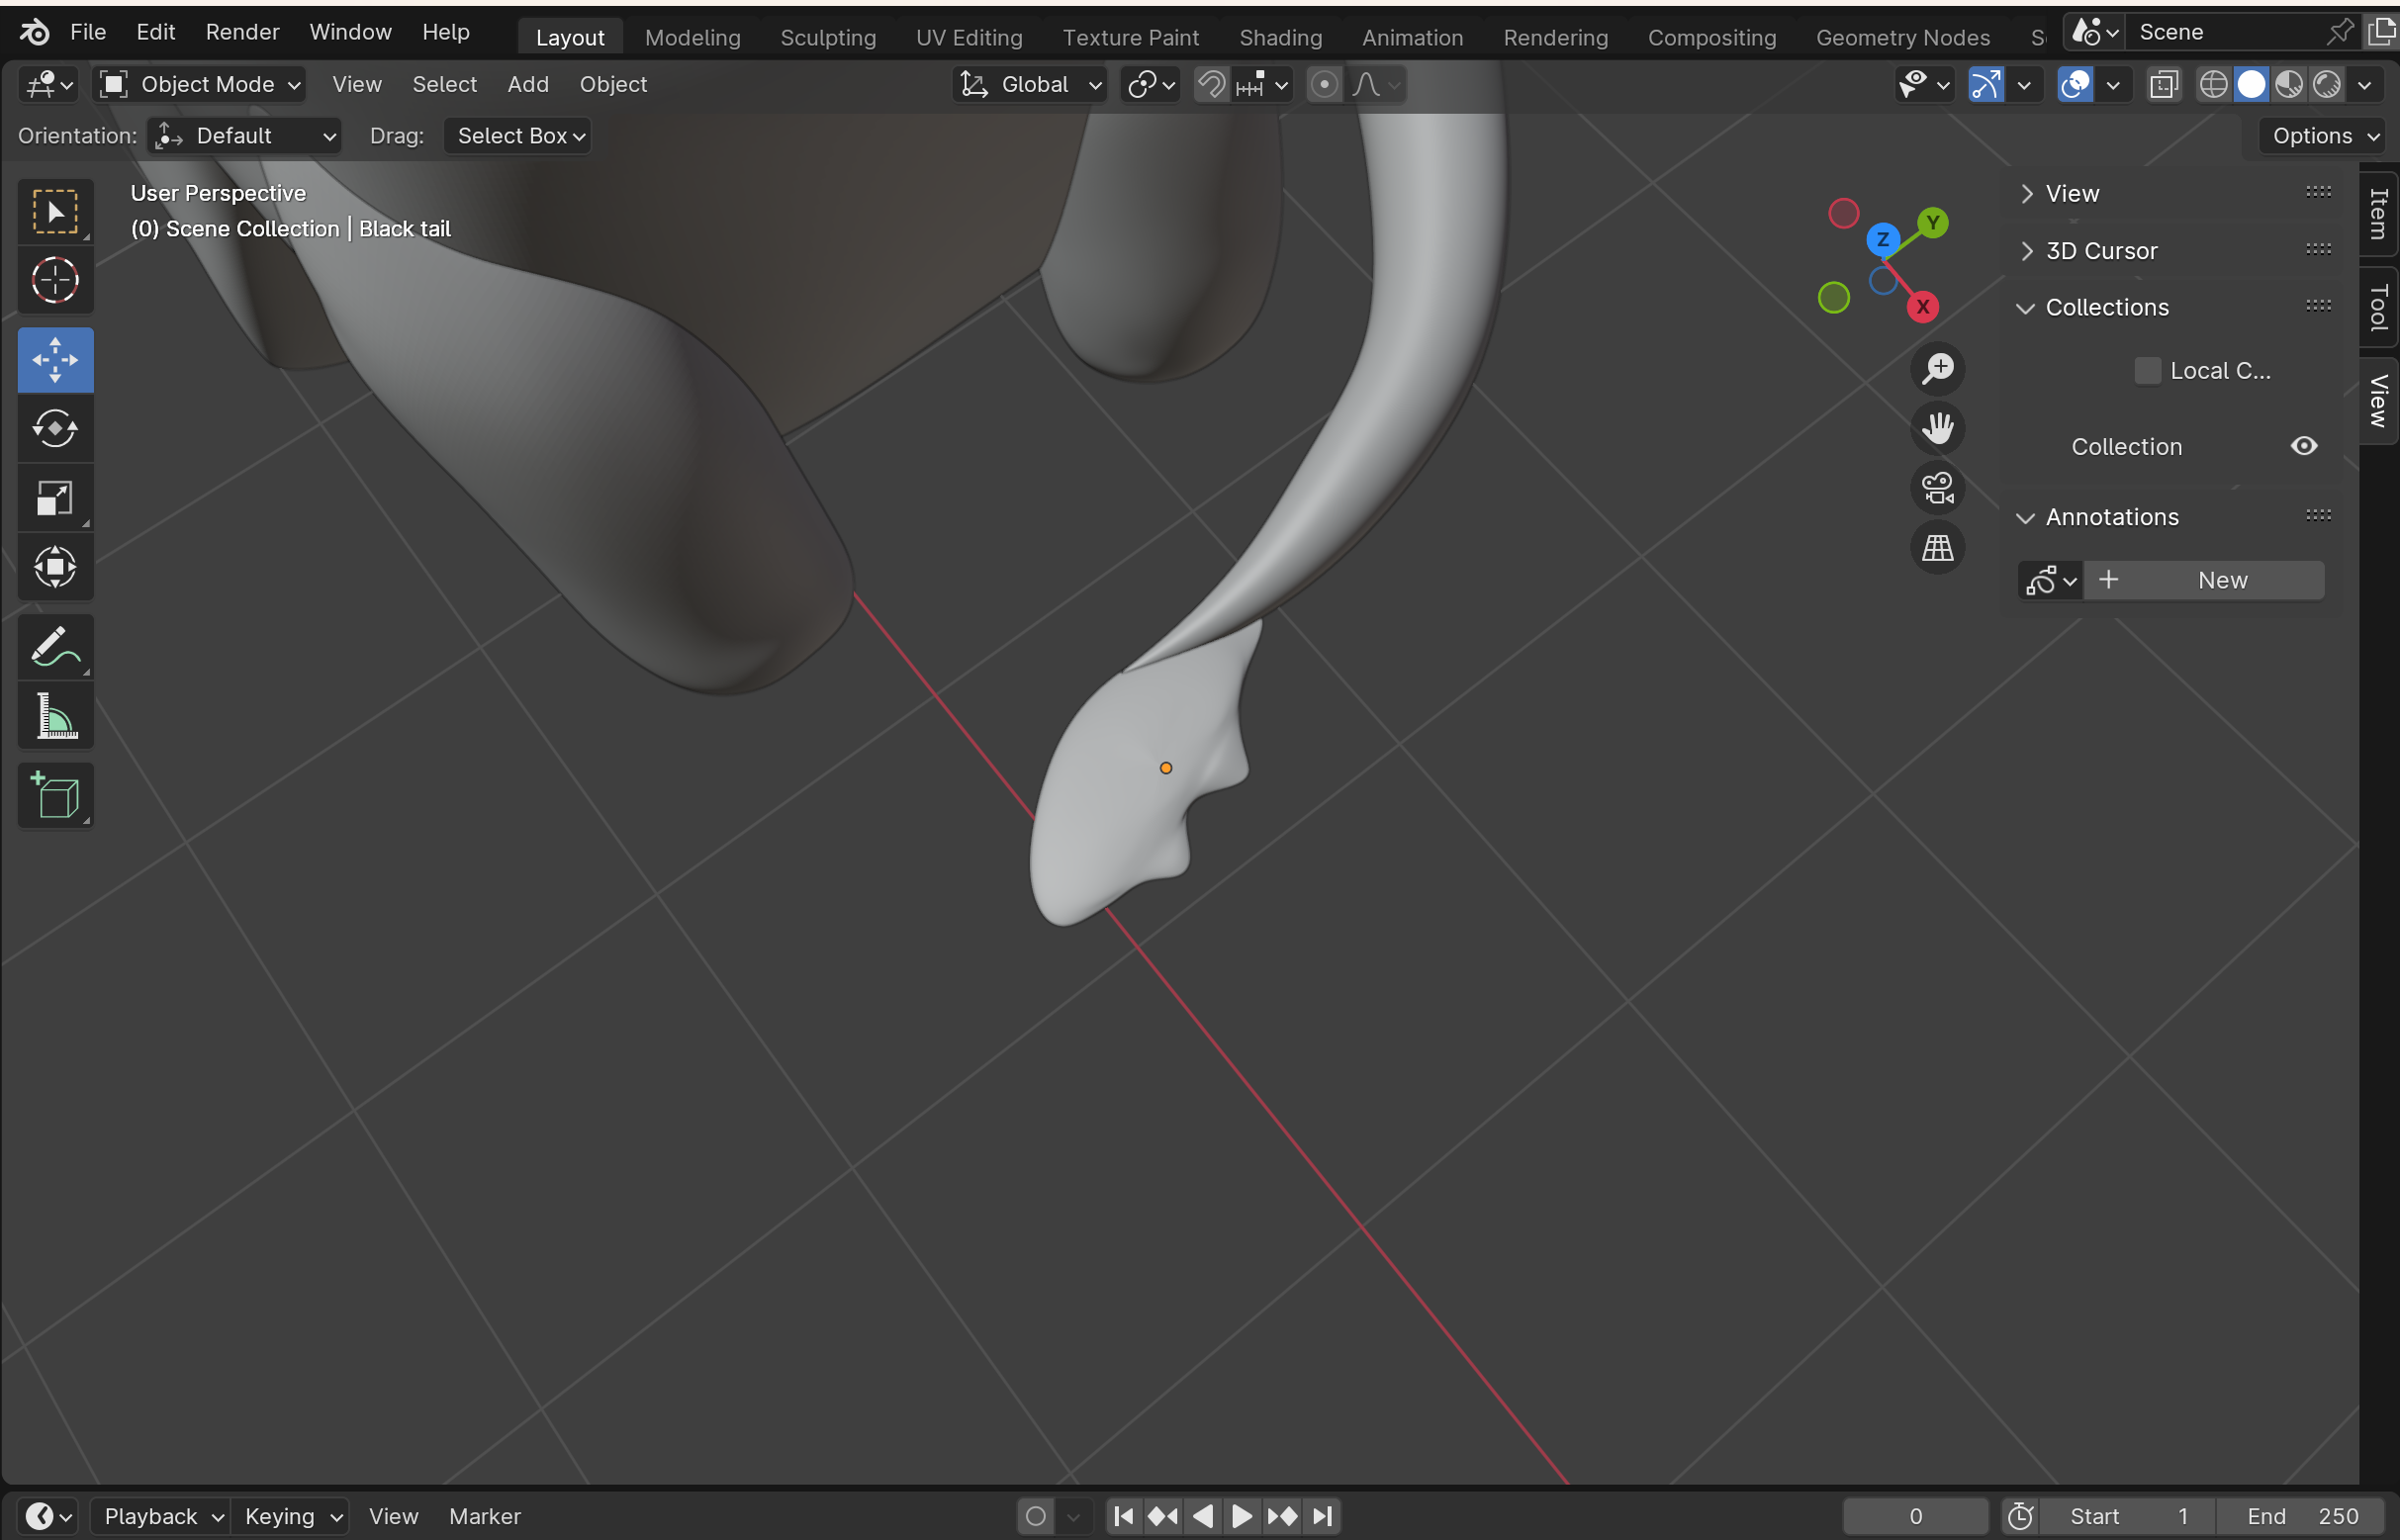
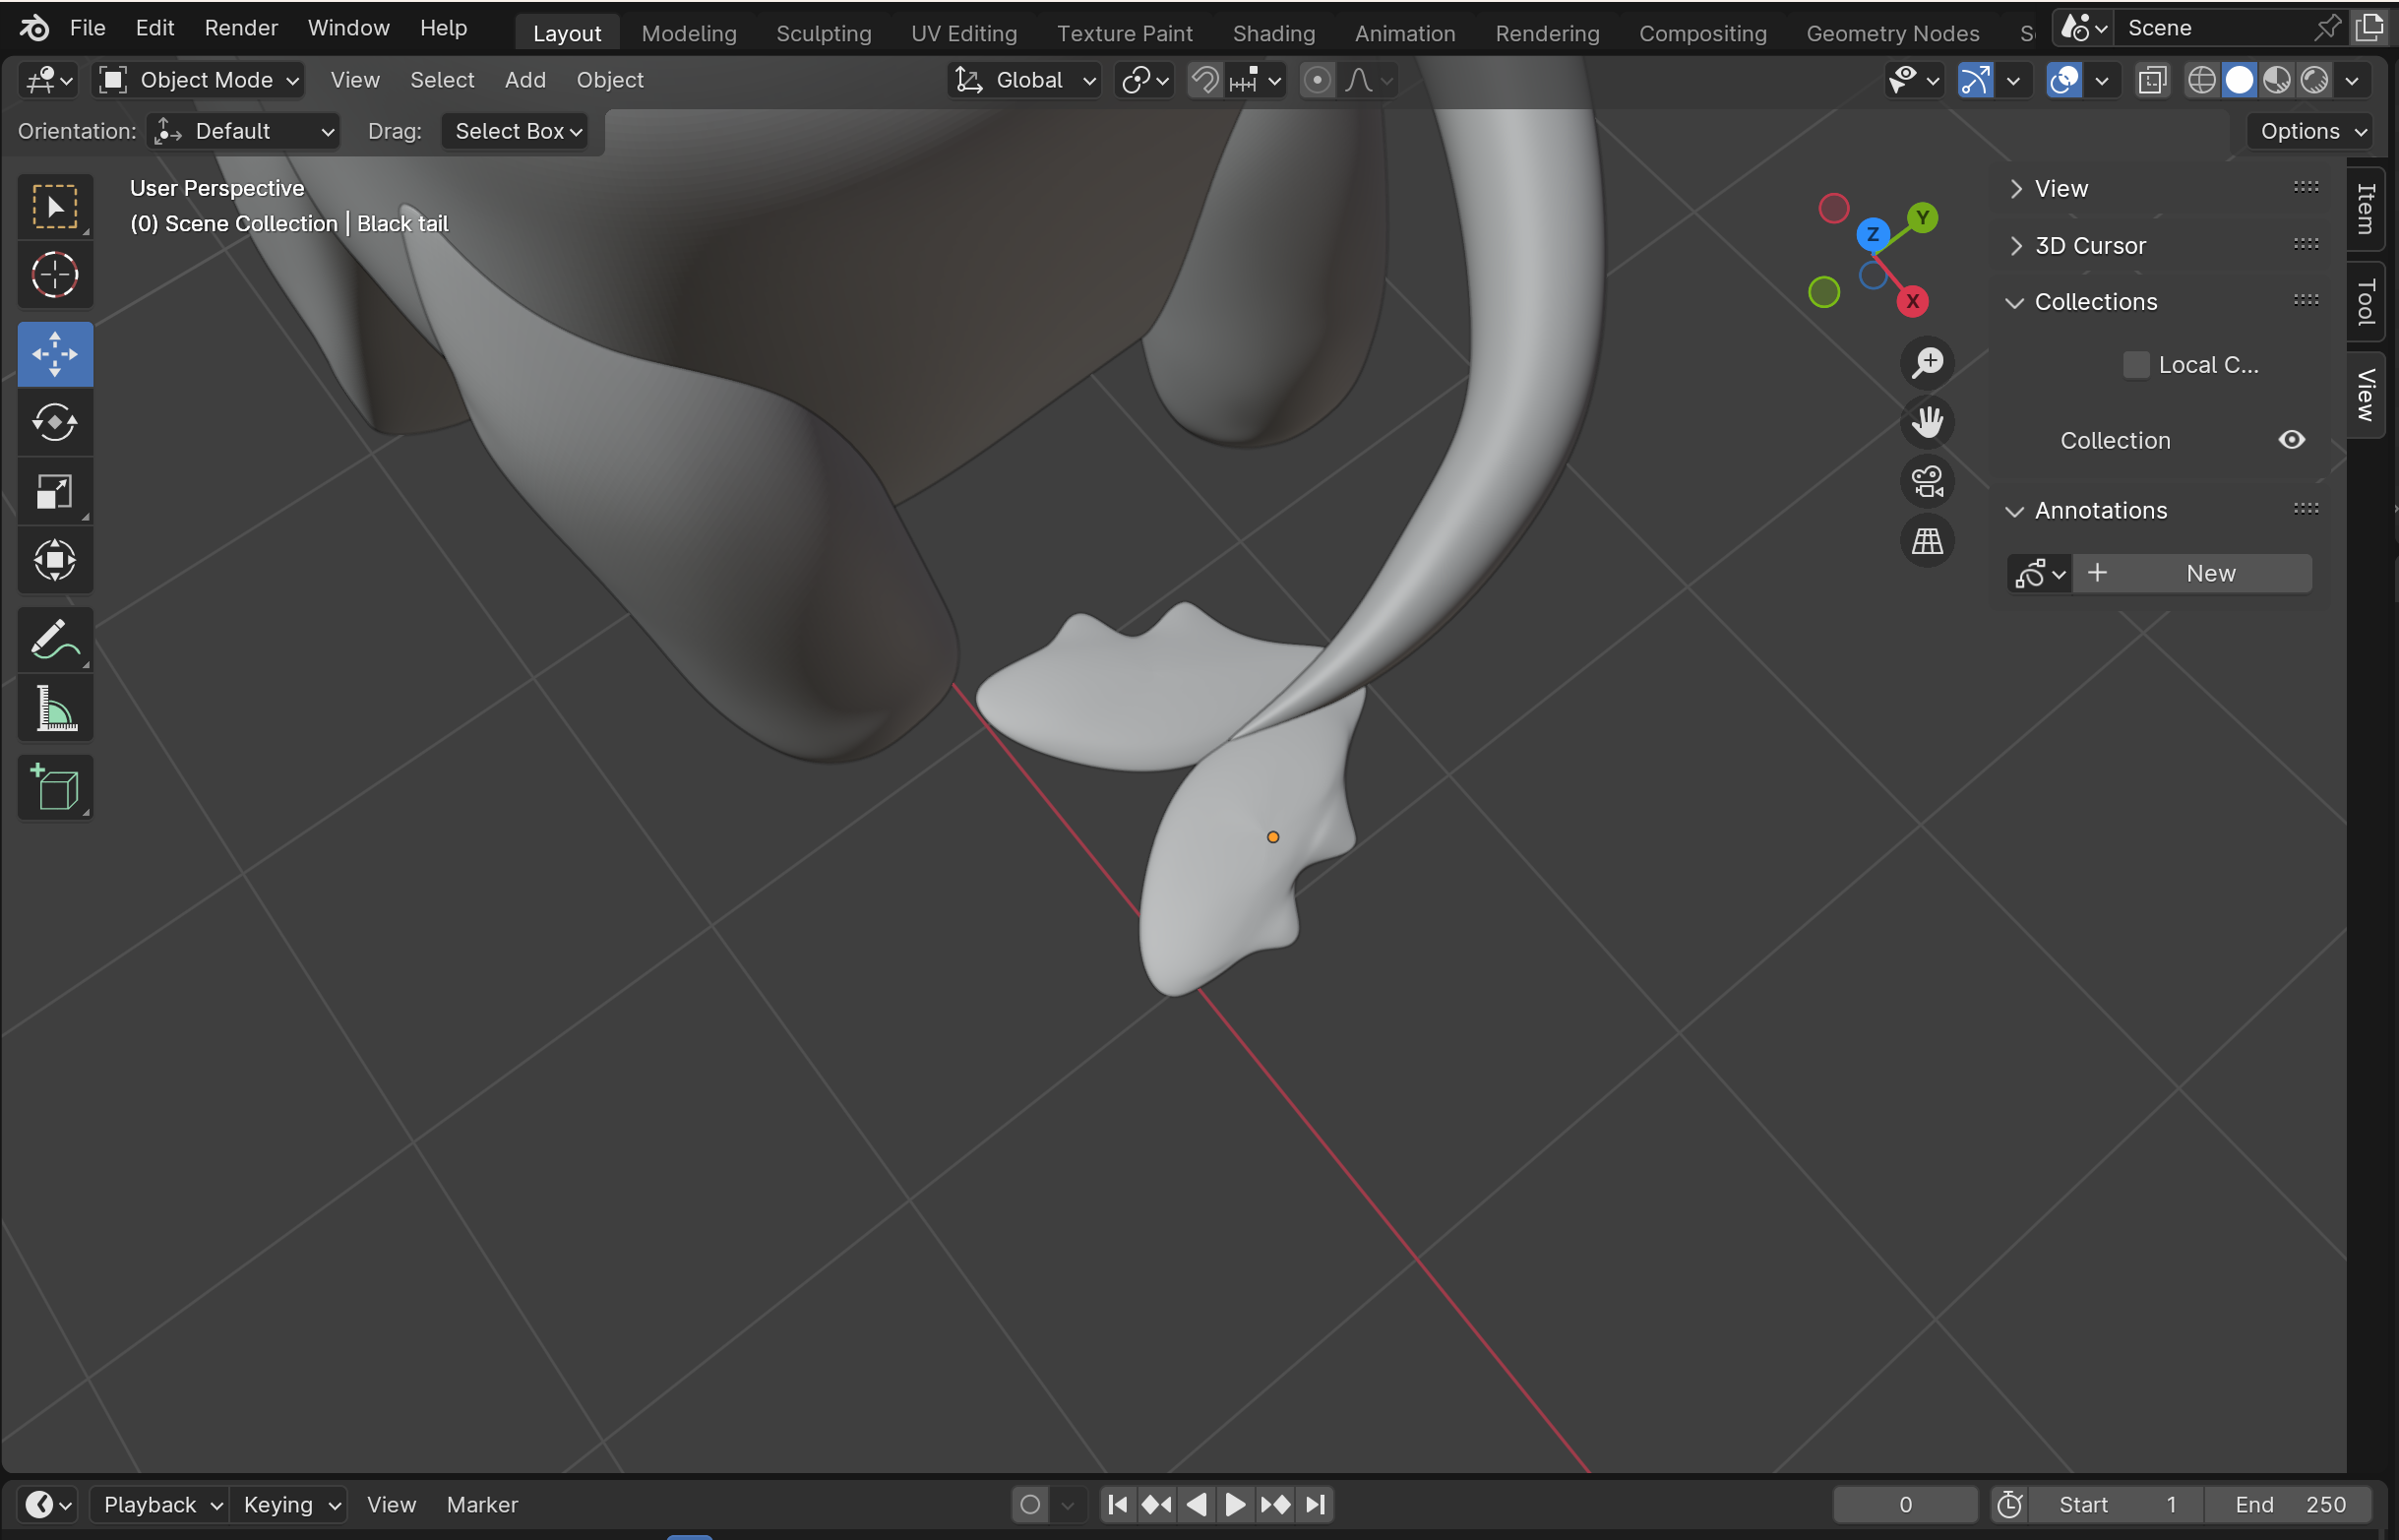
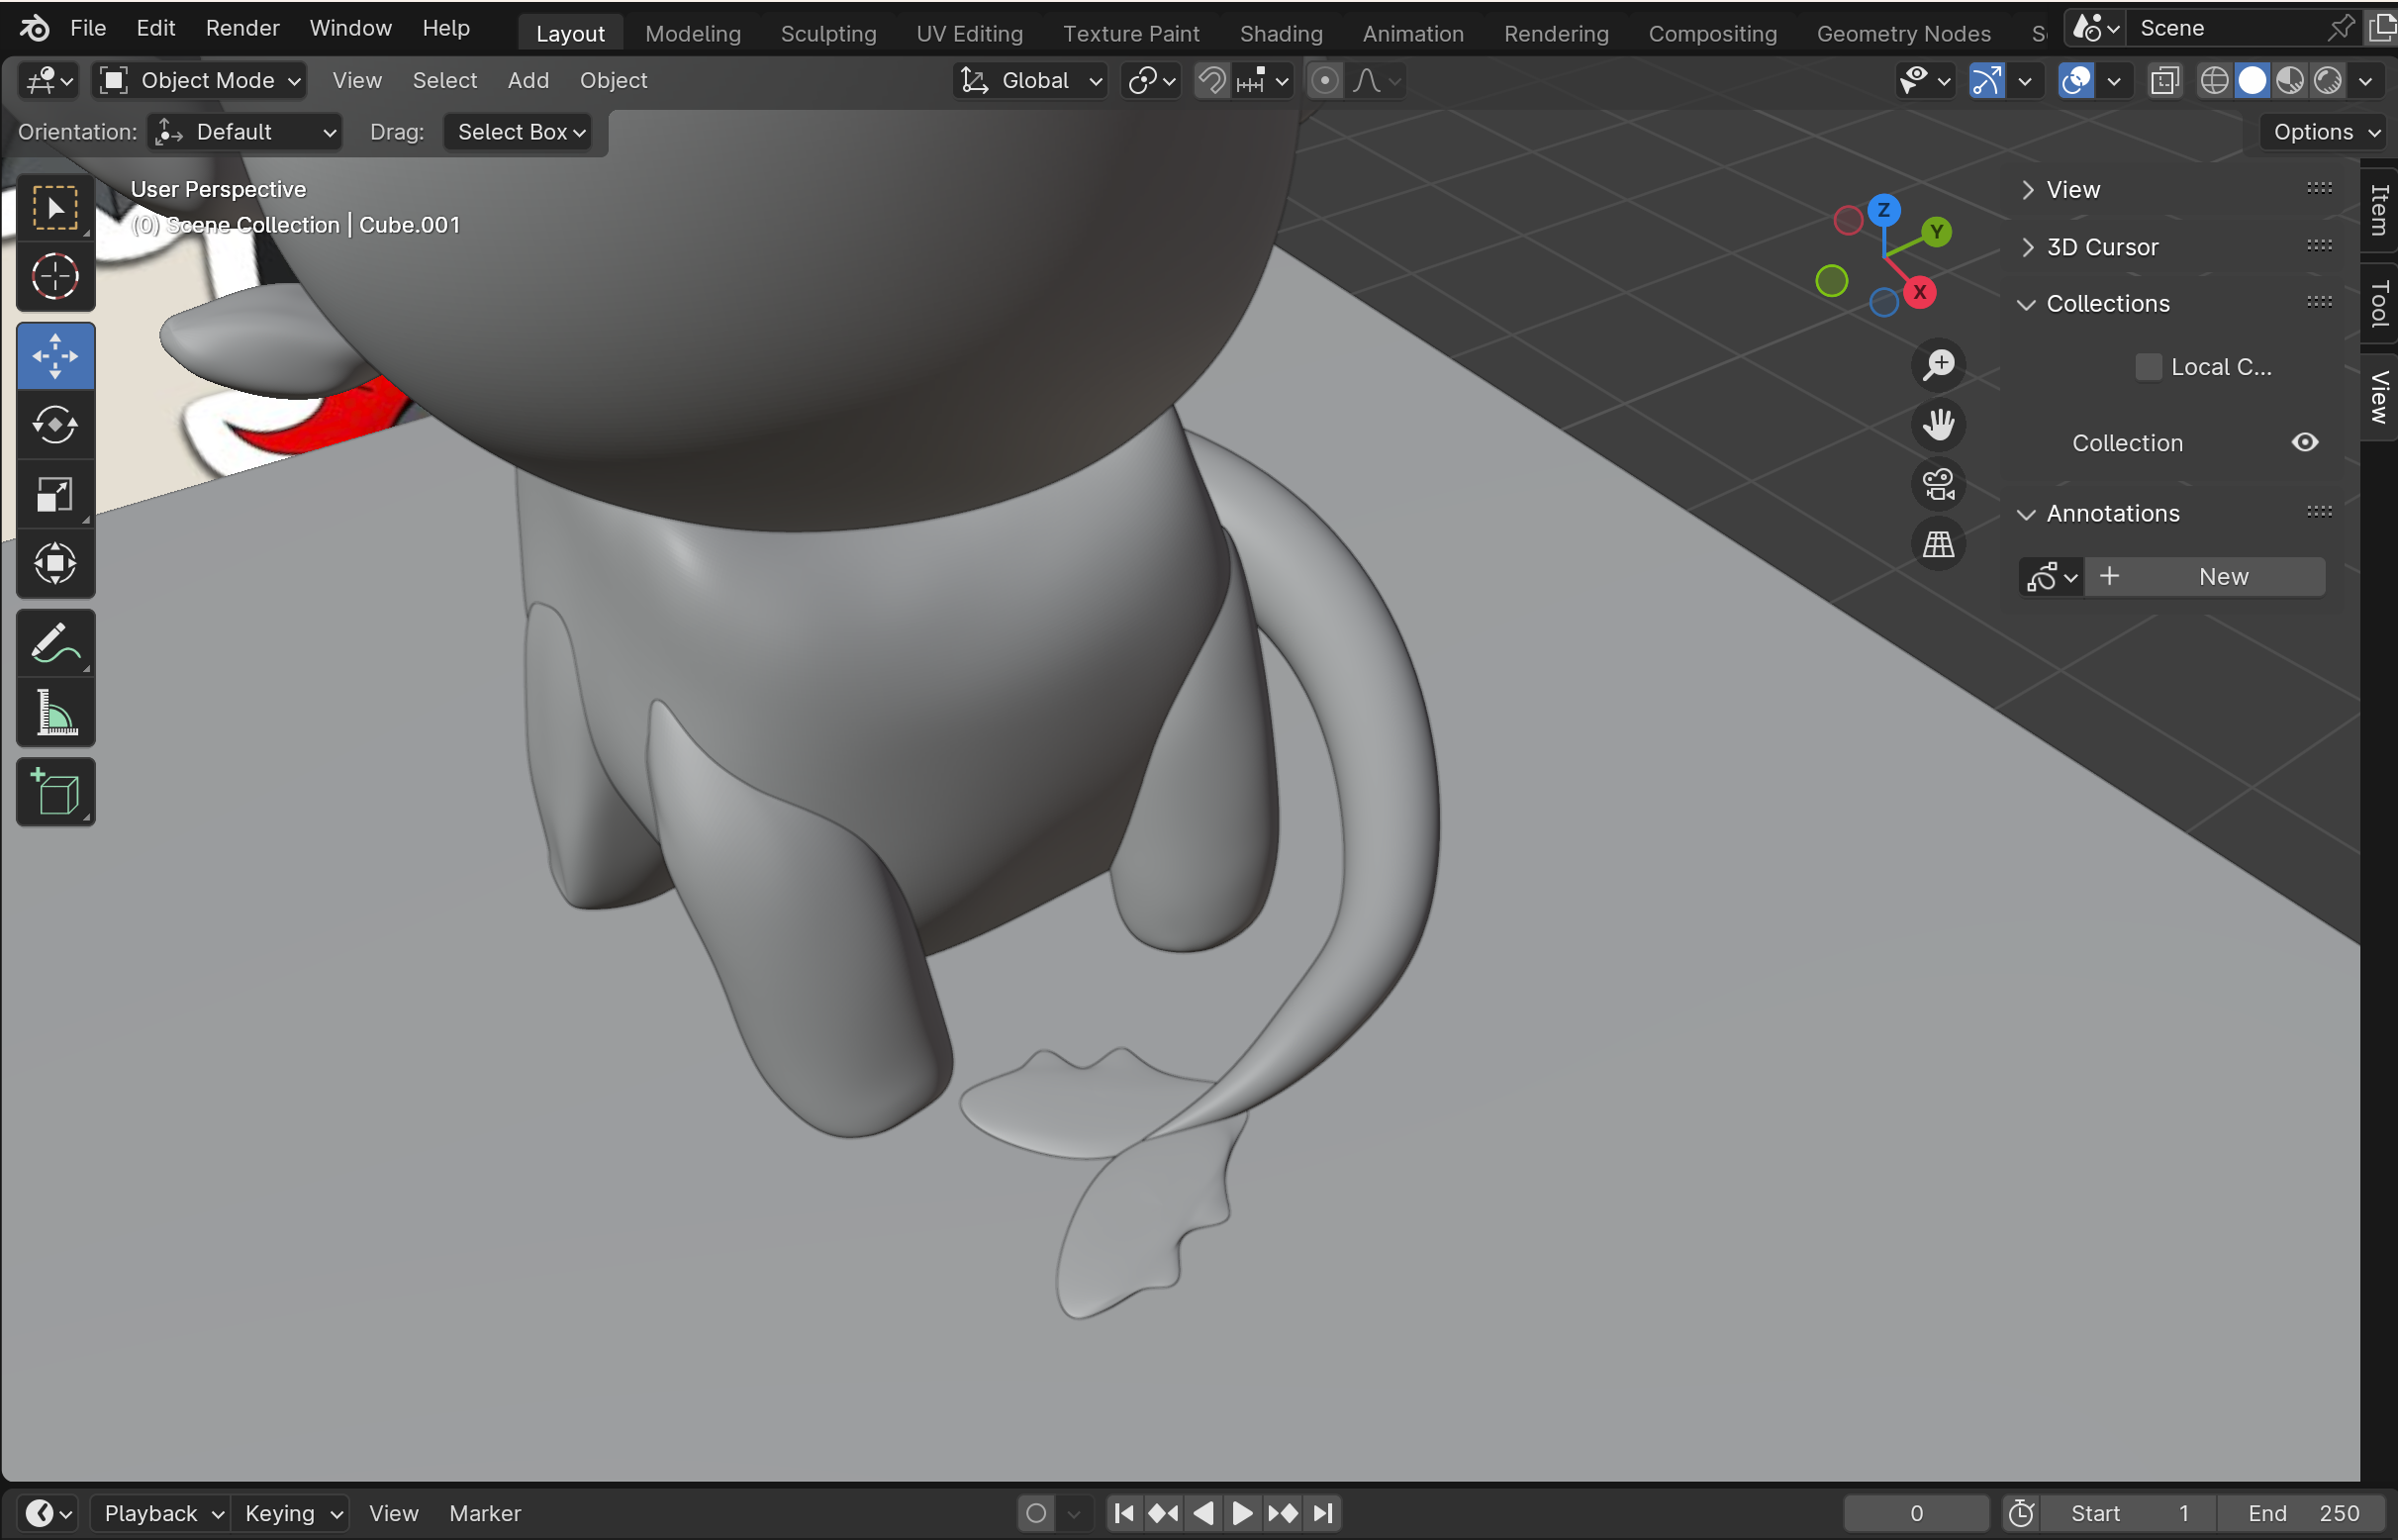
Not entirely sure what to call these, but I'm gonna call them fins. To no surprise, I started with a sphere and repeated the typical steps. I flattened/smoothed out the sphere to get it to a good size and proceeded to sculpt the shape of one of the fins. Once I reached a shape I liked, I duplicated it and positioned both fins on the tail where they fit in place and looked good.
!!!! MAKE SURE TO NAME YOUR OBJECTS AS YOU CREATE THEM TO NOT LOSE TRACK OF ANYTHING !!!!
Sculpting the Spikes
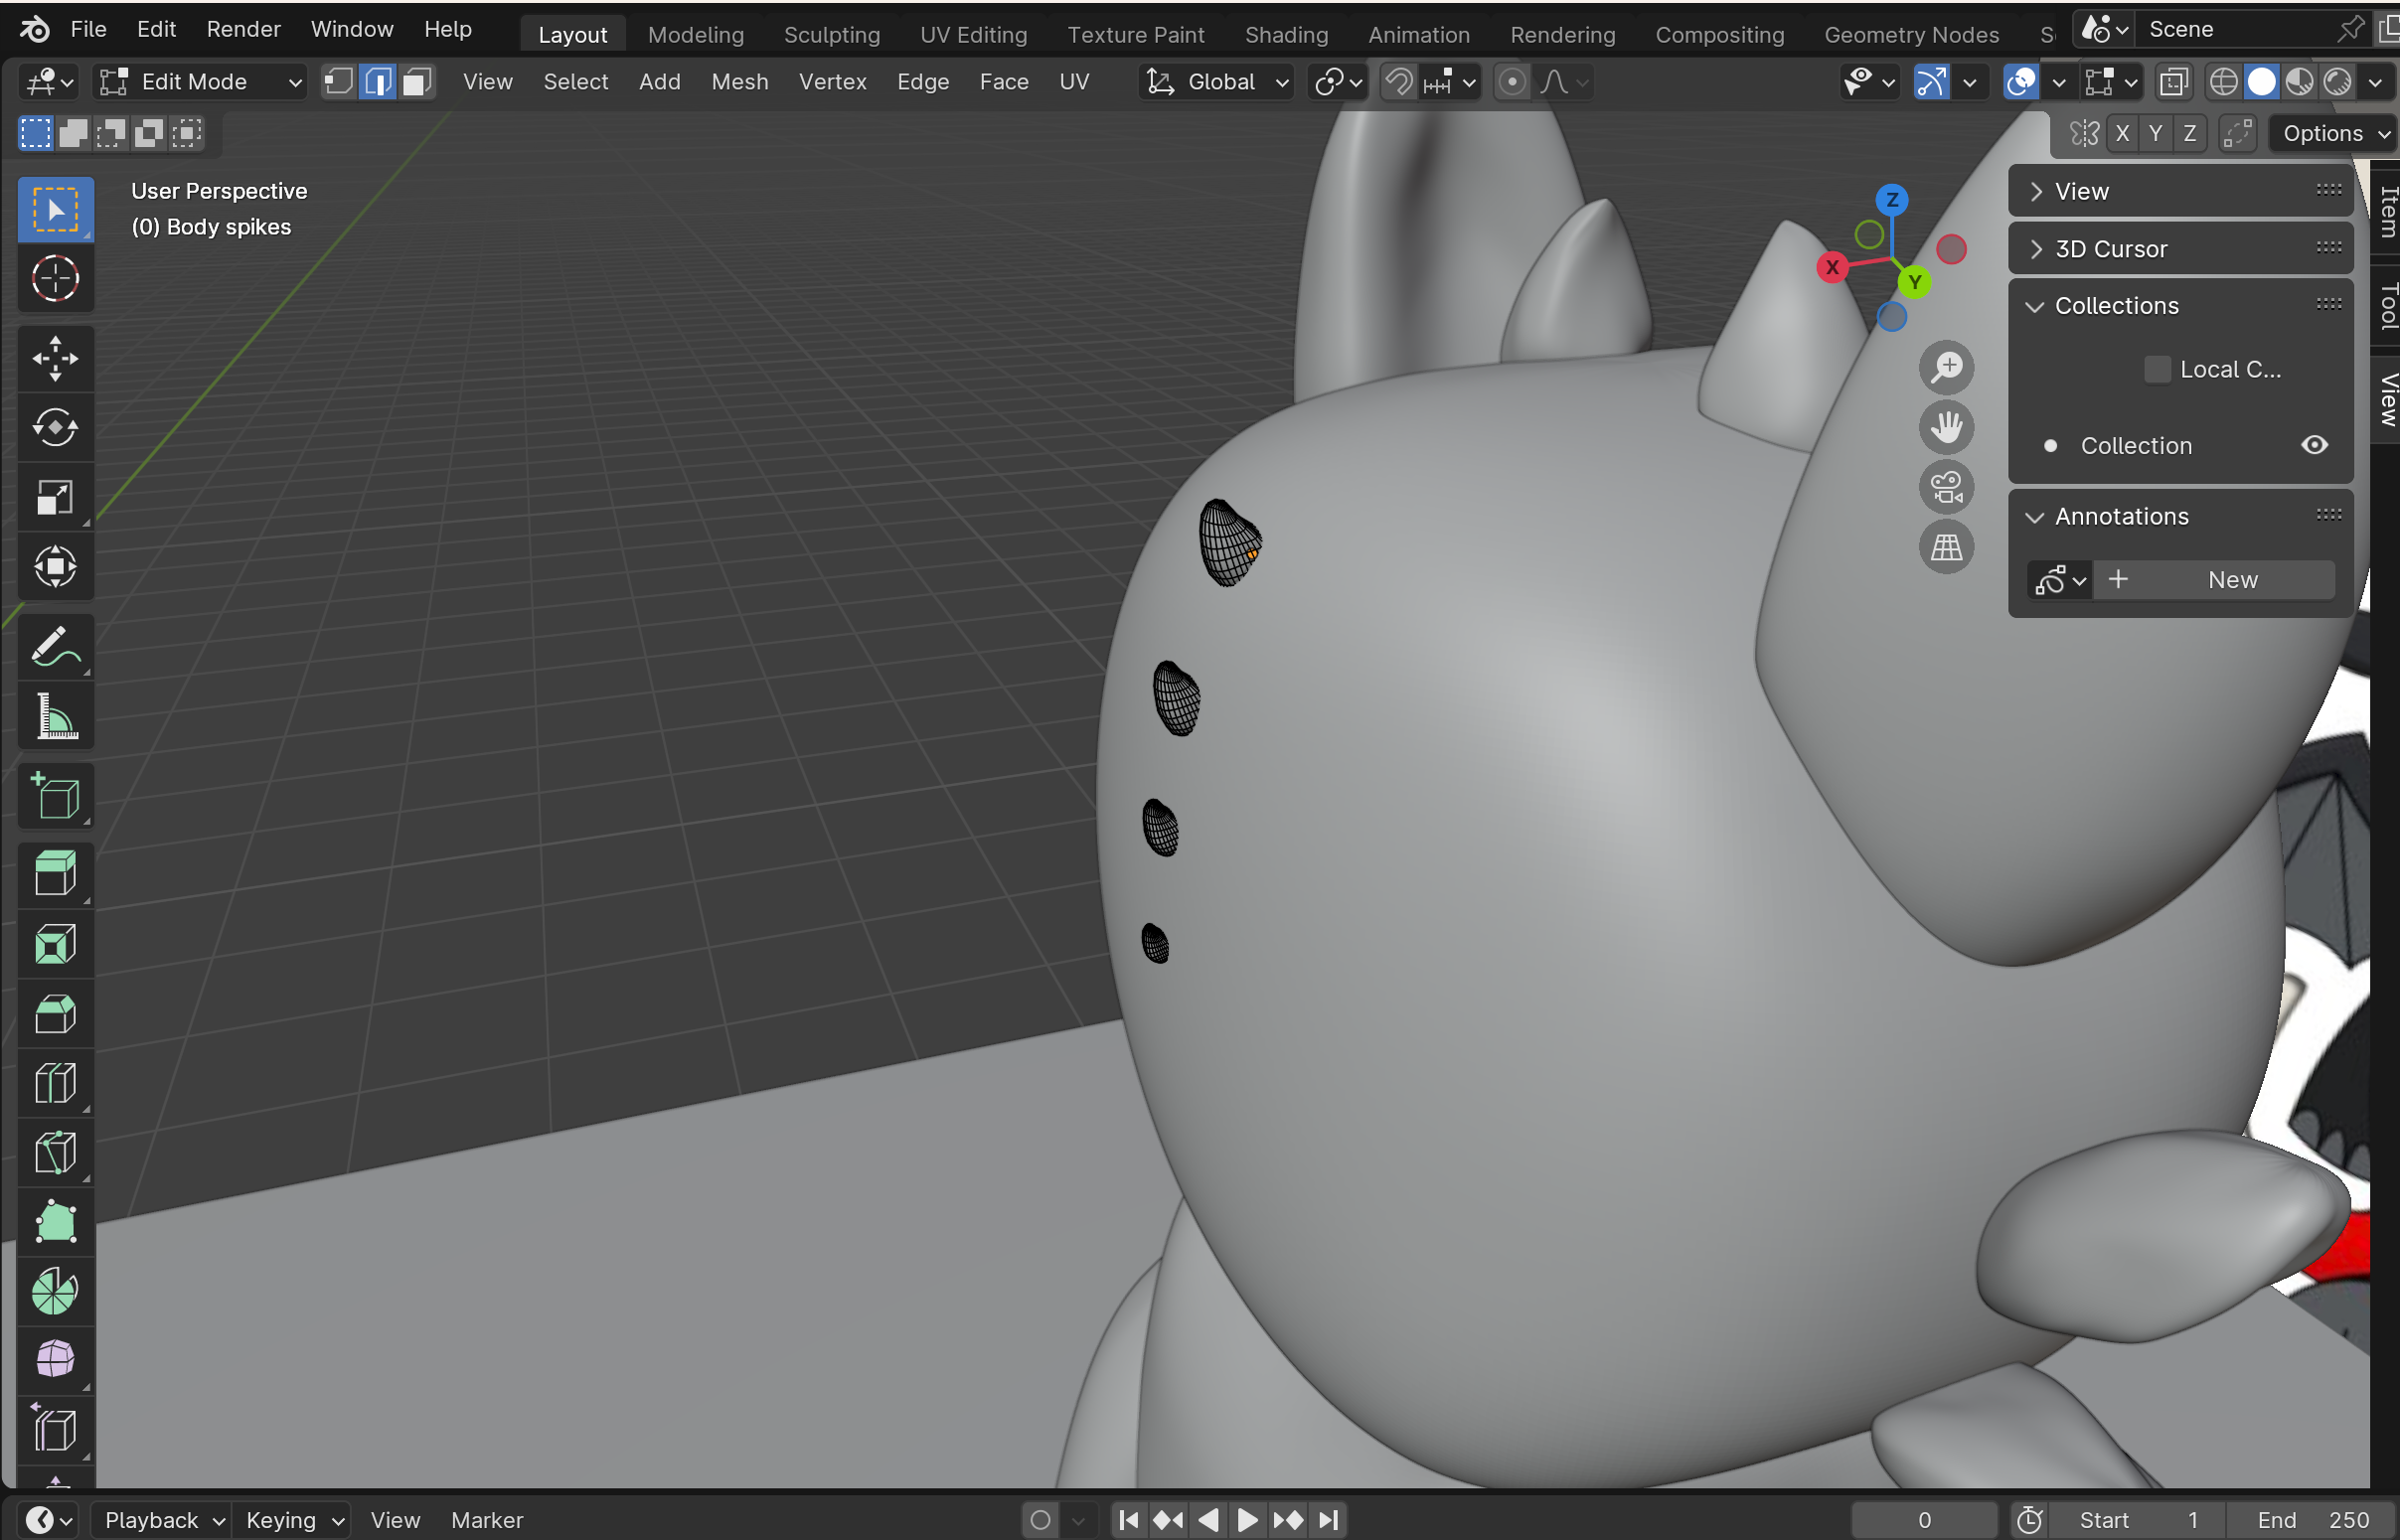
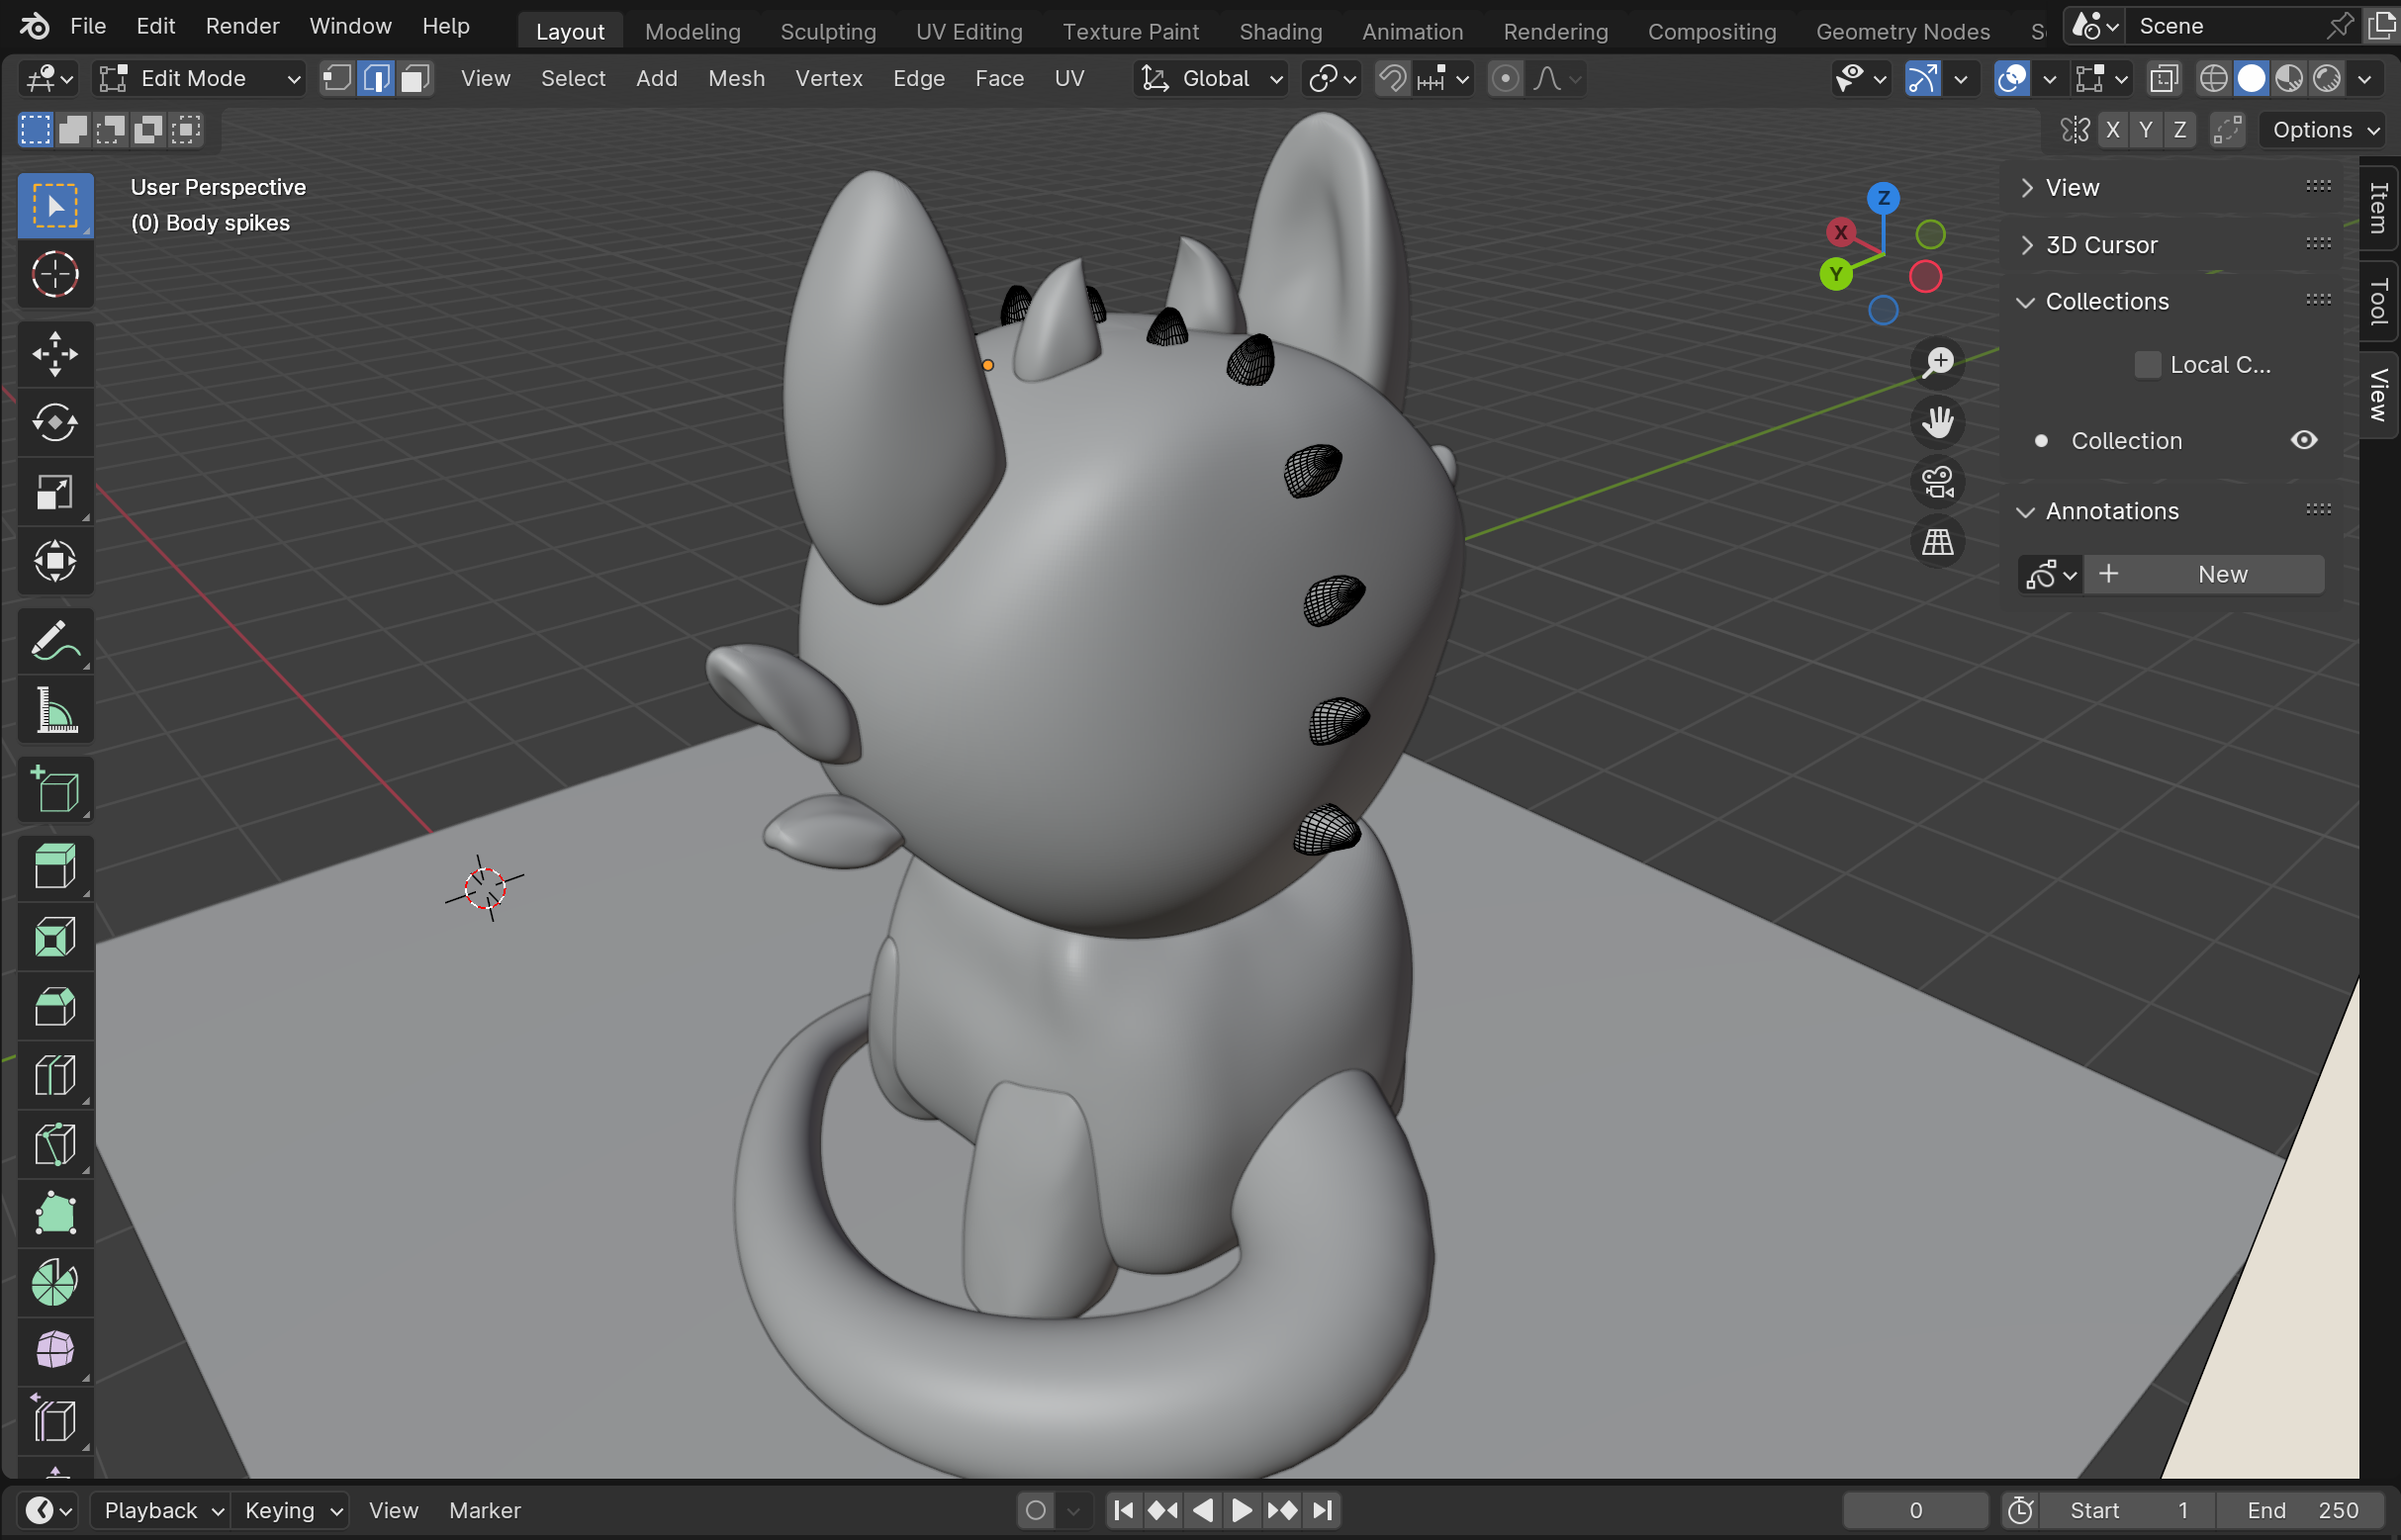
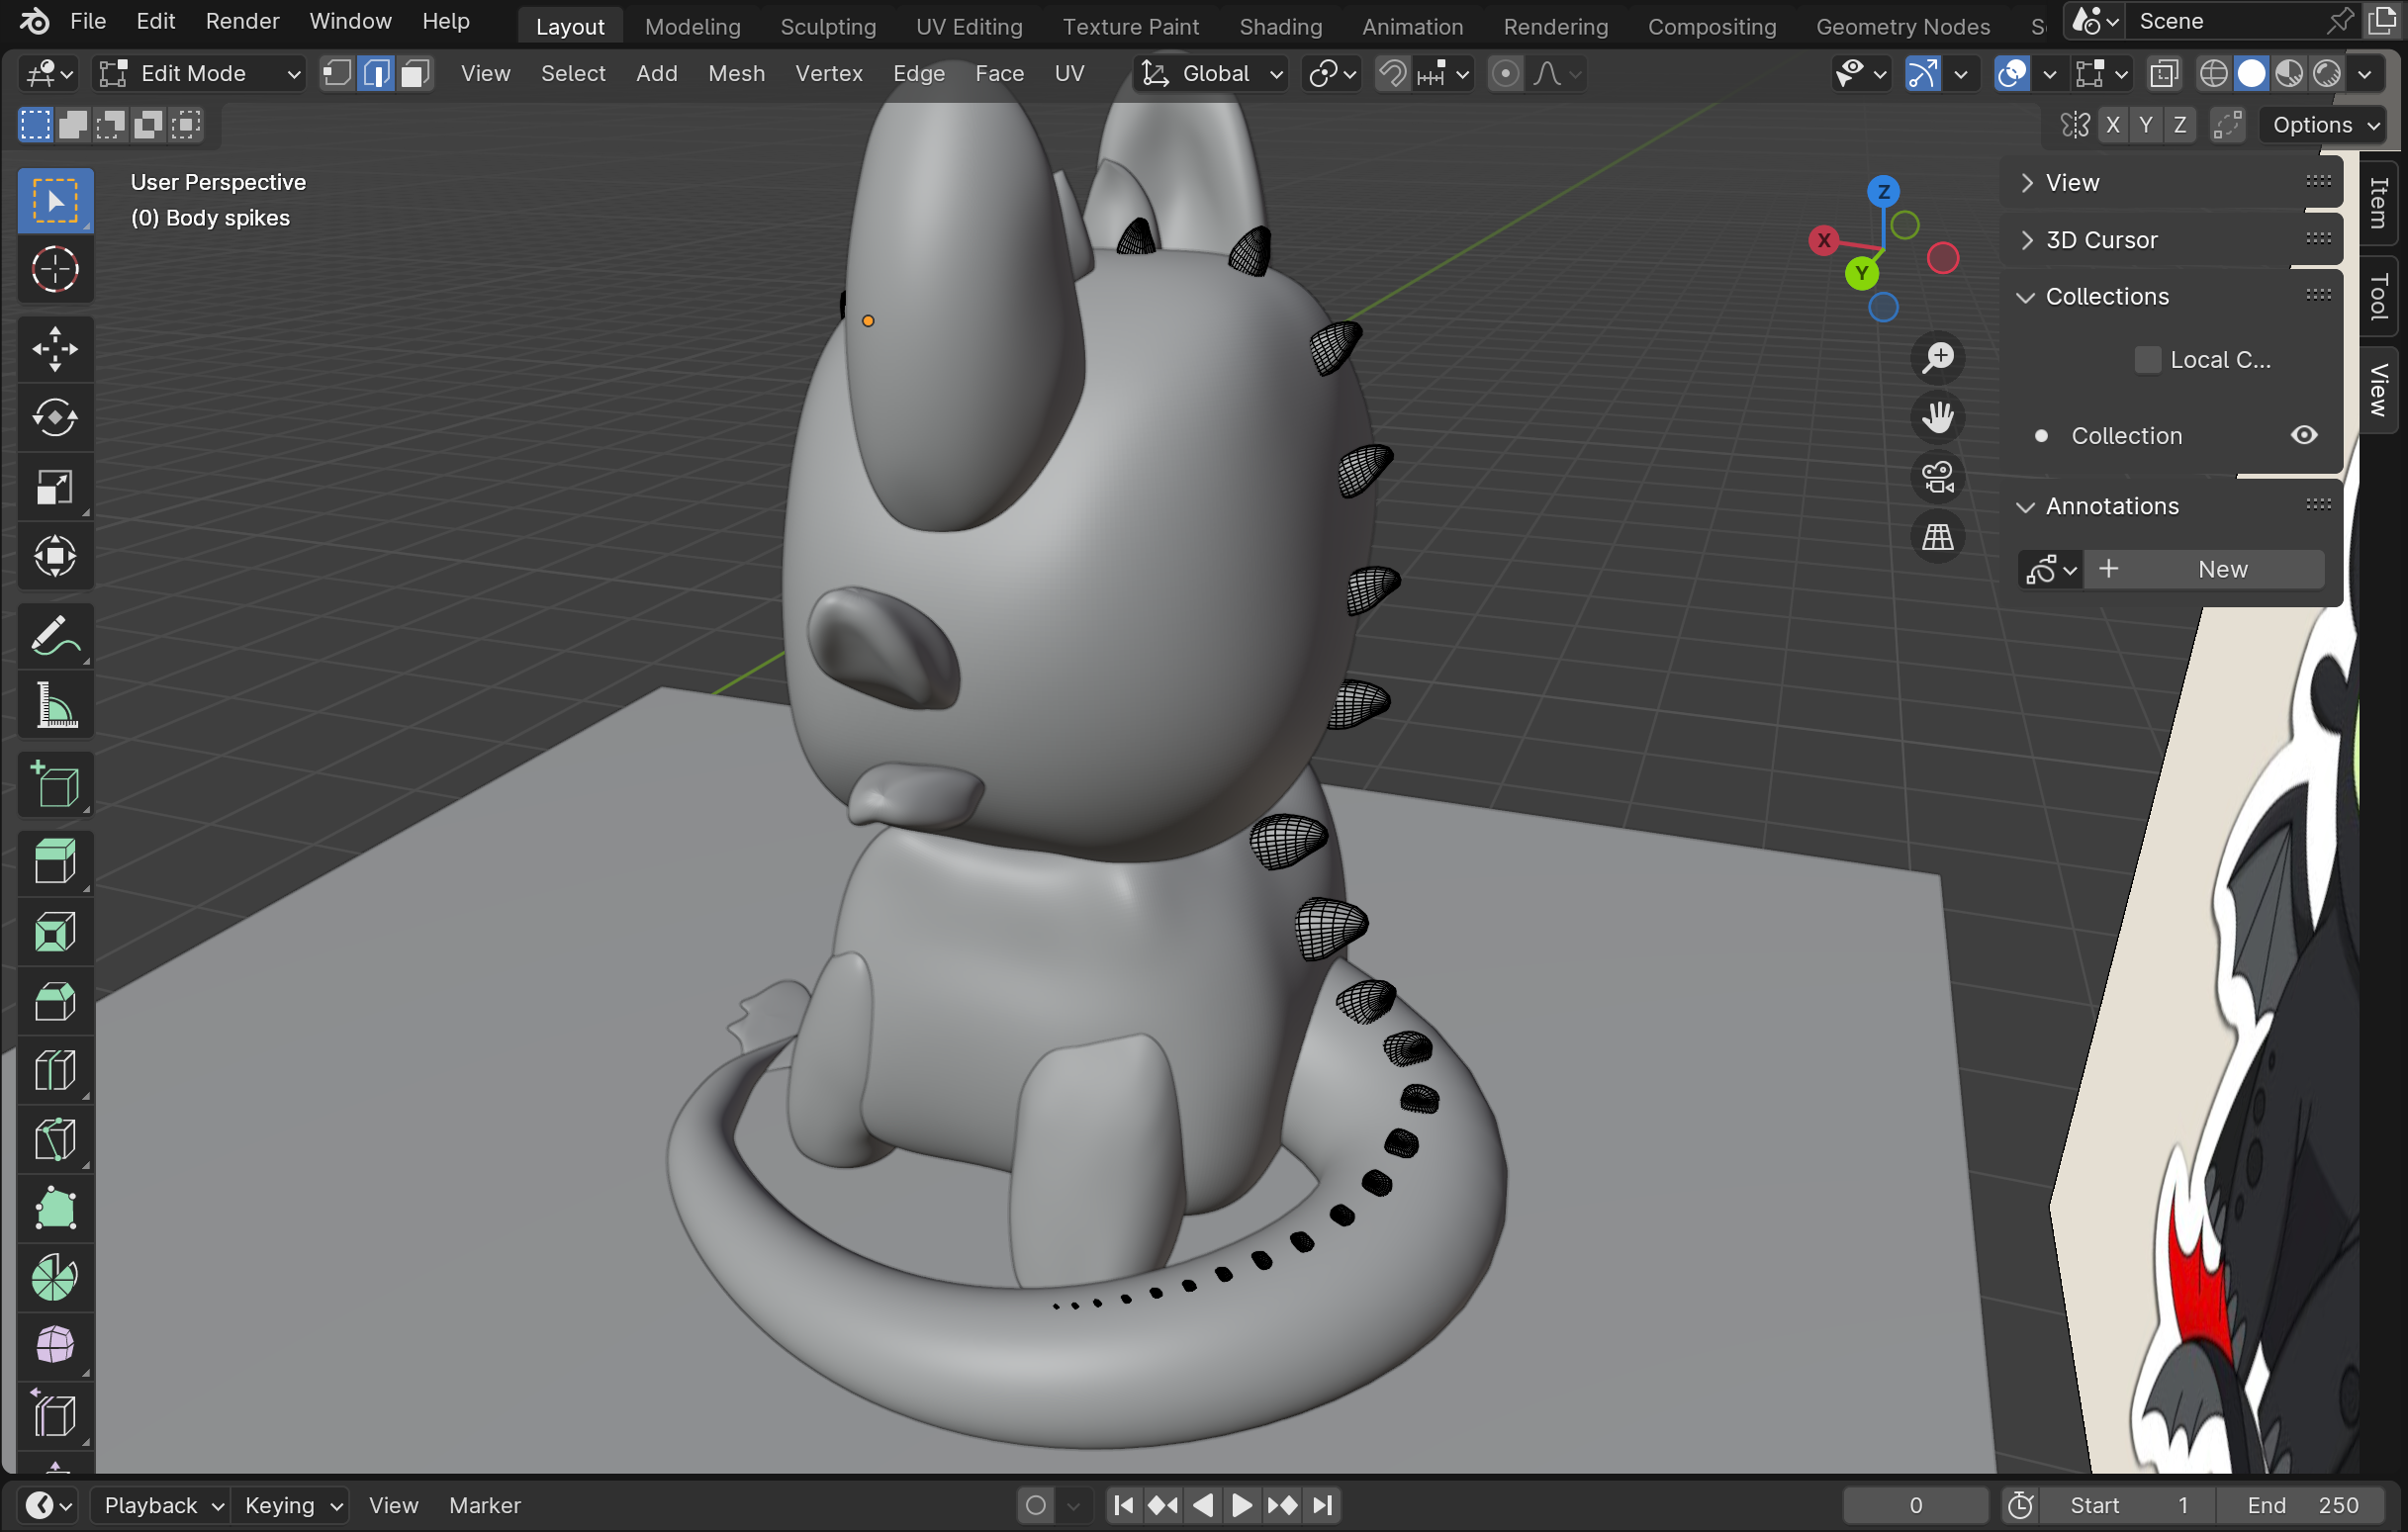
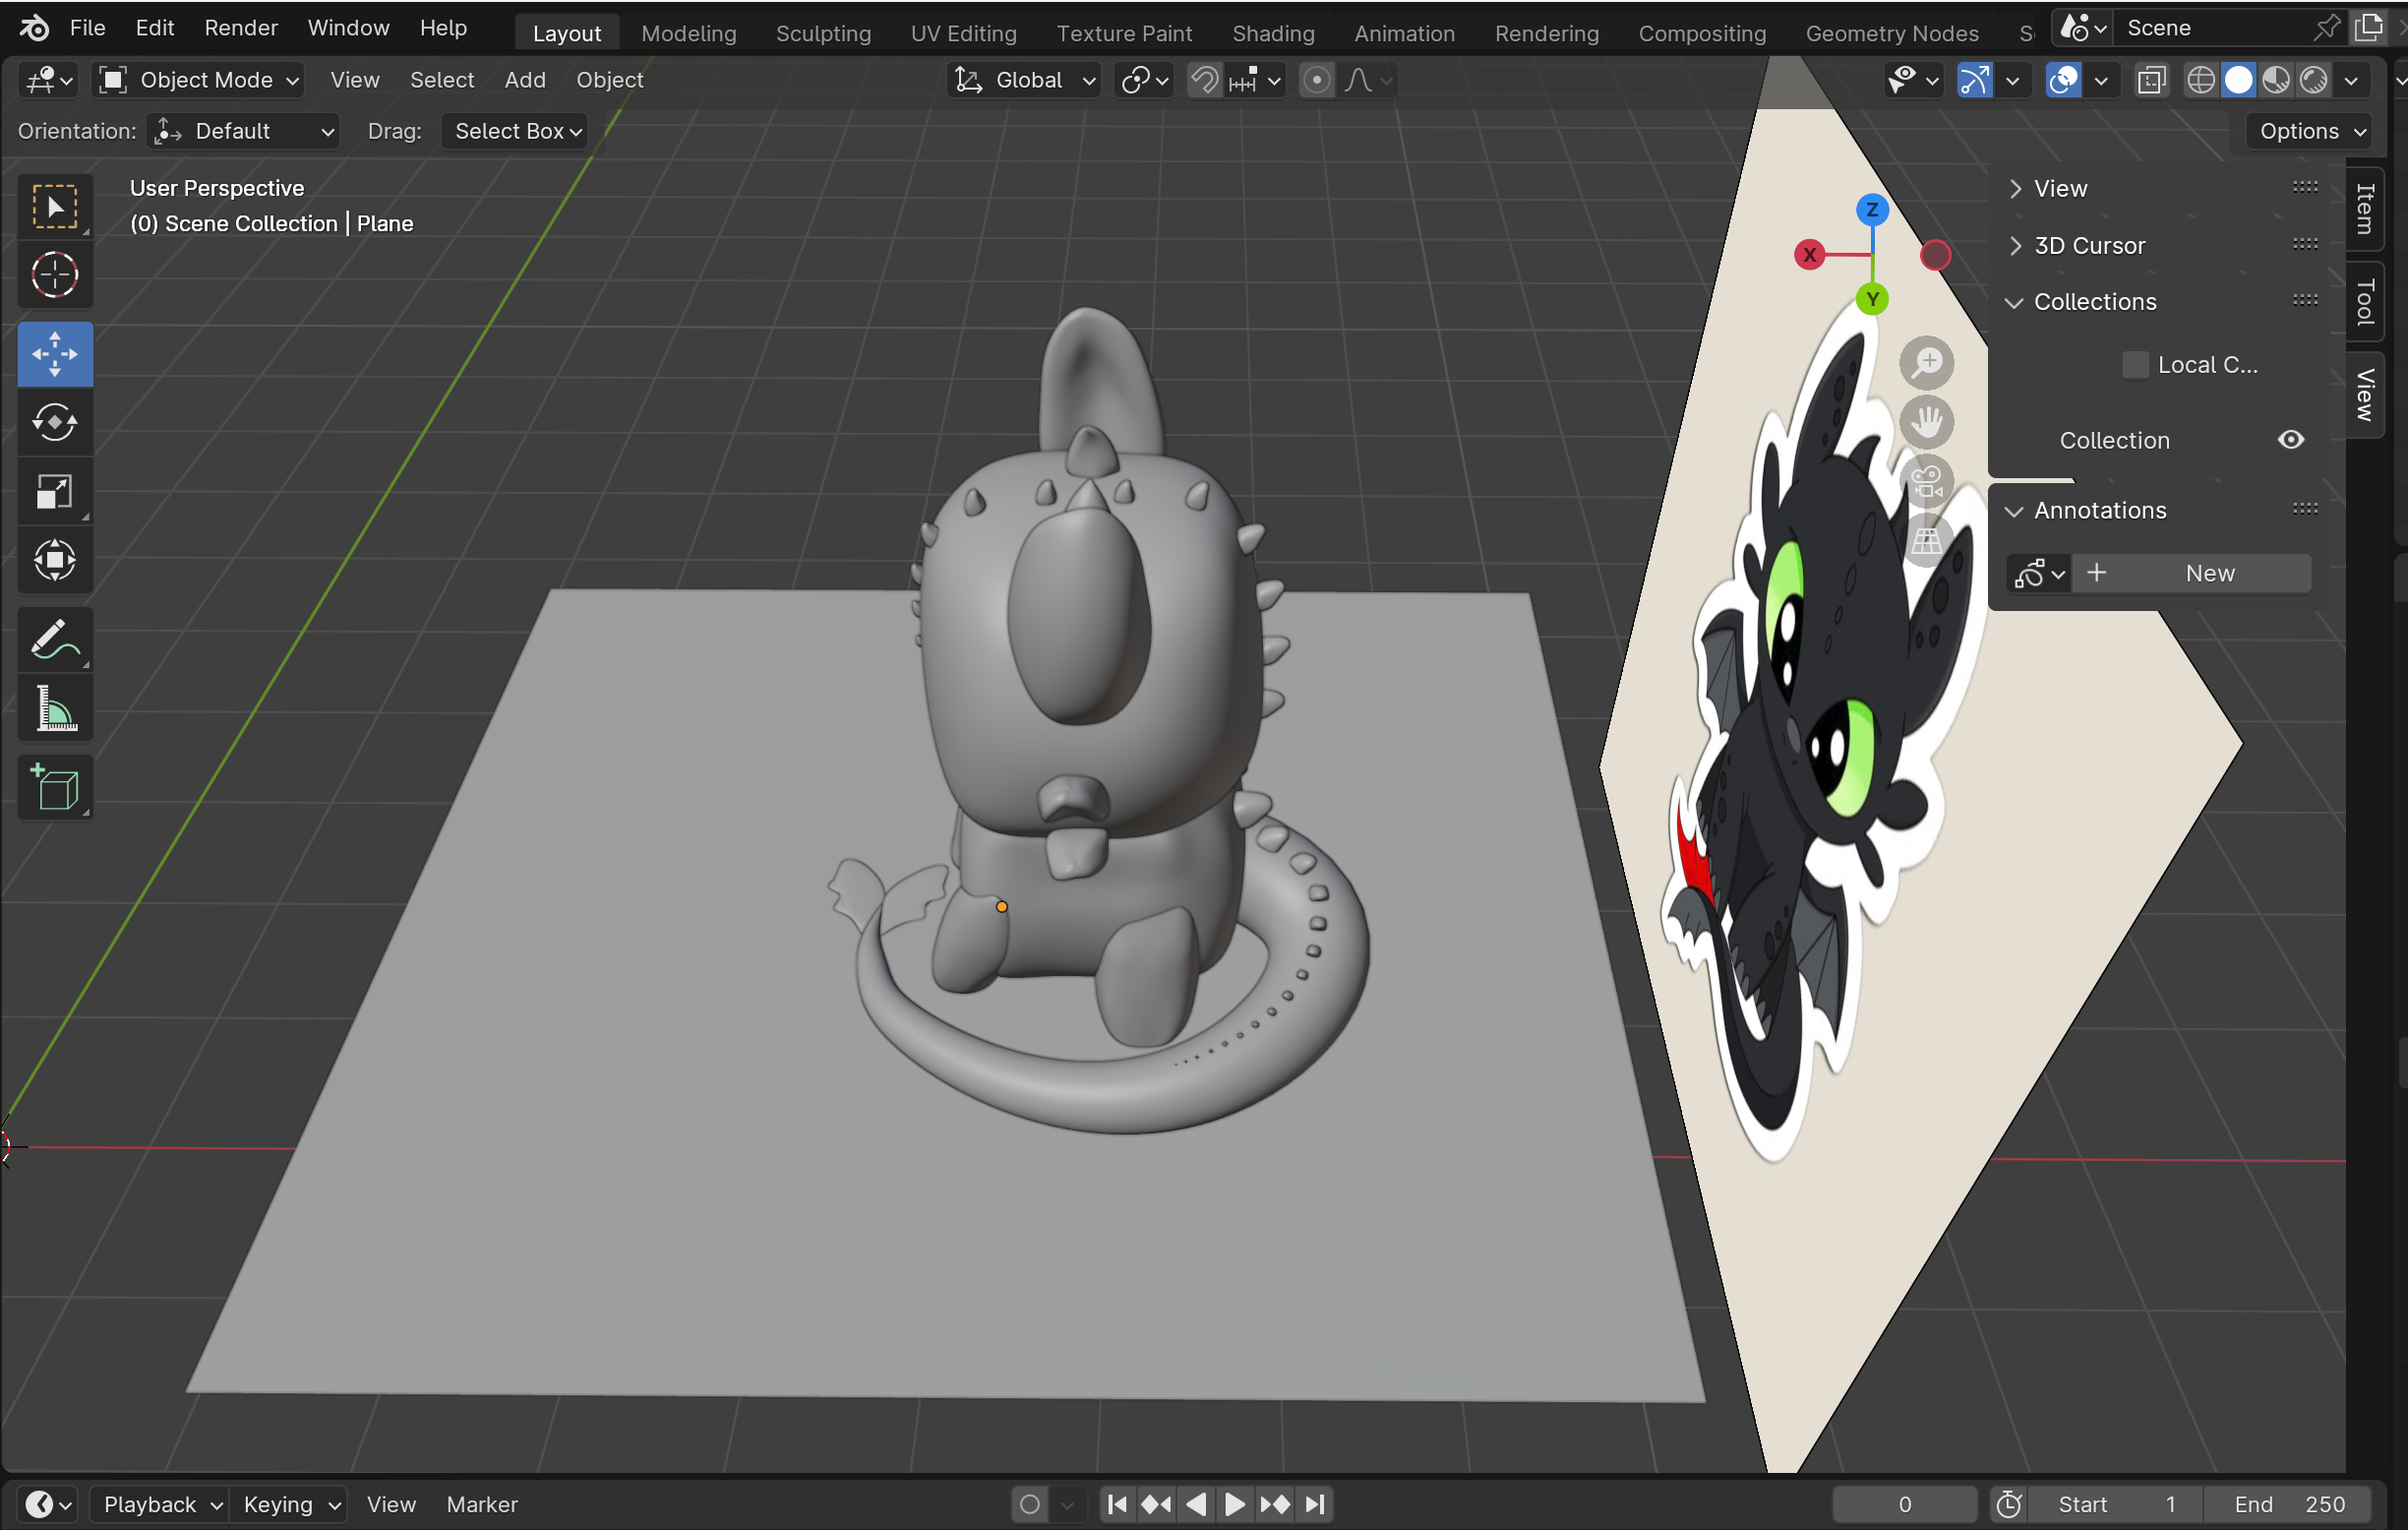
After making the tail, I started to add details, the first ones being the spikes that run down the face and back of the body. For this, I again started with a sphere and repeated the typical steps, subdivision, scaling. I also used the typical tools until I reached my desired shape and pointiness. After I made one I liked, I duplicated it and scaled it to get slightly smaller, moving it centered on the x-axis and repeating the process down the back of the figure, adjusting up, down and scaling as required. You can go down the tail as far as you would like, but I did it as far as I could until it got to a size that would have no point in printing.
!!!! MAKE SURE TO NAME YOUR OBJECTS AS YOU CREATE THEM TO NOT LOSE TRACK OF ANYTHING !!!!
Sculpting the Eyes and Nose
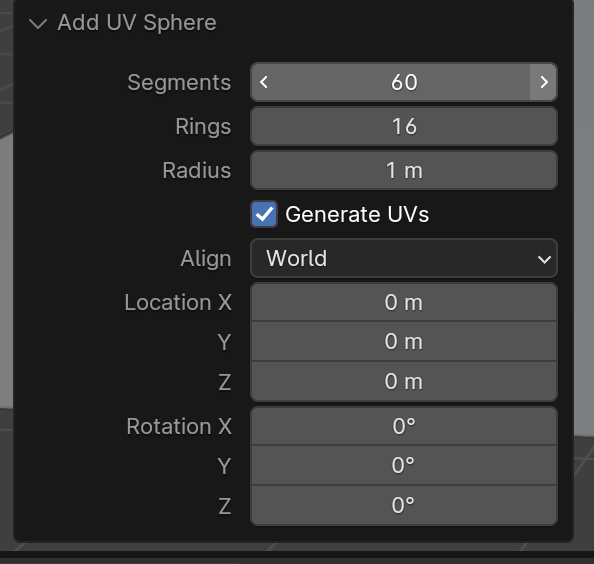
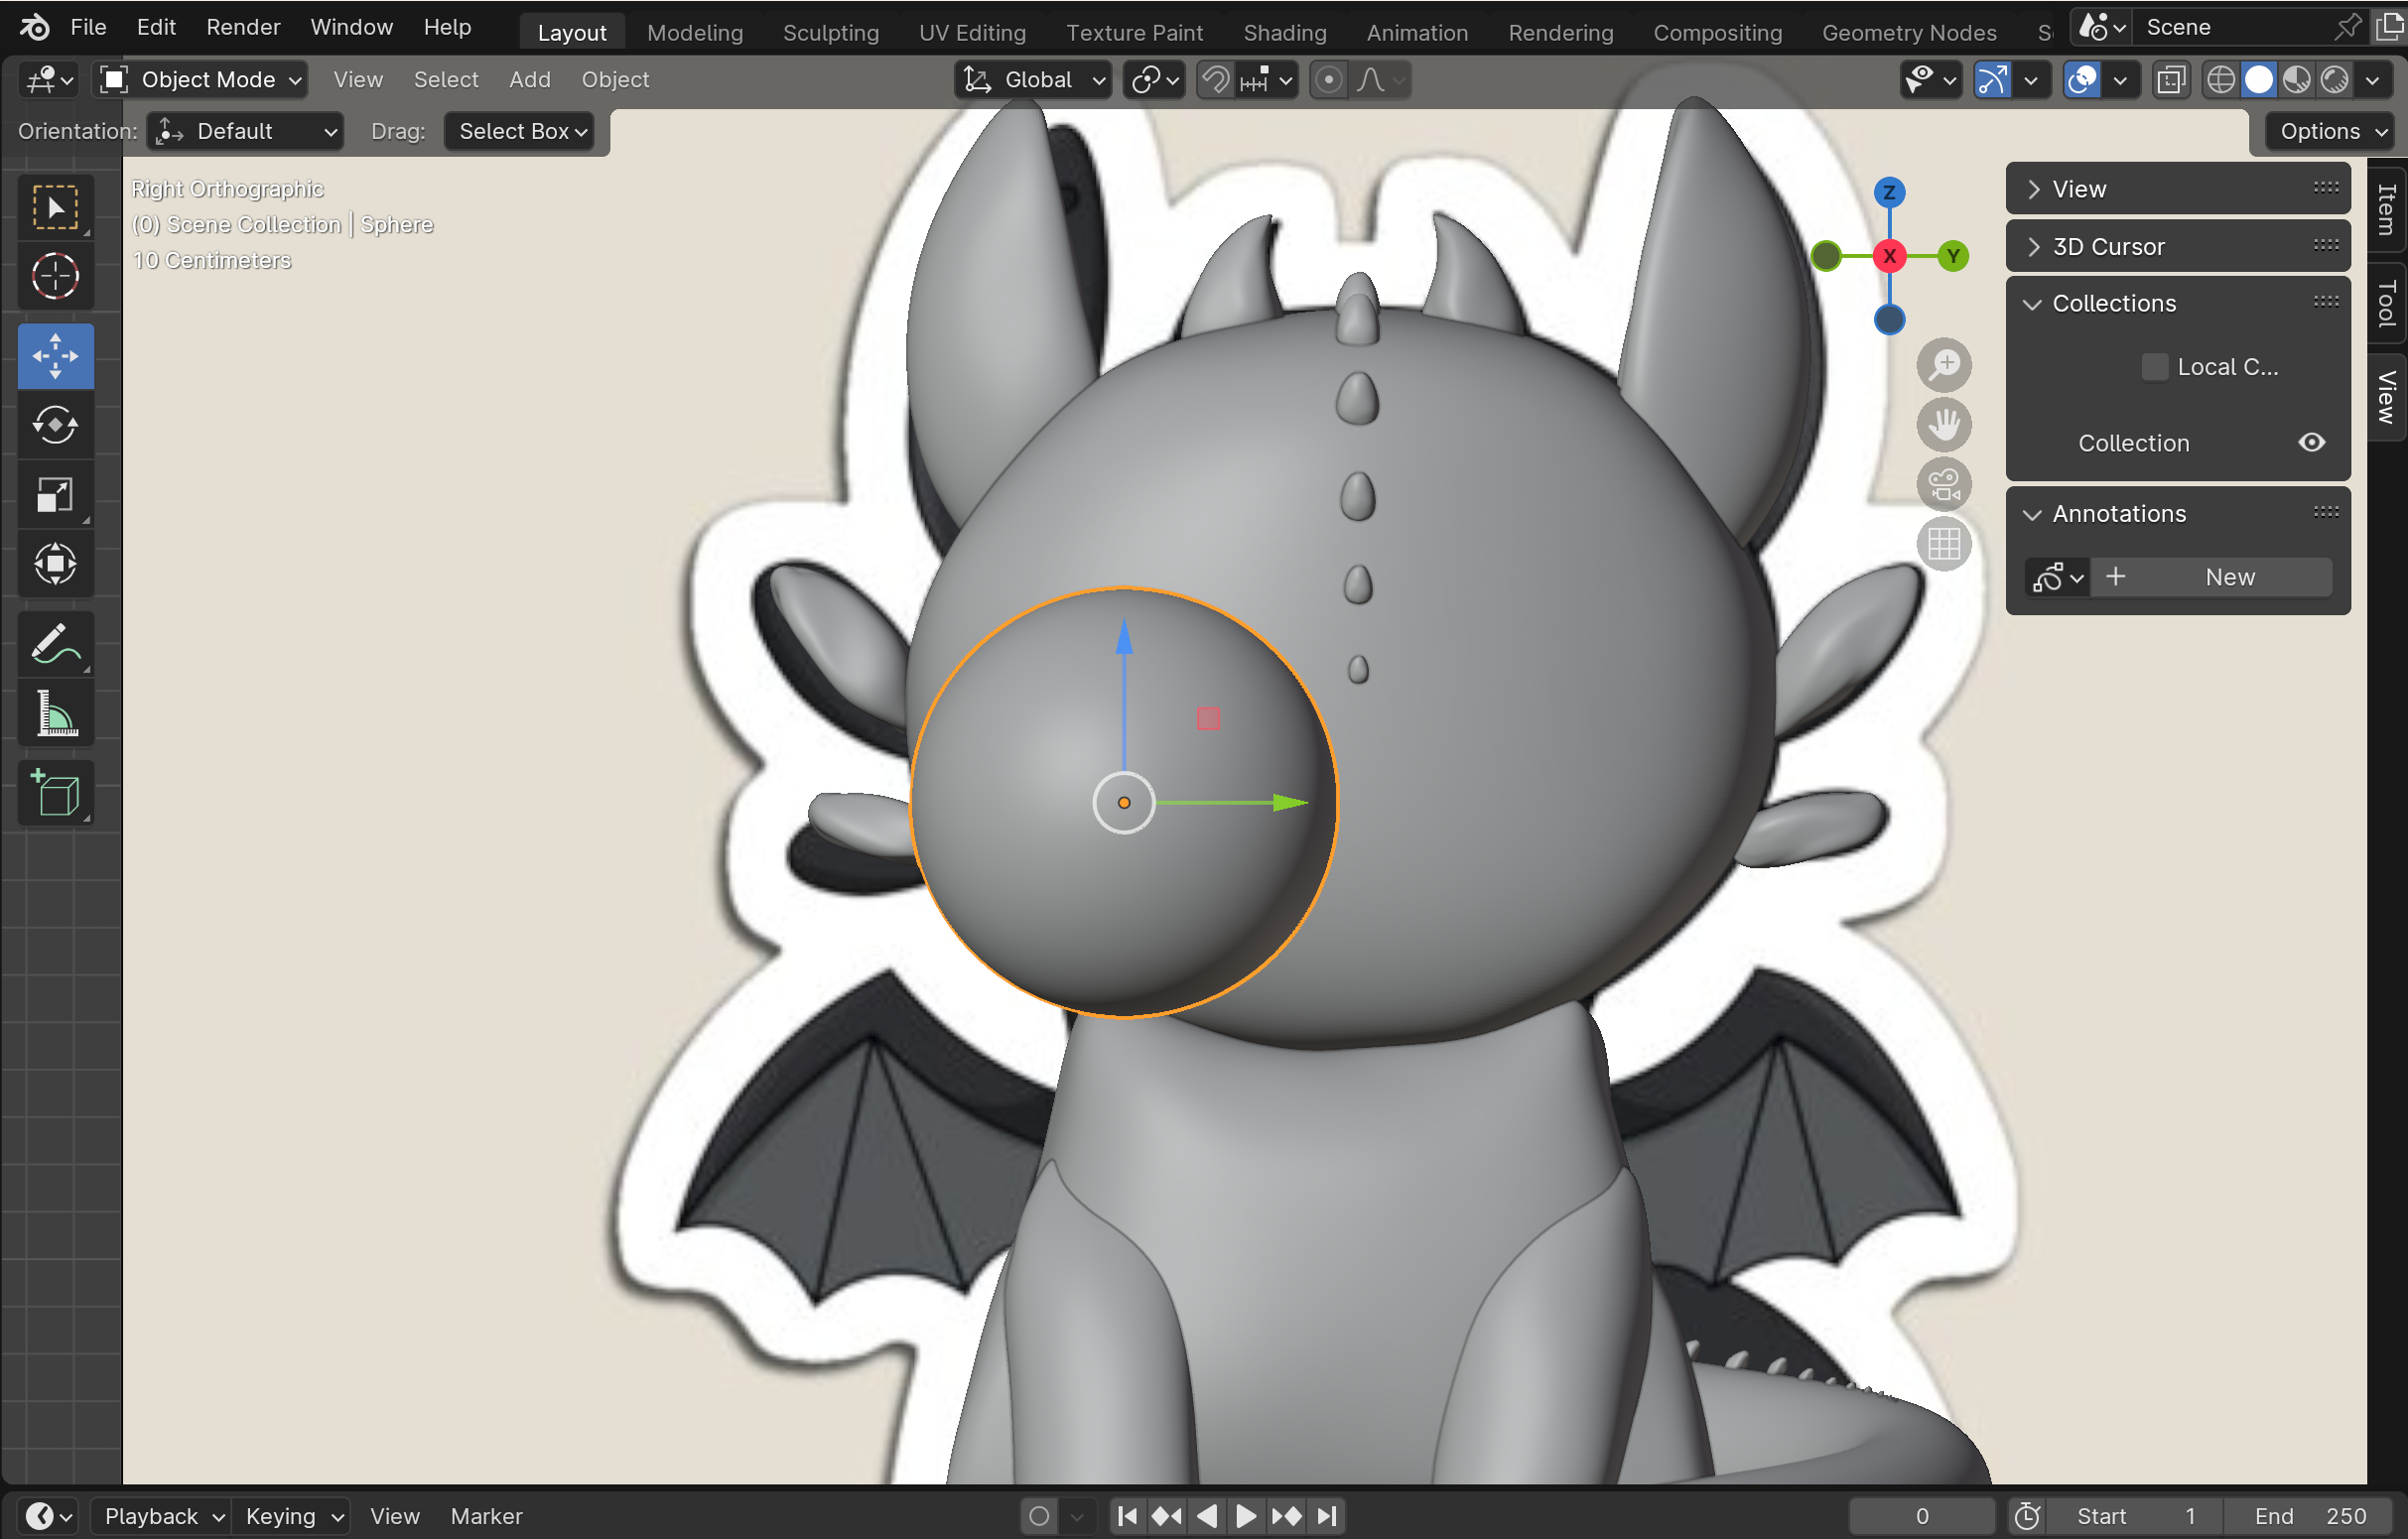
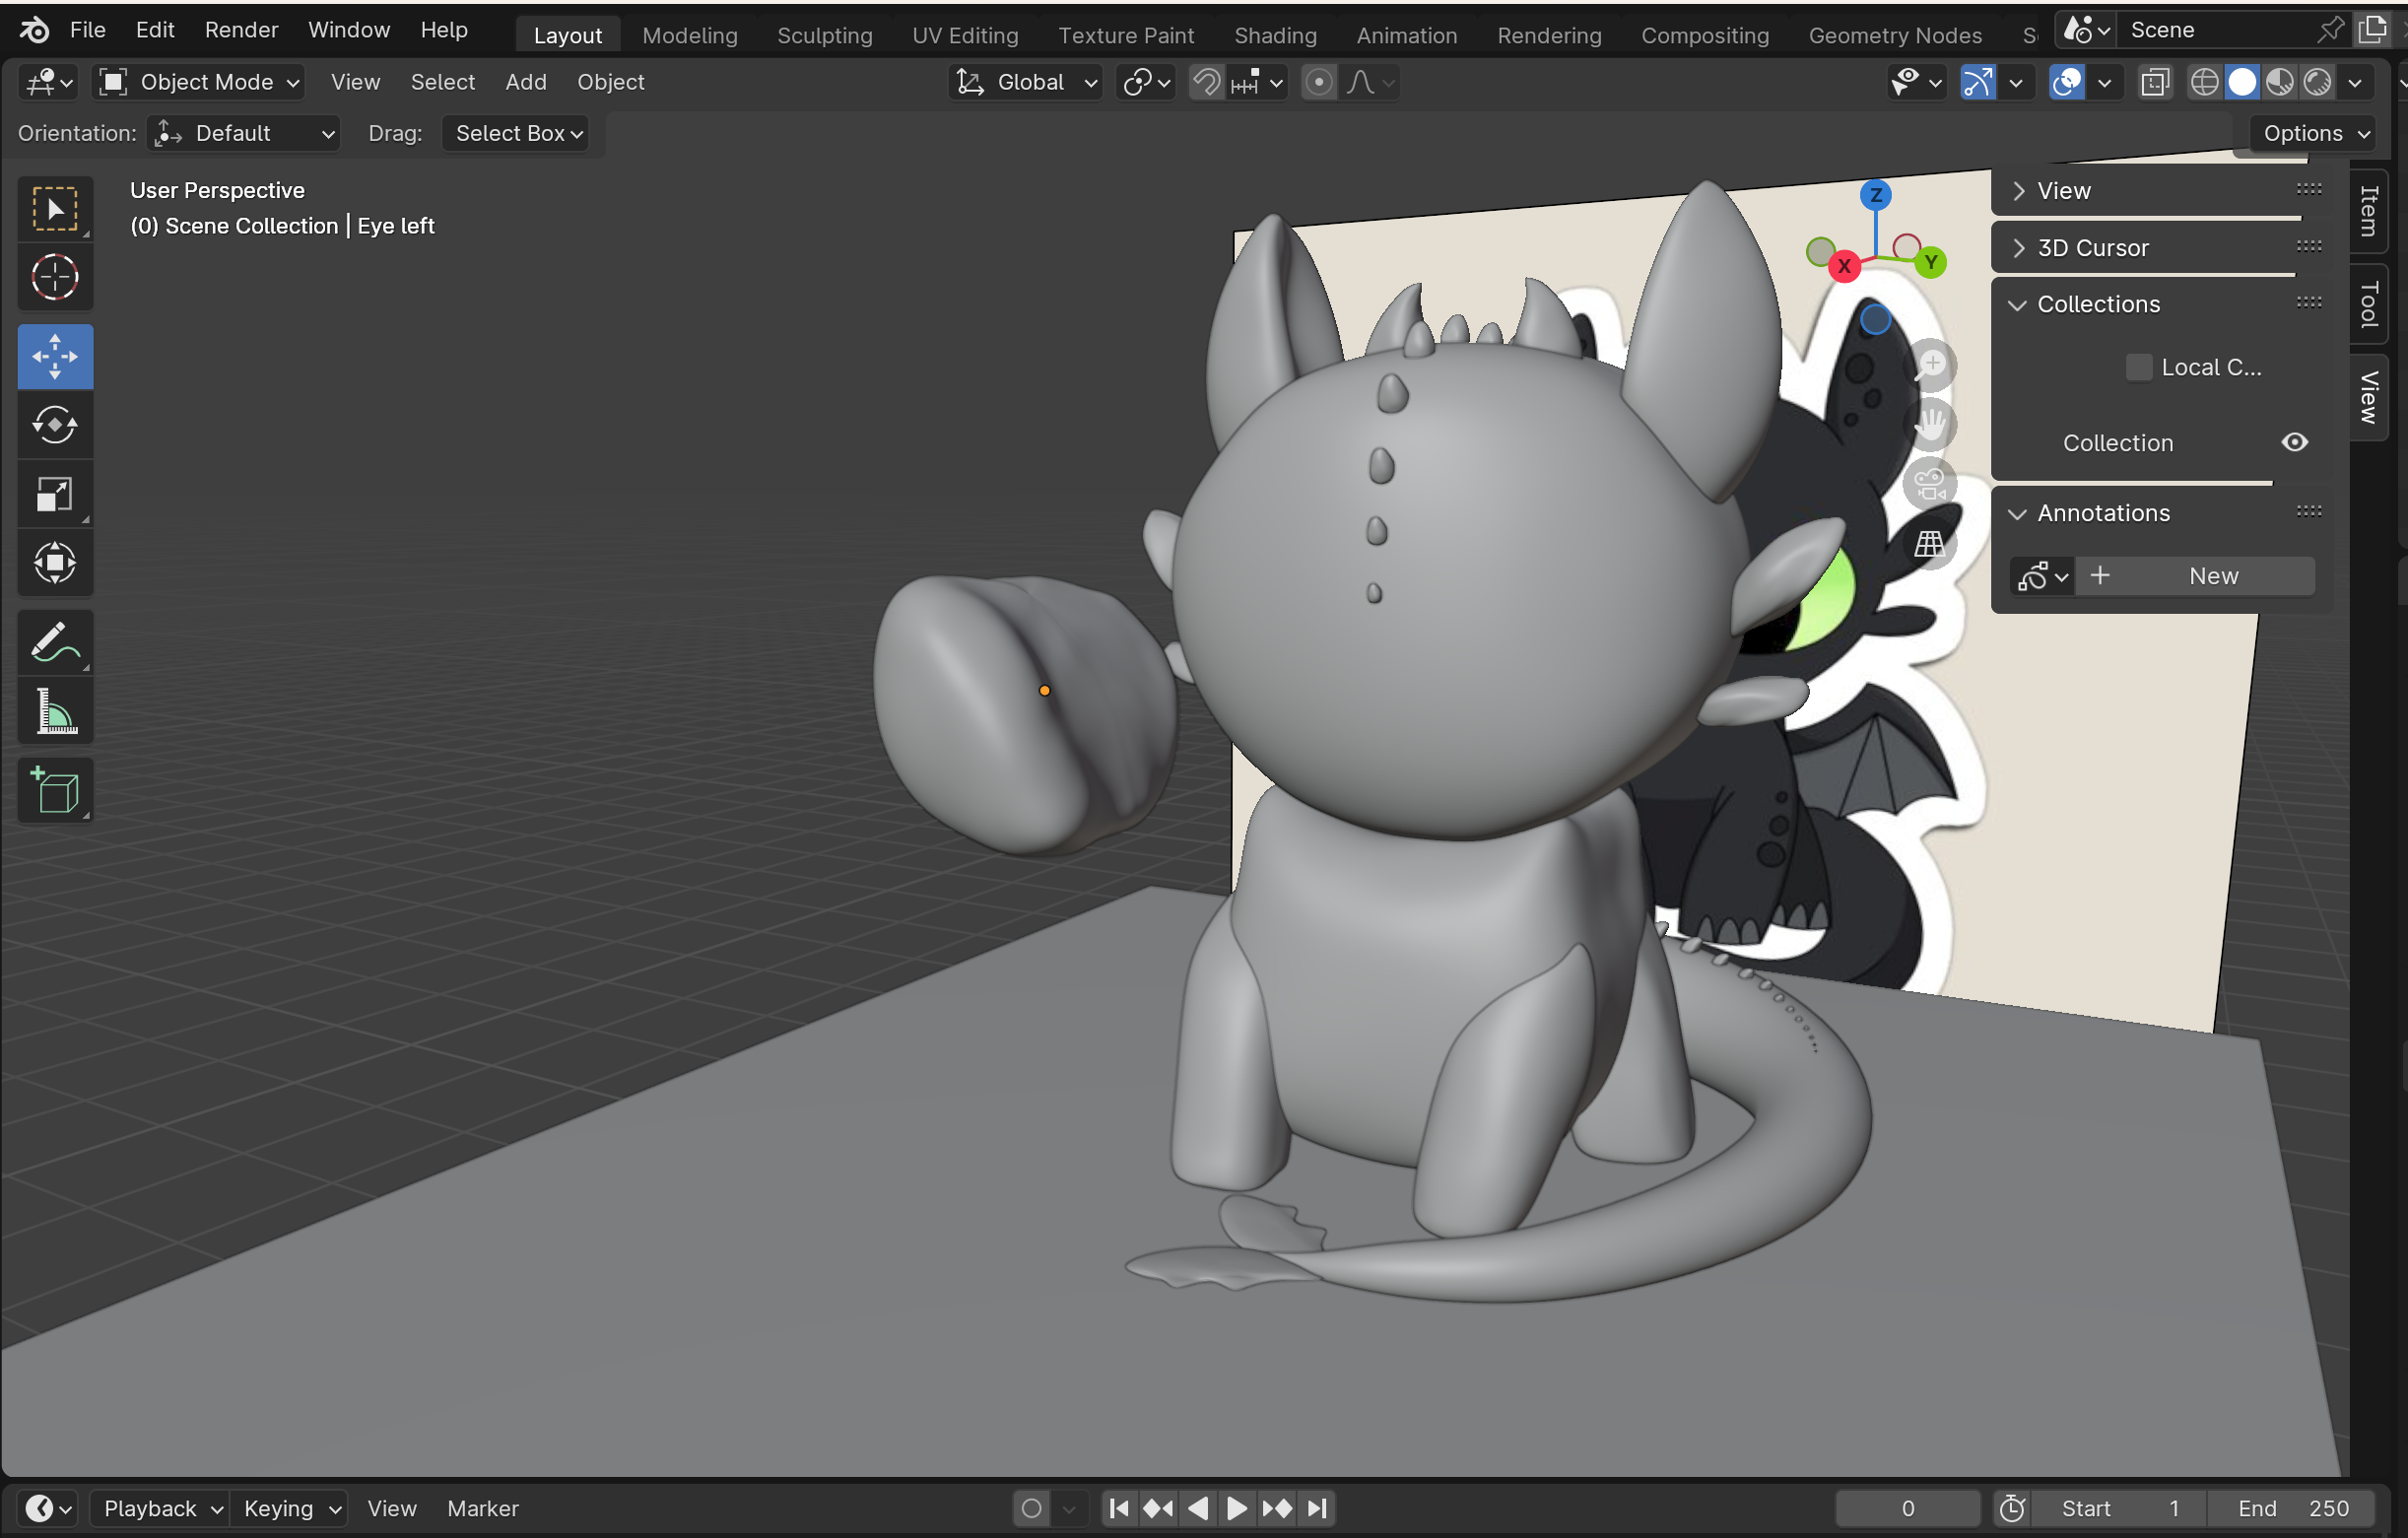
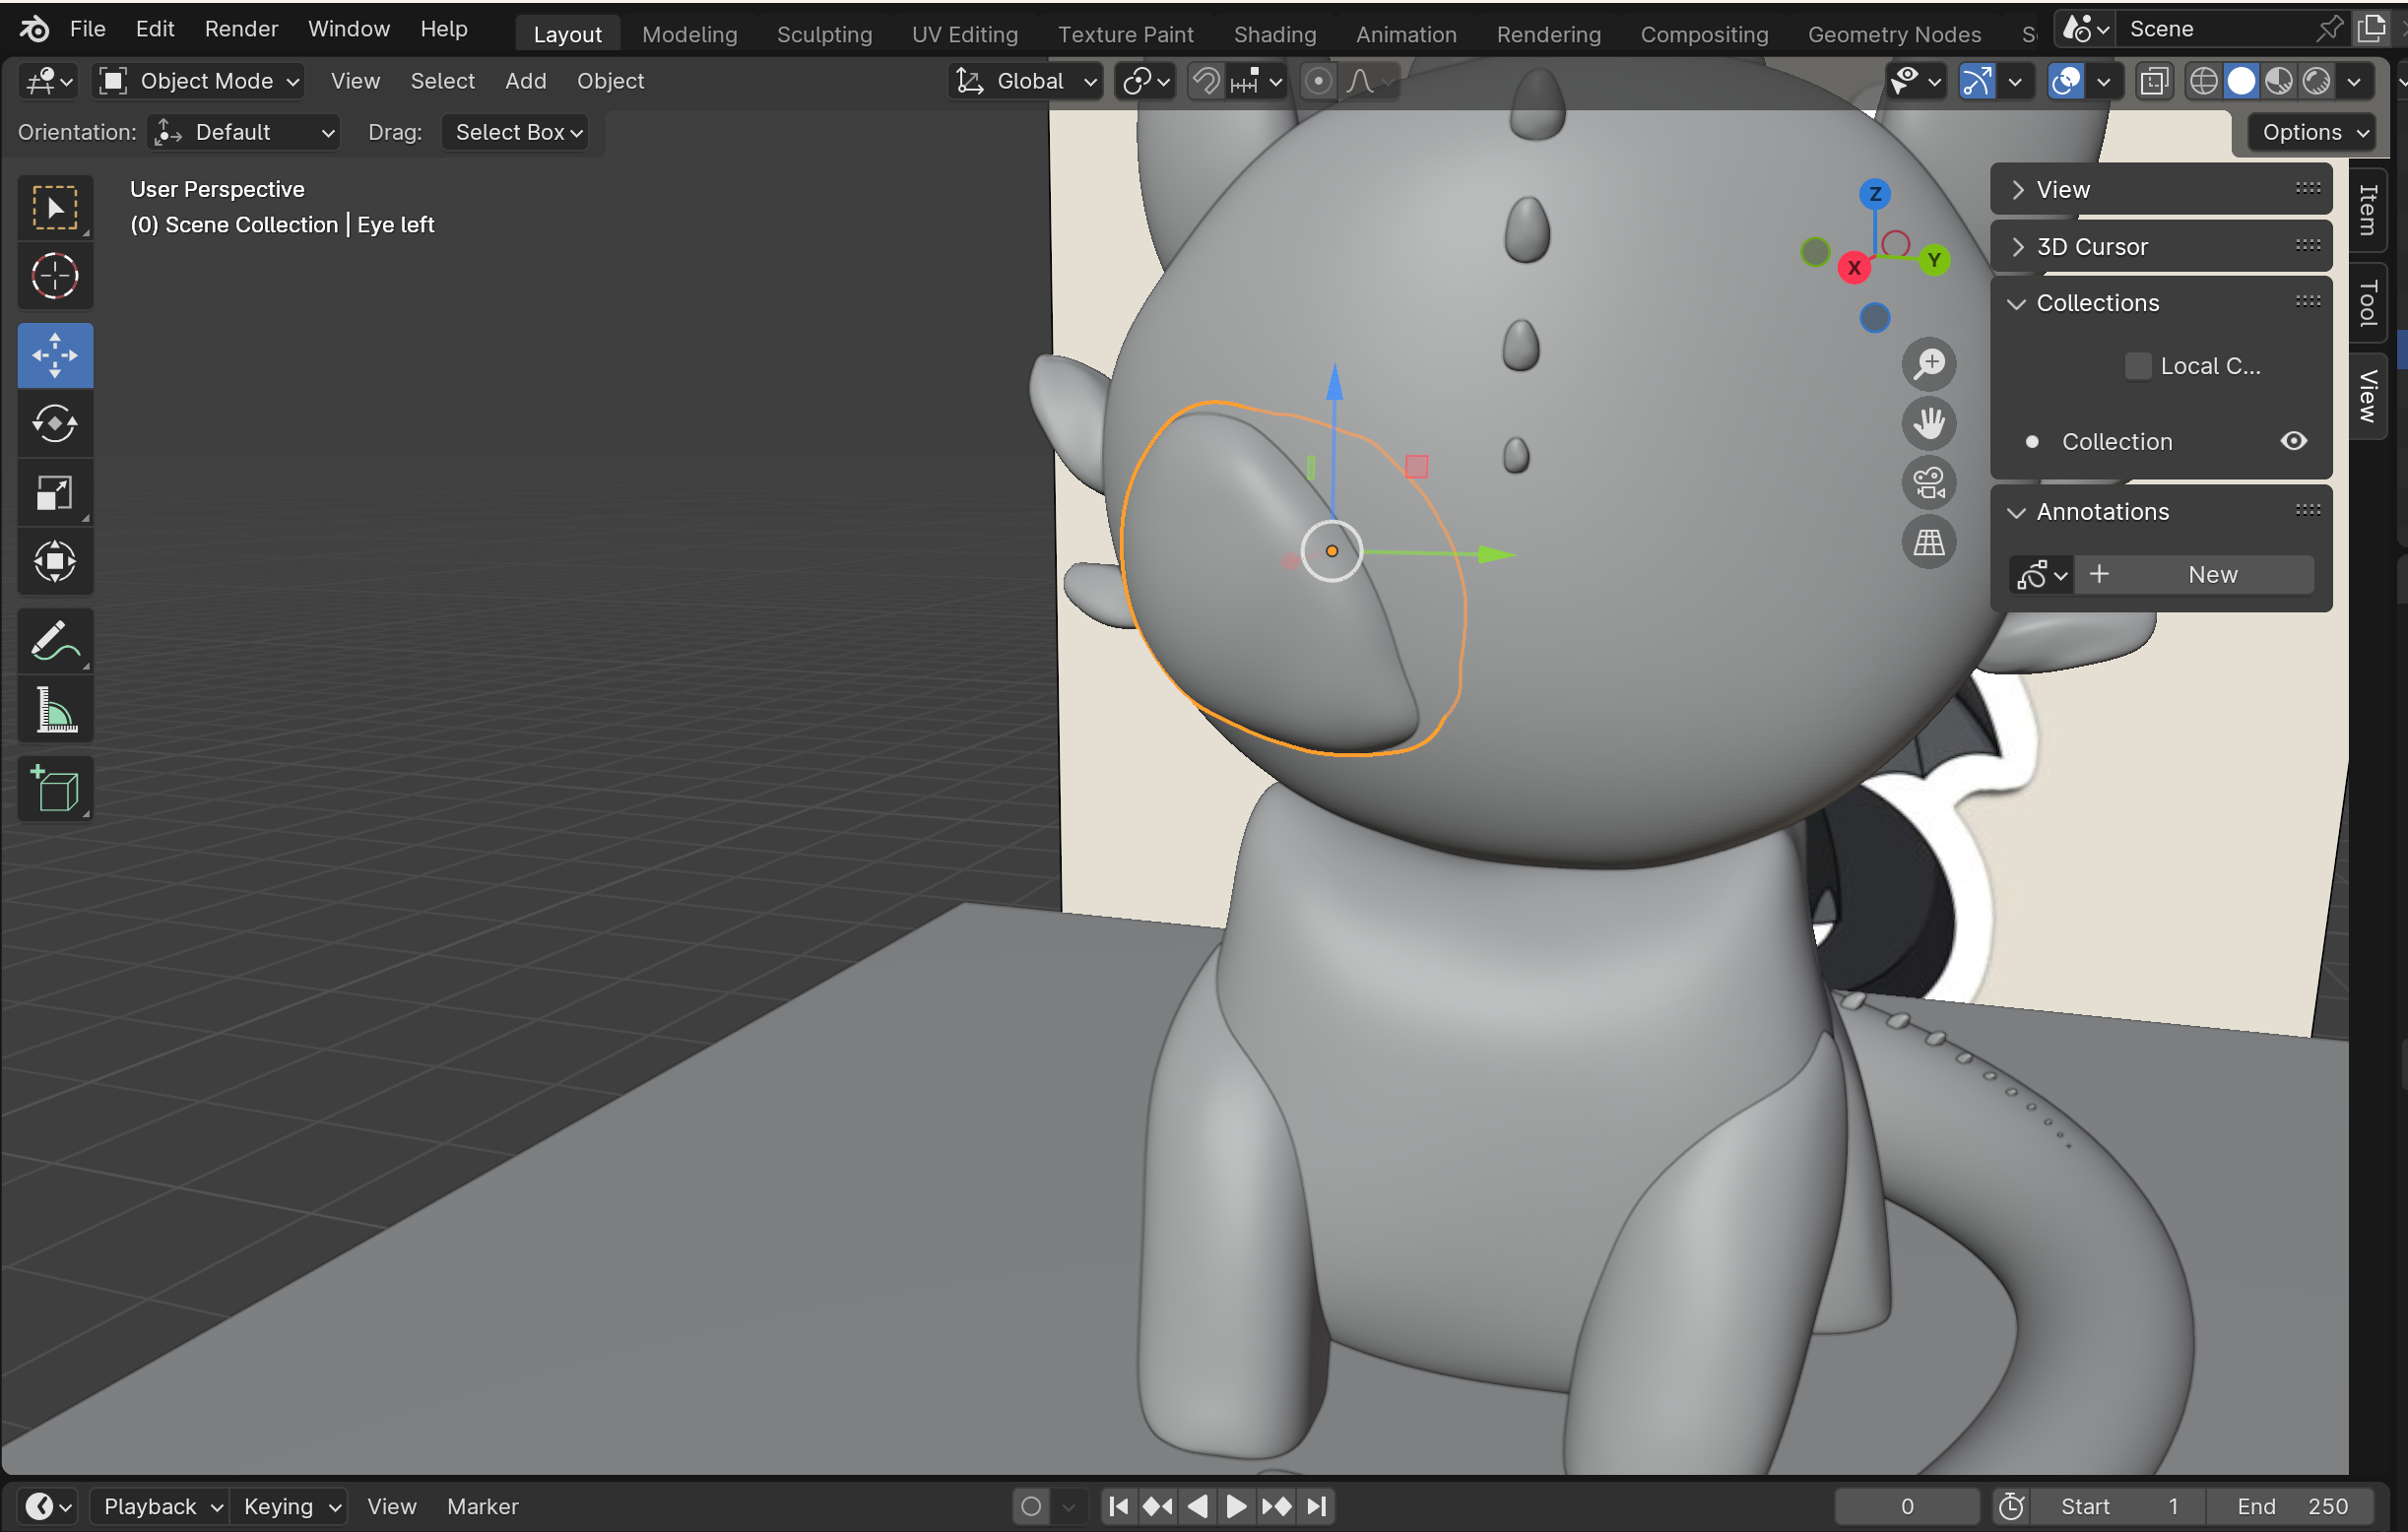
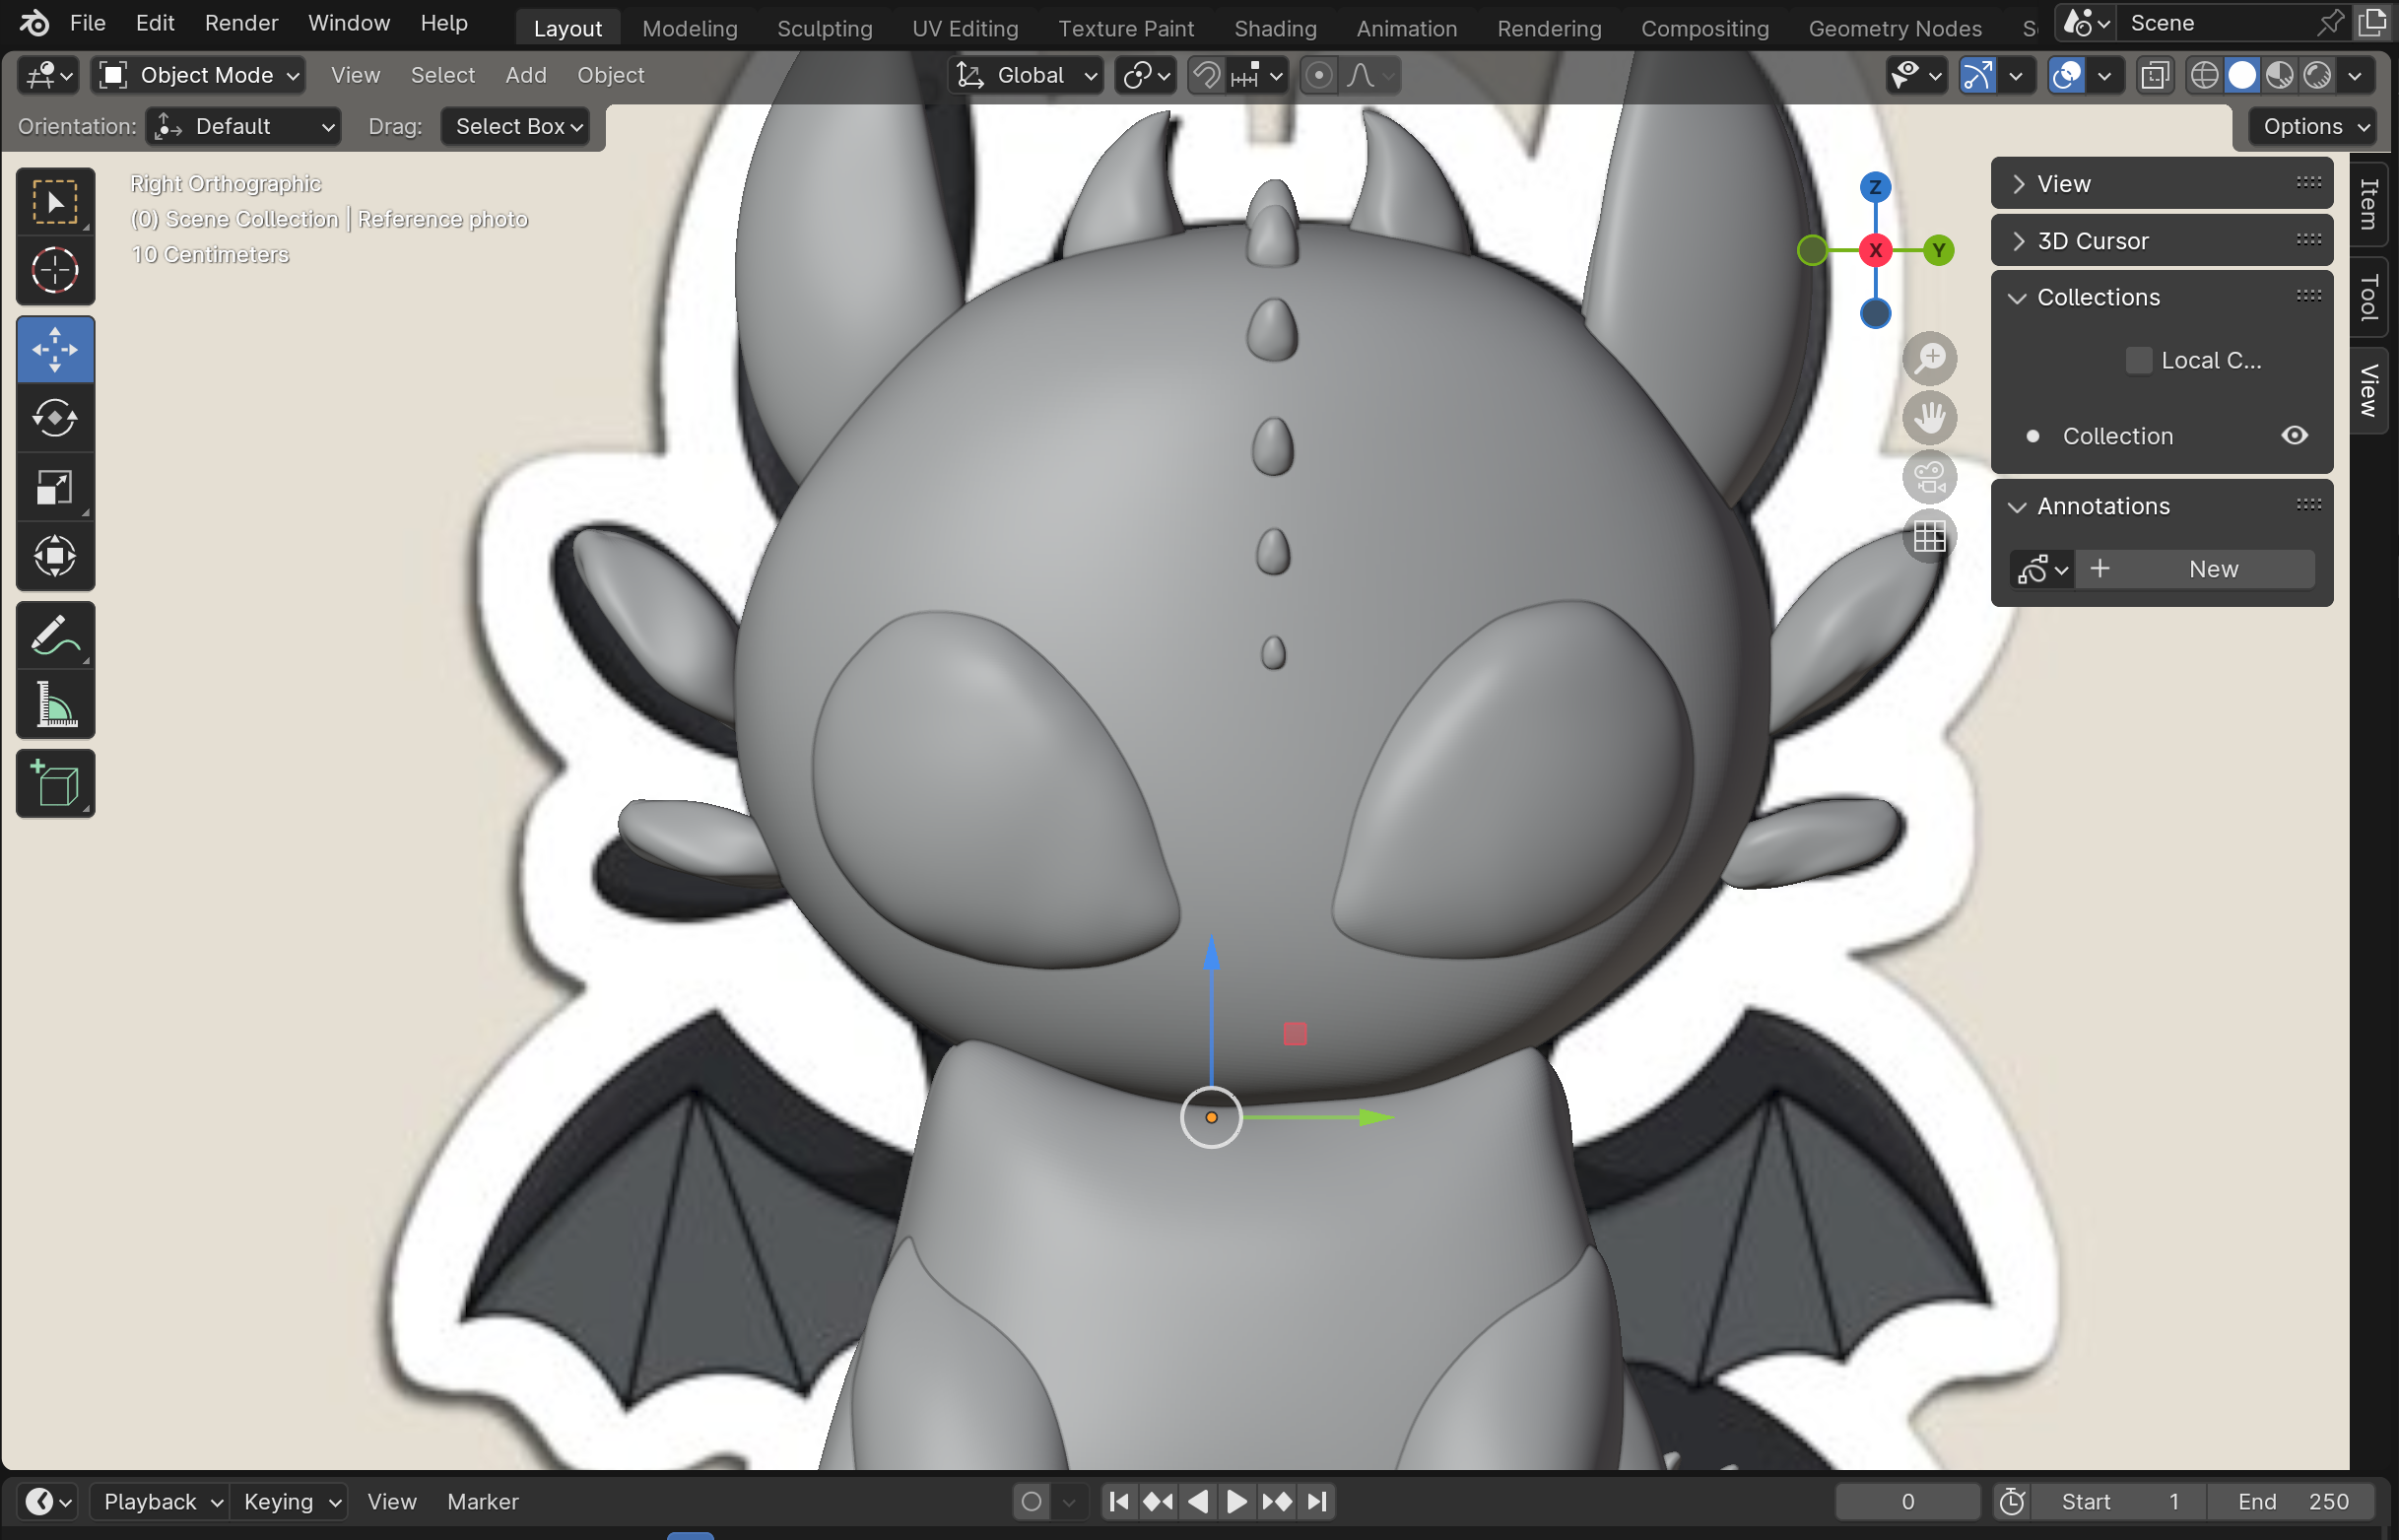
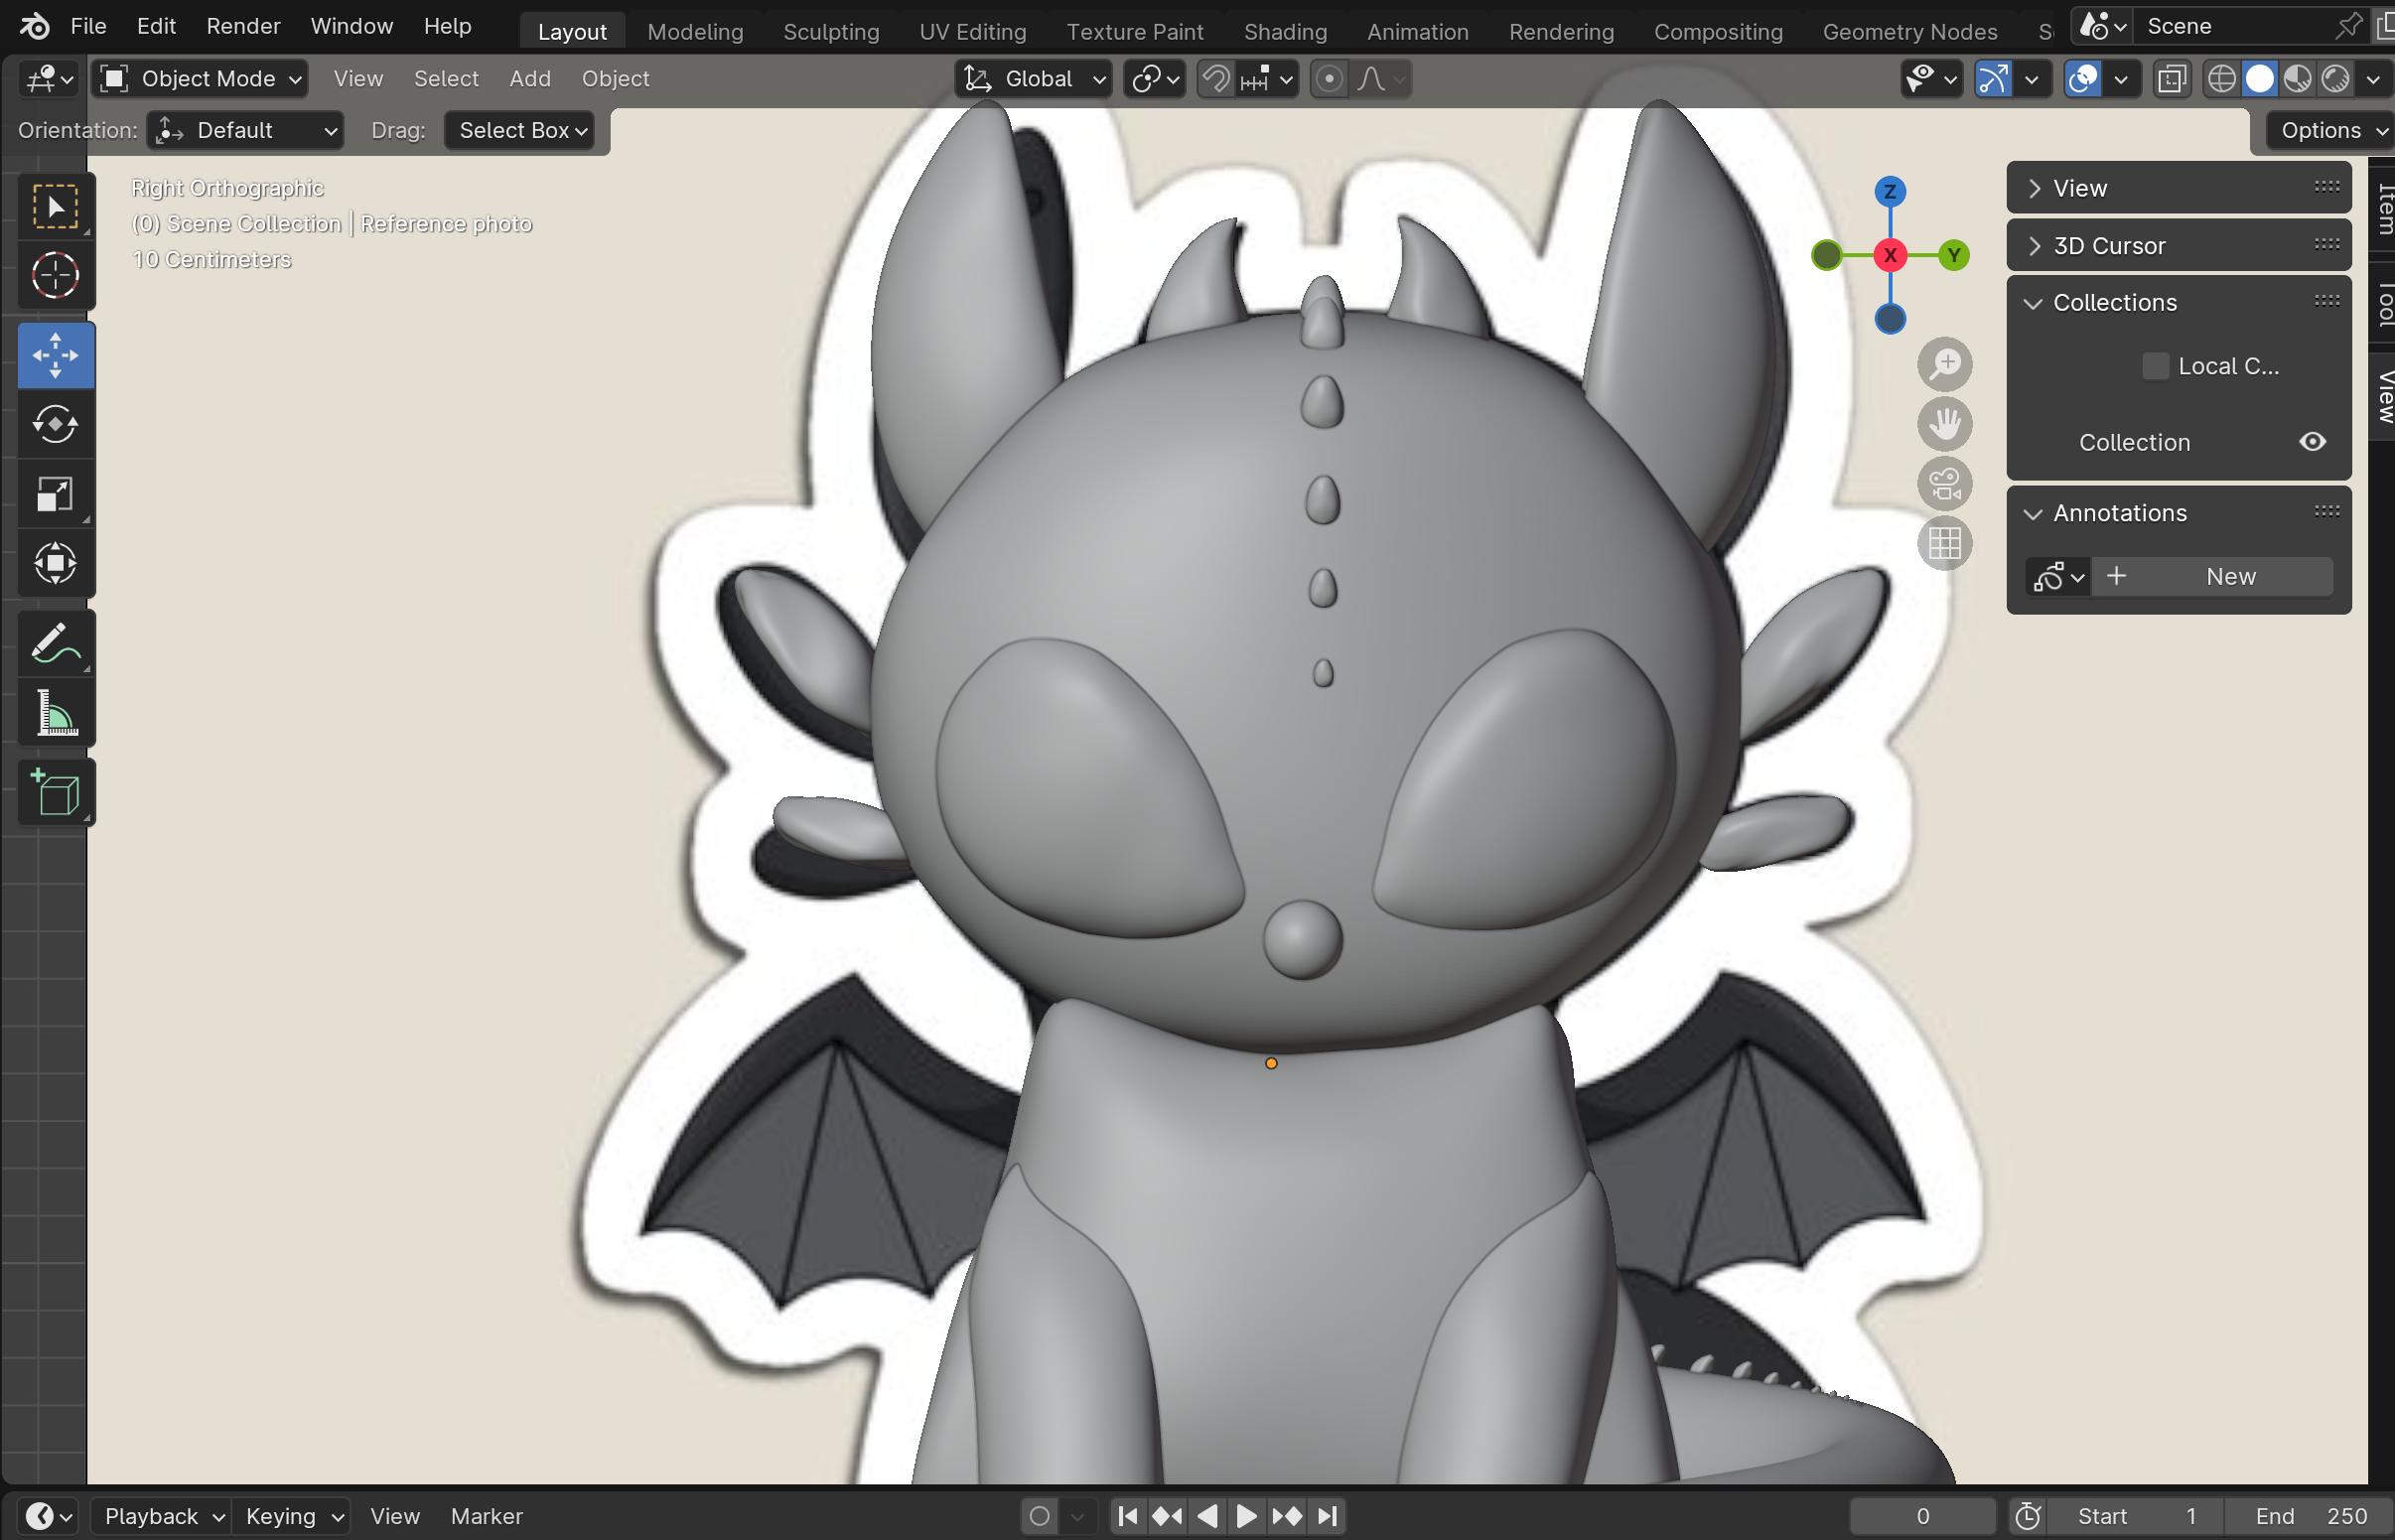
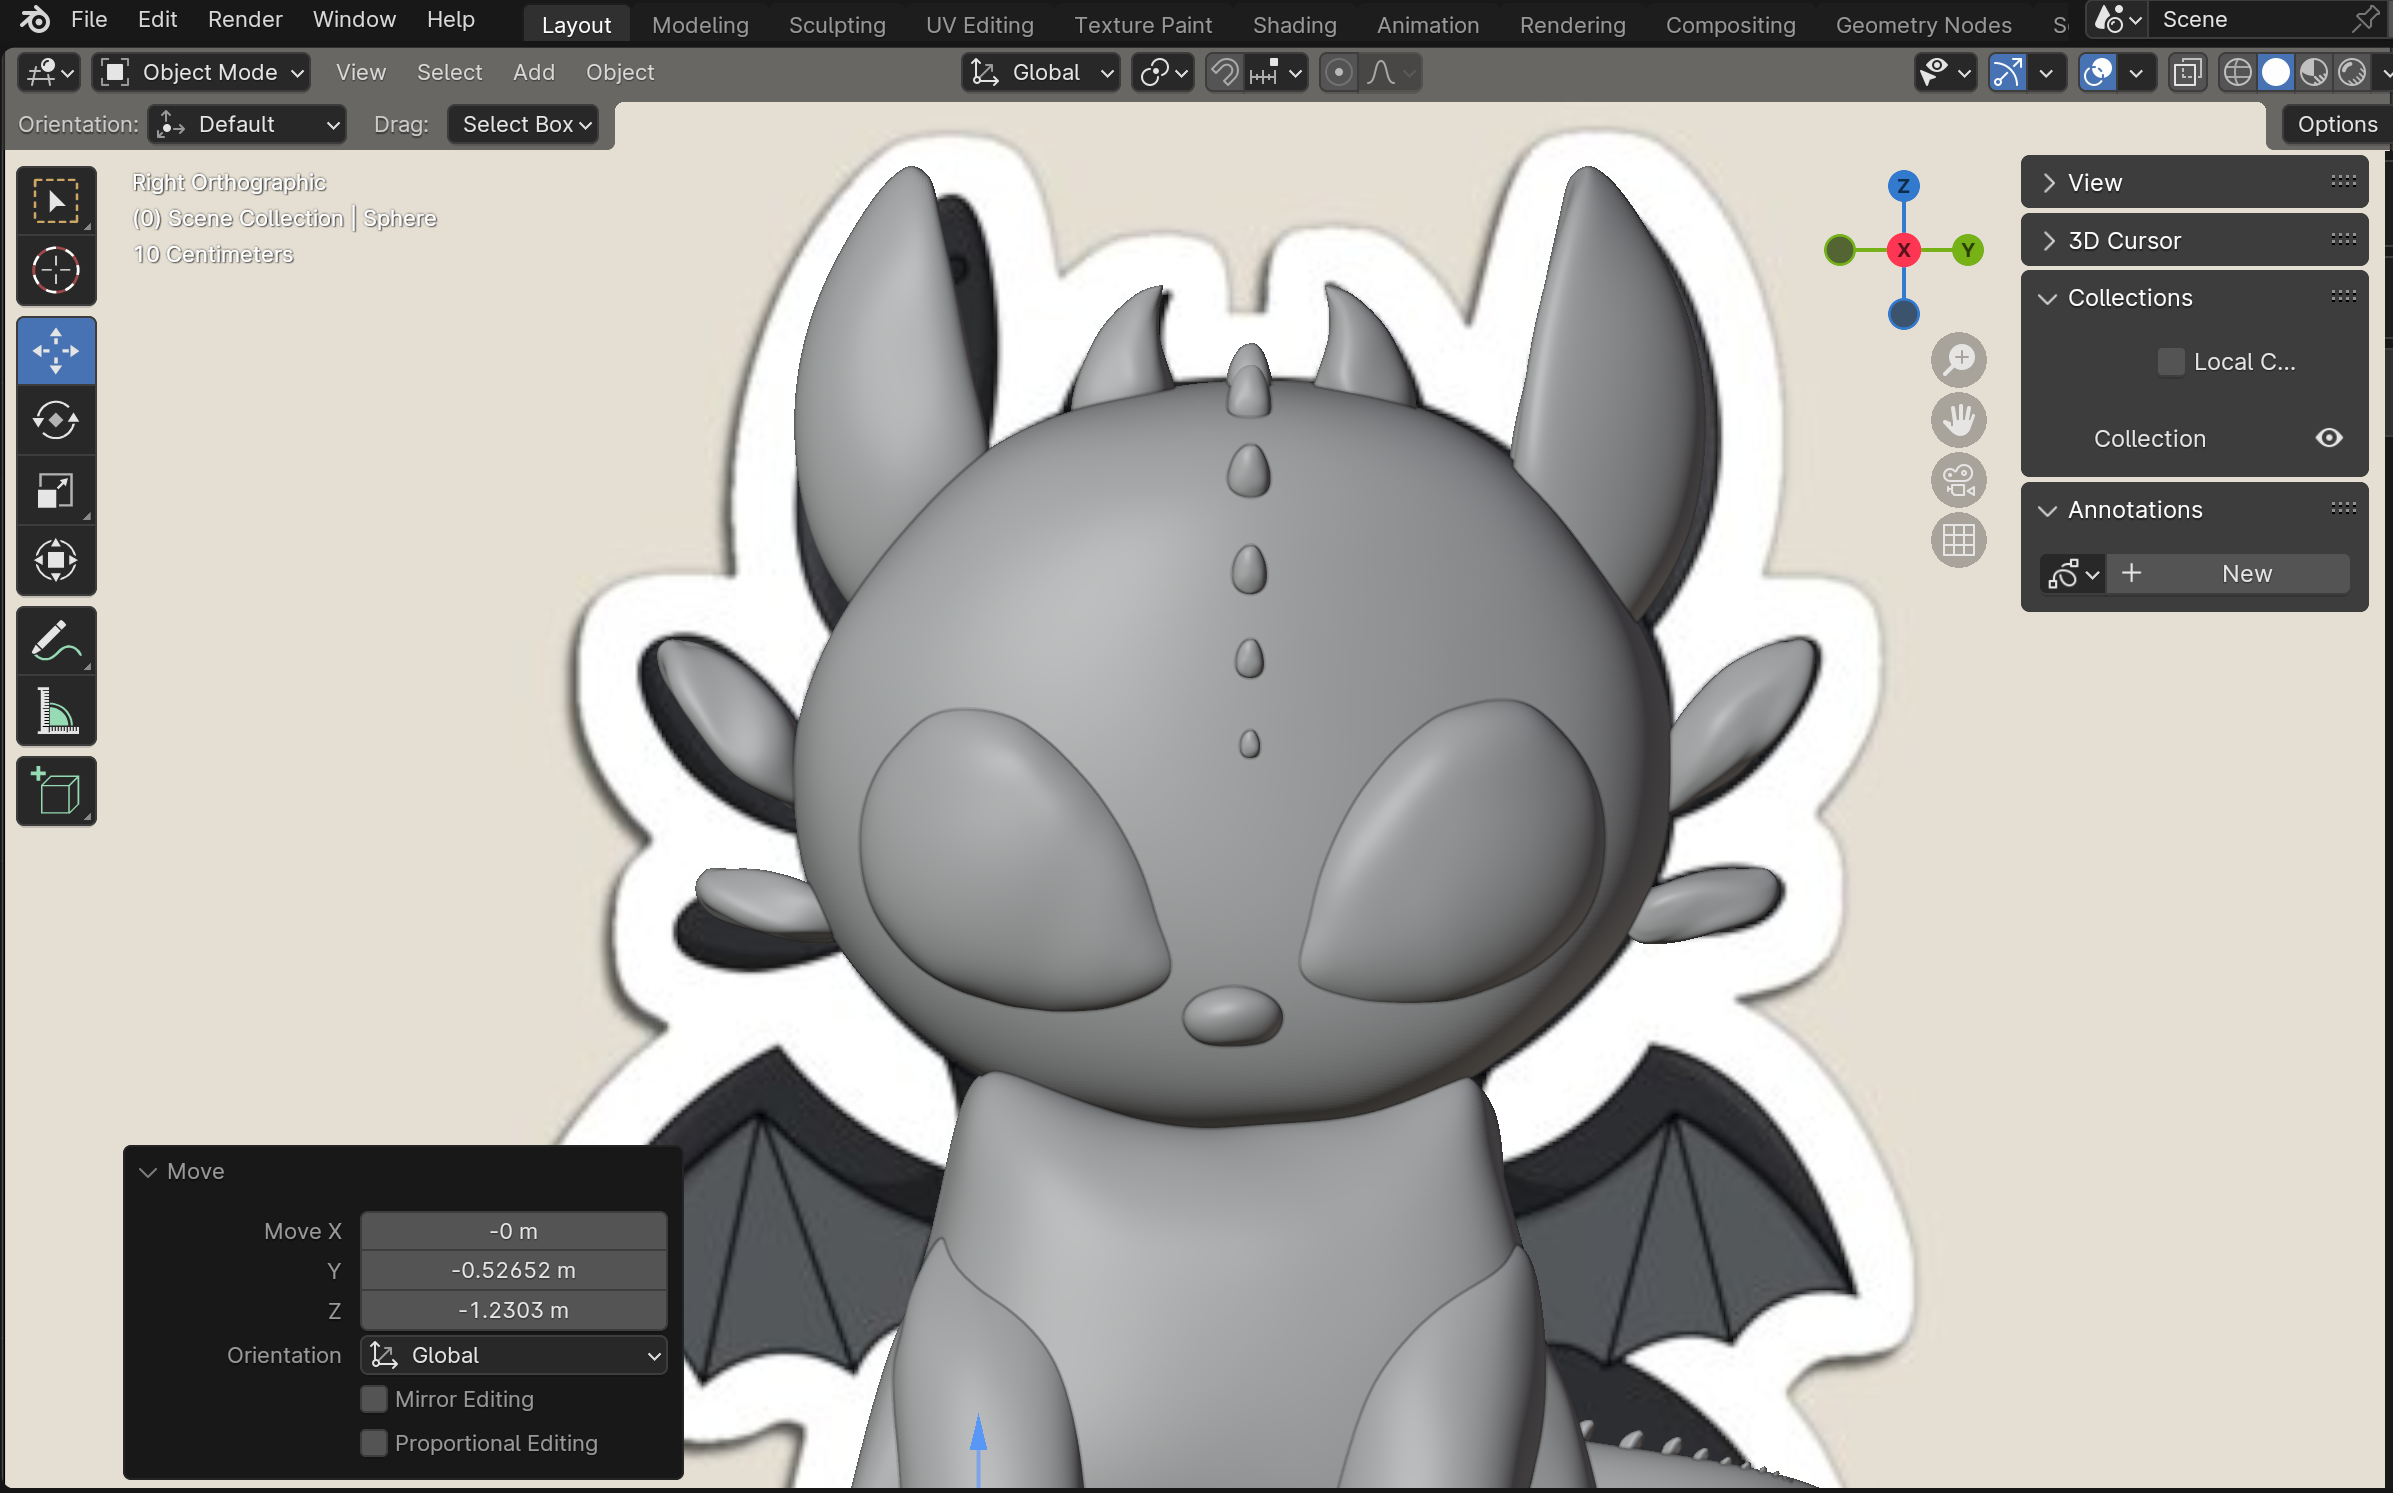
The Eyes and nose weren't particularly complicated. For the eyes I again started with a sphere and repeated the usual steps but with one difference. When I first added in the sphere I increased the number of segments in the sphere, meaning I increased the number of vertices on the sphere which allowed for more control when sculpting, making it easier to sculpt the eyes into a more accurate shape. You have to increase the segments when you first add the object, because you won't find this function again. After increasing the segments, I toggled the x-ray view (Alt+Z) and sculpted the right eye to my desired shape, shifting between being centered on the X-axis and not being centered. Once I was done with that, I mirrored it (I finally figured out how at this point) by first duplicating (Shift+D) and moving it along the y-axis a bit to the left. After that, to mirror is Ctrl+M so I did that and then mirrored it along the Y-axis by clicking the Y key on the keyboard. Once the eye was mirrored I moved it to it's respective place on the head and adjusted what was necessary.
After the Eyes came the Nose, which was just another sculpted small sphere. The nose can be sculpted in any way, I just tweaked it to my liking and ended up with a cute button nose
!!!! MAKE SURE TO NAME YOUR OBJECTS AS YOU CREATE THEM TO NOT LOSE TRACK OF ANYTHING !!!!
Sculpting the Toes
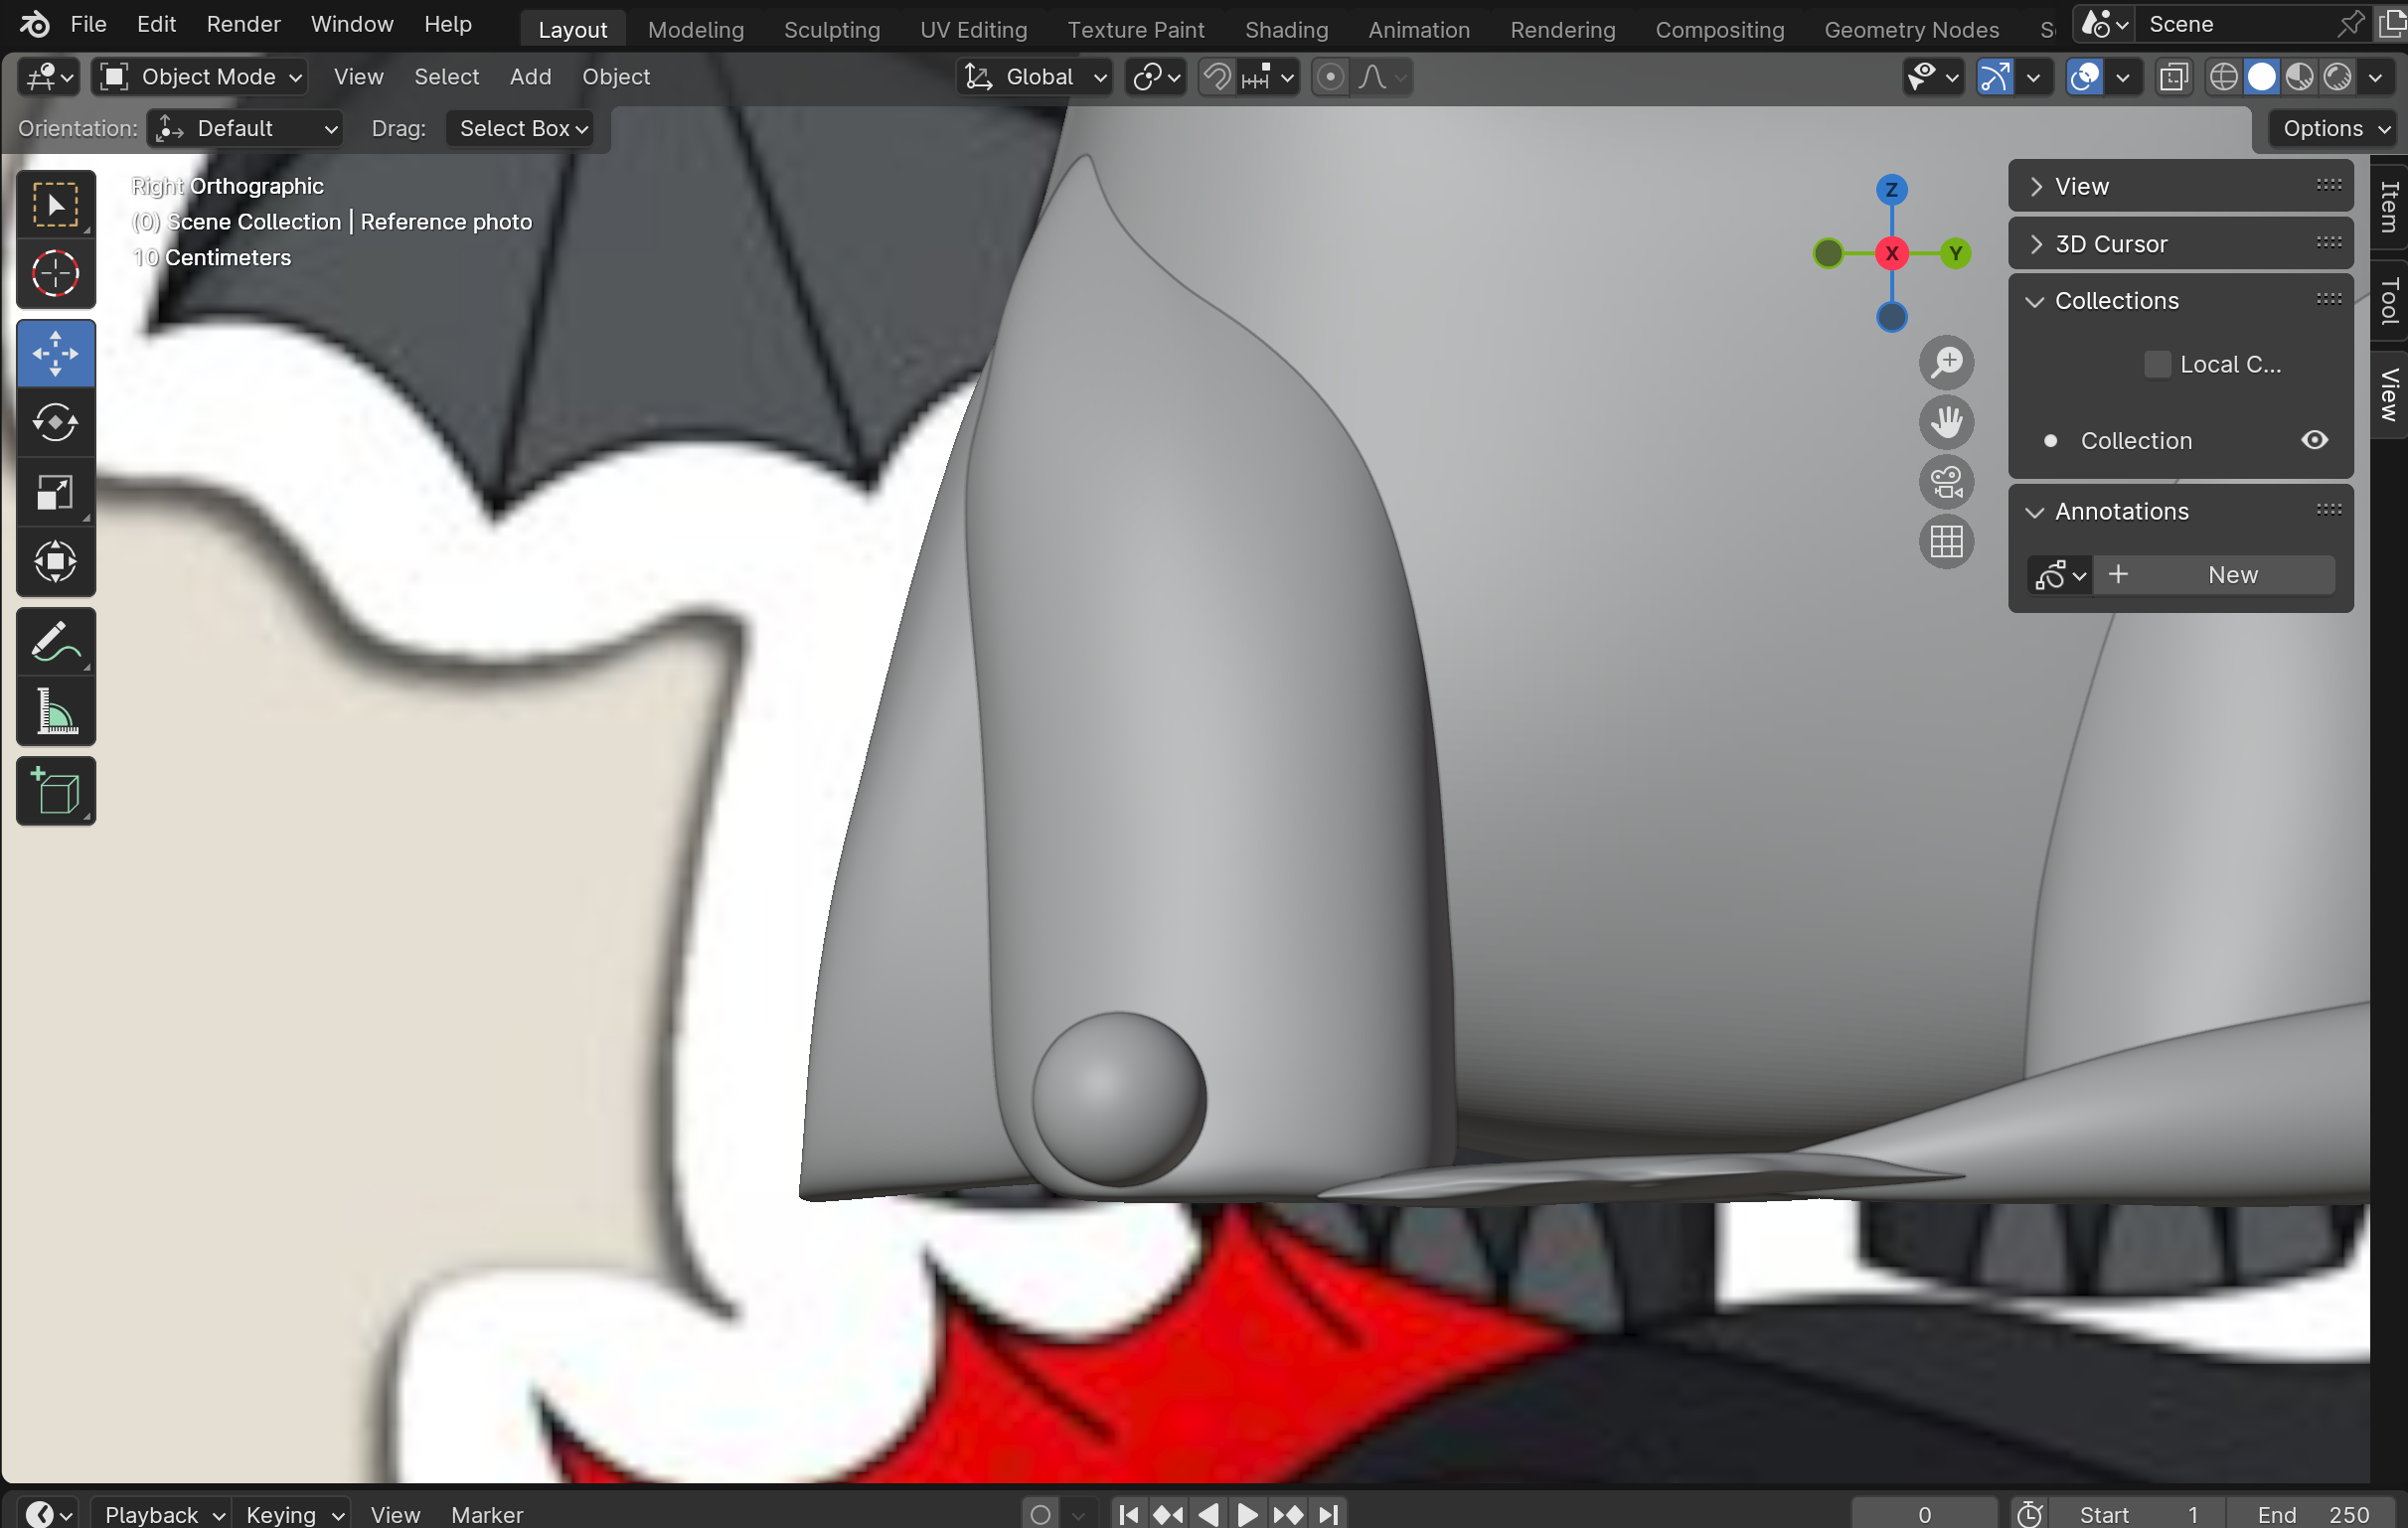
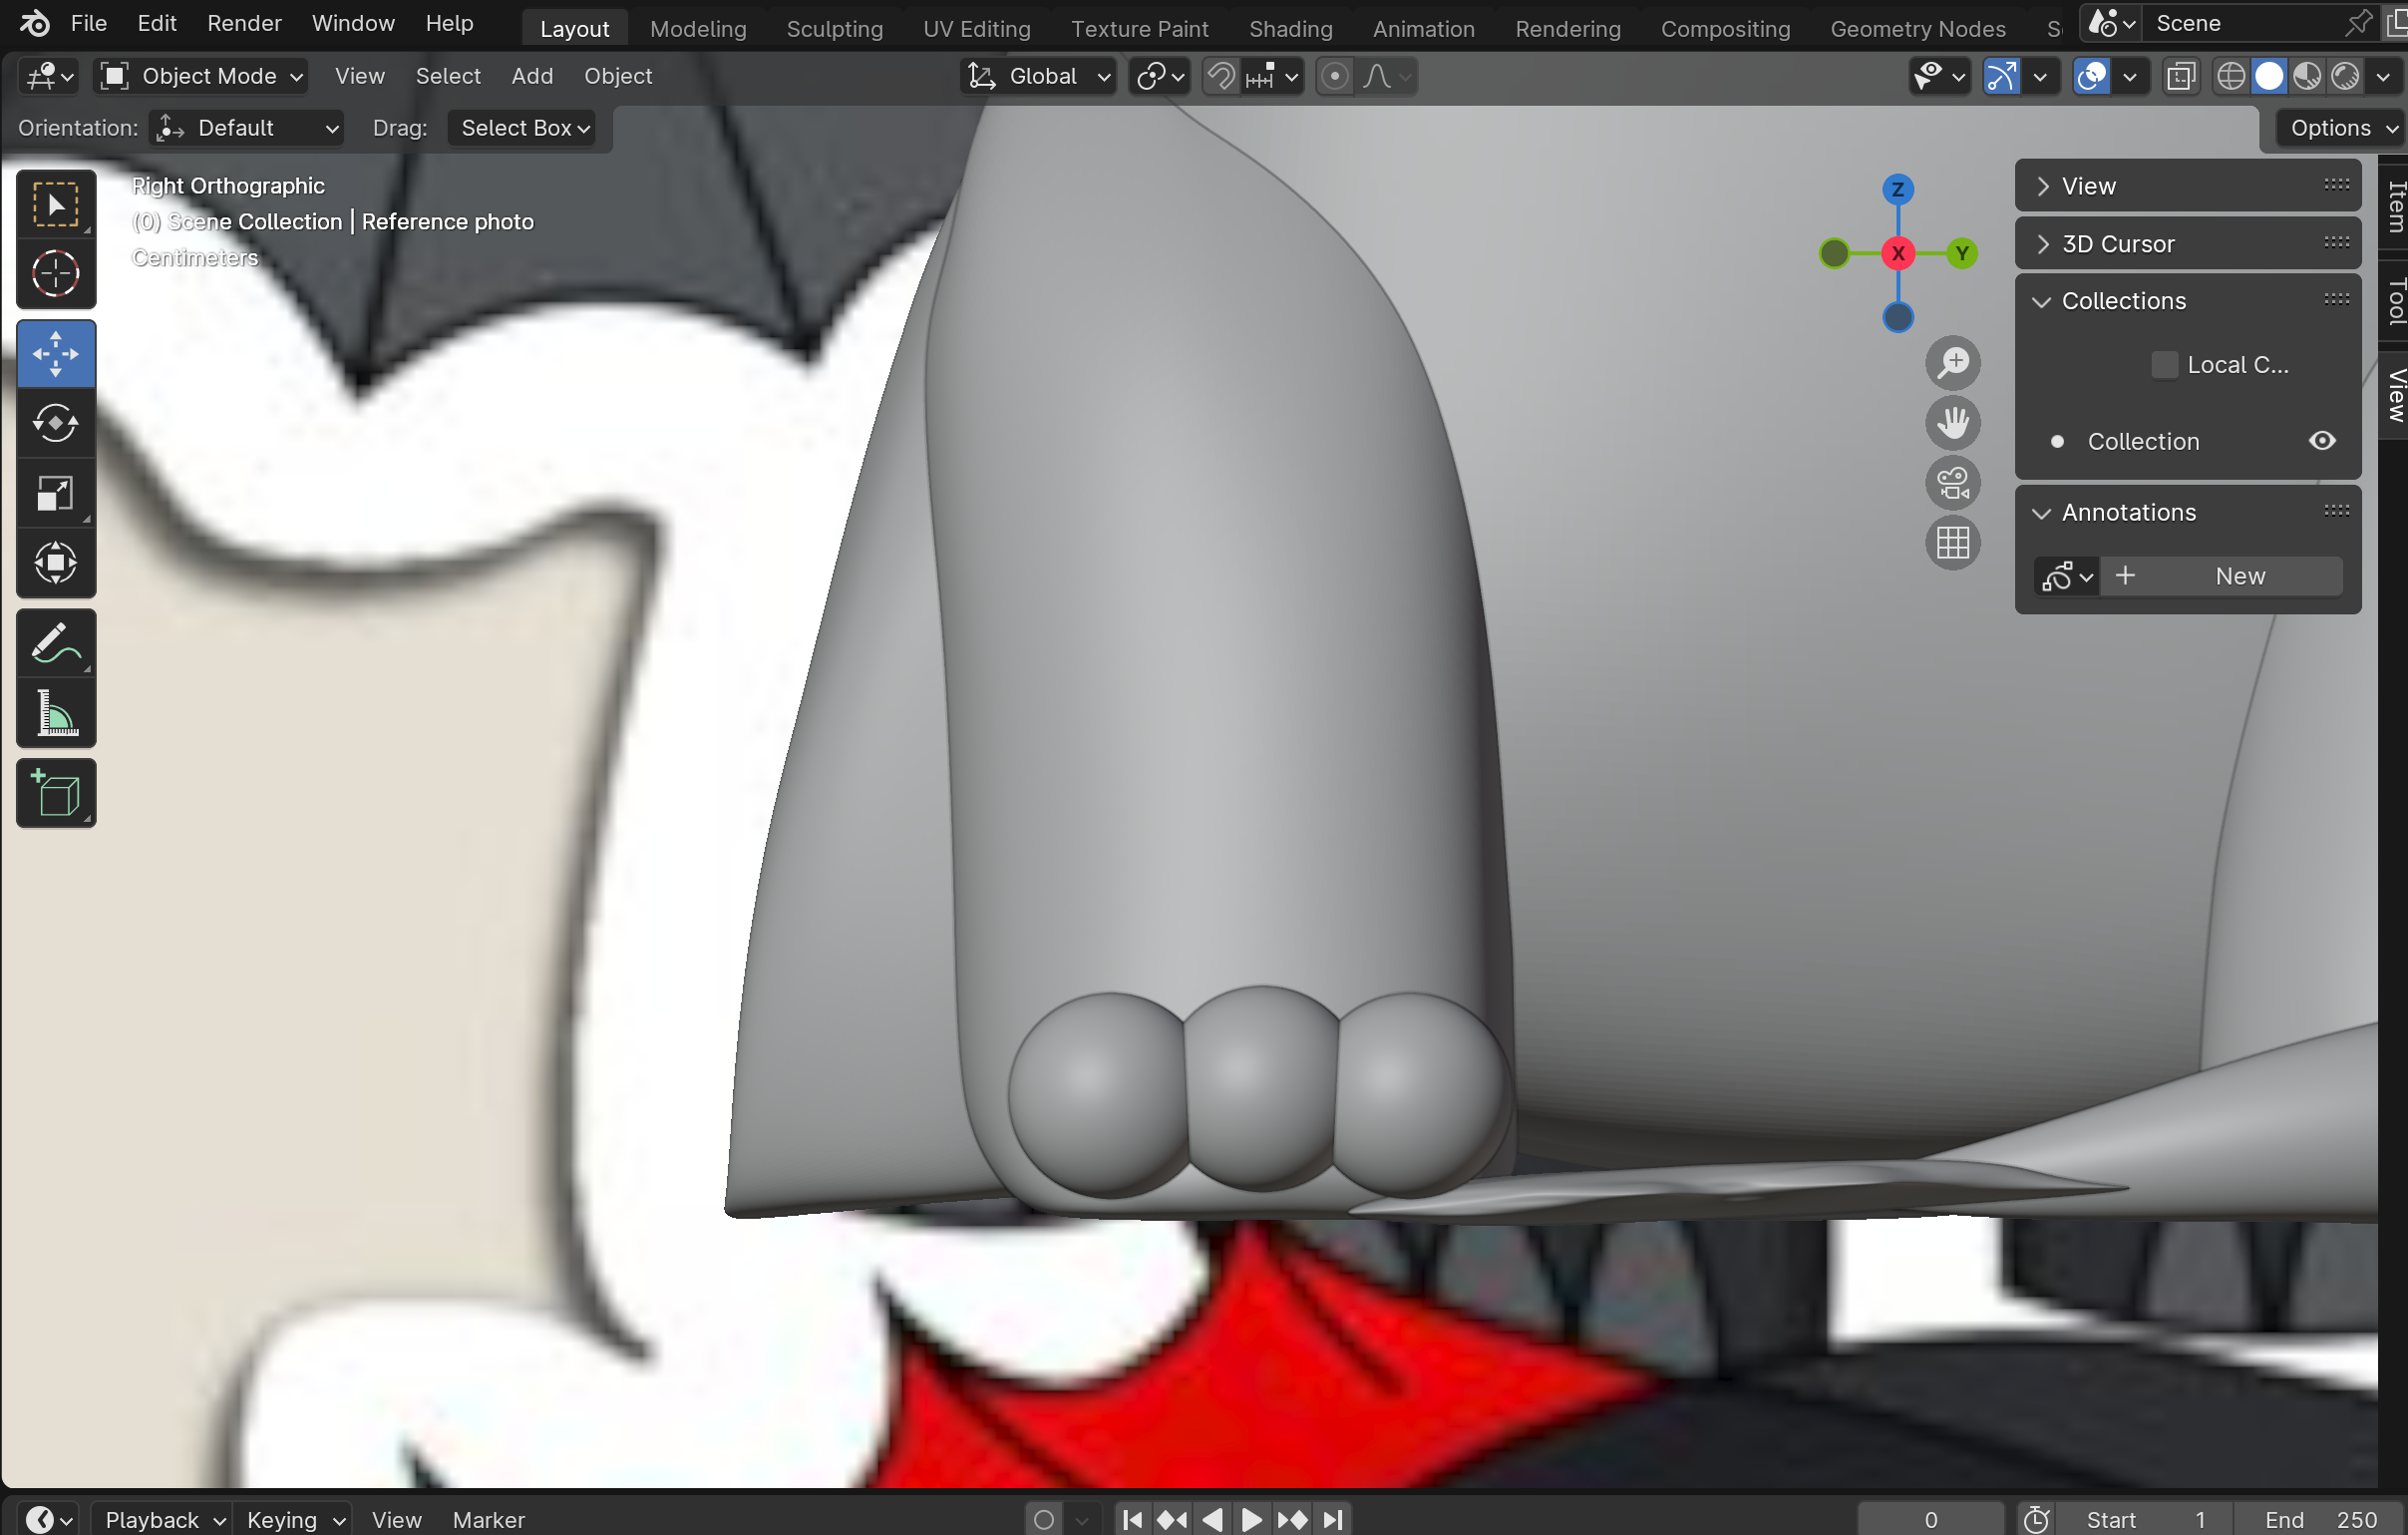
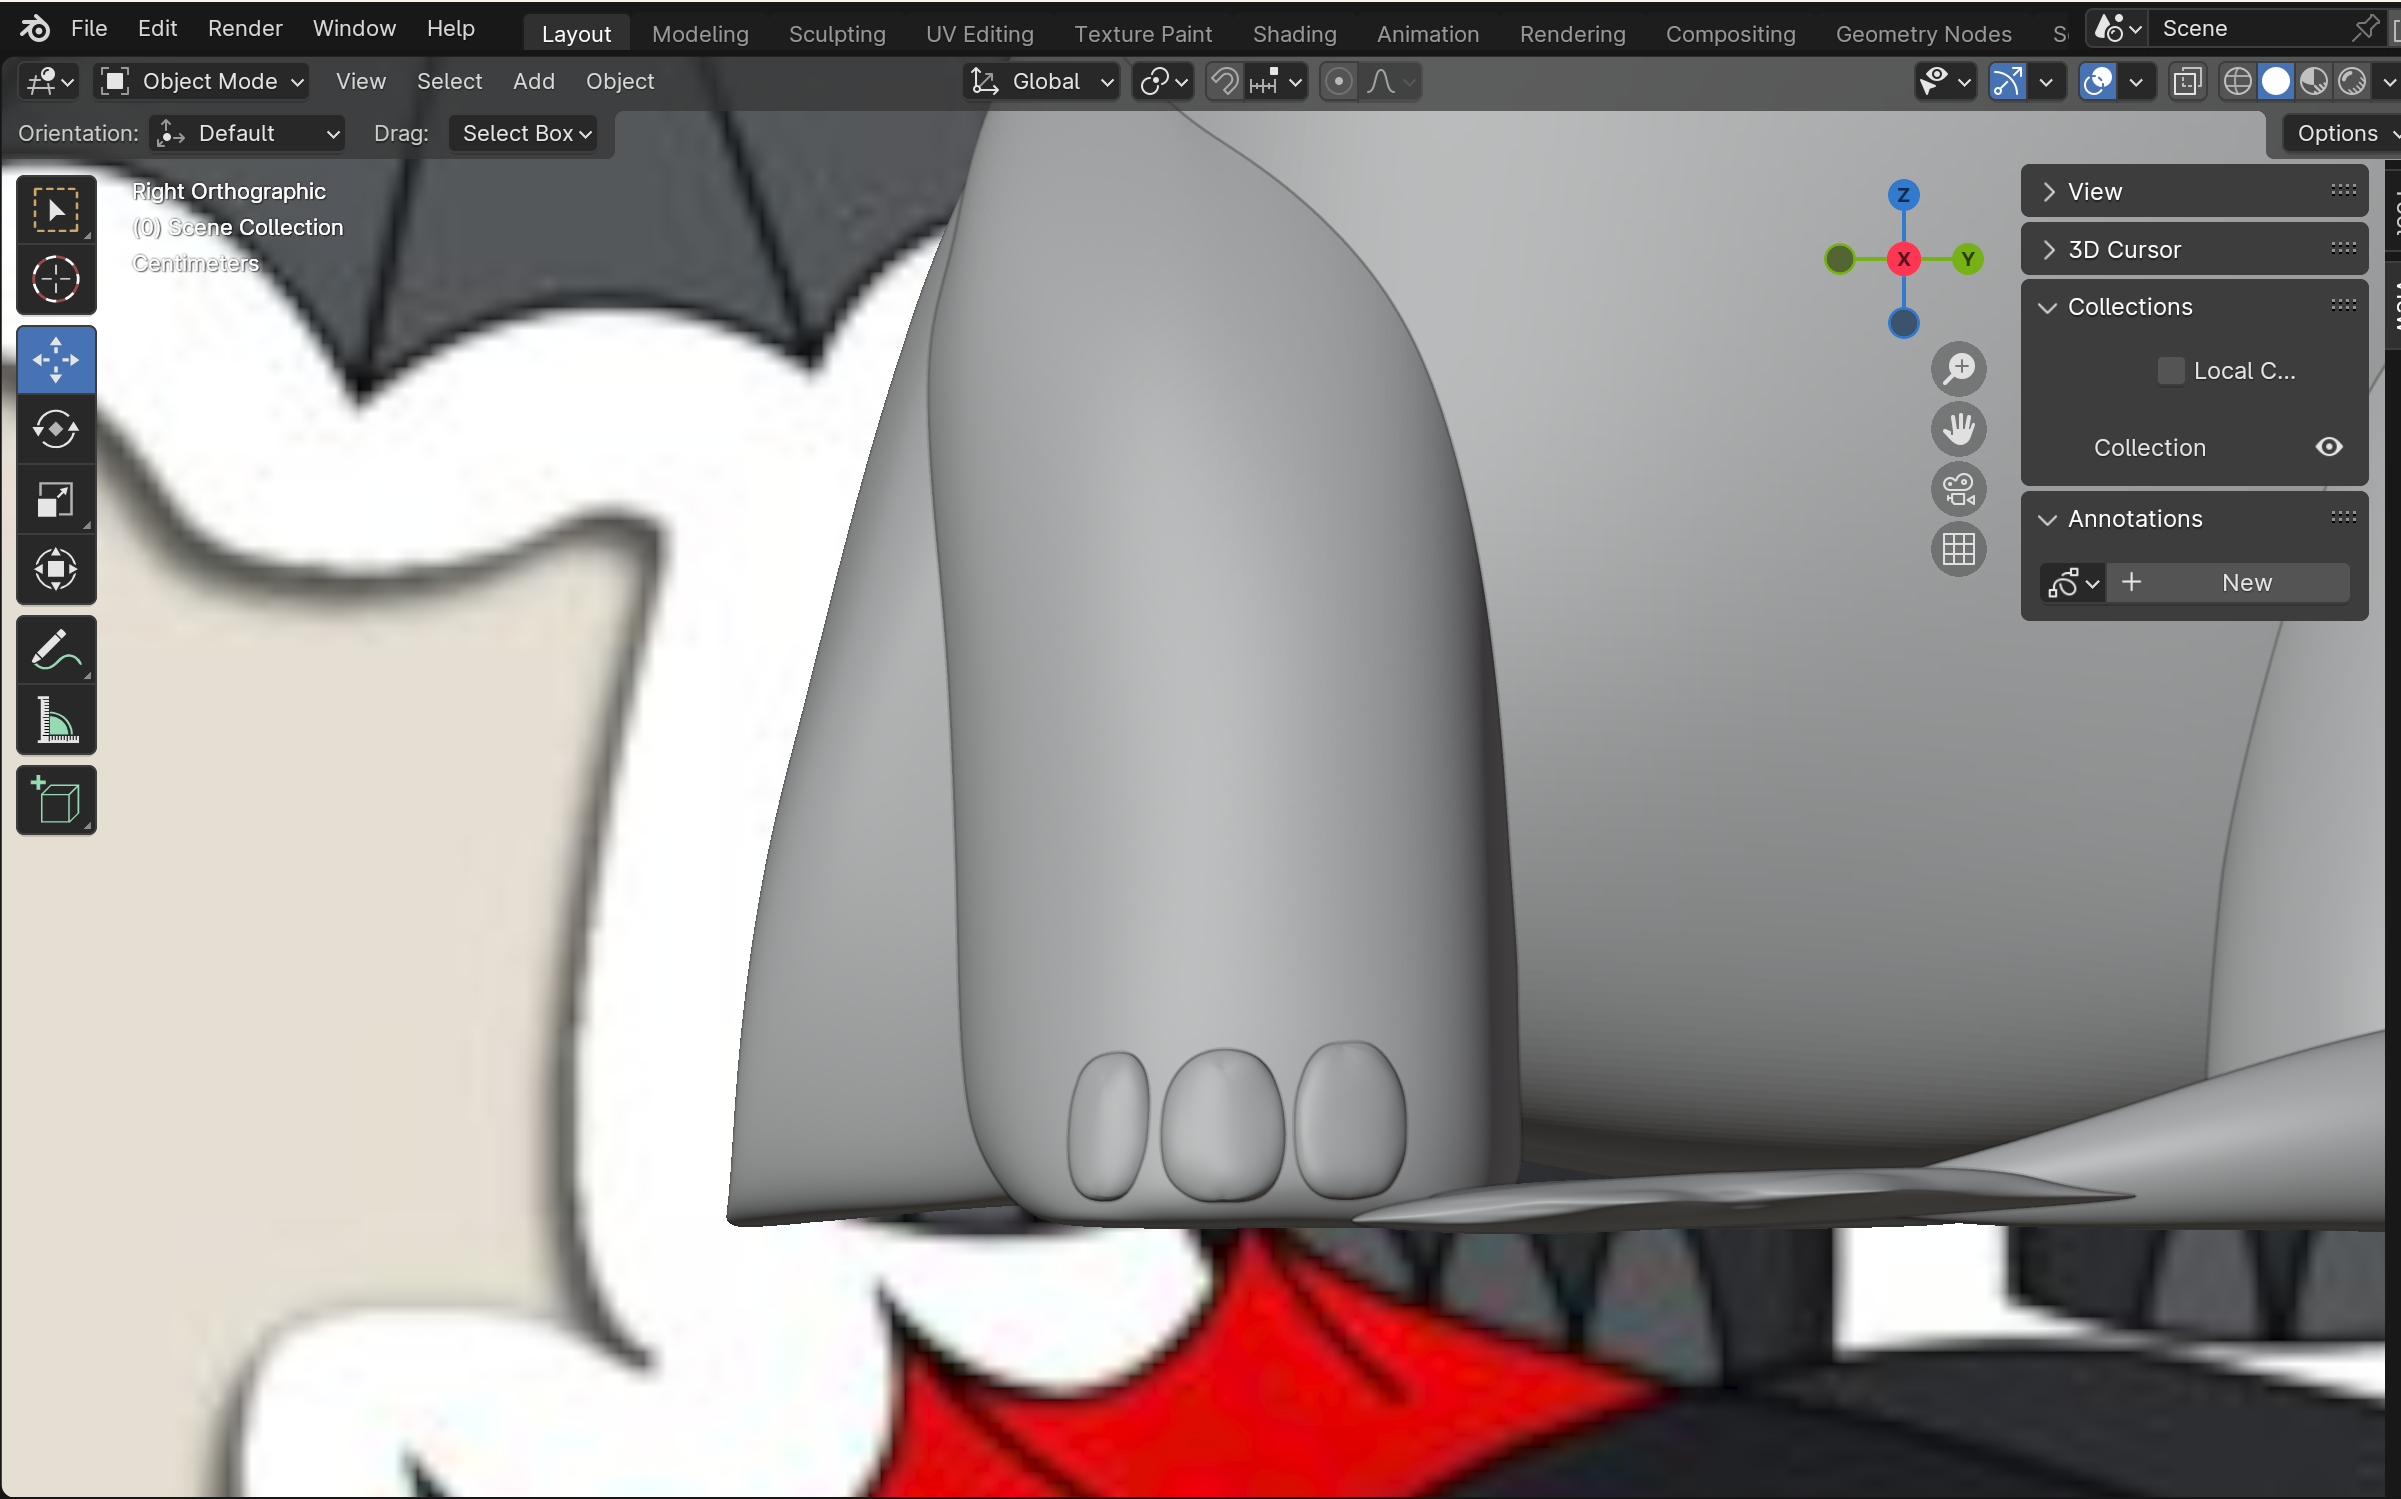
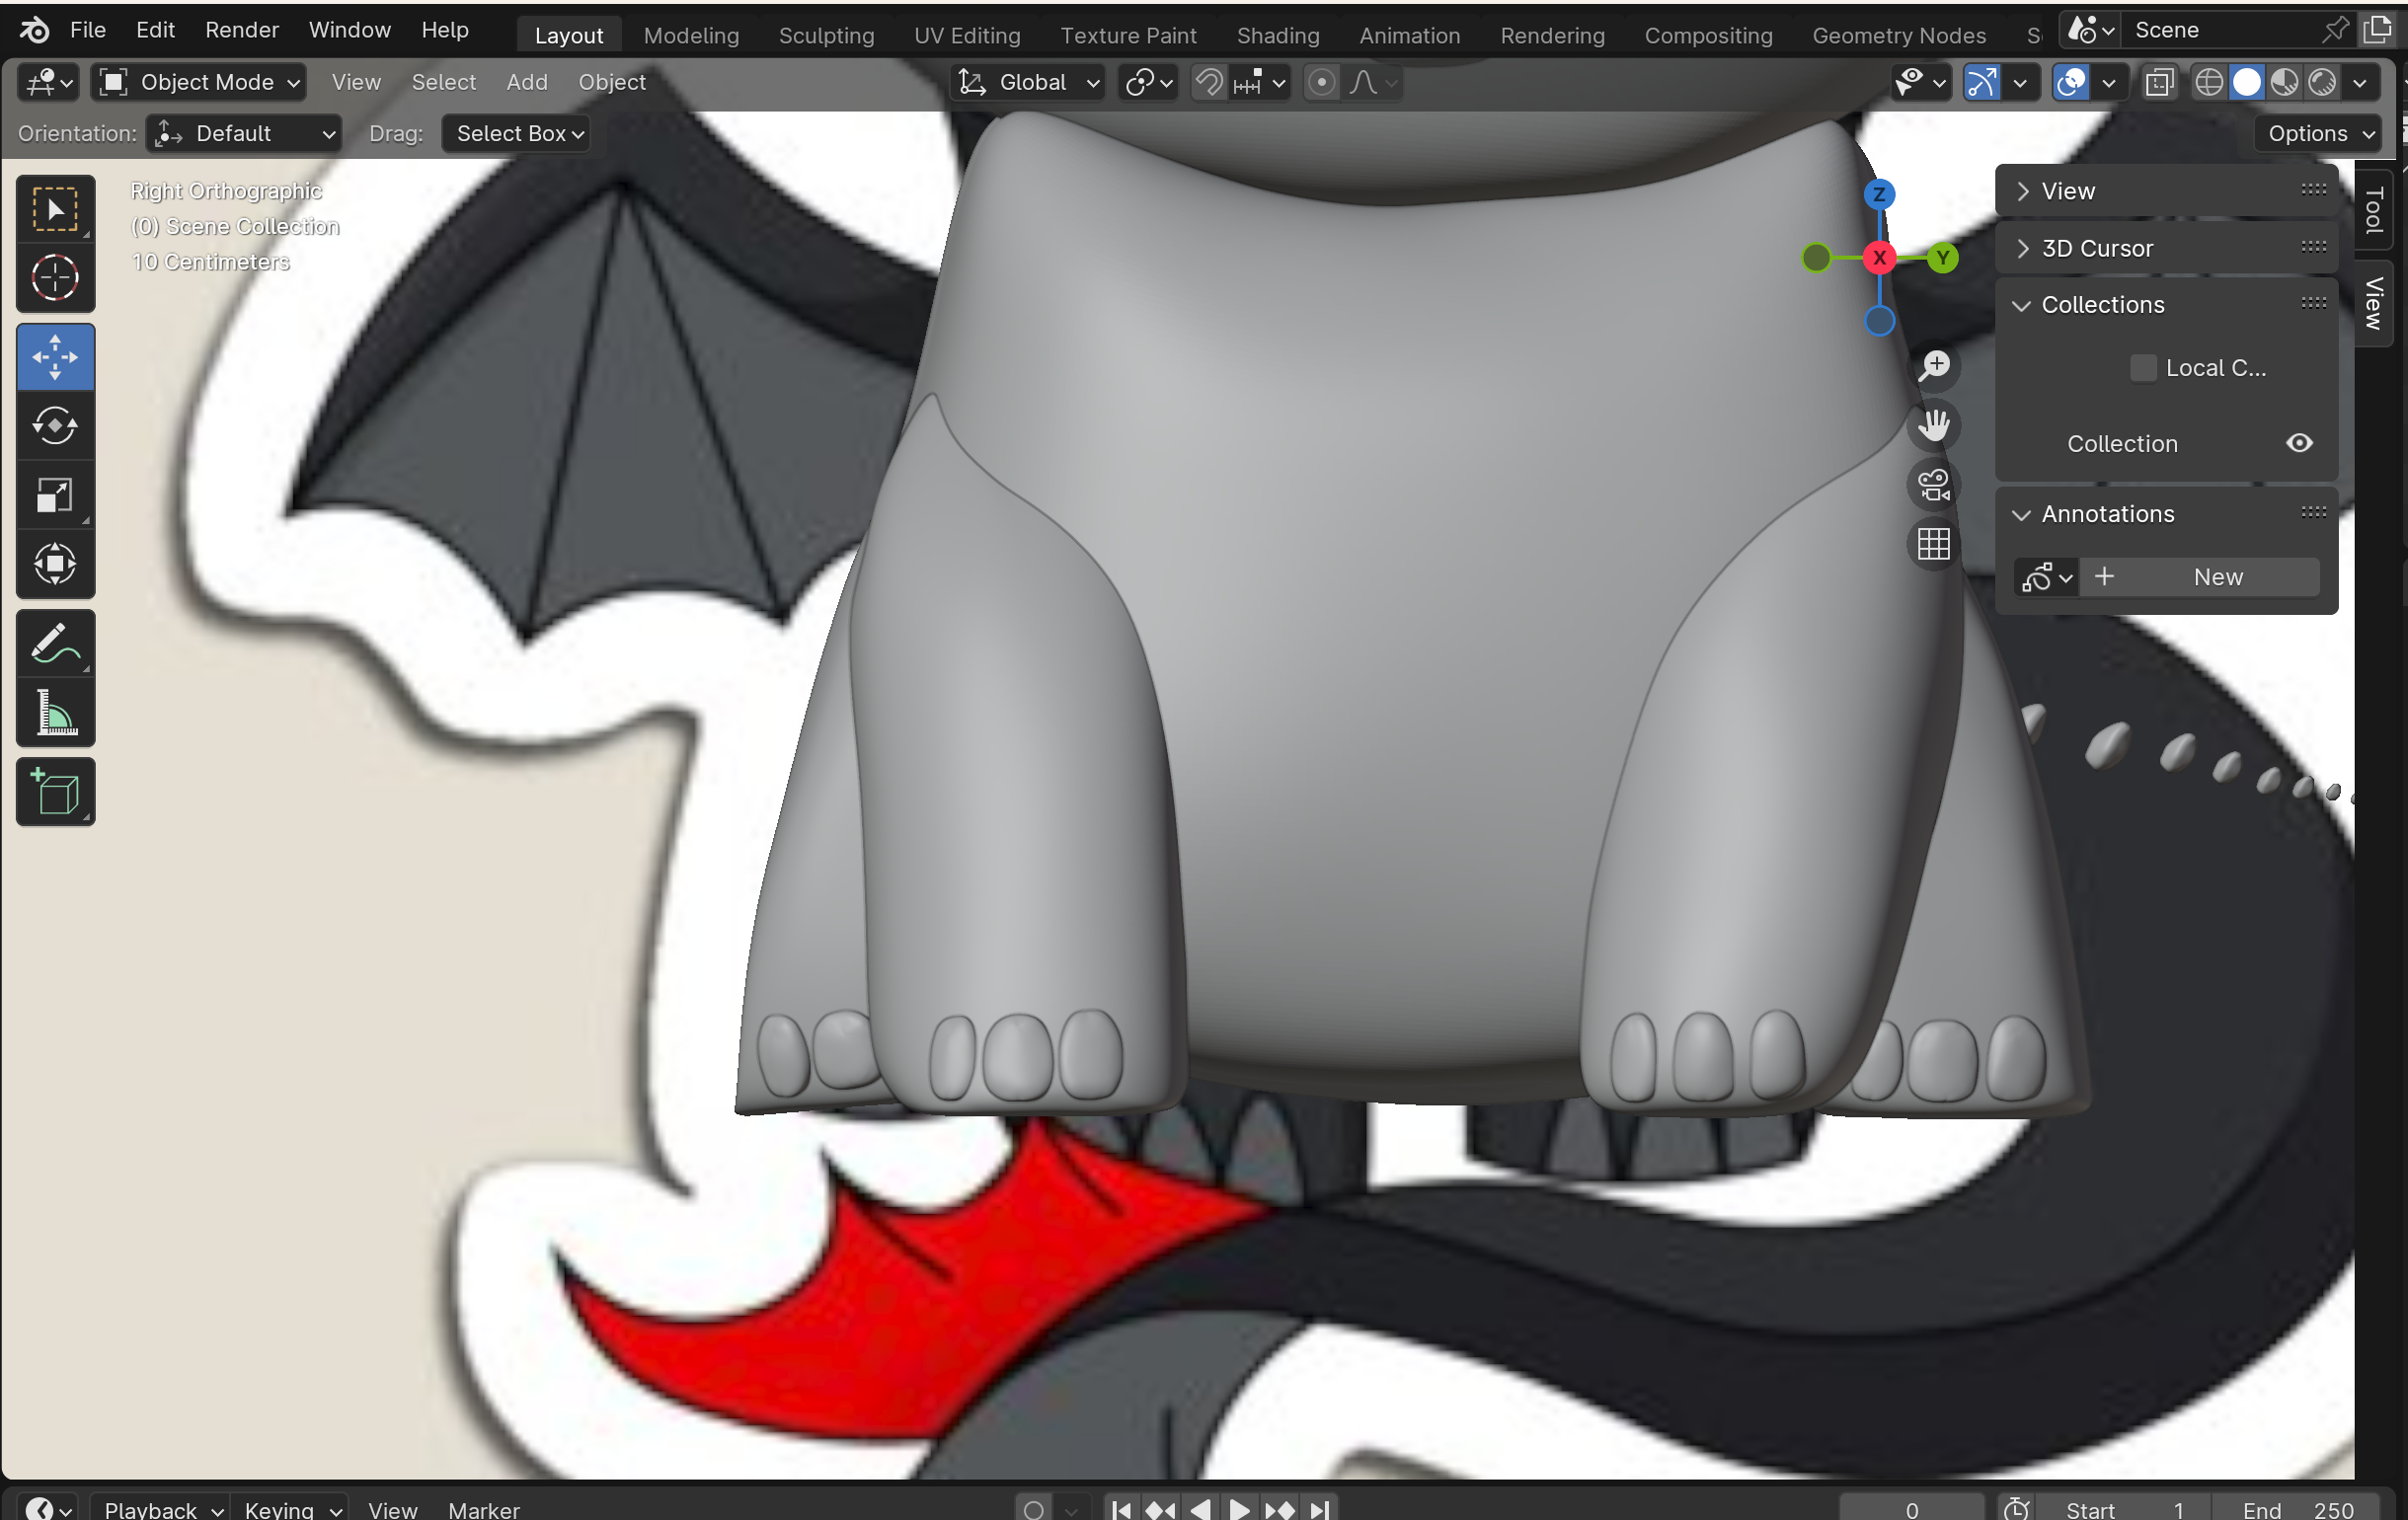
Last detail! This isn't really necessary but I wanted to add the definition of the little toes/toenails on the feet. For this I just repeated the usual sphere steps but flattened the sphere a lot and duplicated it a couple times to get the three toes. From there, I sculpted the different shapes, not making them perfect ovals. once I was happy with one foot, I duplicated the three toes and did the same thing for each foot, adding the toes and sculpting the nails as fit.
!!!! MAKE SURE TO NAME YOUR OBJECTS AS YOU CREATE THEM TO NOT LOSE TRACK OF ANYTHING !!!!
Time to 3d Print
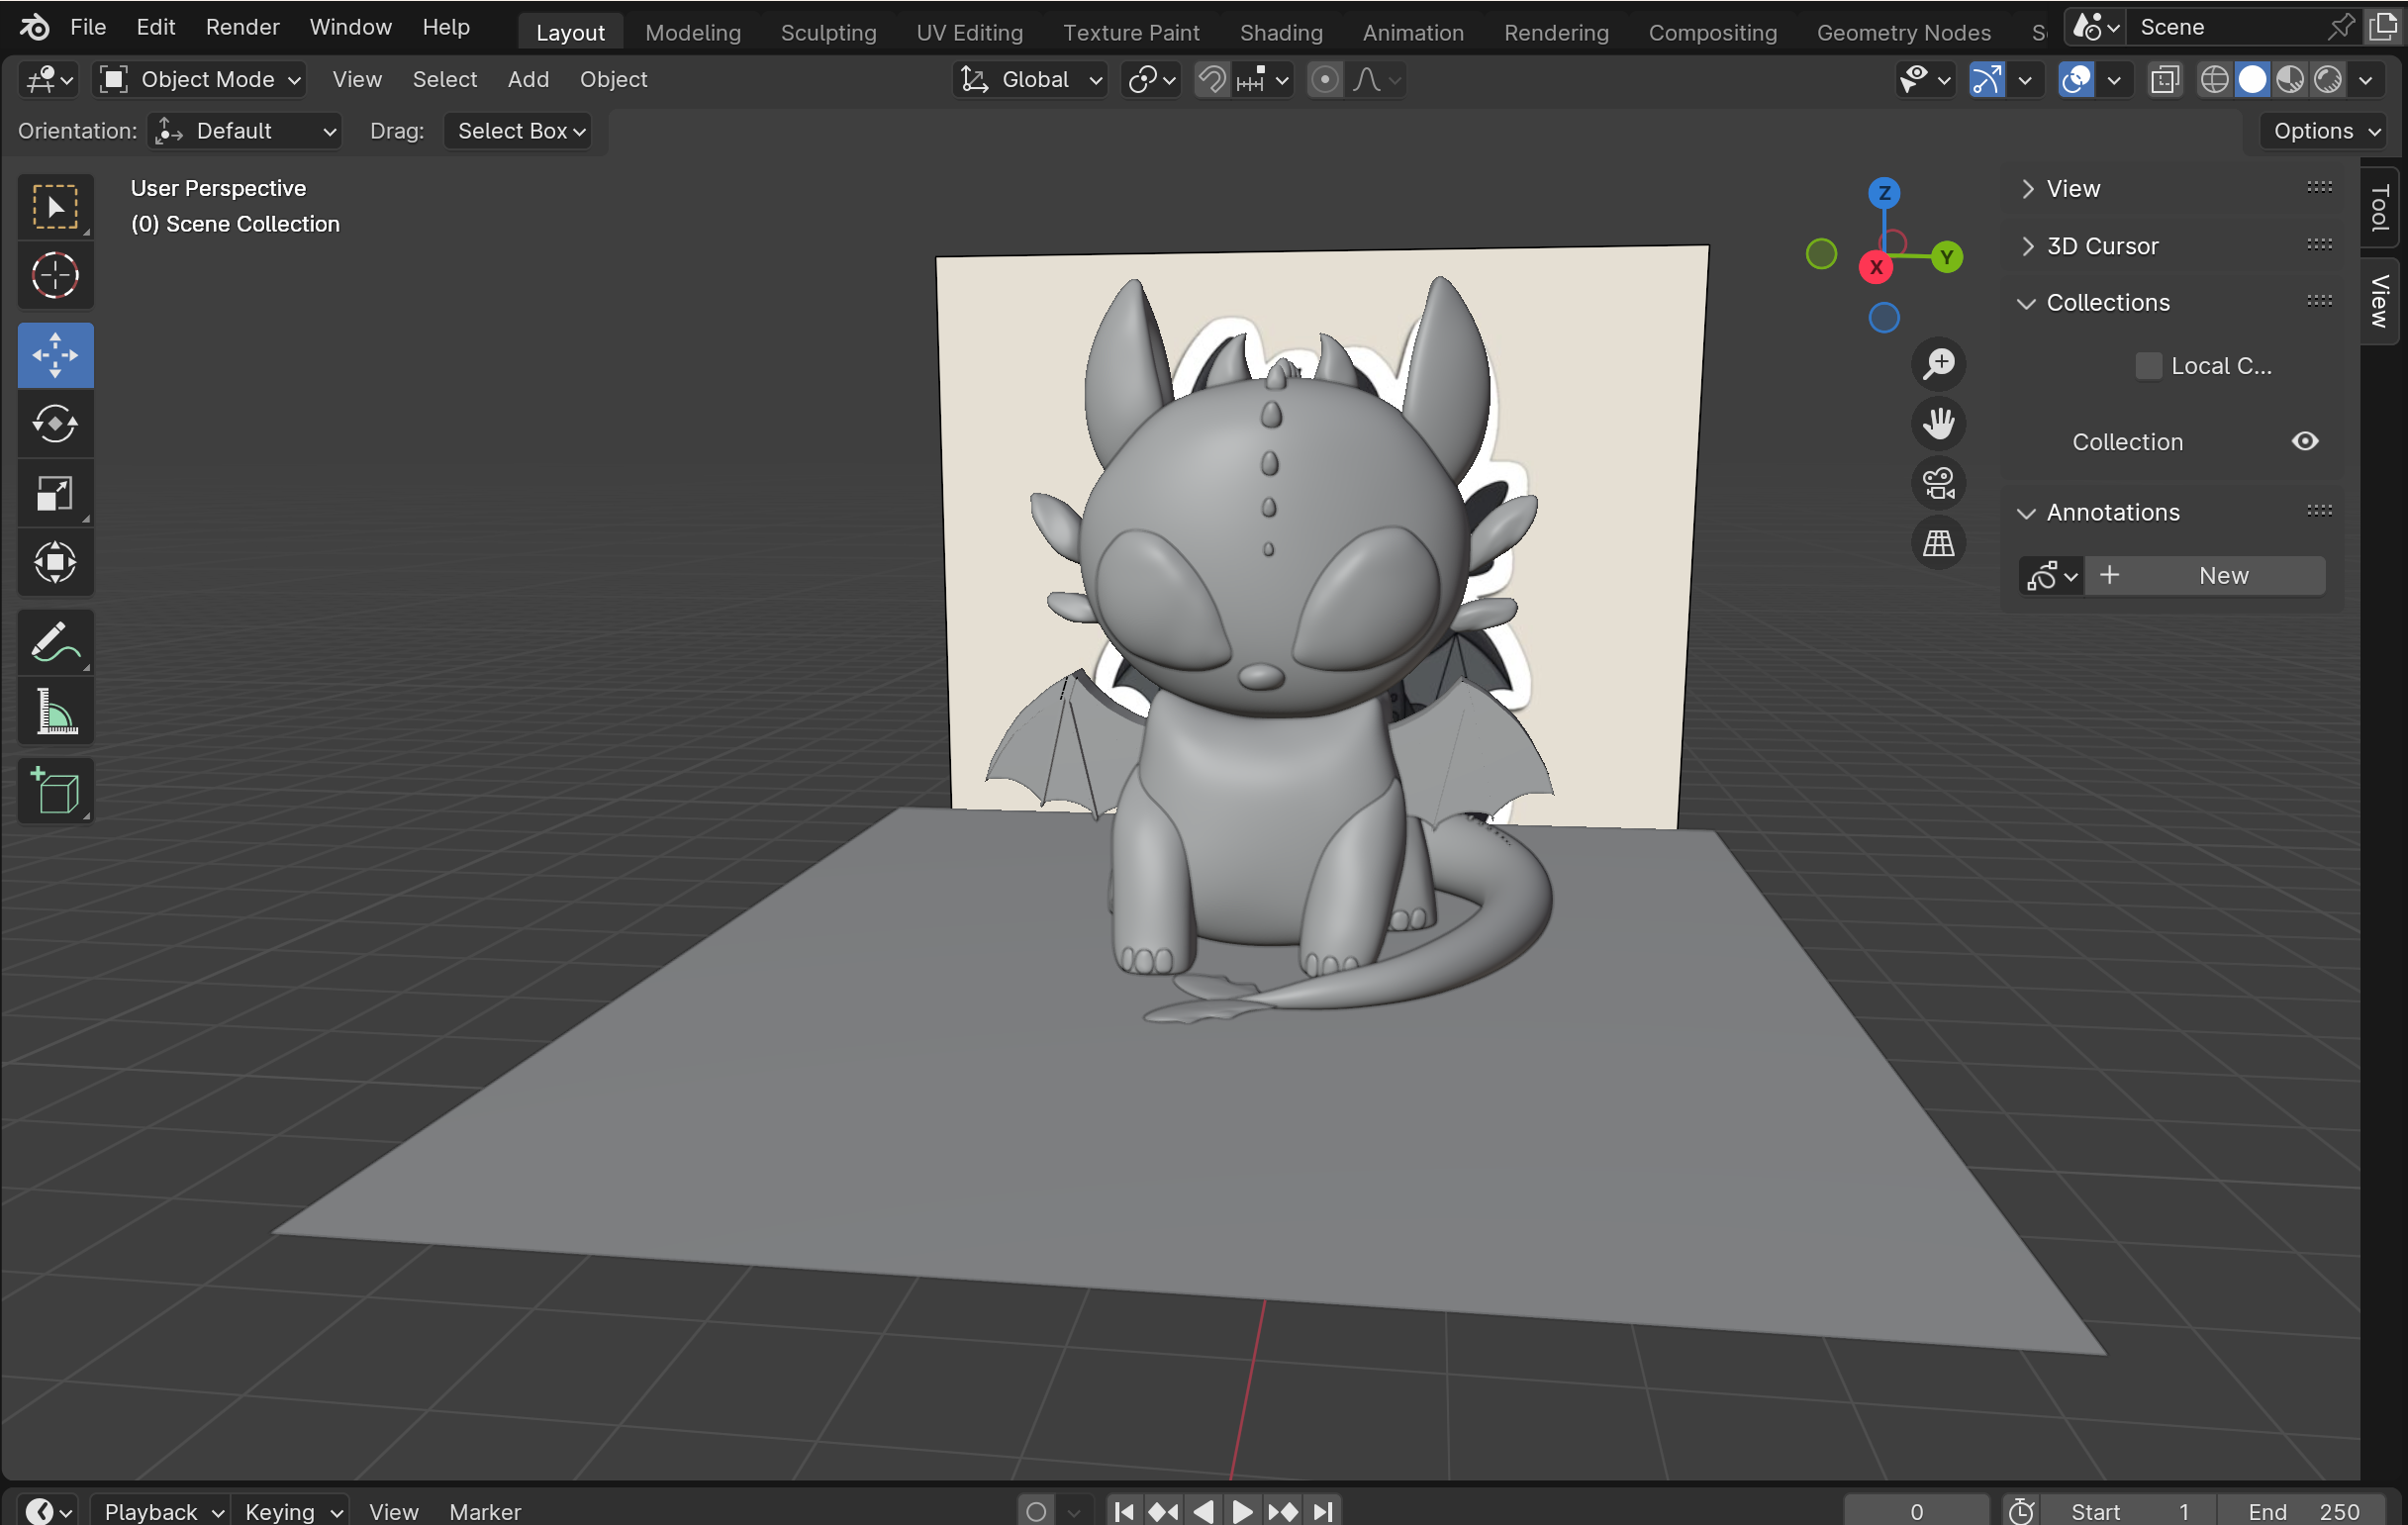
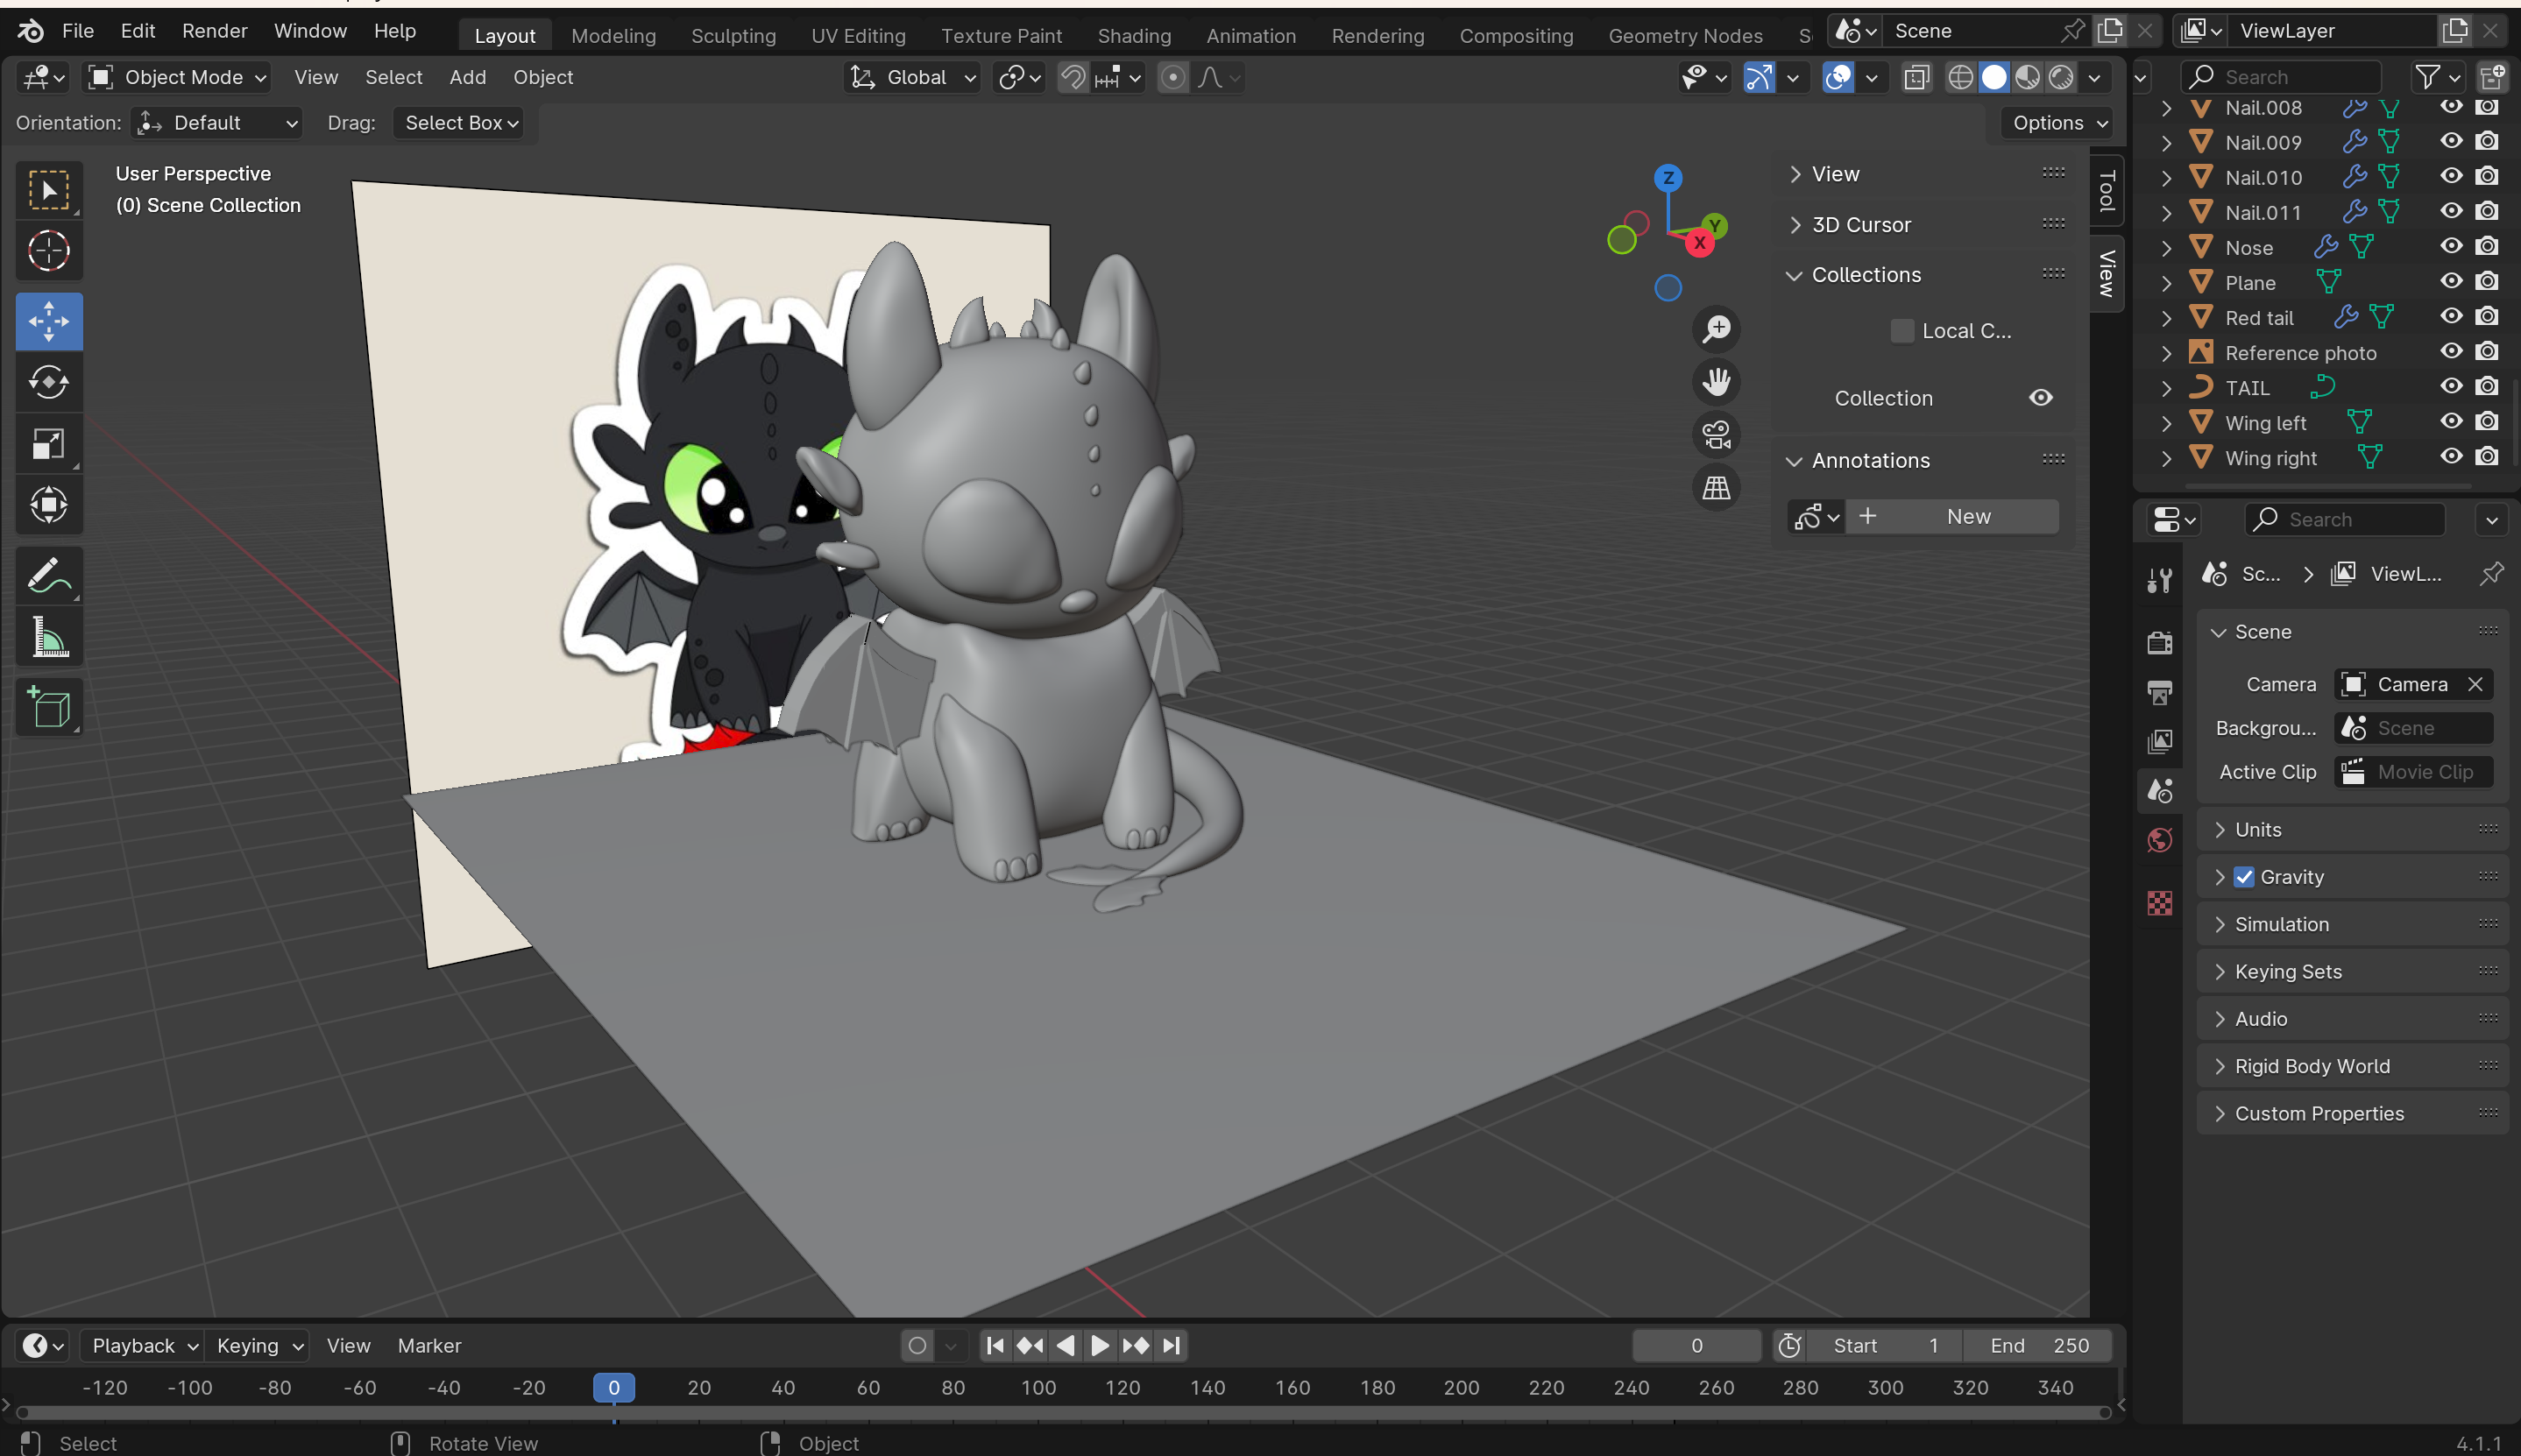
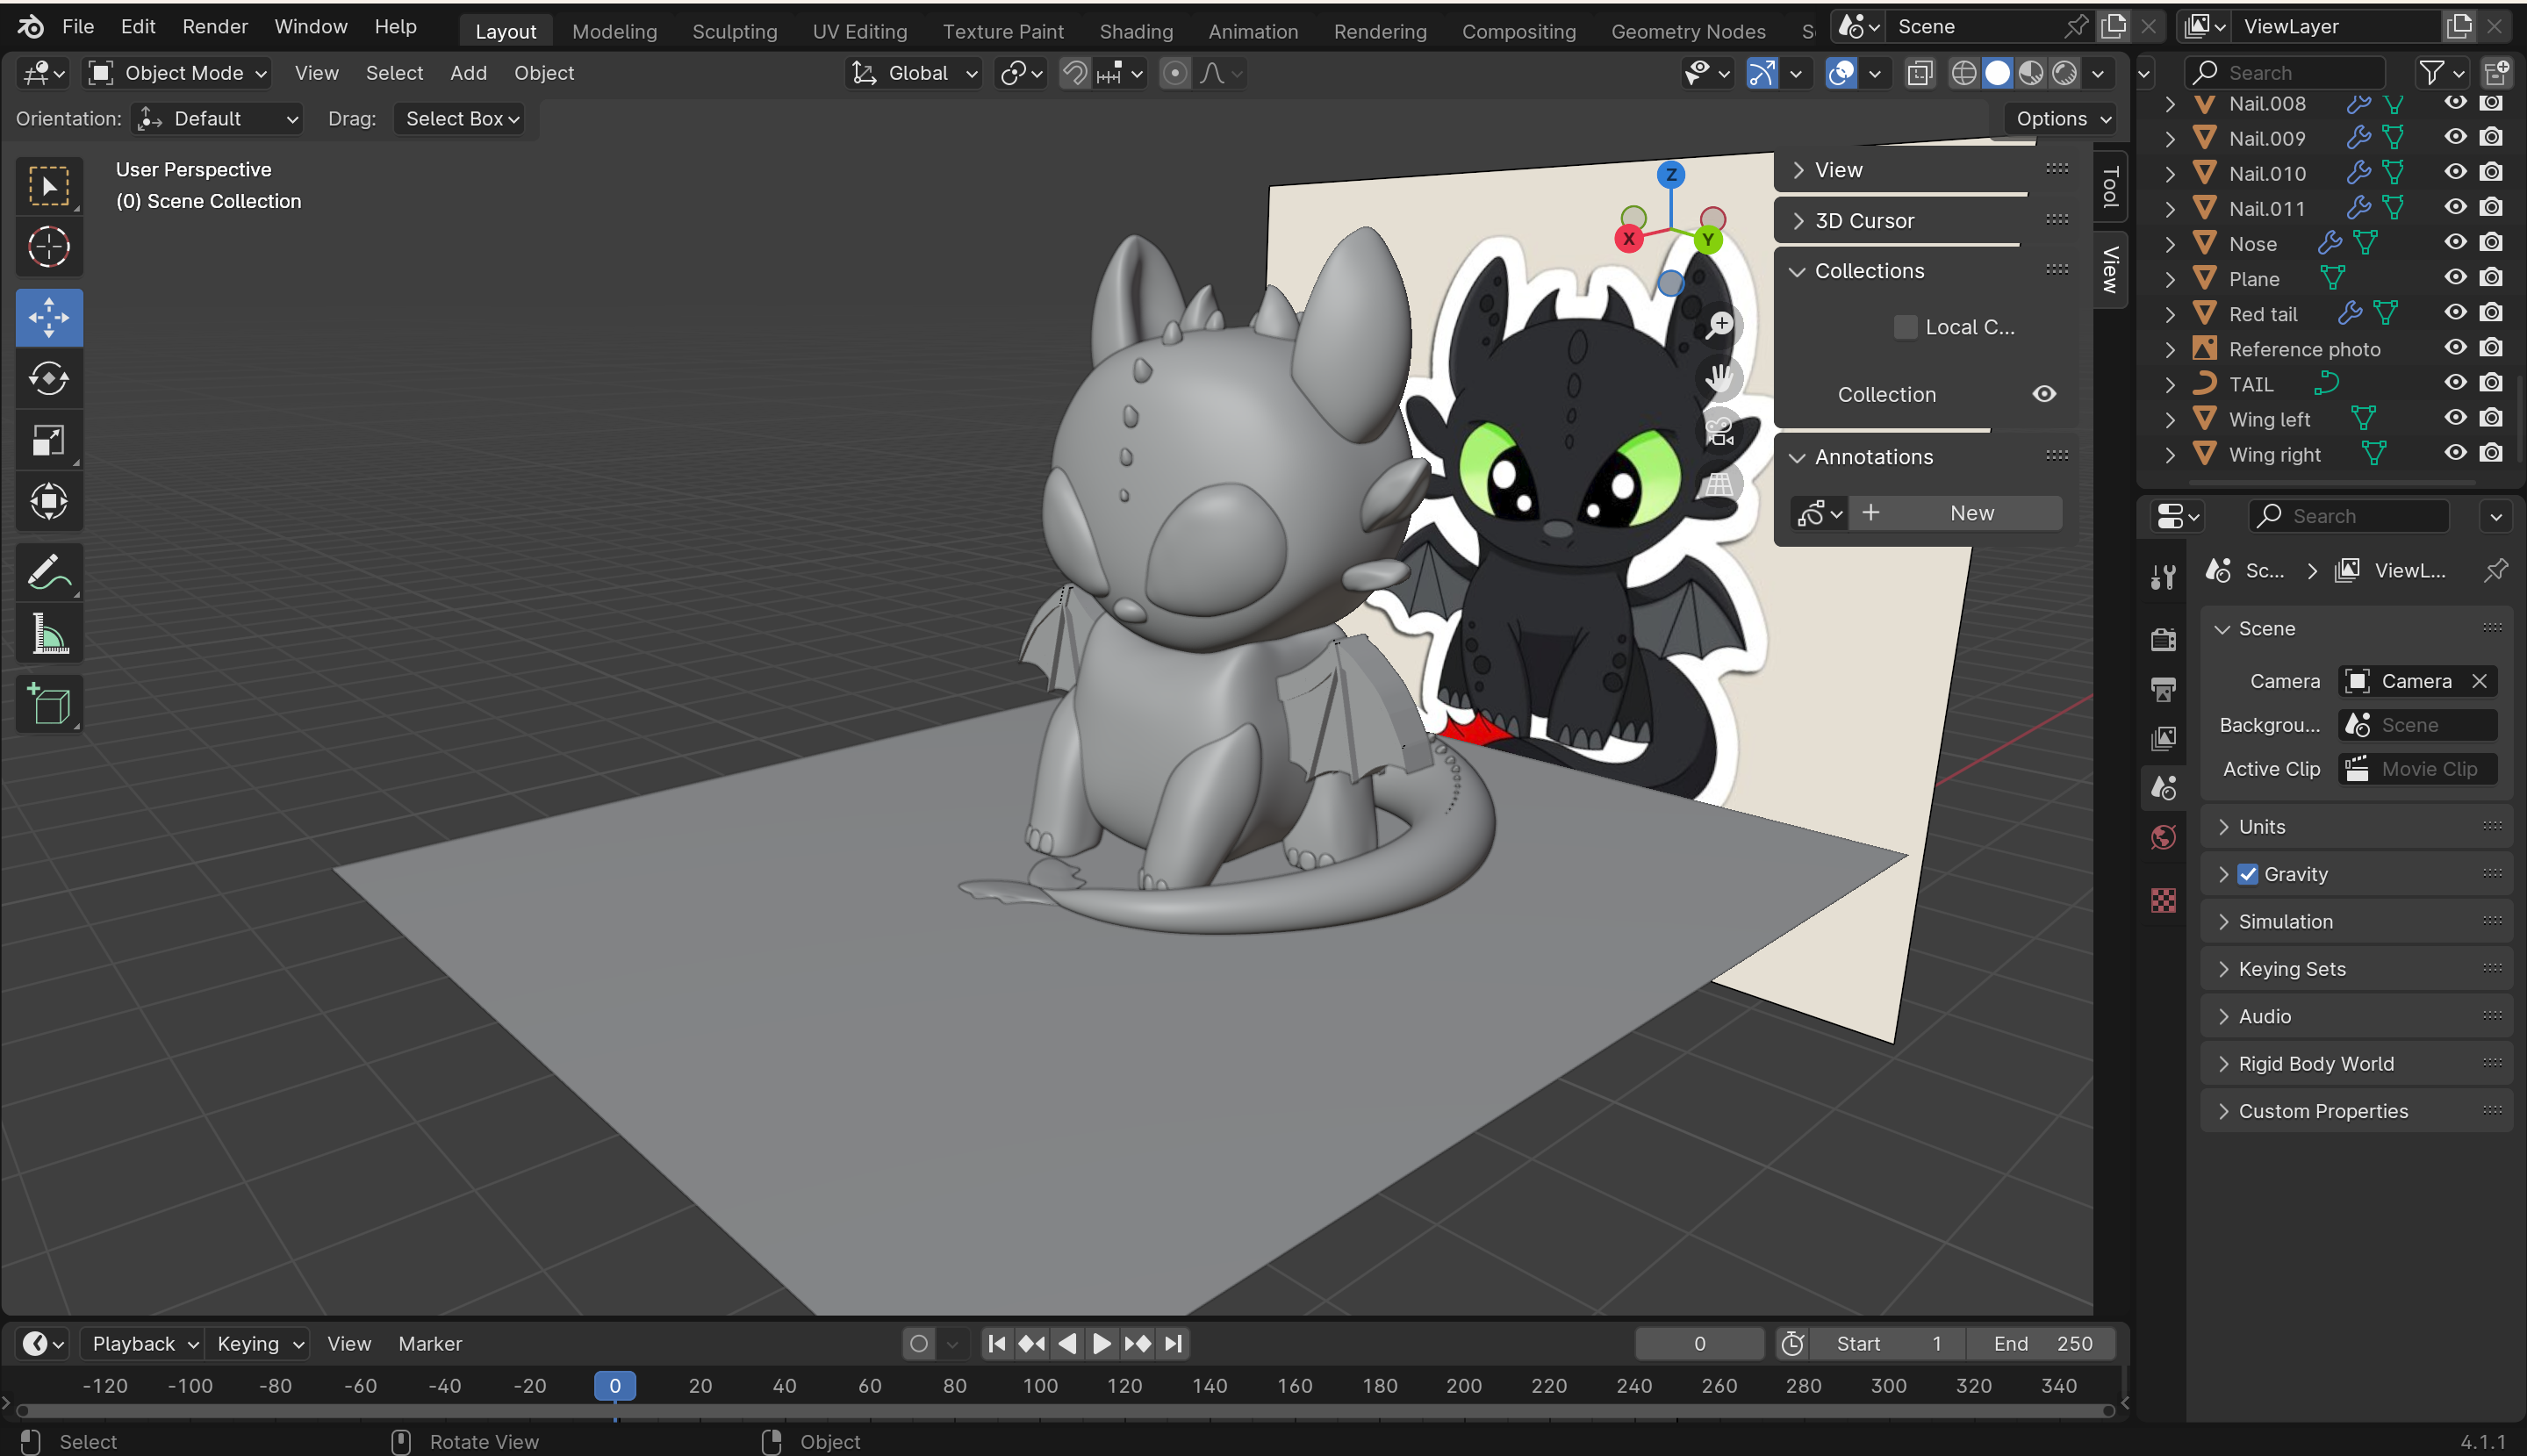
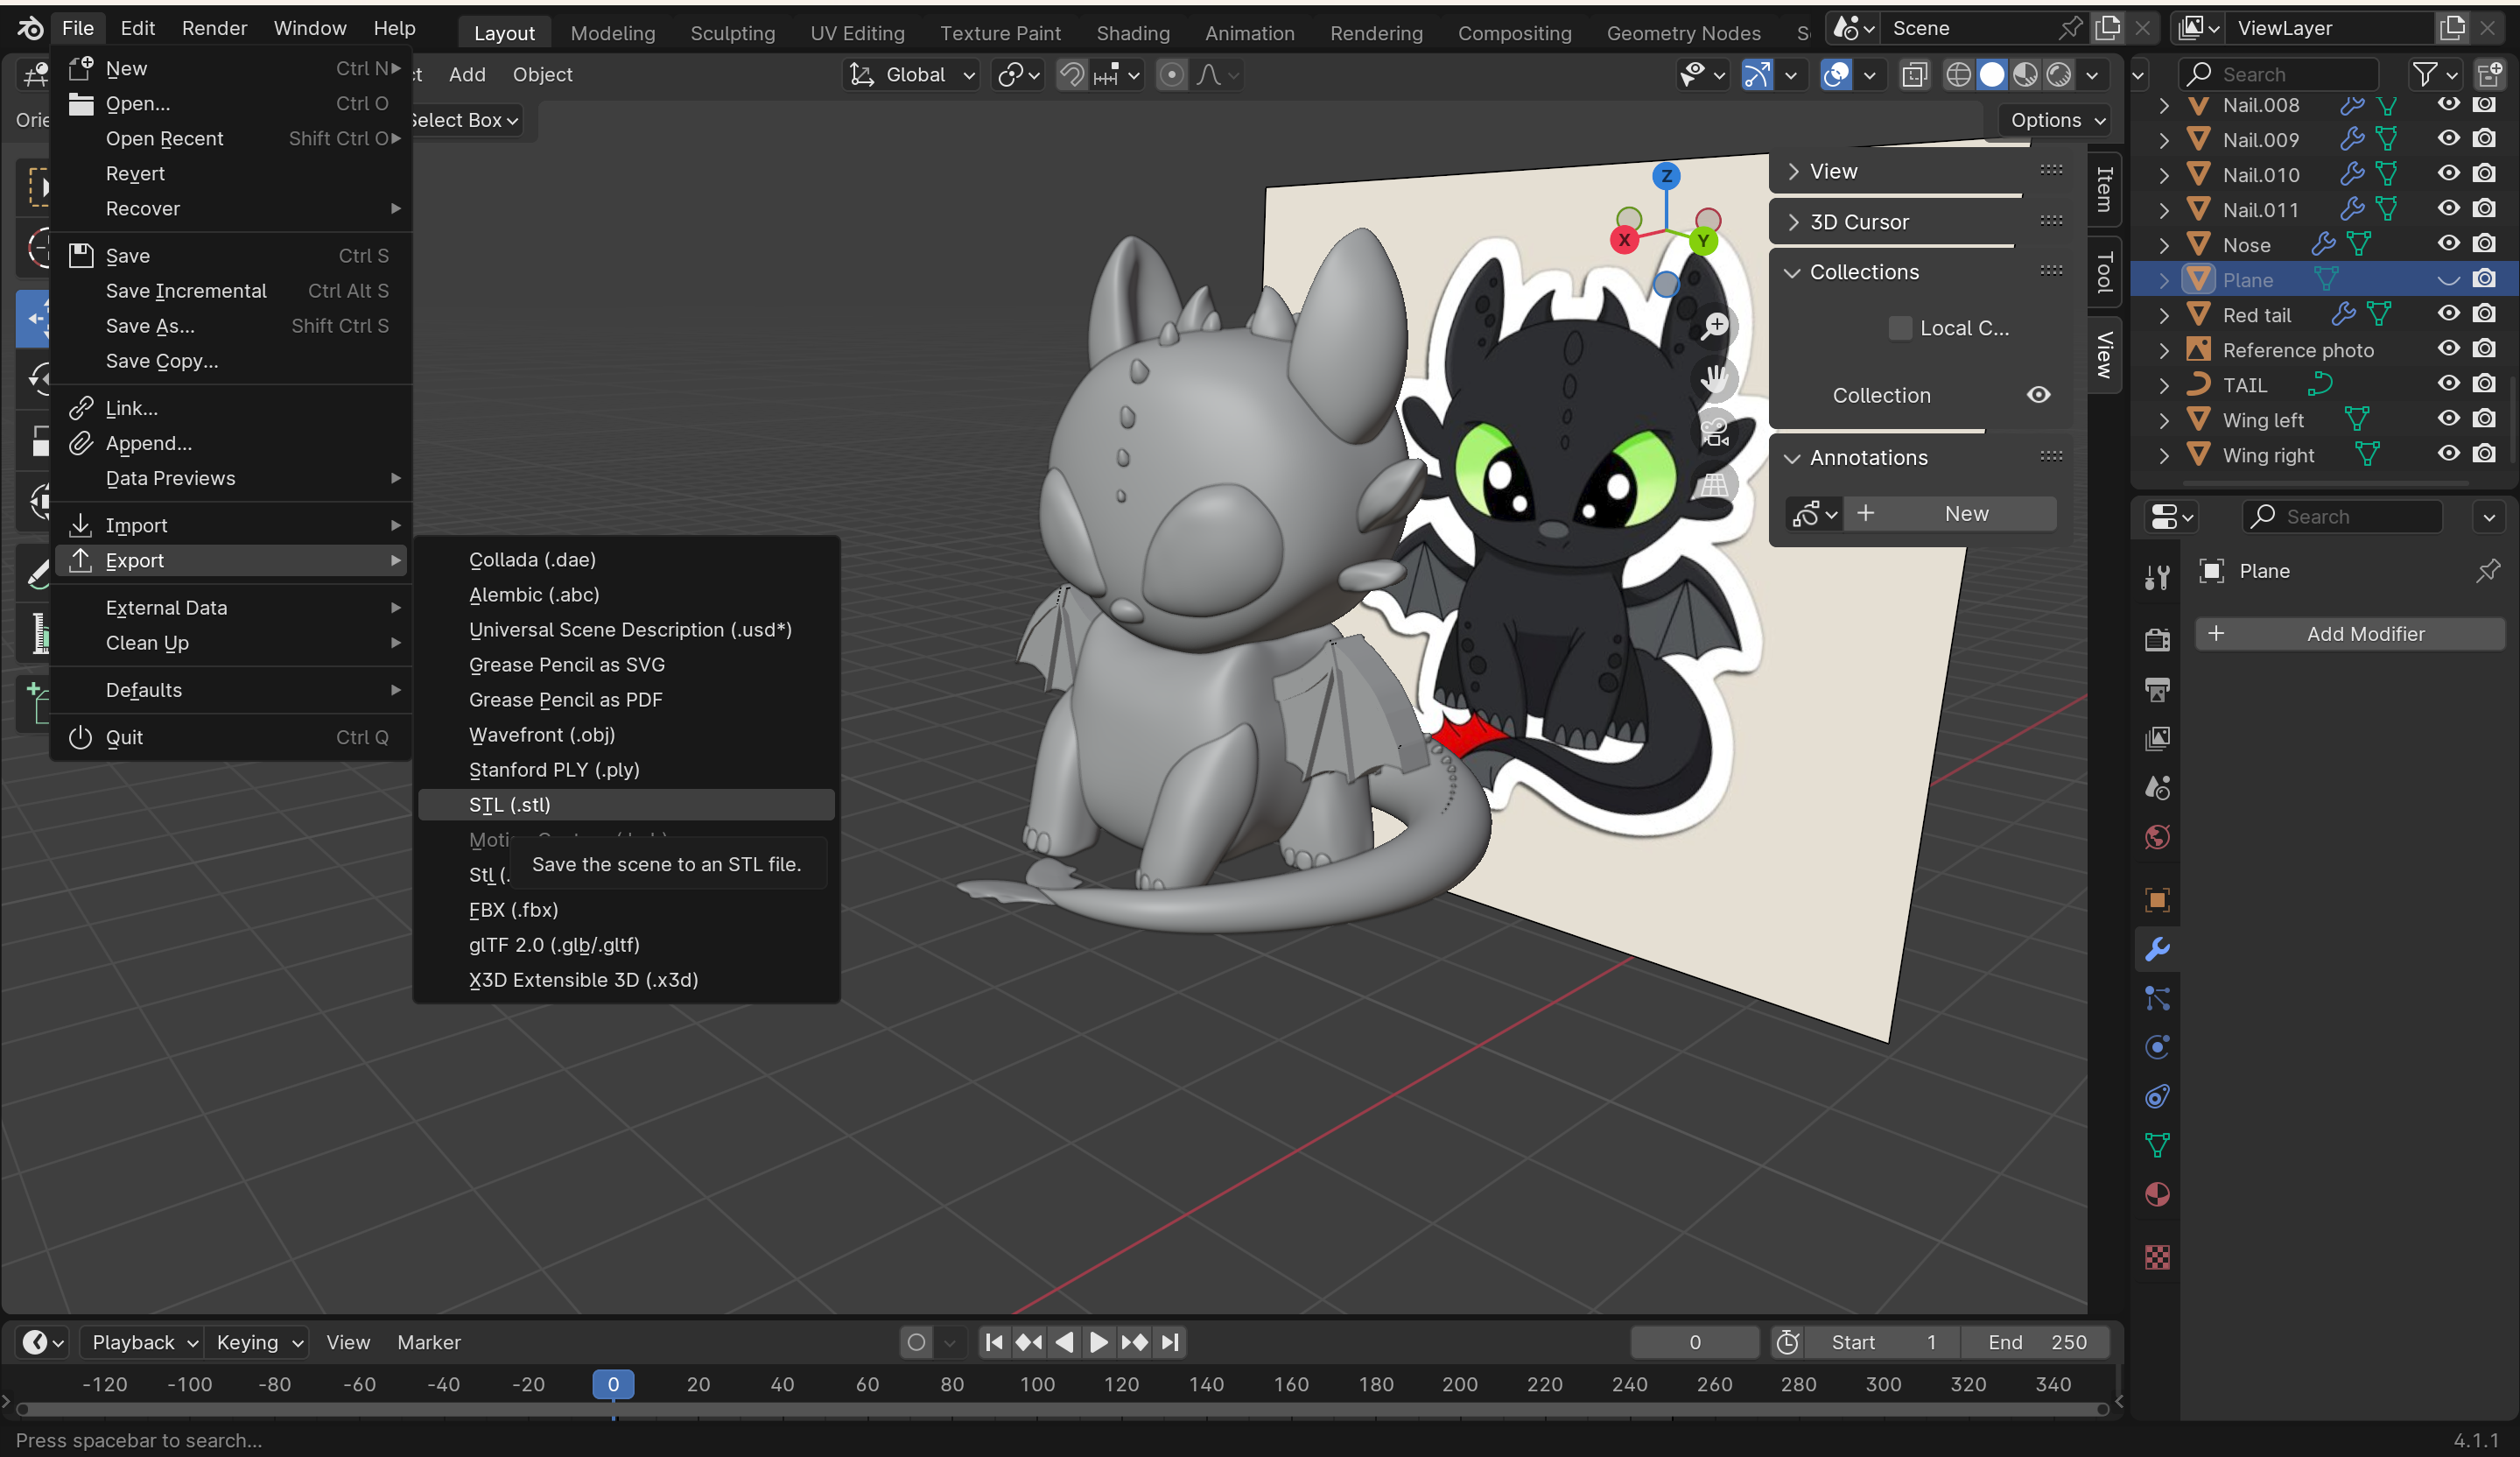
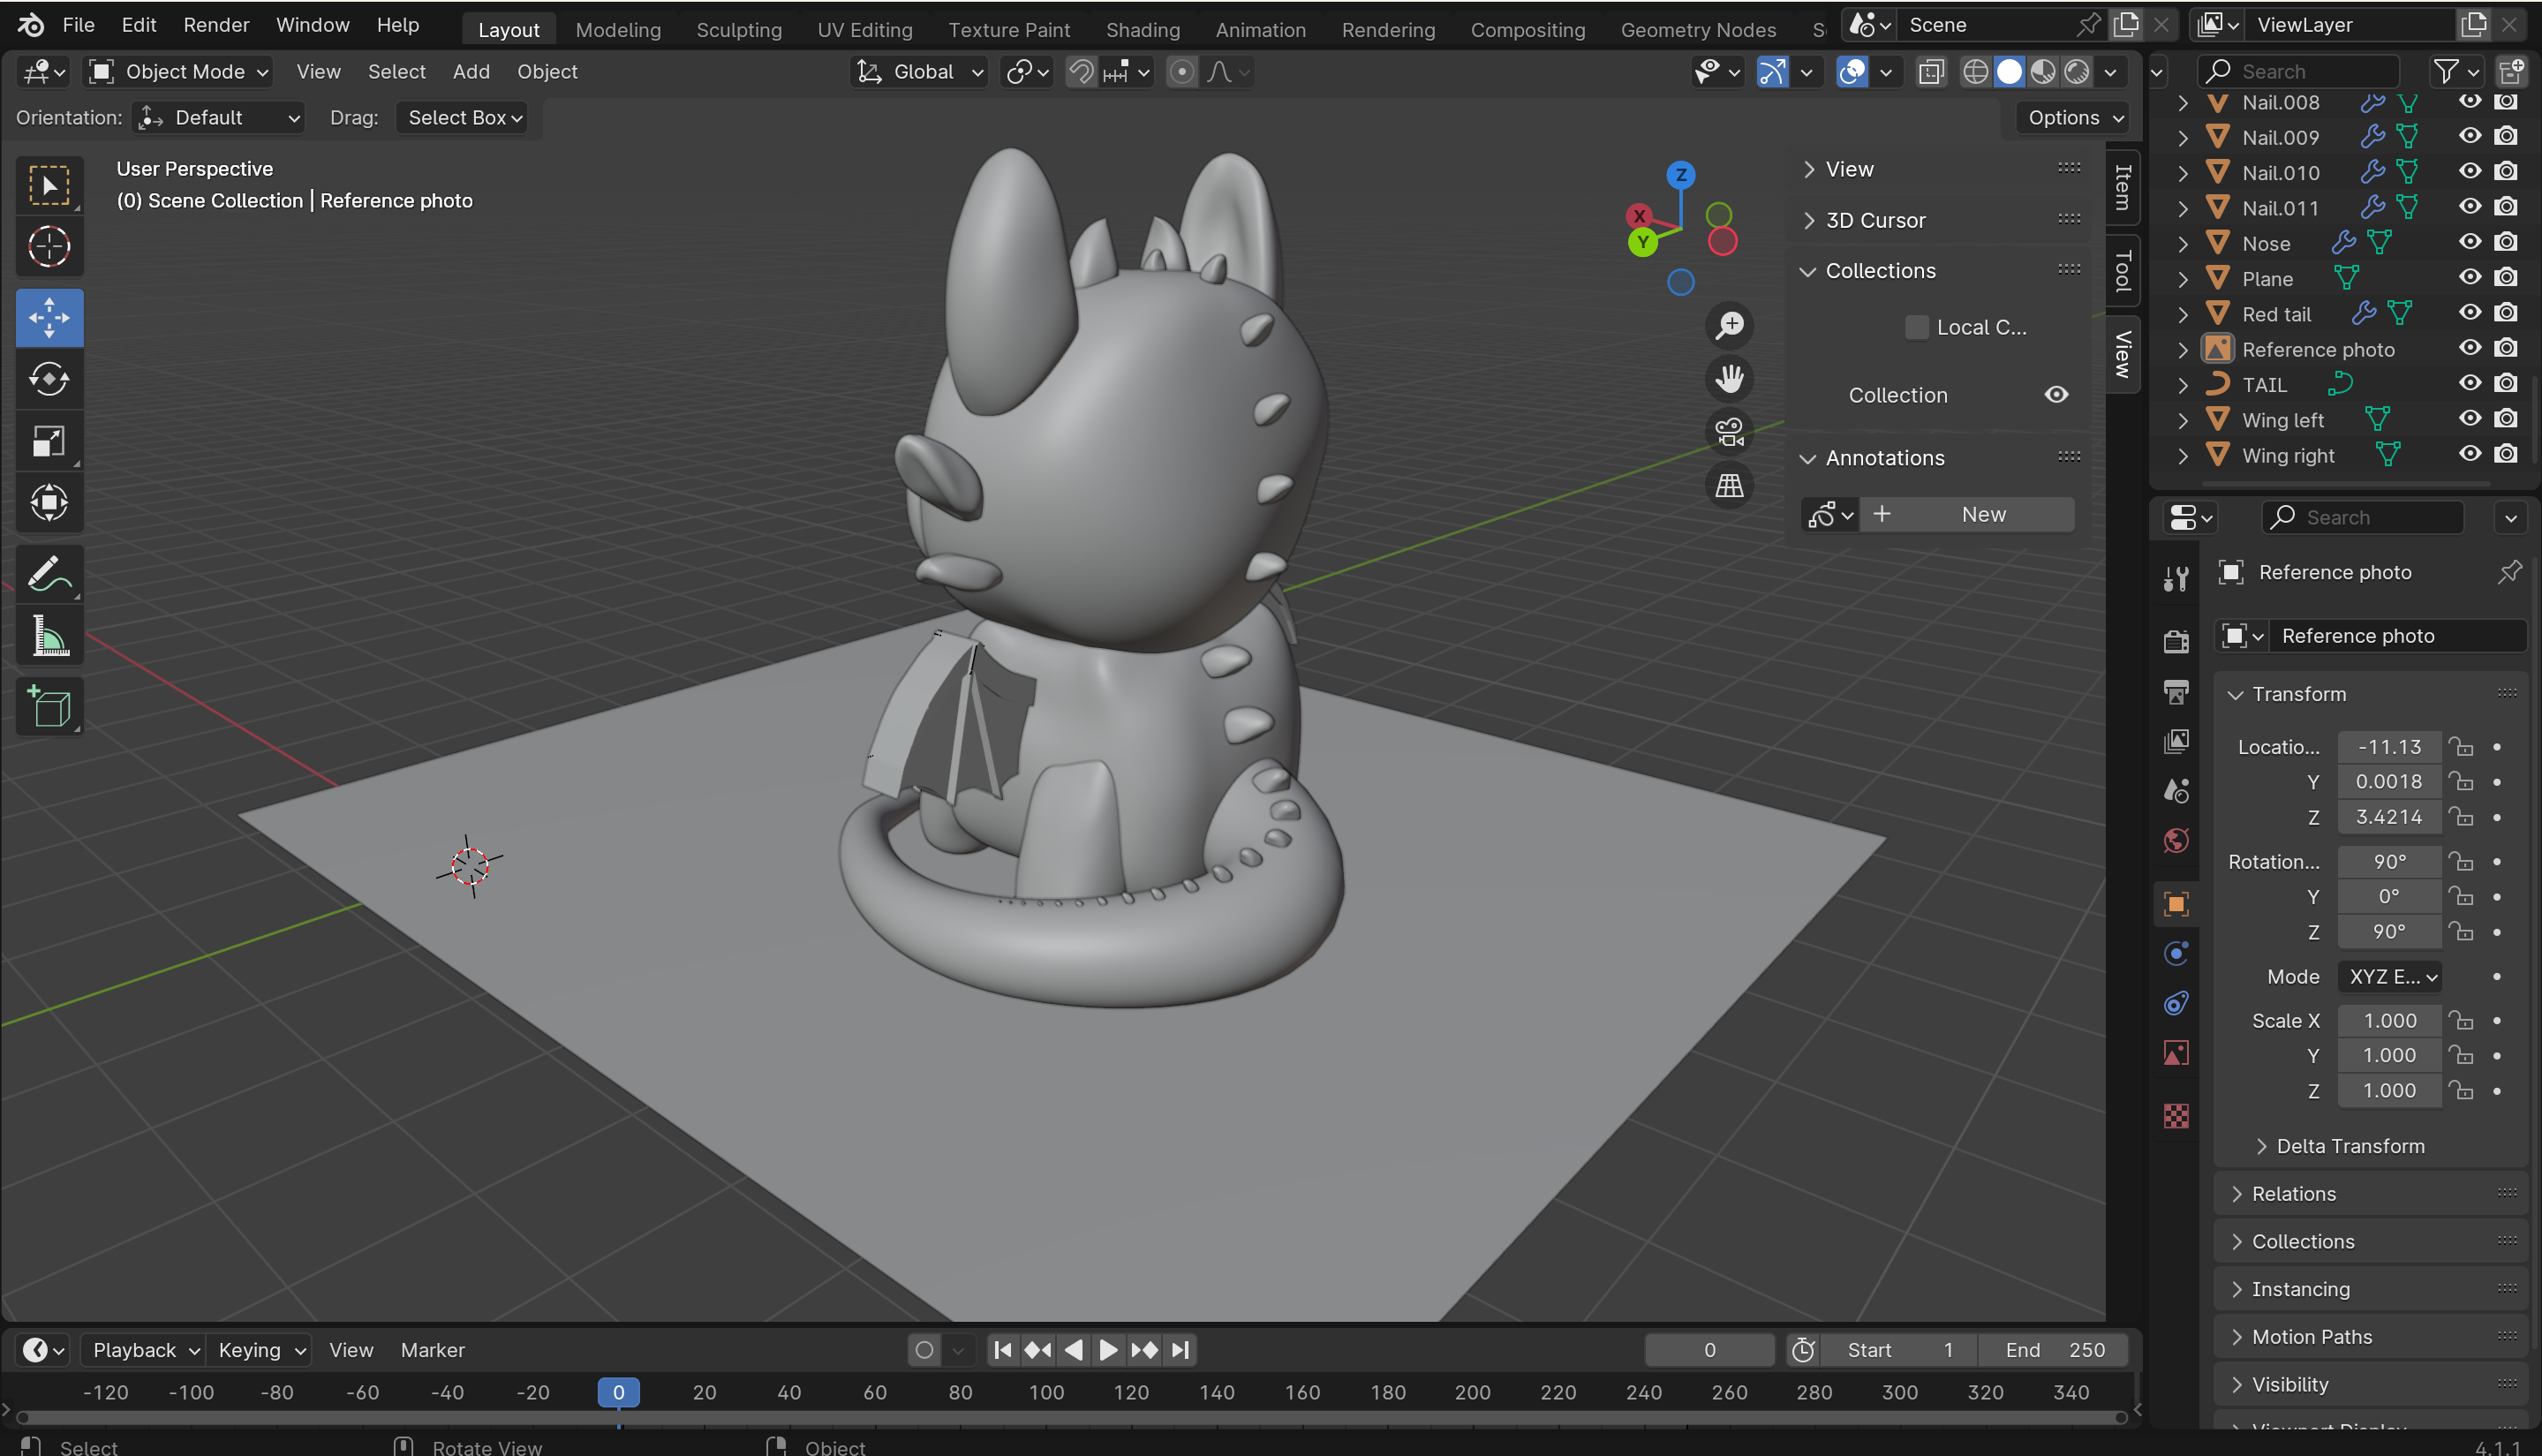
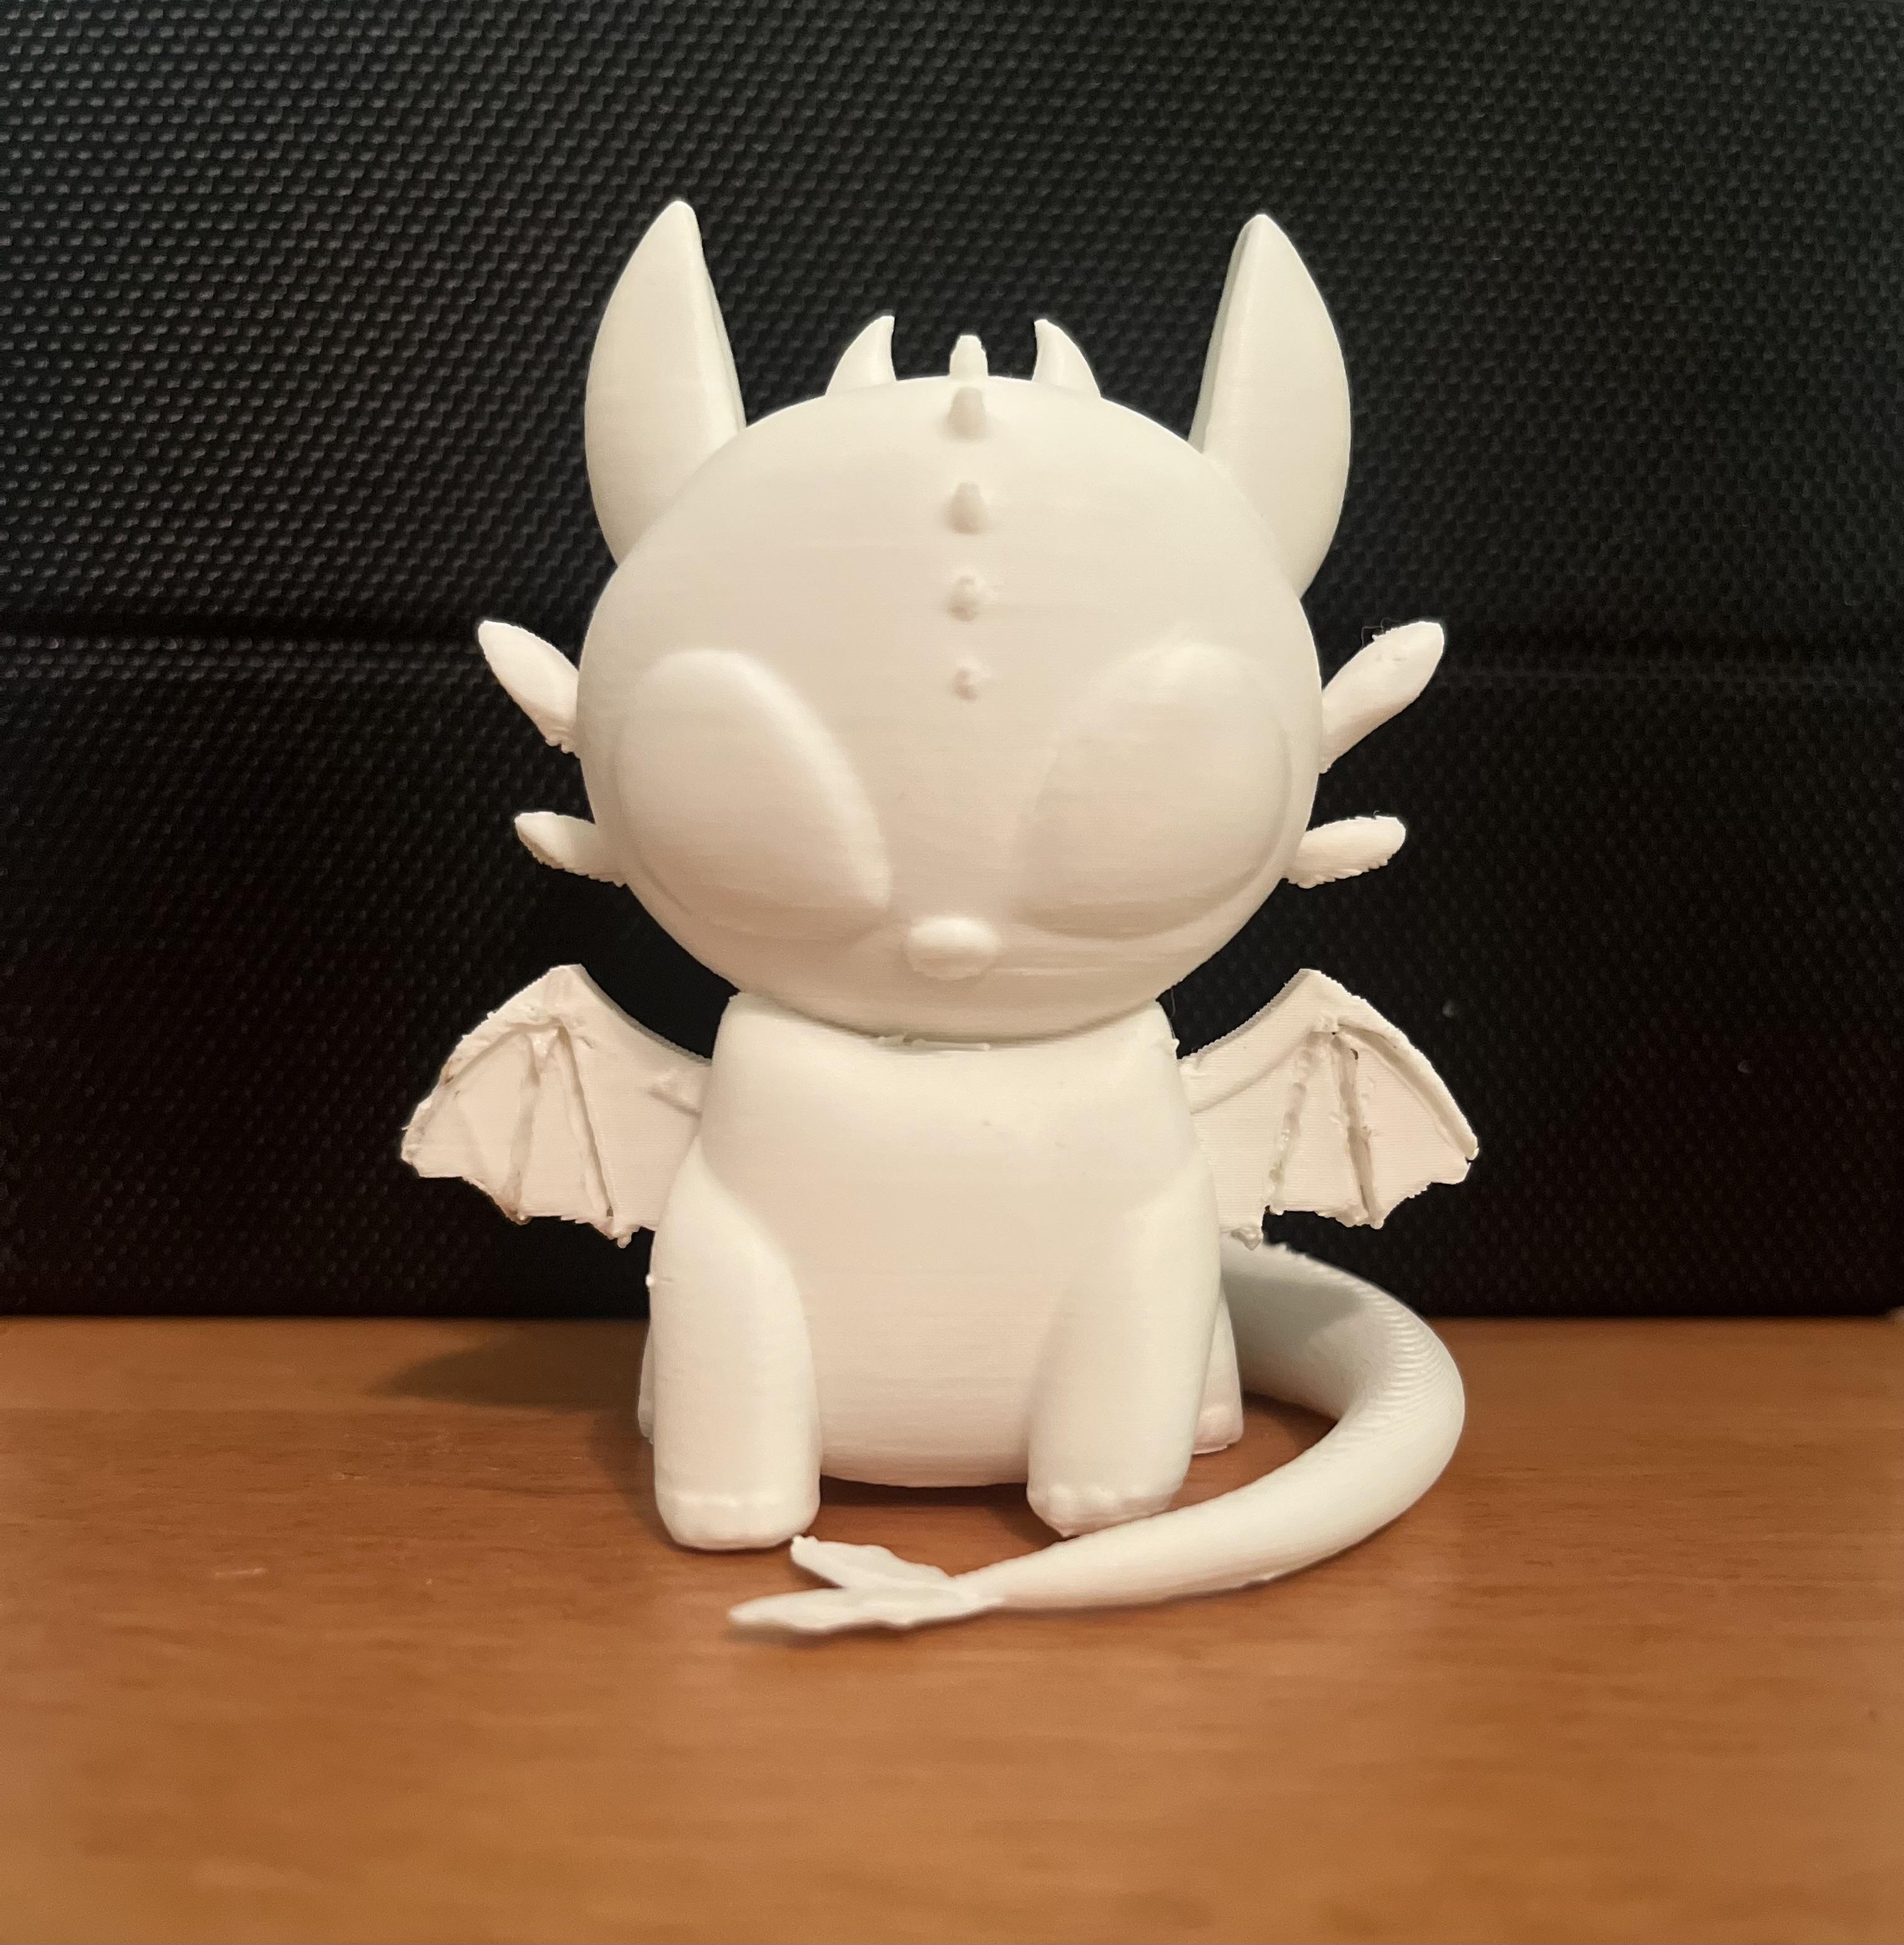
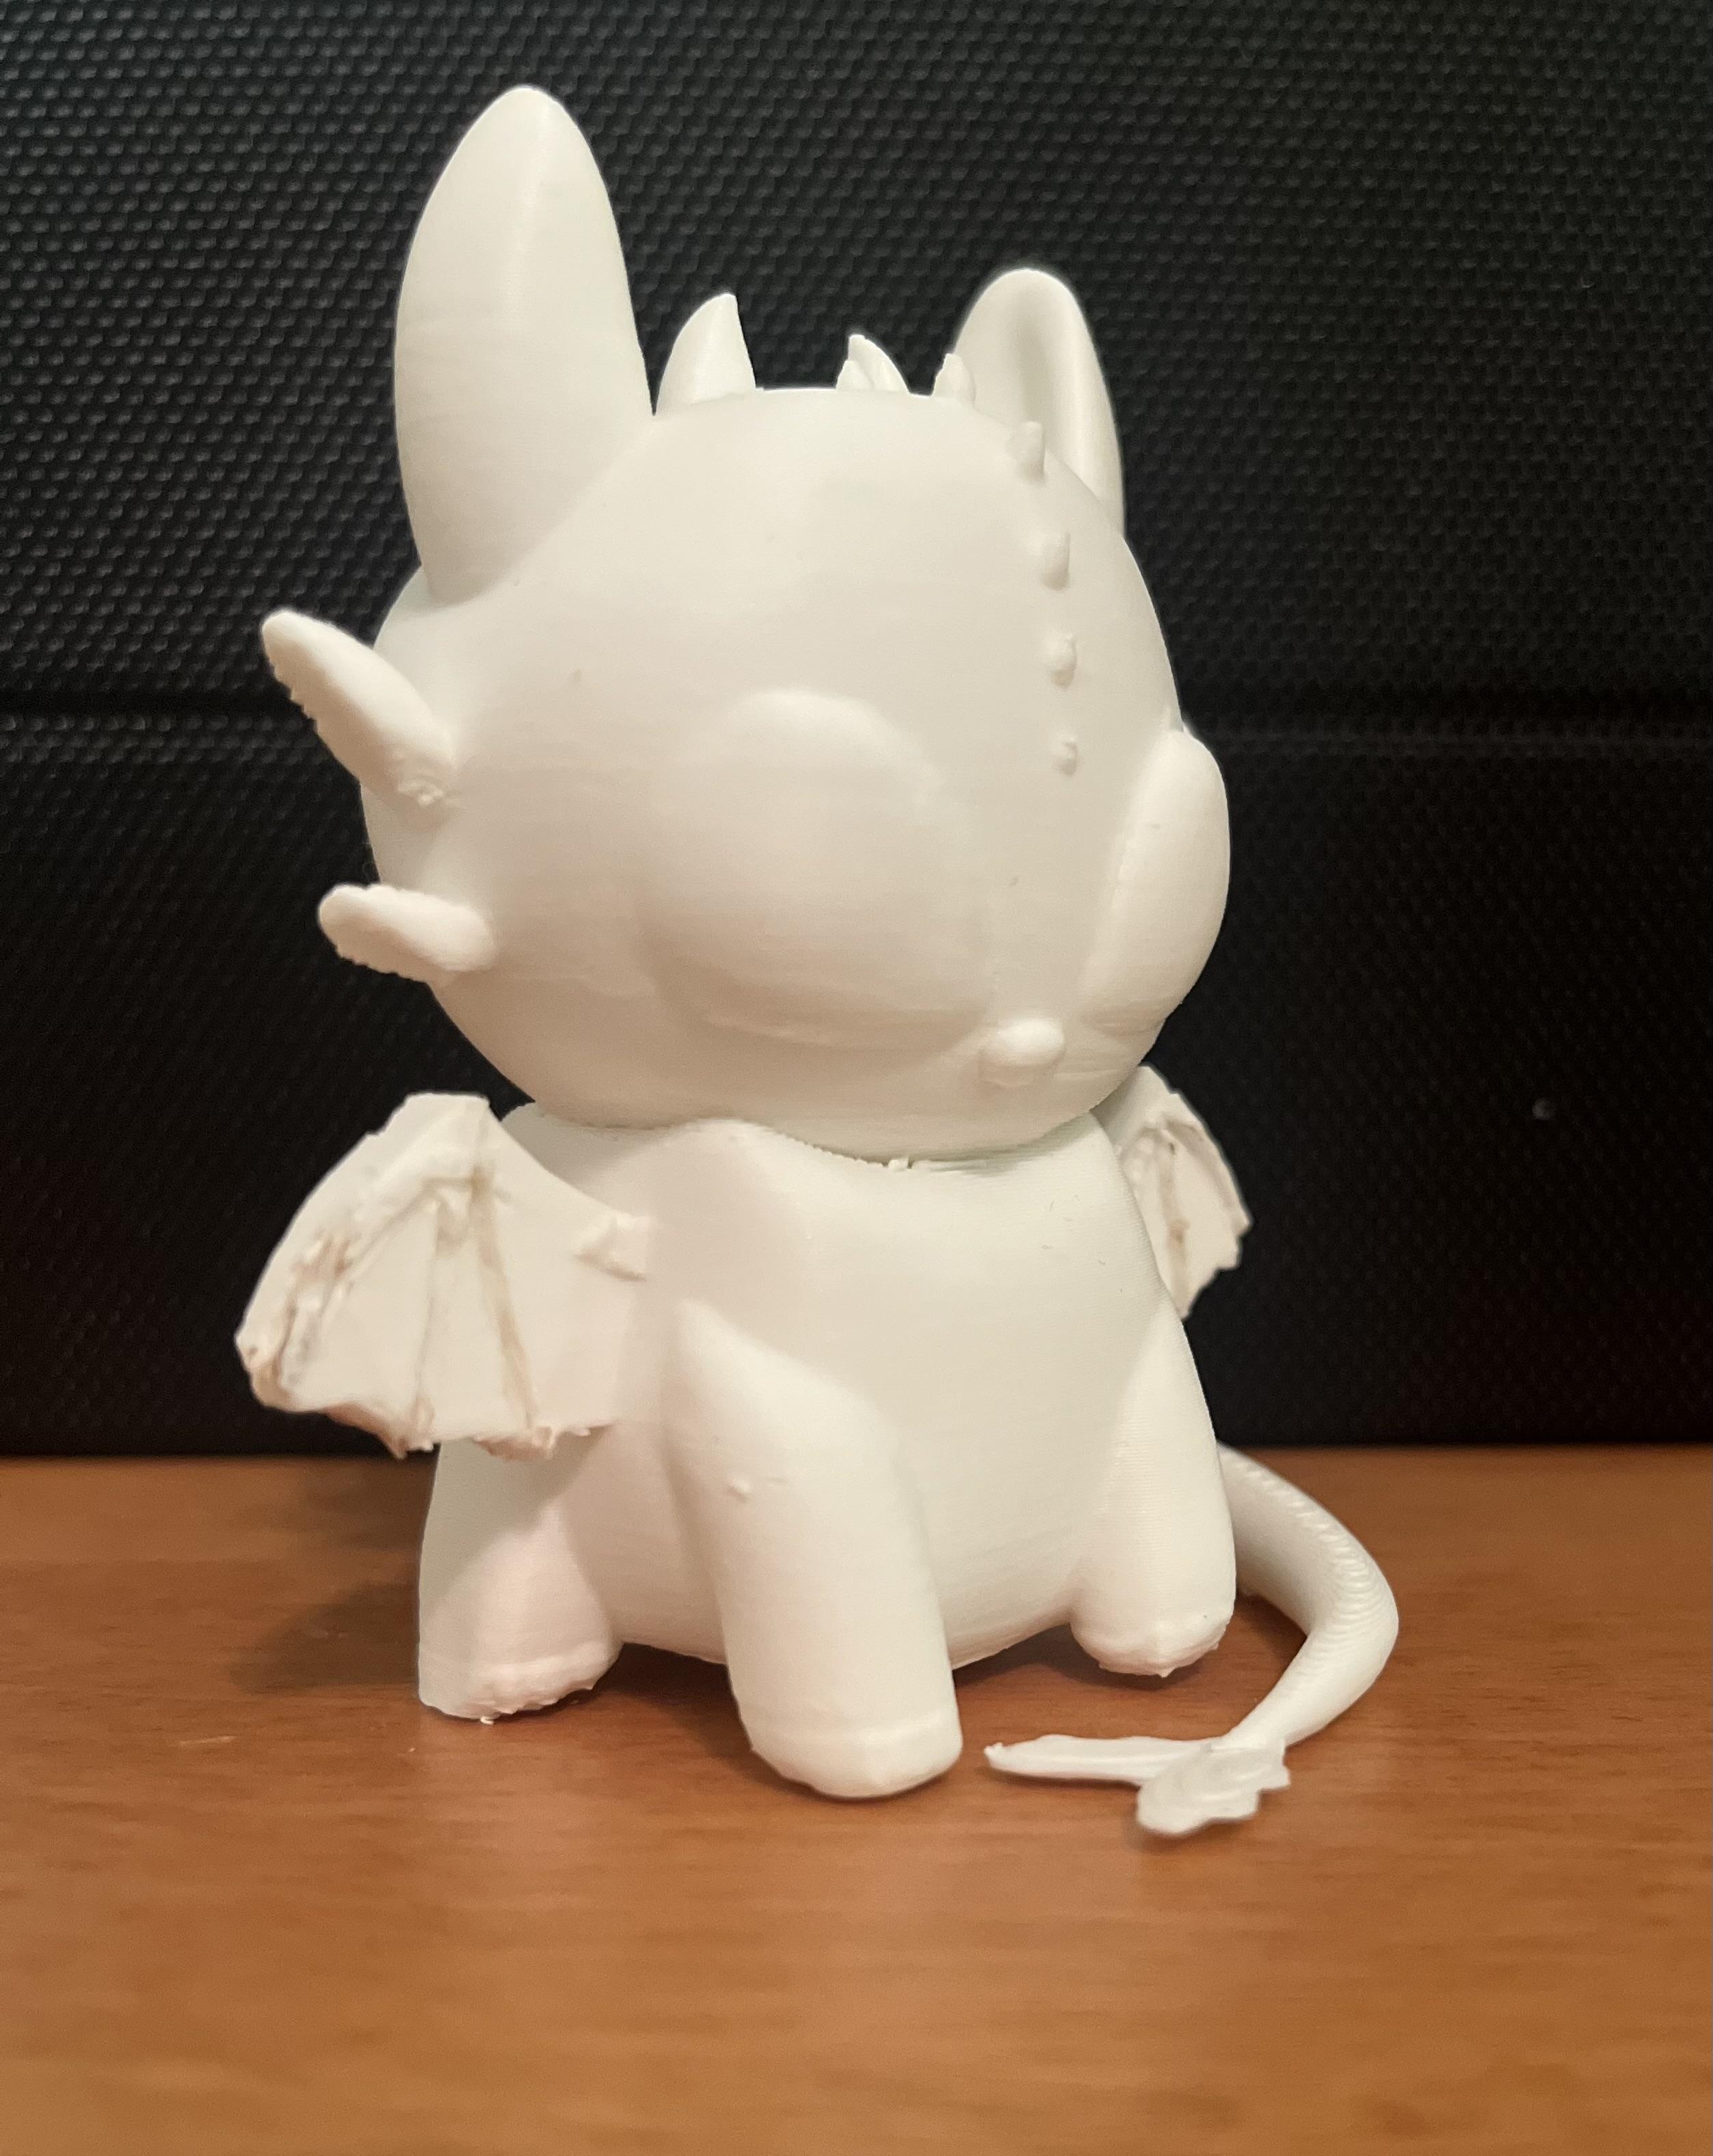
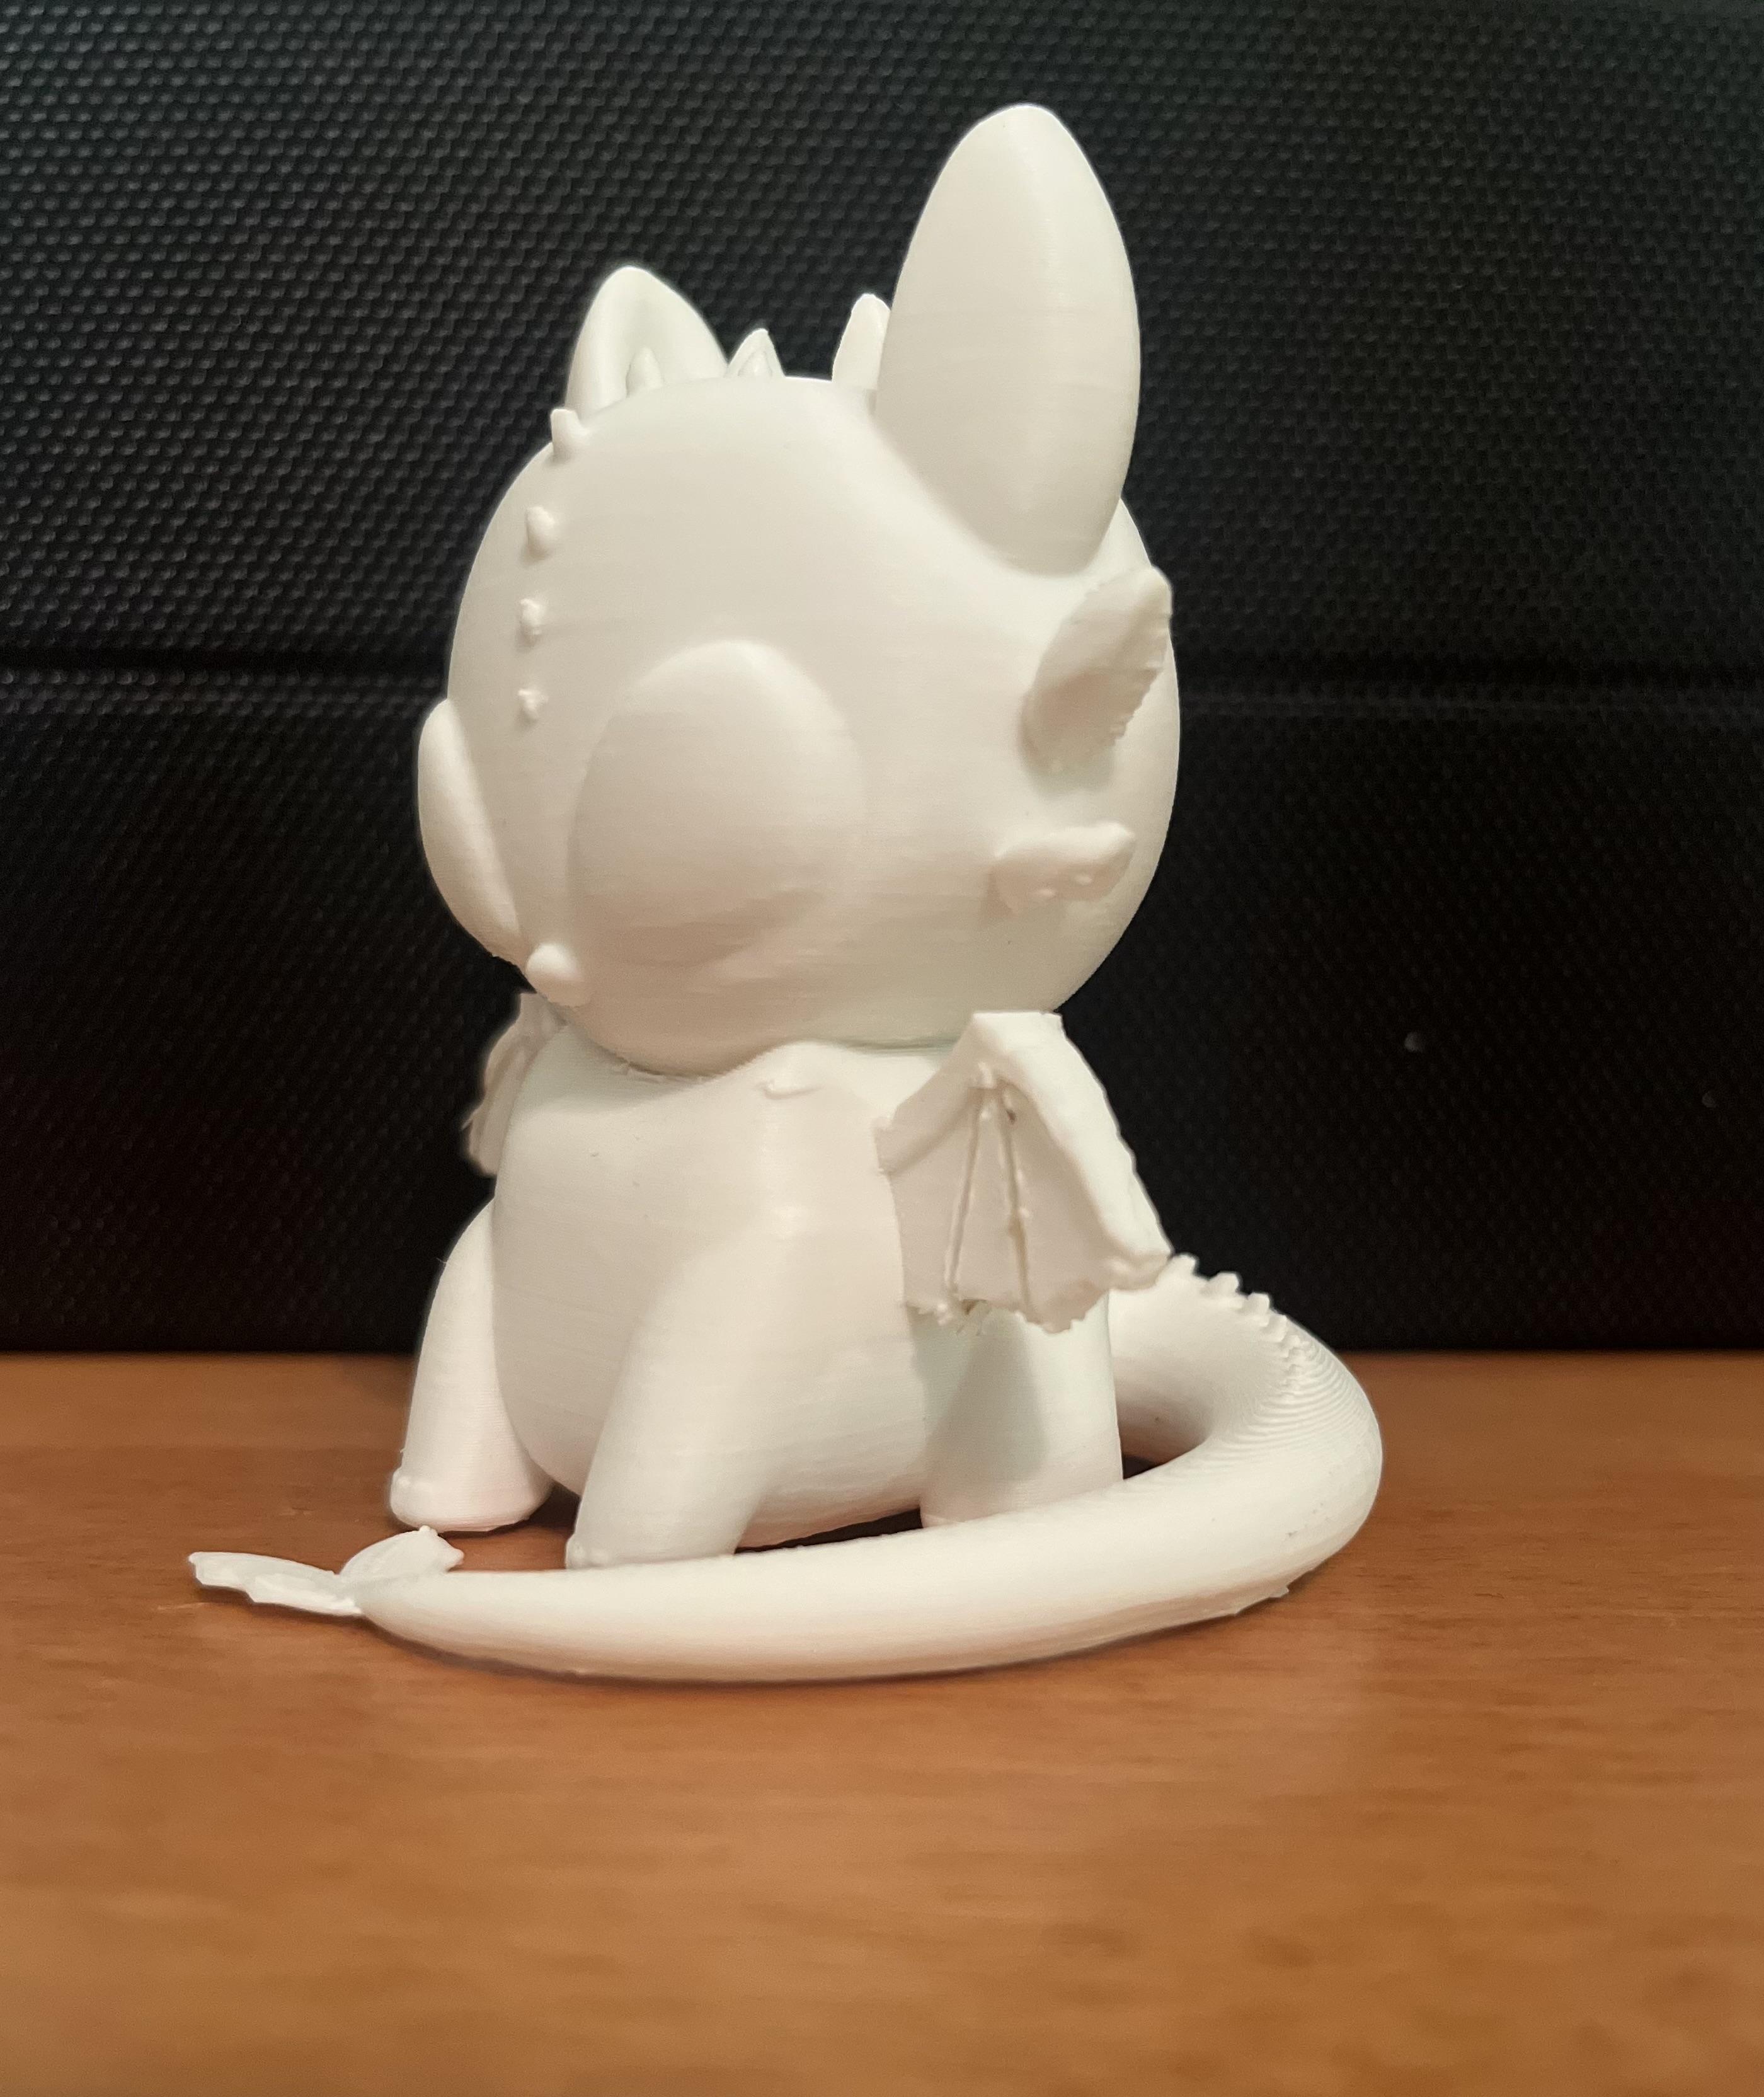
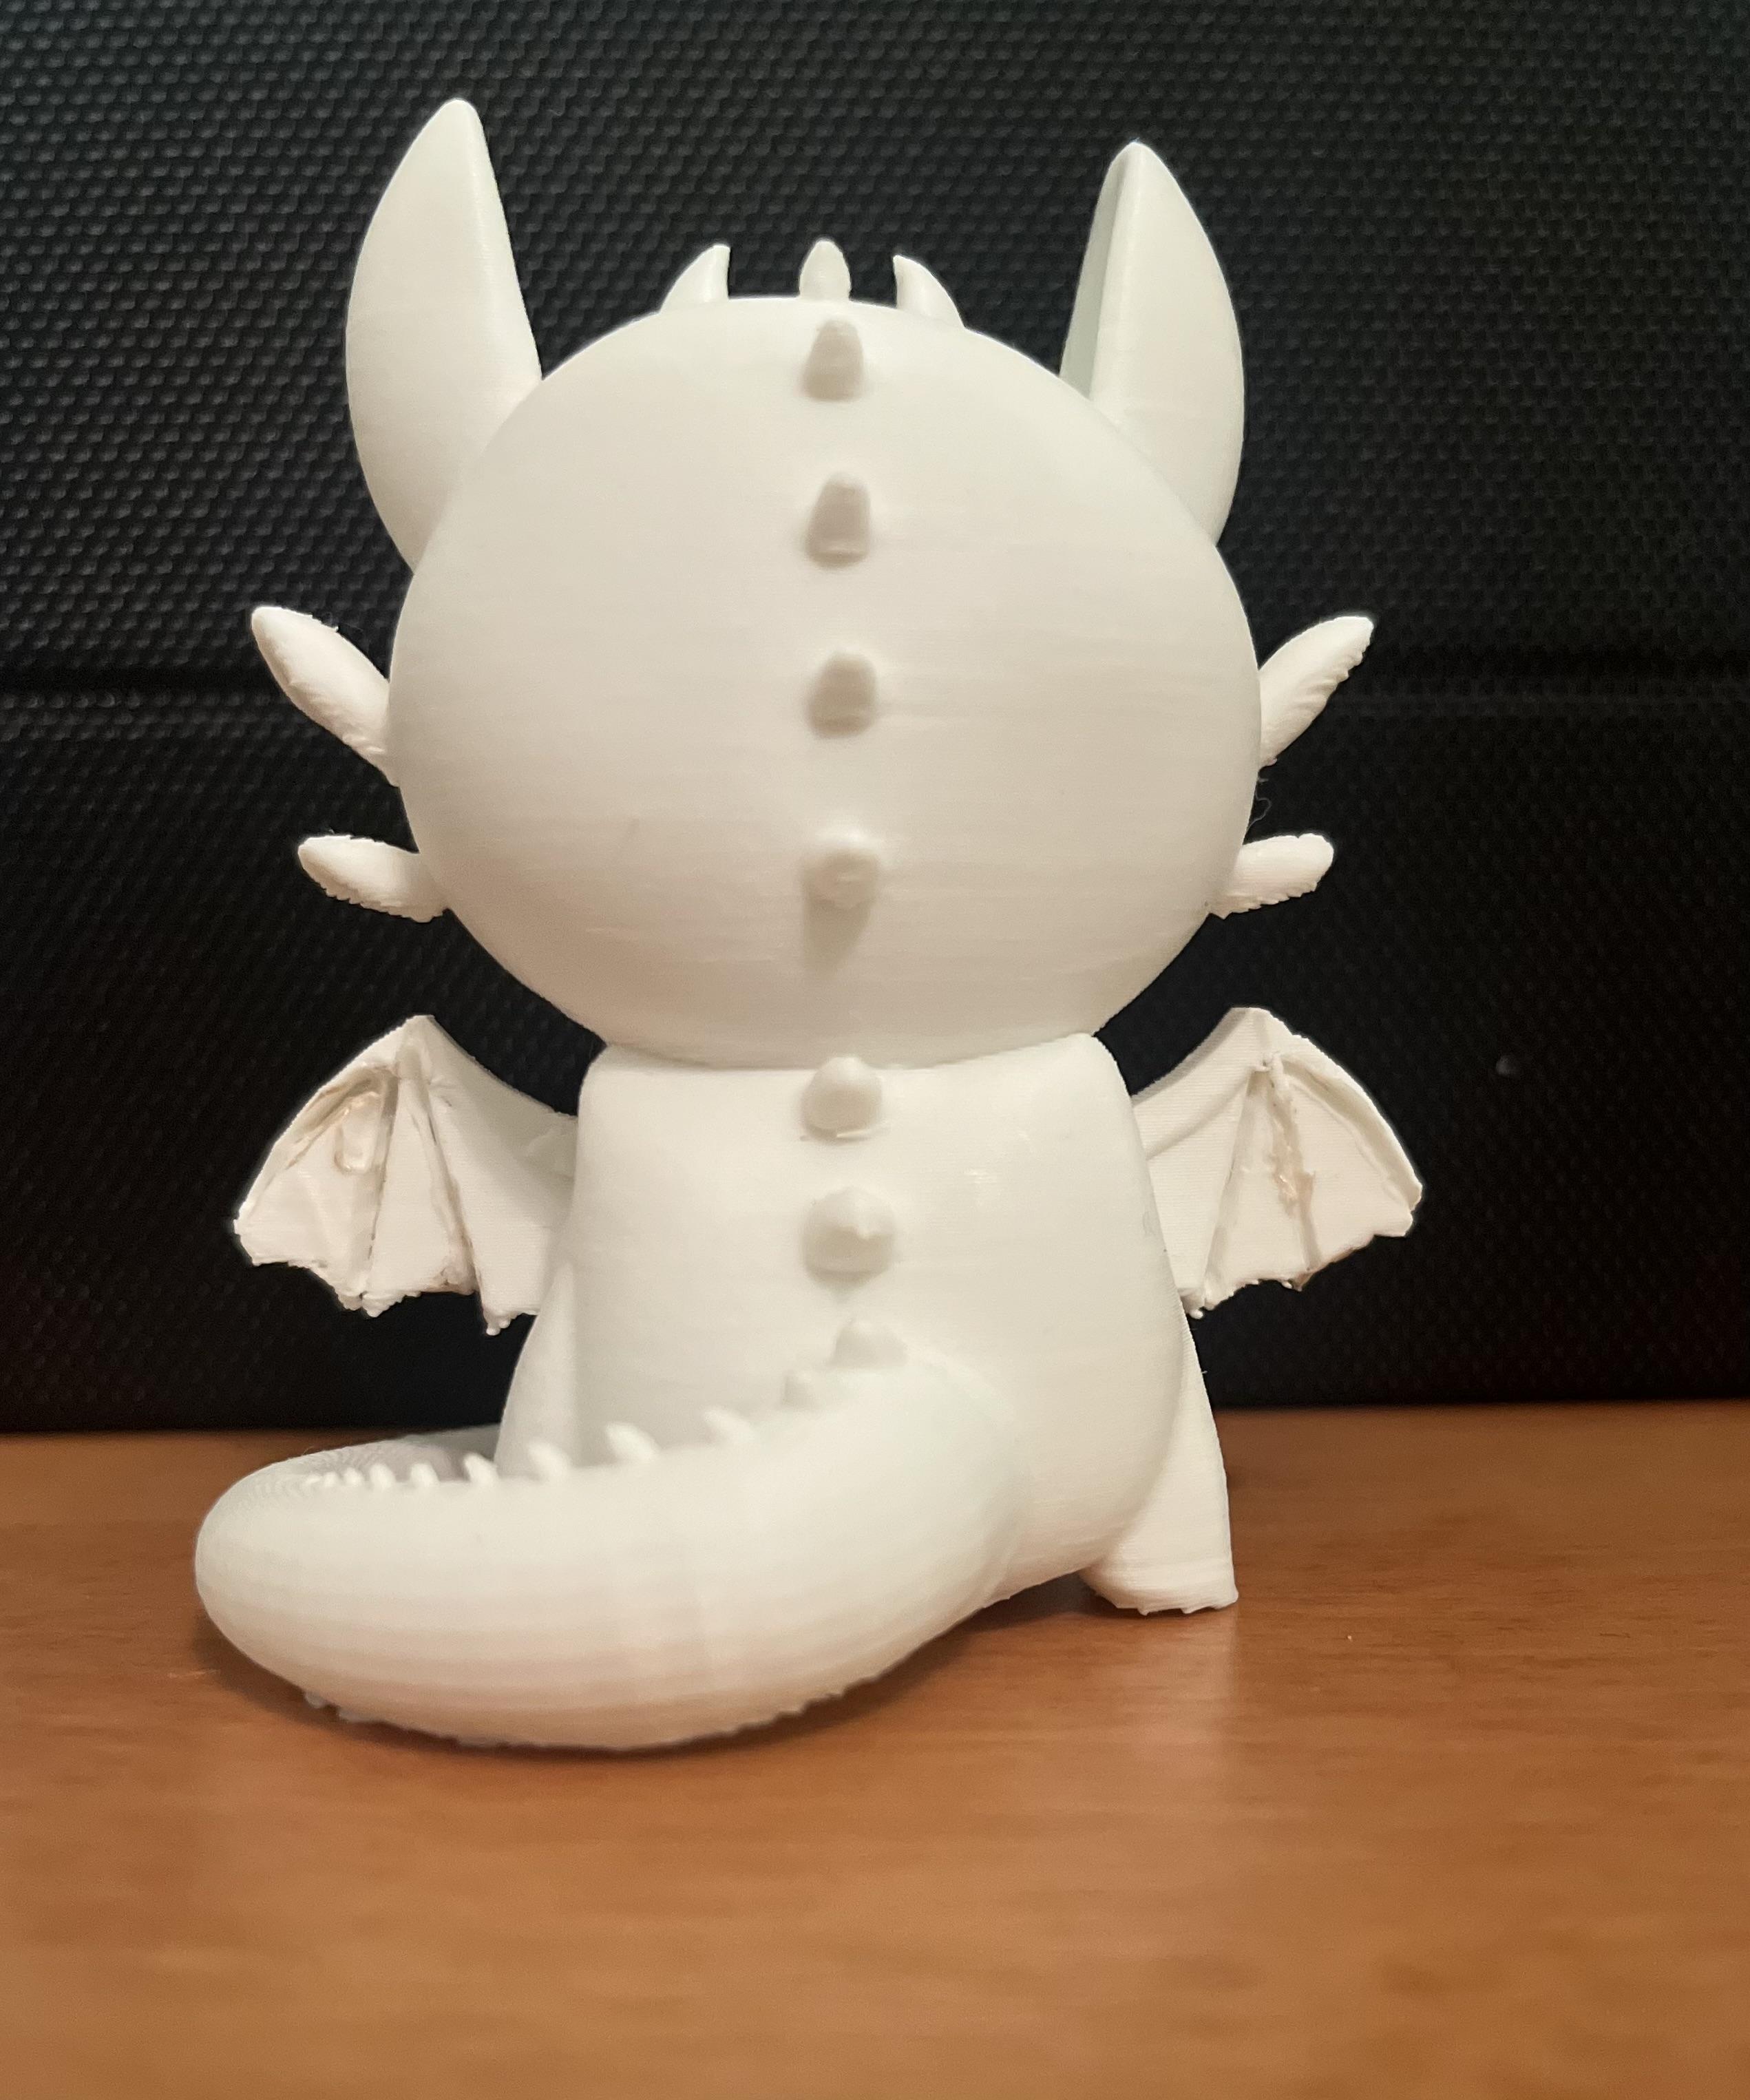
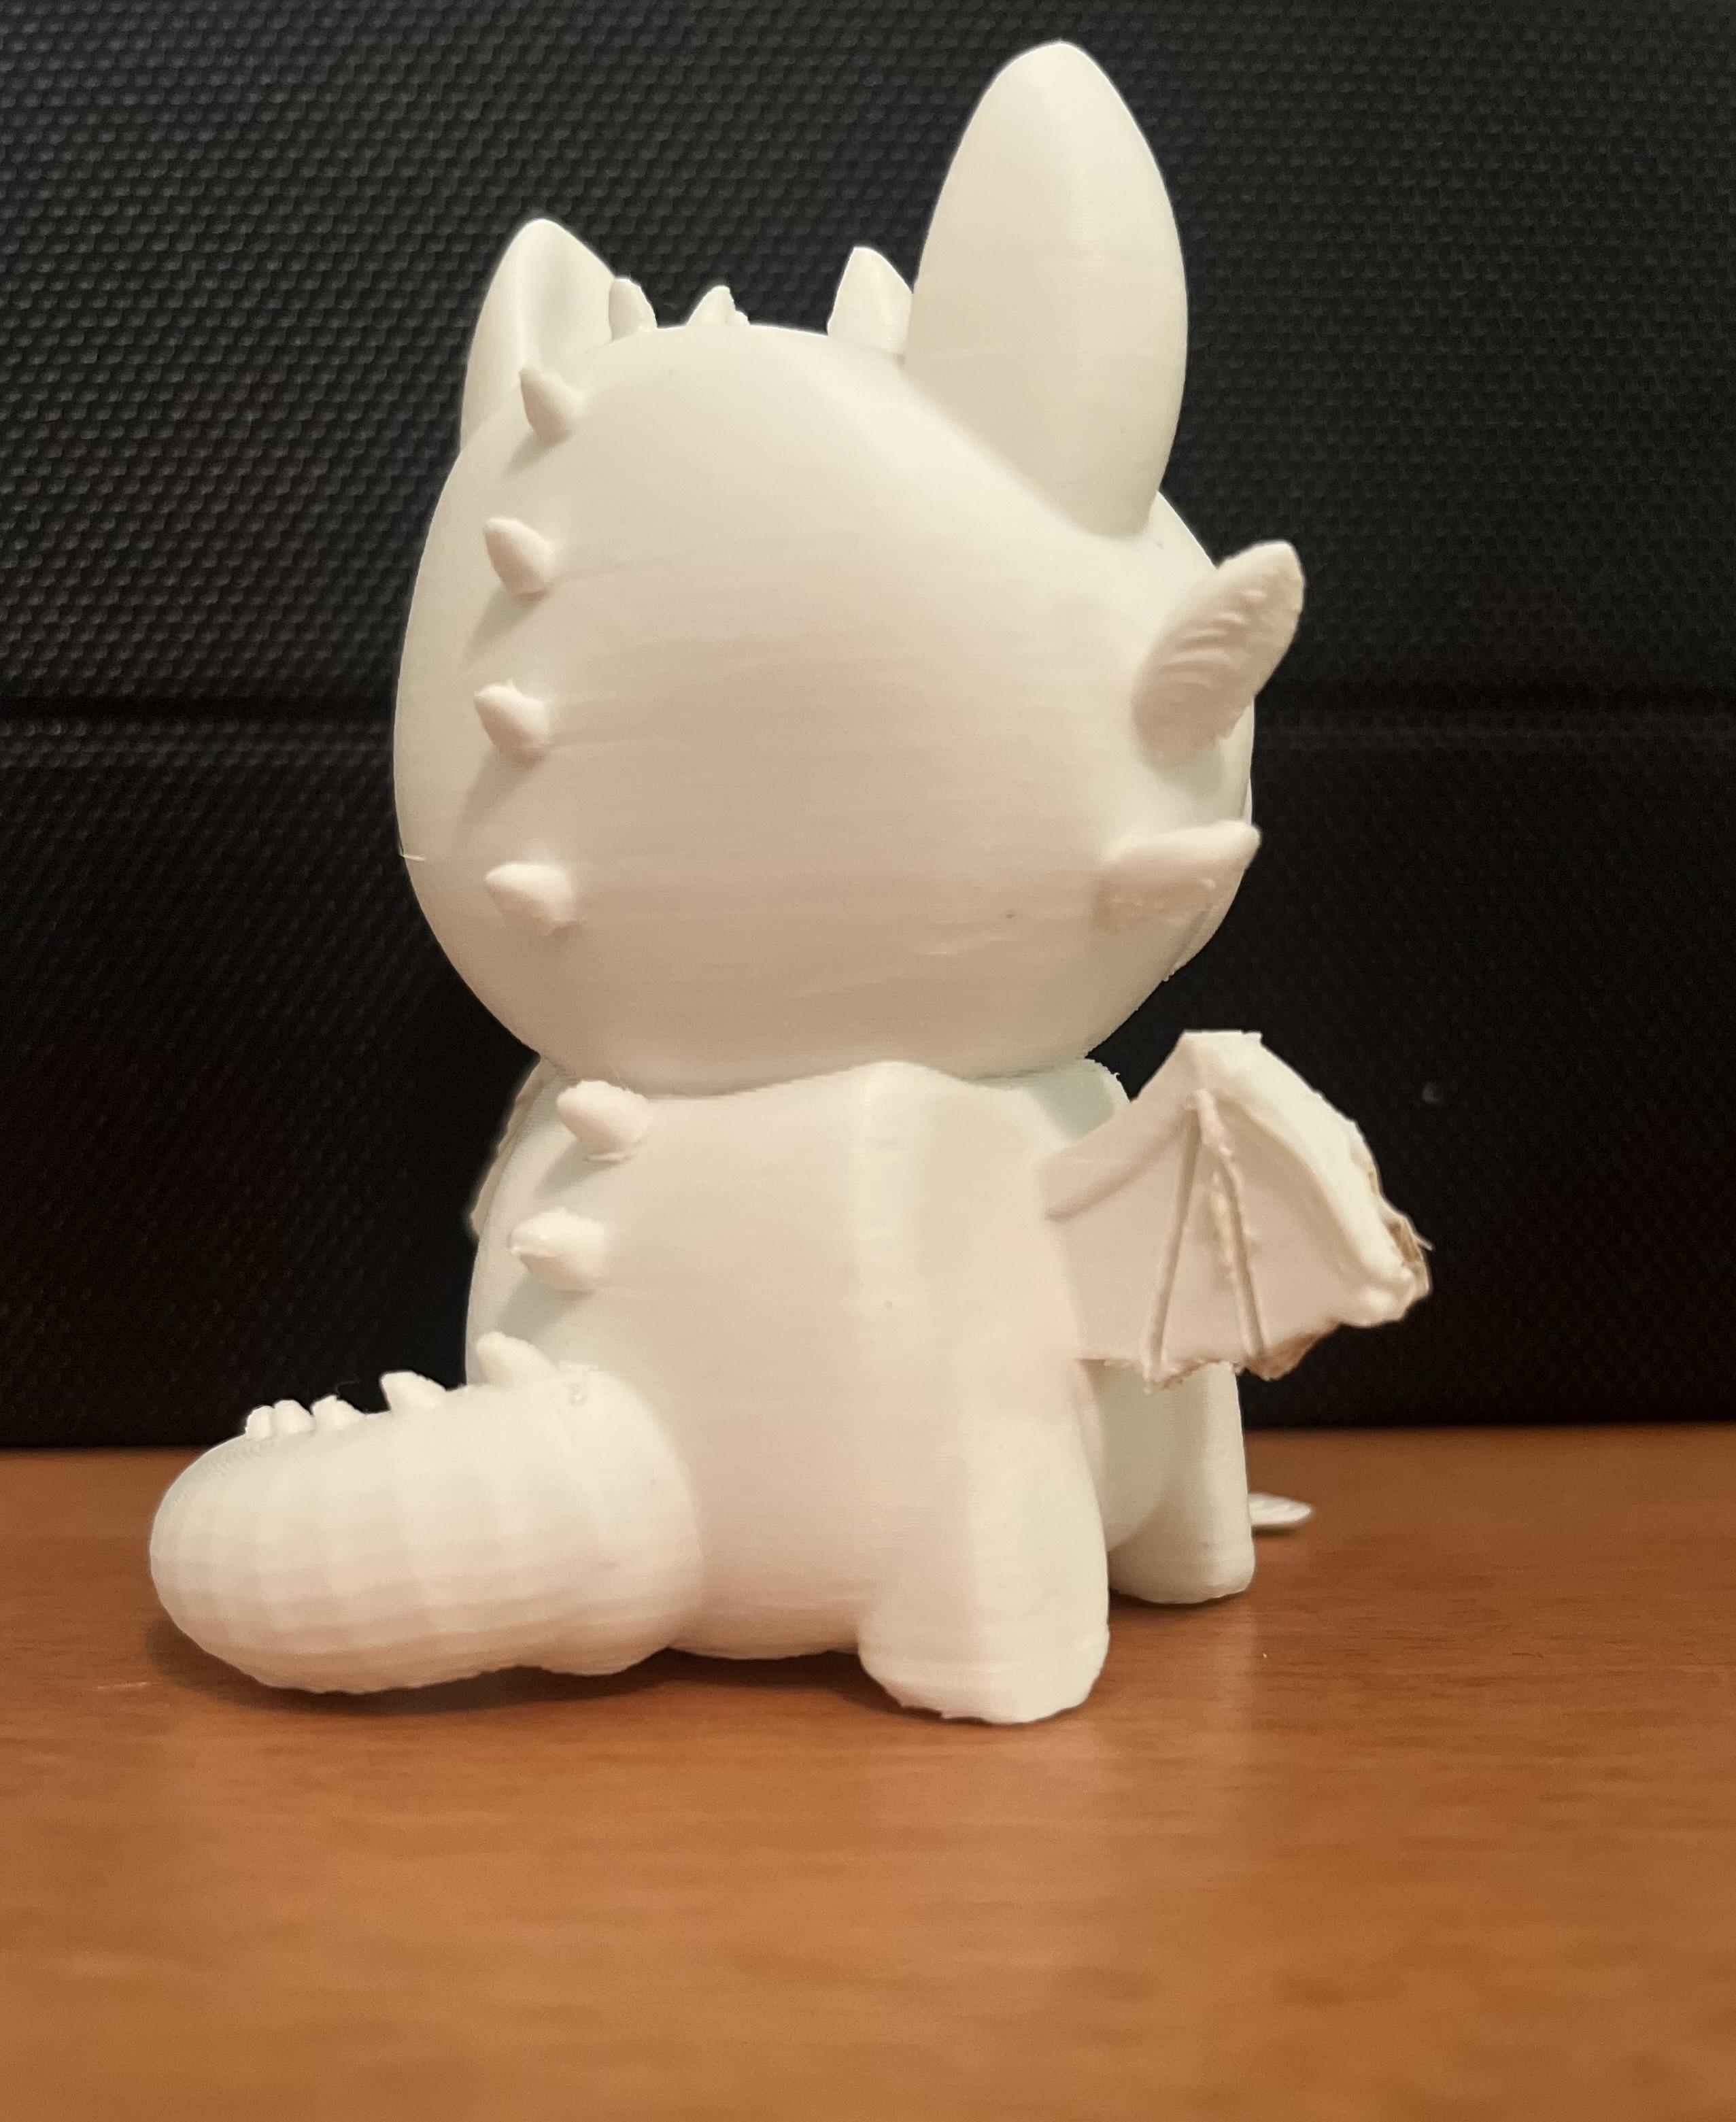
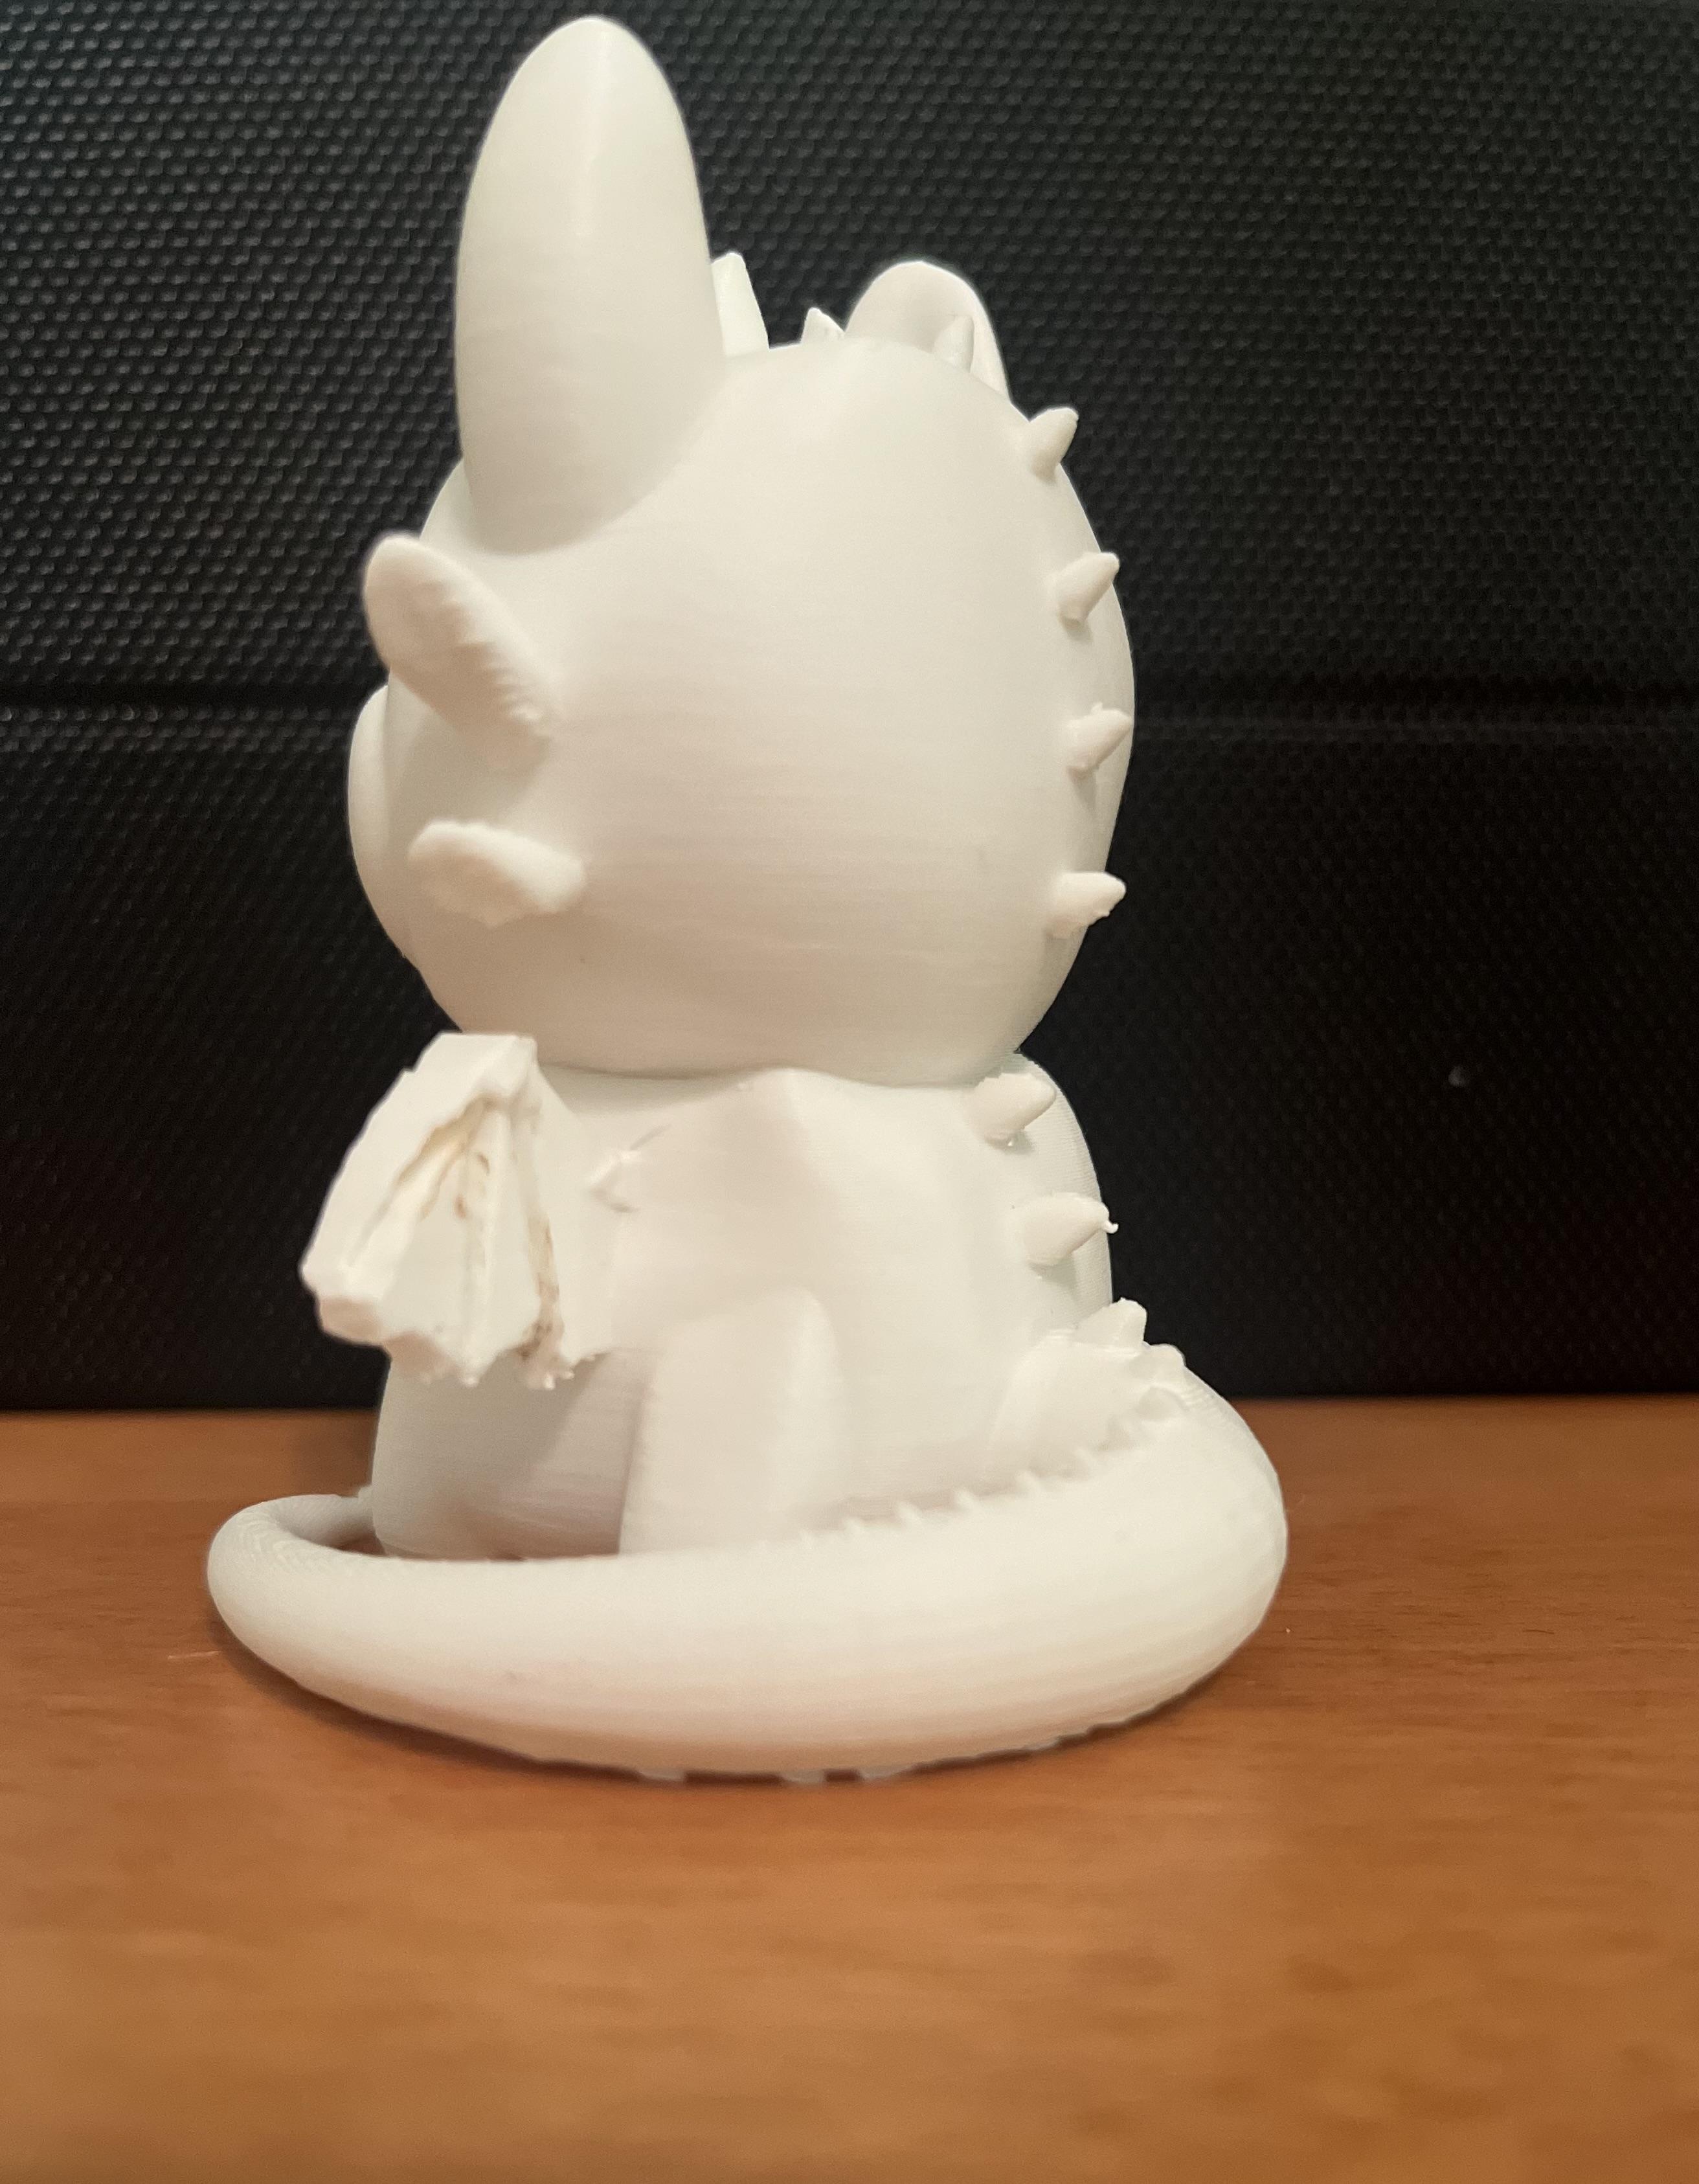
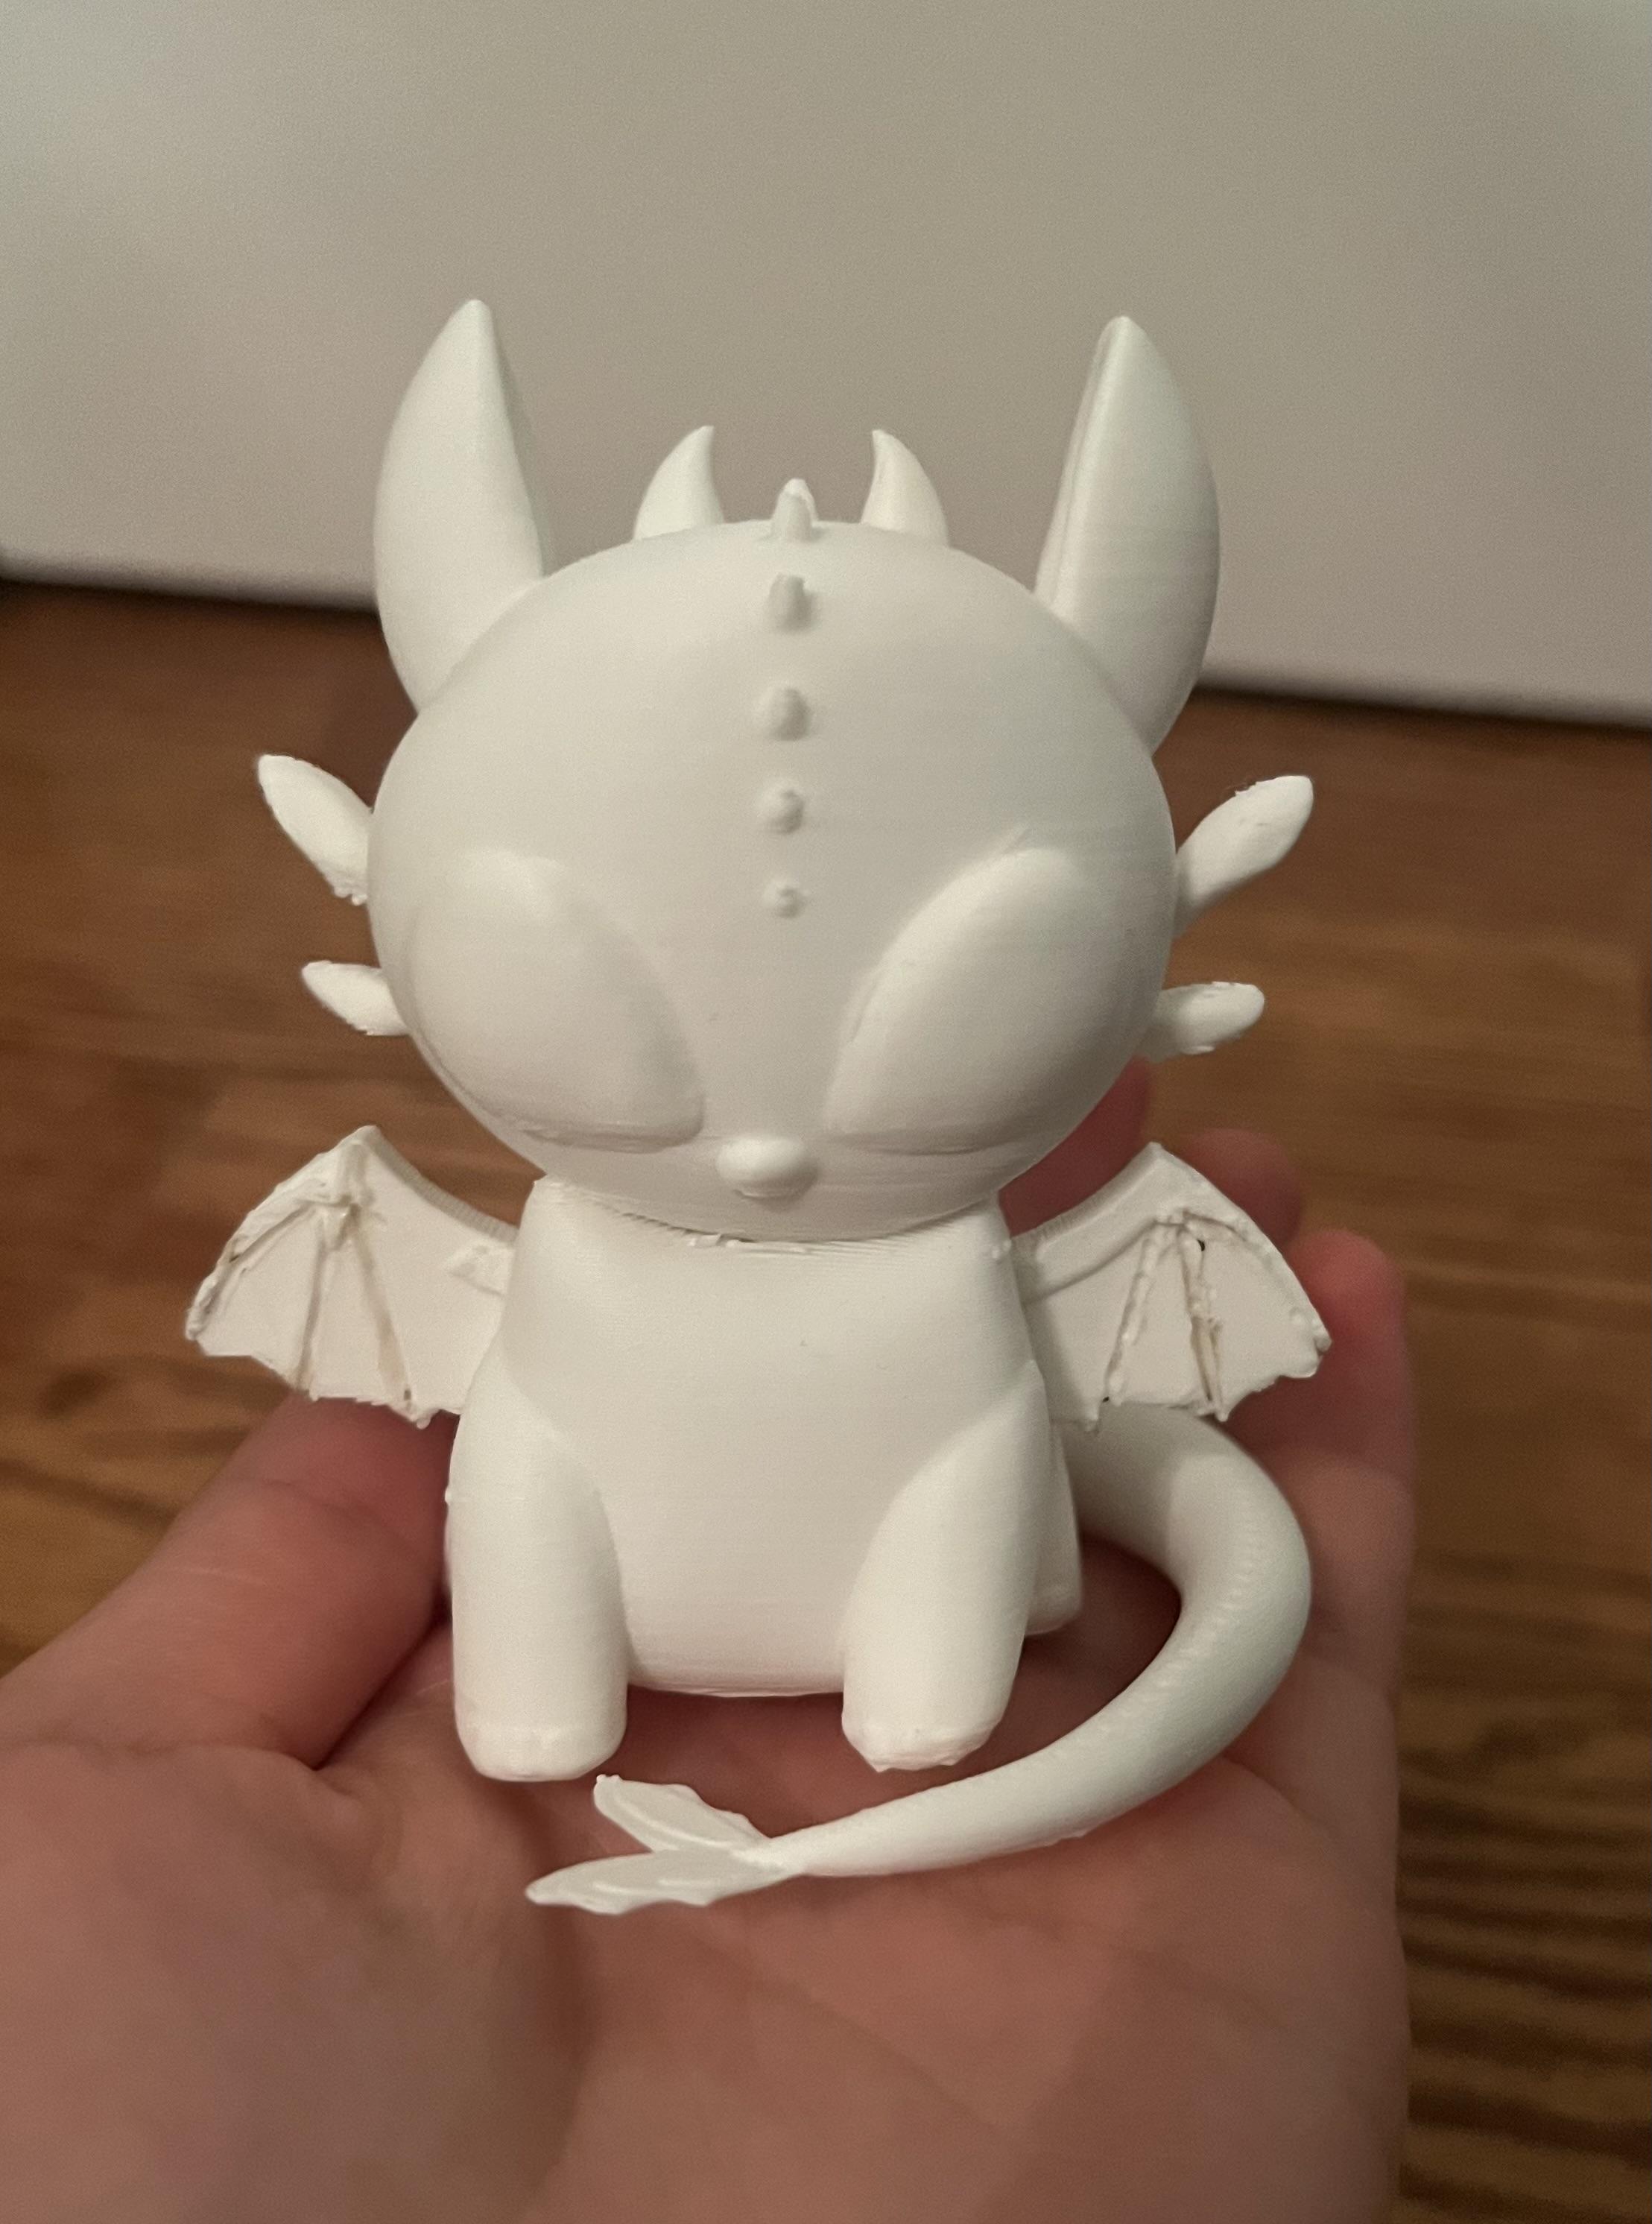
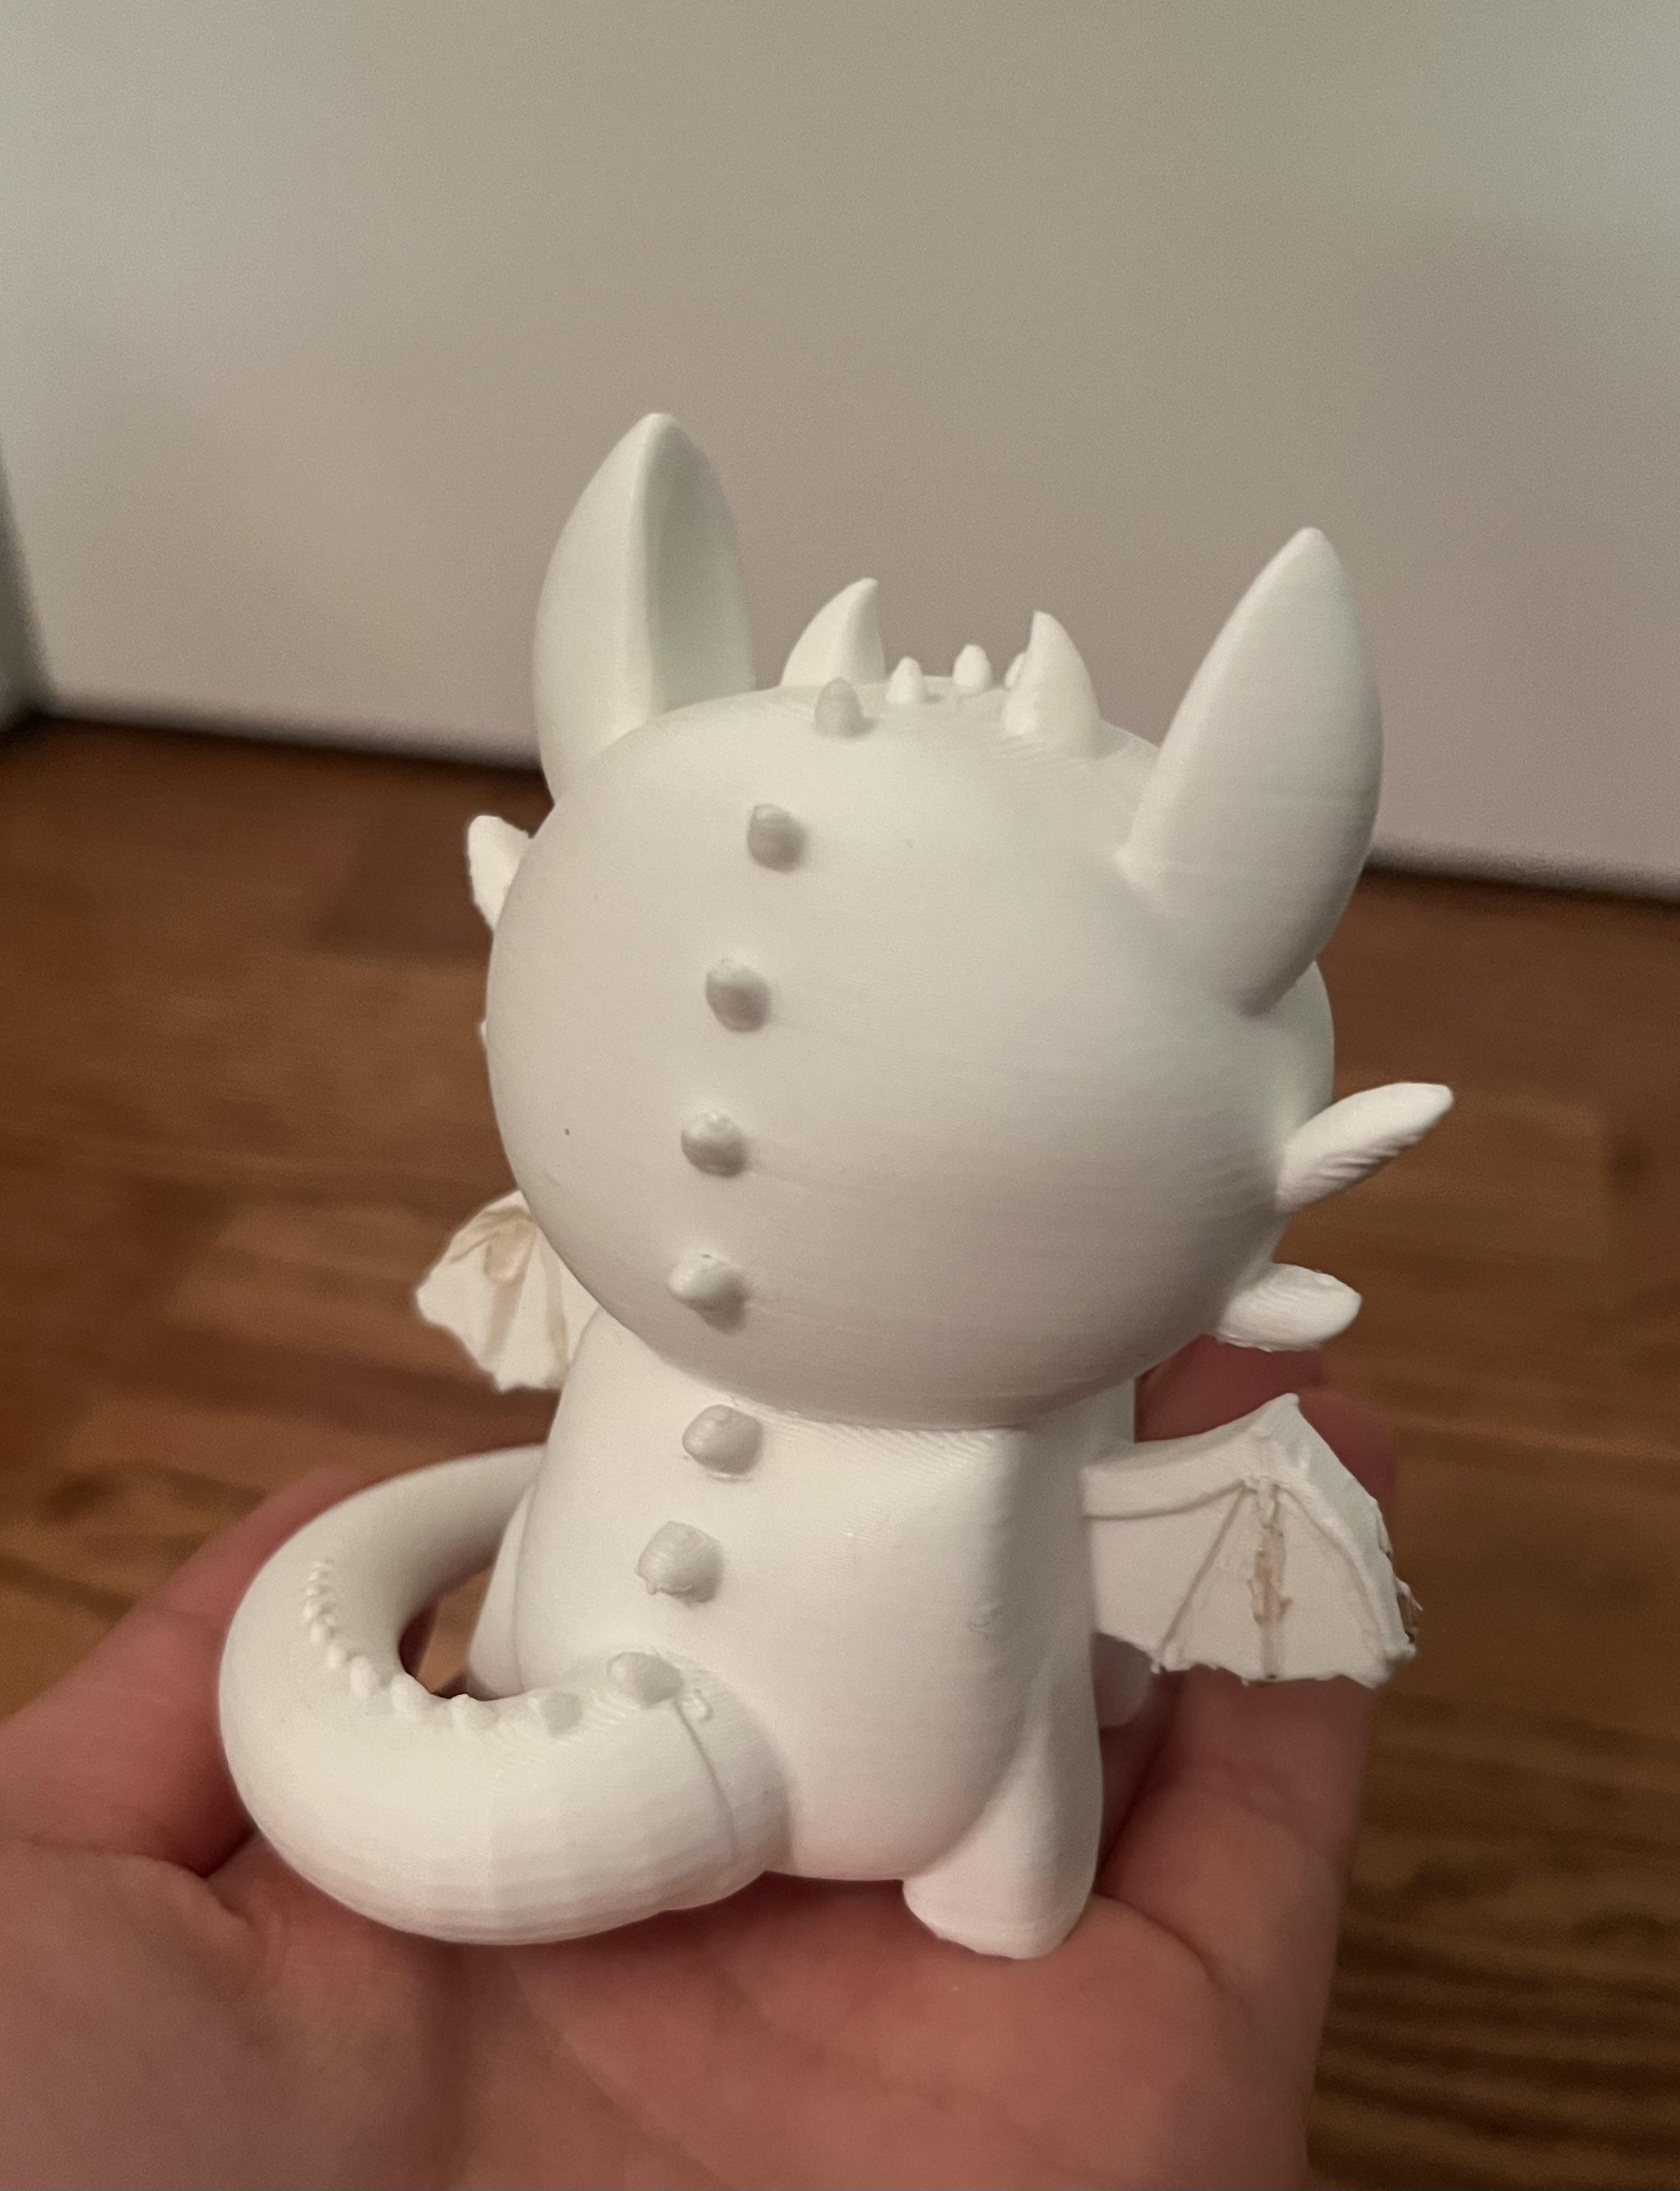
We're finally done! It's time to 3d print. For this, you're going to first want to delete any unnecessary objects. Next we're gonna go to file, in the top left corner, export, and then STL (.stl). Export that STL file to somewhere safe on your computer or flash drive. From there I unfortunately cannot tell you how to actually 3d print it, as I asked my teacher to do it for me, but you would import the STL file into a program that runs 3d prints and go from there. The wings sadly got a little messed up while printing, but the rest turned out ok. Hopefully it can be relatively covered up by paint. Which brings me to my next step.
Paint It!
I never got to this step due to a lack of time and supplies but I highly recommend painting the figure to make it look better and add detail, such as Toothless' iconic red tail. I personally will definitely eventually be painting him.
Thank You and I Hope You Try It Out!
Thank you for looking at my Instructable and I hope that if you are a fan of How to Train Your Dragon, or just someone who wants to try out Blender you can use this to your advantage. Have fun!