Customize a Windup Music Box
by kitanovicbojan1 in Design > 3D Design
496 Views, 3 Favorites, 0 Comments
Customize a Windup Music Box
Hello, In this setup I will go over how to customize a windup music box. If you look up customized music boxes they are all hand-cracked ones. If you already own a Windup music box and what to make your own song here is how to do that.
Supplies
The supplies you need are as follows.
- A 3d printer
- a windup music box
- glue
- a computer with slicer software installed (chitubox recommended)
- SolidWorks or other cad software installed.
- caliper gauge
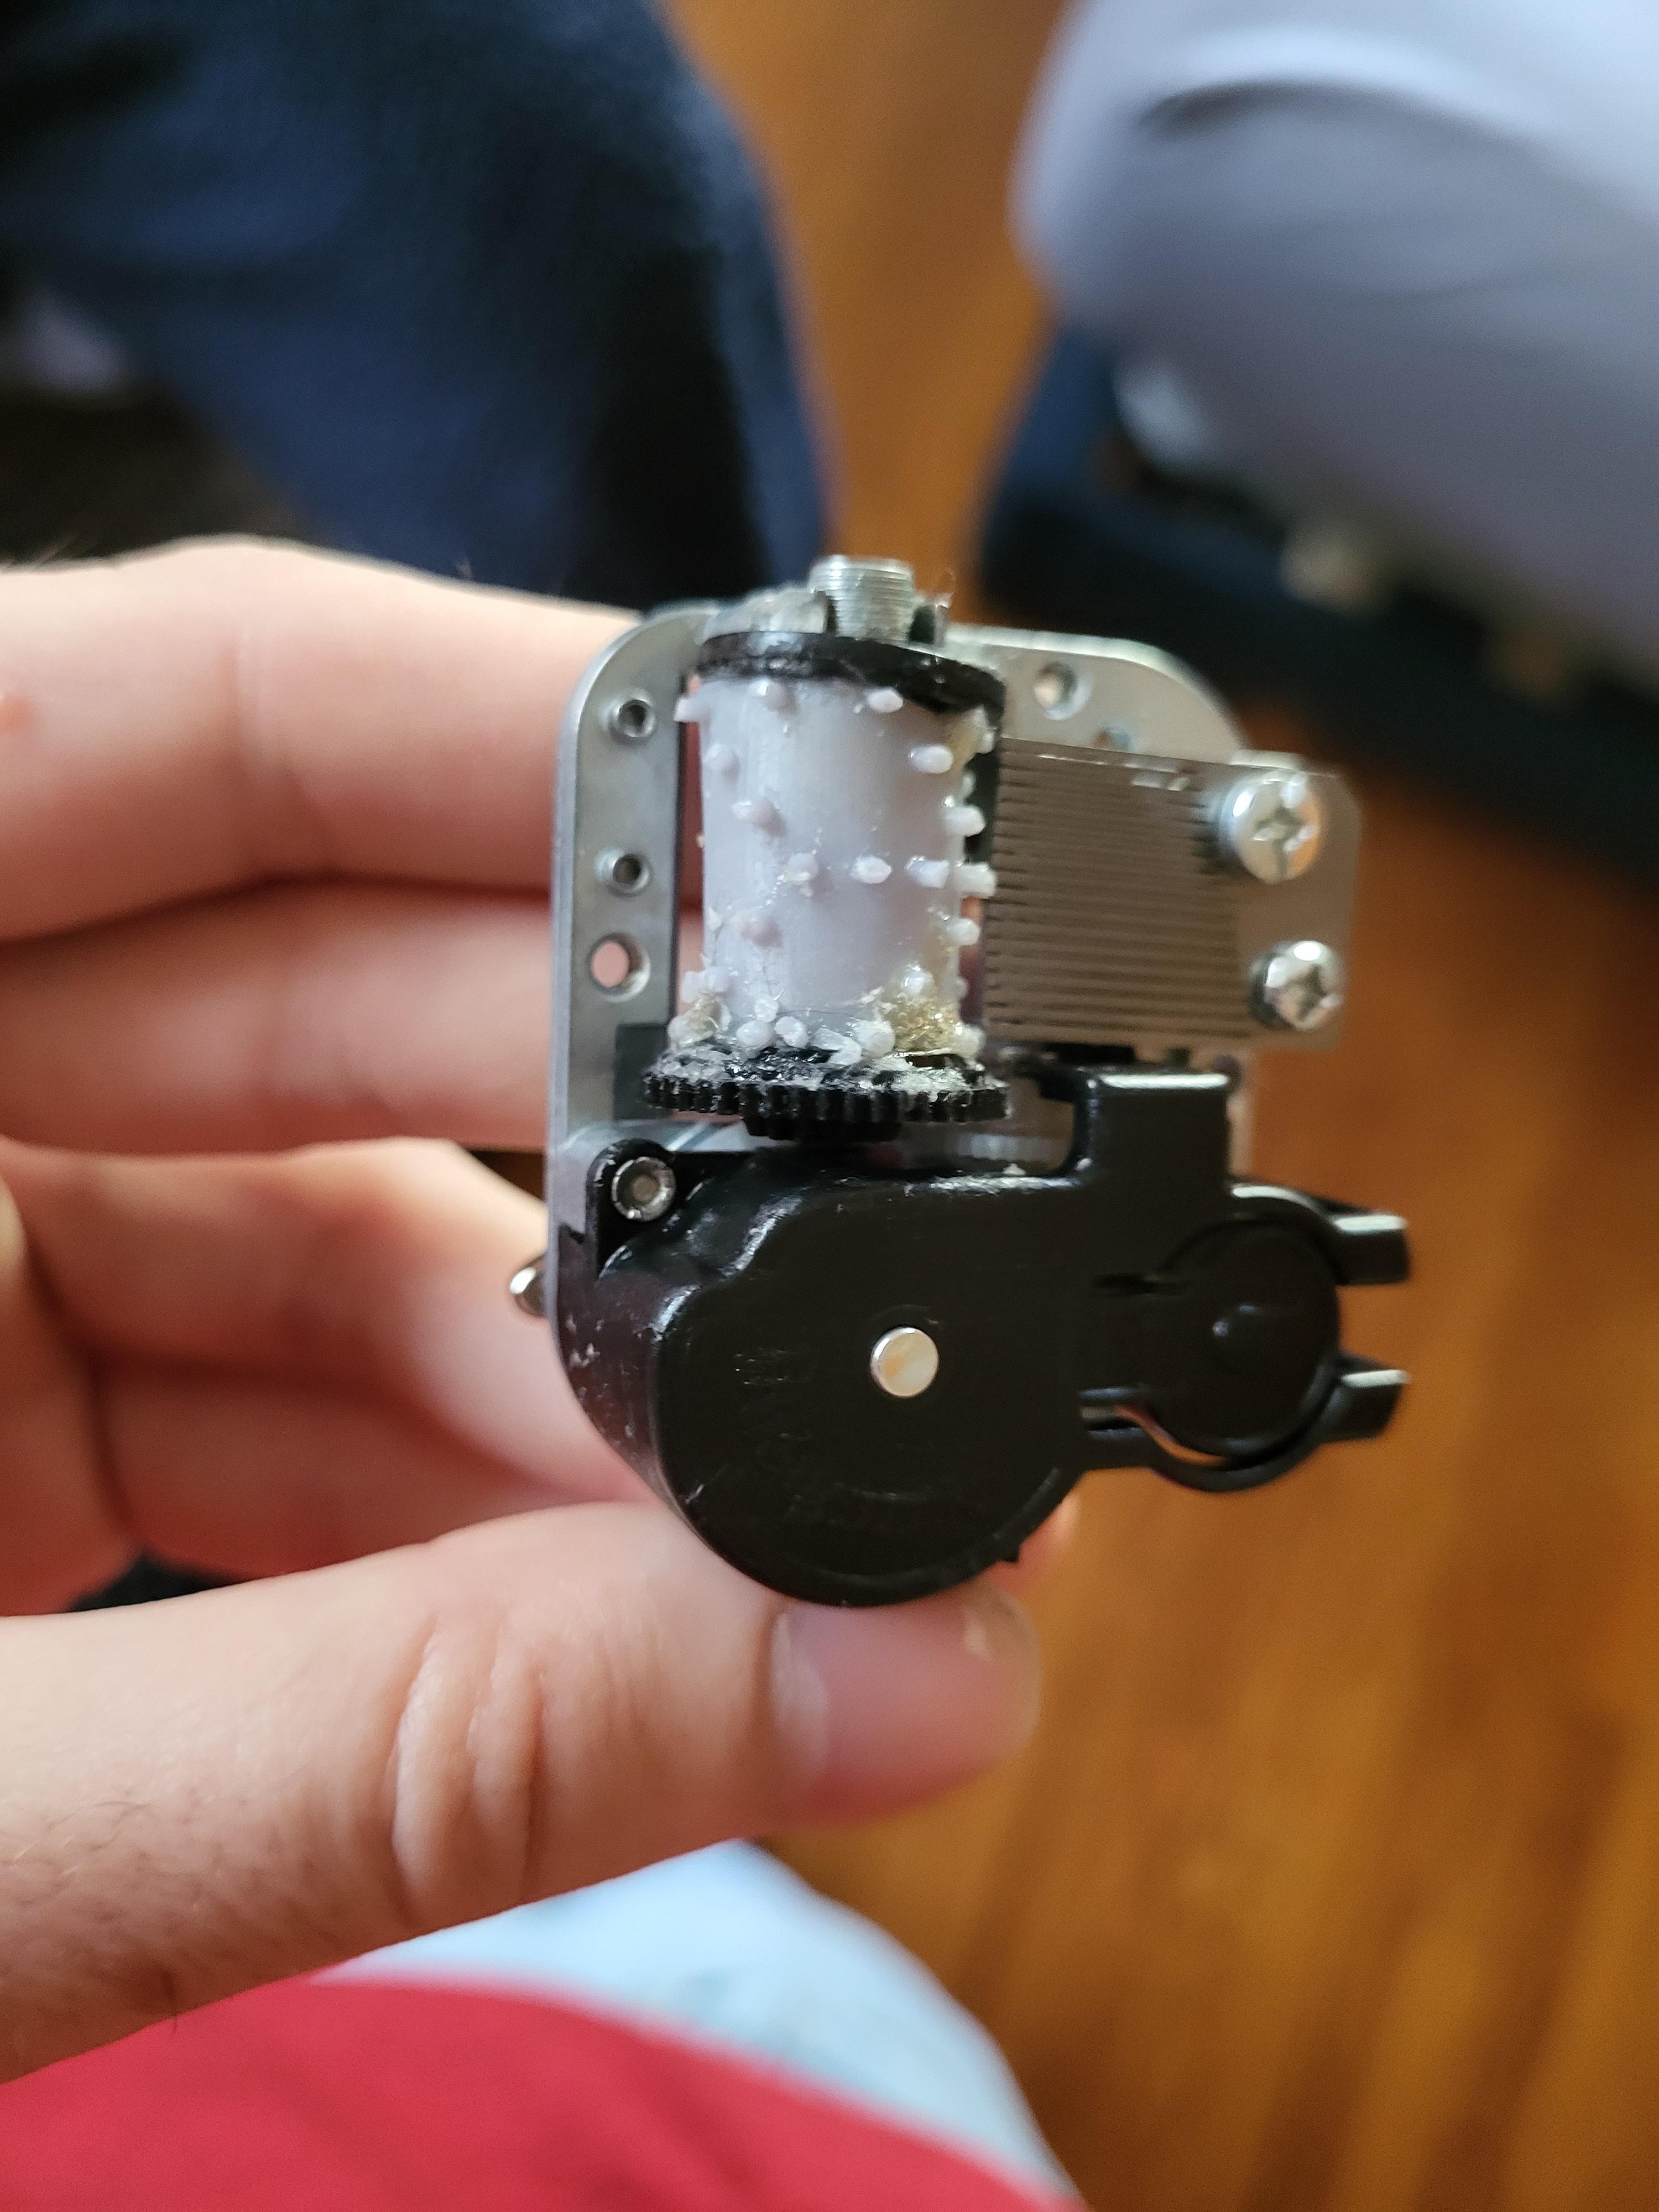
Remove the cylinder or drum from the music box and from the dimensions. It's length, diameter, and the length of the pins. The length of the pins only use as a reference since we are 3d printing and the resin pins will be bigger. In my case, the length is 20 mm, and the inside diameter is 12 m. The pins are 0.01776 inches.
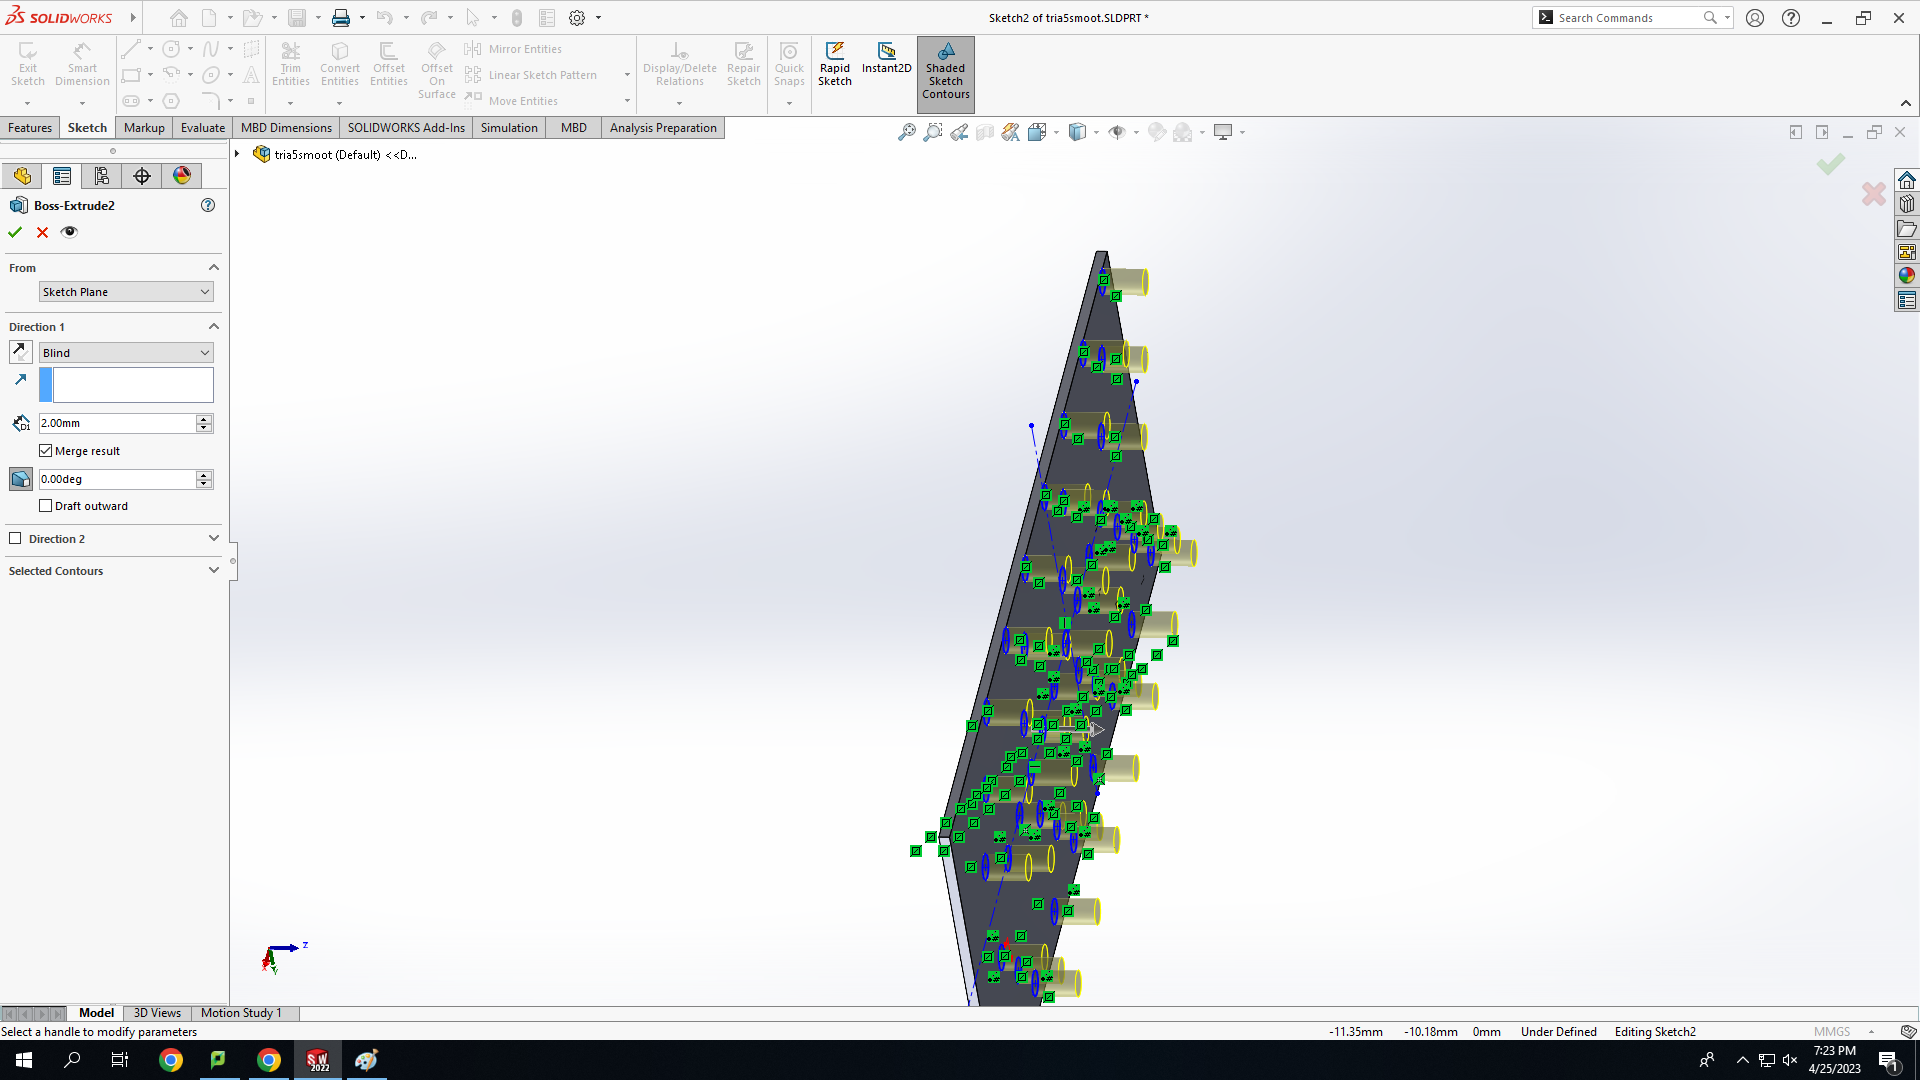
The next two steps are to open up solid works and make a square the length of the square that of your cylinder. The width can be determined with the equations here https://www.cmrp.com/blog/faq/calculations/how-to-develop-the-blank-flat-length-for-a-cylinder.html then use embody it to 1mm thickness and make a sheet. On this sheet make your design by making circles 0.5mm in diameter and embody them. The pattern you chose is the program or song that will play.
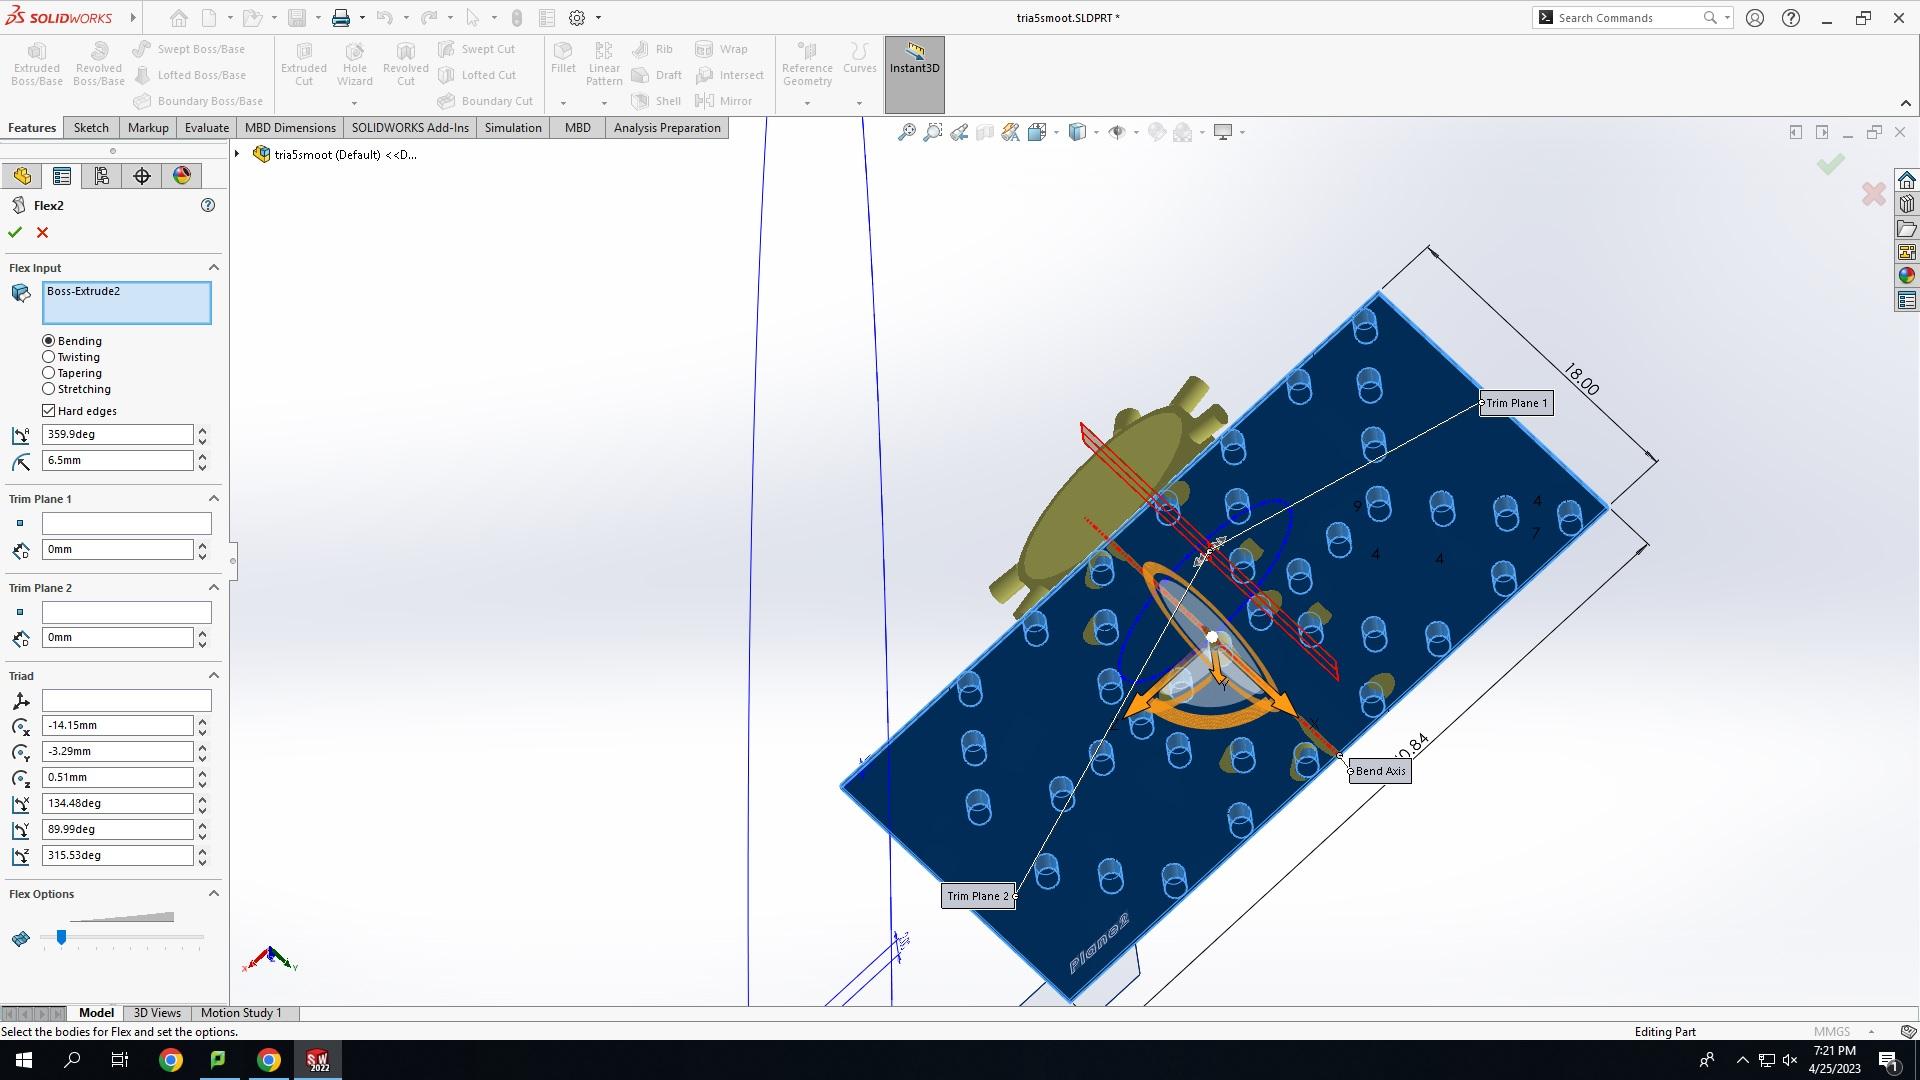
Use the flex feature and chose the length of your sheet as the part to fold. Make the angle 359.9 degrees on you have your cylinder model. Save it as an STL file.
Use the slicer software of your choice to make the STL file into something that can be used for your printer.
Print your model then use glue it to where our cylinder was originally. This is so that it spins and hits the keys. Now you can hear our song.