Customize Name Keychain
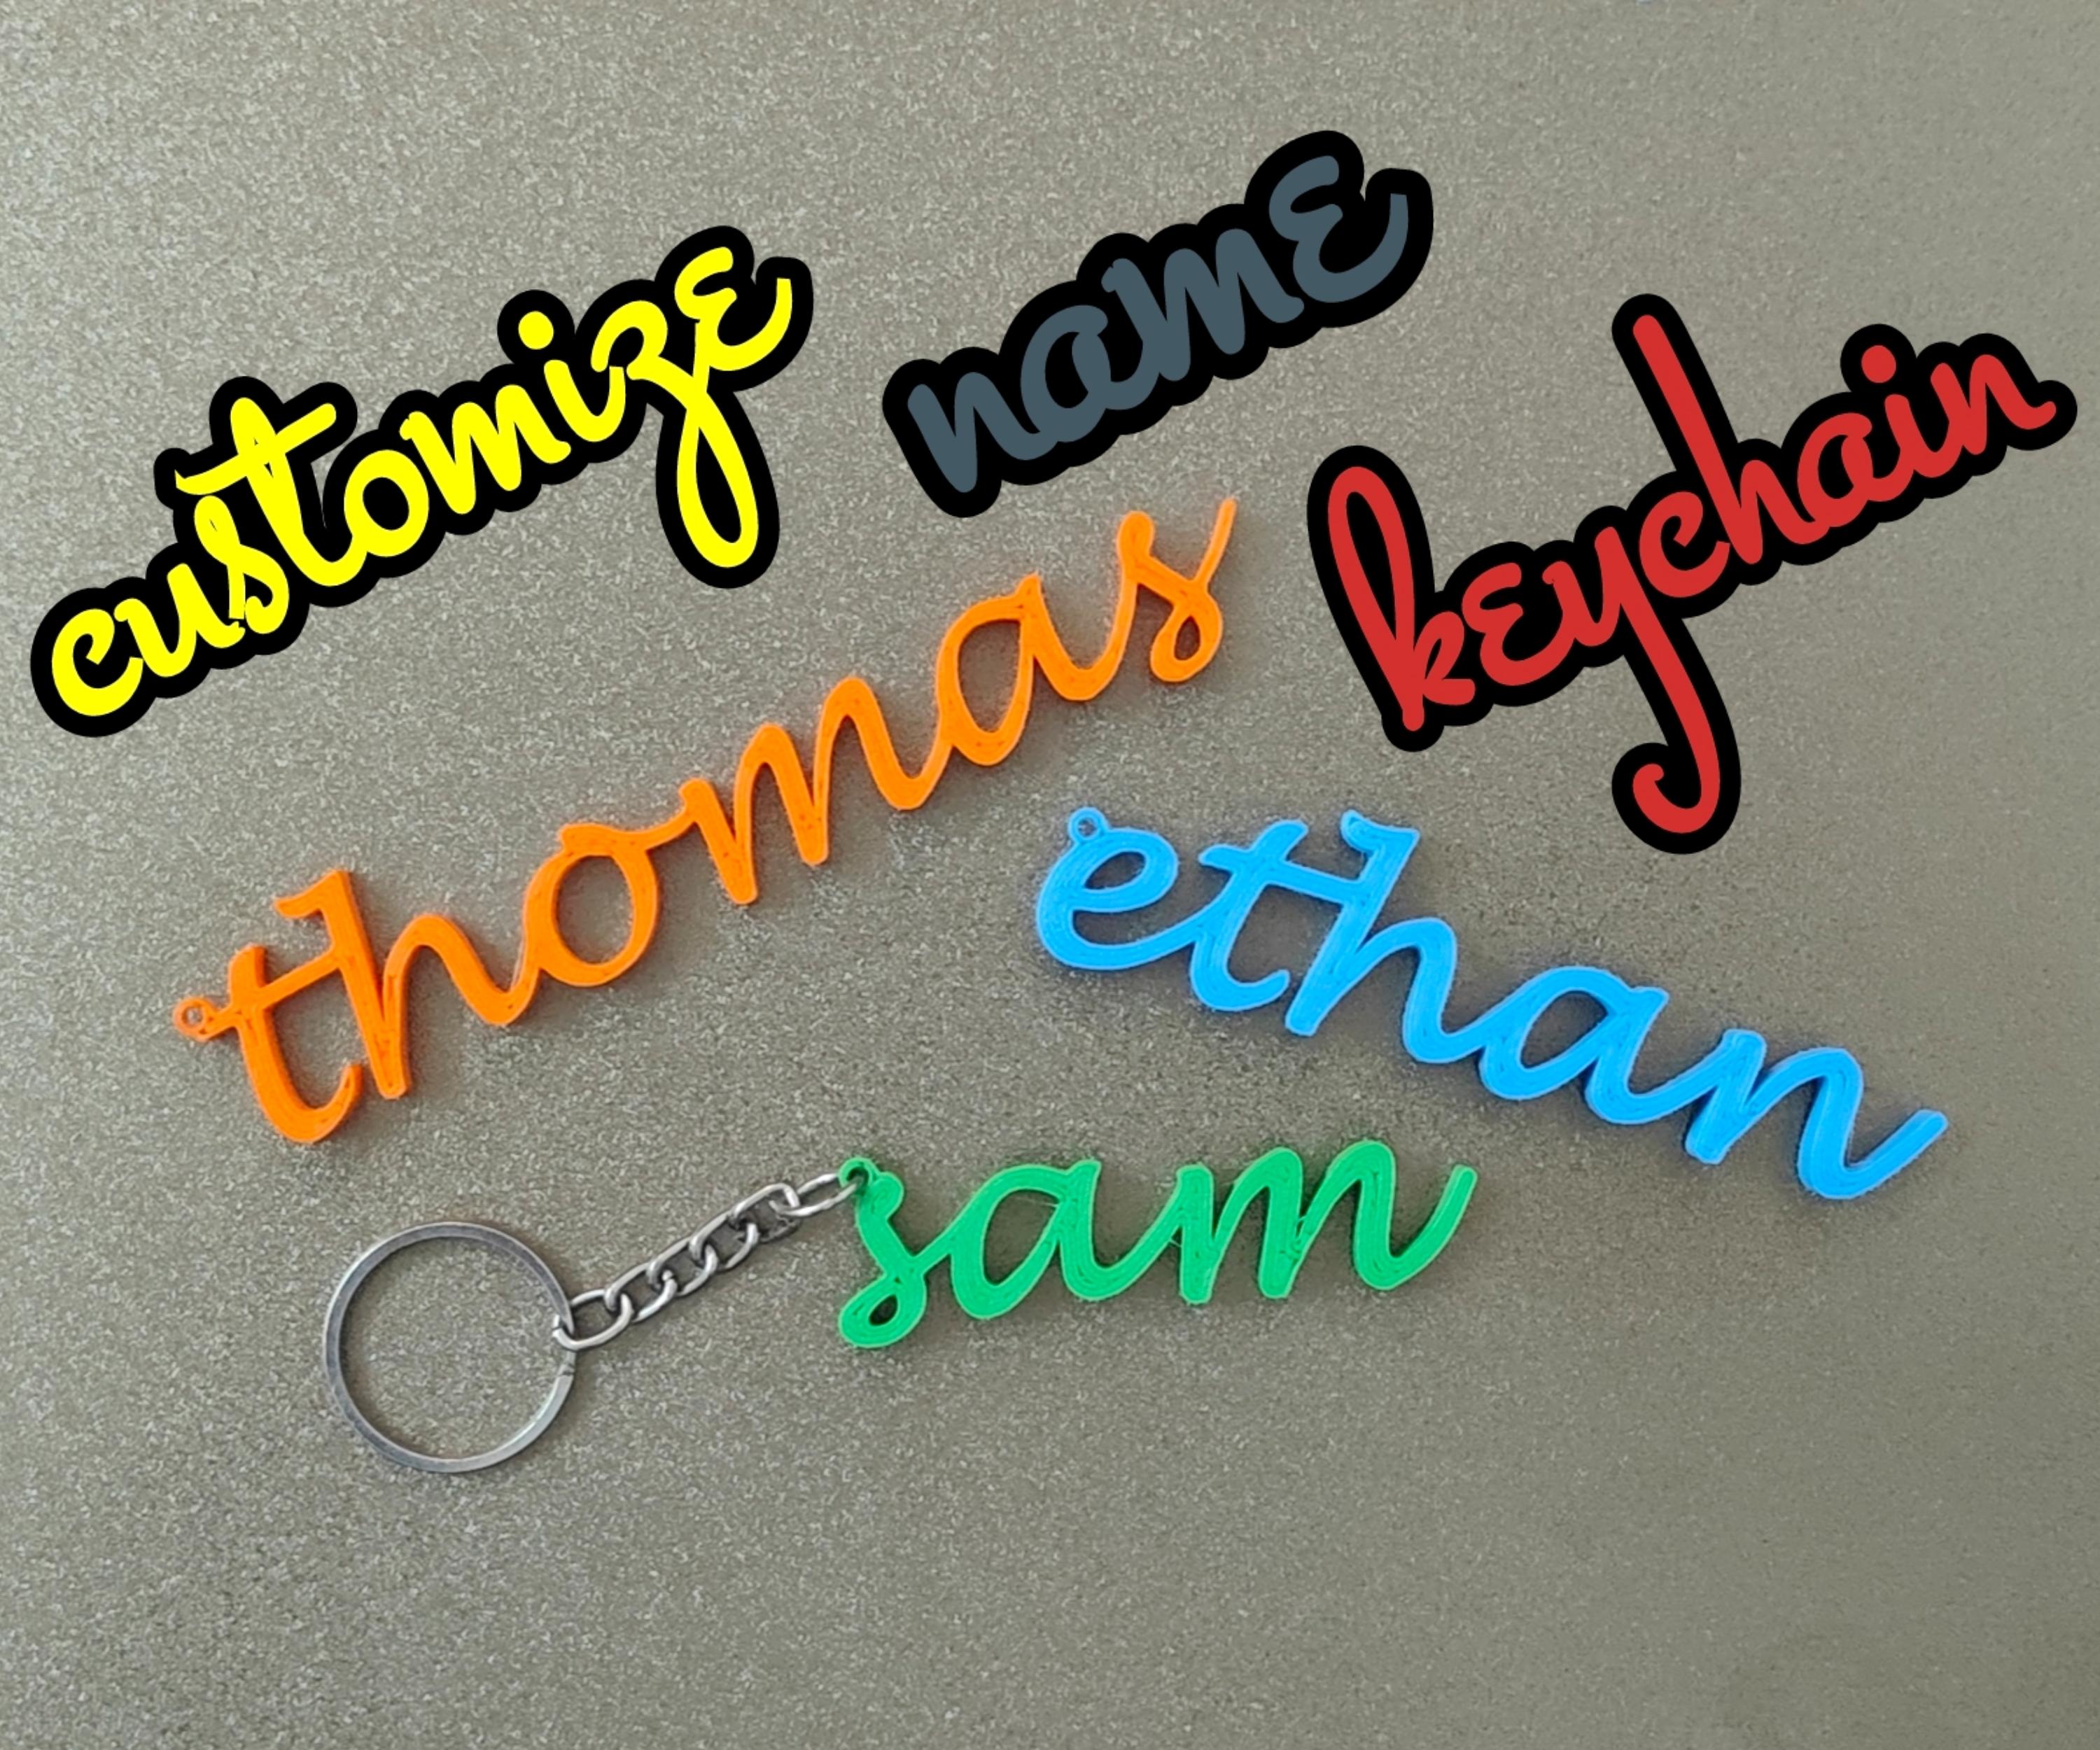
Do you have someone in your life who loves collecting keychains? My brother is one of those enthusiasts, always on the lookout for unique designs to add to his collection. Inspired by his passion, I decided to create a special keychain just for him – one personalized with his name. Whether you're making it for yourself or as a thoughtful gift, a custom name keychain looks fantastic in your favorite color!
Follow along as I take you through the steps to create your own custom name keychain!
Supplies
- Software: Fusion 360 (or any 3D modeling software)
- Filament: PLA filament (color of your choice)
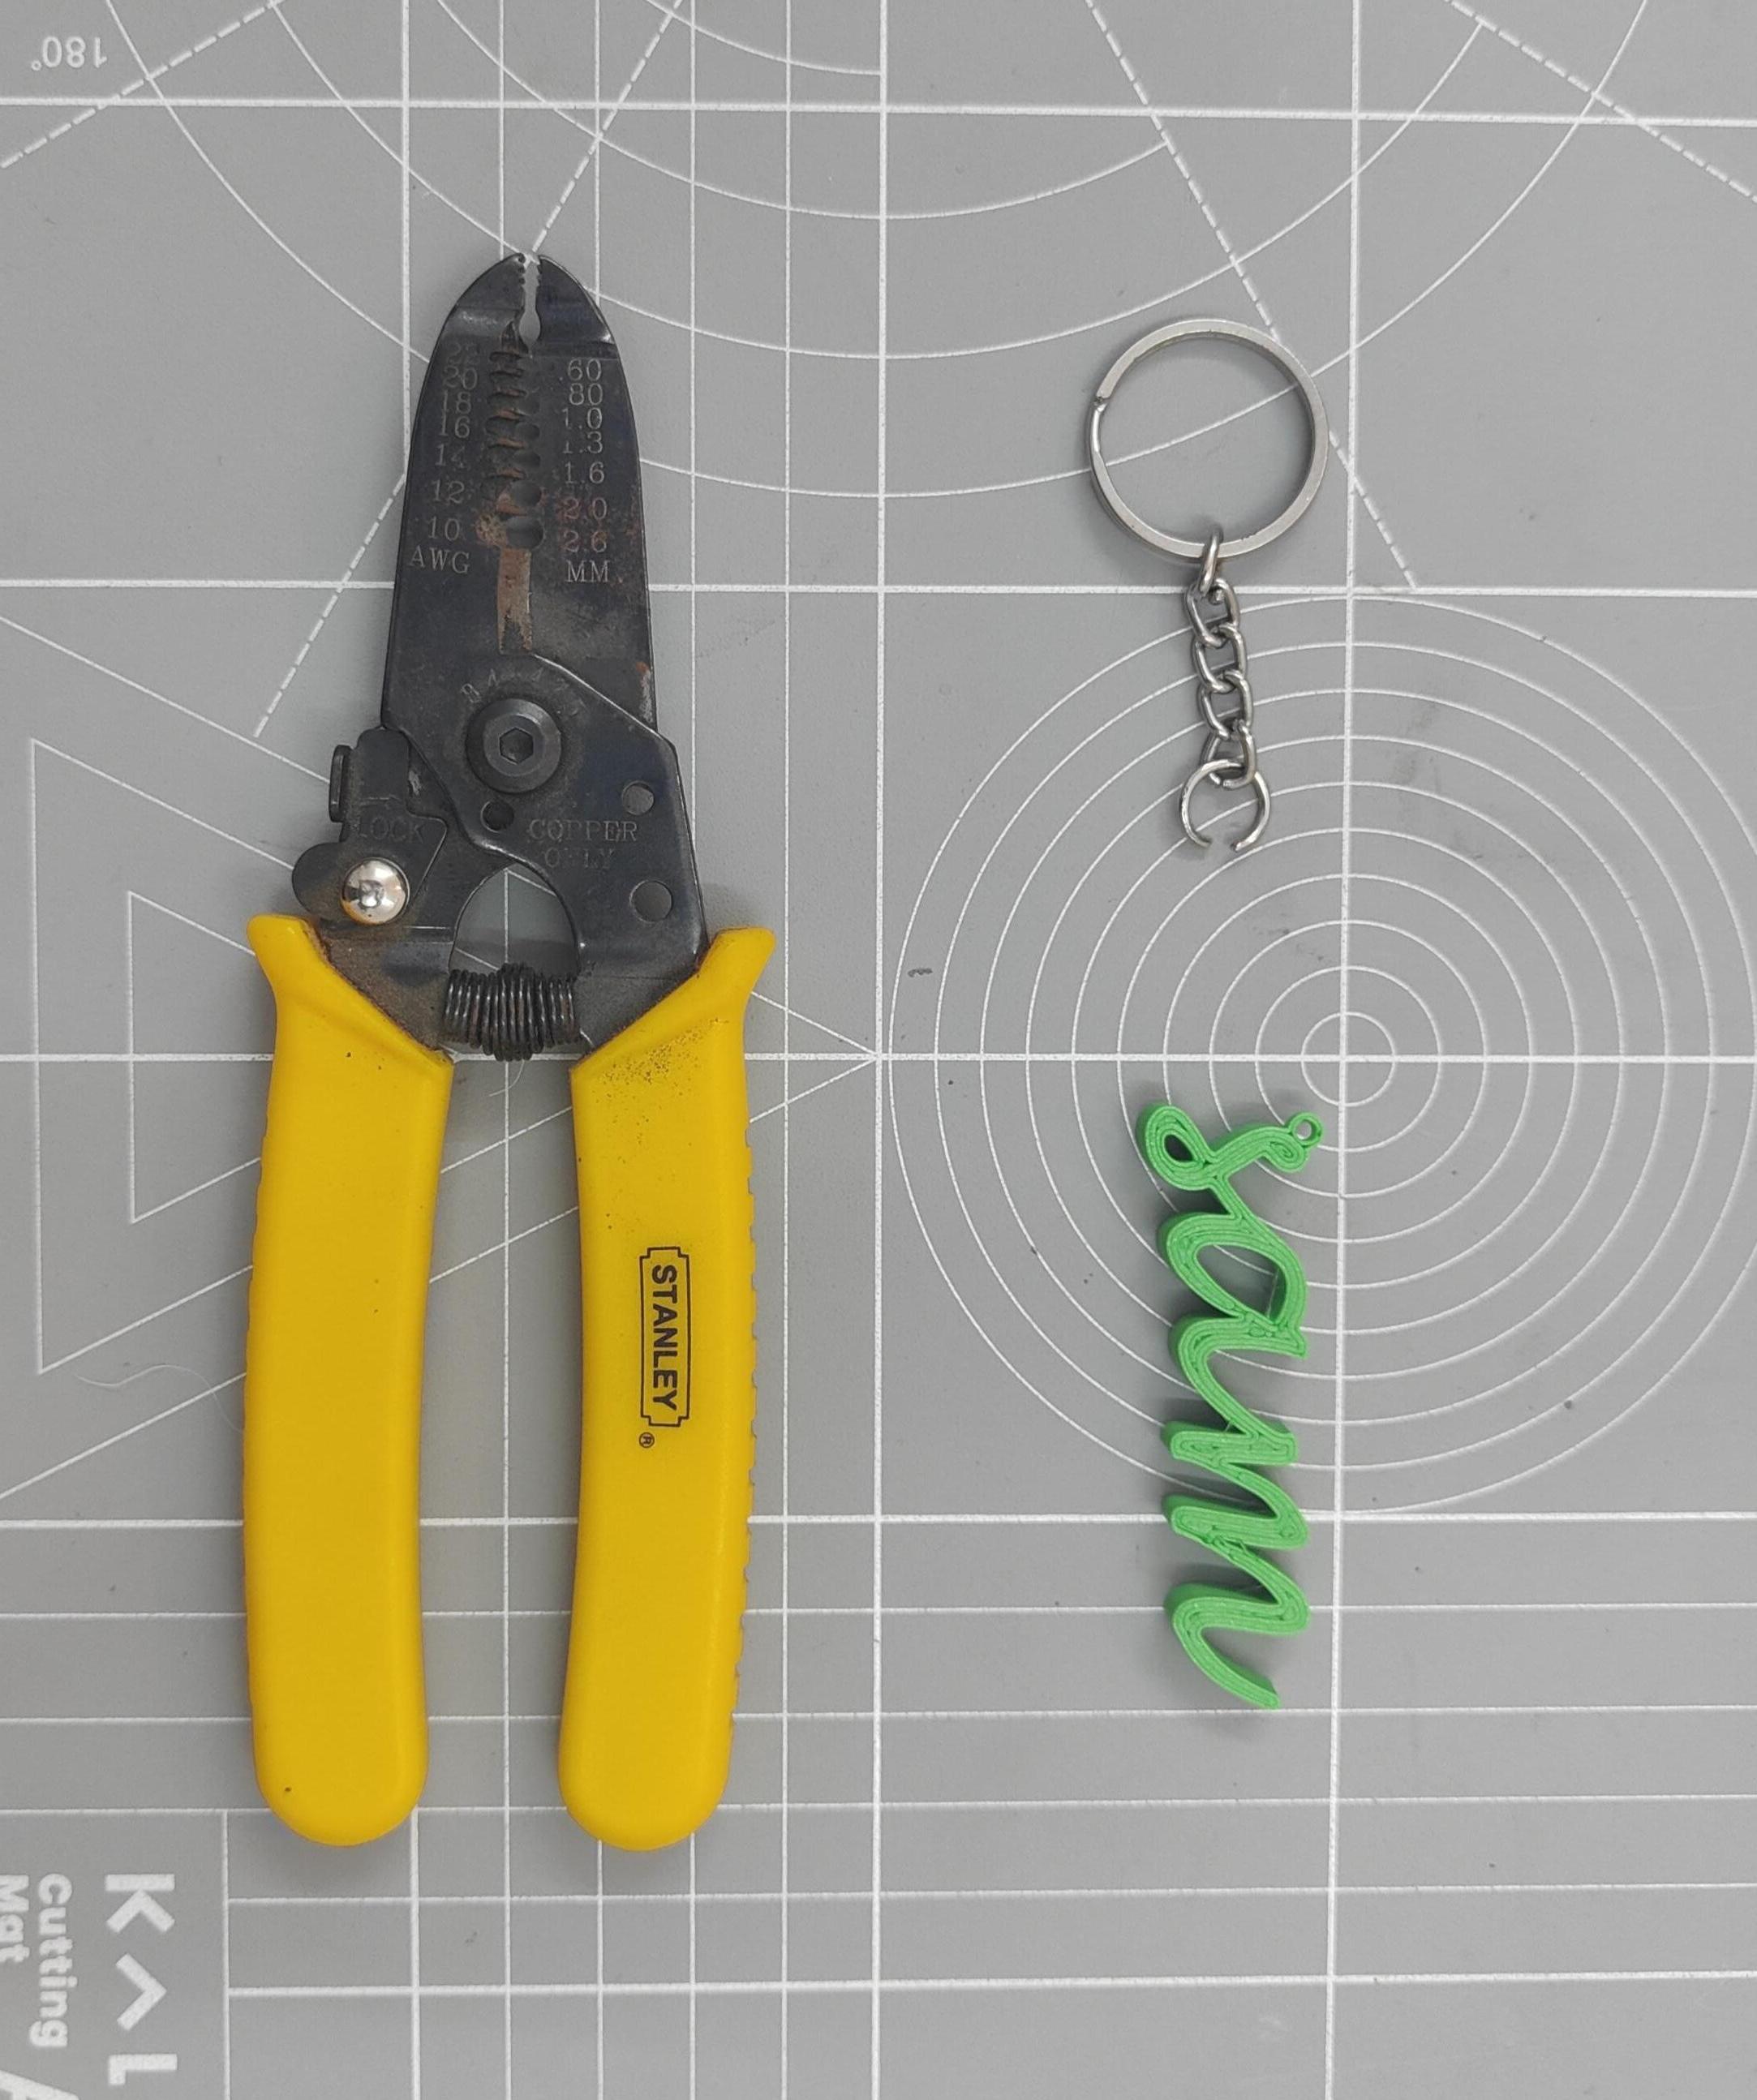
- Chain: Thin metal chain (length as desired)
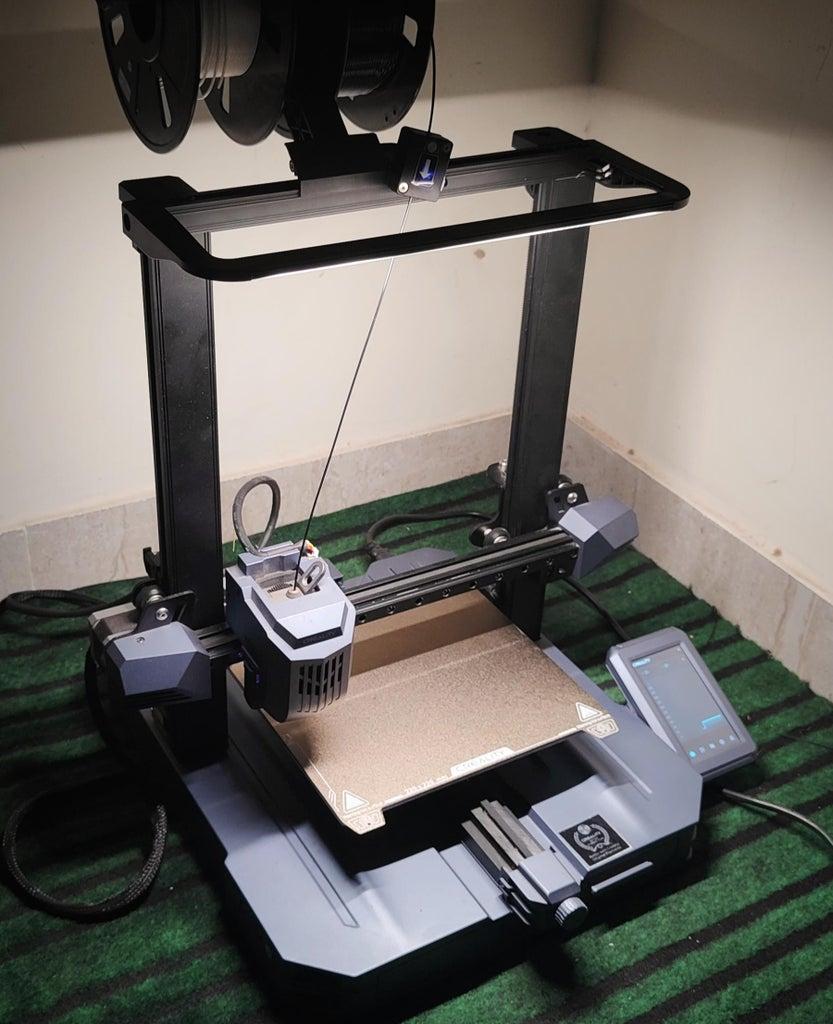
- Tools: 3D printer, slicer software (e.g., Cura, PrusaSlicer), needle-nose pliers (for assembly)
...
Personalizing Your Keychain
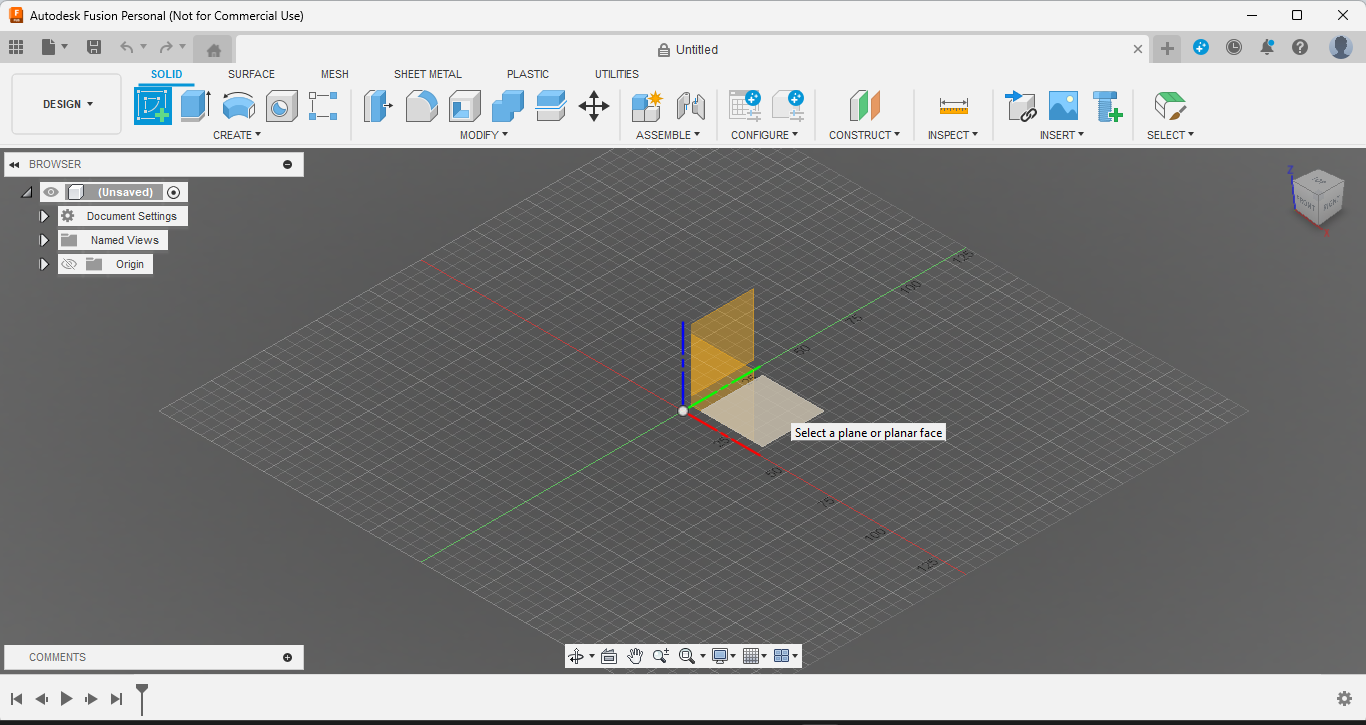
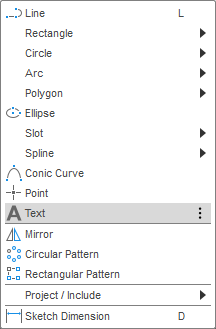
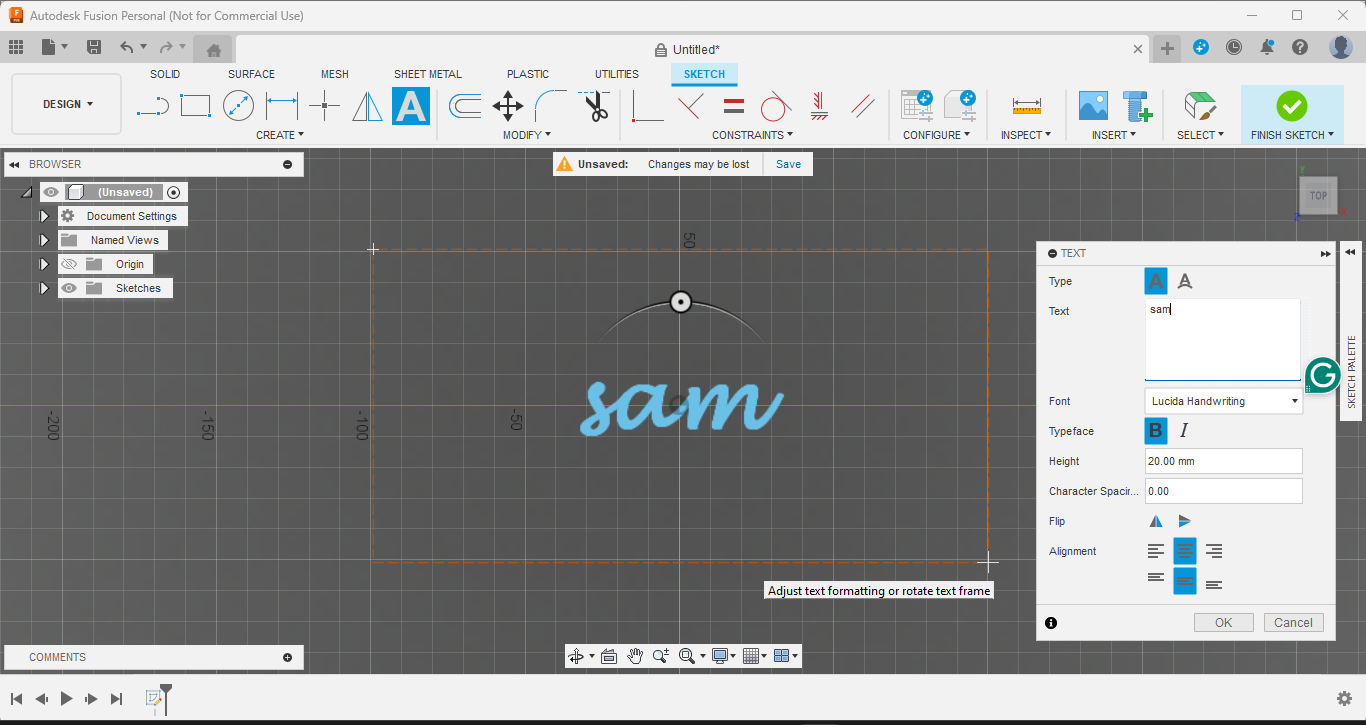
Creating a custom name keychain is a fun way to add a personal touch to your belongings. Let's start by designing the name or text you want to feature on the keychain using Fusion 360.
- Open Fusion 360: Launch Fusion 360 on your computer. If you don't have it installed, you can download it from Autodesk's website.
- Create a New Sketch: In Fusion 360, start a new sketch by selecting the plane or surface where you want to create your design.
- Add Text: Locate the "Text" tool in the toolbar. Click on it to enter the text editing mode. Type in the name or word that you want to appear on your keychain.
- Positioning and Alignment: Drag the text to the desired location on your sketch. Use the alignment tools to center it or align it according to your design.
Choosing the Font and Size
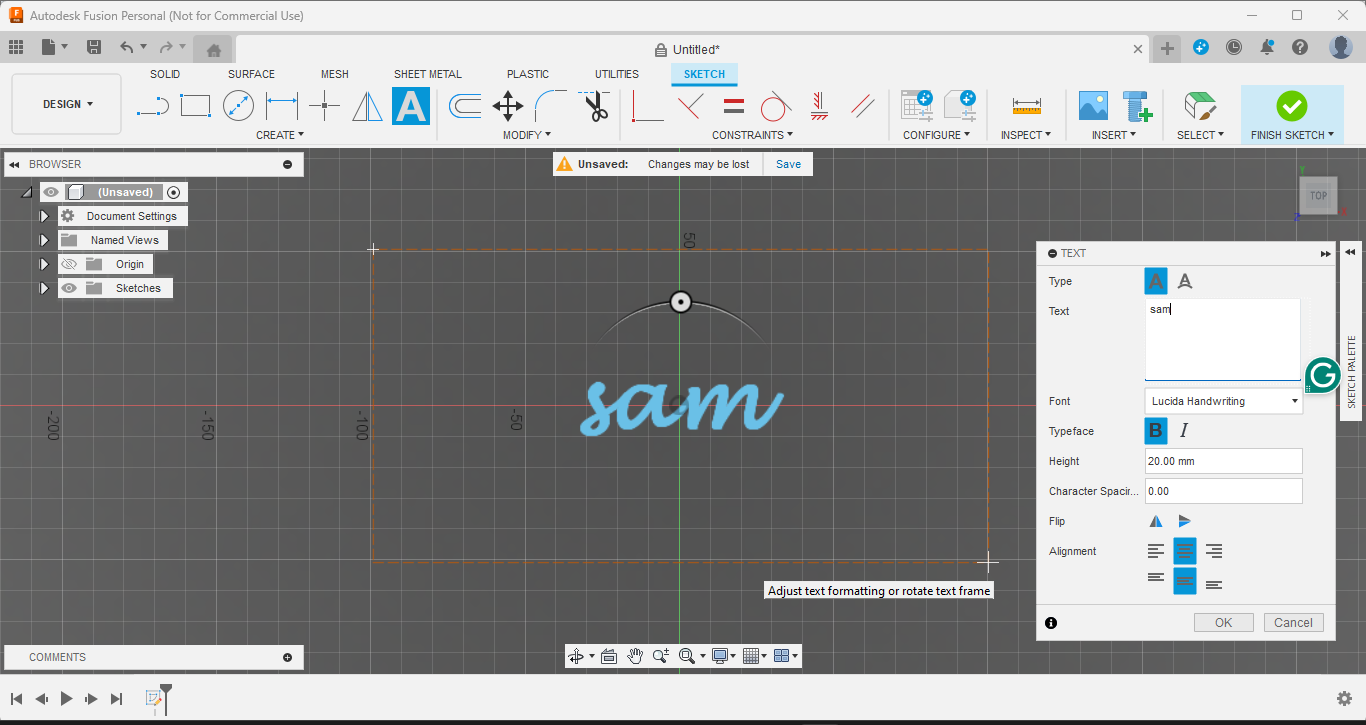
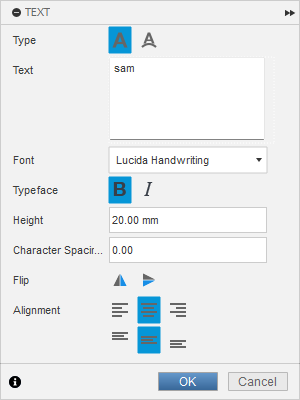
Now, let's refine your keychain design by selecting the perfect font and size.
- Select Arial Font: In the text editing mode of Fusion 360, choose the "Lucida Handwriting" font from the list of available fonts. Arial is a clear and widely recognized font that works well for keychains.
- Adjust the Size: Set the size of the text to 20. This size is optimal for keychains, providing clear visibility without being too large or too small.
- Fine-tune Placement: Ensure that the text is still positioned where you want it on the sketch. Use Fusion 360's alignment tools to center the text and adjust its alignment as needed.
Adding a 3D Effect to Your Design
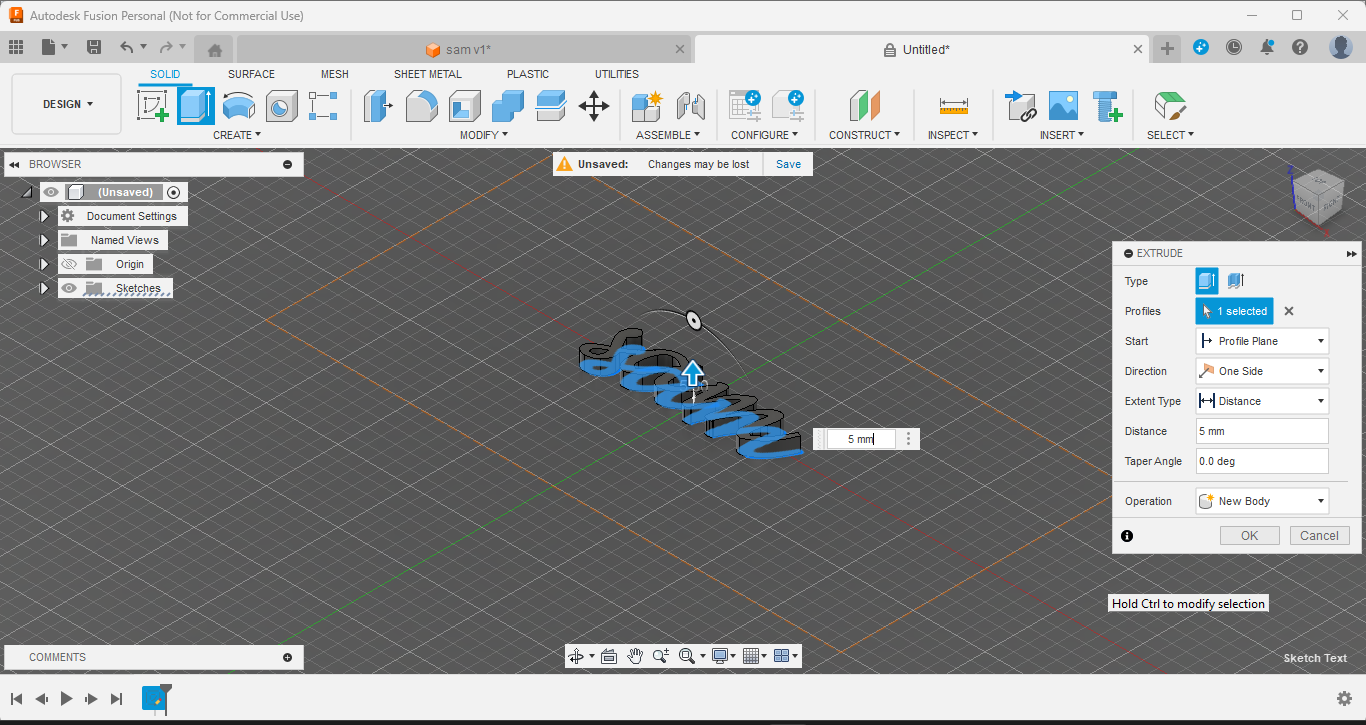
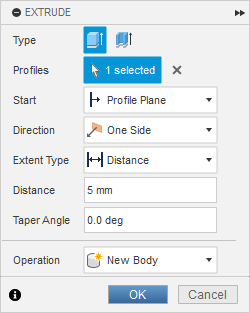
Now, let's give your keychain design some depth by extruding the text.
- Extrude the Text: Select the text you've created in Fusion 360. Look for the "Extrude" tool in the toolbar or menu. Click on it to bring up the extrusion options.
- Set the Extrusion Distance: Enter 5 mm as the extrusion distance. This will give your text a noticeable depth, making it stand out on the keychain.
- Preview and Adjust: Preview the extruded text in your Fusion 360 workspace. You can adjust the extrusion distance if you want a deeper or shallower effect.
Creating Attachment Points
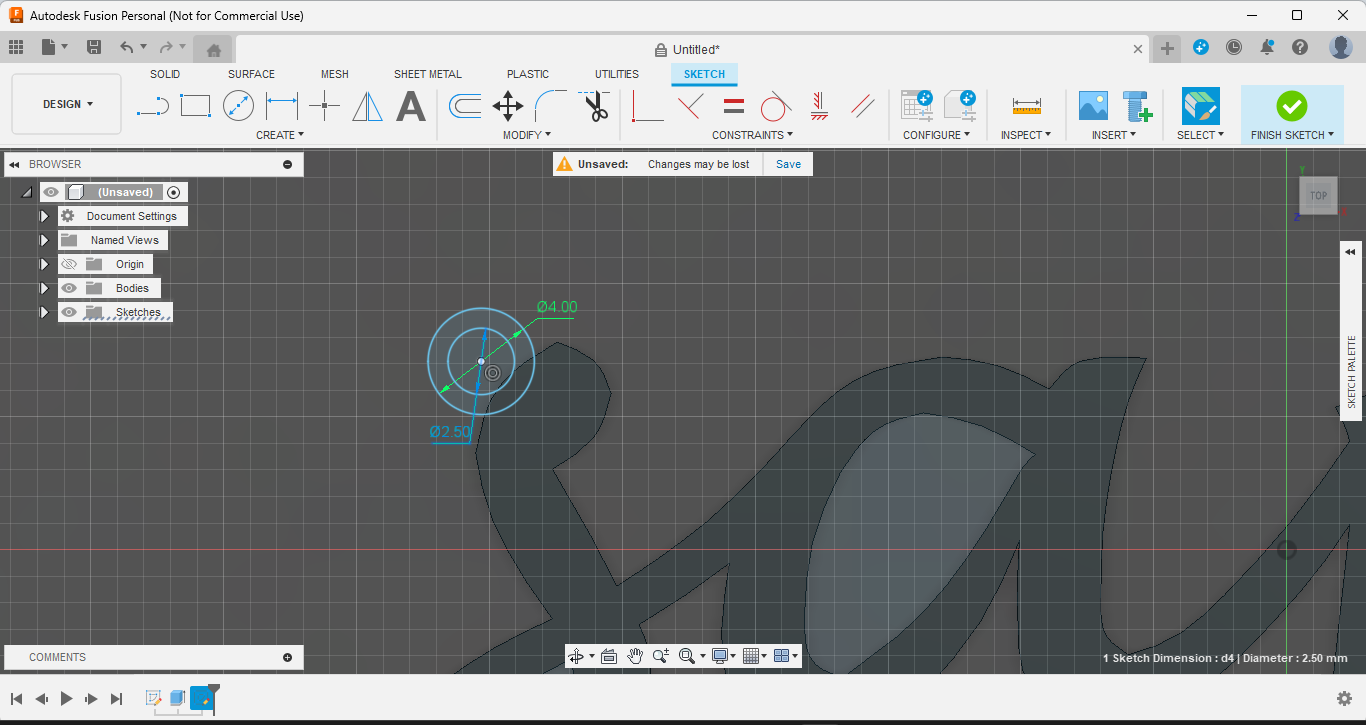
Now, let's add attachment points to your keychain design so that it can be connected to a chain or wire.
1. Create Two Circles: Start a new sketch on the same plane as your text. Use the circle tool to create two circles:
- First Circle (Inner): Create a circle with a diameter of 2.5 mm. This will be the inner circle that your chain or wire will pass through.
- Second Circle (Outer): Create a circle around the first one with a diameter of 4 mm. This outer circle will provide a visible border and structural support for the attachment point.
2. Positioning: Place these circles strategically, typically near the top of the first letter of your text. Ensure they are positioned where the keychain will balance well when attached to a chain.
3. Visual Reference: Refer to an image or diagram for clarity on how these attachment points should look. This will help you visualize the final design and ensure the circles are correctly placed.
Strengthening Attachment Points
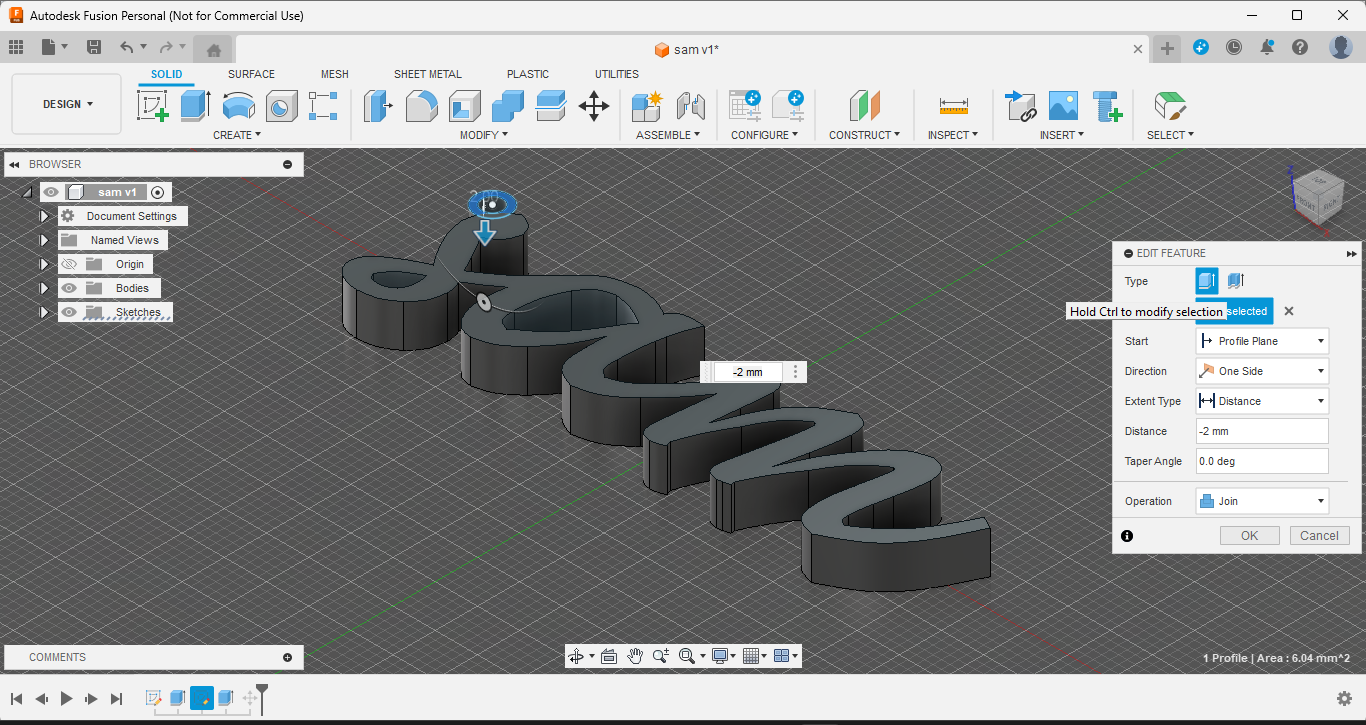
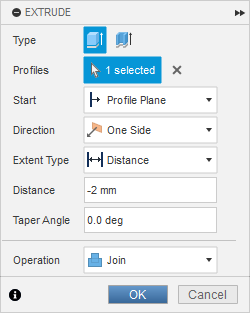
Enhance the attachment points of your keychain design by adding a downward extrusion between the circles.
- Extrude Between Circles: Select the area between the two circles you've created in Fusion 360. Use the "Extrude" tool to extrude this area downward by 2 mm. This will strengthen the attachment points and provide a clear passage for the chain or wire.
- Ensure Structural Integrity: Preview the extrusion to ensure that it enhances the strength of the attachment points and provides ample space for the chain to pass through easily.
- Visual Reference: Refer to an image or diagram for a clearer understanding of how the extrusion should look and function in your keychain design.
Optimizing Print Orientation
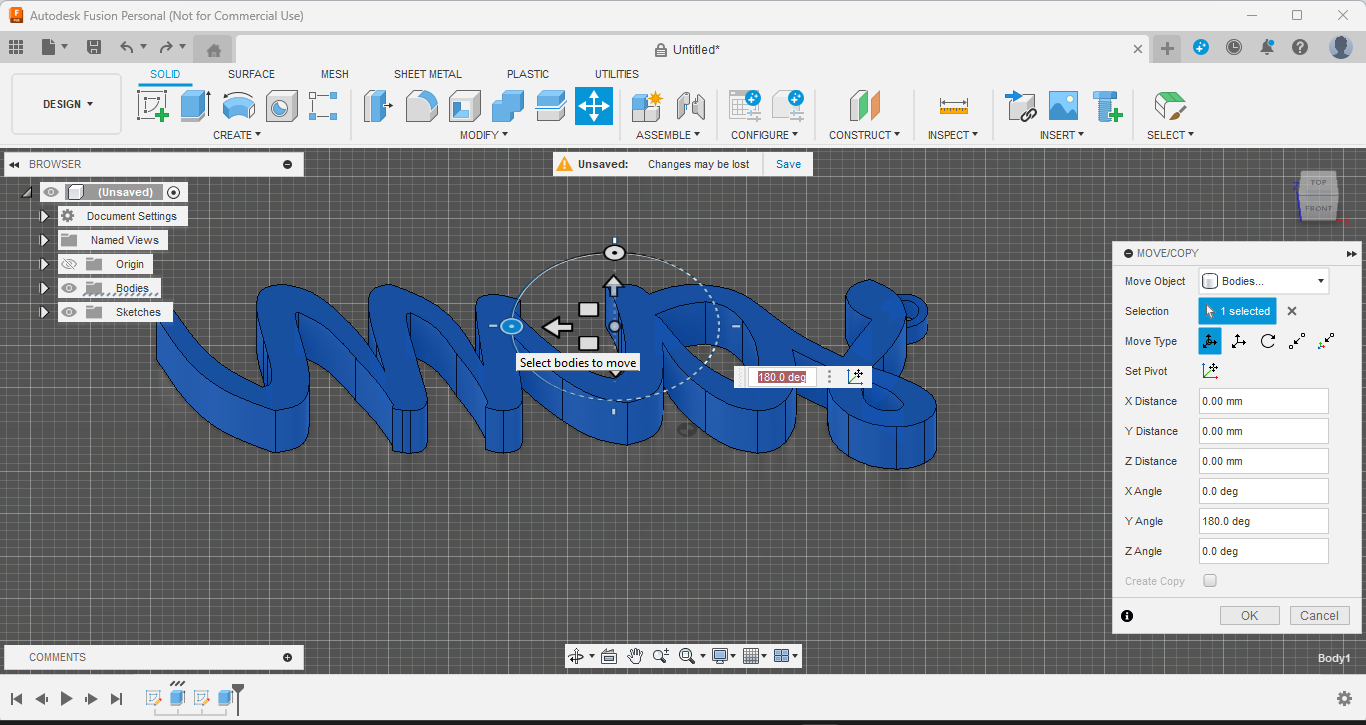
Rotate or flip your keychain design 180 degrees to enhance its appearance using the base layer of the 3D printer.
- Adjust Orientation: In Fusion 360, select your entire keychain design. Use the rotate or flip tools to reposition it so that the base layer (typically the first layer printed) faces upward.
- Enhancing Appearance: Printing with the base layer facing up can improve the overall finish and clarity of your keychain, especially for features like text and details.
- Preview Orientation: Preview the rotated or flipped orientation in Fusion 360 to ensure that all components are correctly positioned for printing.
Saving and 3D Printing
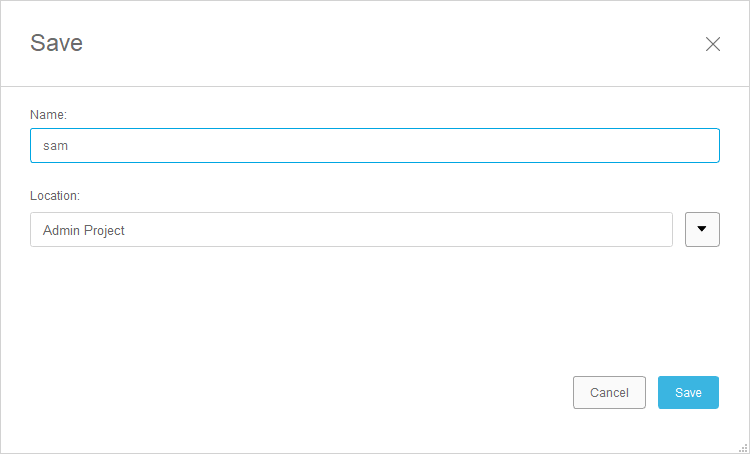
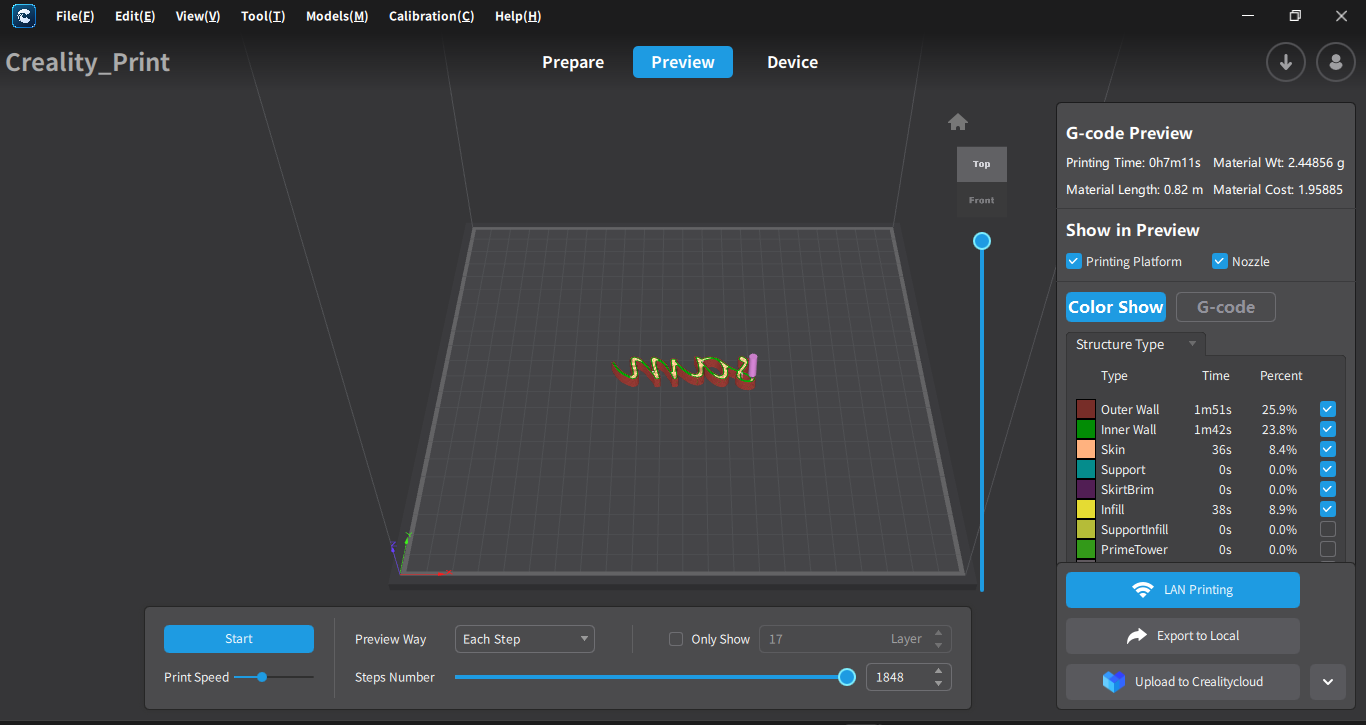
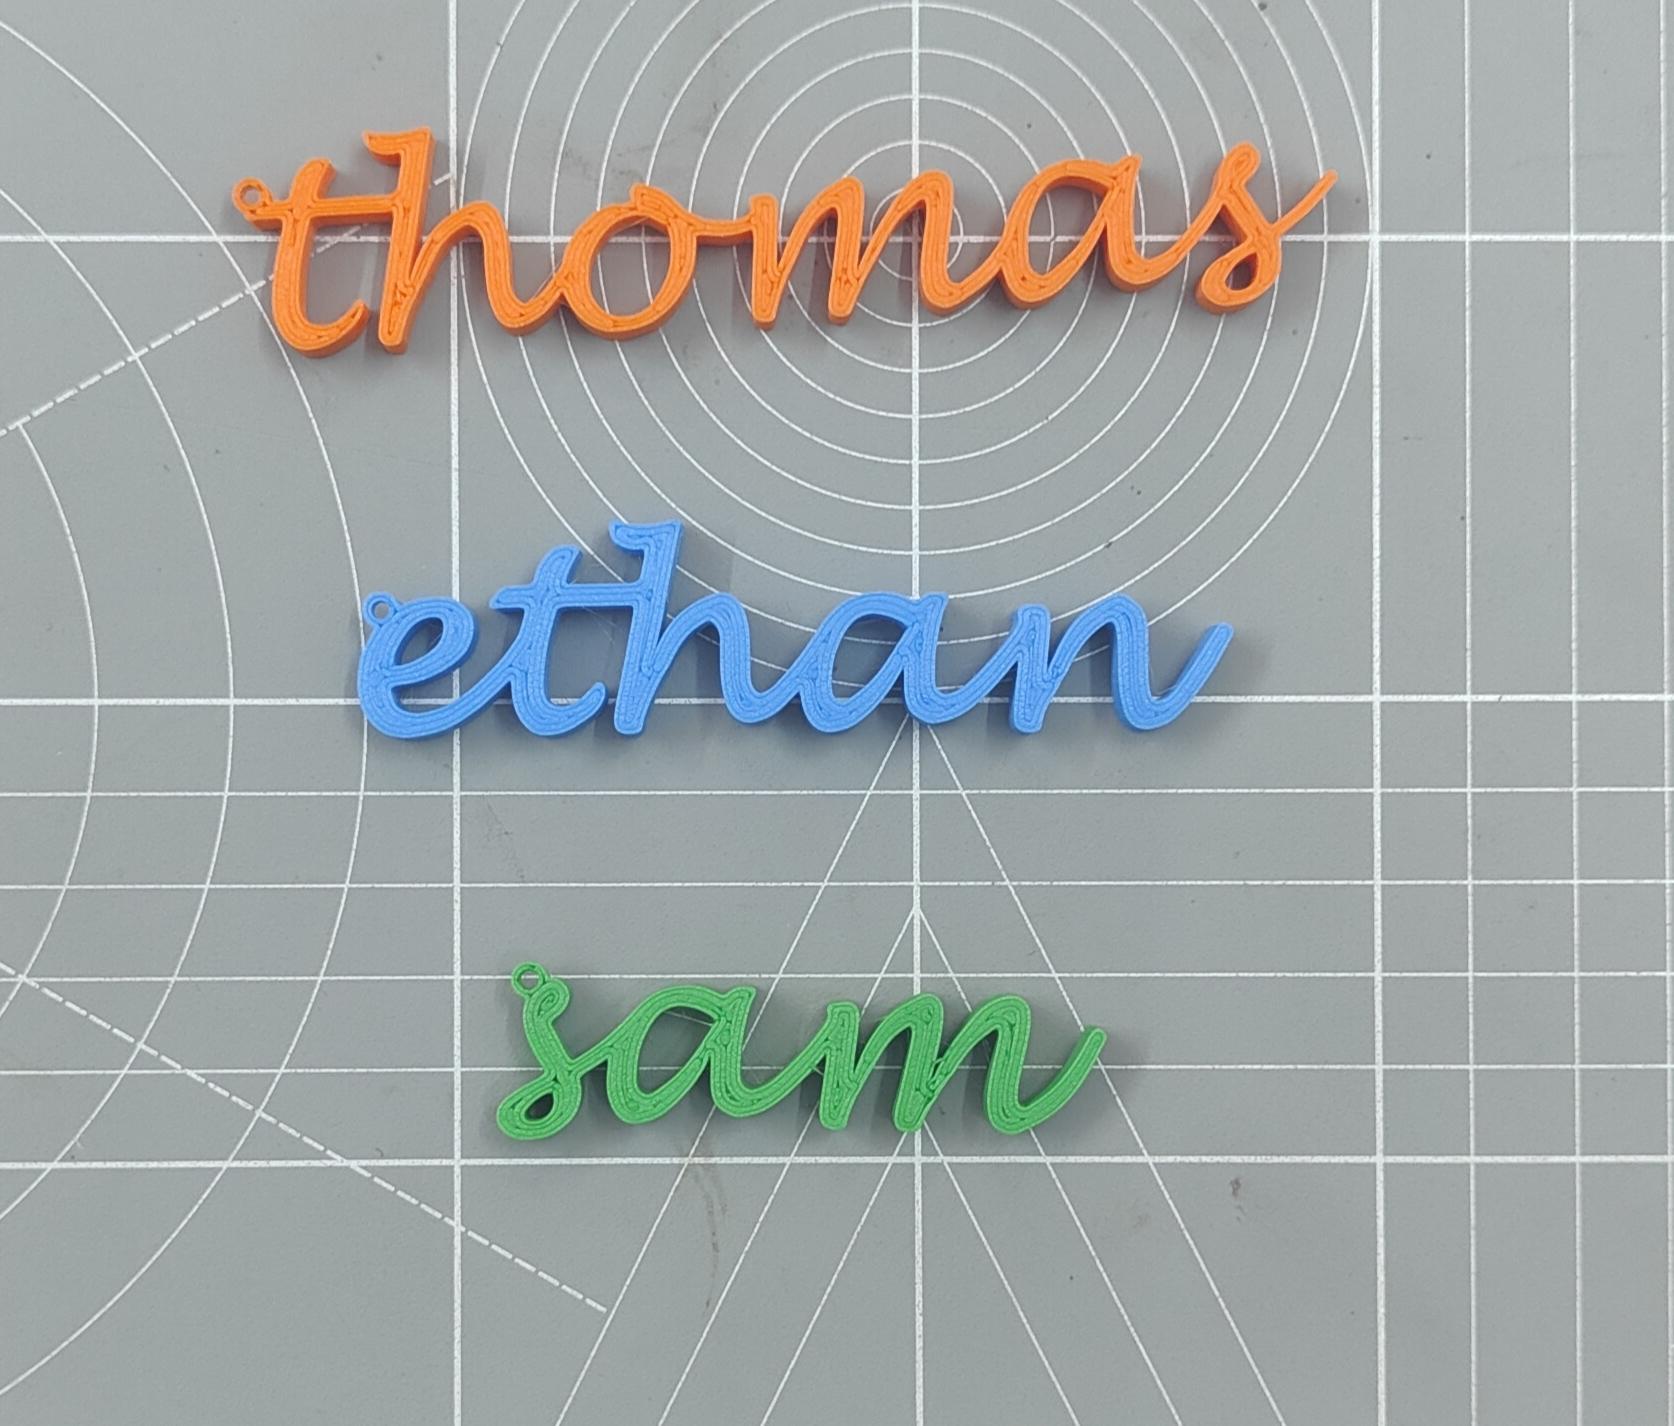
Save your keychain design and prepare it for 3D printing using your preferred slicing software.
- Save Your File: In Fusion 360, ensure your design is saved in a format compatible with 3D printing (e.g., .STL file format).
- Export to Slicer: Export your saved design file to your preferred slicing software (e.g., Cura, PrusaSlicer). This step allows you to configure print settings and generate the G-code necessary for 3D printing.
- Slicing Settings: In your slicing software, adjust the settings according to your preferences and printer capabilities. Here are some recommended settings:
- Layer Height: Choose a layer height that balances print quality and printing time (e.g., 0.2 mm).
- Infill Density: Determine the infill density based on the desired strength of your keychain (e.g., 20-30% infill).
- Supports and Rafts: Depending on your design, enable supports and rafts if necessary to ensure stable printing.
- Print Speed: Adjust print speed to achieve optimal results without compromising quality.
- Choose Your Favorite Color: Select your preferred filament color for printing your keychain. You can choose a color that complements your design or matches your personal style.
- Generate G-code: Once settings are configured, generate the G-code file using your slicing software. This file contains instructions for your 3D printer on how to print your keychain.
- Save Settings: Save your slicing settings for future reference or adjustments.
Assembly - Attaching Key and Chain
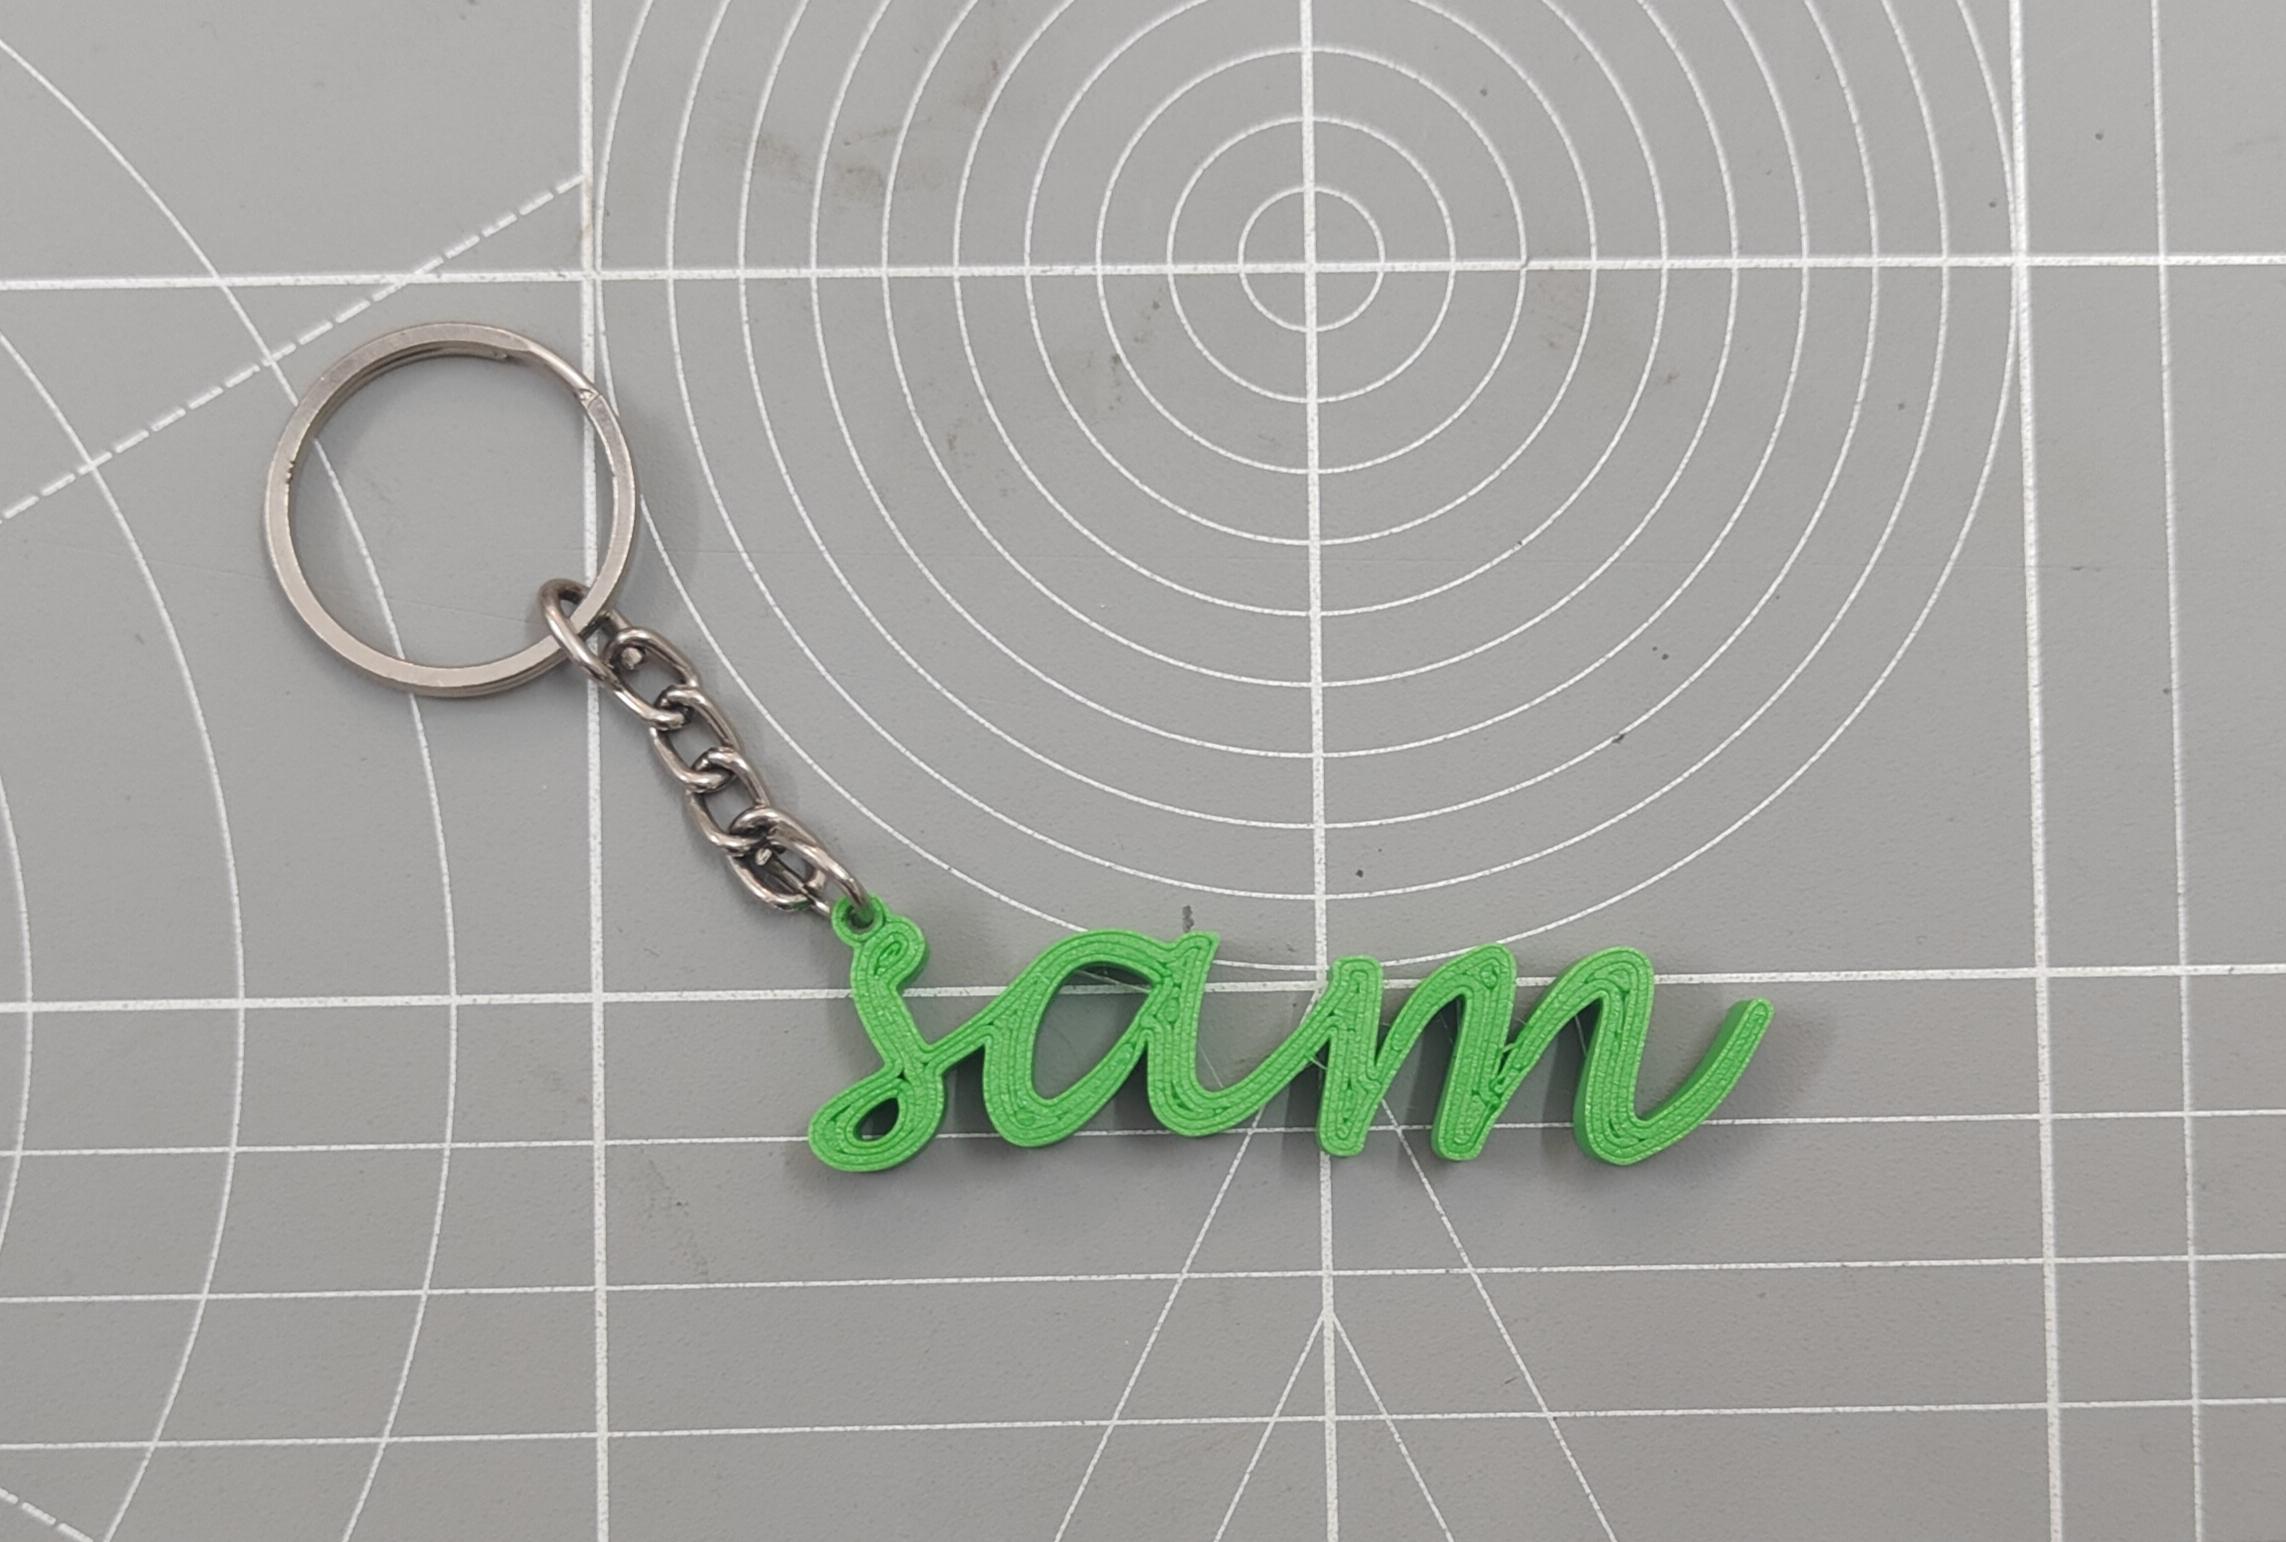
Complete your custom name keychain by attaching the keyring and chain to the printed design.
- Add Chain: Thread a chain through the keyring. The length of the chain can vary depending on how you intend to use your keychain (e.g., as a key holder, bag accessory).
- Final Inspection: Double-check that all components are securely attached and that your keychain is in good condition.
- Personal Touch: Optionally, you can further personalize your keychain by adding decorative elements or charms to the chain.
- Enjoy Your Custom Keychain: Your custom name keychain is now ready to use or gift! Show off your unique design and enjoy the satisfaction of creating something personalized.
Congratulations on completing your custom name keychain project! If there's anything else you'd like to add or adjust in your Instructable, feel free to let me know.
Conclusion
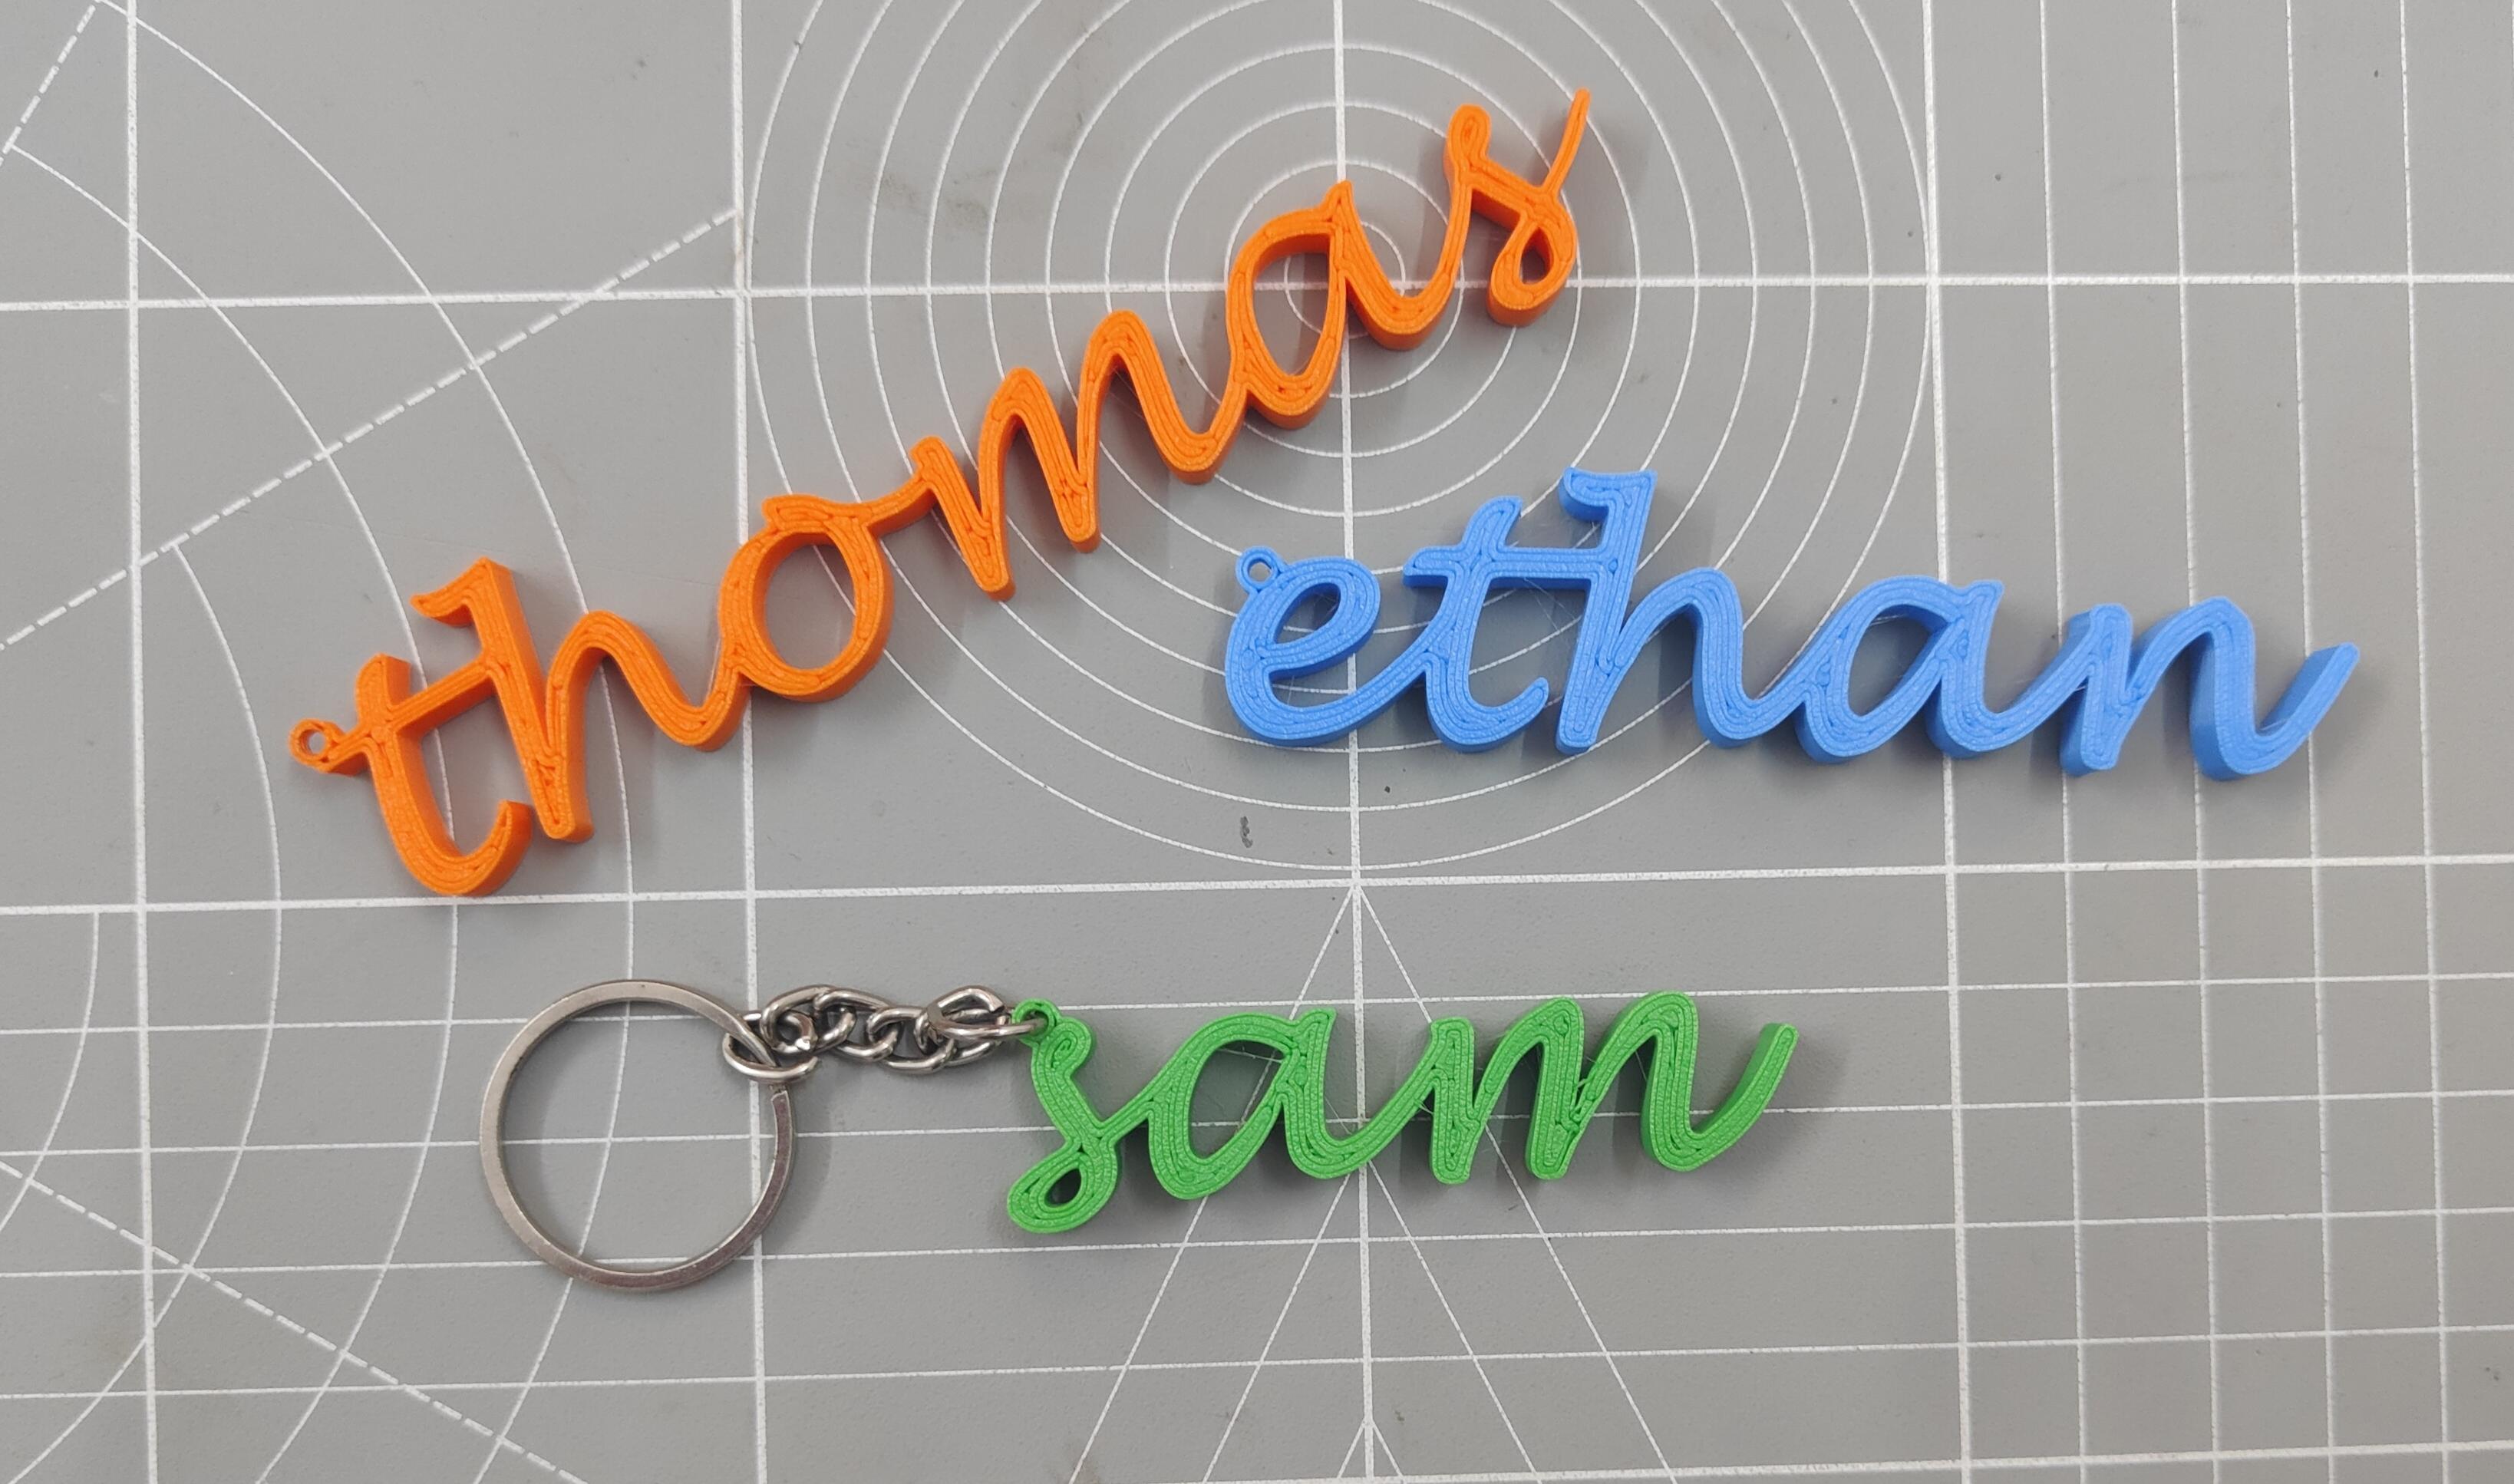
My brother's face lit up with joy when he received this personalized keychain – a small token of appreciation for his love of collecting keychains. Creating your own custom name keychain allows you to add a personal touch to everyday items or make heartfelt gifts for loved ones. Enjoy the process of designing, printing, and assembling your unique creation!