Customizable 3D Printed Text Board and Name Plate: Design, Print, and Personalize!
by PROJECT_X in Workshop > 3D Printing
2237 Views, 30 Favorites, 0 Comments
Customizable 3D Printed Text Board and Name Plate: Design, Print, and Personalize!
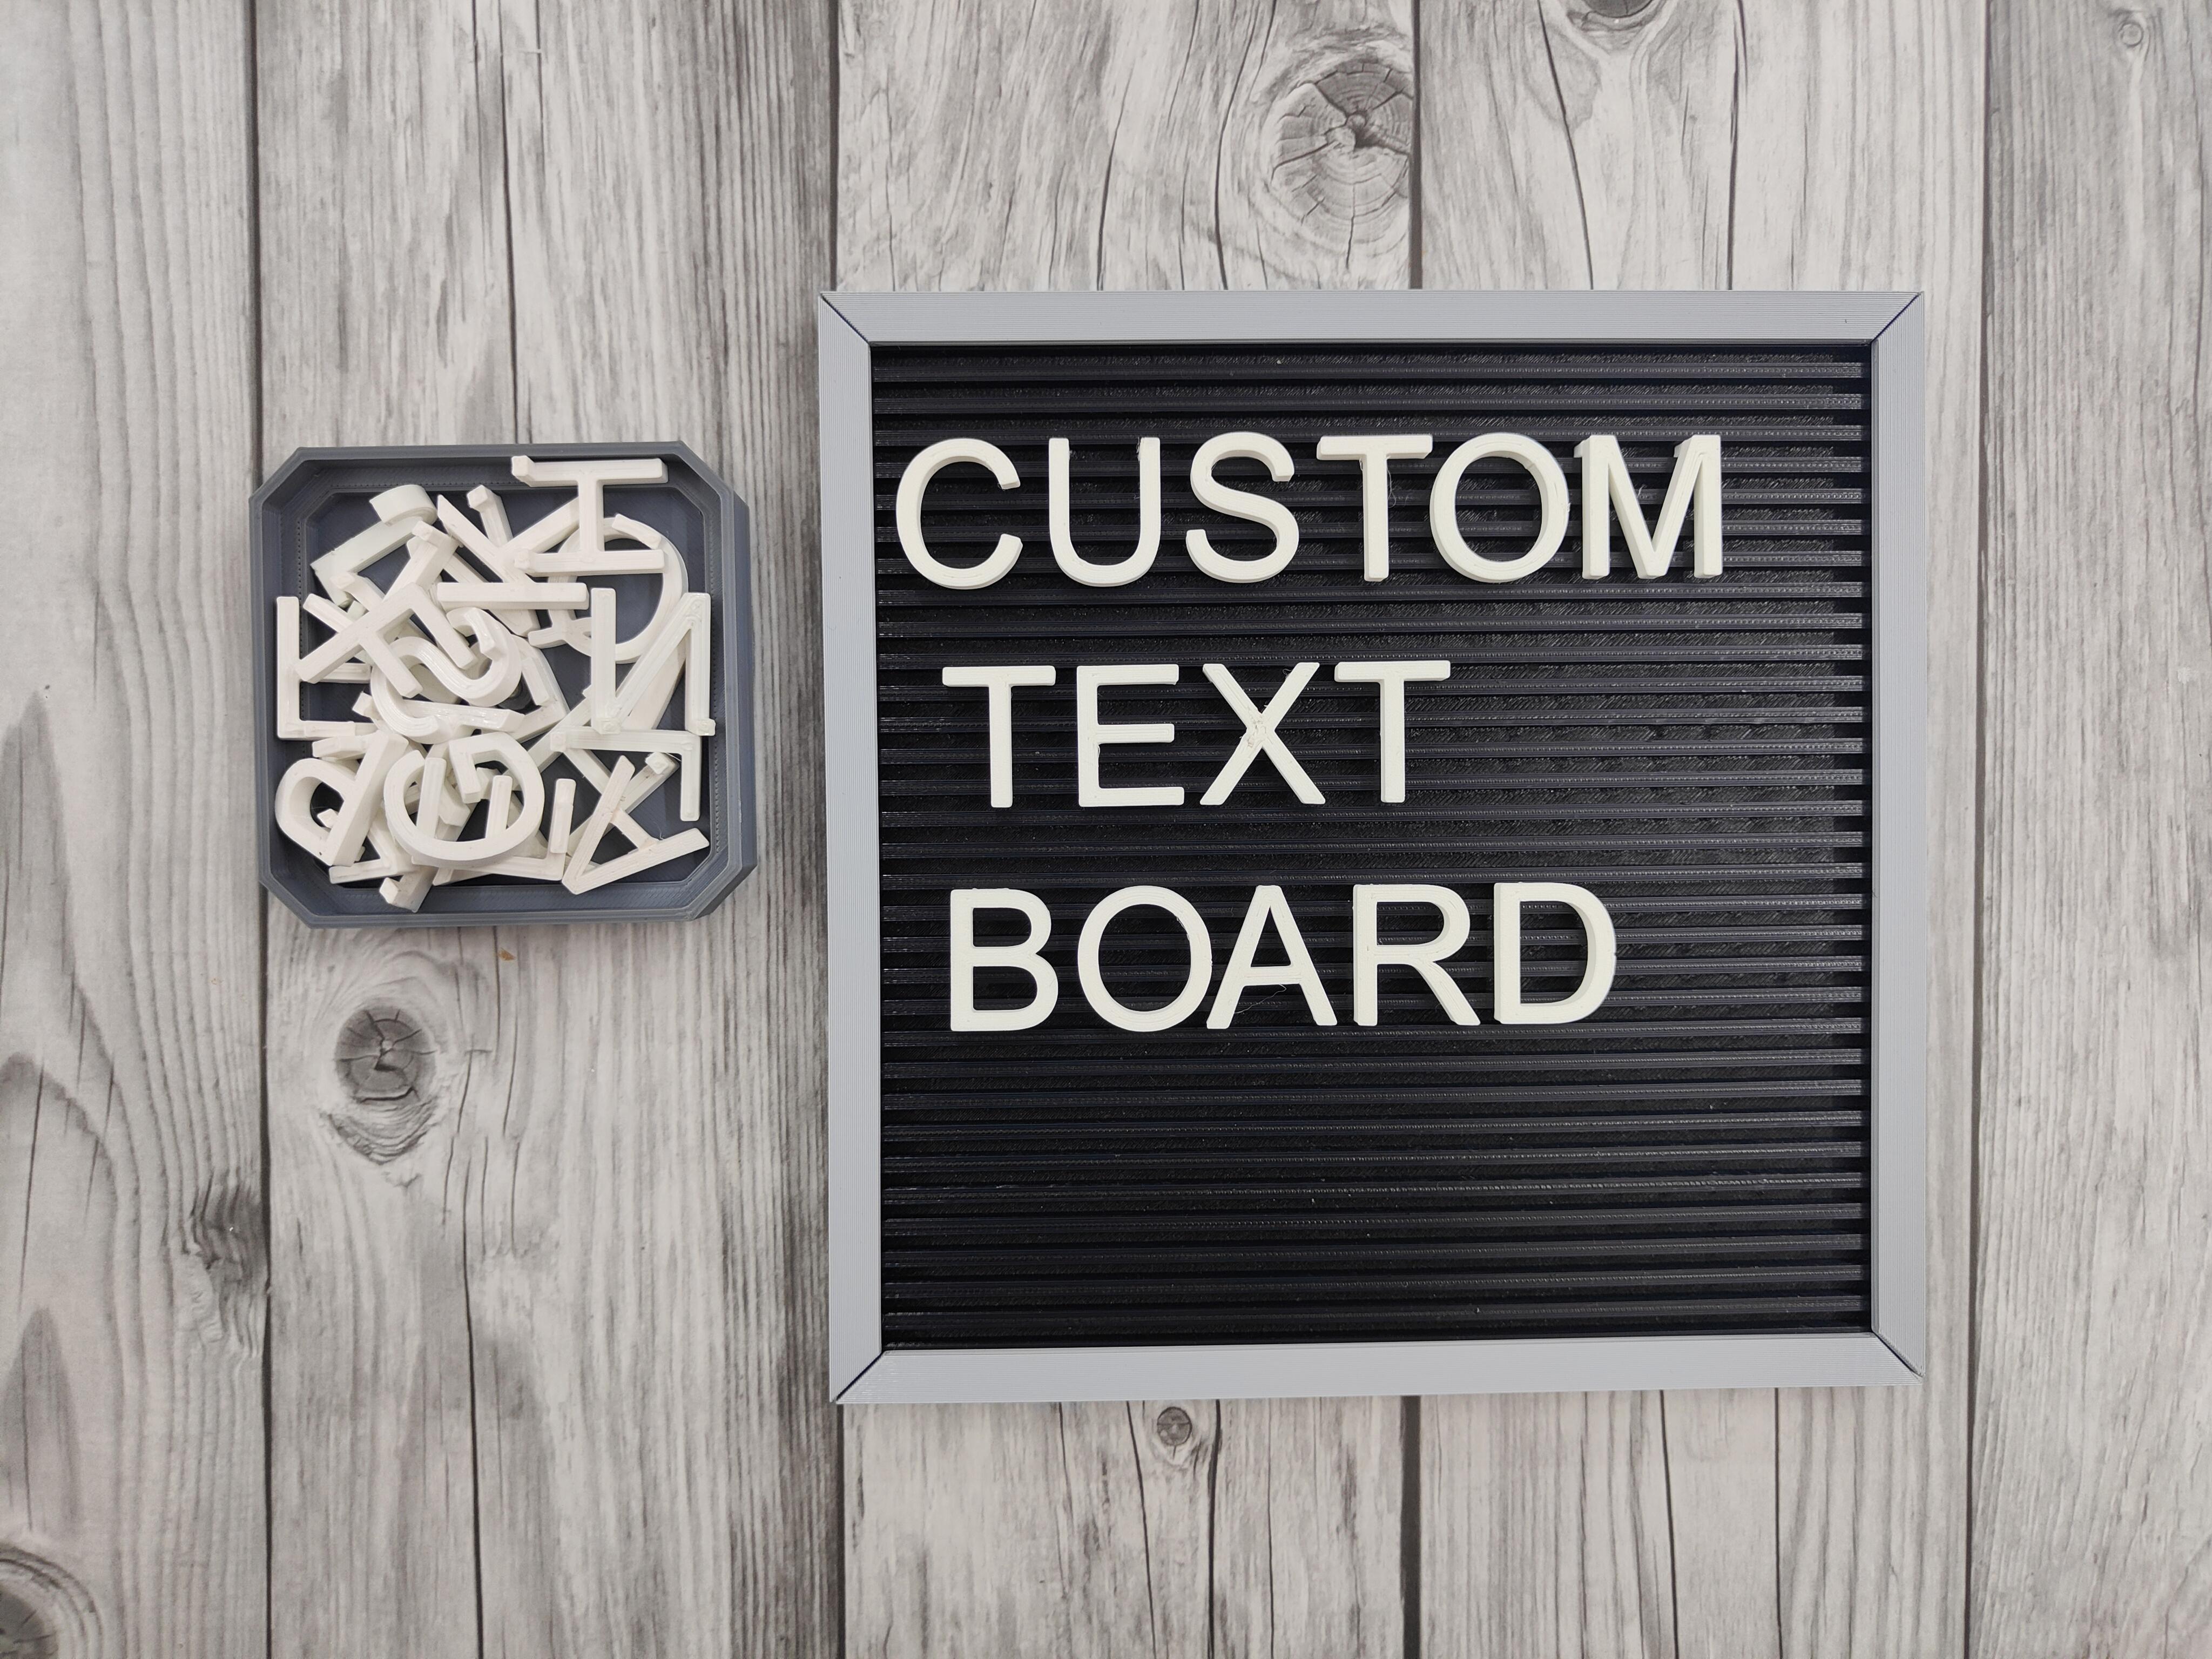
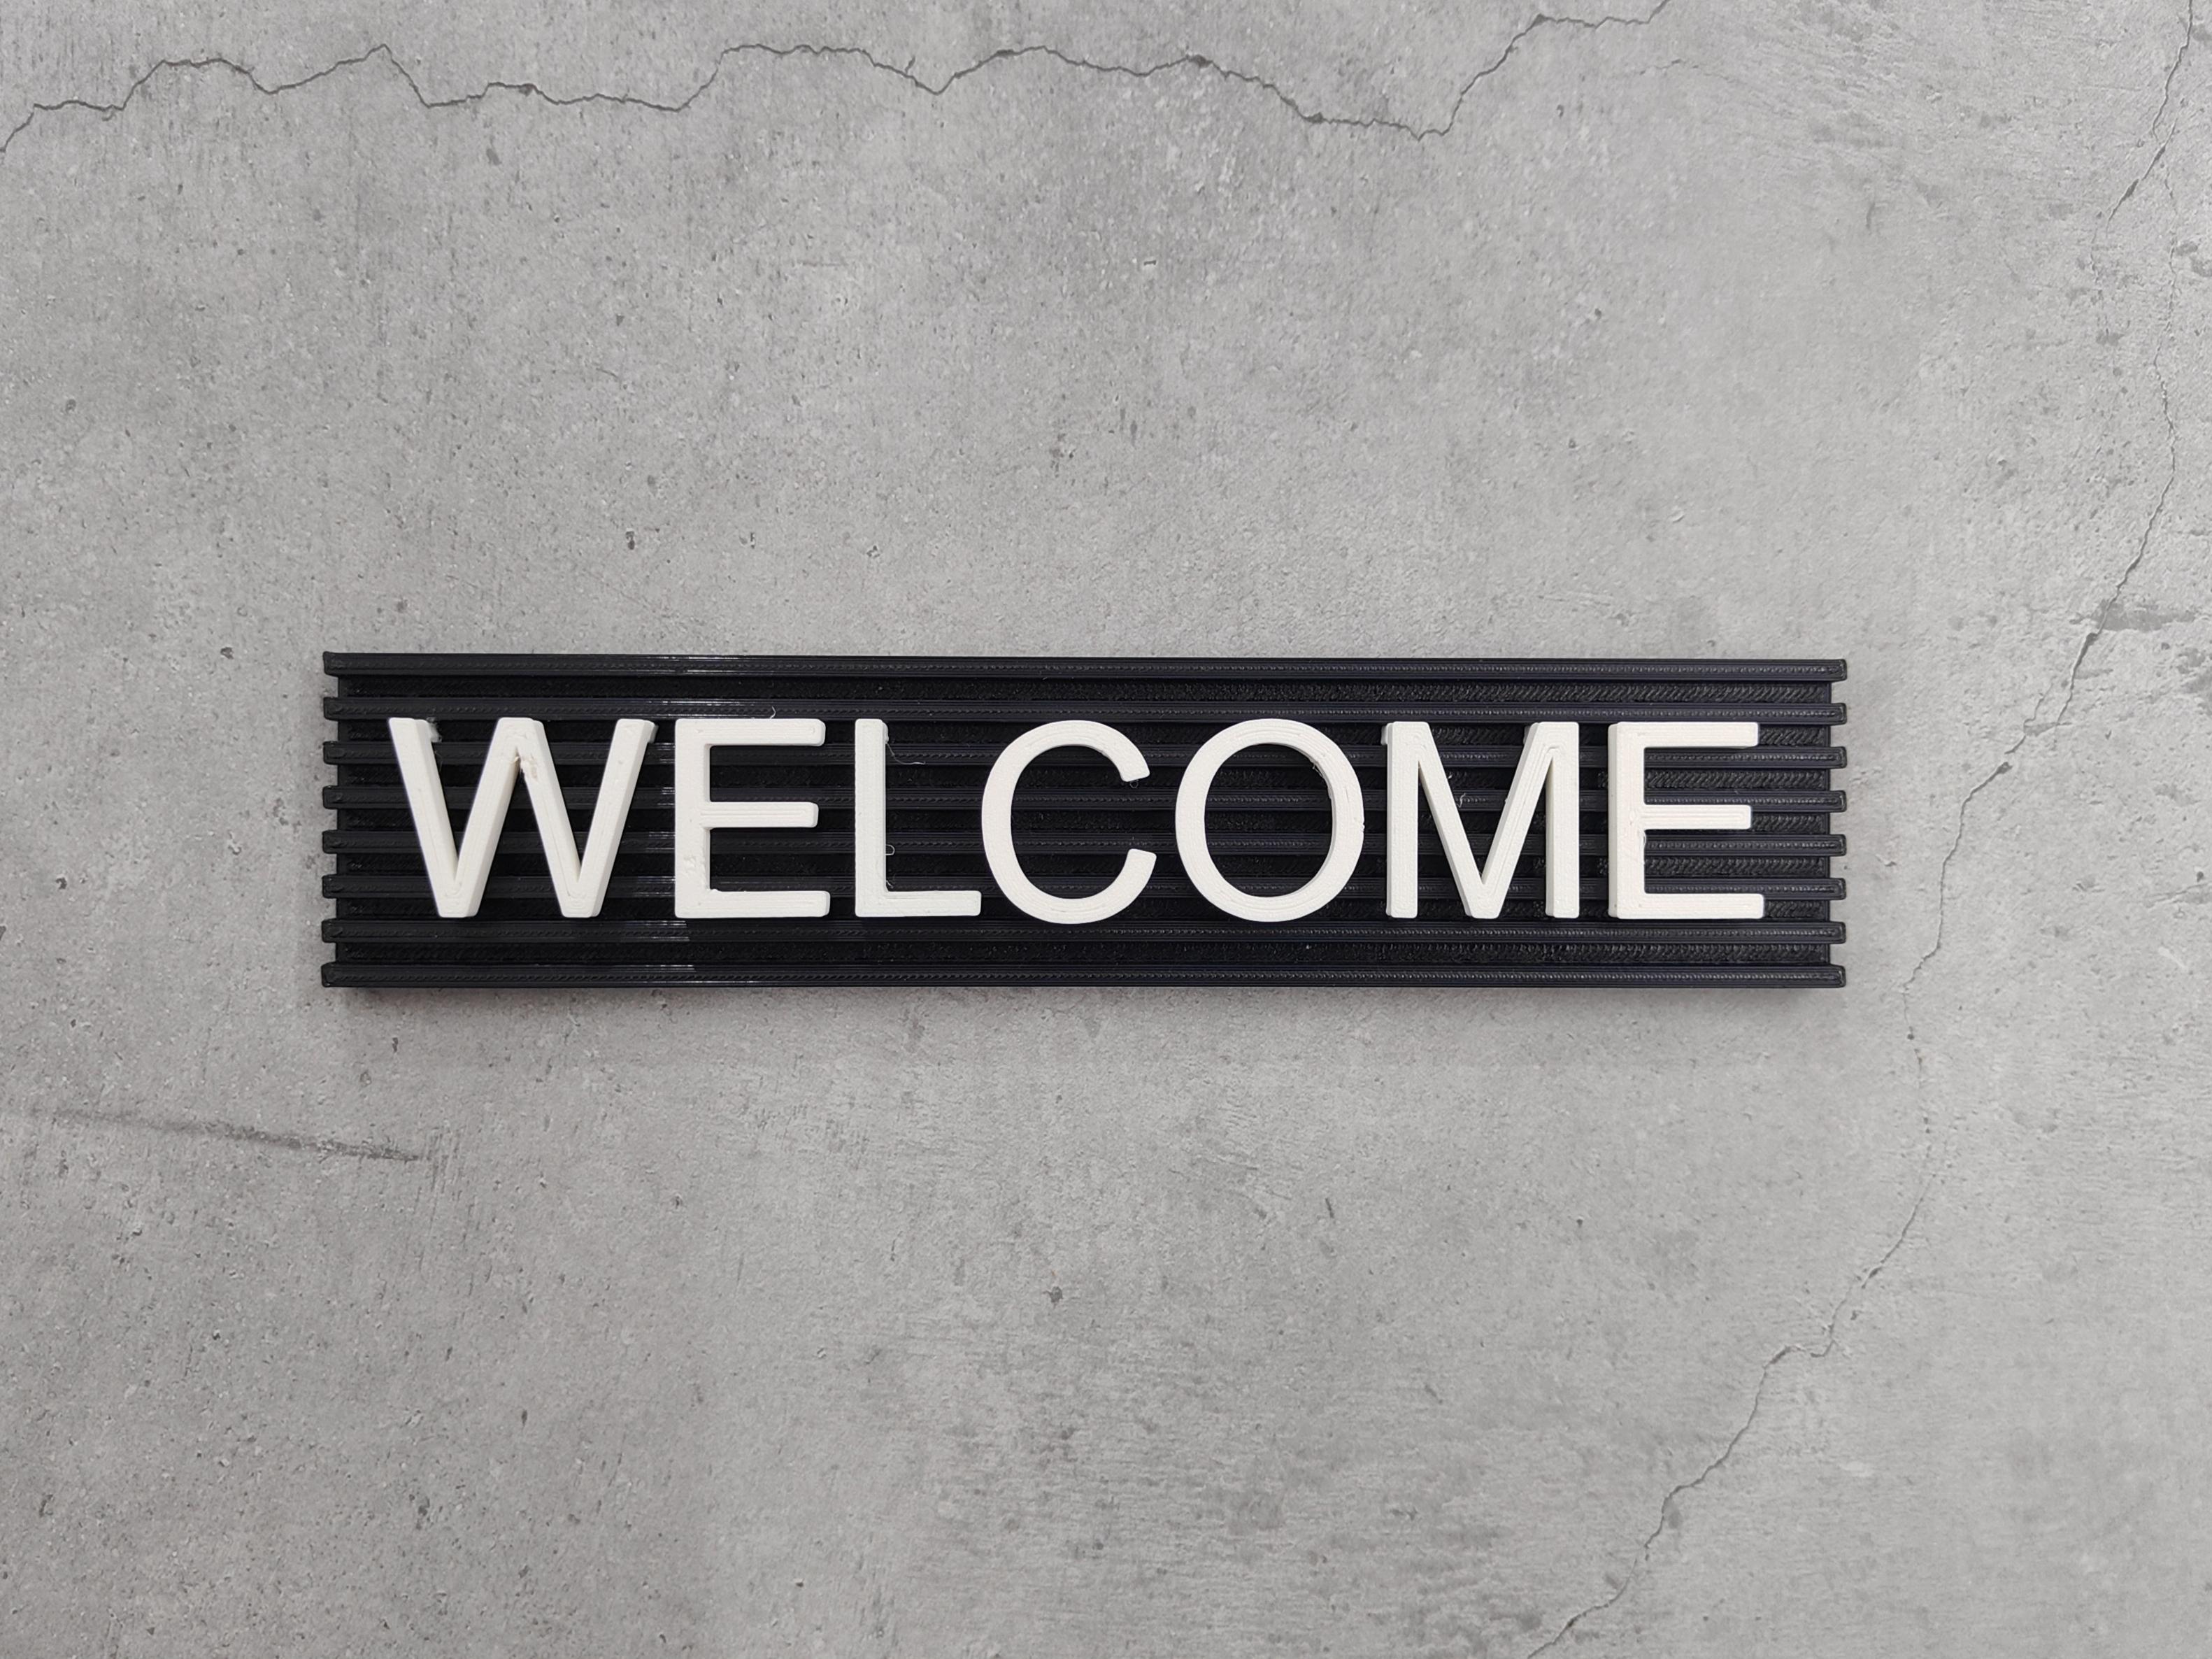
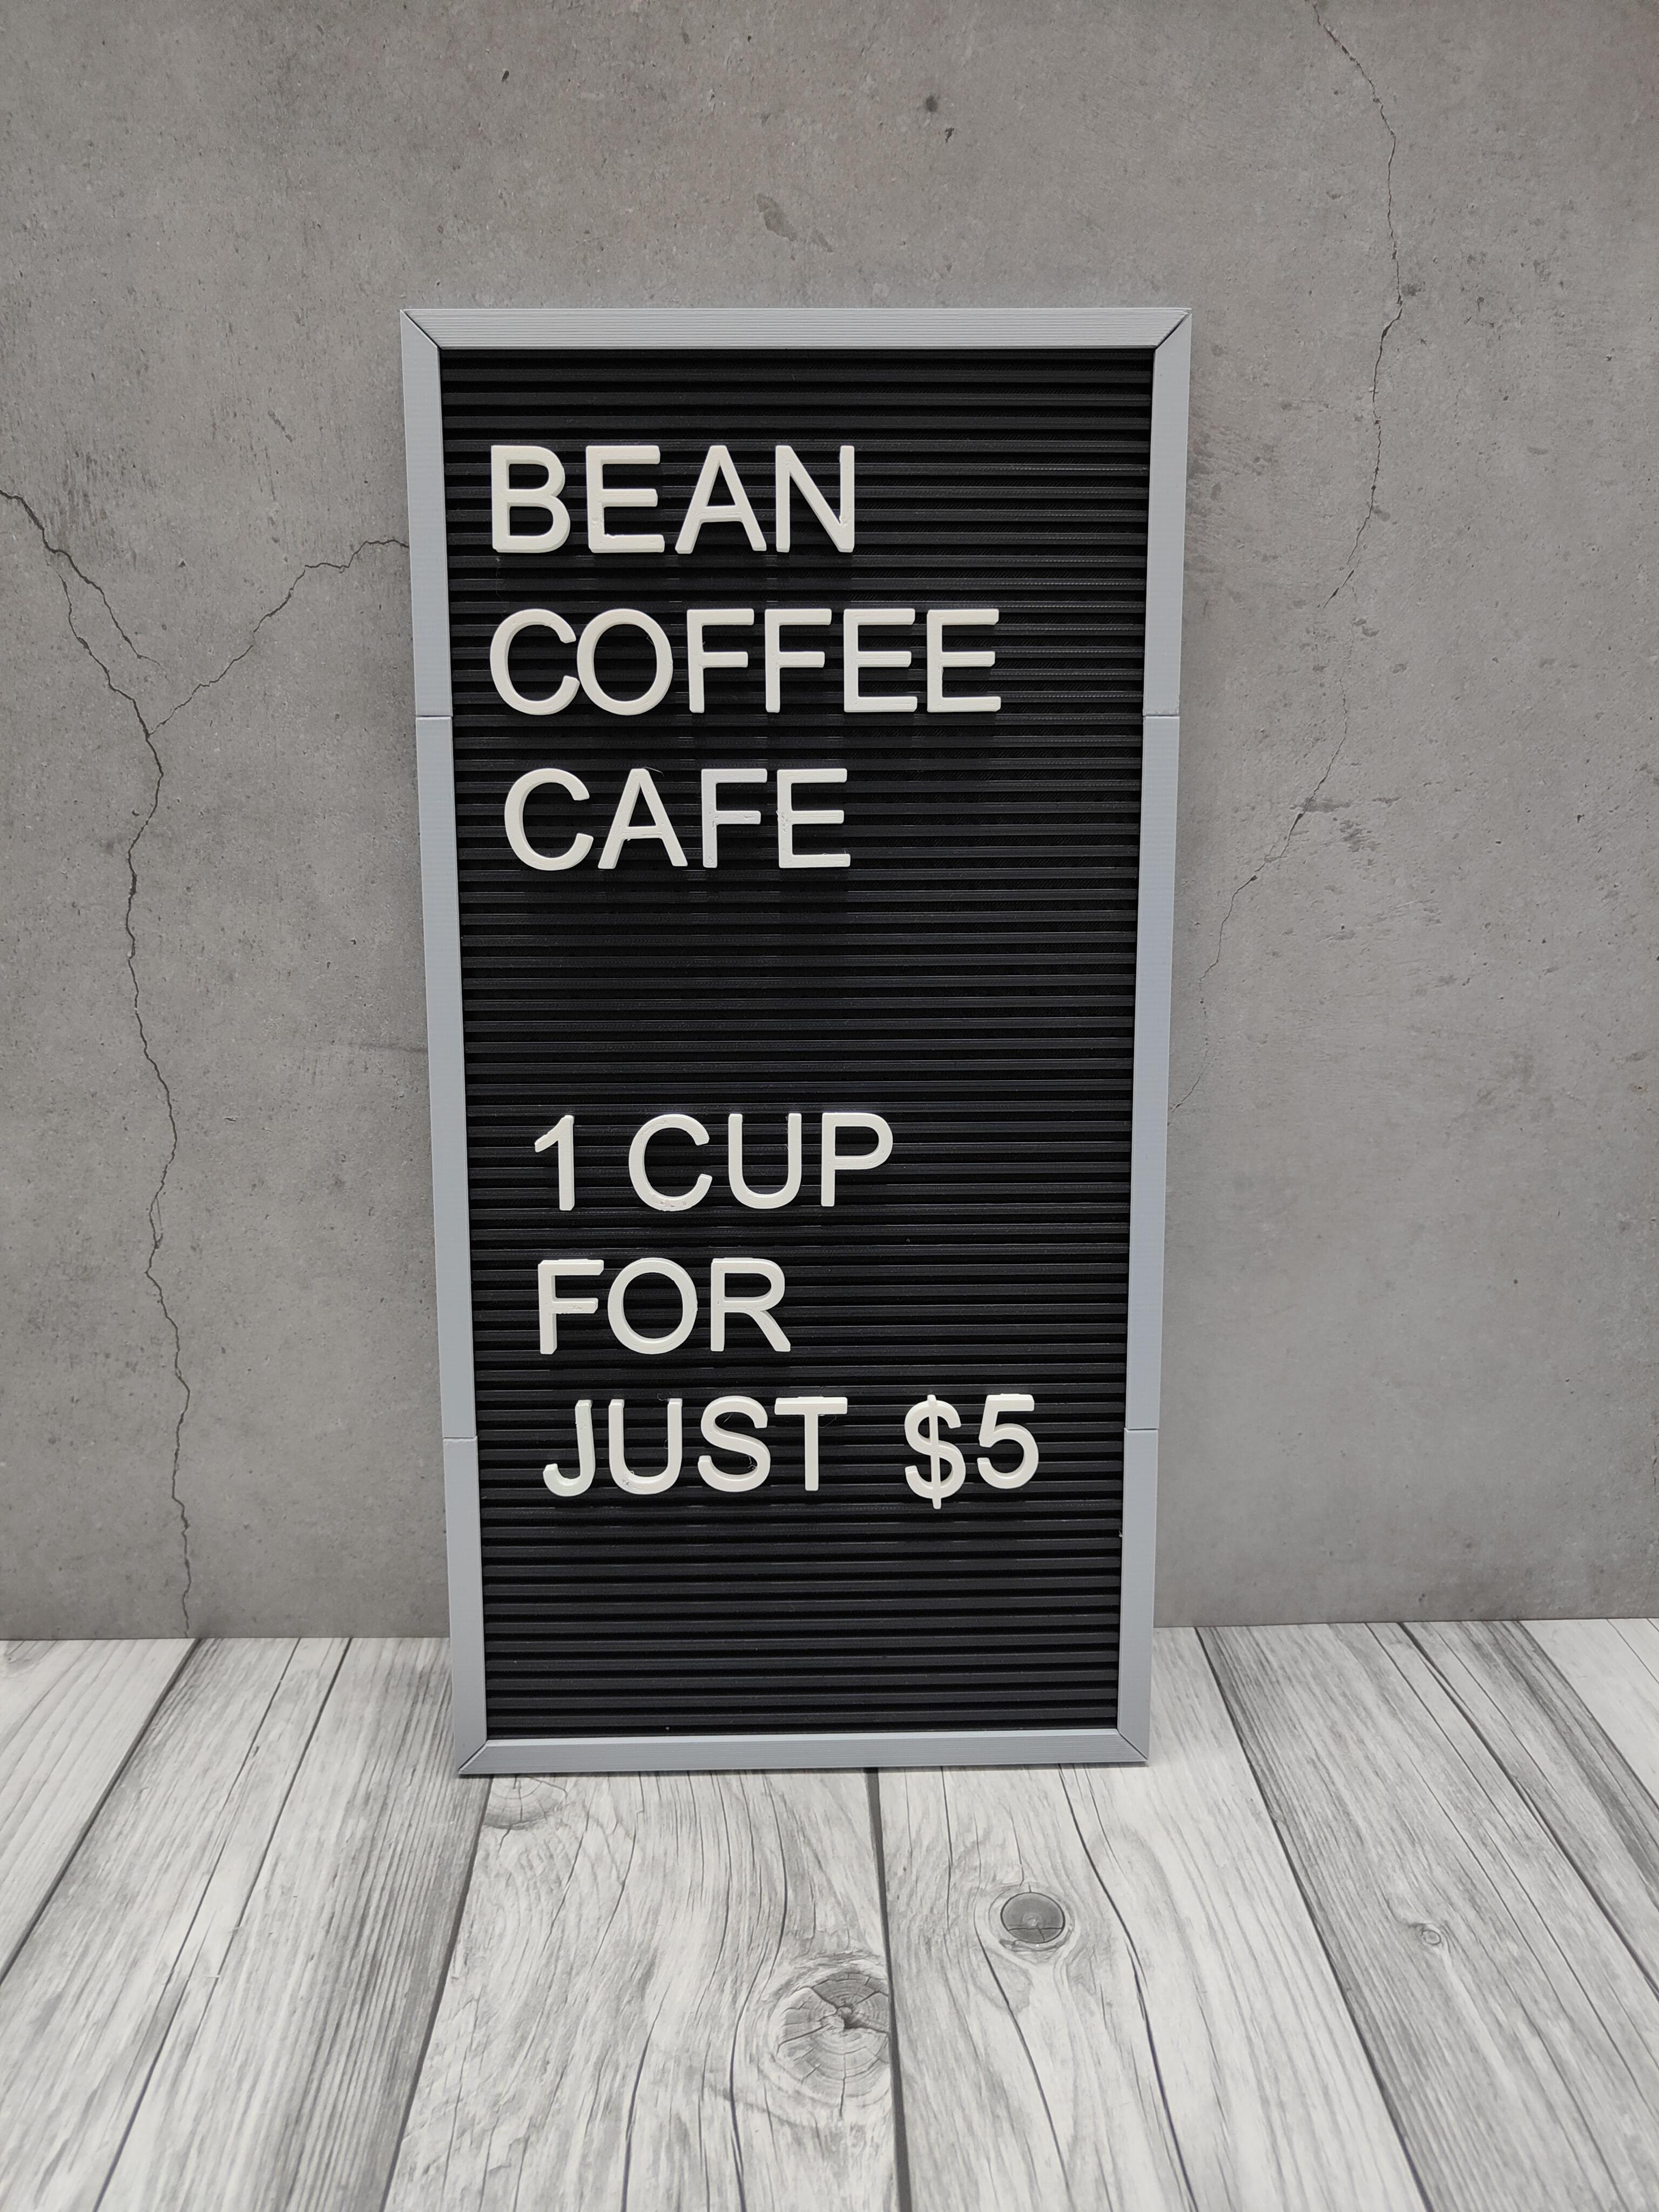
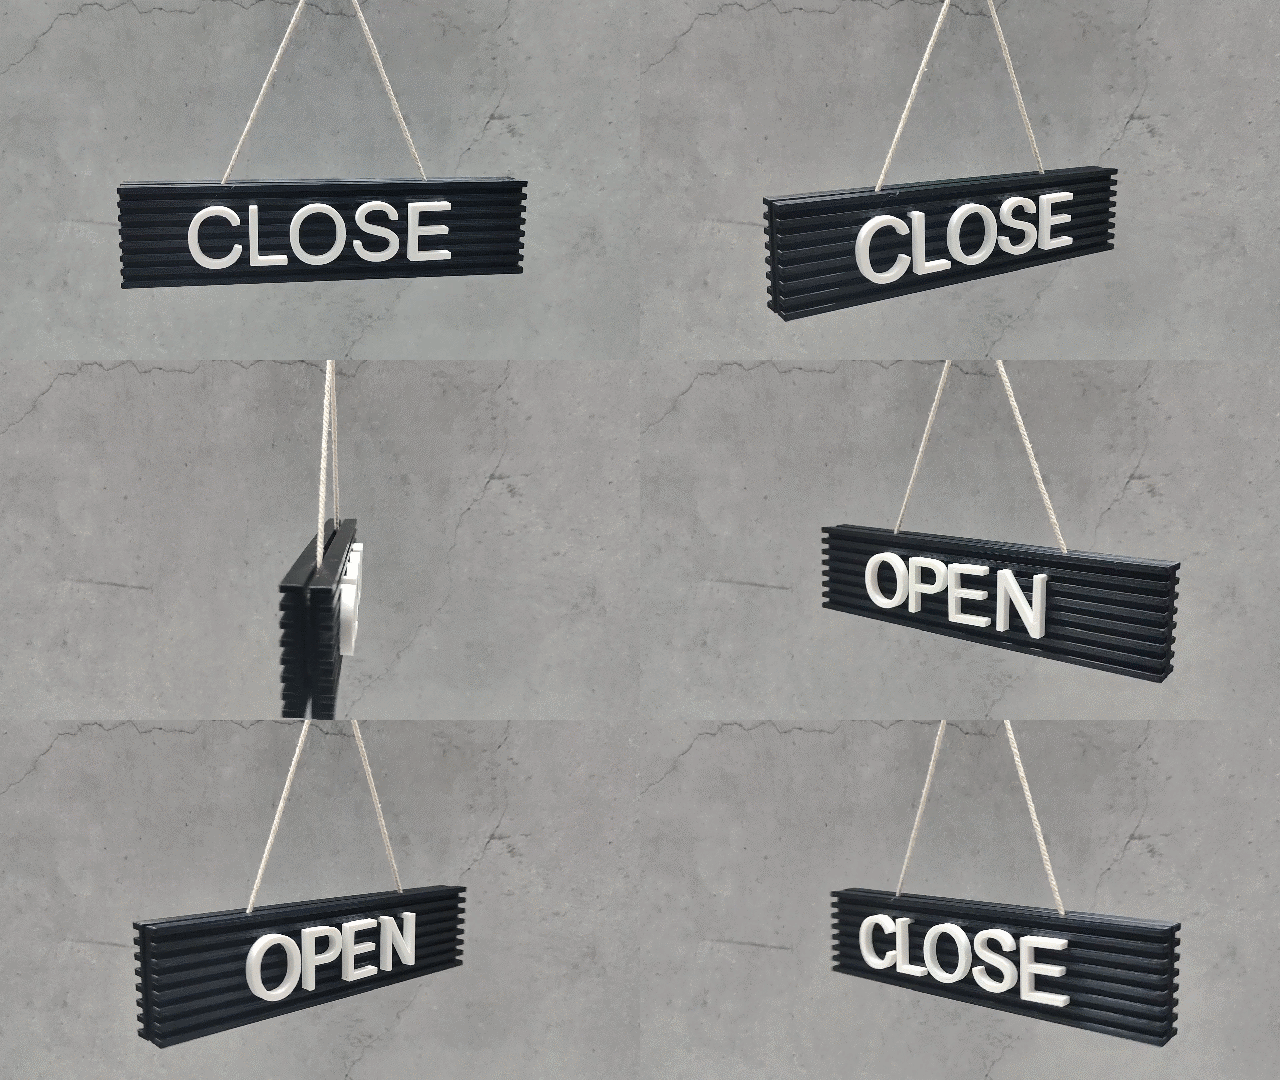
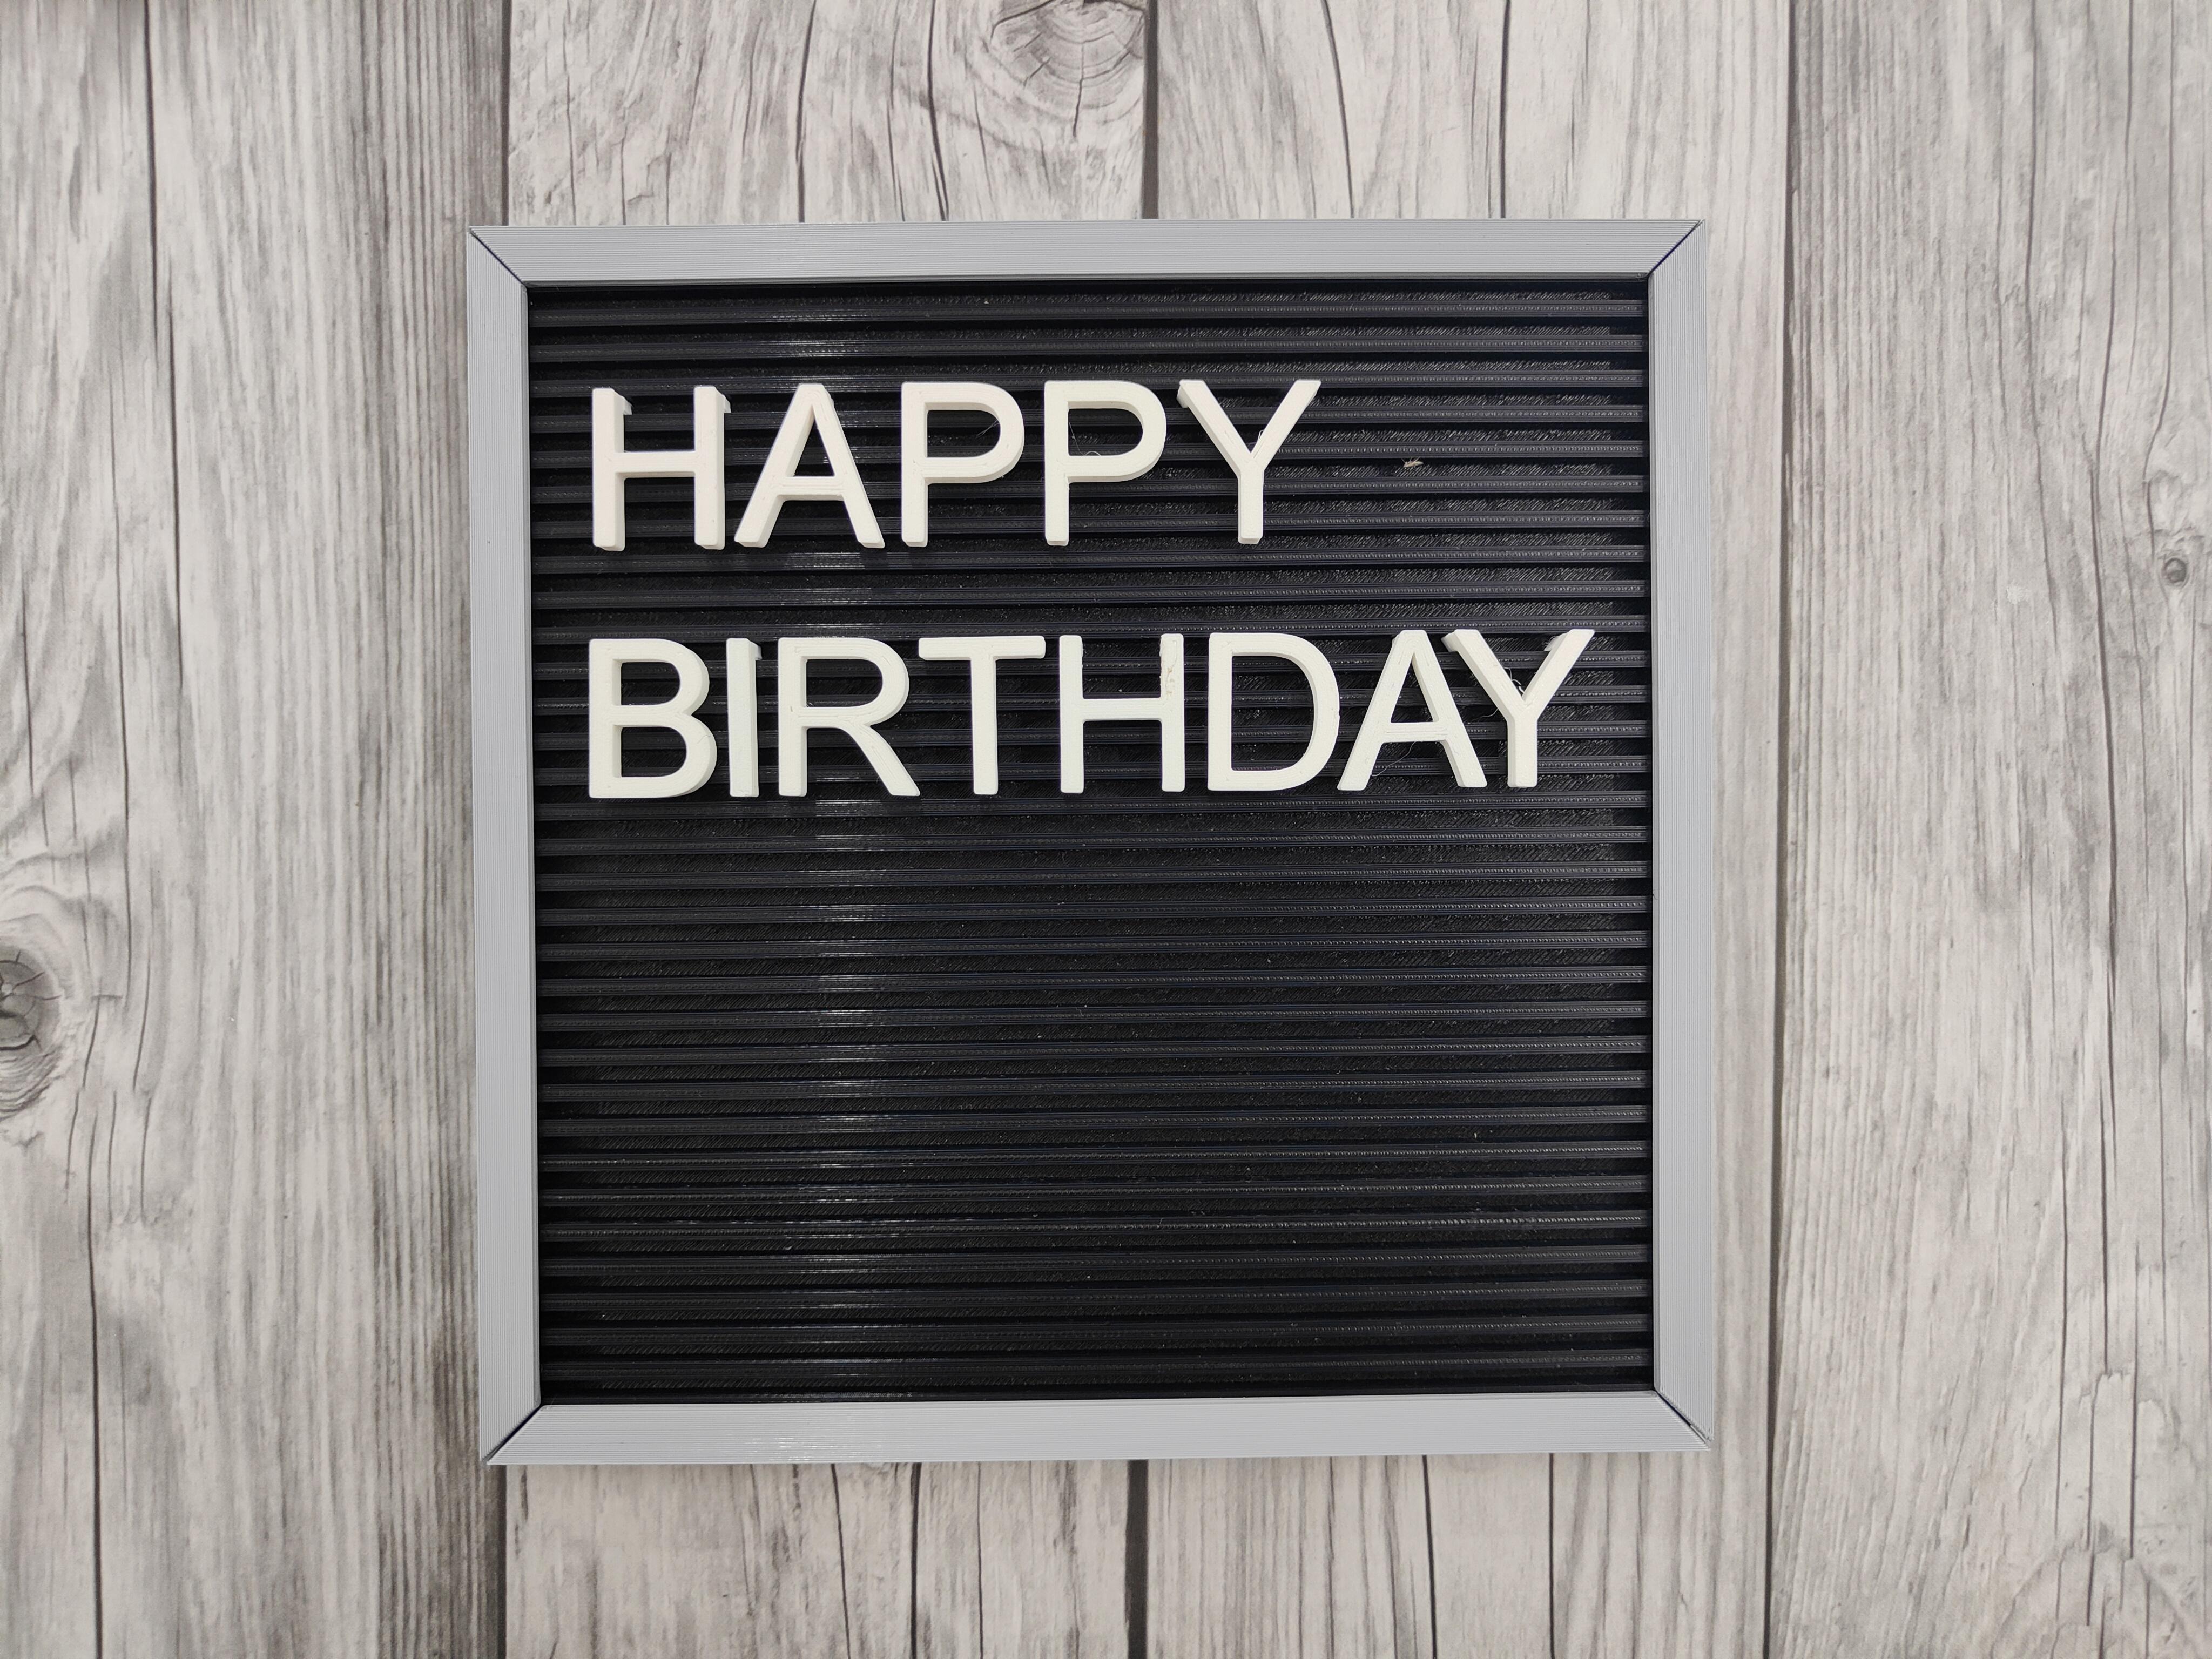
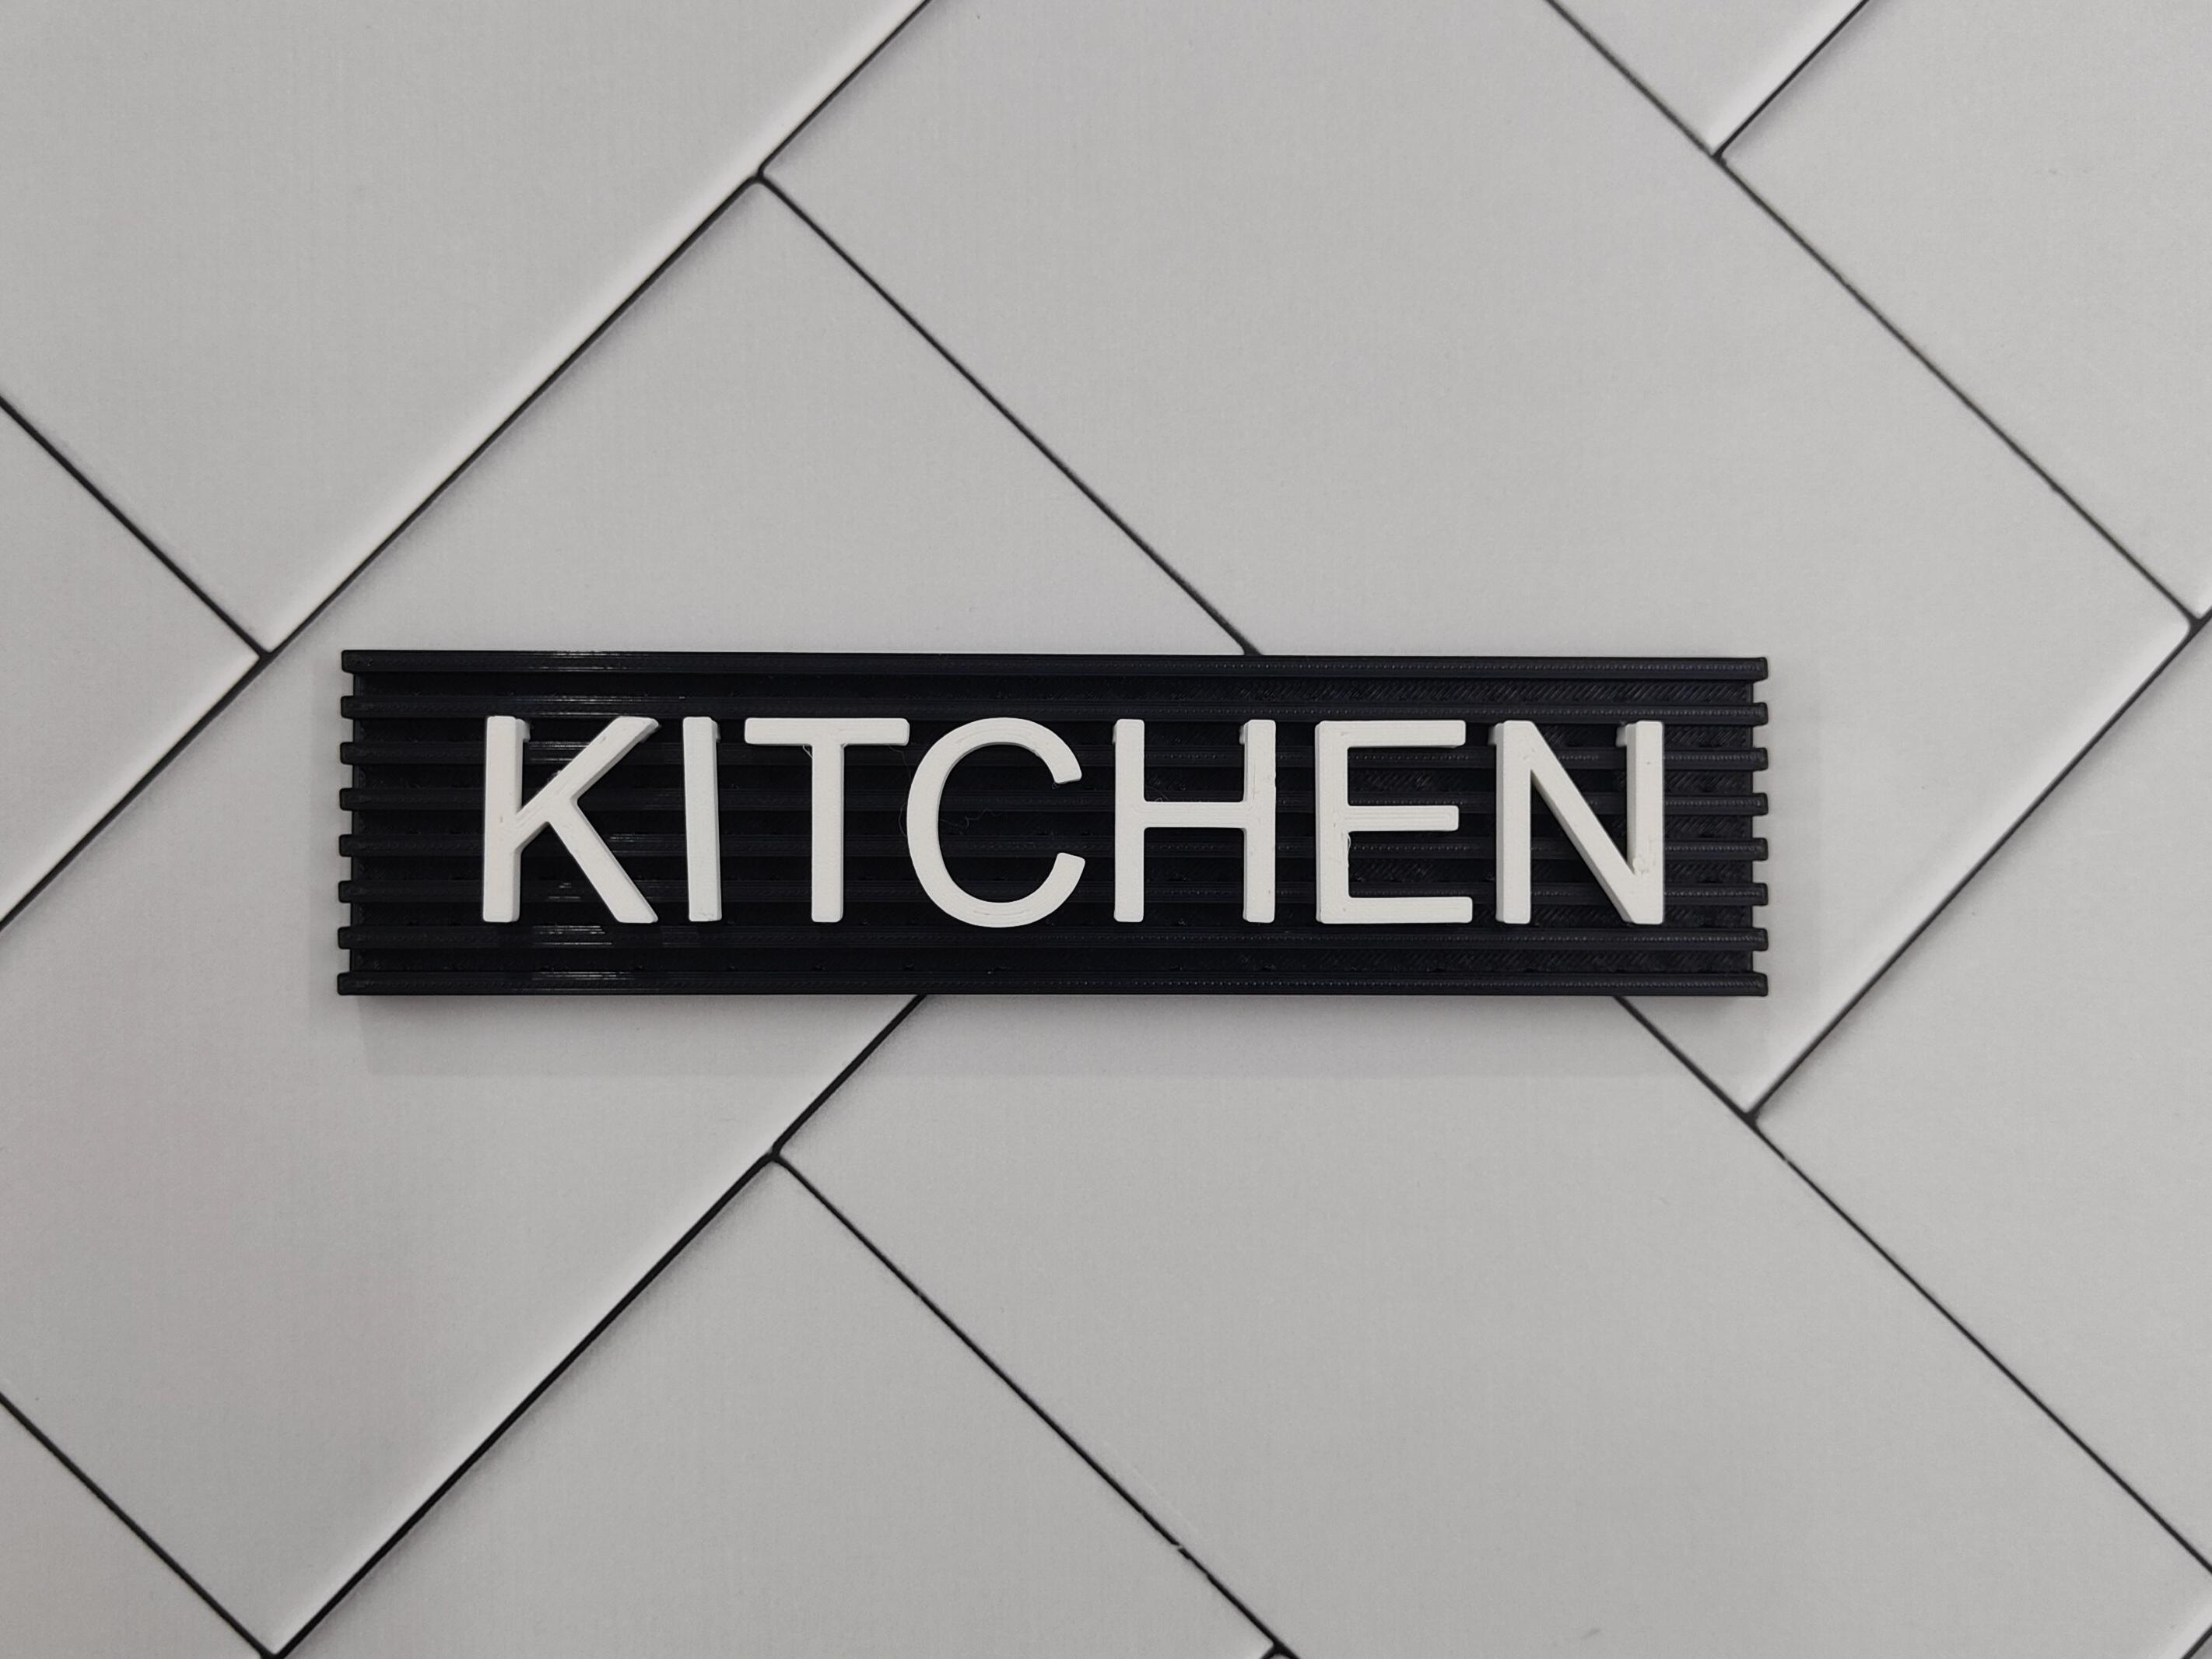
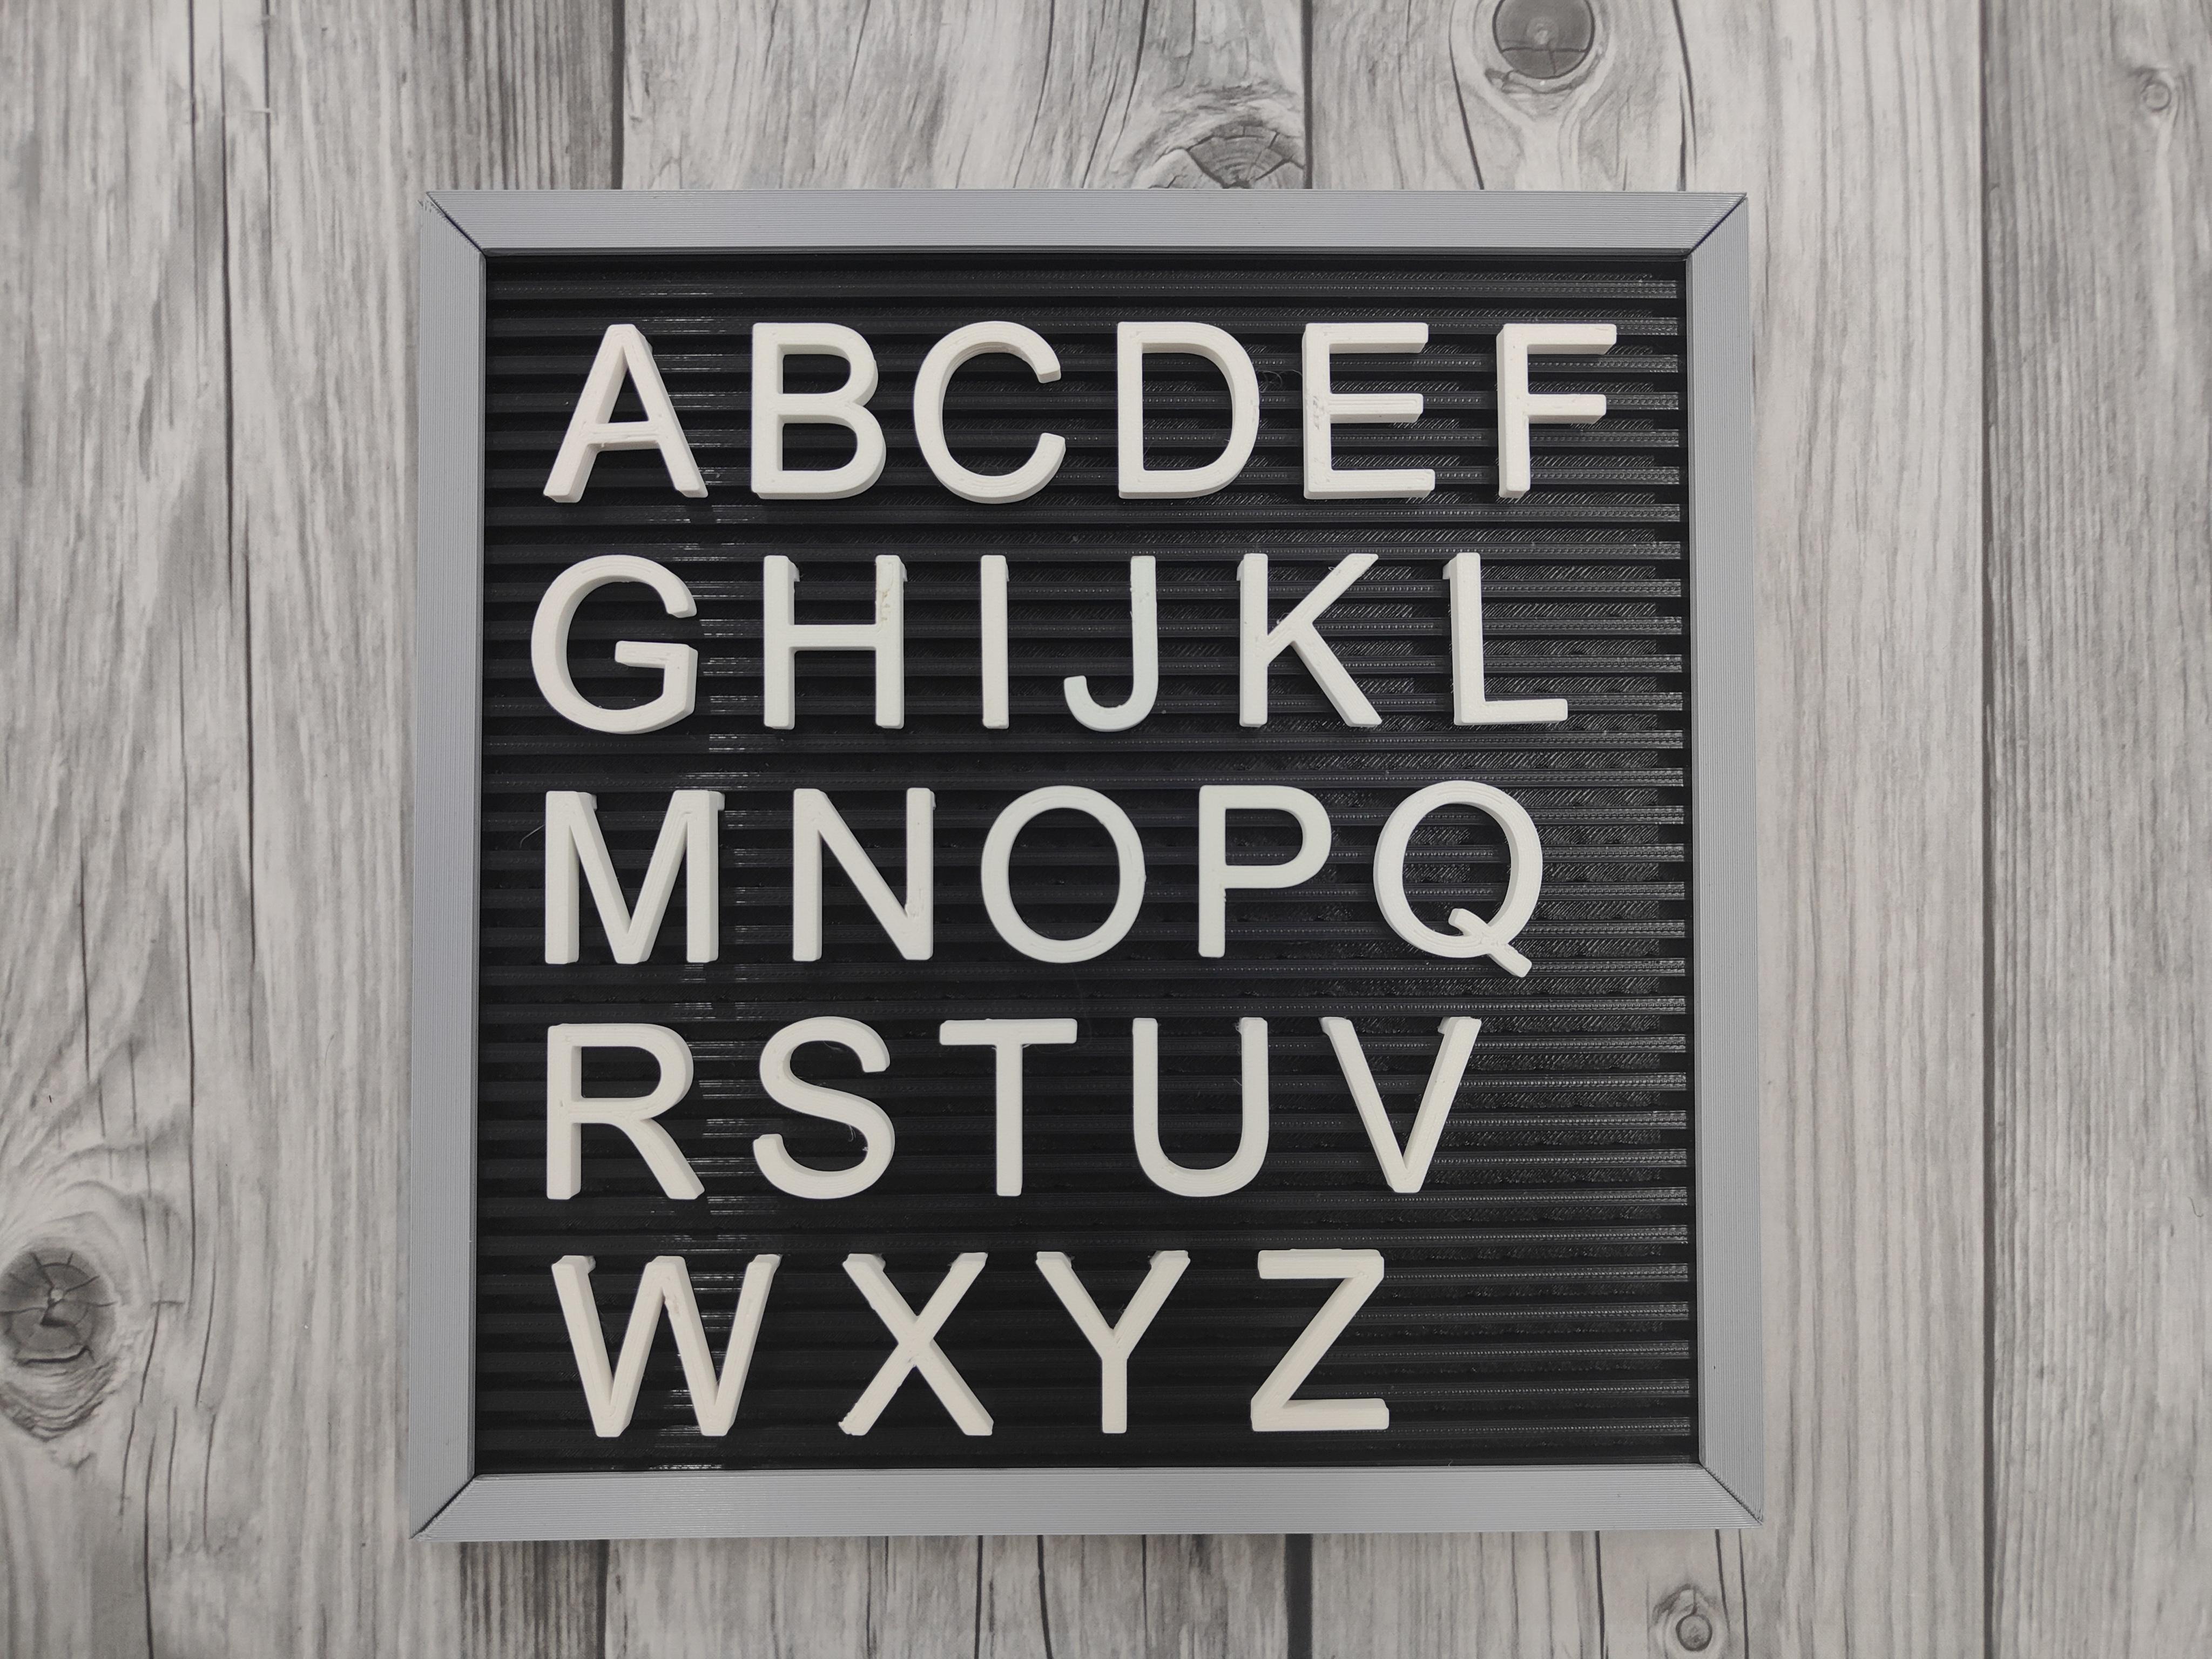
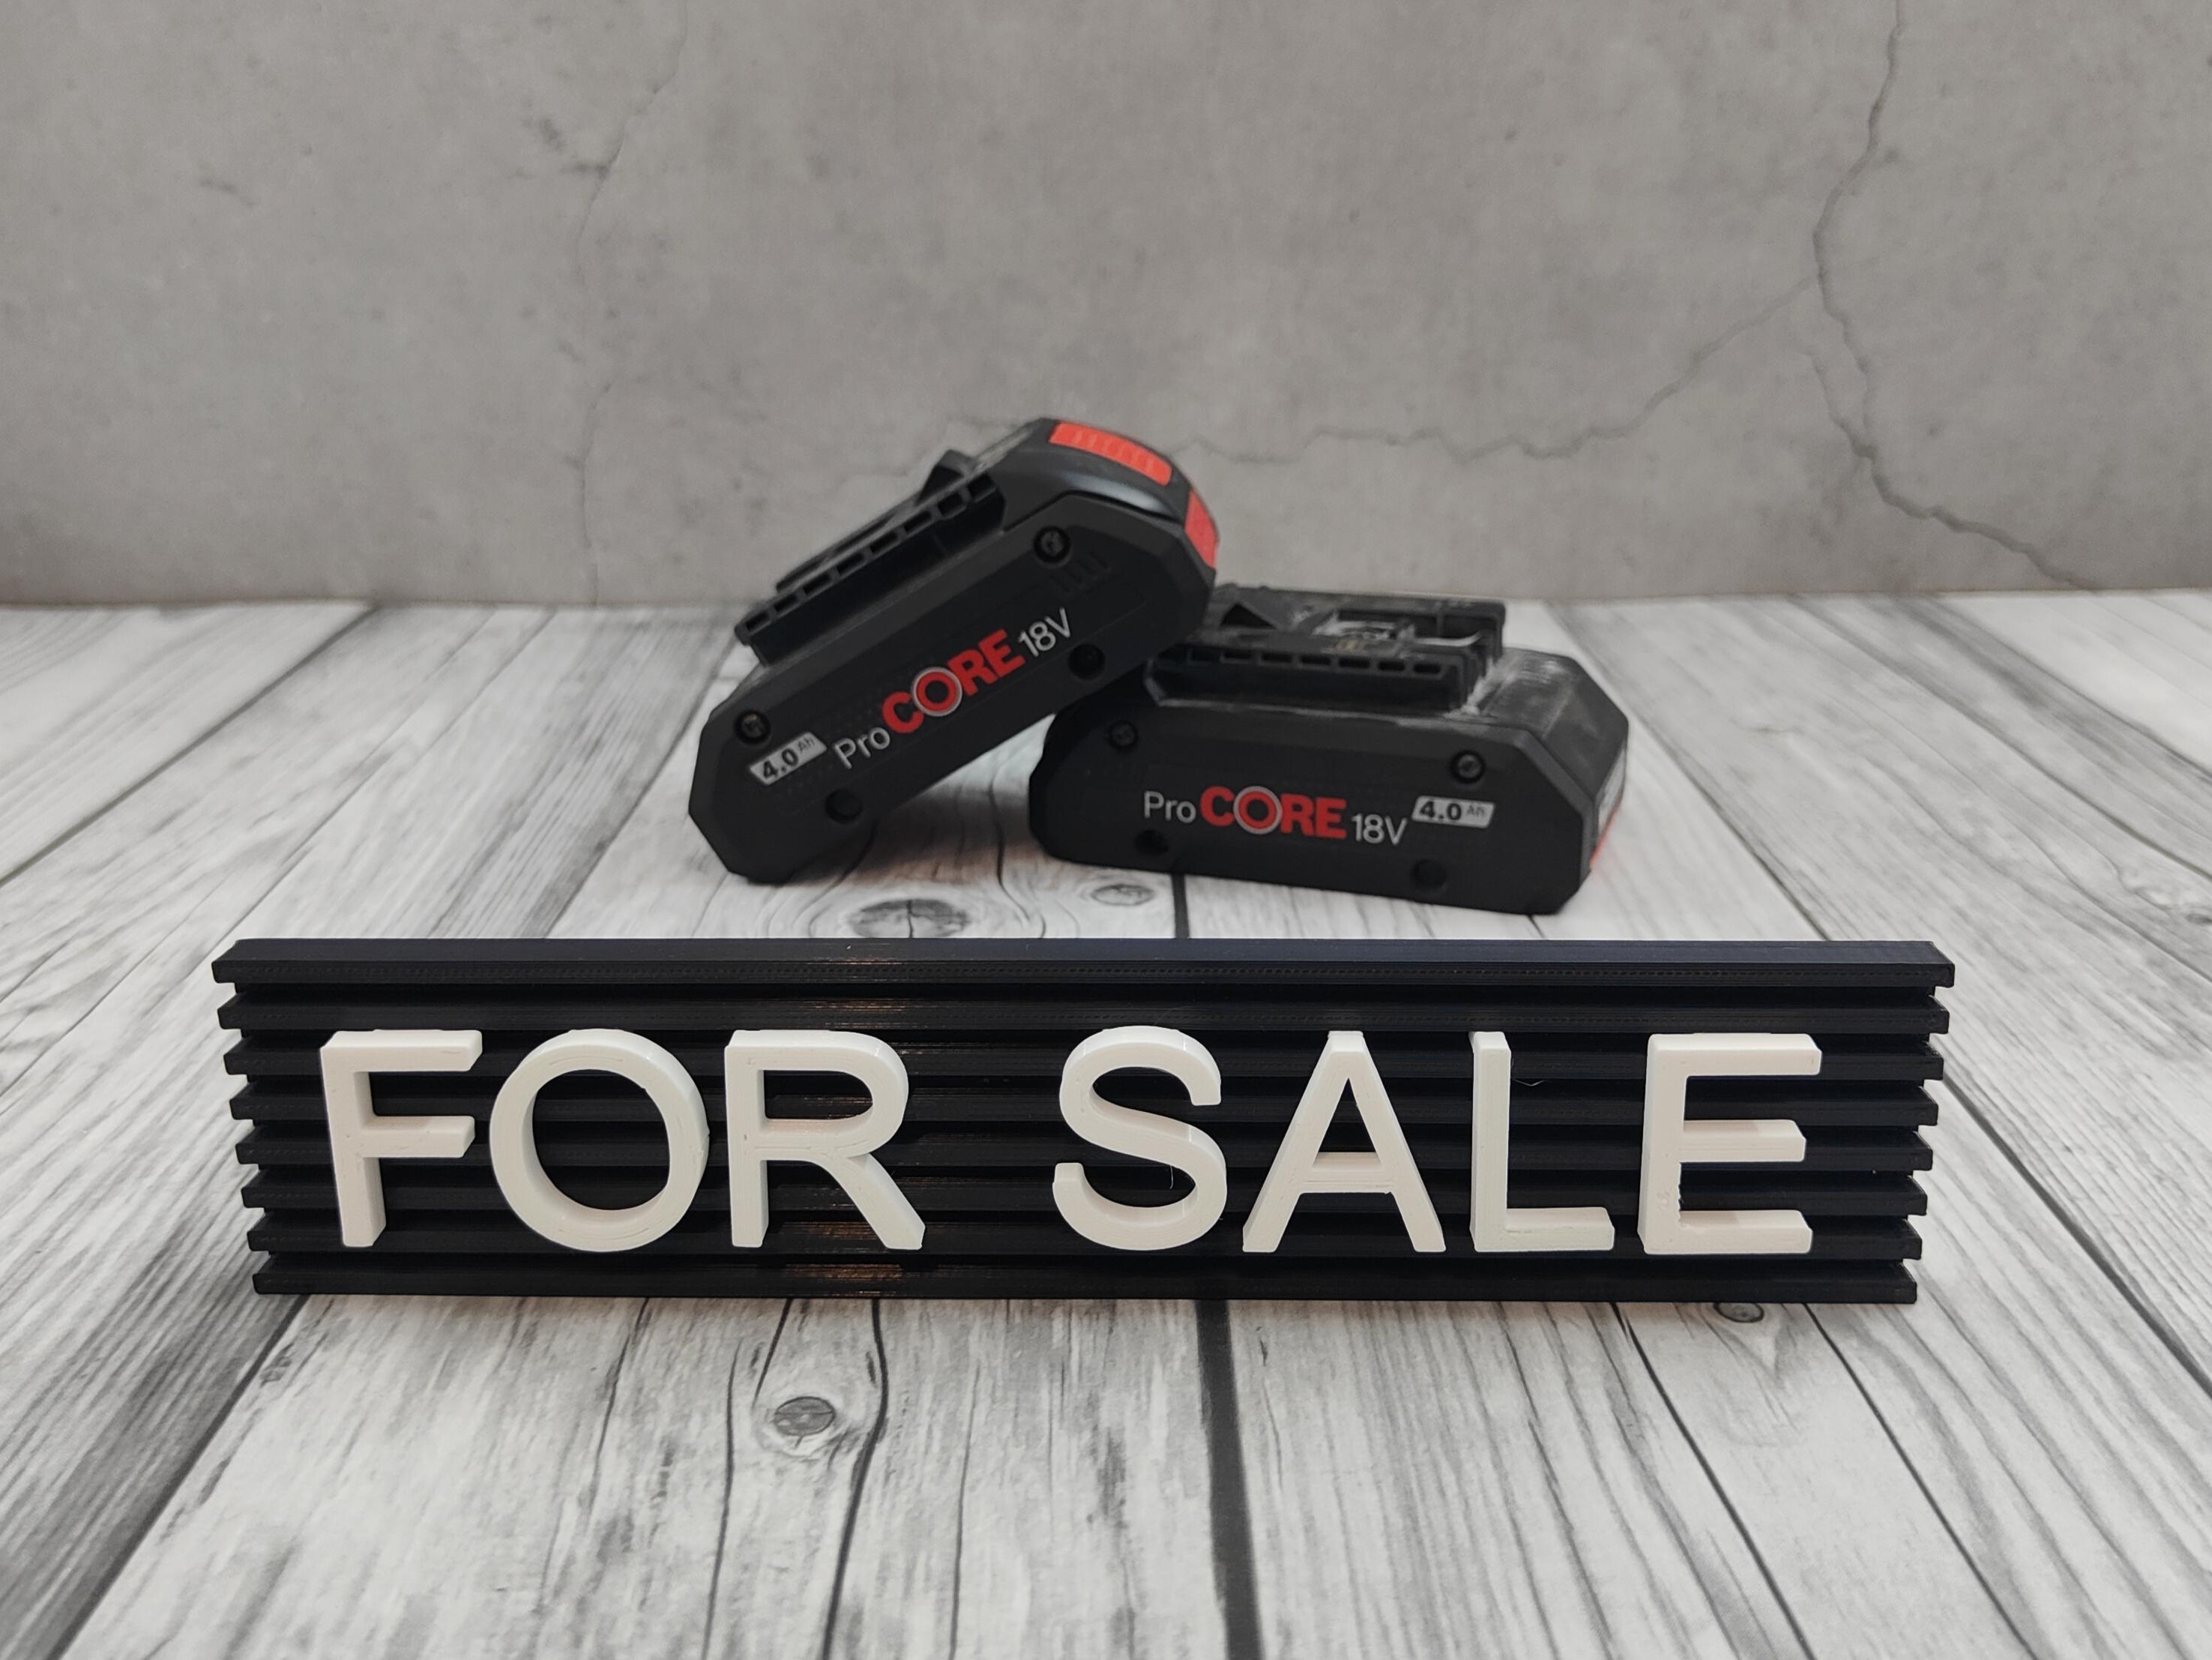
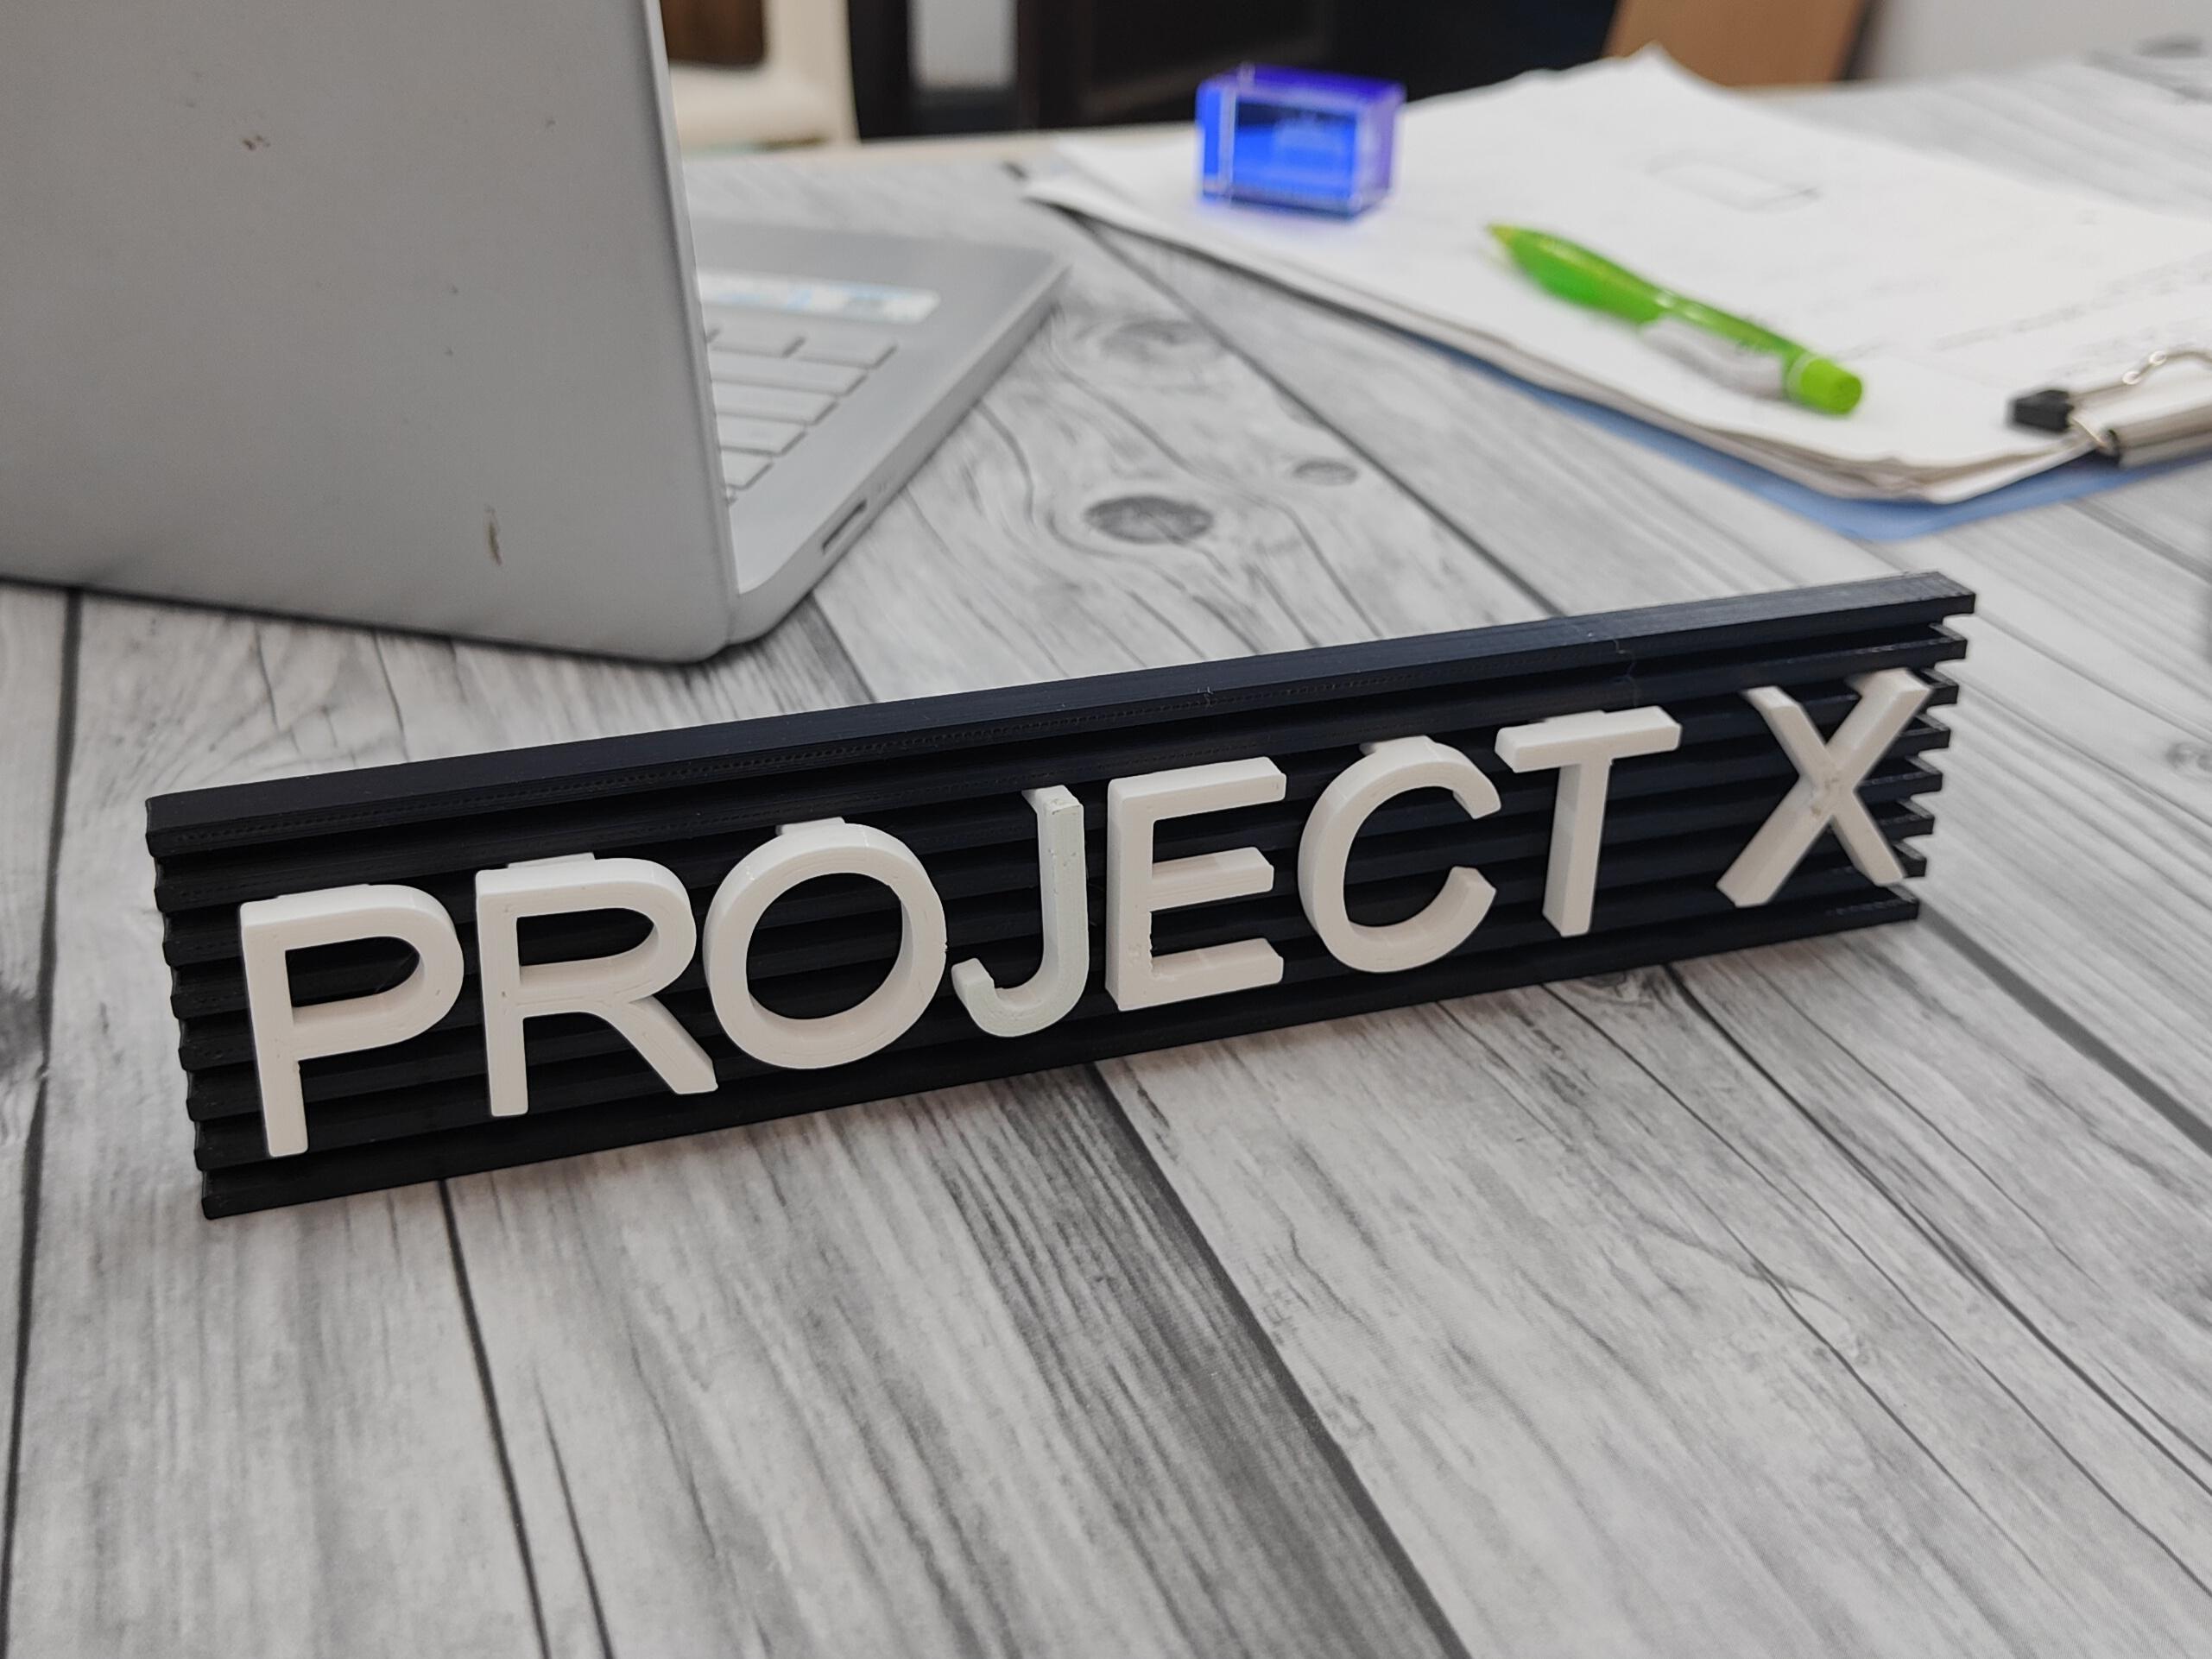
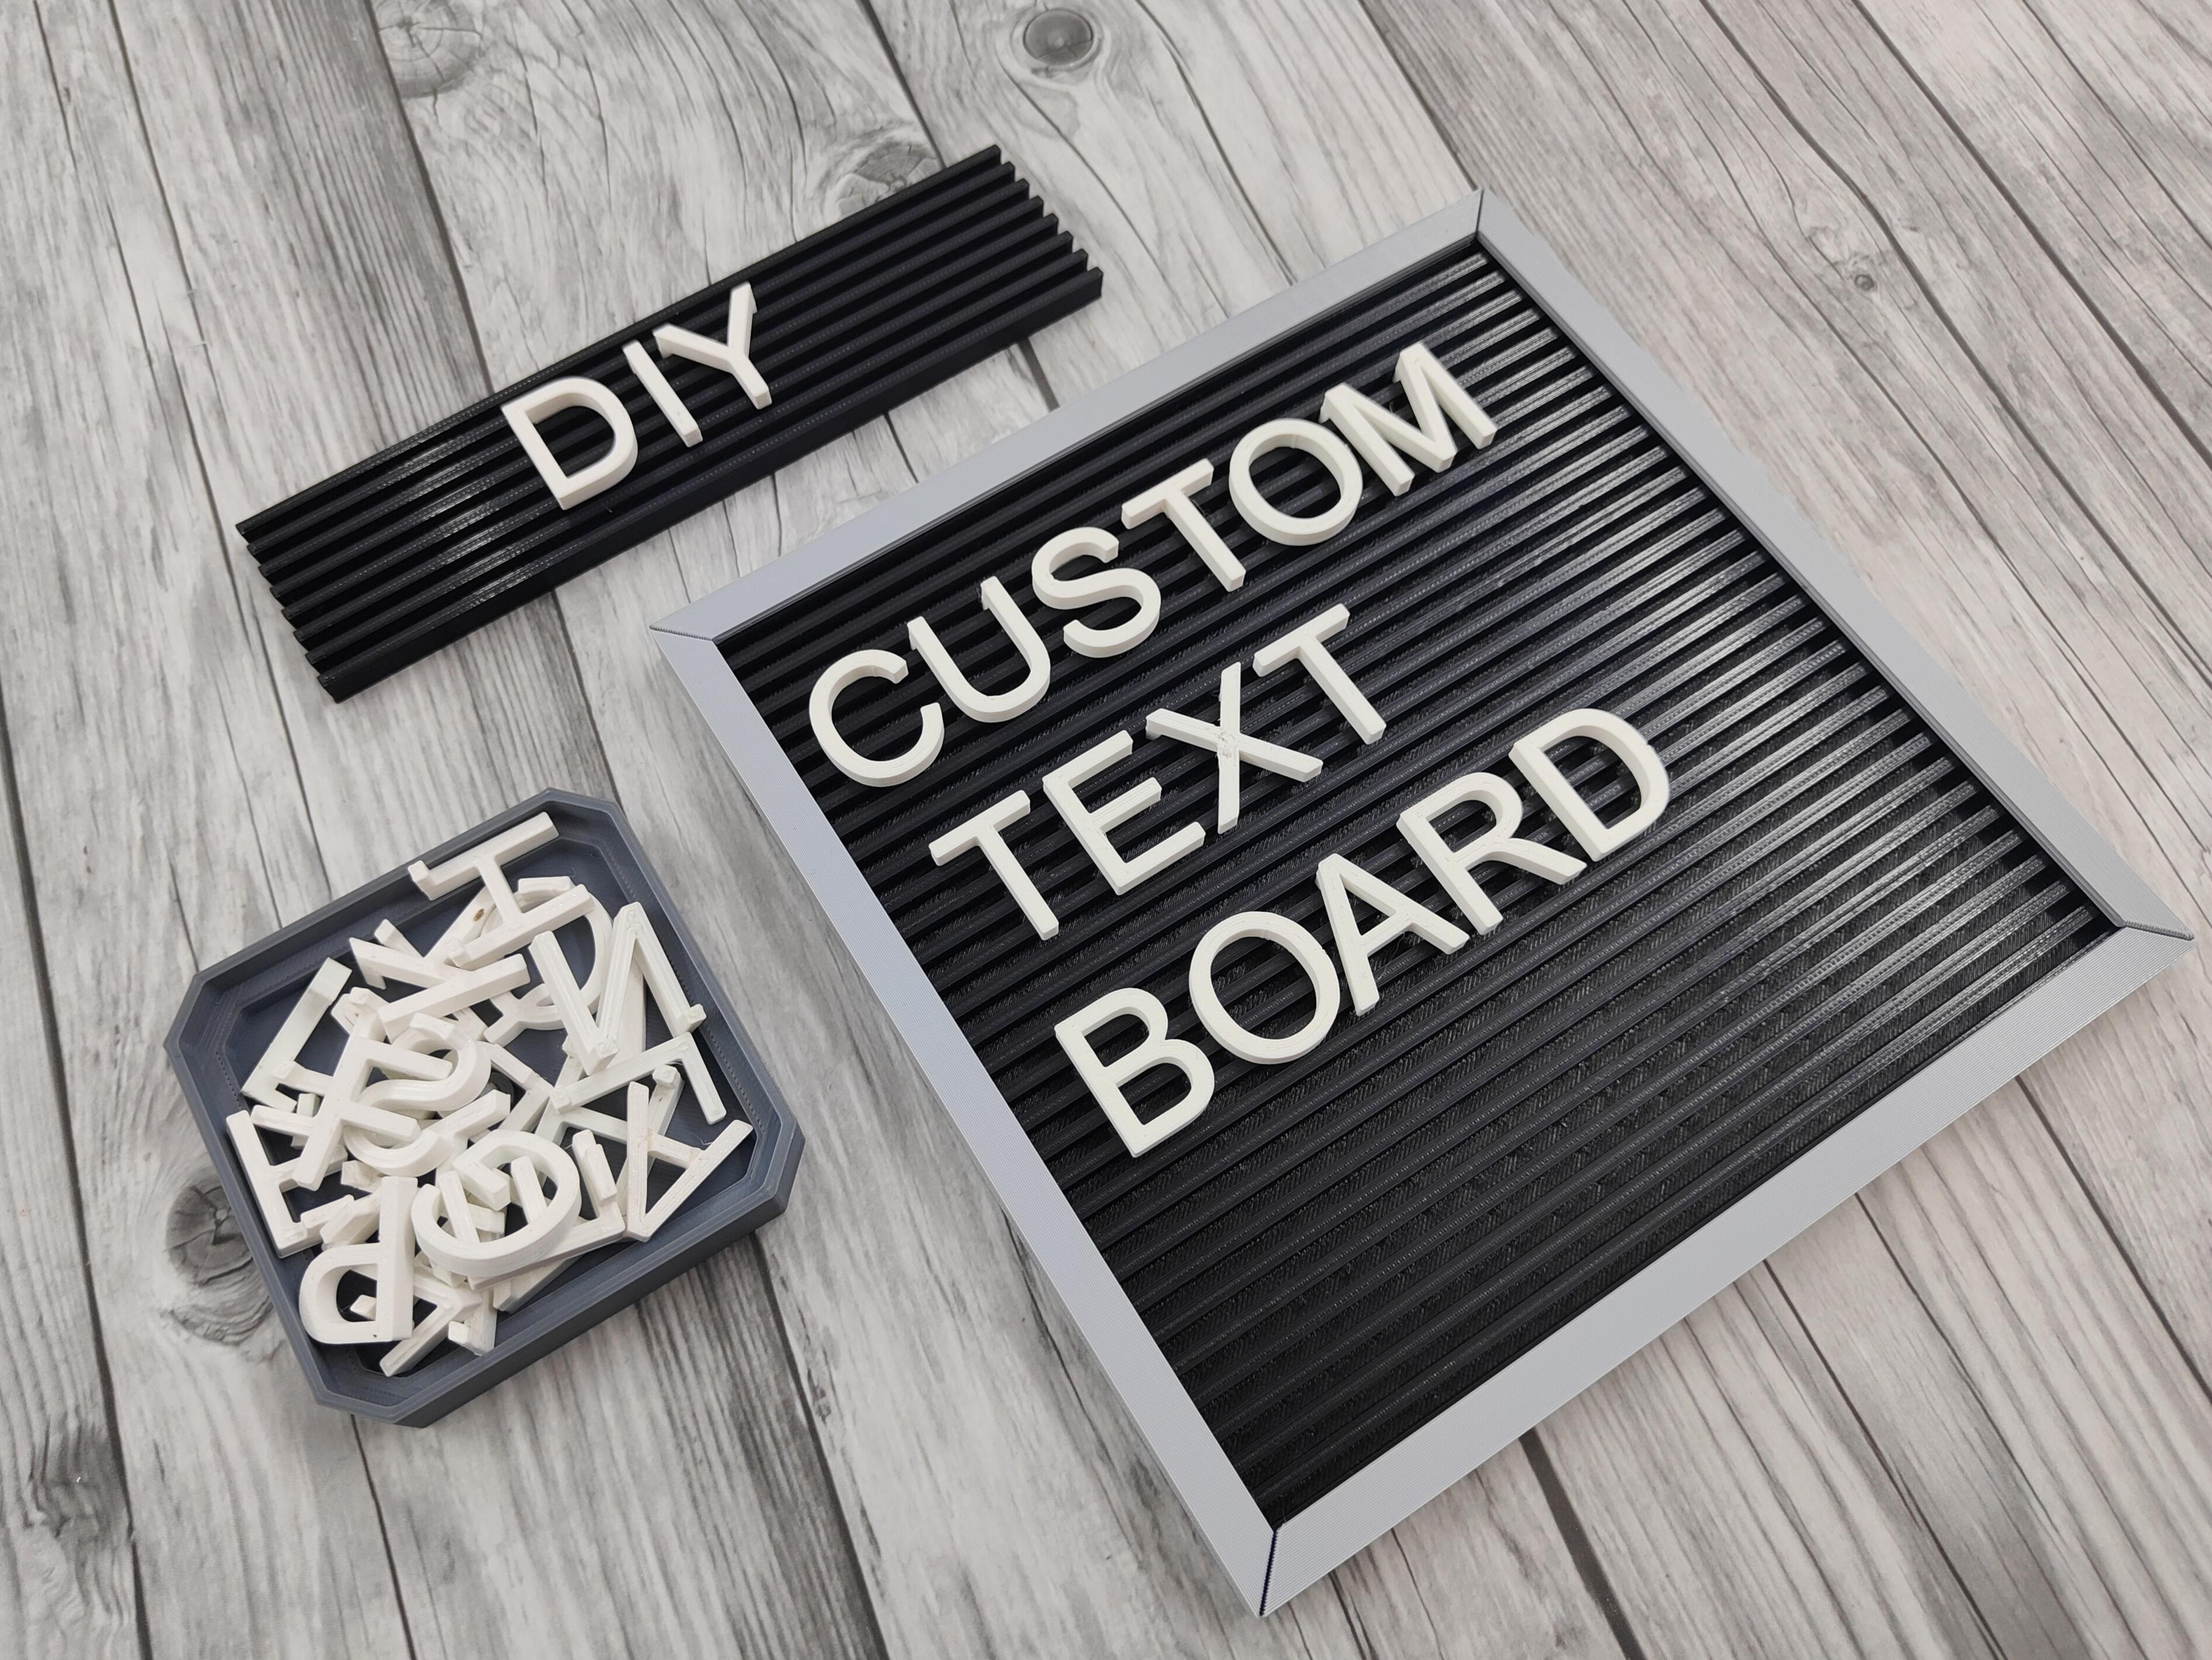
Welcome to the customizable letter board and nameplate project! This guide will take you through the steps to create your very own personalized letter board and nameplate using Autodesk Fusion 360 and 3D printing.
The letter board is a versatile and stylish tool that can be used for home decoration, office organization, educational purposes, events, and more. Whether you want to display inspirational quotes, daily reminders, or important messages, this customizable letter board can be tailored to fit any need. The interchangeable letters allow you to change the message as often as you like, providing endless possibilities for creativity and personalization.
Alongside the letter board, we'll also be creating a nameplate. This nameplate is perfect for desks, office doors, classrooms, events, and even home use. It can be customized with your name, title, or any text you prefer, adding a professional and personal touch to your space.
In this project, we will:
- Design the letters of different fonts in Autodesk fusion360.
- Design the letter board and nameplate.
- Create a frame and stand to support the letter board and nameplate.
- 3D print all the components.
- Assemble and use the letter board and nameplate in various applications.
Whether you’re a DIY enthusiast, a professional looking to add a personal touch to your workspace, or someone who loves to organize and decorate, this project is for you. Let's get started and bring your custom letter board and nameplate to life!
Supplies
Materials:
- PLA Filament: Choose your favorite color.
- Super Glue: For assembling parts.
Tools:
- 3D Printer: Ensure it's calibrated.
- Computer with Autodesk Fusion 360: For designing.
- Slicing Software: Cura, PrusaSlicer, or similar.
- Cutting pliers: For trimming excess filament.
- Fine Grit Sandpaper: For smoothing rough edges (optional).
Additional Items:
- Digital Caliper or Ruler: For checking dimensions.
- Masking Tape or Glue Stick: For bed adhesion during printing.
Designing the Letters
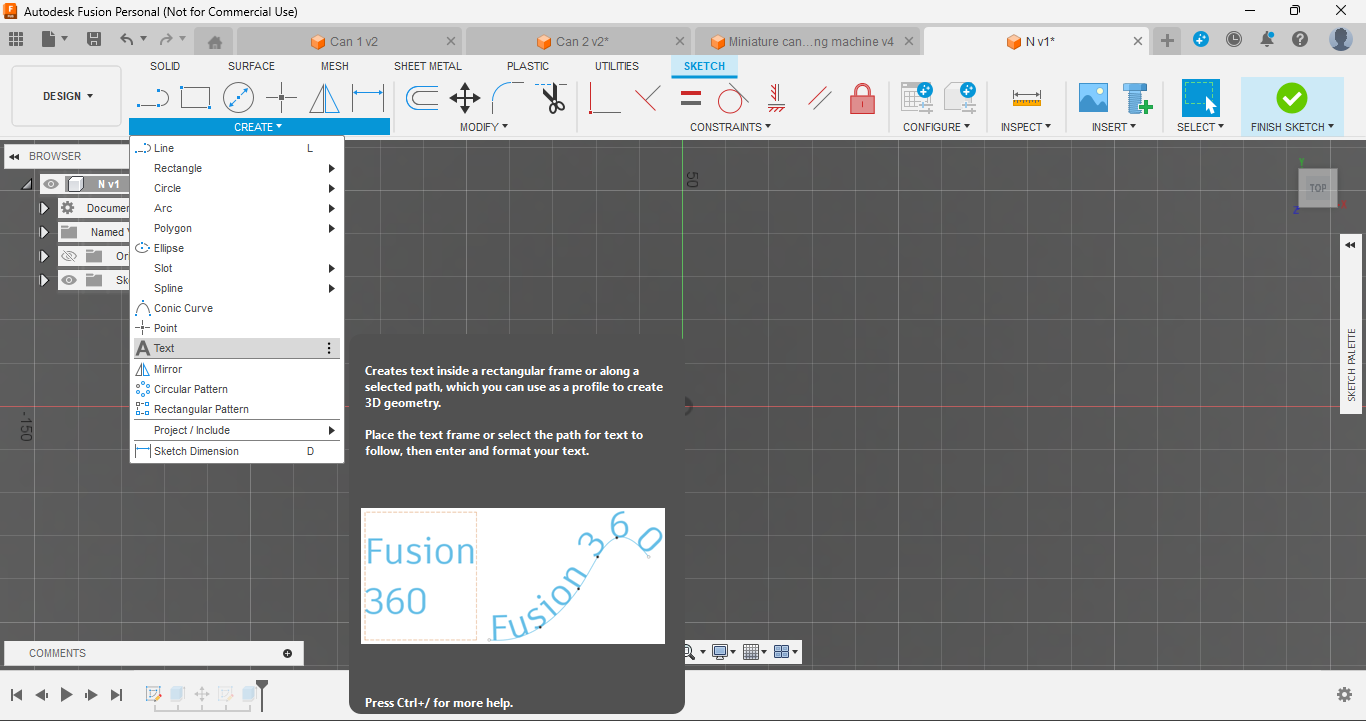
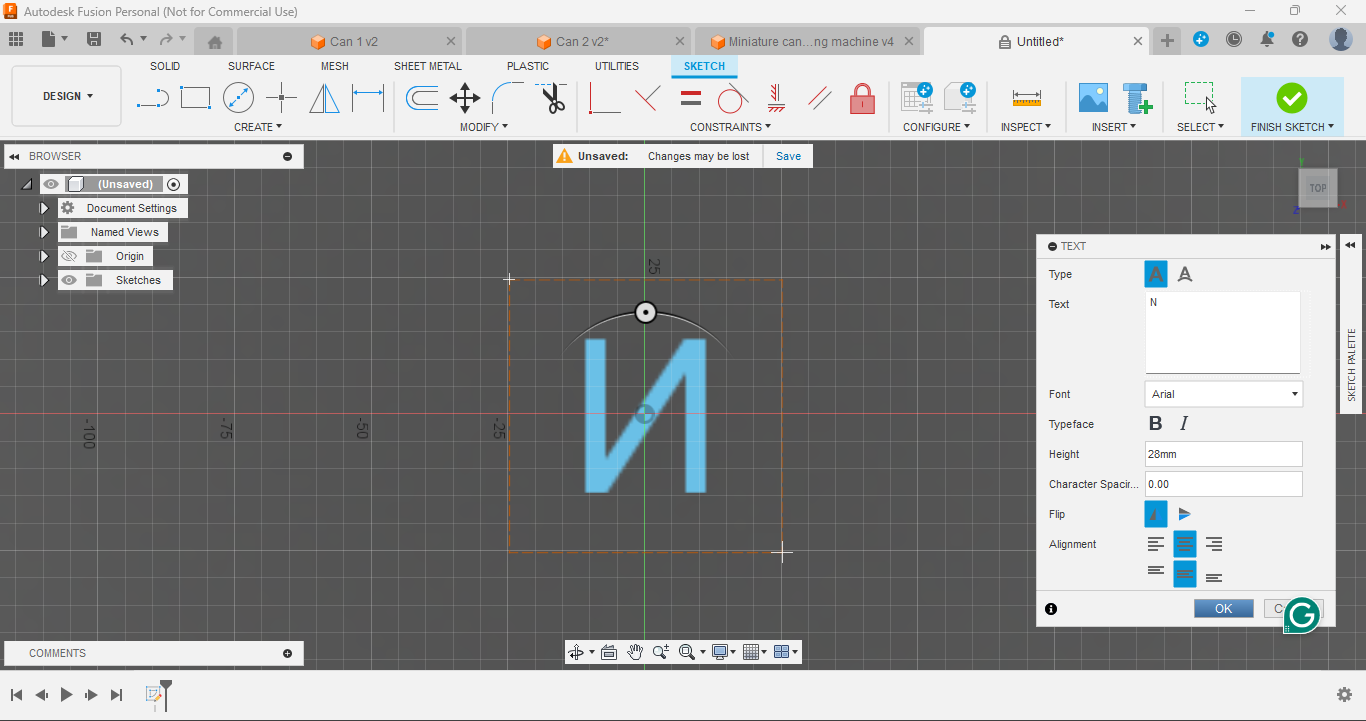
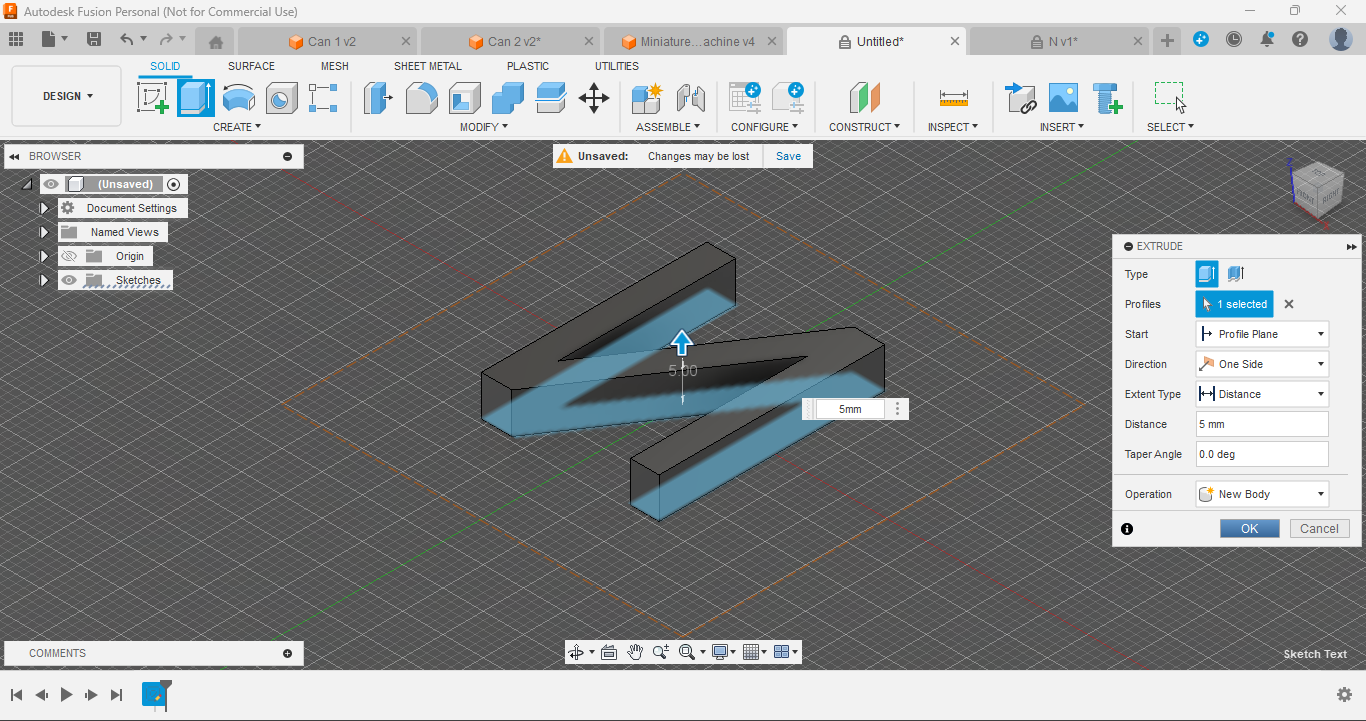
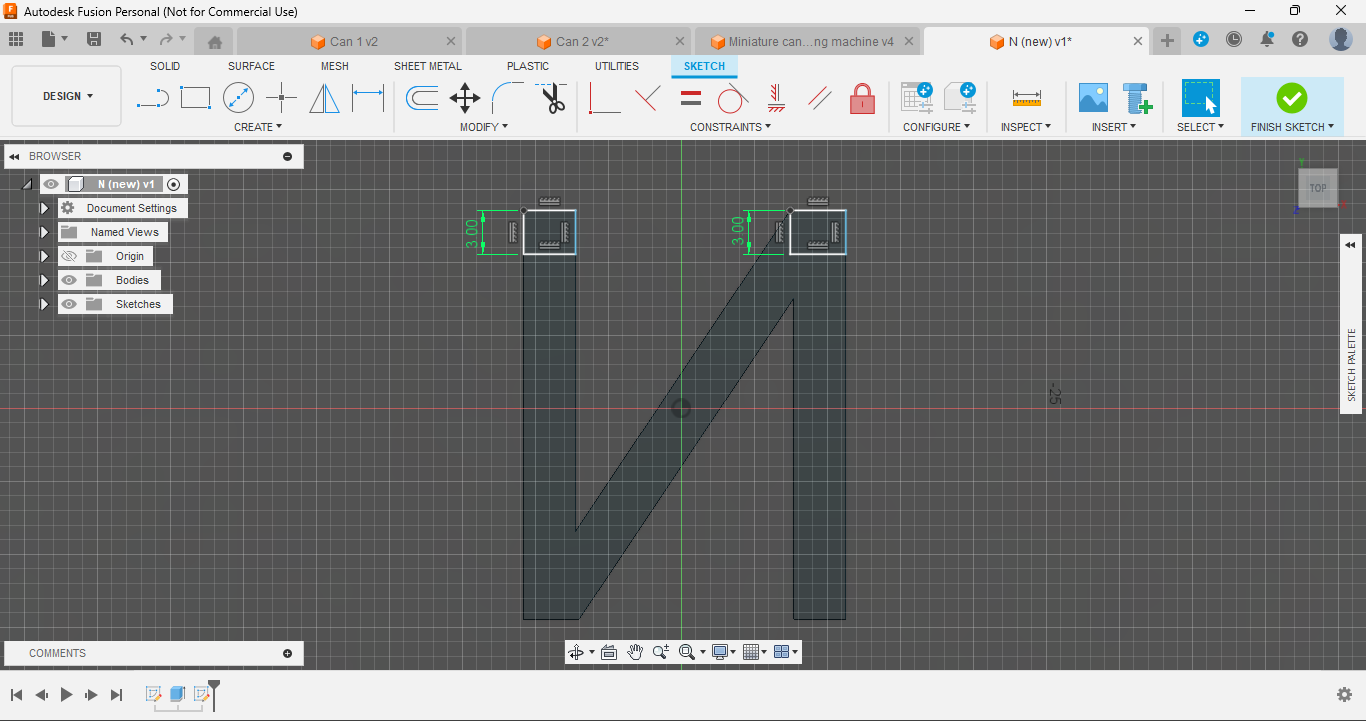
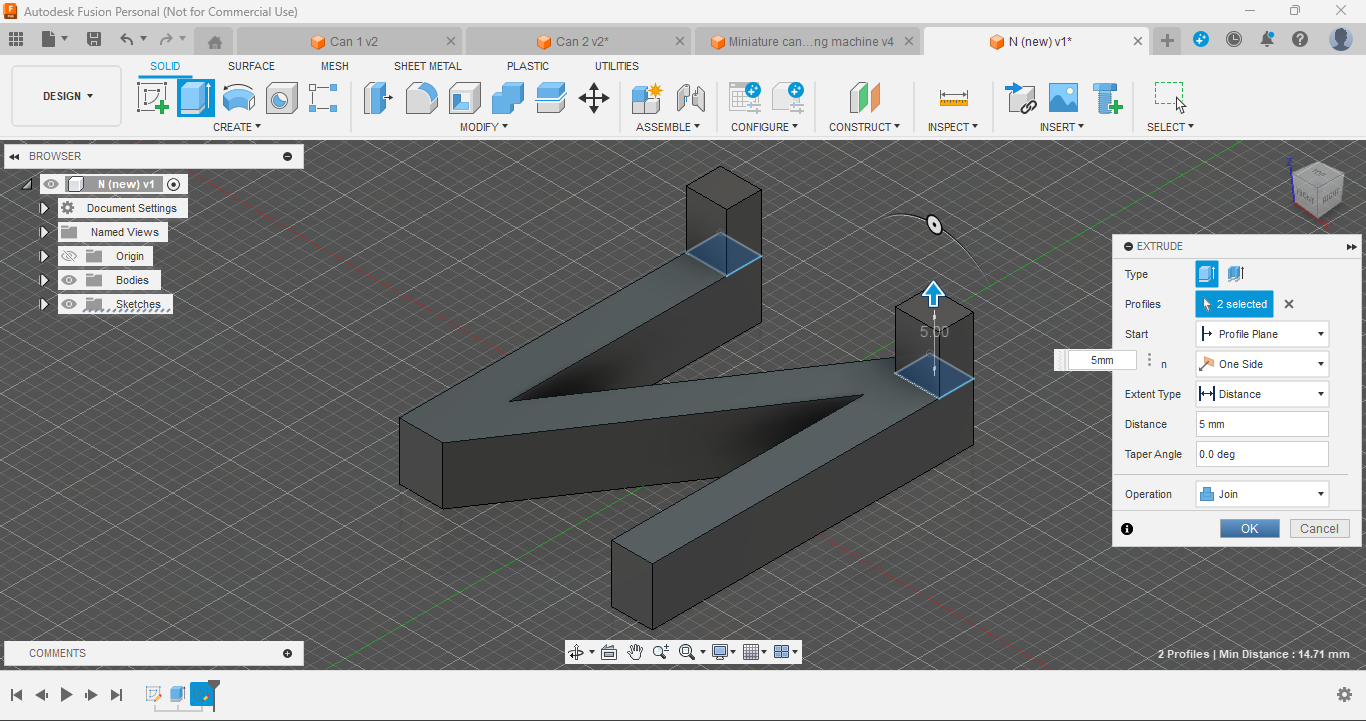
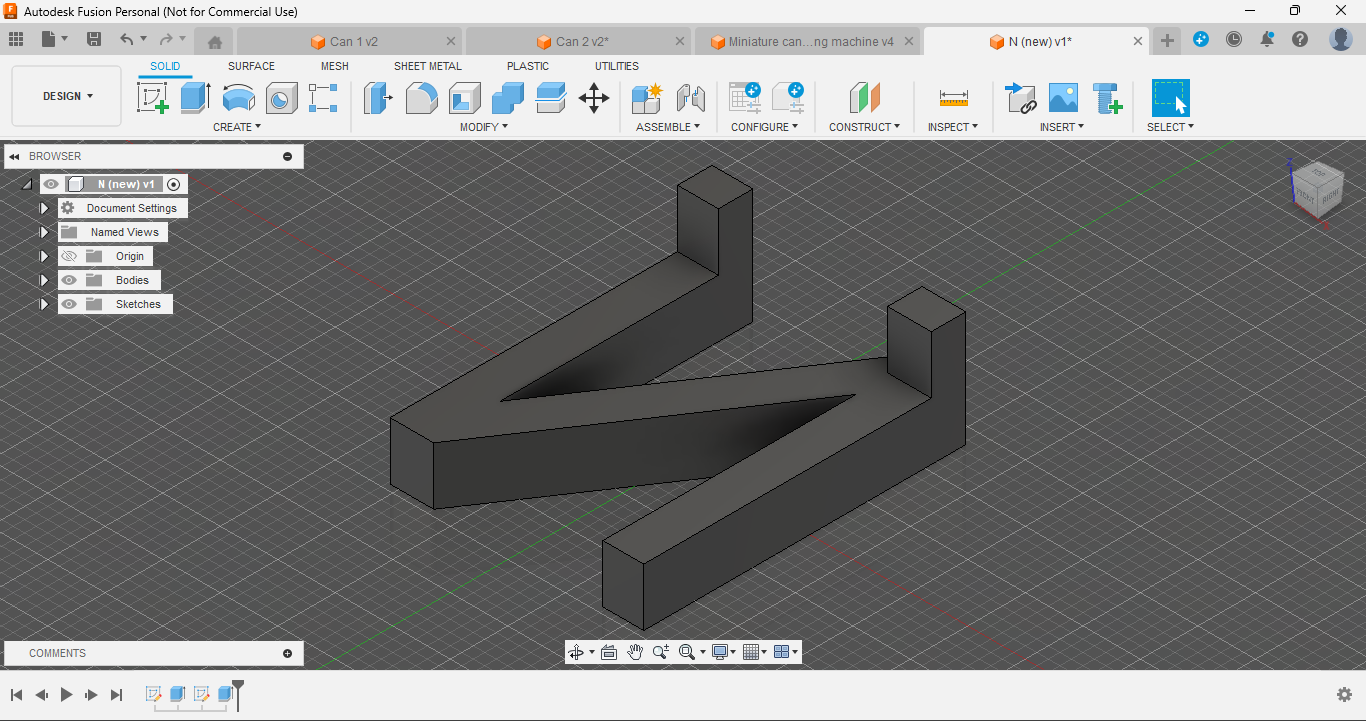
1. Create a Sketch:
- Open Fusion 360 and create a new sketch for designing the custom letters.
2. Use Text function:
- Use the text function to sketch any letter.
- Place the text in the middle.
- Don’t forget to flip the letter horizontally. Trust me, I made this mistake, and many of them came out reversed. I had to reprint them all!
3. Choose Your Font:
- Pick a font that suits your style. It can be simple, bold, or even stylish. For a basic and versatile look, I chose "Arial". It’s clean and easy to read.
4. Extrude the Text:
- Extrude your letter to a thickness of 5mm. This gives the letters a solid, 3D appearance.
5. Create a Box Behind the Text:
- To ensure the letters fit securely into the board, create a box behind each letter of height 5mm and 0.2mm tolerance in the width for the letters to snugly fit in the slots.
I used medium-sized letters as a standard for this project. If you want to use smaller or larger size letters, use this configuration: (for every font)
- for small letters- 22mm
- for medium letters- 28mm (standard)
- for large letters- 34mm
Use the provided STL files for each letter [A-Z] and number [0-9] (medium size), or adjust the design in Fusion 360 accordingly to suit your needs.
Downloads
Designing the Board
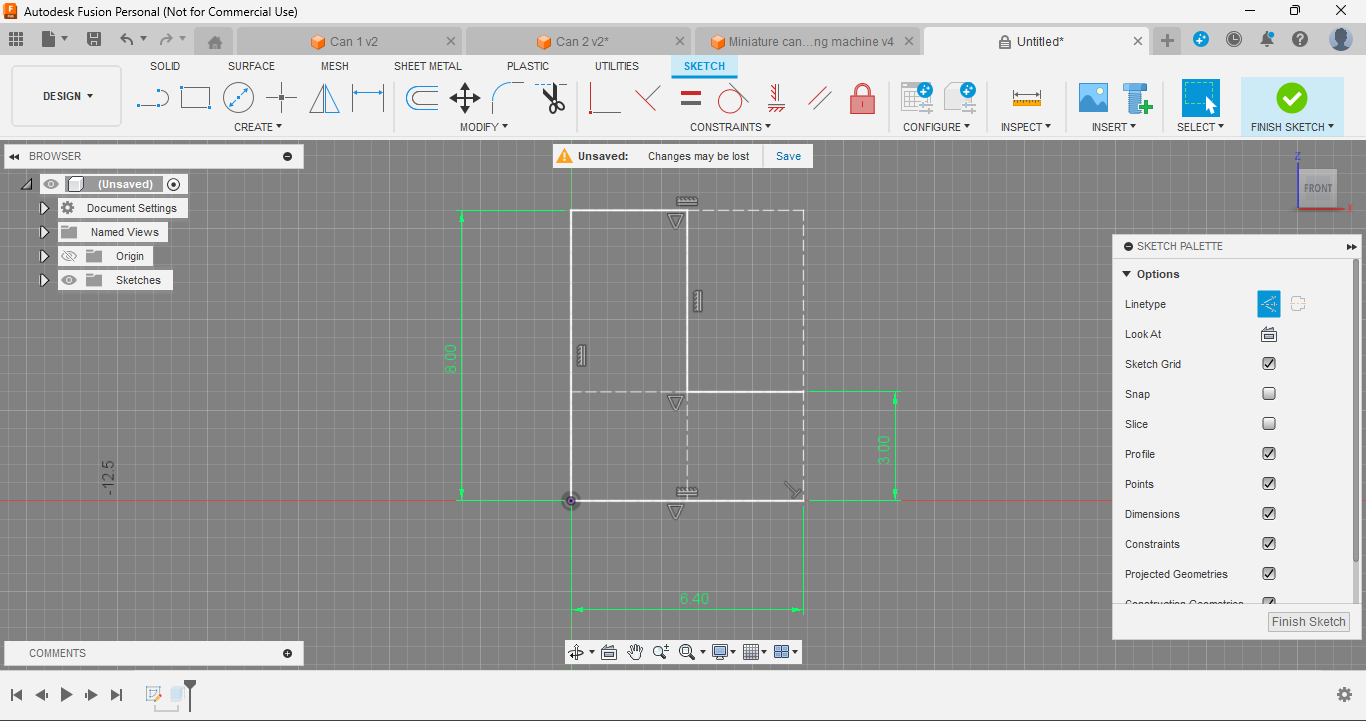
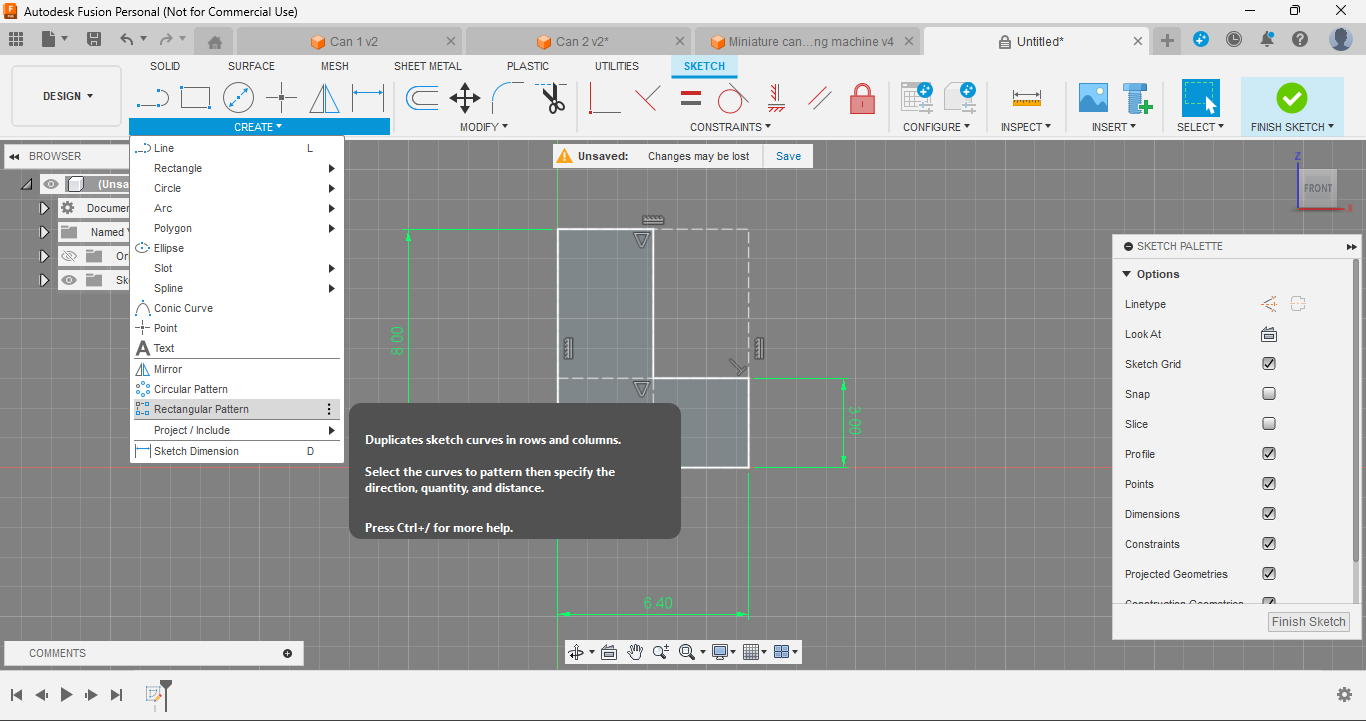
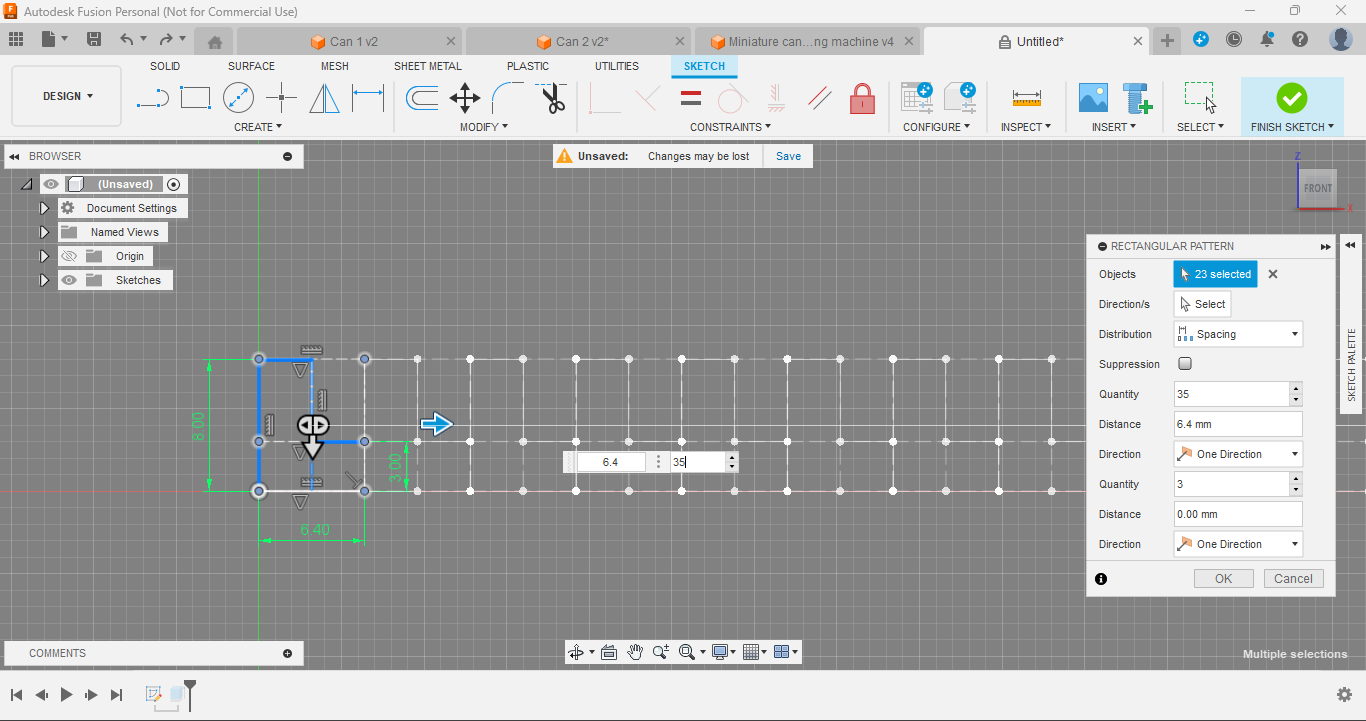
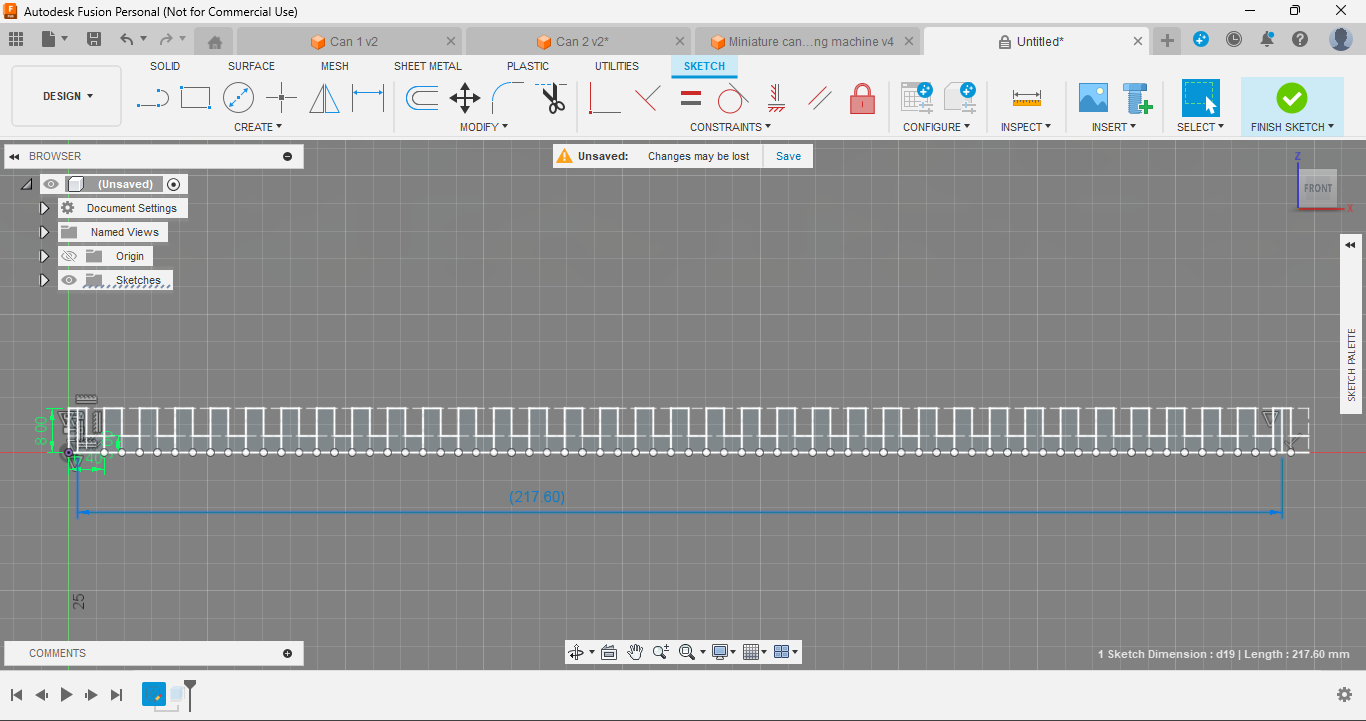
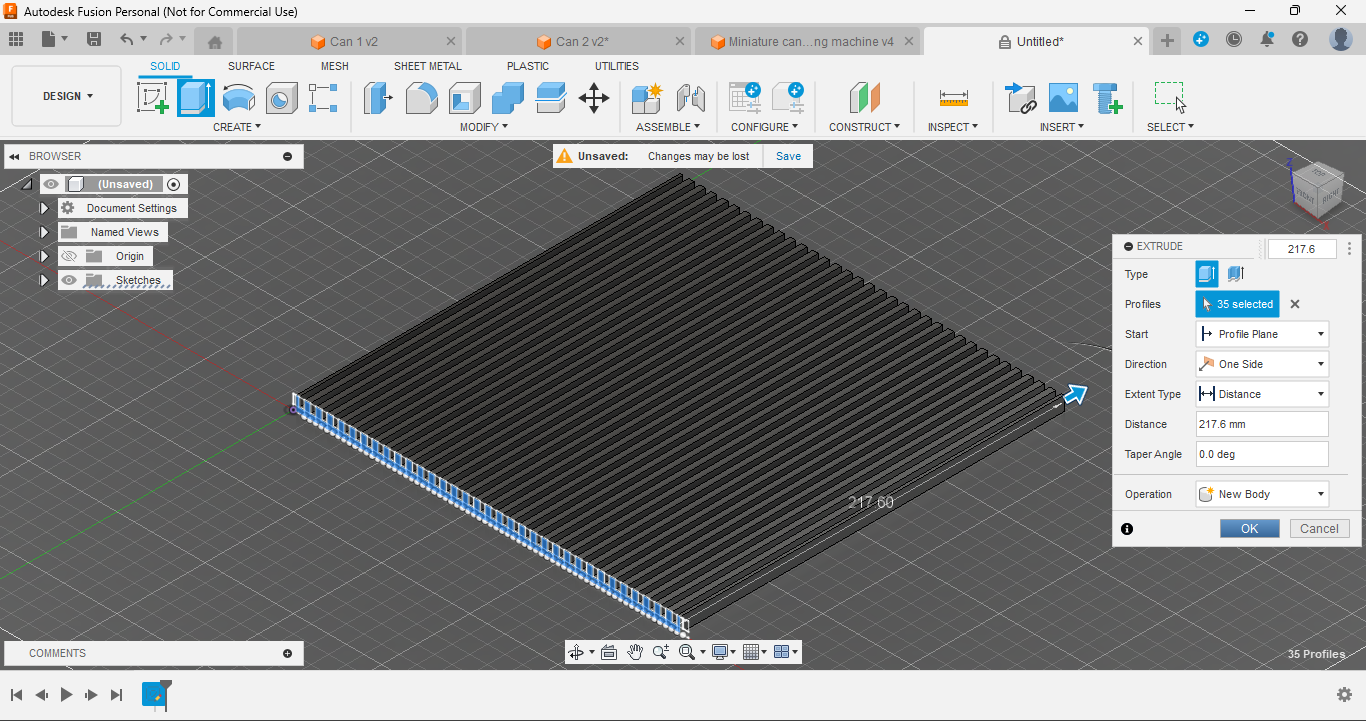
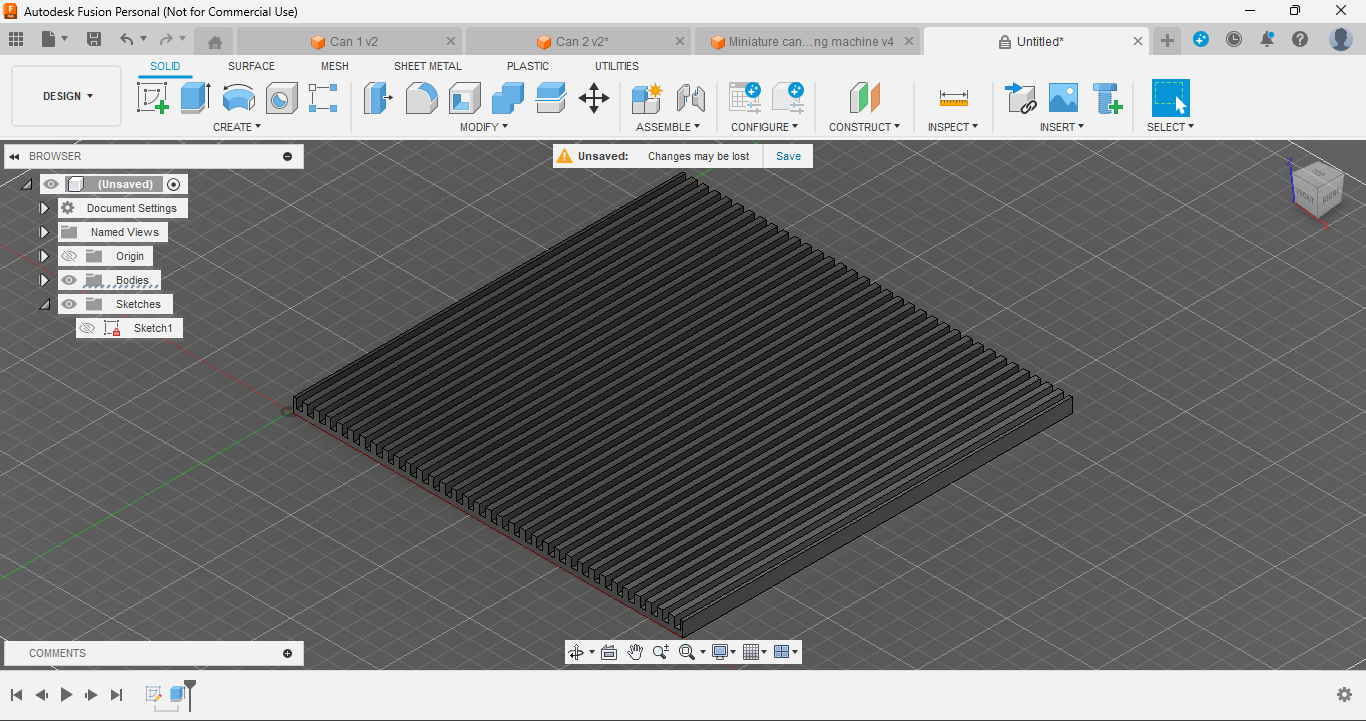
1. Create a Sketch:
- Start by opening Autodesk Fusion 360 and sketching the basic design for your letter board. Think of this as drawing the framework where the letters will eventually fit.
2. Duplicate the Sketch:
- After you have your initial sketch, copy it horizontally using the rectangular pattern tool, until it reaches the desired length. This repetition ensures that your board will have evenly spaced strips for the letters.
3. Extrude to Form the Board:
- Extrude your design until it becomes a solid square board. The board features long strips spaced 3.2cm apart. This spacing is crucial because each letter has a 3cm box behind it, allowing it to fit snugly into the strips.
4. Custom Sizing:
- Here’s where you can get creative! The best part about this project is its flexibility. You can easily adjust the size in Fusion 360 to fit your space. Want a landscape or portrait board? No problem- just join two boards together. If you have a larger 3D printer, you can even print a bigger board in one go.
Use the provided STL files for the textboard (Standard sizes) as per your printer or adjust the design in Fusion 360 to suit your needs.
For example- if you want to write a long quote, let's say "Education is not the learning of many facts but the training of the mind to think - Albert Einstein" and it doesn't fit on a single board, then join another same board in any configuration, horizontally or vertically (its design doesn't compromise on its functionality or looks when joined in any configuration, you can confirm it by seeing its both top and bottom strips, it's half the width than the other ones, so when the two of them joins it looks same).
Also, you can make many tiles and combine all together to make a full-text wall and write anything you want to. (but it costs a bit too!)
Designing the Frame (for Textboard)
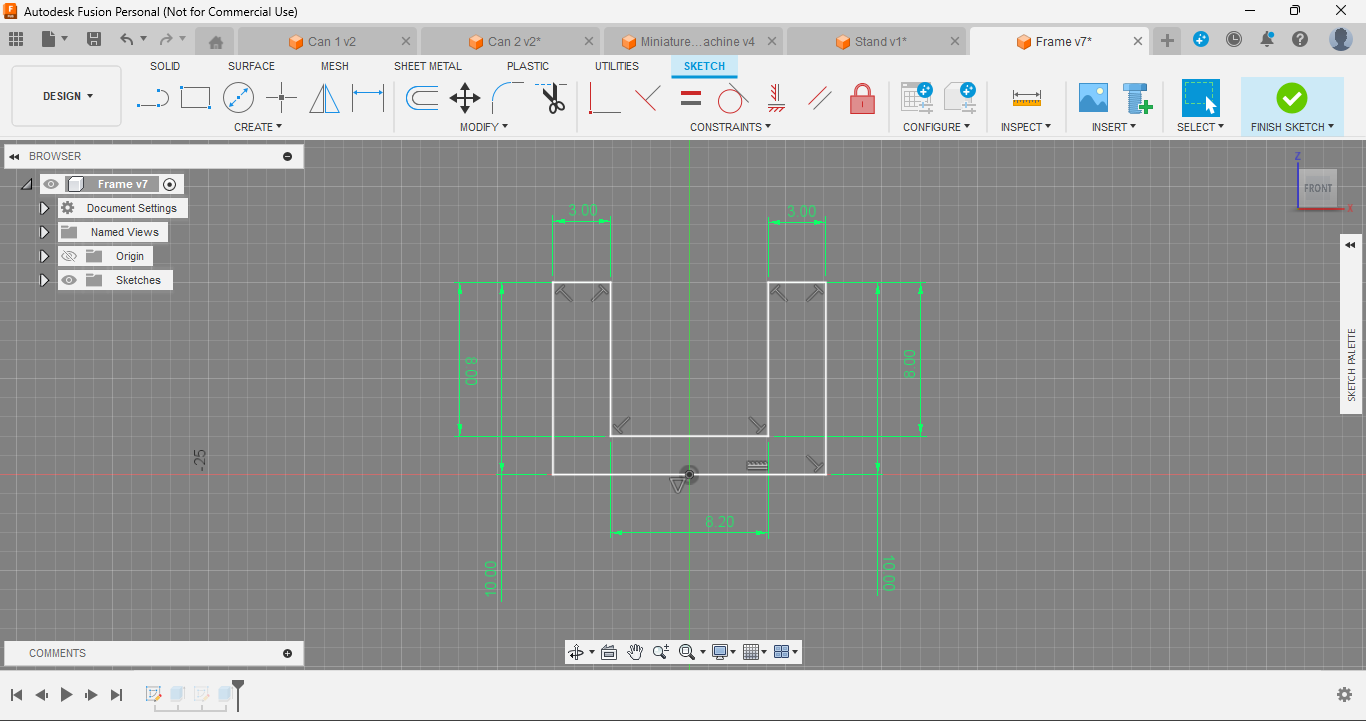
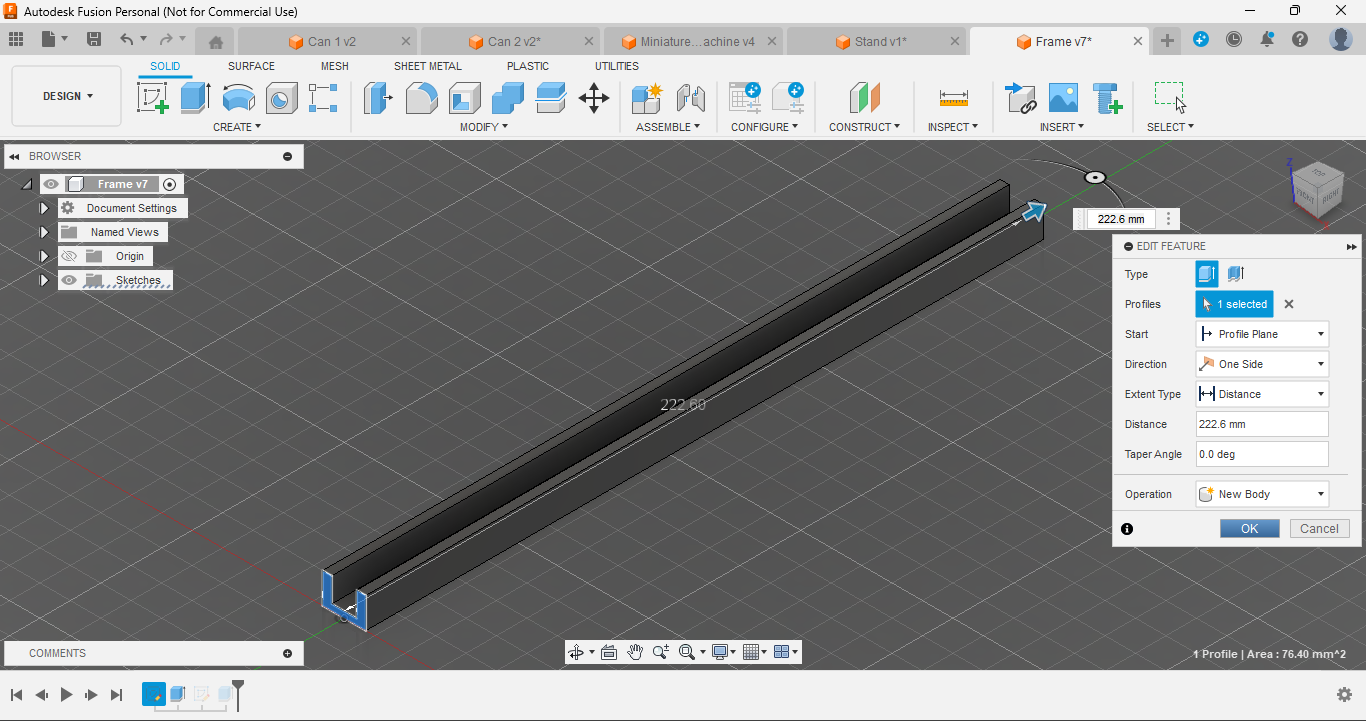
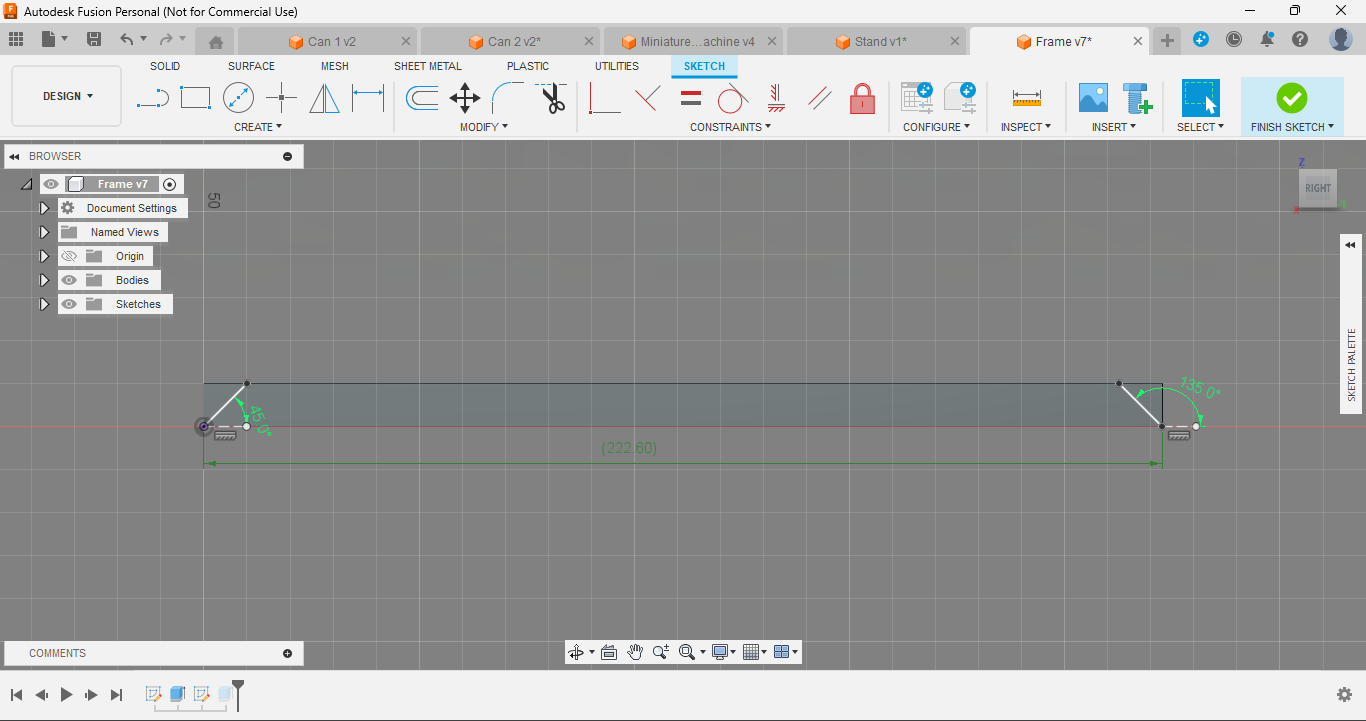
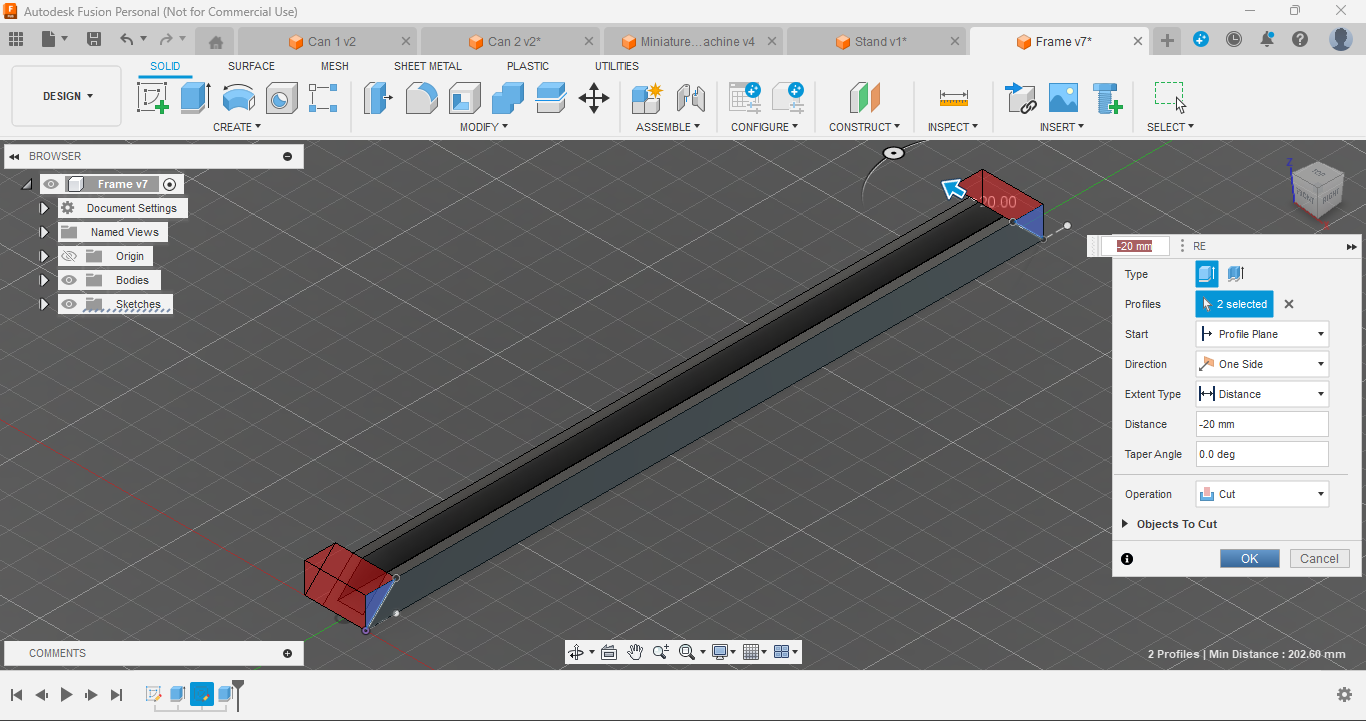
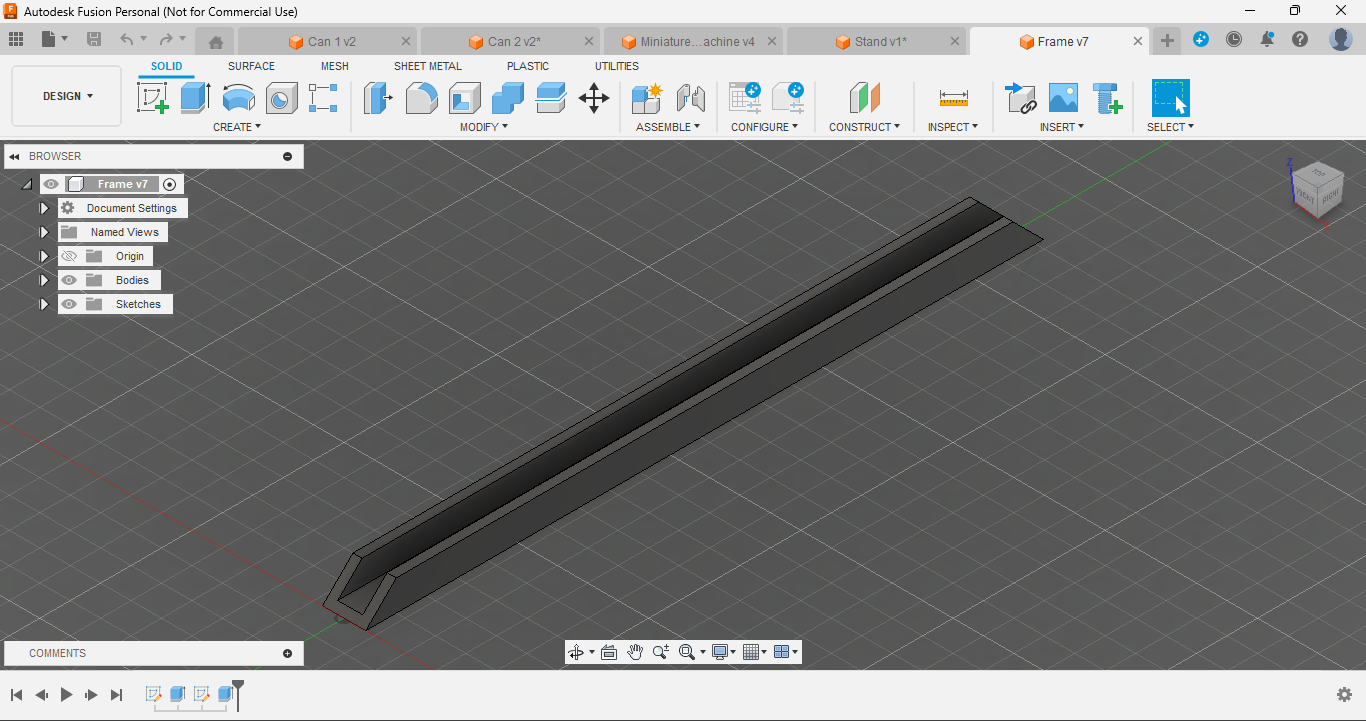
1. Create a Sketch:
- Open Fusion 360 and create a new sketch for the frame. The frame will be U-shaped to cover three sides of the board.
2. Draw the U-Shaped Frame:
- Sketch the U-shape, ensuring it fits around the top and sides of your board. Initially, I tried a single L-shaped piece, but it didn’t fit well and didn’t look as good. The U-shape design works best for both compatibility and aesthetics.
3. Extrude the Frame:
- Extrude the U-shaped sketch to the as per your board size. This ensures a proper fit around the board.
4. Add 45-Degree Cuts:
- Each side of the frame should have a 45-degree cut at the ends. This allows the four pieces of the frame to join together seamlessly, creating a neat and professional look.
The frame on the sides will enhance the look and increase the board's strength when combined (in any configuration).
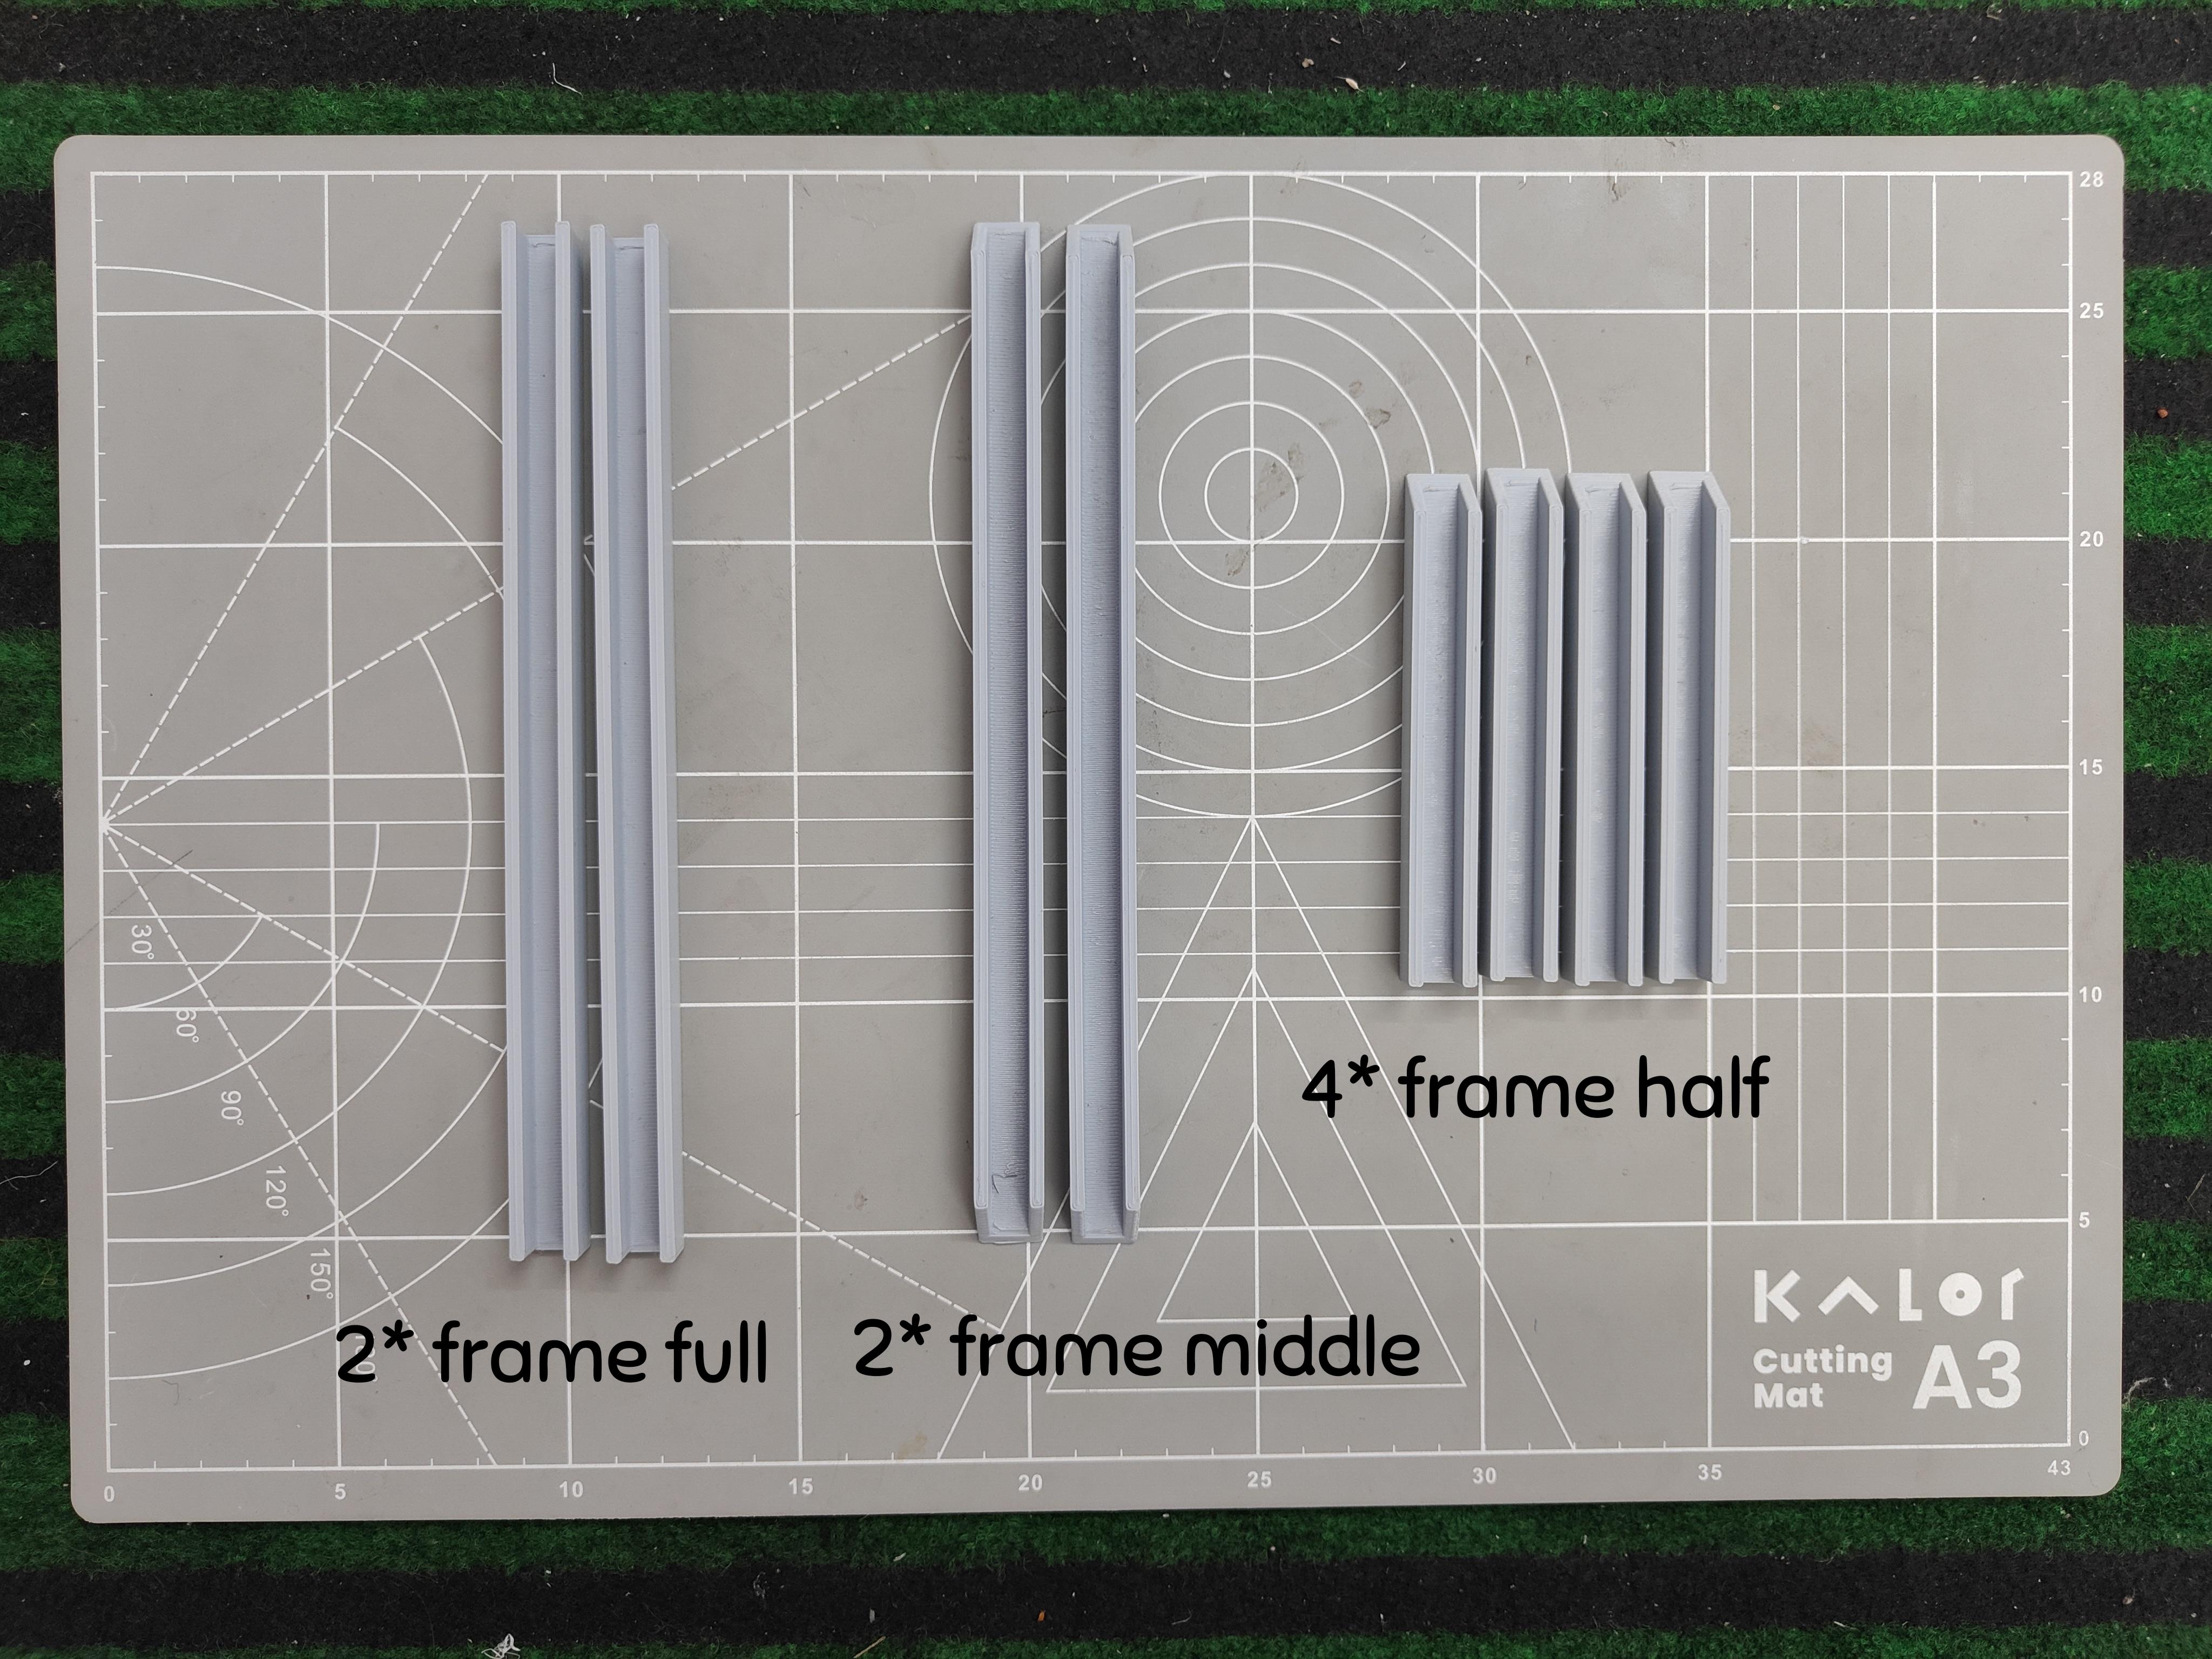
Details of the frame:
- Frame full- use with single board
- Frame half- use with multiple boards (in the ends)
- Frame middle- use with multiple boards (in the middle)
Note- "Frame half and middle are used together to make a longer frame in multiples". For example- say you want a larger board, and you joined two boards horizontally or vertically, now the frame- for the smaller sides, use "frame full" and for the longer sides, use two "frame half" at the ends and one "frame middle" in the middle to make a frame double the size. Similarly, if you want a frame for connecting three boards, use two "frame half" at the ends and two "frame middle" in the middle.
You may wonder why to use three pieces to make a frame for two boards, and here's the answer- with the three pieces the board will get strong support on the joint in the middle, making the board stronger and less prone to breaking, and if it used 2 pieces then the joint will remain weak causing the board to break easily. (illustrated in step 7 "Assembly")
Designing the Name Plate
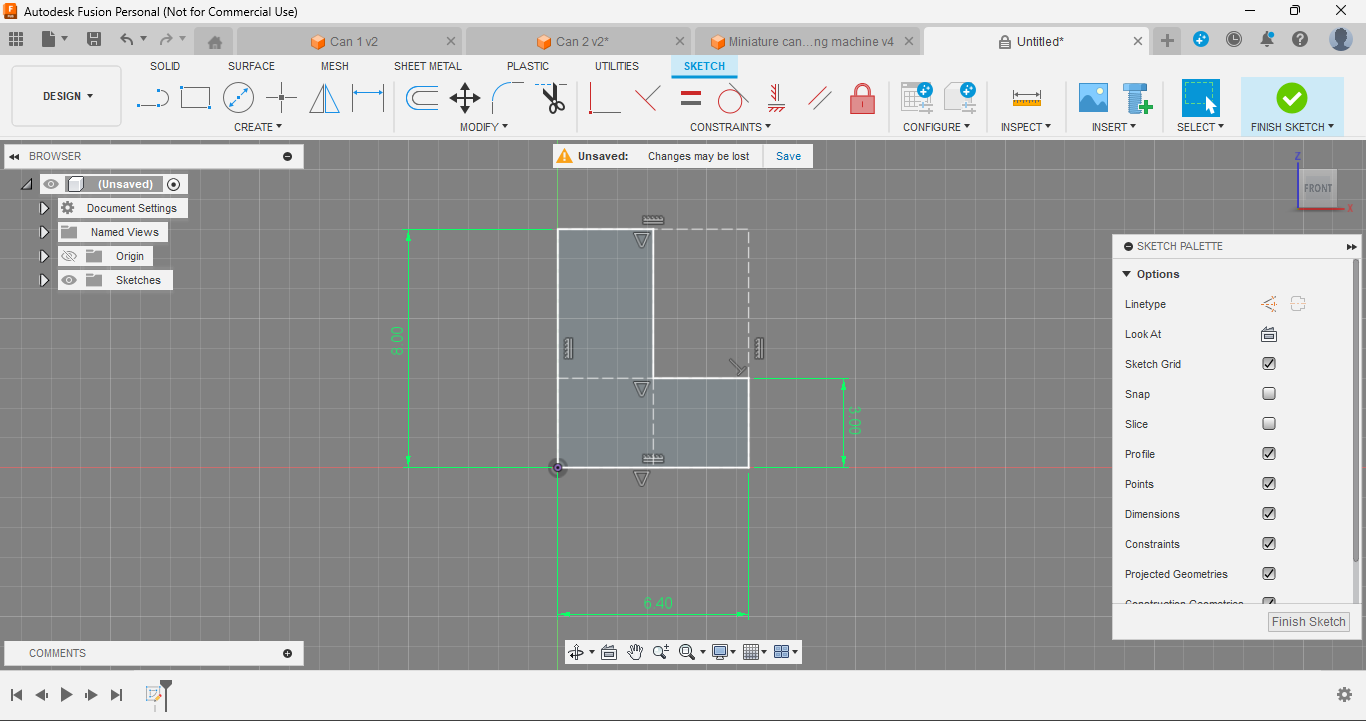
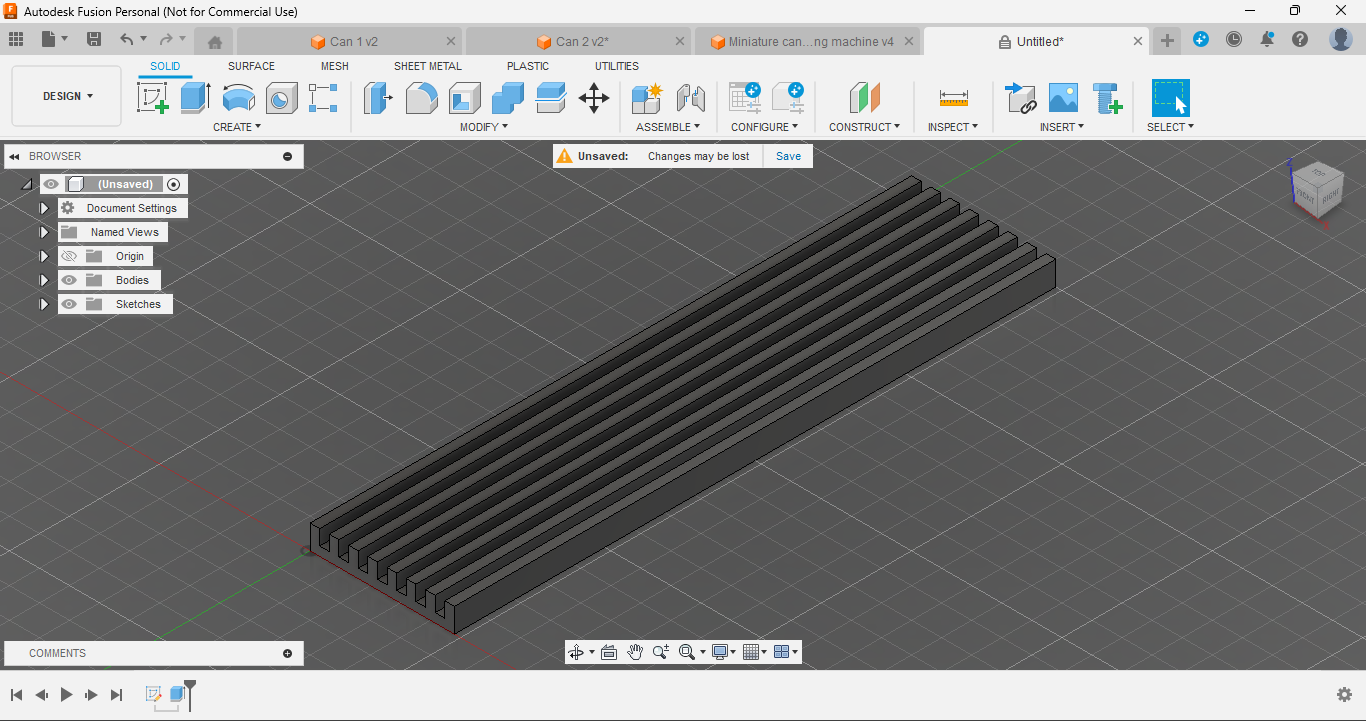
1. Create the Sketch:
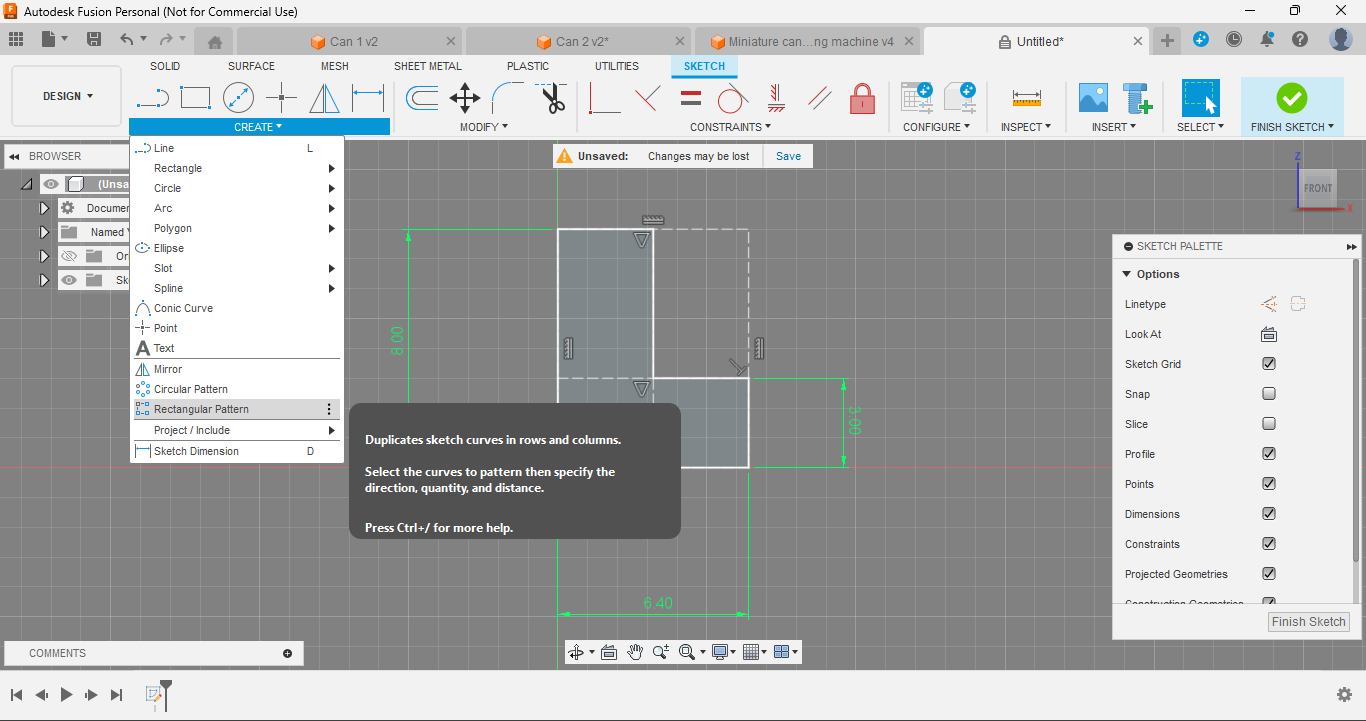
- Start by opening Autodesk Fusion 360 and sketching the basic design for your Nameplate. Ensure the dimensions fit your intended use, such as a desk or wall display.
2. Duplicate the Sketch:
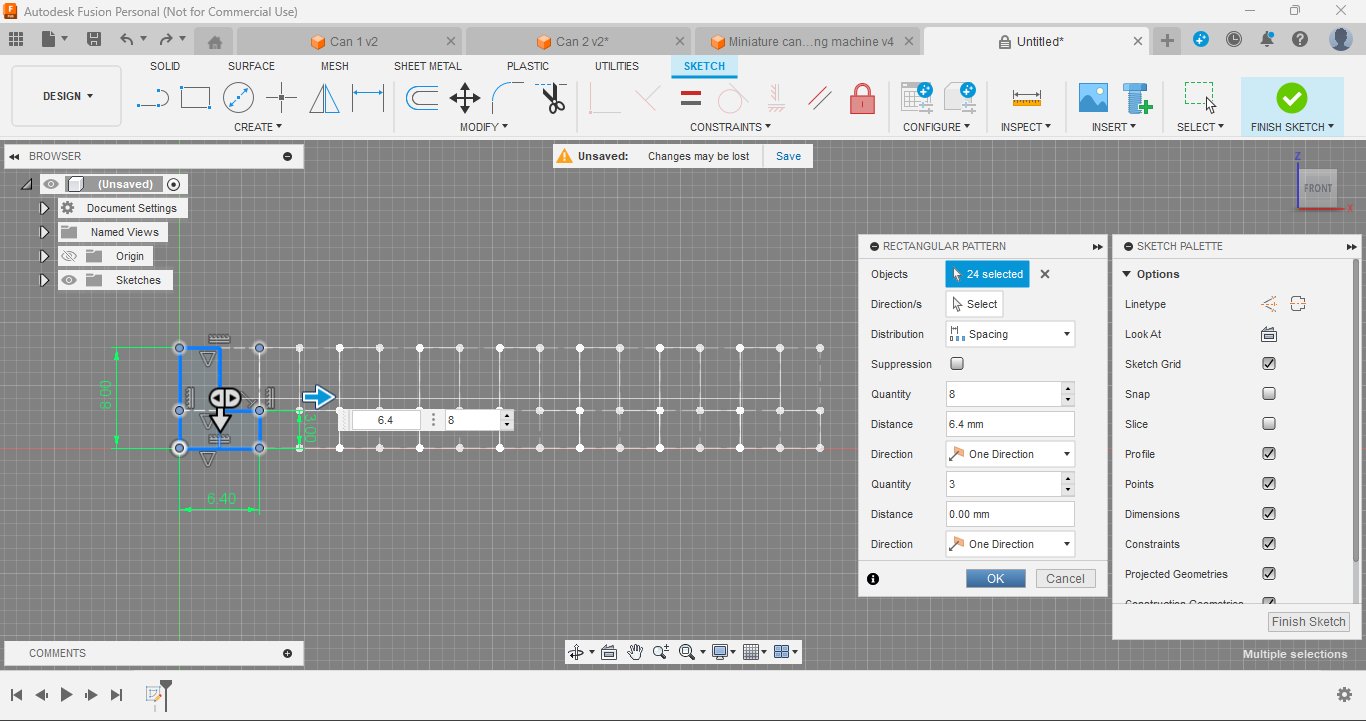
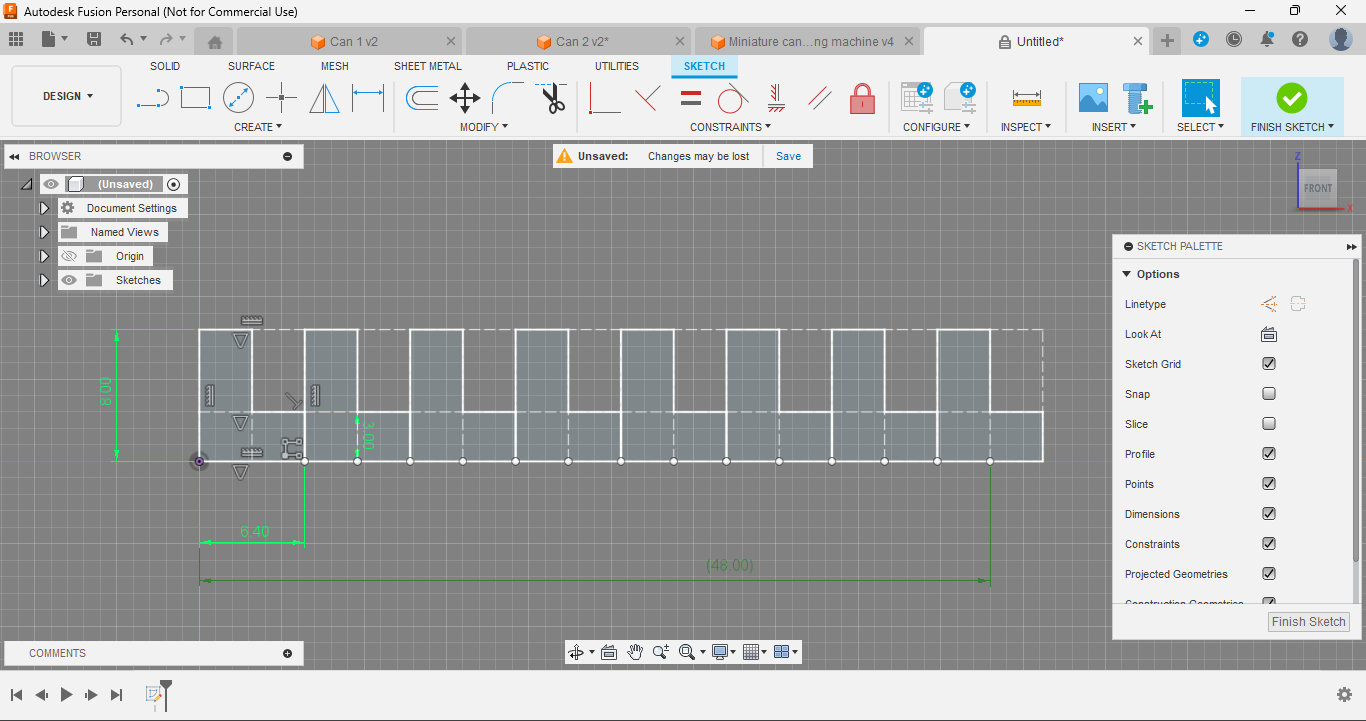
- After you have your initial sketch, copy it horizontally using the rectangular pattern tool, until it reaches the desired length. This repetition ensures that your board will have evenly spaced strips for the letters.
3. Extrude the Nameplate:
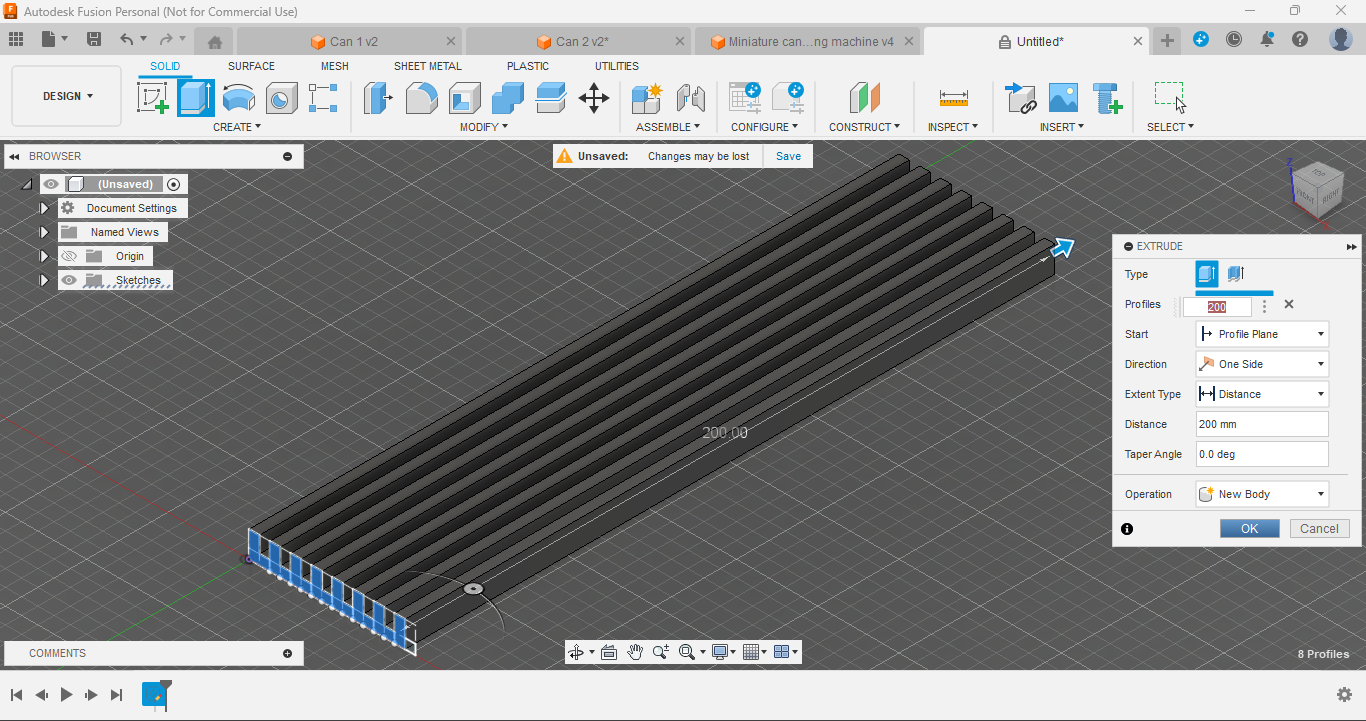
- Extrude the sketch, and adjust the length of the nameplate as needed to accommodate your text or design. If you want to write longer text, simply create additional segments and join them horizontally using super glue.
4. Versatile Uses:
- This nameplate design can be used in various settings, from a desk nameplate to a door sign. It adds a personal and professional touch to any space.
The width of the plate is 48mm which looks great with medium-sized fronts as standard for this project, if you want to make it compatible with smaller size or larger size fonts, adjust its width accordingly:
- for small fonts- 41.6mm
- for medium fonts- 48mm (standard)
- for large fonts- 54.4mm
Use the provided STL files for the nameplate (common sizes) or adjust the design in Fusion 360 to suit your needs.
For example- if you want to write "Living room" and it doesn't fit in, let's say 200mm nameplate, simply join it with another plate, let's say 50mm horizontally using super glue to meet your needs, or you can make full 250mm nameplate in a go if your printer supports it, or you can create your custom size as per your need.
Designing the Stand (for Namepate)
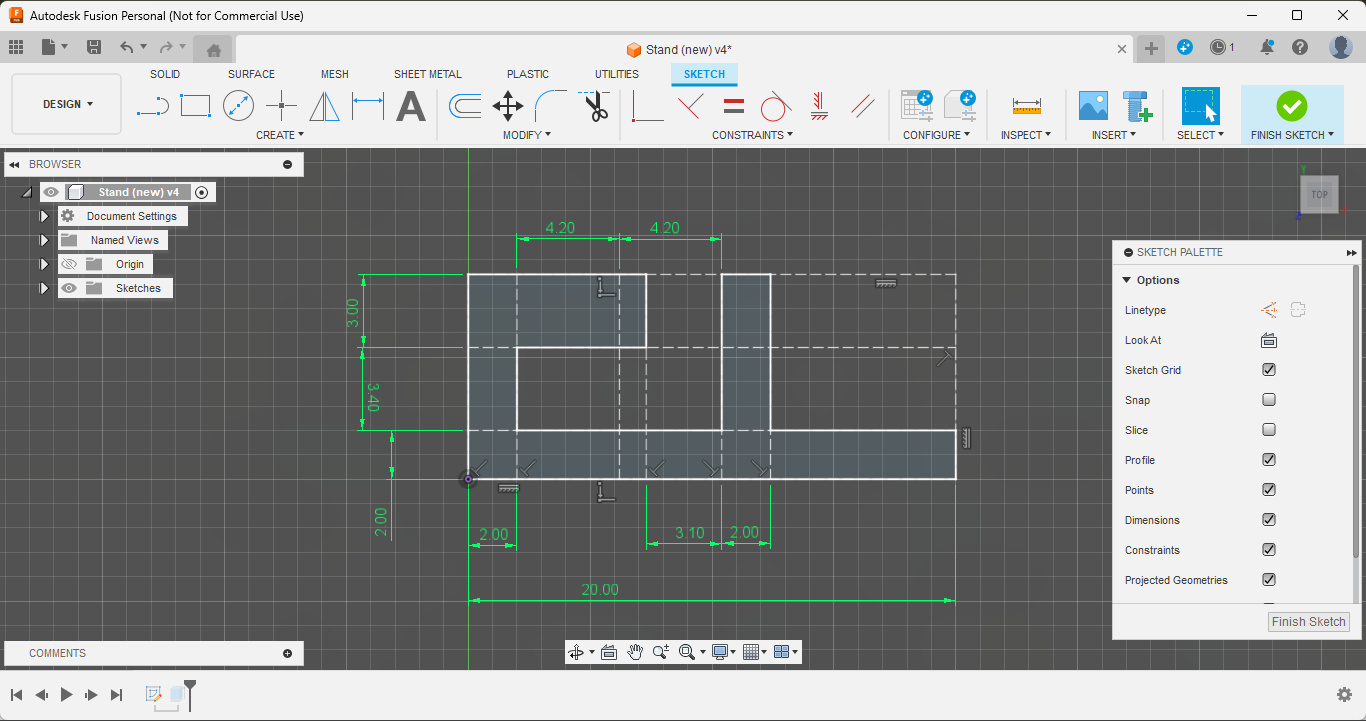
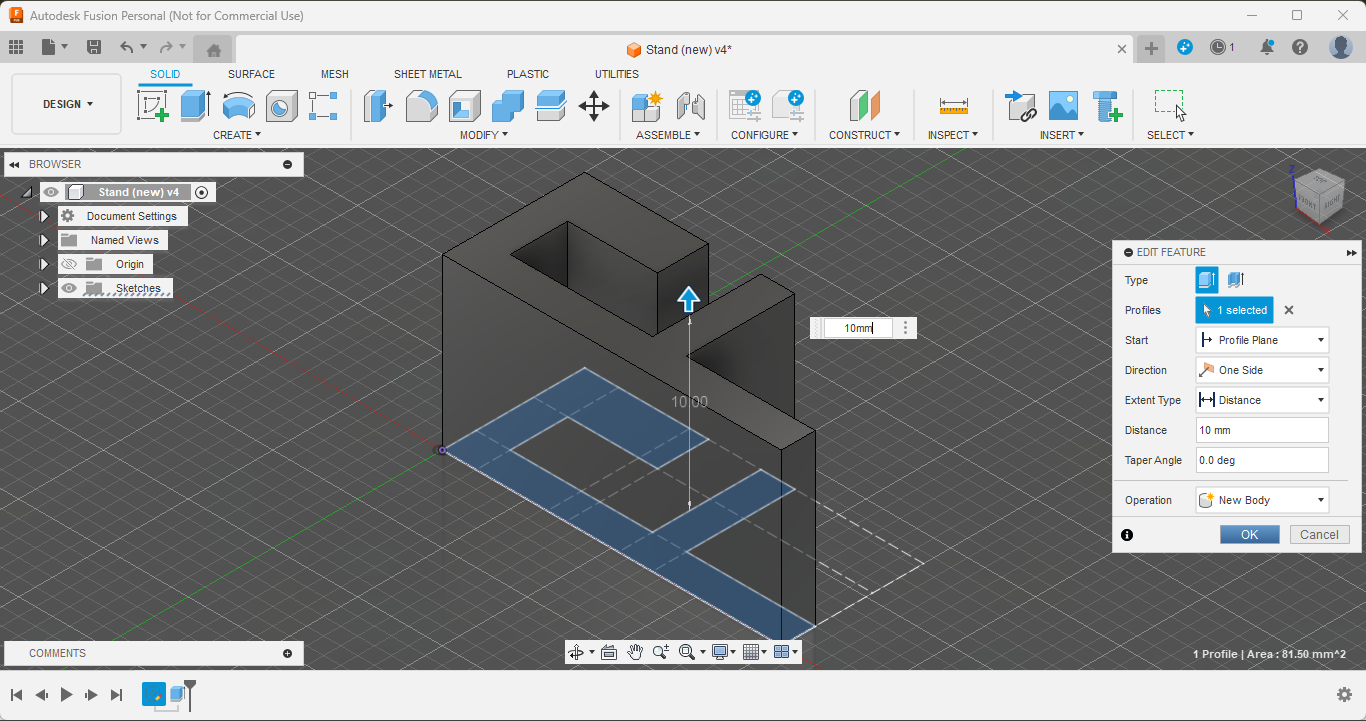
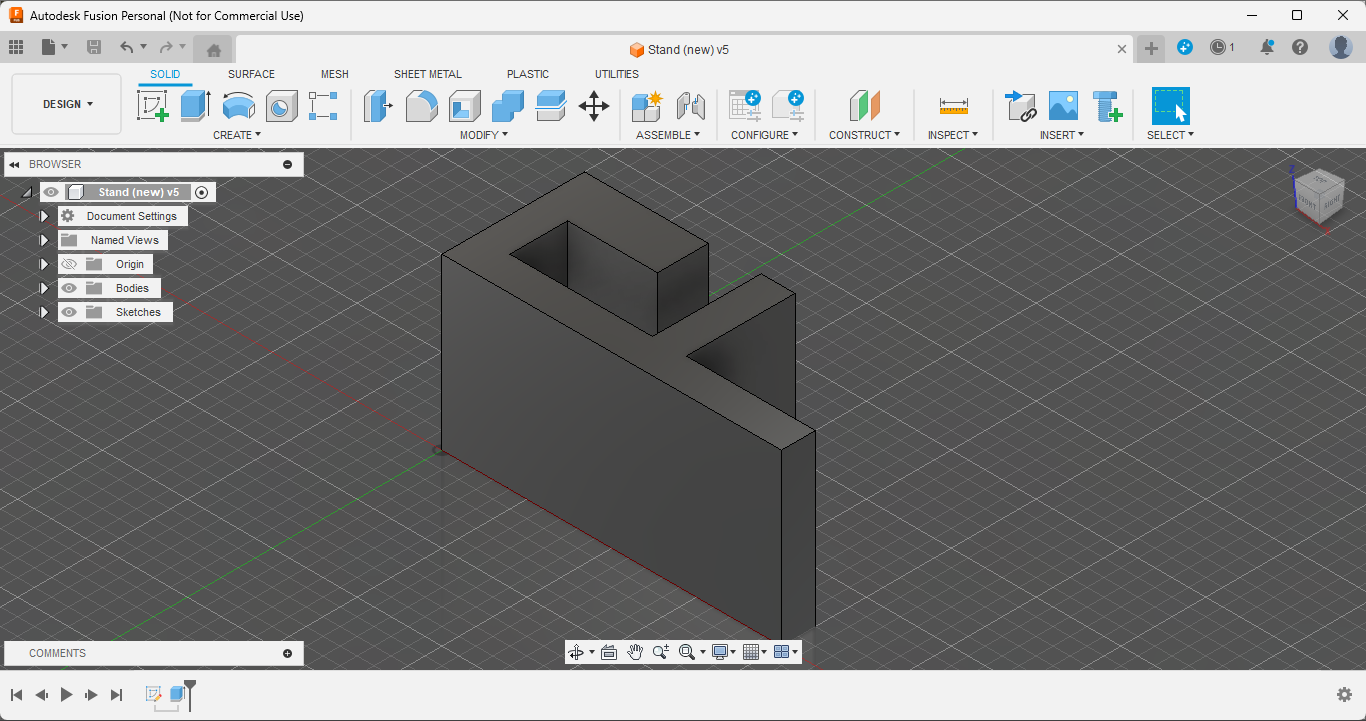
1. Create a Sketch in Autodesk Fusion 360:
- To create a stand for your nameplate, start by sketching a simple rectangular pad in Fusion 360. This stand will serve as the base to support your nameplate.
2. Extrude the Stand:
- Extrude the sketch to your desired thickness. The stand should be sturdy enough to hold the nameplate upright and securely.
3. Usage of the Stand:
- The stand is essential for stabilizing the nameplate on a desk or similar surface. It ensures that your nameplate stands upright and remains visible, whether used for professional or decorative purposes.
By adding this stand, your nameplate will be able to sit securely on any flat surface like on a table, making it versatile and functional for various uses. (also this slides to the nameplate making it stable even without using any glue)
Downloads
3D Printing All the Components
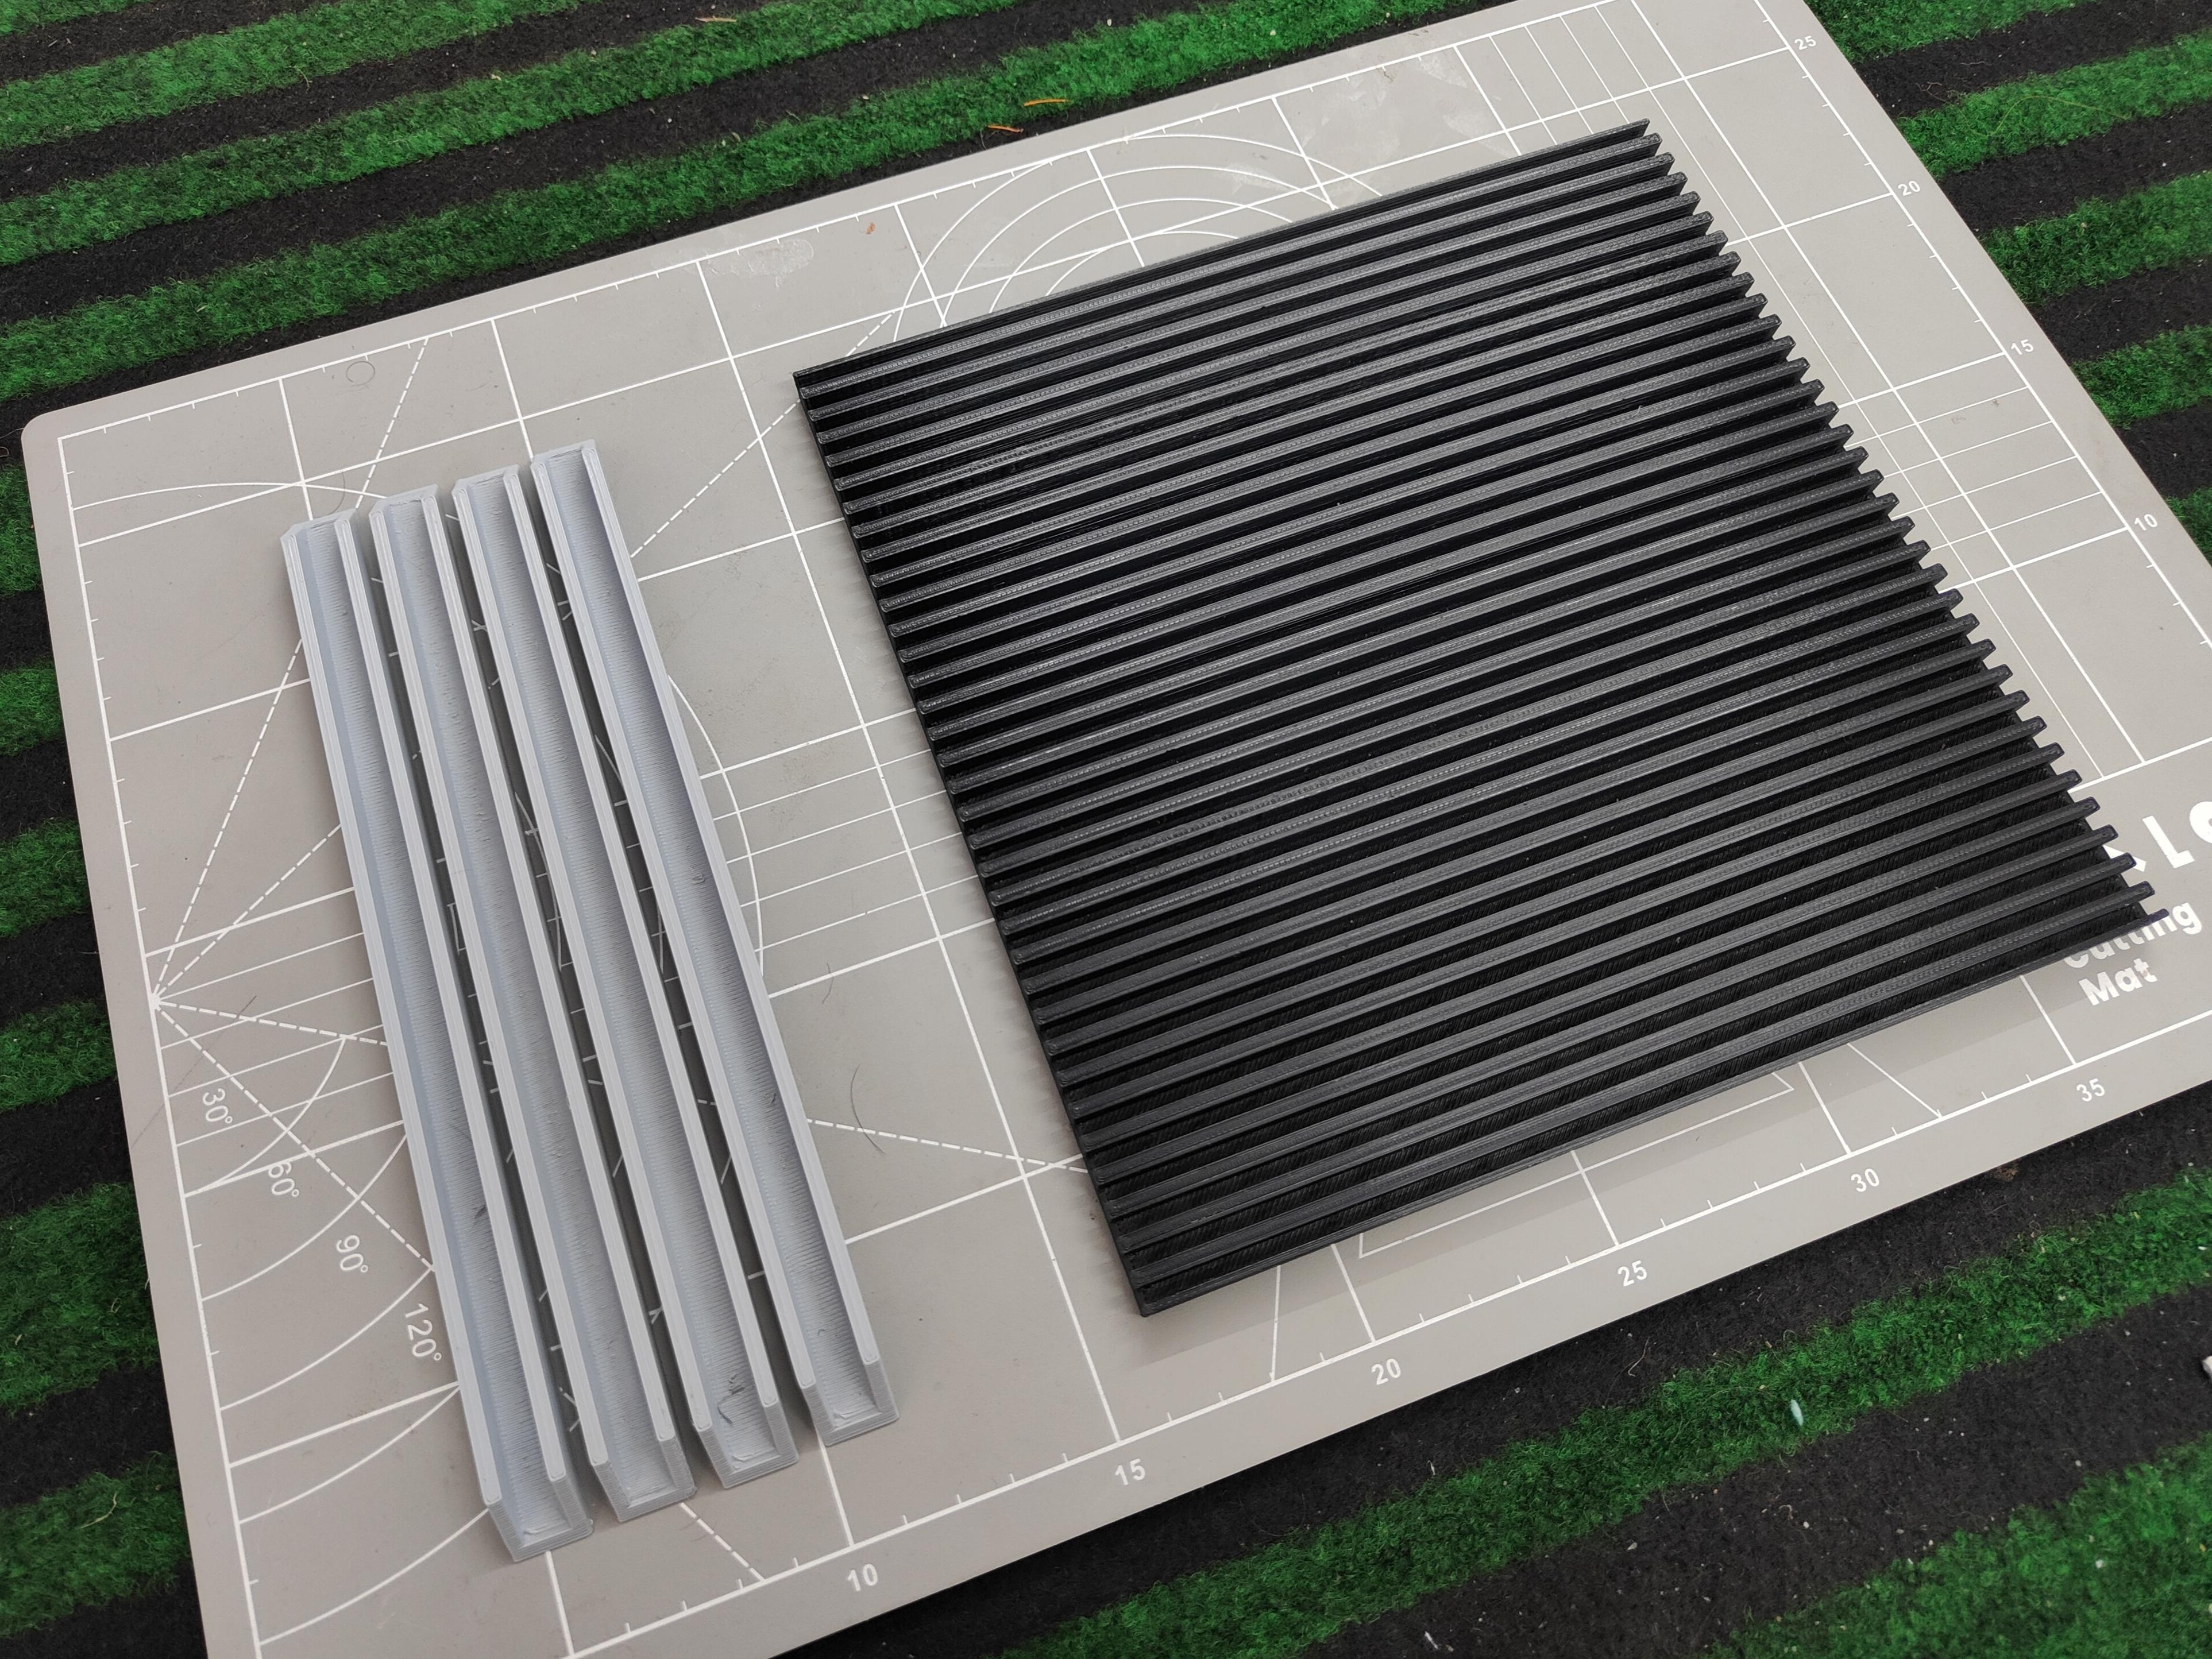
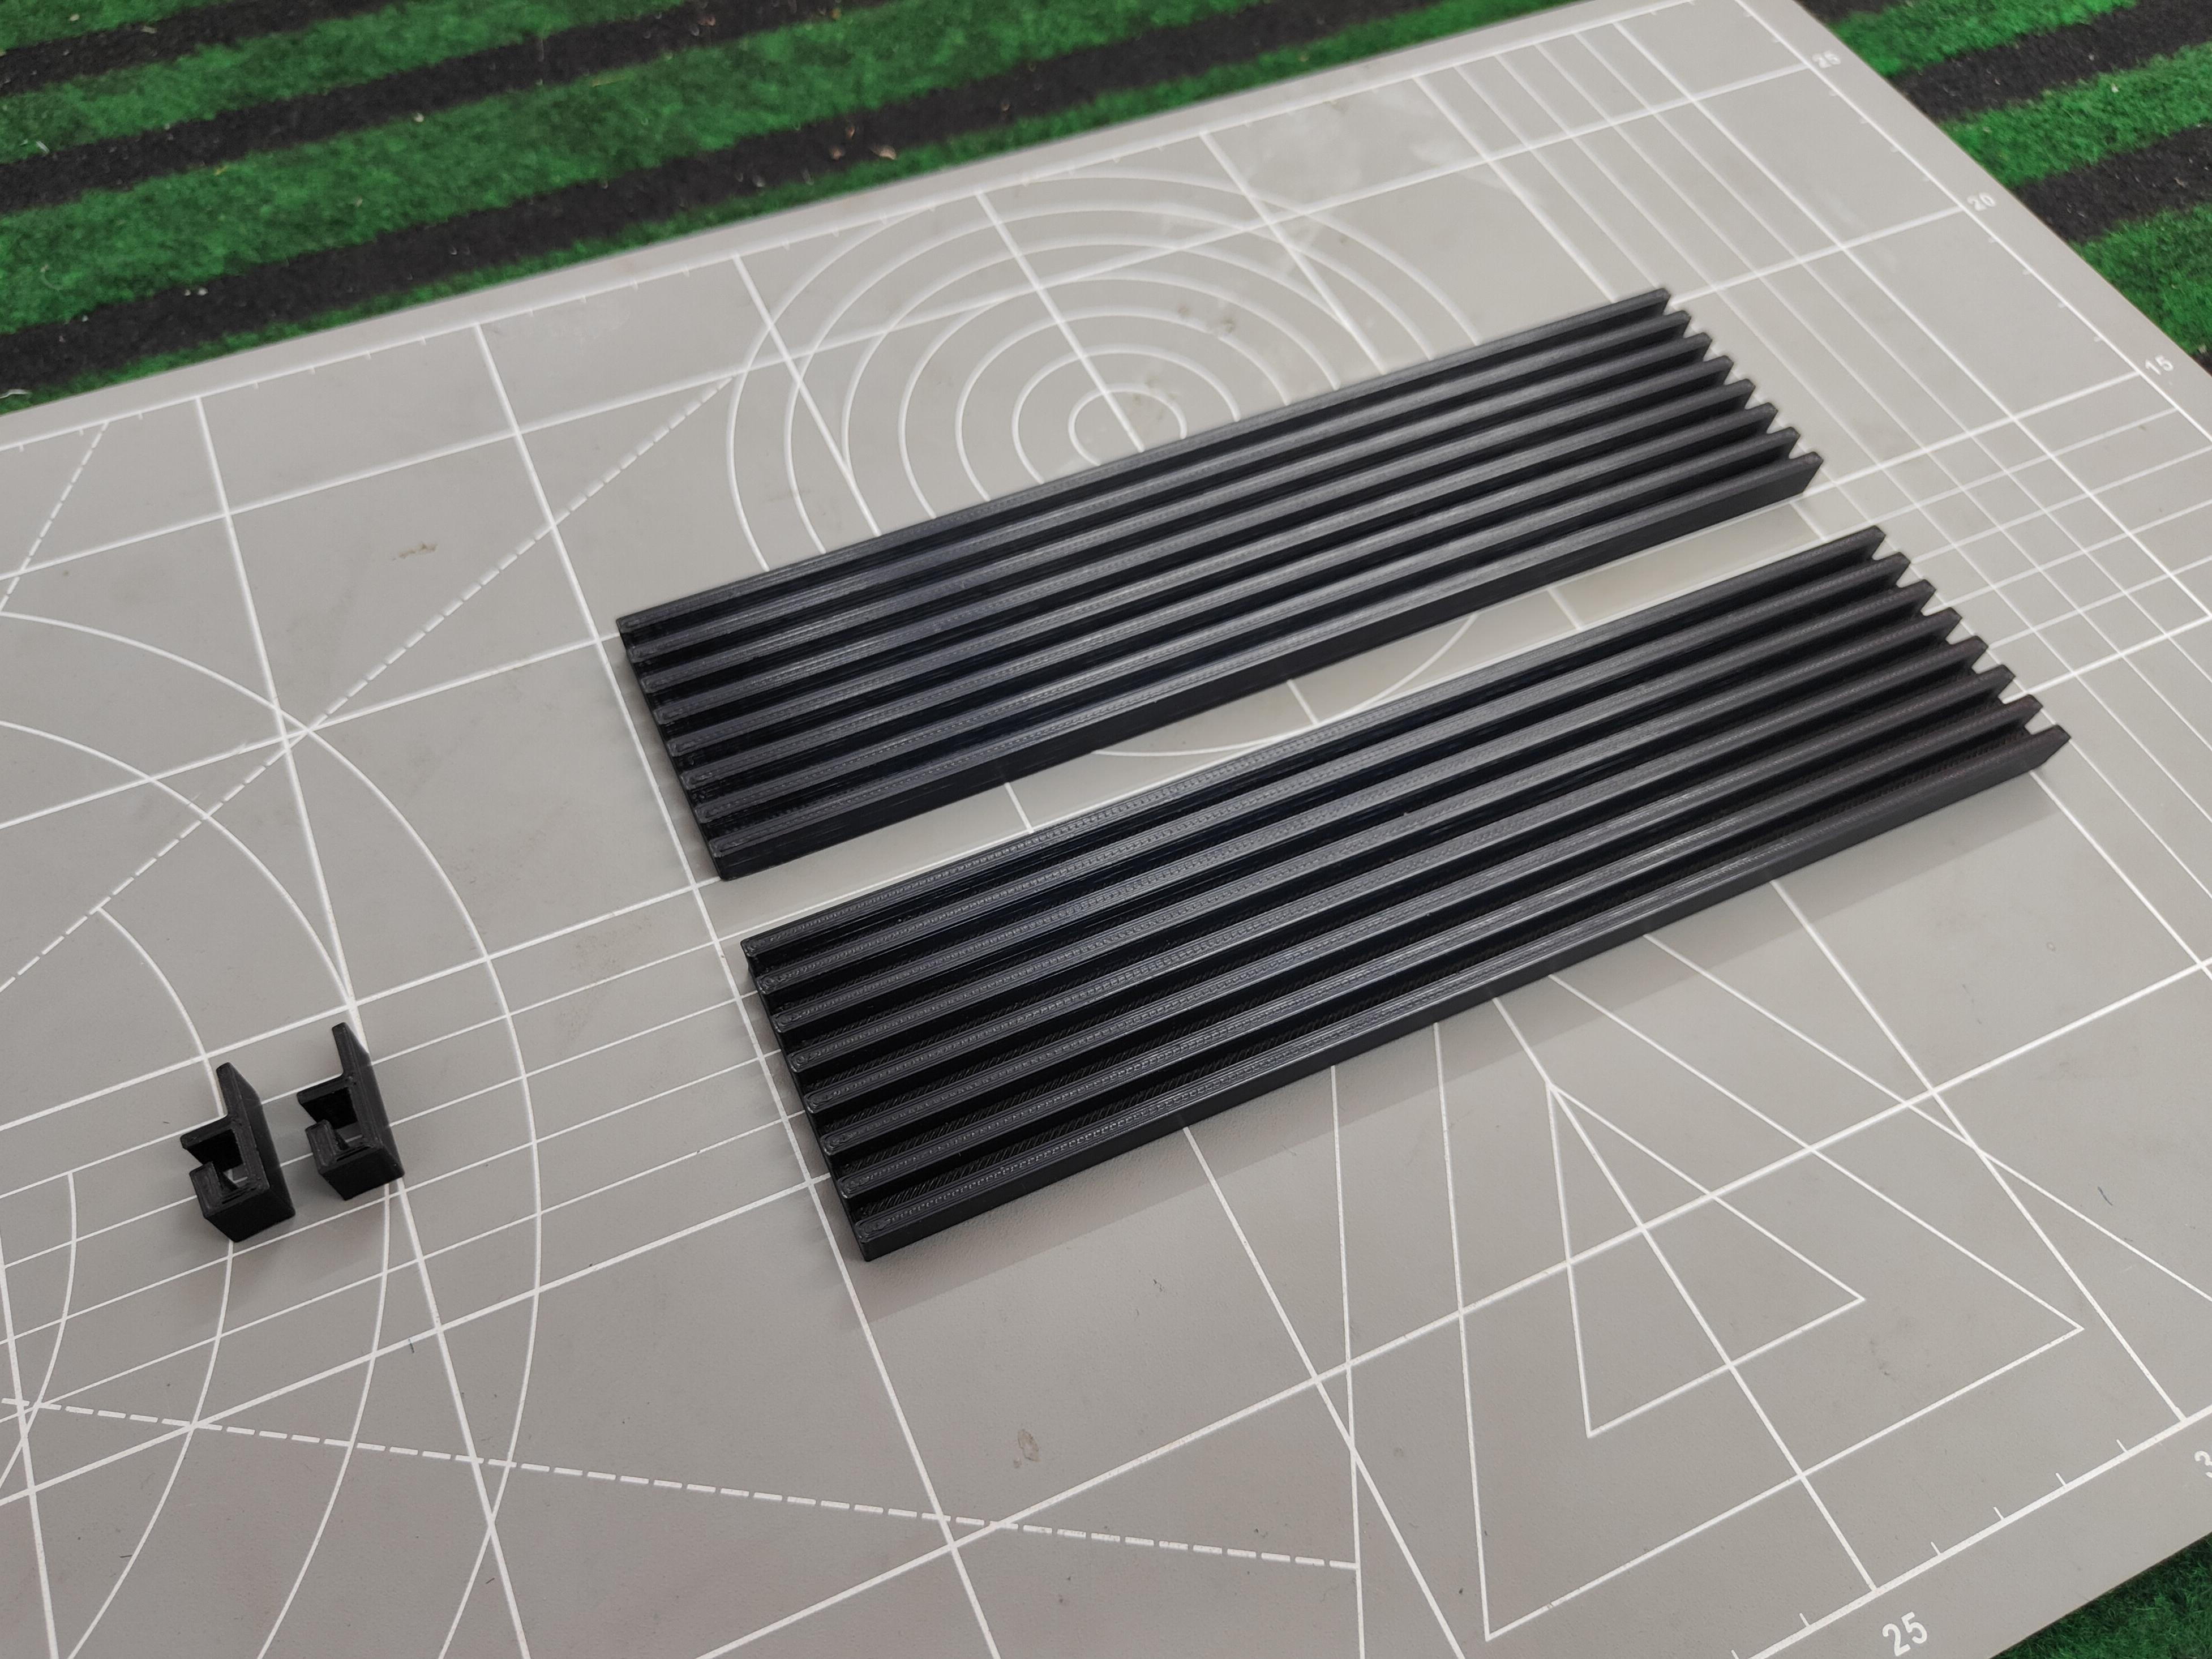
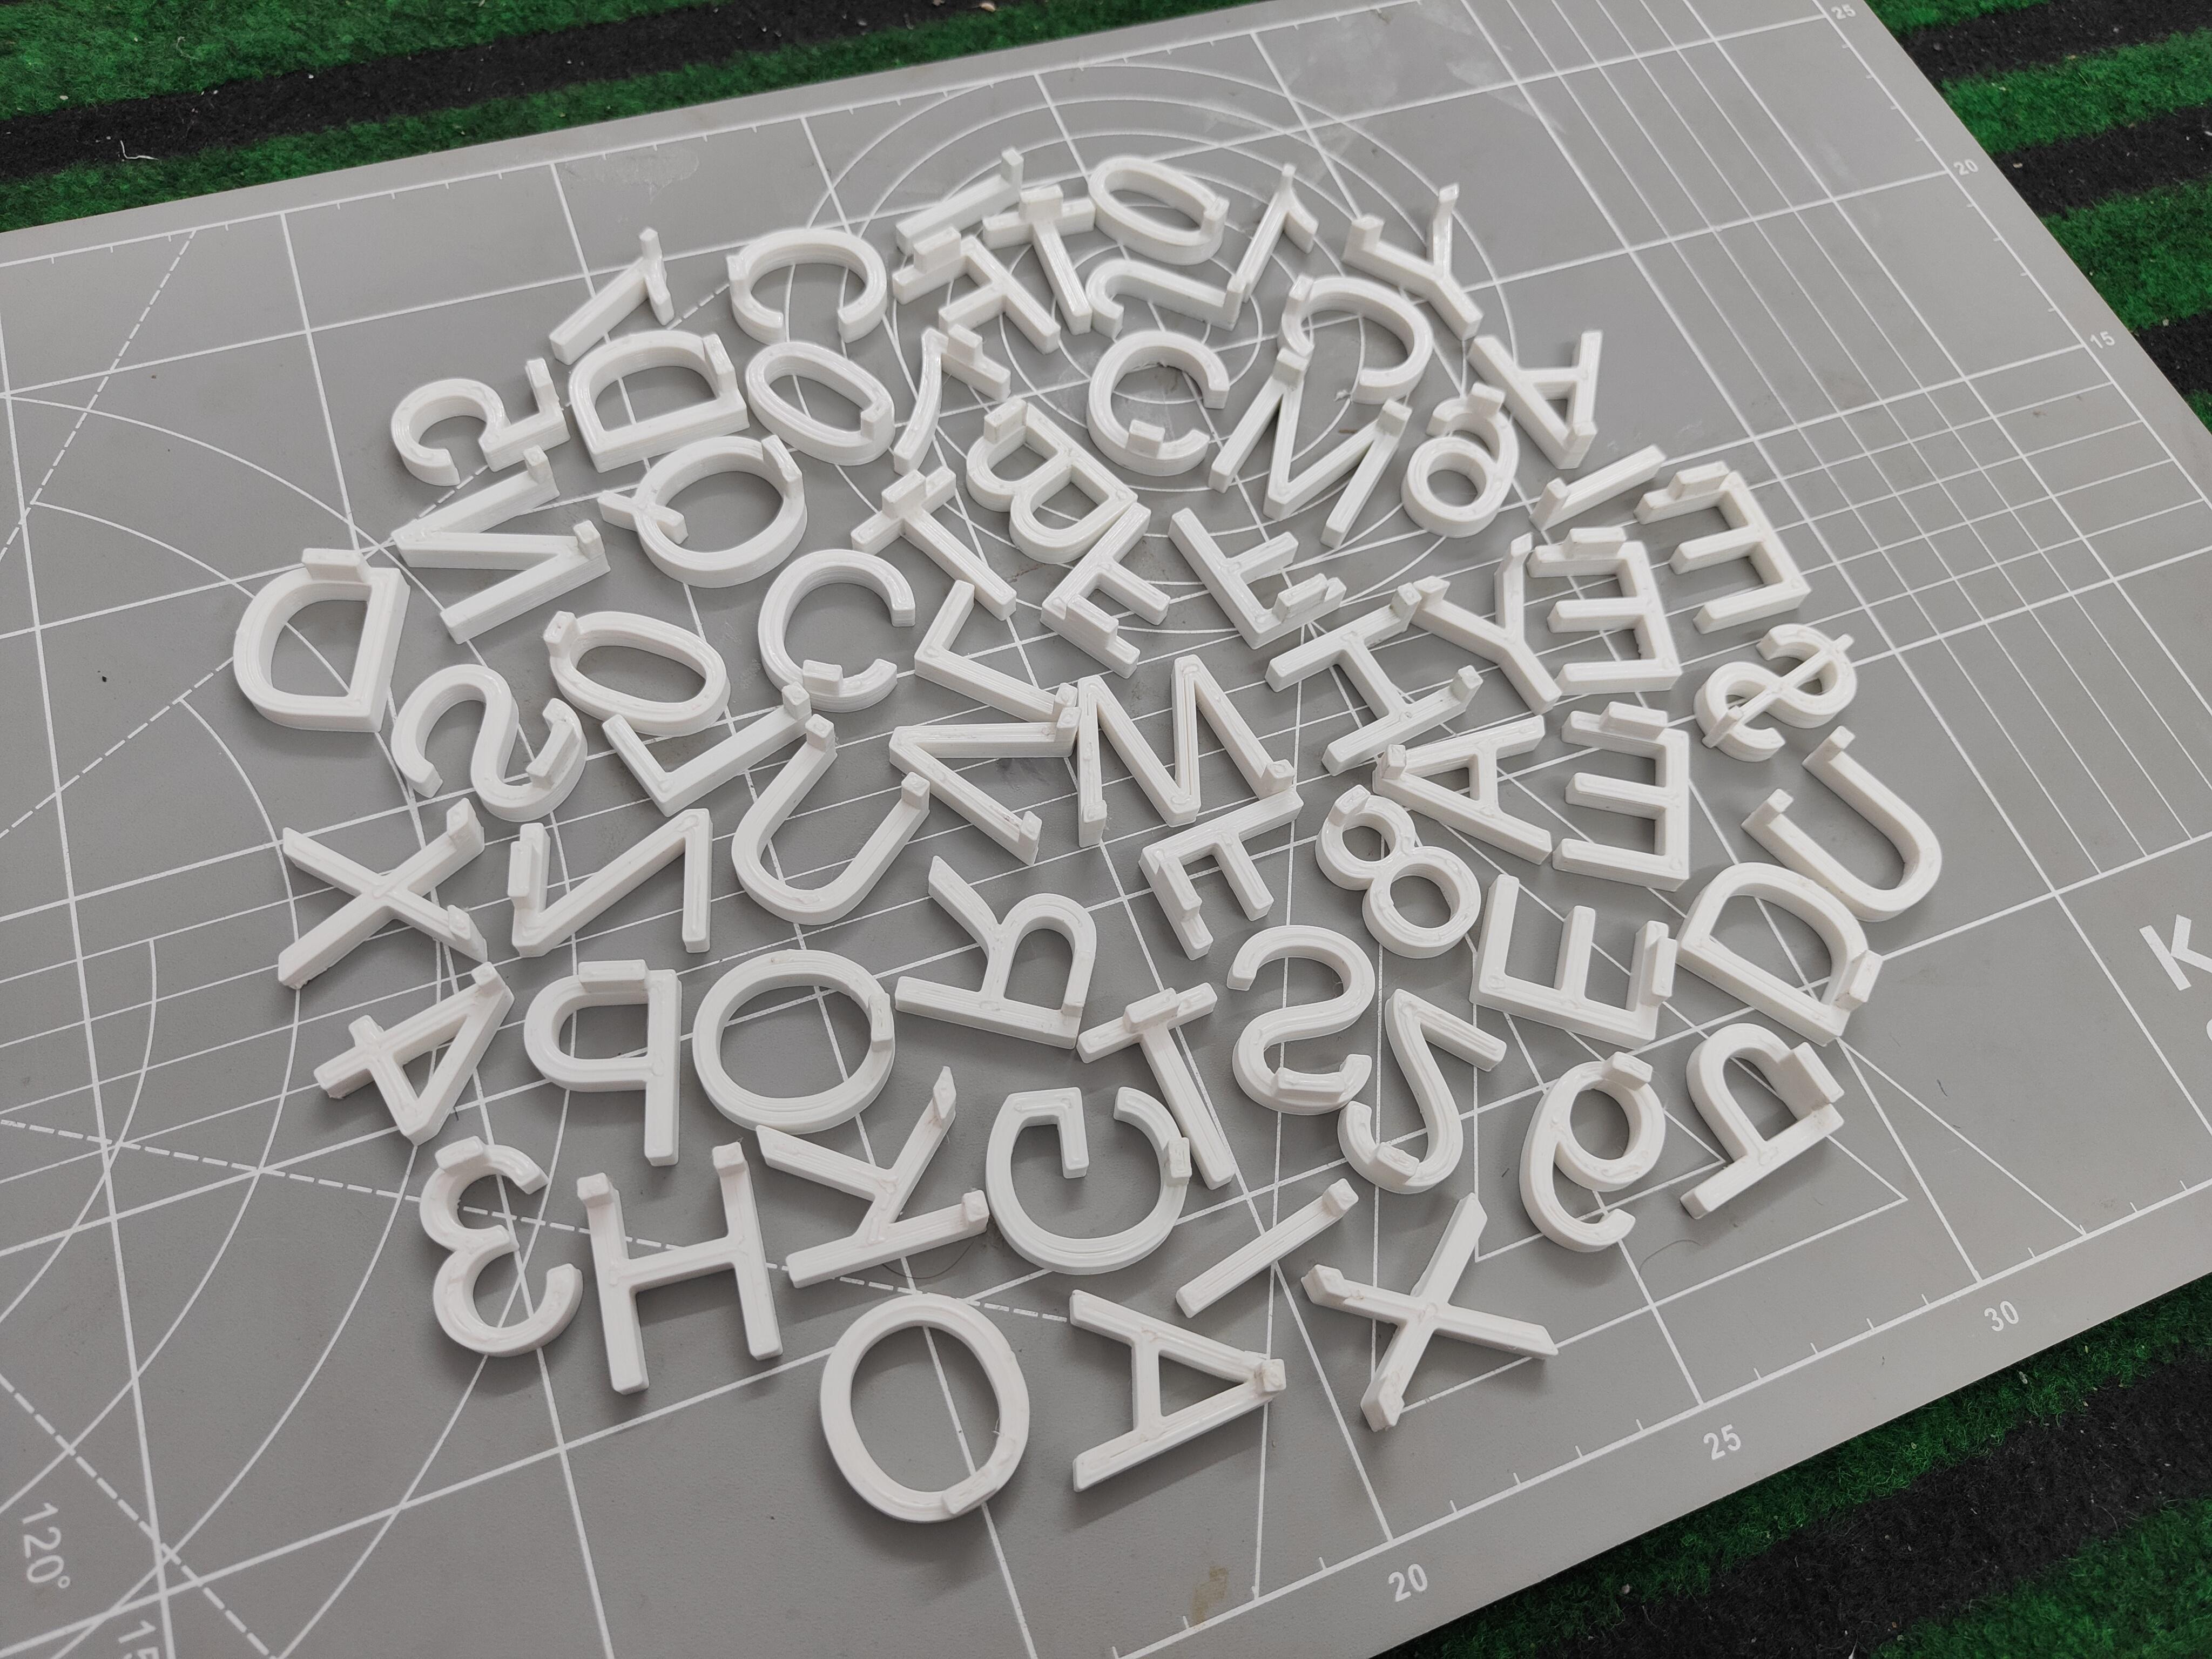
1. Using Provided STL Files:
- If you prefer the standard size and are satisfied with the overall design, use the provided STL file. This ensures consistency and ease of printing.
2. Customizing Size:
- If you want to customize the size of your board, design the parts in Fusion 360 as per the steps and export them to your slicing software.
3. Slicing Settings:
- Adjust the slicing settings for the board to ensure a sturdy and durable print. Here are some recommended settings:
- Layer Height: 0.3 mm (recommended)
- Nozzle temperature- 230C
- Bed temperature- 60C
- Infill Density: 10% (for the board, plate, and other parts), 100% (for letters)
- Print Speed: 50 mm/s (for cleaner prints)
- Infill pattern: Zig-zag (for the board, plate, and other parts), Concentric (for letters)
- Material- PLA+ (good quality)
4. Printing Multiple Boards:
- If you need to print more than one board or want to attach multiple boards together, print each piece one by one for the best results.
5. Color Combination:
- While the color choice is up to you, classic combinations like black and white are timeless and offer good visibility. Alternatively, dark and light grey can also provide a stylish contrast.
Please use the recommended slicing settings for your 3d prints, especially the "infill pattern", I have damaged a whole text board by using the wrong infill pattern. Hope you won't do that!
Assembling Text Board
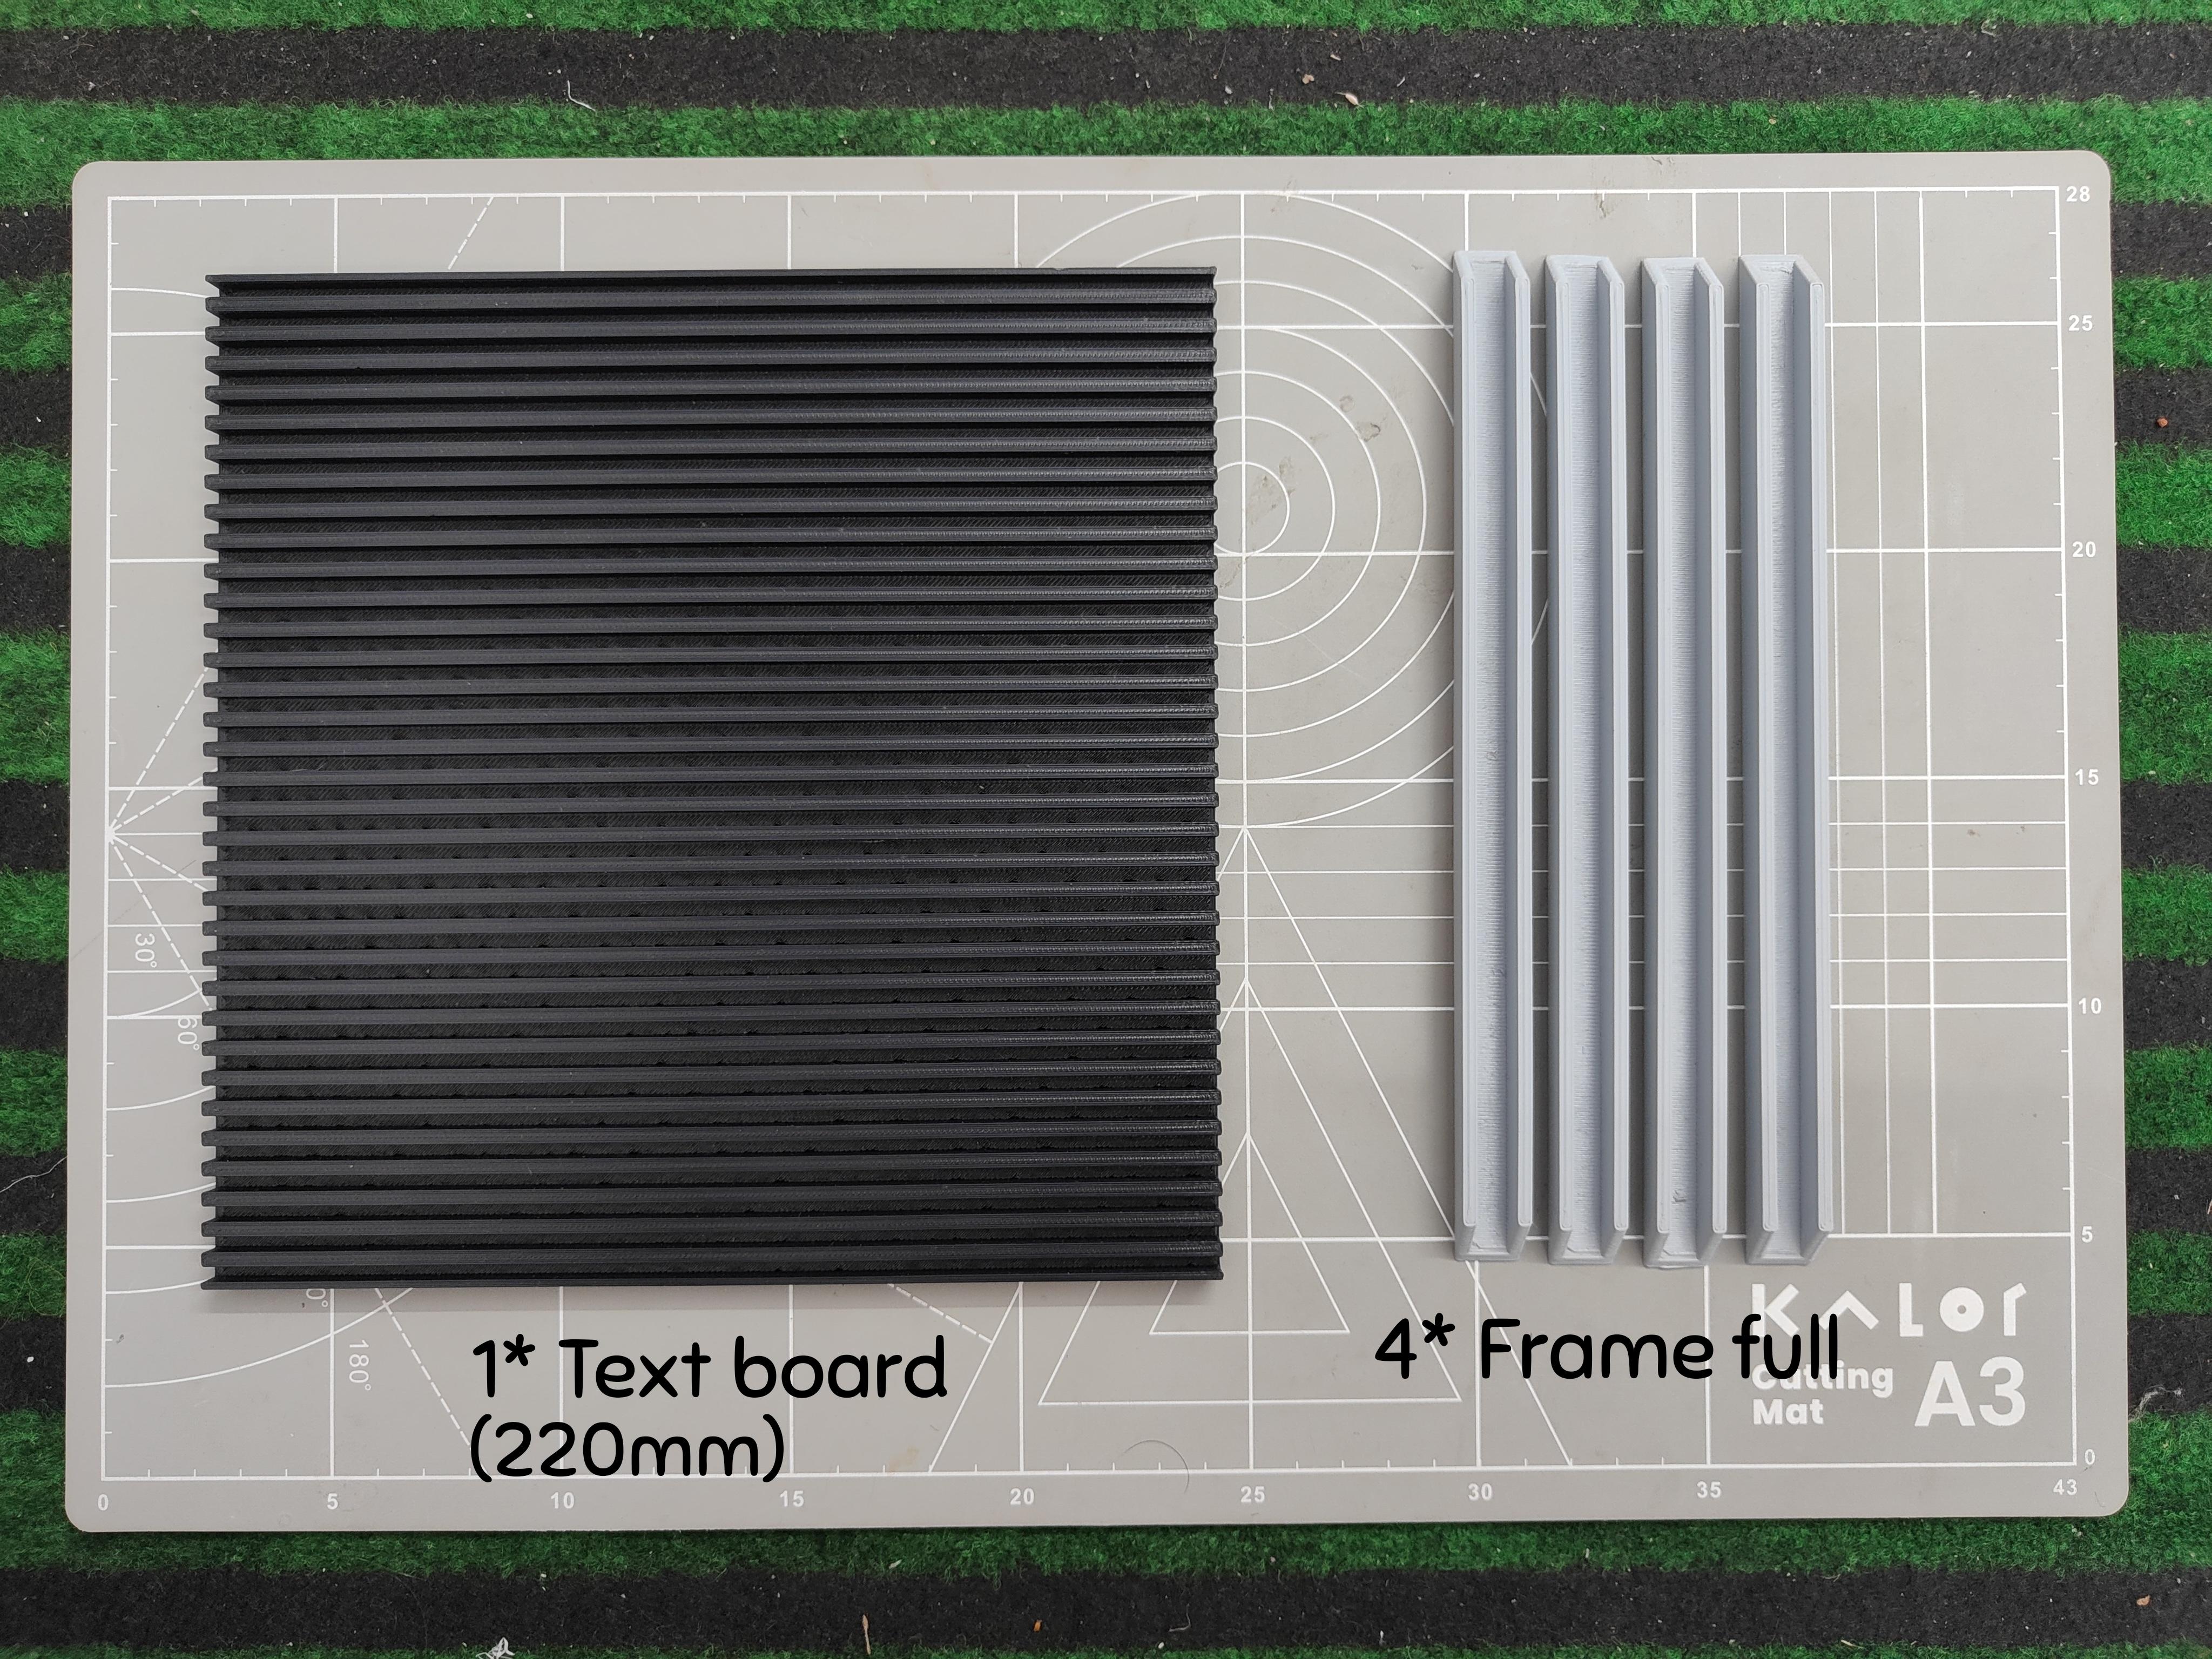
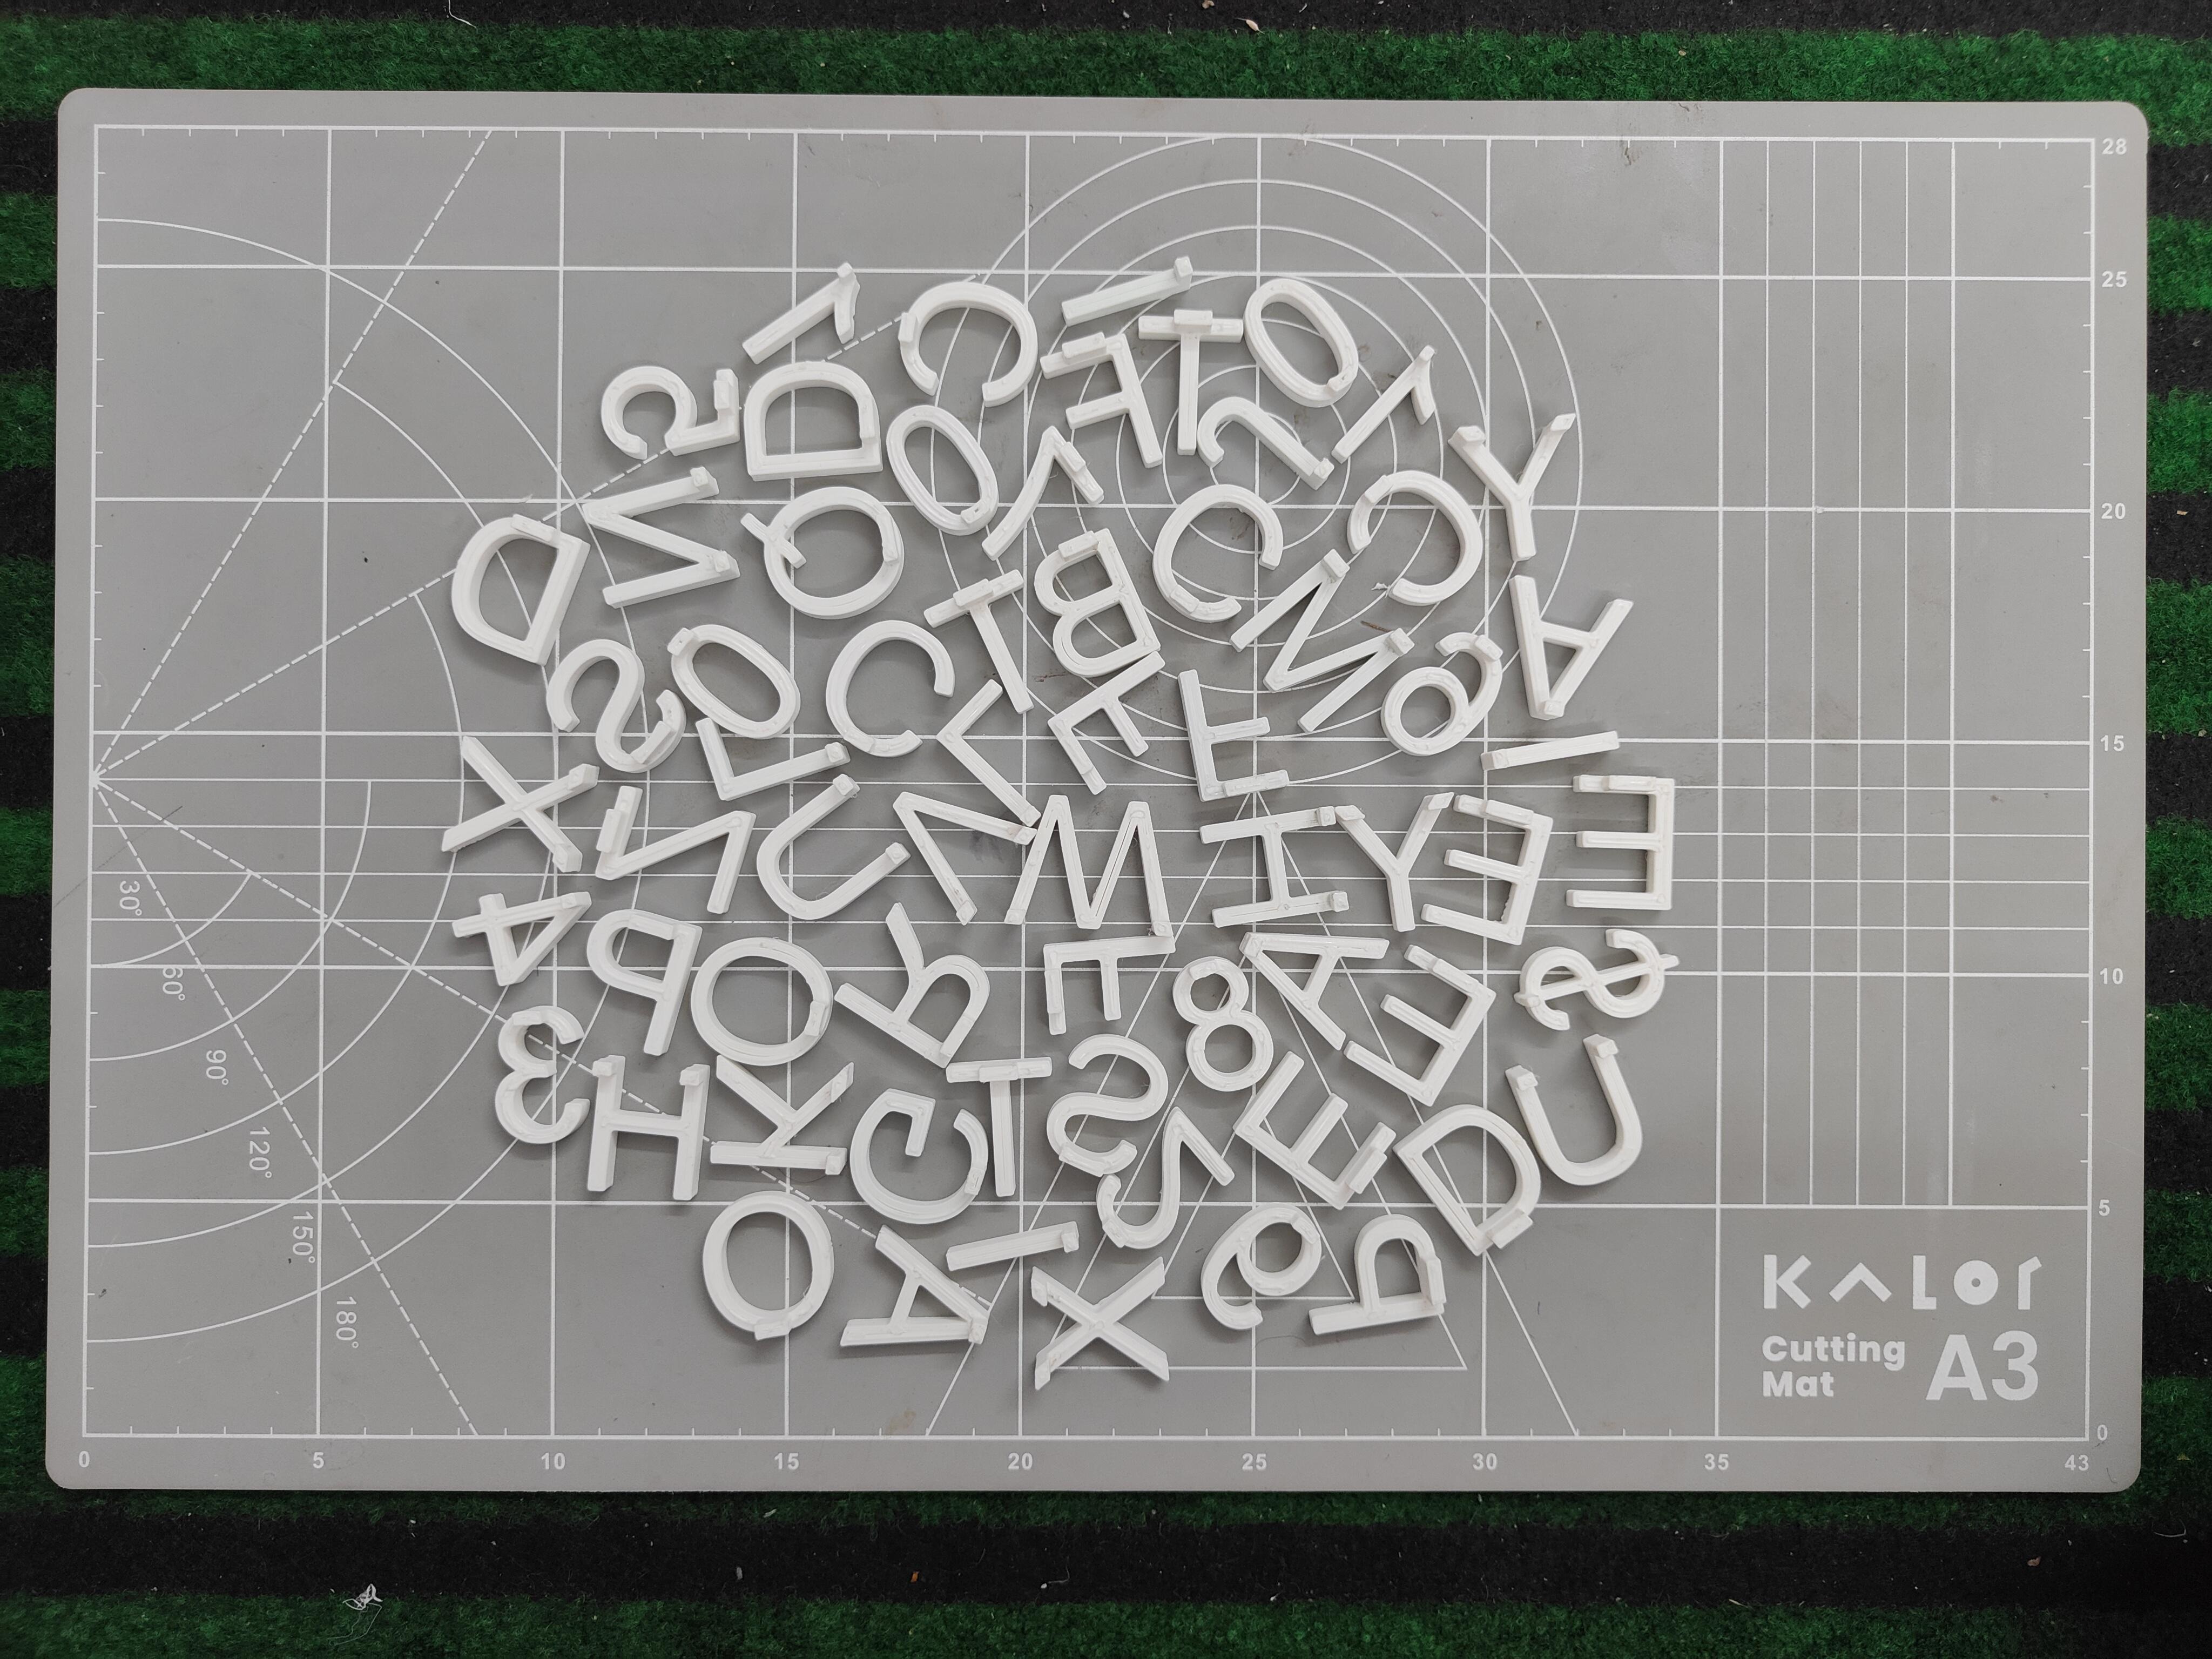
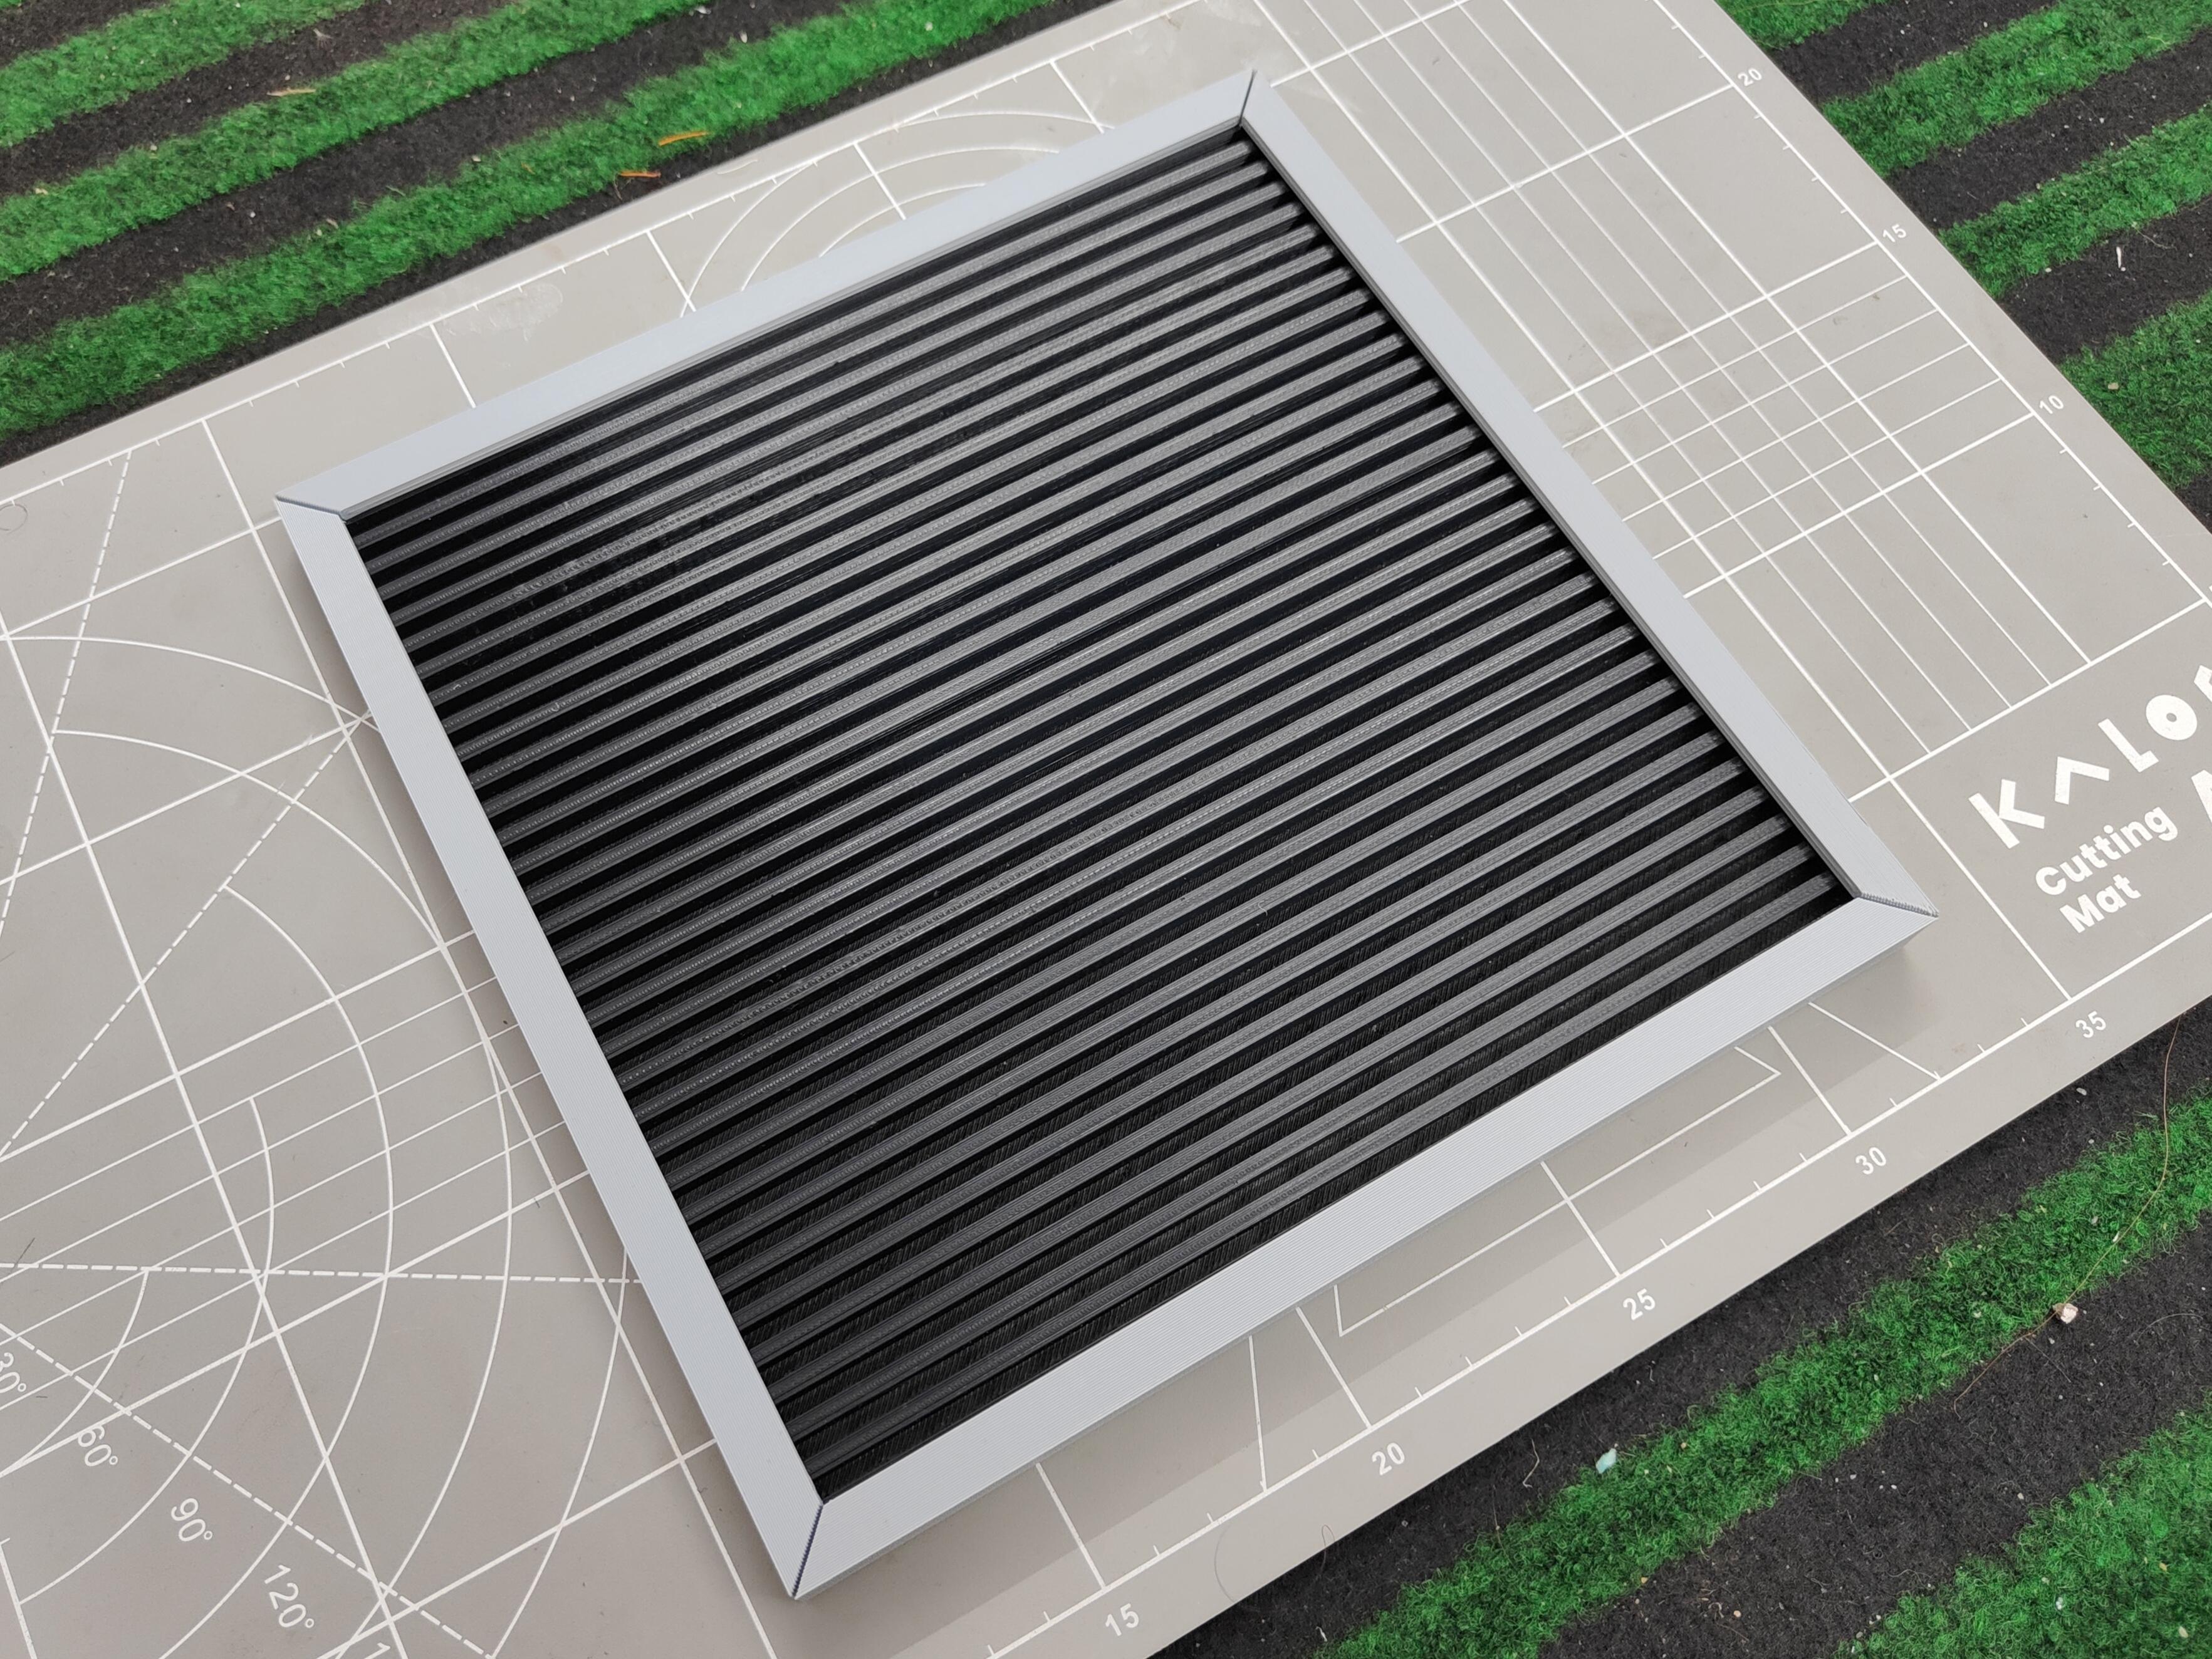
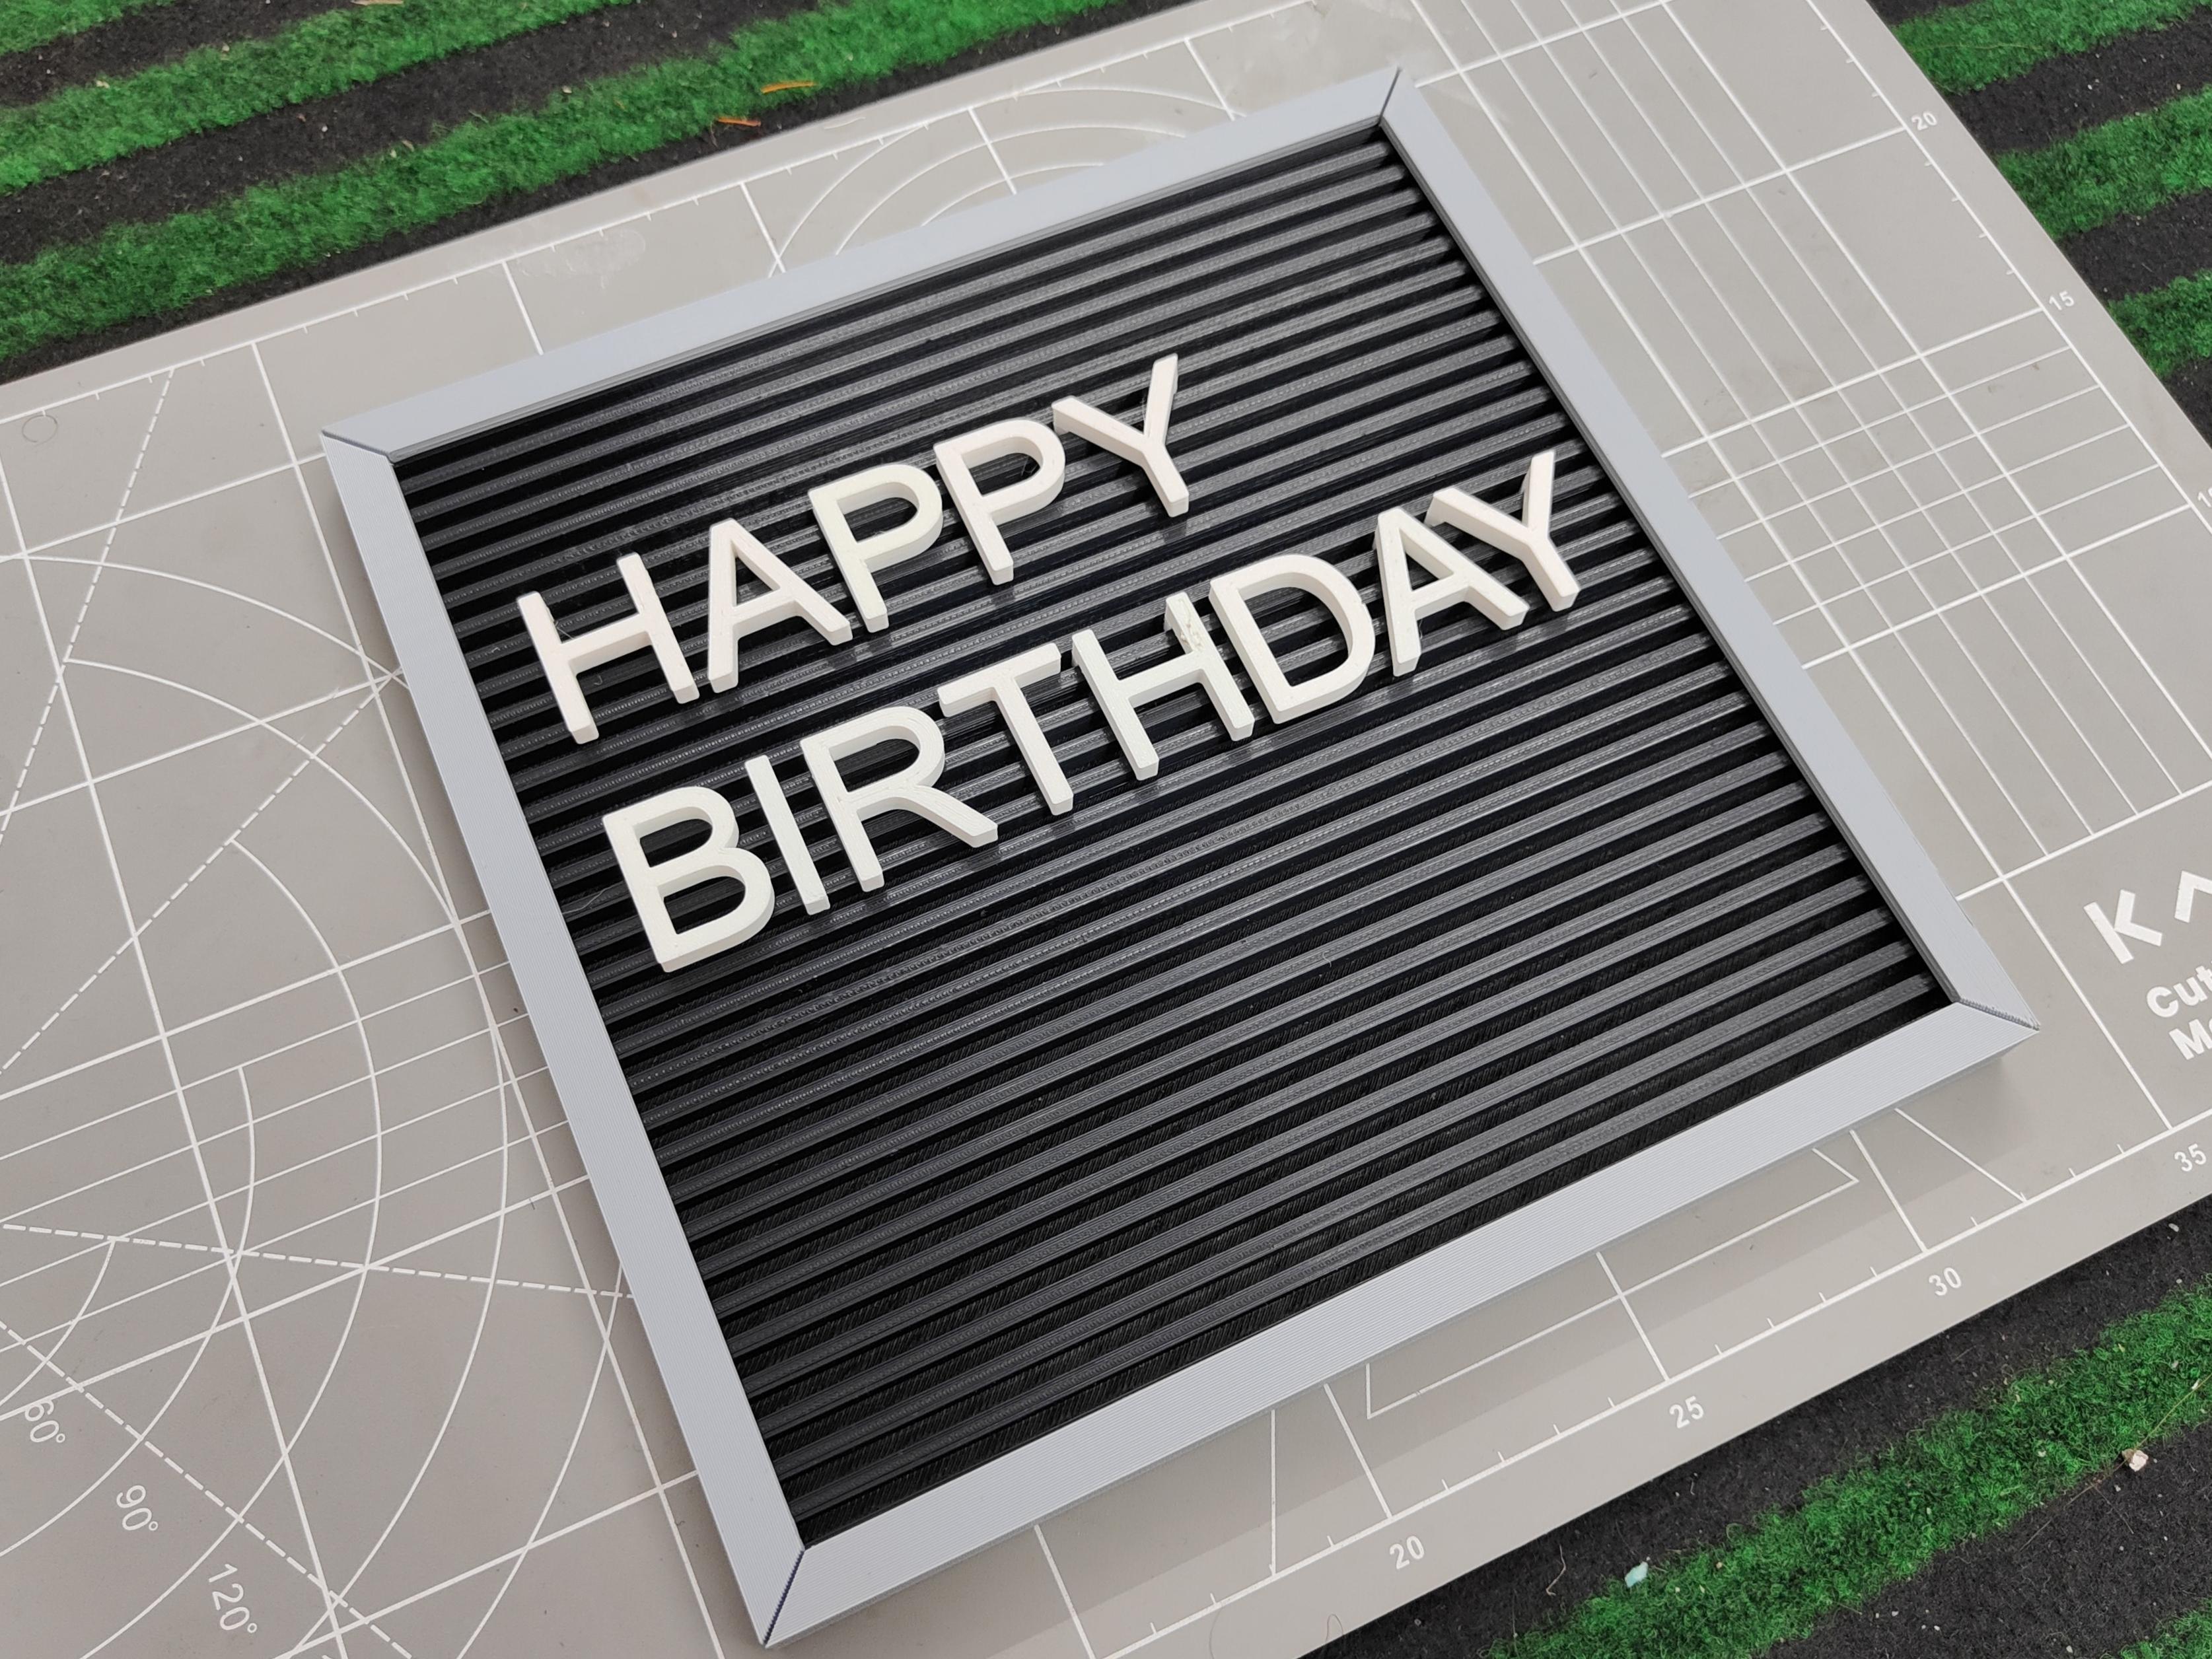
1. Prepare the Parts:
- Once all the components are 3D printed, gather them together for assembly. Ensure you have the textboard, letters, and frame ready.
2. Assemble the Frame:
- The frame is printed in segments, use super glue to join the pieces together. Ensure the corners align perfectly to form a seamless frame around the textboard.
3. Insert the Letters:
- Place the letters into the slots on the nameplate. Arrange them to display the desired name or message. Ensure each letter fits snugly and is properly aligned.
- Now secure all the letters using super glue.
4. Final Touches:
- Check the overall assembly for any loose parts or misalignments. Make any necessary adjustments to ensure a polished and professional appearance.
If you want the text board for your kids (if you have one) to learn and play with letters and numbers, skip using super glue for securing letters and numbers.
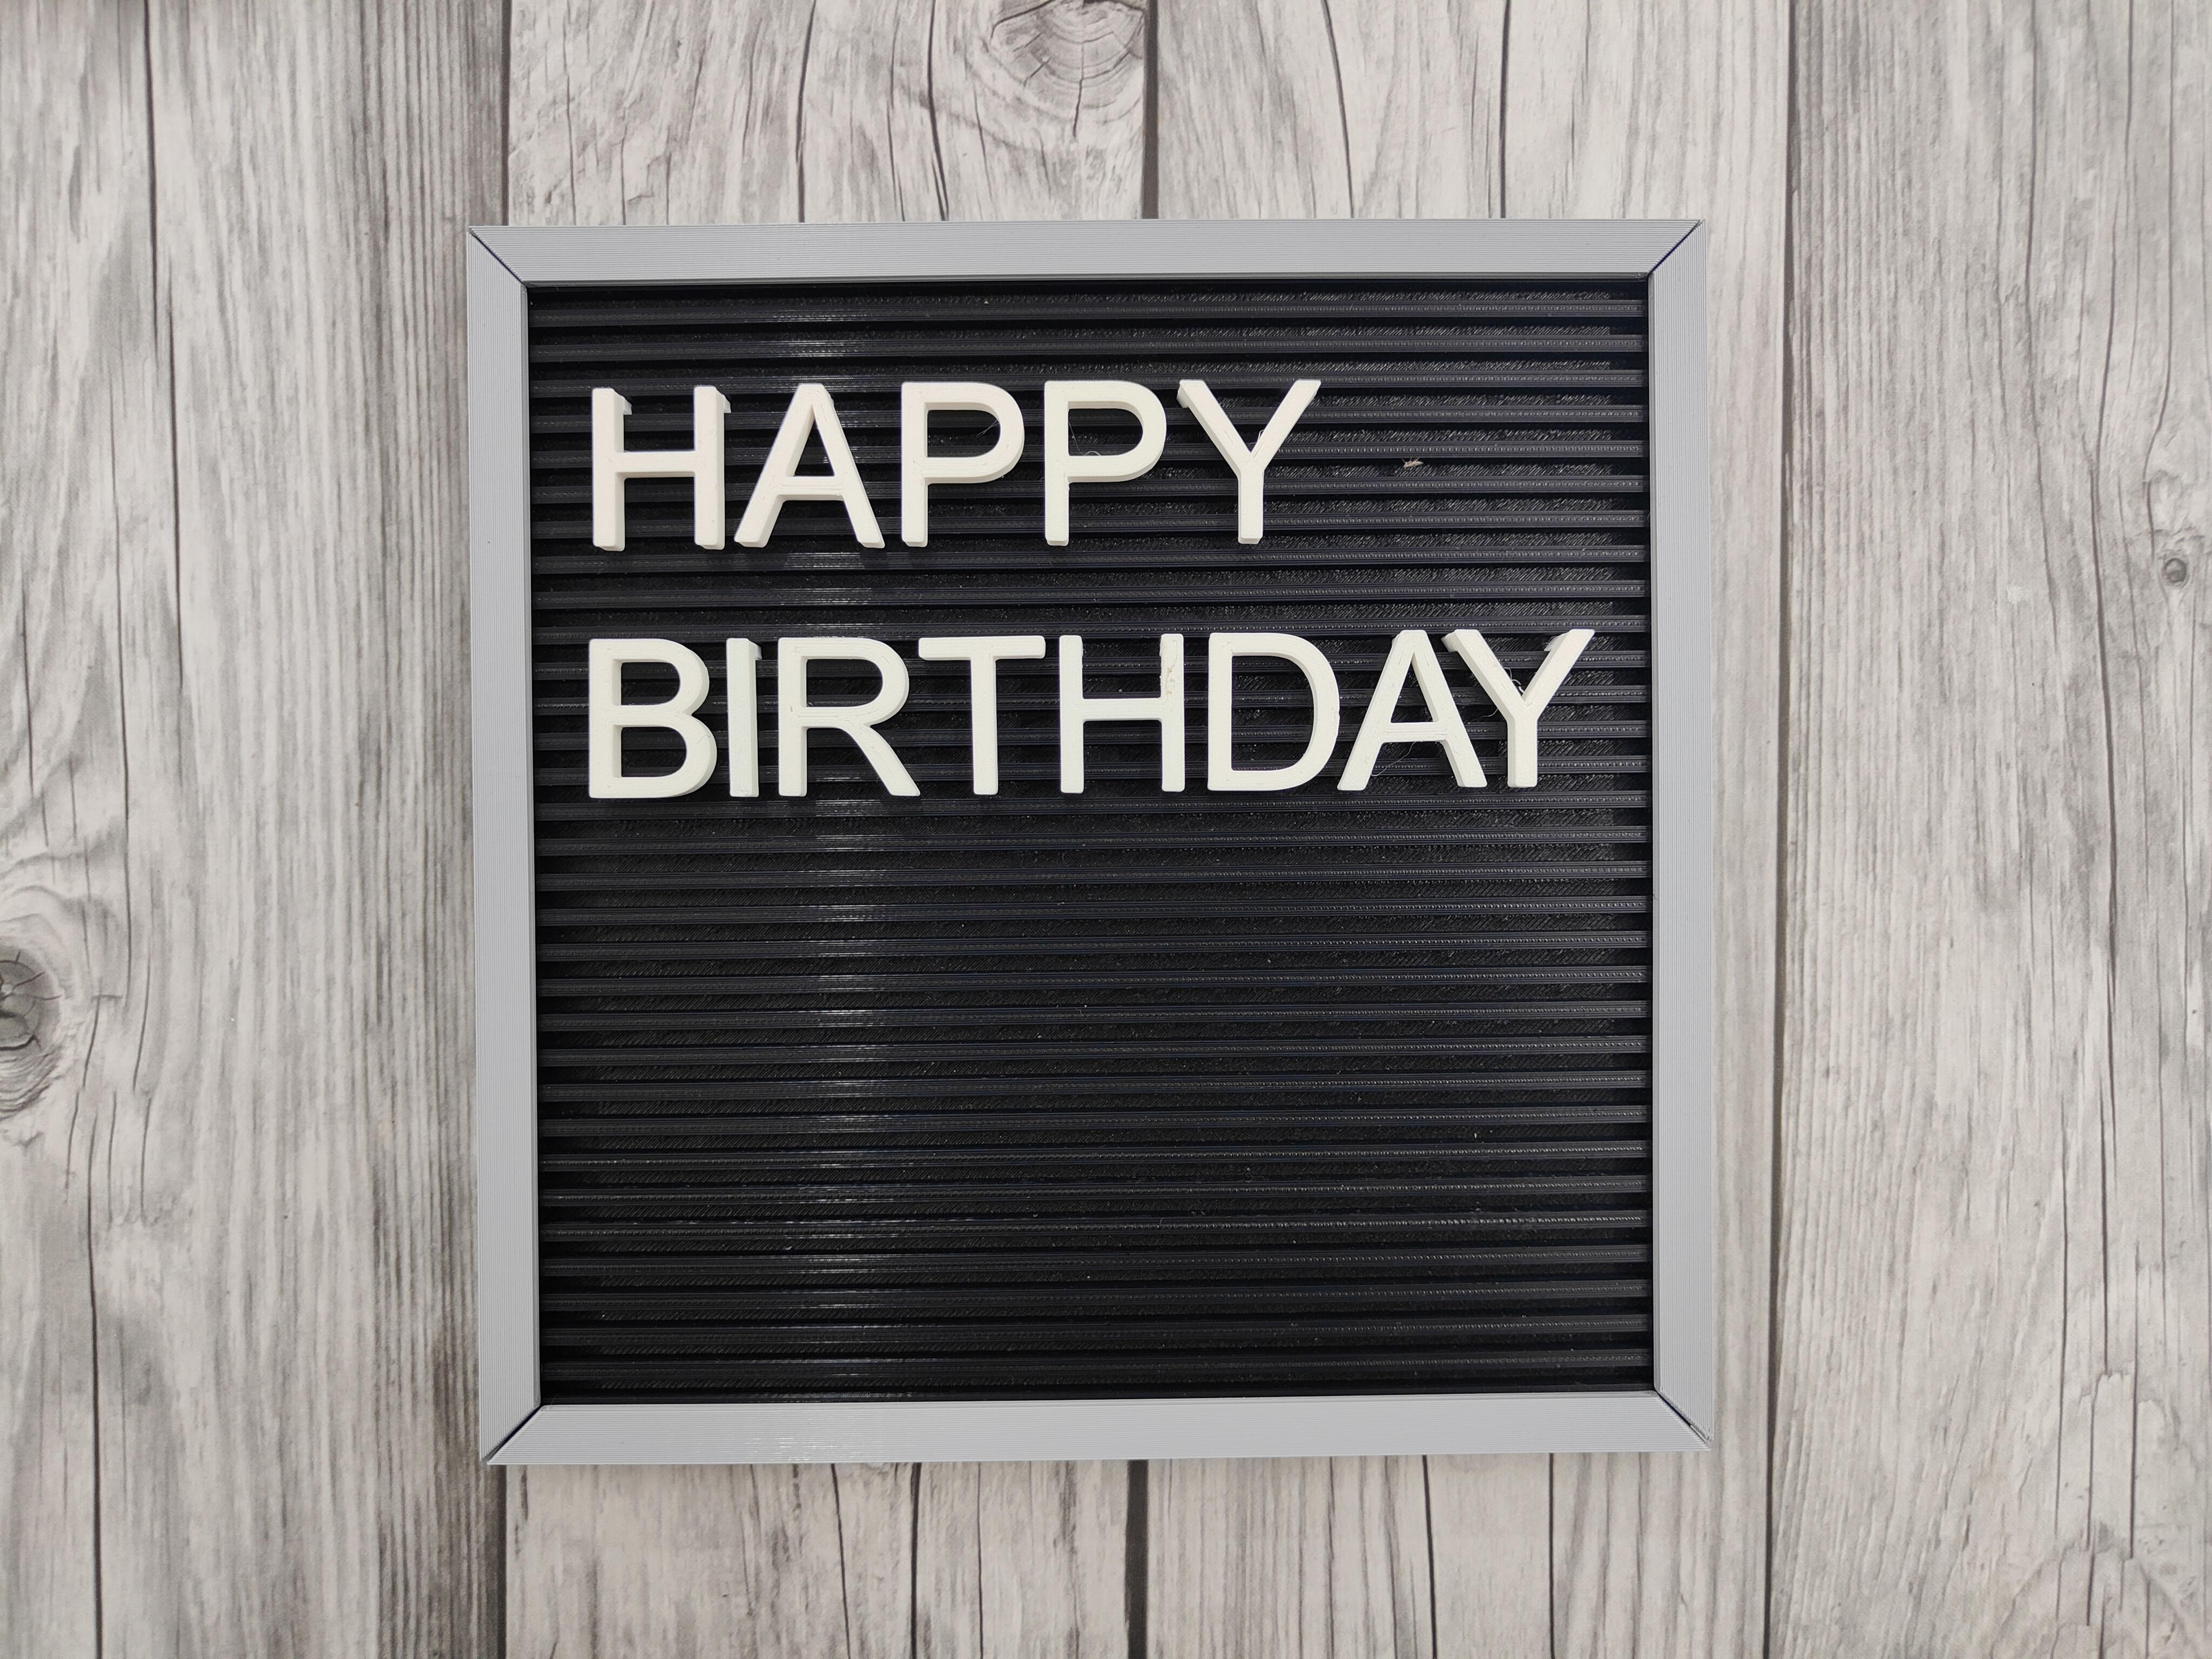
A perfect make for your workspace! General purpose board for daily needs, from birthdays to special occasions, it adds touch to your space.
Assembling Text Board (multiple)
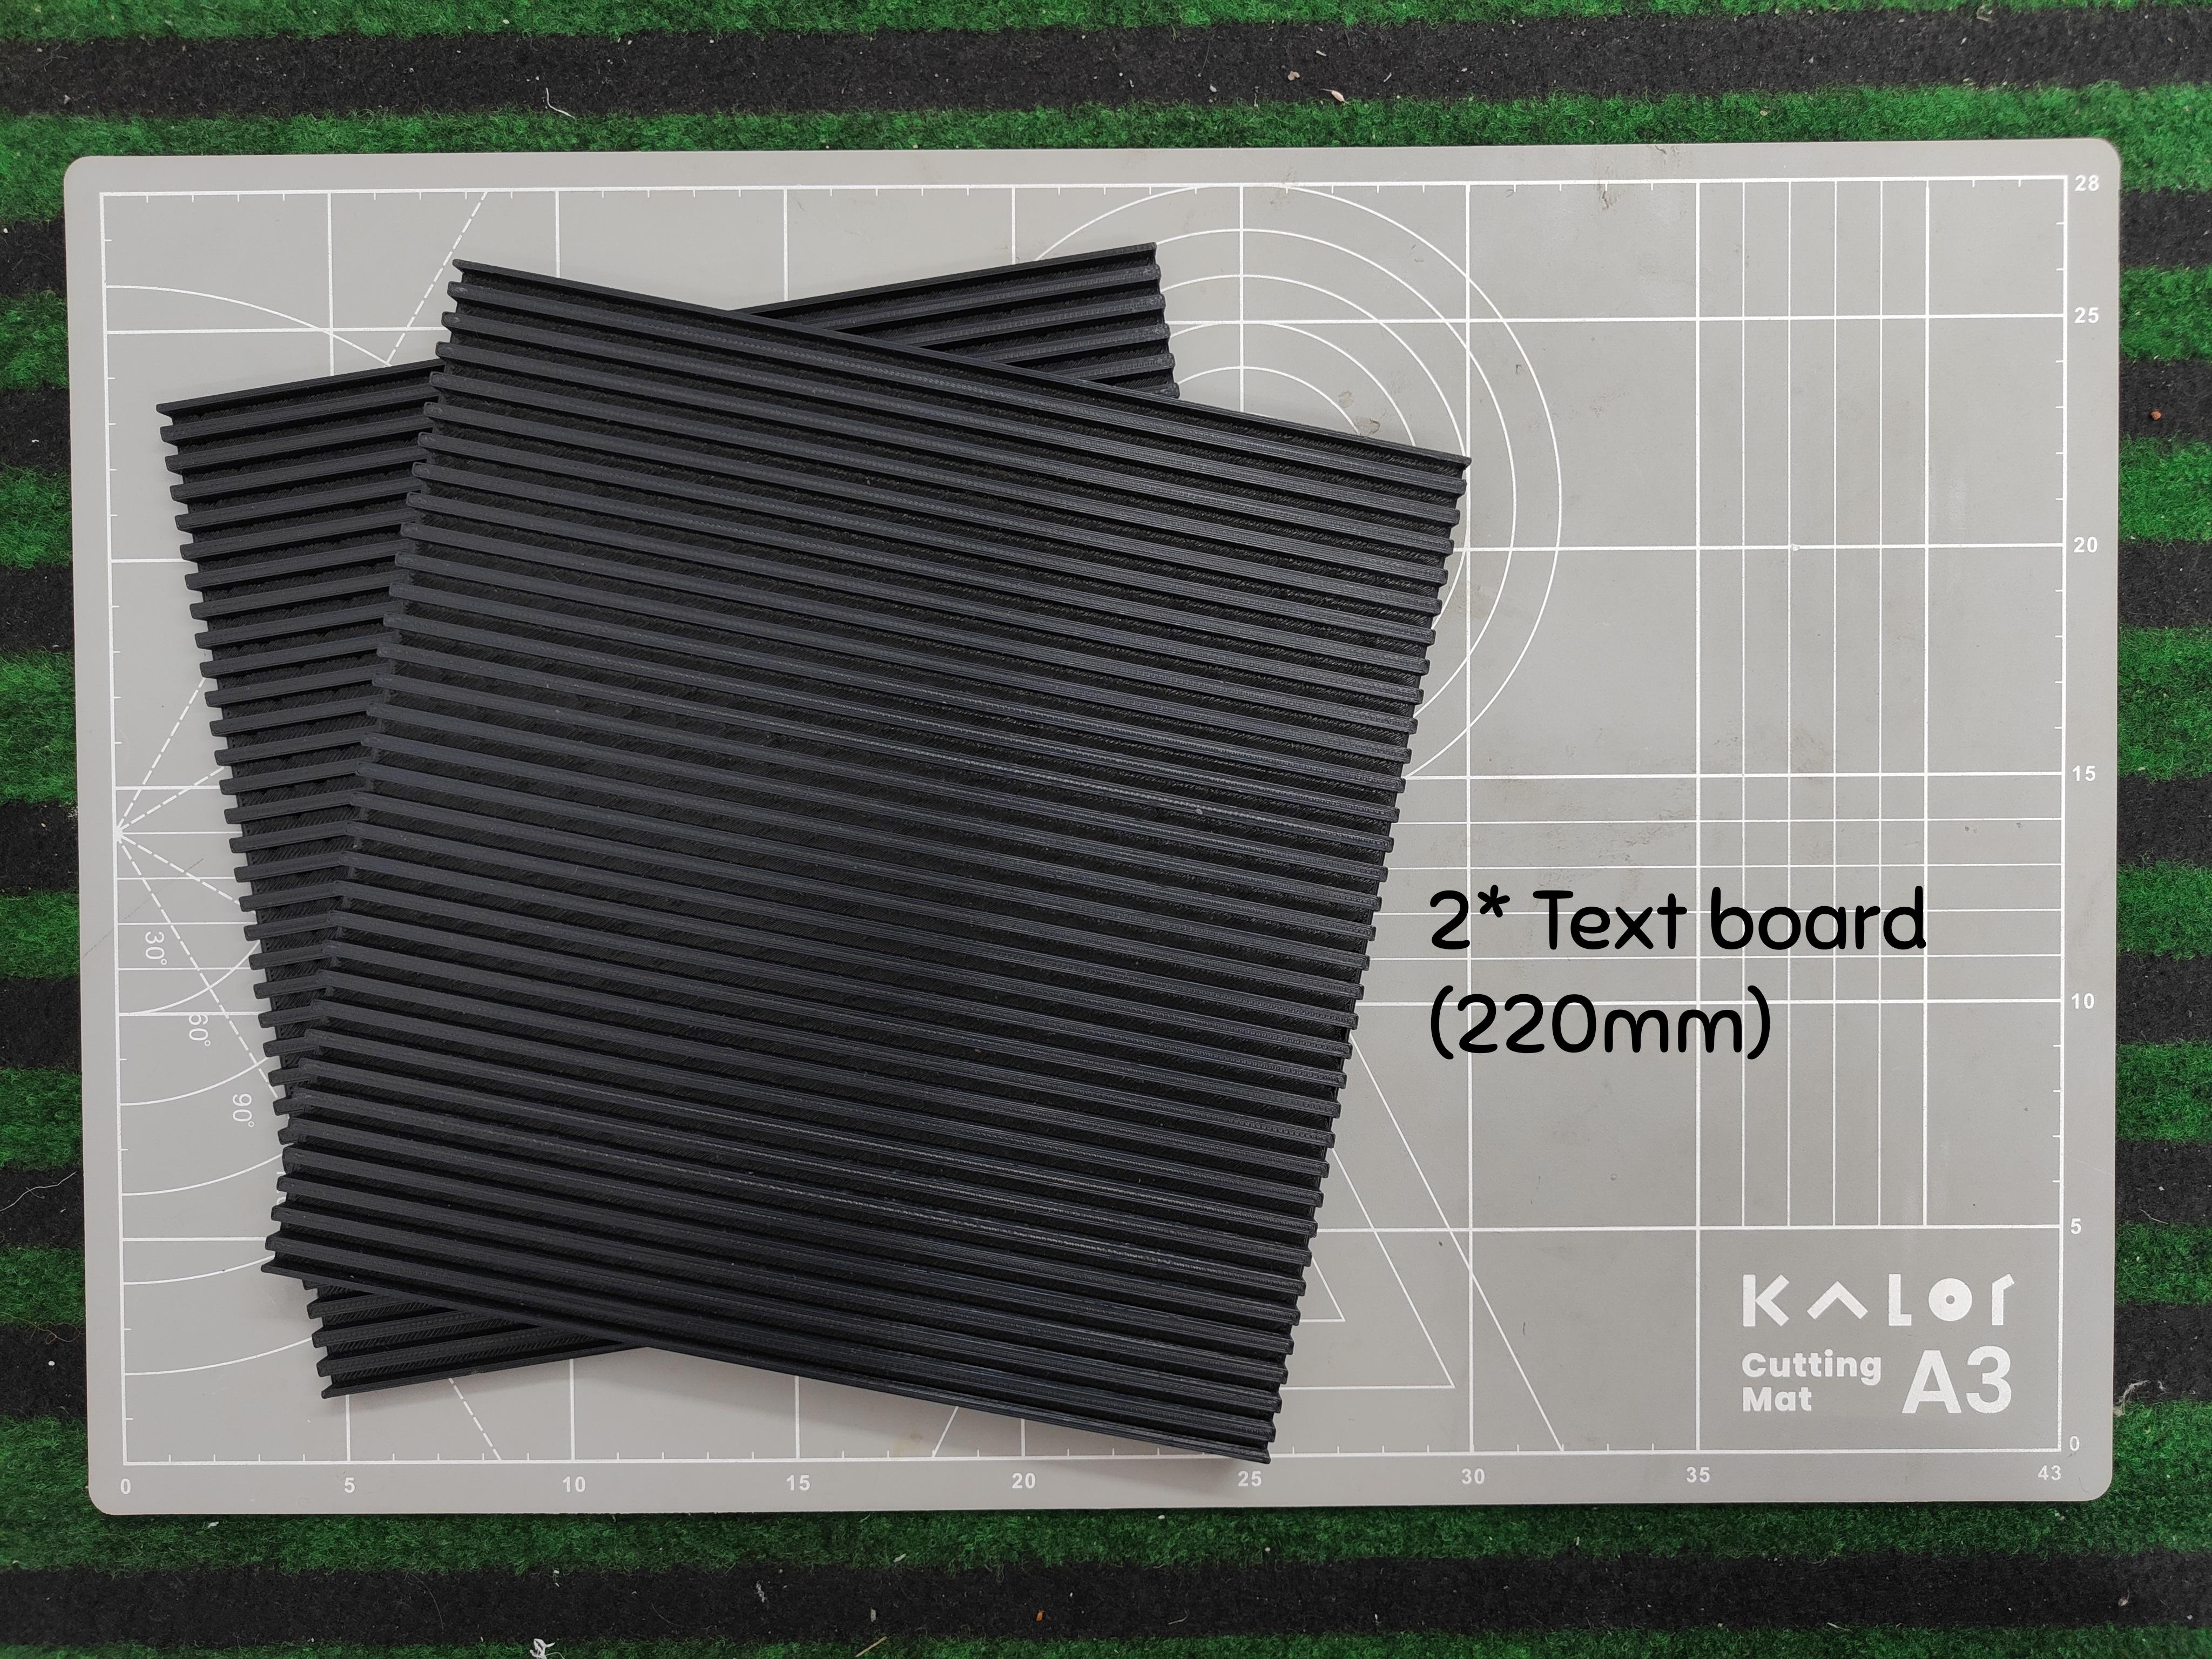
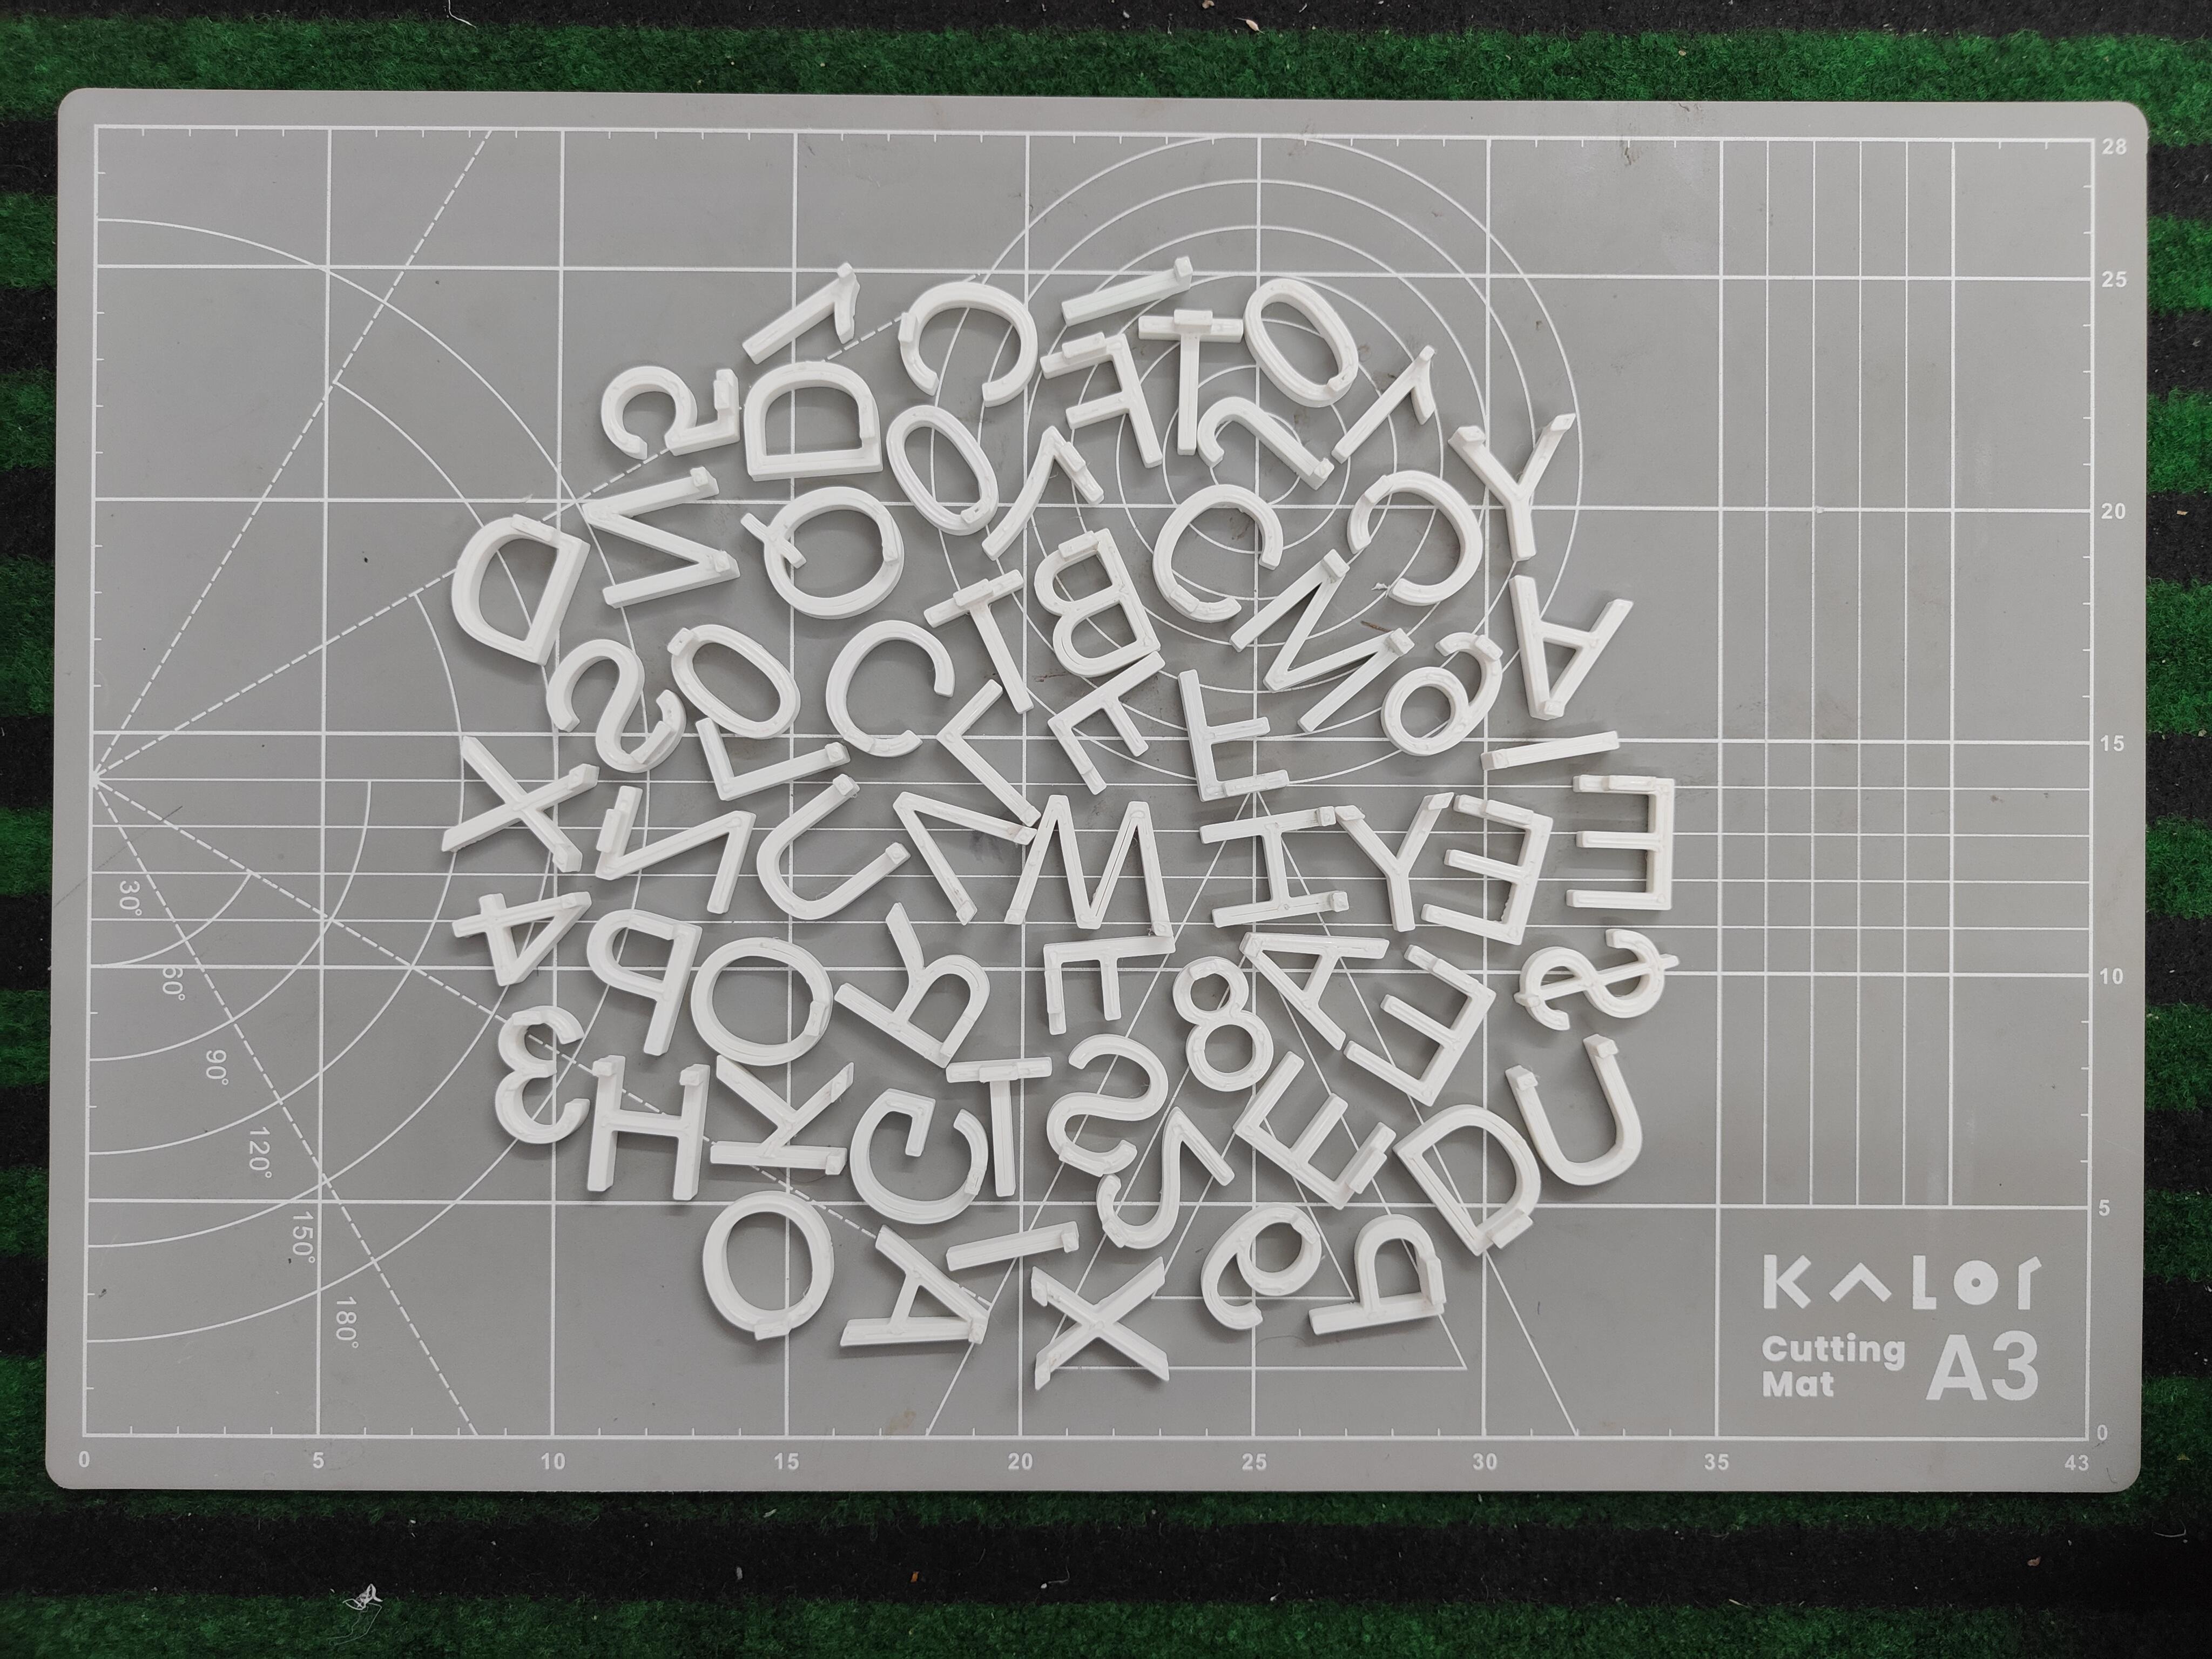
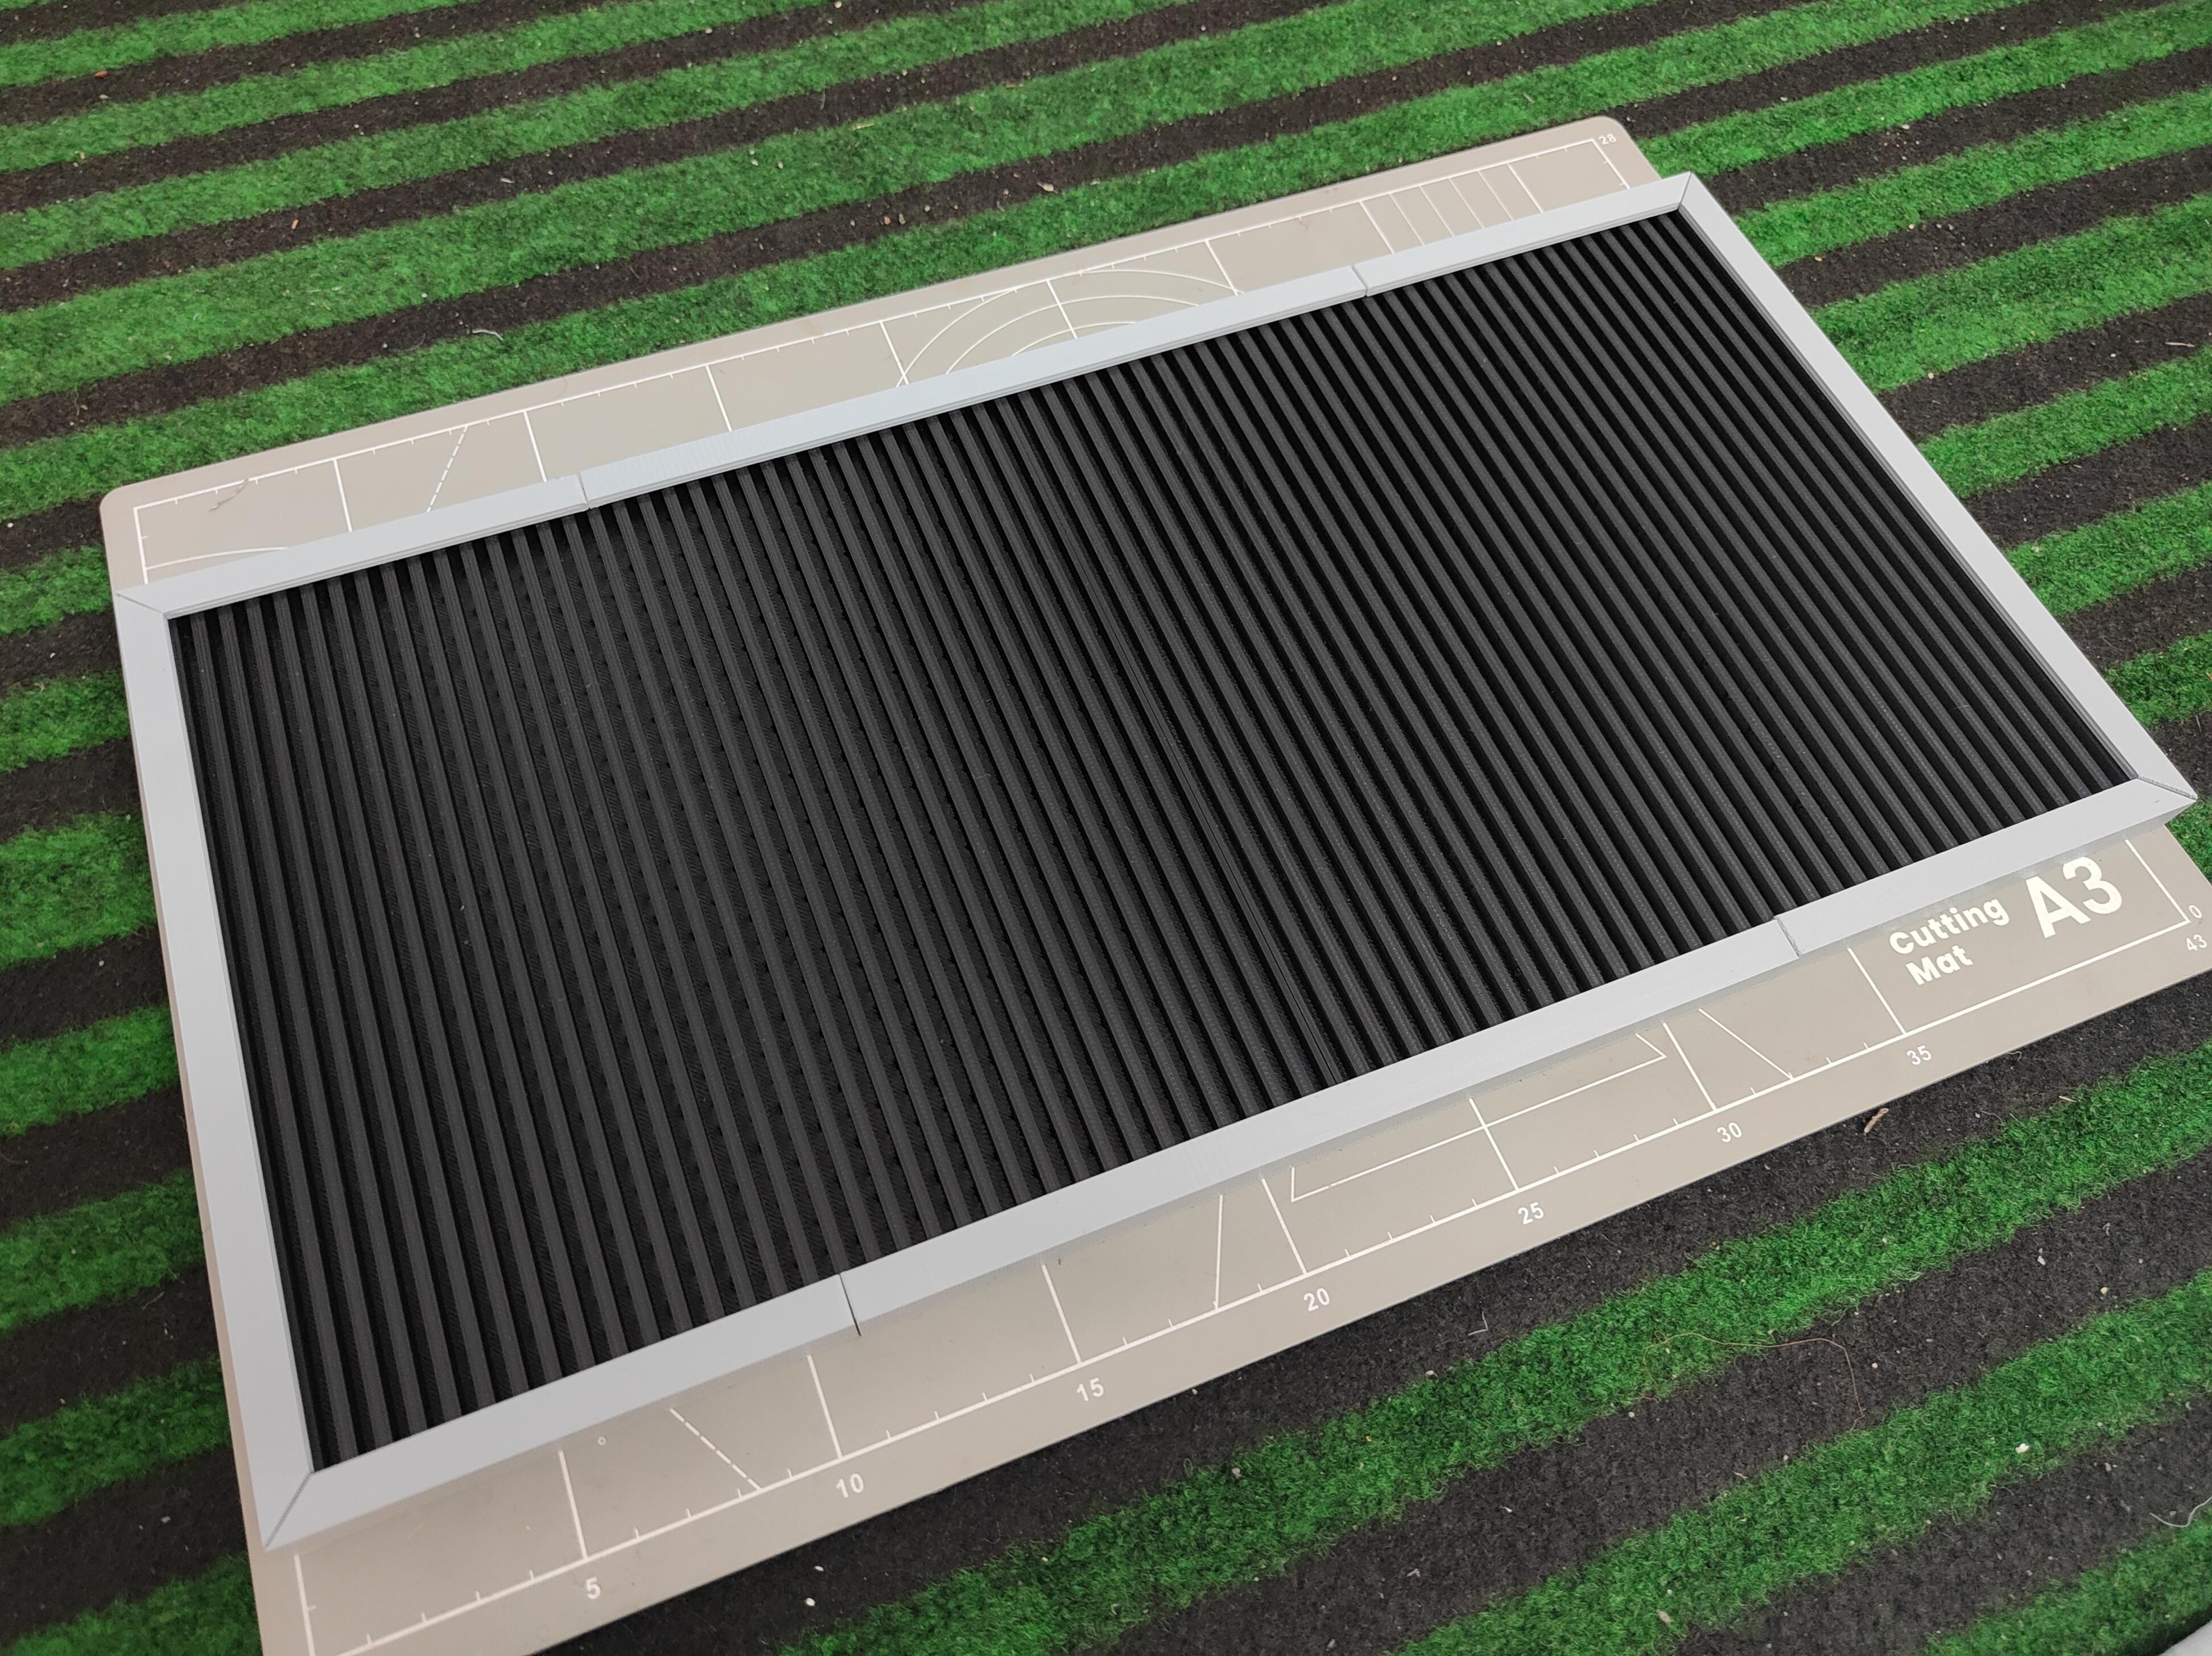
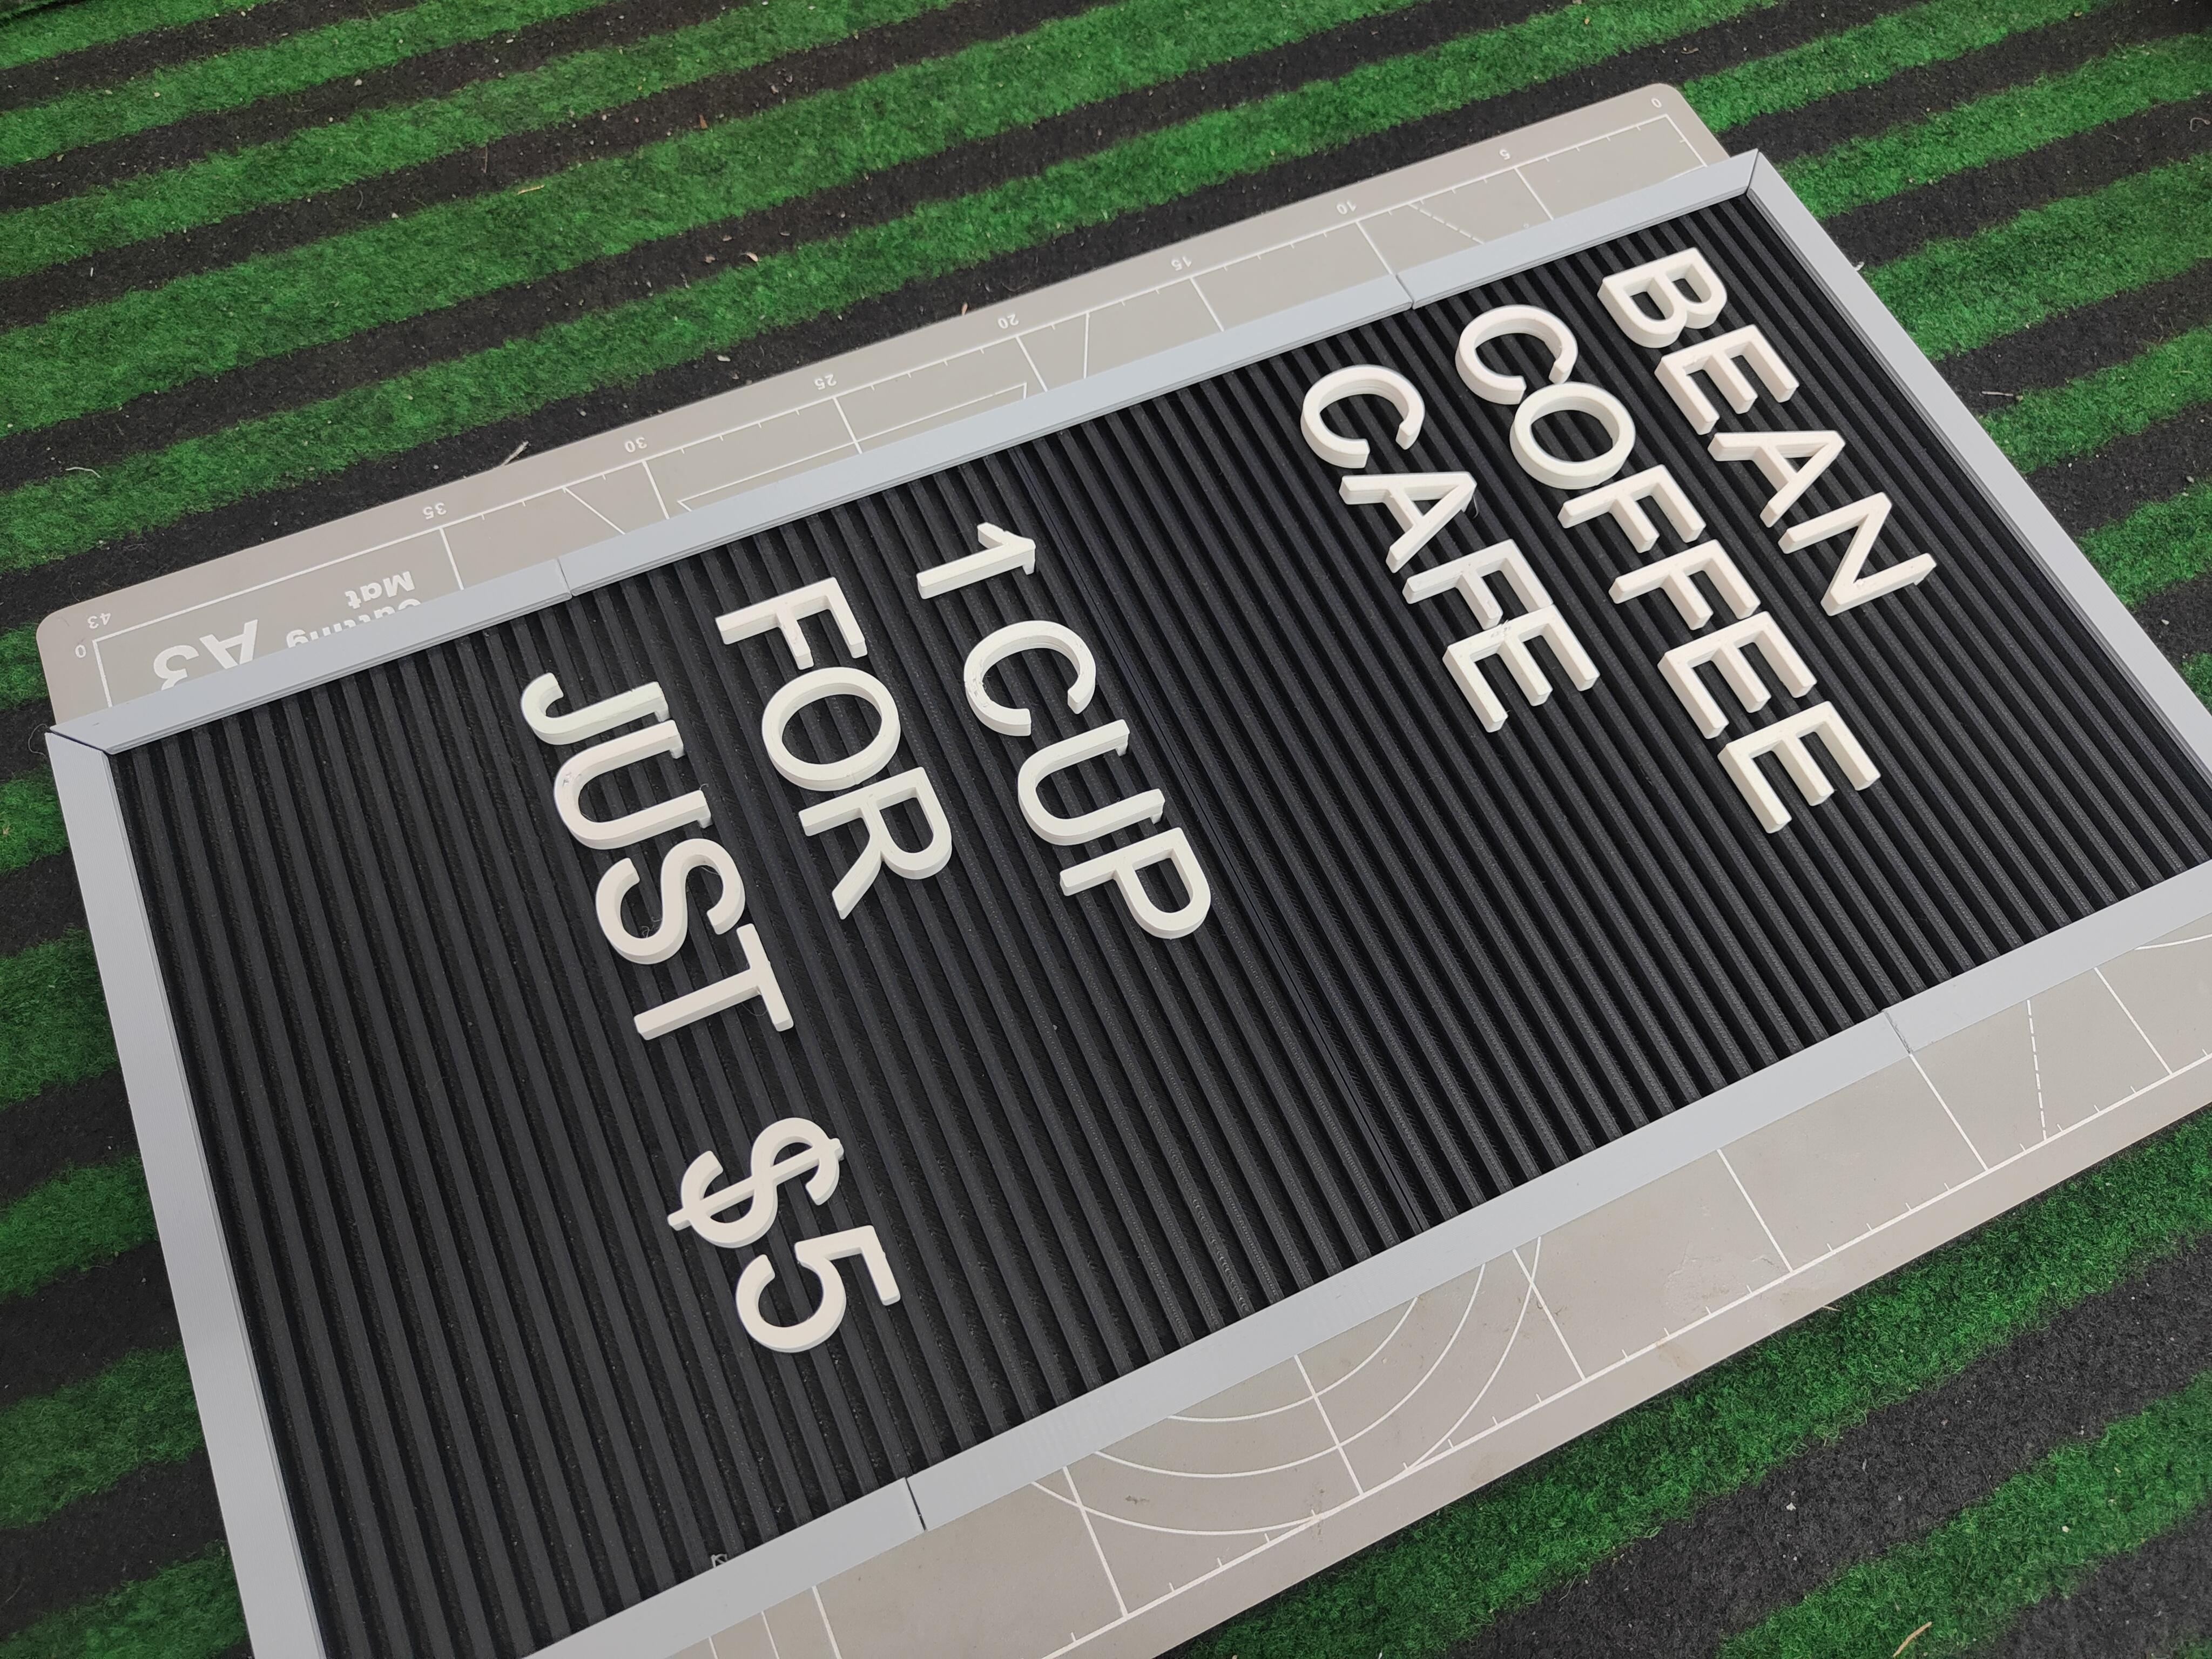
1. Prepare the Parts:
- Once all the components are 3D printed, gather them together for assembly. Ensure you have the textboard, letters, and frame ready.
2. Assemble the Frame:
- The frame is printed in segments, use super glue to join the pieces together. Ensure the corners align perfectly to form a seamless frame around the textboard.
3. Insert the Letters:
- Place the letters into the slots on the nameplate. Arrange them to display the desired name or message. Ensure each letter fits snugly and is properly aligned.
- Now secure all the letters using super glue.
4. Final Touches:
- Check the overall assembly for any loose parts or misalignments. Make any necessary adjustments to ensure a polished and professional appearance.
Note- Its design doesn't compromise on its functionality or looks when joined in any configuration. You can join as many boards together as you want using the same method!
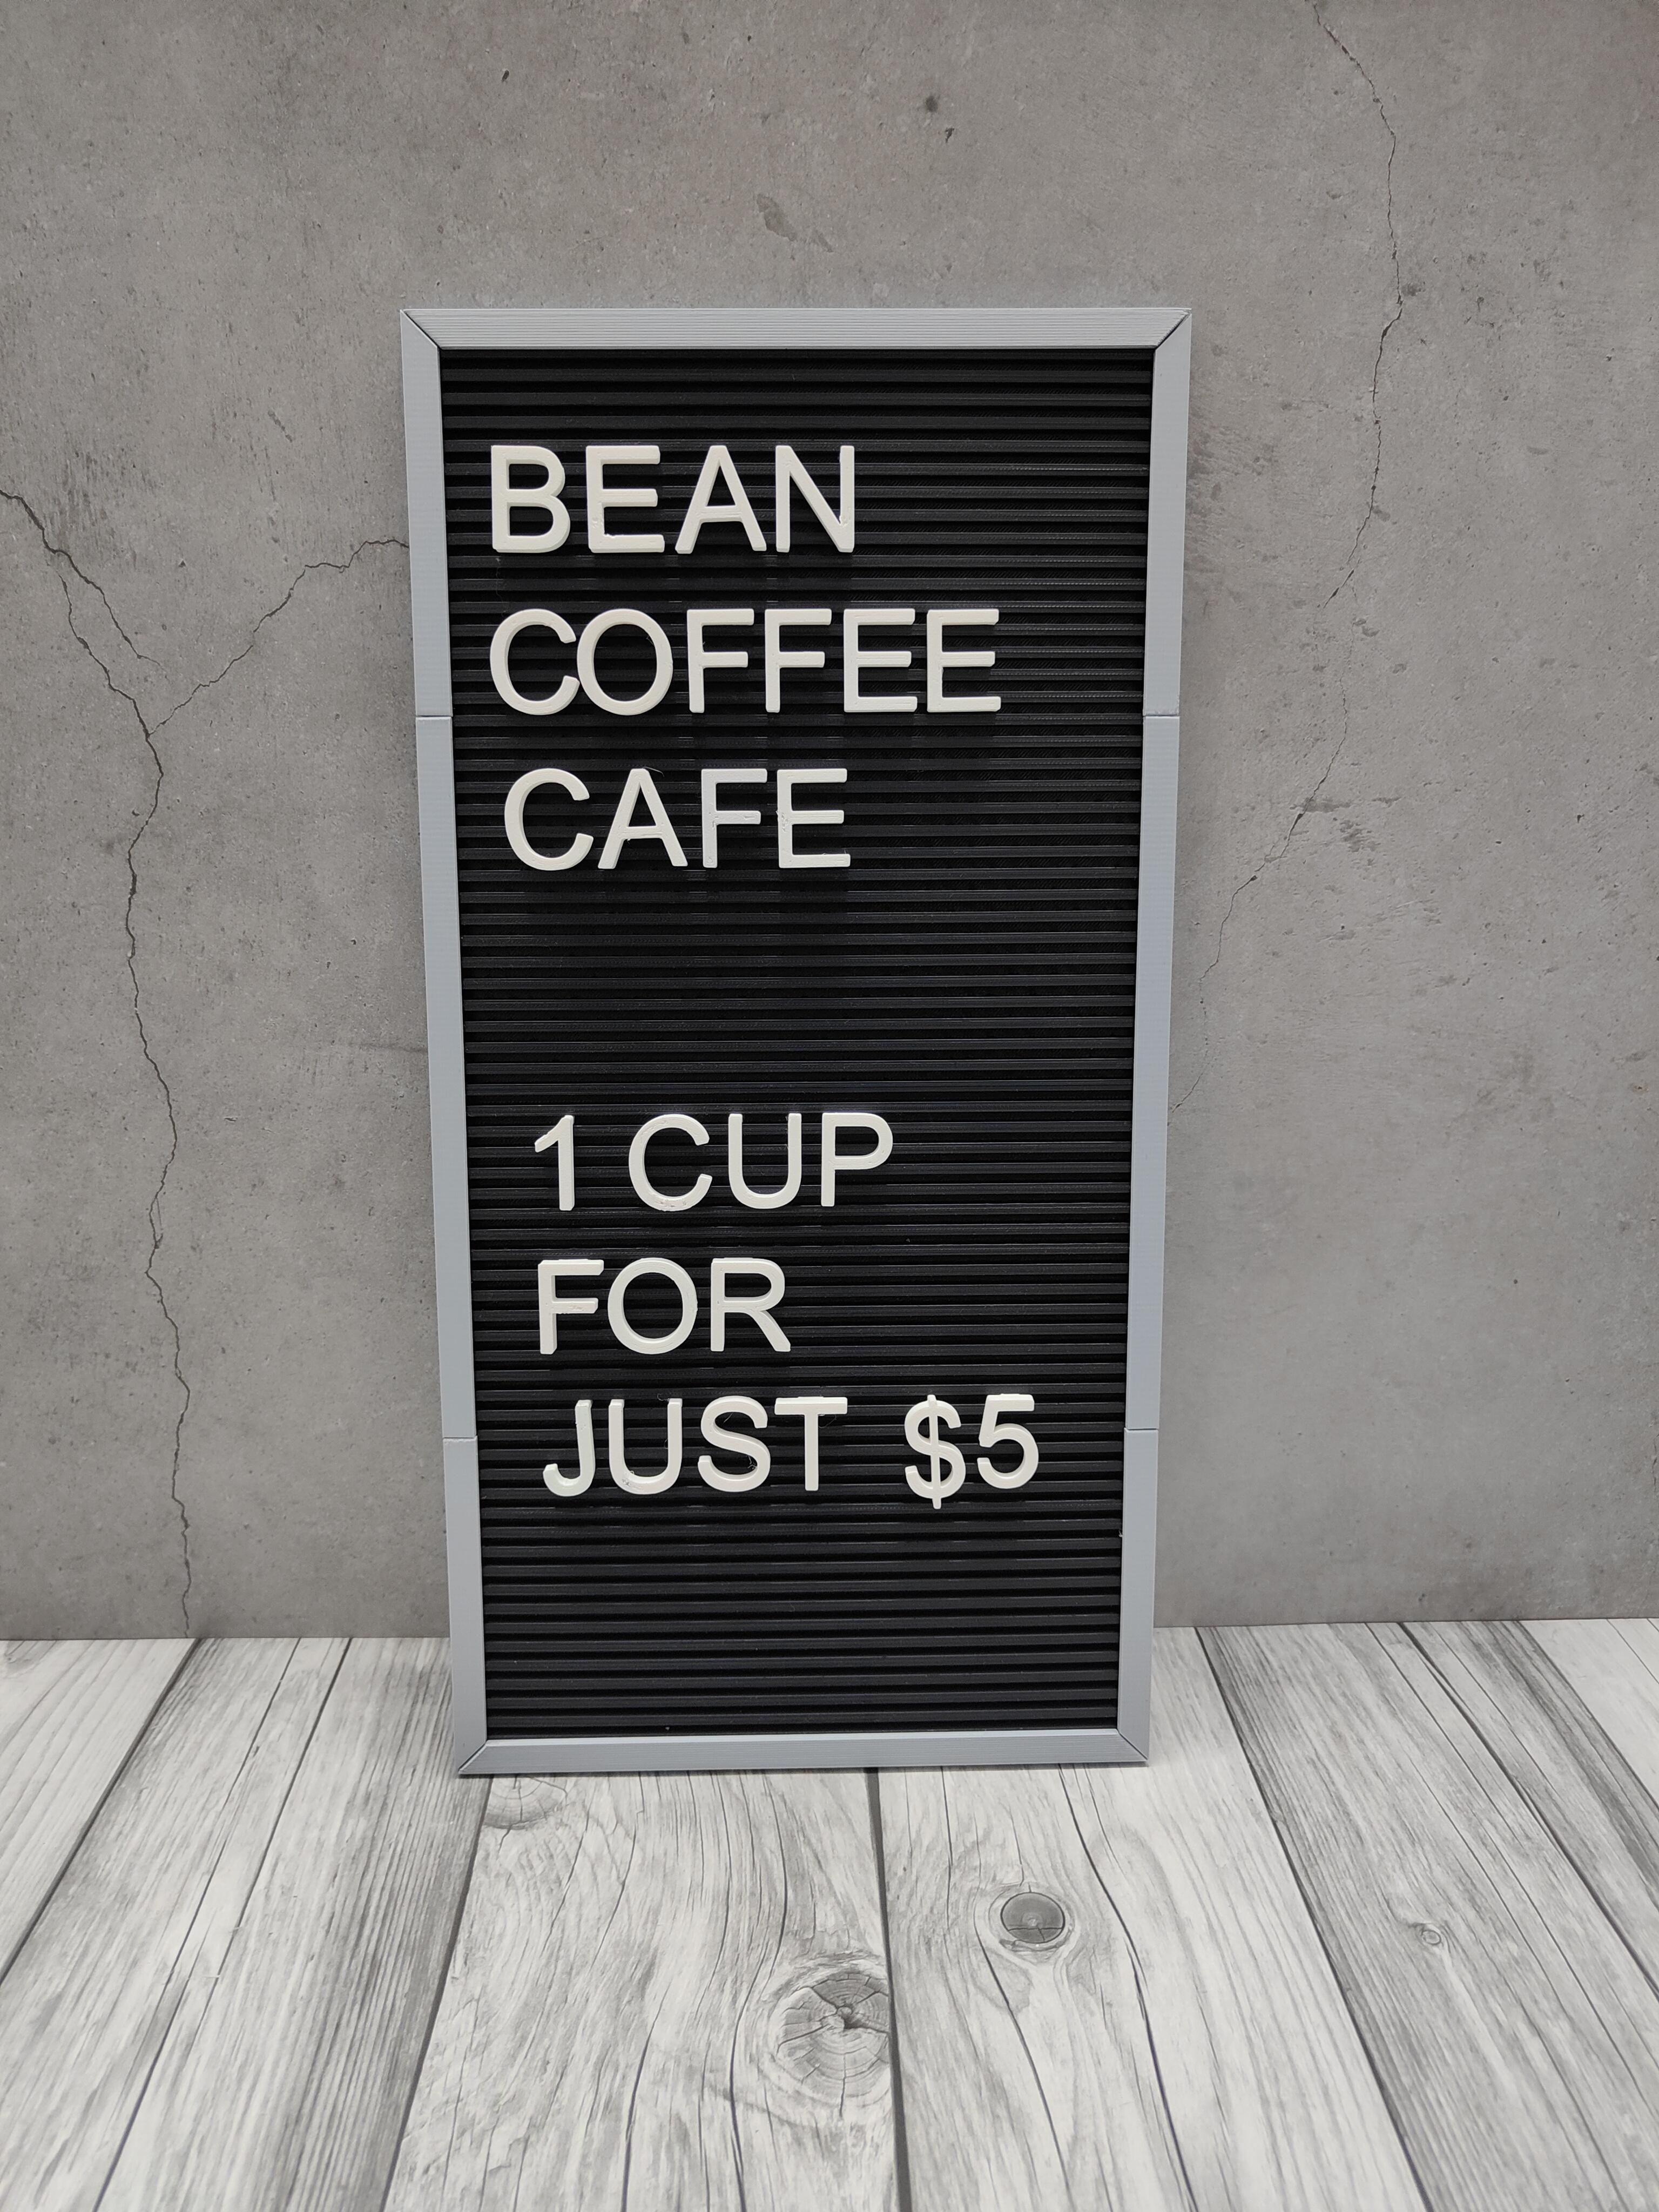
A perfect make for your workspace! Now you can write what you want from promotions to product information and, even your store's outdoor sign board!
Assembling Name Plate
1. Prepare the Parts:
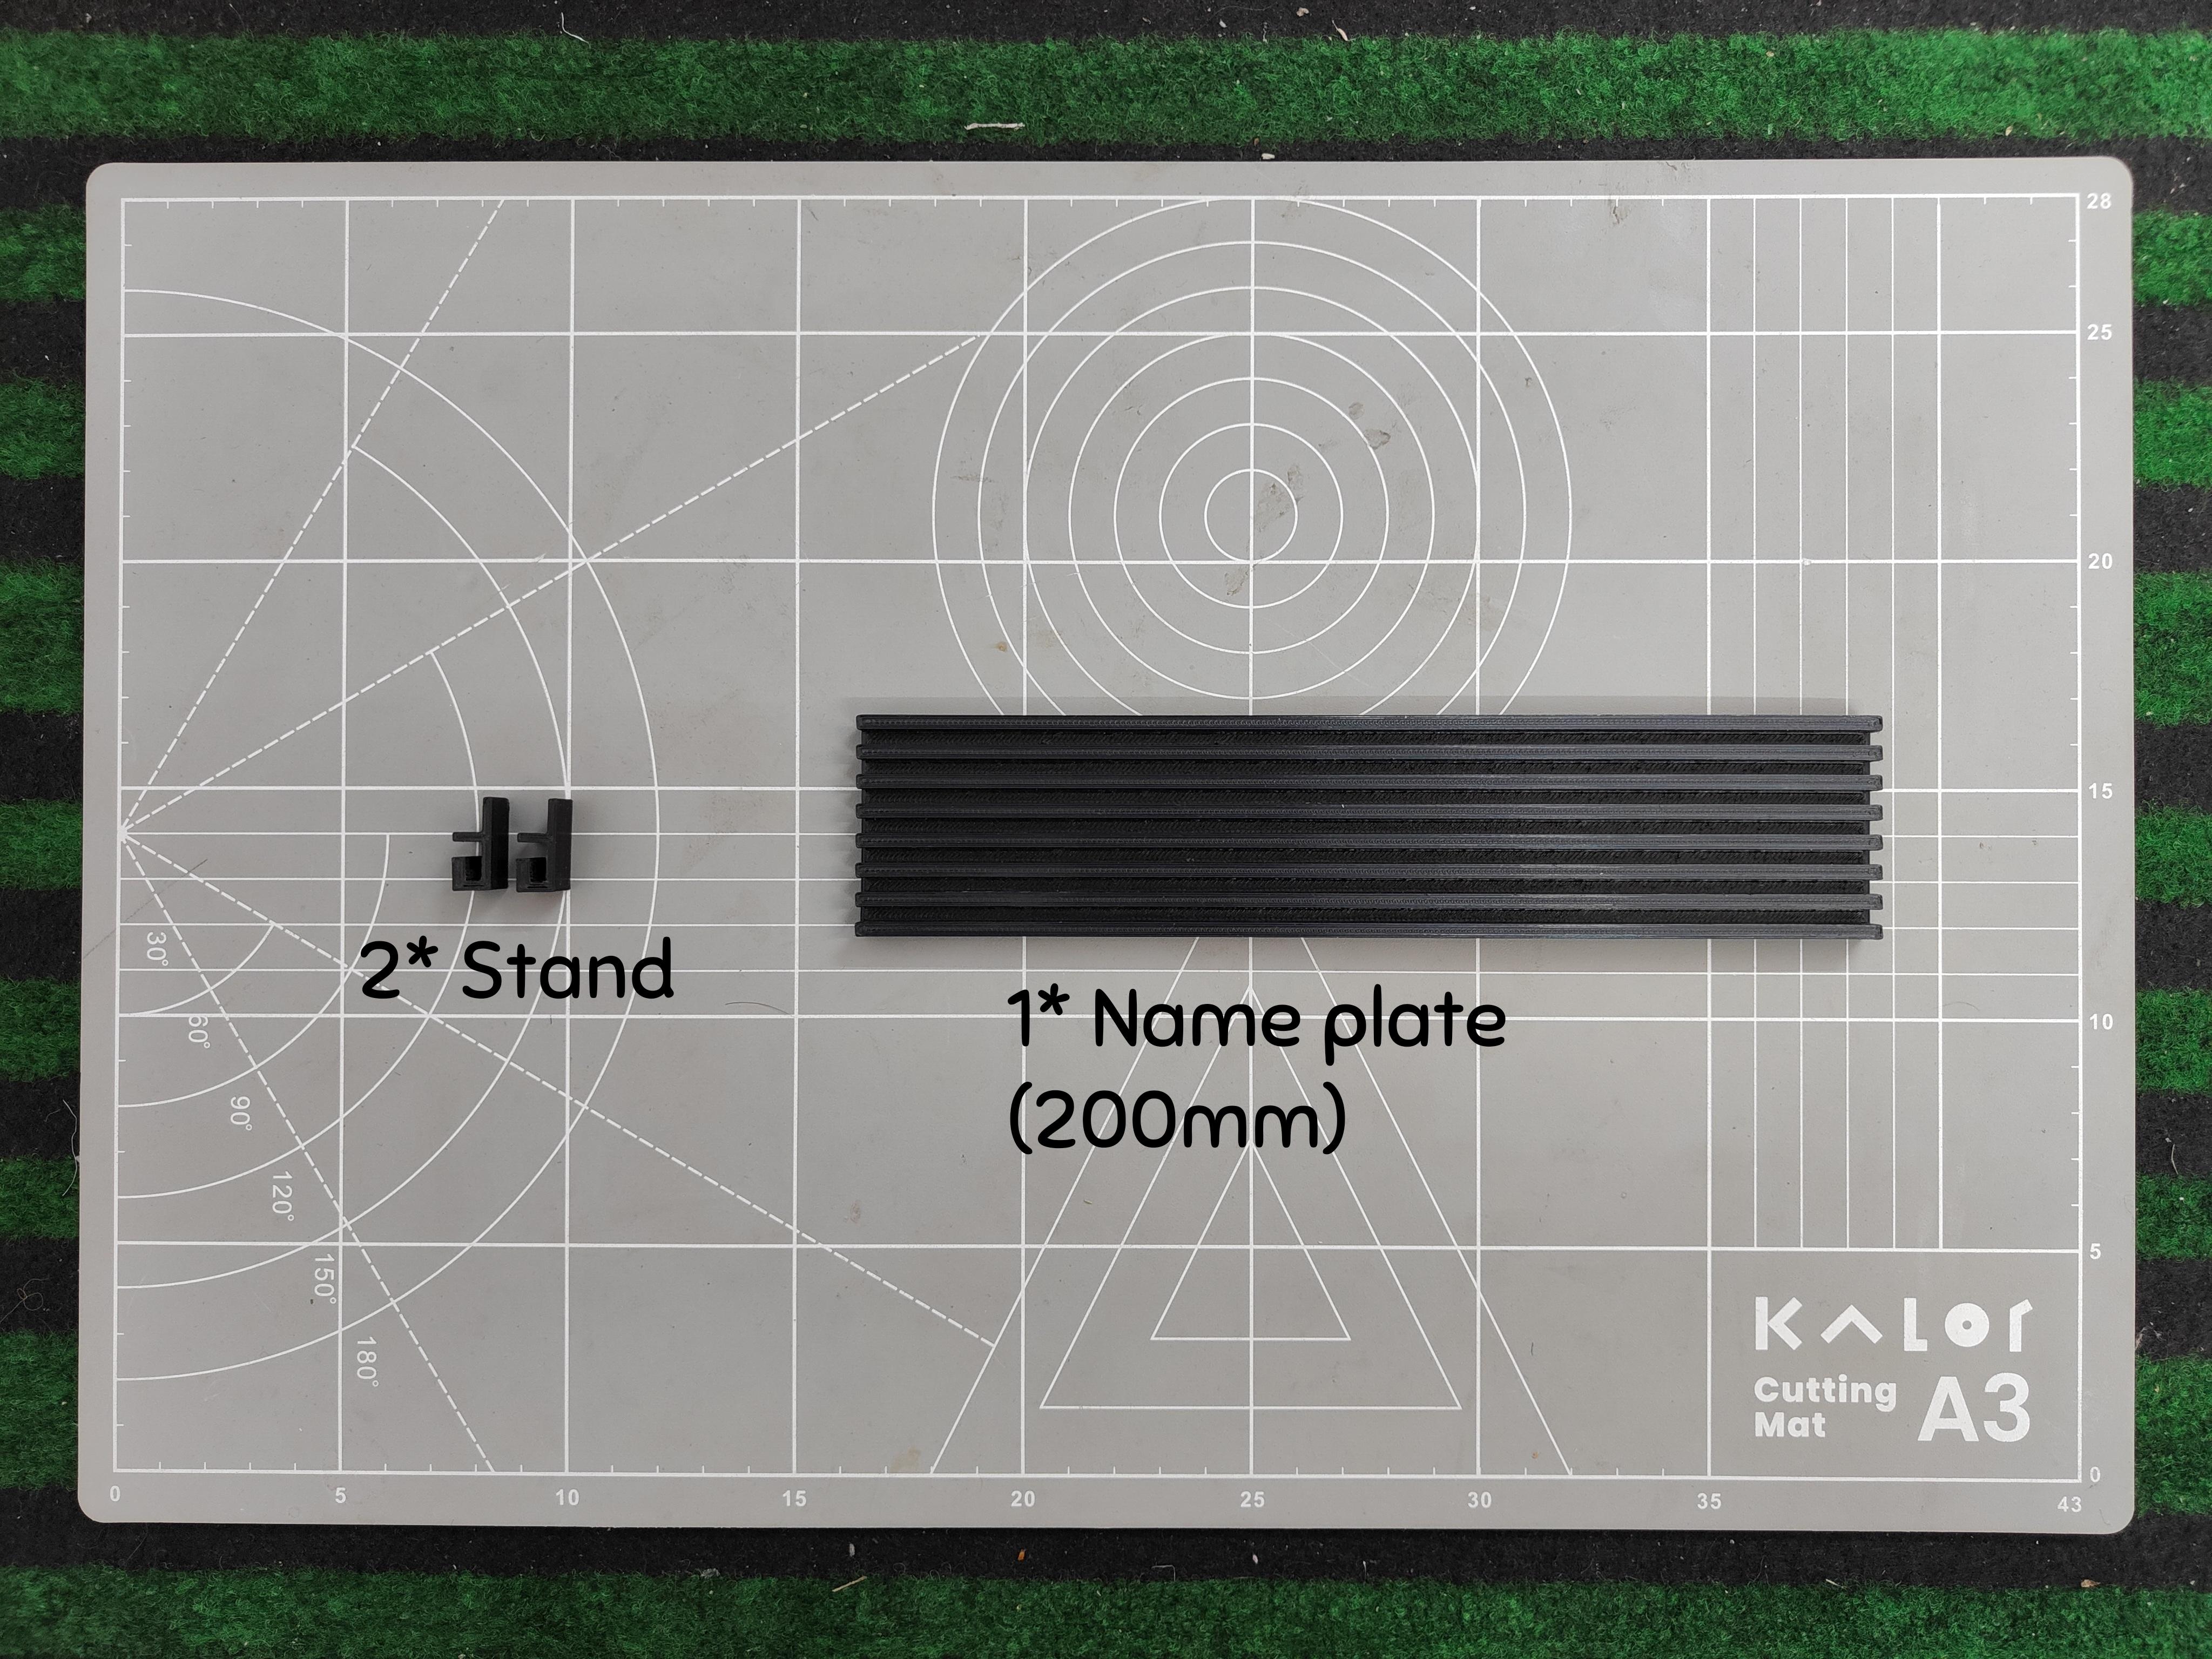
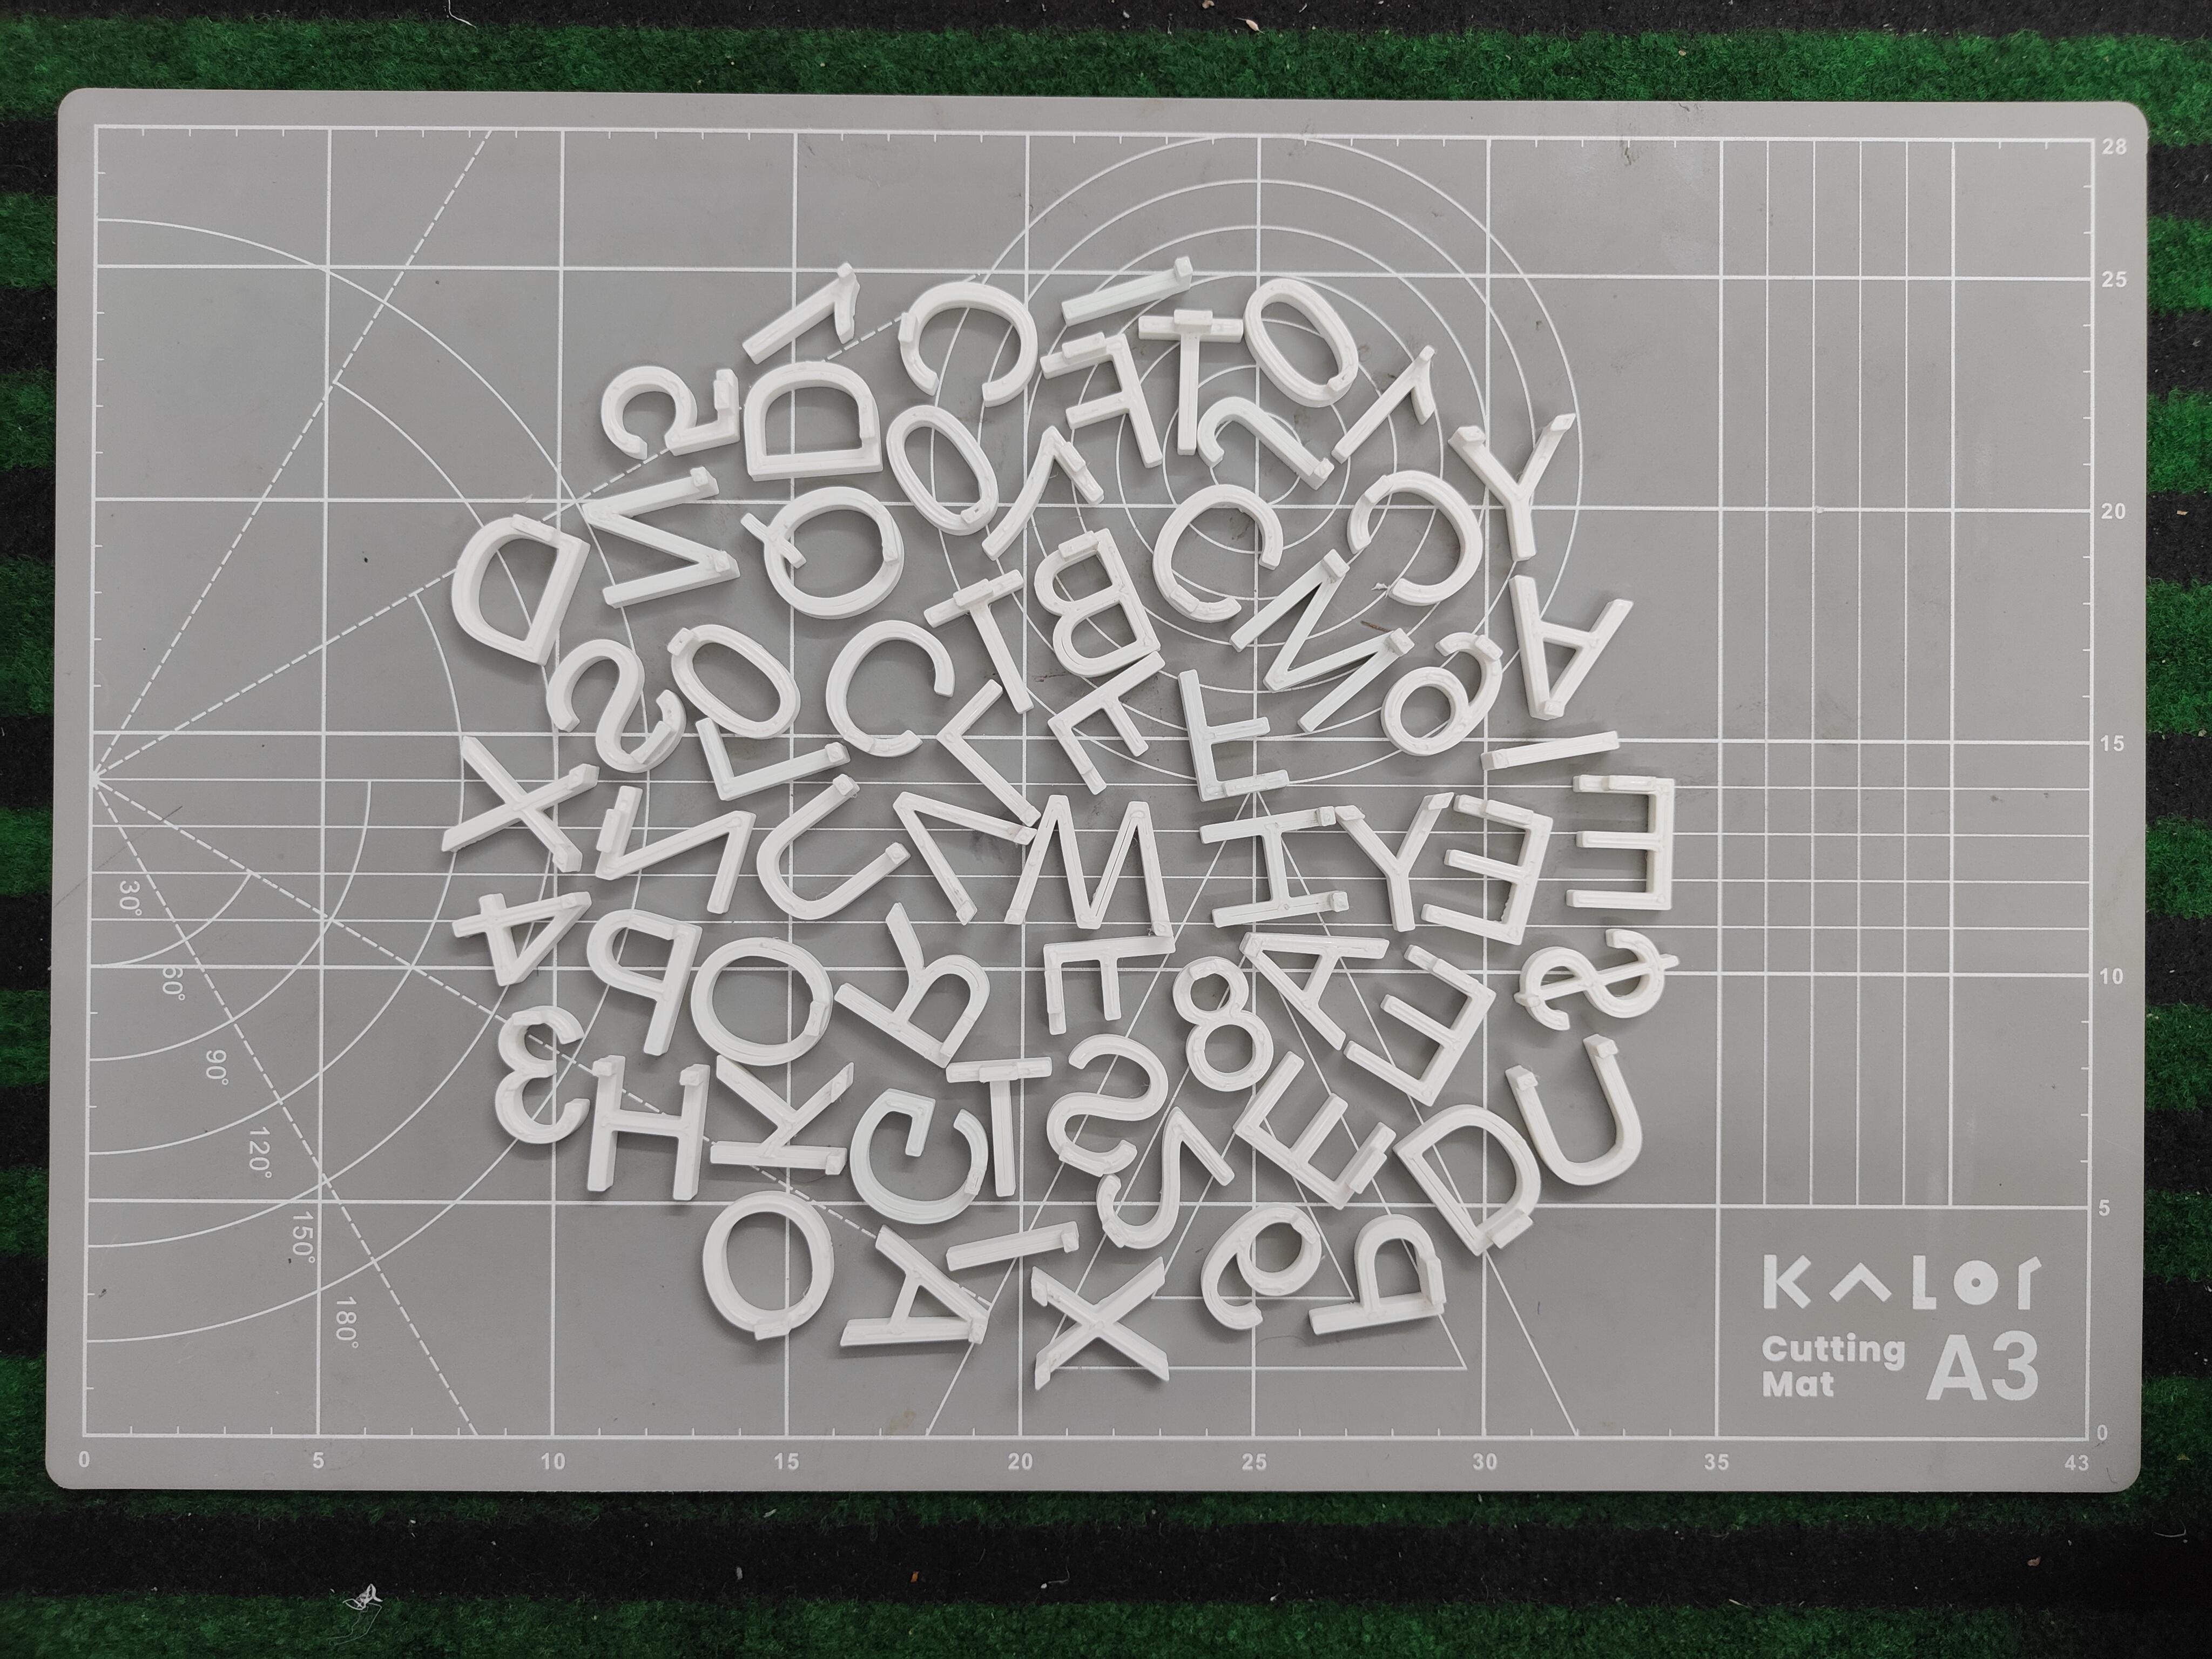
- Once all the components are 3D printed, gather them together for assembly. Ensure you have the nameplate, letters, frame, and stand ready.
2. Attach the Stand: (optional- if you want a nameplate for your desk)
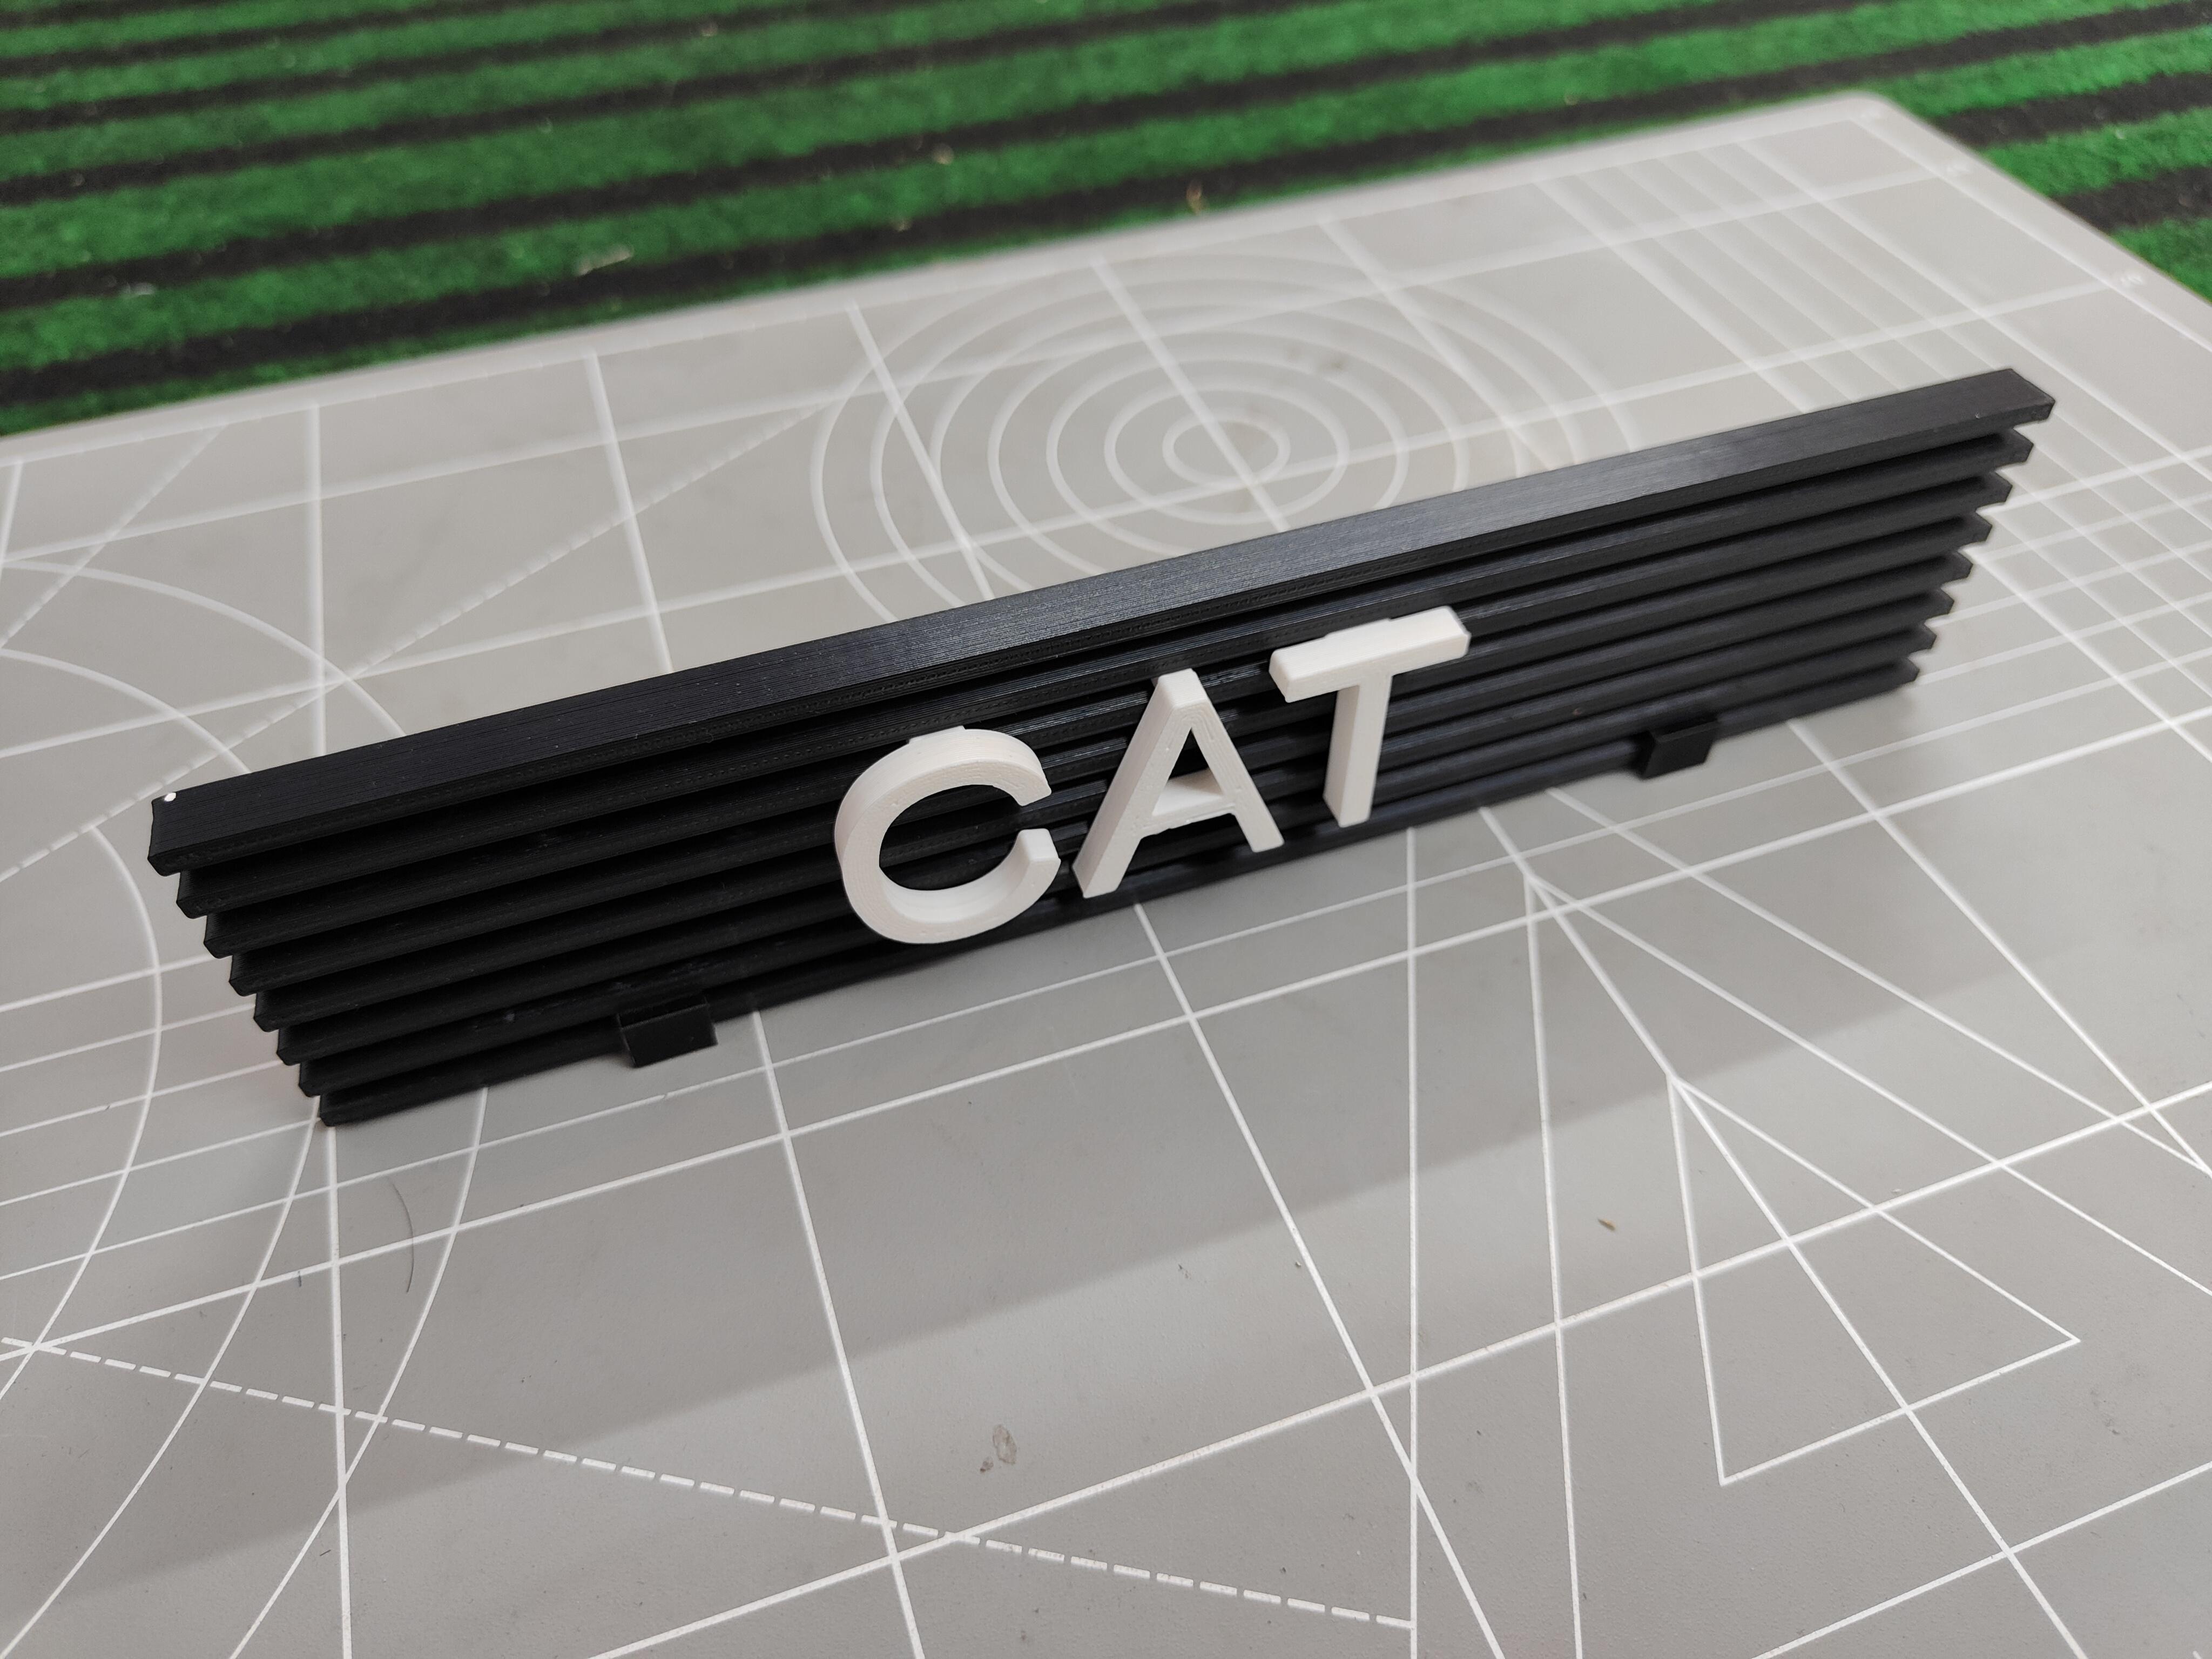
- For attaching the nameplate stand, slide it from the edge along the slot, and fix it using super glue. Make sure it is evenly spaced, allowing the nameplate to stand upright on the table.
3. Insert the Letters:
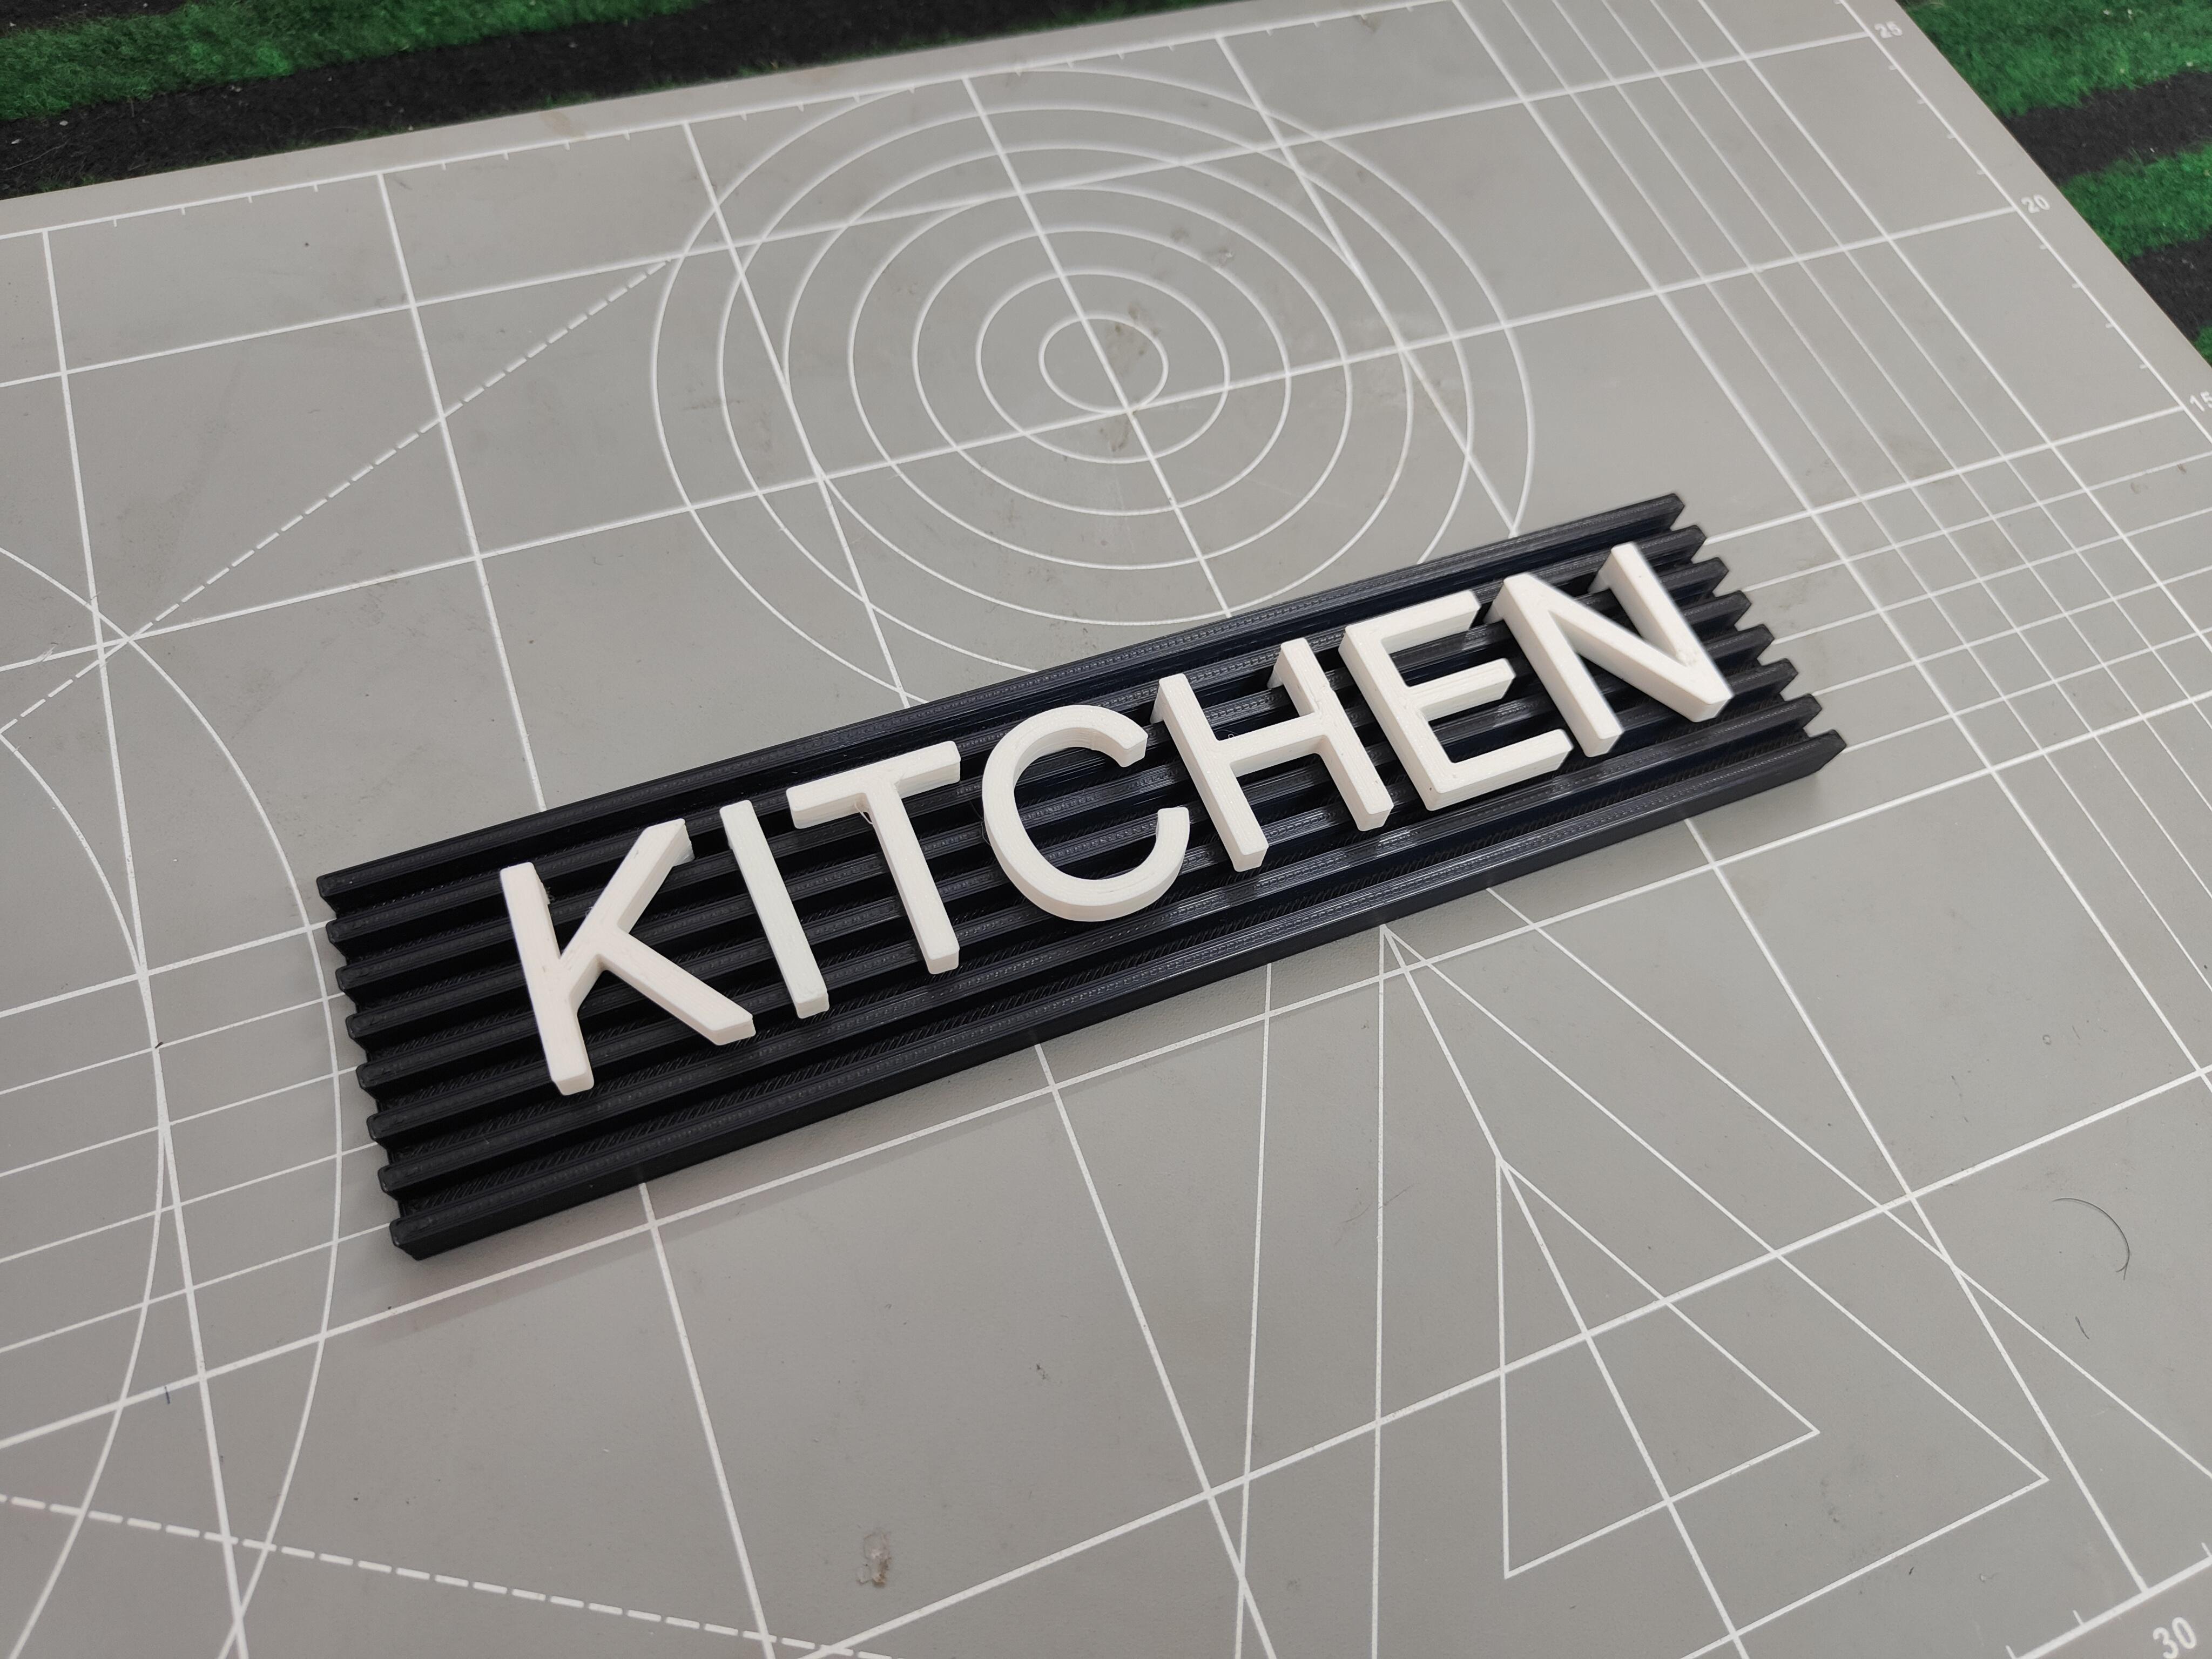
- Place the letters into the slots on the nameplate. Arrange them to display the desired name or message. Ensure each letter fits snugly and is properly aligned.
- Now secure all the letters using super glue.
4. Final Touches:
- Check the overall assembly for any loose parts or misalignments. Make any necessary adjustments to ensure a polished and professional appearance.
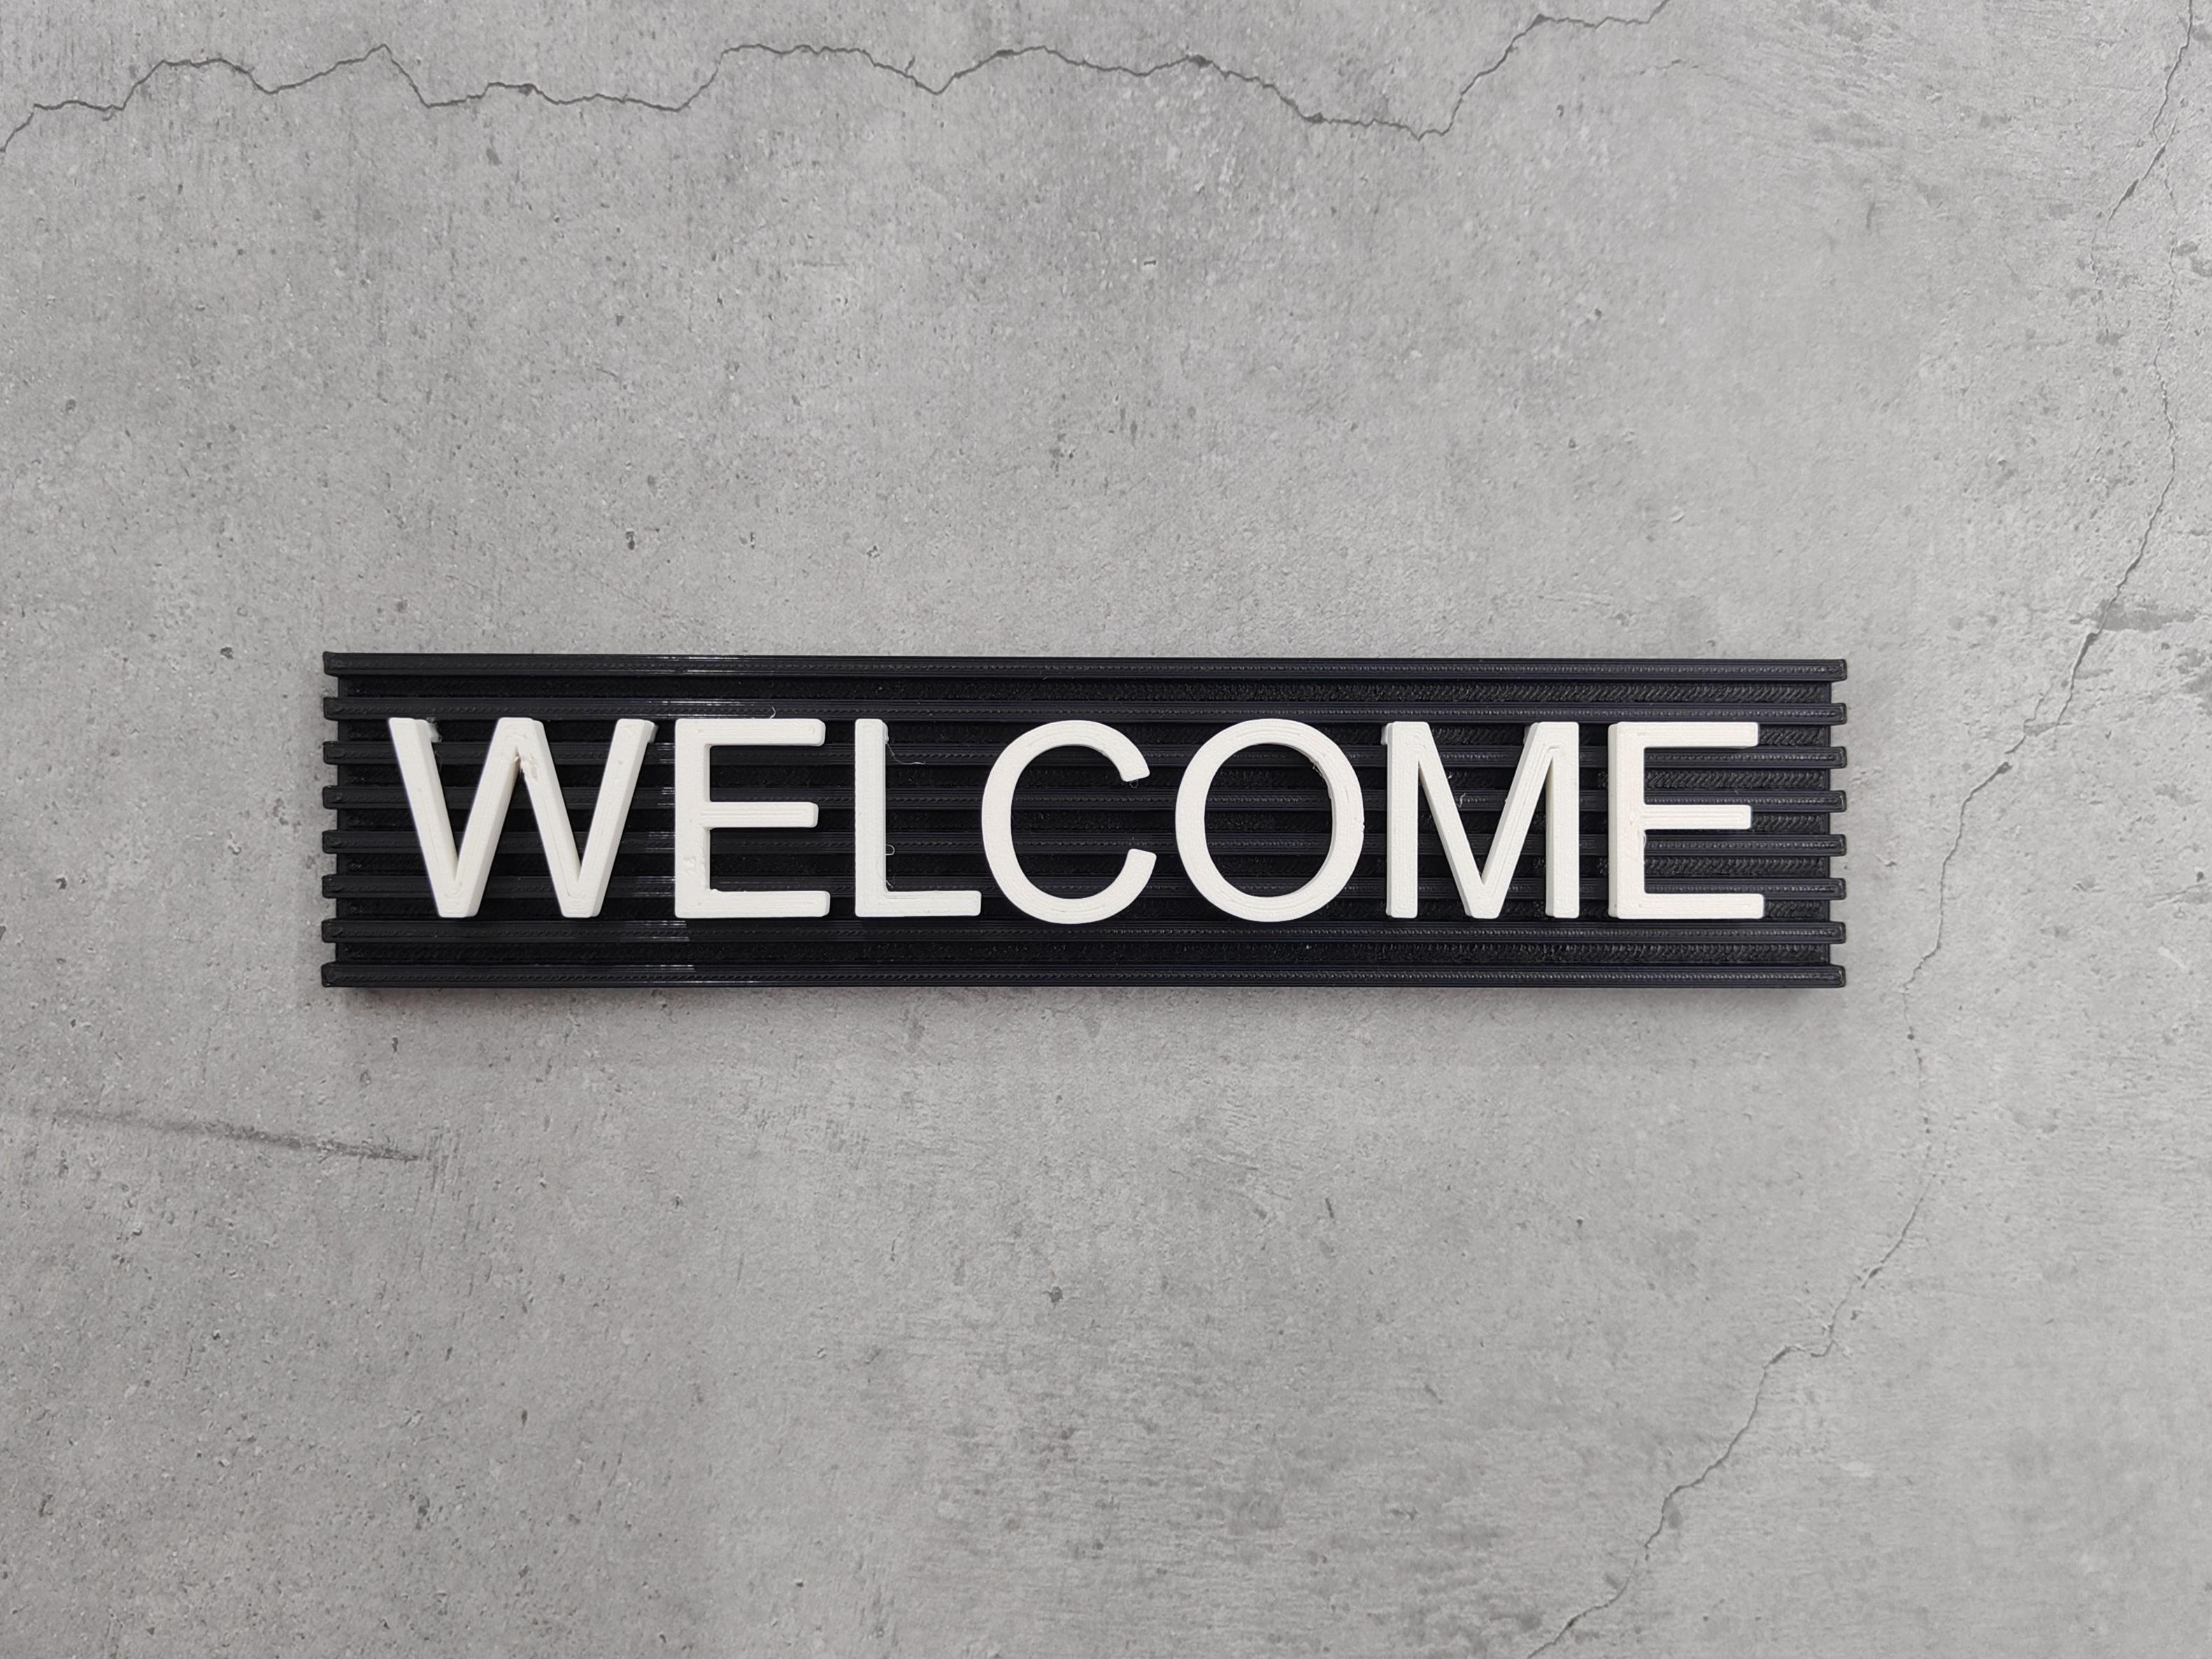
A perfect make for your workspace! Add some labels to help your customers in the shop, restaurants, office desks, or maybe in your house.
Assembling Name Plate (open N Close)
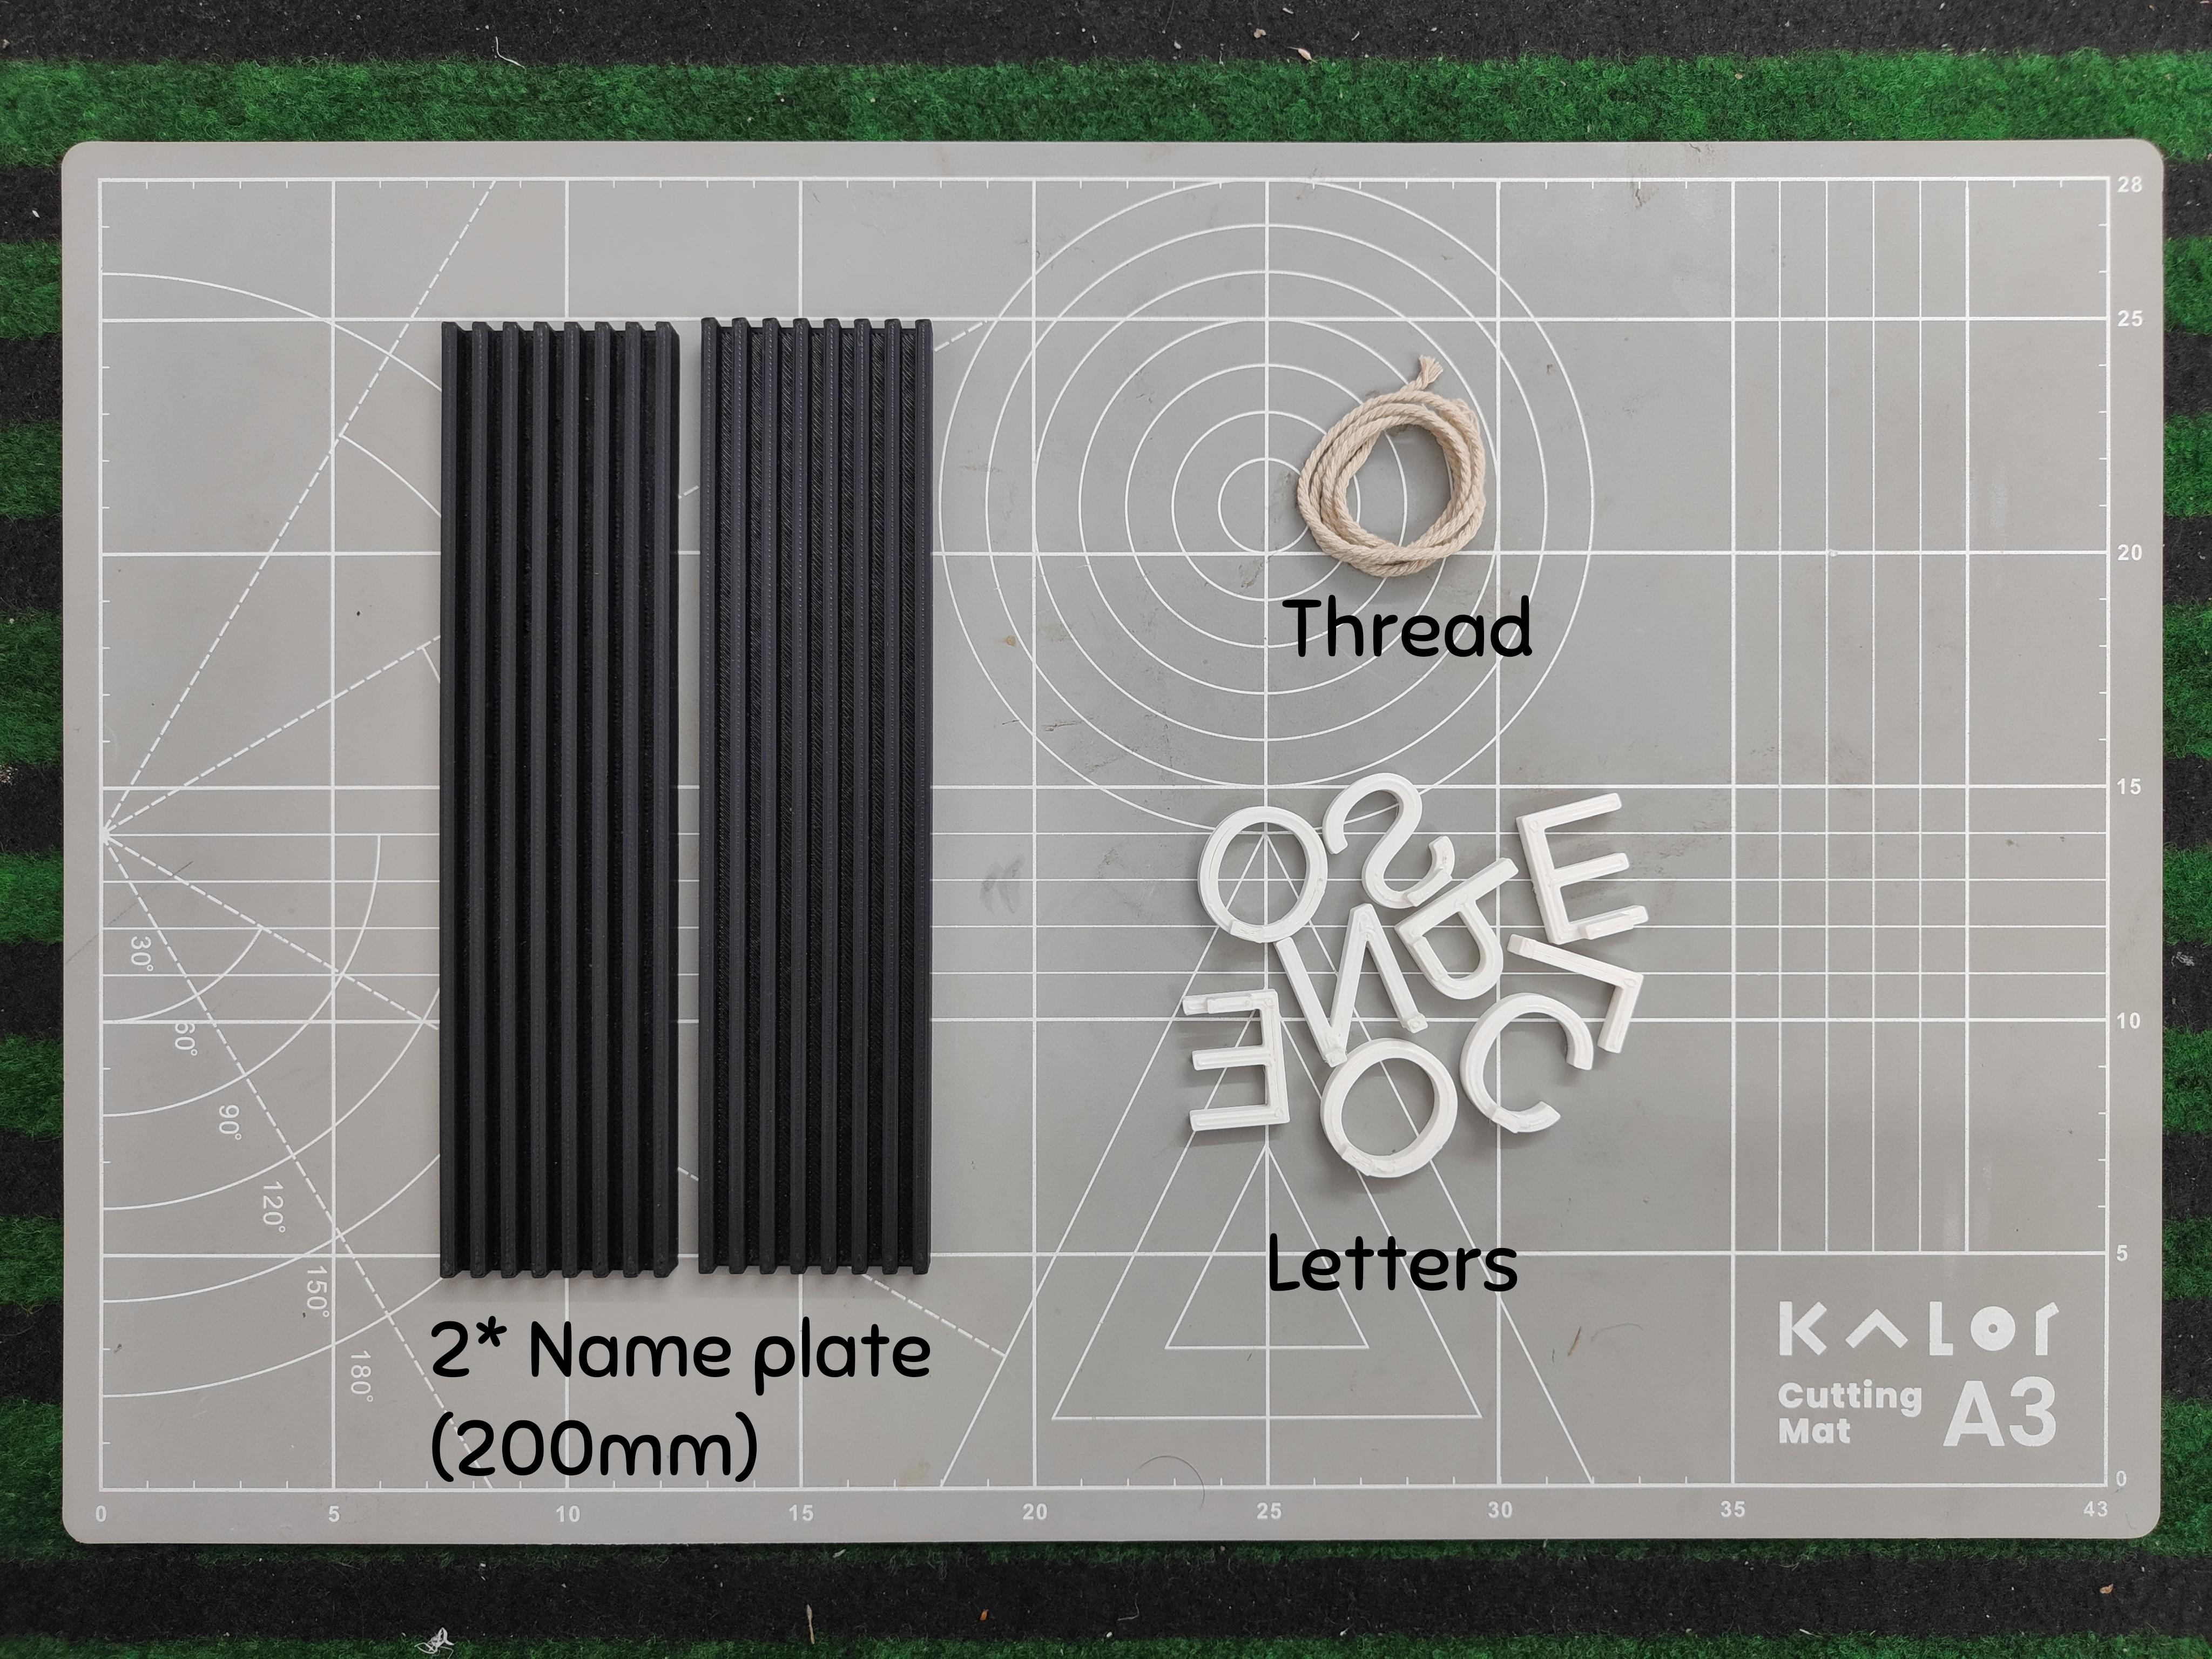
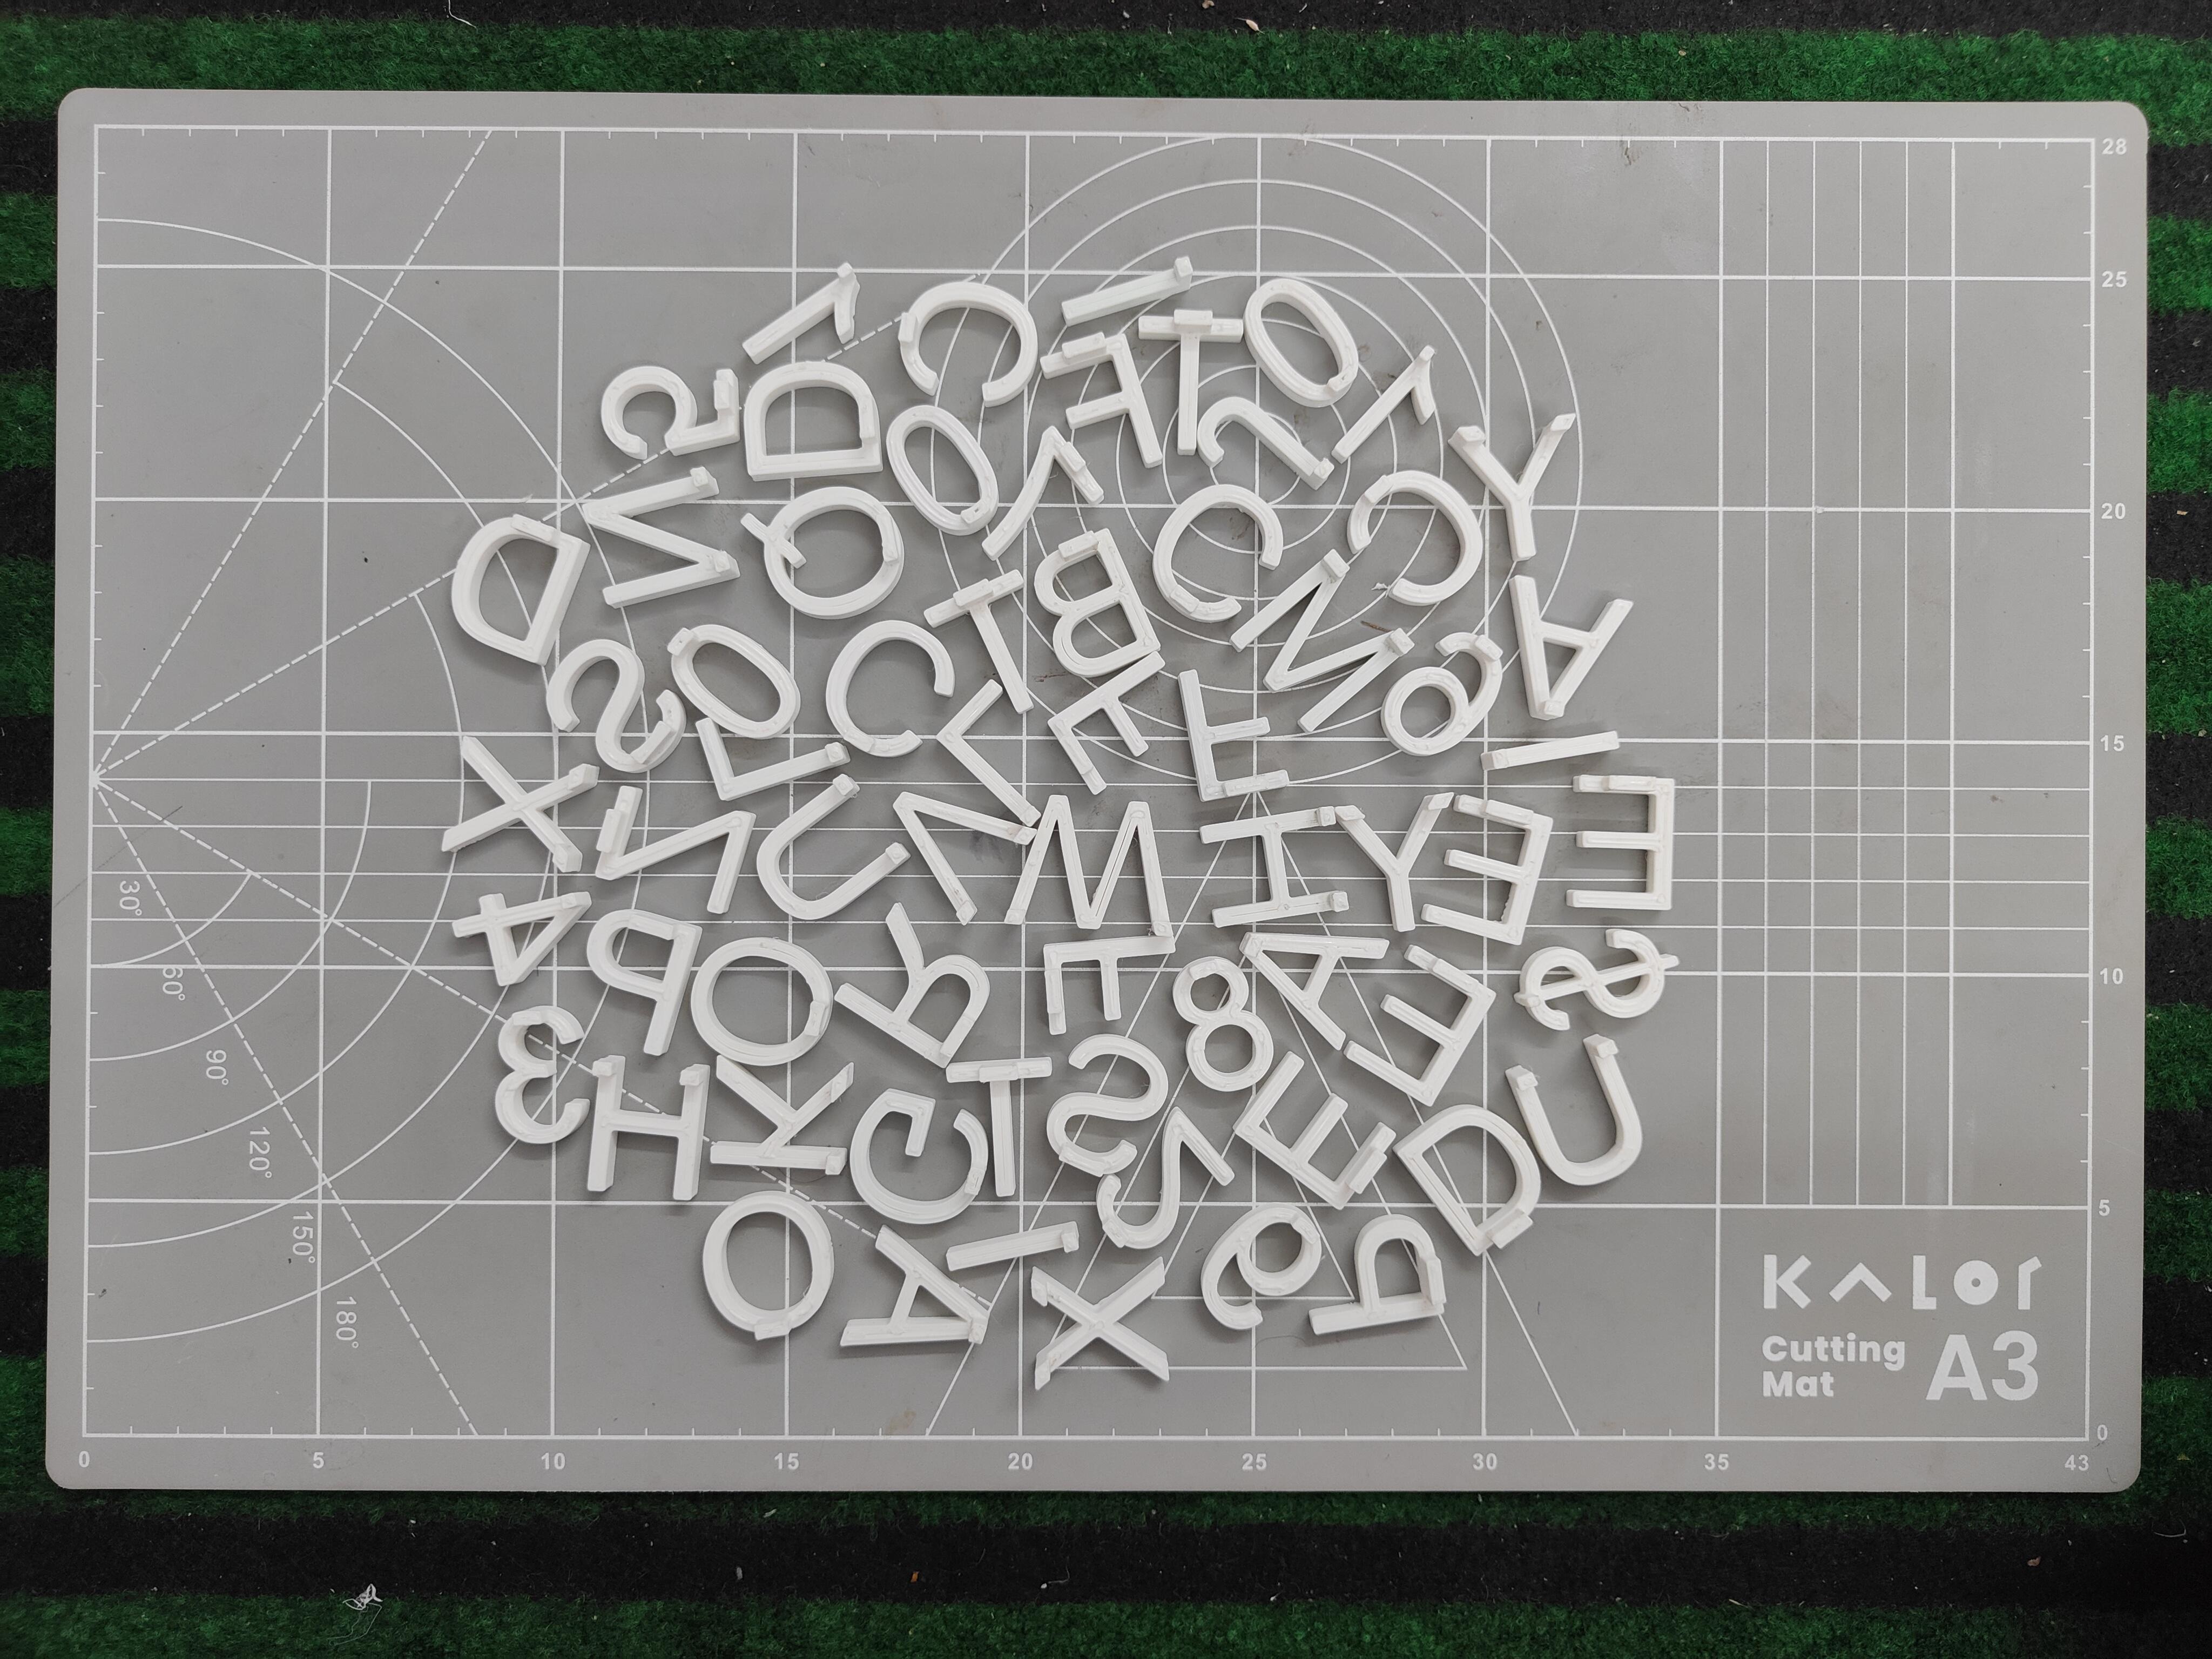
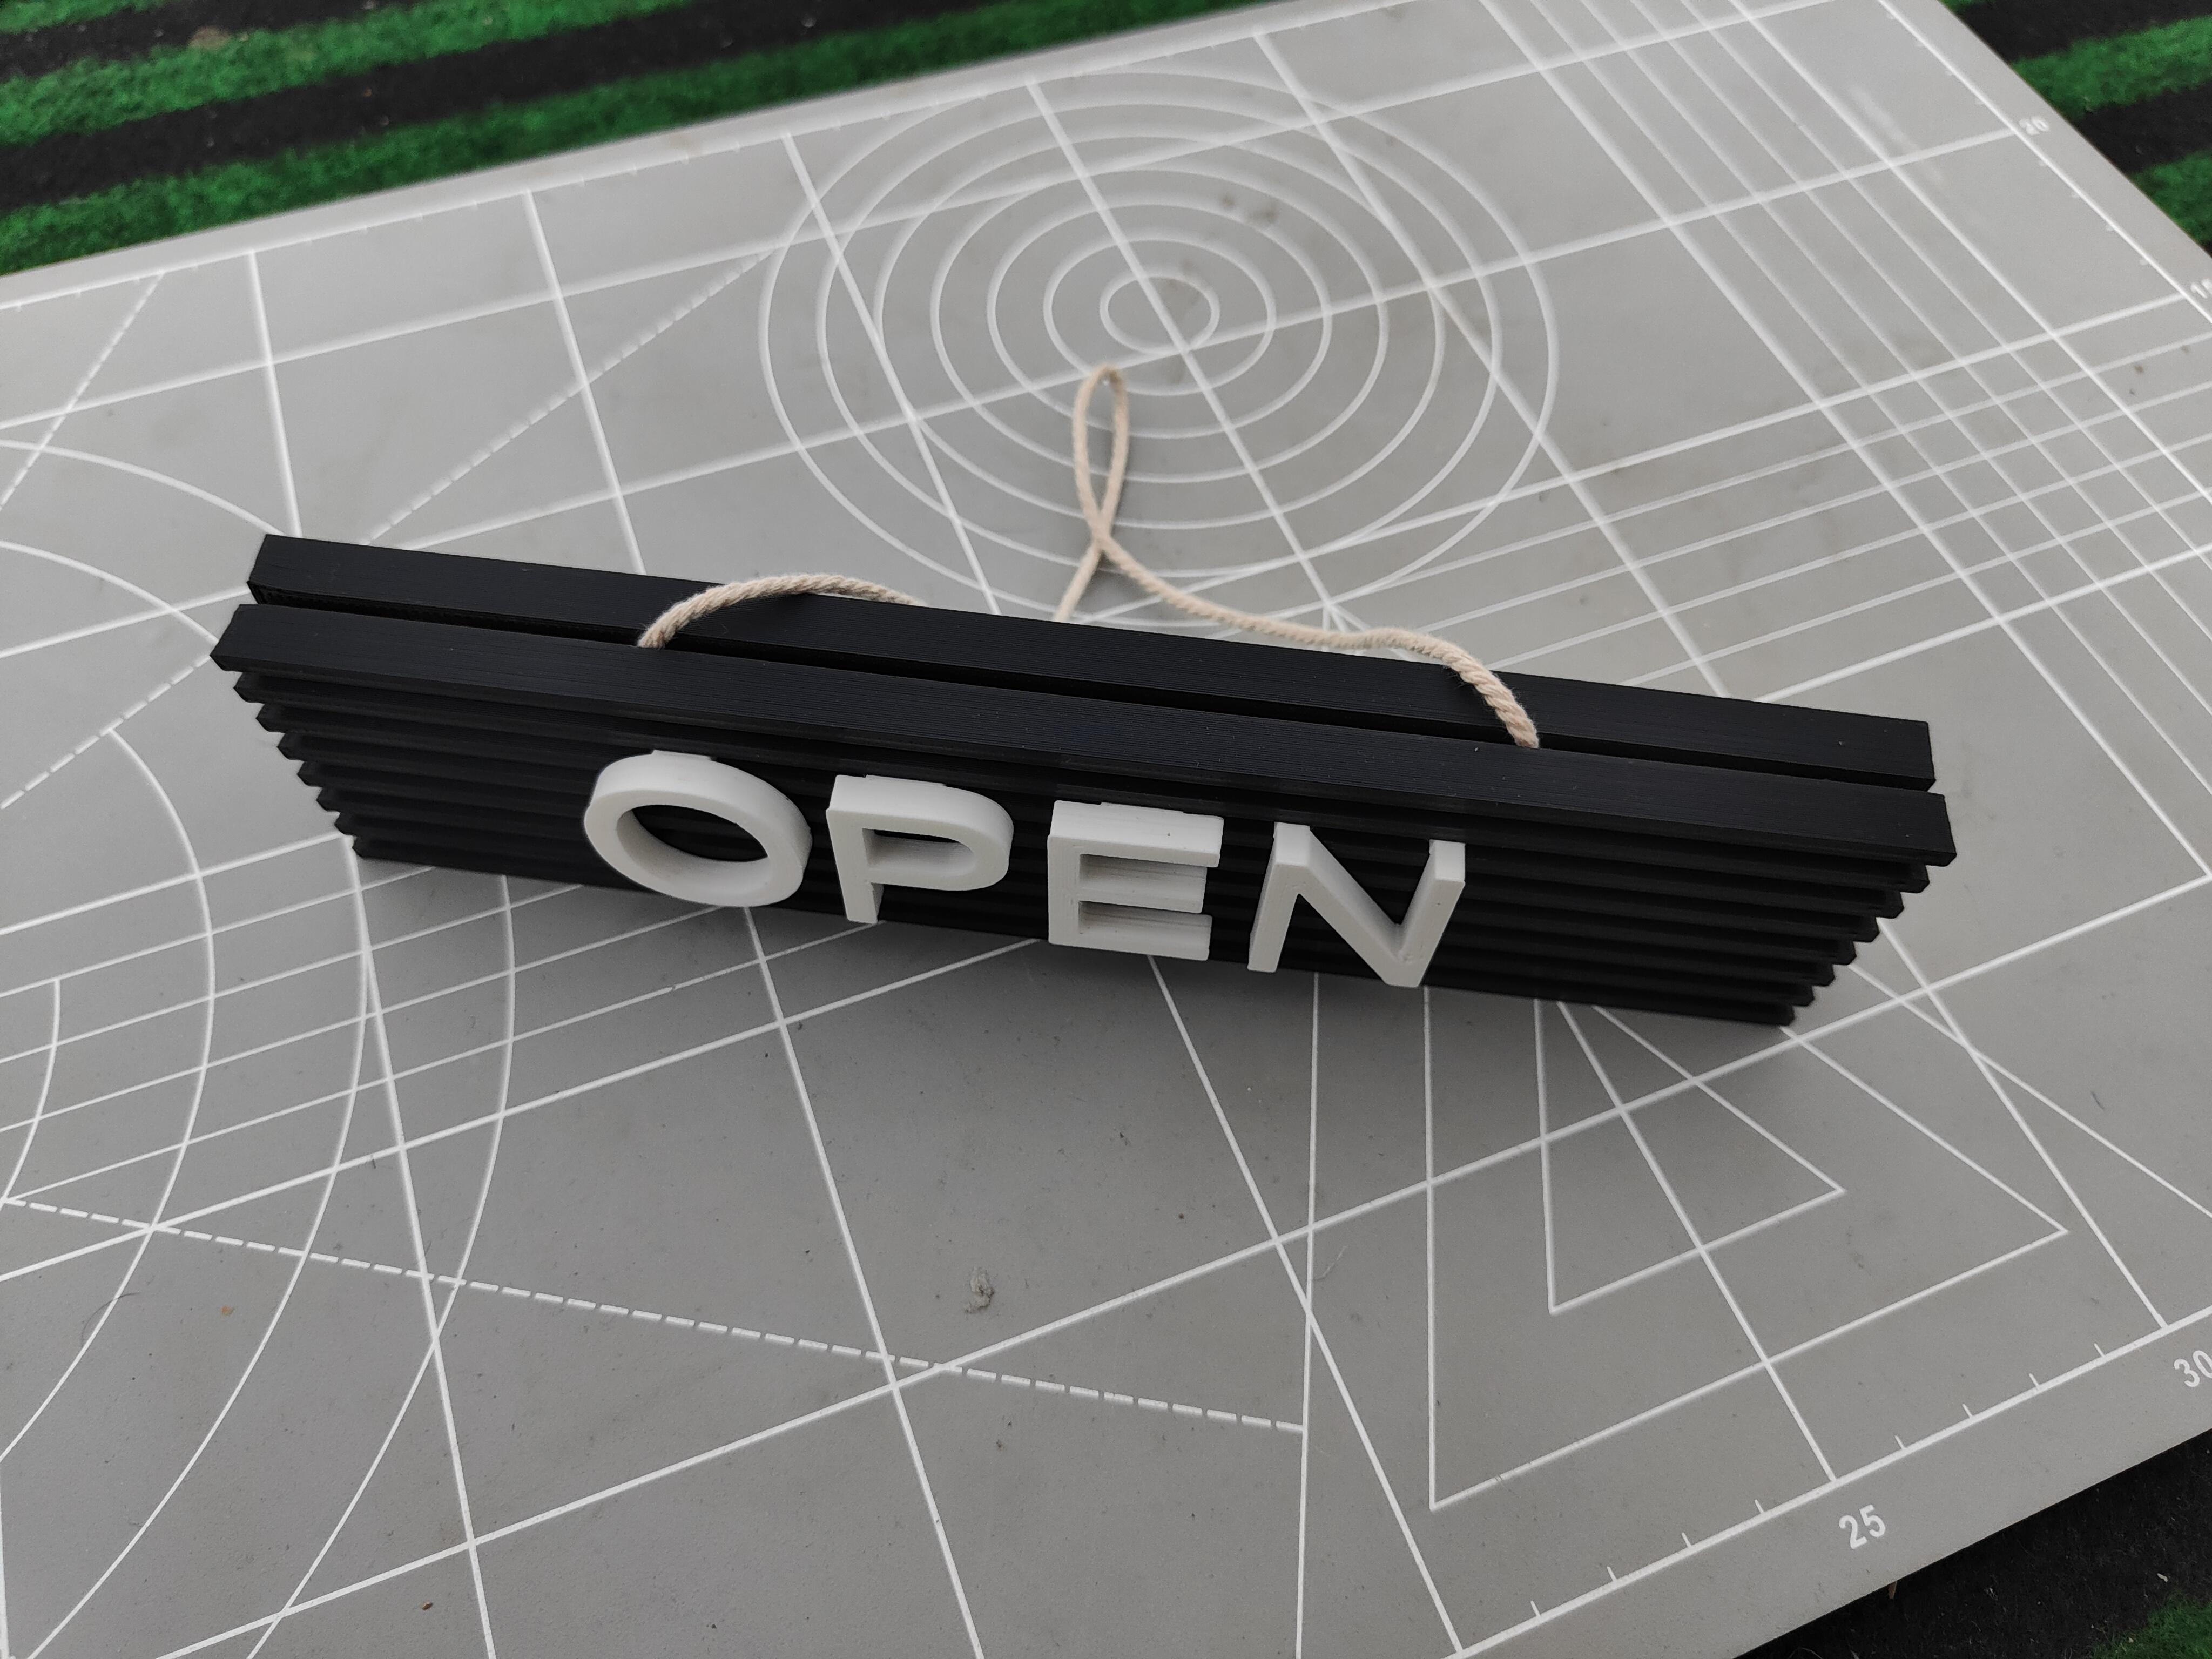
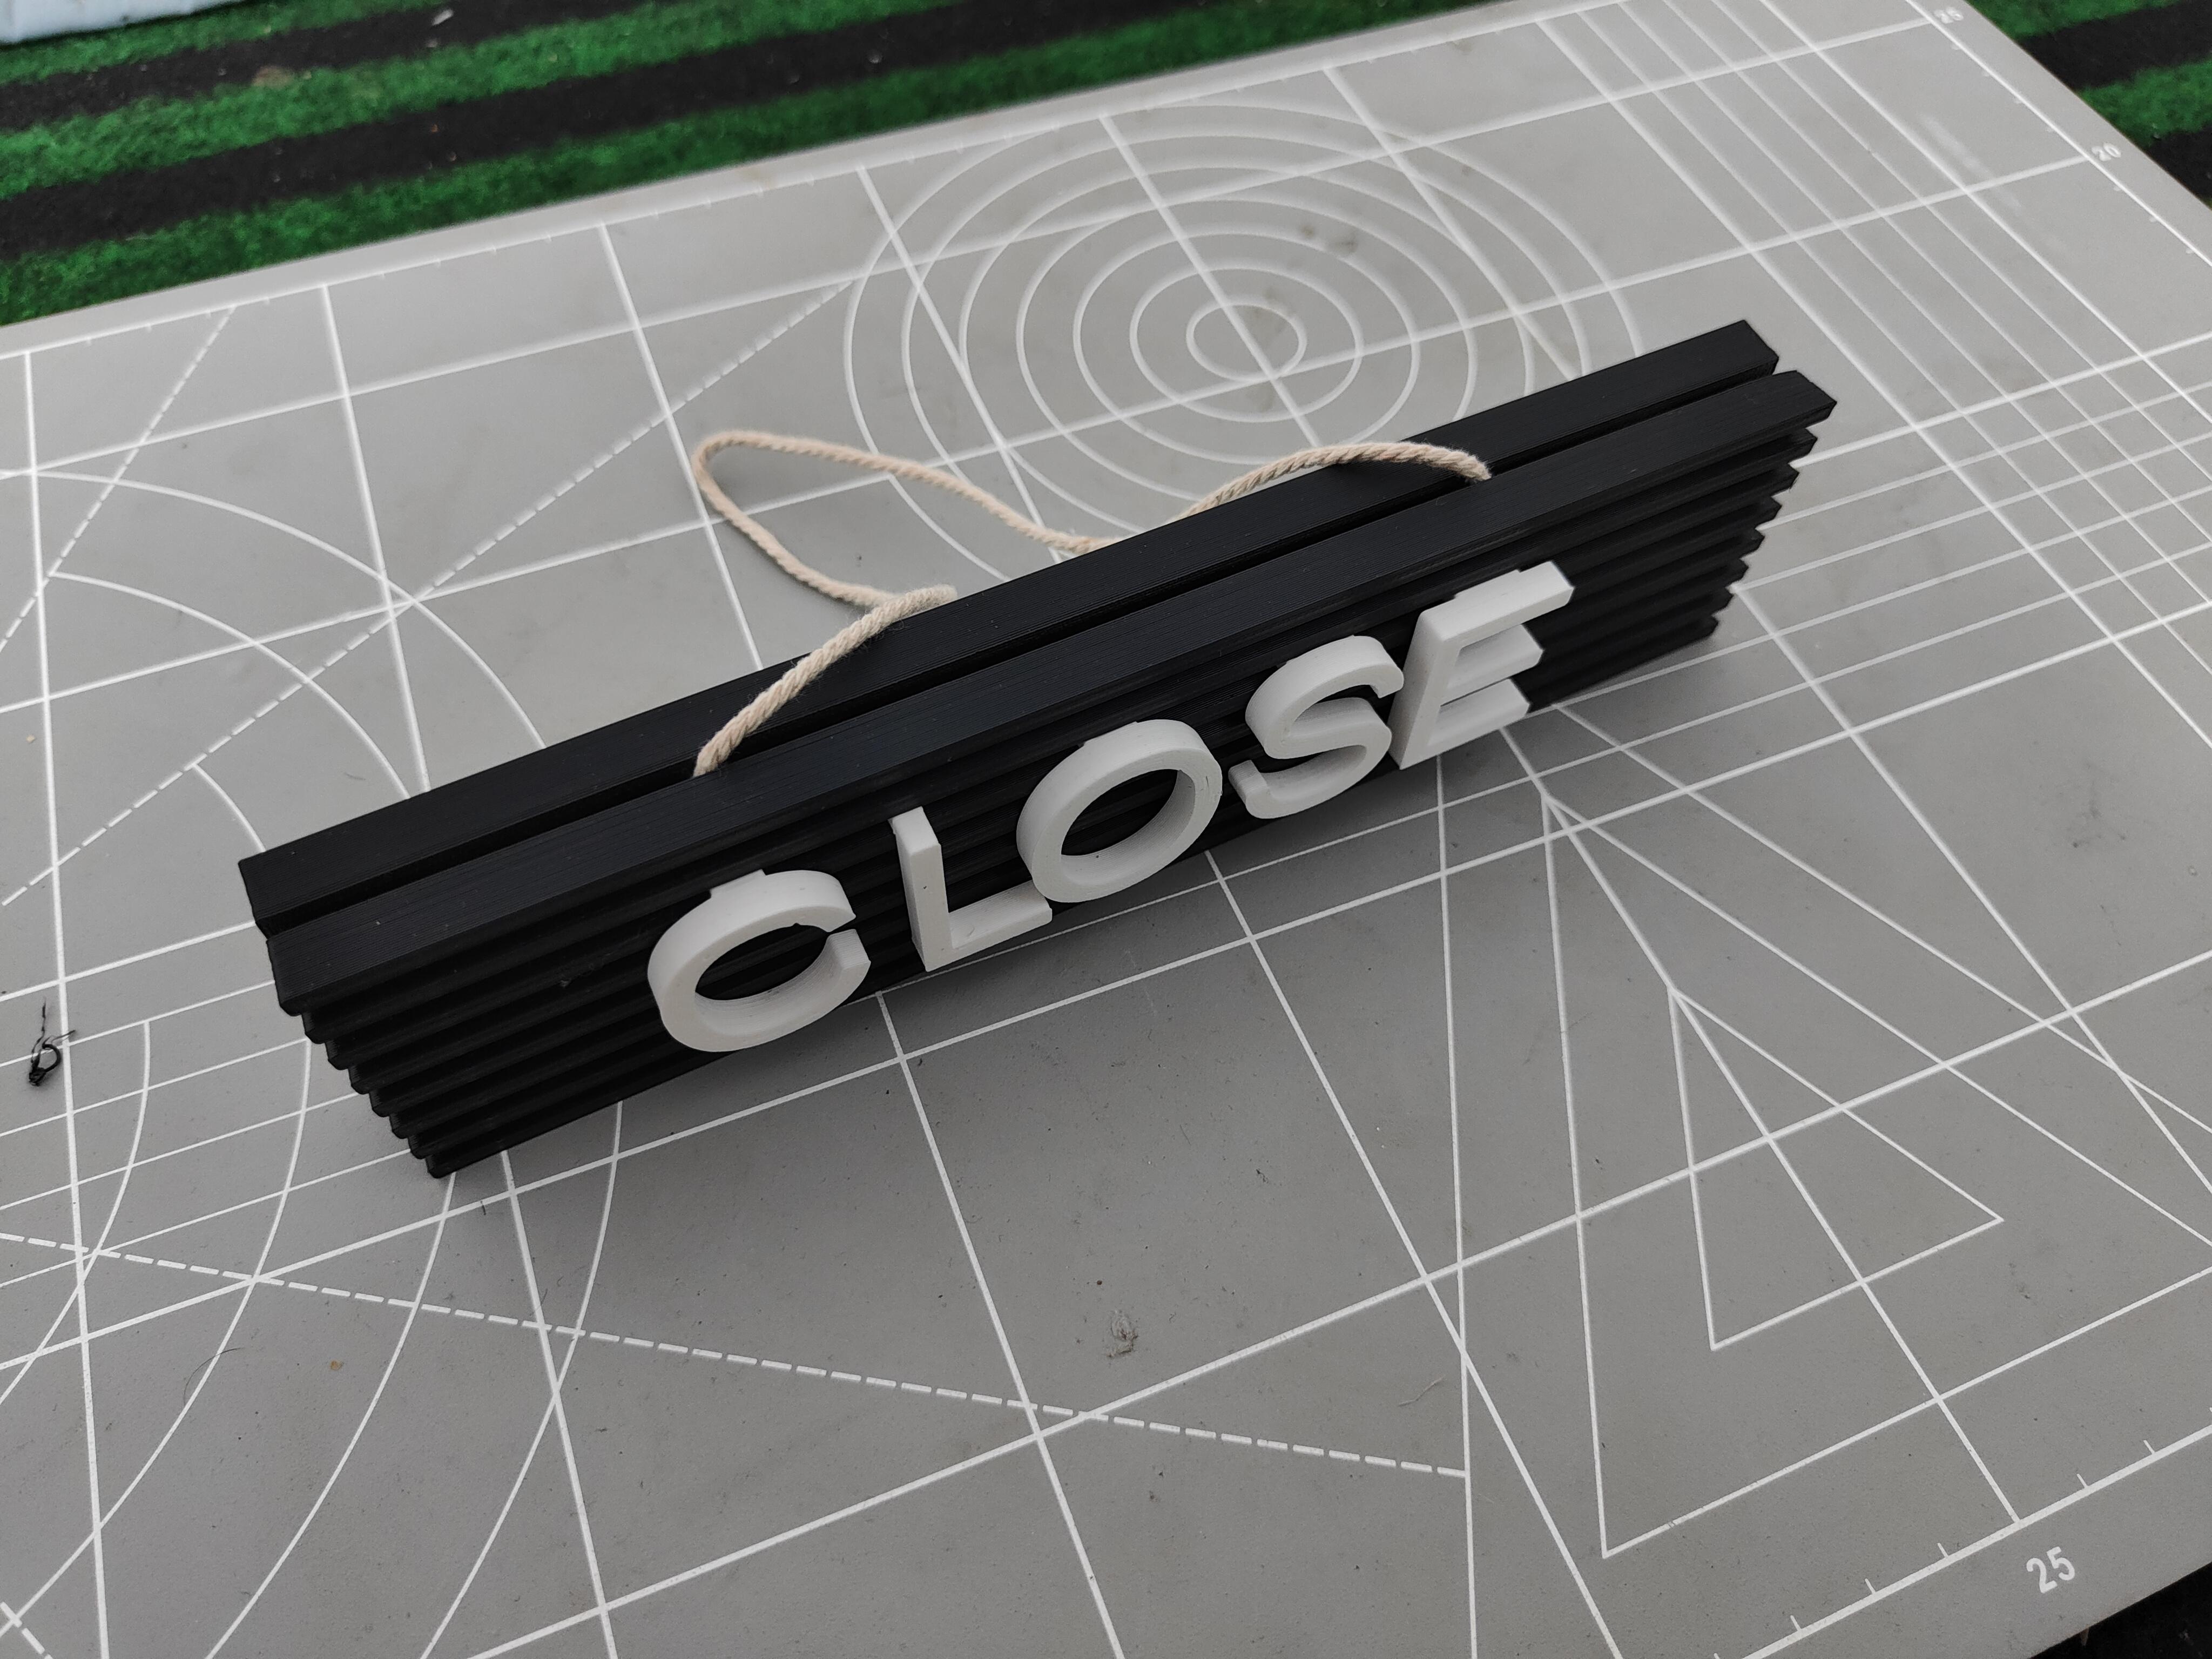
1. Prepare the Parts:
- Once all the components are 3D printed, gather them together for assembly. Ensure you have the nameplate, letters, and thread ready.
2. Joining plates together:
- Join two same-sized name plates together using double-sided tape, make sure that both sides have slots for placing letters in it.
- Attach the thread between the two plates for hanging.
3. Insert the Letters:
- Place the letters into the slots on the nameplate. Arrange them to display the desired name or message. Ensure each letter fits snugly and is properly aligned.
- Now secure all the letters using super glue.
4. Final Touches:
- Check the overall assembly for any loose parts or misalignments. Make any necessary adjustments to ensure a polished and professional appearance.
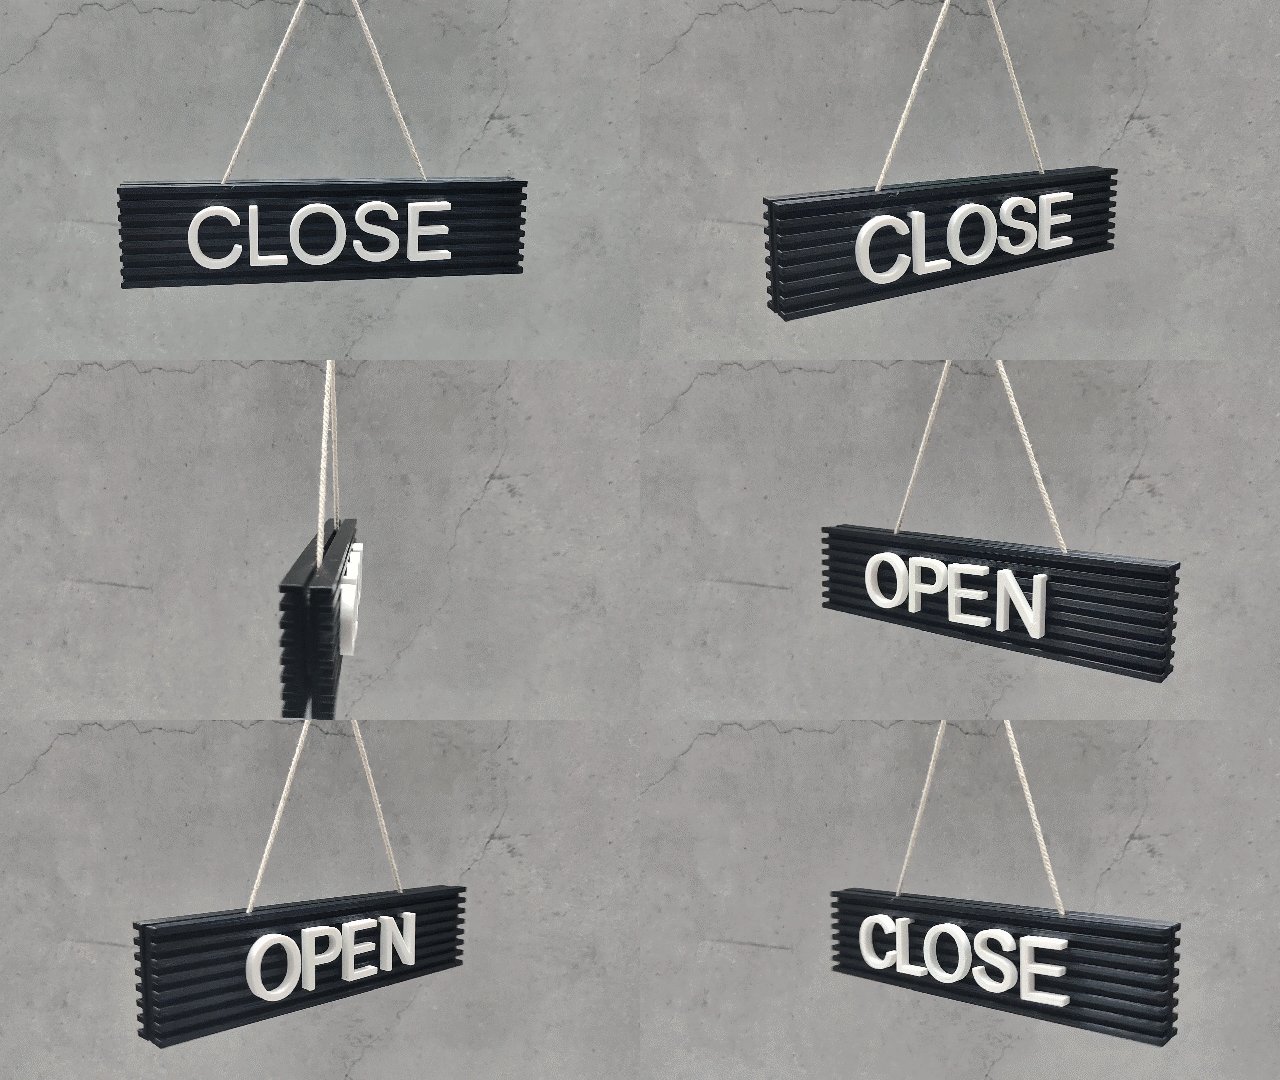
A perfect make for your Workplace! Simple flip in the morning and in the evening.
Application
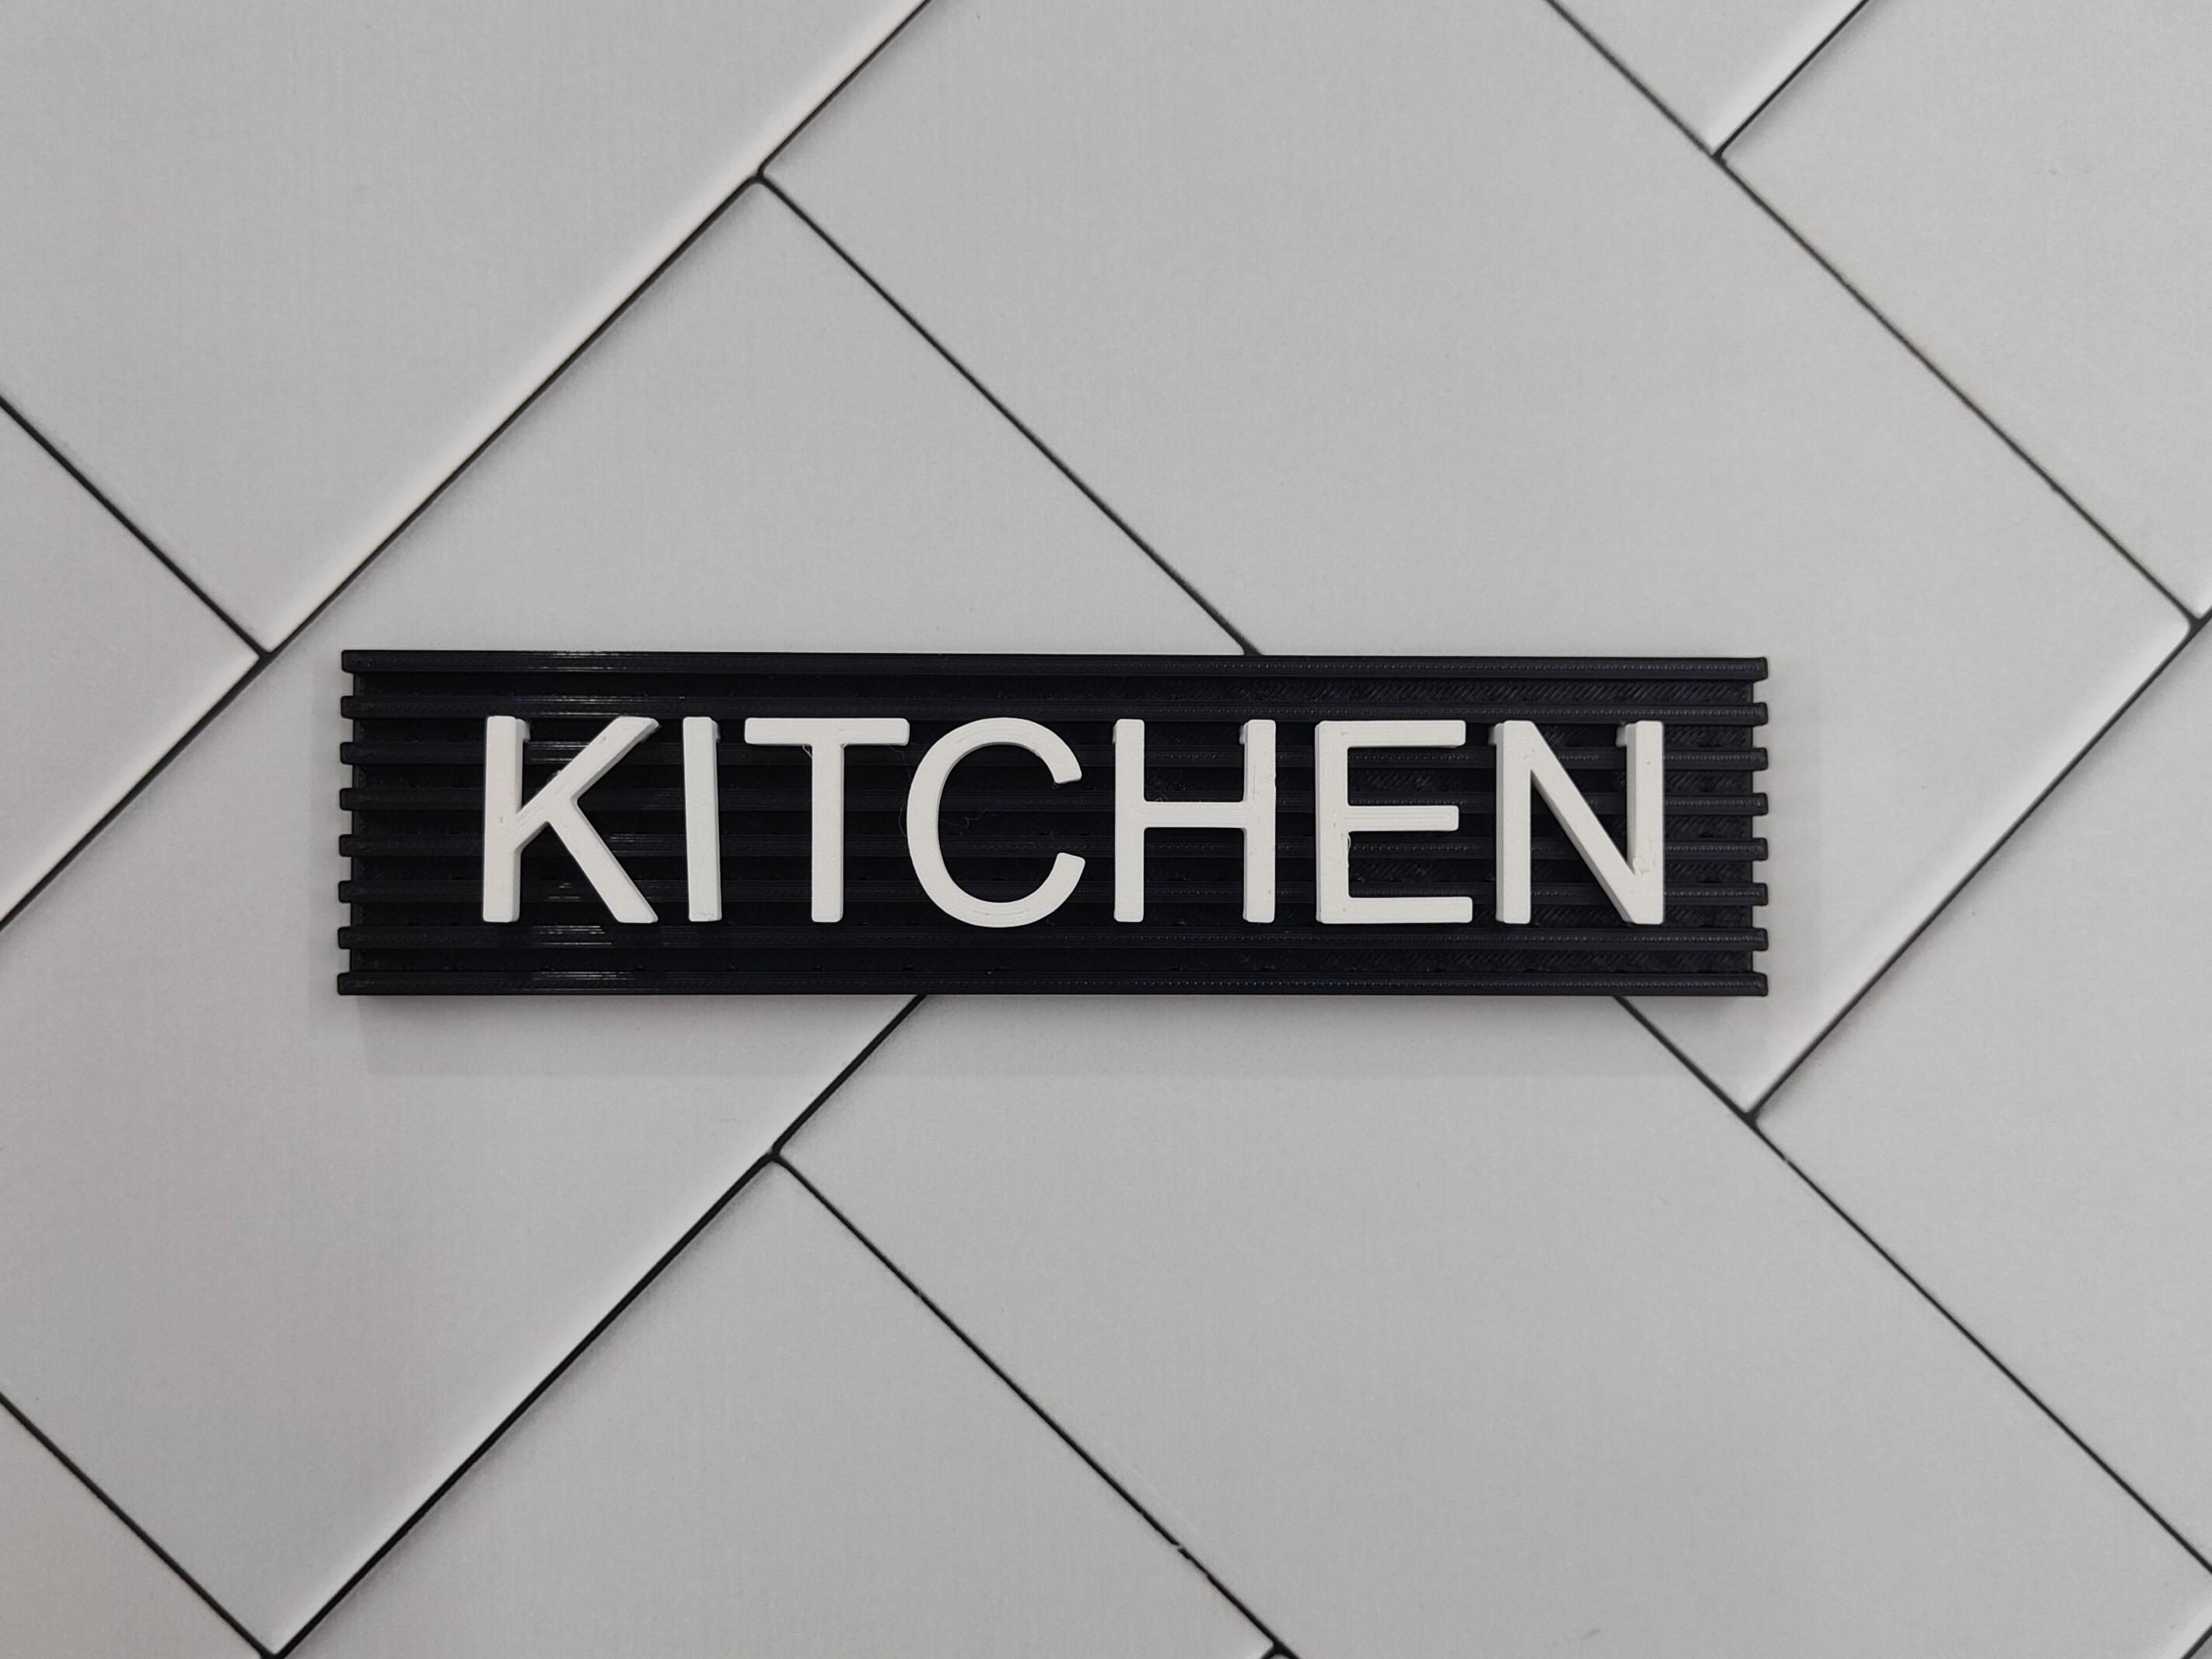
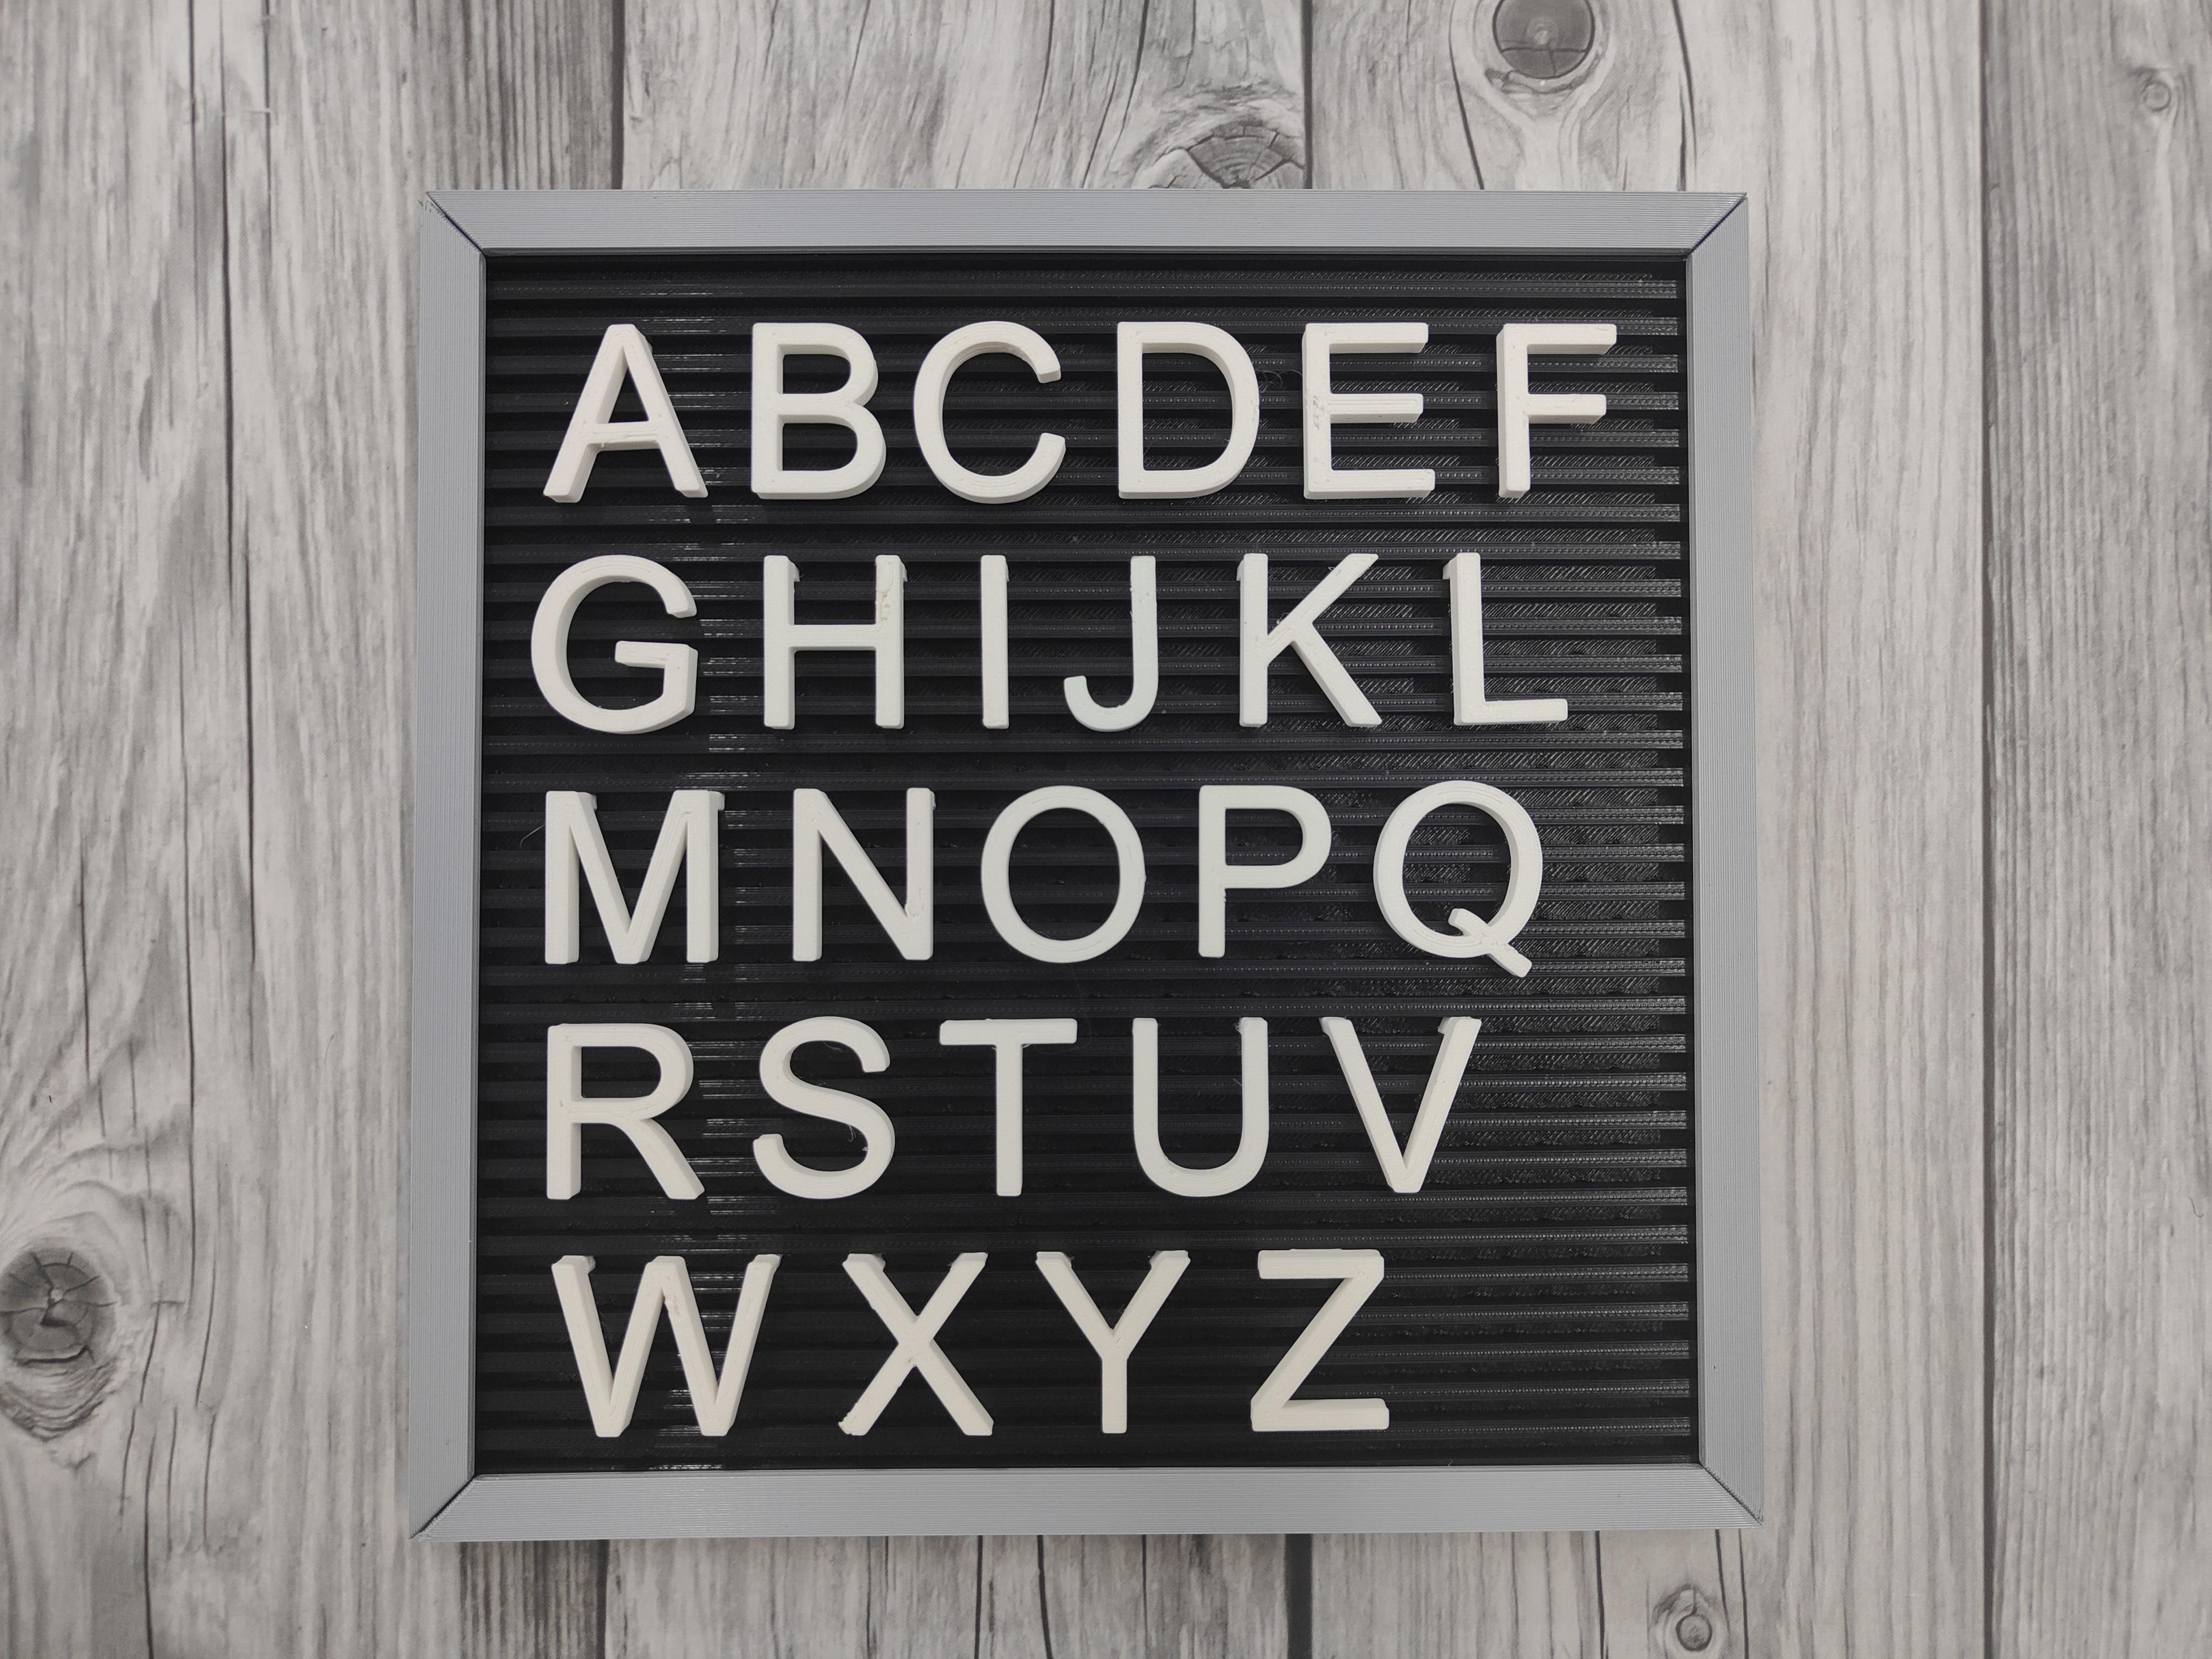
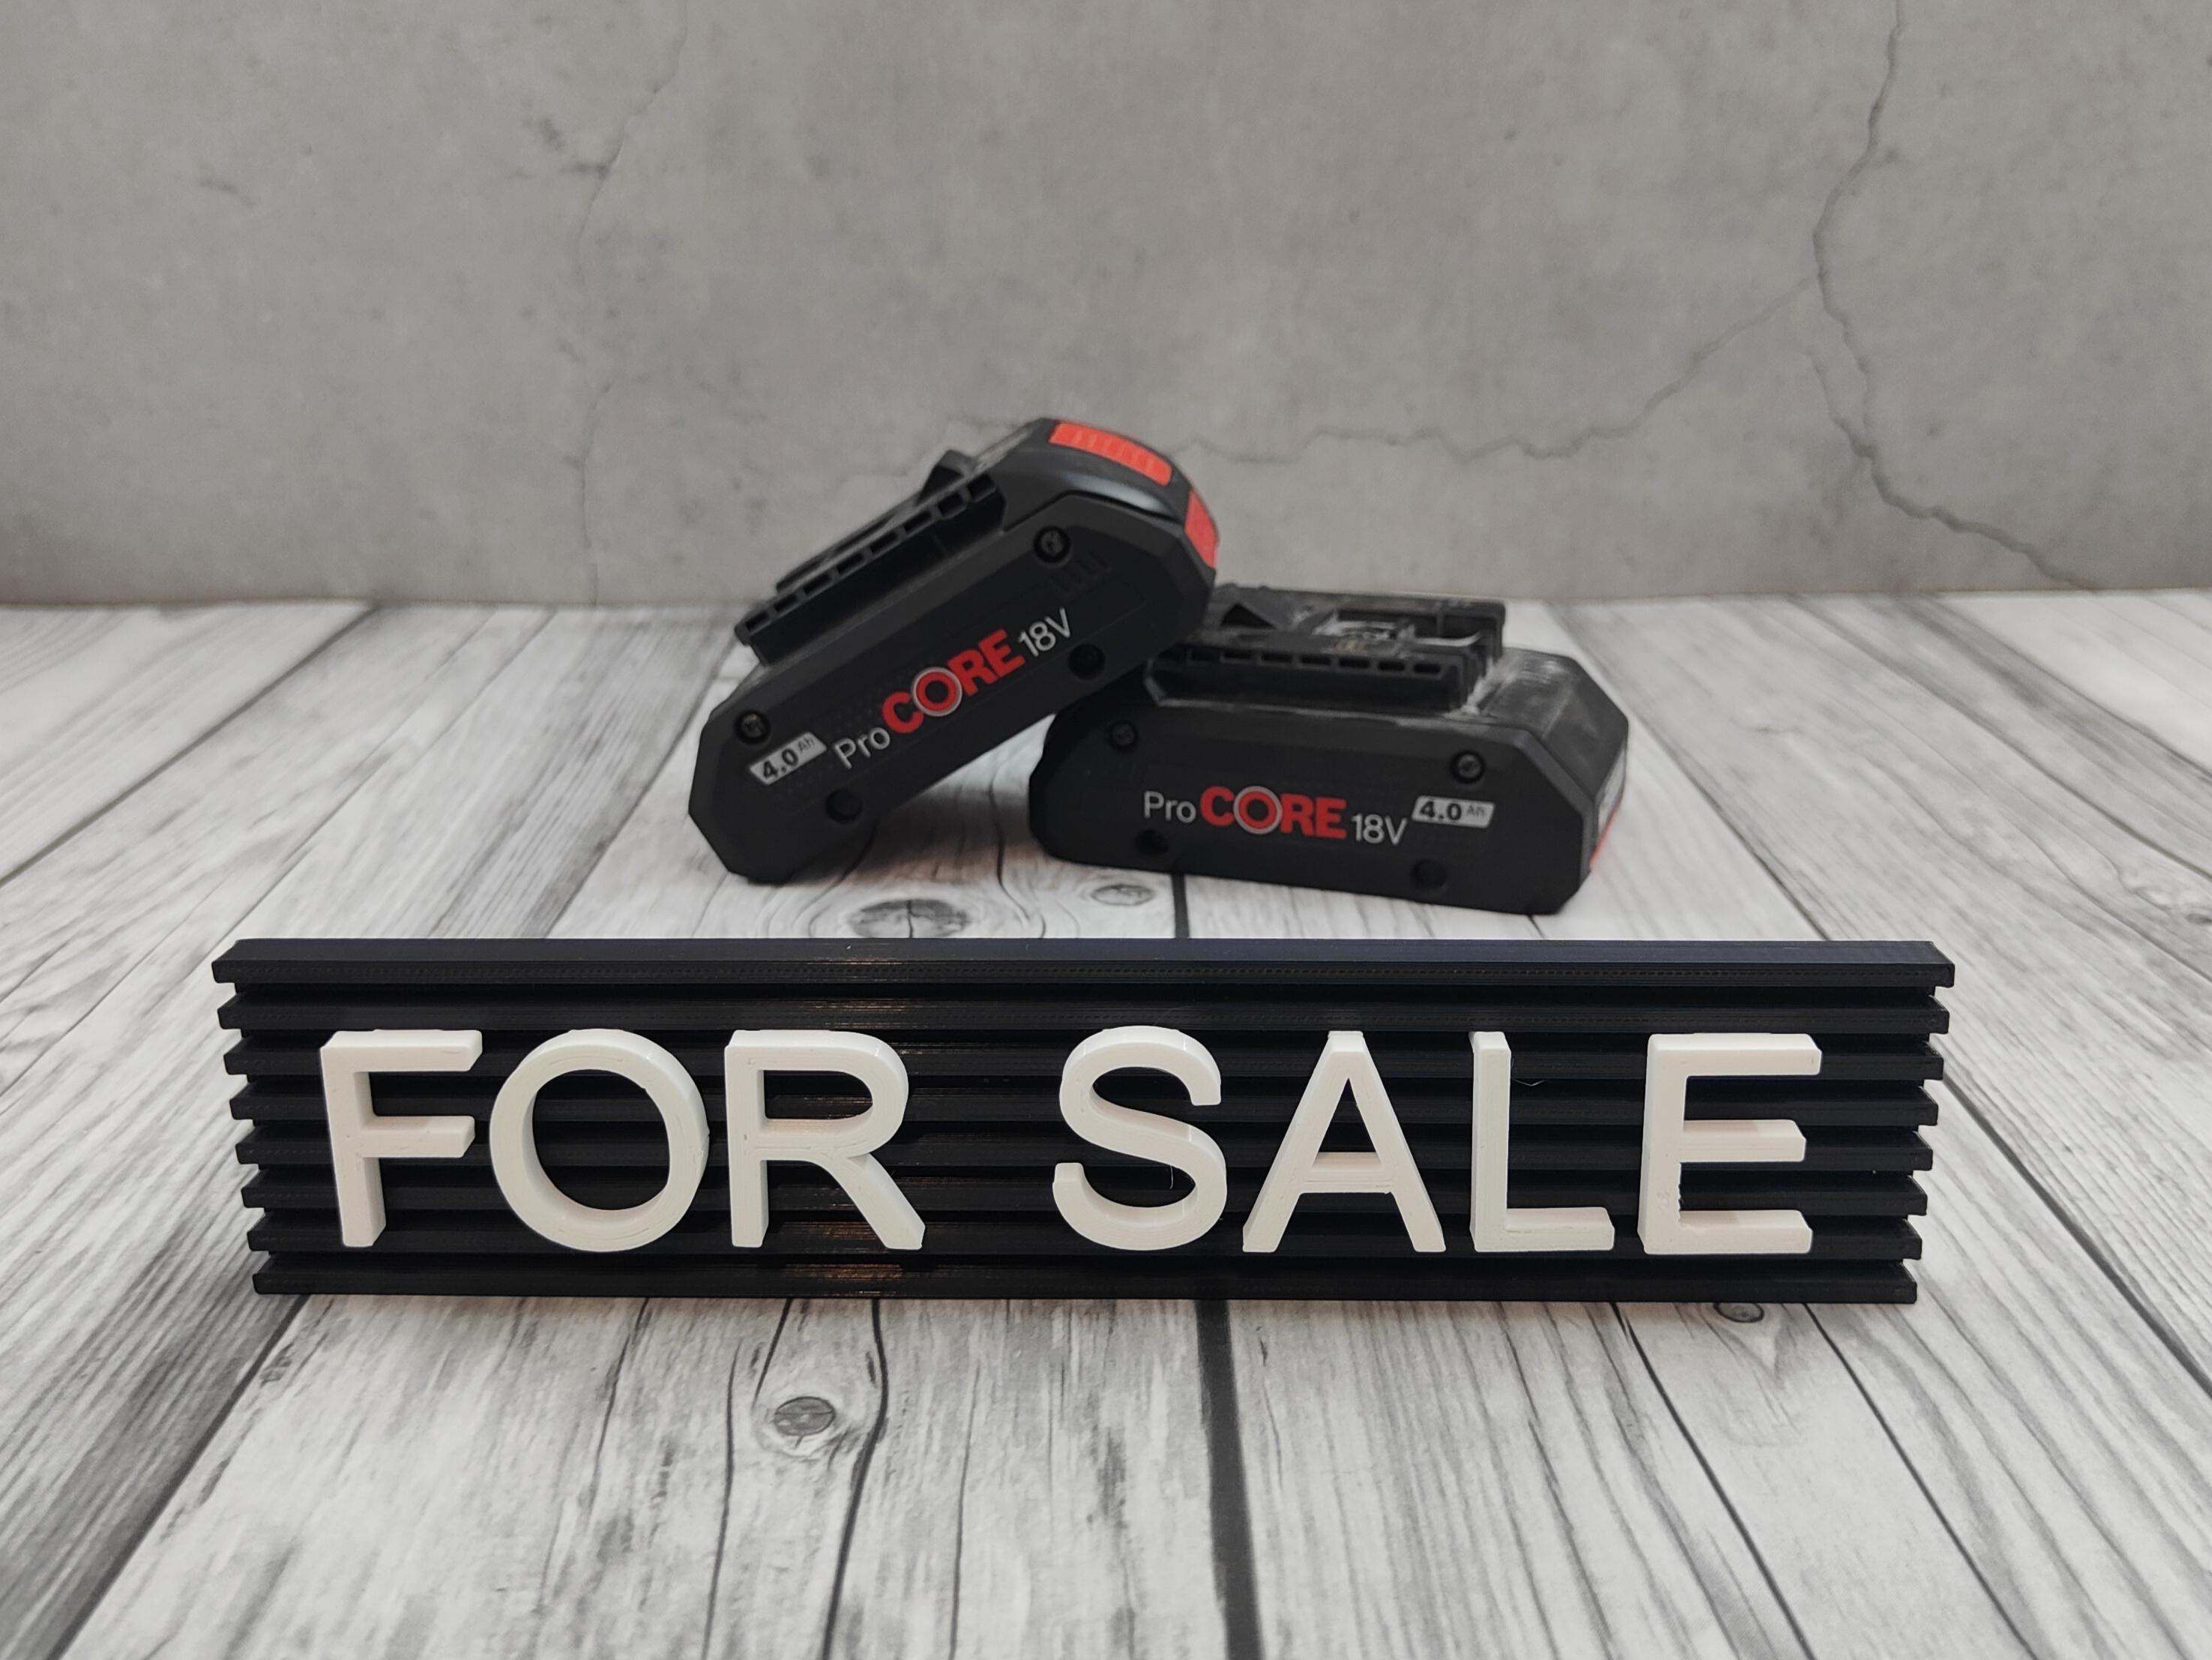
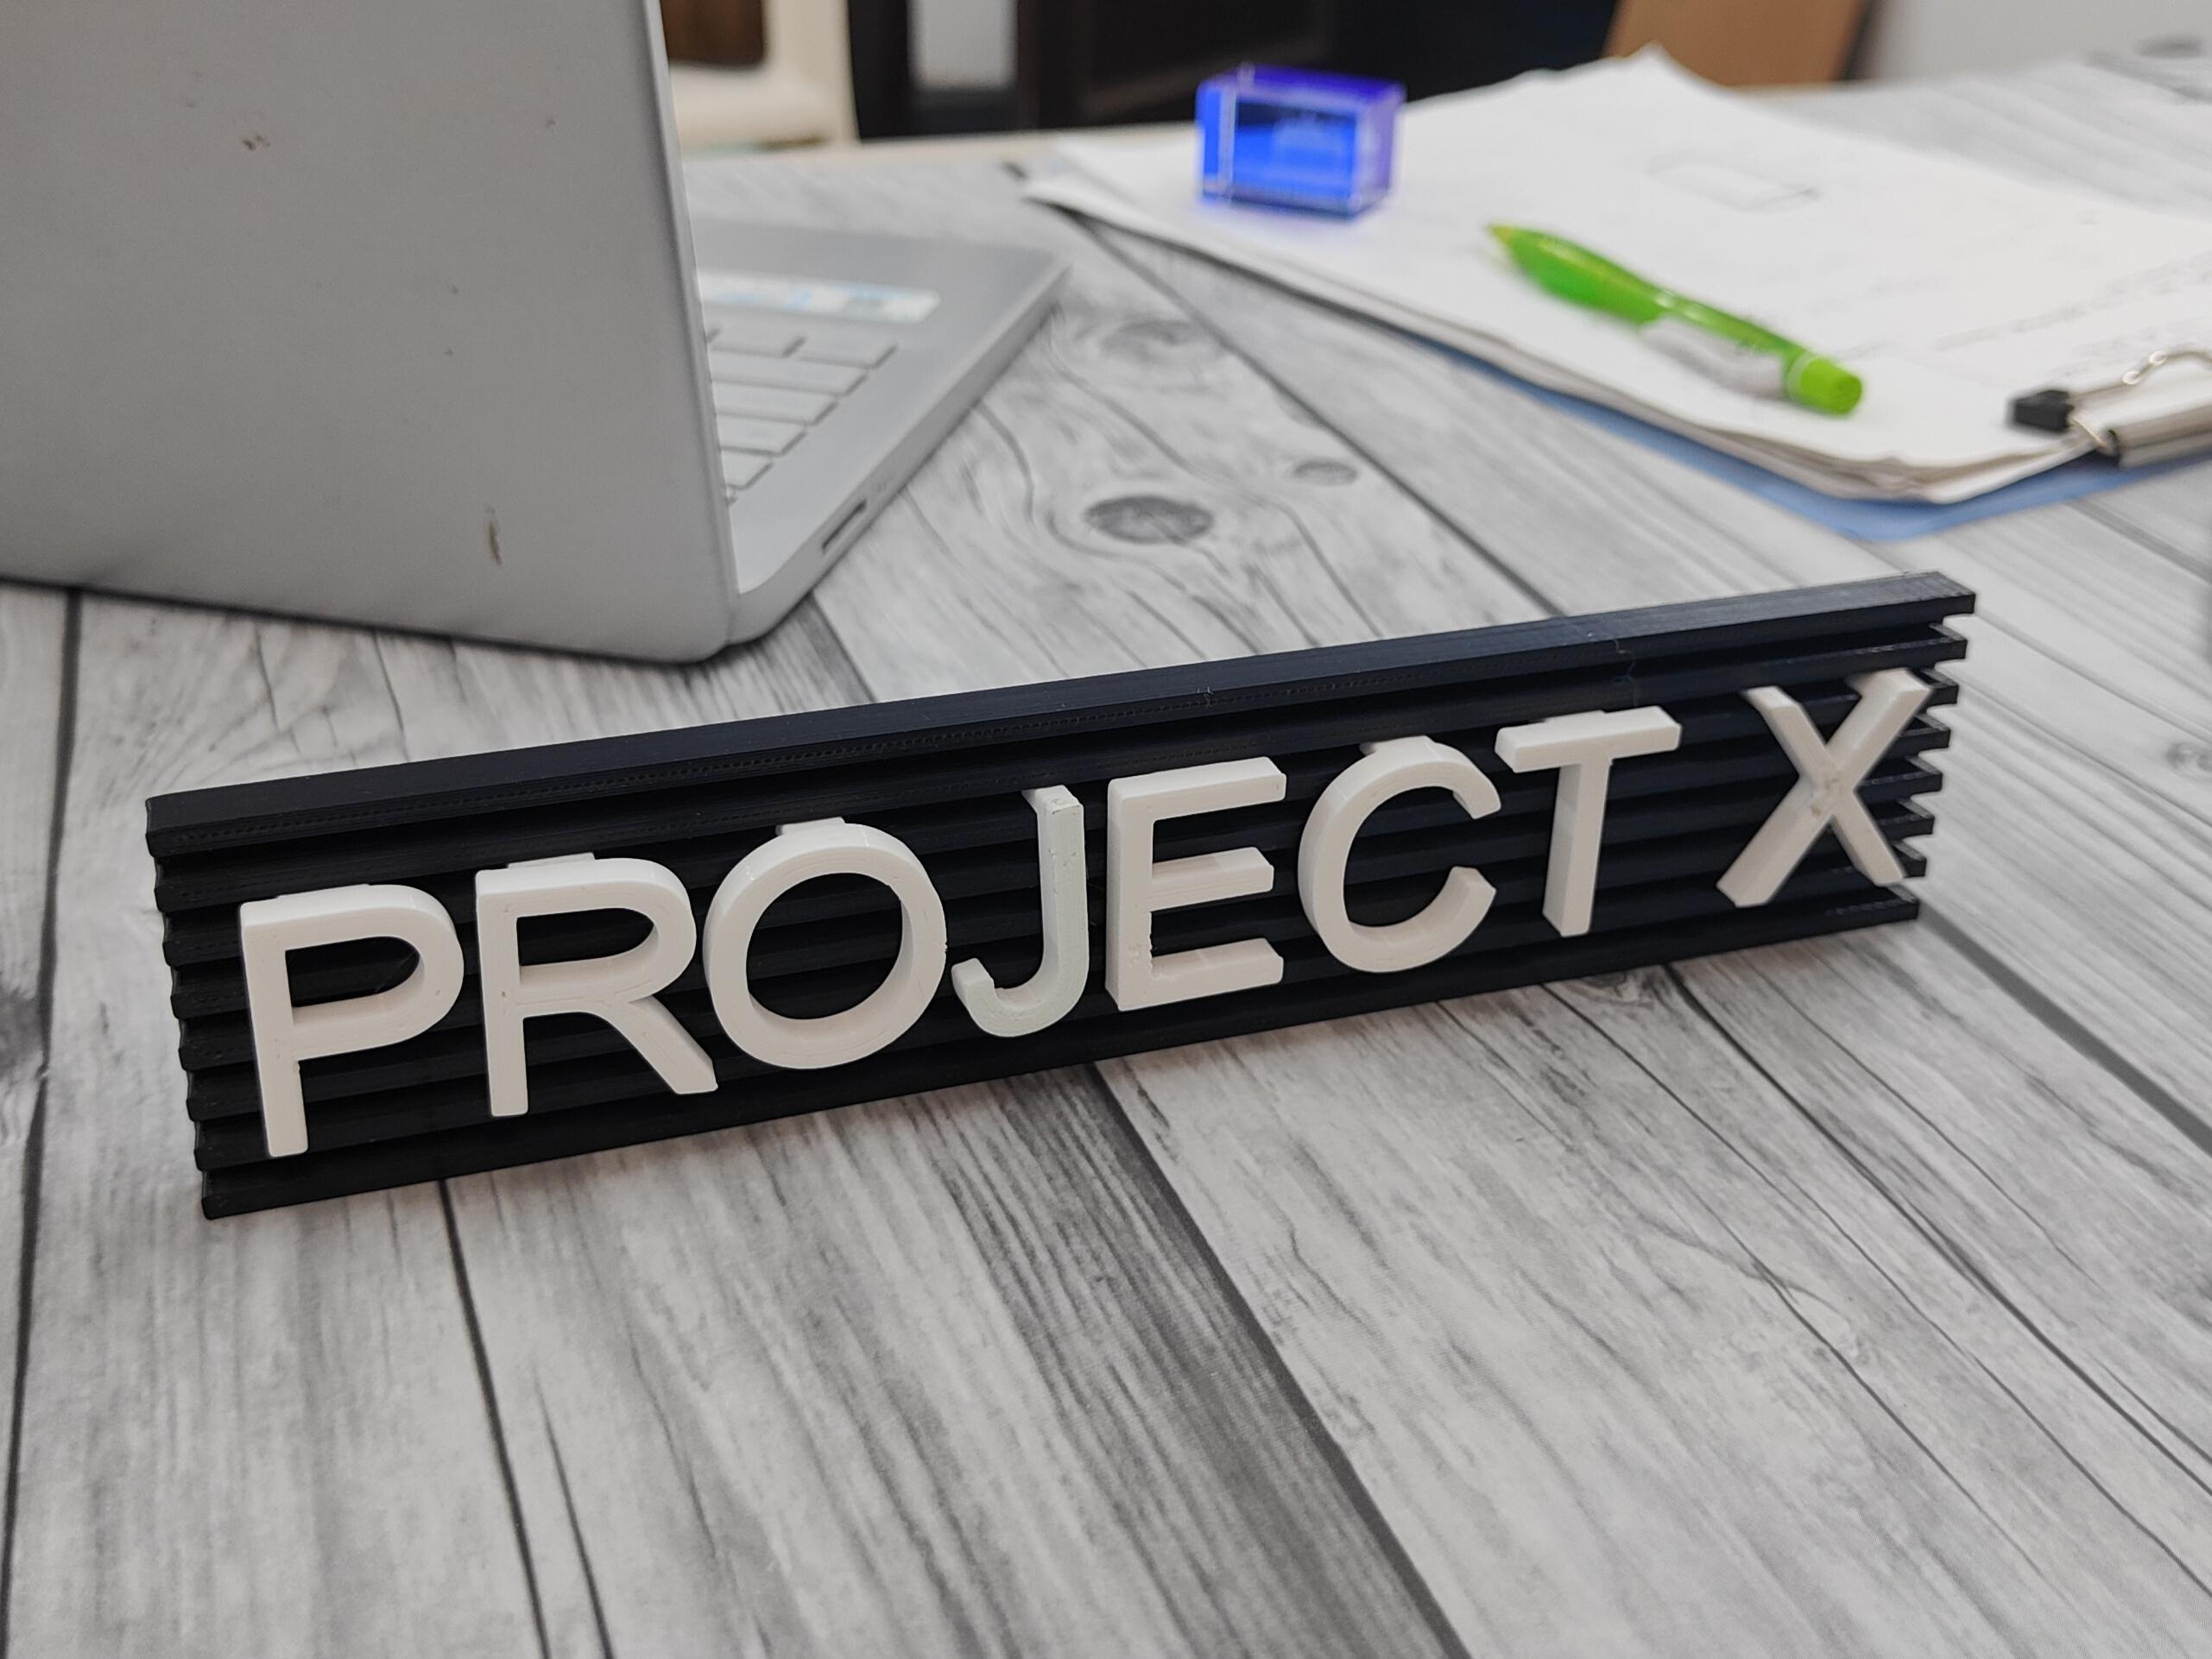
(A) Text board:
1. Home Decoration:
- Use the letter board to display inspirational quotes, daily reminders, or welcome messages in your living room, kitchen, or hallway. It’s a great way to add a personal touch to your home decor.
2. Office and Workspace:
- In a professional setting, the letter board can be used to display important notices, meeting agendas, or motivational quotes. It can also serve as a nameplate outside your office door.
3. Educational Purposes:
- Teachers can use the letter board in classrooms to display the day’s schedule, key vocabulary words, or motivational messages for students. It’s a fun and interactive way to engage students.
4. Events and Parties:
- Use the letter board to welcome guests, display the menu, or highlight important information at events such as weddings, birthday parties, or family gatherings.
5. Retail and Business:
- In retail settings, the letter board can be used to display store hours, promotional messages, or product information. It’s an effective way to communicate with customers and enhance the shopping experience.
6. Personal Projects:
- If you’re into DIY projects or crafting, the letter board can be used to showcase your work, list materials, or provide step-by-step instructions. It’s a handy tool for organizing and presenting your creative ideas.
(B) Name plate:
1. Desk Nameplate:
- Use the nameplate on your desk to display your name and title. It adds a professional touch to your workspace and helps colleagues and visitors identify your desk easily.
2. Office Door Sign:
- Place the nameplate outside your office door to indicate the occupant’s name and role. It’s a simple yet effective way to personalize your workspace and assist visitors in finding the right office.
3. Conference and Meeting Rooms:
- Use nameplates to label conference or meeting rooms. This helps in organizing and identifying rooms during events, meetings, or office activities.
4. Classrooms and Schools:
- Teachers can use nameplates to label their classrooms or display their names on their desks. It’s a helpful tool for students to identify their teachers and classrooms.
5. Events and Exhibitions:
- At events, exhibitions, or trade shows, use nameplates to display the names and titles of presenters, speakers, or exhibitors. It adds a professional look and helps attendees easily identify key personnel.
6. Reception Areas:
- Use the nameplate in reception areas to display the name and title of the receptionist or the person in charge. It’s welcoming and professional, providing visitors with clear information.
7. Personal Projects:
- For DIY enthusiasts and crafters, nameplates can be used to label projects, tools, or workspaces. It’s a great way to stay organized and personalize your creative space.
8. Home Use:
- Use the nameplate in your home for decorative purposes. Label rooms, display family member names on doors, or use it as a decorative piece in your living space.
The customizable nature of the letter board means you can adapt it to suit any purpose, making it a valuable addition to any space. Whether for personal use or professional settings, the letter board offers endless possibilities for communication and decoration.
Conclusion
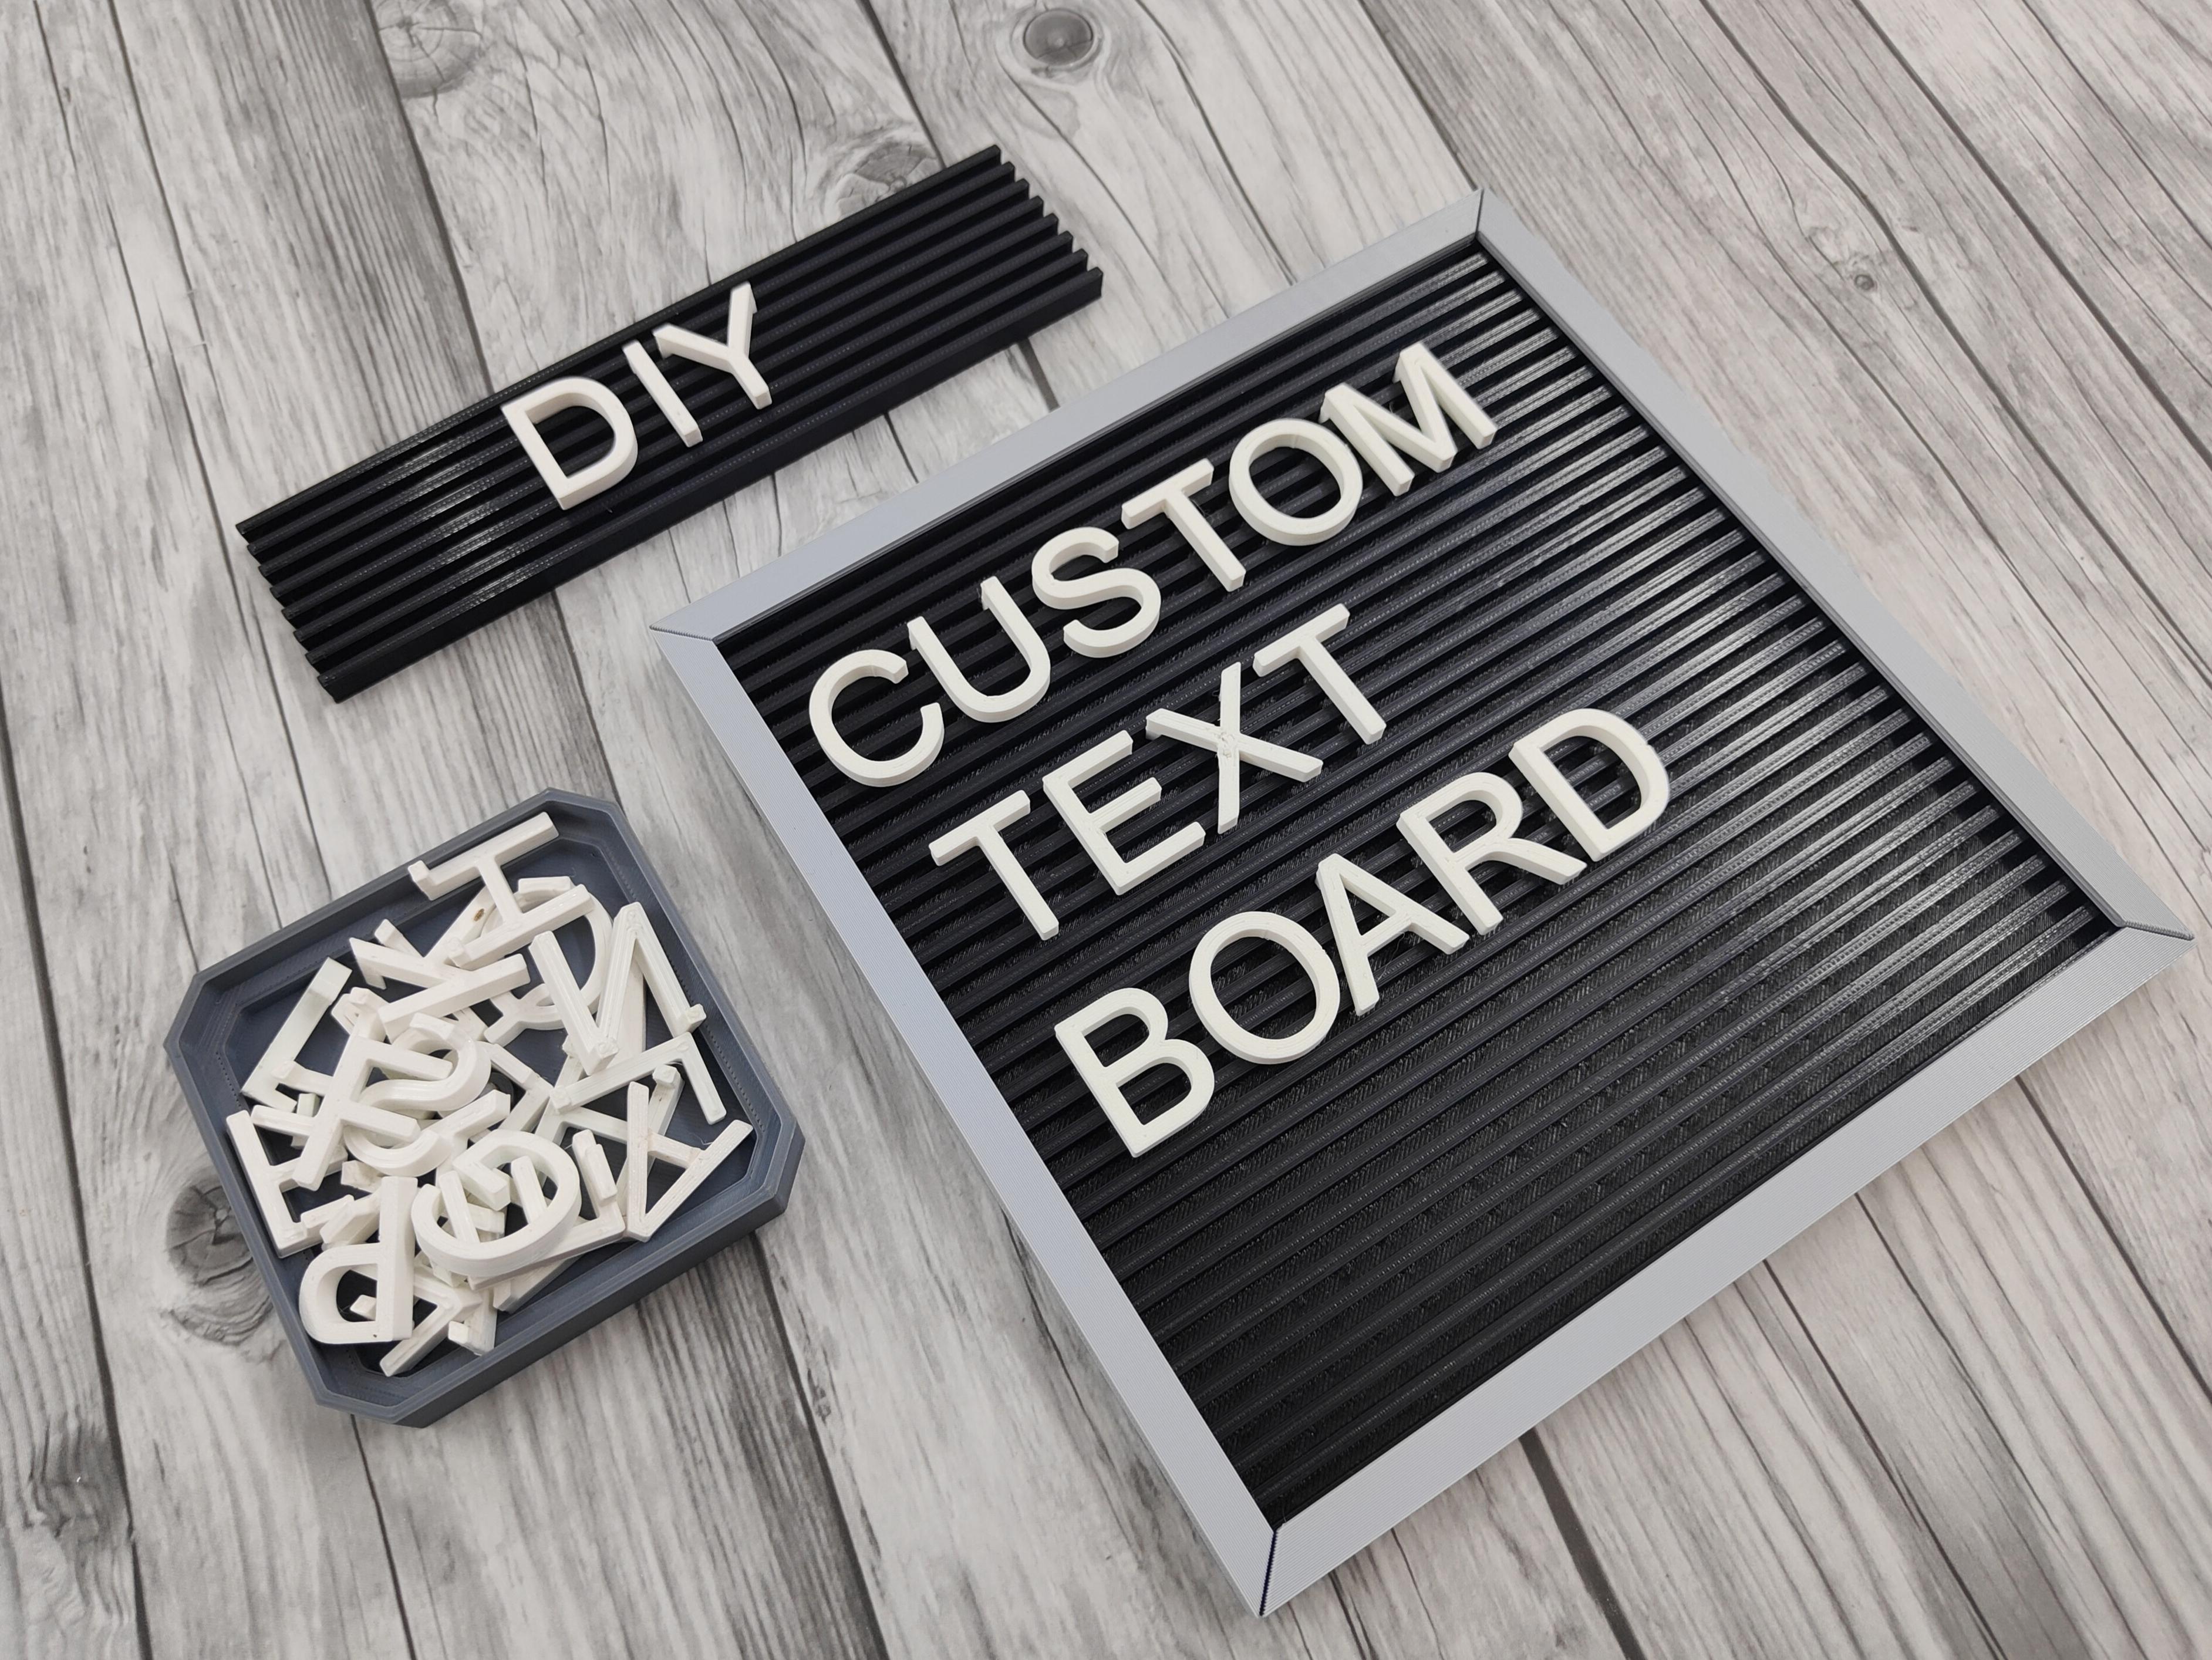
Congratulations on completing your customizable letter board and nameplate! This project has not only allowed you to create a functional and versatile thing but also provided an opportunity to explore and hone your 3D design and printing skills.
Your letter board can now serve multiple purposes—from home decor and office organization to educational and event use. Its customizable nature means you can adapt it to any setting and change the messages as often as you like. Similarly, the nameplate adds a personal and professional touch to any space, whether it’s your desk, office door, or a special event.
I hope you enjoyed the process of designing, printing and assembling these items as much as I did. Feel free to experiment with different colors, fonts, and sizes to truly make this project your own. If you have any questions or want to share your creations, I’d love to hear from you.
Thank you for following along, and happy crafting!