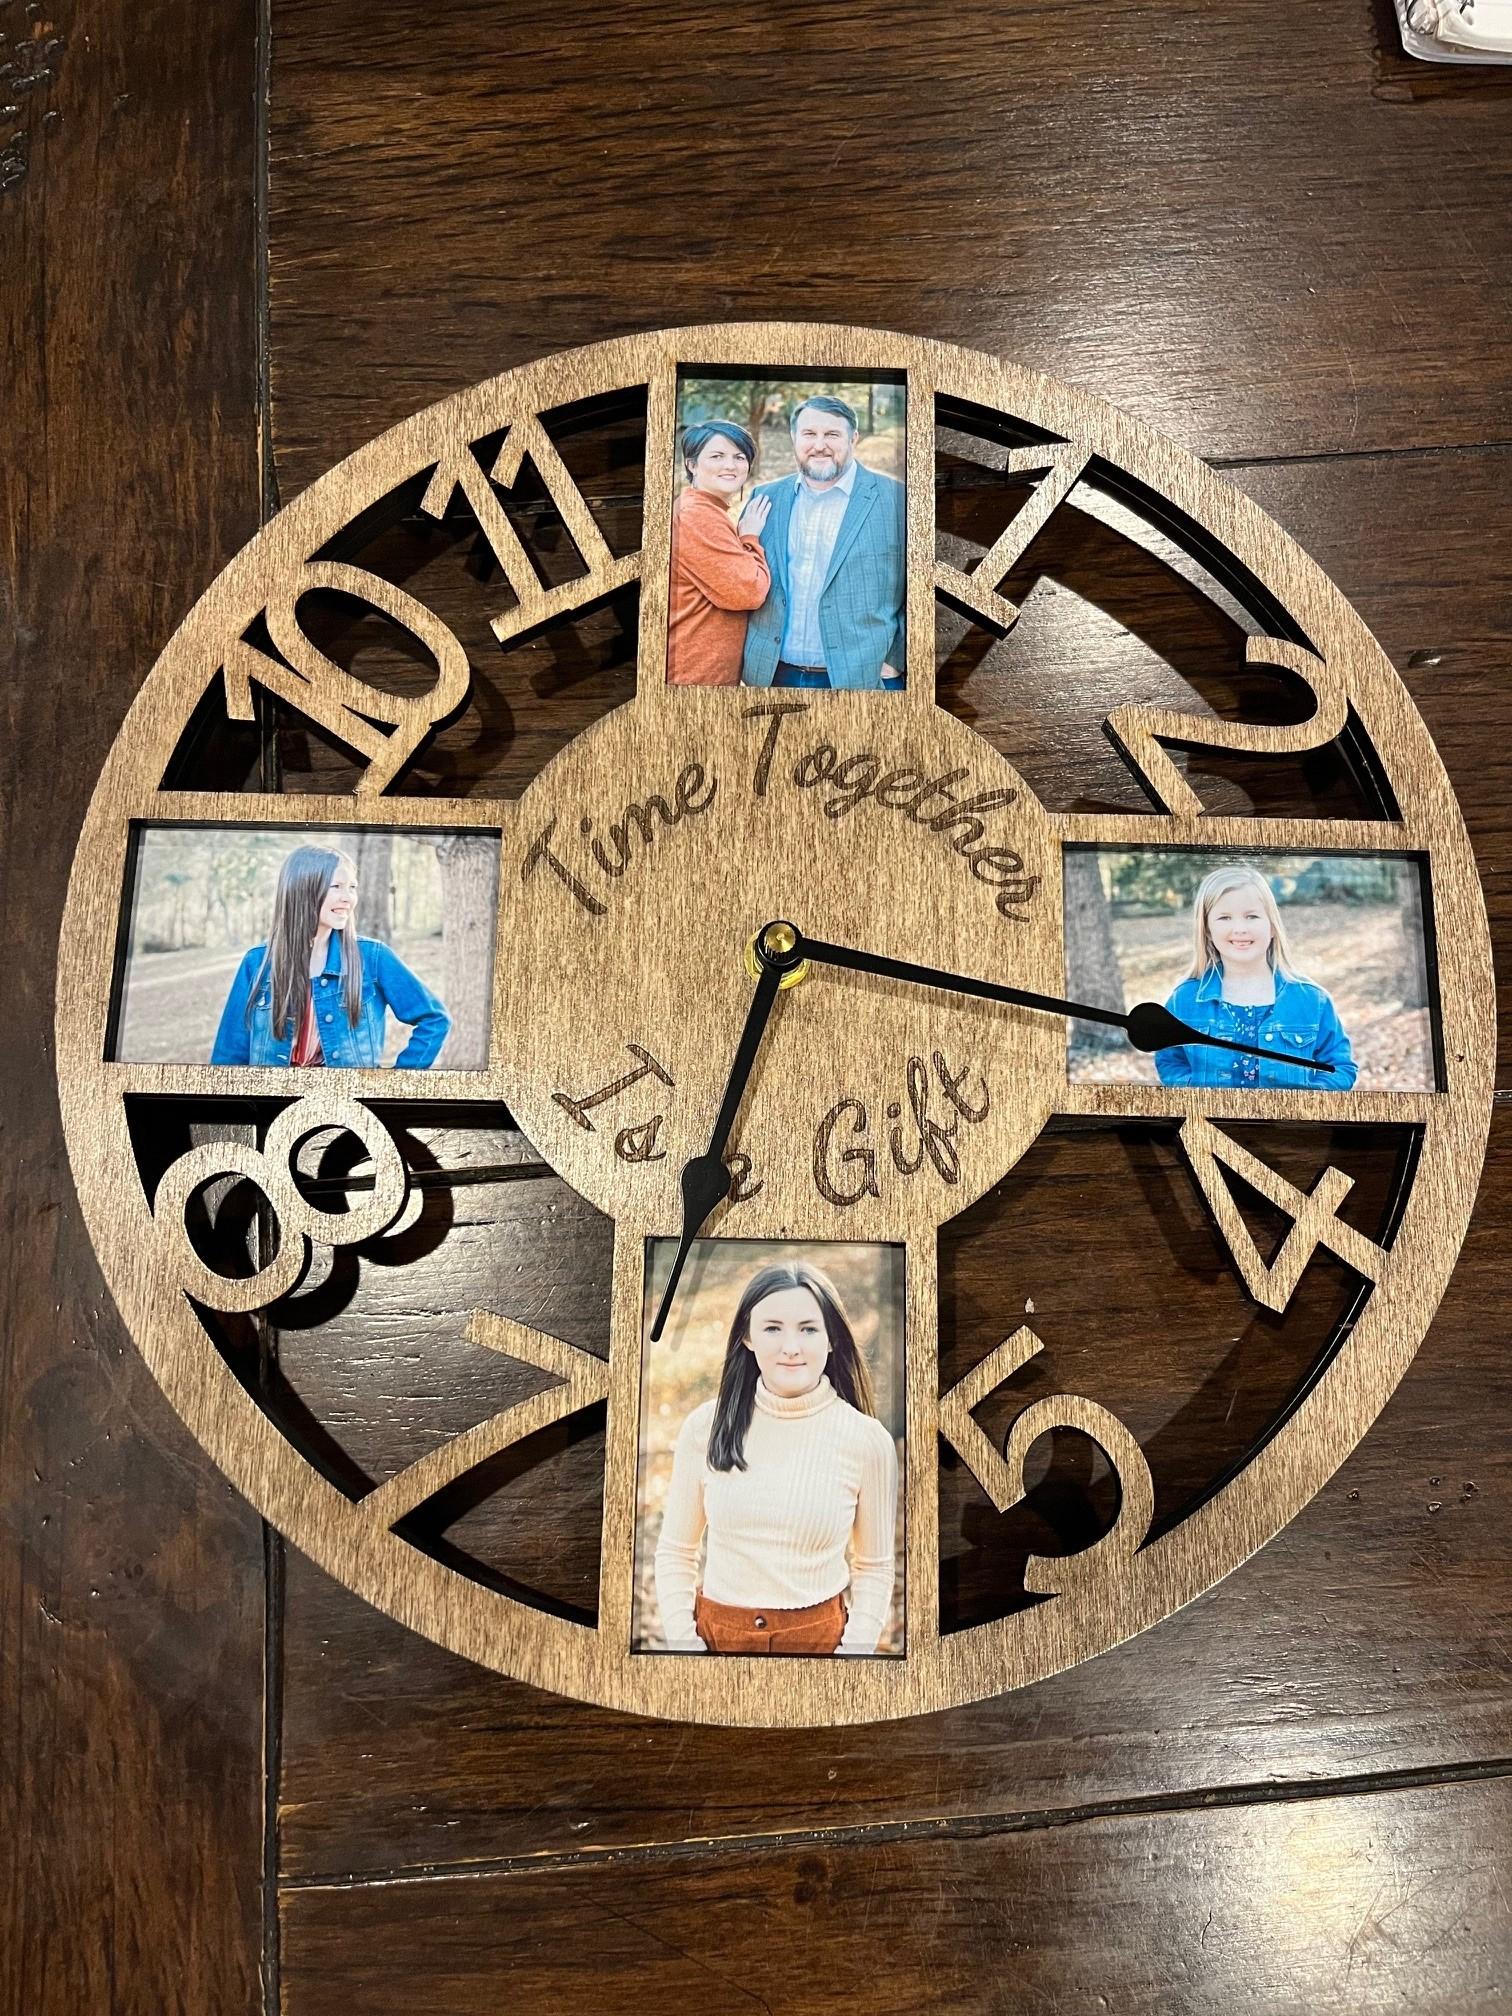
Custom Wooden Clock With Incorporated Picture Frames
by SheltonMaker in Workshop > Laser Cutting
1205 Views, 13 Favorites, 0 Comments
Custom Wooden Clock With Incorporated Picture Frames
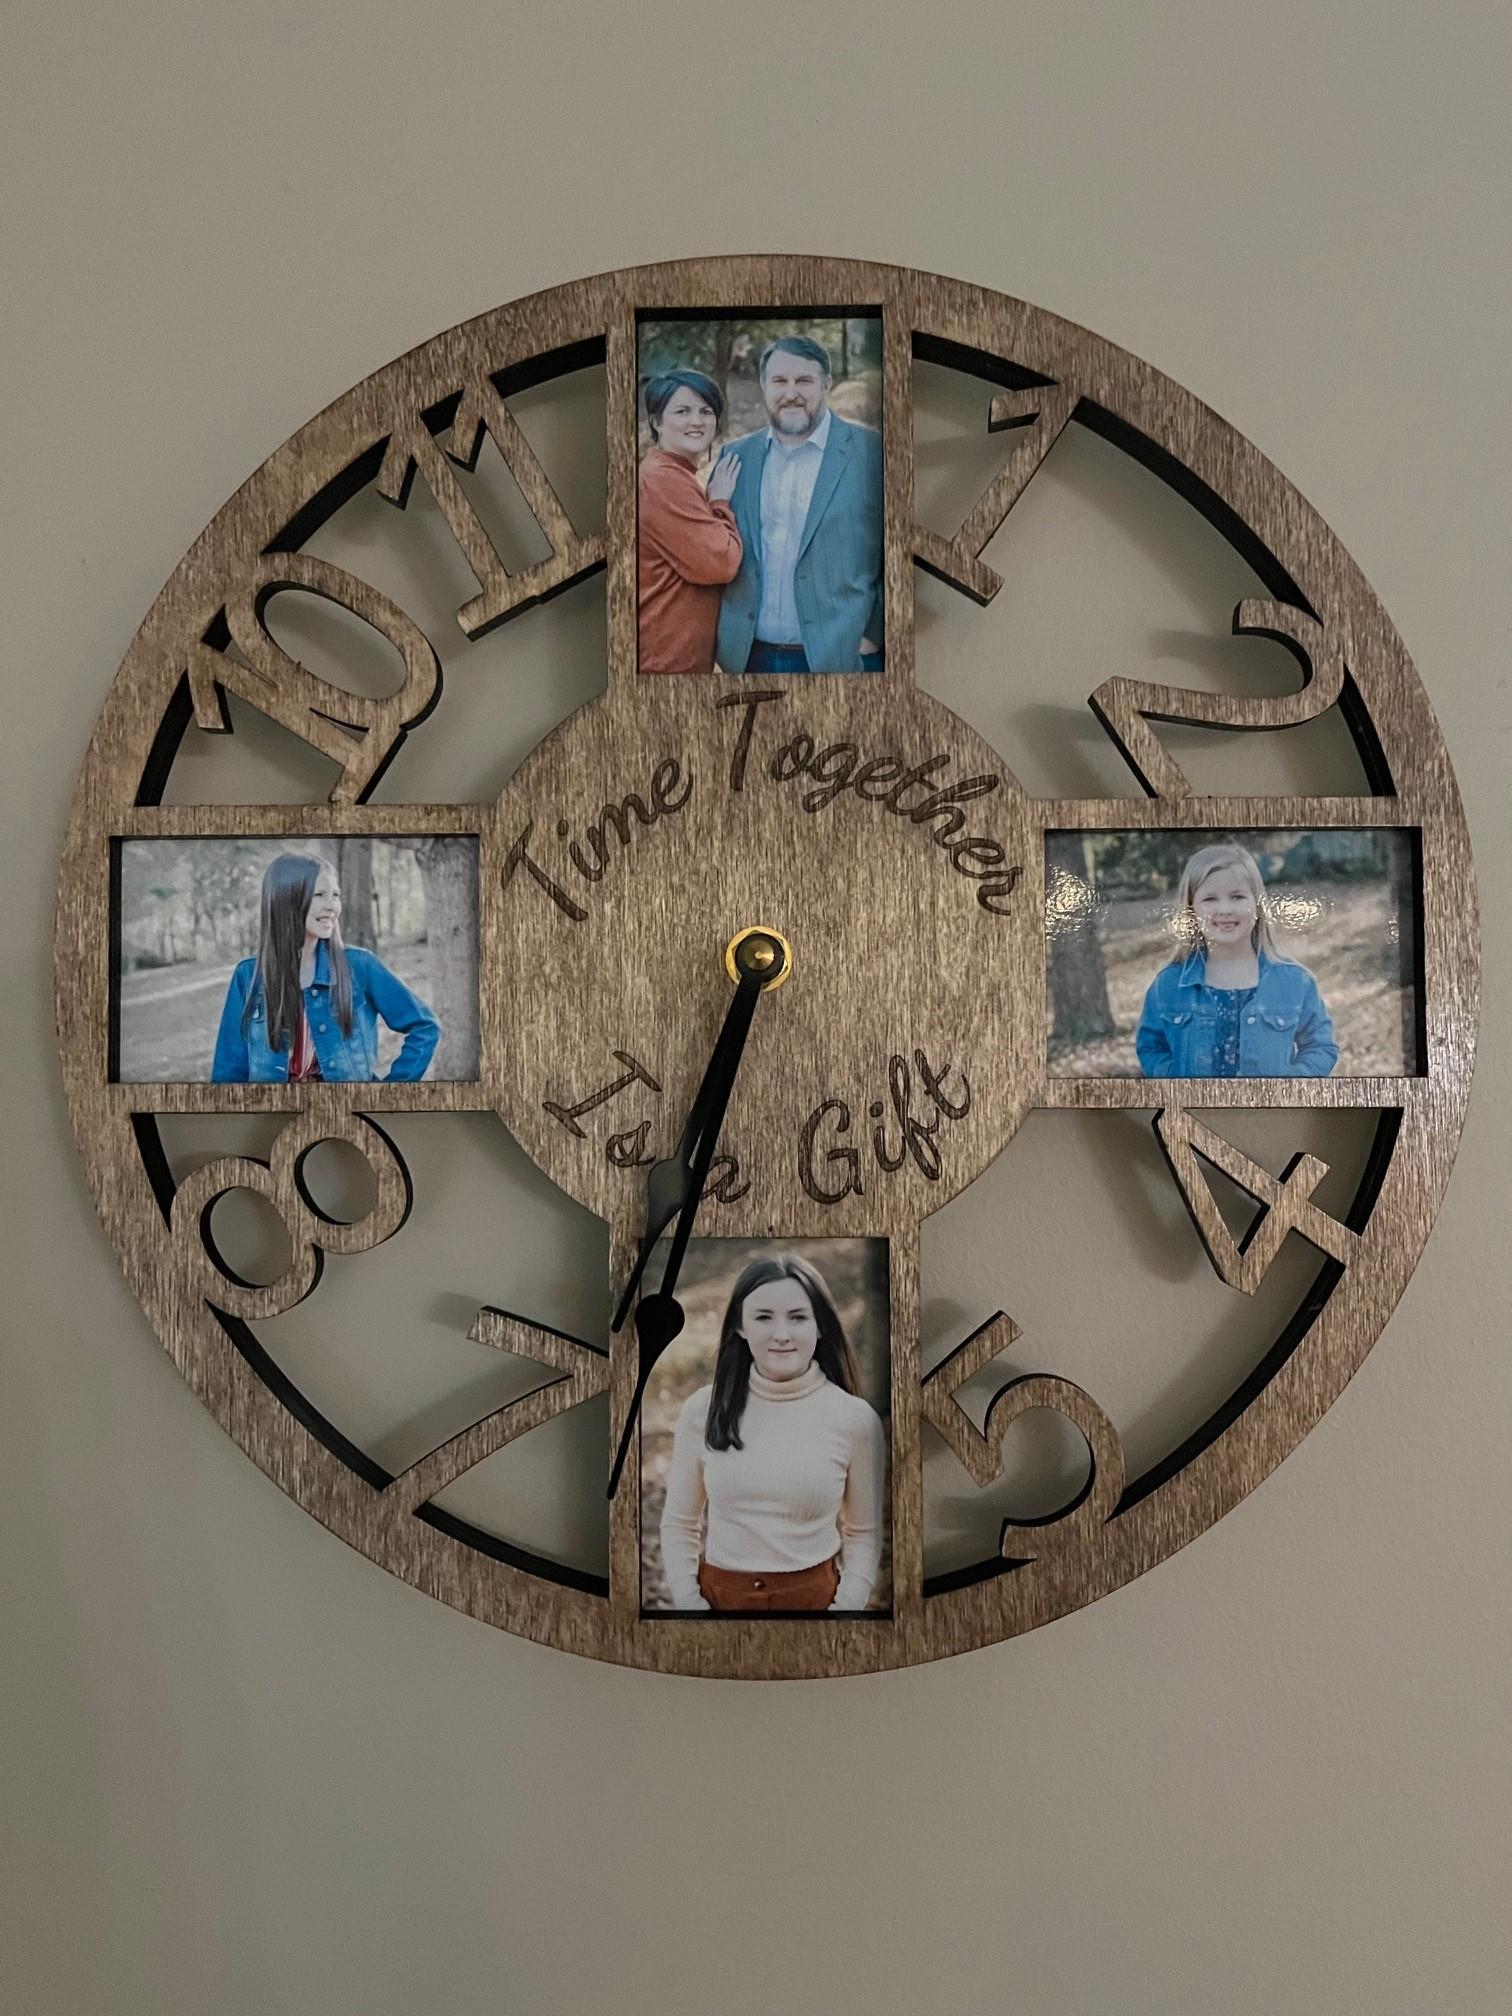
I have been wanting to make a clock since I started working with laser cutting. I happened to be in a Cracker Barrel a couple of months ago and saw a clock that incorporated pictures into its frame. I thought this was a neat idea and with Mother’s Day coming up, I decided this was the perfect time to give it a try.
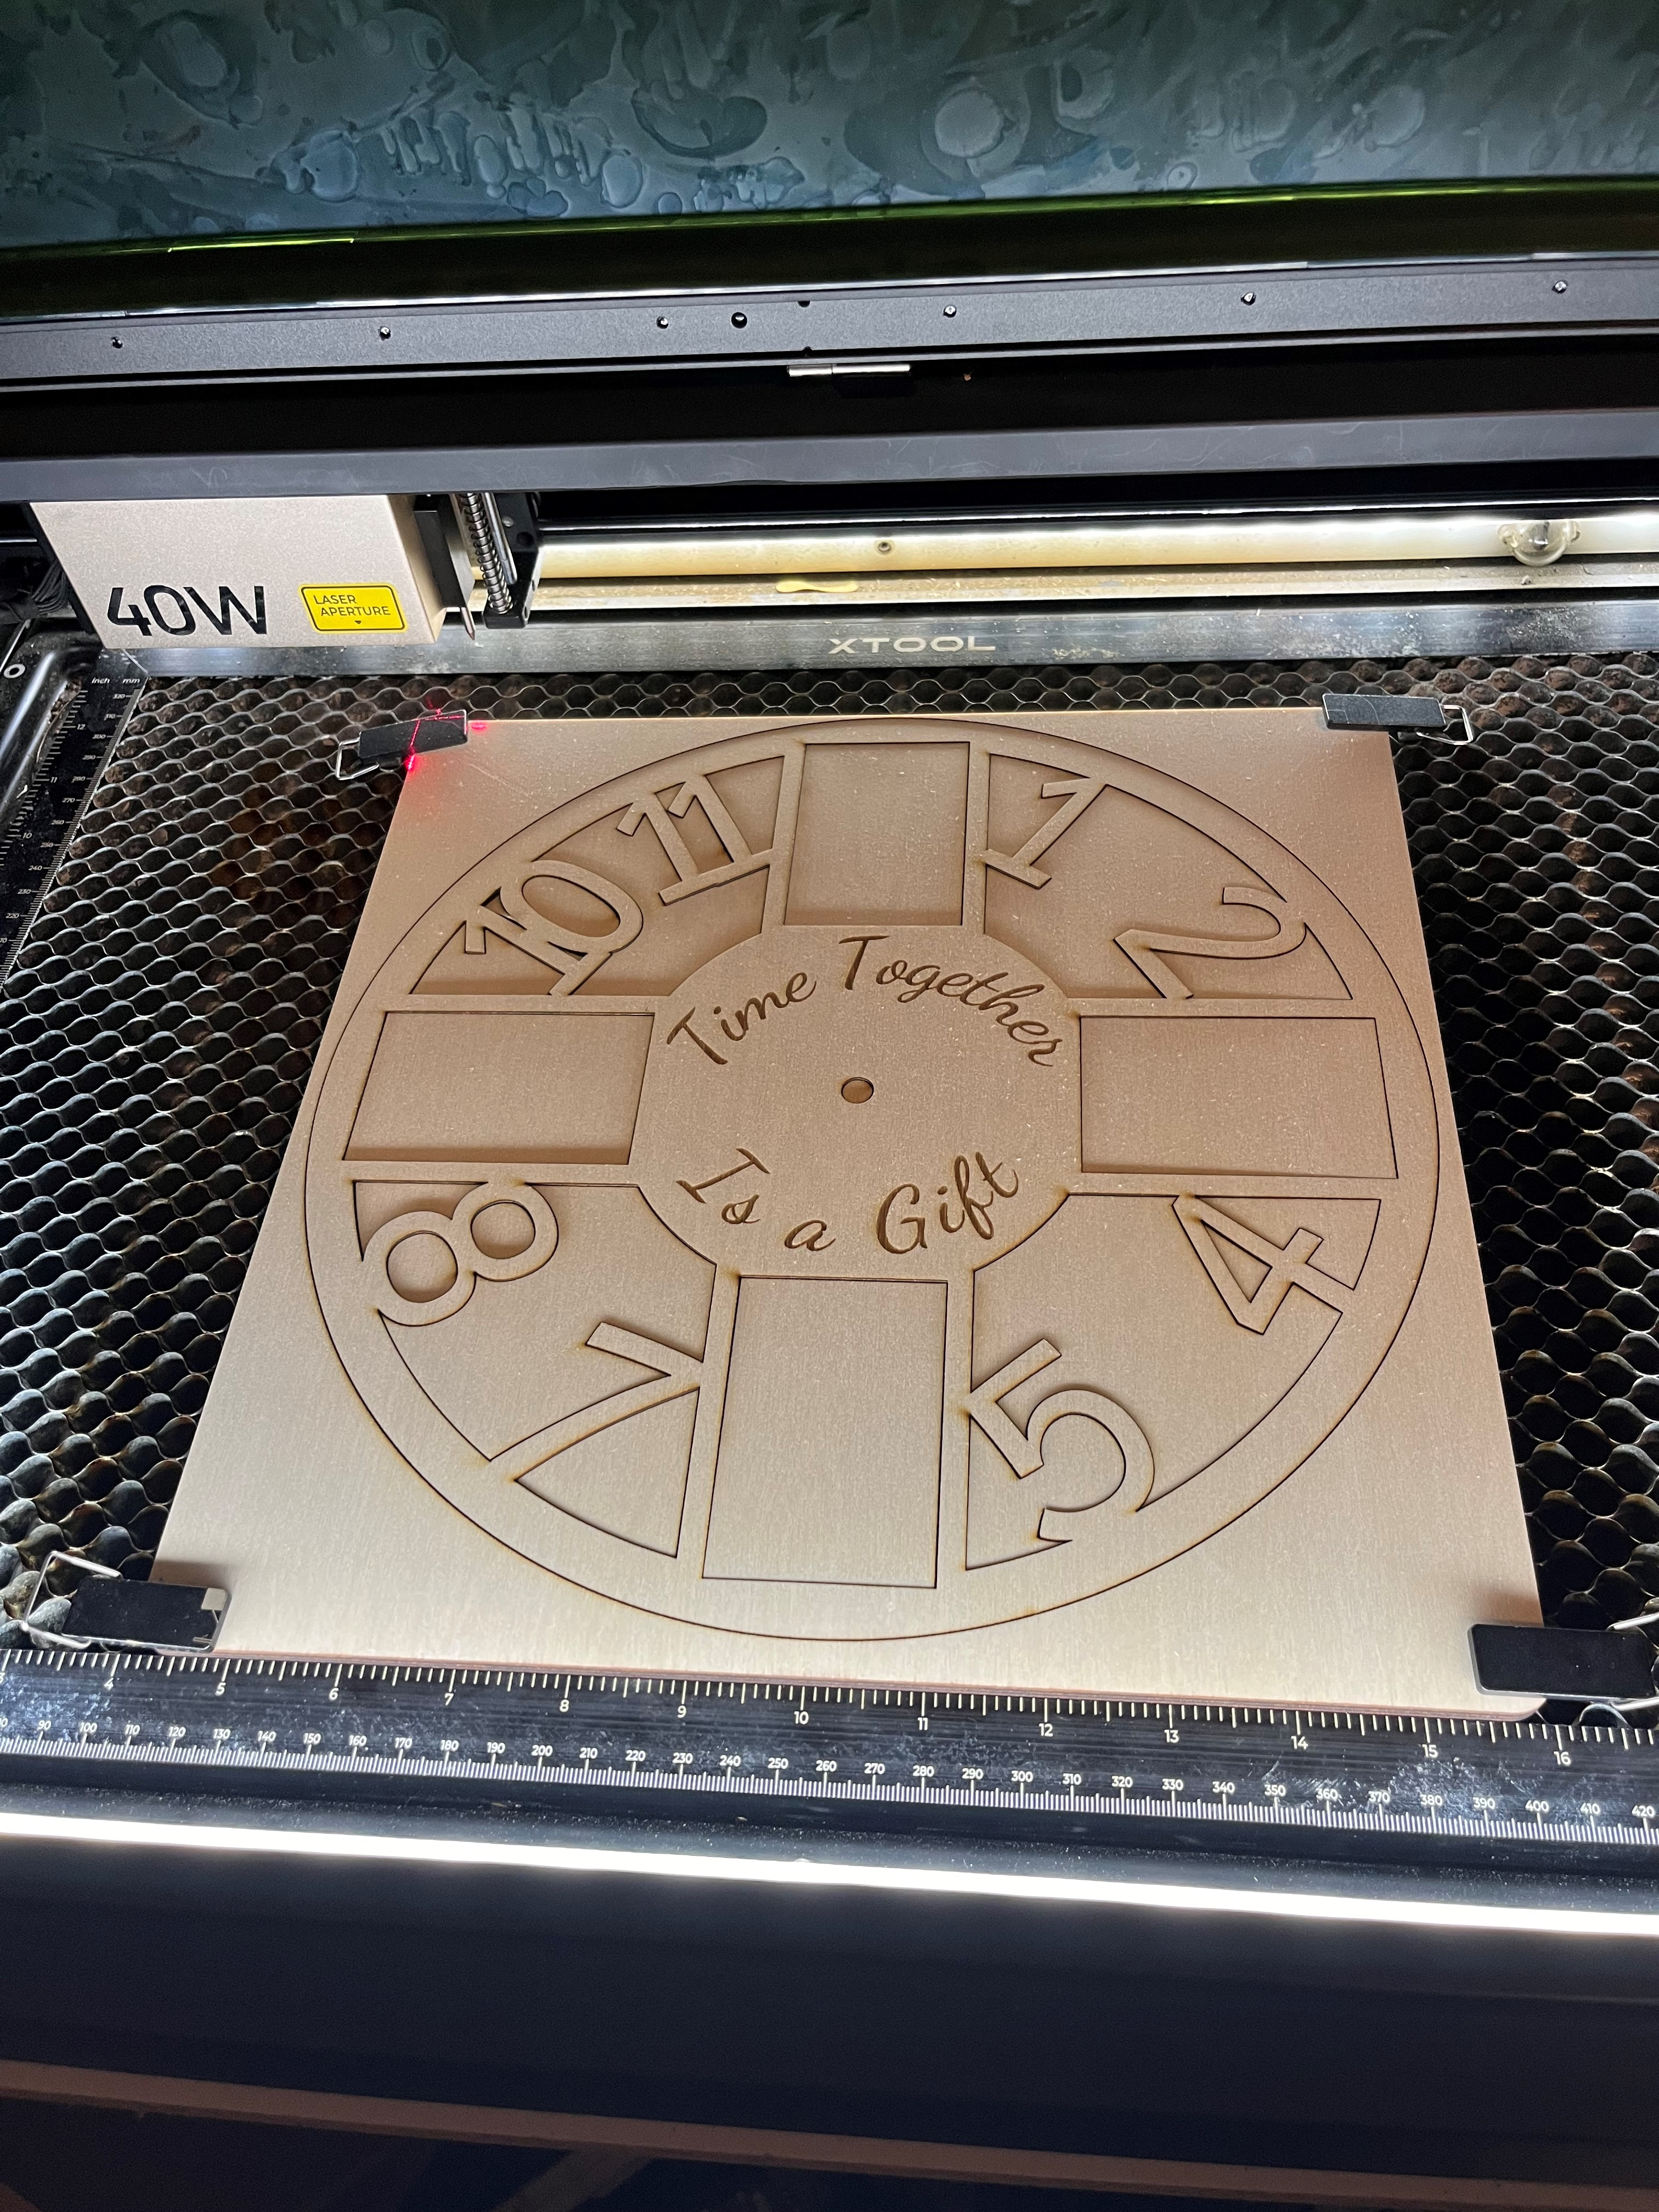
The following are the steps I took to make my clock. The clock design utilizes 2 layers of ¼” basswood plywood and a purchased clock mechanism. It is setup to be displayed by hanging on a wall and has spots for 4 wallet size pictures.
I used xTool Creative Space to do the design, but the process should work similar regardless of your software package.
Supplies
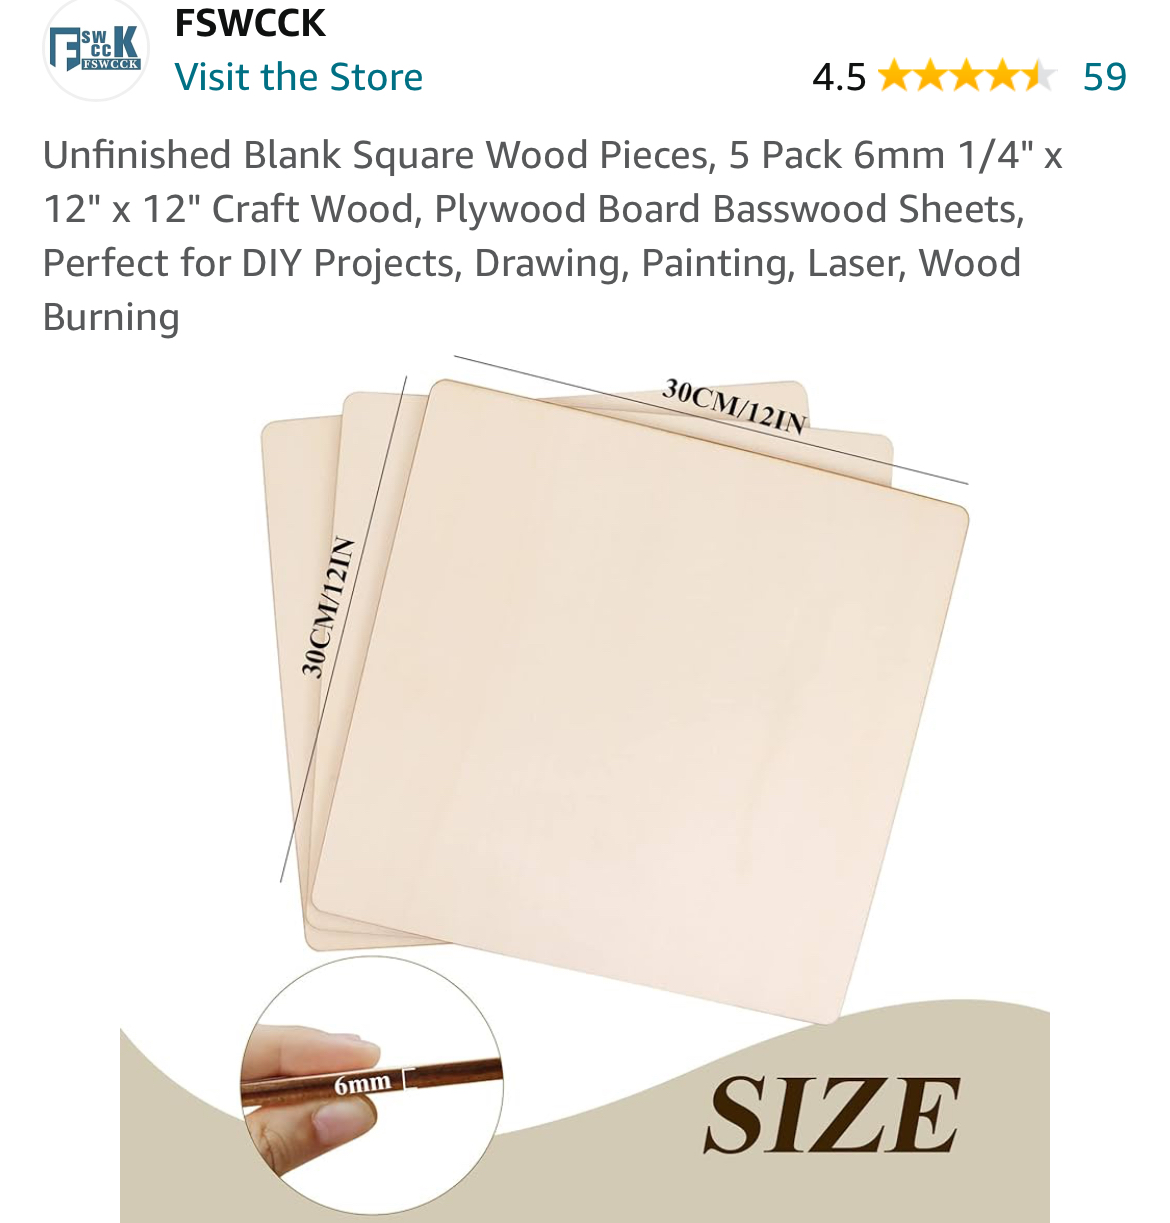
2- 12”x12”x¼” sheets of basswood plywood
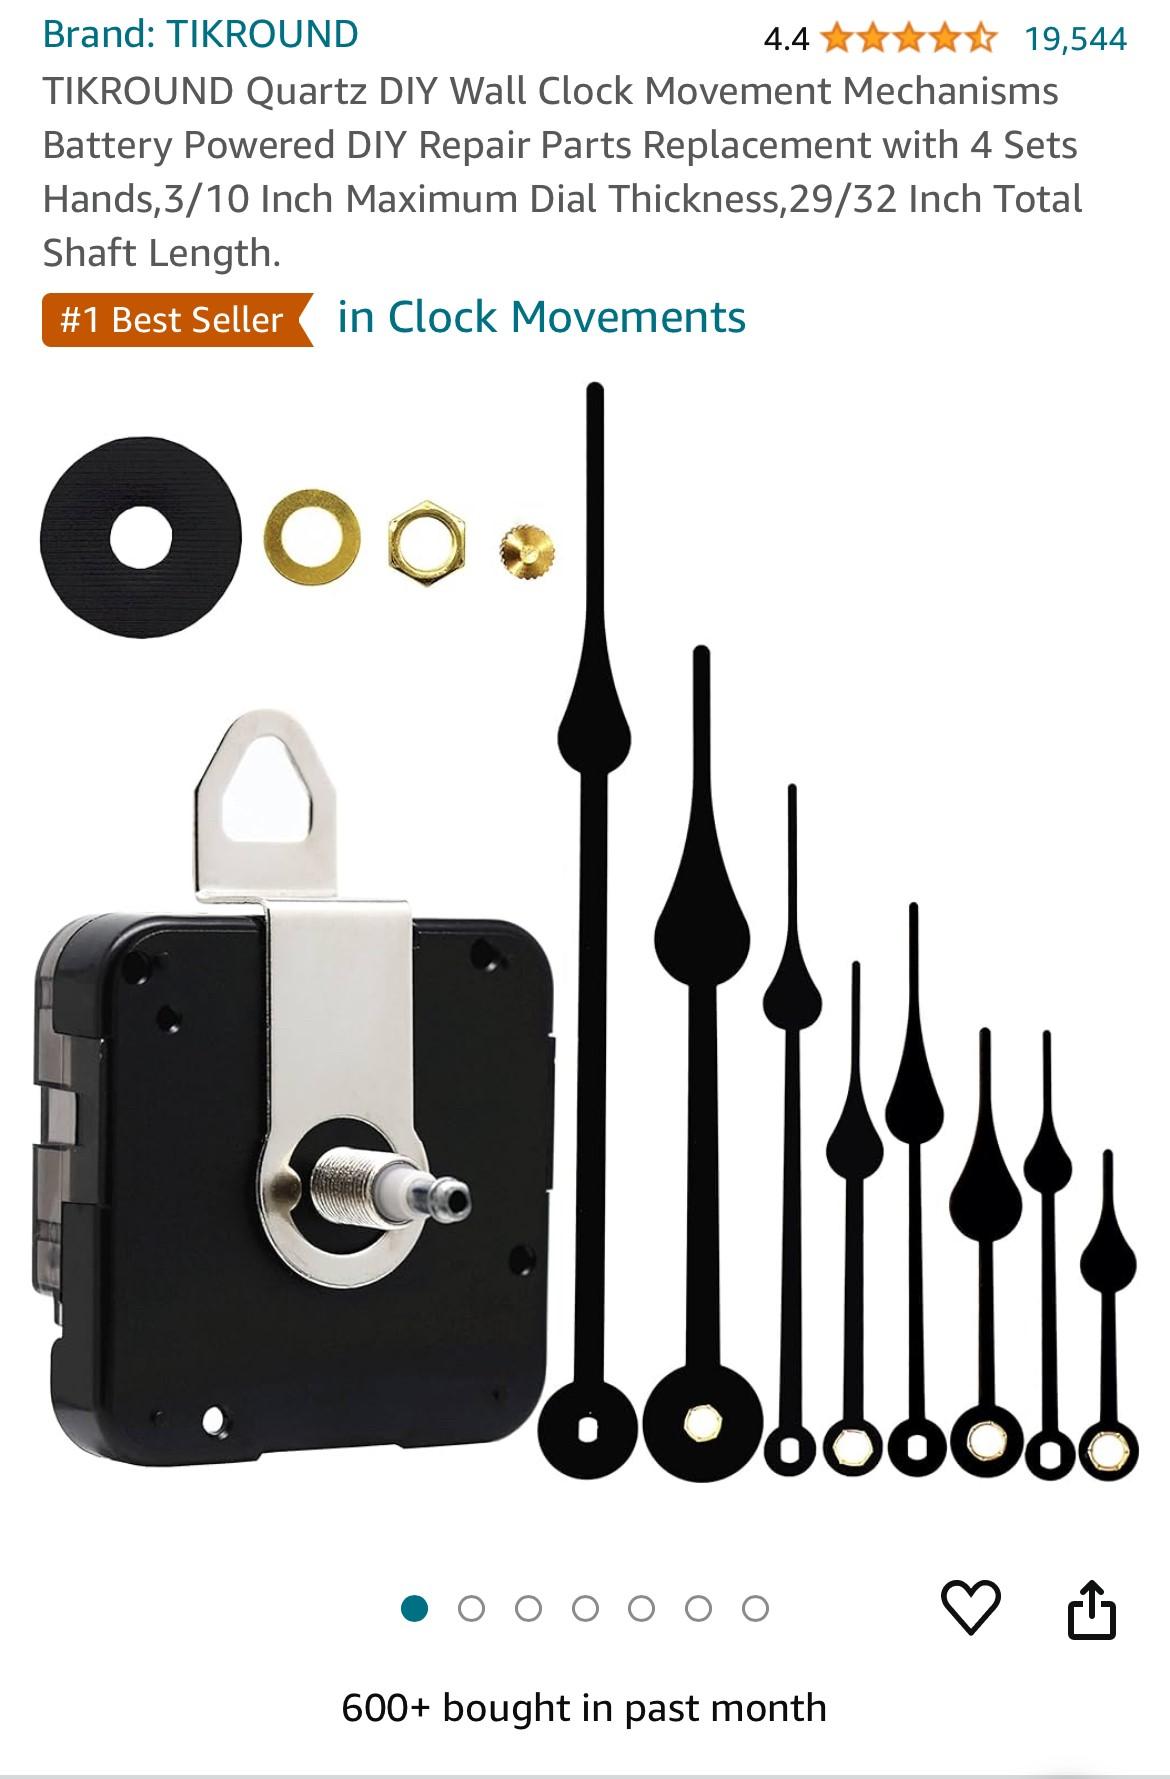
clock mechanism (specific to the thickness of the top layer)
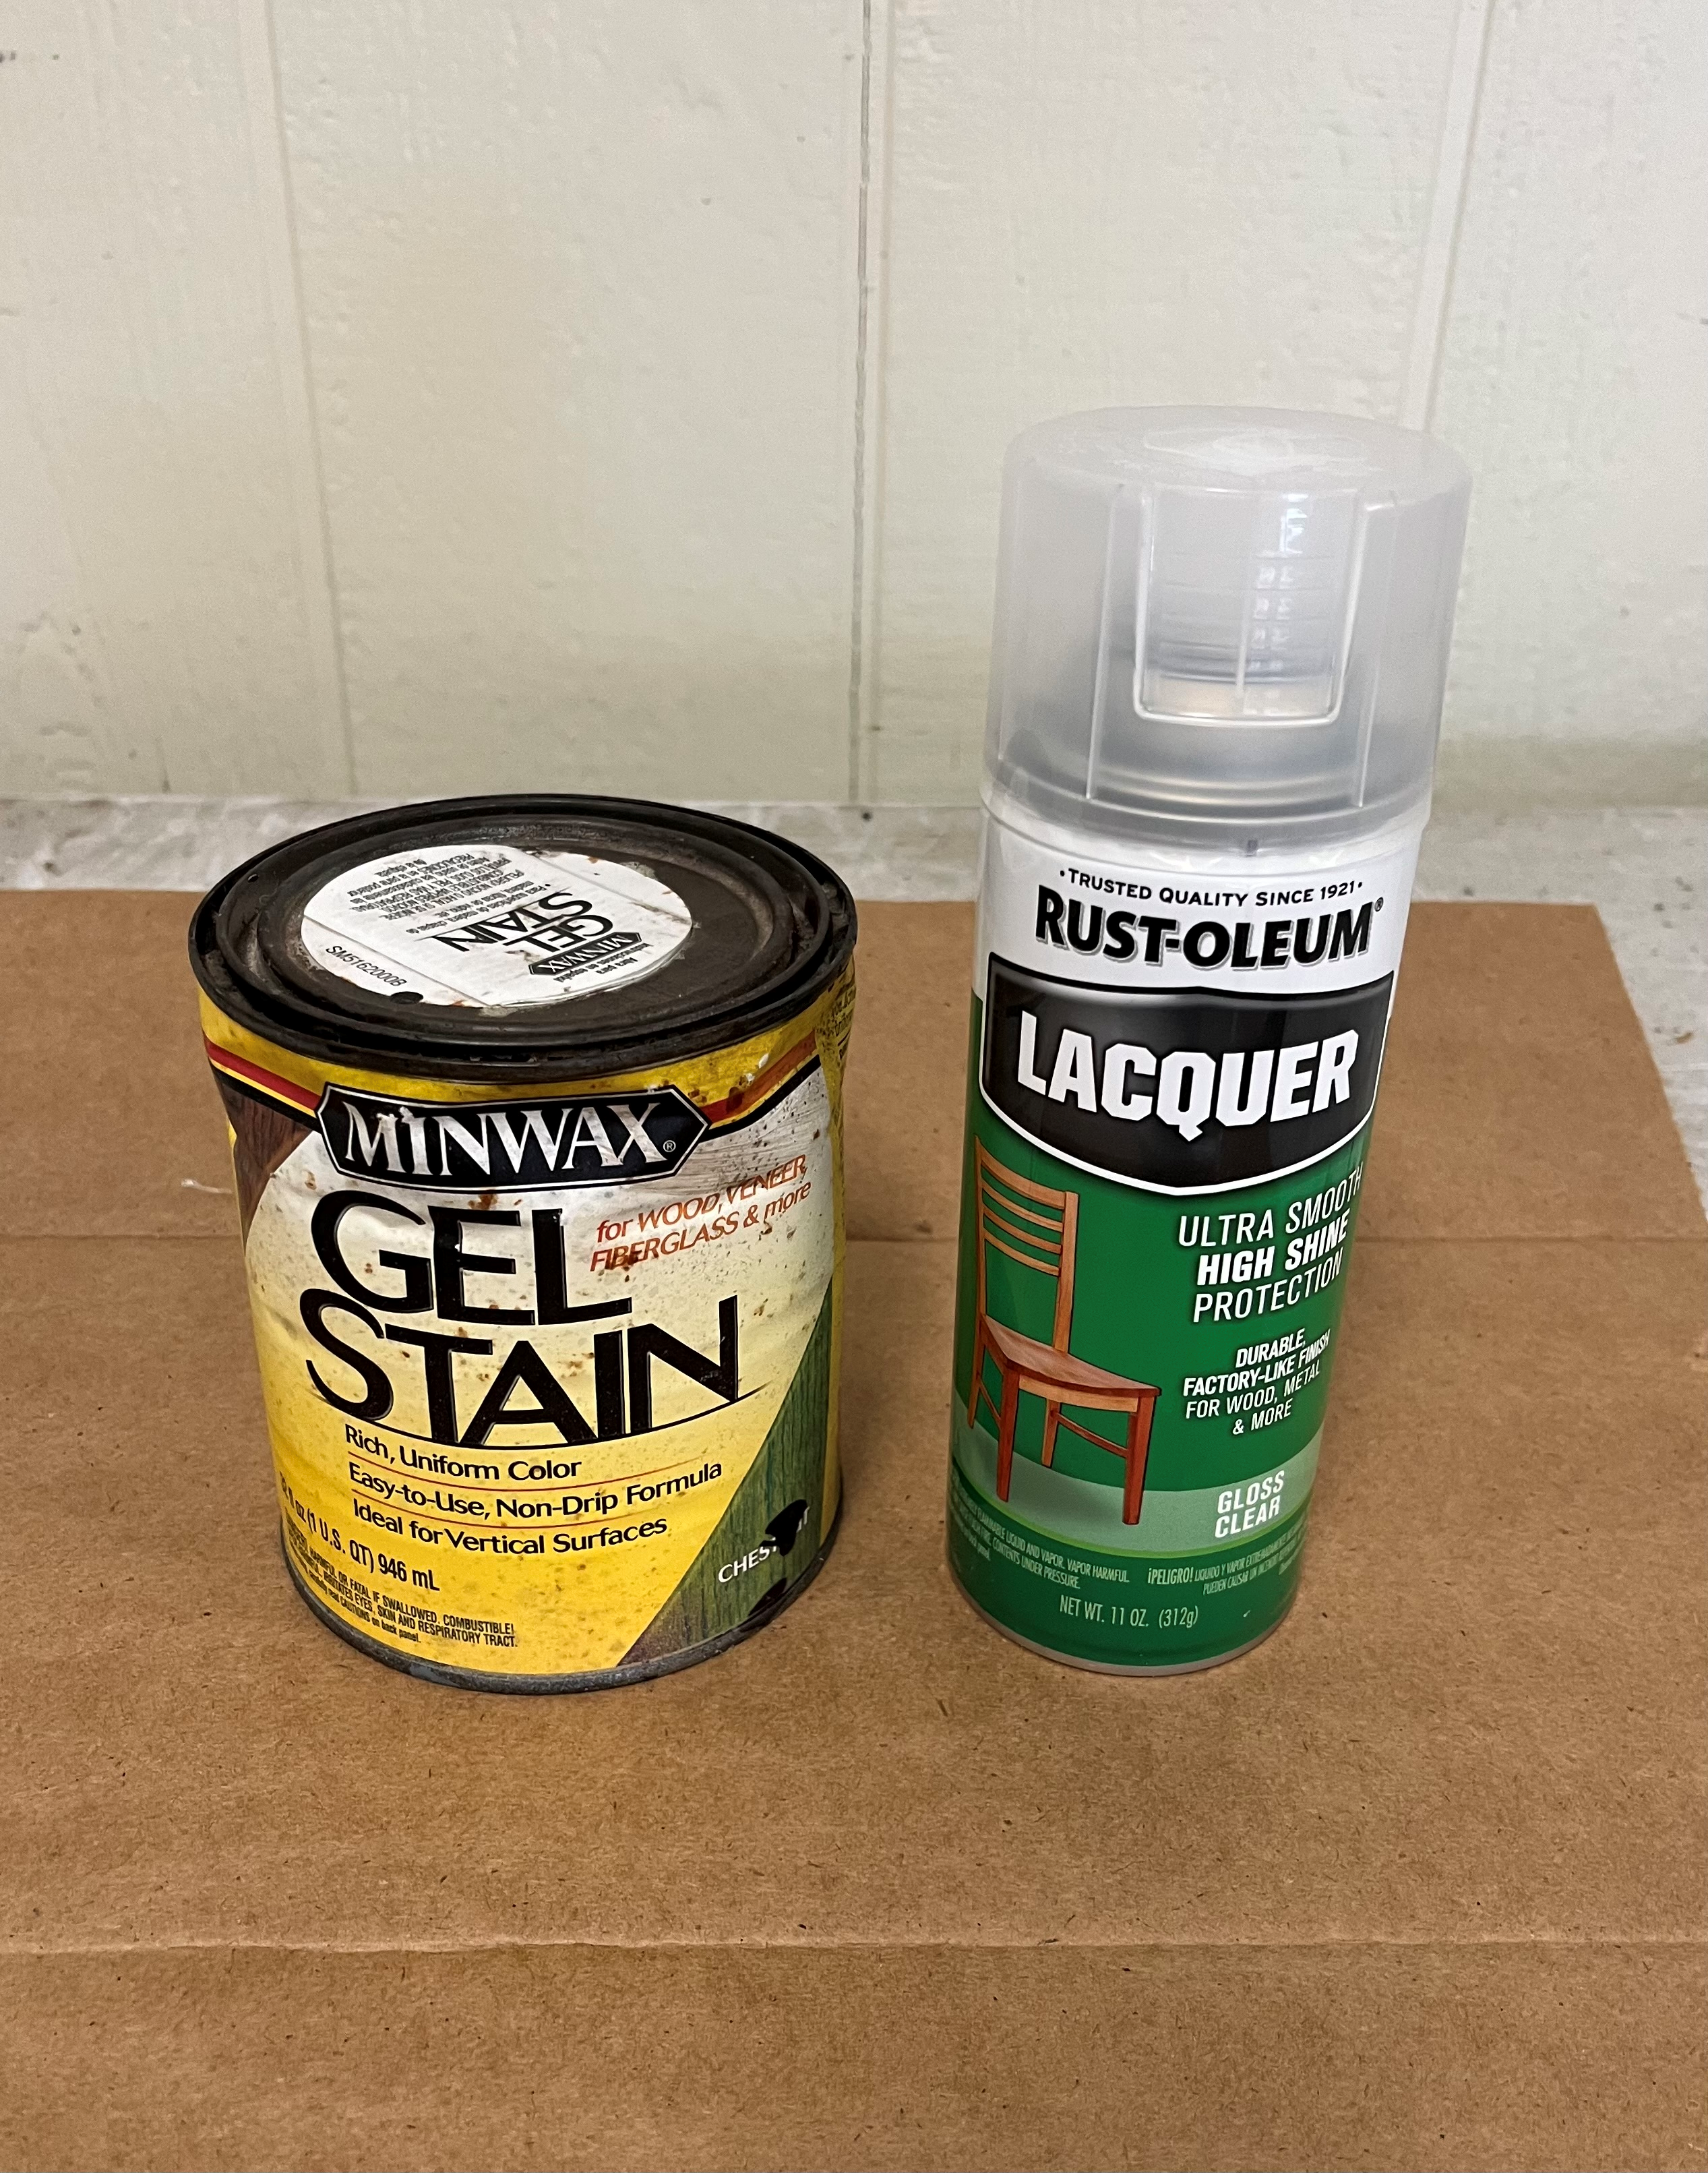
gel stain
clearcoat
cardboard
220 grit sandpaper
xTool S1 40W laser engraver with honeycomb
Creating the Clock Frame
Begin by drawing a 11.5” circle to represent the outside of the clock frame. This was the most practical size for my laser engraver. I used the “Outline” tool to create a circle inset 0.5” from the original. This will be the outer frame.
Creating the Clock Body
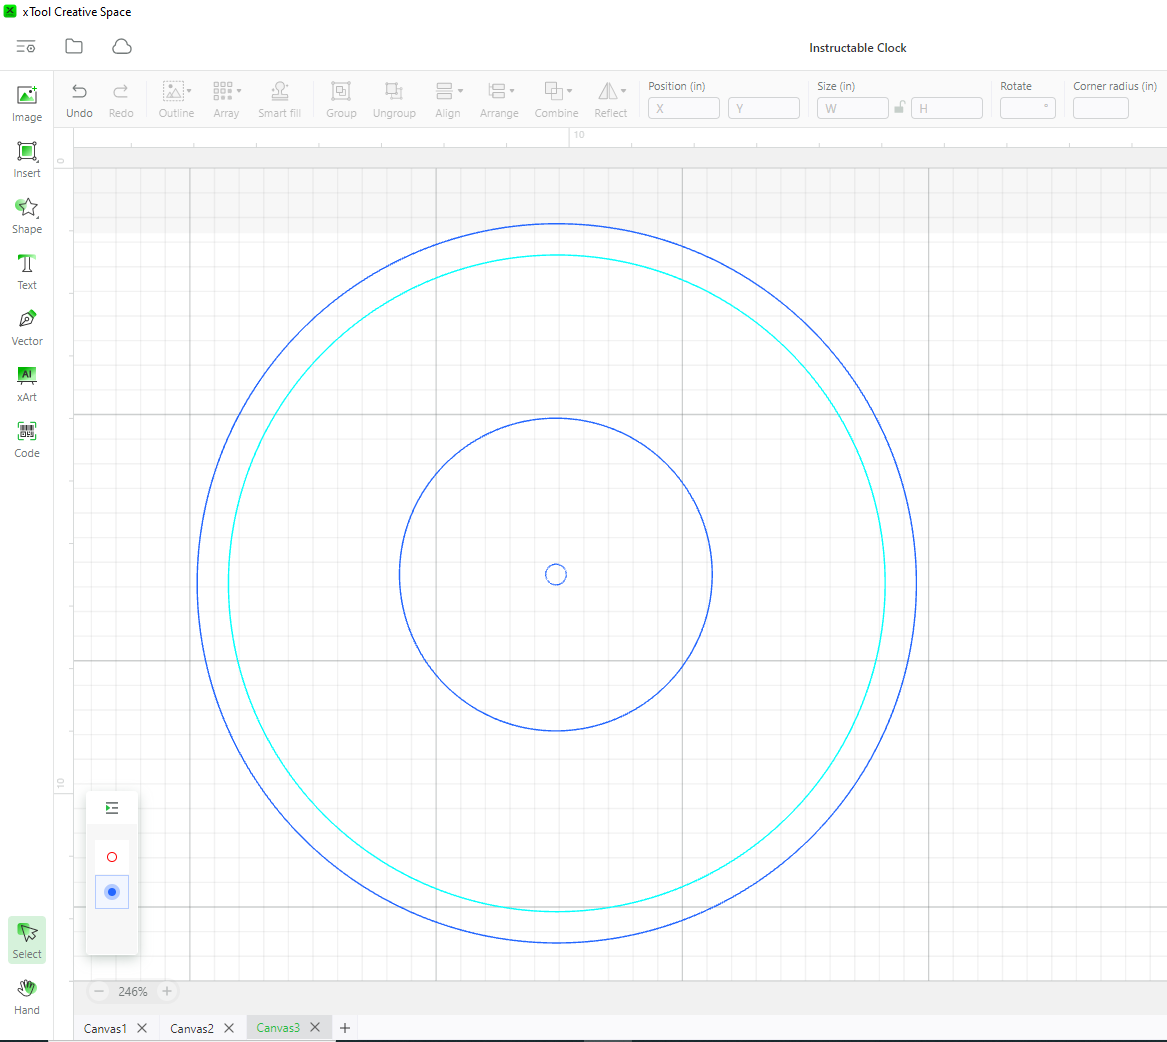
Draw a 4.75” diameter circle in the center of the clock frame with a 0.33” hole in the center. This size should give enough room to hide the mechanism but still accommodate the picture frames.
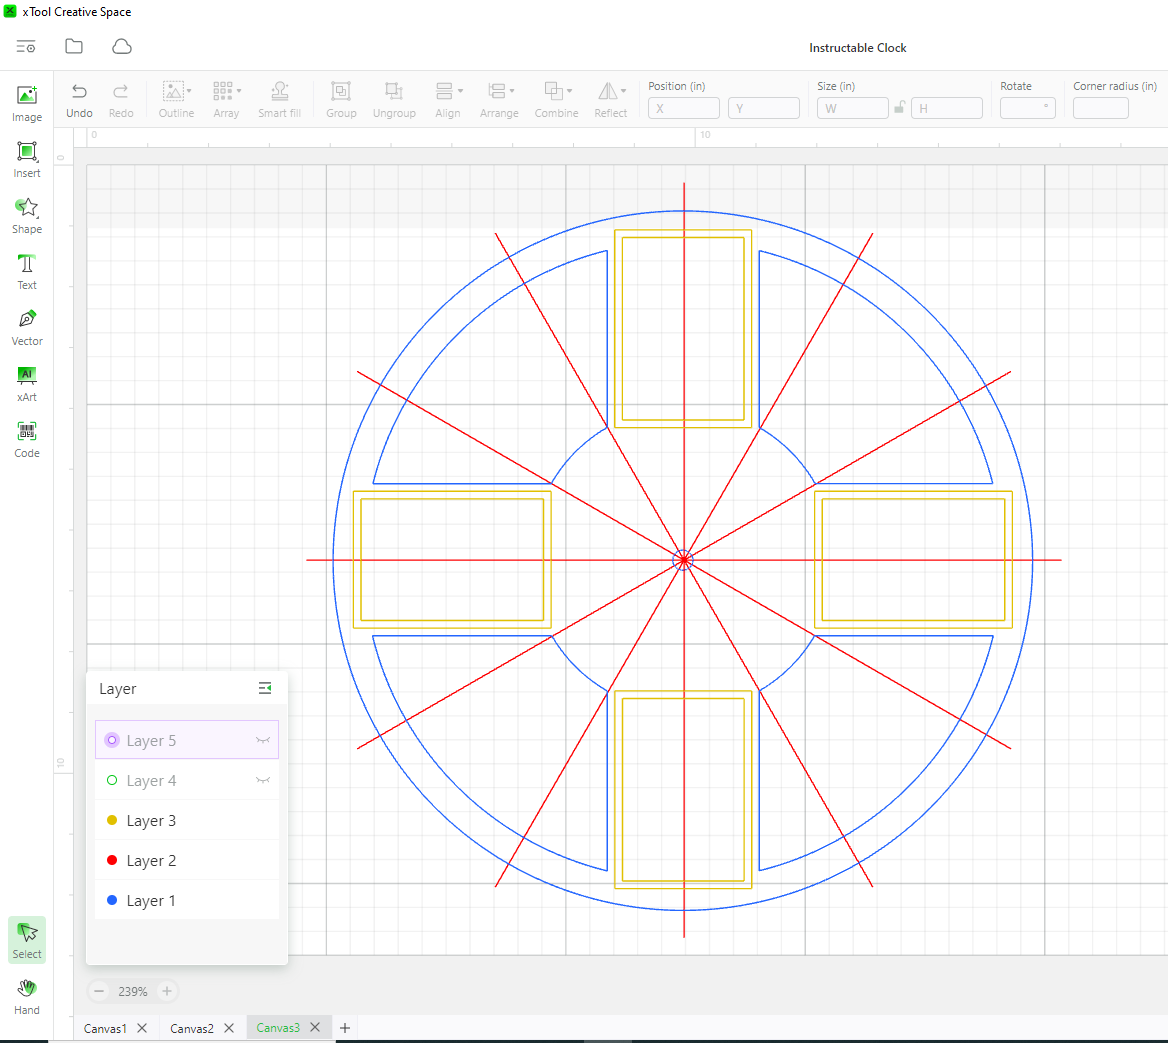
Creating an Array
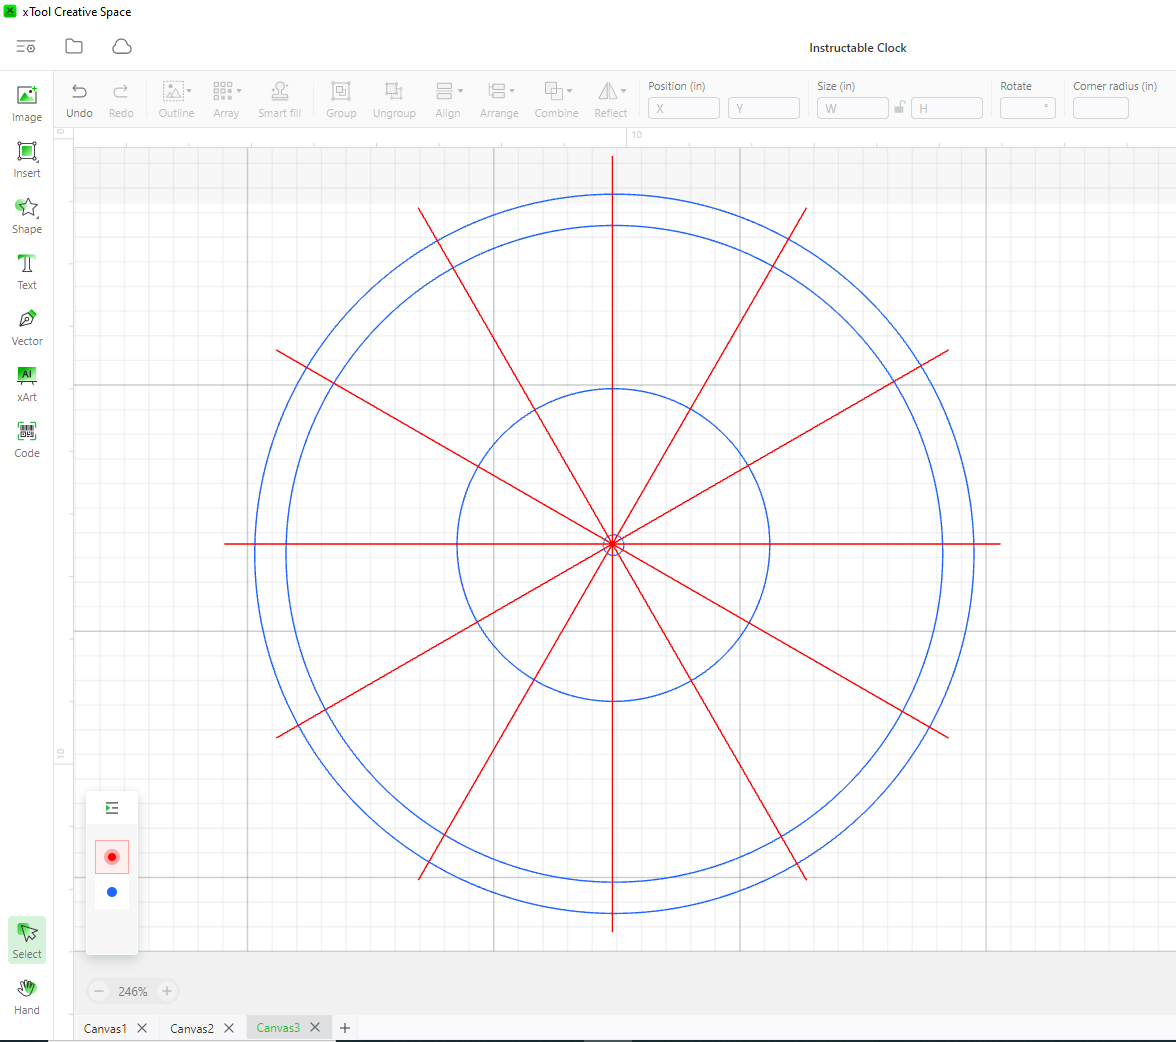
Draw a line that passes through the 12:00 and 6:00 positions. Use the “Array” tool to create a circular array with 6 lines segments centered about the 0.33” hole.
Creating the Picture Frames
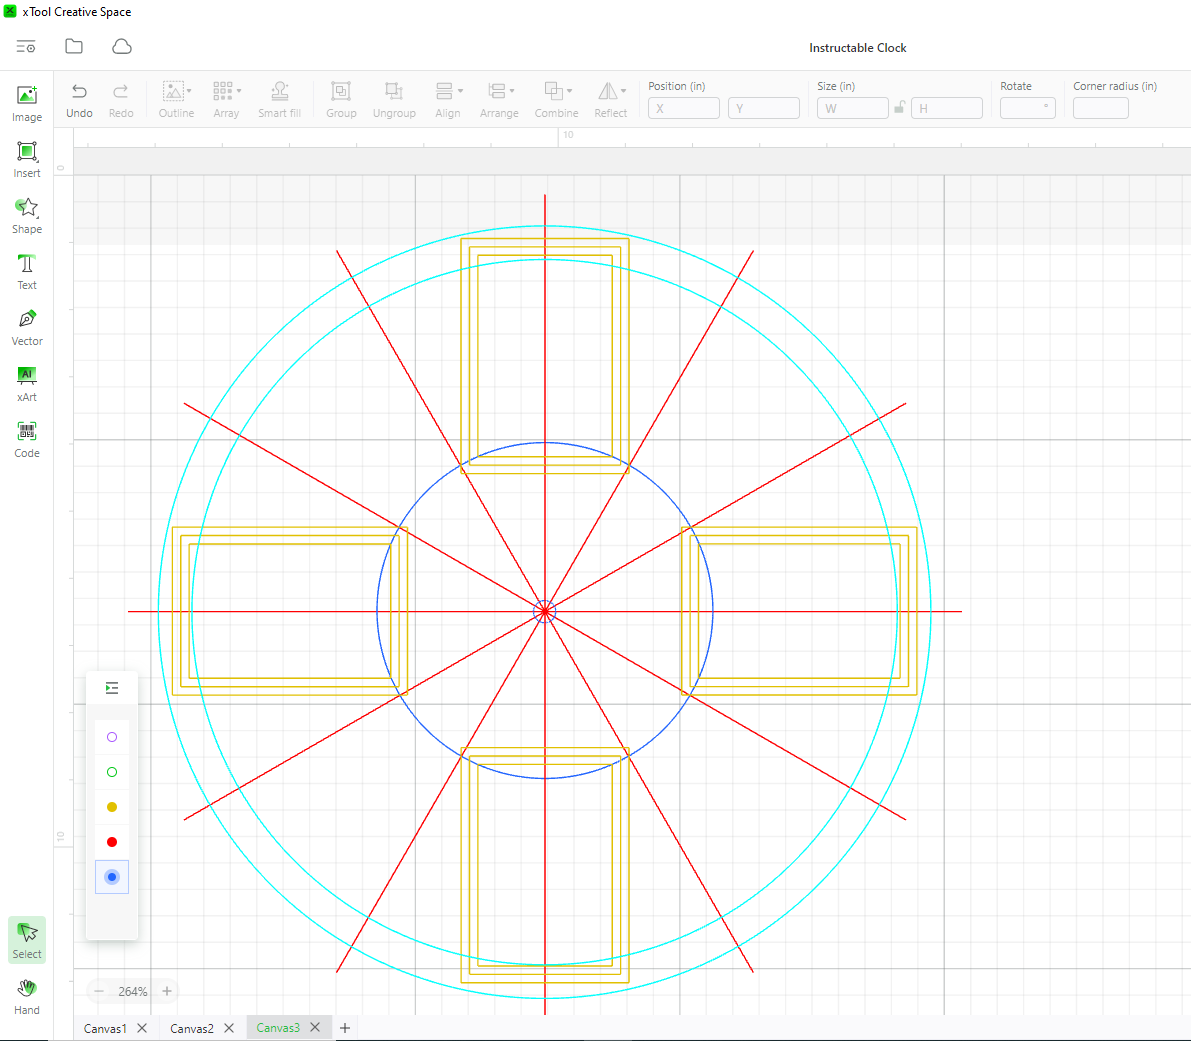
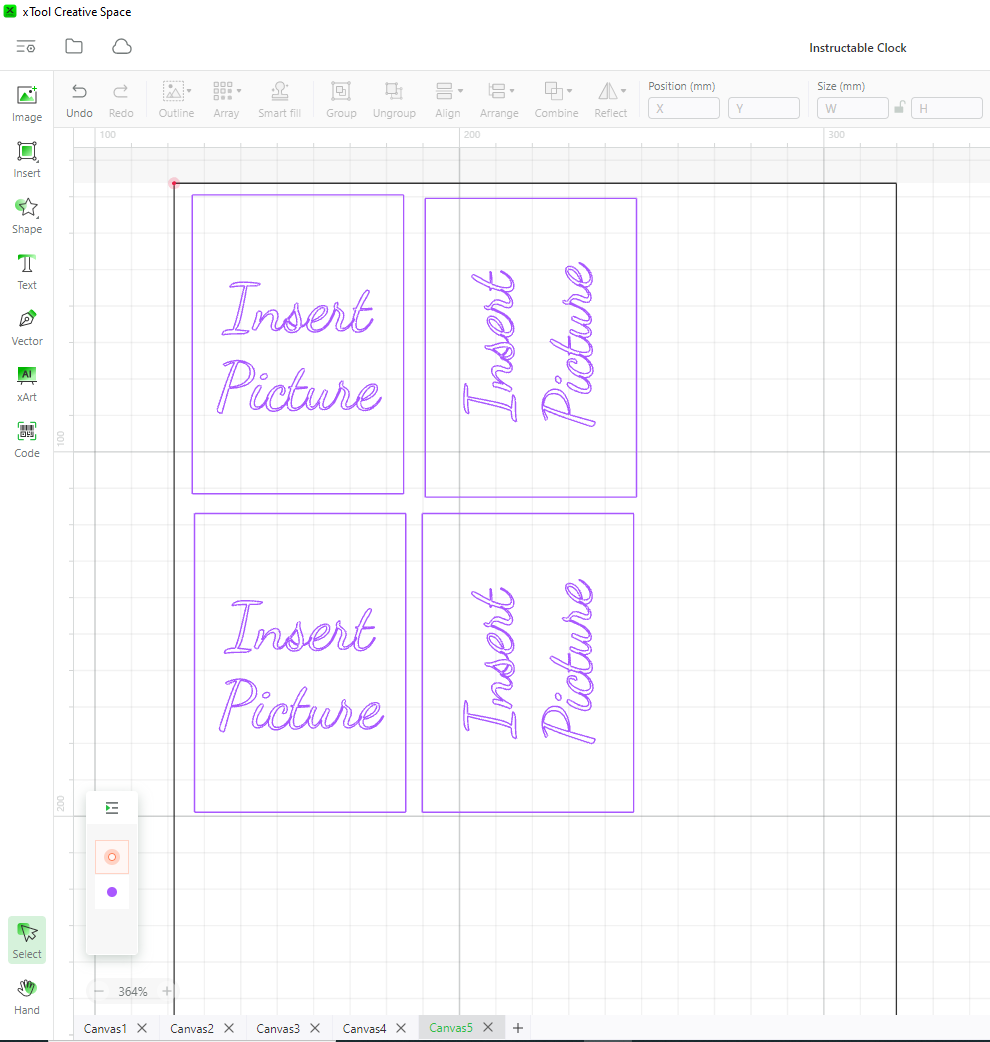
Begin by drawing a 3.75” x 2.75” rectangle to represent the outside of the picture frame. Use the “Outline” tool to create rectangles inset 0.125” and 0.25” from the original. Group the rectangles together to ensure they do not get out of alignment. Using the line arrays as a guide place the grouped rectangles in the 3:00 position. I lined the corners of the inner (3.25” x 2.25”) rectangle with the 4.75” circle. Make sure the outer (3.75” x 2.75”) rectangle does not protrude beyond the outside of the clock frame. Copy and paste the grouped rectangles and place in the 6:00, 9:00, and 12:00 positions in a similar manner.
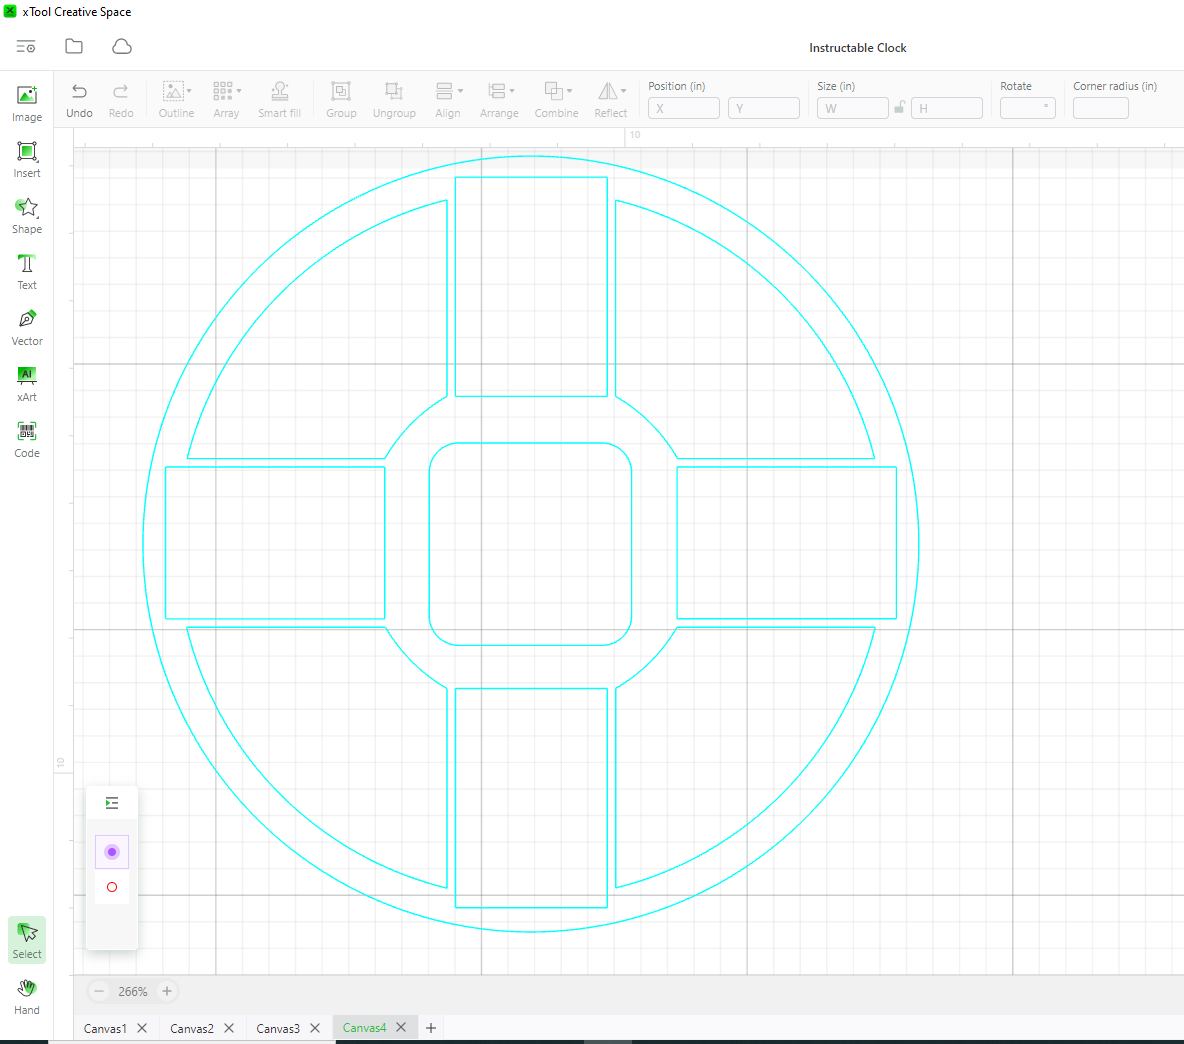
Combining Components
.PNG)
Ungroup the rectangles.
Use the “Combine” tools to unite the 11.5”, 10.5”, and 4.75” circles with the outer (3.75” x 2.75”) rectangle.
Create Duplicate and Finish Combining

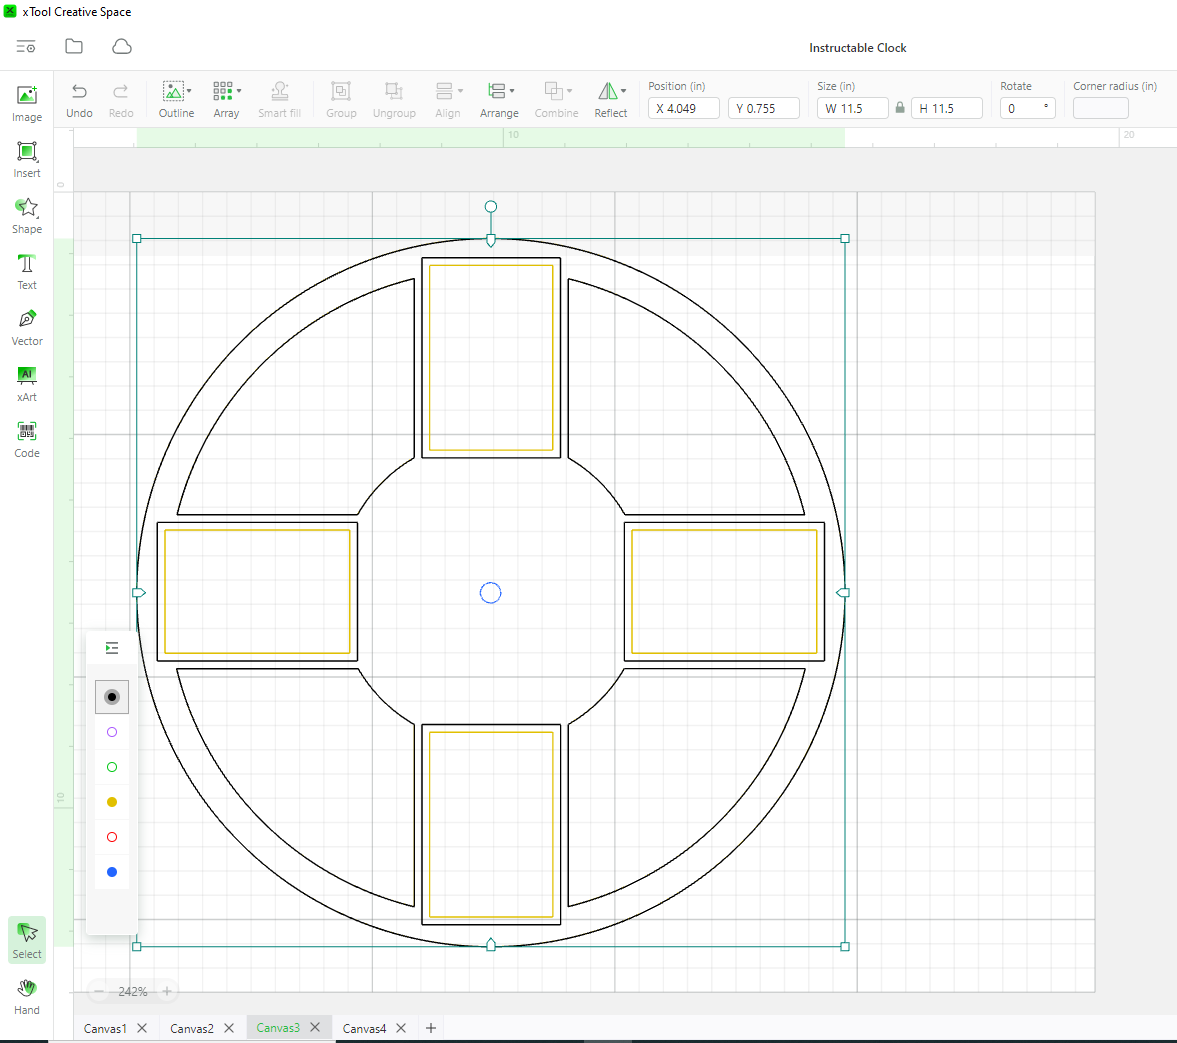
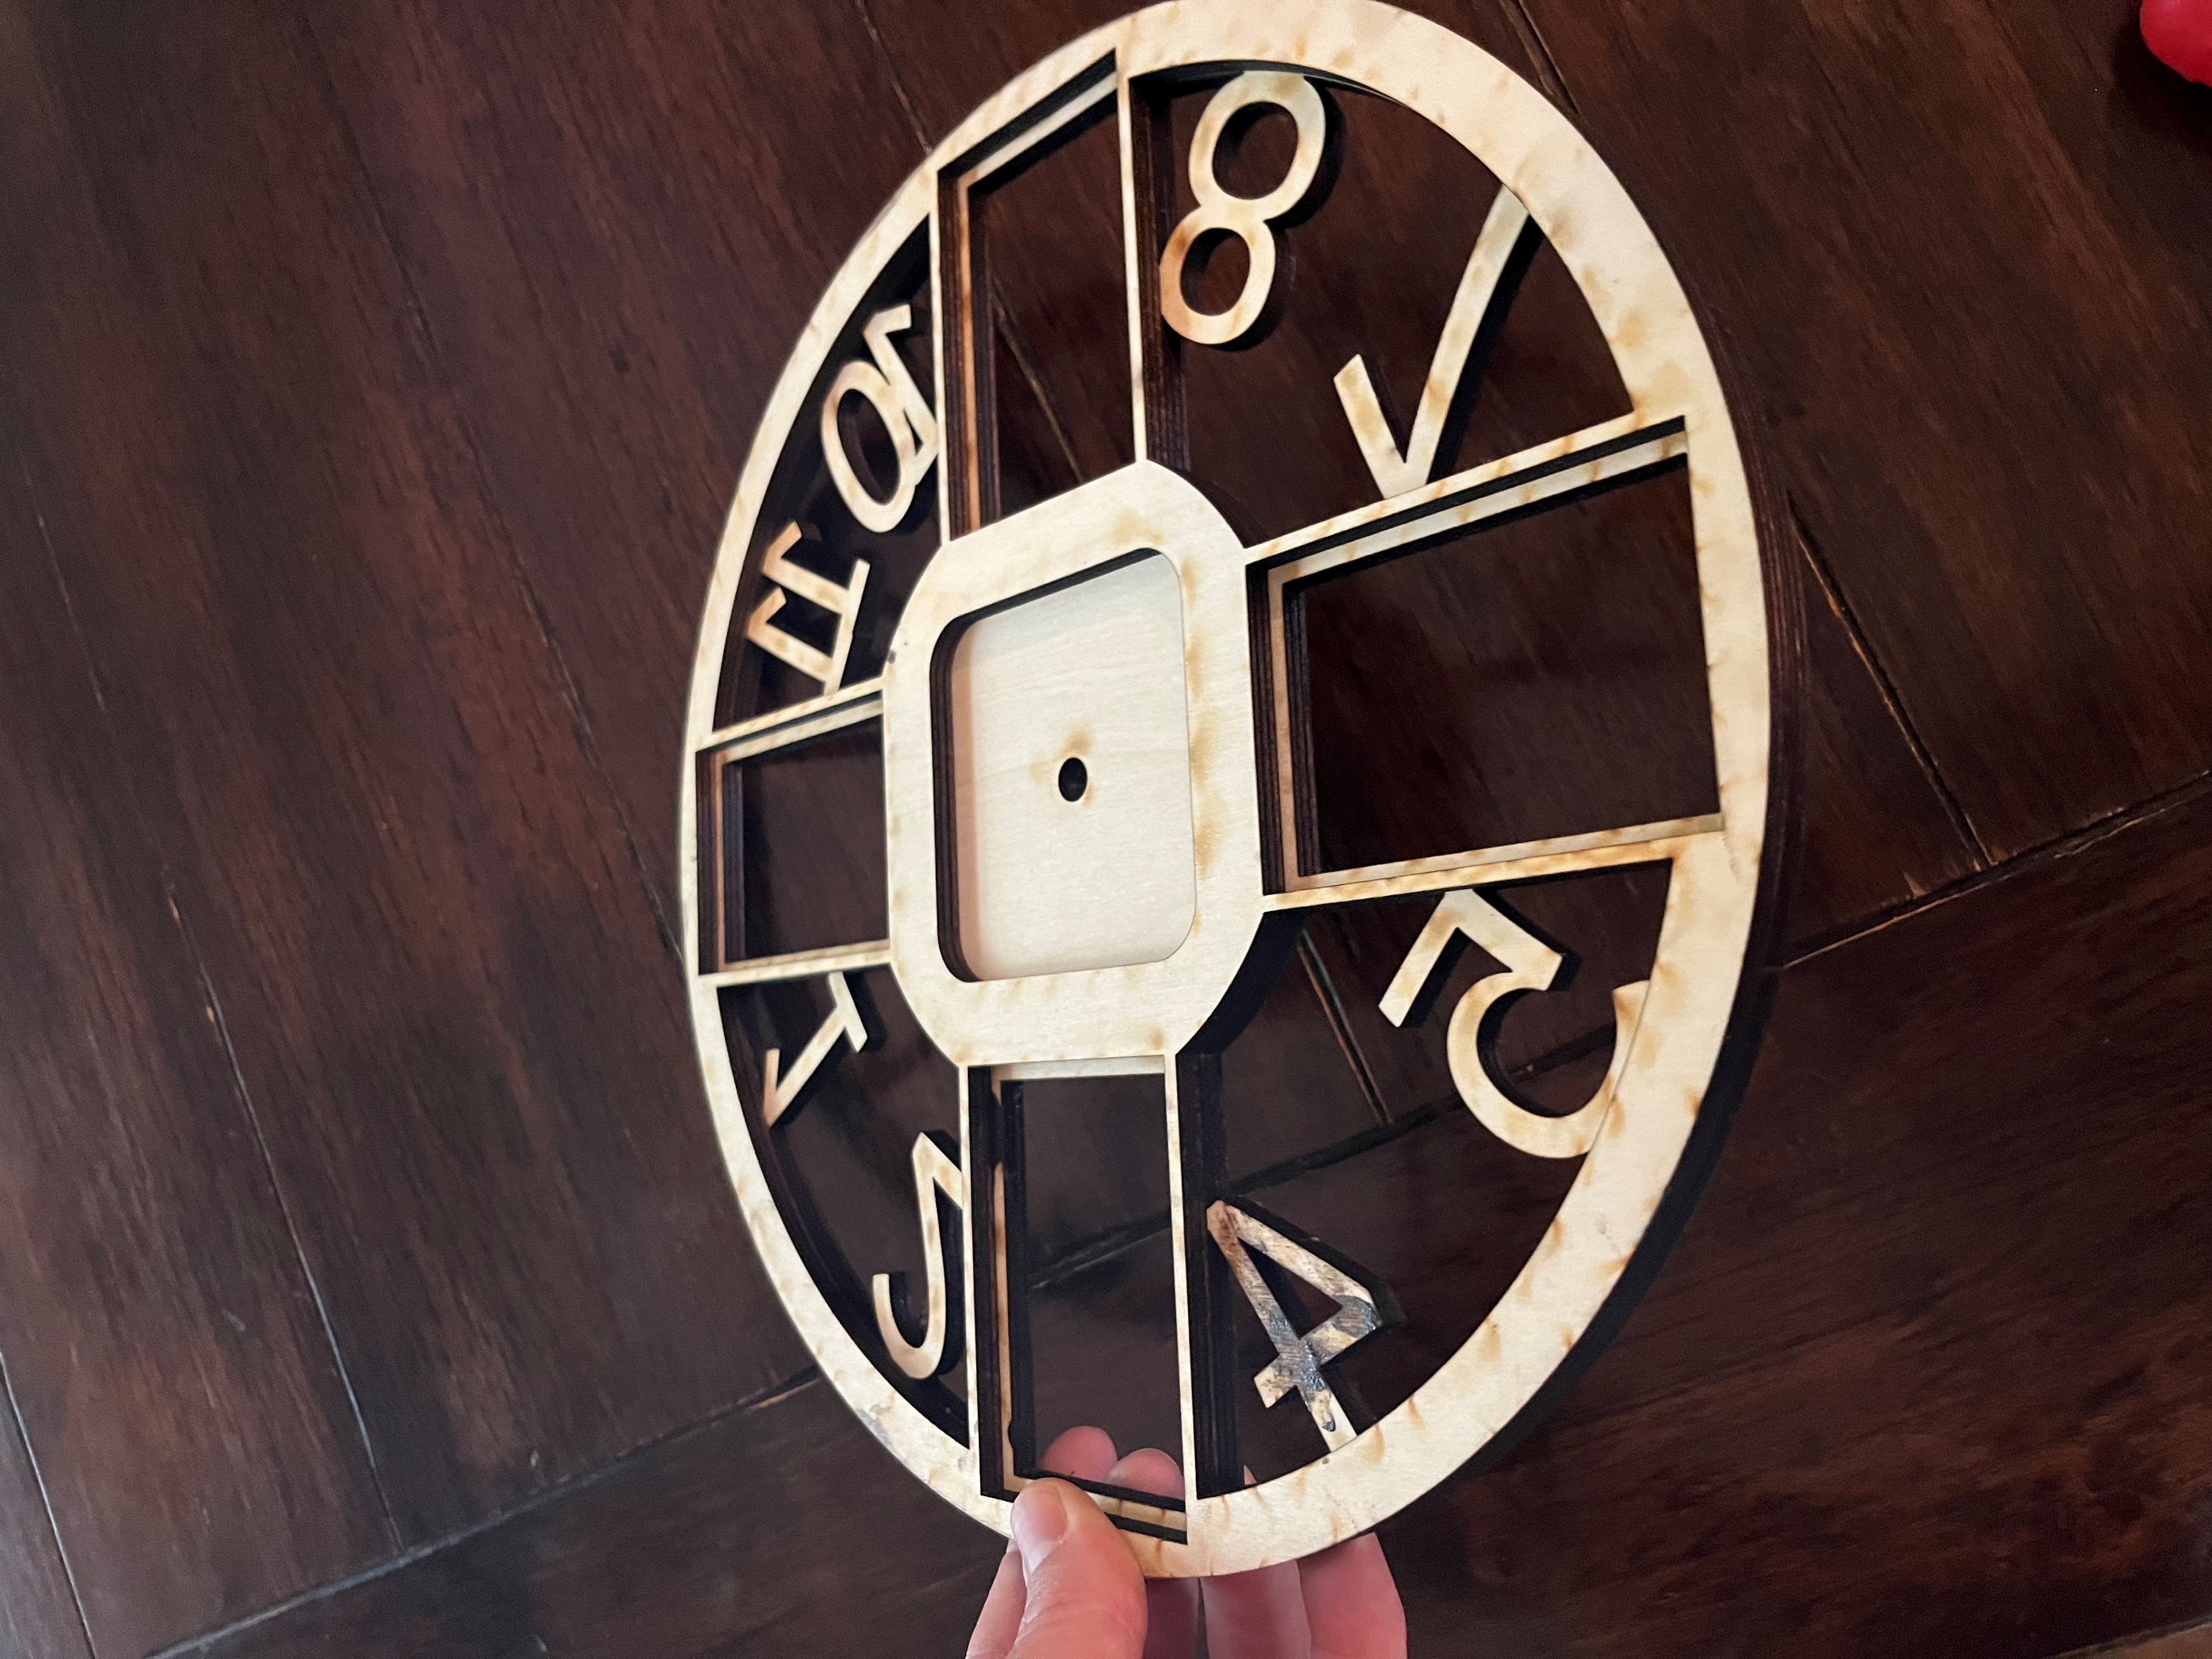
Copy and paste all objects to create a duplicate. These will be the front and back layers.
On the front layer, use the “Combine” tool to unite the main object with the inner (3.25” x 2.25’) rectangle and the 0.33 circle and delete the middle (3.5” x 2.5”) rectangle.
On the back layer, use the “Combine” tool to unite the main object with the middle (3.5” x 2.5”) rectangle and delete the 0.33” circle and inner (3.25” x 2.25”) rectangle.
Stack the 2 layers to make sure everything is in alignment. I had back layer (black) on top. The only part of the top layer (yellow) visible is the inner rectangle.
Adding Numbers
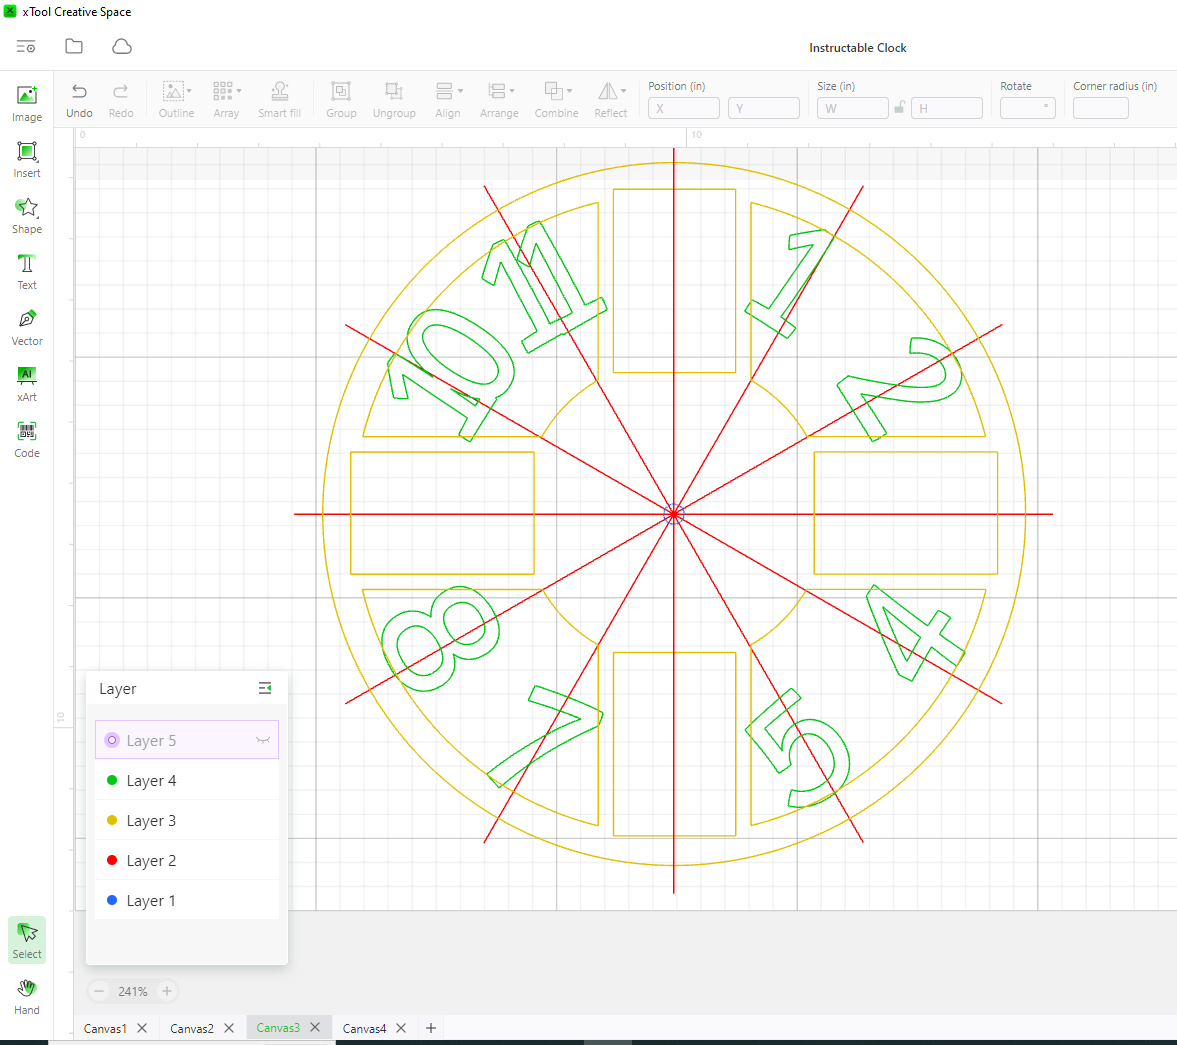
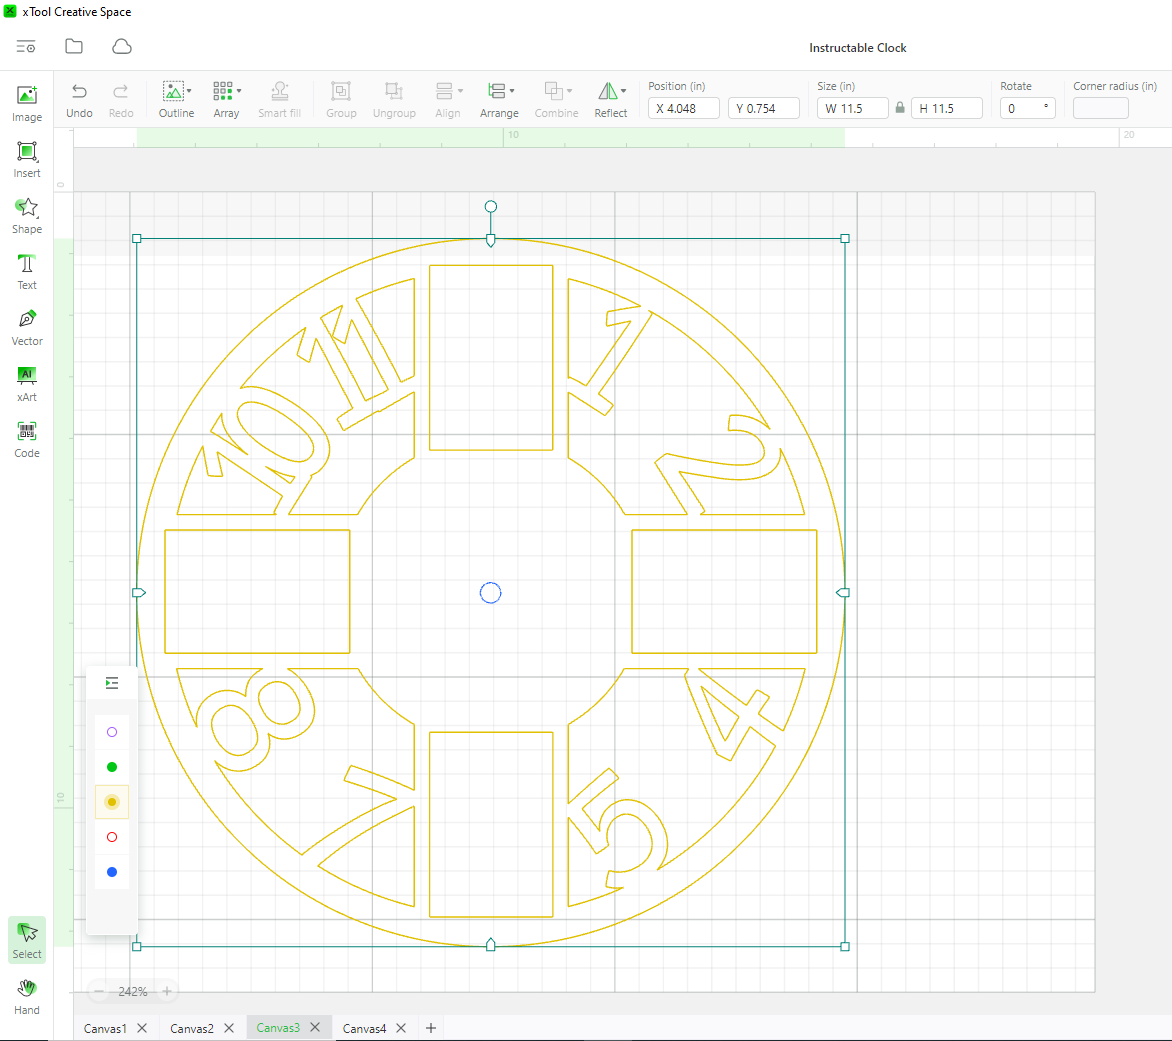
Add numbers 1, 2, 4, 5, 7, 8, 10, and 11 to the front layer utilizing the line arrays as guides for placement and orientation. I used the “Grandstander” font with approximately 200 pt. size. Make sure each digit has 2 points of contact.
Use the “Combine” tools to unite the numbers to the frame.
Finish the Back Layer
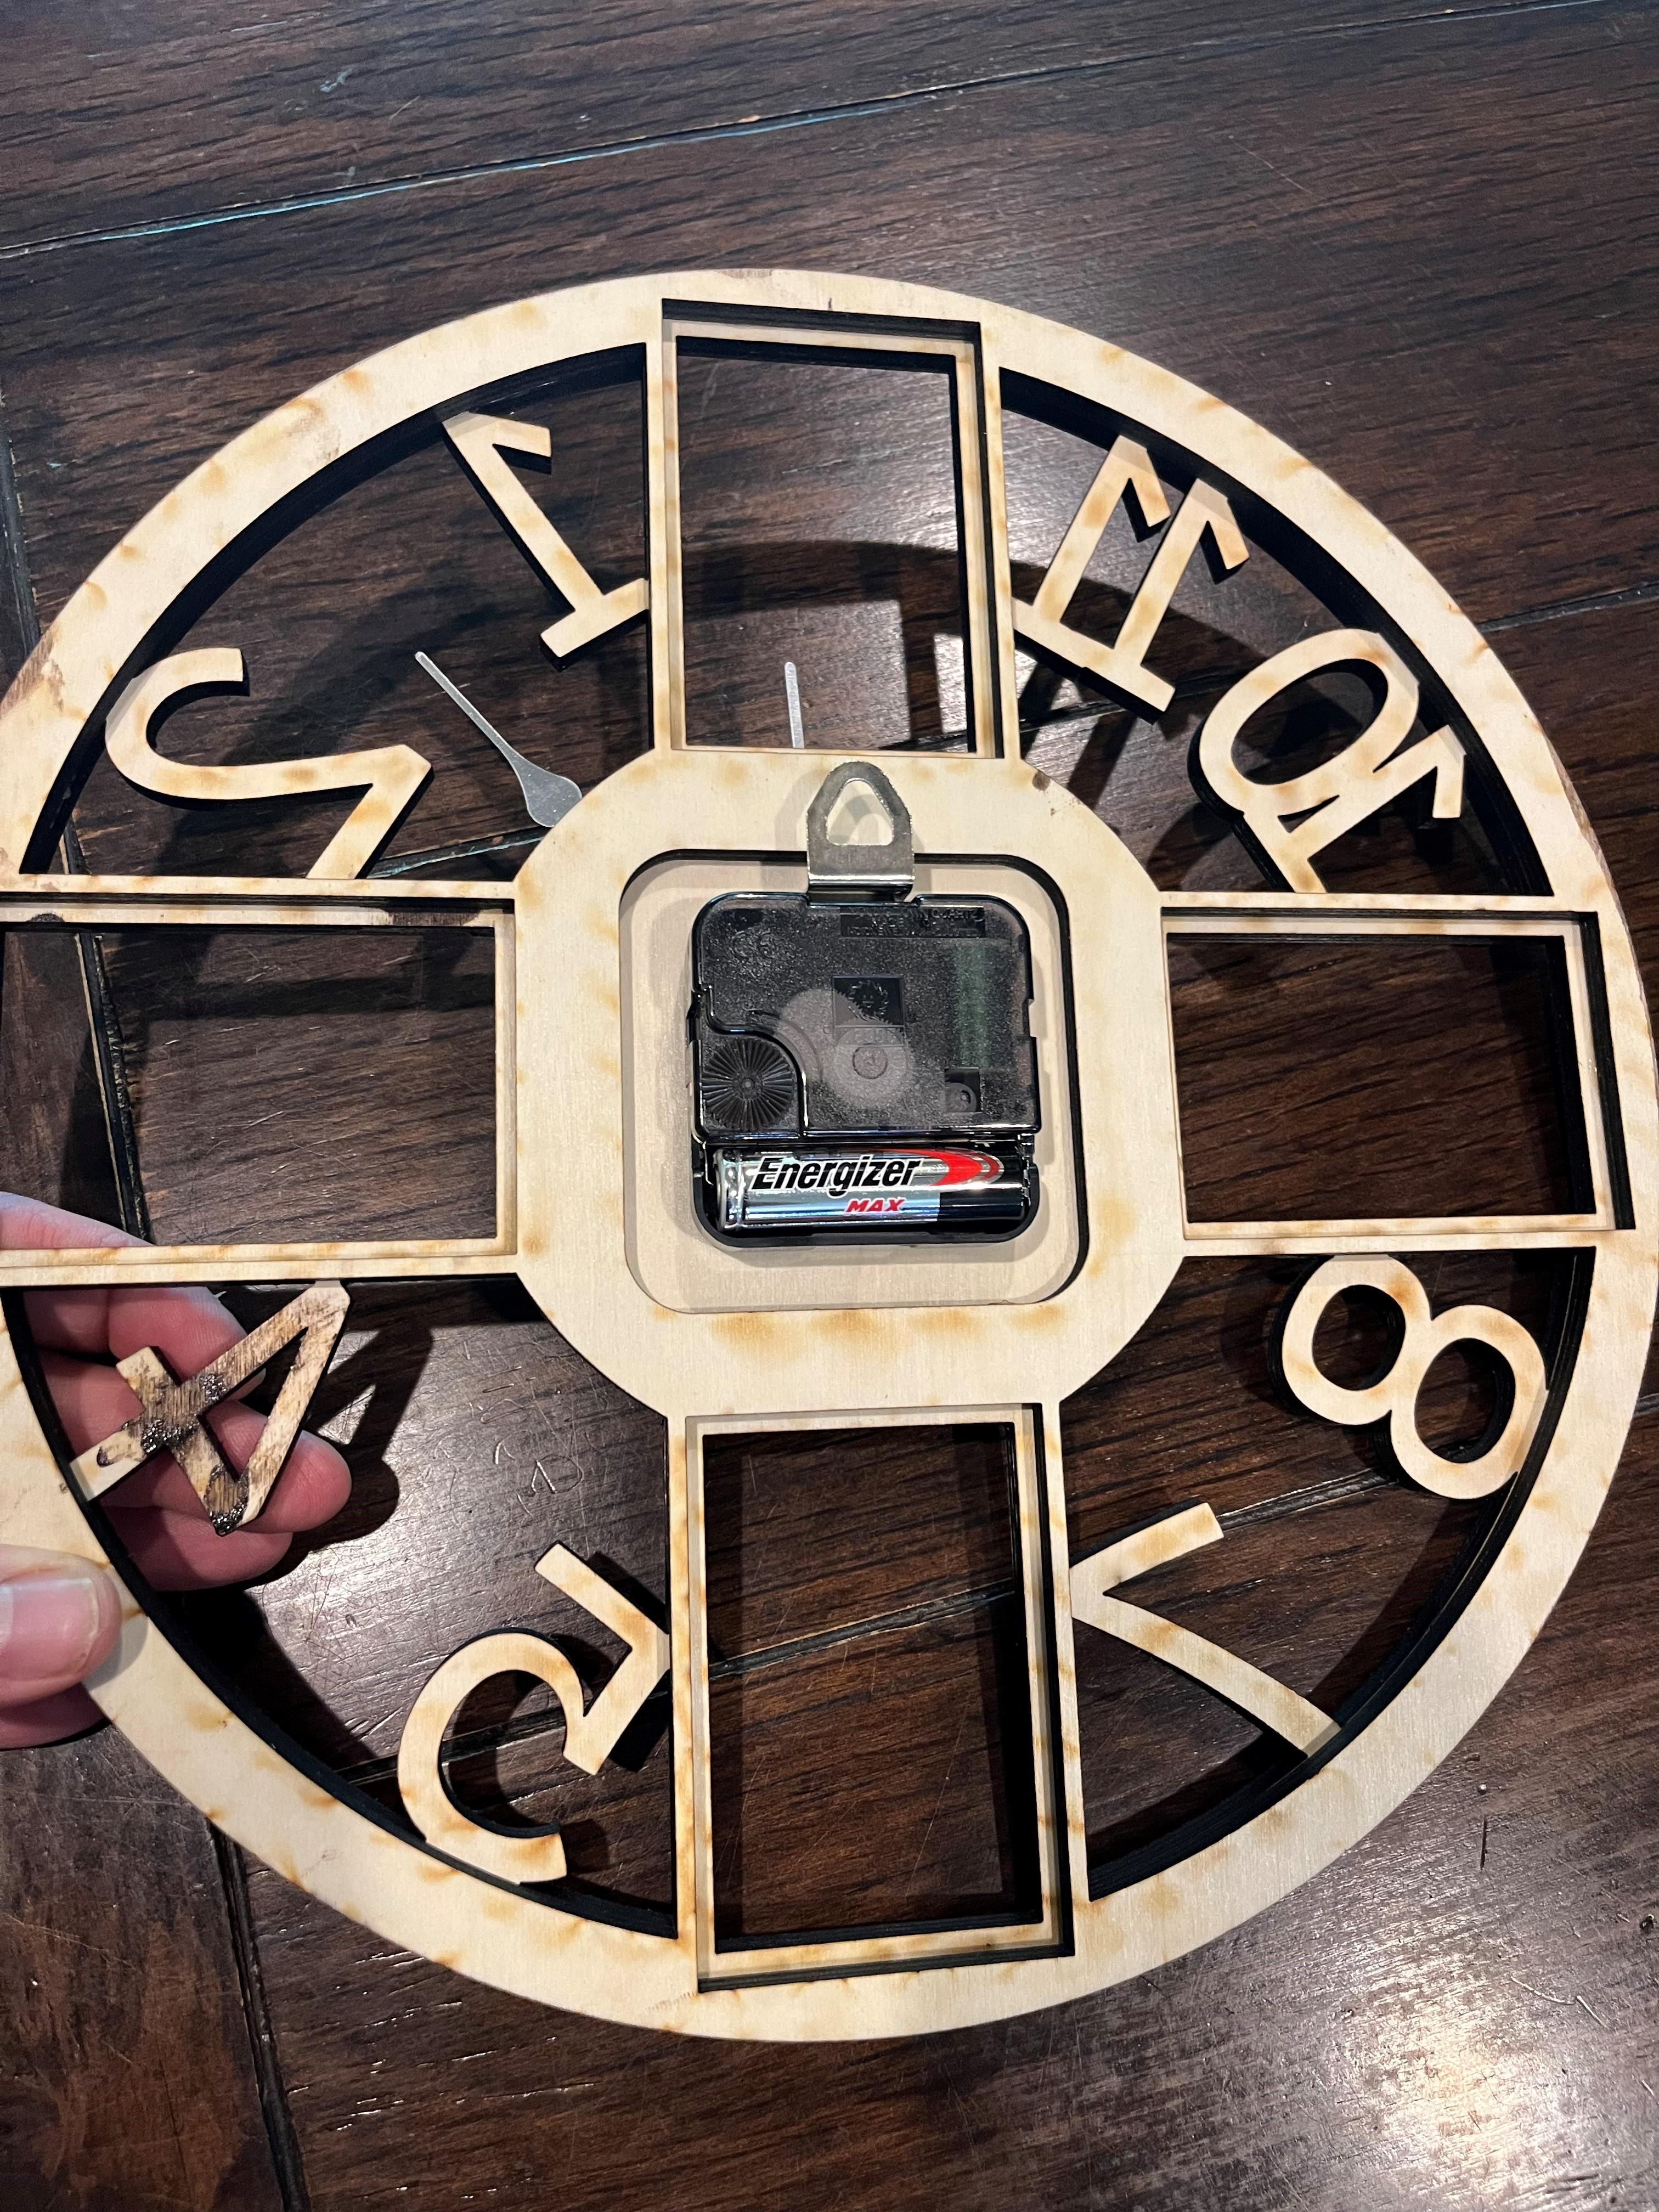
Add a 3” square to the center of the frame. (I used one with rounded corners) Once this is cut away it will give a recessed area for the mechanism to reside after it is attached to the front layer.
Add the Text
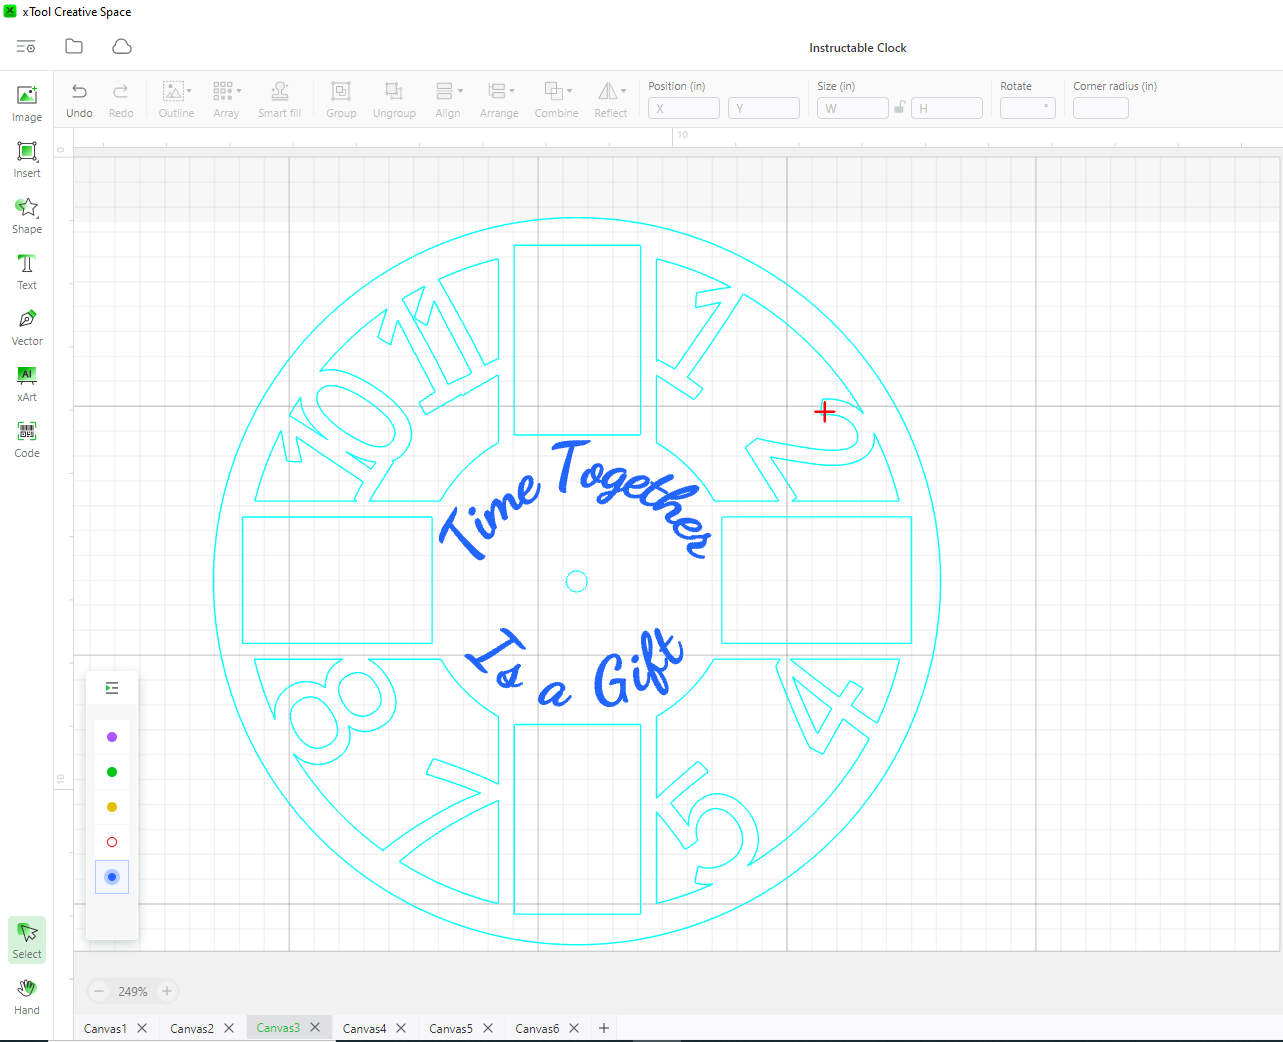
Add the text “Time Together” and “Is a Gift” as separate lines so they can be curved separately. You will have to estimate the amount of curvature to apply to each line. I chose a “Dancing Script” bolded with an 80pt. size.
Select Setting and Process the Job
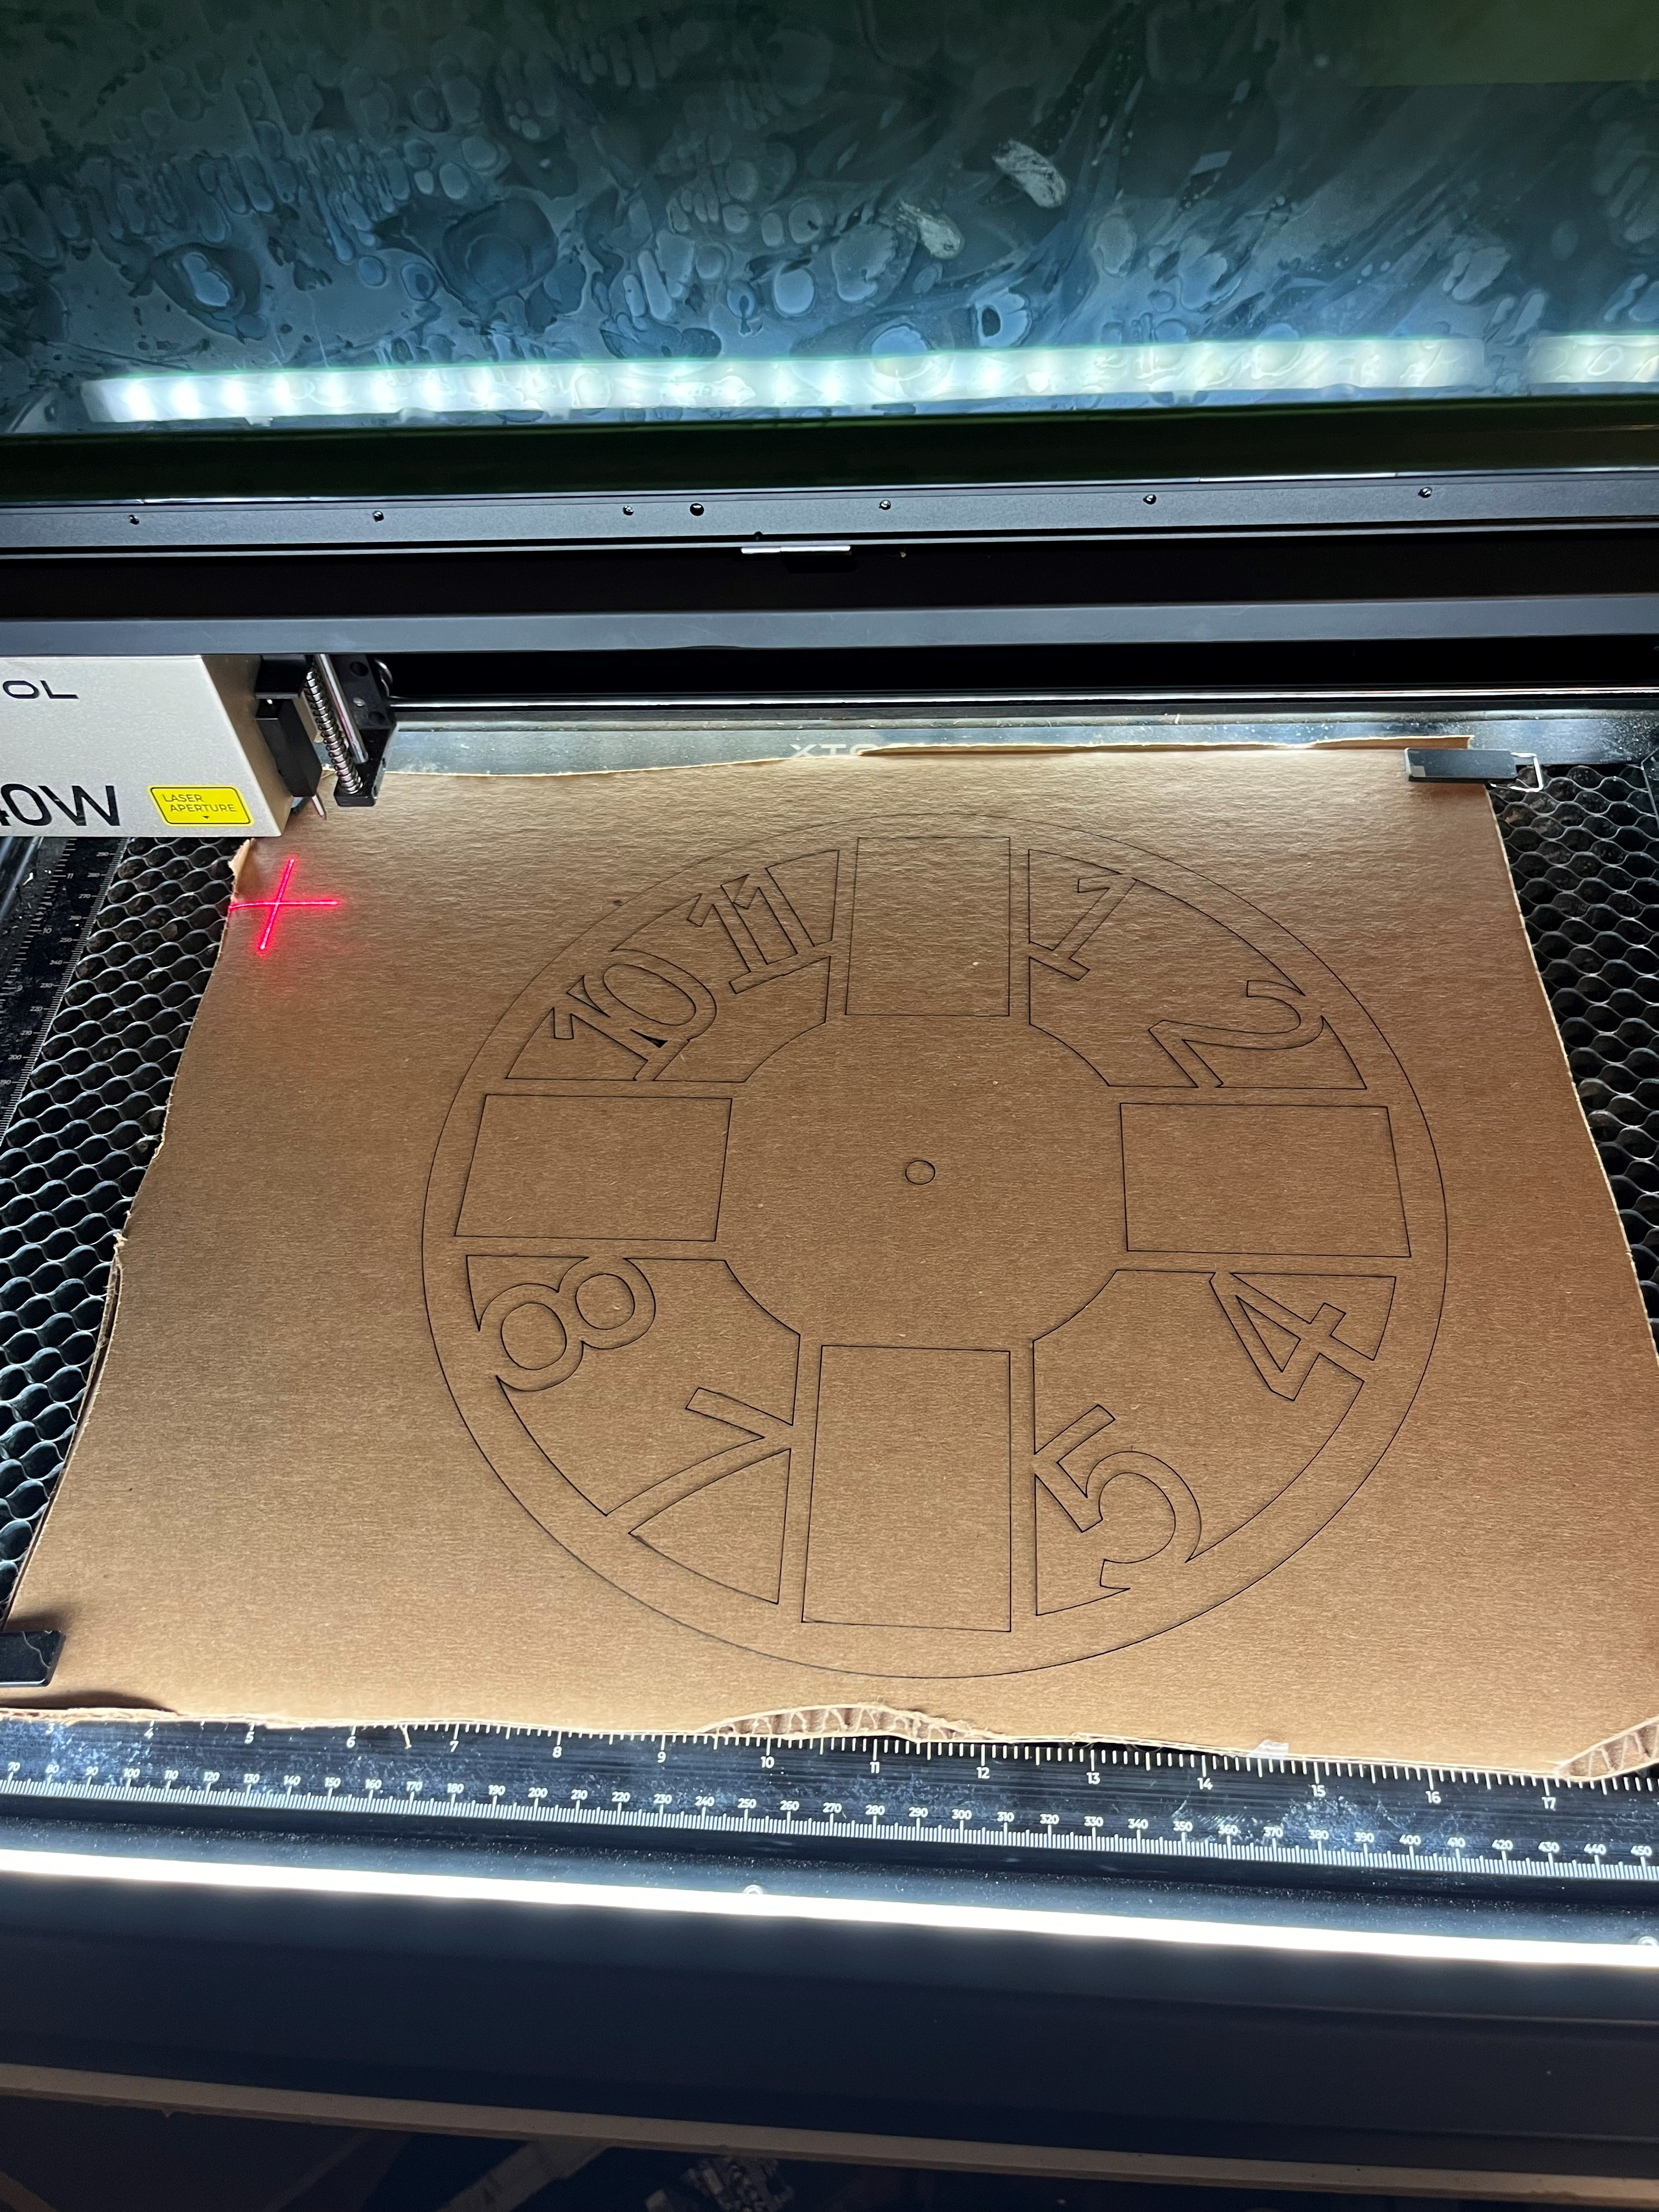
Since this is a new design, I decided to test it on scrap carboard before moving on to the plywood.
After a few minor tweaks, I processed the final product. I used 100% power at a speed of 10 mm/sec for all cuts and 40% power at 250mm/sec for engraving.
Tip: Mark the 12:00 position on the back panel before moving it. This will ensure the best fit up in assembly without the trial and error I went through.
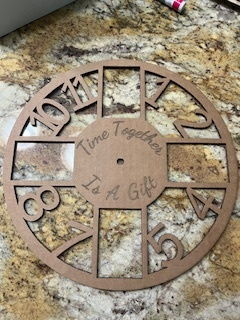
Assembly Layers
Glue the front and back panels together with wood glue. I use large binder clips to hold pressure while the glue was curing. I forgot to take a picture with the clips on it. From the back you can see how the 0.125” insets were creating this frame for the picture. I will cover what to use as a back in the last step.
I usually use CA glue but want the additional time that wood glue would give on this project.
Stain and Clear Coat
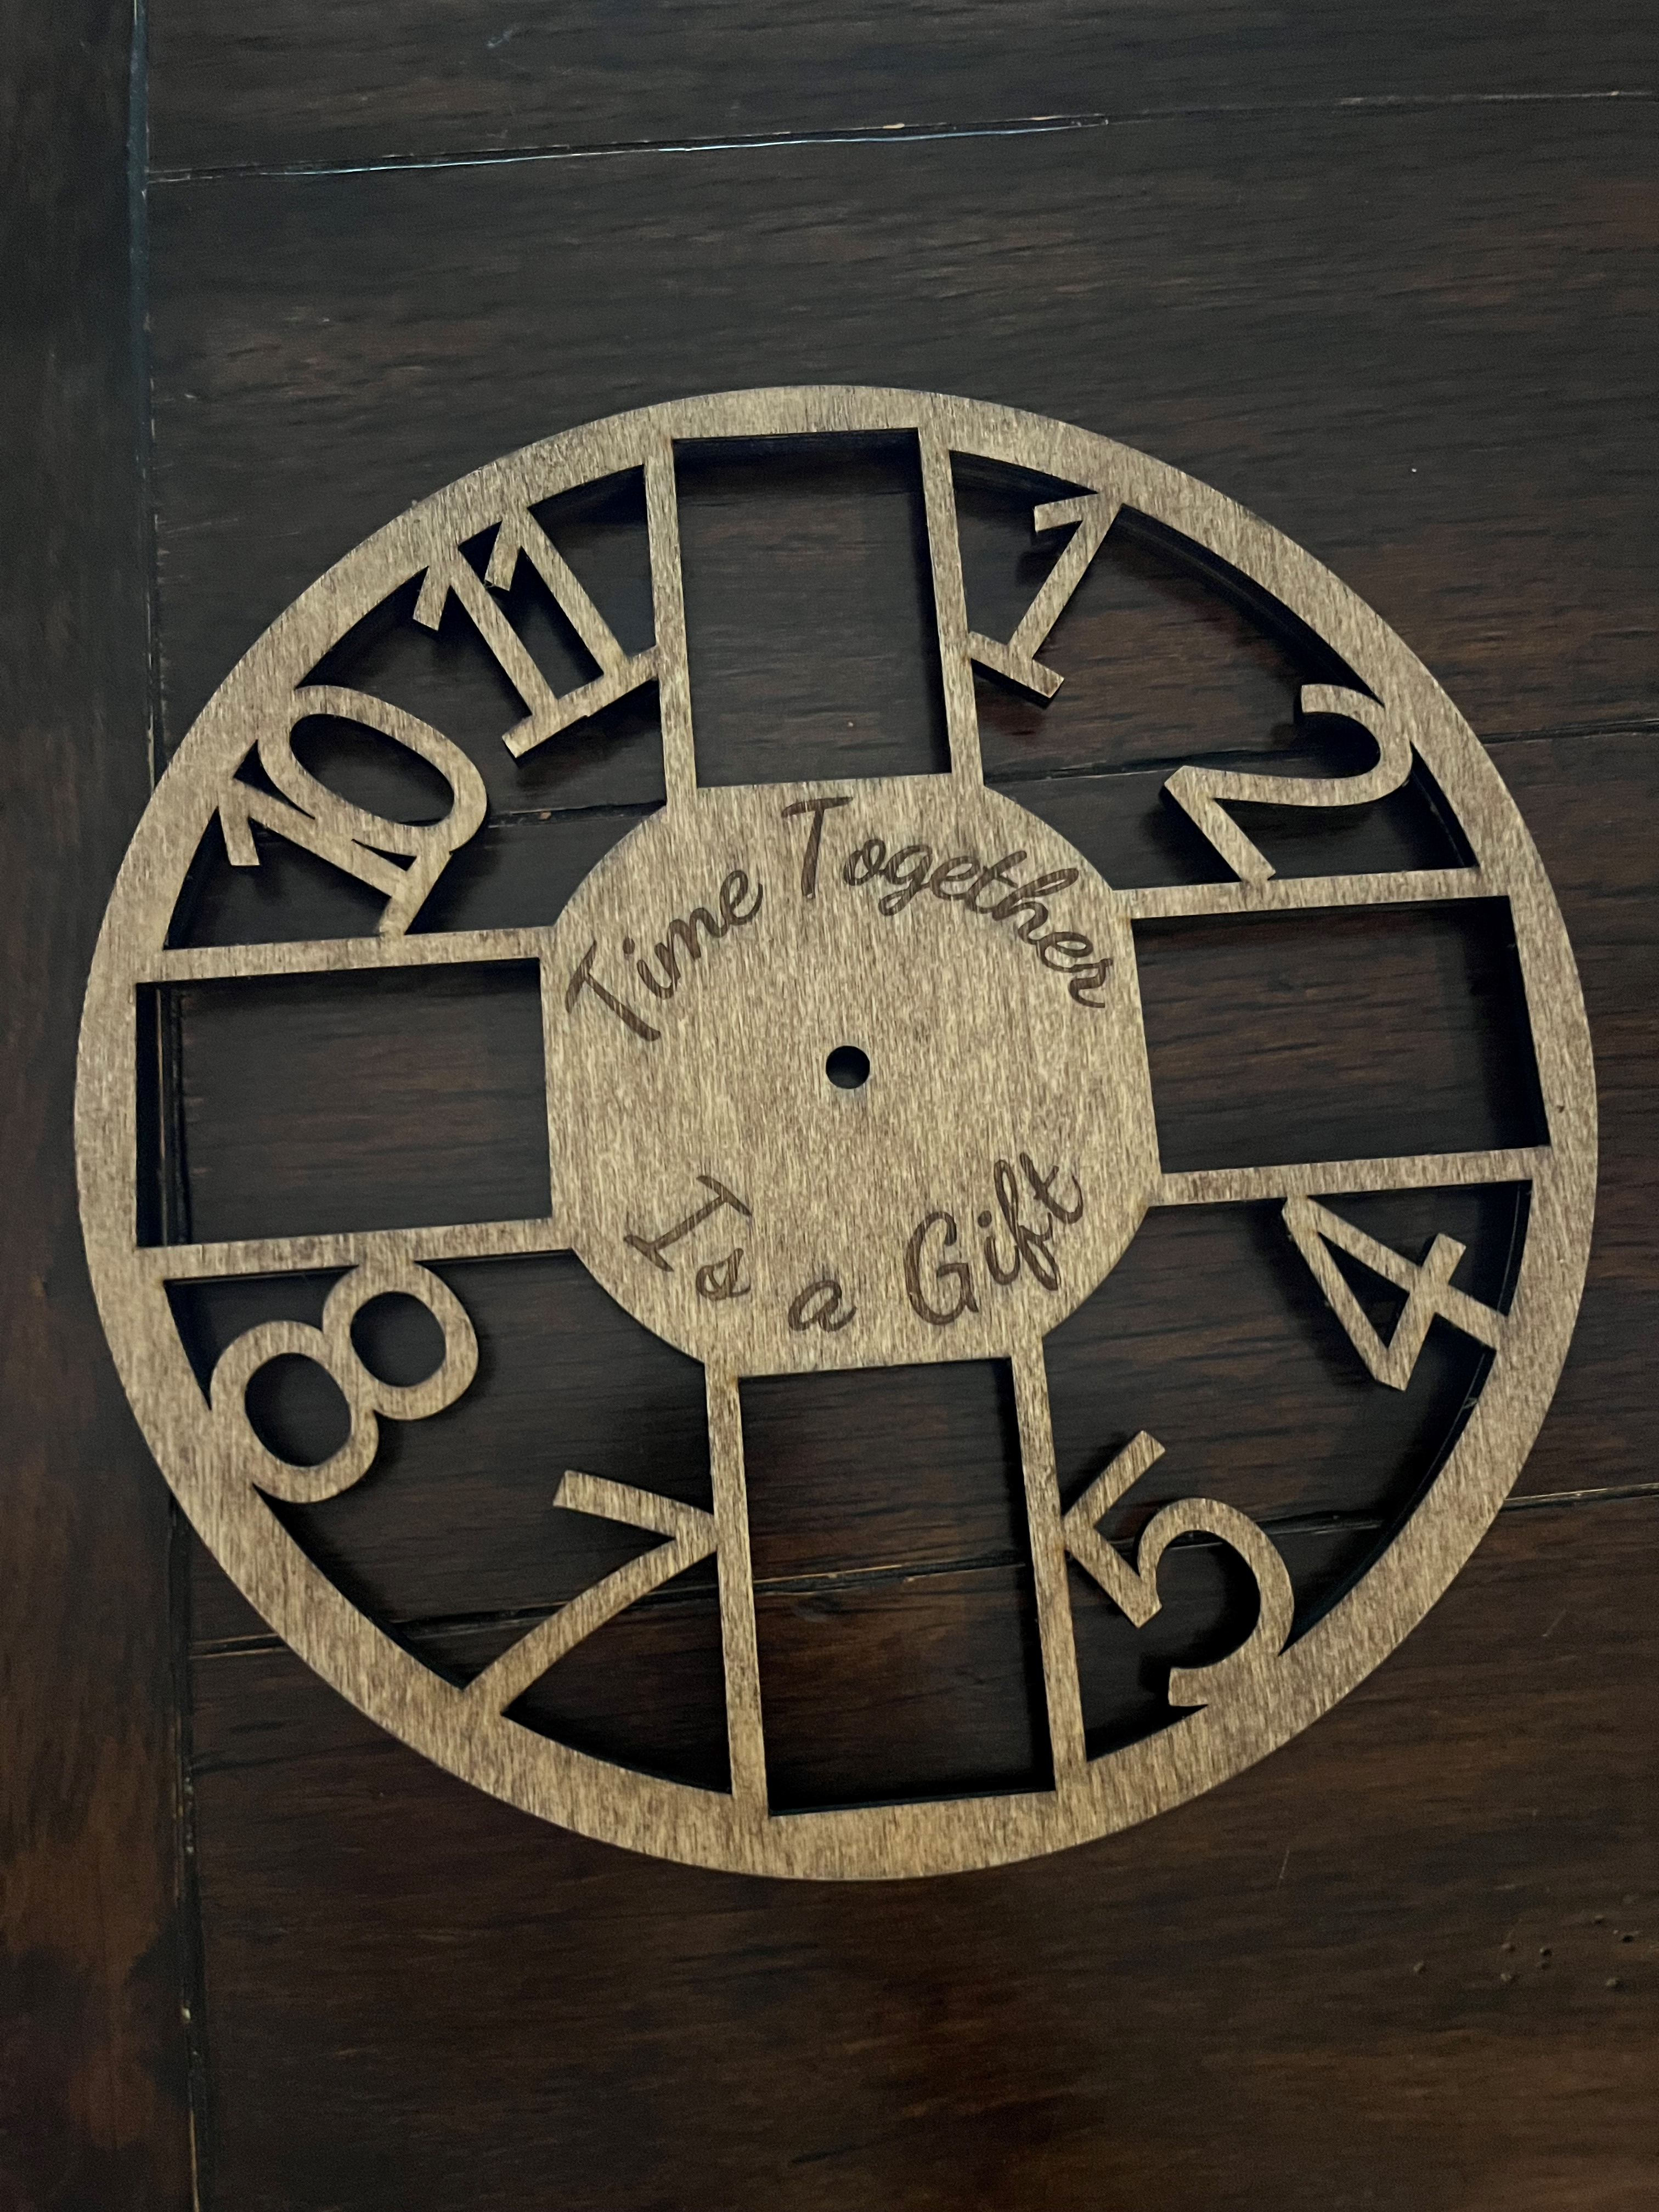
Sand any scorch marks on the surface of the front layer. Apply a generous amount of gel stain to the front layer ensuring to work it into the engraving and then wipe down ASAP.
Once the gel stain is dry, apply 2 coats of clear coat.
Assemble the Mechanism
.png)
.jpeg)
Select which set of clock hands you want to use (I used mediums for this project) and follow the instructions provided with the clock mechanism.
Create Picture Frame Back
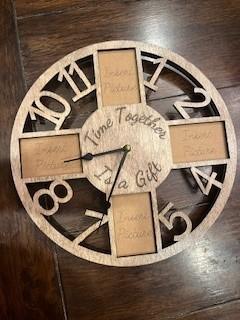
I left this step for last because I didn’t know how I was going to do it. I tried several things but settled on a very simple solution. I use the laser cutter to make backs out of 1/8 cardboard that are held in place by friction. Cut 4 pieces of cardboard slightly larger in one dimension than the middle size rectangle. (ie 3.55” x 2.50”) This 0.05 was all I needed to keep things secure.
Add Pictures