Custom Made Plant Stands, Made With Parameters in Autodesk Fusion 360
by CNCflatpack in Workshop > CNC
876 Views, 3 Favorites, 0 Comments
Custom Made Plant Stands, Made With Parameters in Autodesk Fusion 360


In this instruction, we will make a model for plant stands that we can then tailor to the size of the flowerpot. By using Fusion 360 and its function for parameters, we can easily create several different plant stands in the same style.
Supplies
Autodesk Fusion 360
Autodesk Fusion 360
- Start the application Fusion 360.
Defining Parameters
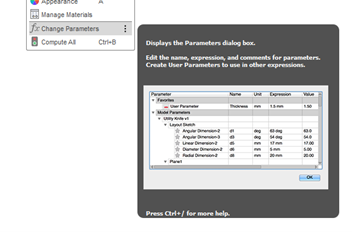
We start by defining the parameters we need in the project. To create parameters go to the menu MODIFY and then select Change parameters.
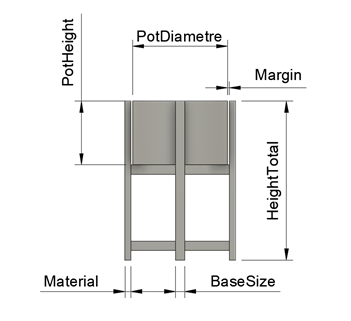
We define eight parameters.
- Material (thickness of the plywood board)
- HeightTotal (the total height of the flower place)
- Pot Diametre (outer diameter of the pot)
- PotHeight (pot height)
- BaseSize (a base measure for creating proportions in the model)
- Margin (the margin between pot and stand)
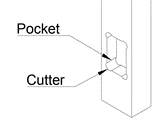
- Cutter (diameter of the cutter)
- Pocket (depth of pockets)
Define Parameters, Continue
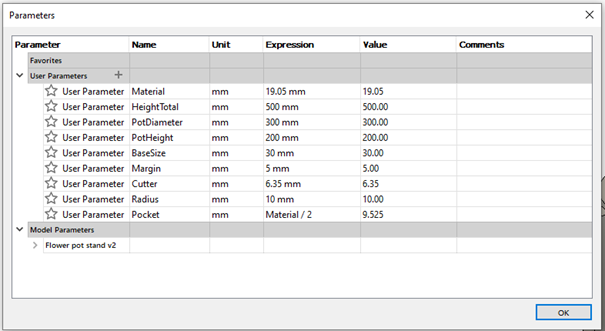
Create the parameters with the values as shown in the image.
Create the Base Sketch
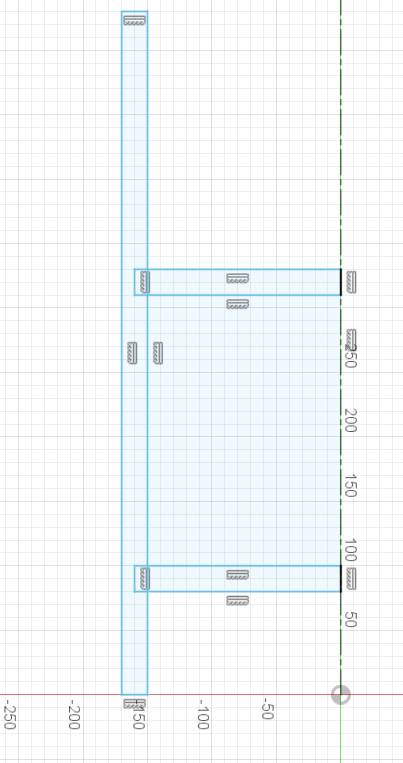
- Create a sketch from the front.
- Create a vertical centerline.
- Draw three rectangles as shown above. Dont have to be exact same measurement but somewhat close.
Create the Base Sketch, Continue
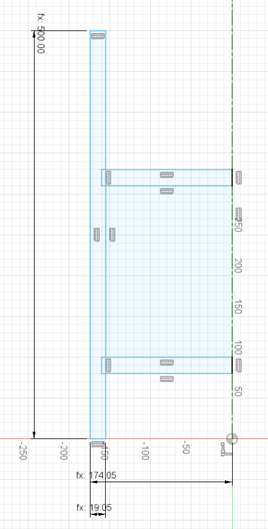
Define the sizes with Sketch Dimension and use parameters as shown below.
Leg
- Measure the line from bottom to top and write “HeightTotal” which will produce the text “fx. 500” as shown below.
- Measure from the centre line to the outer line of the leg and write “Pot Diametre/2+Margin+Material” which will produce the text “fx. 174.05” as shown below.
- Measure from the outer line of the leg to the inner line of the leg and write “Material” which will produce the text “fx. 19.05” as shown below.
Create the Base Sketch, Continue
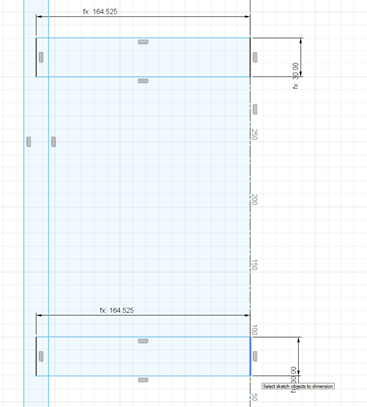
Supports
- Measure from the centre line to the outer line of the support and write “Pot Diametre/2+Margin+Pocket” which will produce the text “fx. 164.525” as shown above.
- Measure between the upper and lower line and write “BaseSize” which will produce the text “fx. 30” as shown above.
Create the Base Sketch, Continue
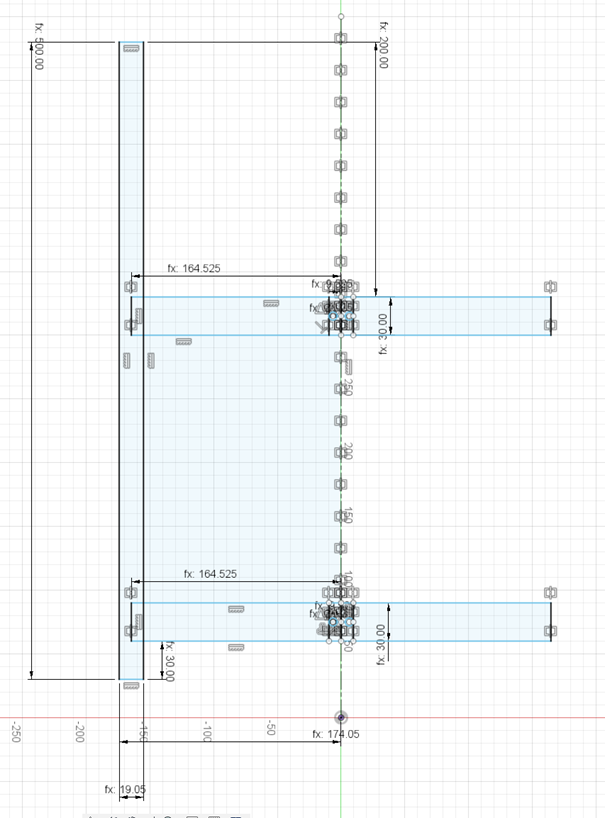
- Measure between the legs upper line and the upper line of the upper support and write “PotHeight” which will produce the text “fx. 200” as shown below.
- Measure between the legs bottom line and the bottom line of the bottom support and write “BaseSize” which will produce the text “fx. 30” as shown below.
Create the Base Sketch, Continue
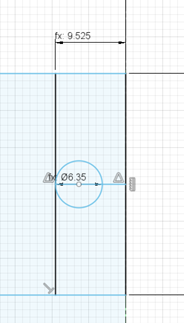
- Draw a vertical line left of the center line on the support and dimension it to “Material/2” which will produce the text fx. 9.525.
- Draw a horizontal line at the center between the vertical lines. Draw a circle starting from left of the line and dimension it to “Cutter” which will produce the text fx. 6.35
- Repeat for the second support
Create the Base Sketch, Continue
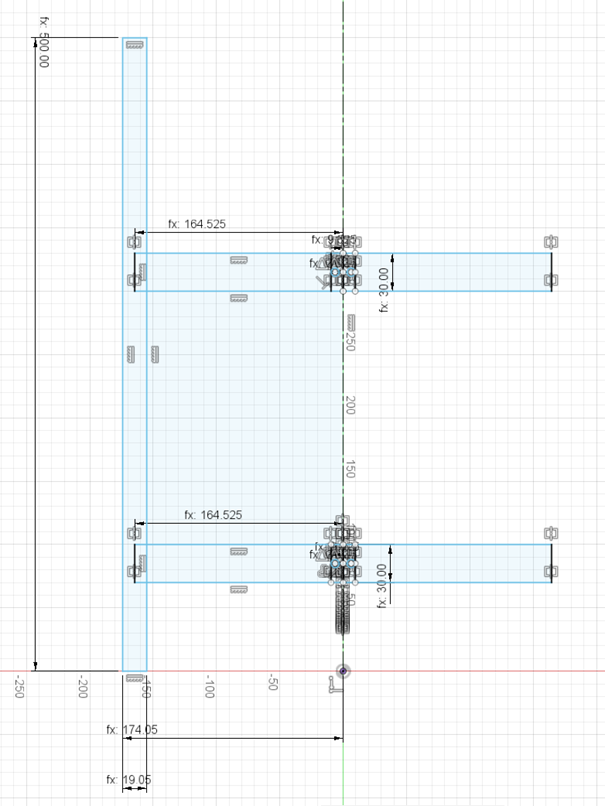
- Mirror the supports through the vertical center line and the sketch should be looking like above.
- Finish the sketch.
Extruding Supports, Part 1
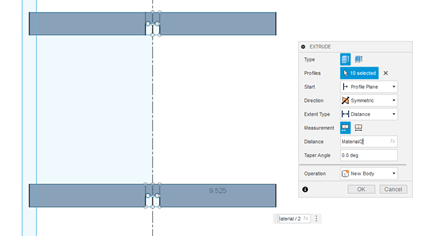
- Extrude two supports like this; “Symmetric” with a distance of “Material/2”. The purpose is to make a body placed at the center.
- Hide the two bodies.
- Show the sketch again.
Extruding Supports, Part 2
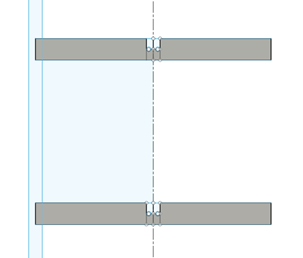
- Extrude two more supports like above.
- Same settings, “Symmetric” with a distance of “Material/2”
Supports
- Hide the sketch.
- Change the view to top view.
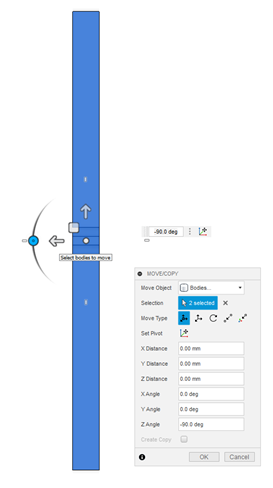
- Select the two latest bodies and choose Move/Copy, set the Pivot point to the center of the parts and rotate 90 degrees.
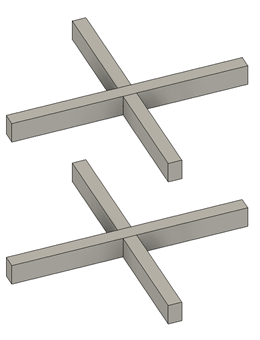
- Show the first two support and it should look like above.
- Hide all four supports,
Legs, Part 1
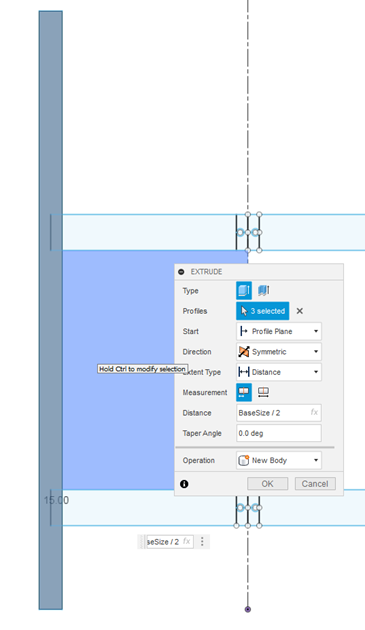
- View the sketch.
- Extrude the leg like this; “Symmetric” with a distance of “BaseSize/2”. The purpose is to make a body placed at the center.
Legs, Part 2
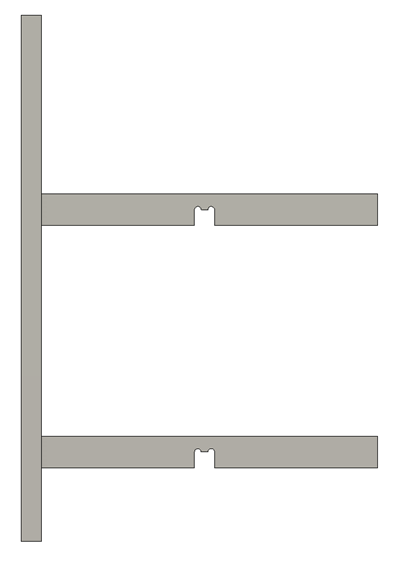
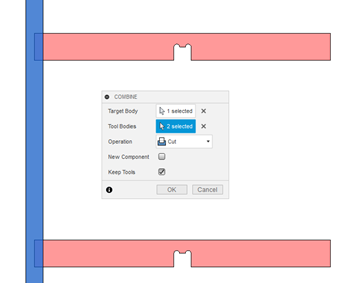
- Hide the sketch and show the two first supports.
- Choose “Combine”.
- Choose the leg as Target body and the two supports as Tool bodies and Cut as Operation. Check the box Keep tools.
Legs, Part 3
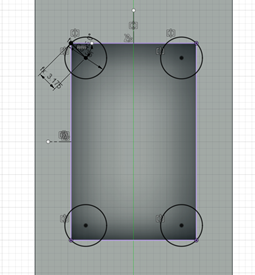
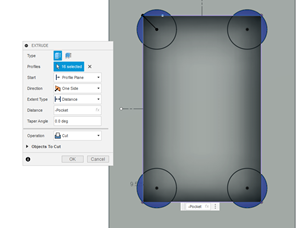
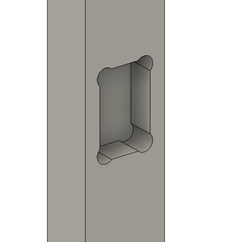
- Hide the two supports and view the leg from right view. Create a sketch on the surface of the leg.
- Choose Project under the menu Create. Choose the two rectangles to project.
- Draw a line from the upper left corner 45 degrees down to the right. The lines length should be “Cutter/2).
- Draw a circle from the endpoint of the line with a diameter of “Cutter”.
- Make a vertical center line and mirror the circle.
- Make a horizontal center line and mirror the circles.
- Repeat with the other rectangle.
- Finish the sketch.
- Extrude all circles to “-Pocket”.
Legs, Part 4
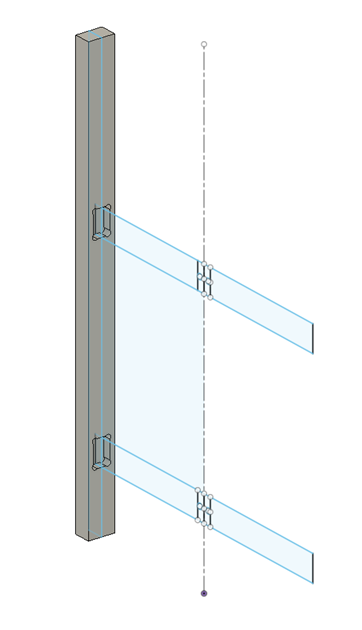
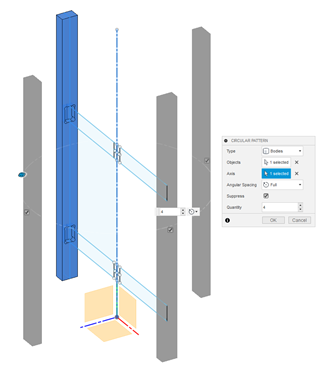
- View the first sketch like above.
- Select “Circular pattern” under the menu “Create” and then “Pattern”.
- Select the leg as “Object”, the center line as “Axis” and 4 as Quantity.
- Hide the sketch and view all bodies.
The model is finished.
Changing Parameters
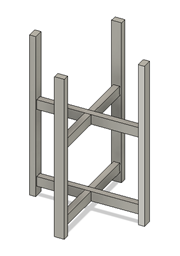
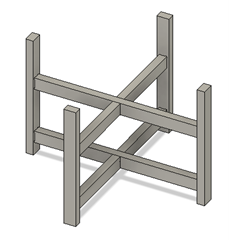
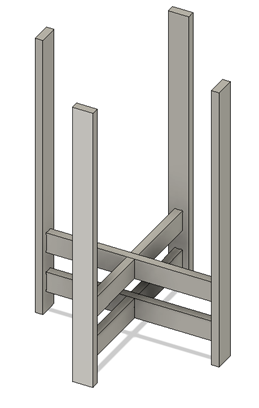
Try and change the parameters to make new designs! Here is a few examples:
First image:
HeigthTotal: 500 mm, PotDiameter: 300 mm, PotHeight: 200 mm, BaseSize: 30 mm
Second image:
HeigthTotal: 300 mm, PotDiameter: 400 mm, PotHeight: 100 mm, BaseSize: 30 mm
Third image:
HeigthTotal: 700 mm, PotDiameter: 400 mm, PotHeight: 500 mm, BaseSize: 50 mm
Prepare for CNC-cutting, Layout
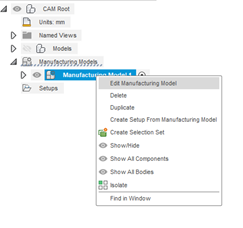
Layout
1. Go to the Manufacture Workspace.
2. Under Setup choose Create manufacturing model.
3. Right-click the Manufacturing model and choose Edit Manufacturing model.
Prepare for CNC-cutting, Layout, Part 2
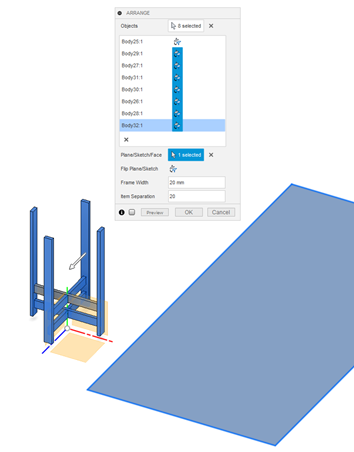

- Select all bodies and make components of them.
- Create a sketch.
- Draw a rectangle with the size of your plywood sheet and Finish Sketch.
- Choose Arrange under Modify.
- Choose Finish Edit
Make the Cut File in Fusion 360, Setup
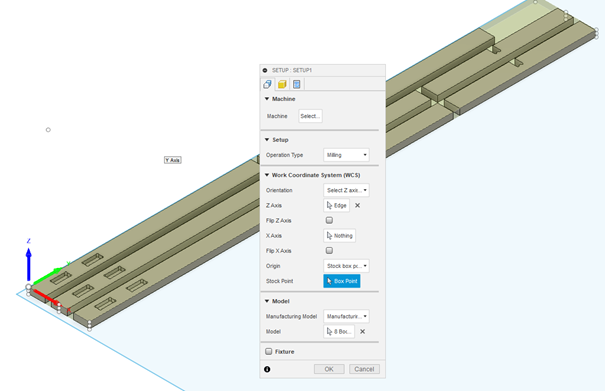
N.B! All settings for cutter, feeds and speeds are machine depending. Settings shown here is for my machine and are only examples.
Choose new Setup and configure for your machine and cutter.
Make the Cut File in Fusion 360, Pocket
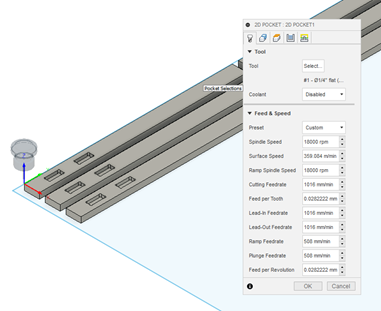
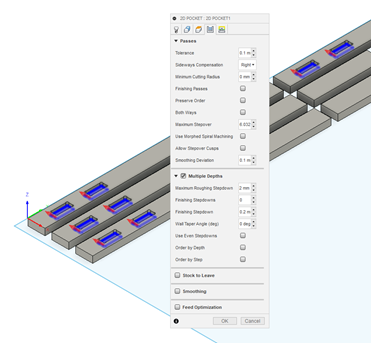
- Choose 2D pocket.
- Select your settings,
Make the Cut File in Fusion 360, Contour
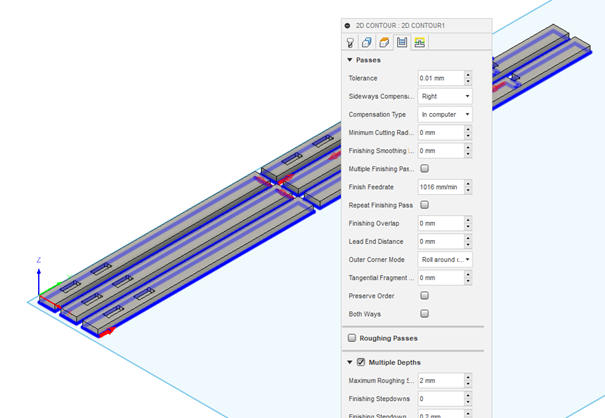
- Choose 2D Contour.
- Select your settings,
Make the Cut File in Fusion 360, Simulation
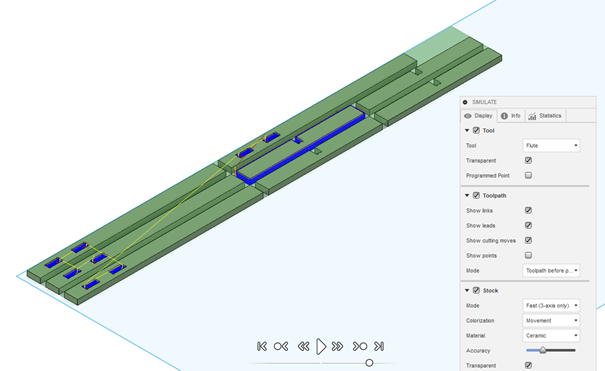
- Choose simulate under Actions.
- Check out for faults,
Make a cut file
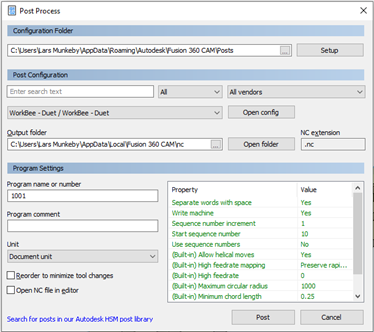
- Choose Post process under Actions.
- Insert information about your specific CNC-machine or import from Autodesk´s library.