Custom Hovercraft Skirt
by DIY-HOVERCRAFT in Circuits > Remote Control
9018 Views, 6 Favorites, 0 Comments
Custom Hovercraft Skirt
This tutorial is for anyone who is looking to make a custom hovercraft skirt, whether for small RC hovercrafts or "manned" hovercrafts. You read it well, this tutorial works for both !
To be more precise, this tutorial focuses on "vented bag skirts", which are the best compromise between ease of design and assembly, value for money and efficient operation. To see a list of other types of skirts with their pros and cons, you can check this page.
Please note that this tutorial is under the Creative Commons 4.0 BY-NC-ND licence.
Supplies
If you are making a RC hovercraft skirt :
- trash bags
- a soldering gun
- a cutter
- pencil, graph paper, or drawing software like Geogebra
- cardboard
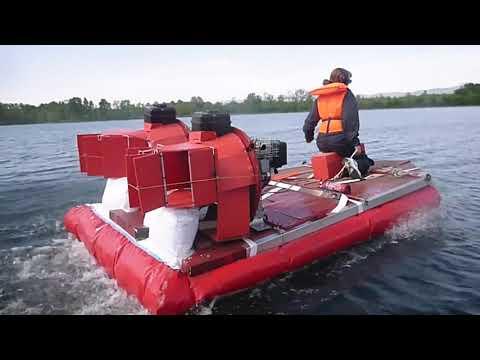
If you are making a "manned" hovercraft skirt :
- sewing equipment
- truck tarpaulin (density of 600g per square metern, must resist to stretching lengthwise and widthwise)
- something suitable for cutting out this truck tarpaulin (very good scissors or a very good cutter, I guess)
- large and thin pieces of cardboard to reproduce your skirt templates on
Introduction

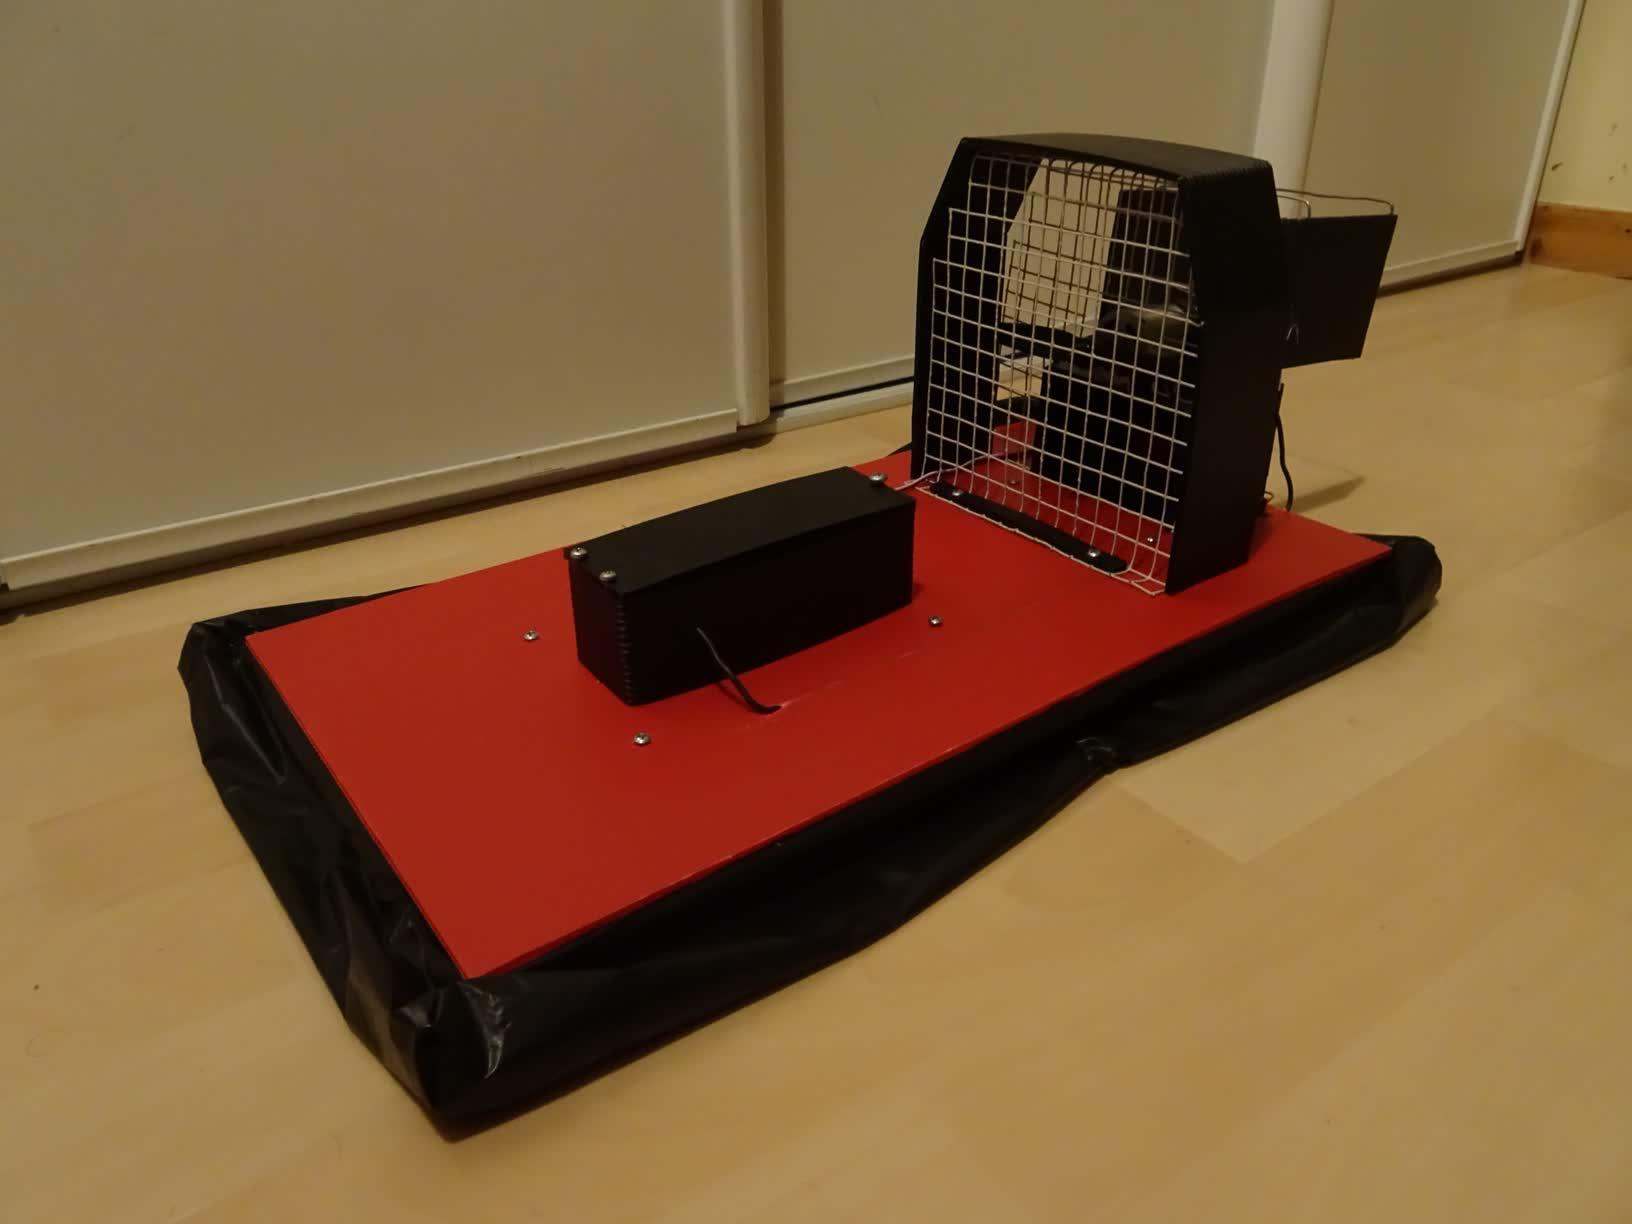
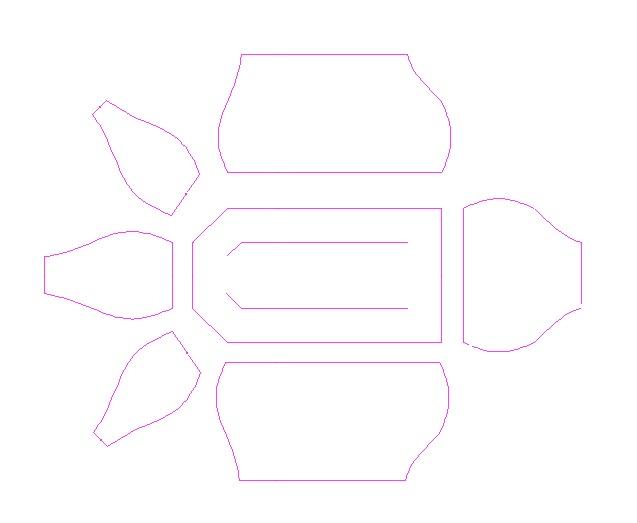
The least we can say is that designing a hovercraft skirt from scratch can be confusing. Fortunately, to make things easier, the skirt can be divided into several parts, as shown on the picture above : one piece of skirt for each side of the hull.
Joined together, these weird parts will give the hovercraft skirt that characteristic cylindrical shape.
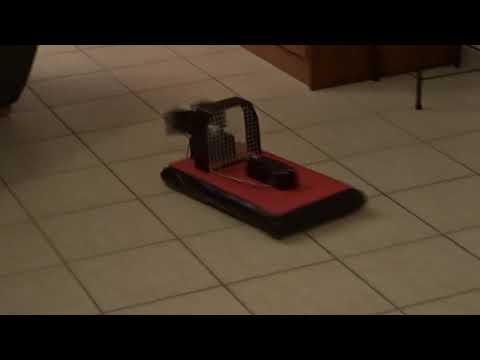
As you can see, I'm using trash bags for my RC hovercrafts, which give surprisingly good results. You can also use other materials or fabrics, like K-way pieces, as long as it is flexible enough to inflate.
Define the Shape of the Hovercraft Hull
First things first : you need to choose what your hovercraft hull will look like. Logically, the more complex your hull is, the more work and calculations you will have to do.
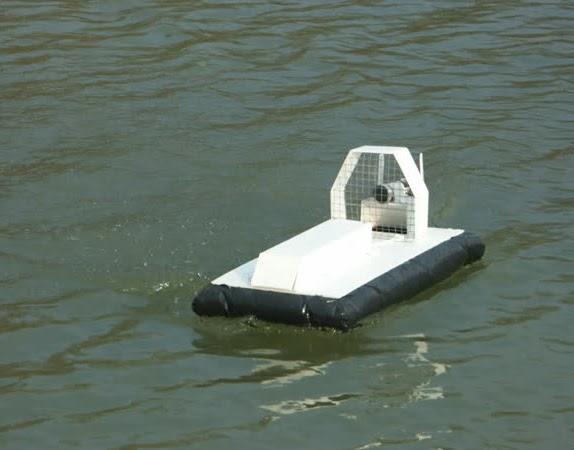
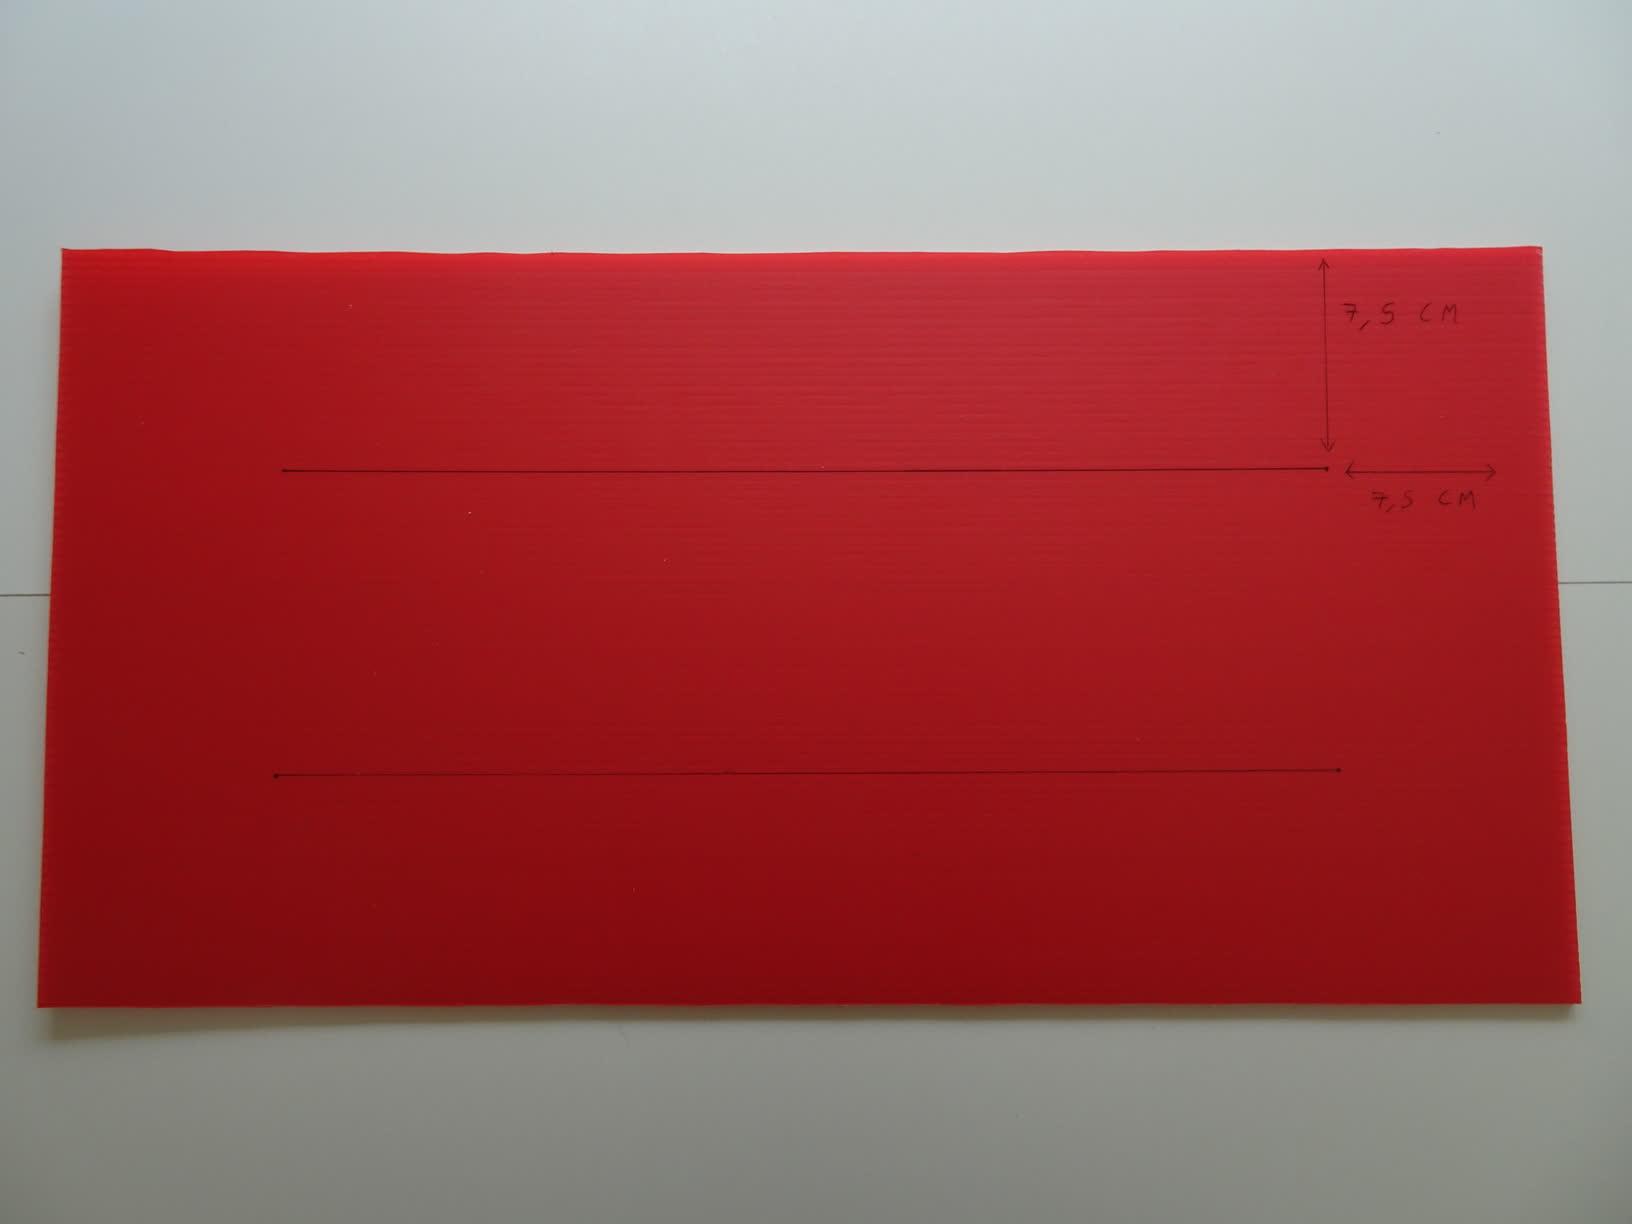
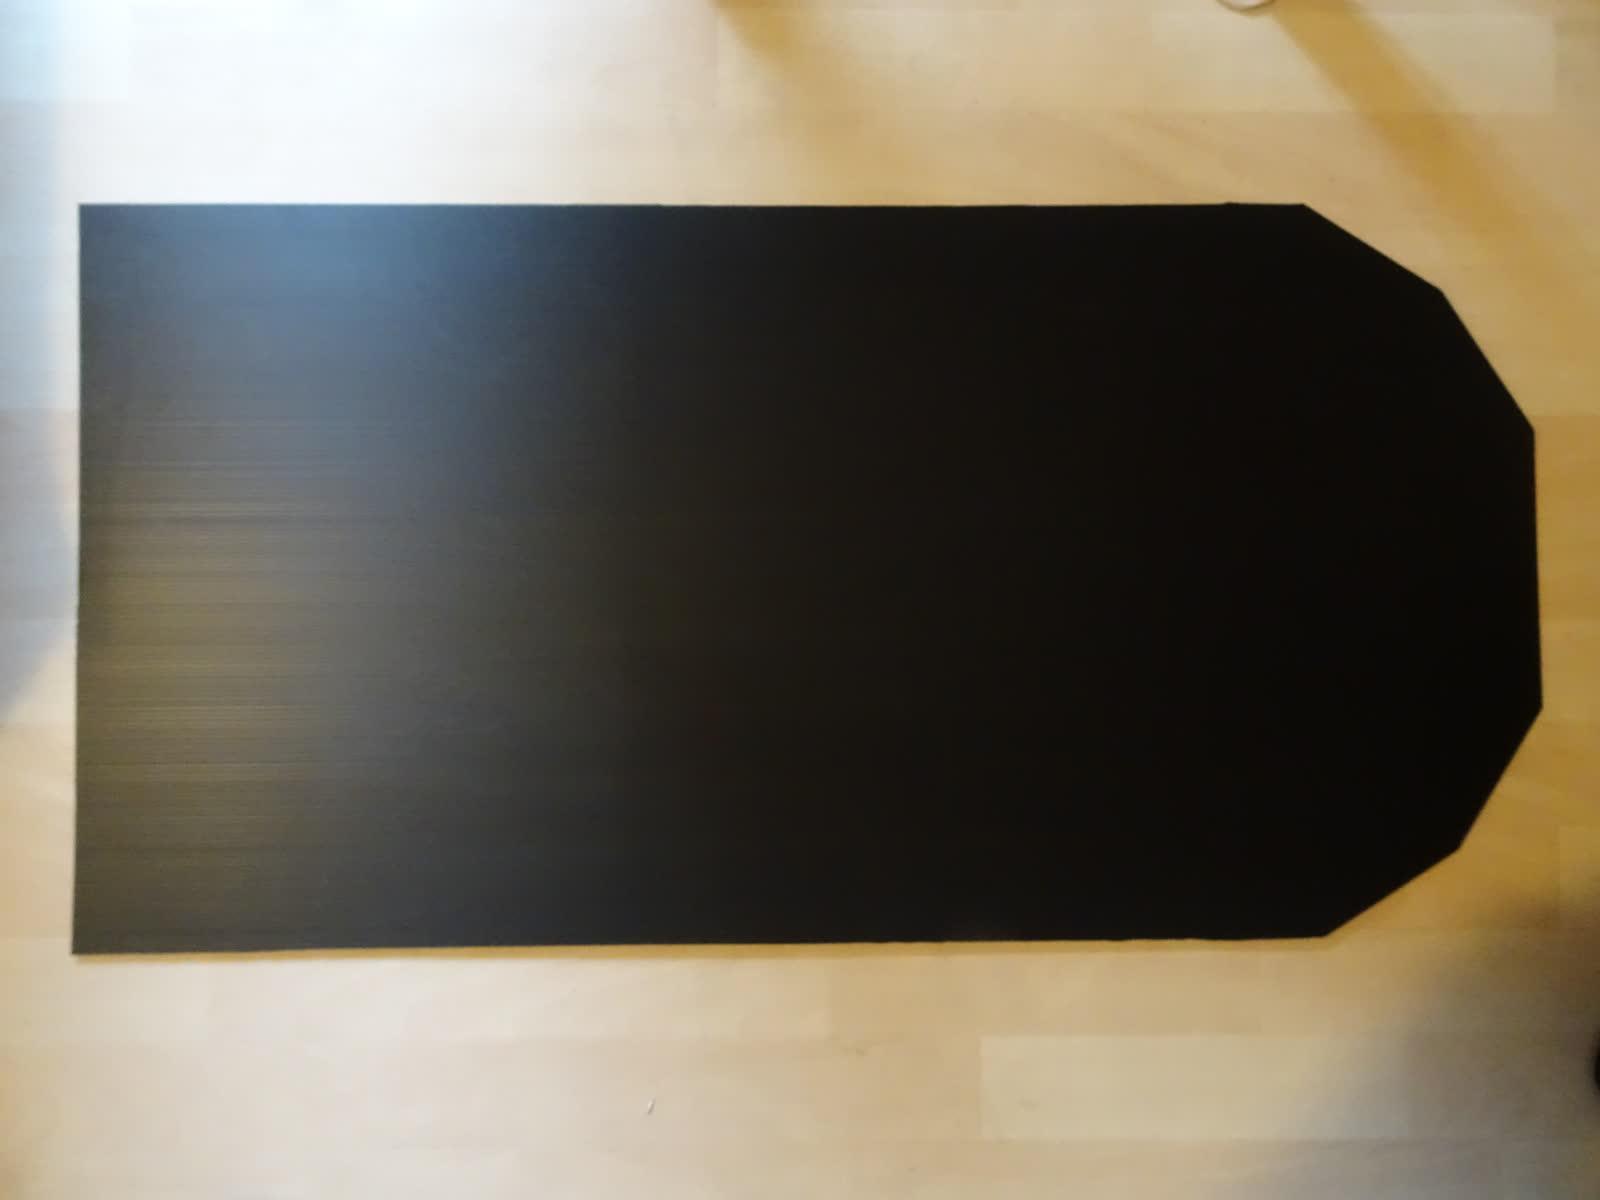
The pictures show two different hulls, made with polypropylene plates, for RC hovercrafts :
- the red hull will require only one angle template (only 90° angles) and 4 pieces of skirt, as it has 4 sides
- the black one, as it has four different angle values, will require four templates and four times more calculations - and as it has 8 sides, it will require 8 pieces of skirt to cut and join together
Attachment Strips
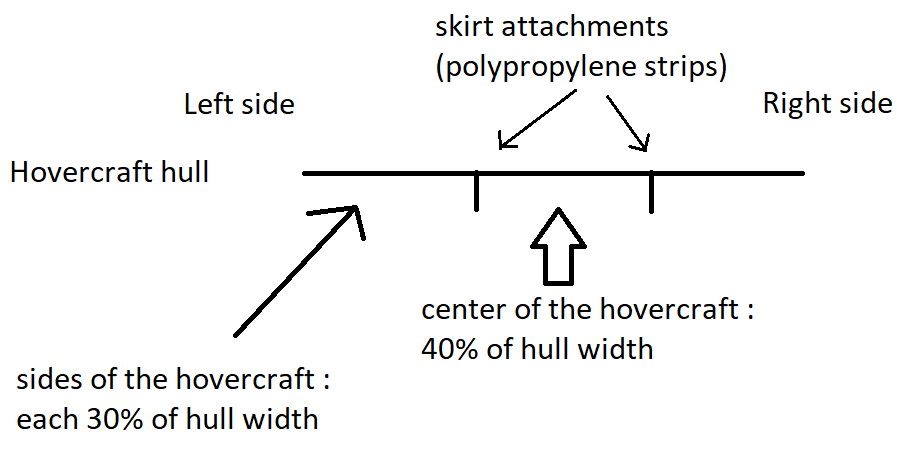
A "vented bag skirt" is set to the hull in two places: on the edges of the hull, and under the hull. In this case, for a RC hovercraft, we will set two strips under the hull first.
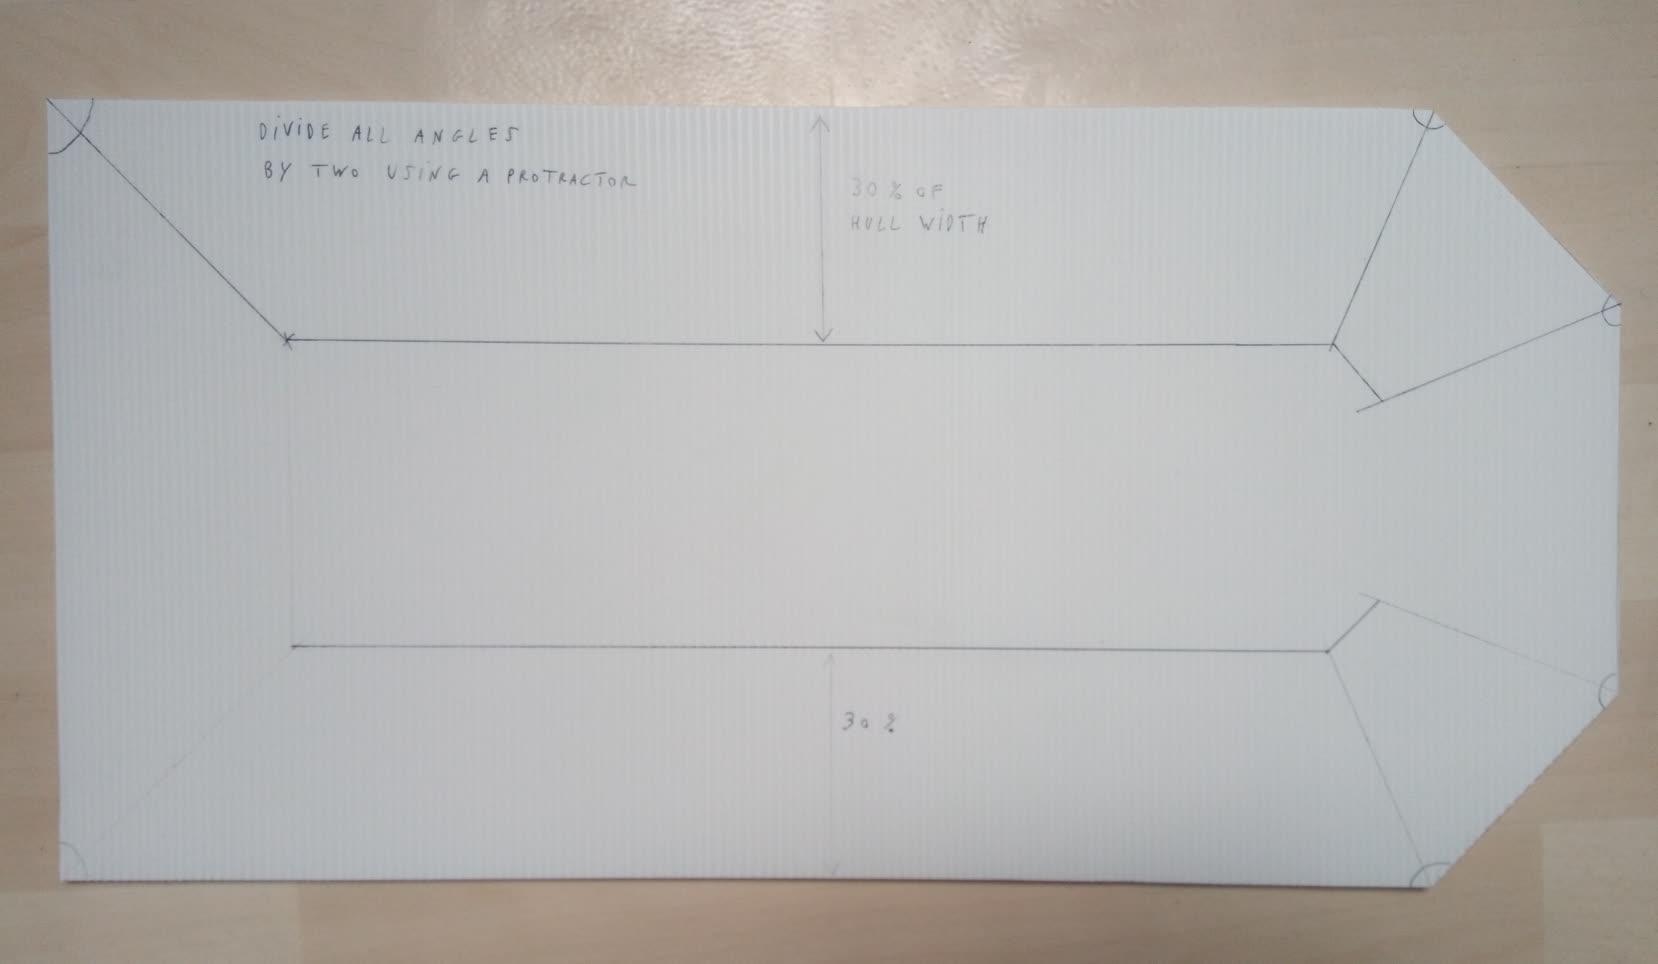
Take the hull upside down. With a pencil, draw two lines parallel to the sides of the hull. They must be separated from the edges of the hull by 30% of the hull width. With a protractor, draw the bisectors of all the angles of the hull. Like shown on the picture, use these bisectors to reproduce the shape of the hull with a smaller ratio.

You can now cut the two strips and fold them in the right places to match the lines drew previously. For RC models, the height of these strips can be 10% of the hull width.
You will notice that the strip is not perfectly straight, and that there should be two strips facing each other - this was a quick draft for me, you have to do better :-)
Note that the front and back of the "vented bag skirt" must be kept open to allow air to escape (again, see this page for more explanations). This is why we don't need skirt attachments for the front nor for the rear.
Drawing the Shape of the Skirt
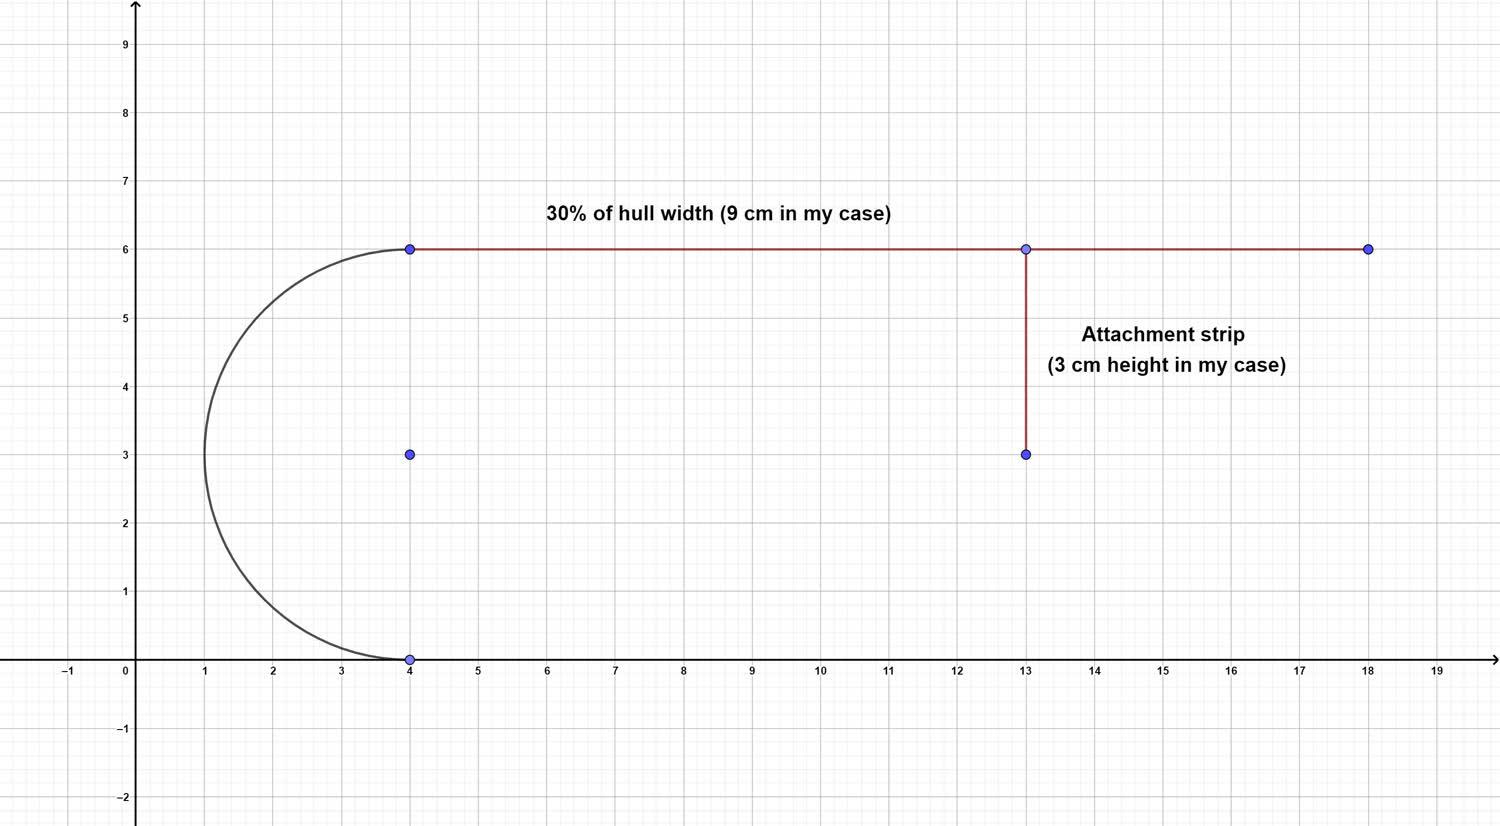
You now need to draw the shape of your skirt using drawing software like Geogebra or graph paper. Draw it at 1 : 1 scale to avoid mistakes, you have to be as precise as possible to get a good result.
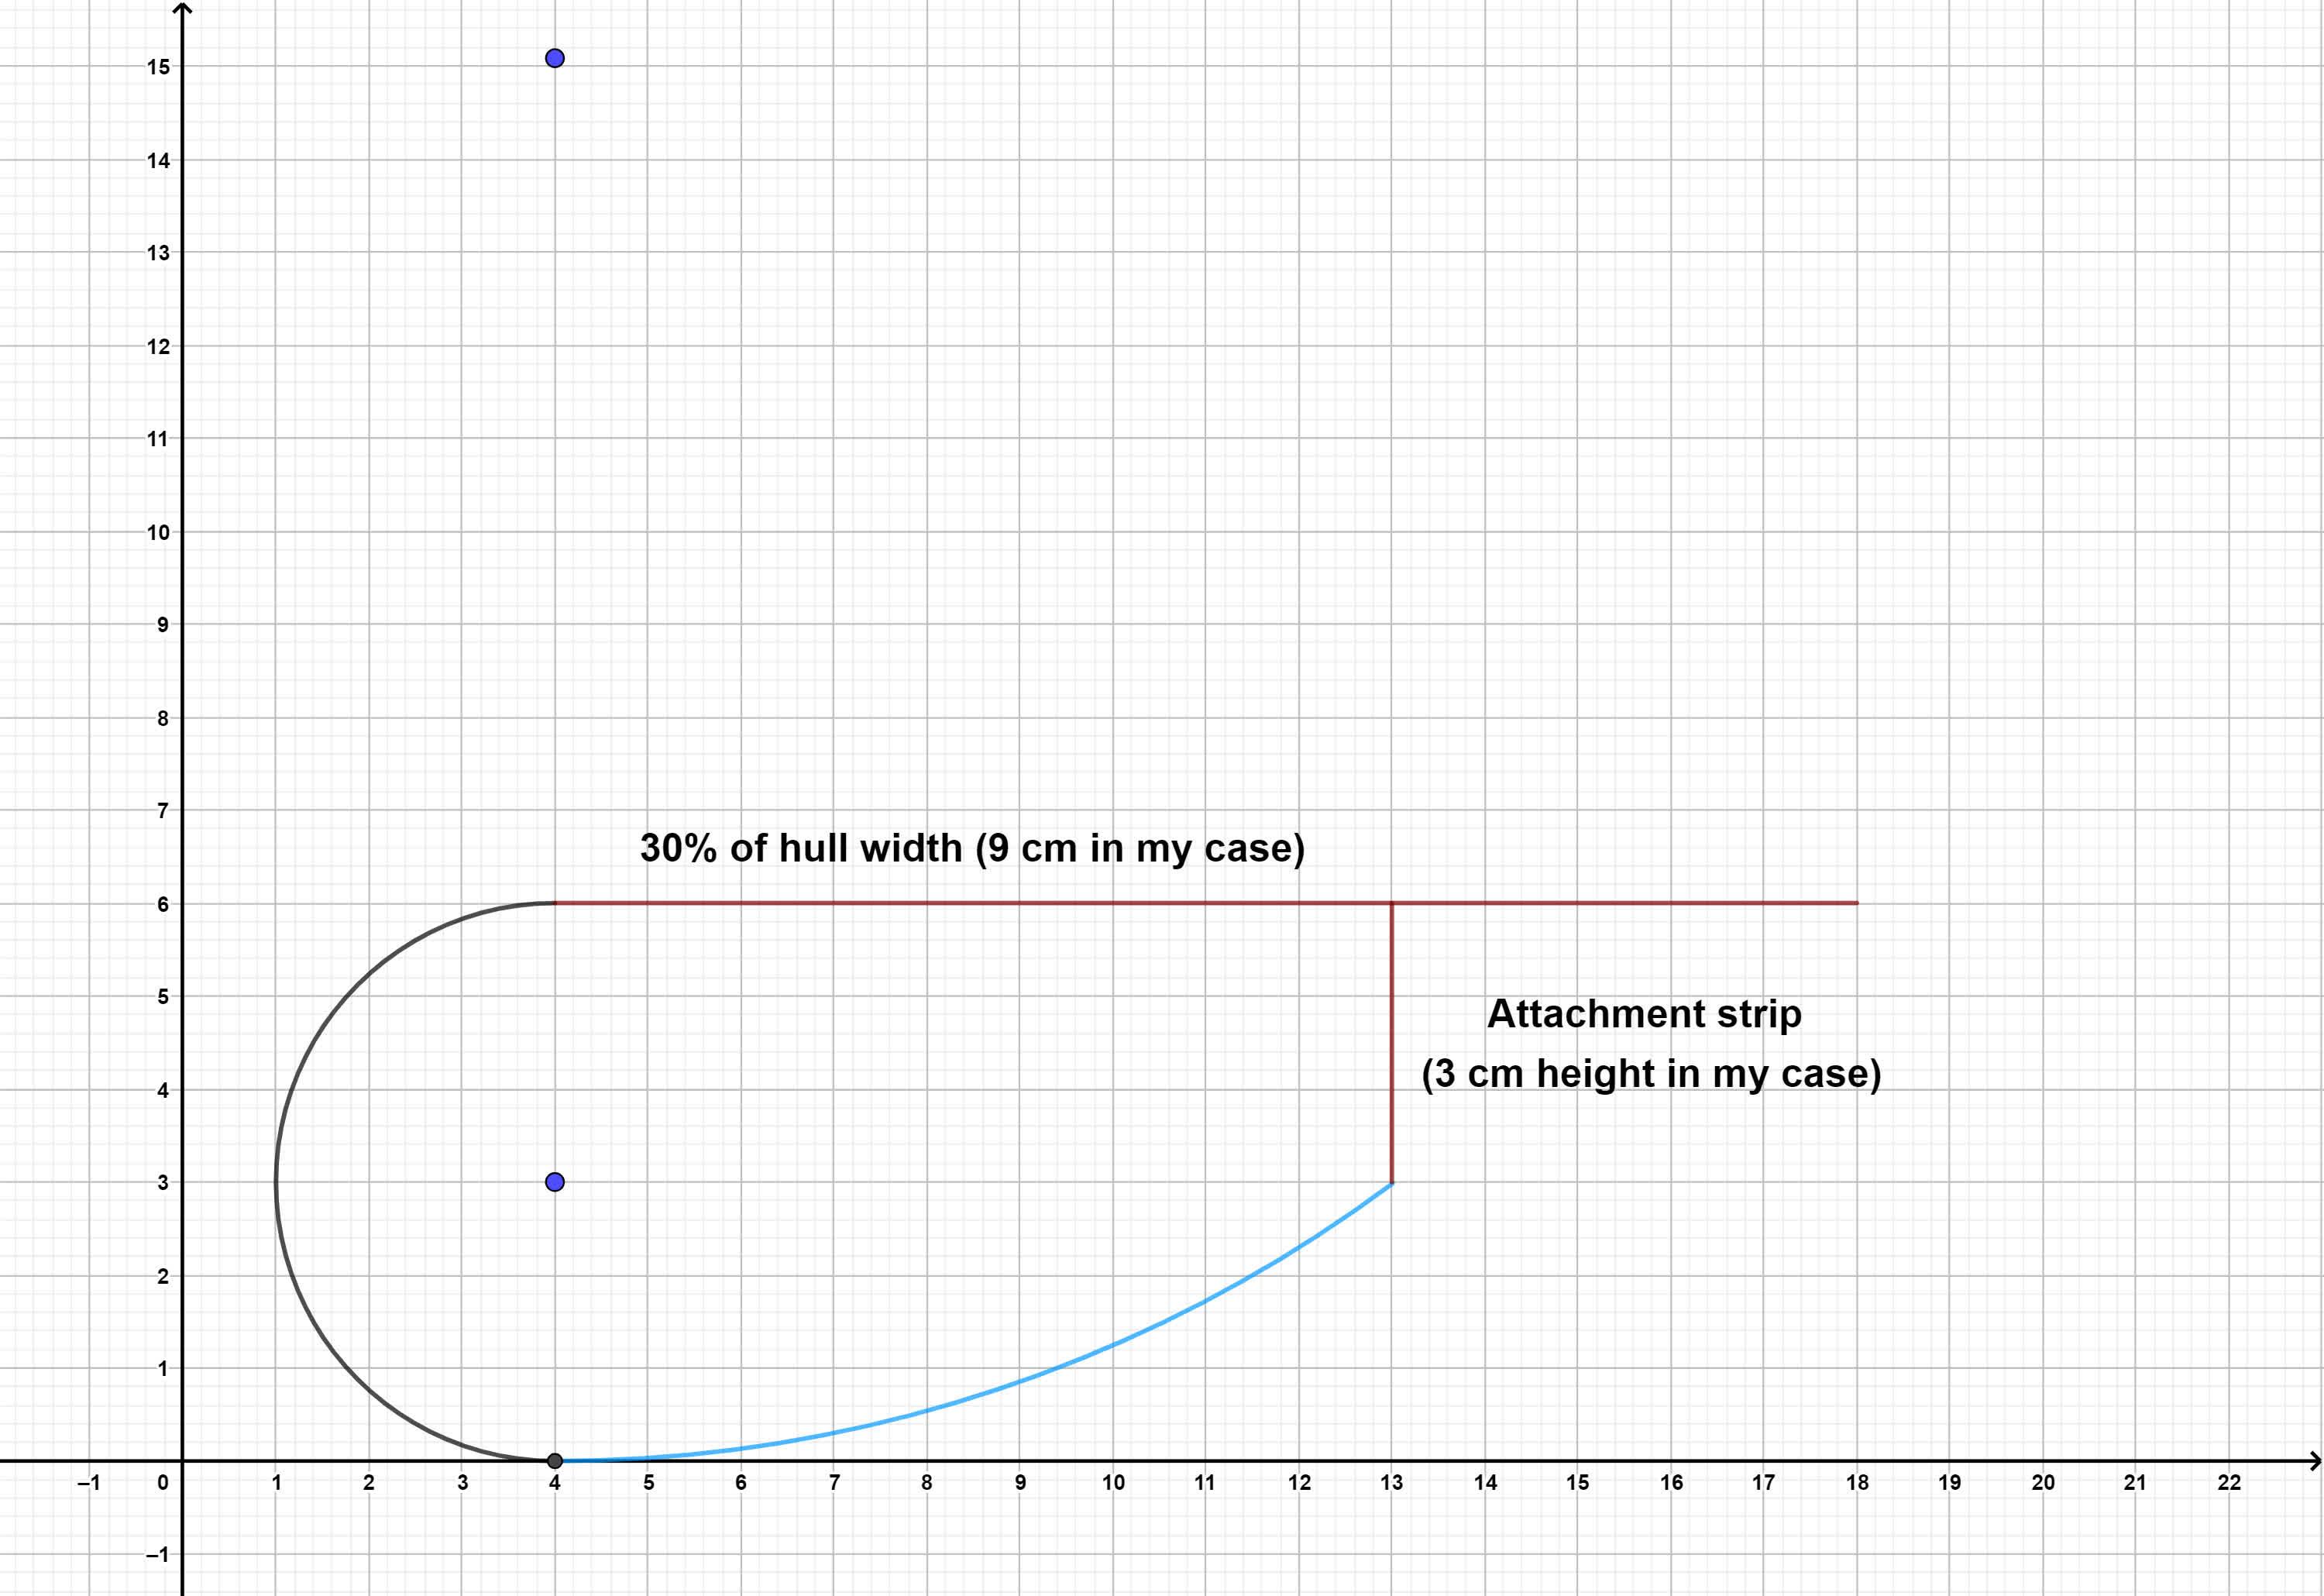
Draw a horizontal line that represents your hovercraft hull. Draw a vertical segment that will depict one of your attaching strips (3 cm height in my case, because my hull is 30 cm large).
Draw a semi-circle, the center of which is exactly below the edge of the hull, and facing the end of the attachment strip. Join the end of the semi-circle to the end of the attaching strip with an arc. Sorry to say that I have no specific instructions to position the compass nor to set its spacing, I usually try several times until I get a correct arc. In this case, the compass was positioned at the top of the drawing, right above the center of the semi-circle.
Finally, you obtain a vertical cut of your skirt : this is what your skirt will look like when inflated.
From this single shape, you can design all the corners templates you need, so be sure to save it or copy it. Remember that you will need one template for each angle value on your hull.
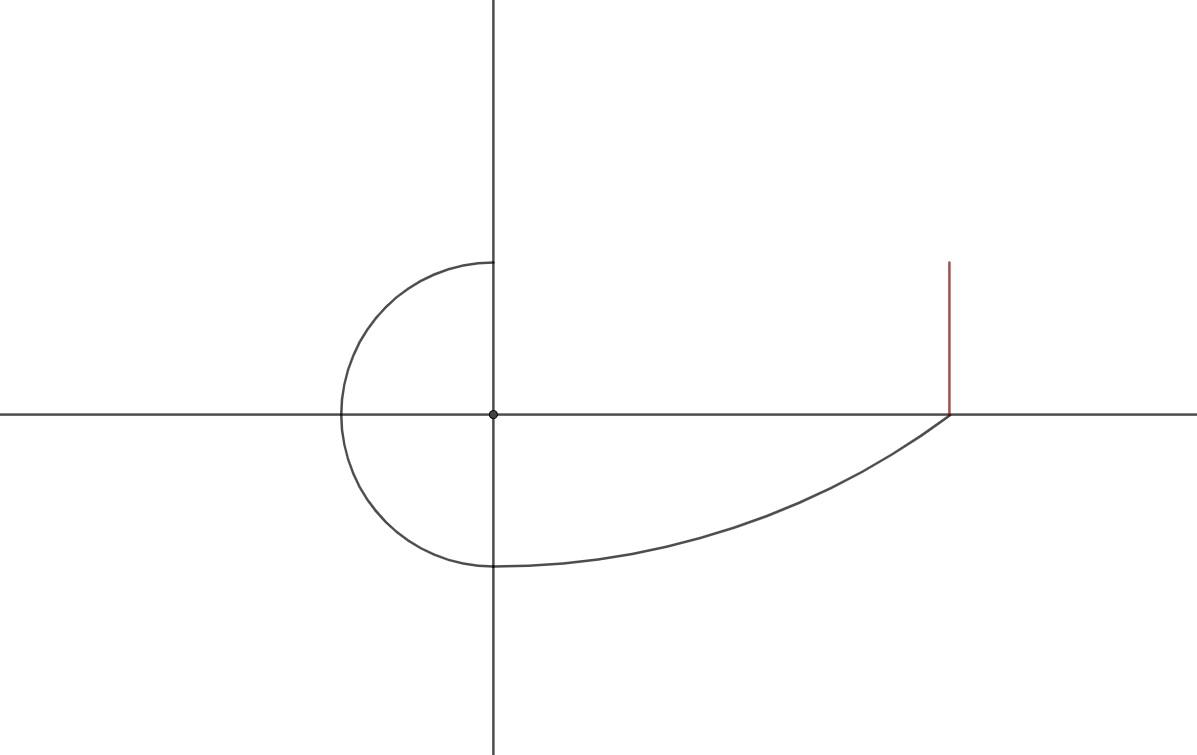
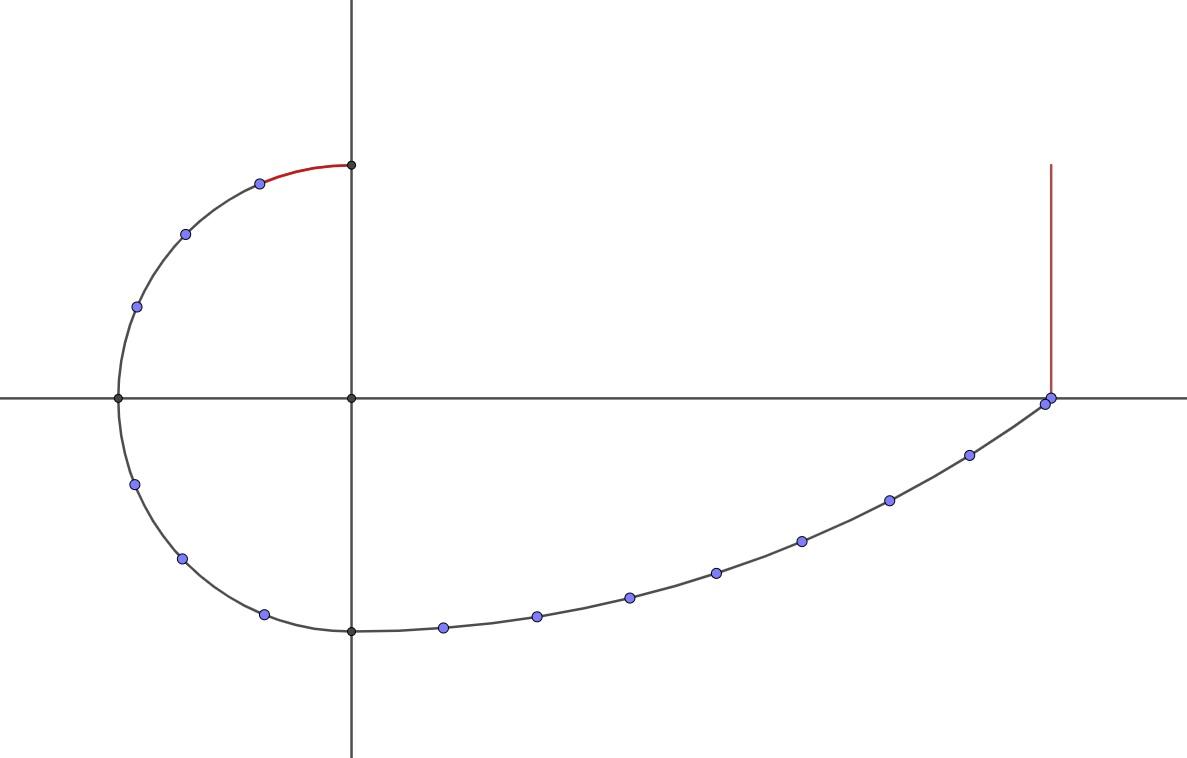
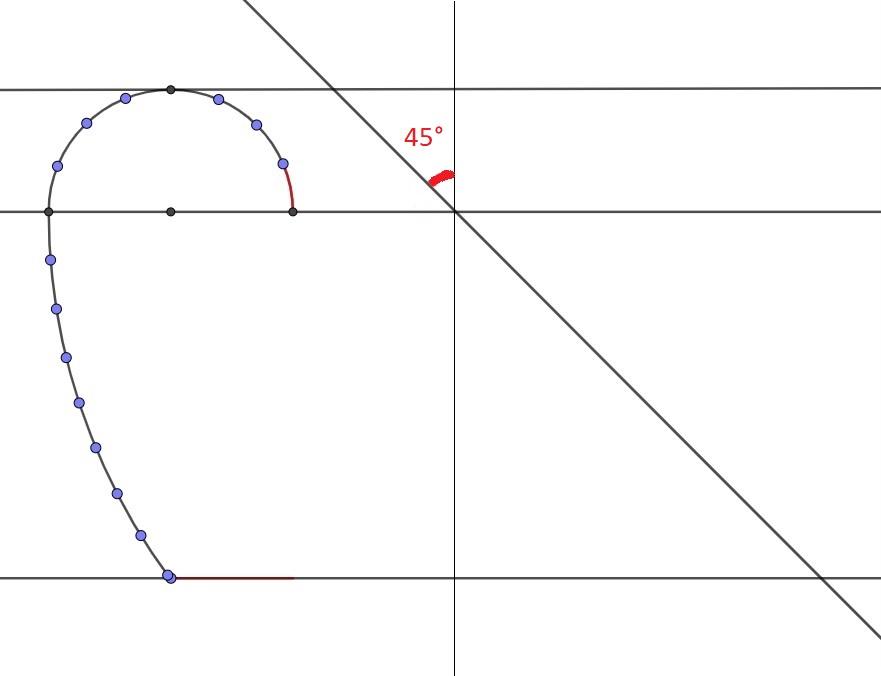
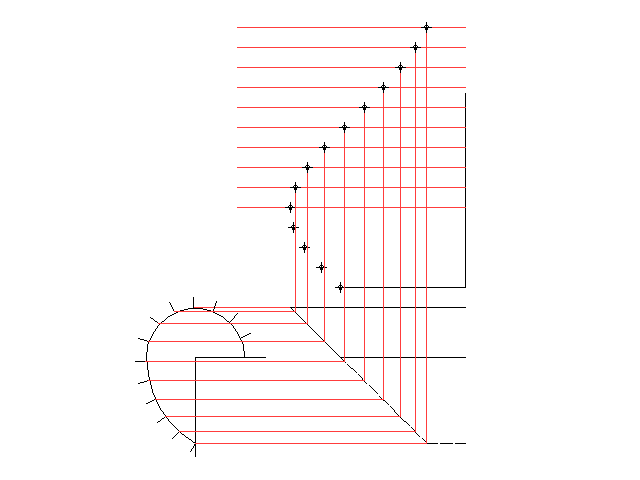
Erase the hull but keep the attachment strip. Draw two horizontal and vertical axes which pass through the center of the semi-circle drawn previously. Divide the semi-circle into 8 equal circular sectors, each one being 22.5°.
With a compass, measure the length of the arc marked in red. Use this arc length to divide the rest of the skirt. If necessary, add a last dot "manually" at the very end of the skirt, like I did. On a real hovercraft, where the semi-circle must be around 40 cm in diameter, you can go up to 12 equal circular sectors to get more precision - in that case you will get 15° sectors. Of course, this level of precision is not required for models. In all cases, it is important to divide the semicircle with an even number, to obtain a correct positioning of your dots.
.jpg)
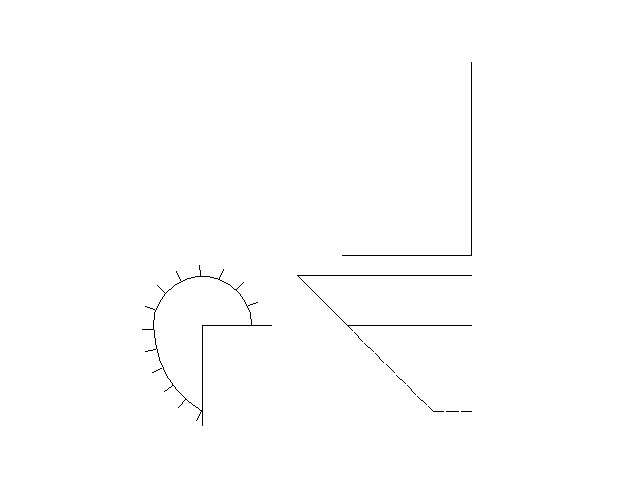
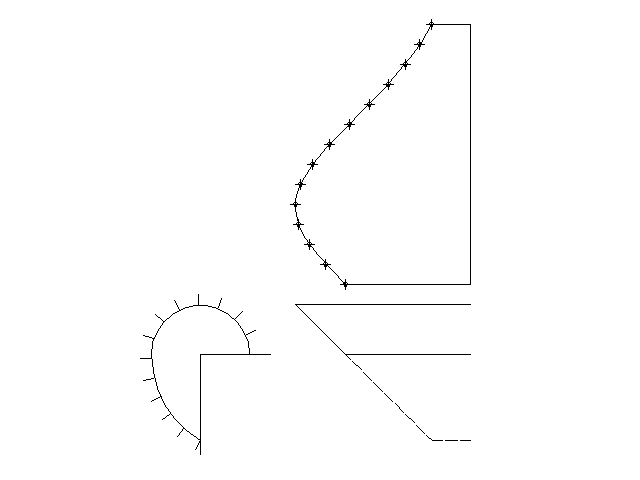
I will rotate the drawing 90° to the right to continue the process. Draw three horizontal lines like shown and a vertical axis.
In this example, let's say I'm making a template for the rear of the hovercraft, where the hull is rectangular (90° angles). Whatever the value of the angle on your hull, divide it by two and use this result to draw the diagonal as shown.
Note that the diagonal musn't come too close to your semi-circle, draw your vertical axis accordingly.
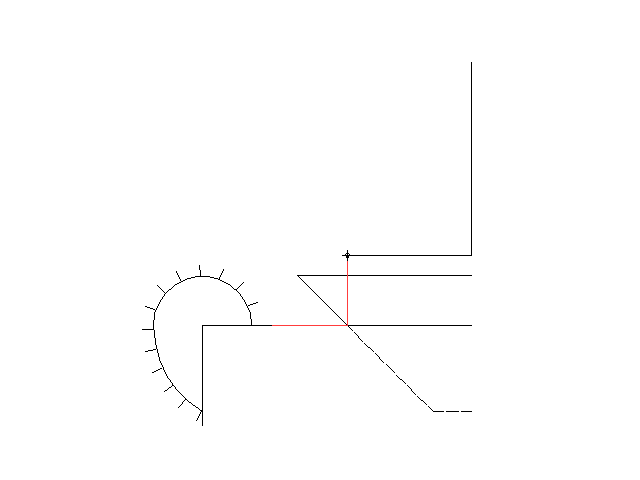
We will continue the tutorial with older drawings. Draw a corner above like shown.
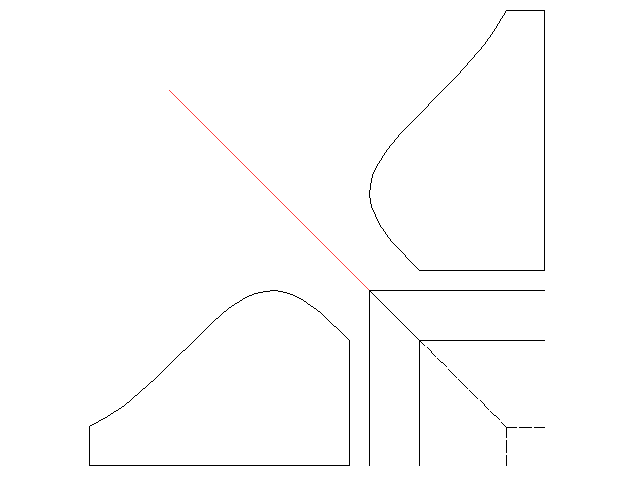
Then, we draw the first dot of the template : draw a horizontal line joining the beginning of the skirt to the diagonal drawn previously, and from there draw a right angle to join the horizontal line of the corner.
Repeat the process like so, to get your second dot.
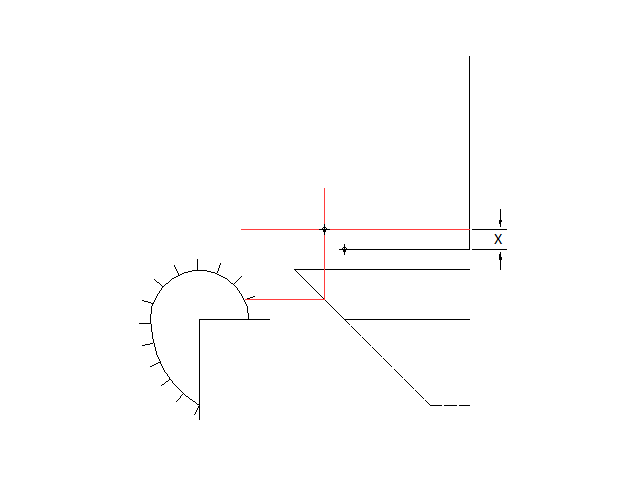
The space between two lines, noted X on the drawing, is calculated from the following formula : θ × (π/180) × r.
In this example, θ = 22.5 because we divided the semi-circle in 8 equal sectors (180 / 8 = 22,5), and r = 3 because the semi-circle radius is 3 cm. Therefore, I get : 22.5 x (π/180) × 3 = 1,2 cm.
Once your dot is drawn, erase the two lines that you used to place it, to make your work easier.
Repeat this process to get all your dots.
Pay attention to the last dot that you may have added manually on the skirt profile during the previous steps - in that case, the two last lines, at the top of the drawing, will not have the same "X" gap as the others.
Use your compass to measure the distance between the penultimate dot and the last dot on the skirt profile, at the bottom left, and use this length as your last "X" gap. The result may contain a very small margin of error, which will have no bad consequence.
Your Skirt Template Is Done
Join the dots, et voilà, you have your template, ready to be reproduced on a piece of cardboard.
As said before, as you need to draw one template for each angle value on the hull, repeat this operation until you have all the templates you need.
The second picture shows the final result of two 45° corners facing each other. When joined together by soldering or sewing, this part of the skirt will have an angle of 90°.
Cutting Out Skirt Pieces
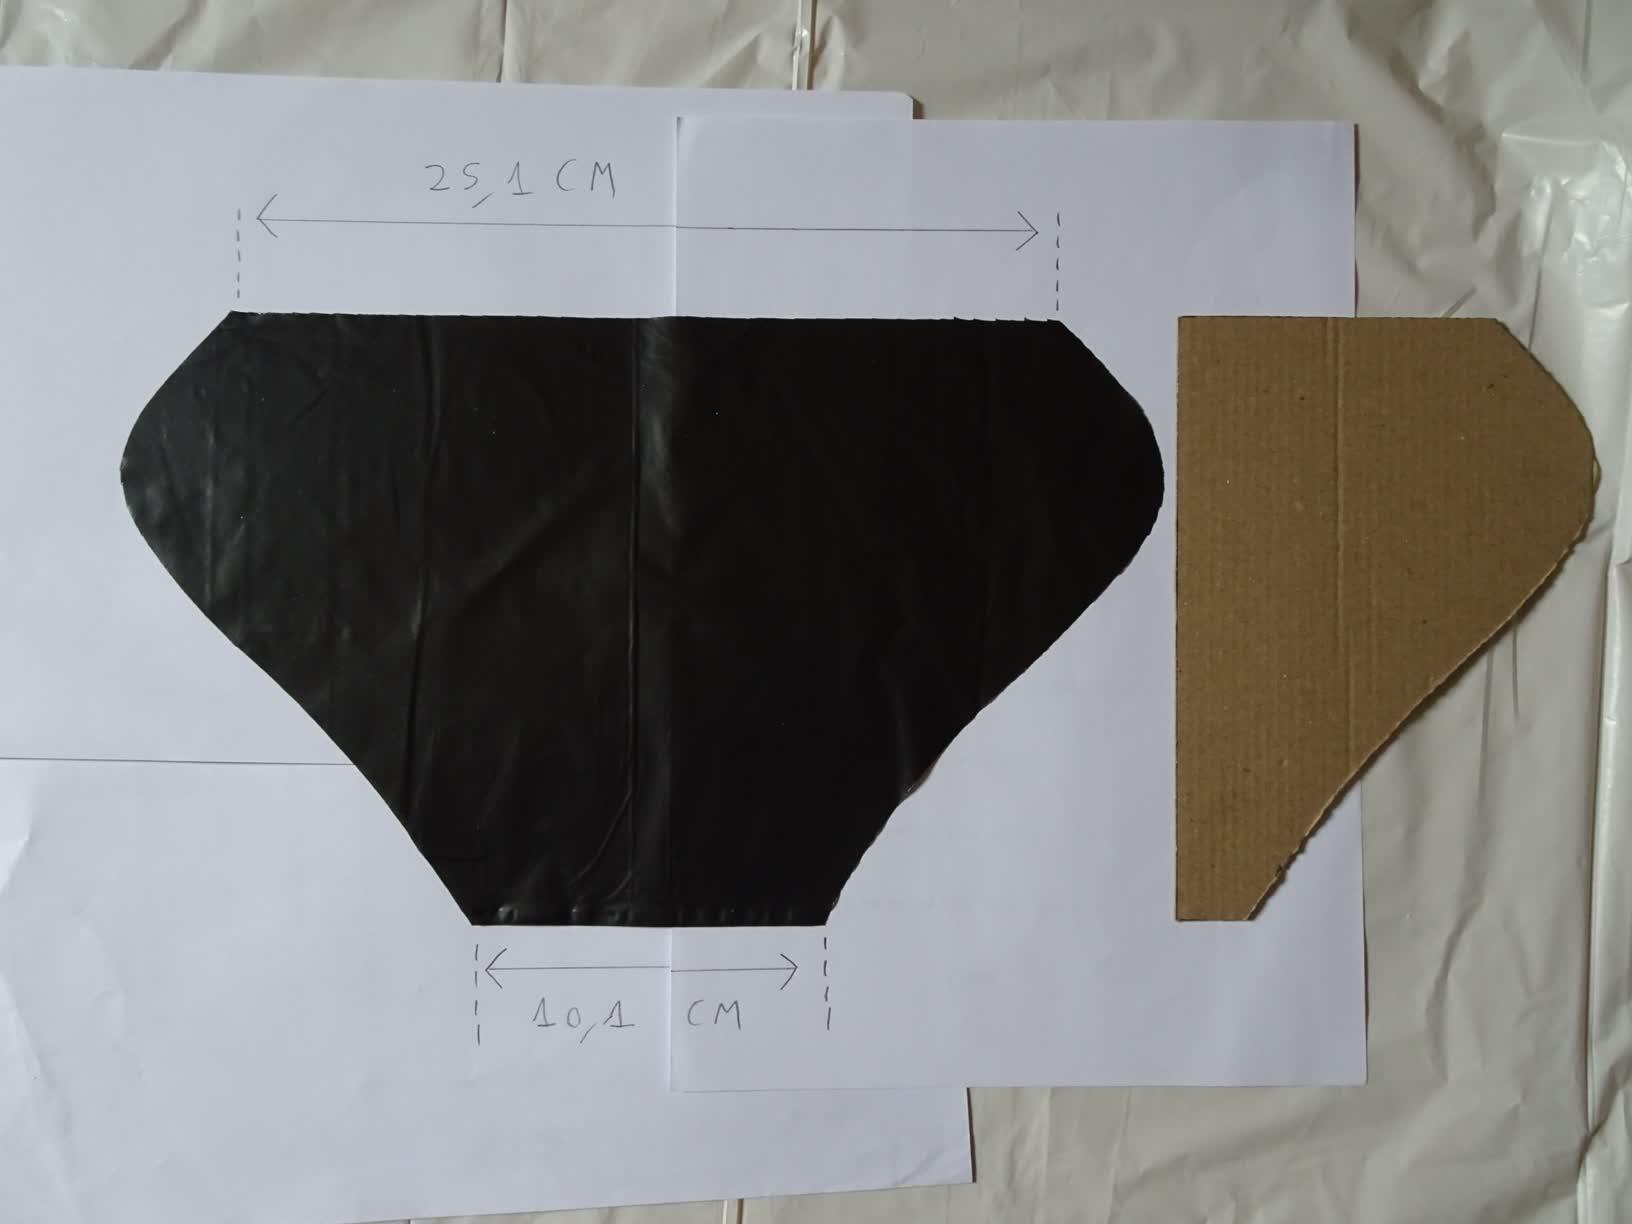
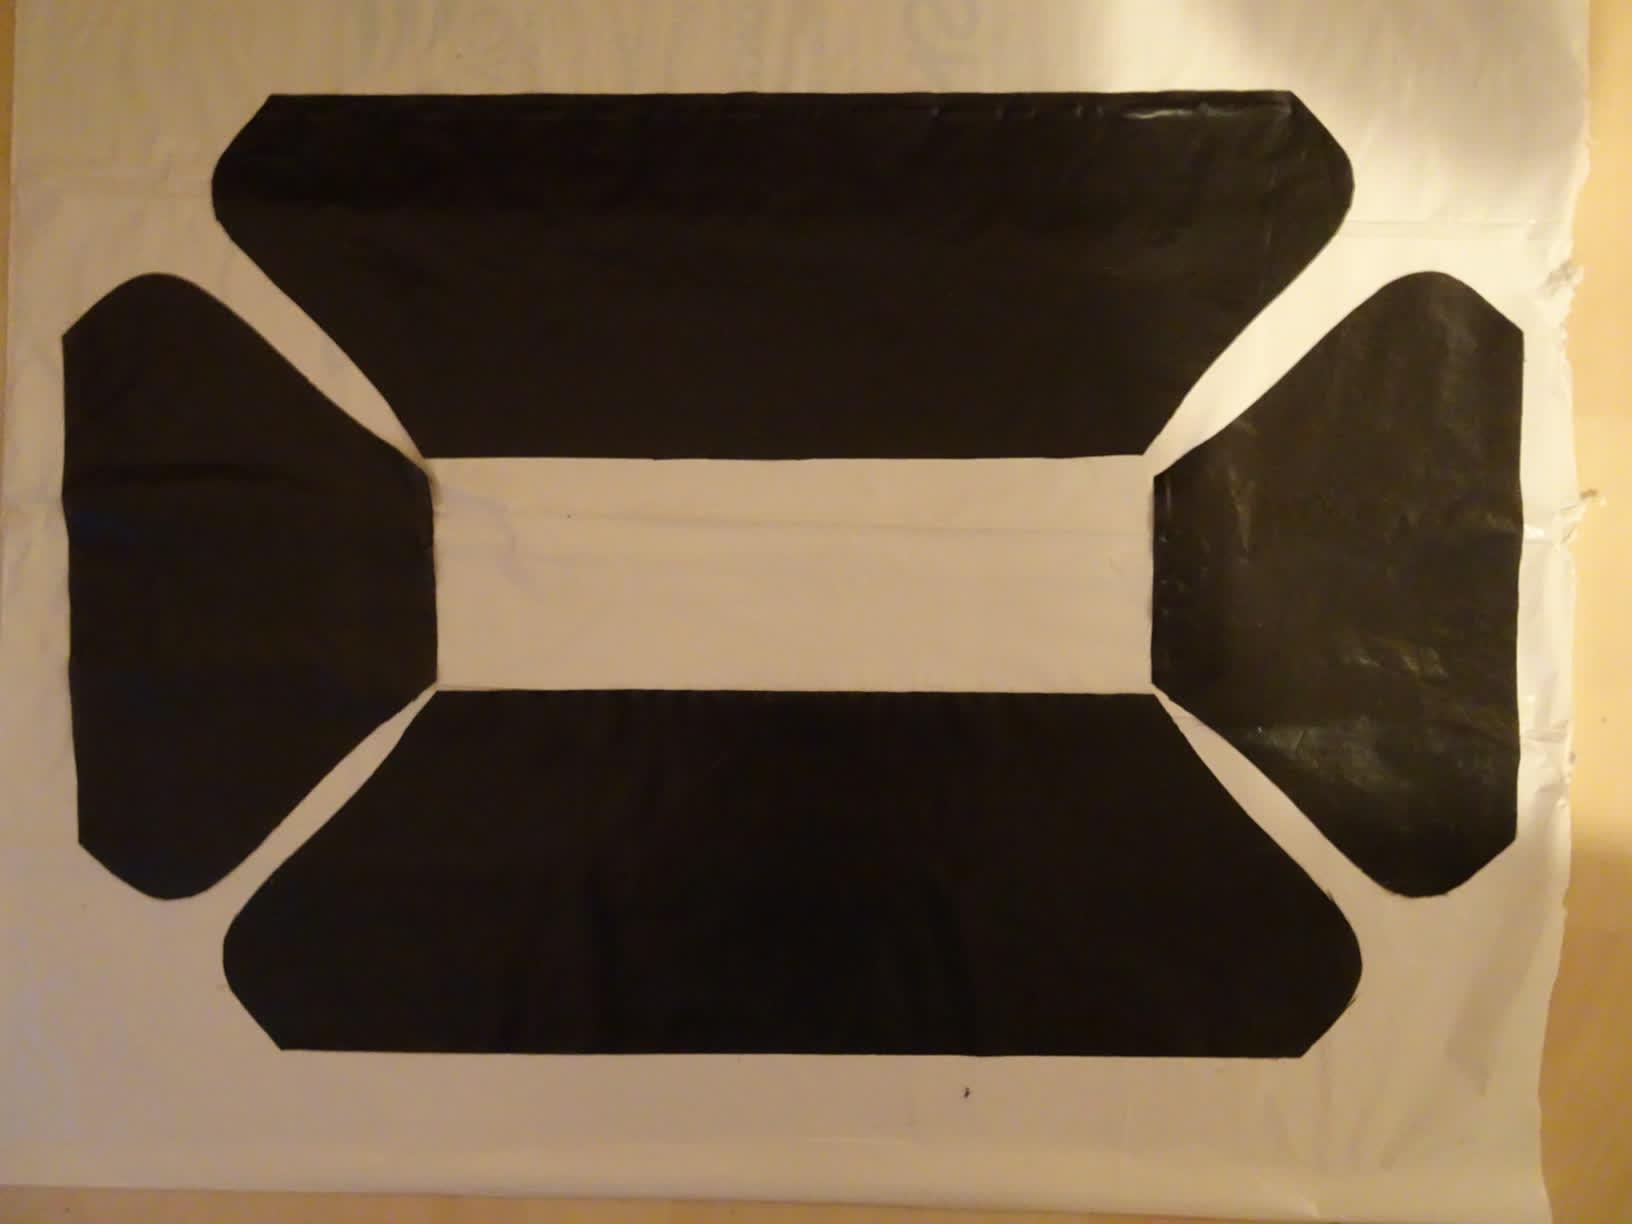
Now that you have all your templates, you need to cut skirts pieces with the right dimensions.
Let's say we have made the template for the rear of a RC hovercraft with a 25 cm hull width. Therefore, we need the top of this piece of skirt to be 25 cm (25,1 cm because you will need a margin when sewing or soldering the pieces together).
Thanks to the template, you don't have to worry about the length at the bottom of the piece, nor the height of the piece - they will be exactly as you need.
Repeat the same operation for all your hull sides. Just remember to use the correct templates for each different angle value on your hull, and to use the length corresponding to the hull side. If your hull design is complex, you can have two different angle values on the same piece of skirt, as shown on the drawing on the right. Therefore, you will need to use two different templates for the right and left sides of these skirt pieces.
The drawing shows a RC hovercraft hull with its two attachment strips and all its skirt pieces ready to be put together. As you can guess, the longer sides will be sticked on the edges of the hovercraft hull, while the smaller sides of the skirt will be sticked on the attachment strips (except for the front and the rear which have no attachment strips as I explained earlier).
Solder / Sew the Skirt Pieces Together

Are you done cutting all your skirt pieces ? Congratulations for following the tutorial so far, you're almost there.
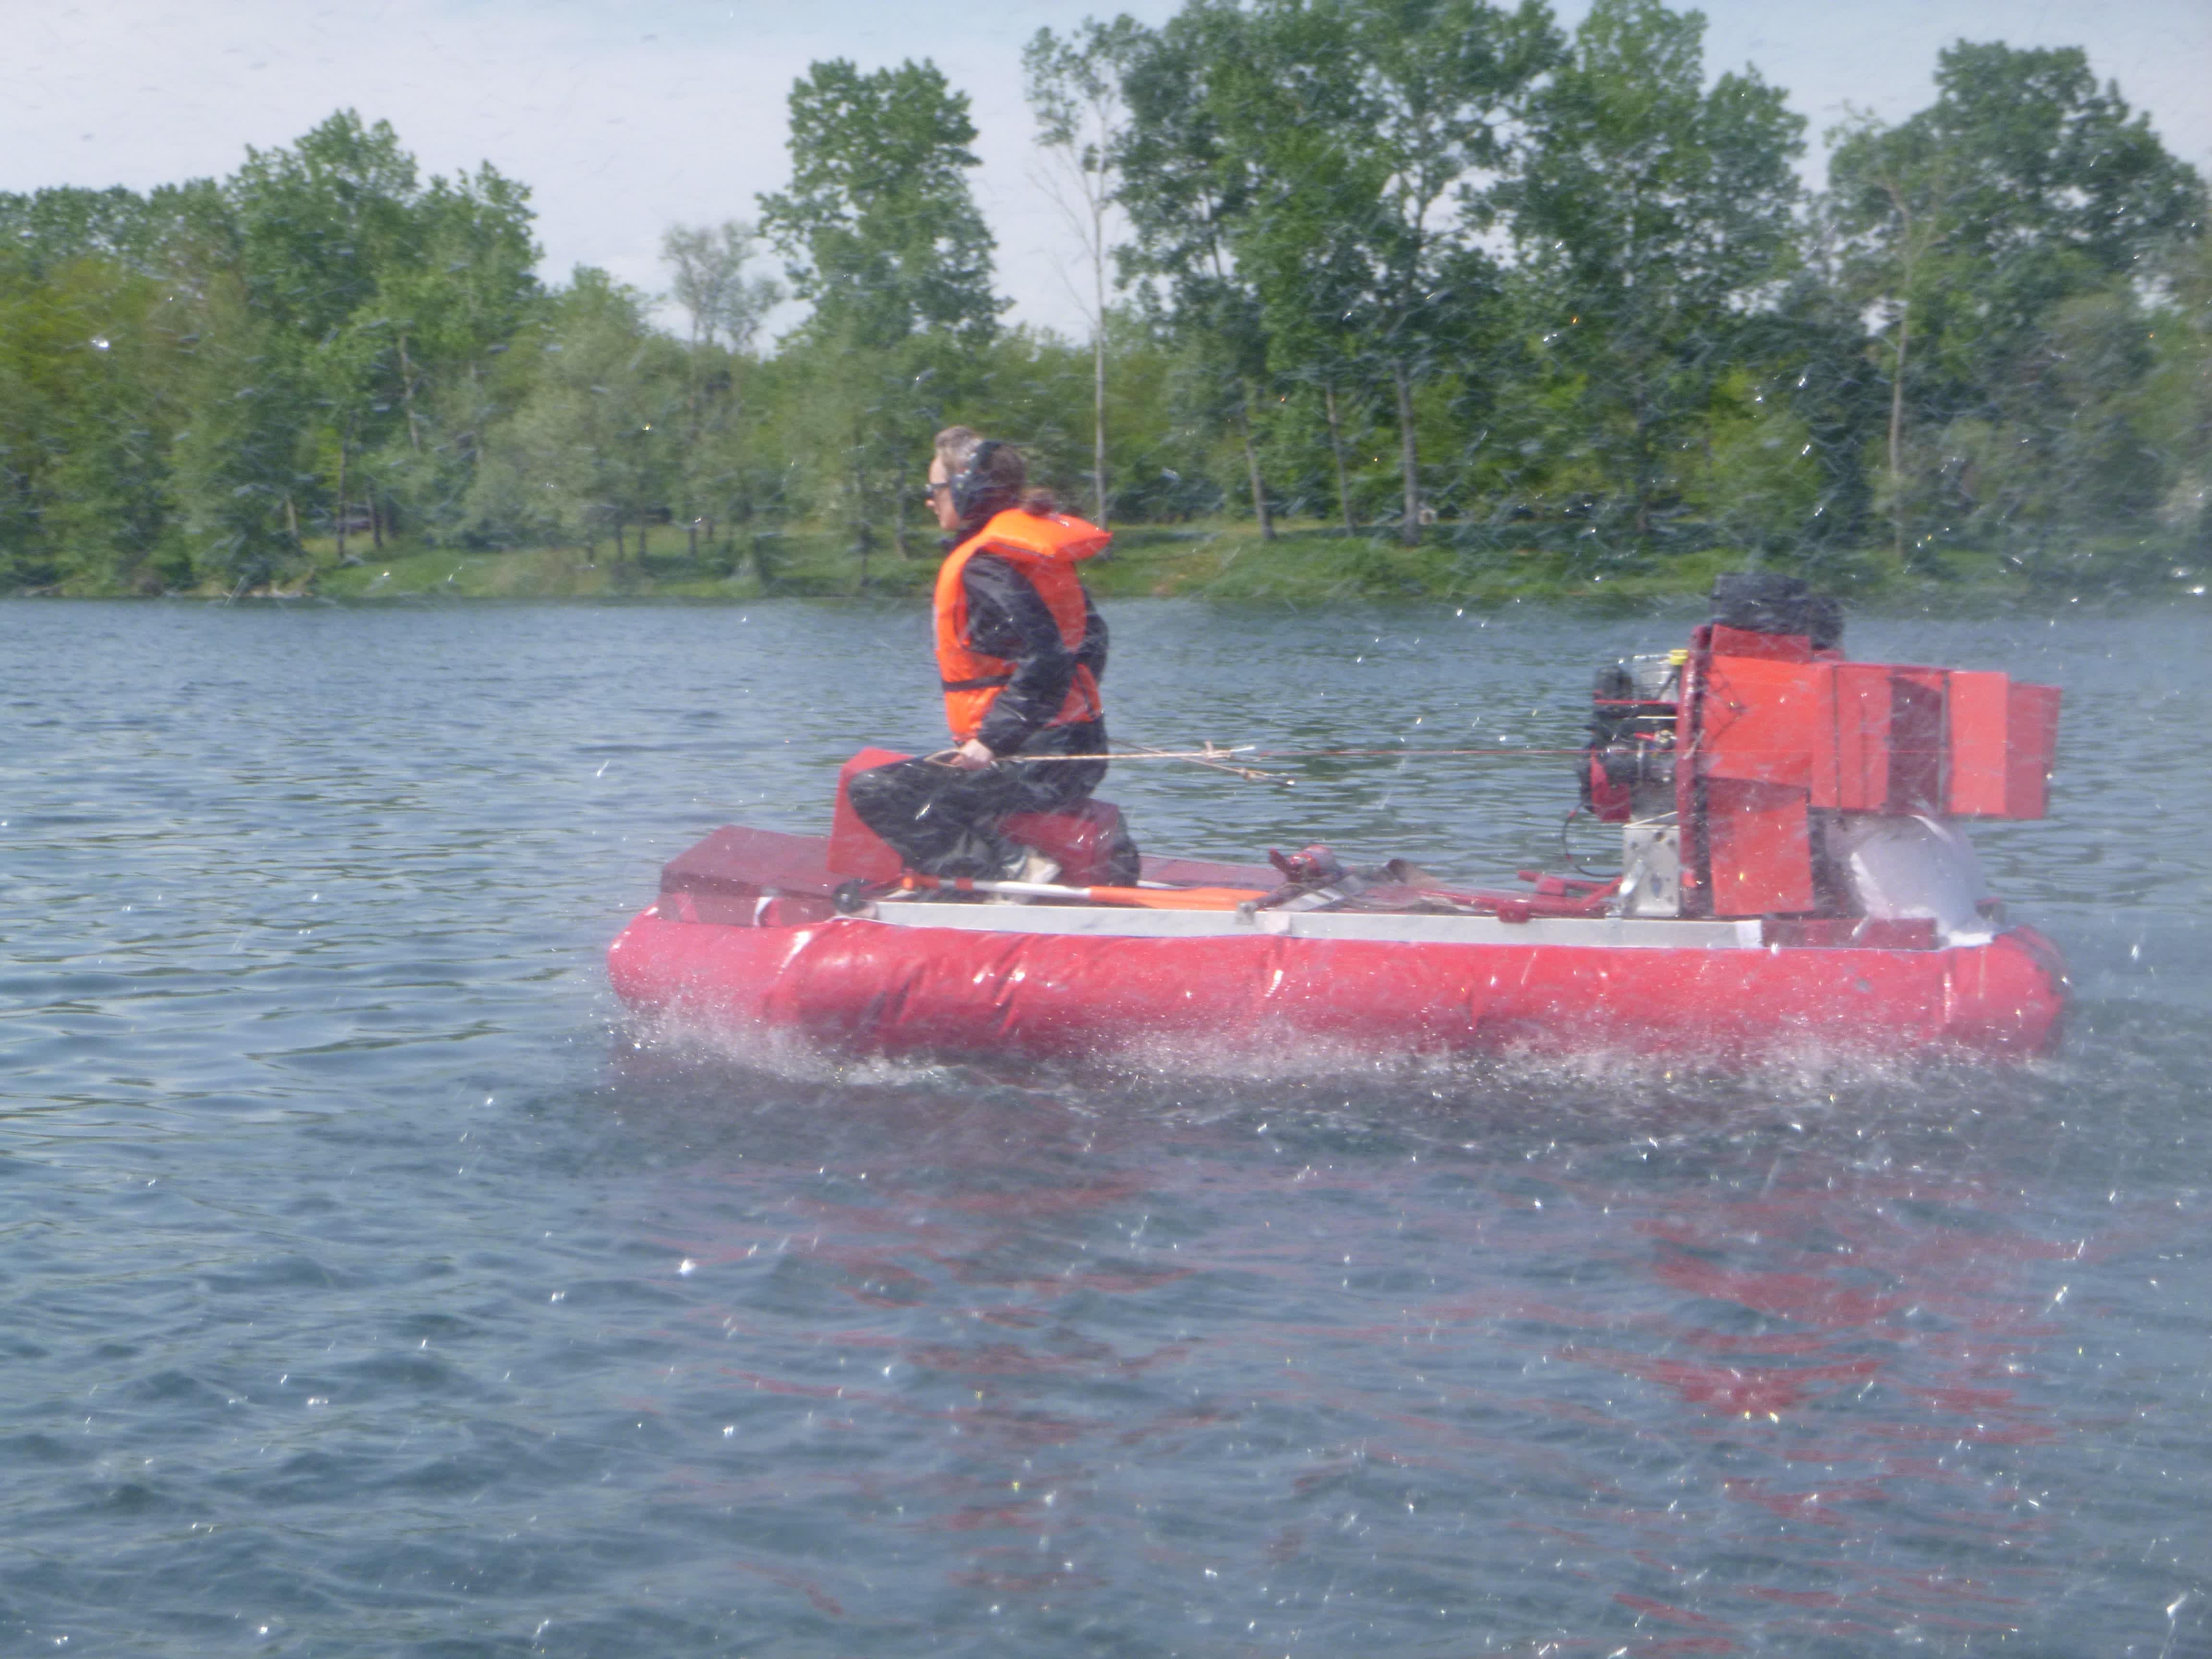
I will demonstrate the following steps with a RC hovercraft skirt made with trash bags. Sorry to say that I don't have pictures to show the sewing of bigger hovercrafts skirts right now, but the principle remains exactly the same.
From here, we need to put the skirt pieces together, either by sewing them or soldering them. Take two pieces of skirt and put one on top of the other so that the corners match.
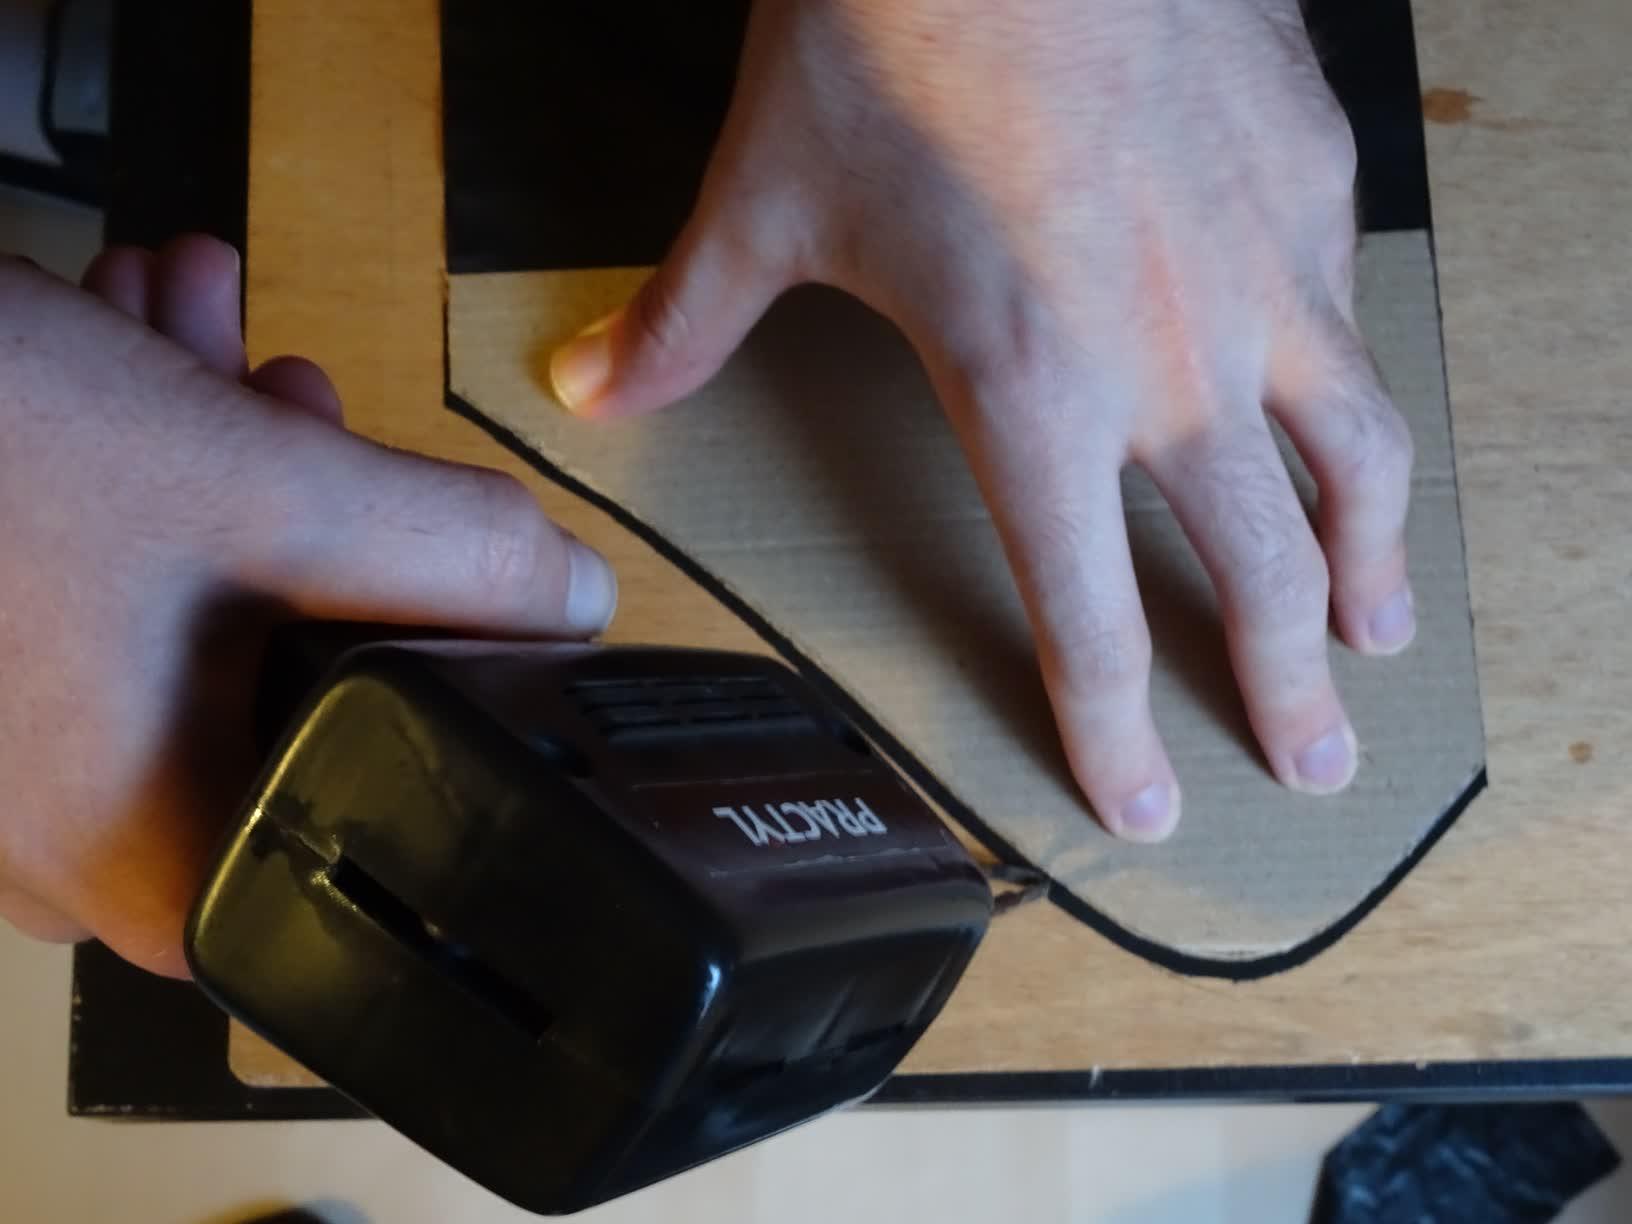
Take the appropriate cardboard template and set it 1 mm before the corner. With your soldering gun, slowly follow the shape of the cardboard. The two skirt pieces will melt and solder.
Your Skirt Is Done !
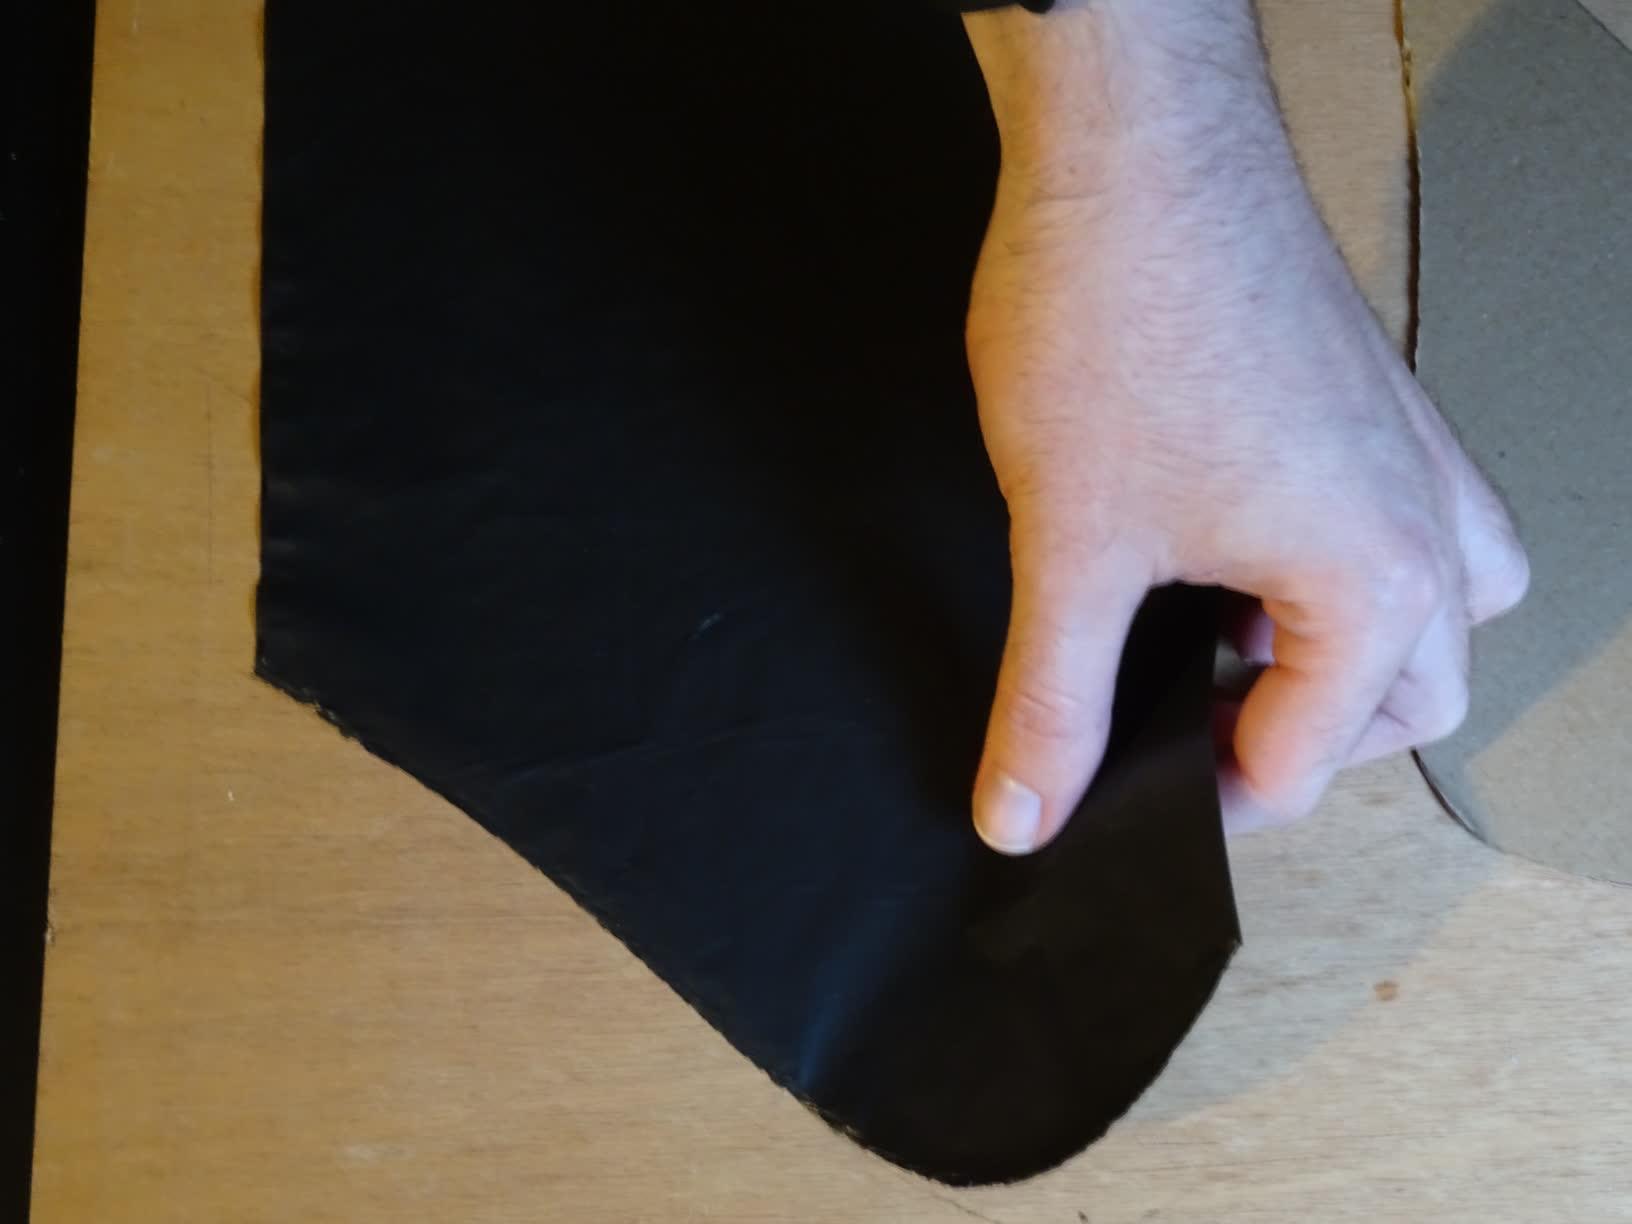
Let cool for 20 seconds, then gently remove the skirt pieces that will certainly be sticked both to the workbench and to the cardboard.
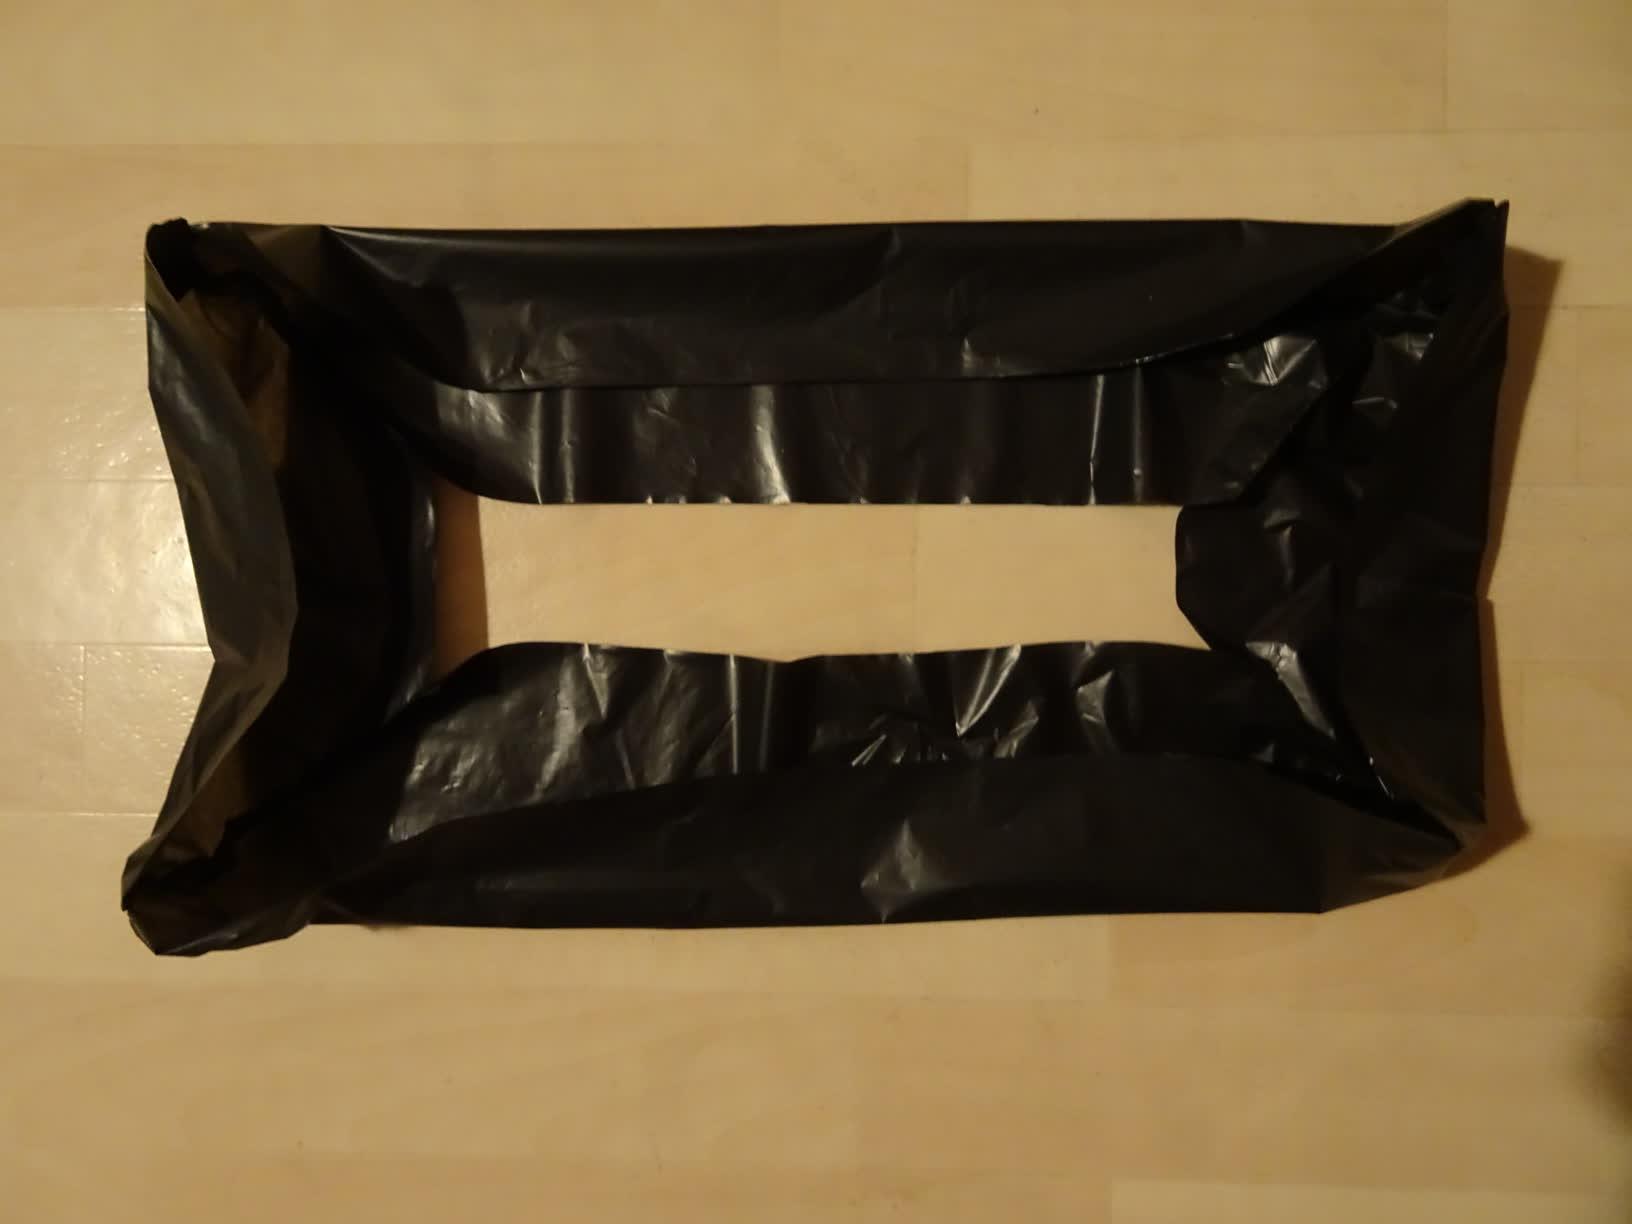
In the same way, sew / solder all the corners together to complete the skirt. Then turn it over like a sock, so that the solders are on the inside, for strength and aesthetics.
Setting the Skirt on the Hull
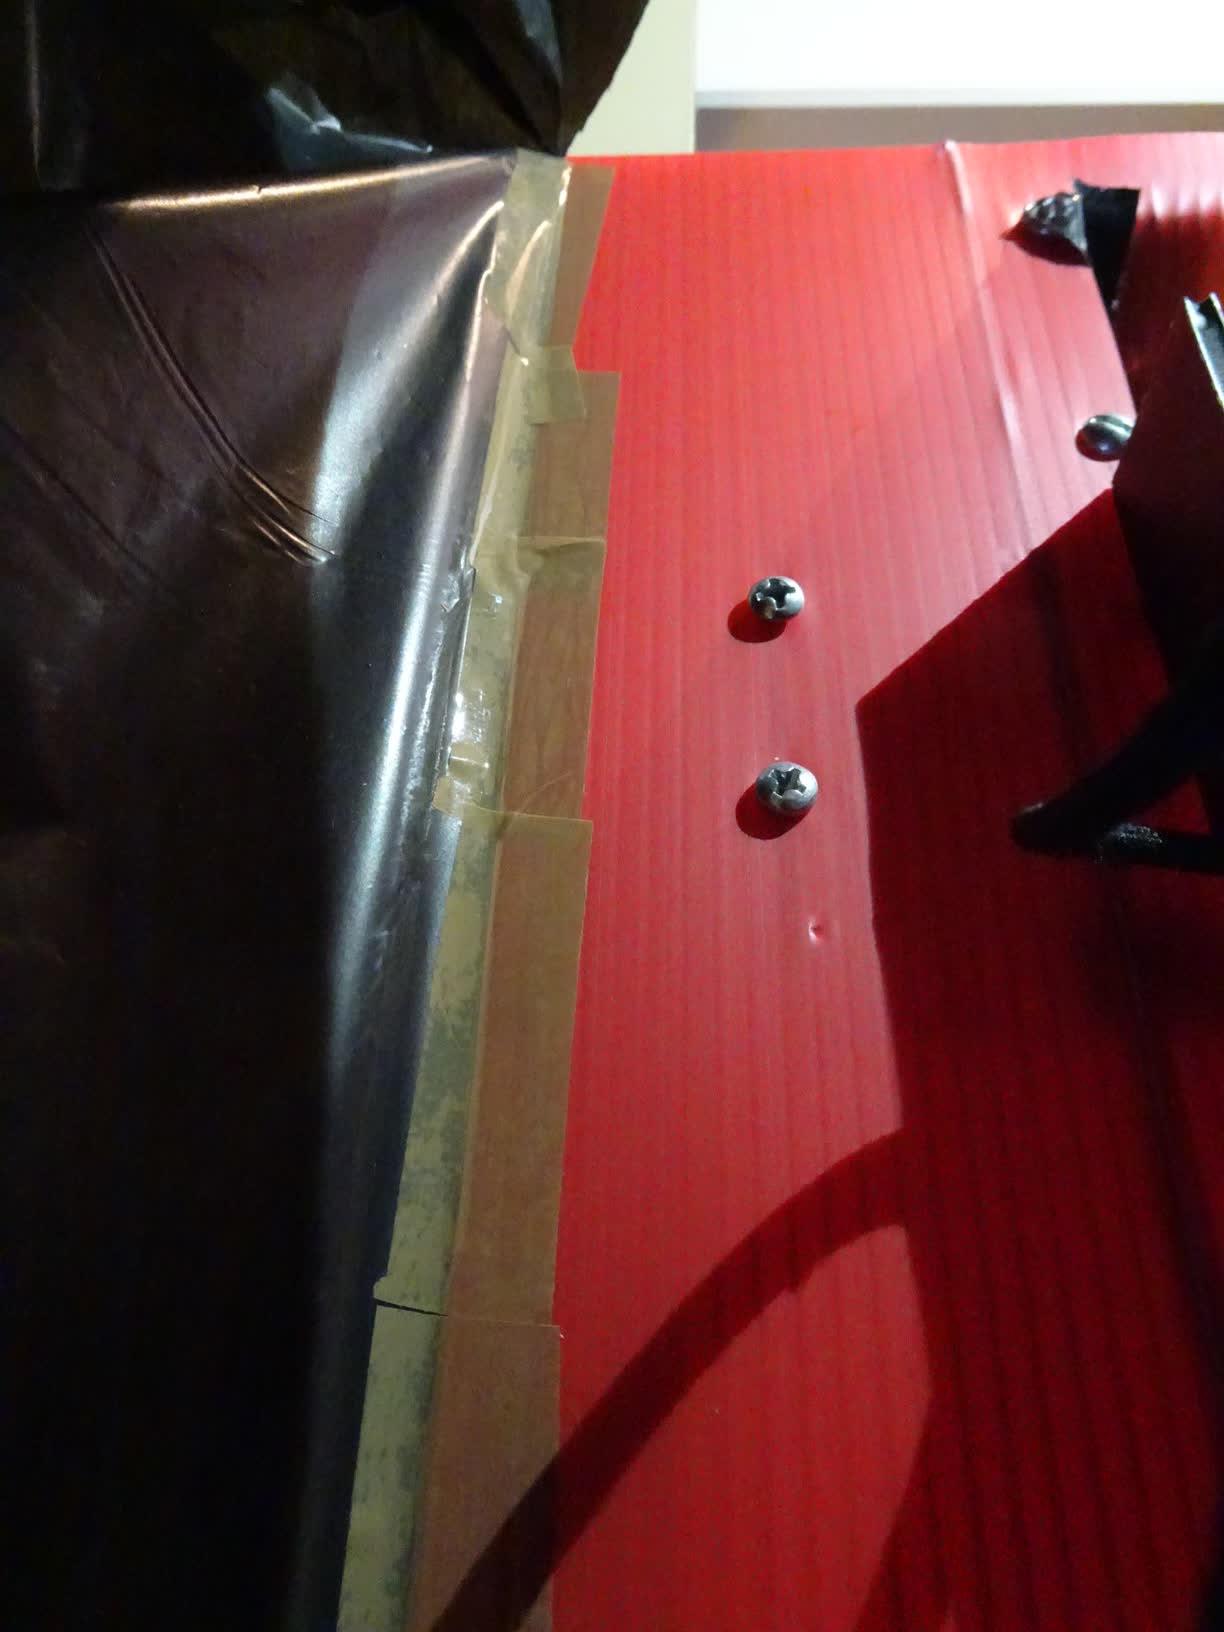
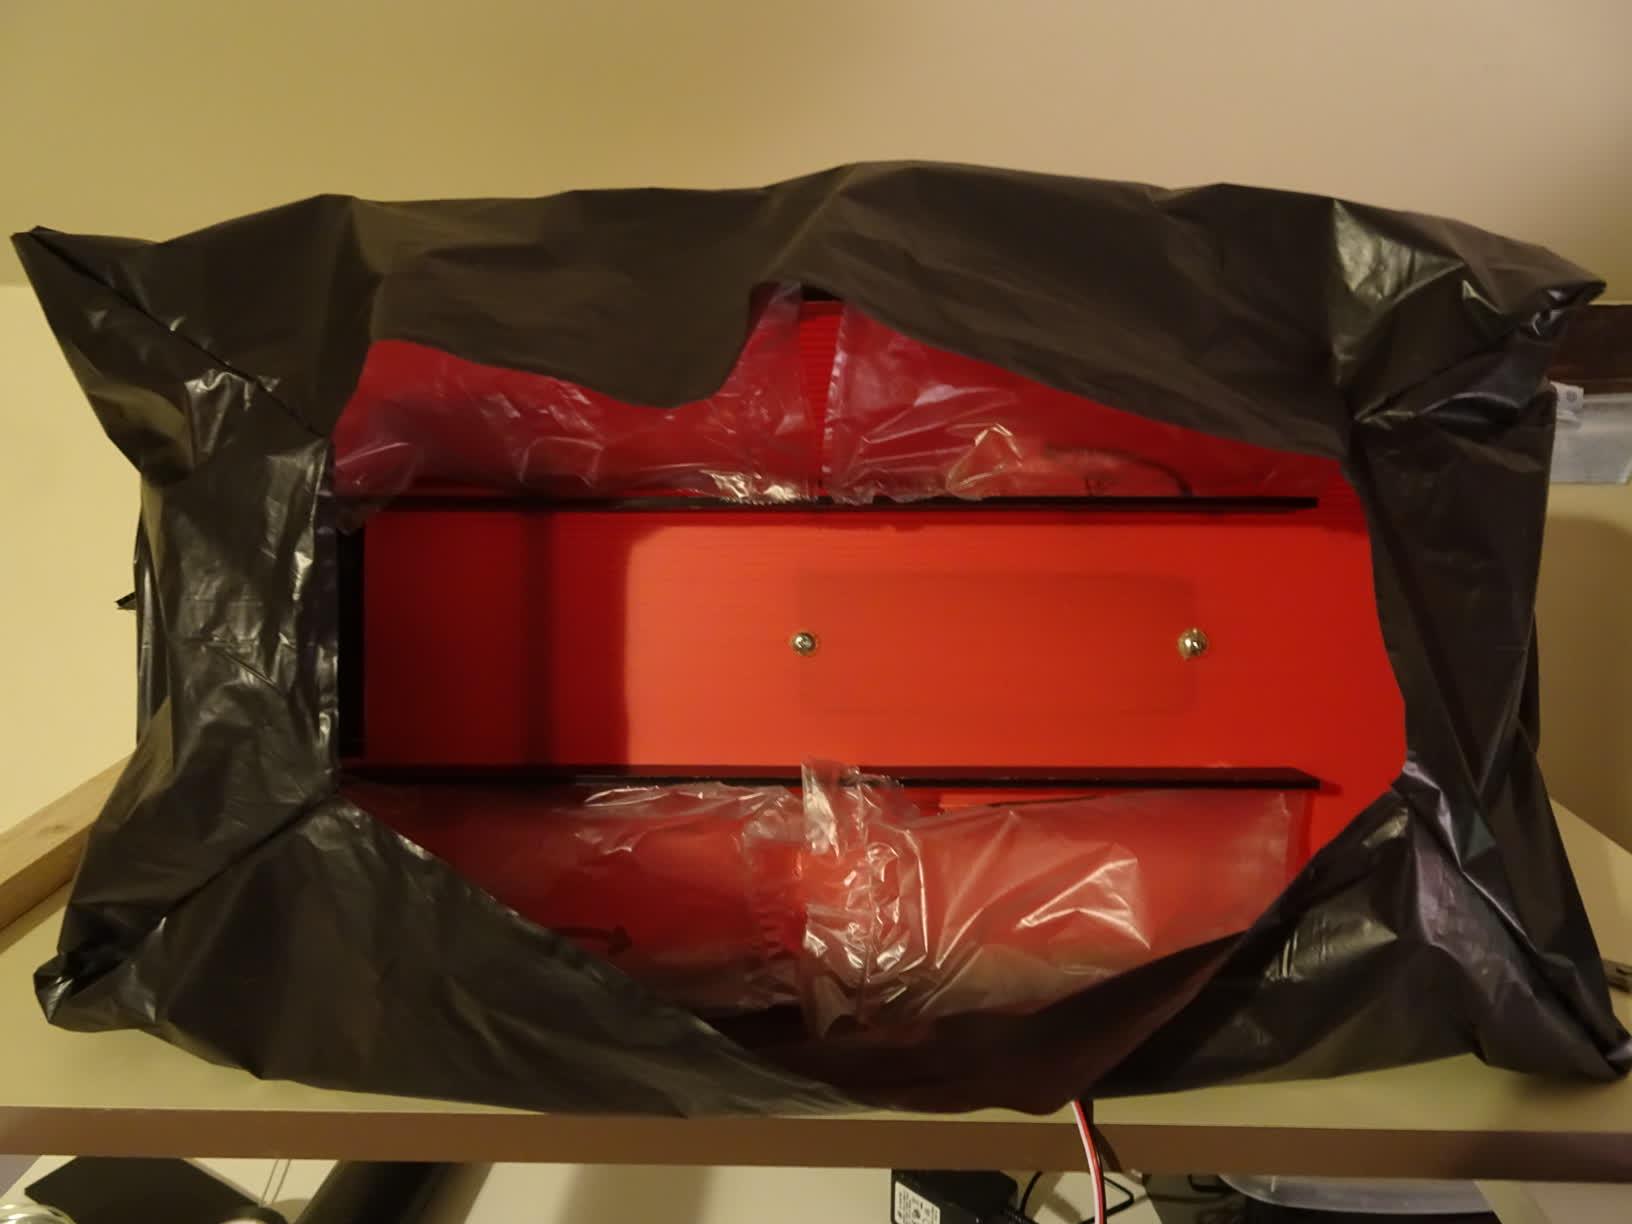
Now, take your time for this part as it is imperative to make everything airproof and waterproof.
Tape the skirt under the sides of the hull. Start by taping two corners to tighten one side of the skirt, then add tape along the length. Do the same for the remaining sides, taping one corner at a time. This is certainly the most difficult step of the build : you will have to work in a smaller and smaller space as you tape the skirt.
It is also possible to tape the skirt on the upperside of the hovercraft - but as the tape will be visible on the upperside of the hull, the finish will be much worse.

You can then "close the skirt" by taping it on the two polypropylene strips, edge to edge. Tape the ends first to tighten the skirt, then add tape along the strips.
Two Last Steps
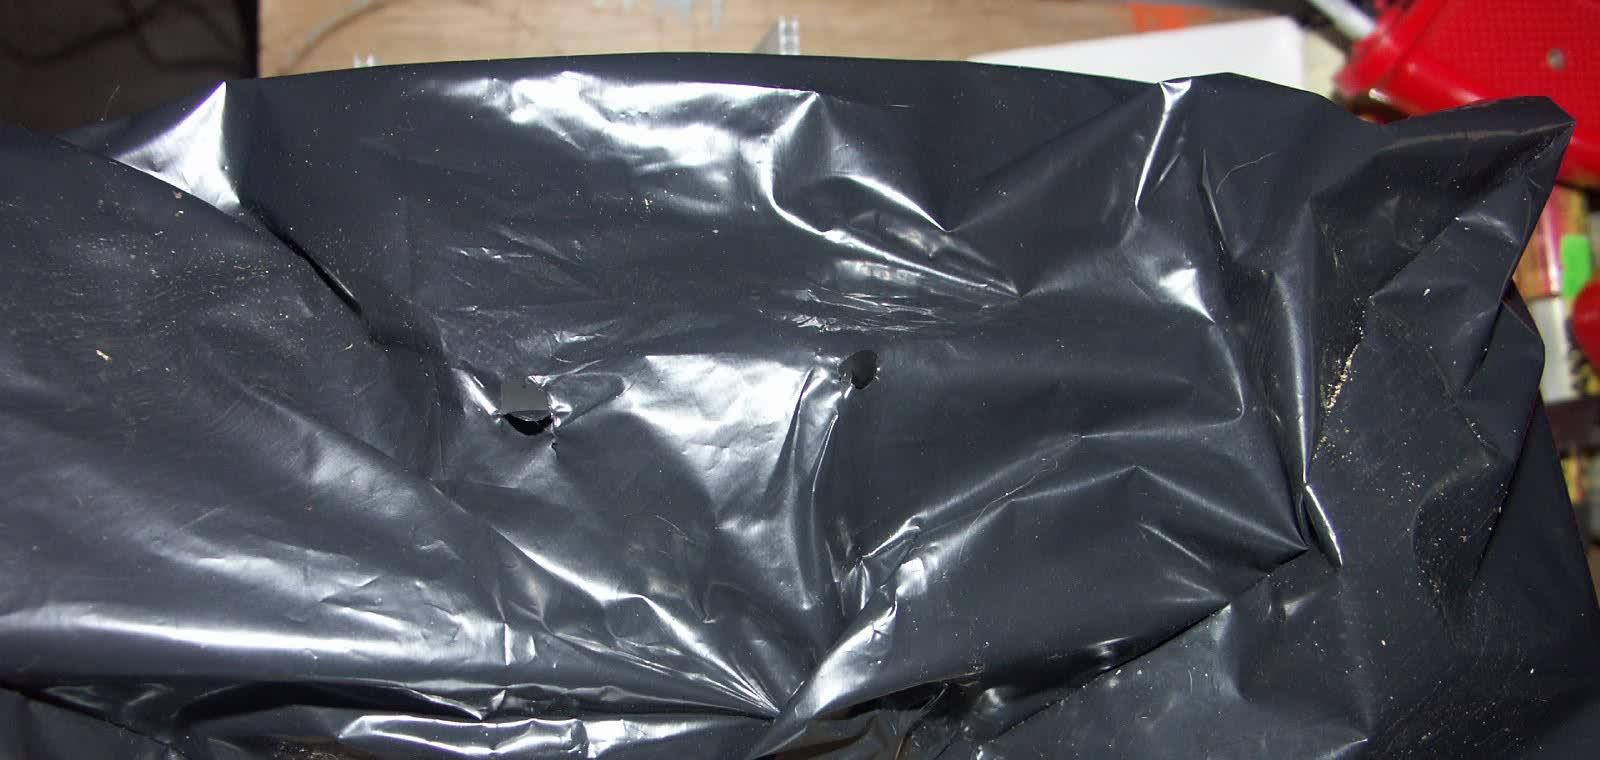
It is possible that some water gets inside the rear of the skirt when you operate it on water. Drill a few holes at the rear of the skirt, so that the water that would have entered into the skirt can flow out.
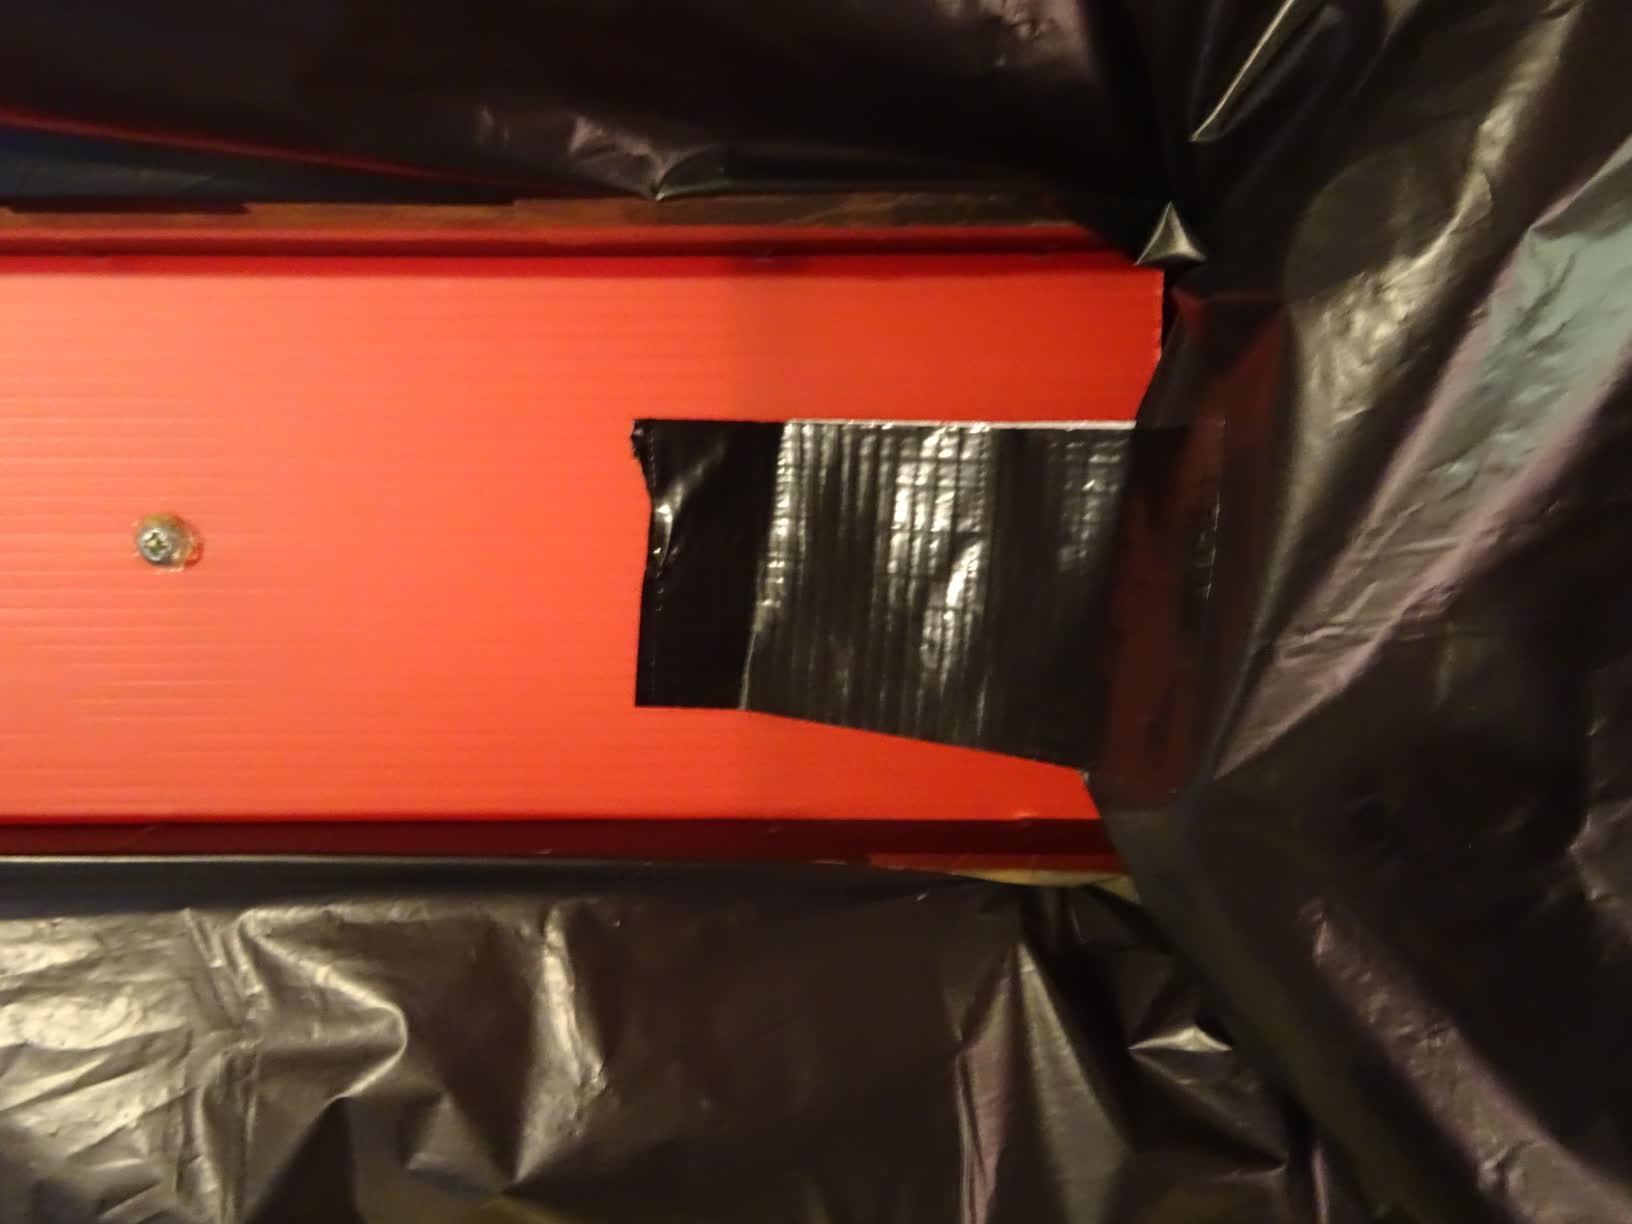
Finally, use a piece of tape to stick the rear of the skirt and the hull together. It will keep the back of the skirt from vibrating and tearing. It must keep the skirt in place without hindering its inflation. It is not useful to do the same at the front of the hovercraft.
For a large hovercraft, these two steps must also be performed - but using the appropriate tools and materials, of course.
Et Voilà !
And you're done. You finally have your custom vented bag skirt set on your hovercraft / RC hovercraft.
Thank you for following this tutorial until the end. If you used it to make your own skirt, please post a picture, it will be a great reward for my work :-)