Custom Color Art Board
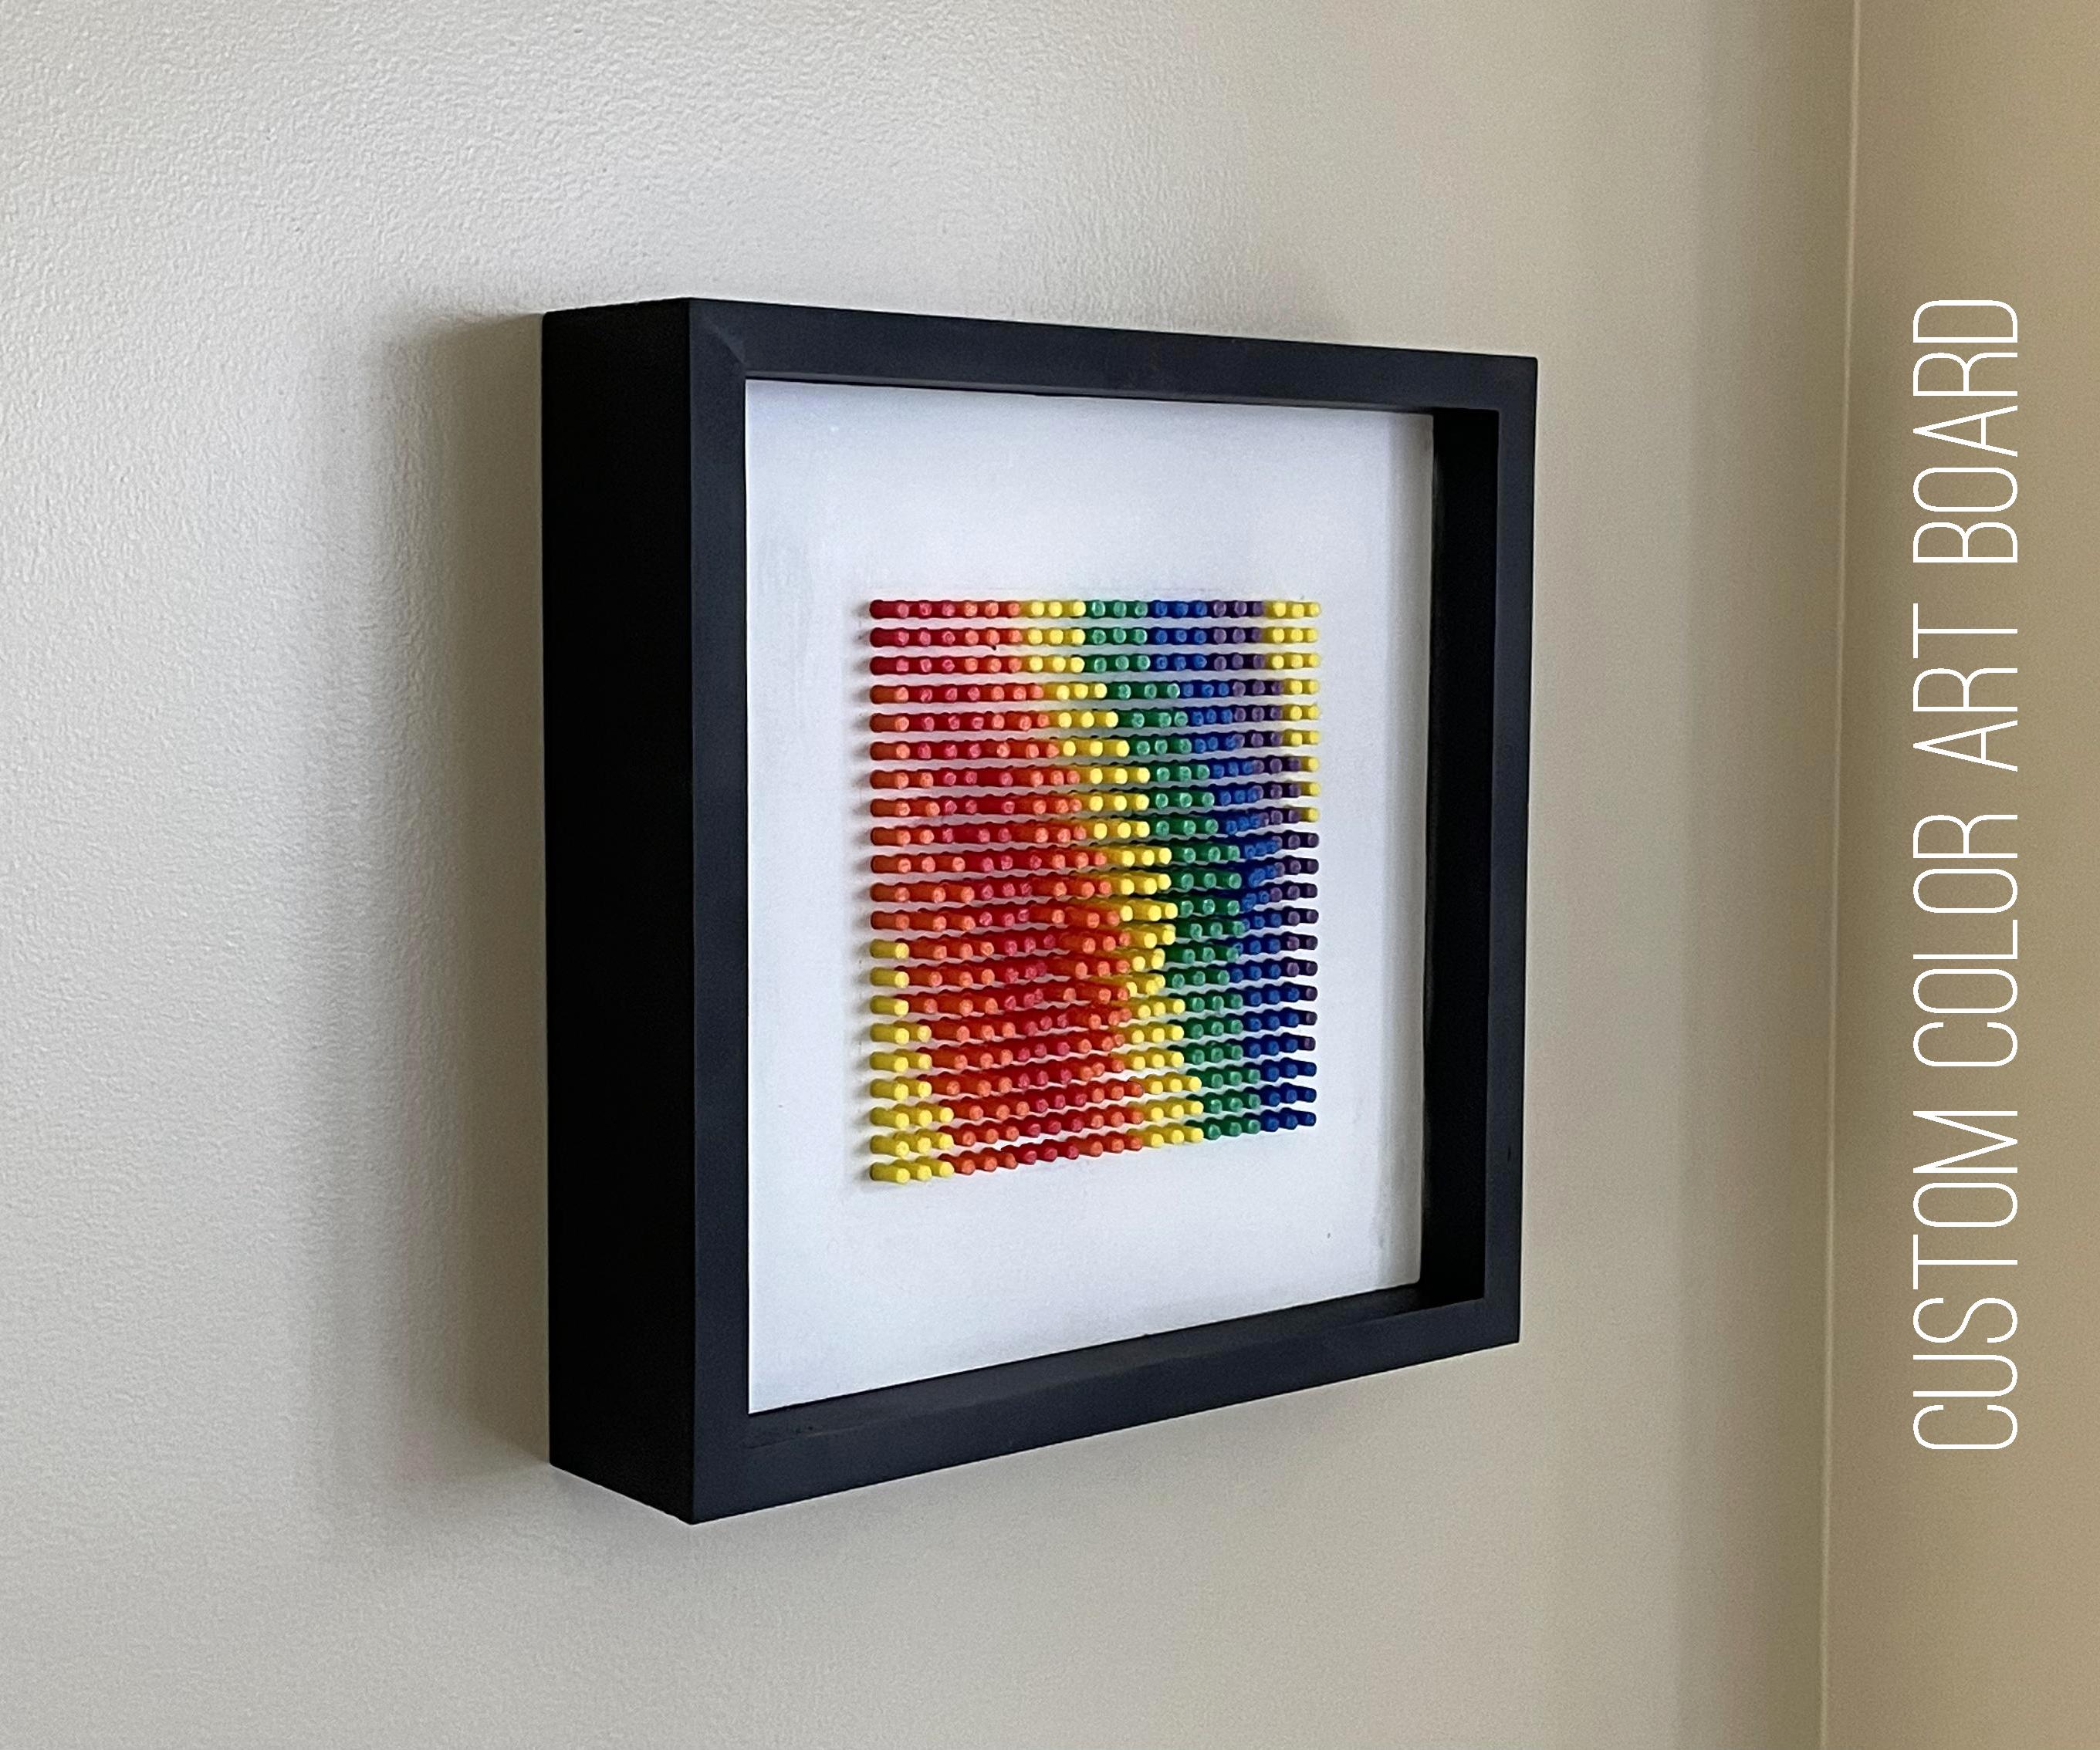
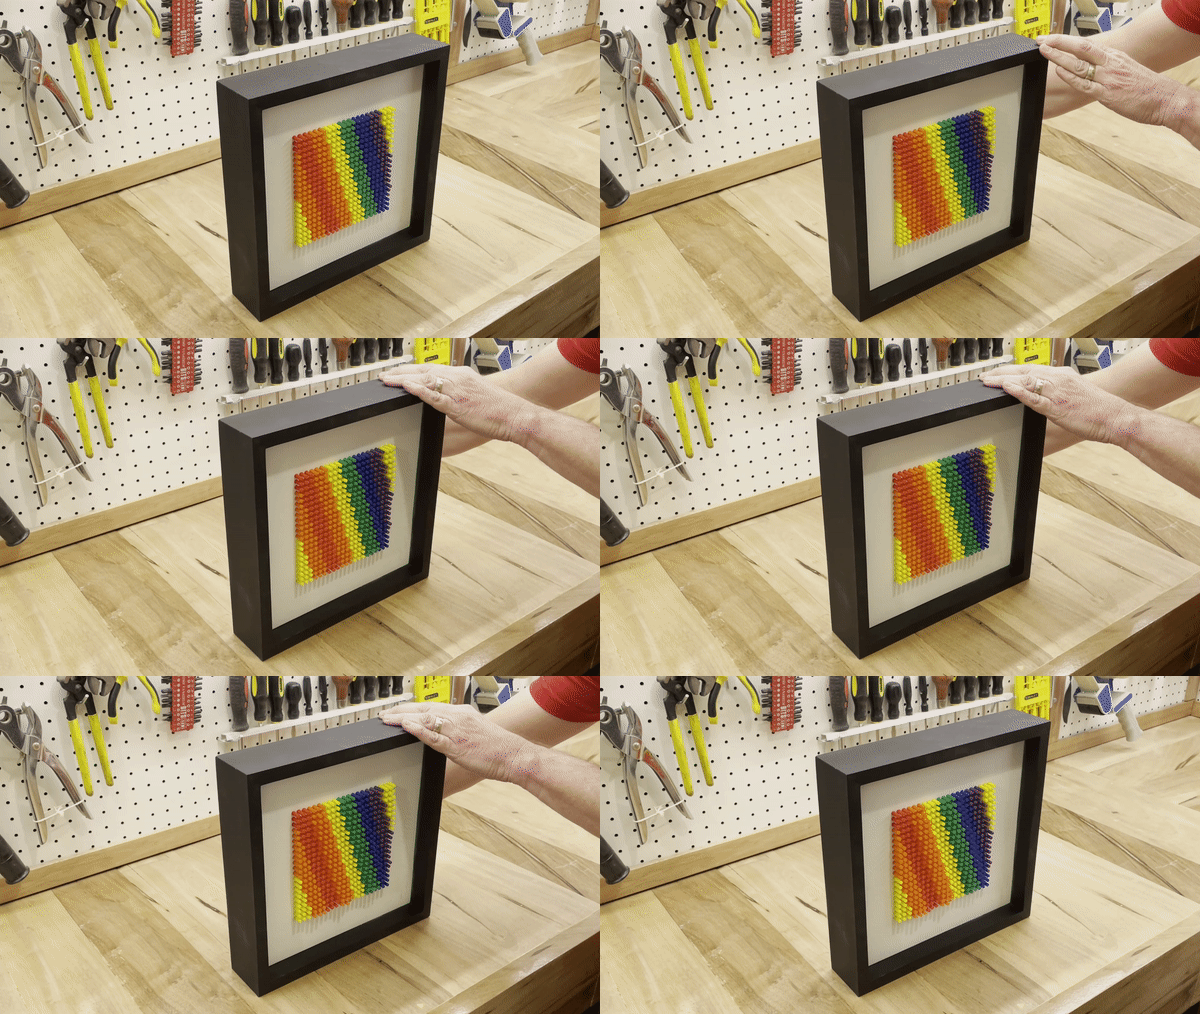
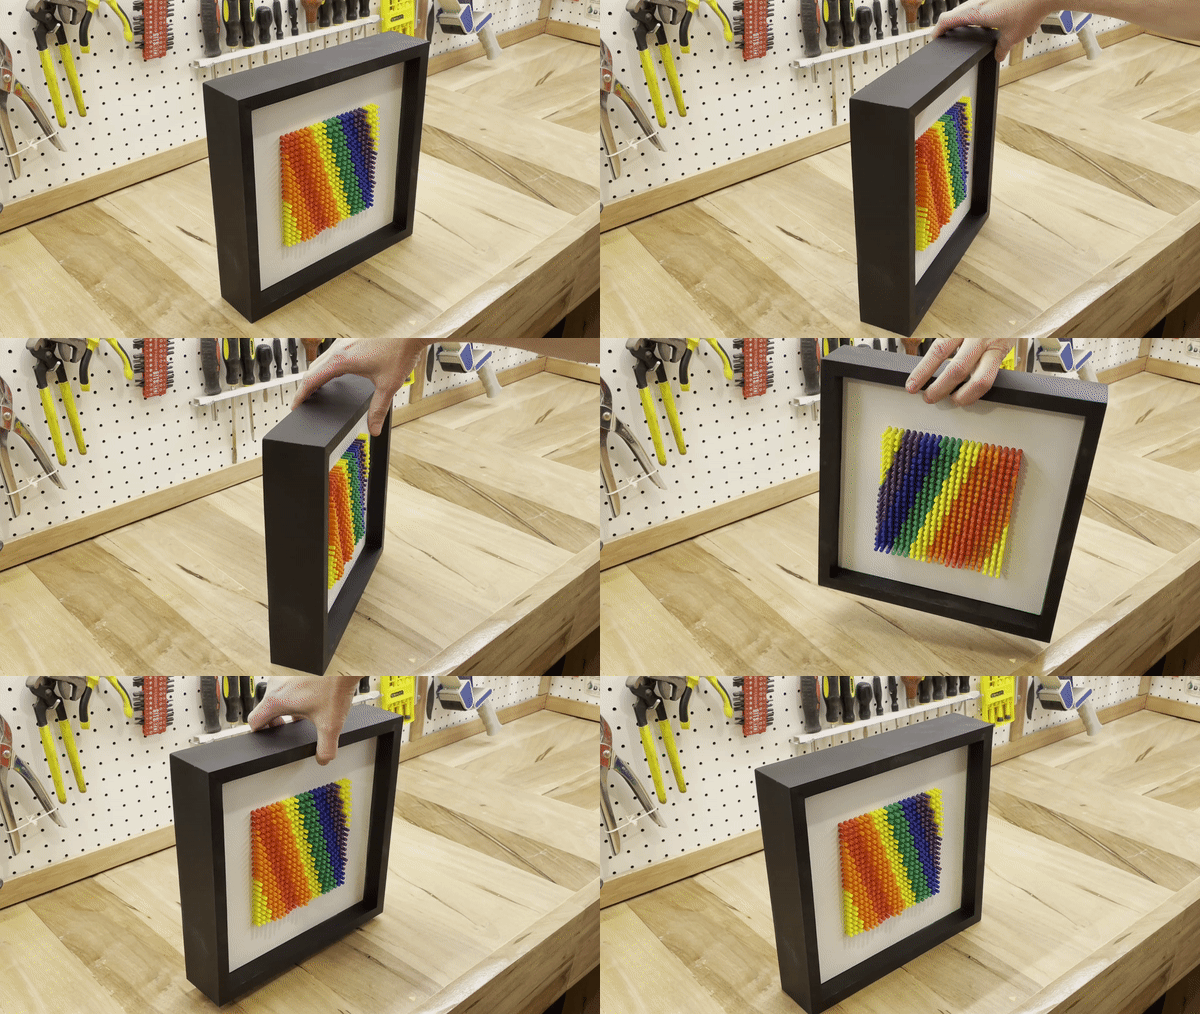
I wonder who doesn't love rainbows?
Many of us probably associate those images to the time when we were children.
That's why I thought it would be good to create a work of art with this reason to place it in a corner of the house.
I also thought that it would be good if the image was not flat but had volume. How to do it?
I remembered those gadgets known as "needle fingerprint" and decided to combine both ideas to create this work of art.
That is the reason for the name of this instructable. You can customize your work of art with different colors on the plane and also add relief.
In this instructable I will describe step by step how to make it using simple materials like MDF and pieces printed in 3d.
If you decide to build this project (I encourage you to do it) I suggest that you first give it a quick read, and then do it step by step, especially see all photos, plans, graphics, schemes where I have added explanatory notes. Do not hesitate to contact me and I will respond as quickly as possible.
Join this project and enjoy it!
Let's get started...
Supplies
Materials:
- Wooden MDF 15 mm.
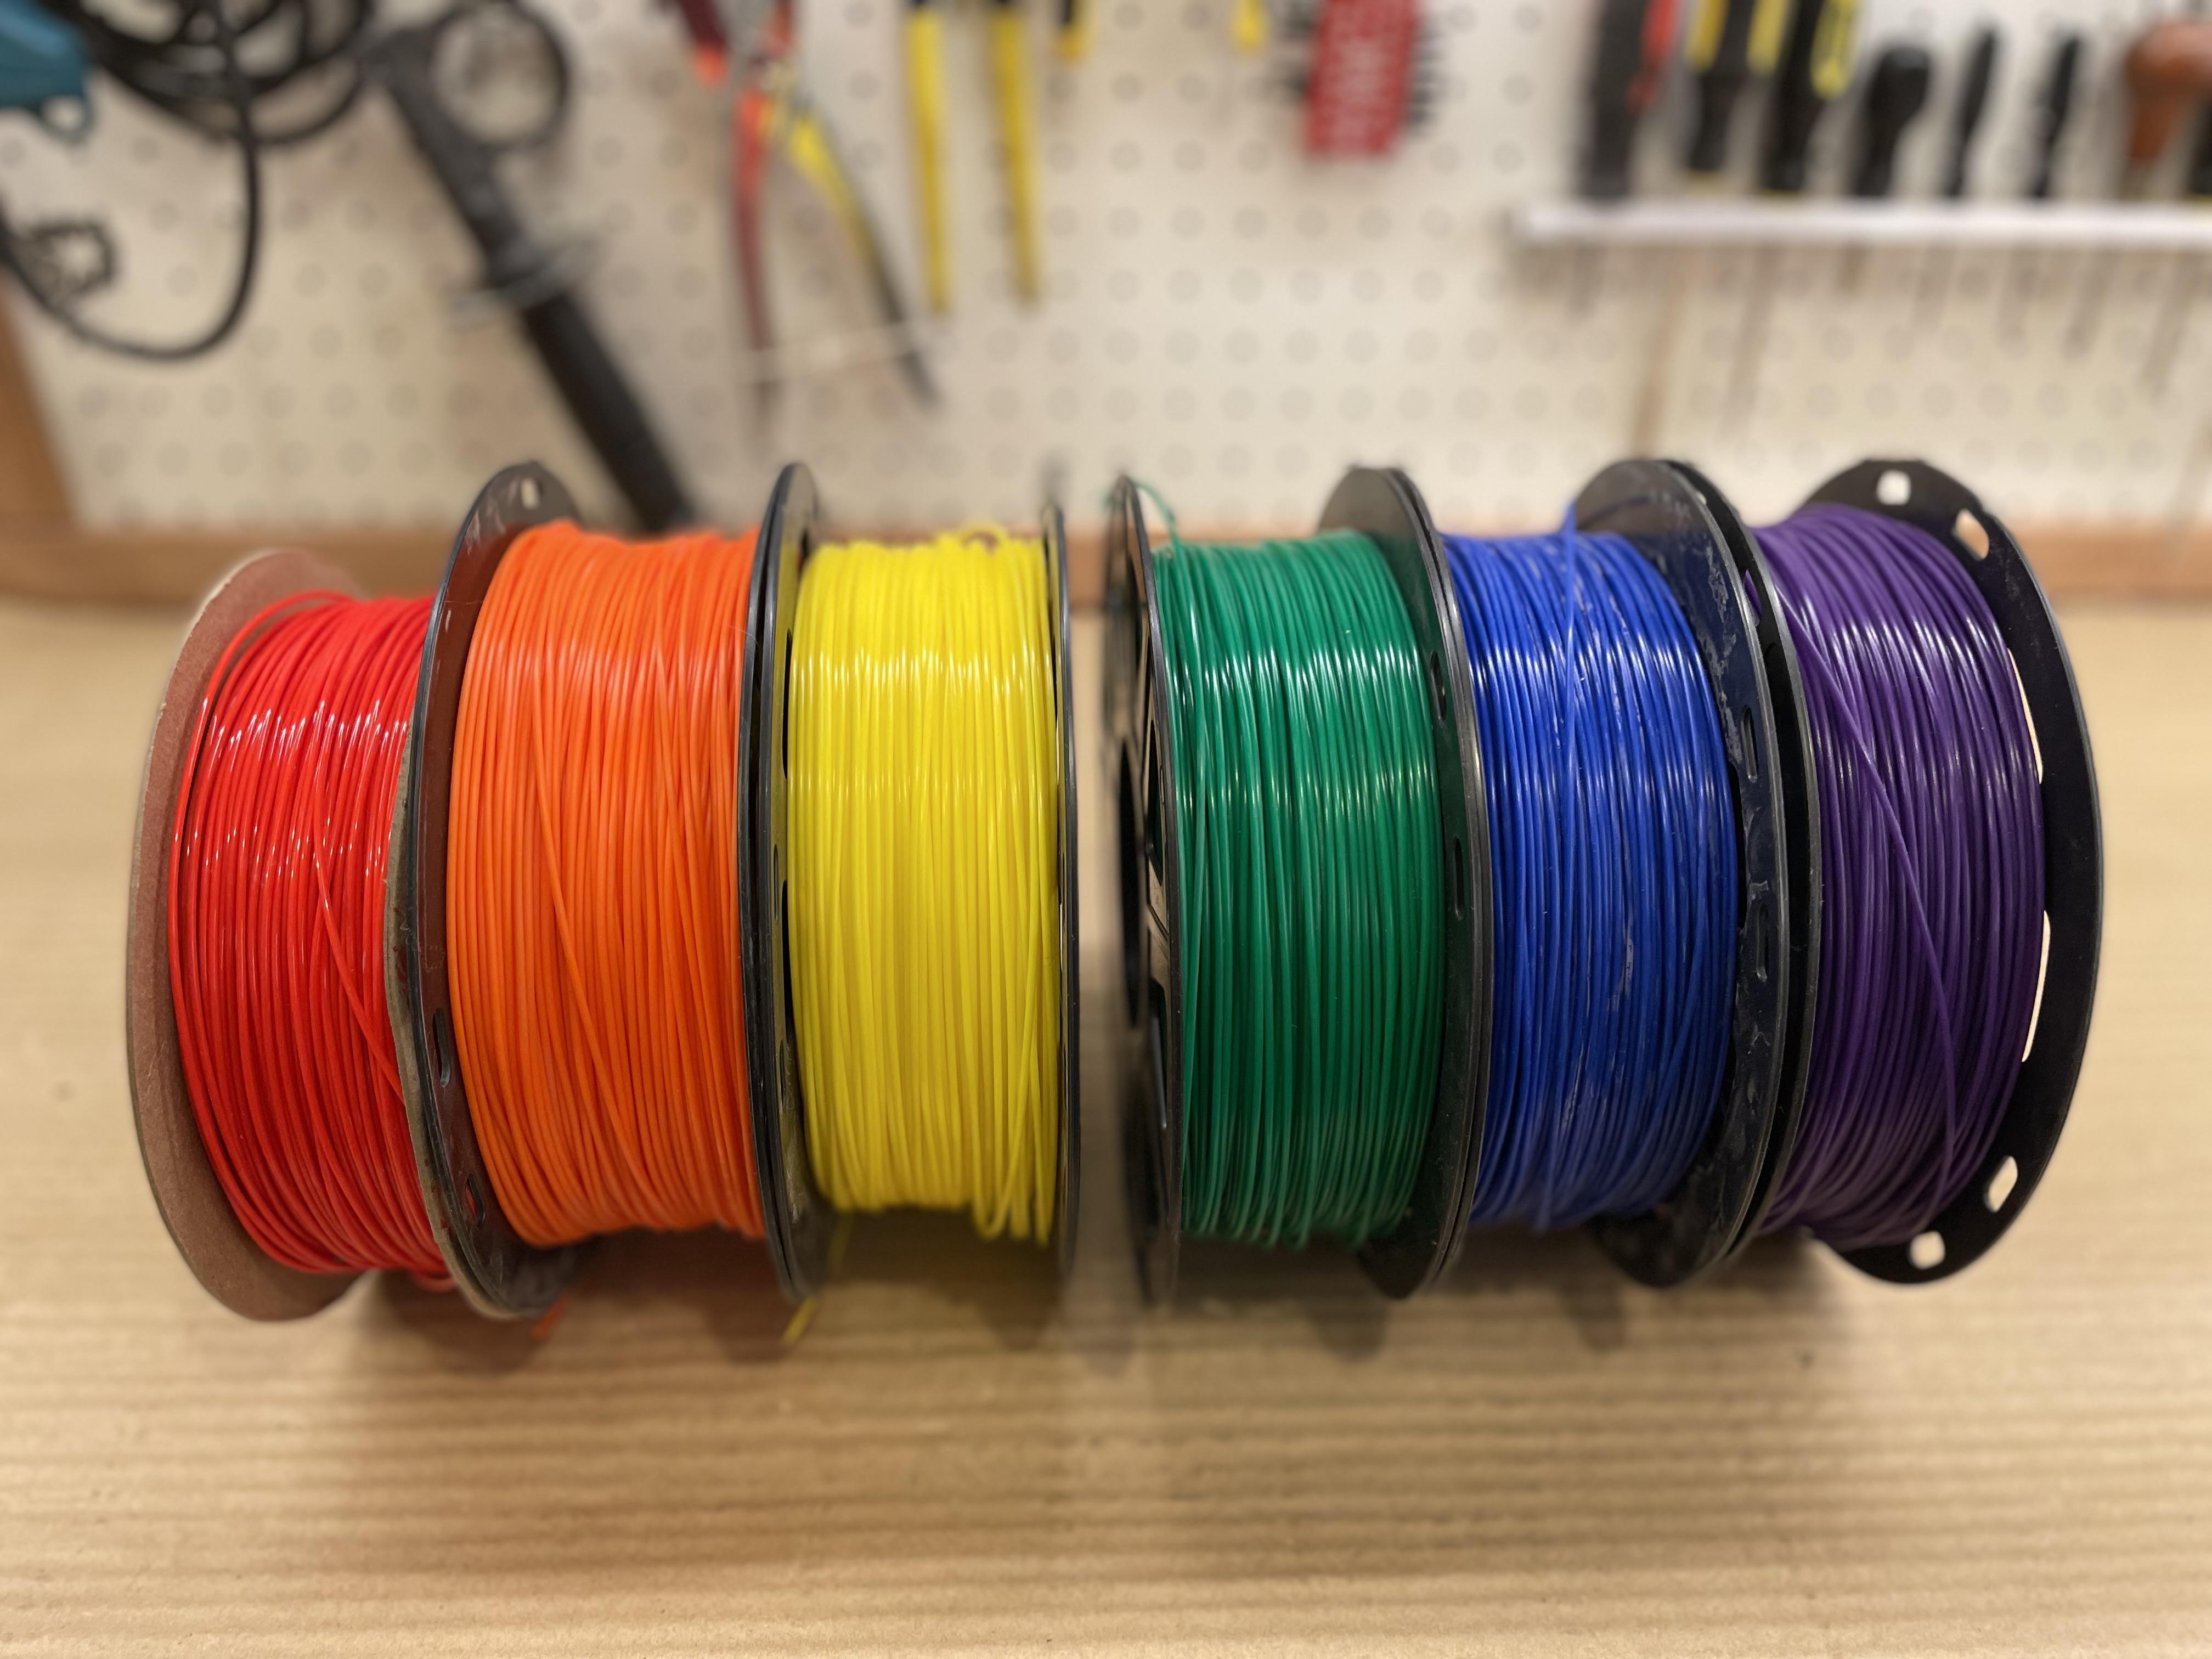
- PLA filament (Red, Orange, Yellow, Blue, Green and Purple)
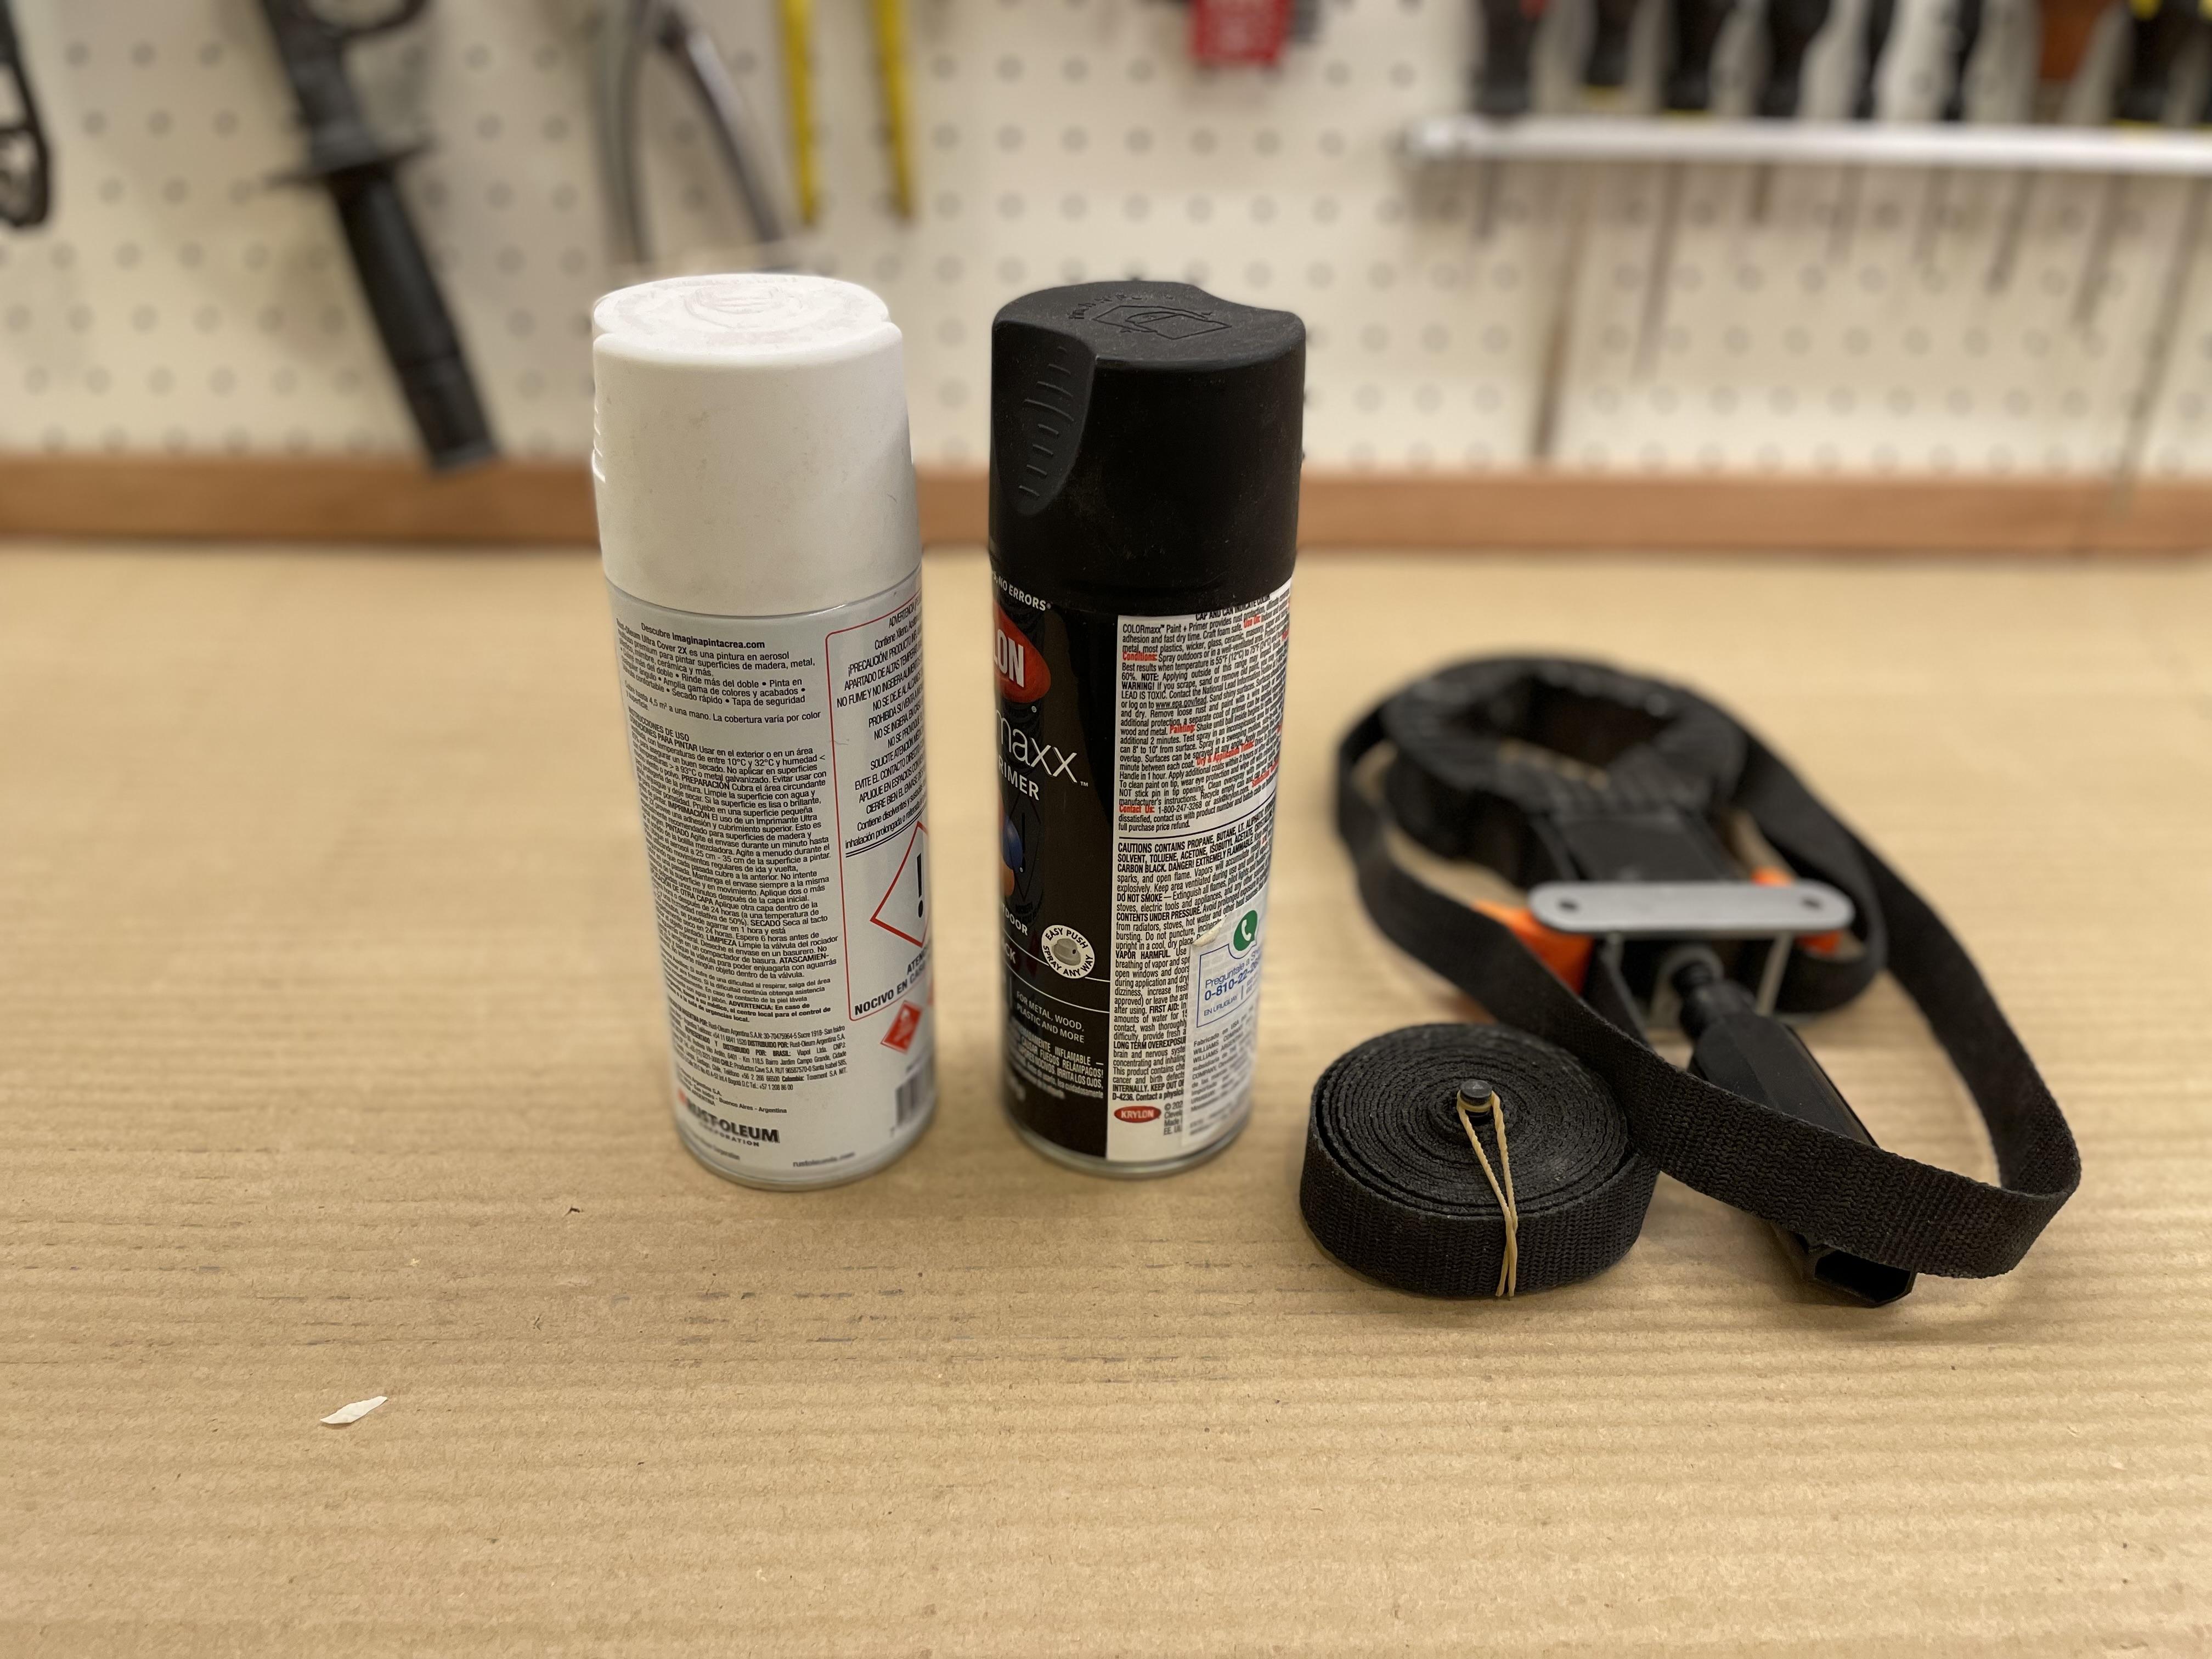
- Black paint spray (matte).
- White paint spray (matte).
- Glue.
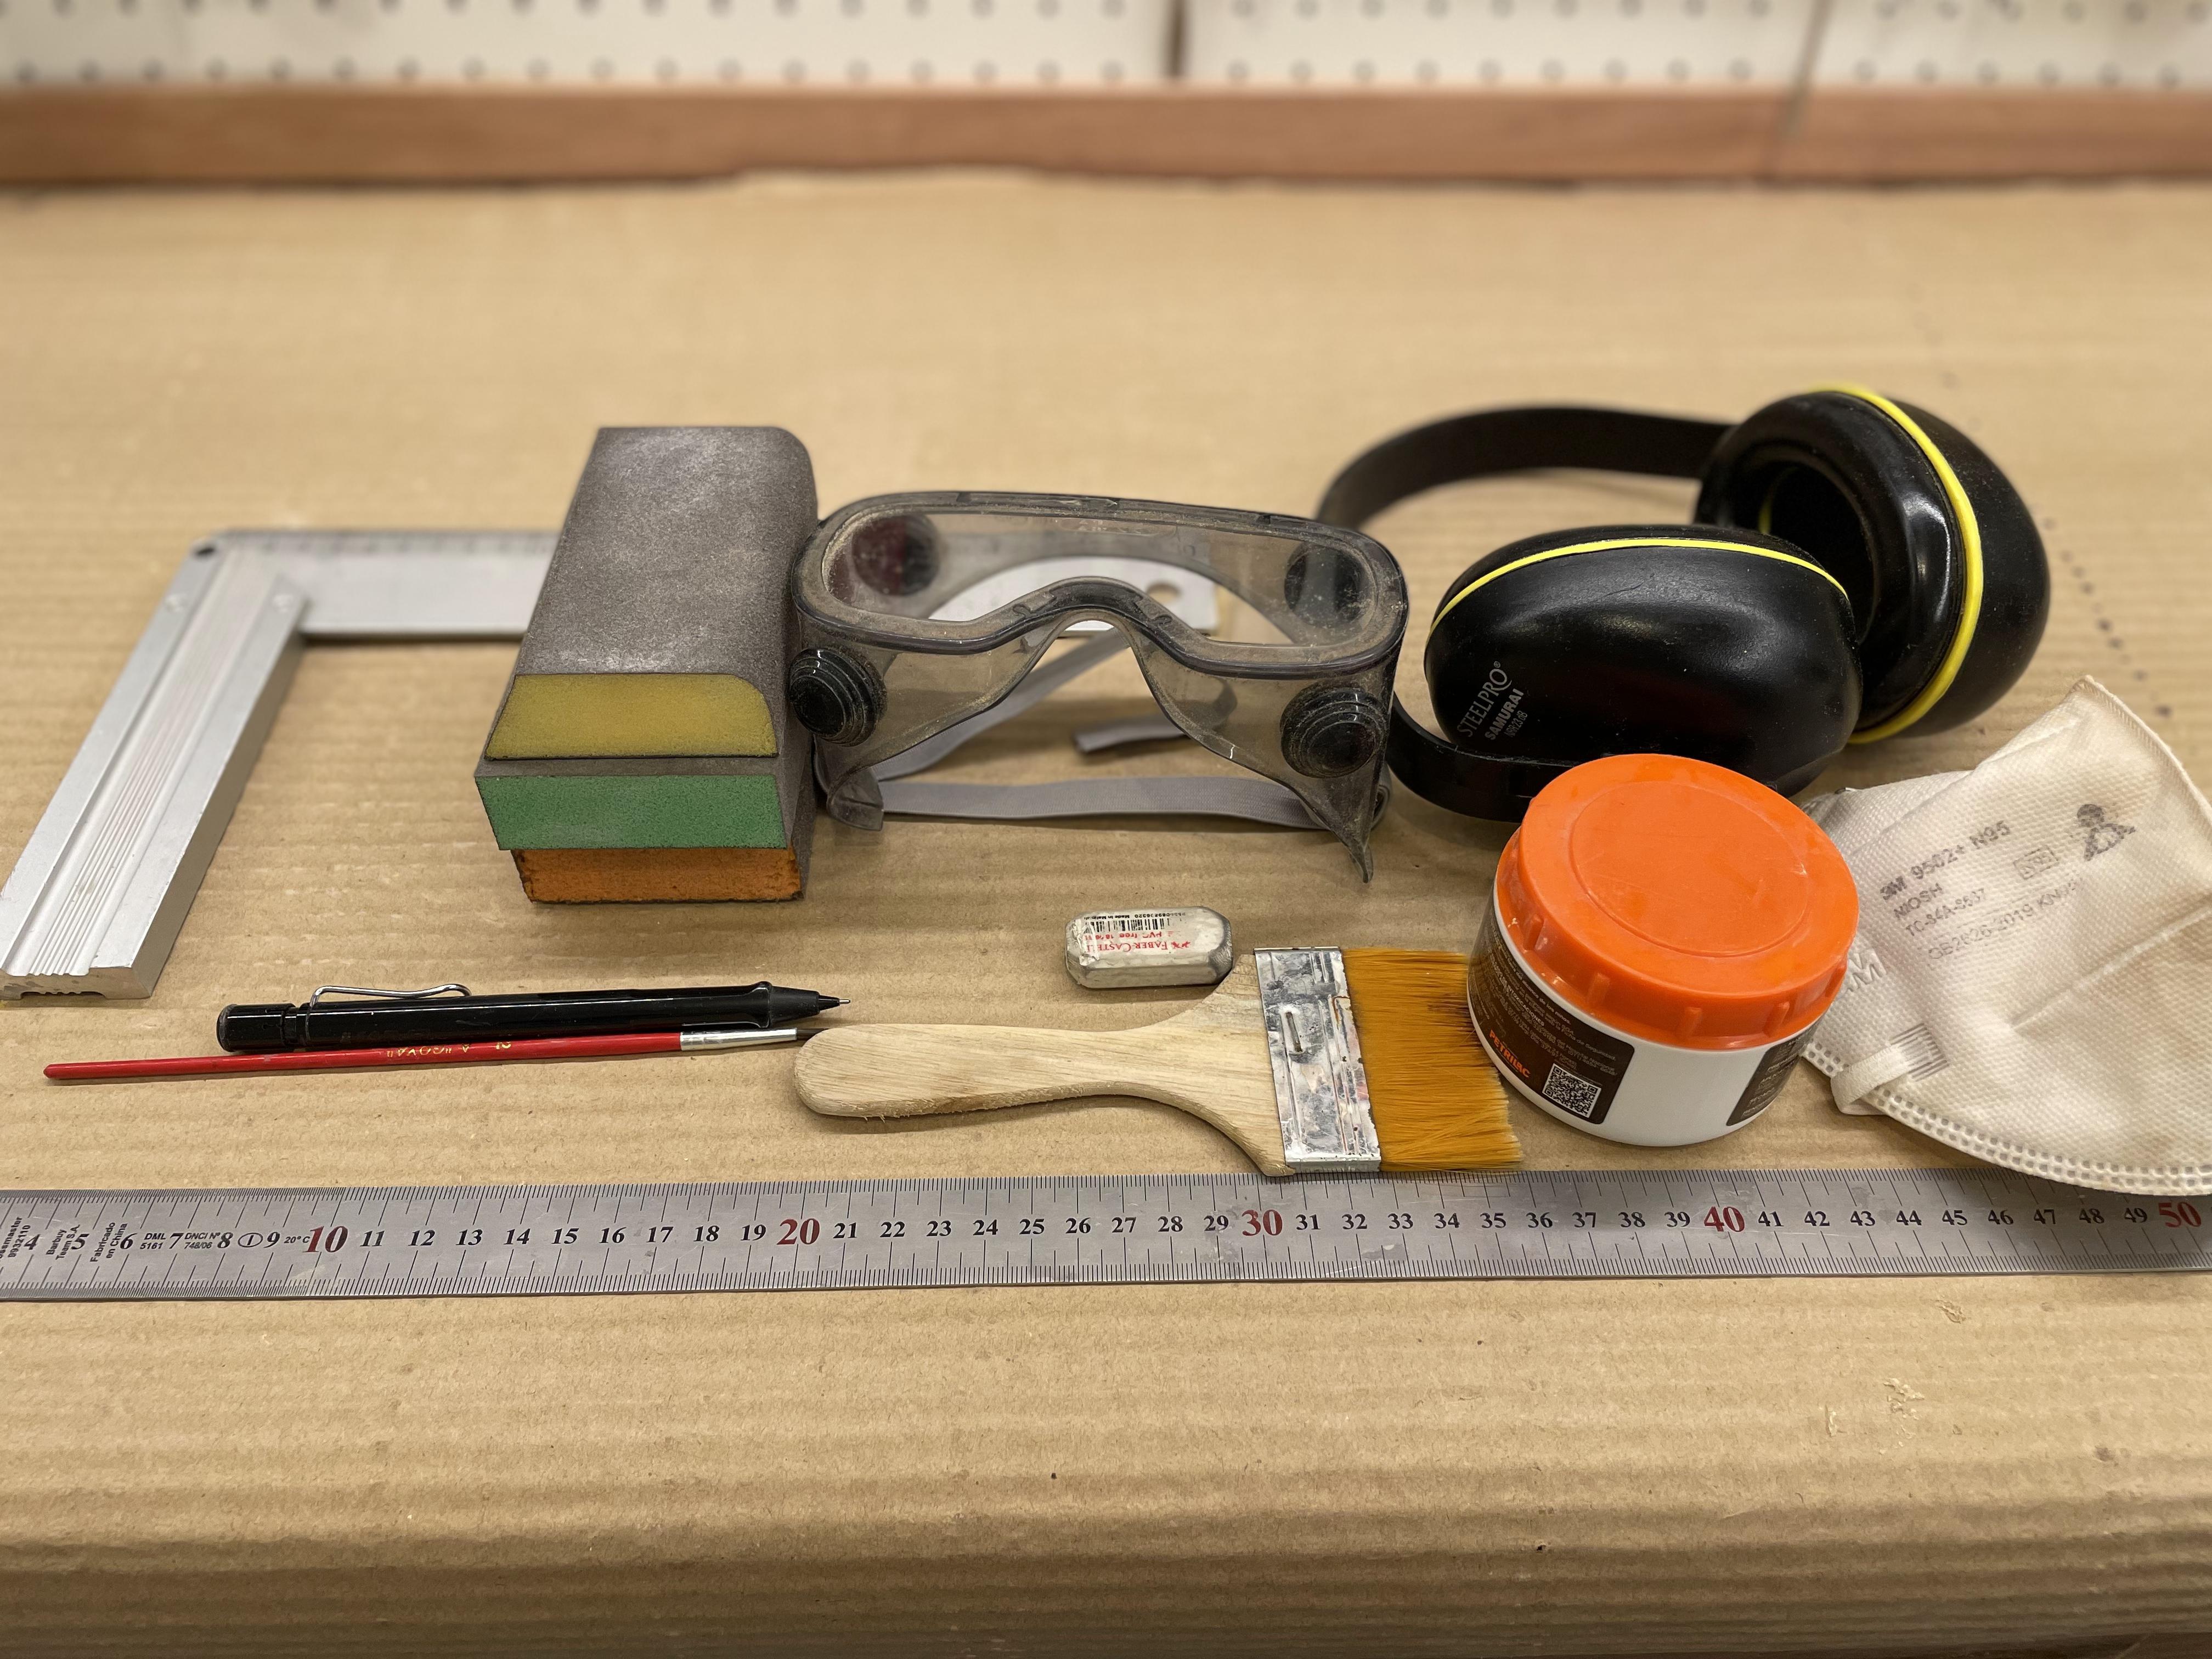
- Sand paper or flexible sanding sponges.
- Any metal piece to hang.
Tools:
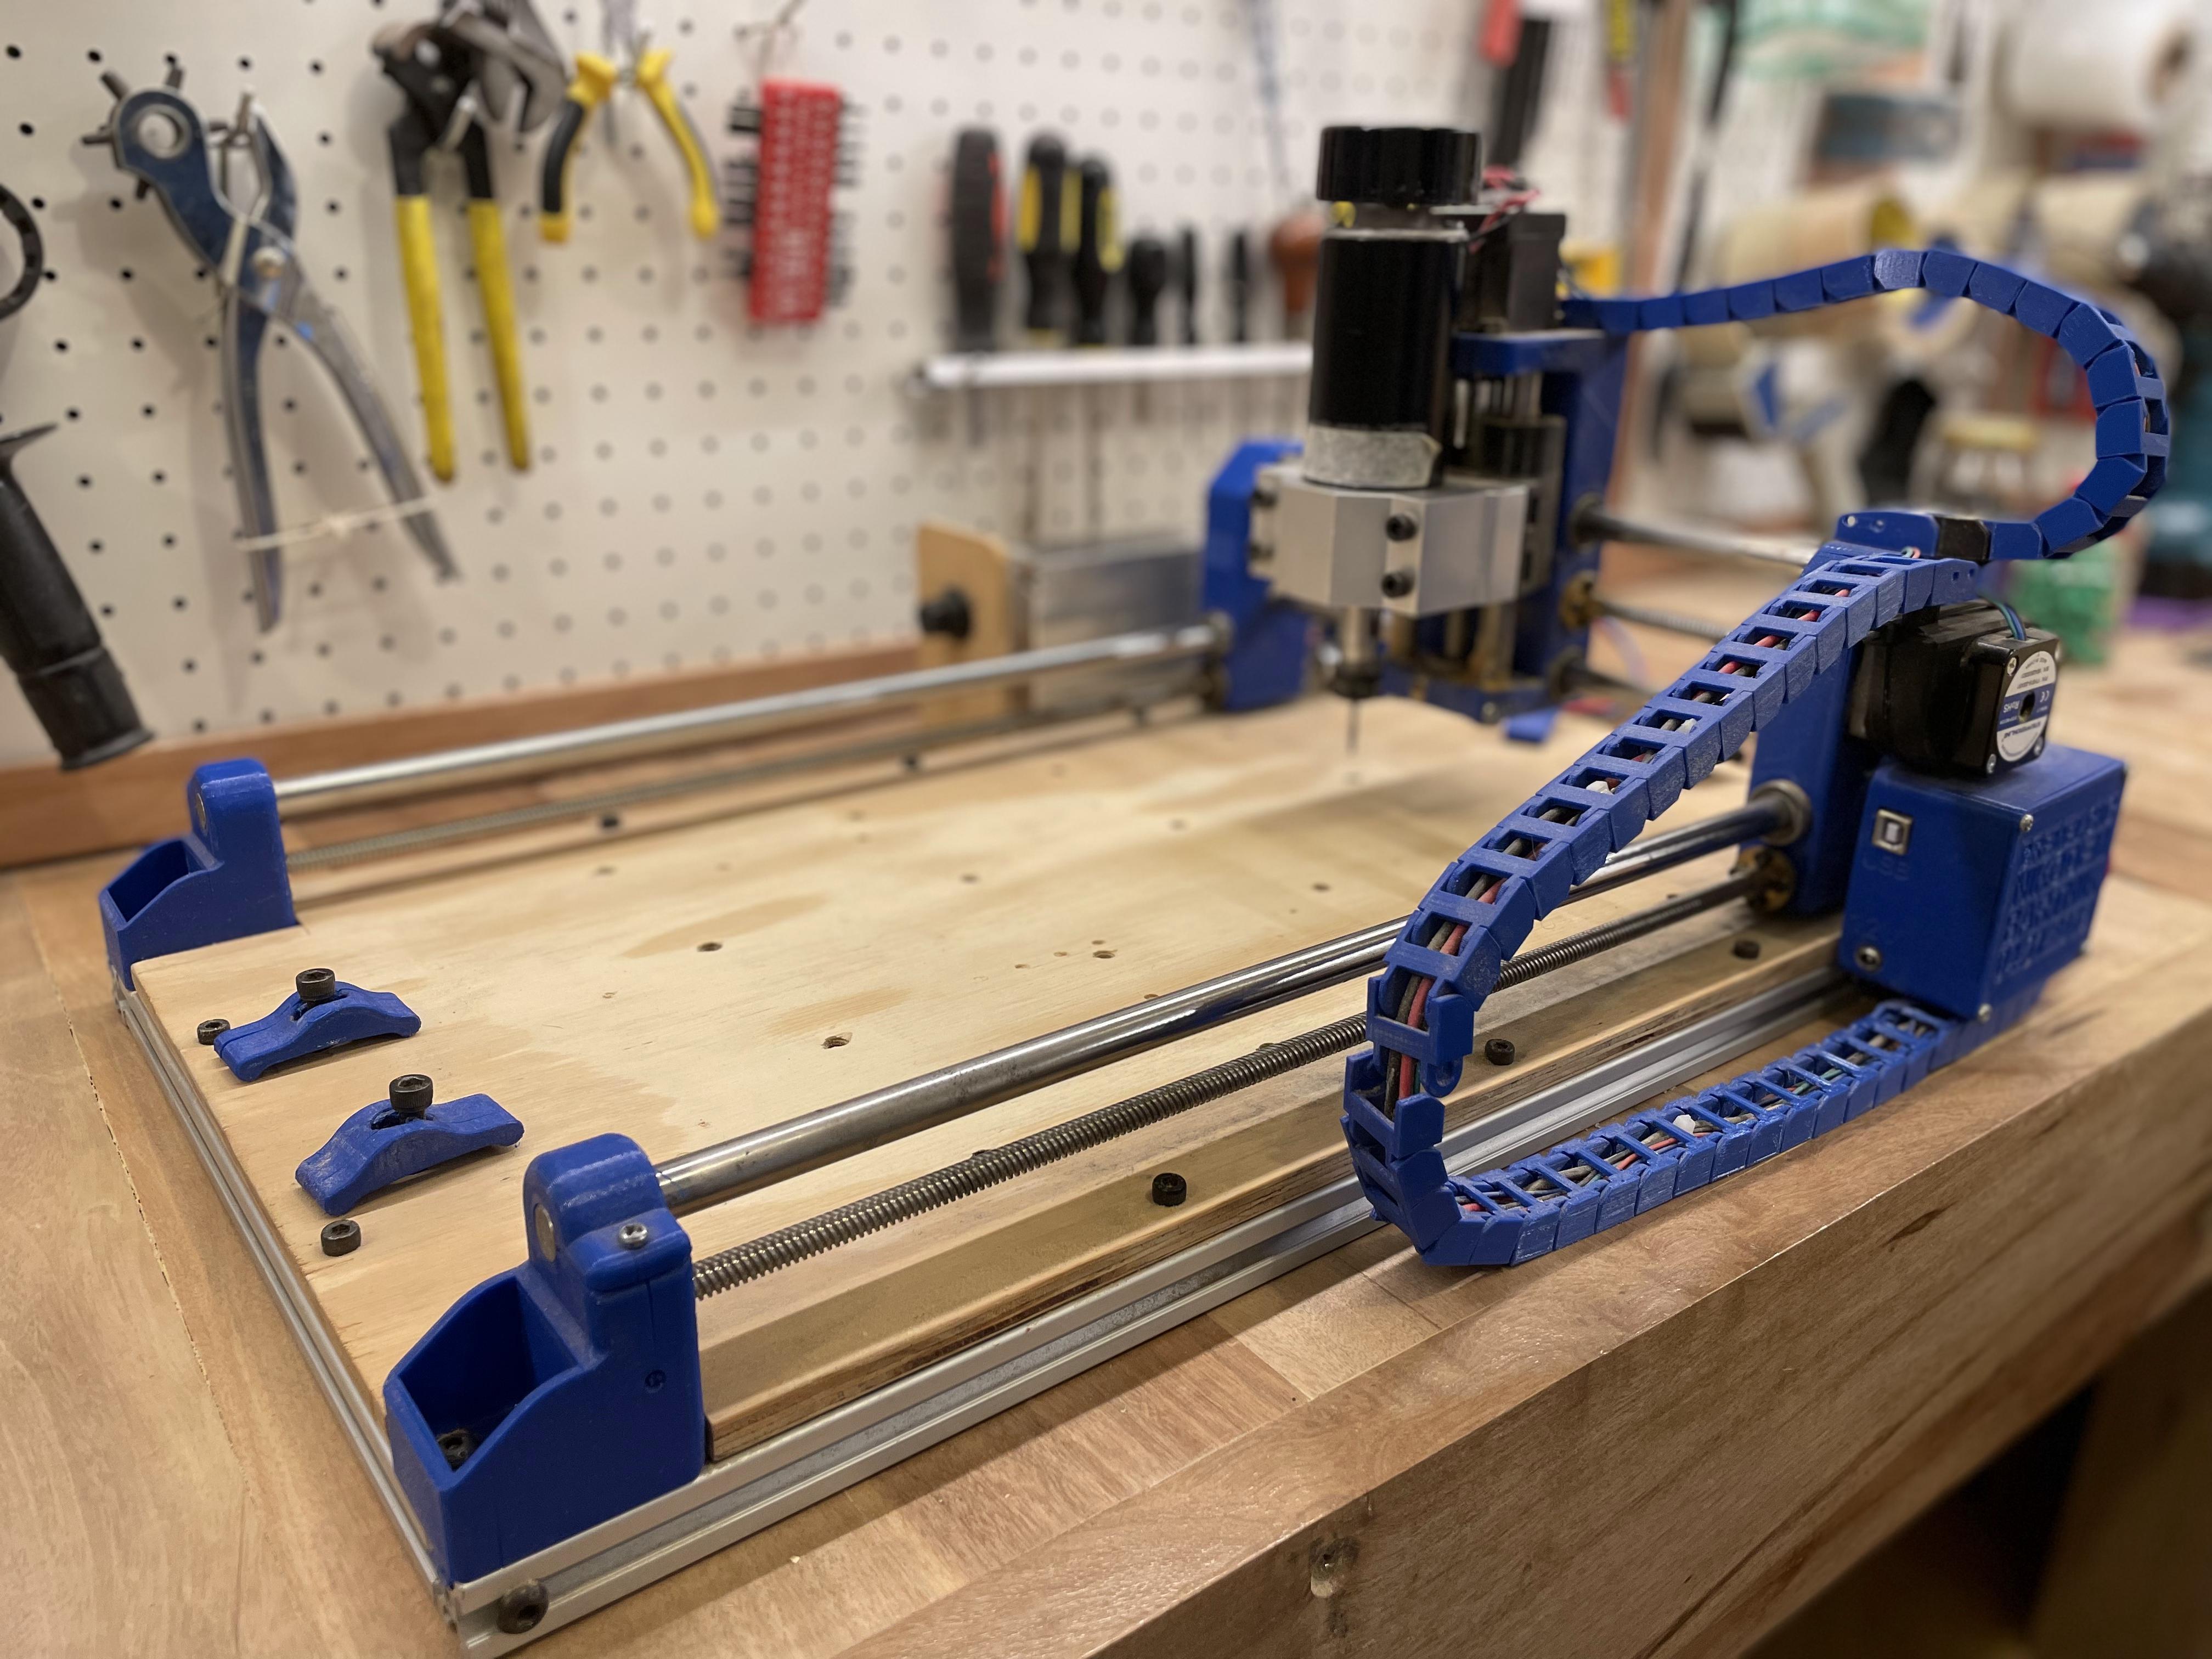
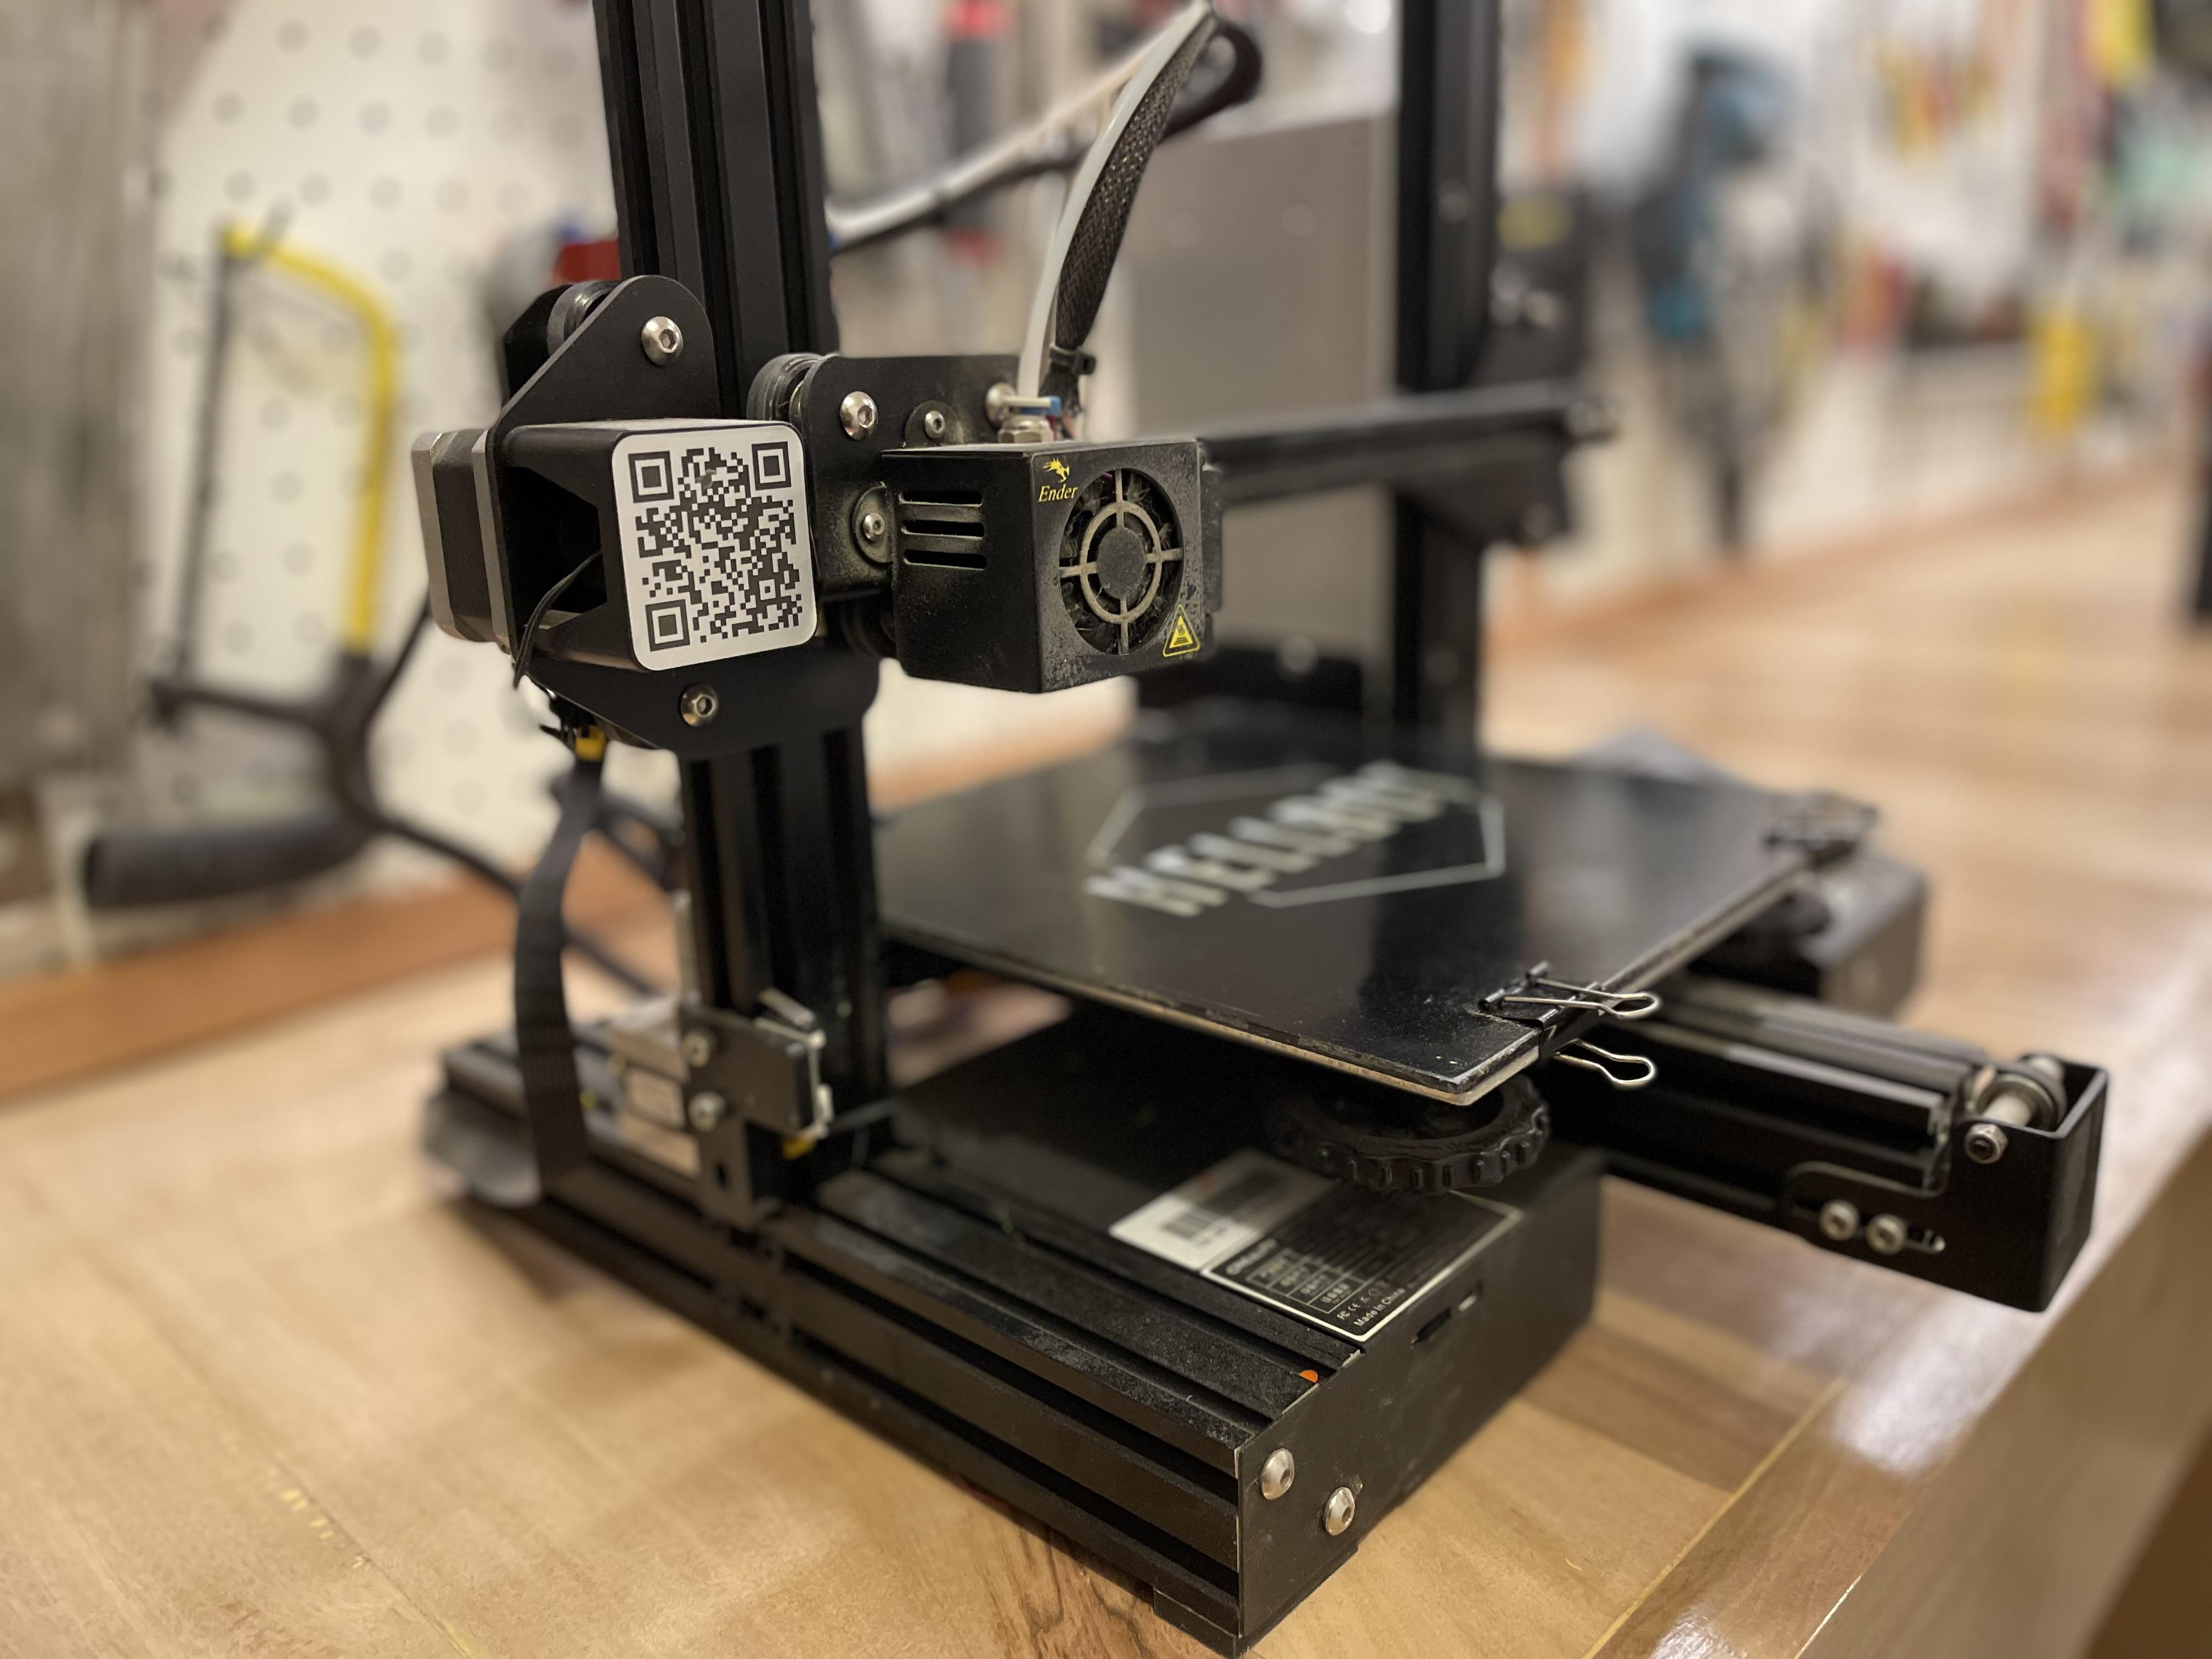
- 3D printer (or access to one of them)
- CNC (or accesso to one of them).
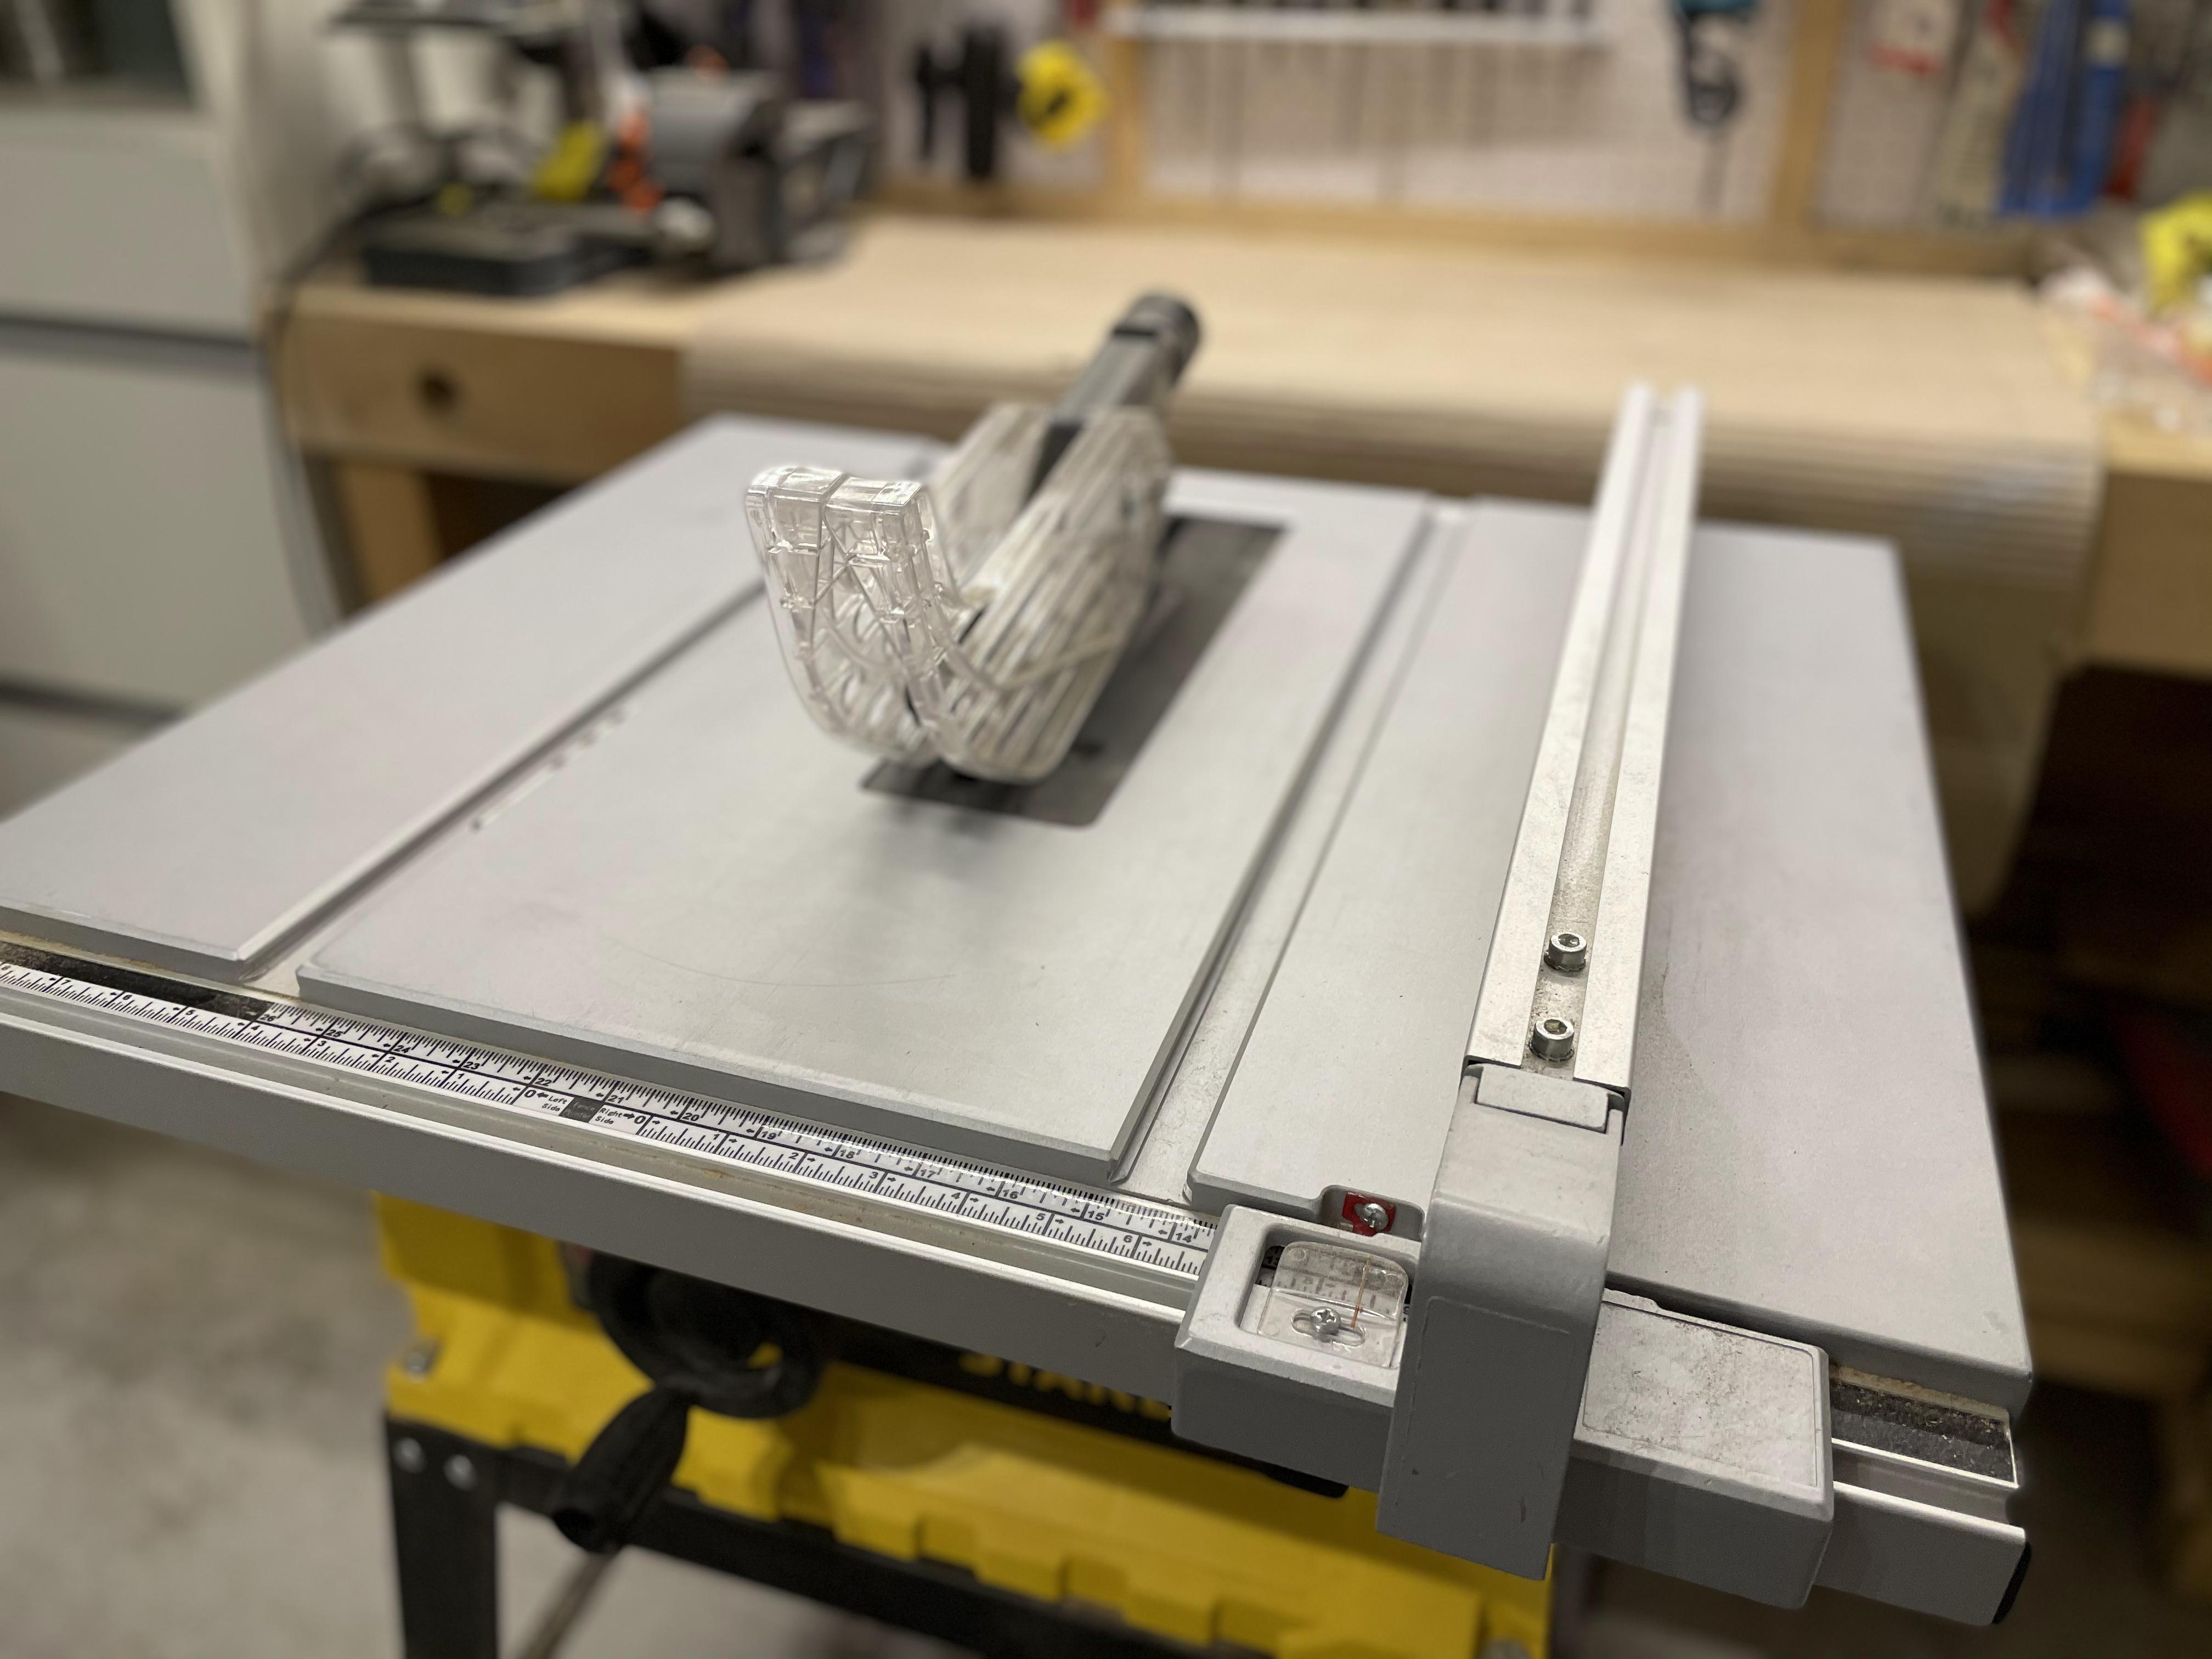
- Table saw.
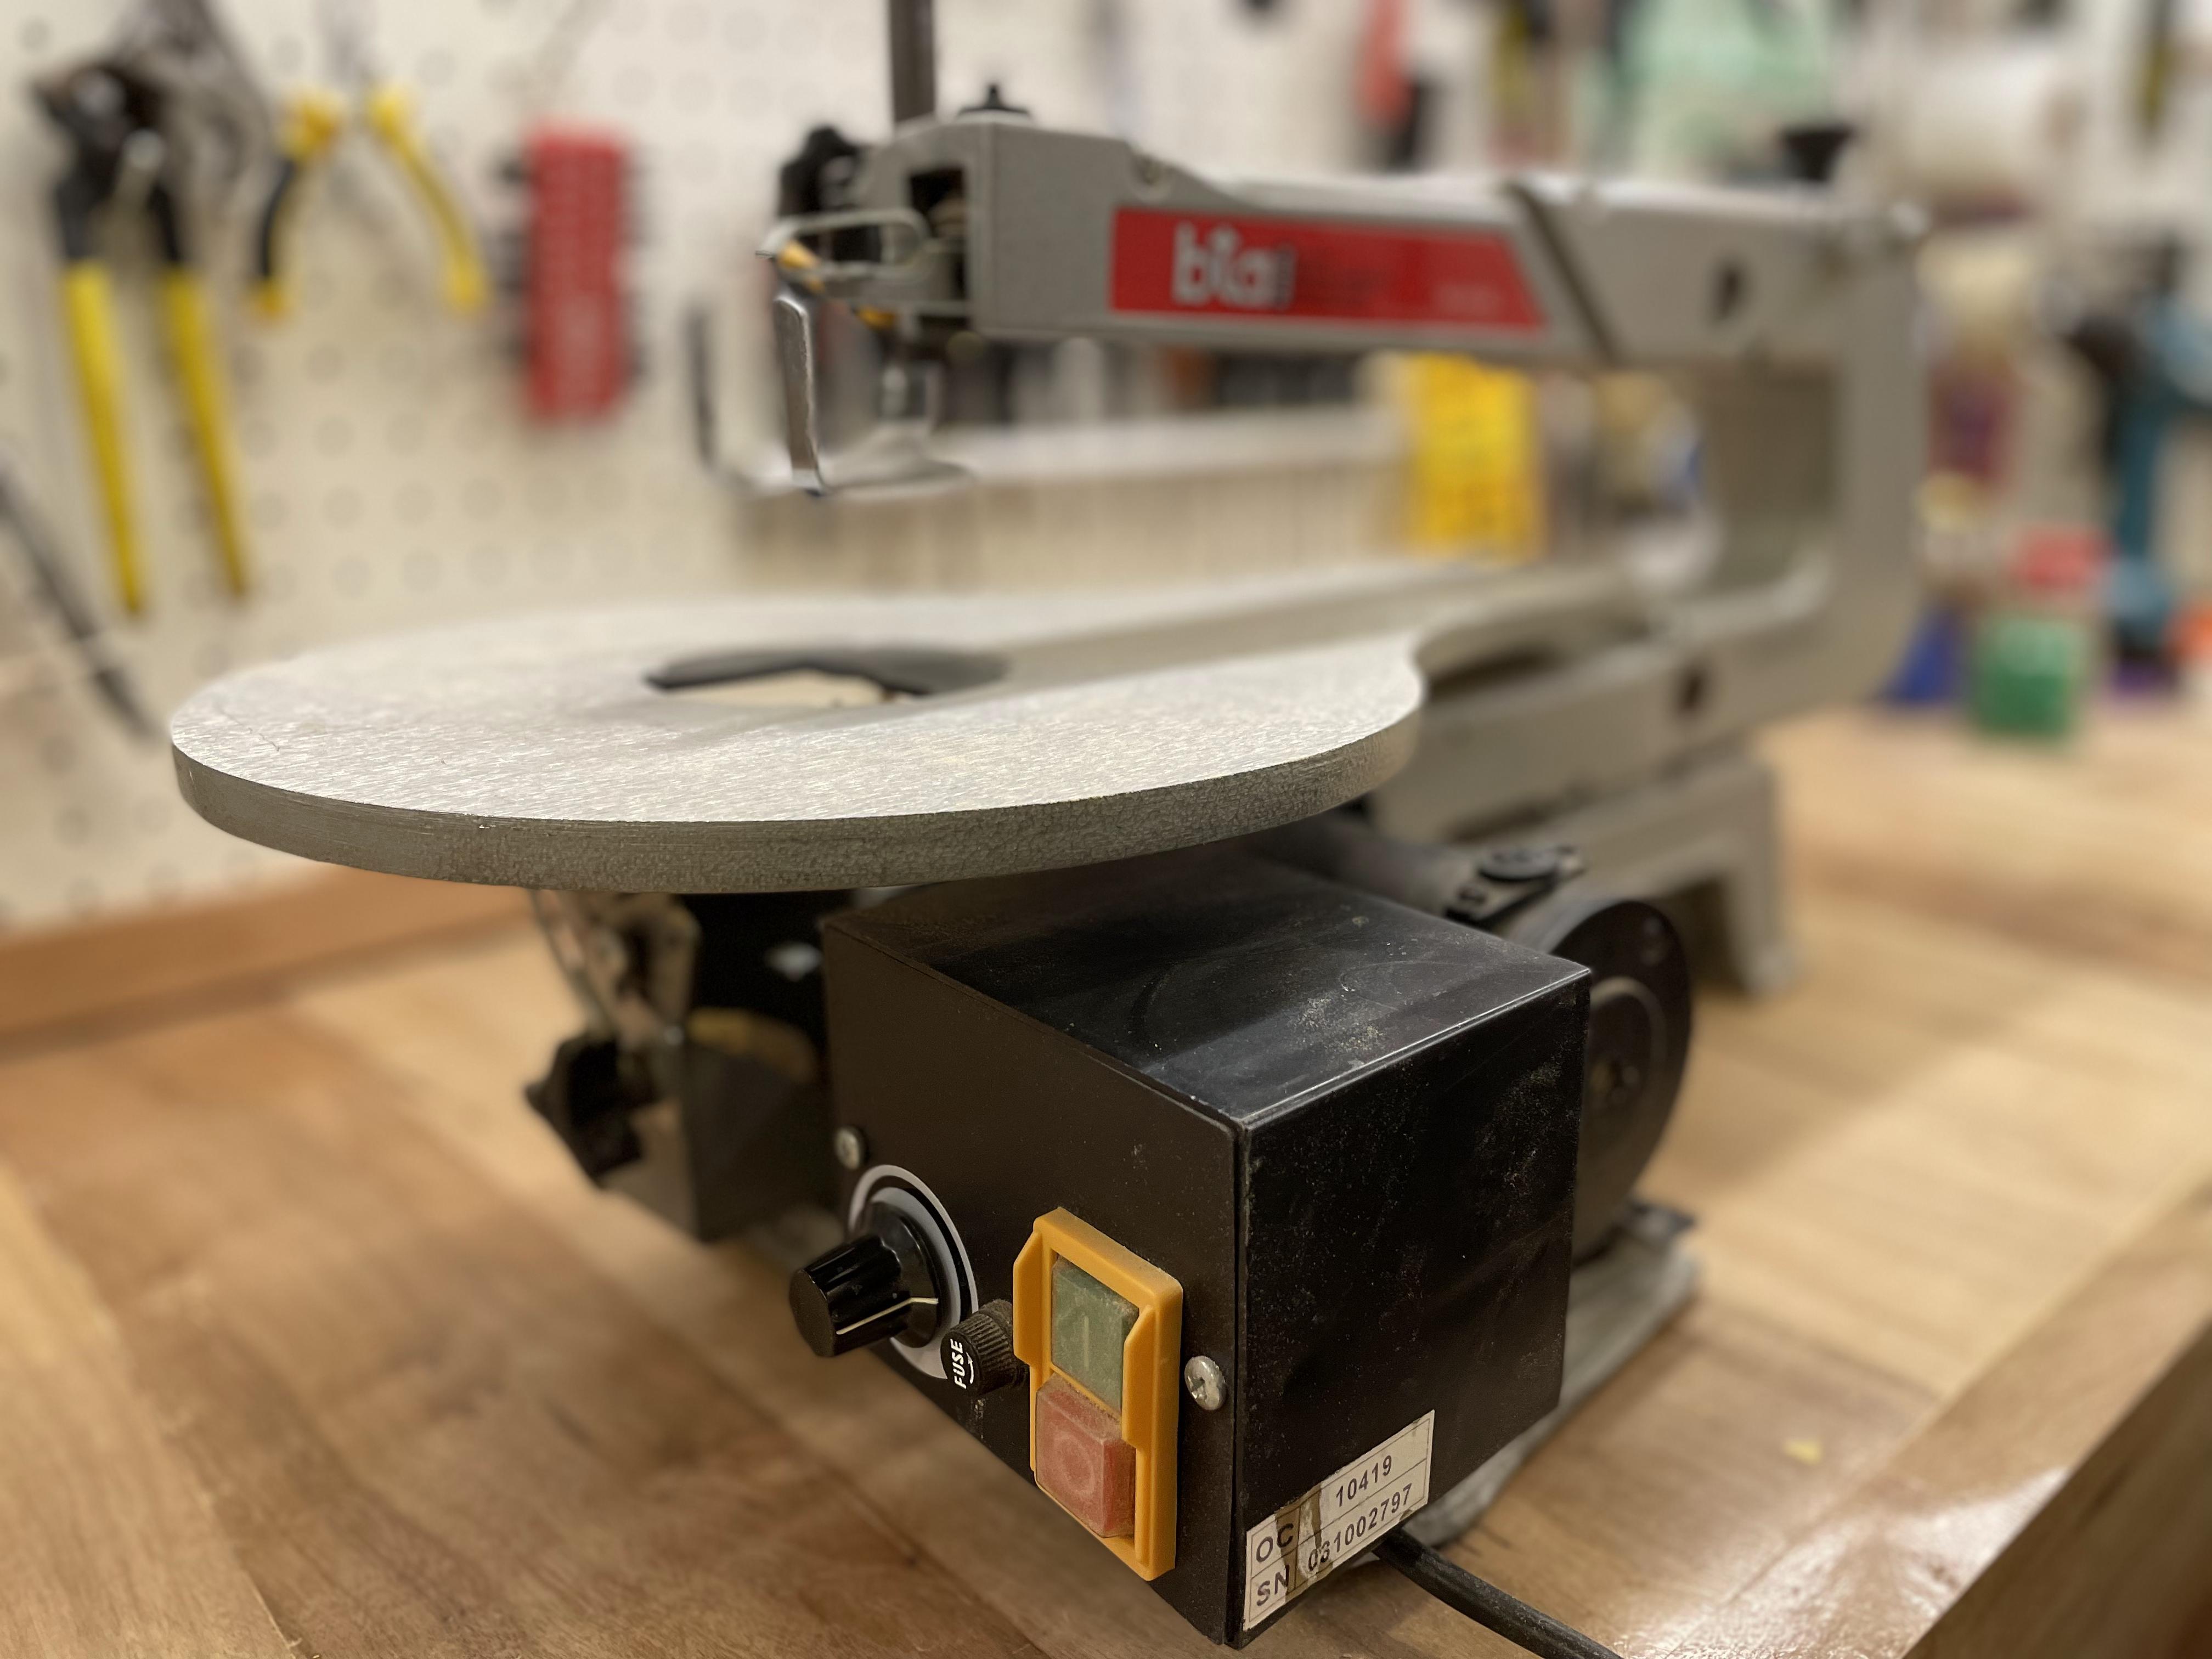
- Bench jigsaw.
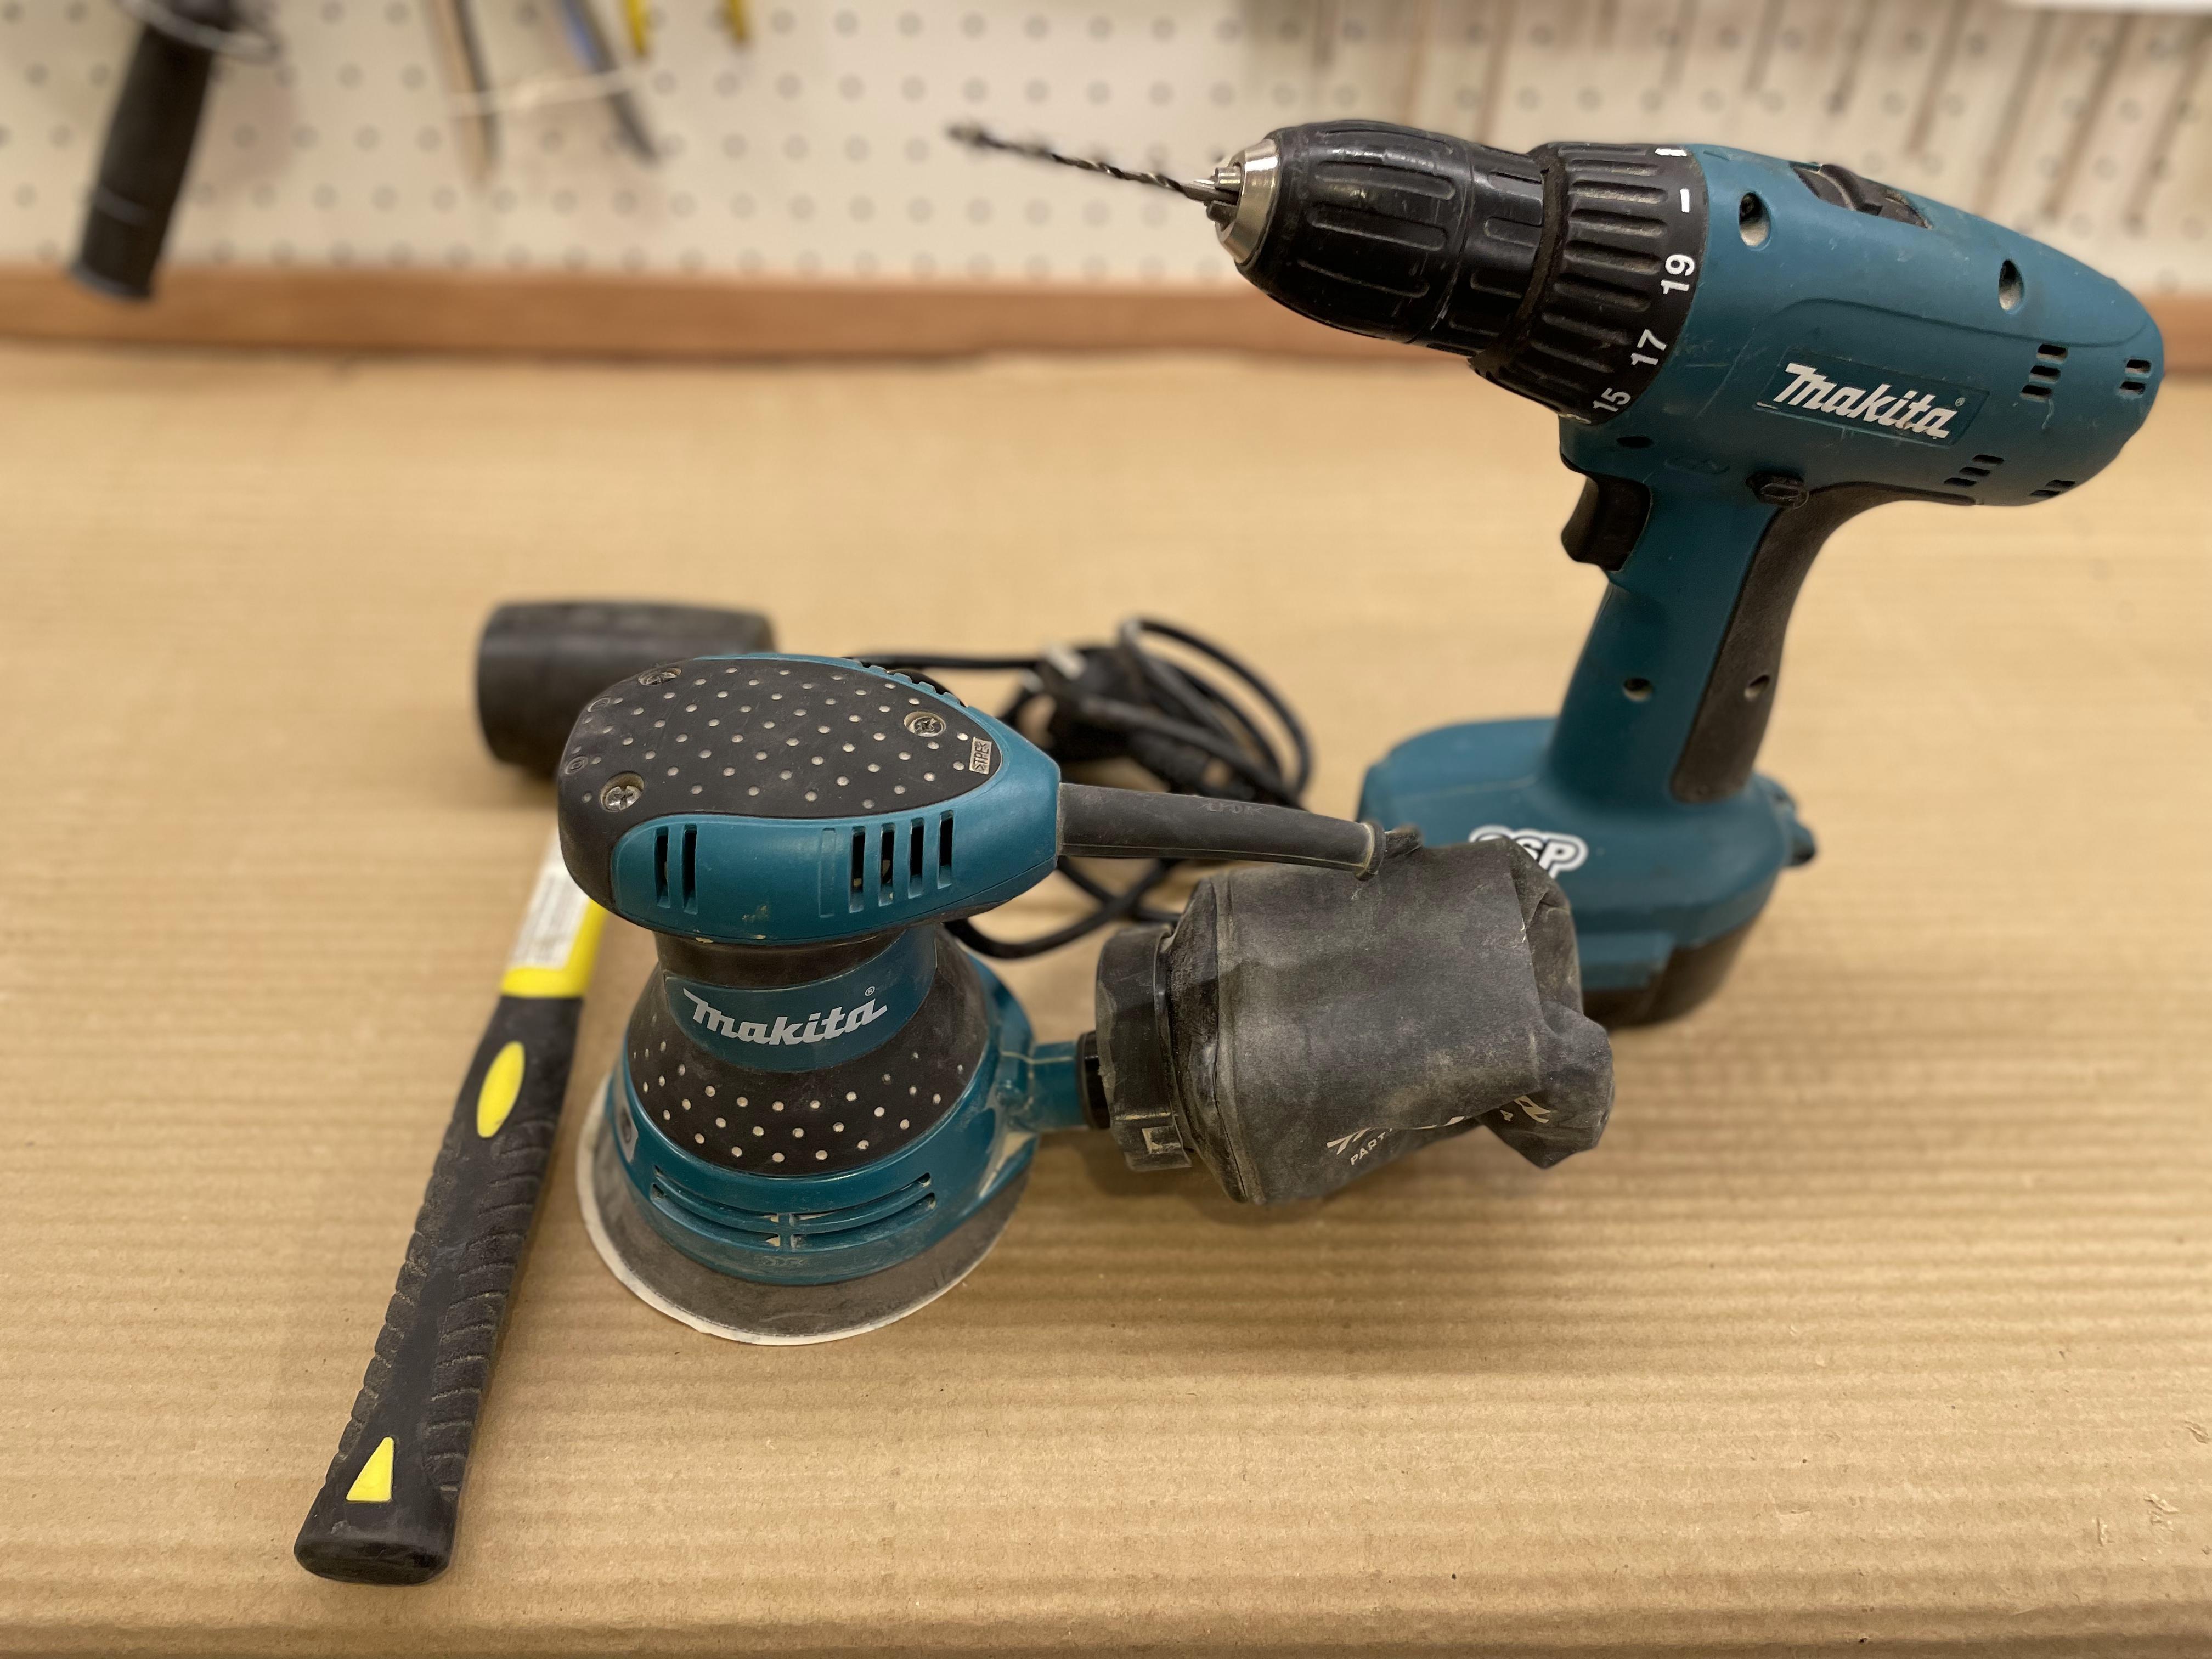
- Orbital sander.
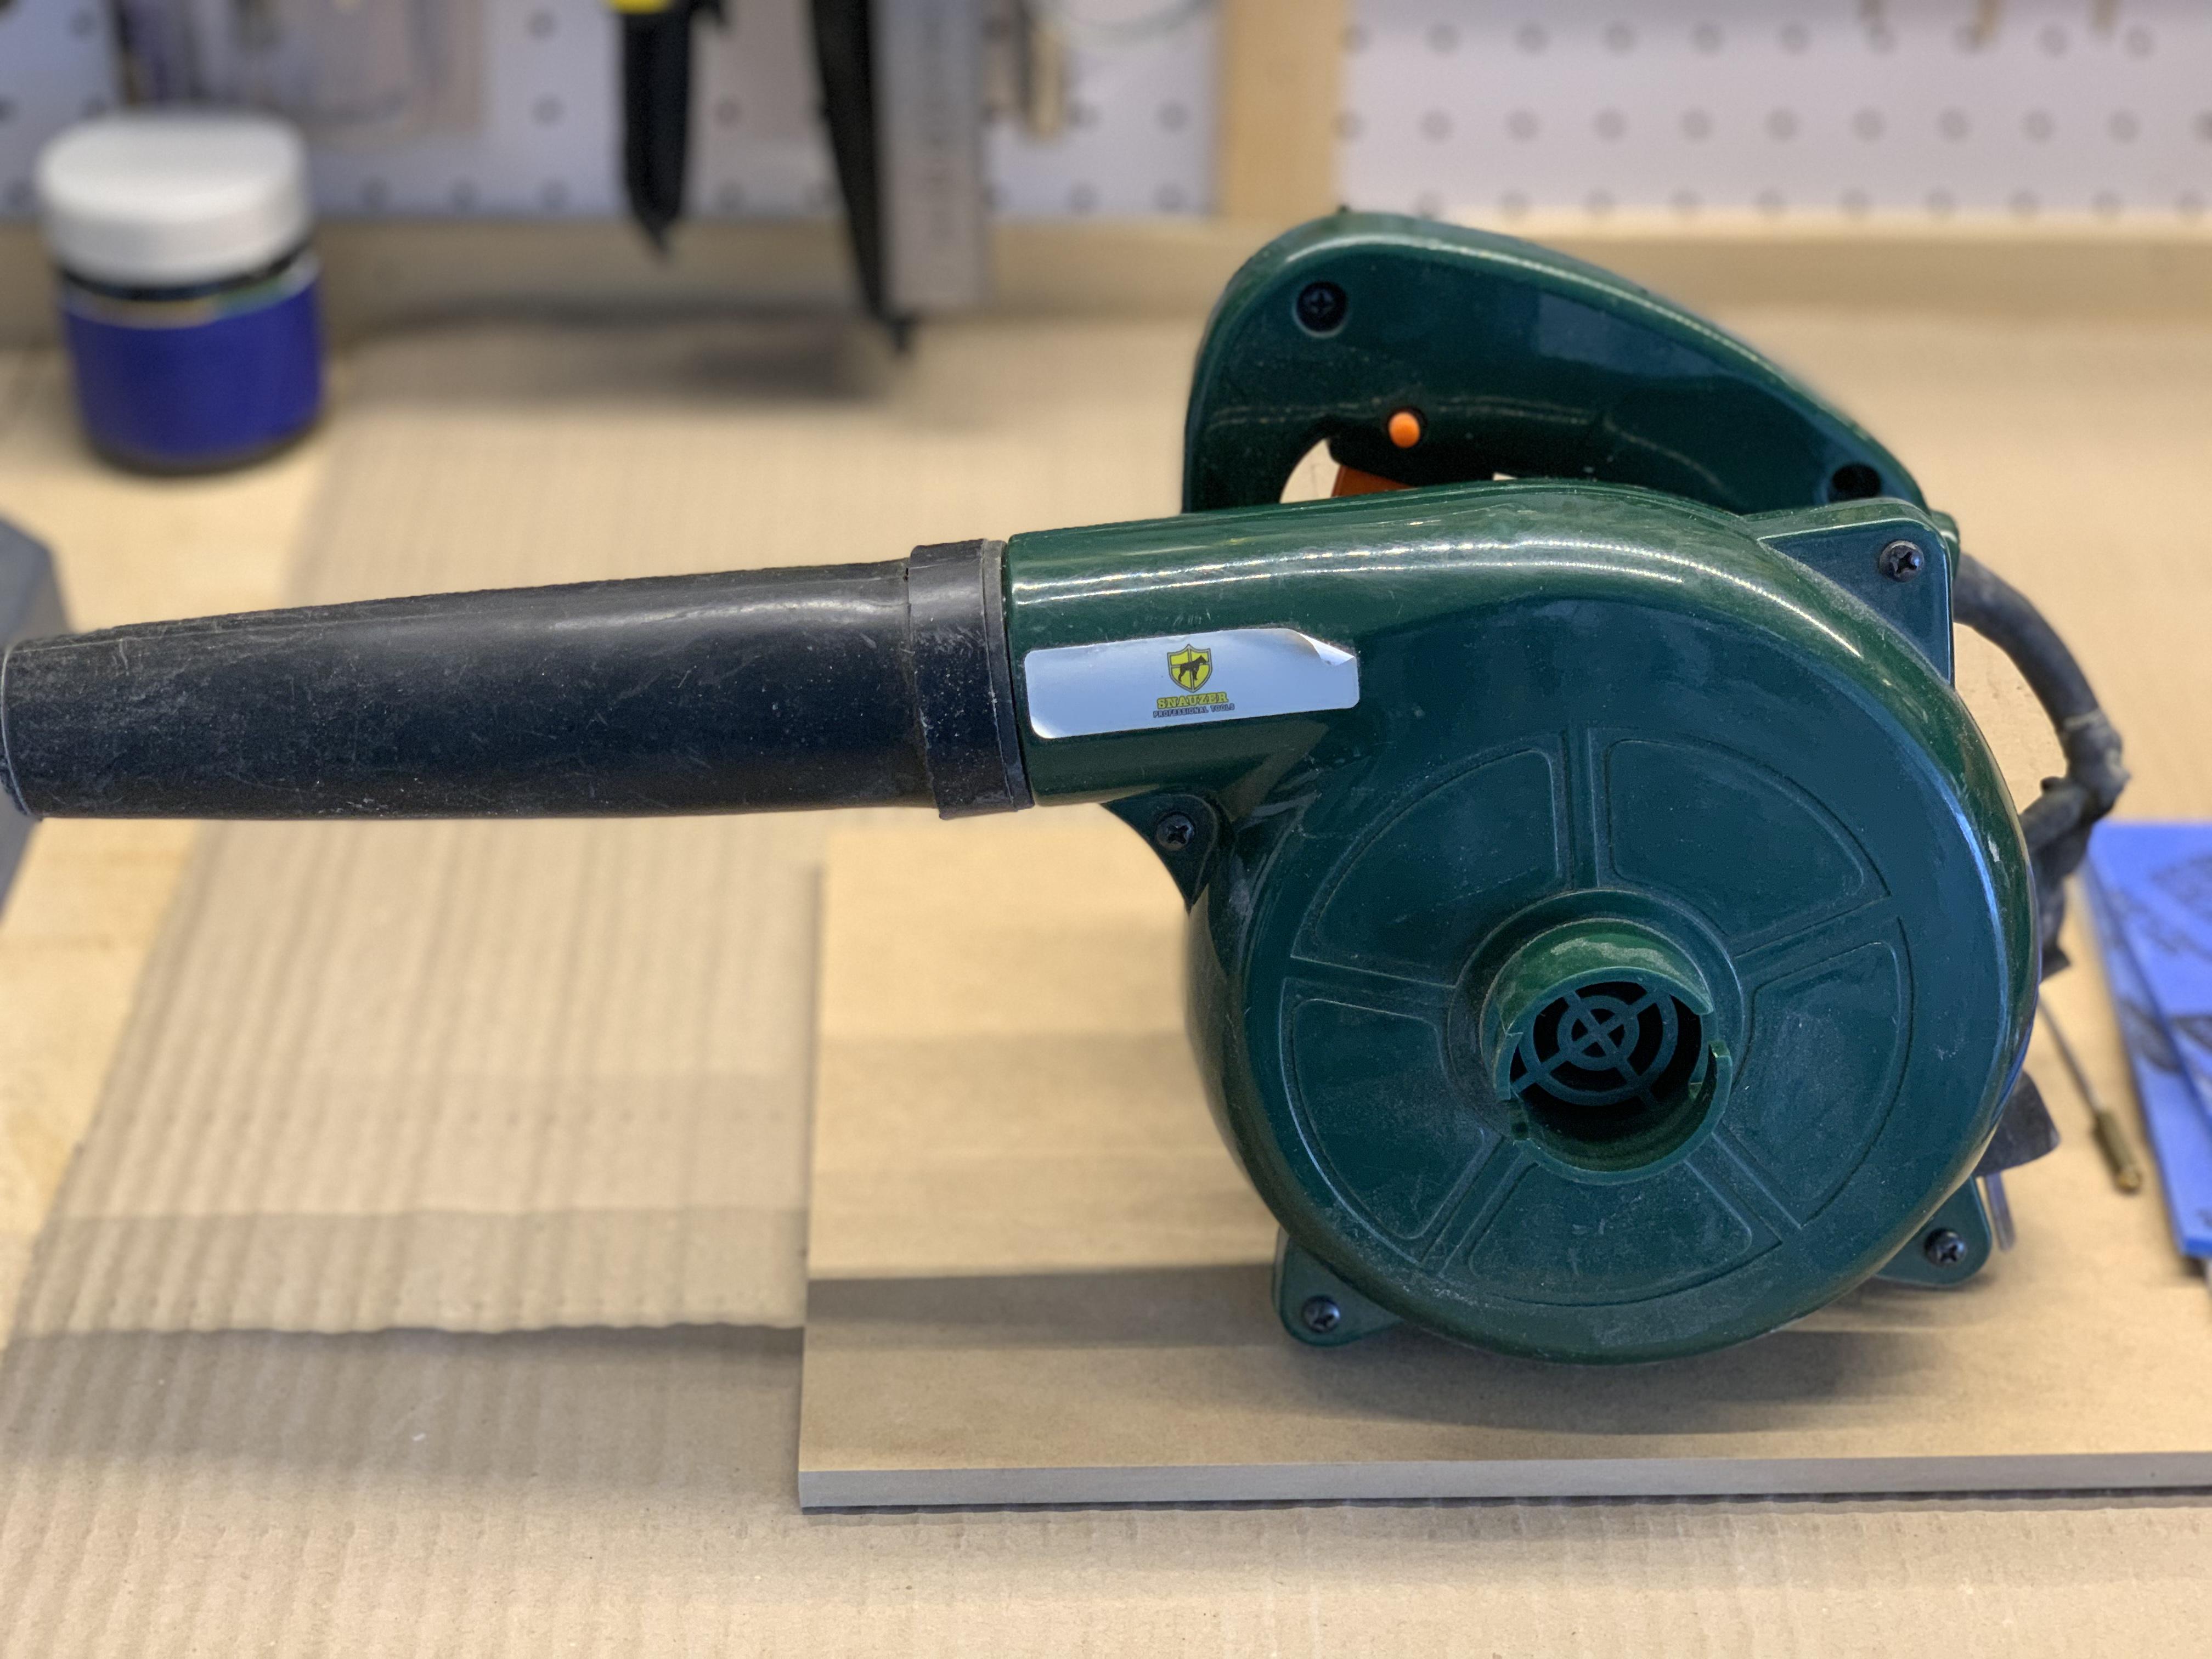
- Hand air blower.
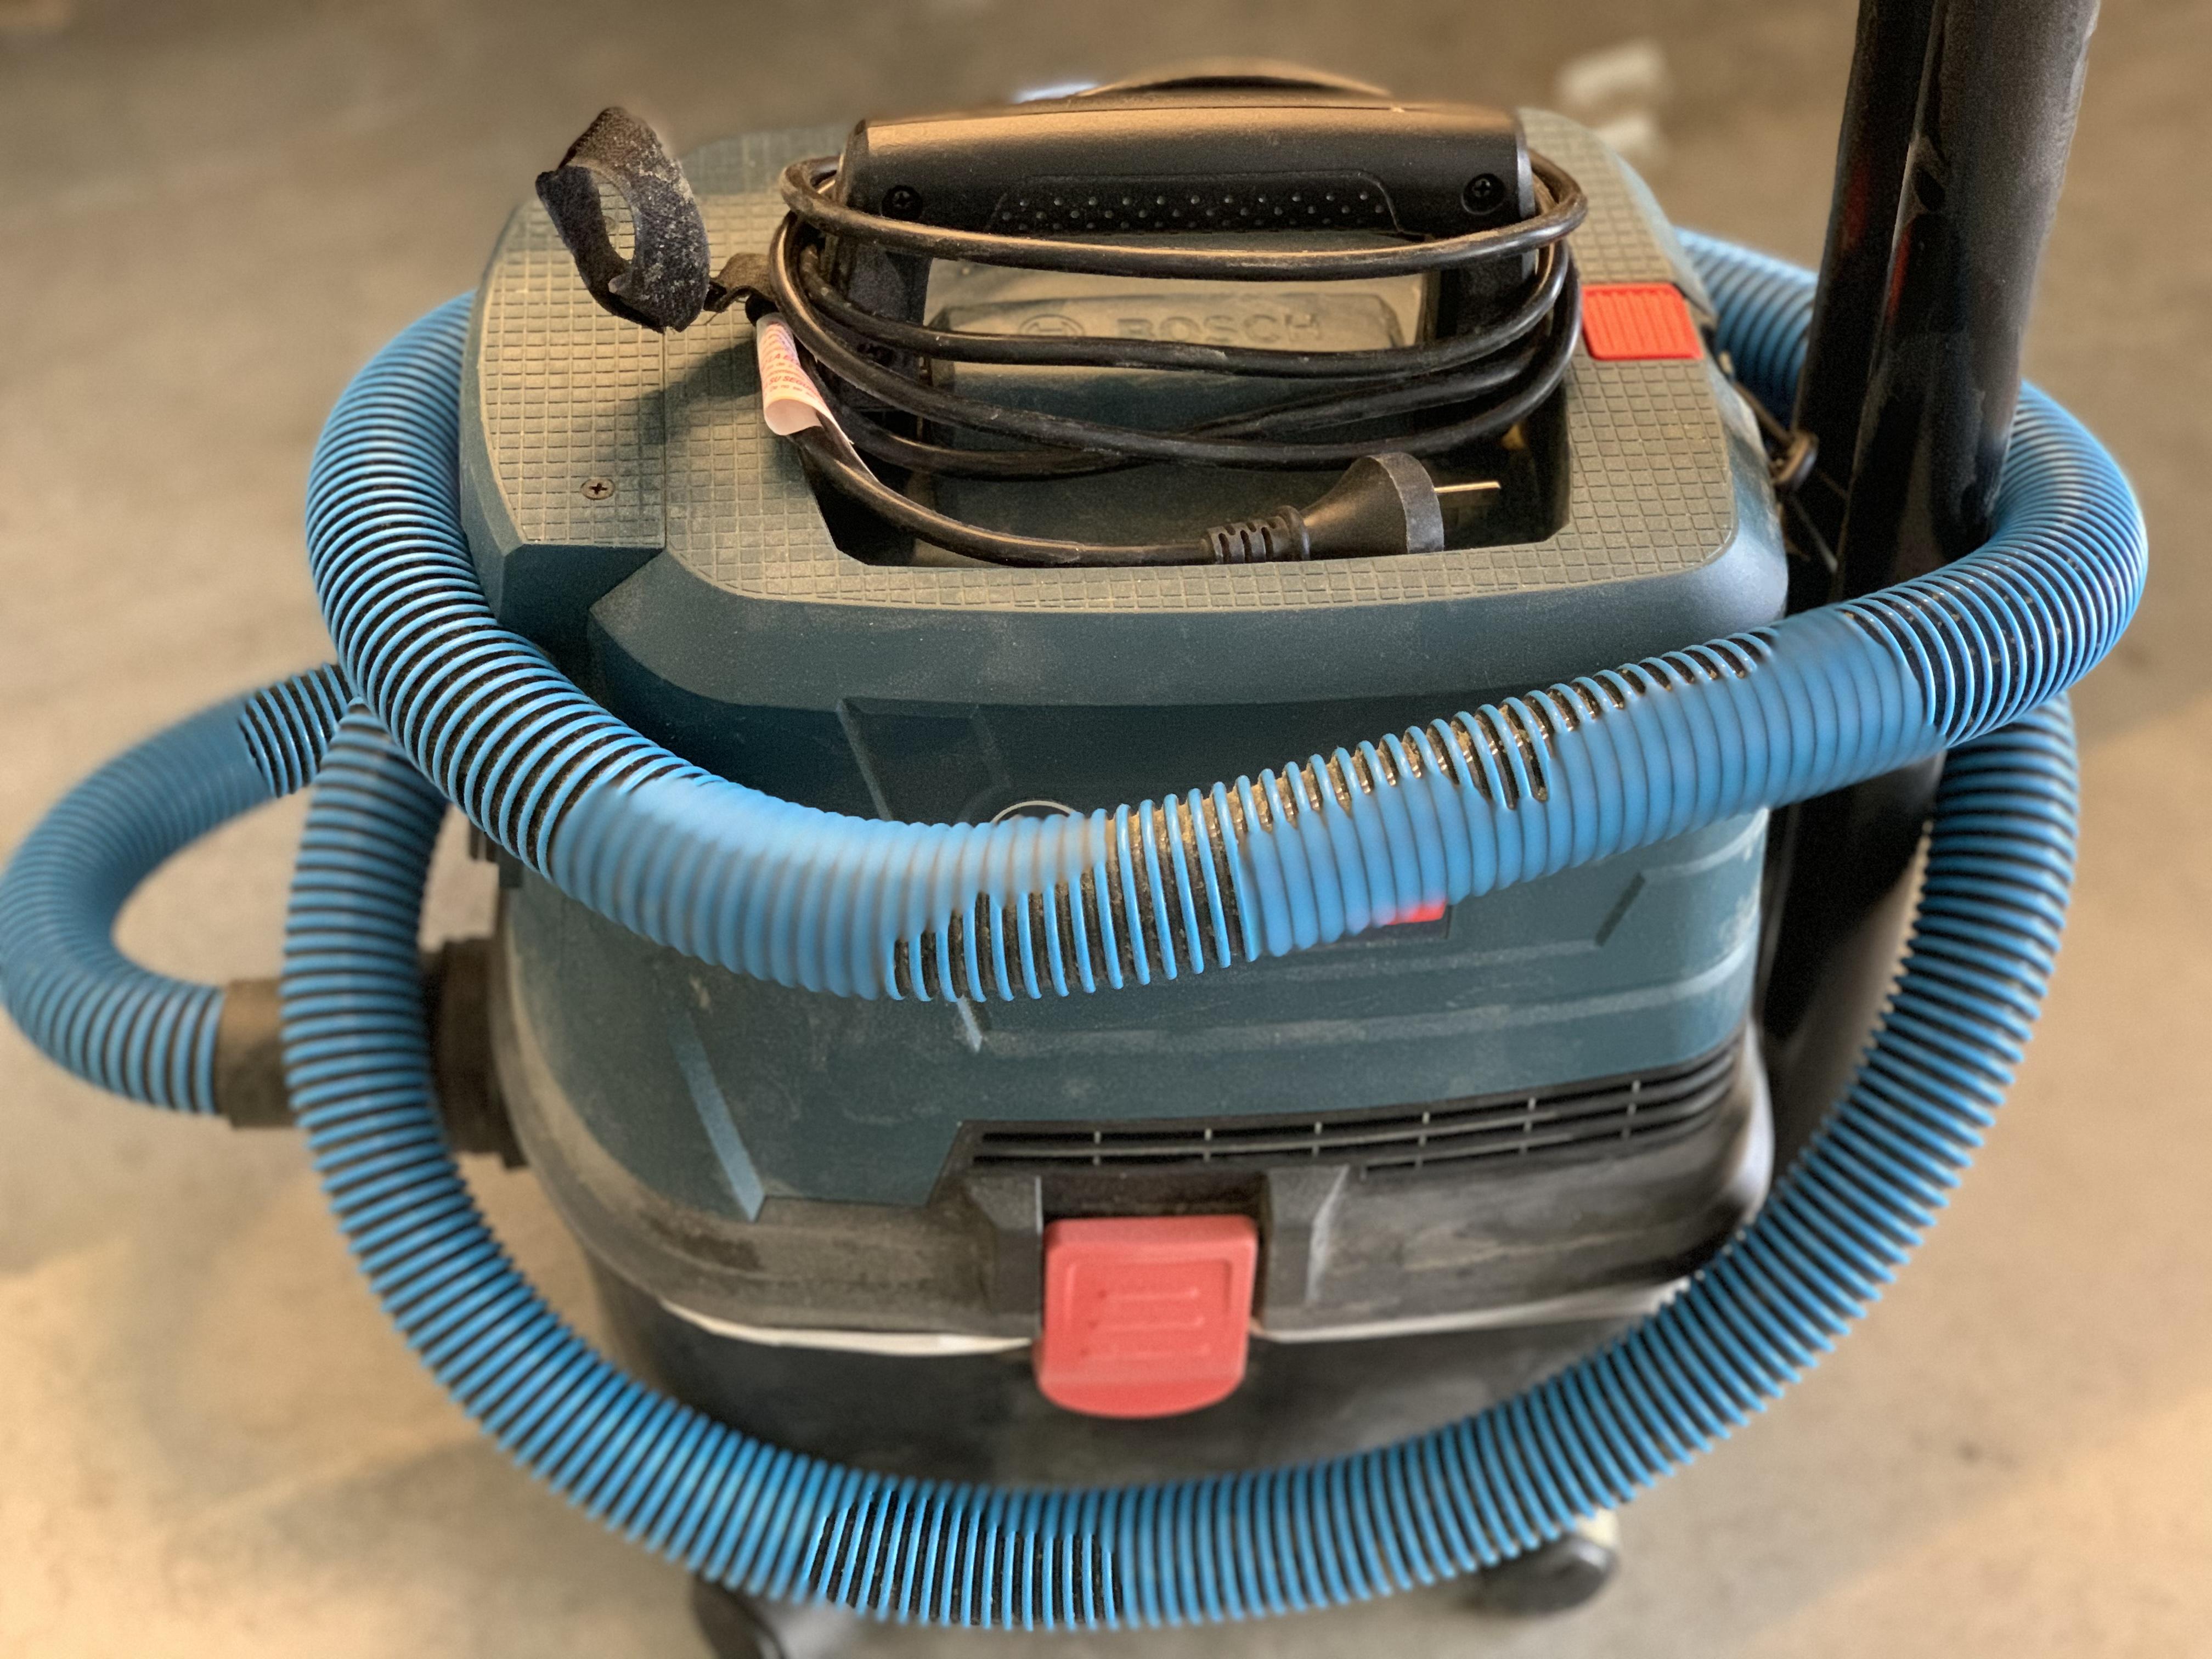
- Dust vacuum cleaner.
- Pencil.
- Eraser.
- Metalic ruler.
- Metal square.
Personal Protection Equipment (PPI):
- Protection glasses.
- Ear protector.
- Dust mask.
Design
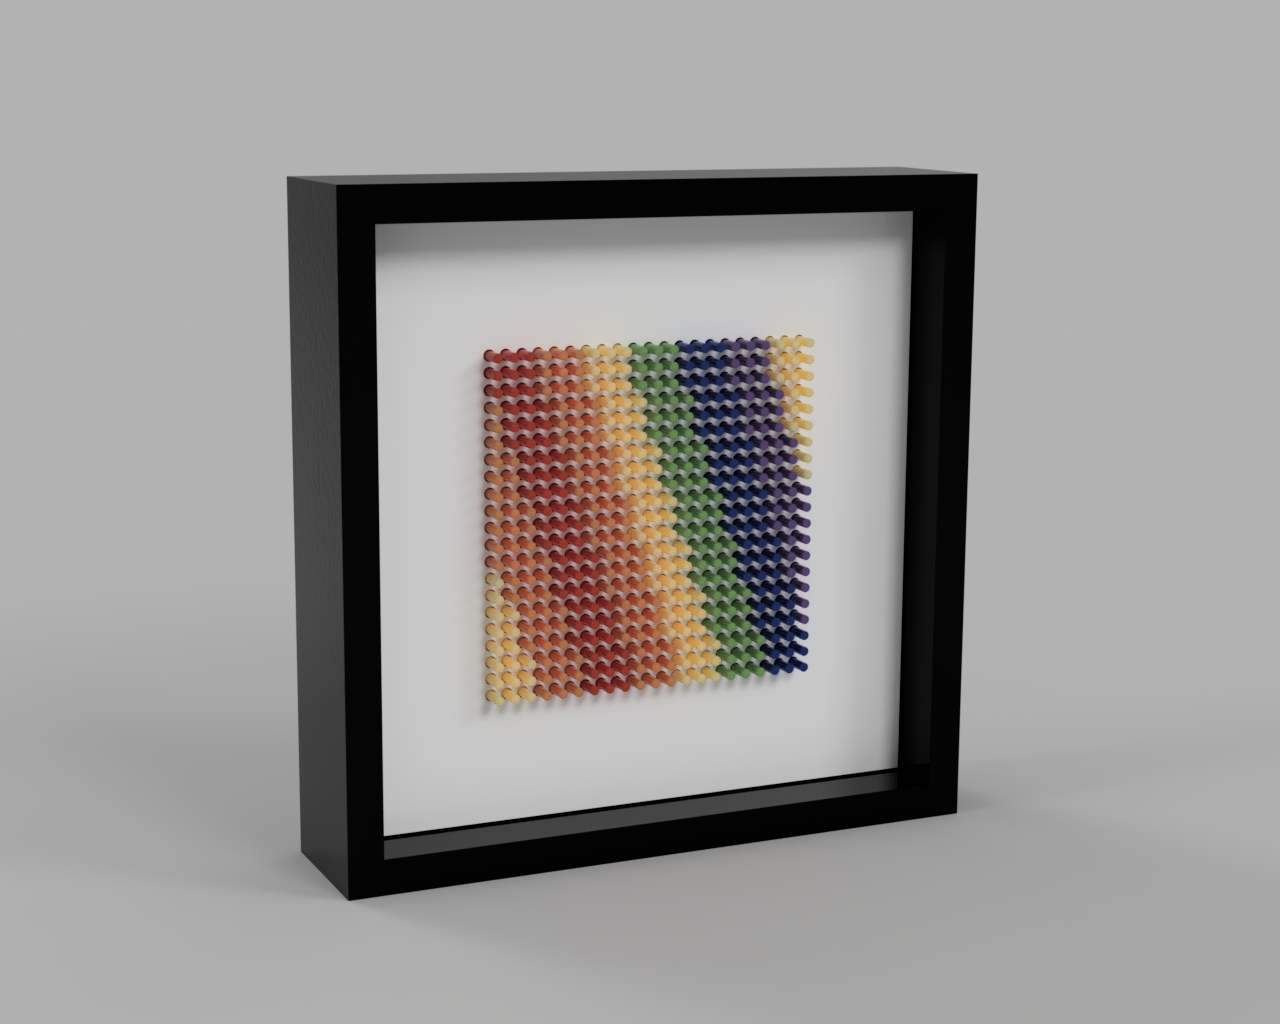
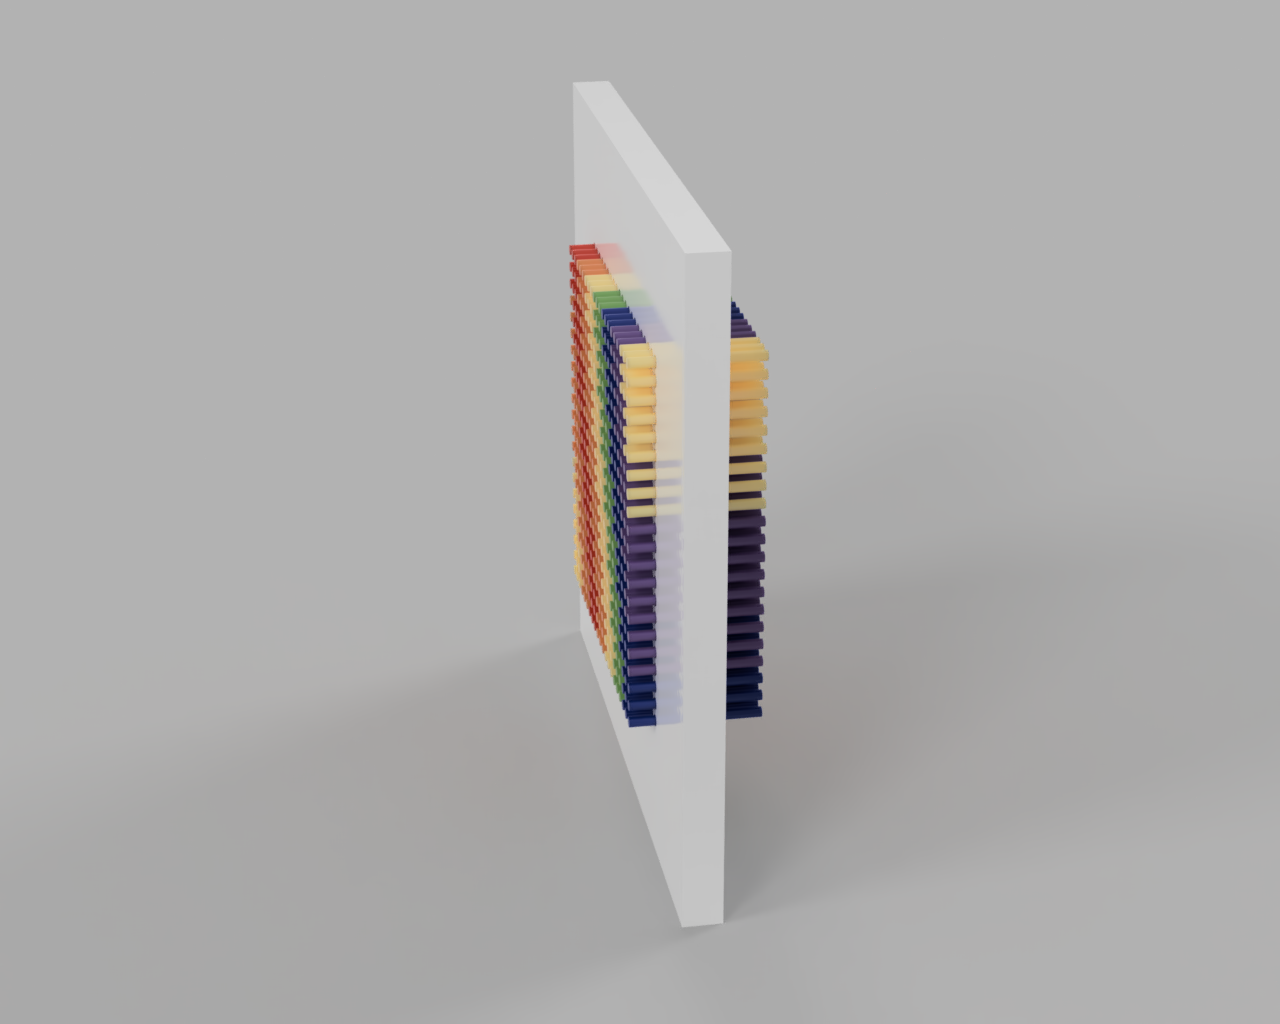
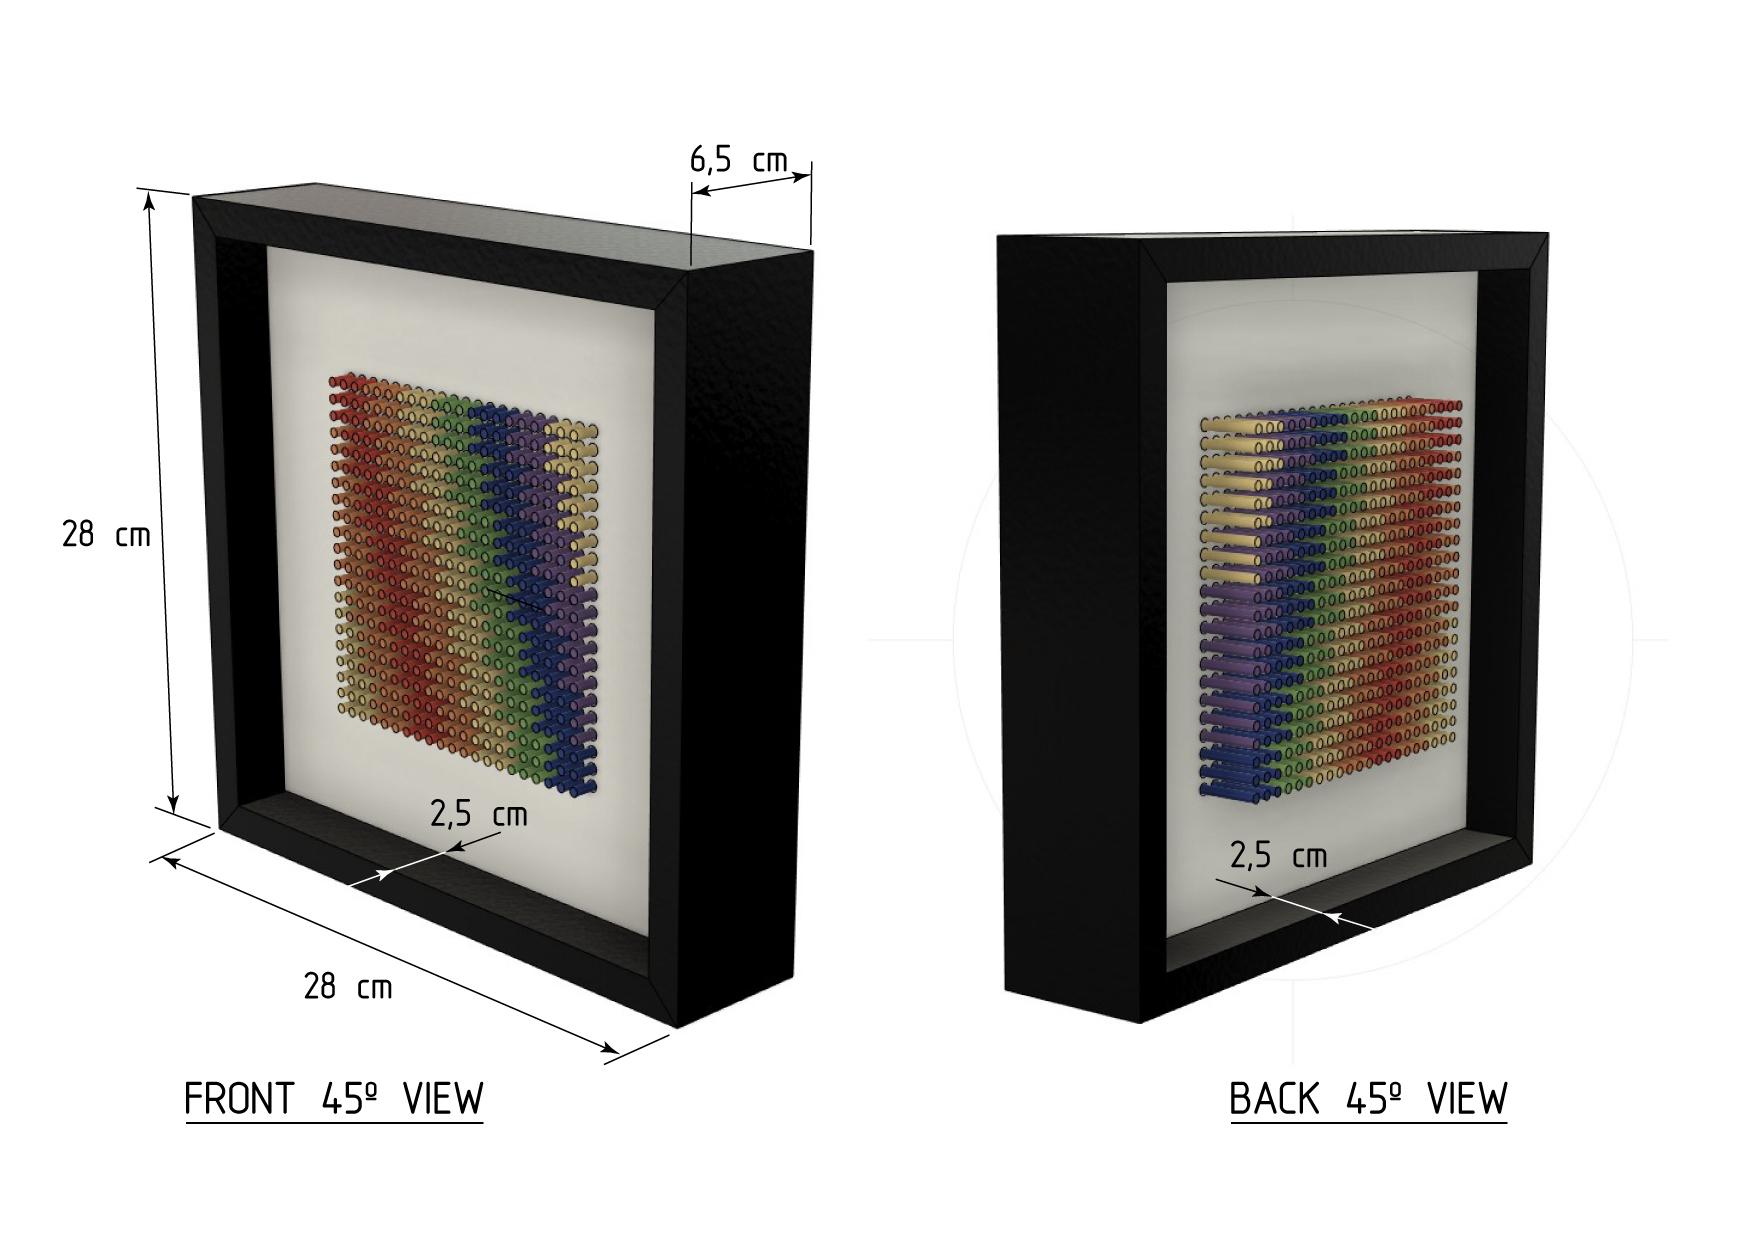
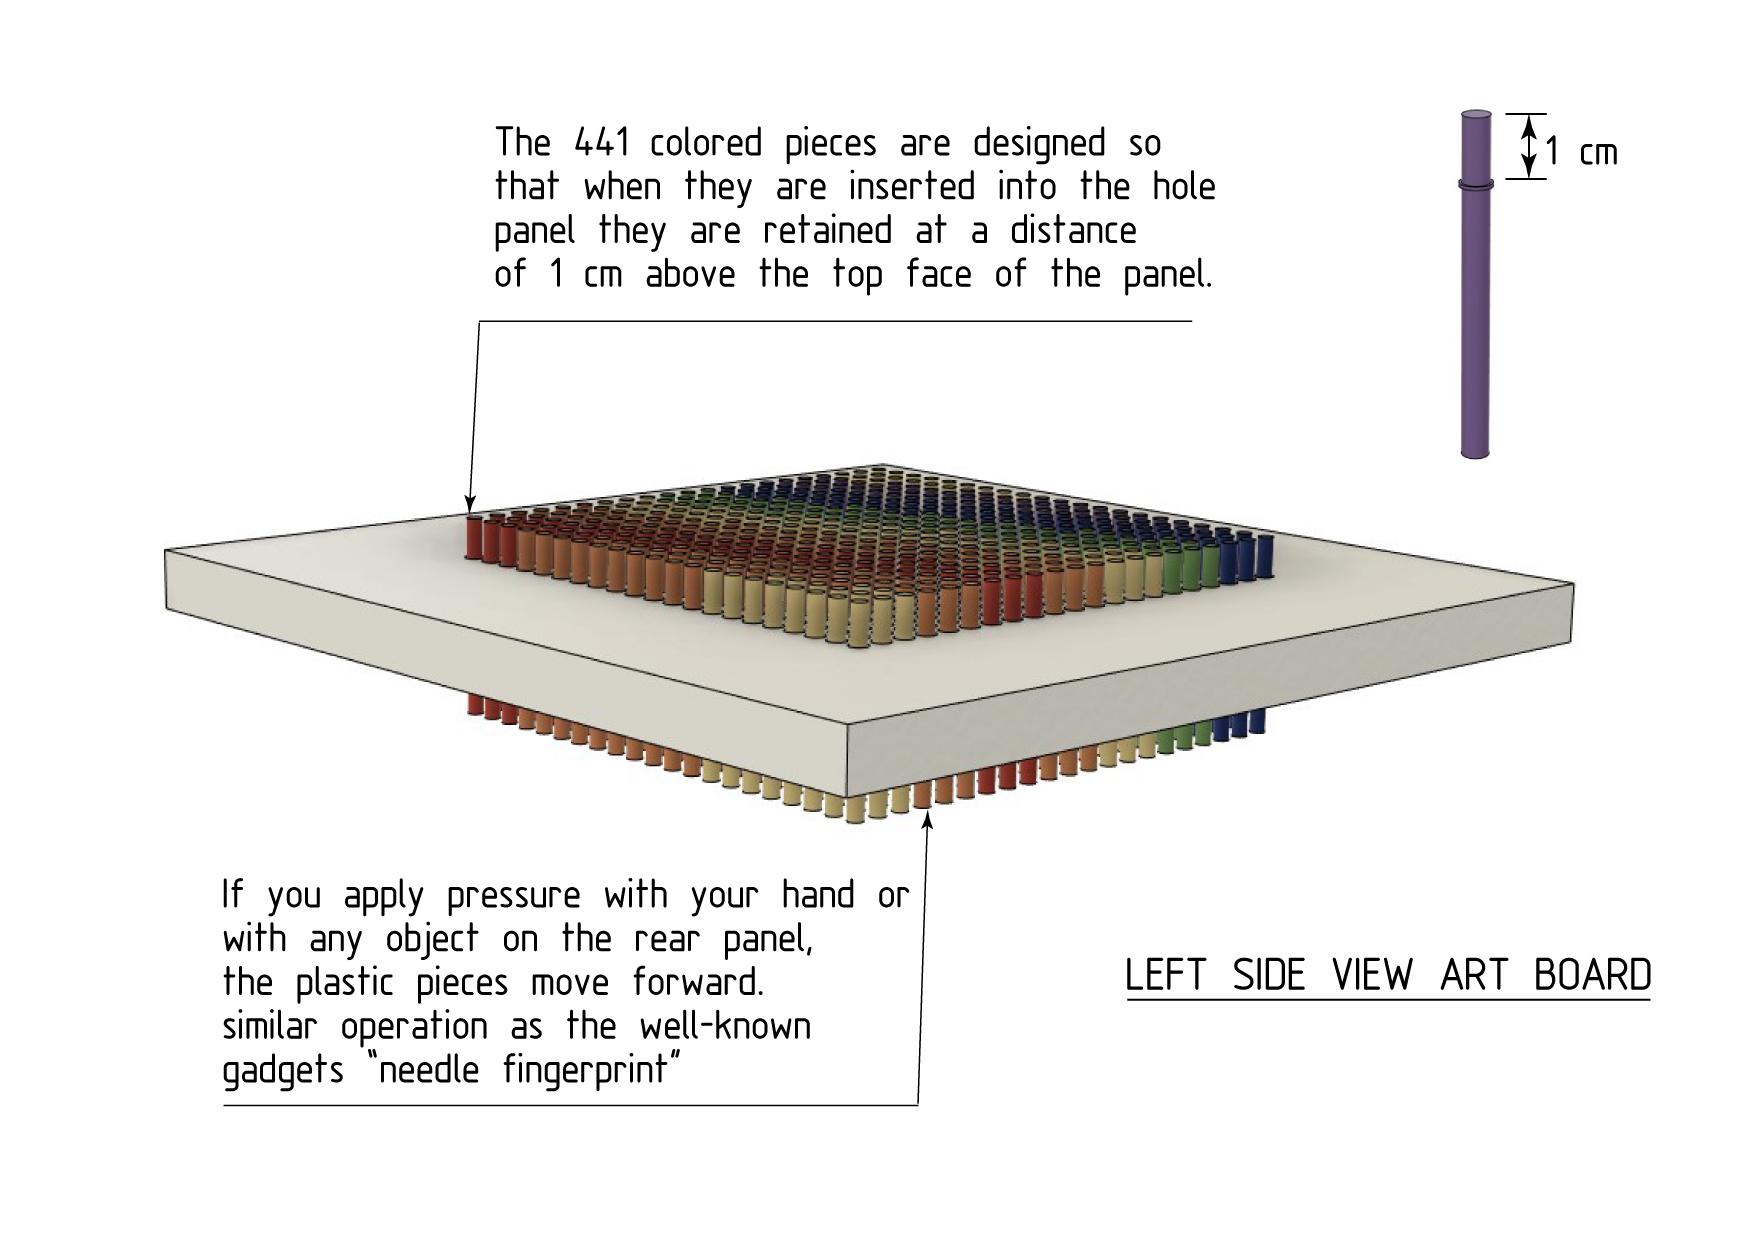
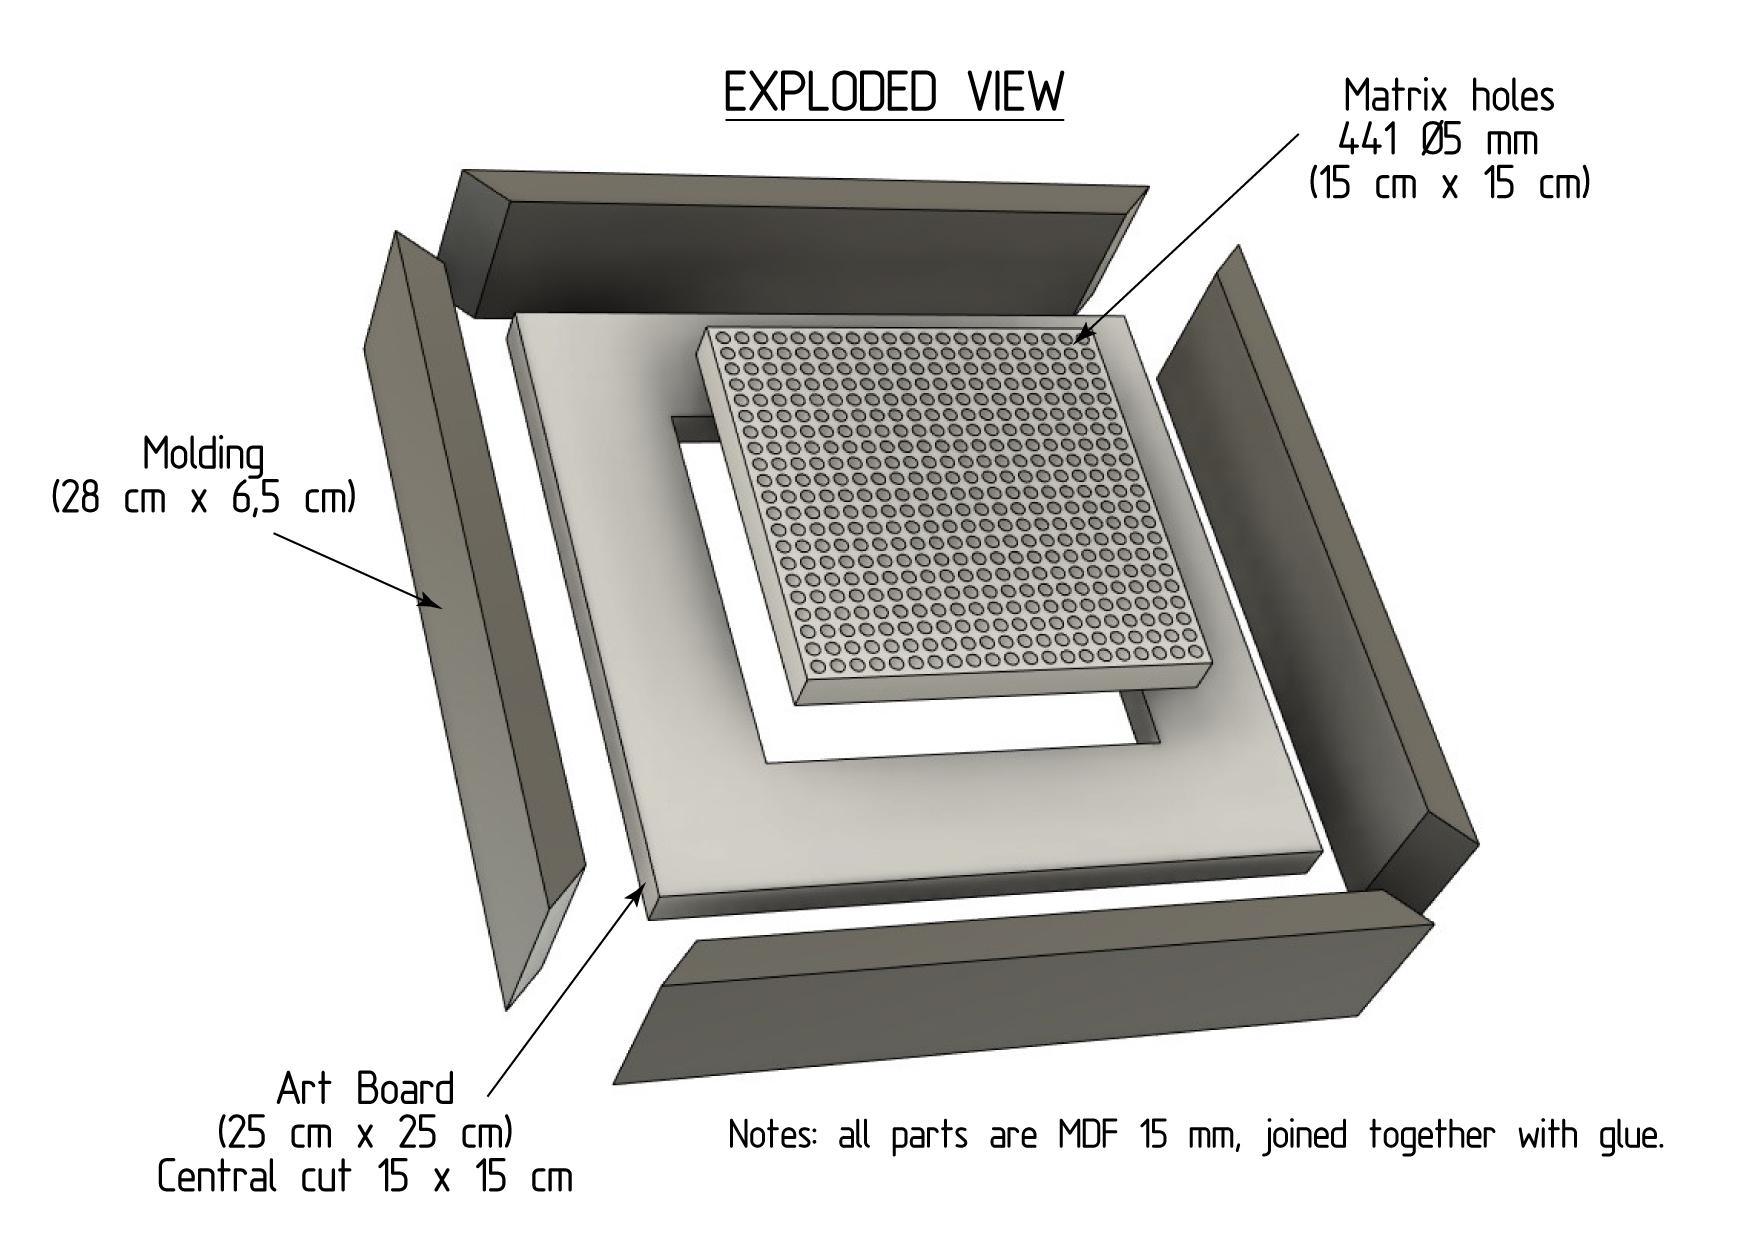
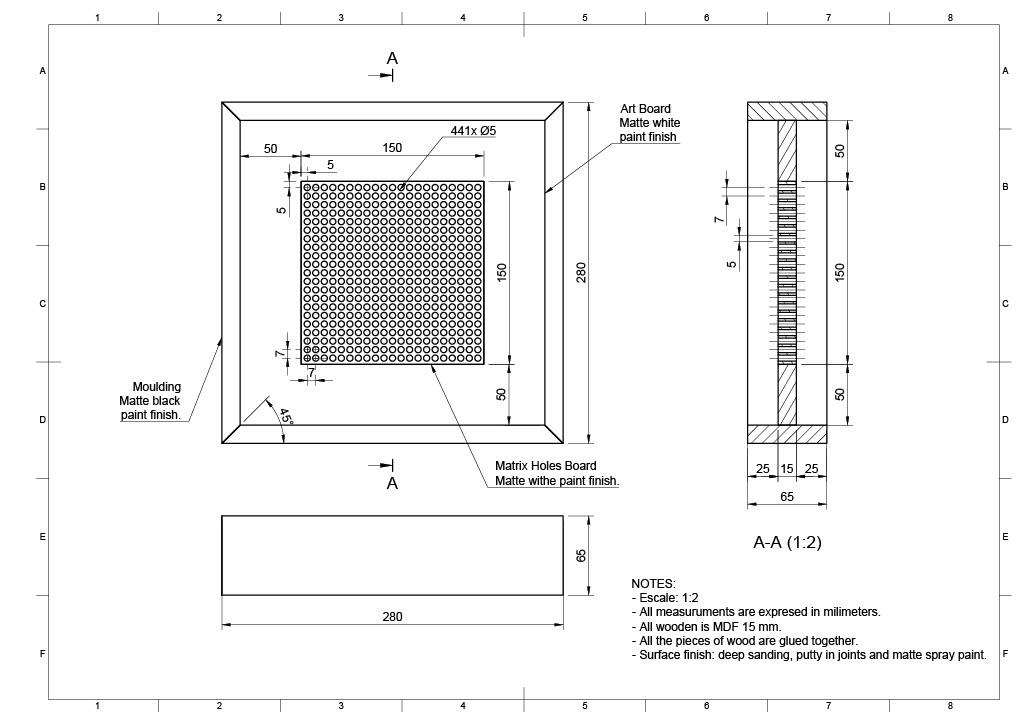
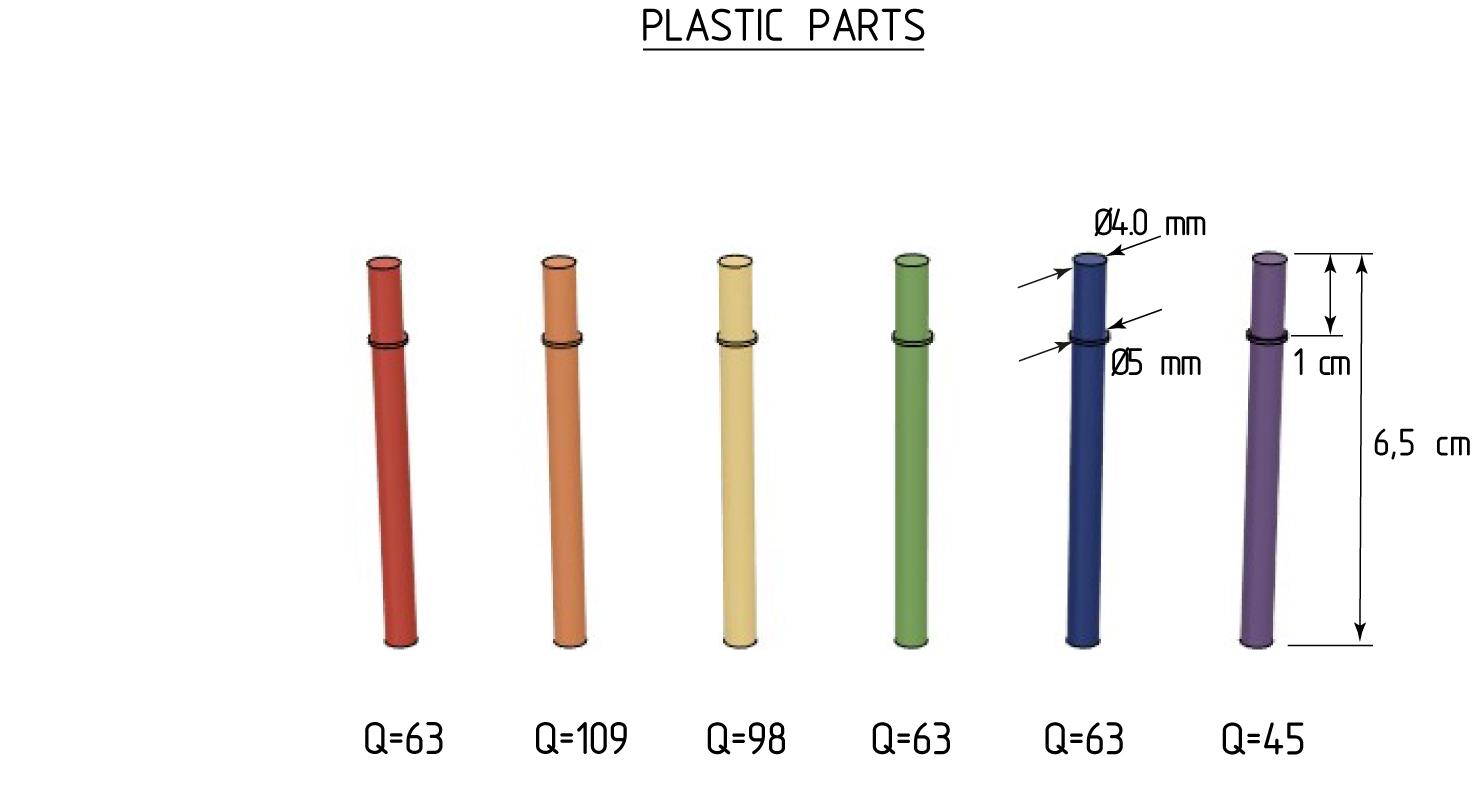
The design is very simple.
I did plans using fusion 360 (https://www.autodesk.com)
All the wooden parts are made of 15 mm MDF.
The size of the finished work is 28 cm x 28 cm x 6,5 cm (width x length x depth)
The mouldings are 1,5 cm x 6,5 cm with a 45 degree bevel finish.
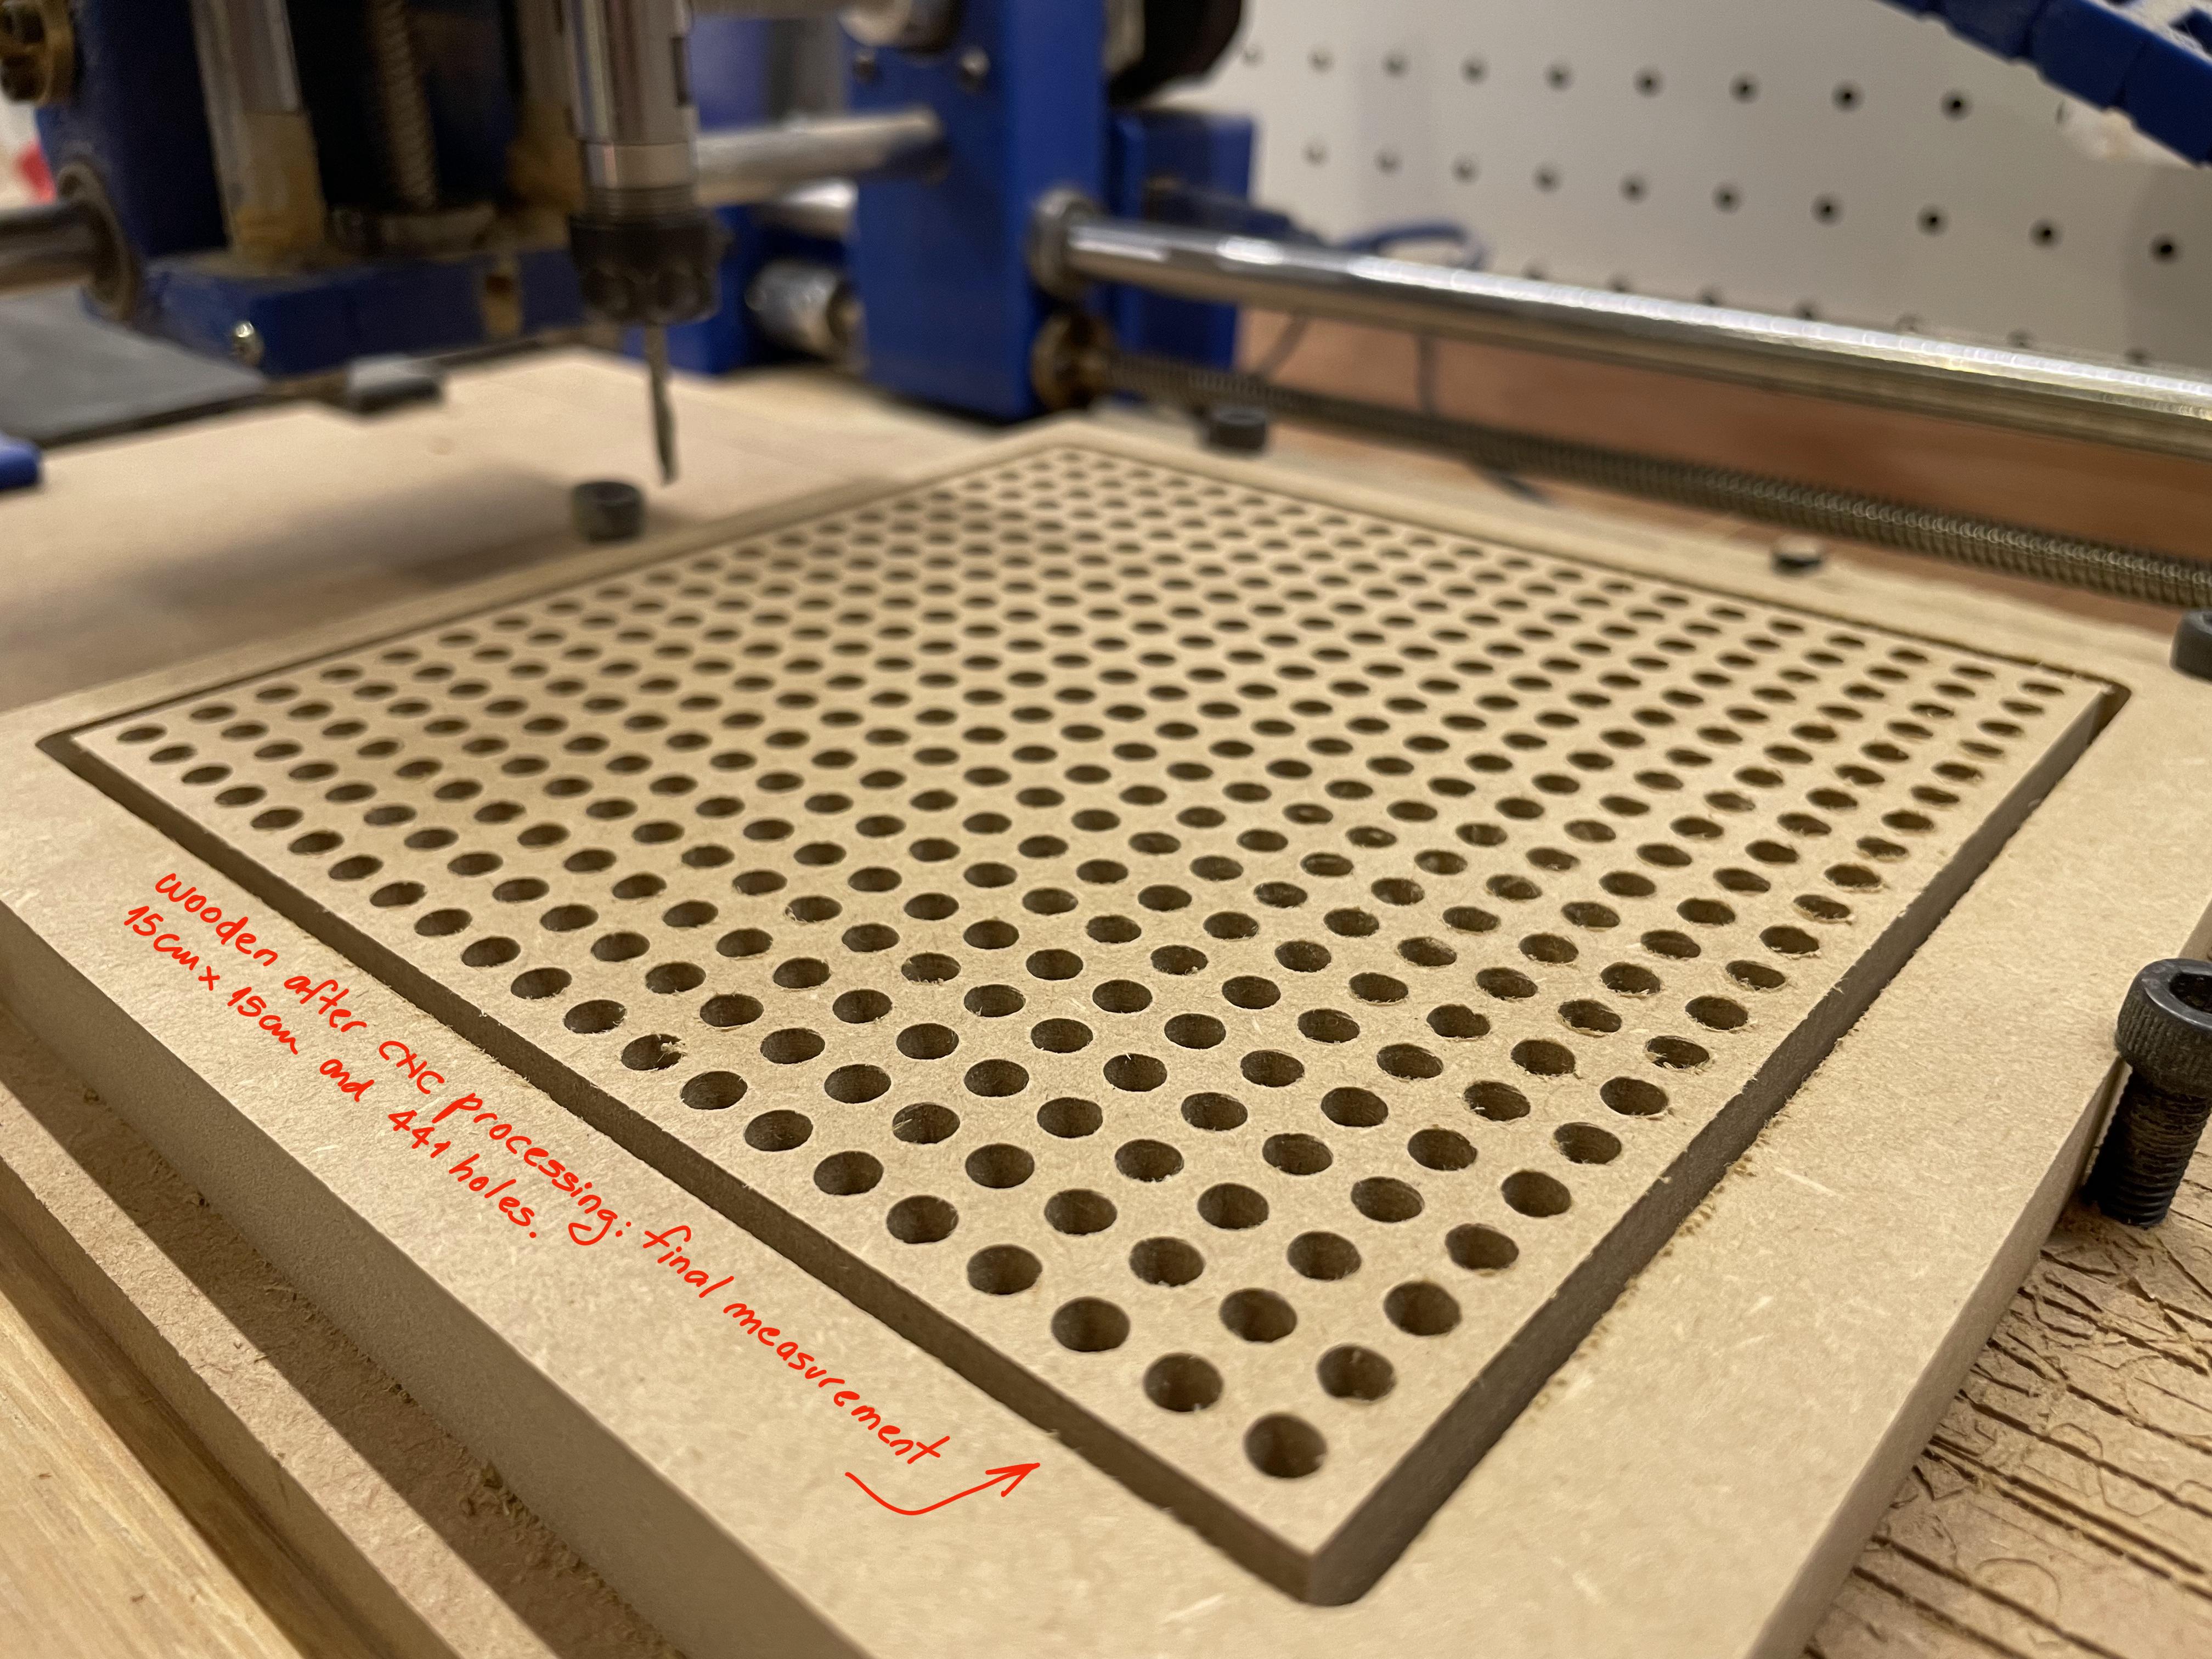
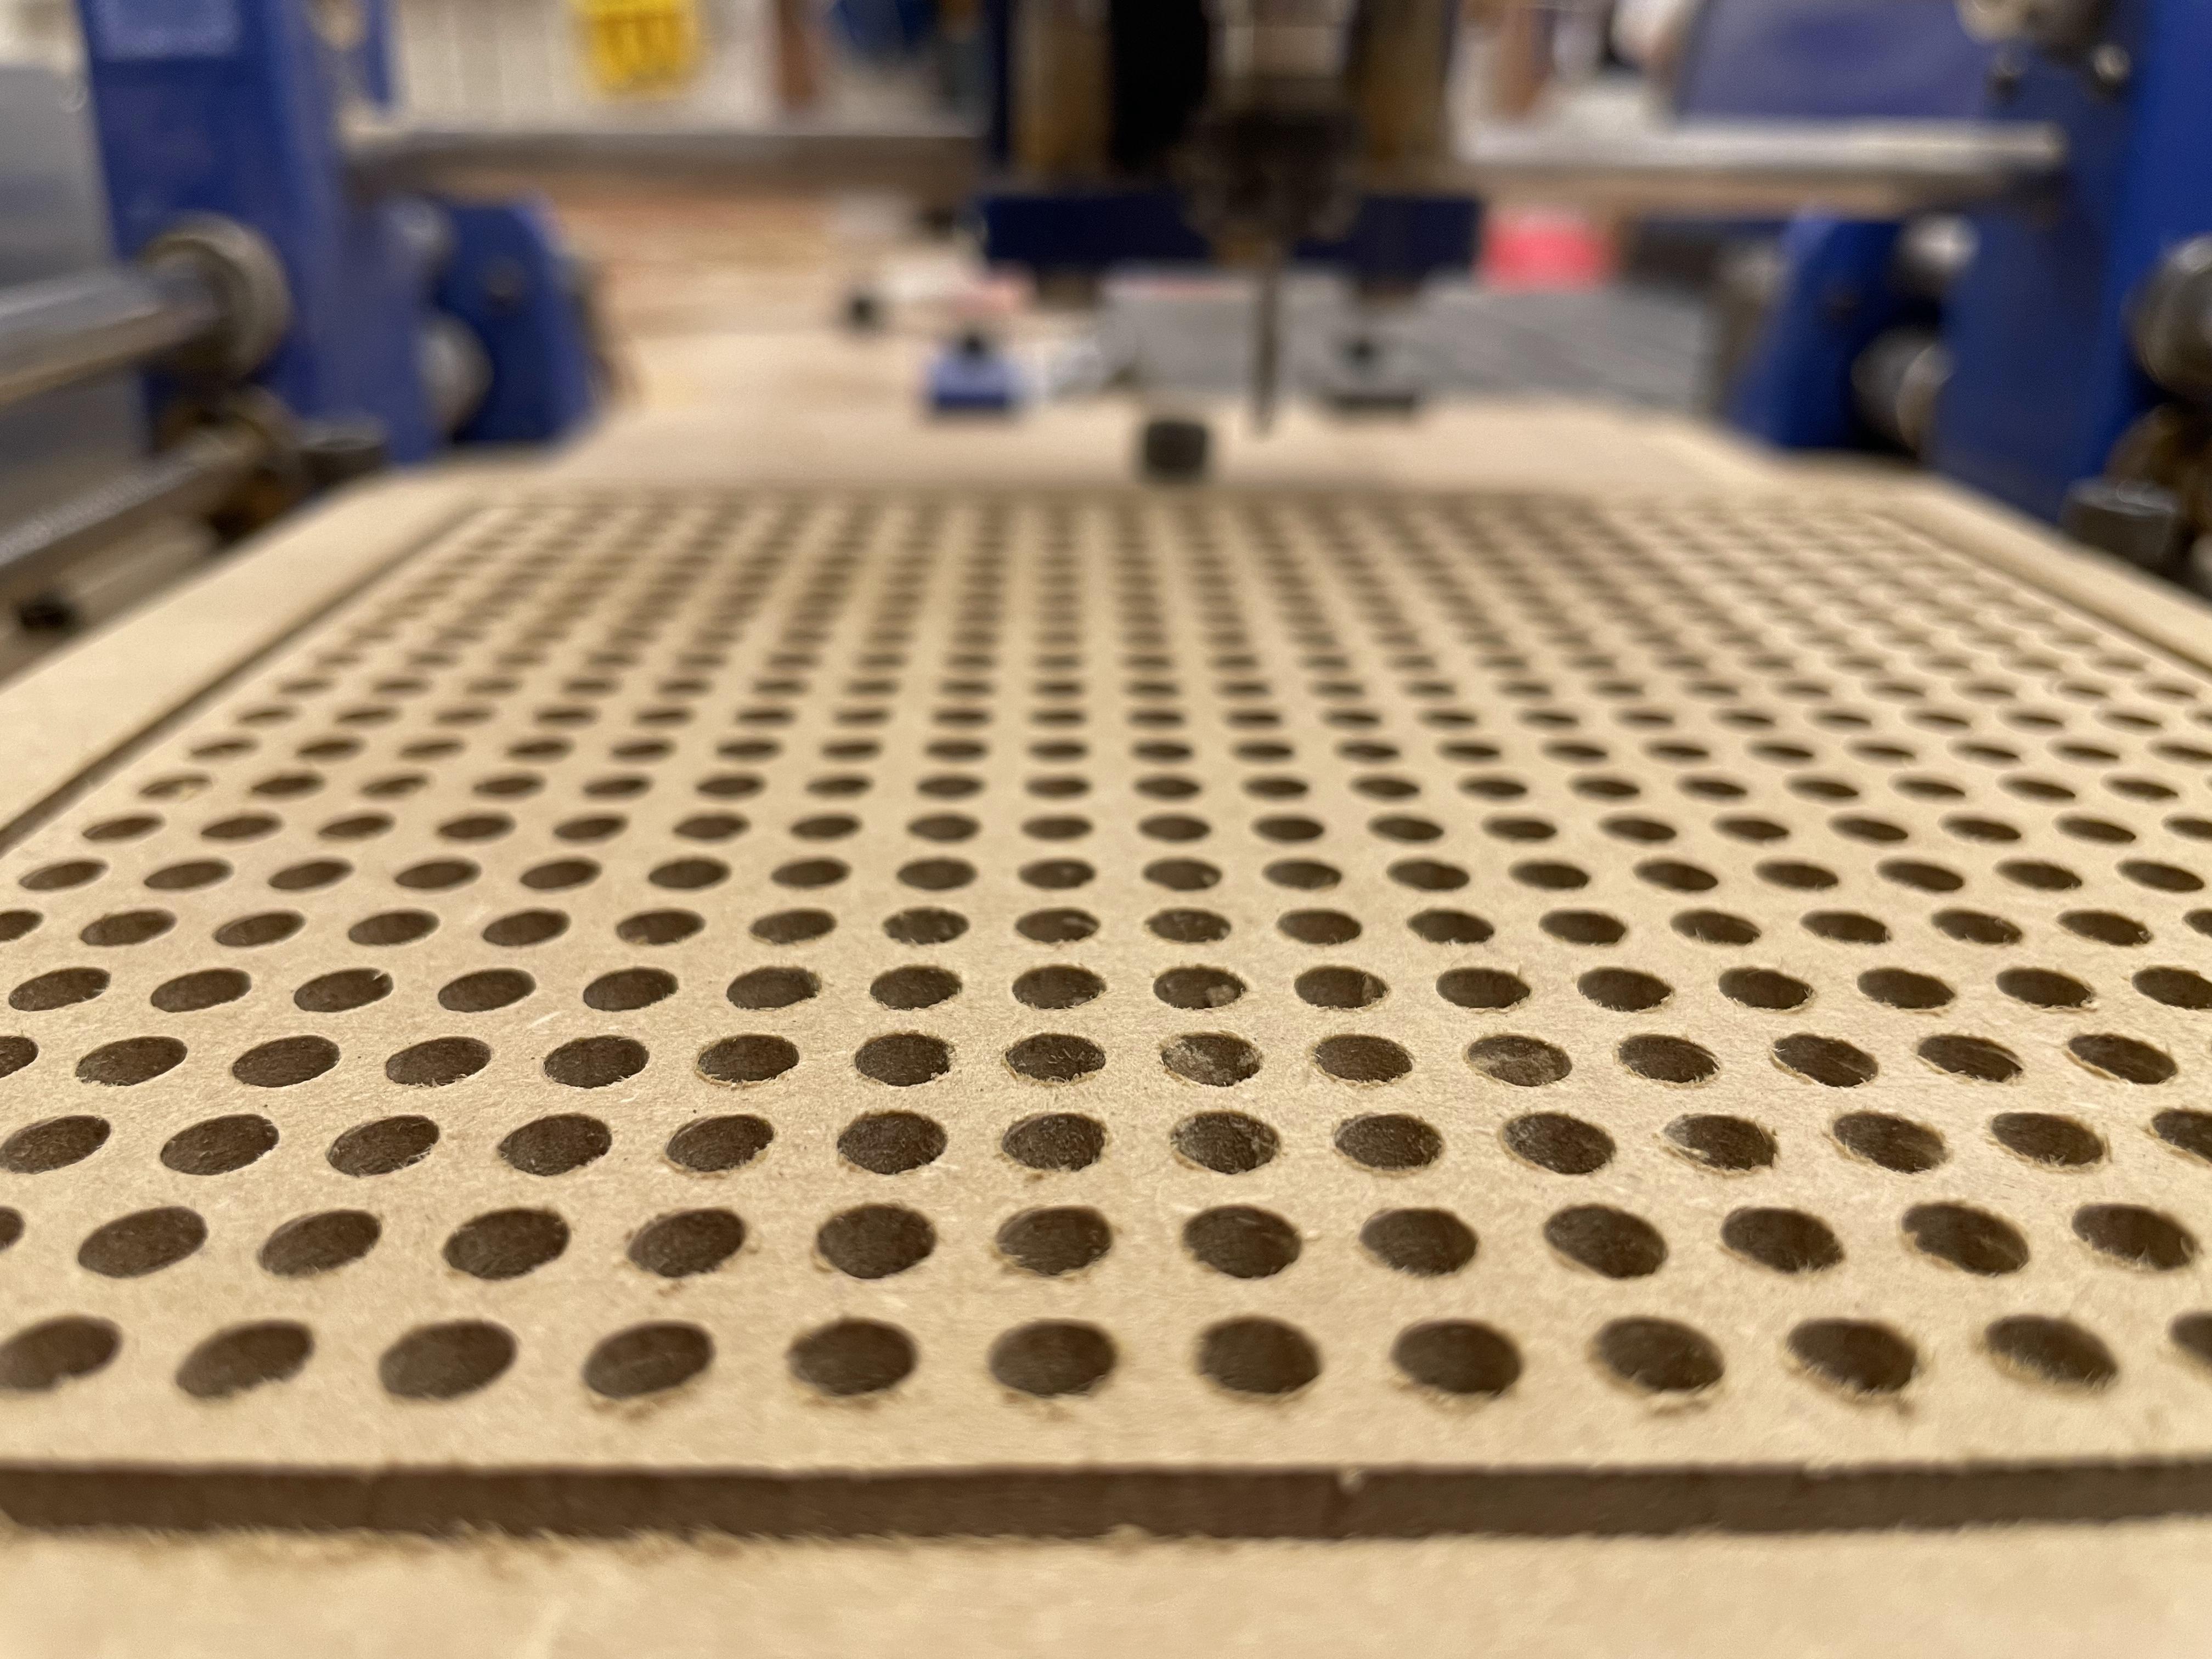
The board where the artwork goes is 25 cm x 25 cm. It has a central part that is a 15 x 15 cm matrix with 441 Ø5 holes located equidistantly (21 rows x 21 columns).
How does it work?
The holes in the matrix allow the colored plastic pieces to be inserted one by one following a predefined pattern (see step 5)
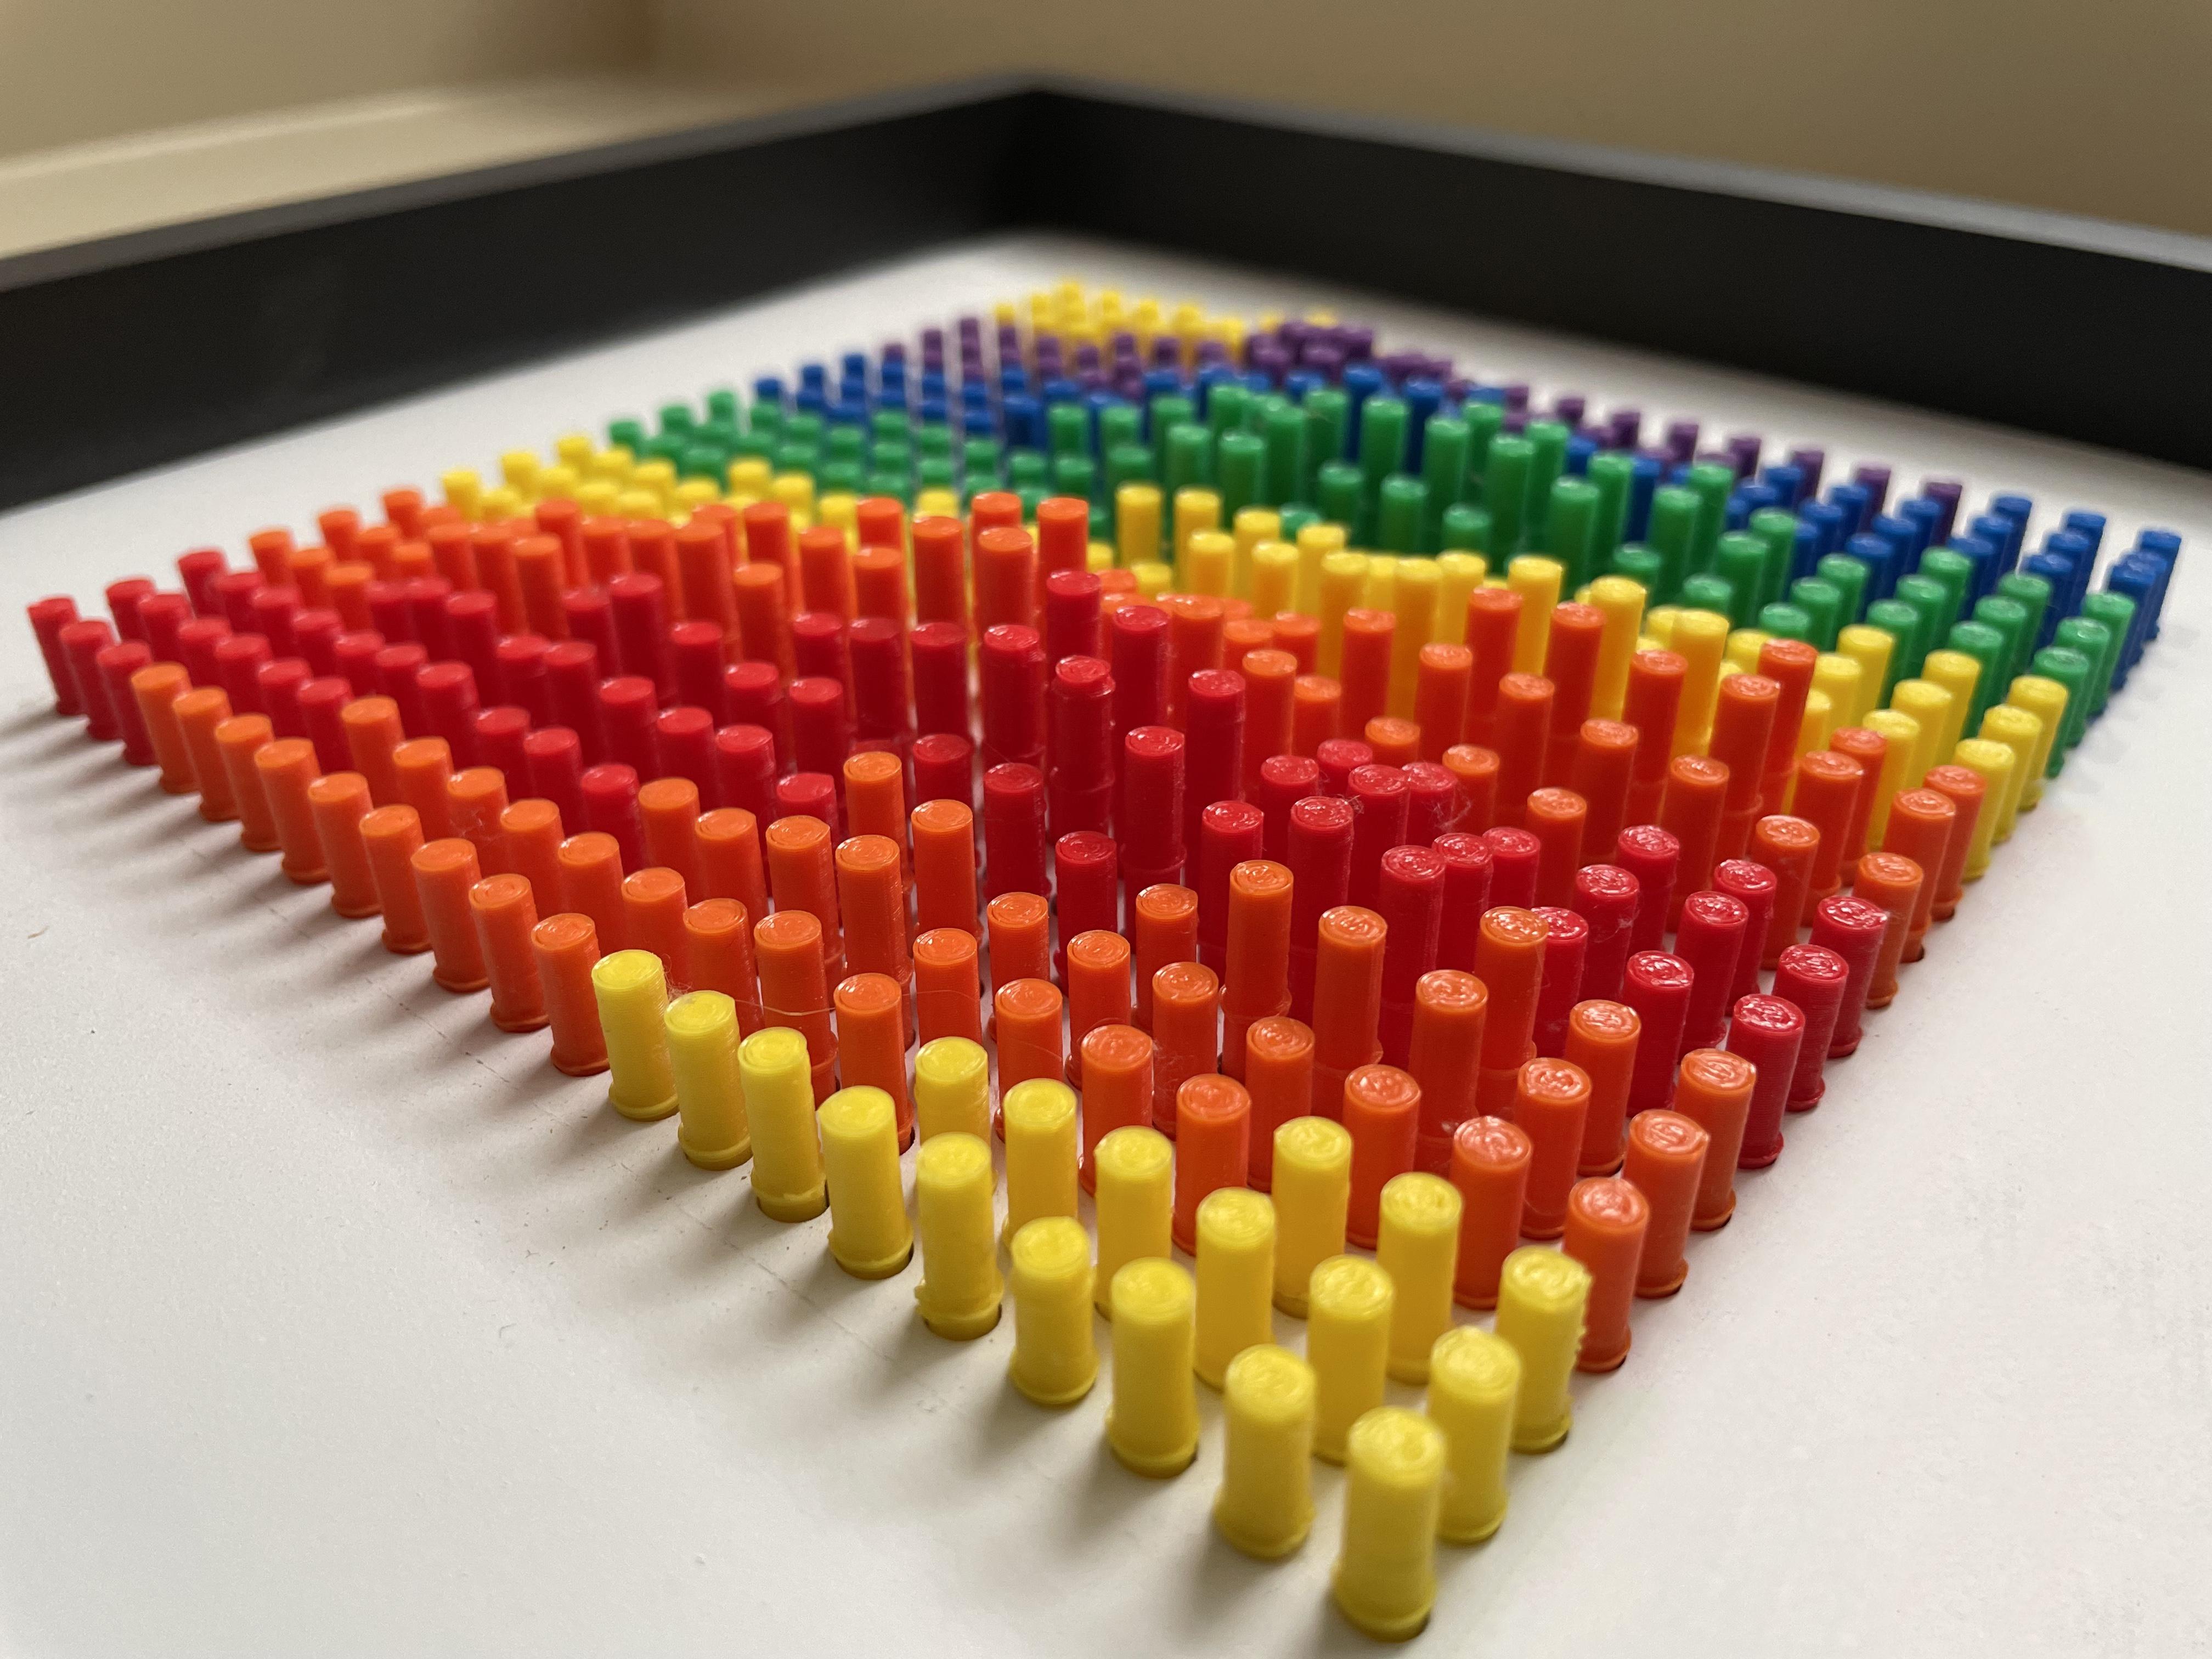
They are 441 plastic pieces Ø4 x 65 mm with the colors of the rainbow: red, orange, yellow, green, blue and purple.
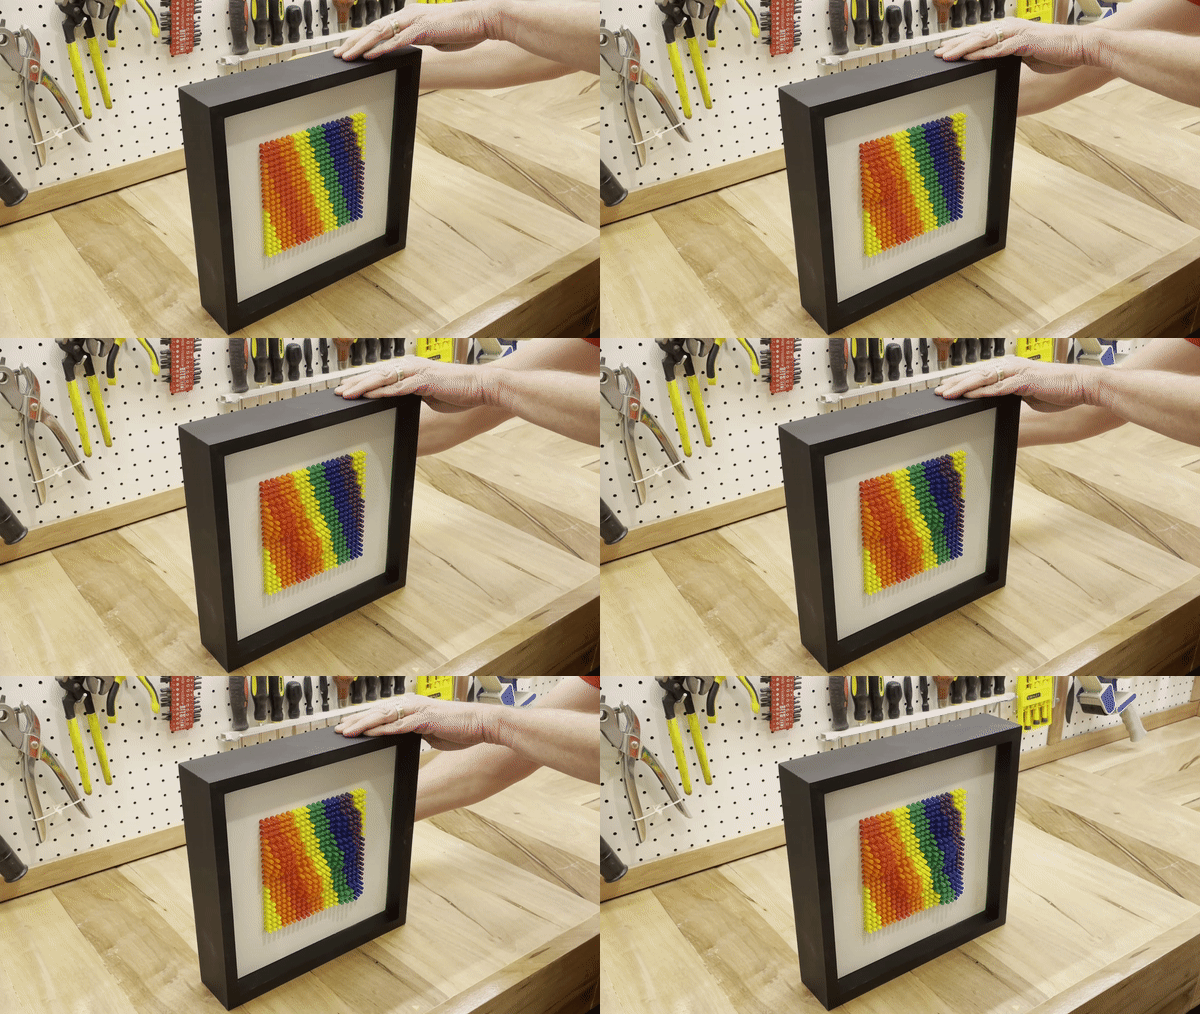
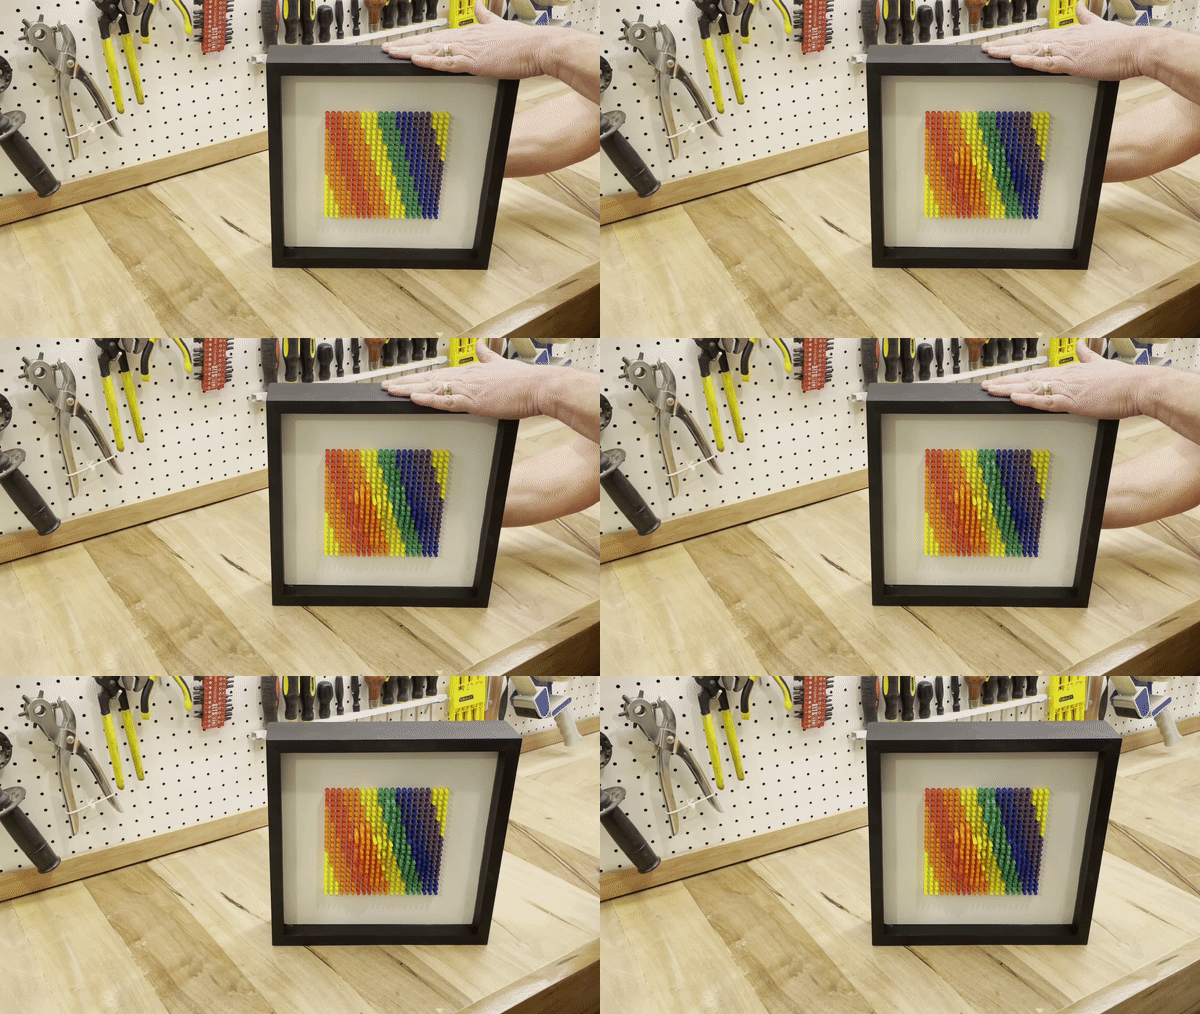
From the back, if the pins are pressed with an object or by hand, they move forward, taking the artwork dimension and shape on his front.
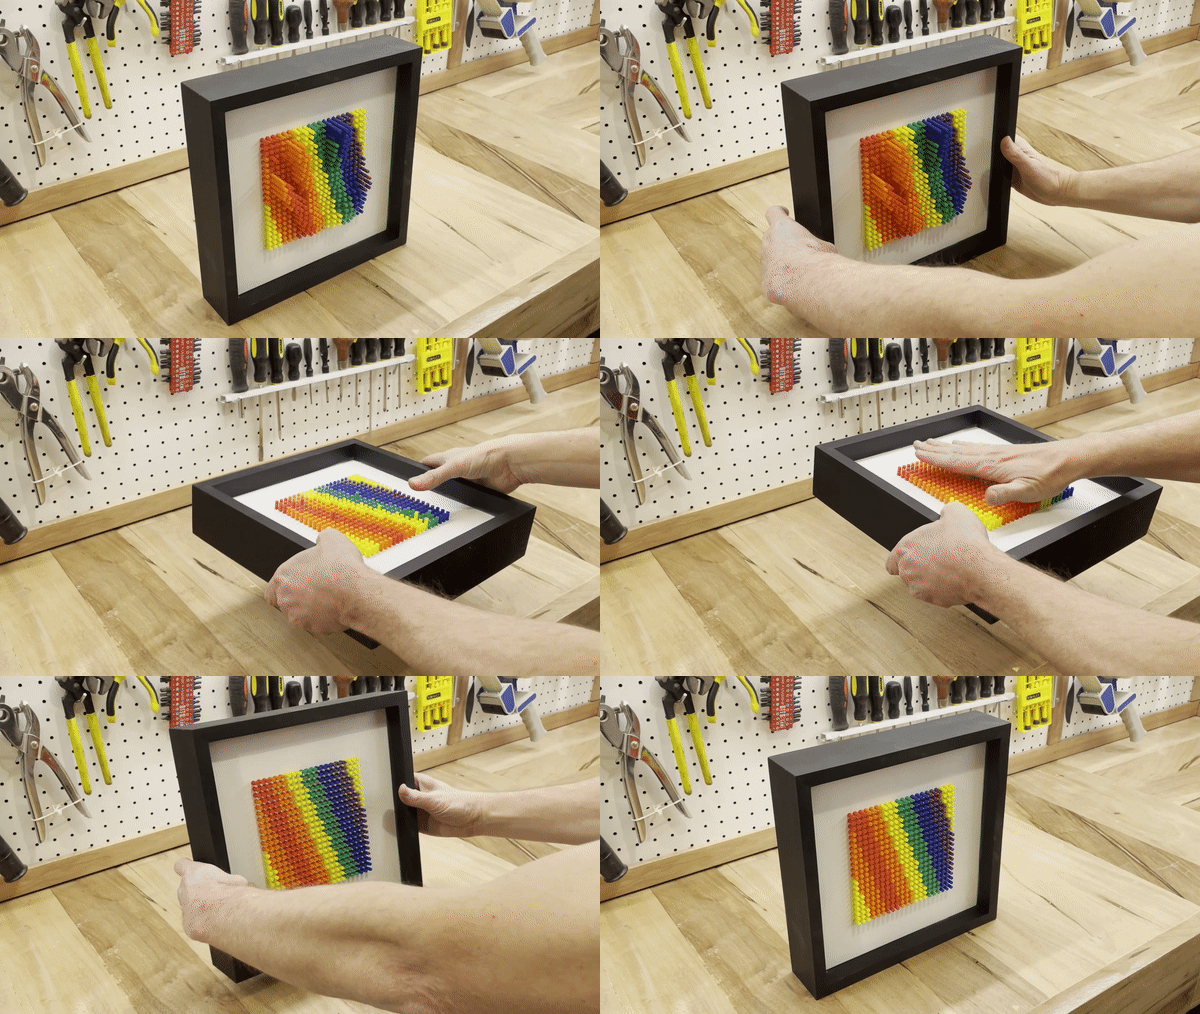
If you want to re-level the plastic pieces, simply lay the artwork flat with the front facing up.
The attractiveness of the design is that you can play creating other figures and shapes of your choice, and also make variations with the relief of the work of art, accommodating the position of the plastic pegs.
Cutting the MDF
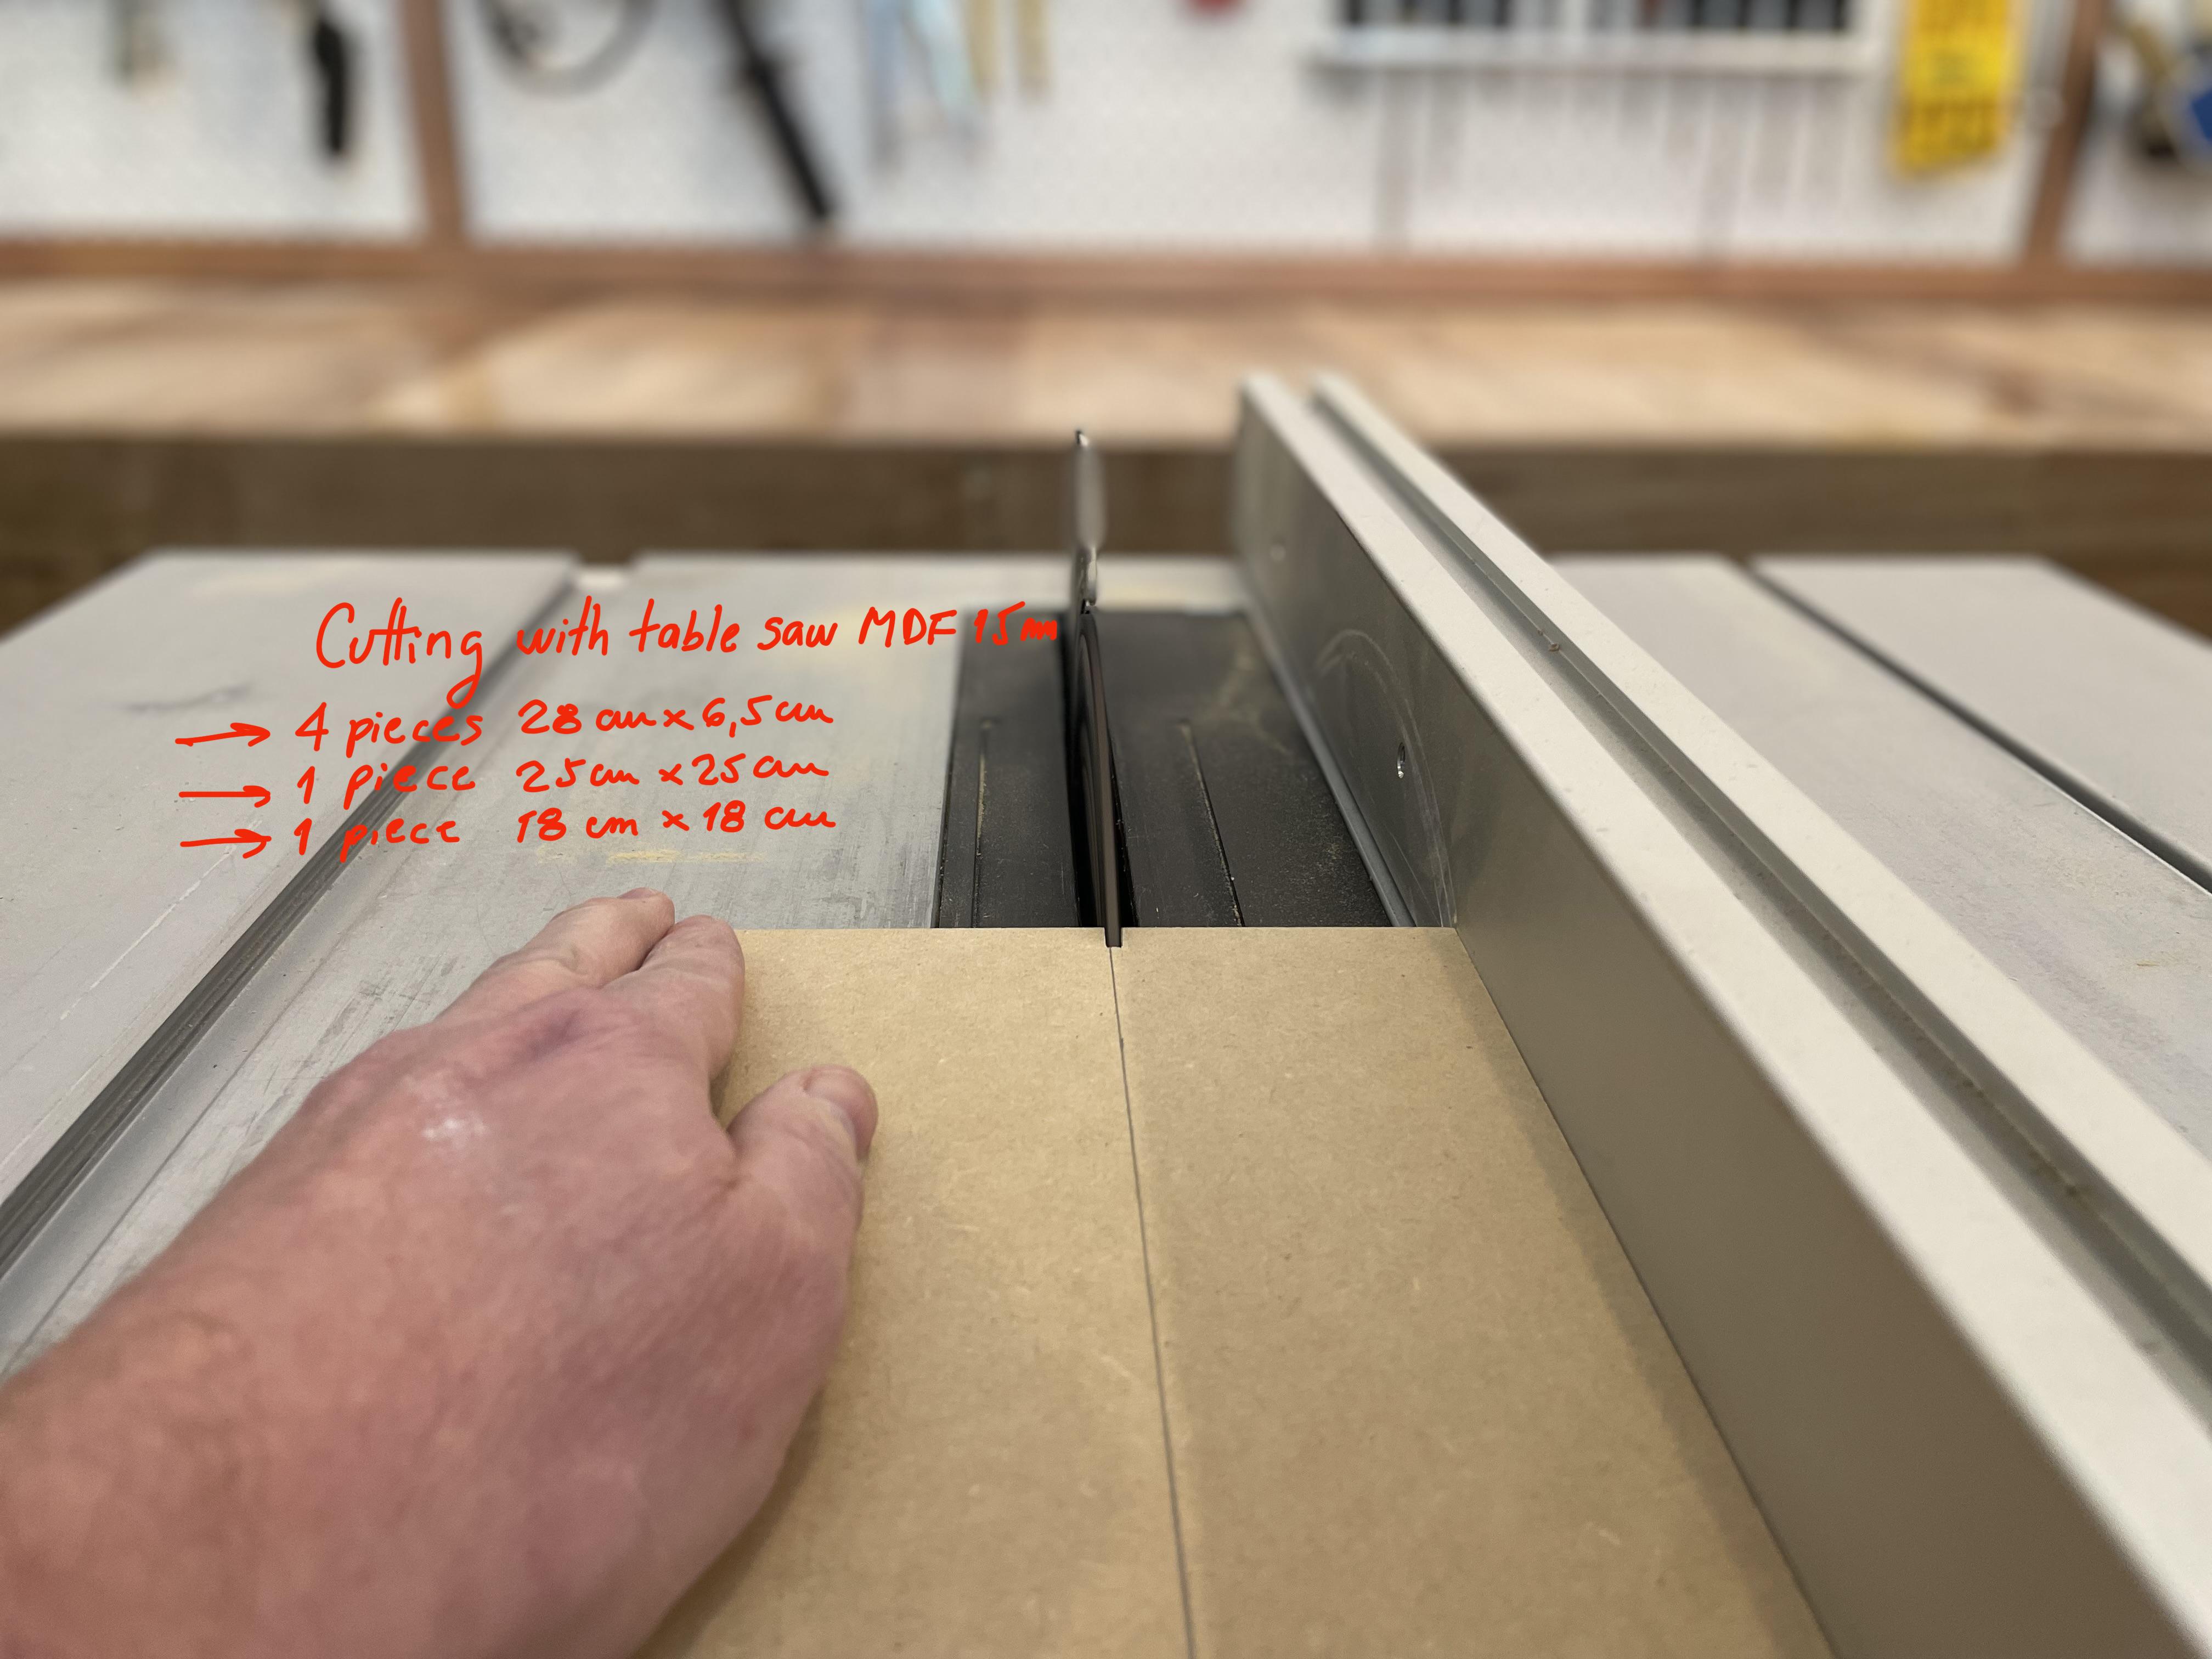
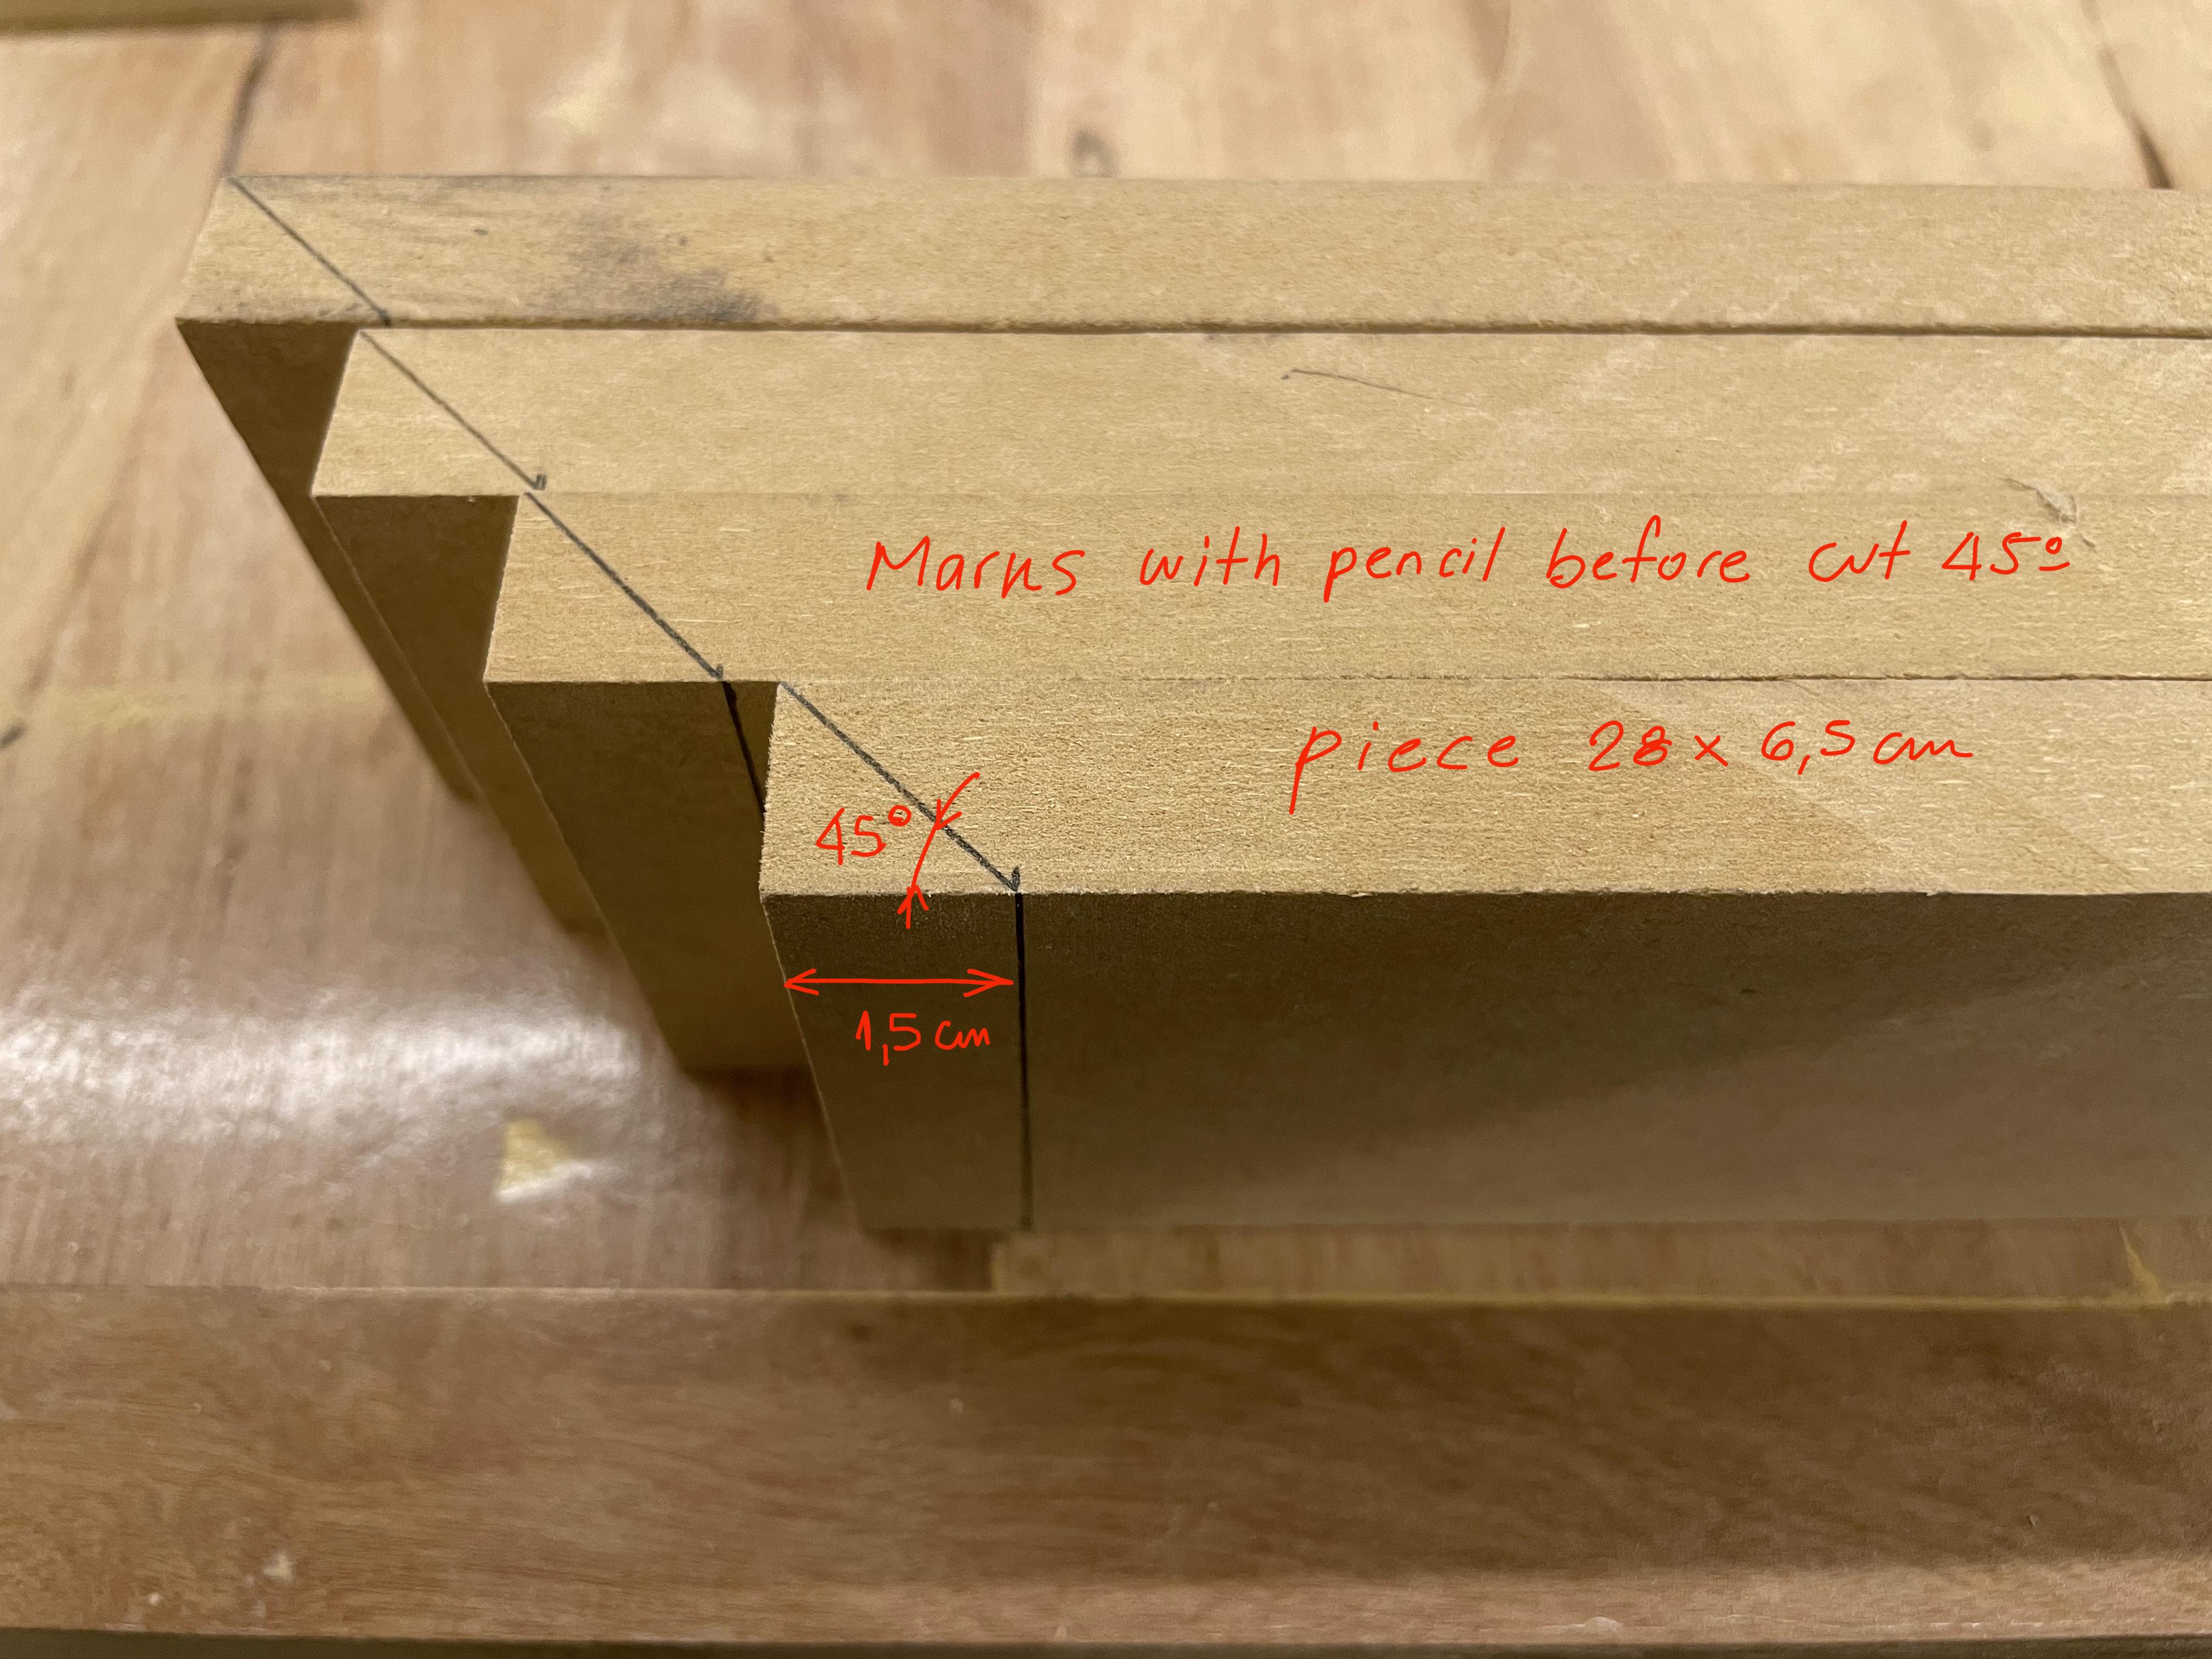
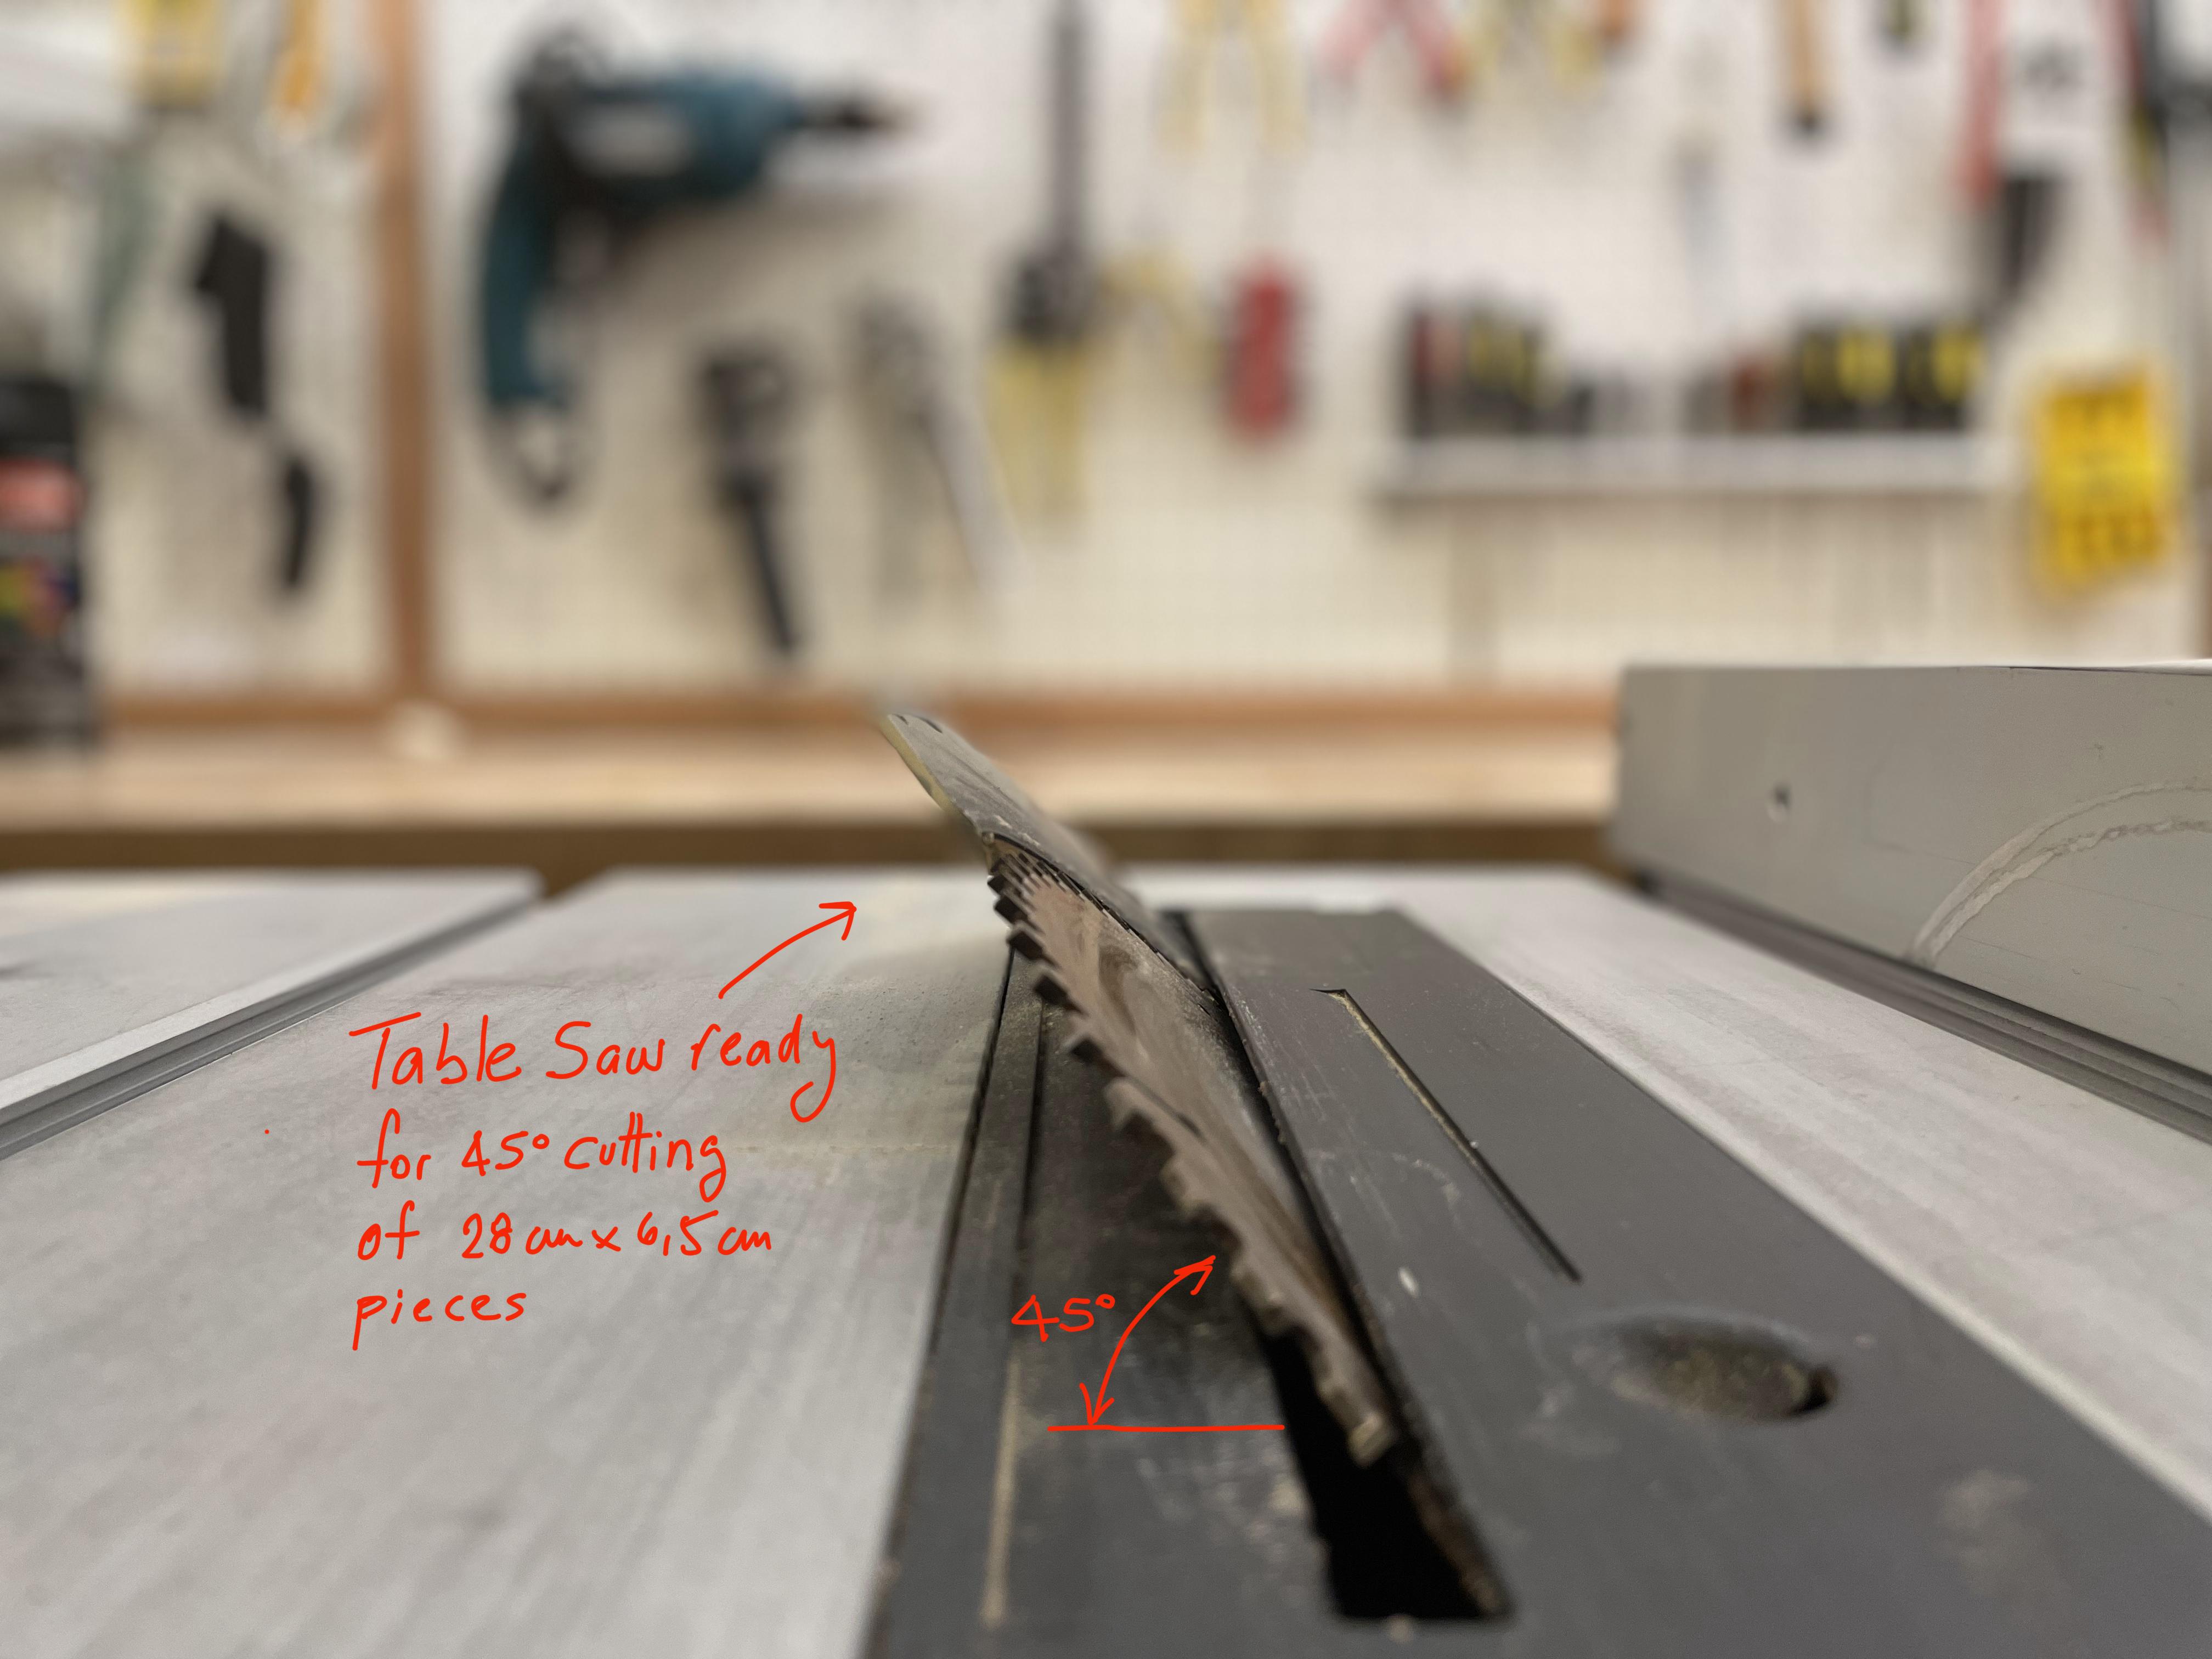
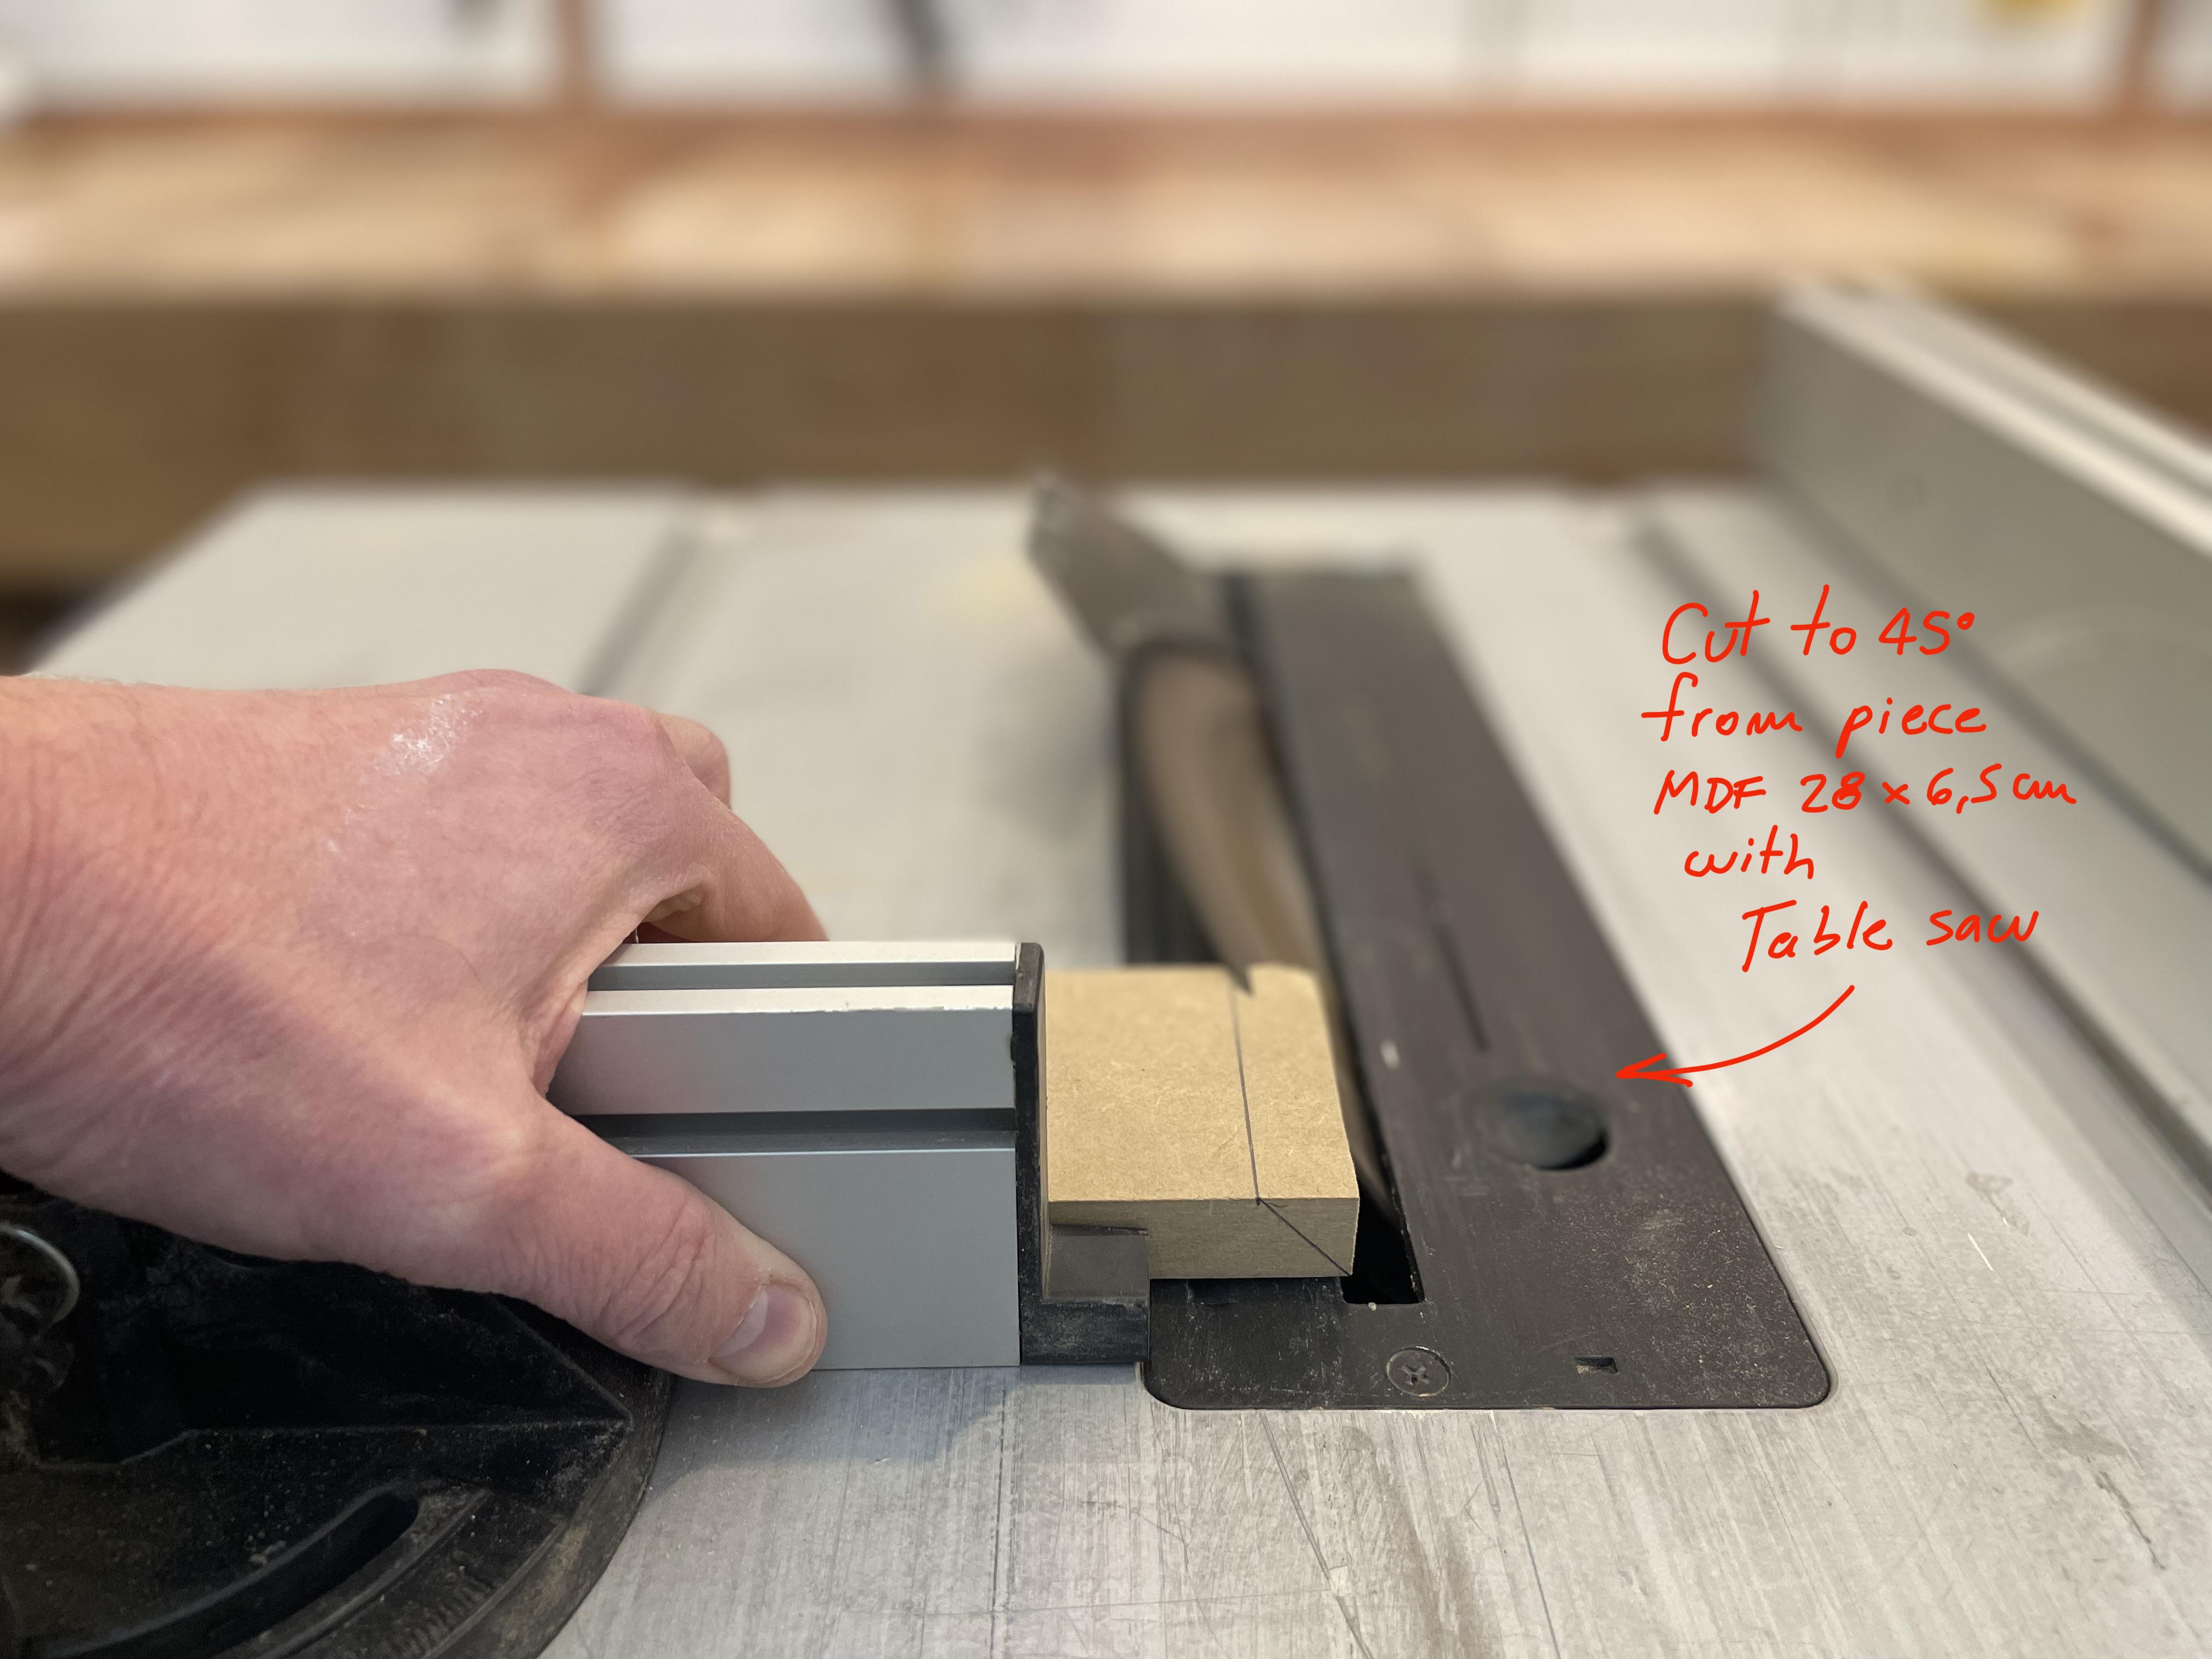
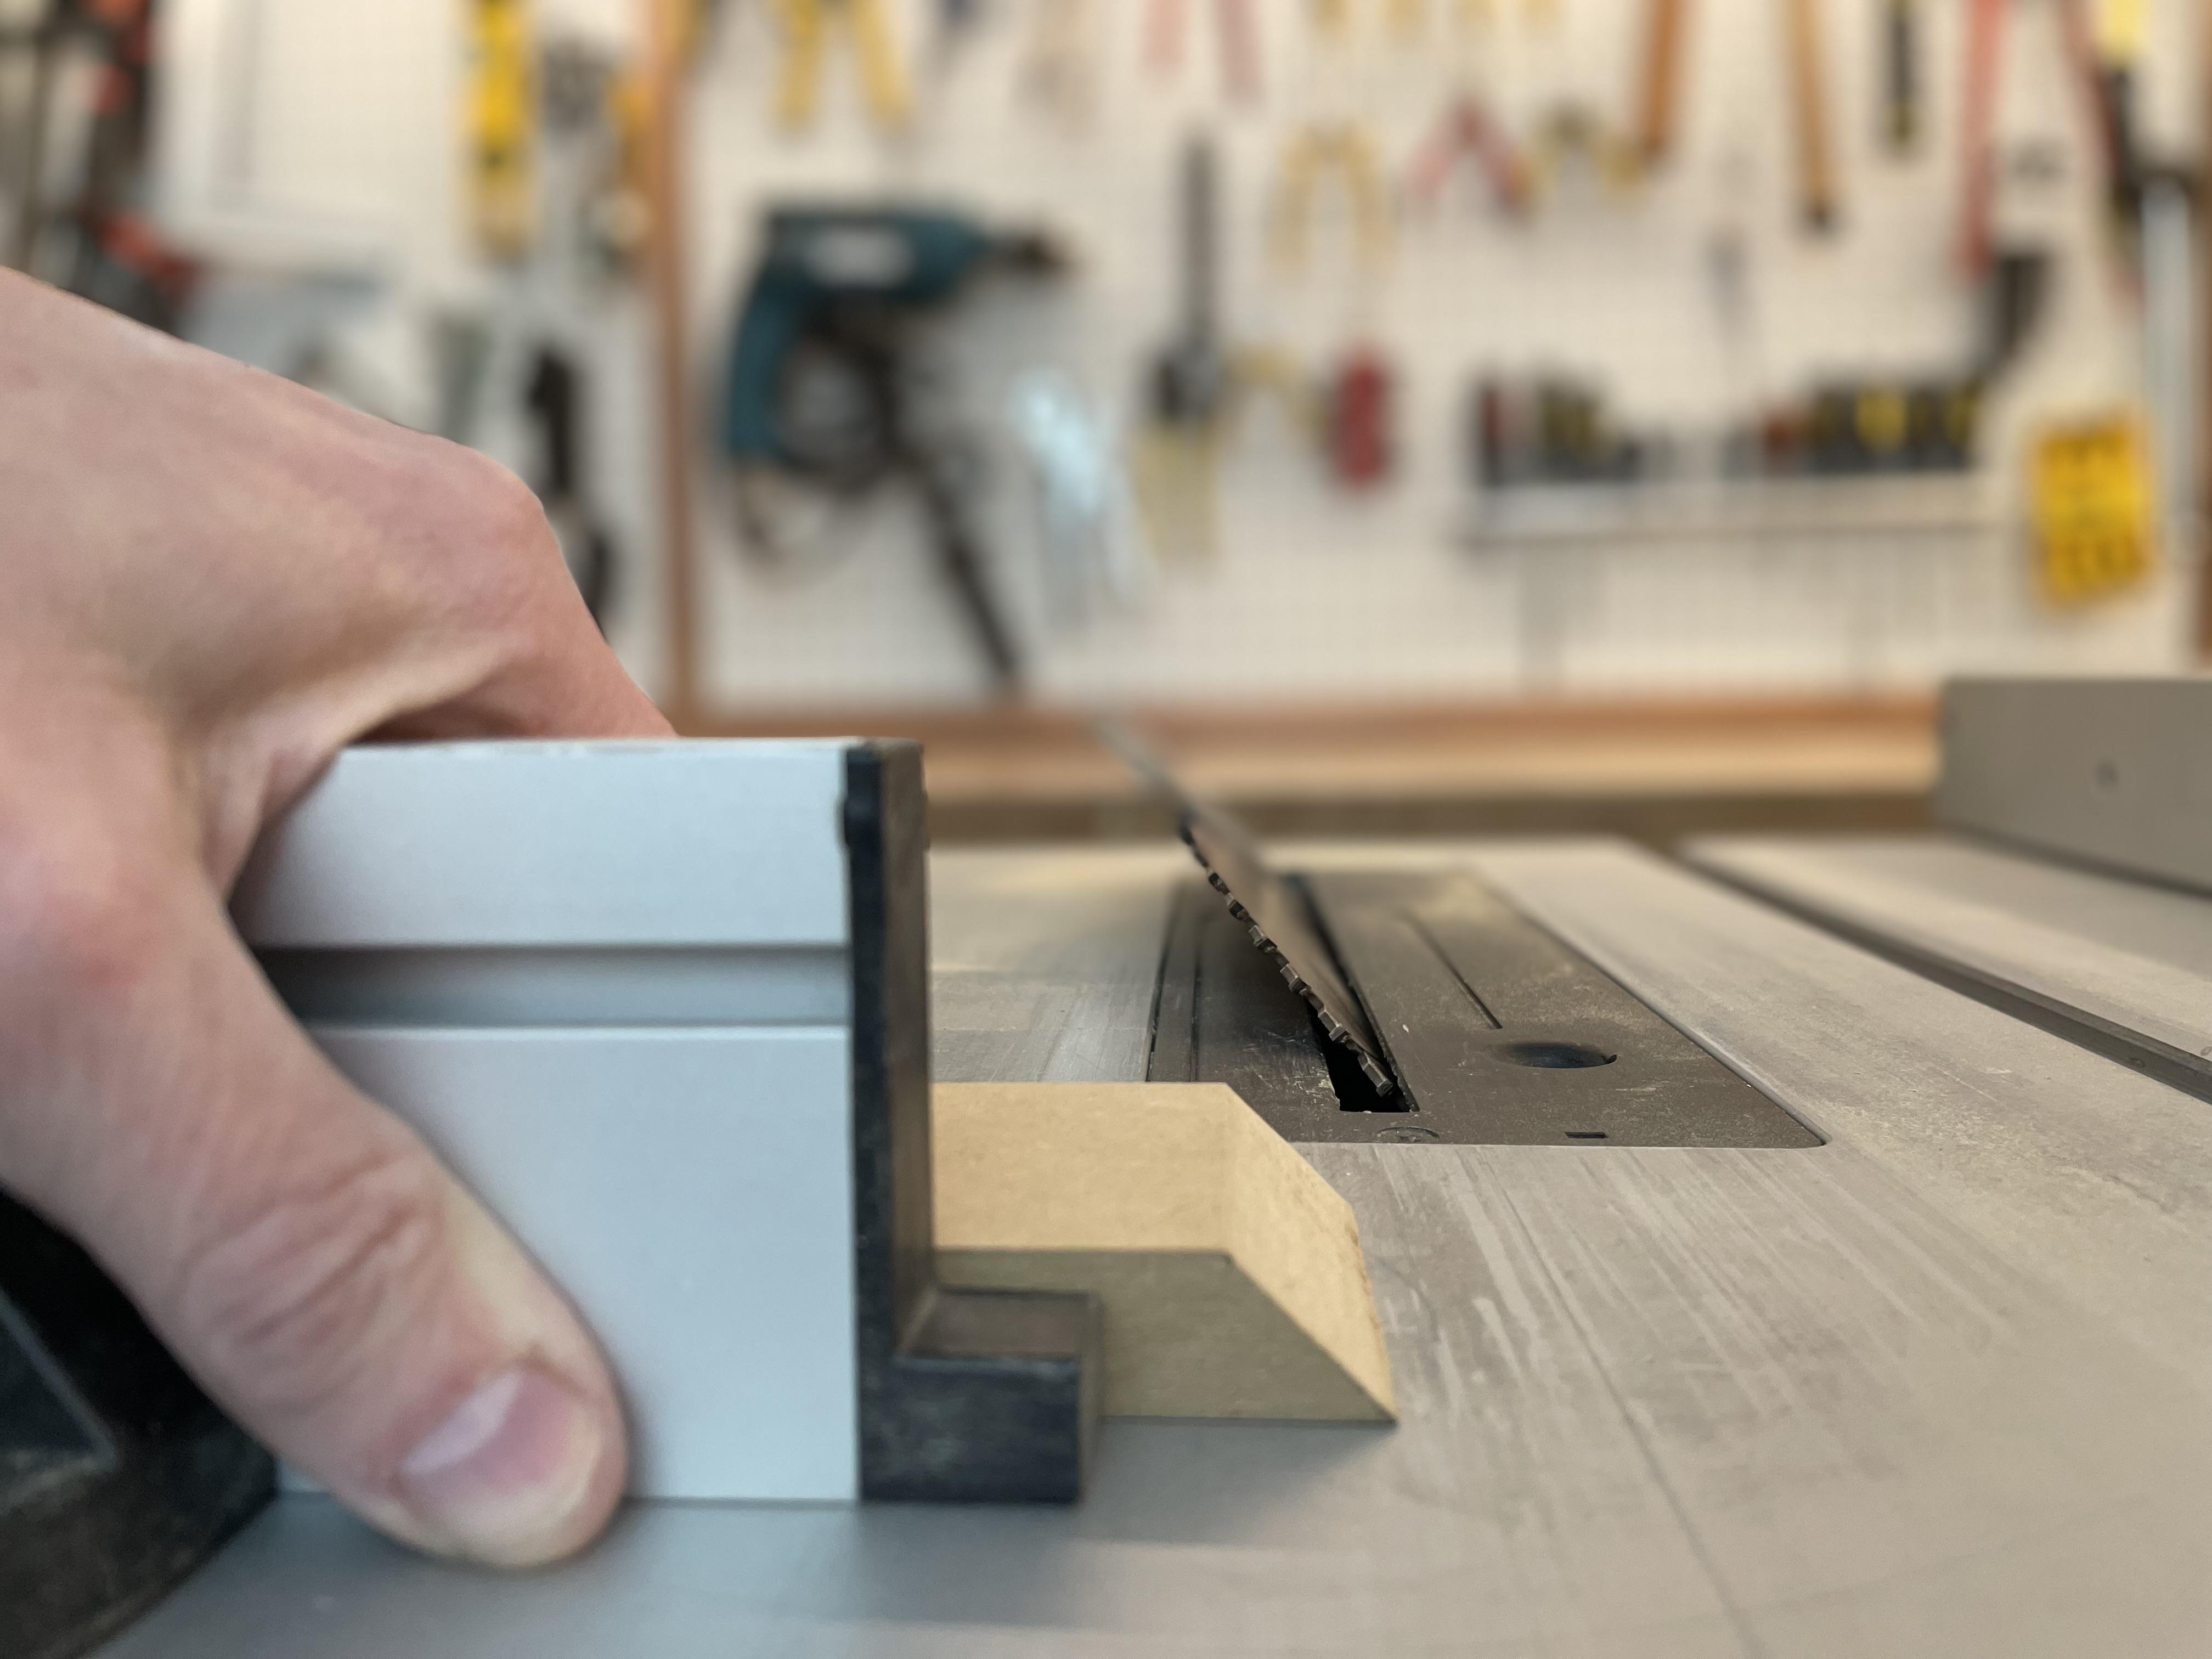
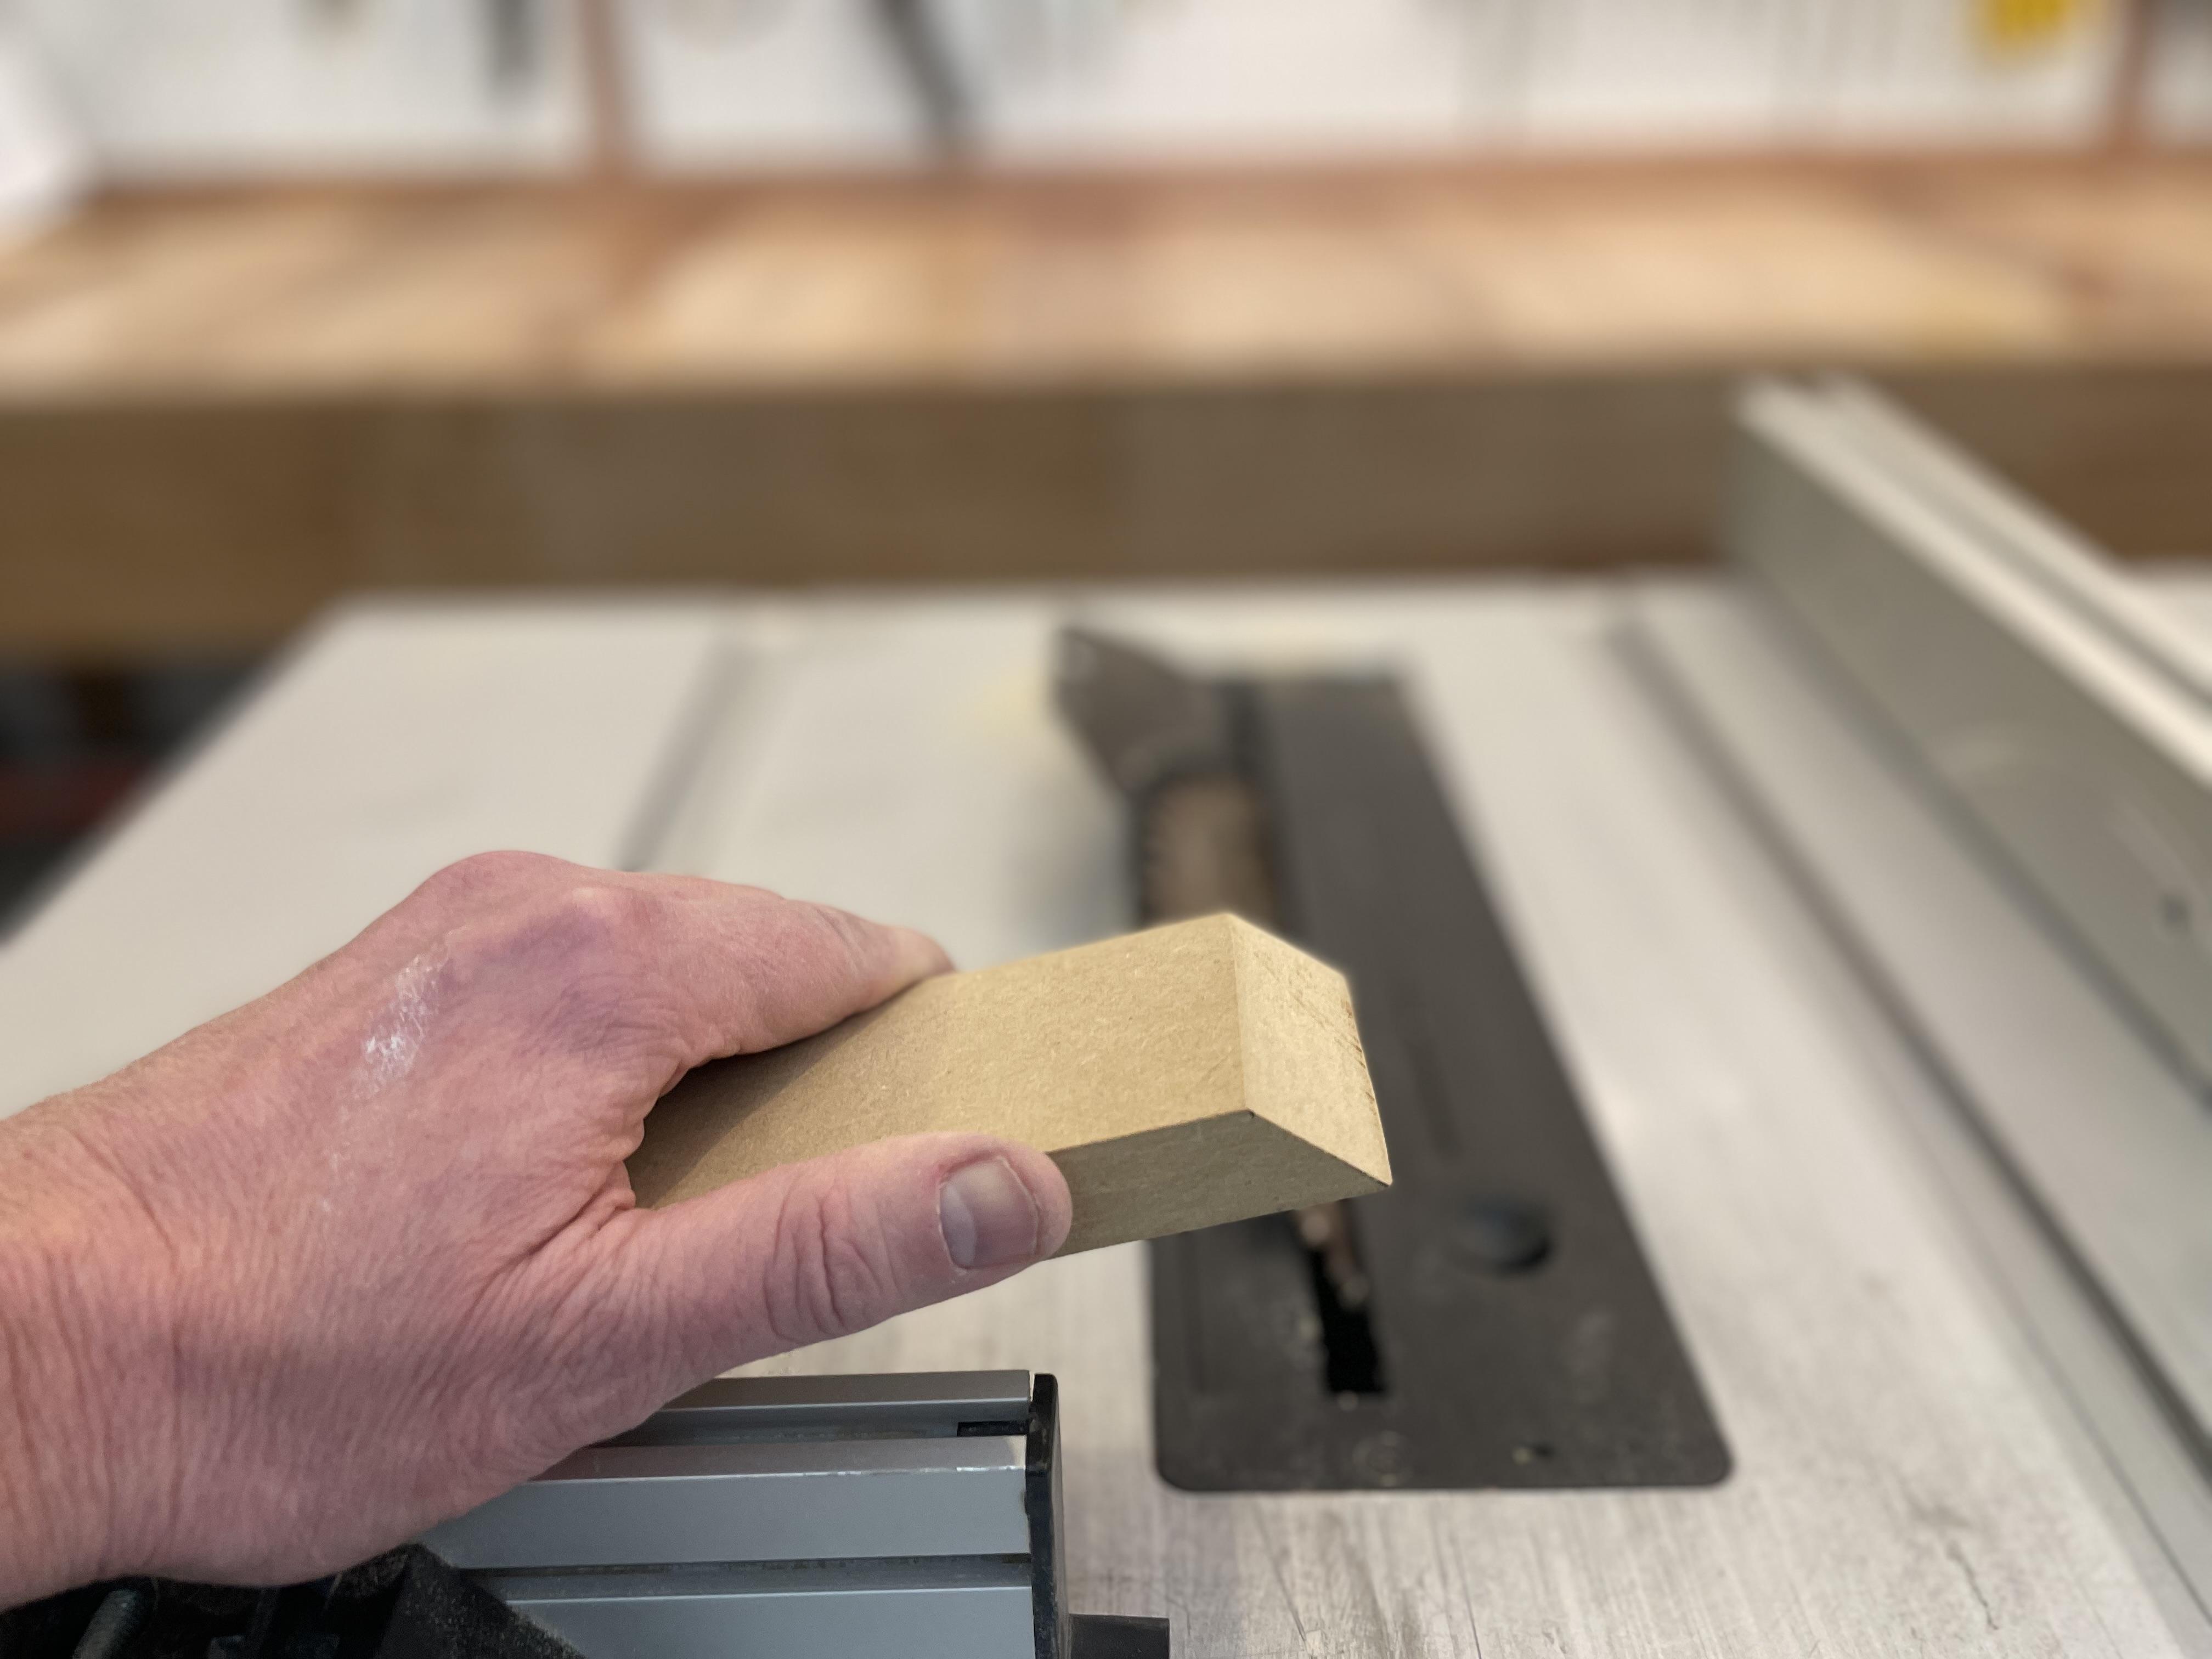
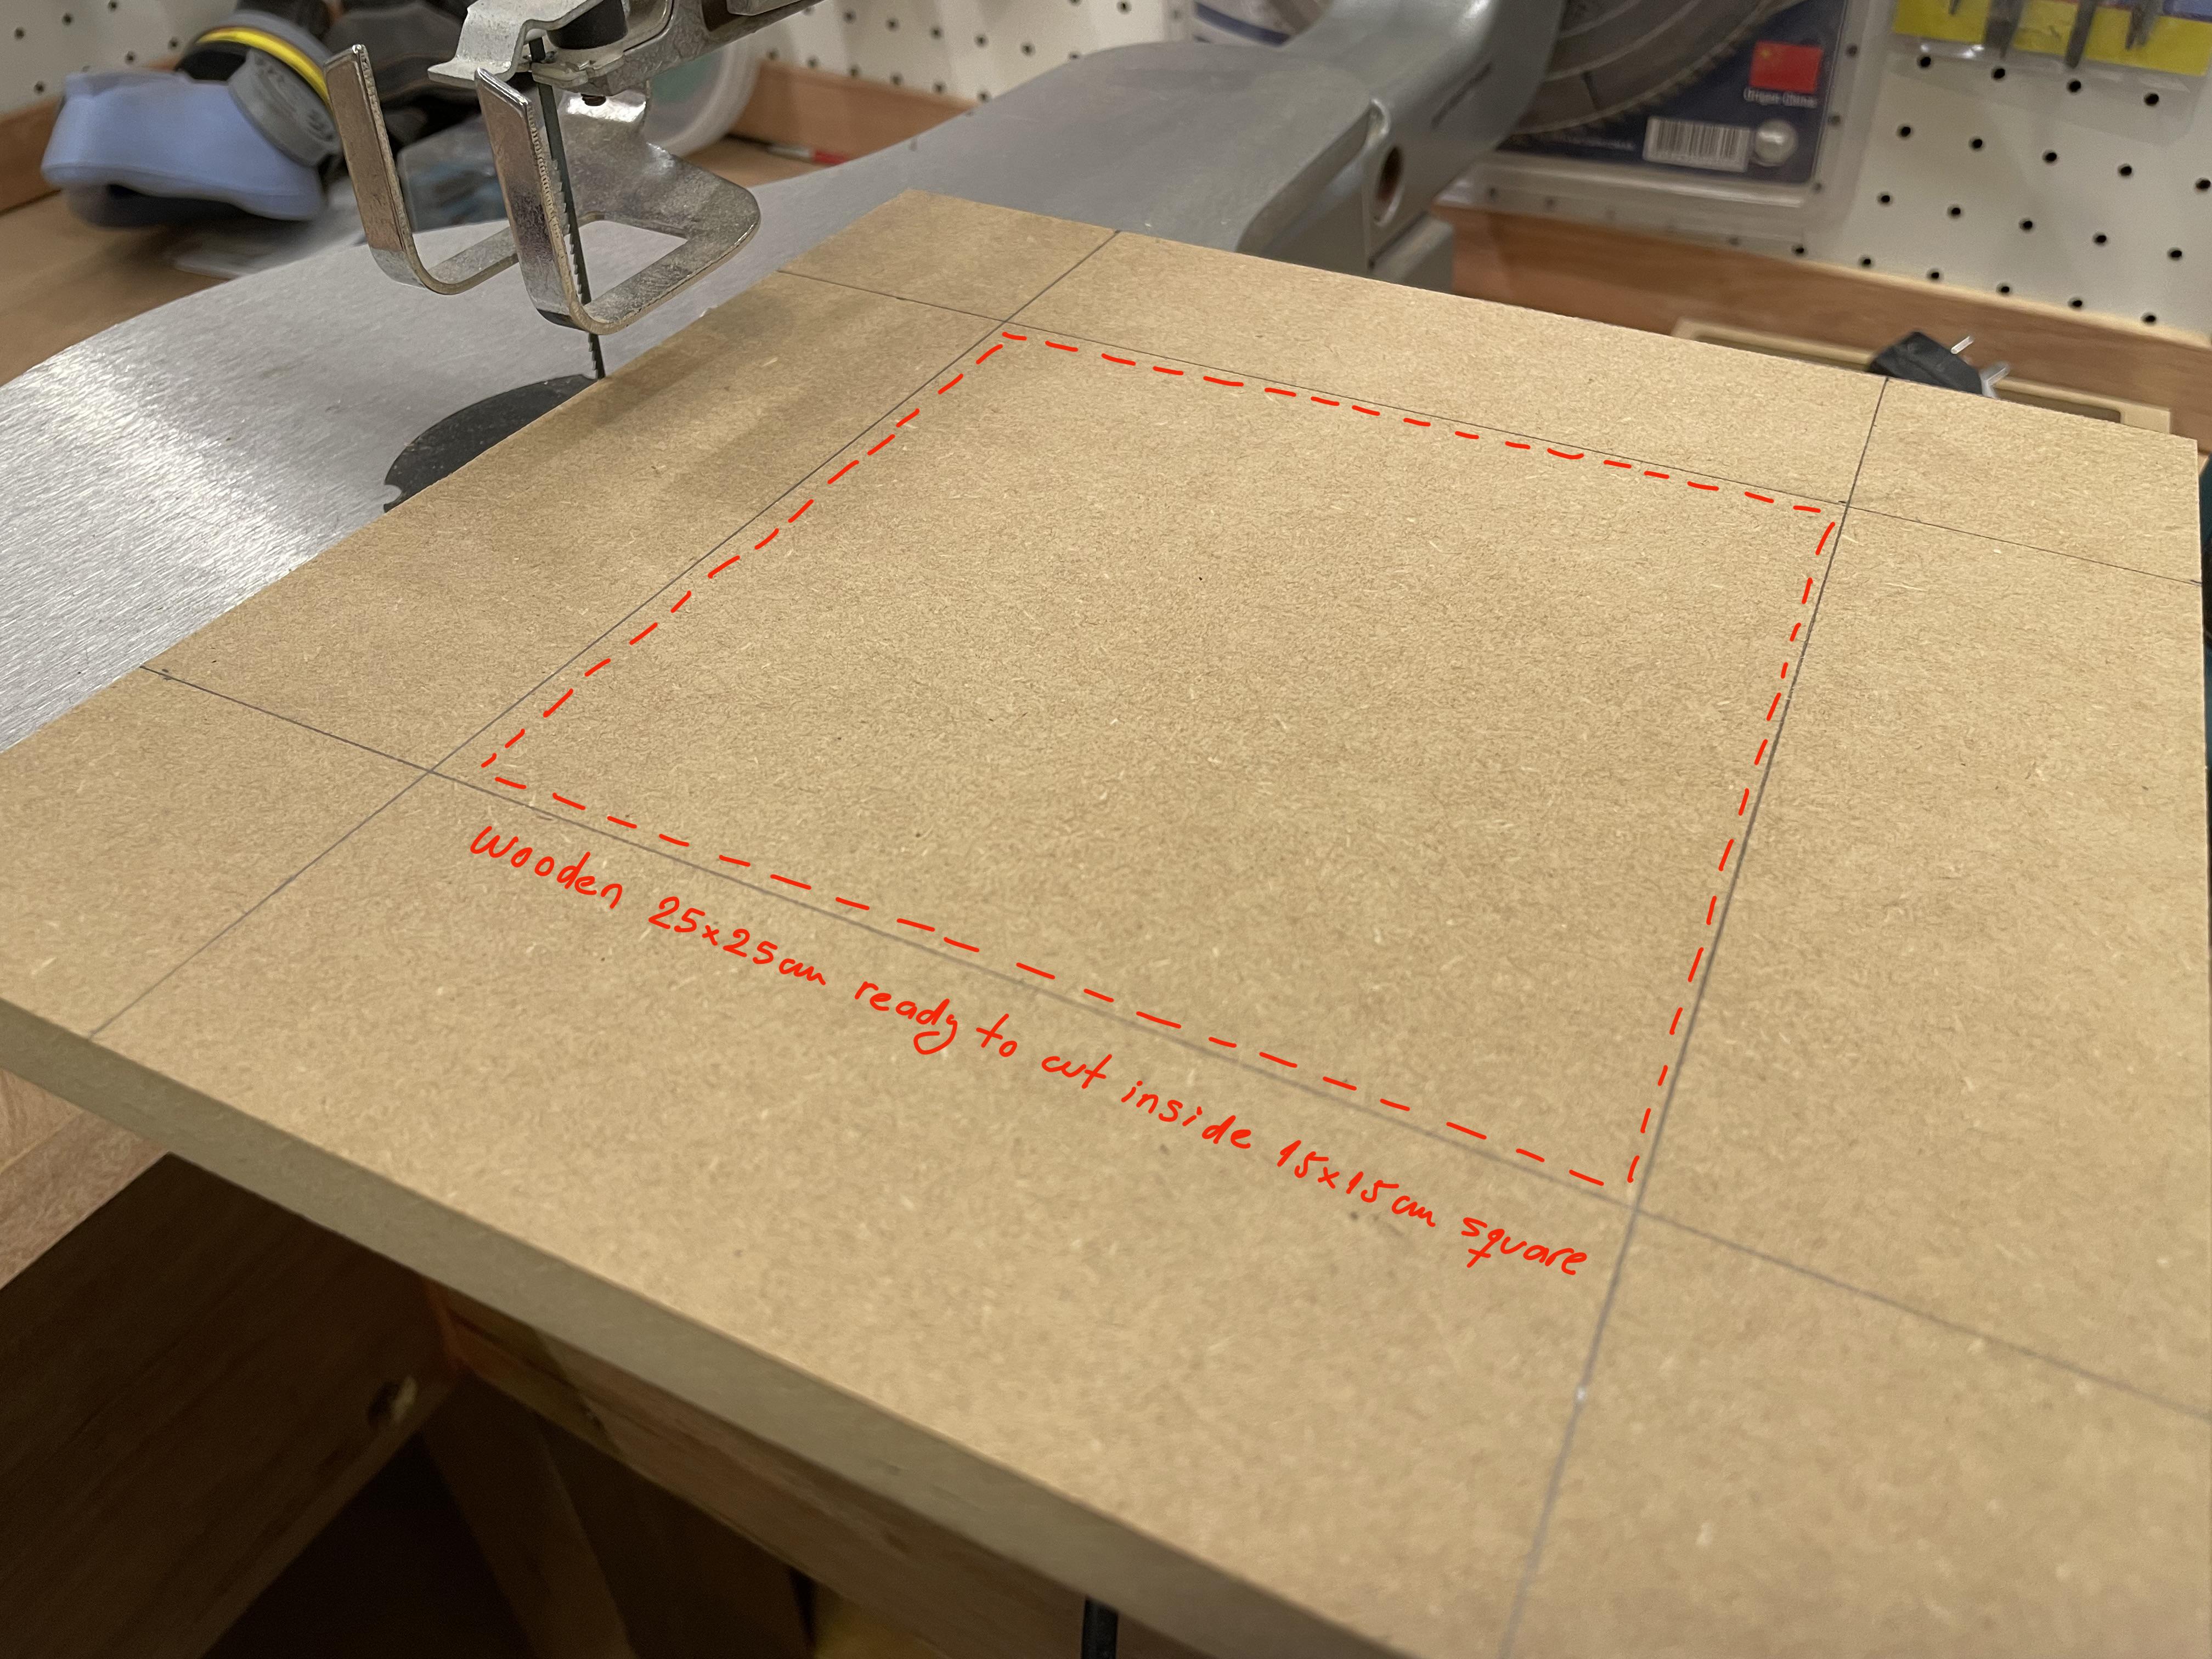
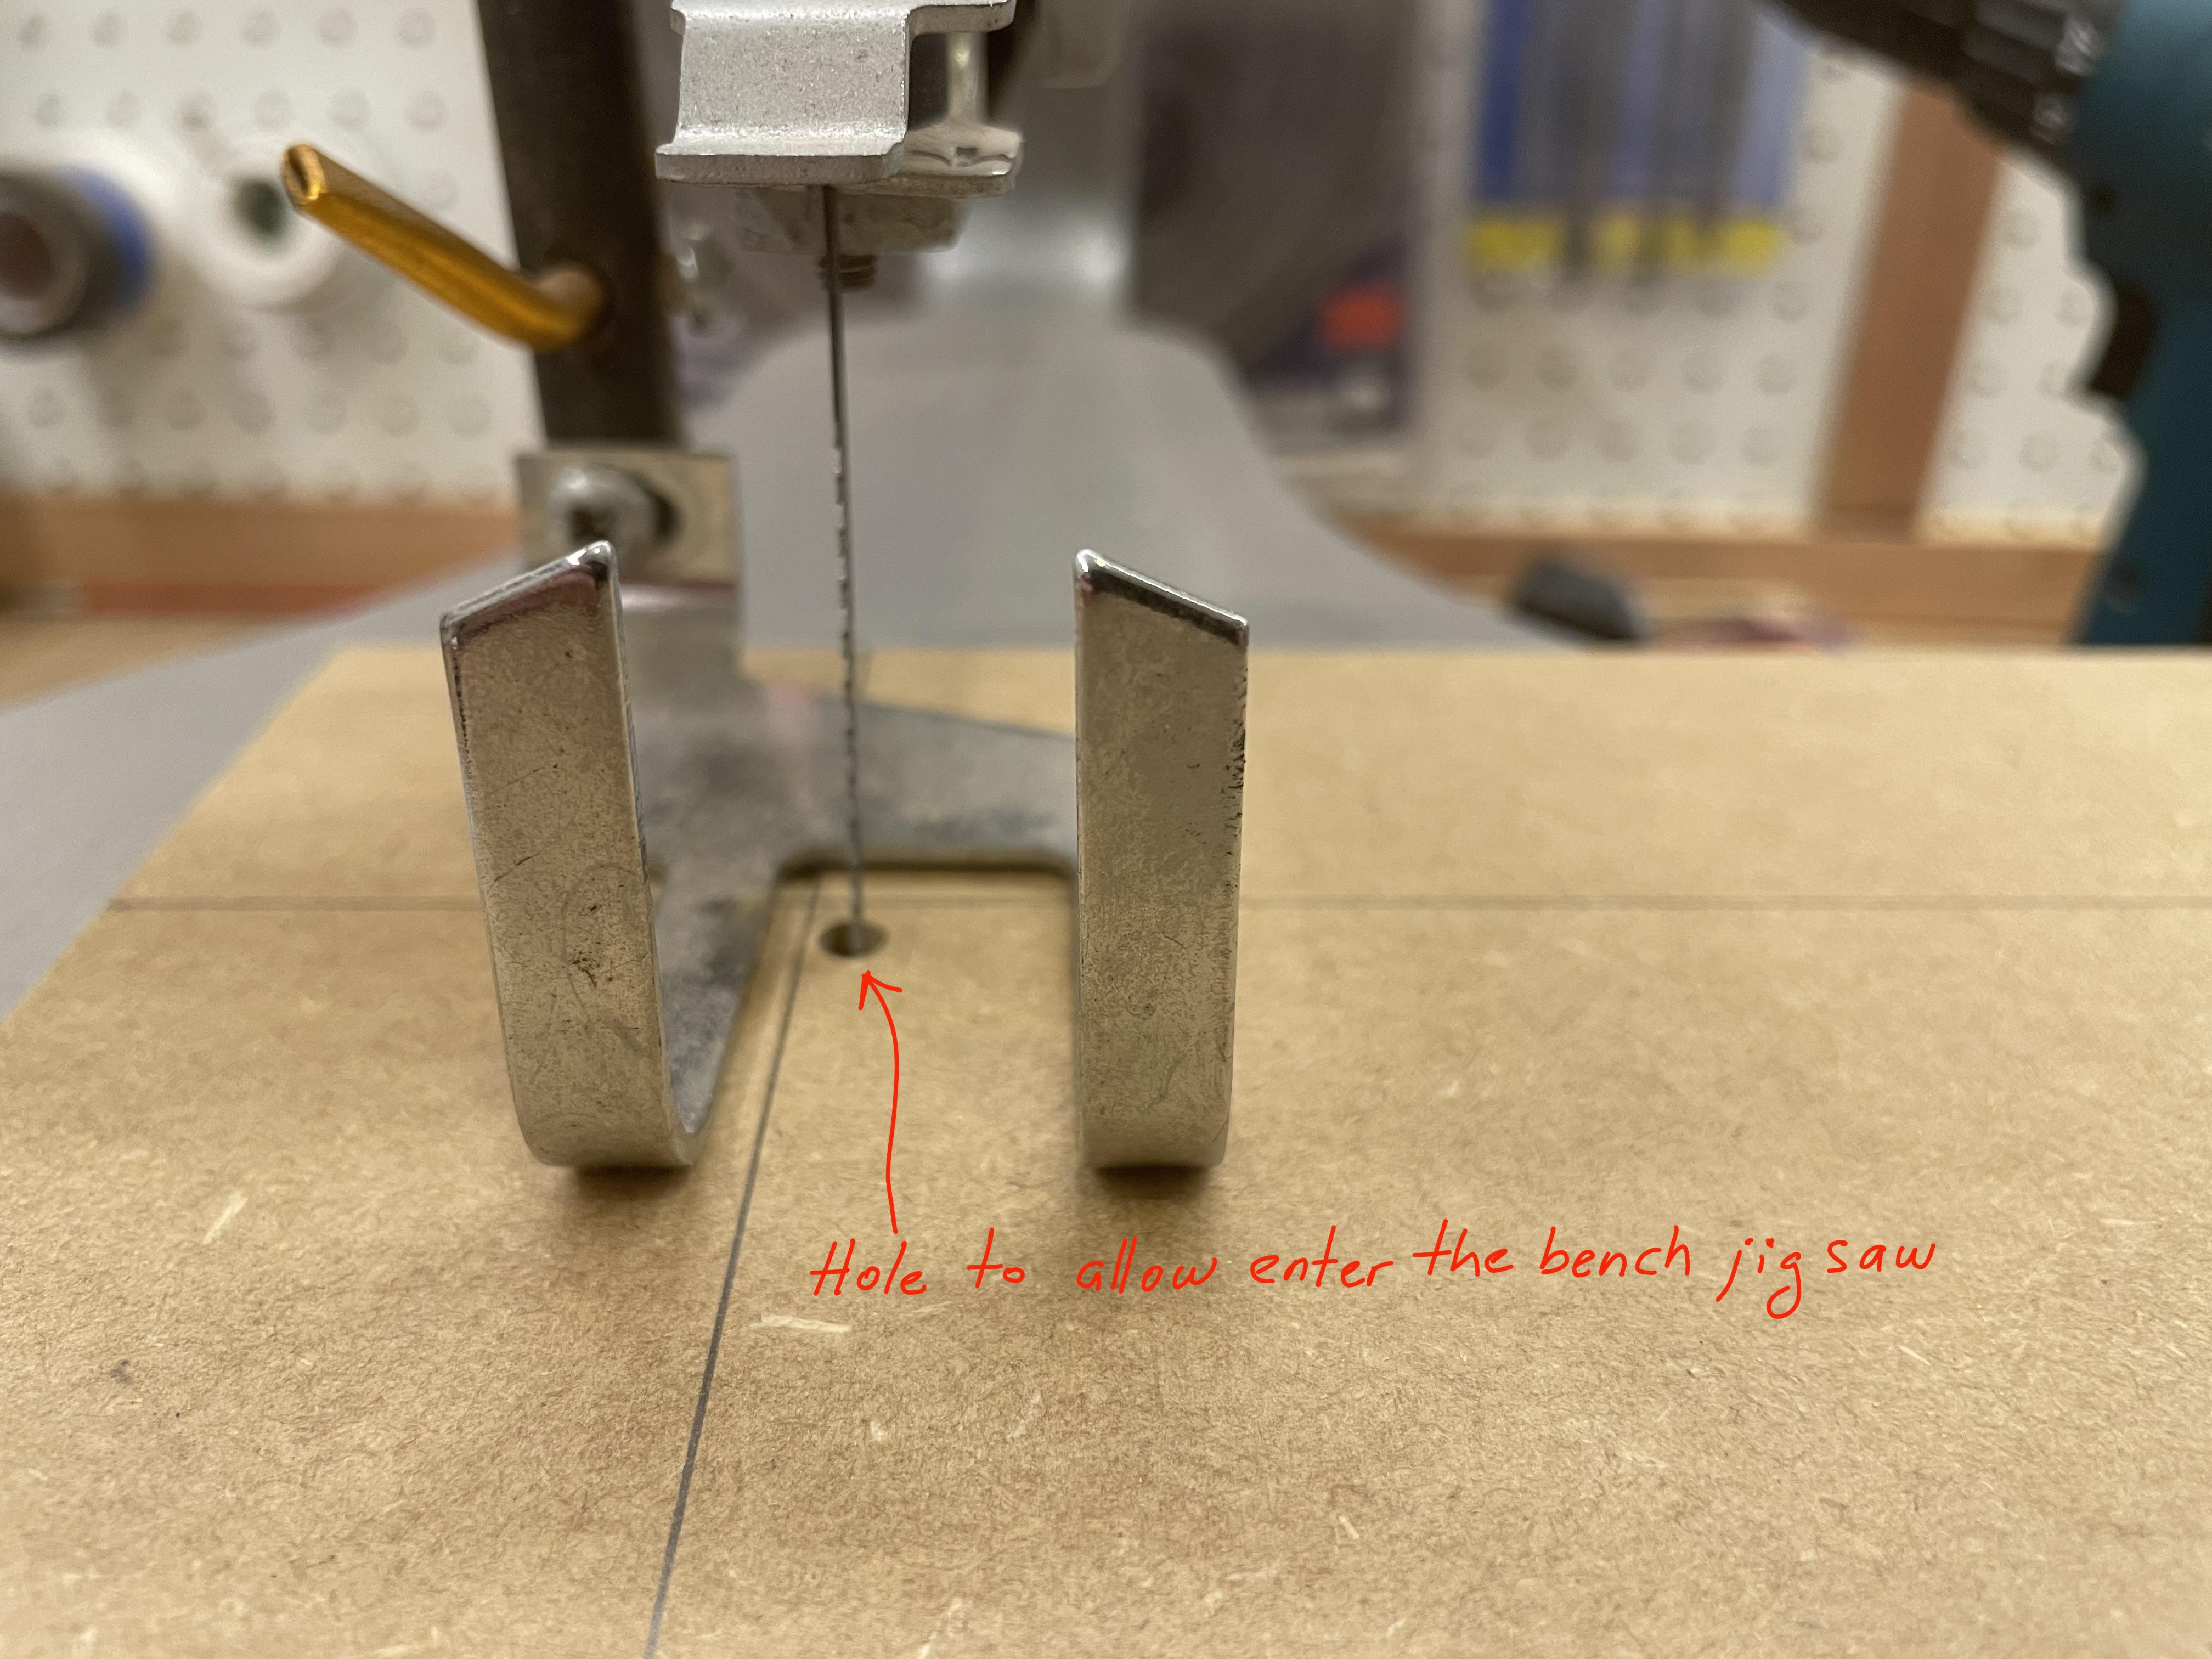
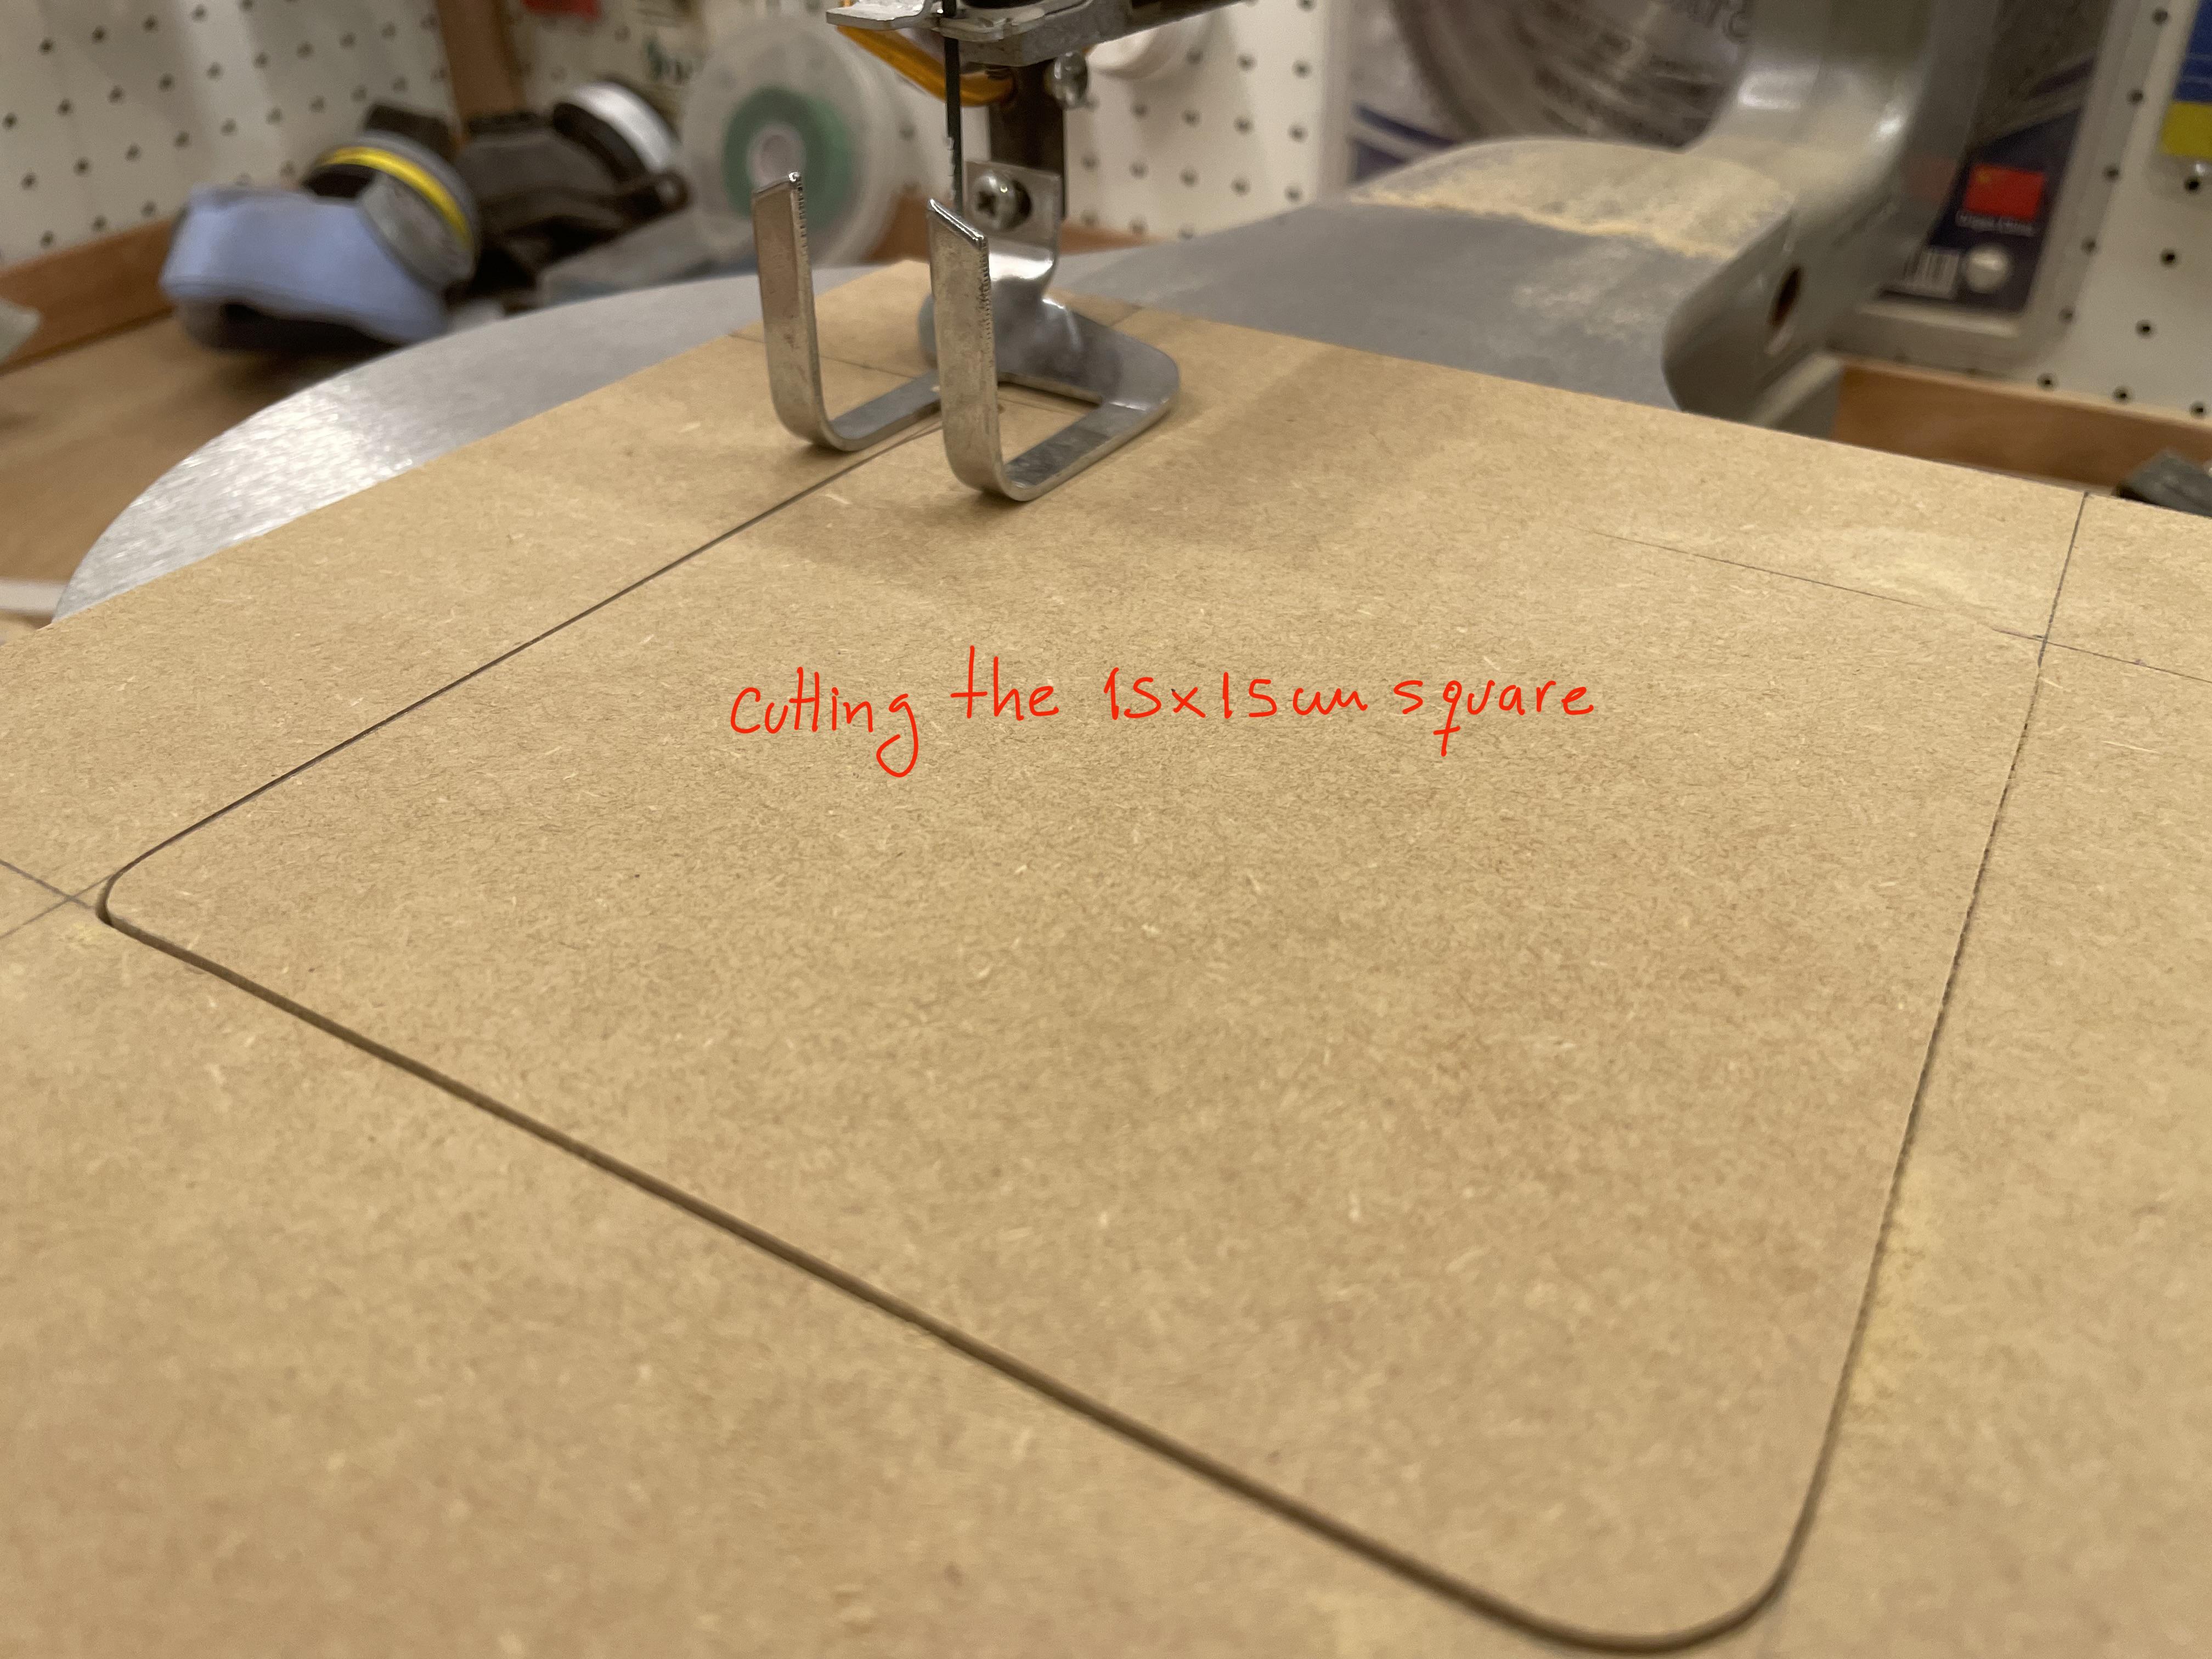
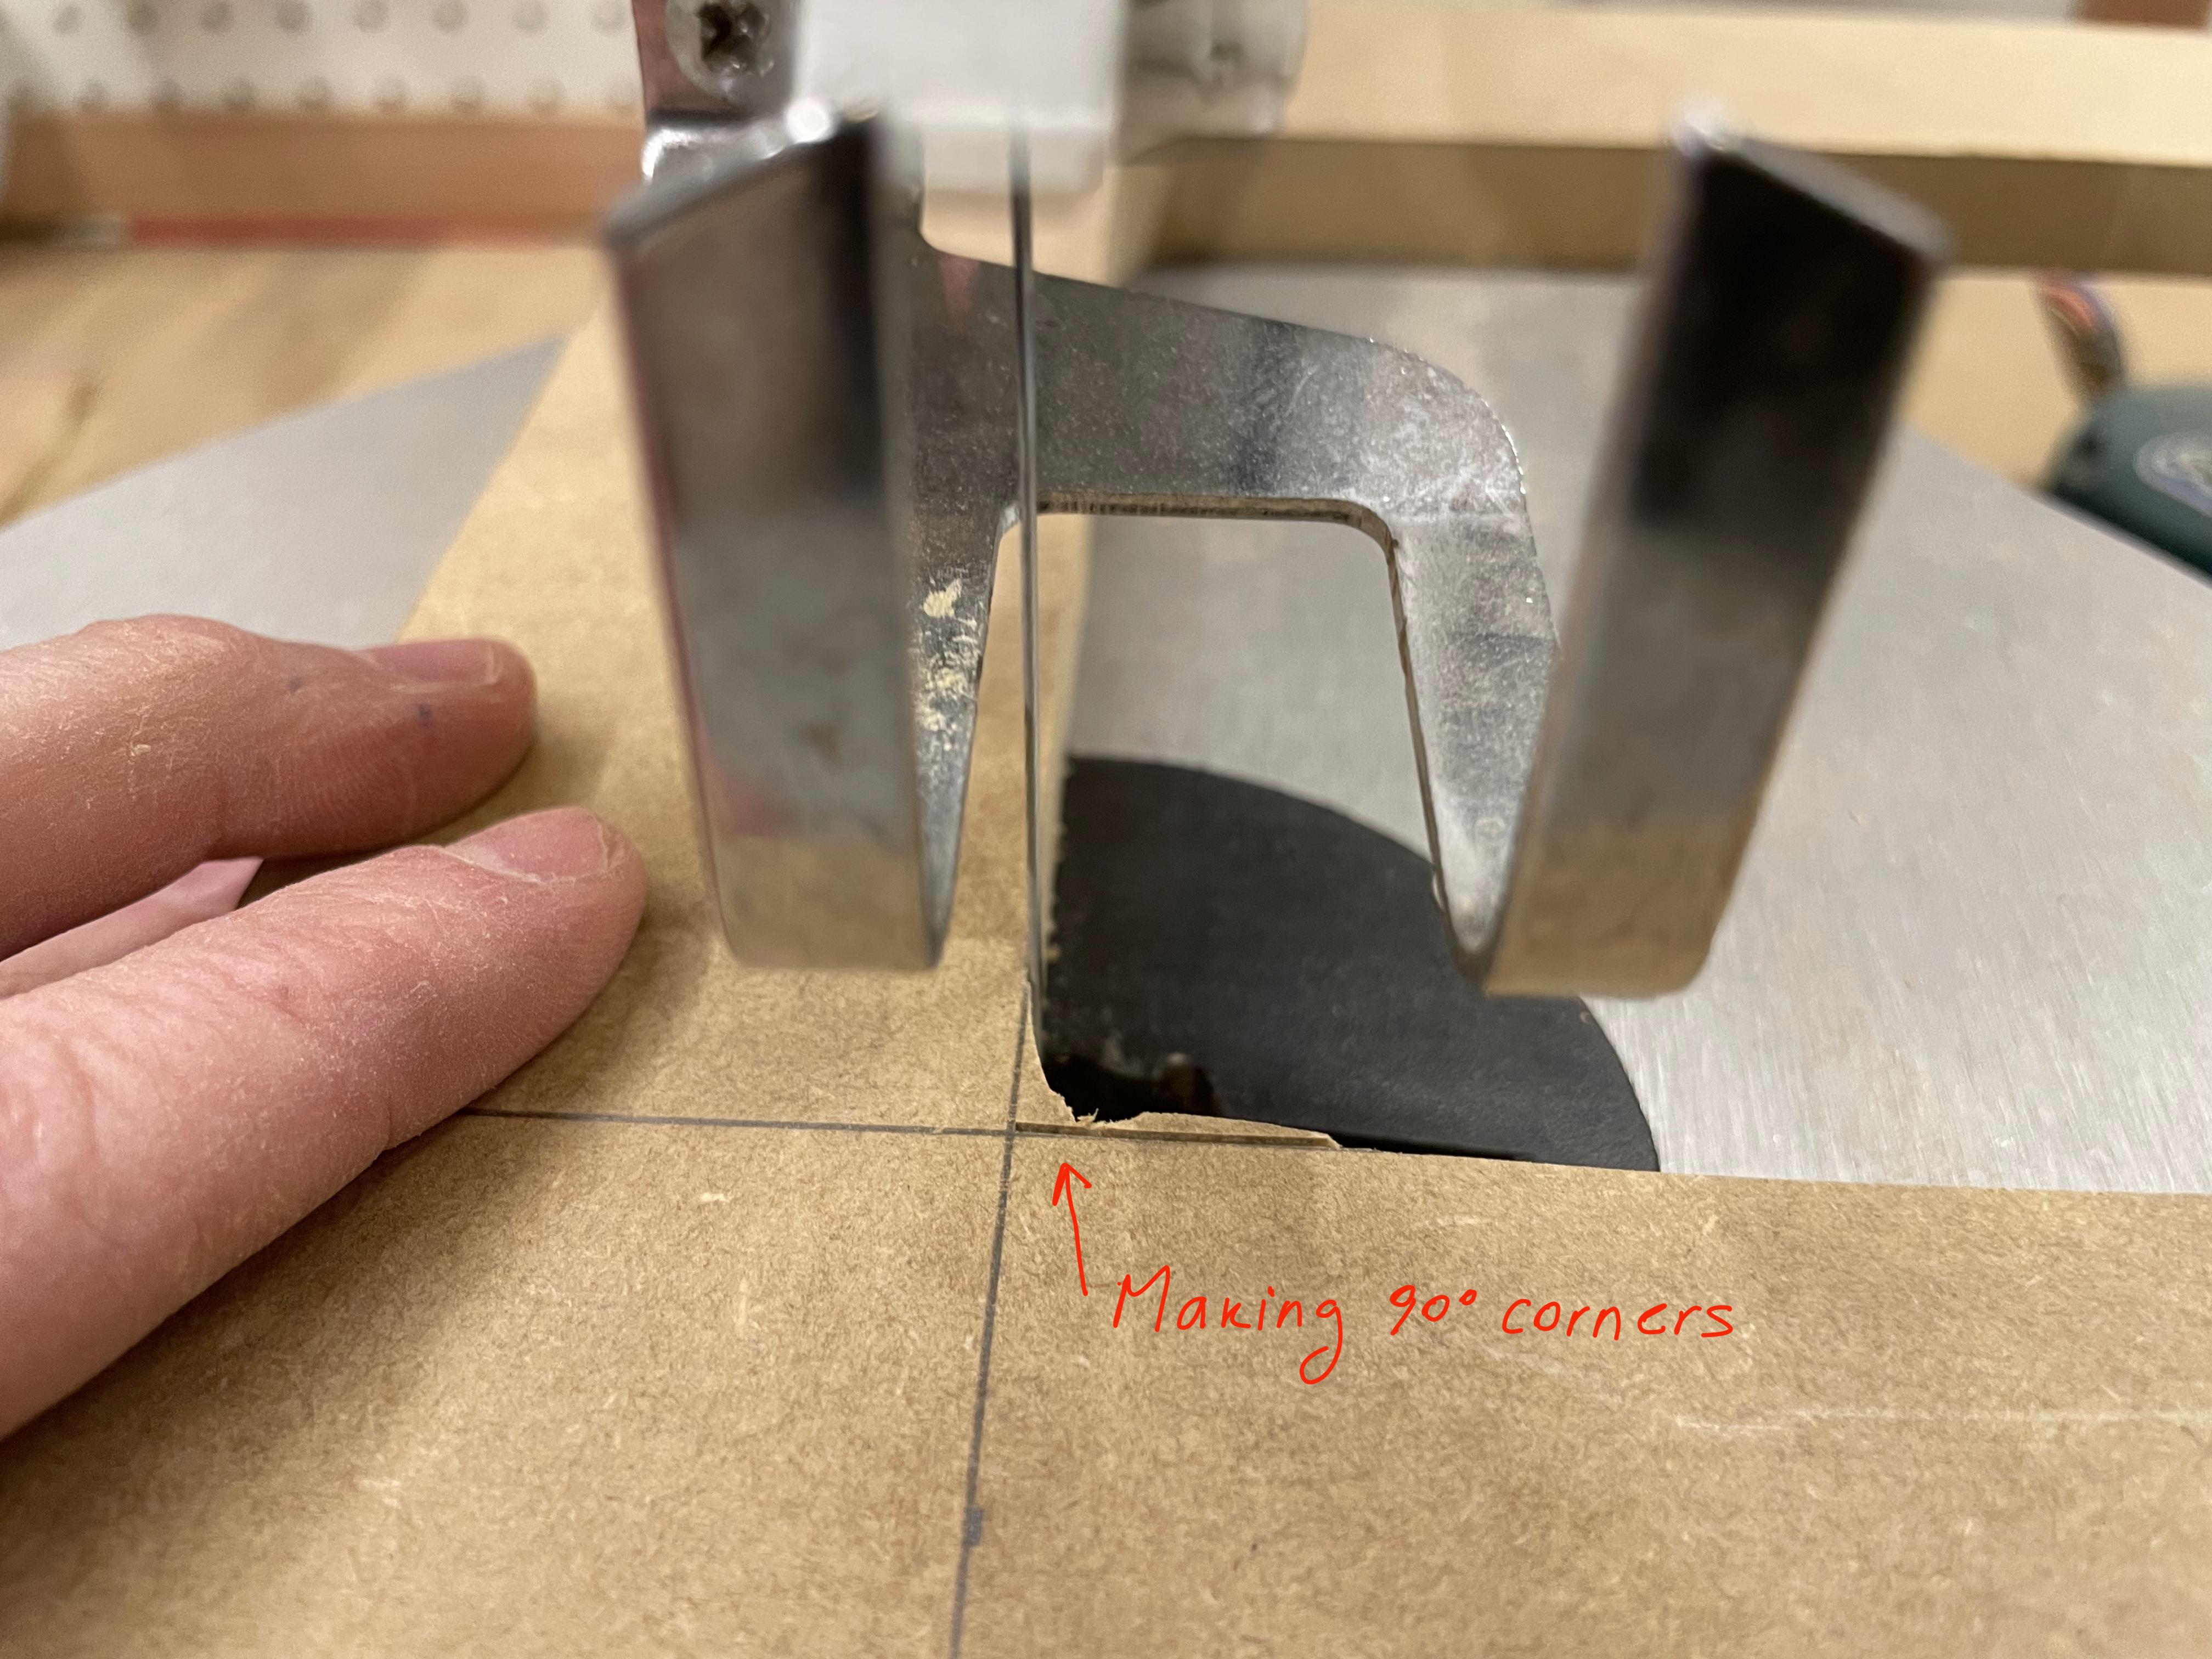
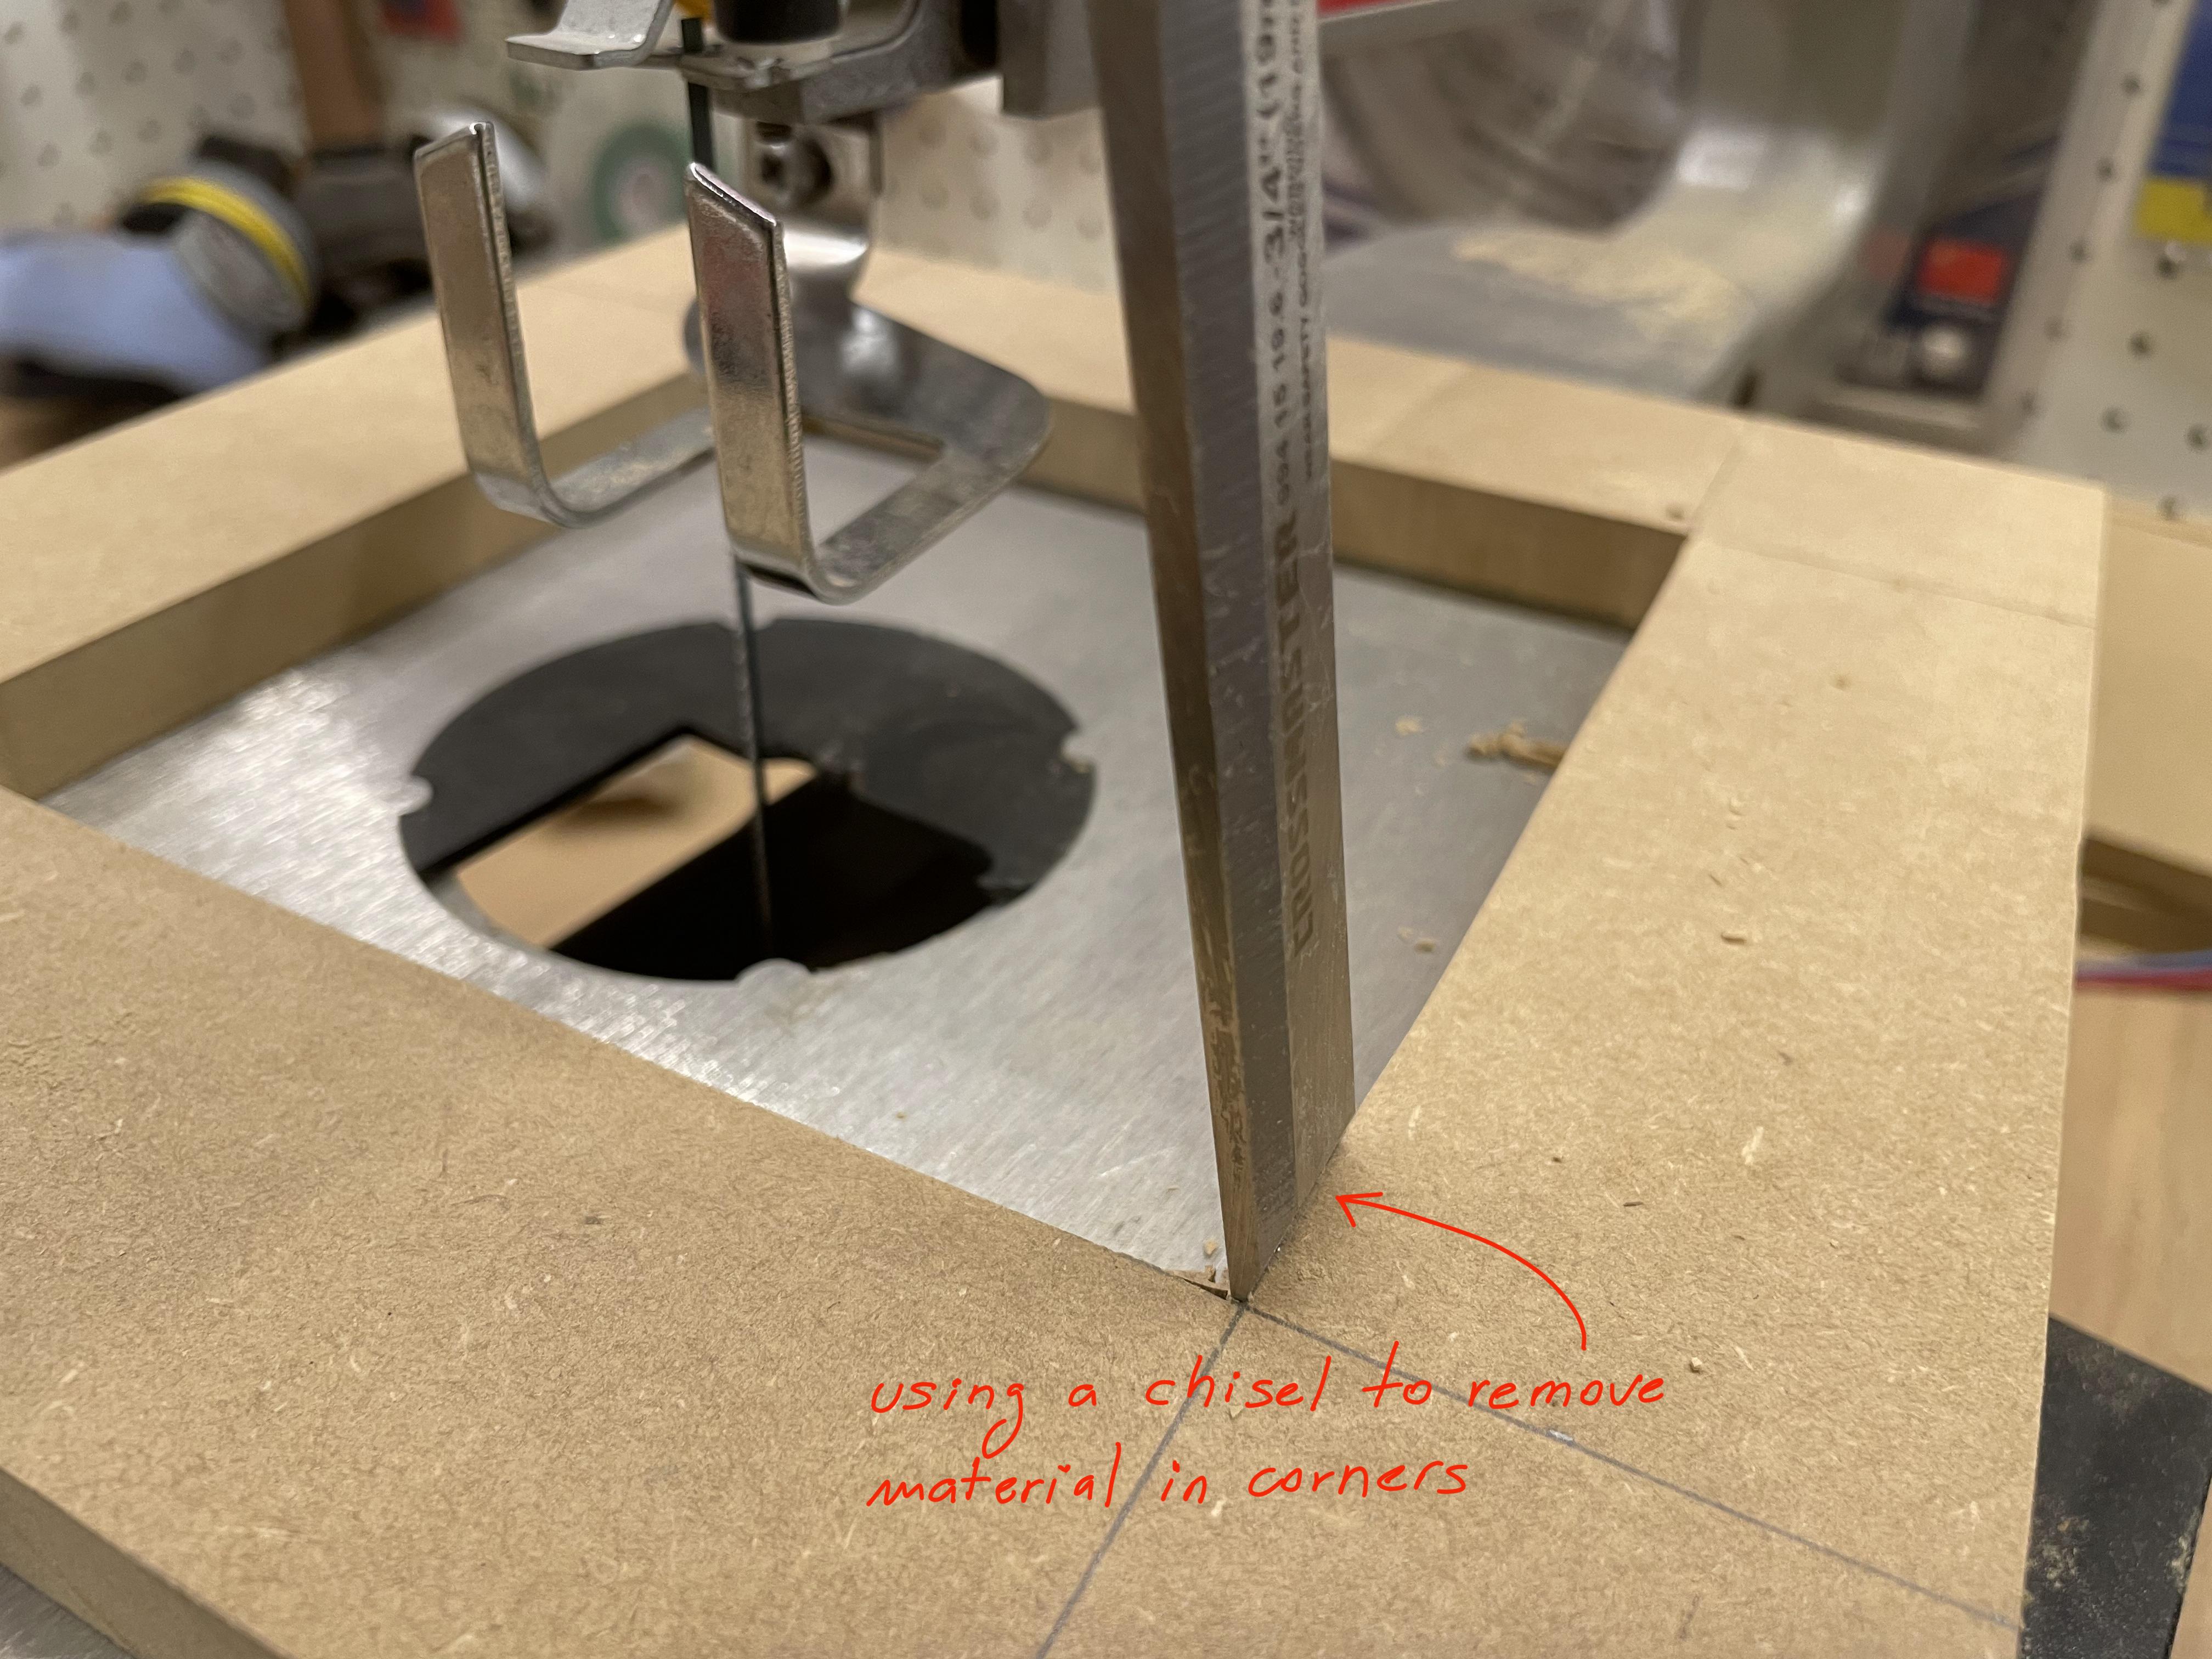
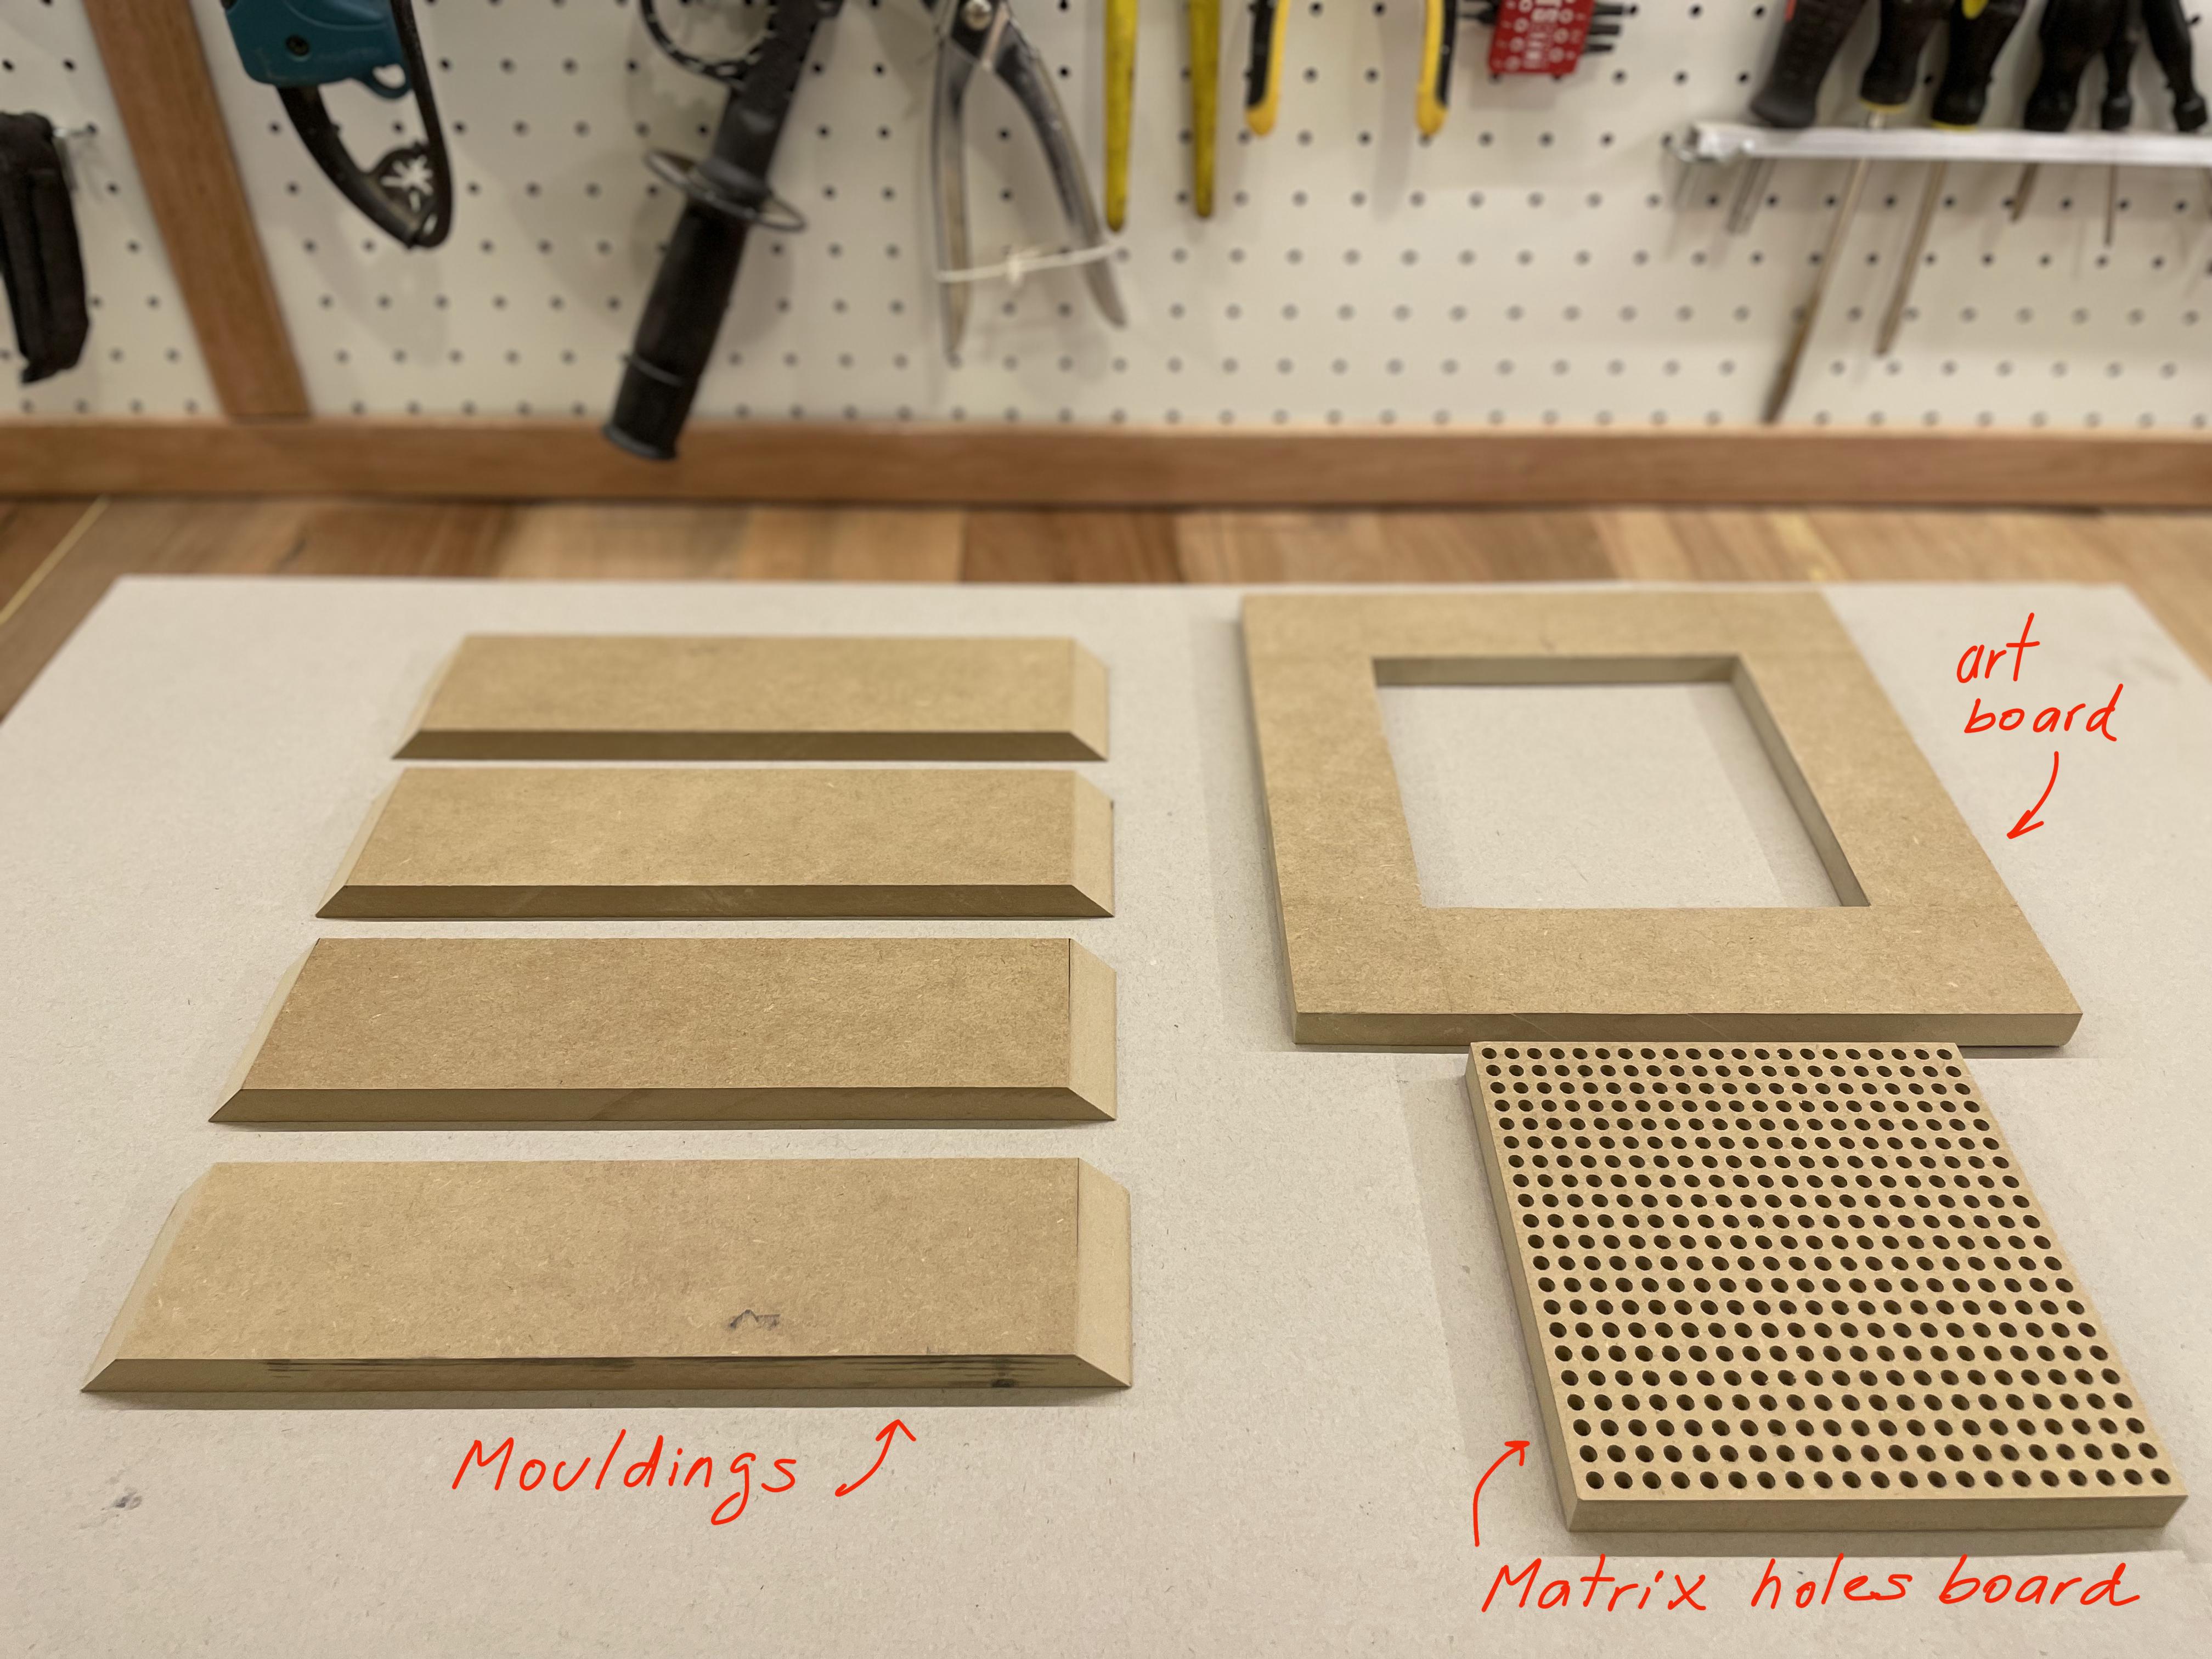
I used table saw and bench jigsaw to cut de MDF. If you prefer you can use other mechanical cutting tool.
a) Molding cut:
- Cut 4 rectangles 28 cm x 6.5 cm with 15 mm MDF using a table saw.
- Mark with a pencil on the ends of the previous pieces where the bezels will be cut at 45 degrees.
- Rotate the saw blade 45 degrees.
- Very precisely and very carefully cut the bezels at 45 degrees.
b) Art board cut:
- Cut 1 square 25 cm x 25 cm with 15 mm MDF.
- Mark a 15 cm x 15 cm square in the central area with a pencil.
- Make a Ø5 mm hole inside the 15 cm x 15 cm square with an electric drill to allow the bench jigsaw to enter and cut out that square.
- Make the cuts trying to make them as straight as possible and then, with the help of a tool, finish the corners of the central square of 15 cm x cm with chisel some perfect ones at 90 degrees.
If you have a CNC or can access one that allows you to work with dimensions greater than 30 x 30 cm, you could make this part directly with the CNC much more easily.
c) Matrix Holes Cut:
- This is a key step in the whole job. The exact dimension of the holes and their quality are really important.
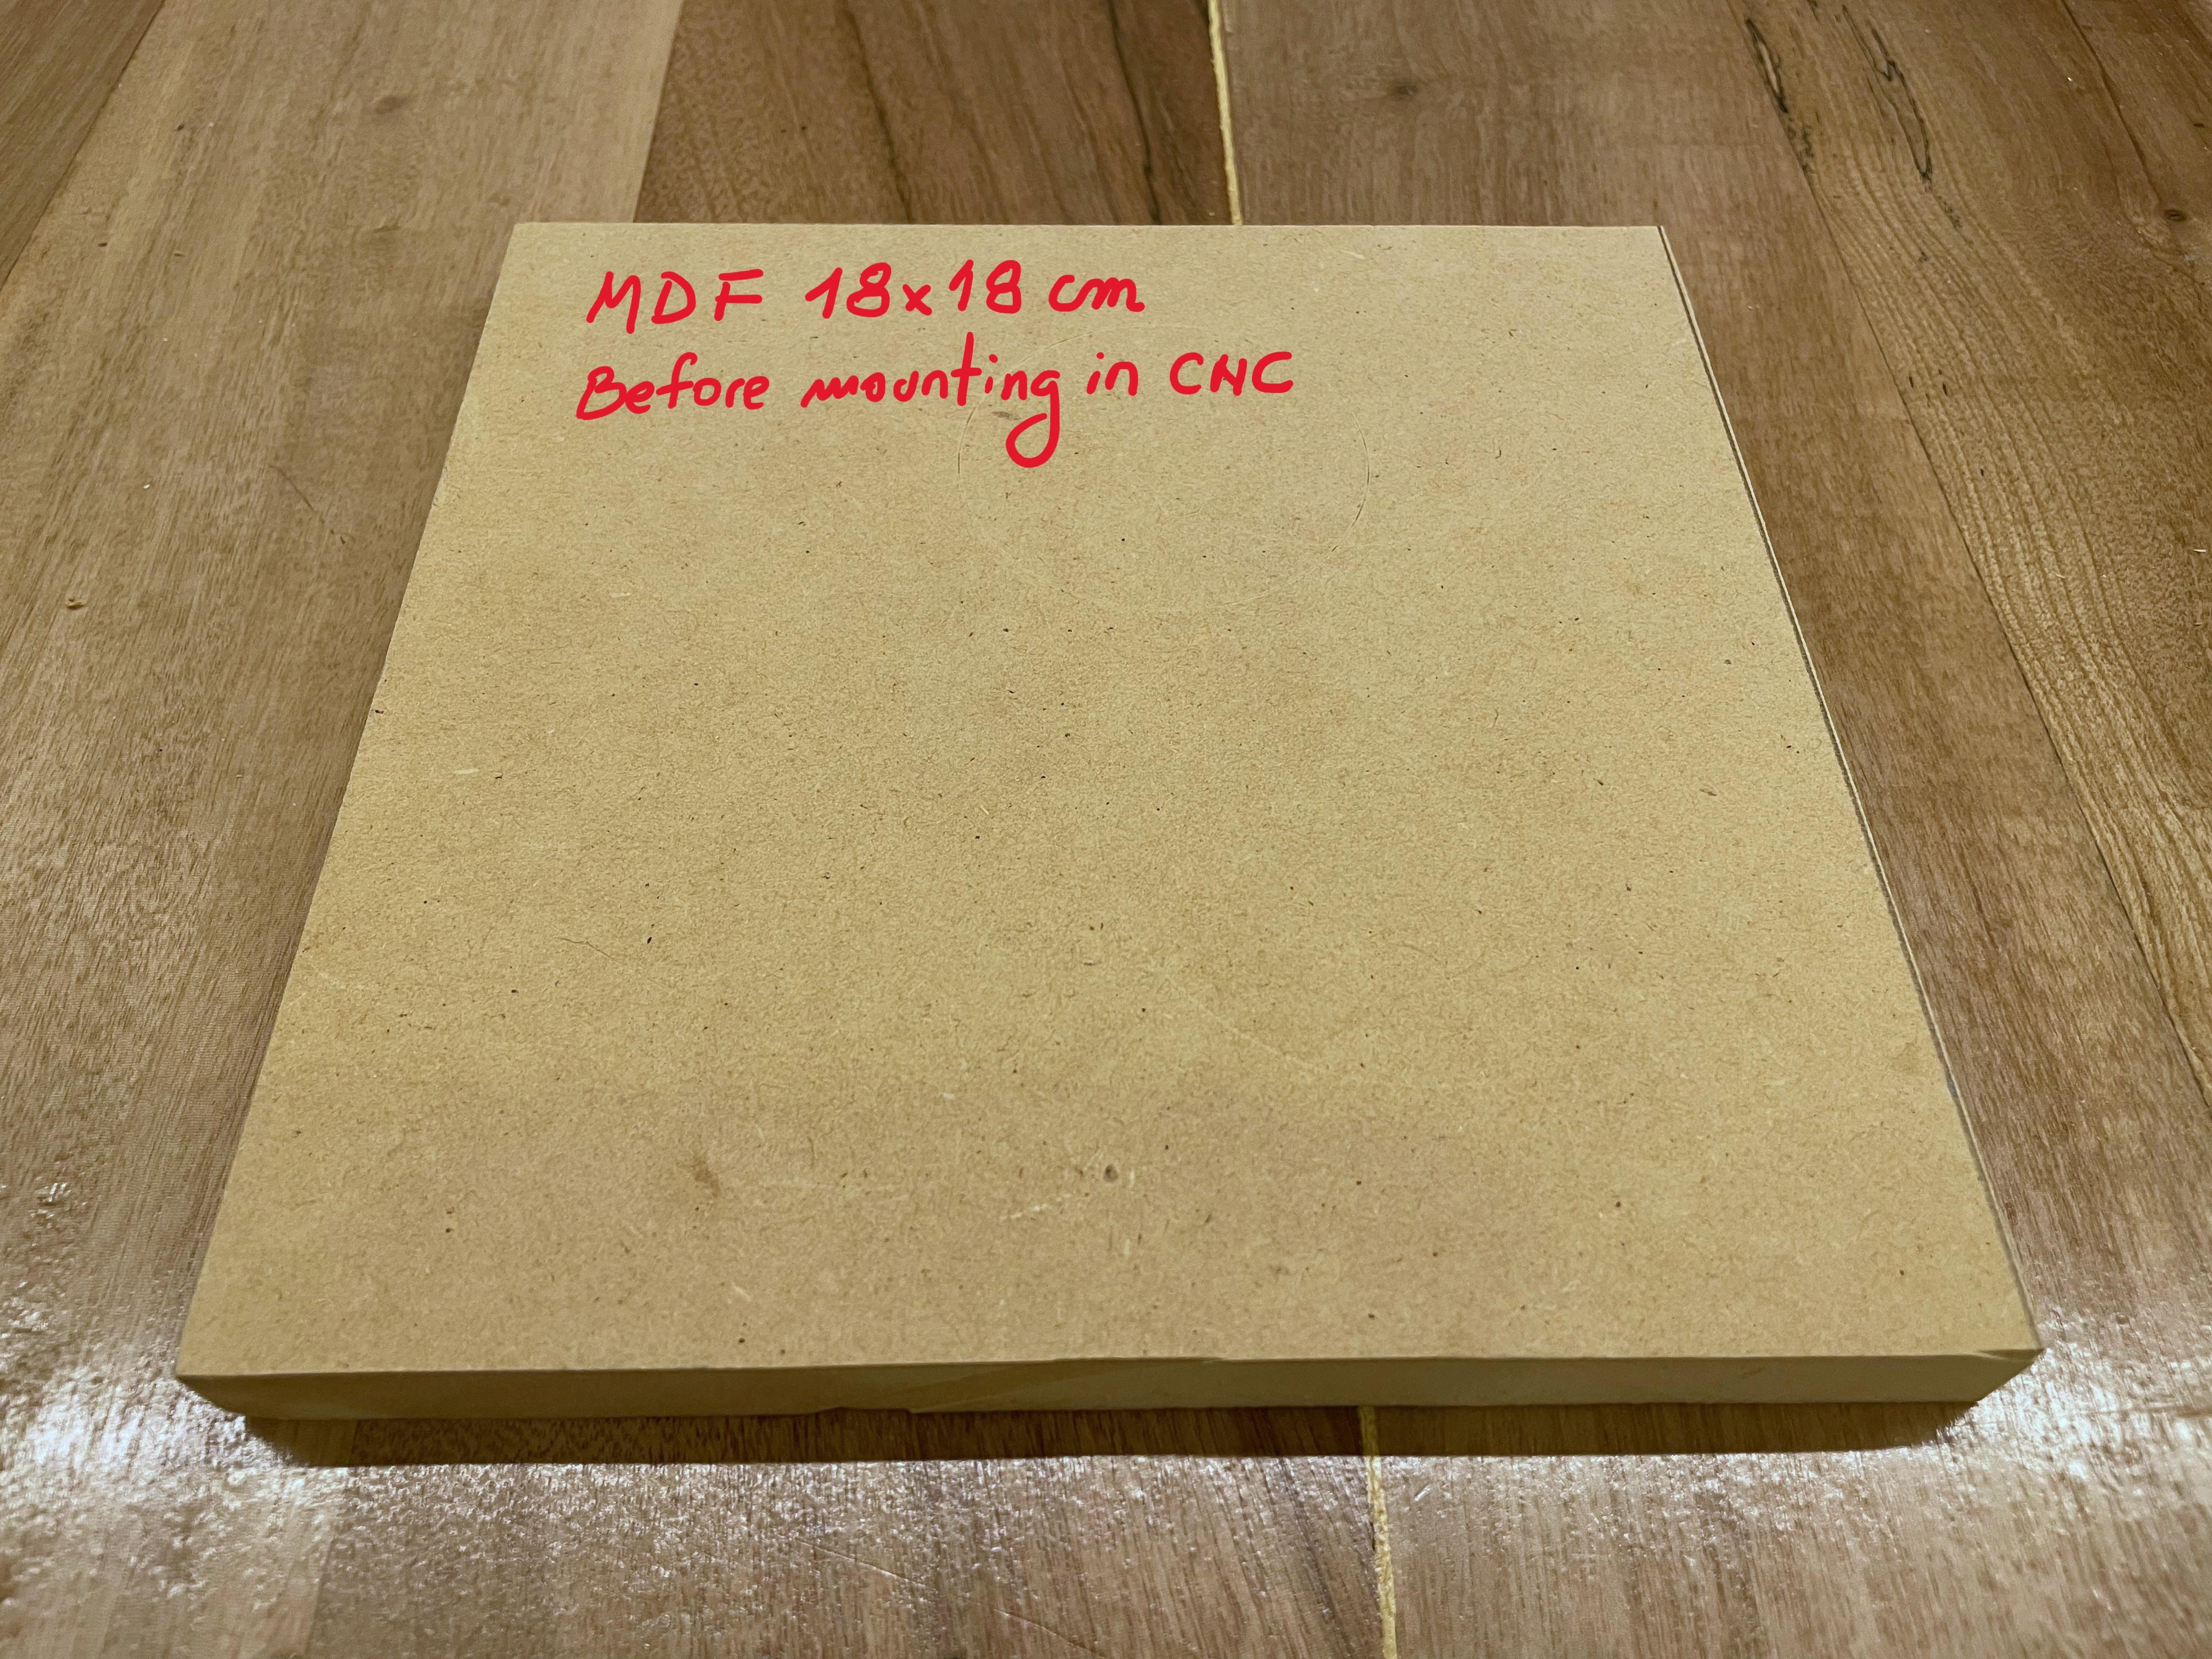
- Cut 1 square 18 cm x 18 cm with 15 mm MDF.
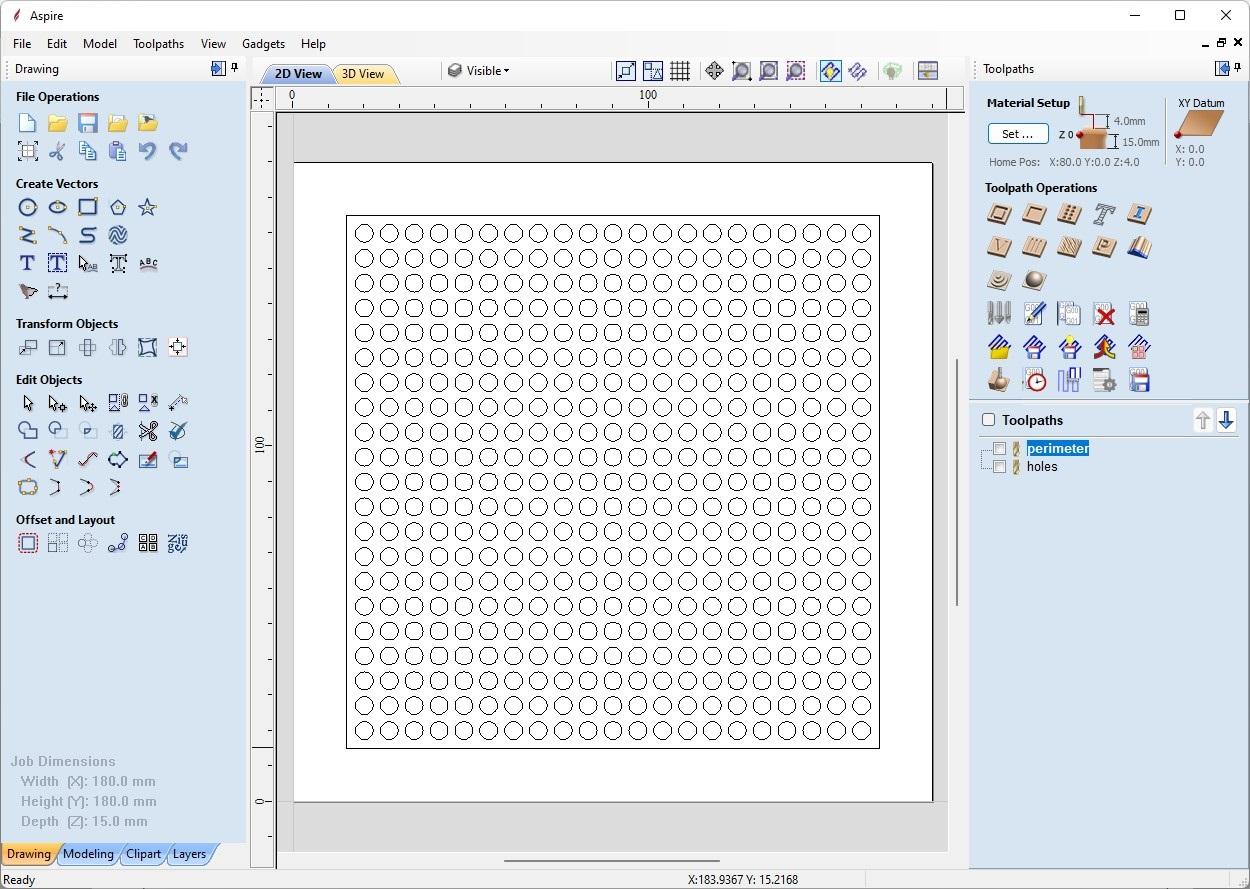
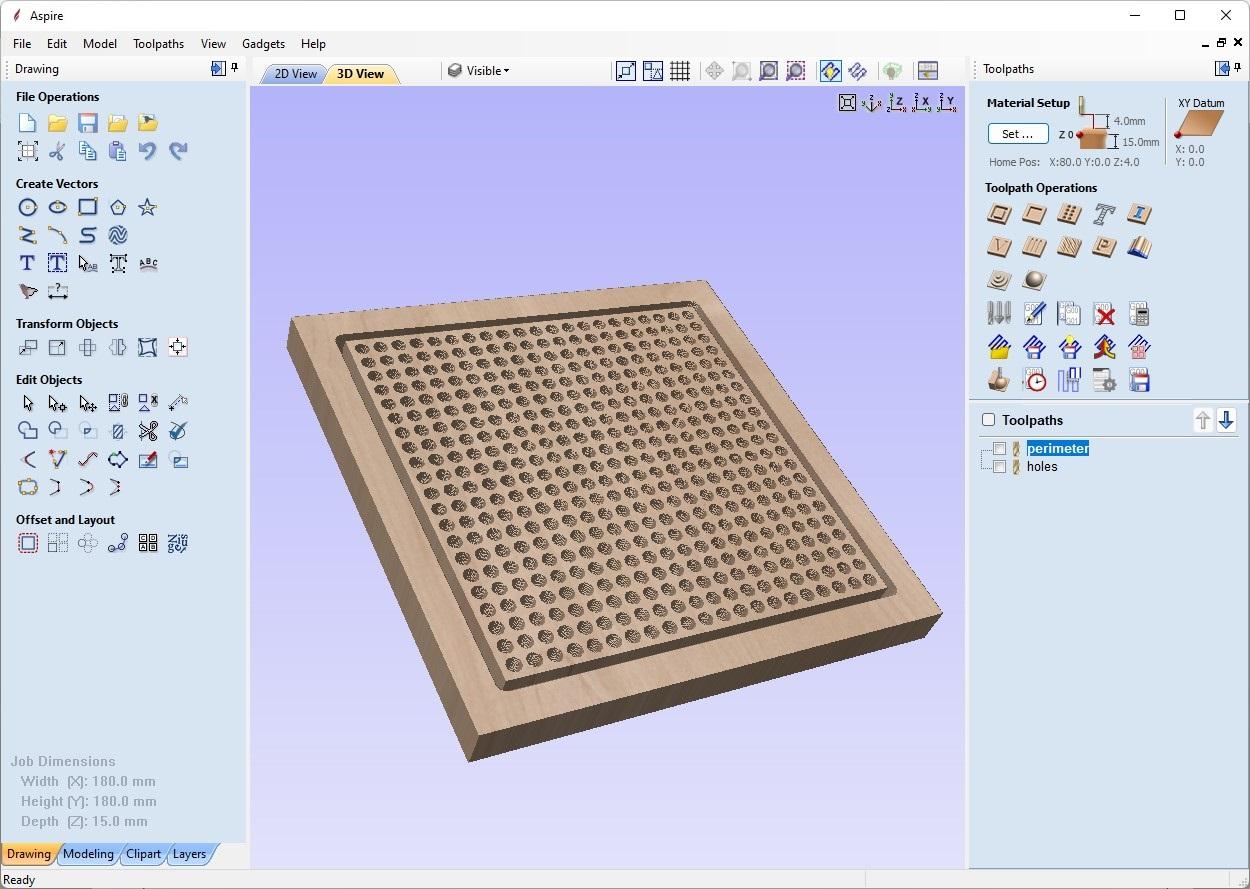
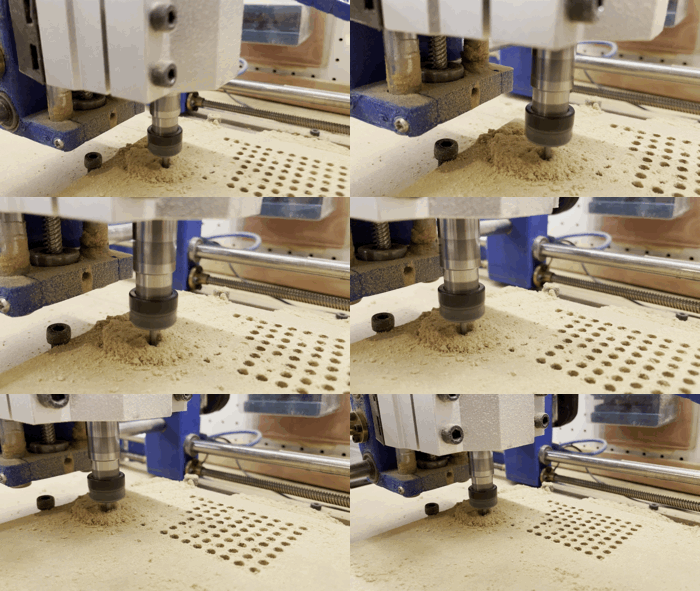
- Position the wood in a CNC to make a matrix of 441 holes (21 rows x 21 columns) and a final external dimension of 15 cm x 15 cm.
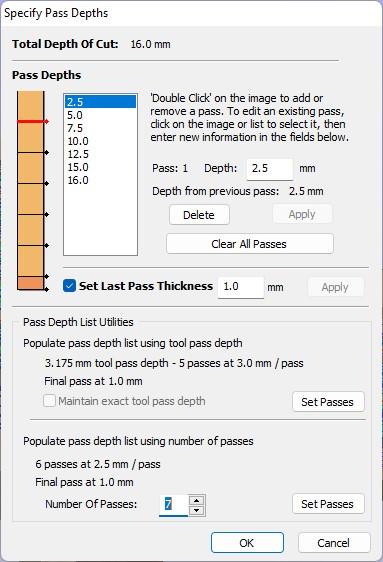
- I used a 1/8” Shank Spiral Upcut Router Bit.
- I used Vector Aspire software to create the g-code file. I attach the file in DXF format to import the vector in your in your favorite cnc cutting software.
- Parameters I used in my CNC:
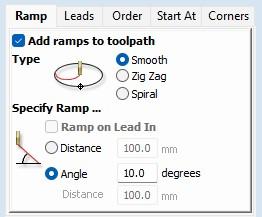
- Holes: spindle speed 6000 rpm / feed rate 100 mm/min / plunge rate 50 mm/min - Use option "Add ramps to toolpath" that allows the hole to be built with the cutting tool in the form of a helicoid.
- Perimeter: spindle speed 6000 rpm / feed rate 300 mm/min / plunge rate 100 mm/min.
If you do not have a CNC, seriously think about making one like the DREMEL CNC in the future available with free plans and easy to assemble on instructables (by Nikodem Bartnik).
Downloads
Assembly and Final Finishing
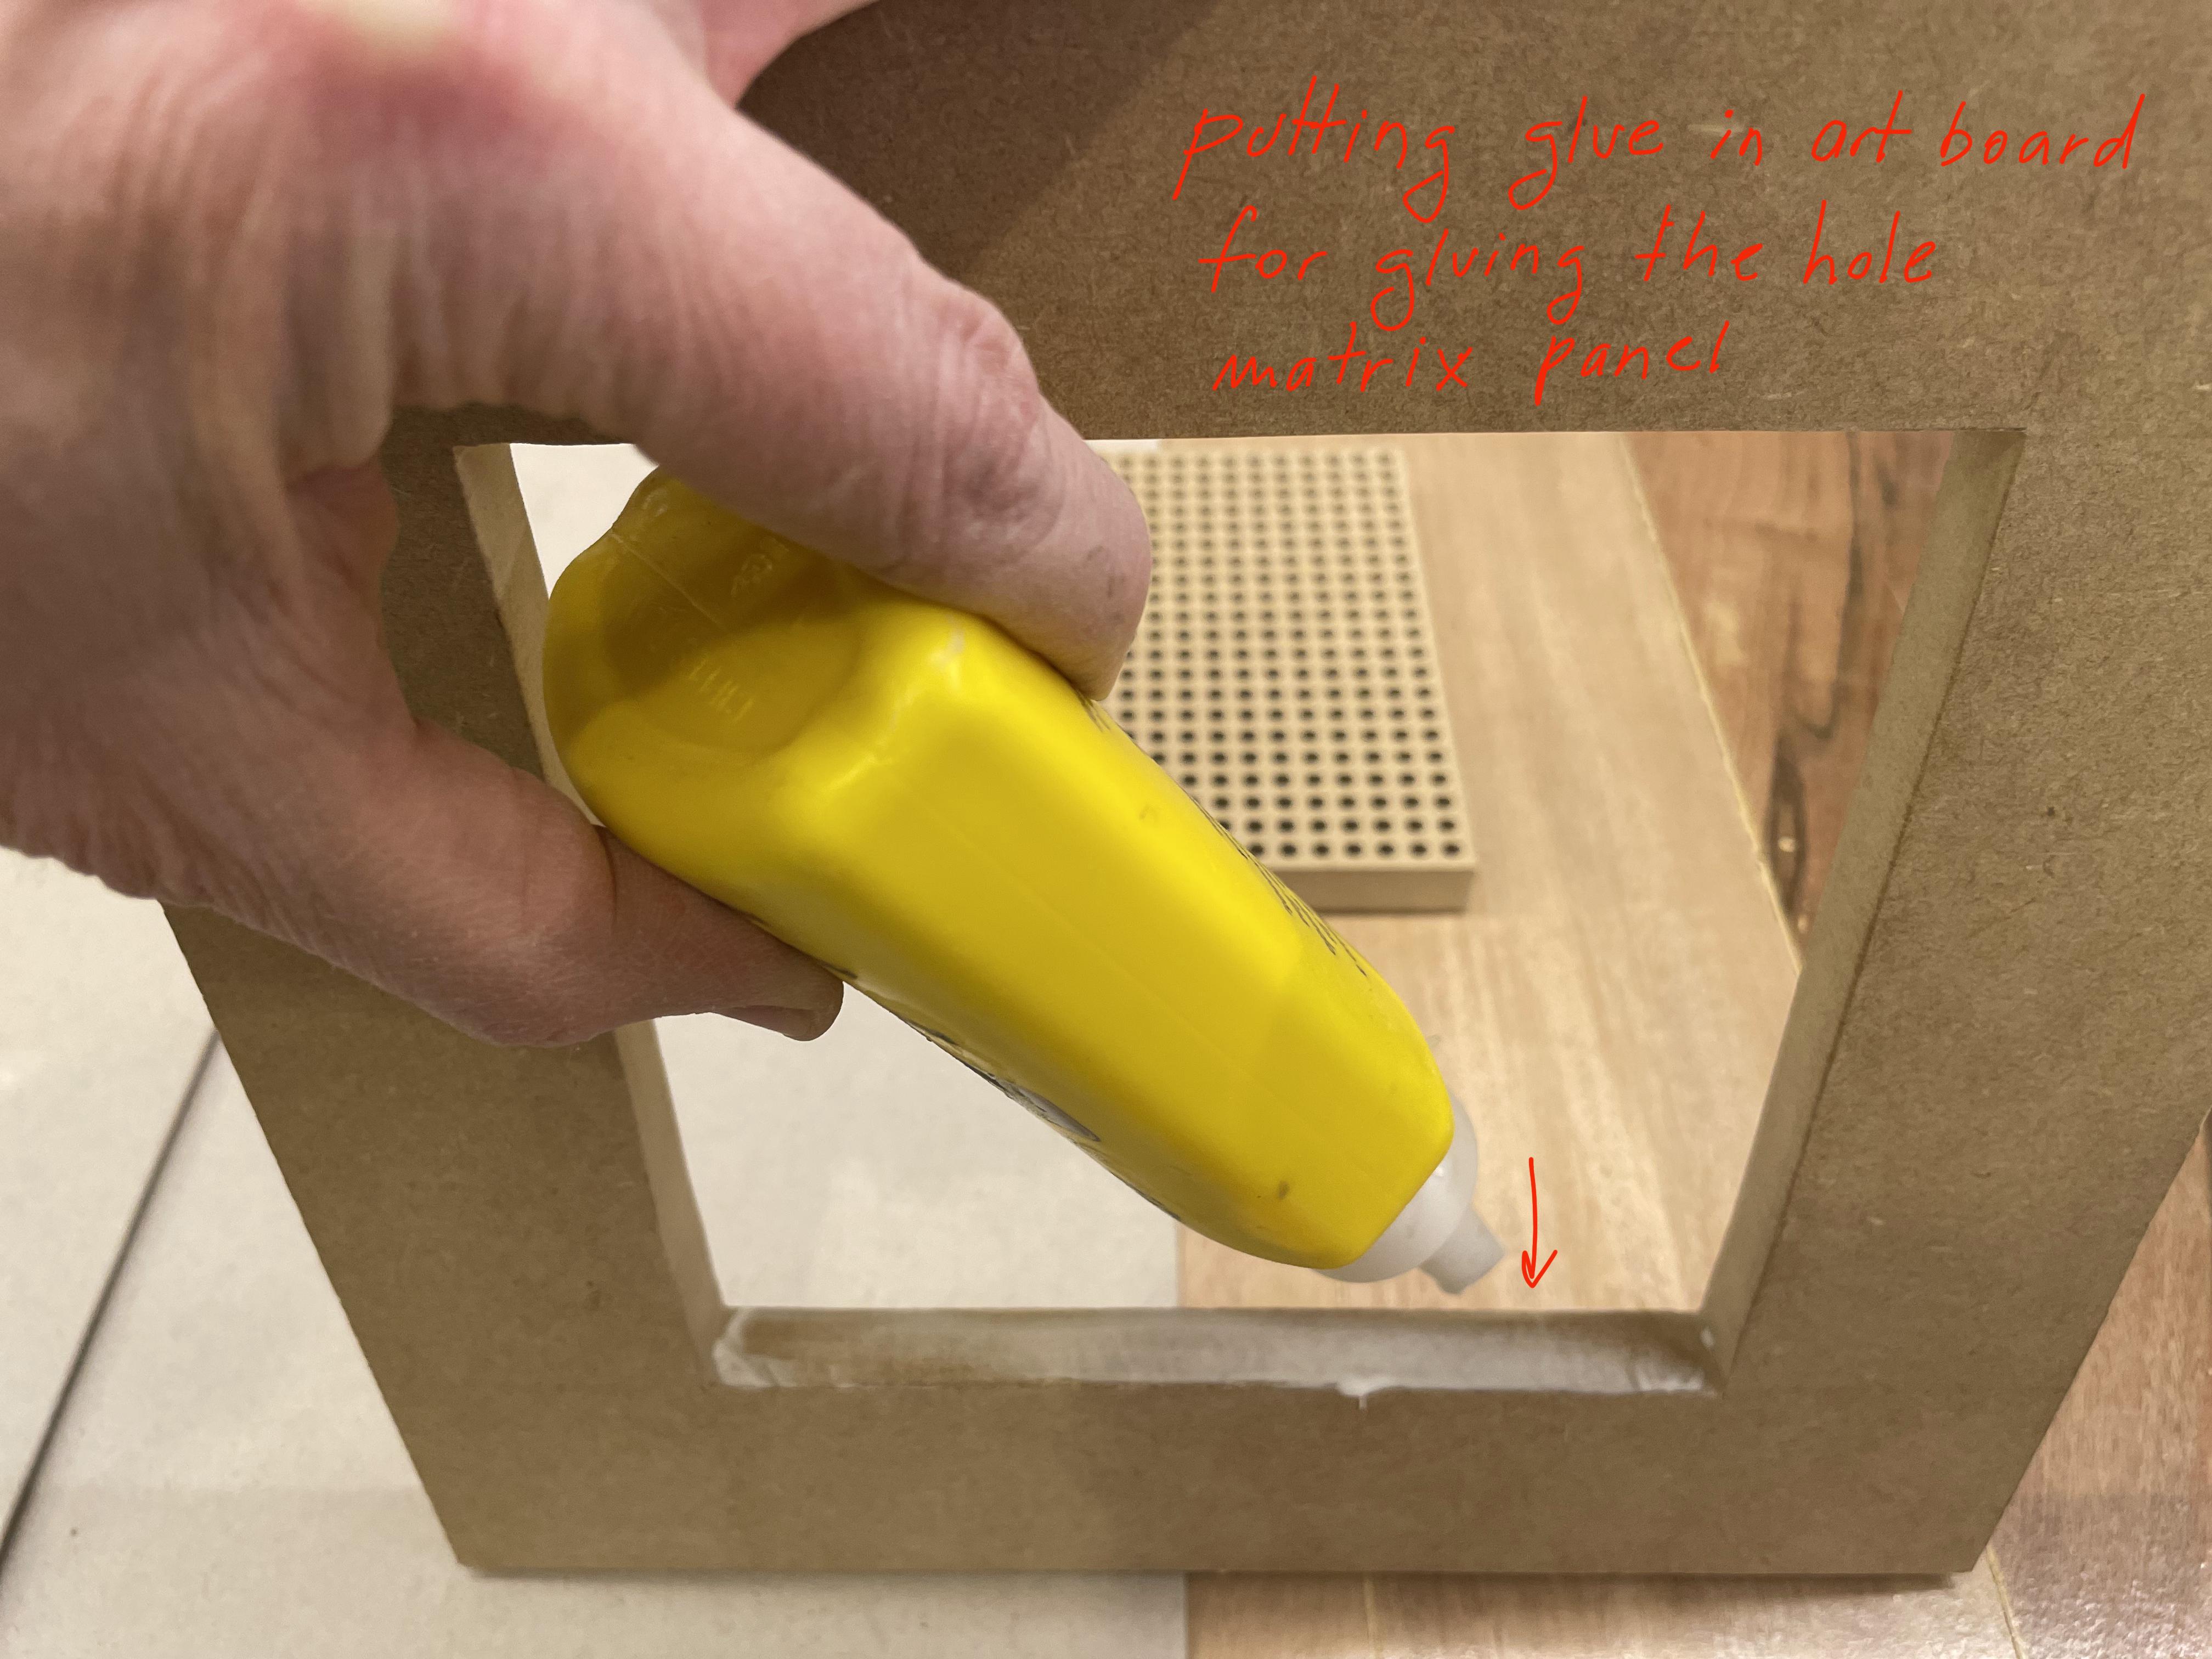
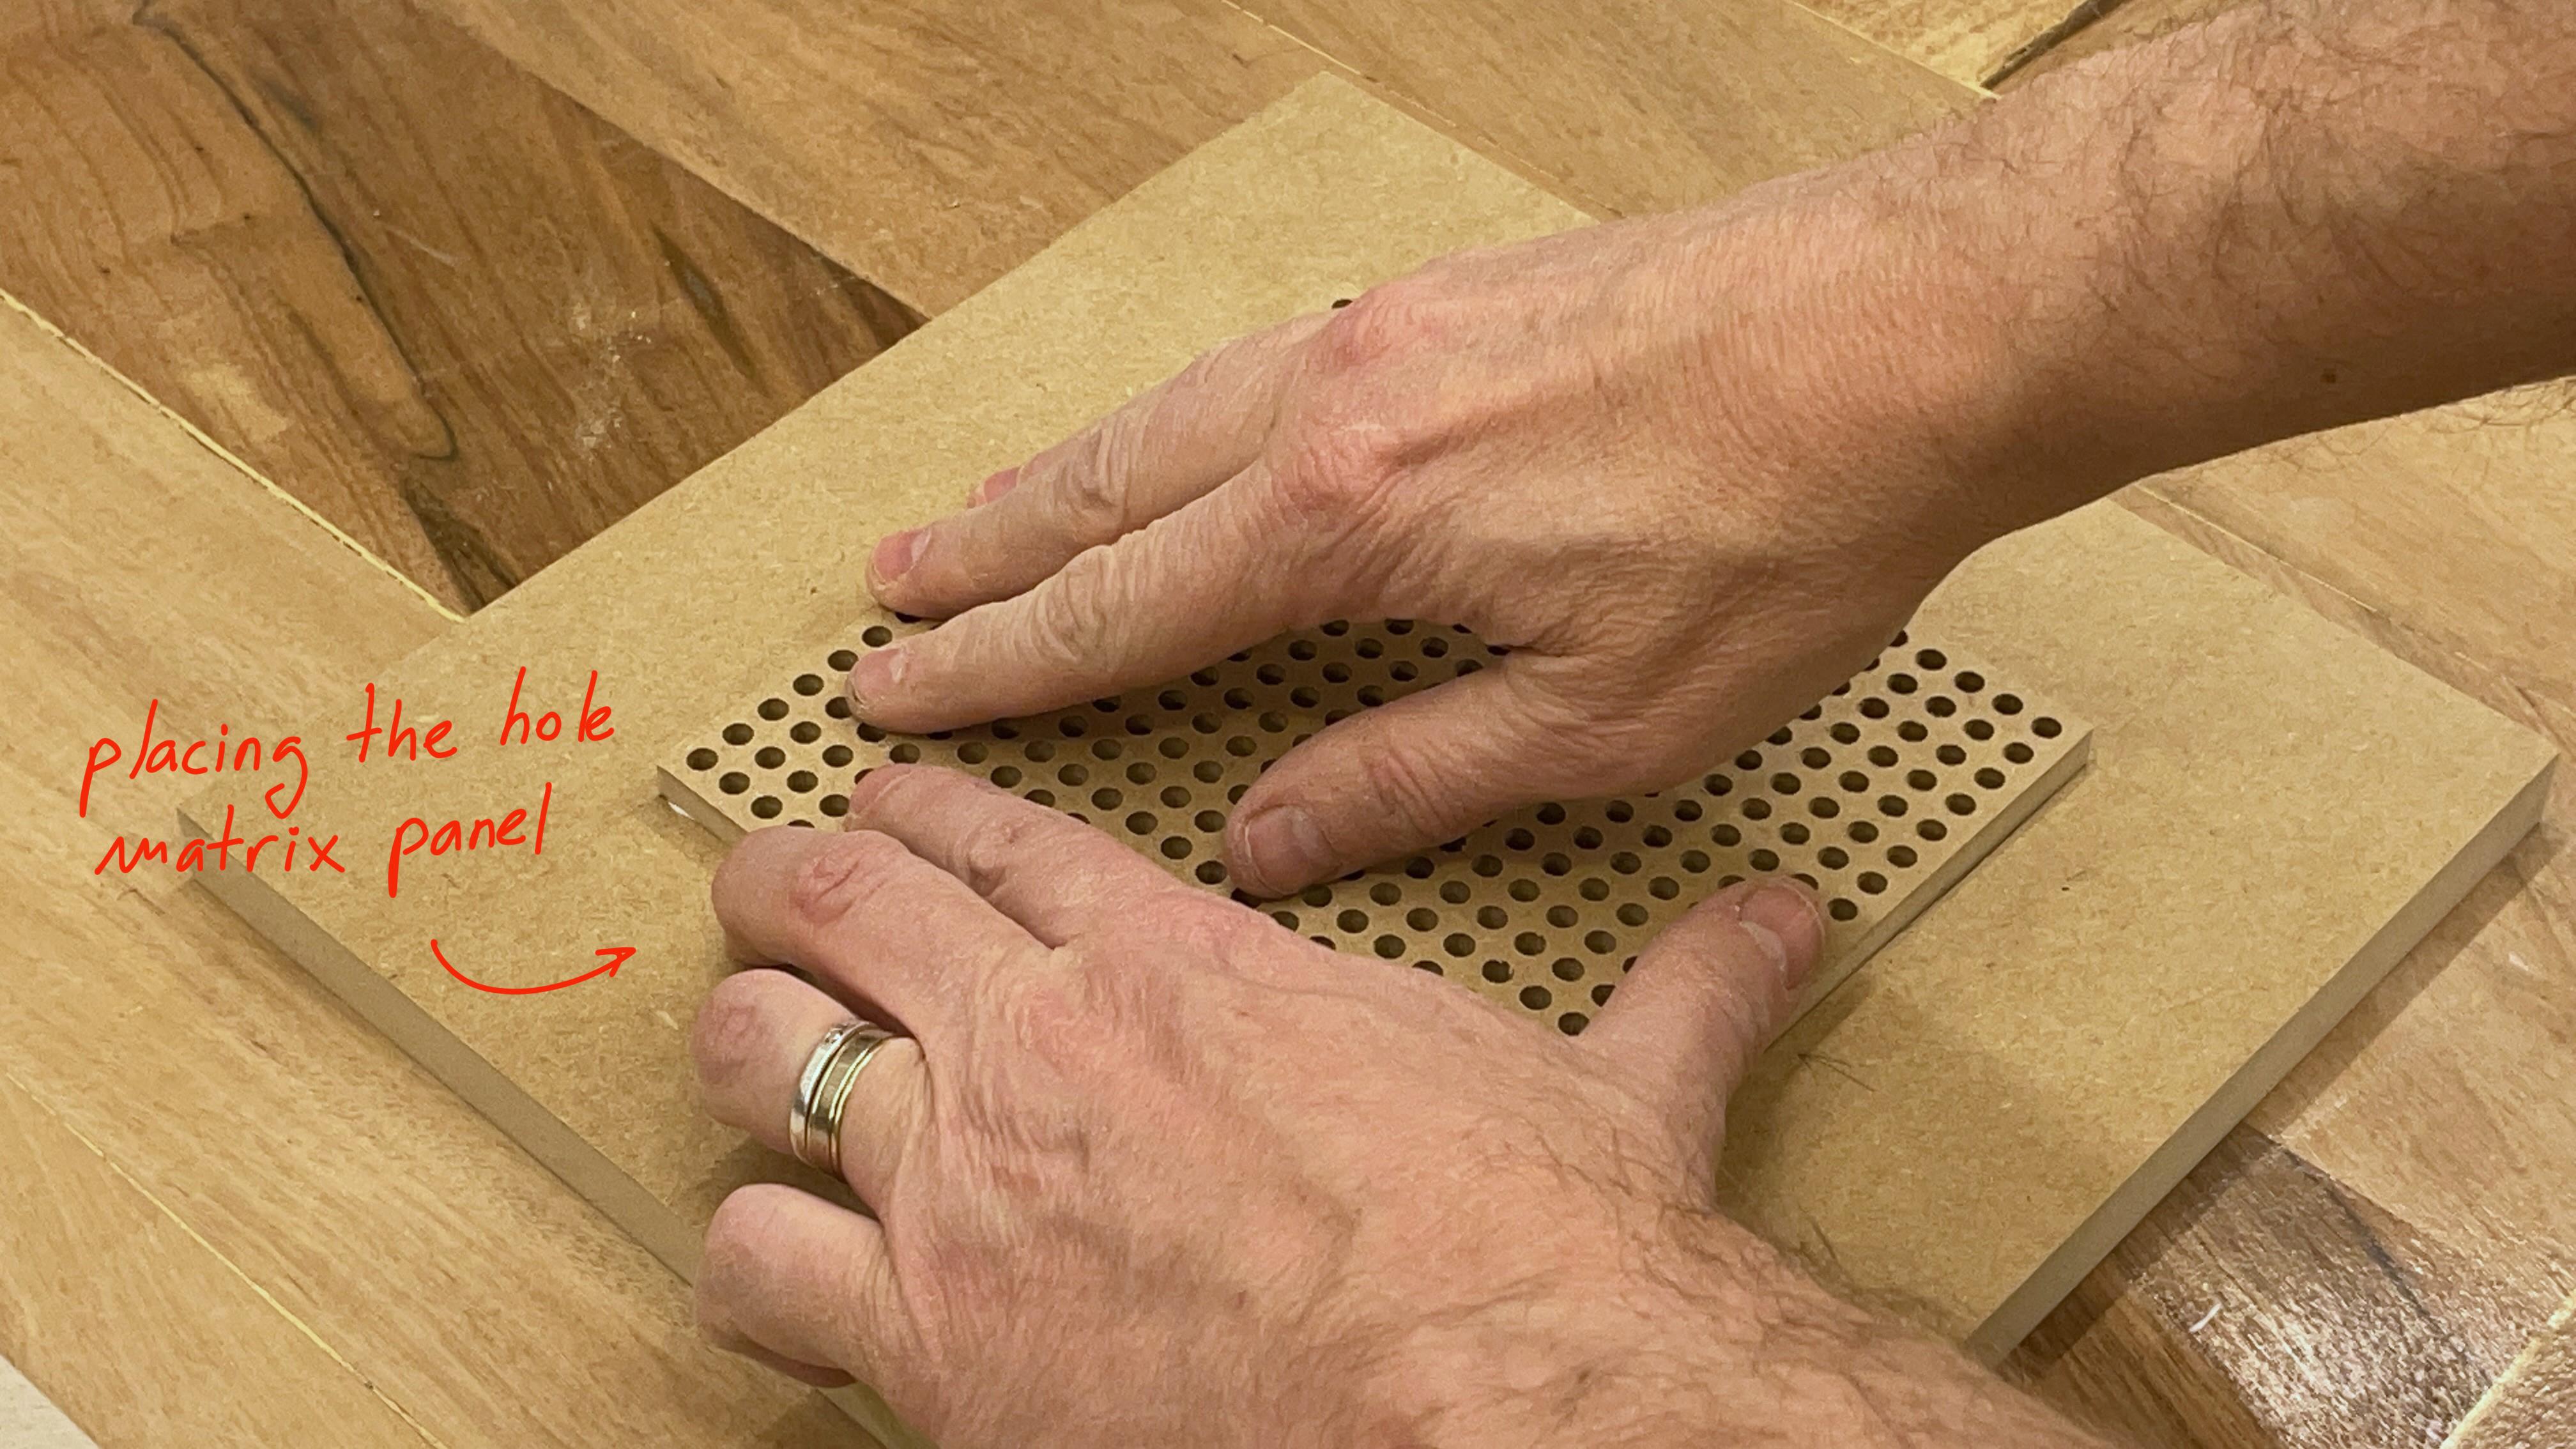
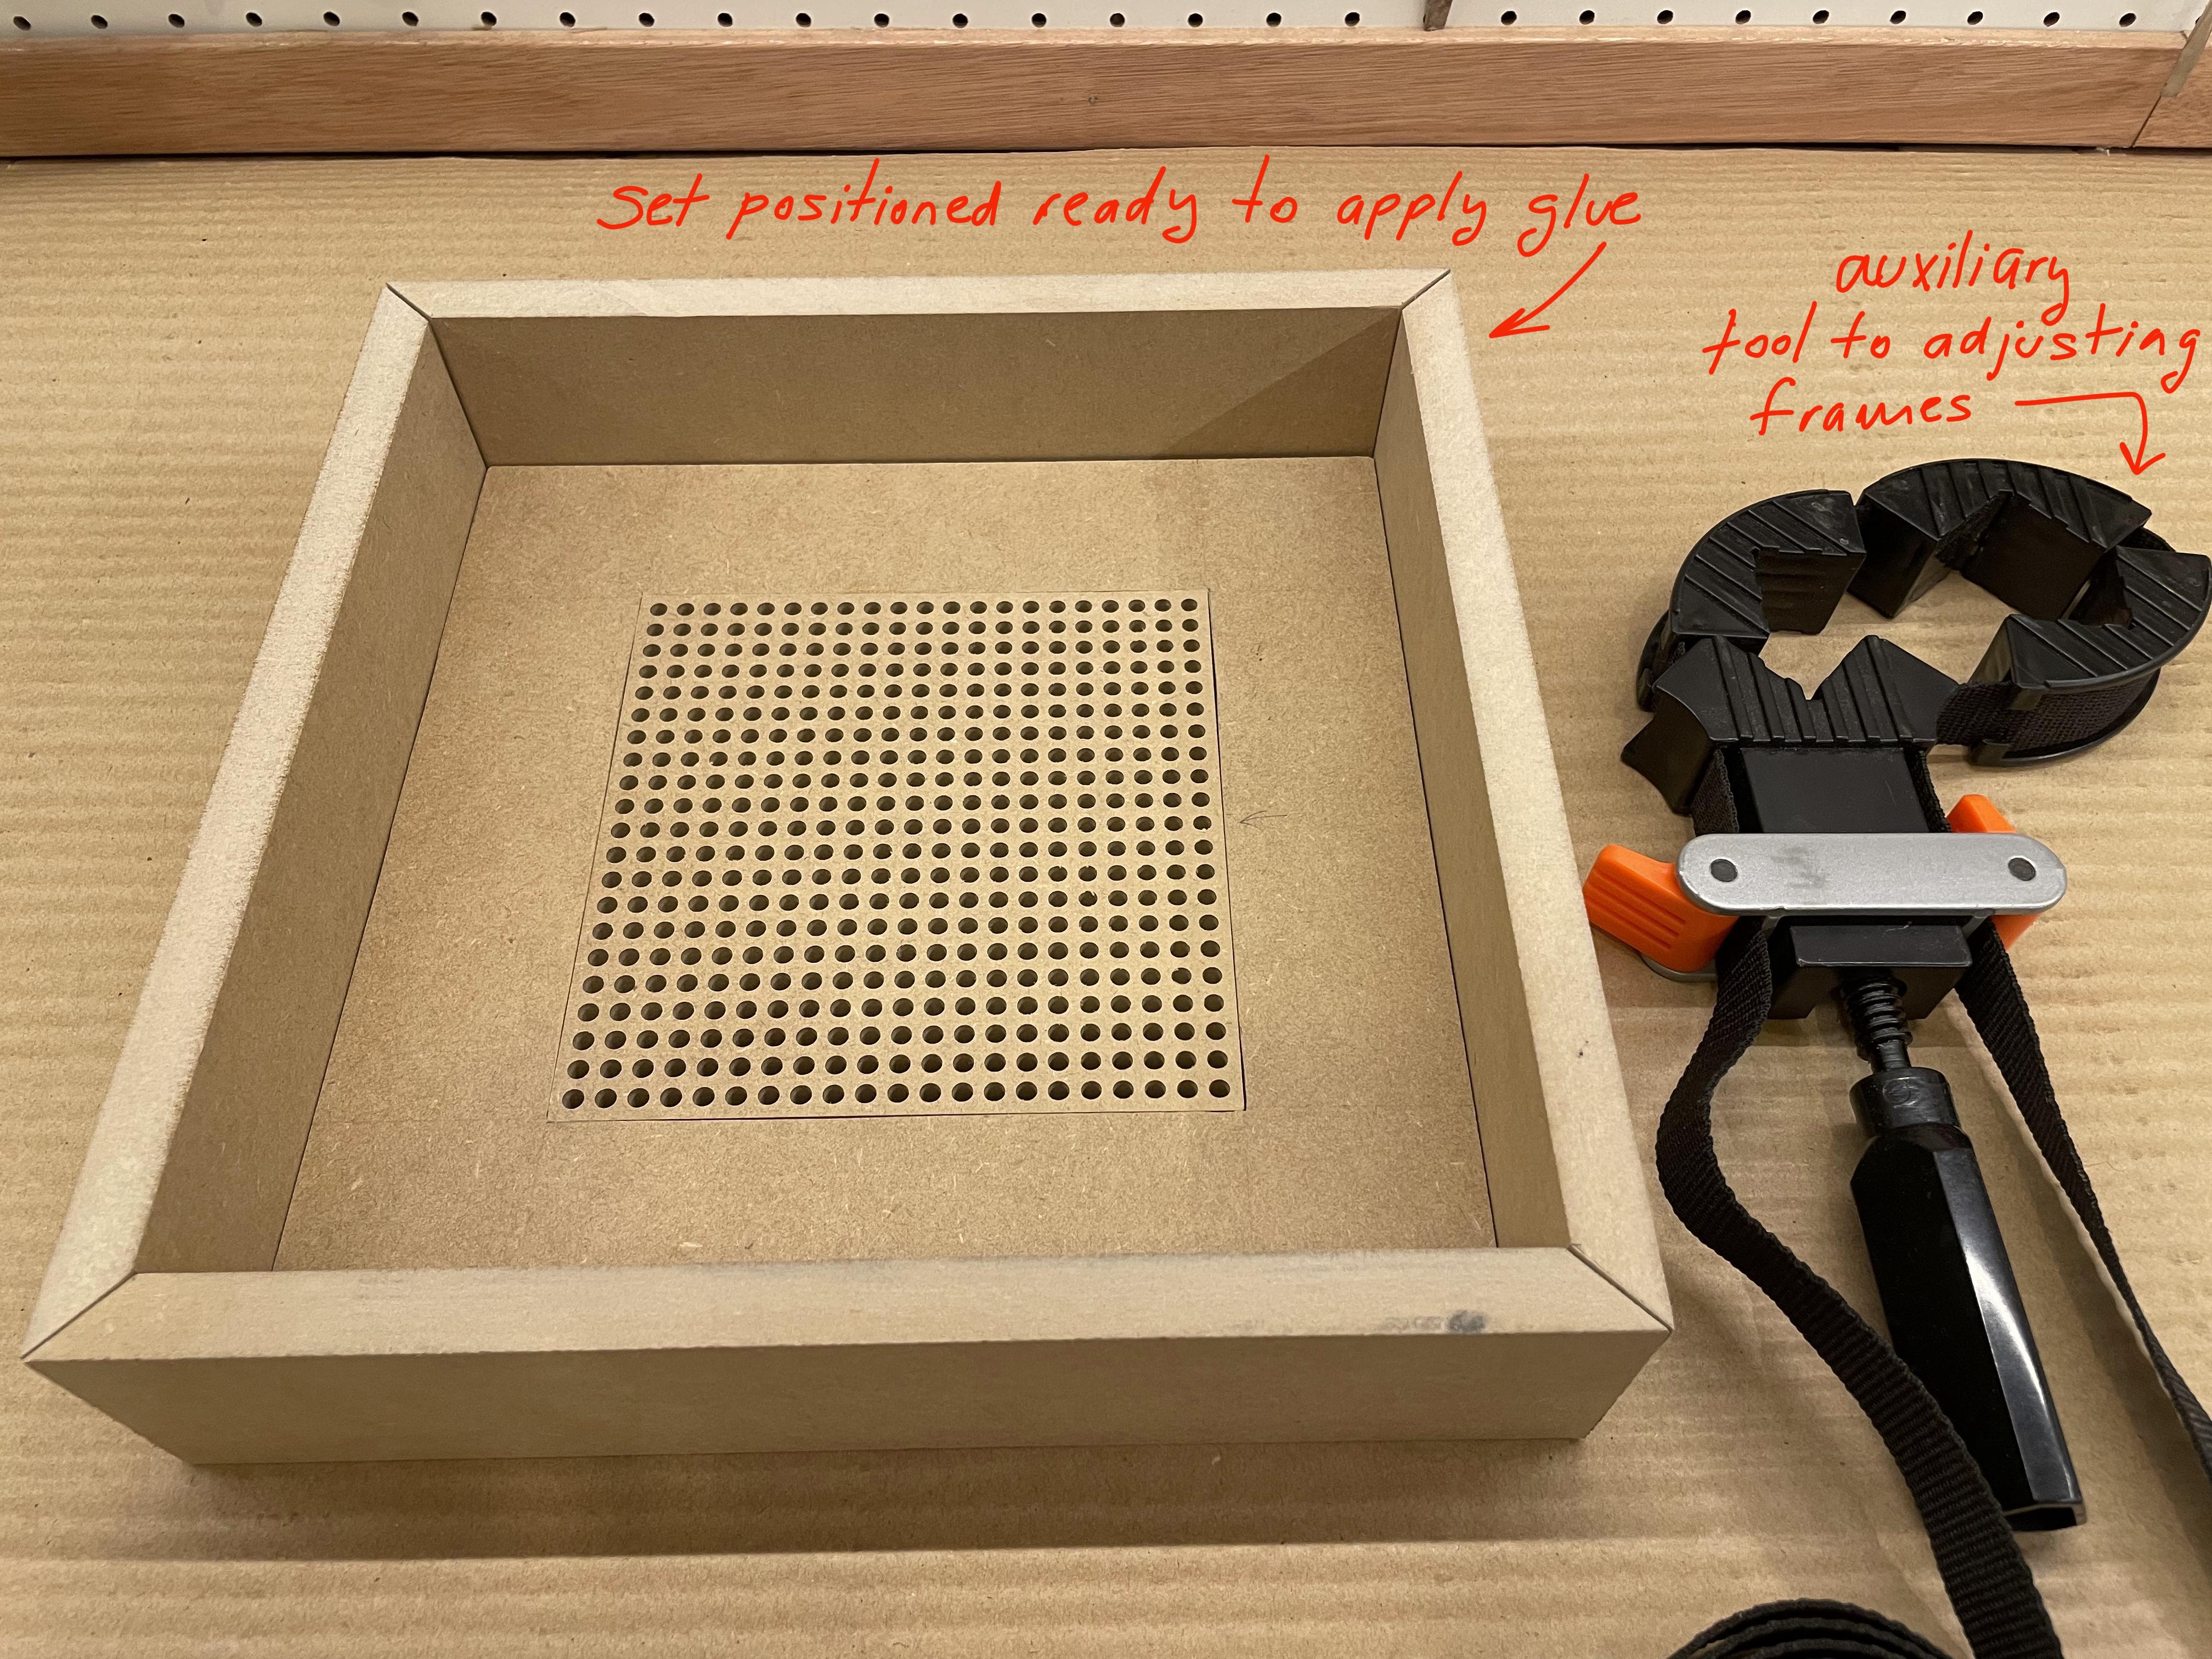
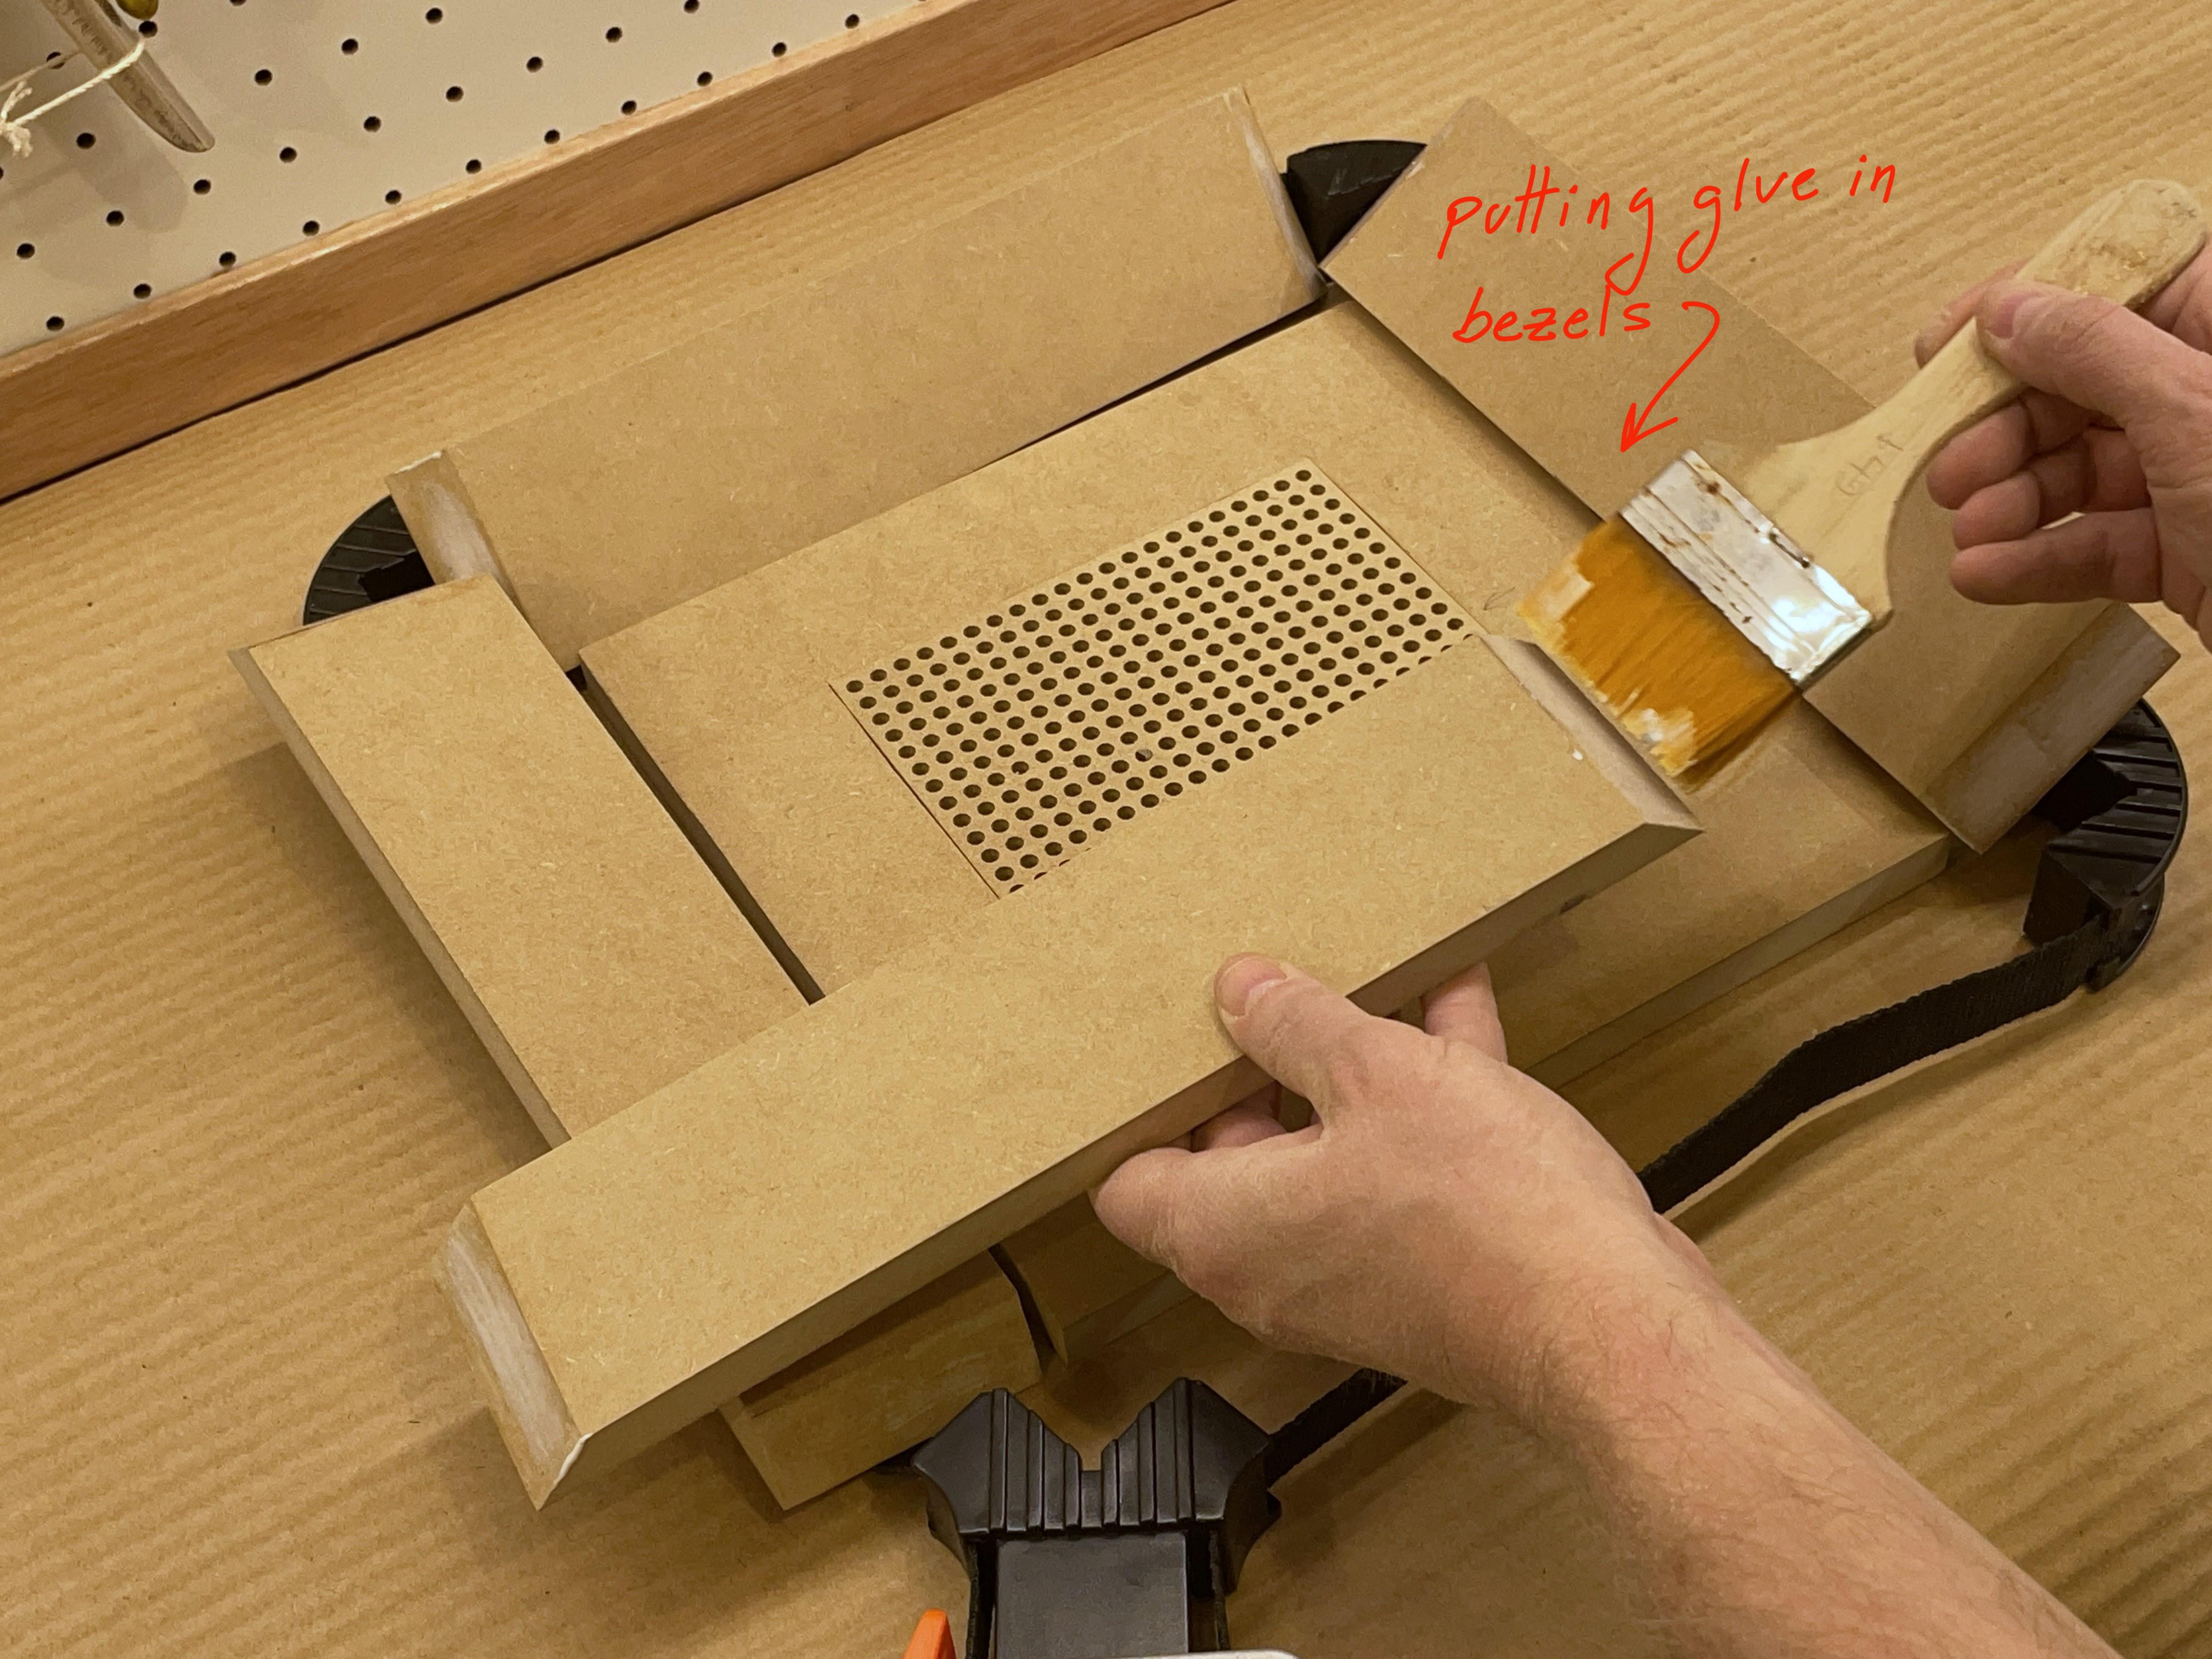
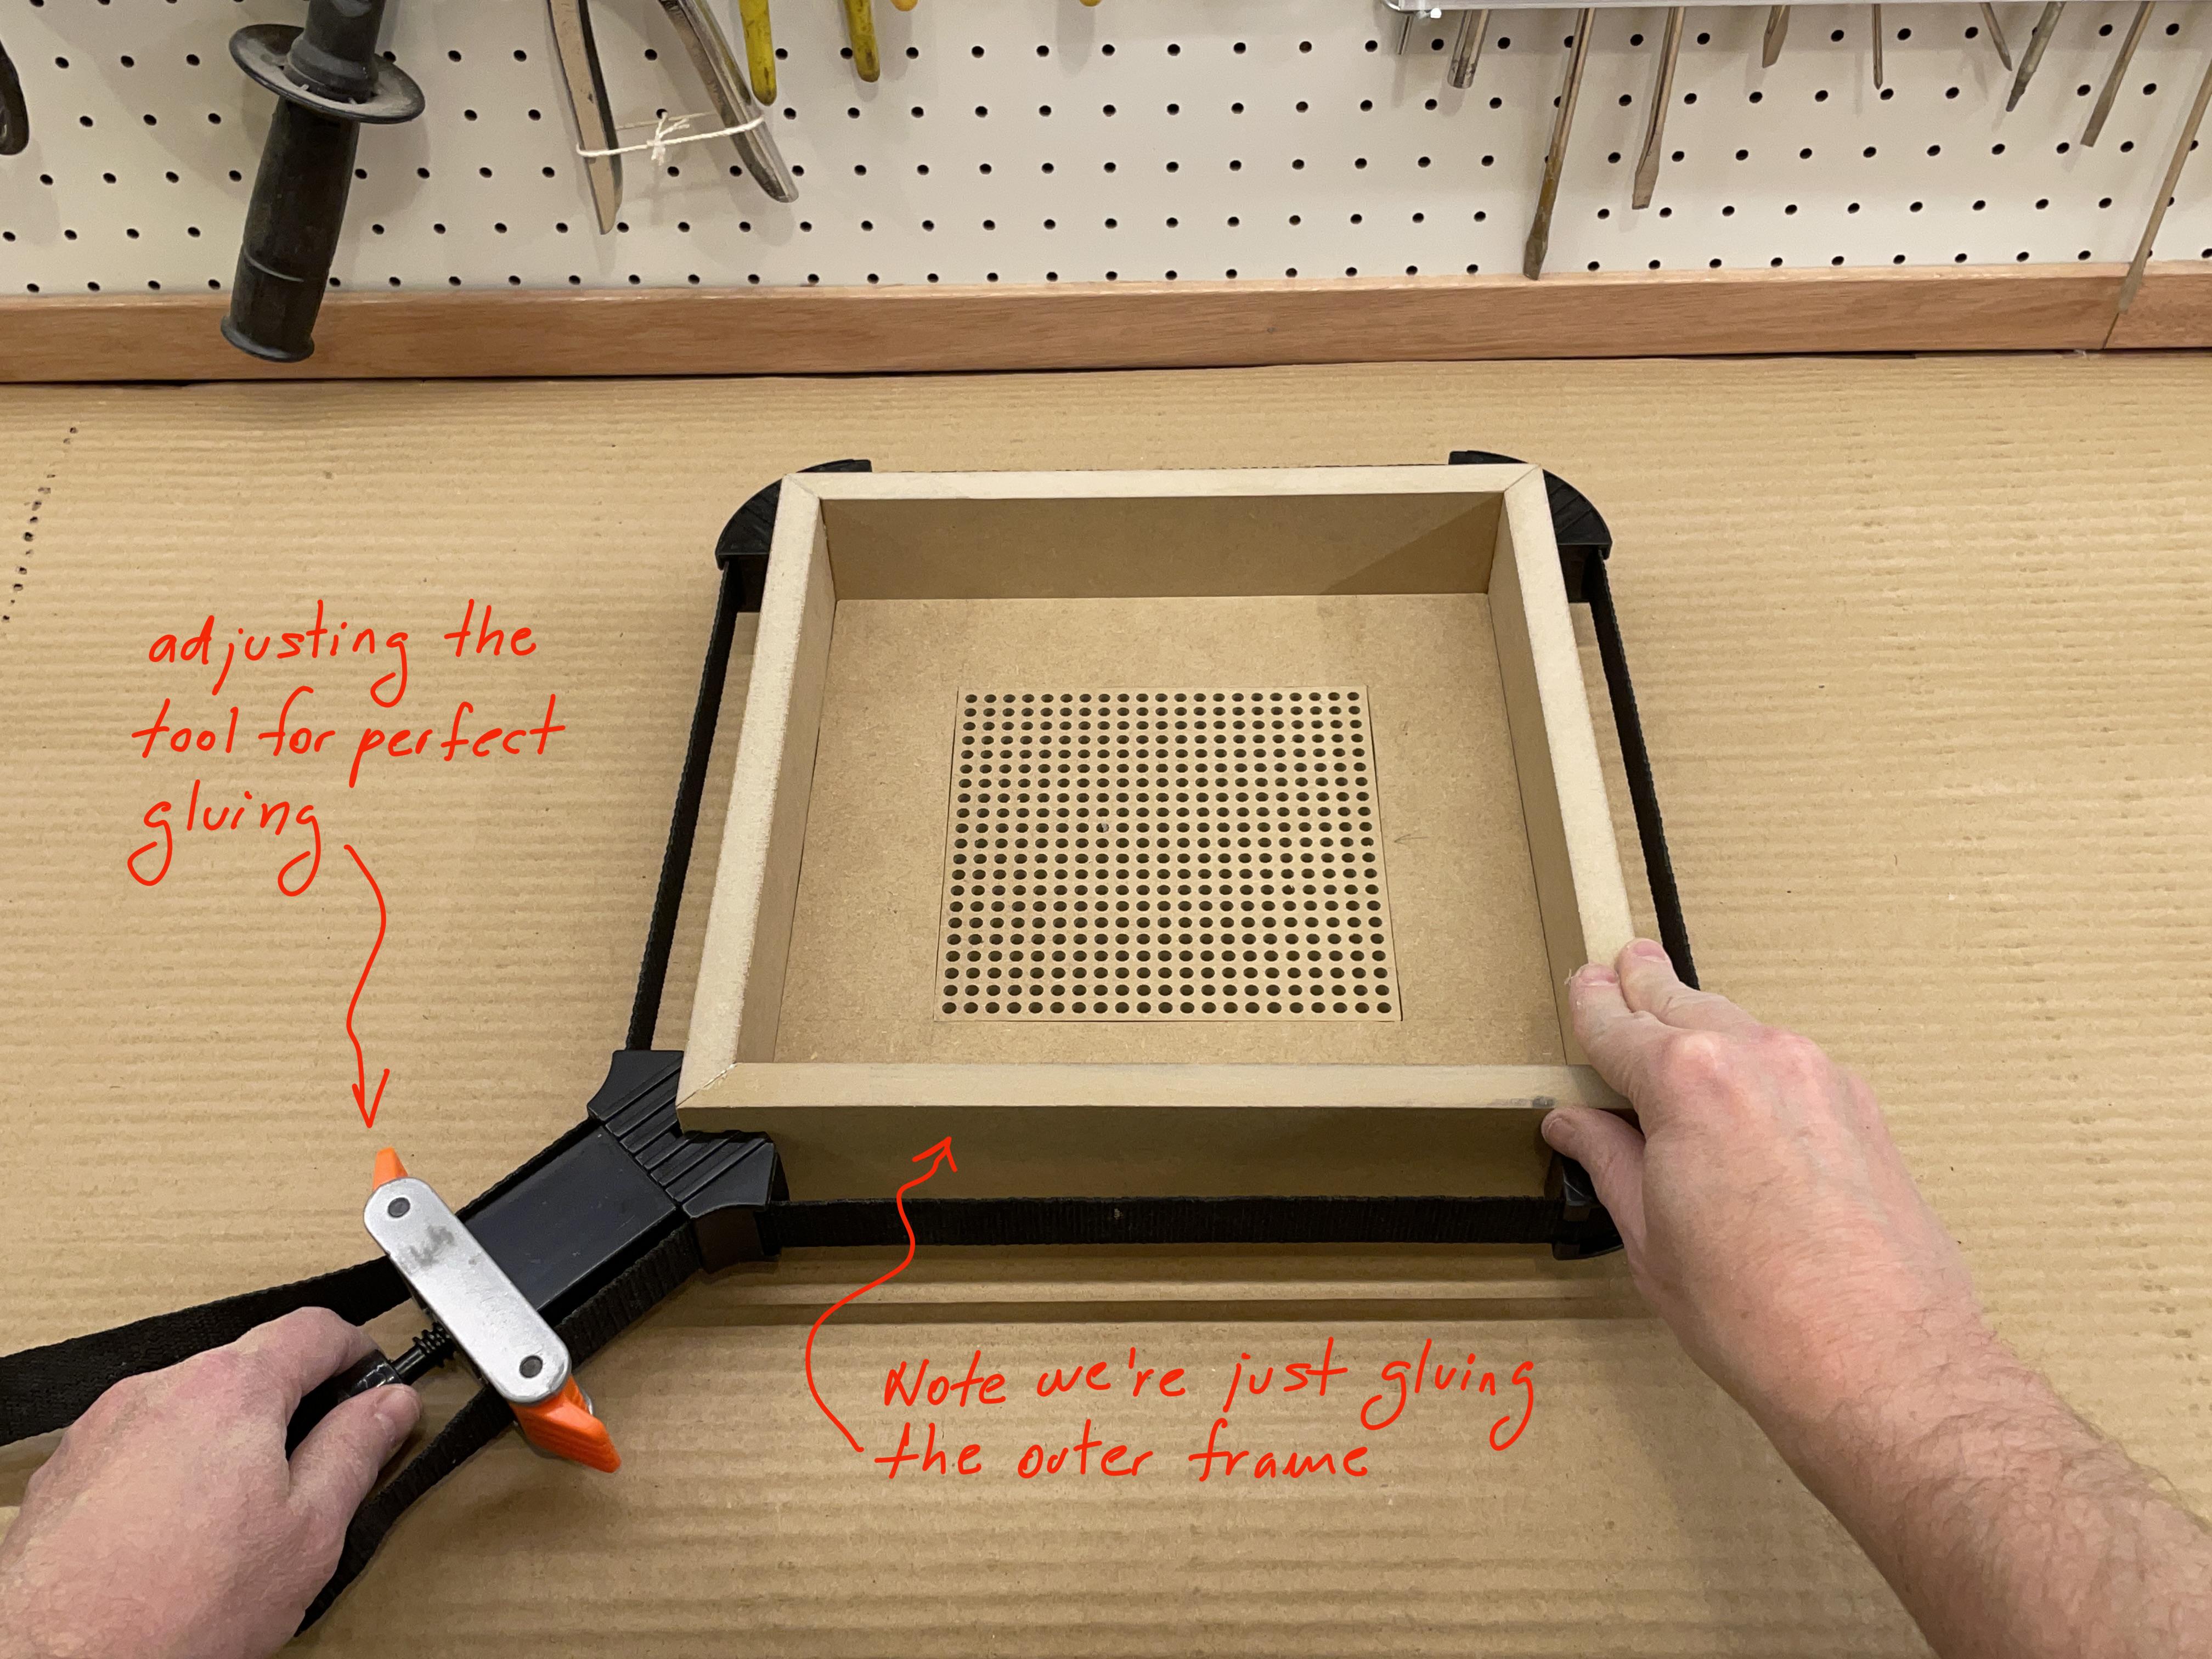
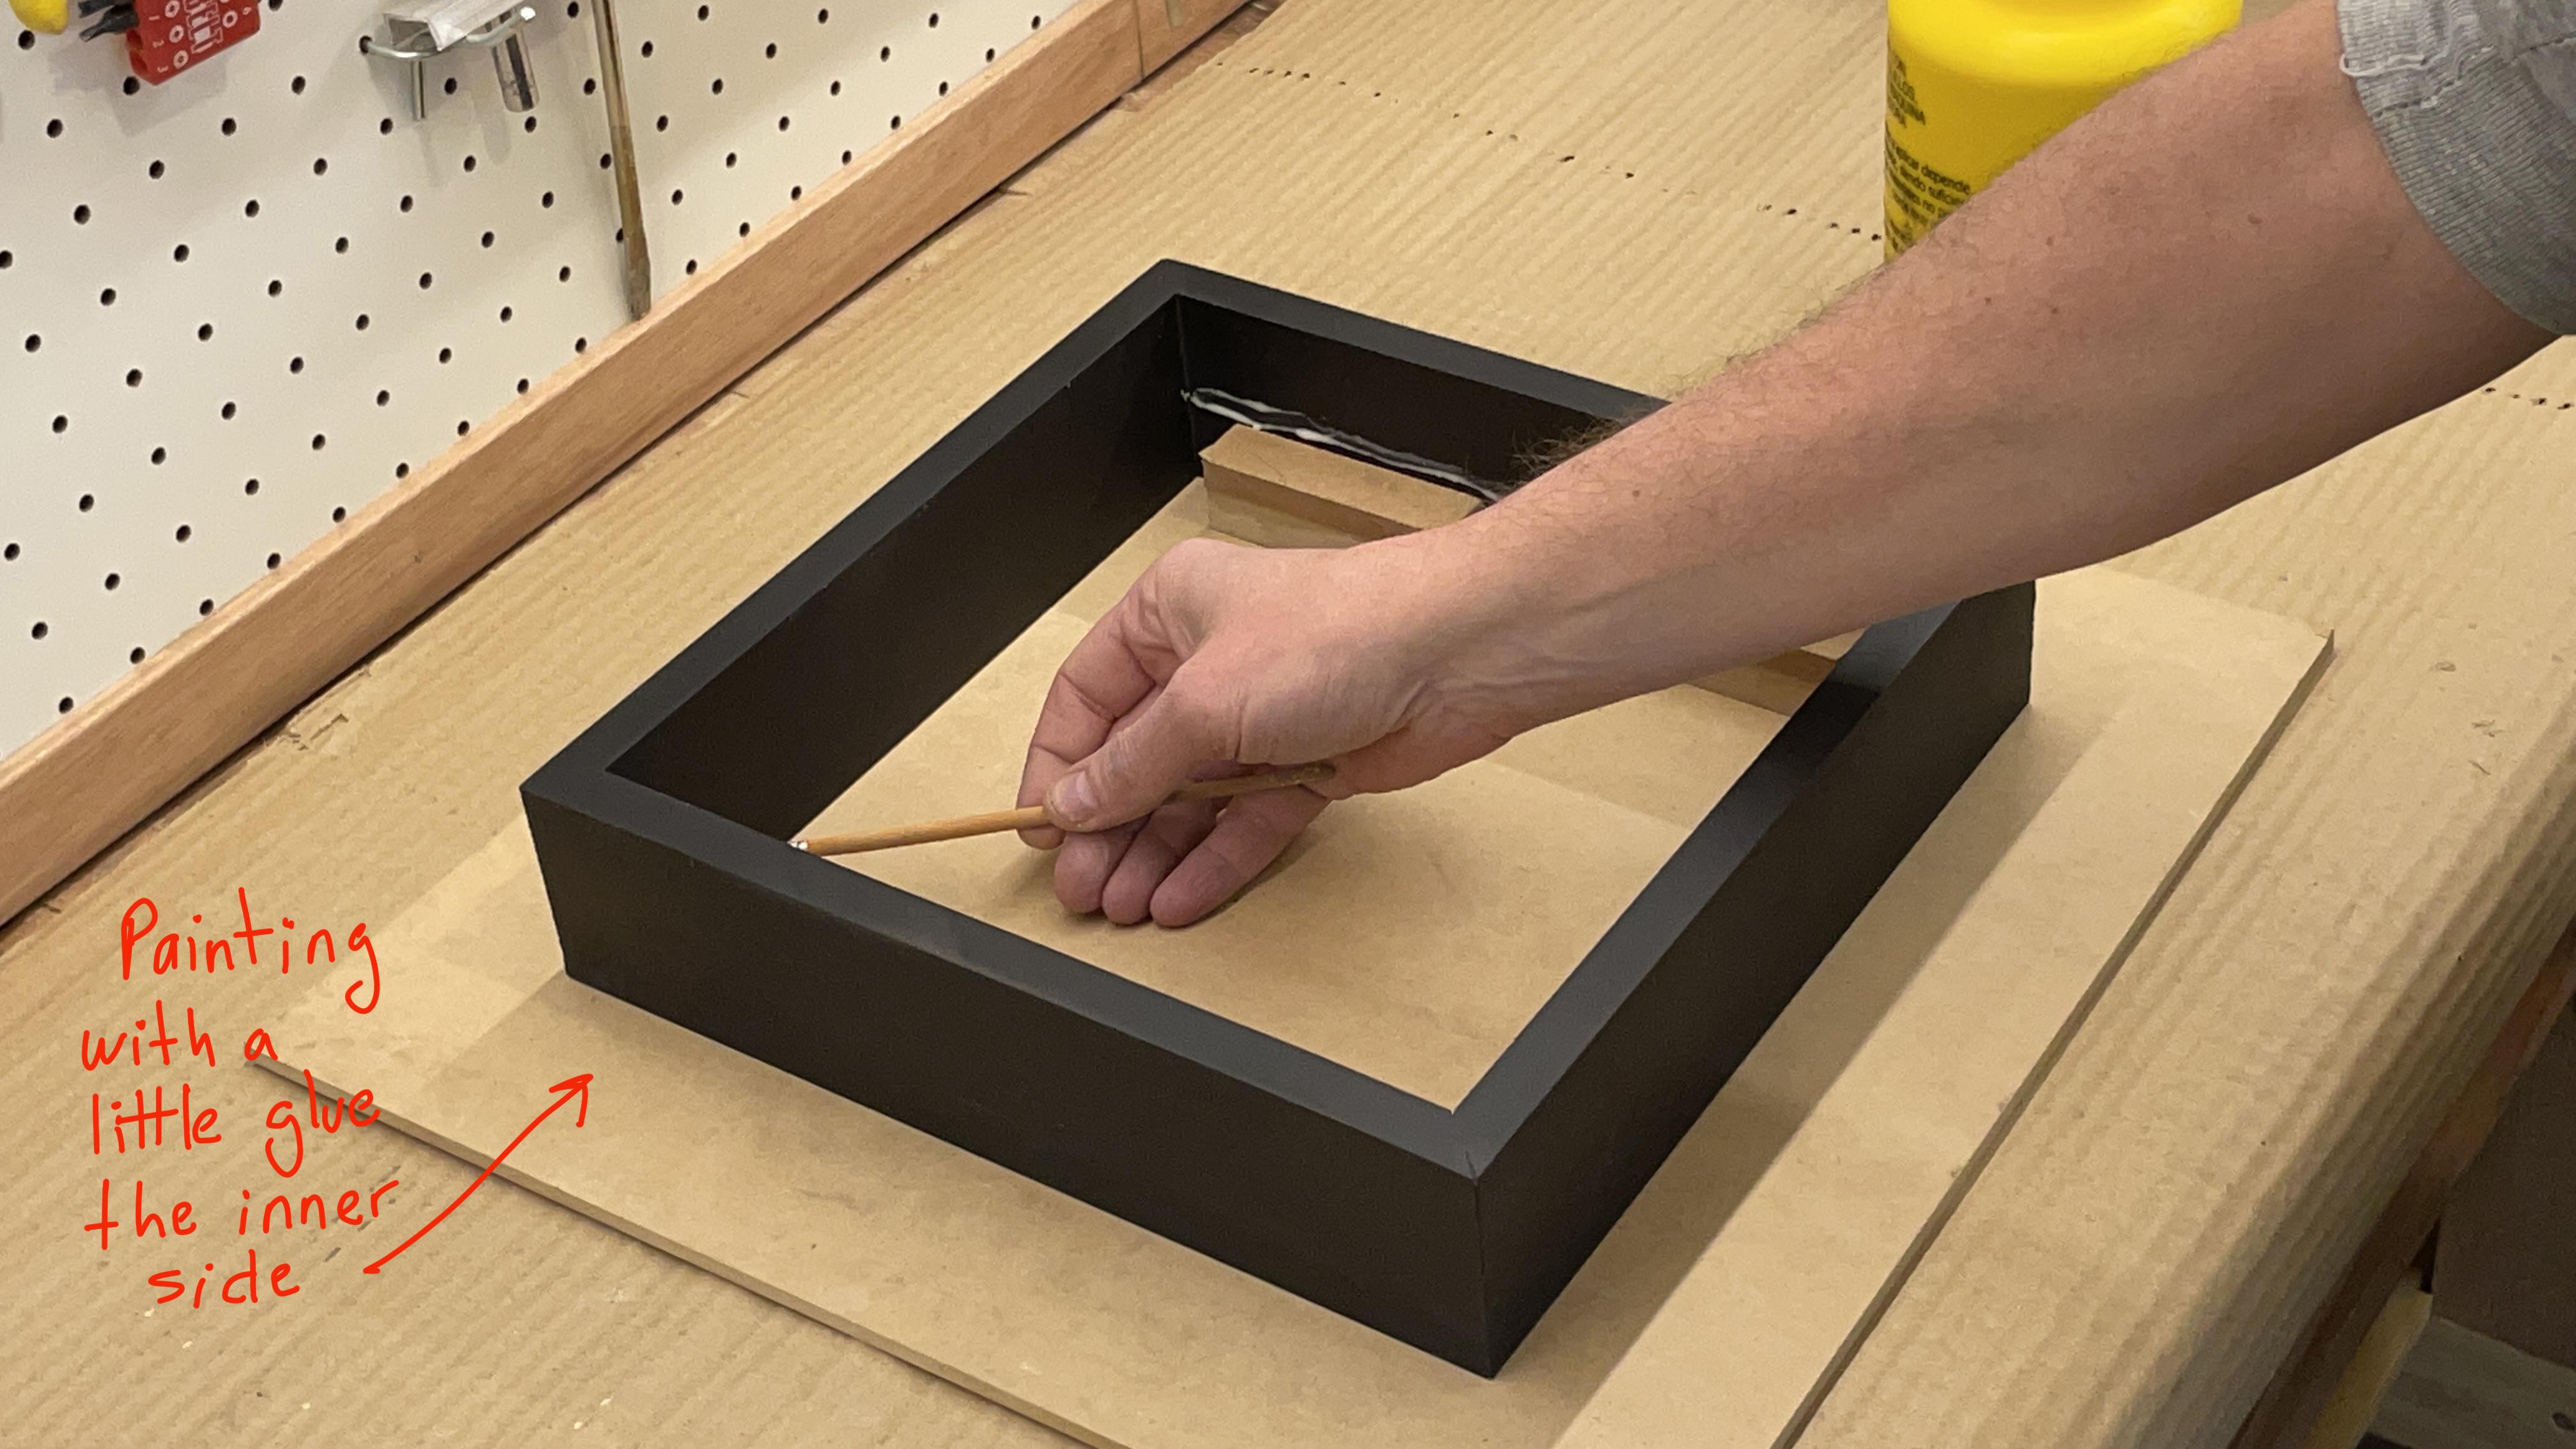
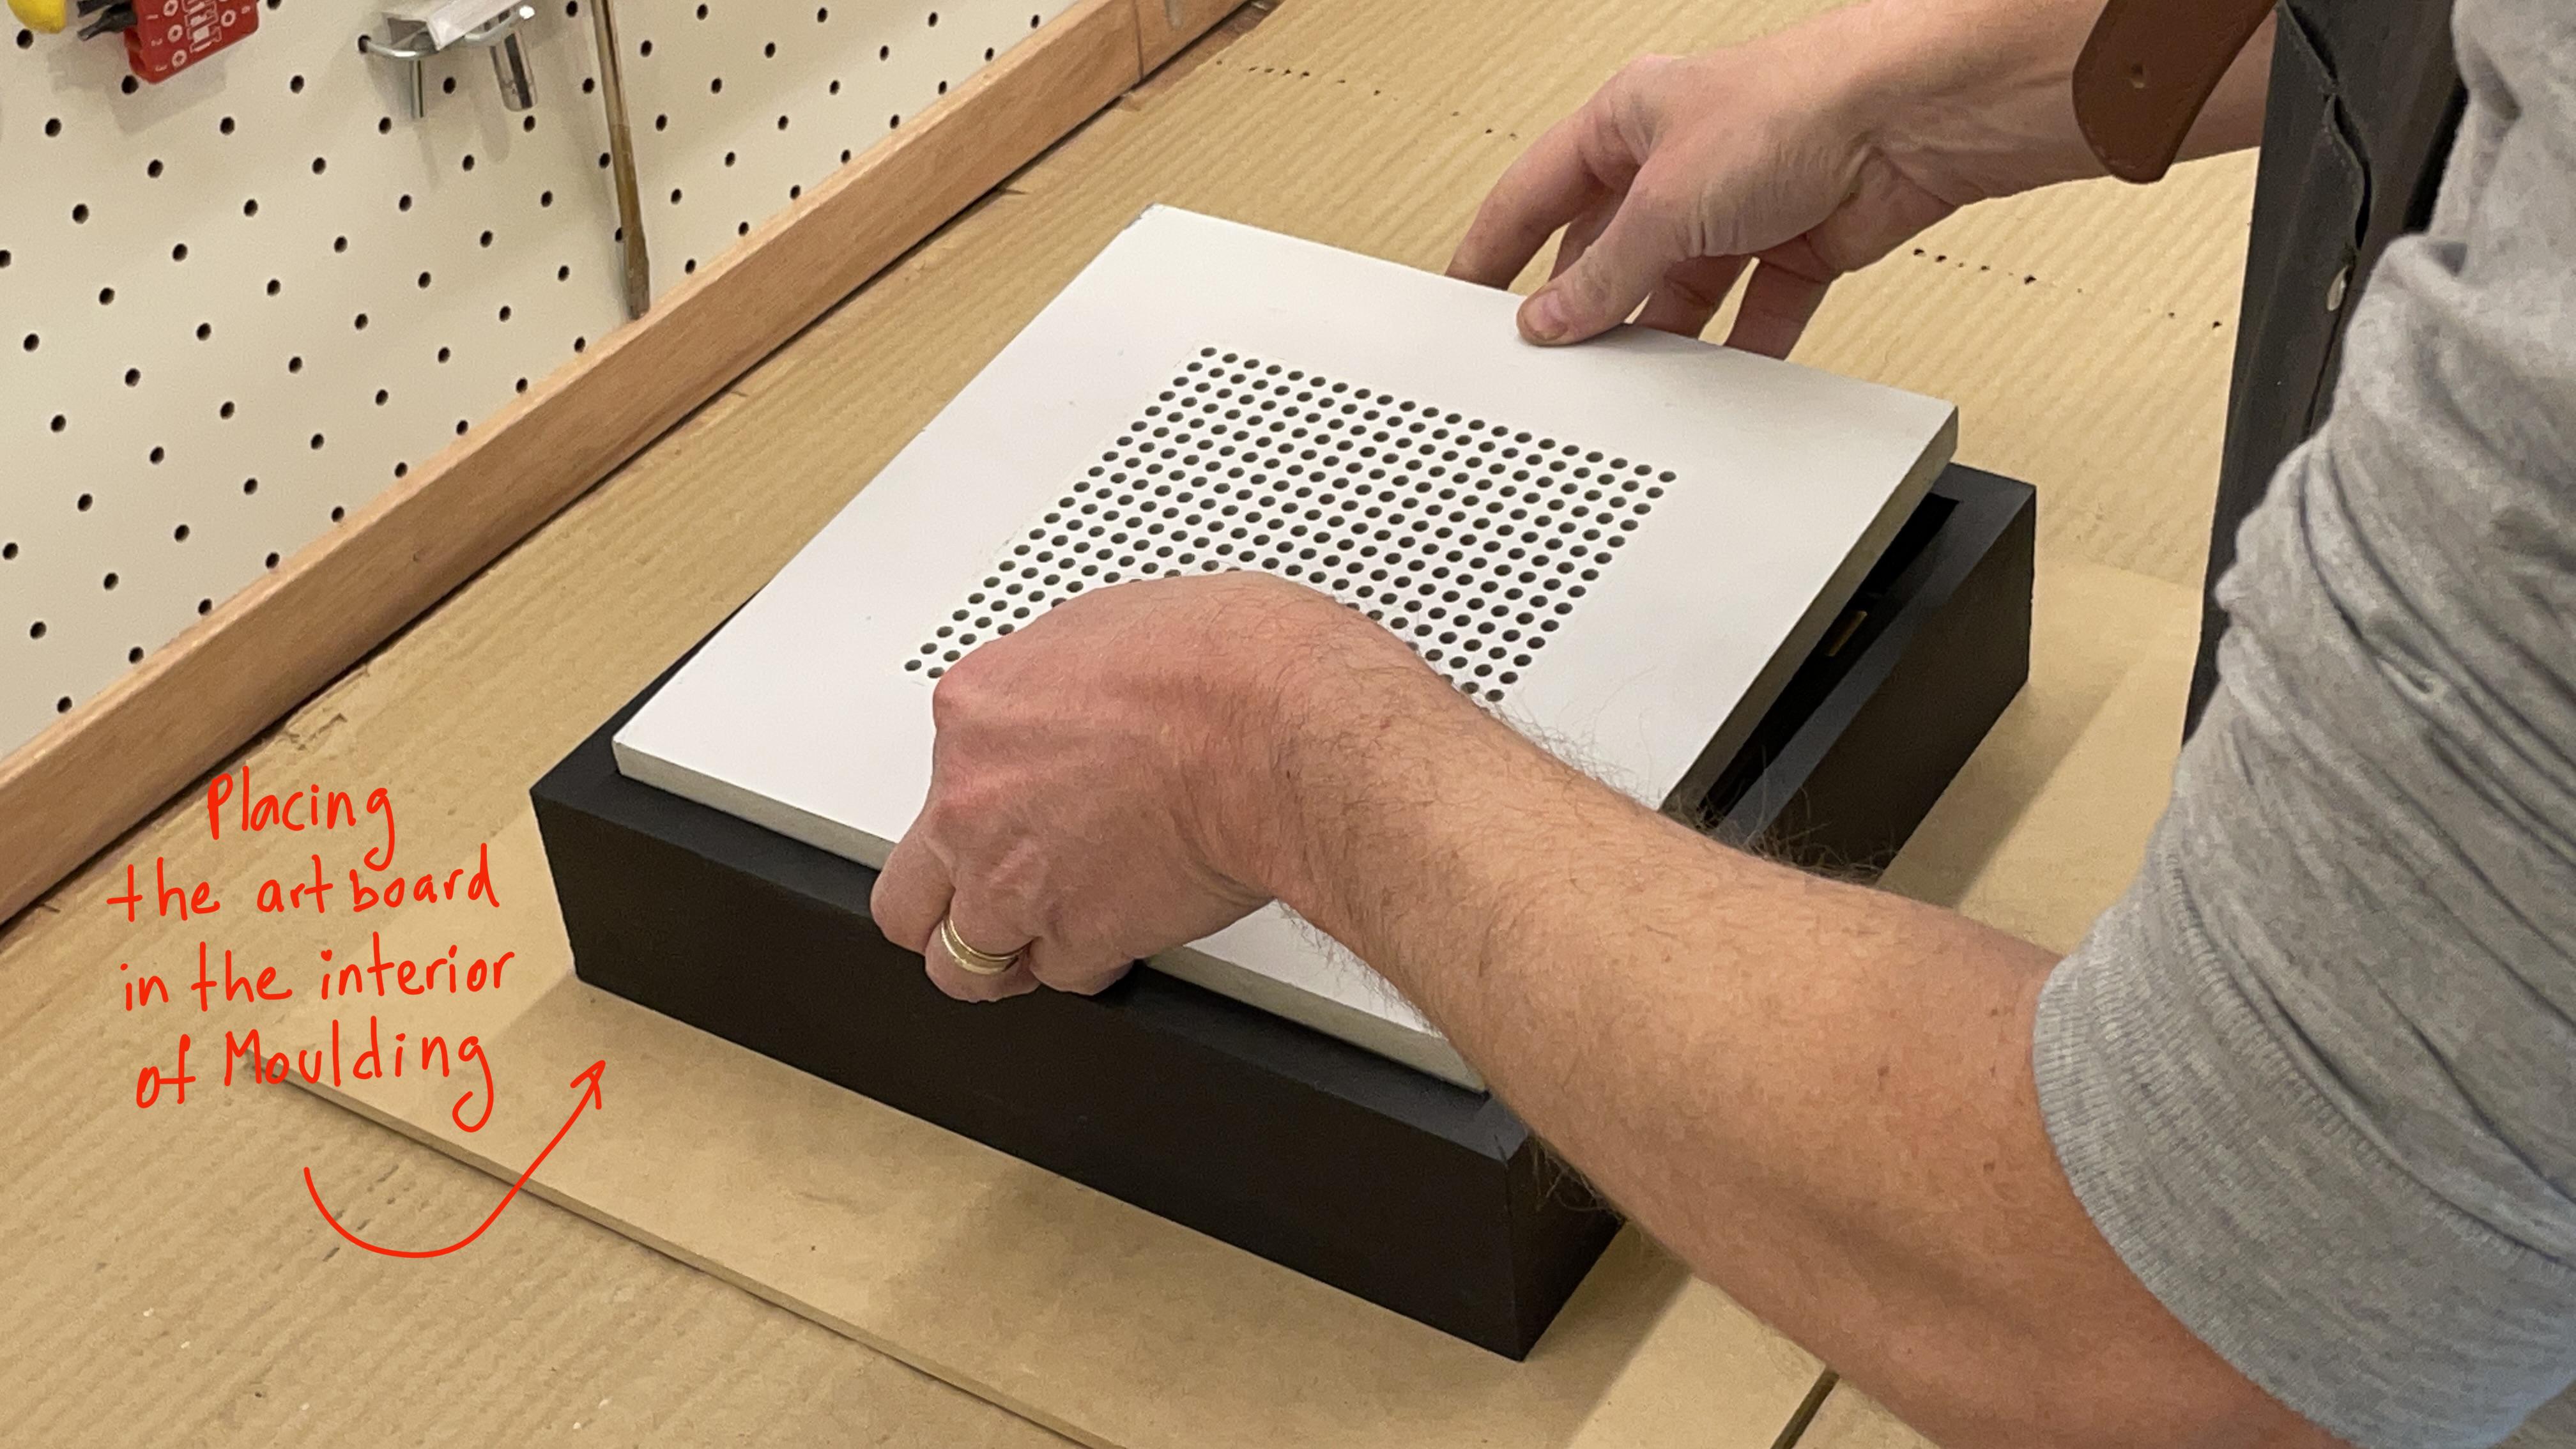
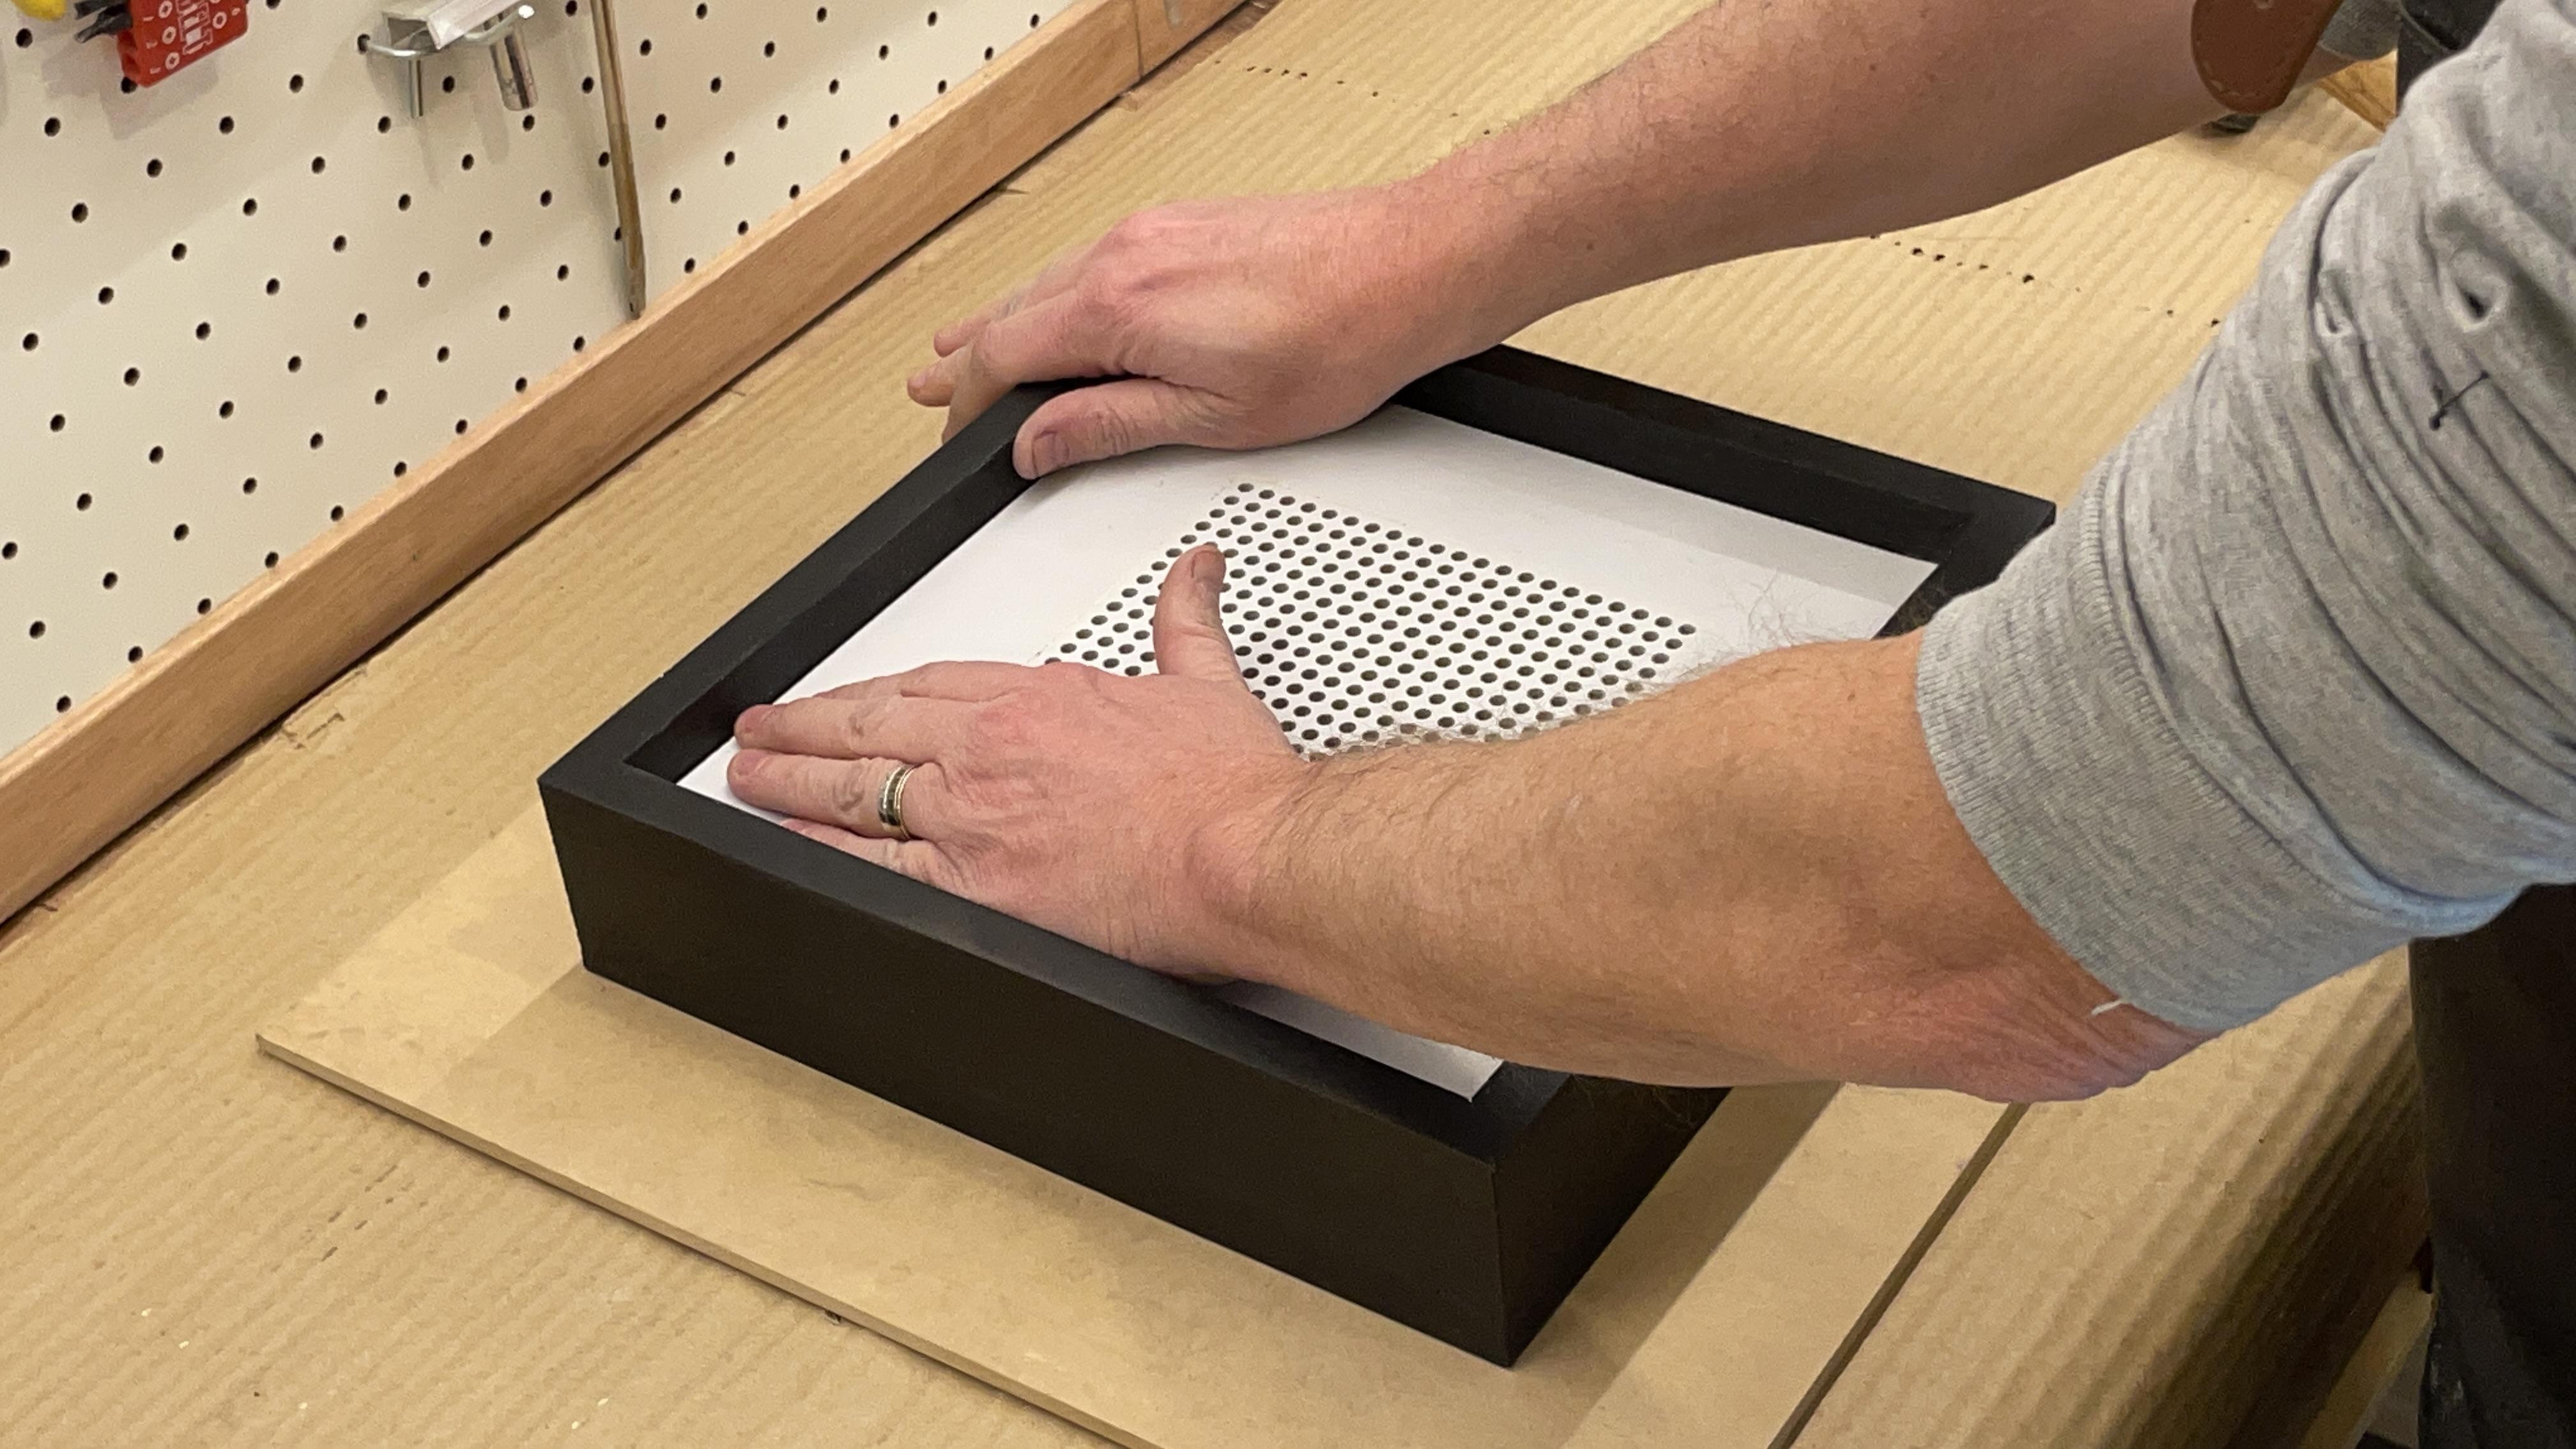
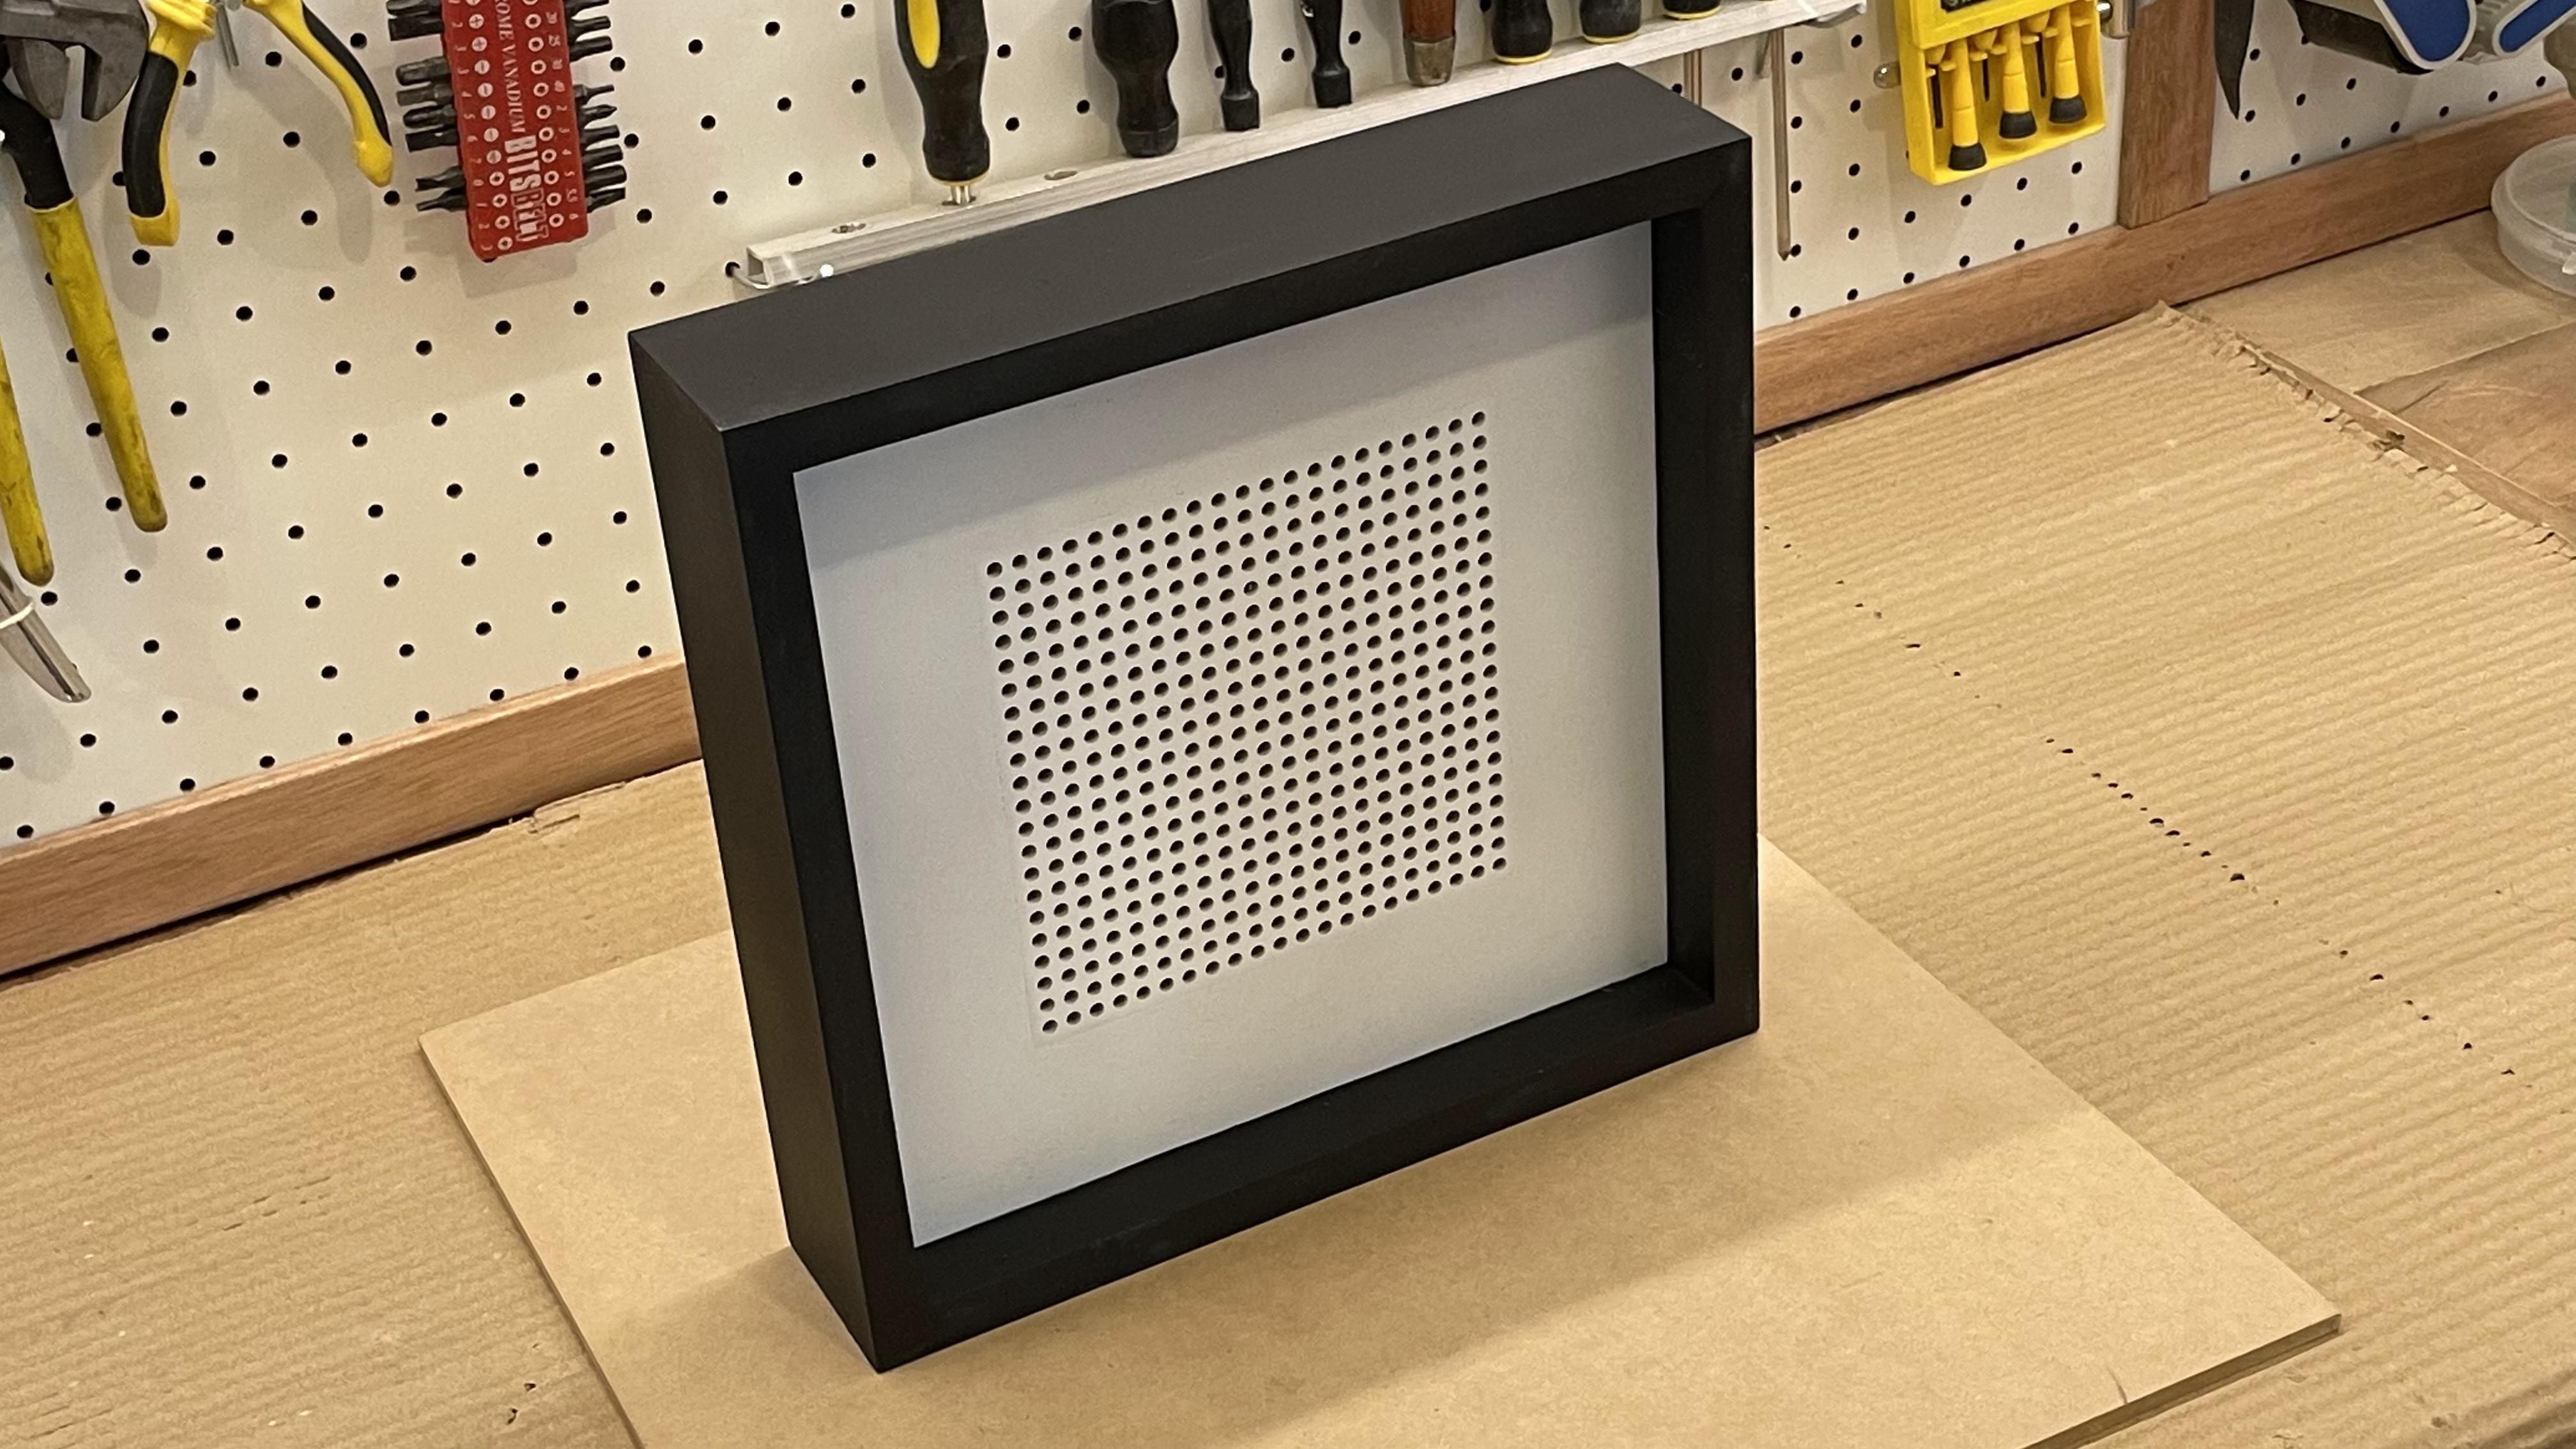
a) Pre assembled set:
- Put glue on the bezels moldings with a brush.
- Put glue on the four sides of the 15 cm x 15 cm Art Matrix Holes.
- Insert with pressure the Art Matrix Holes into the Art board.
- Group the whole assembly to its final position and press firmly using tools such a rubber hammer or any method that ensures the perfect bonding of the assembly.
- Let dry.
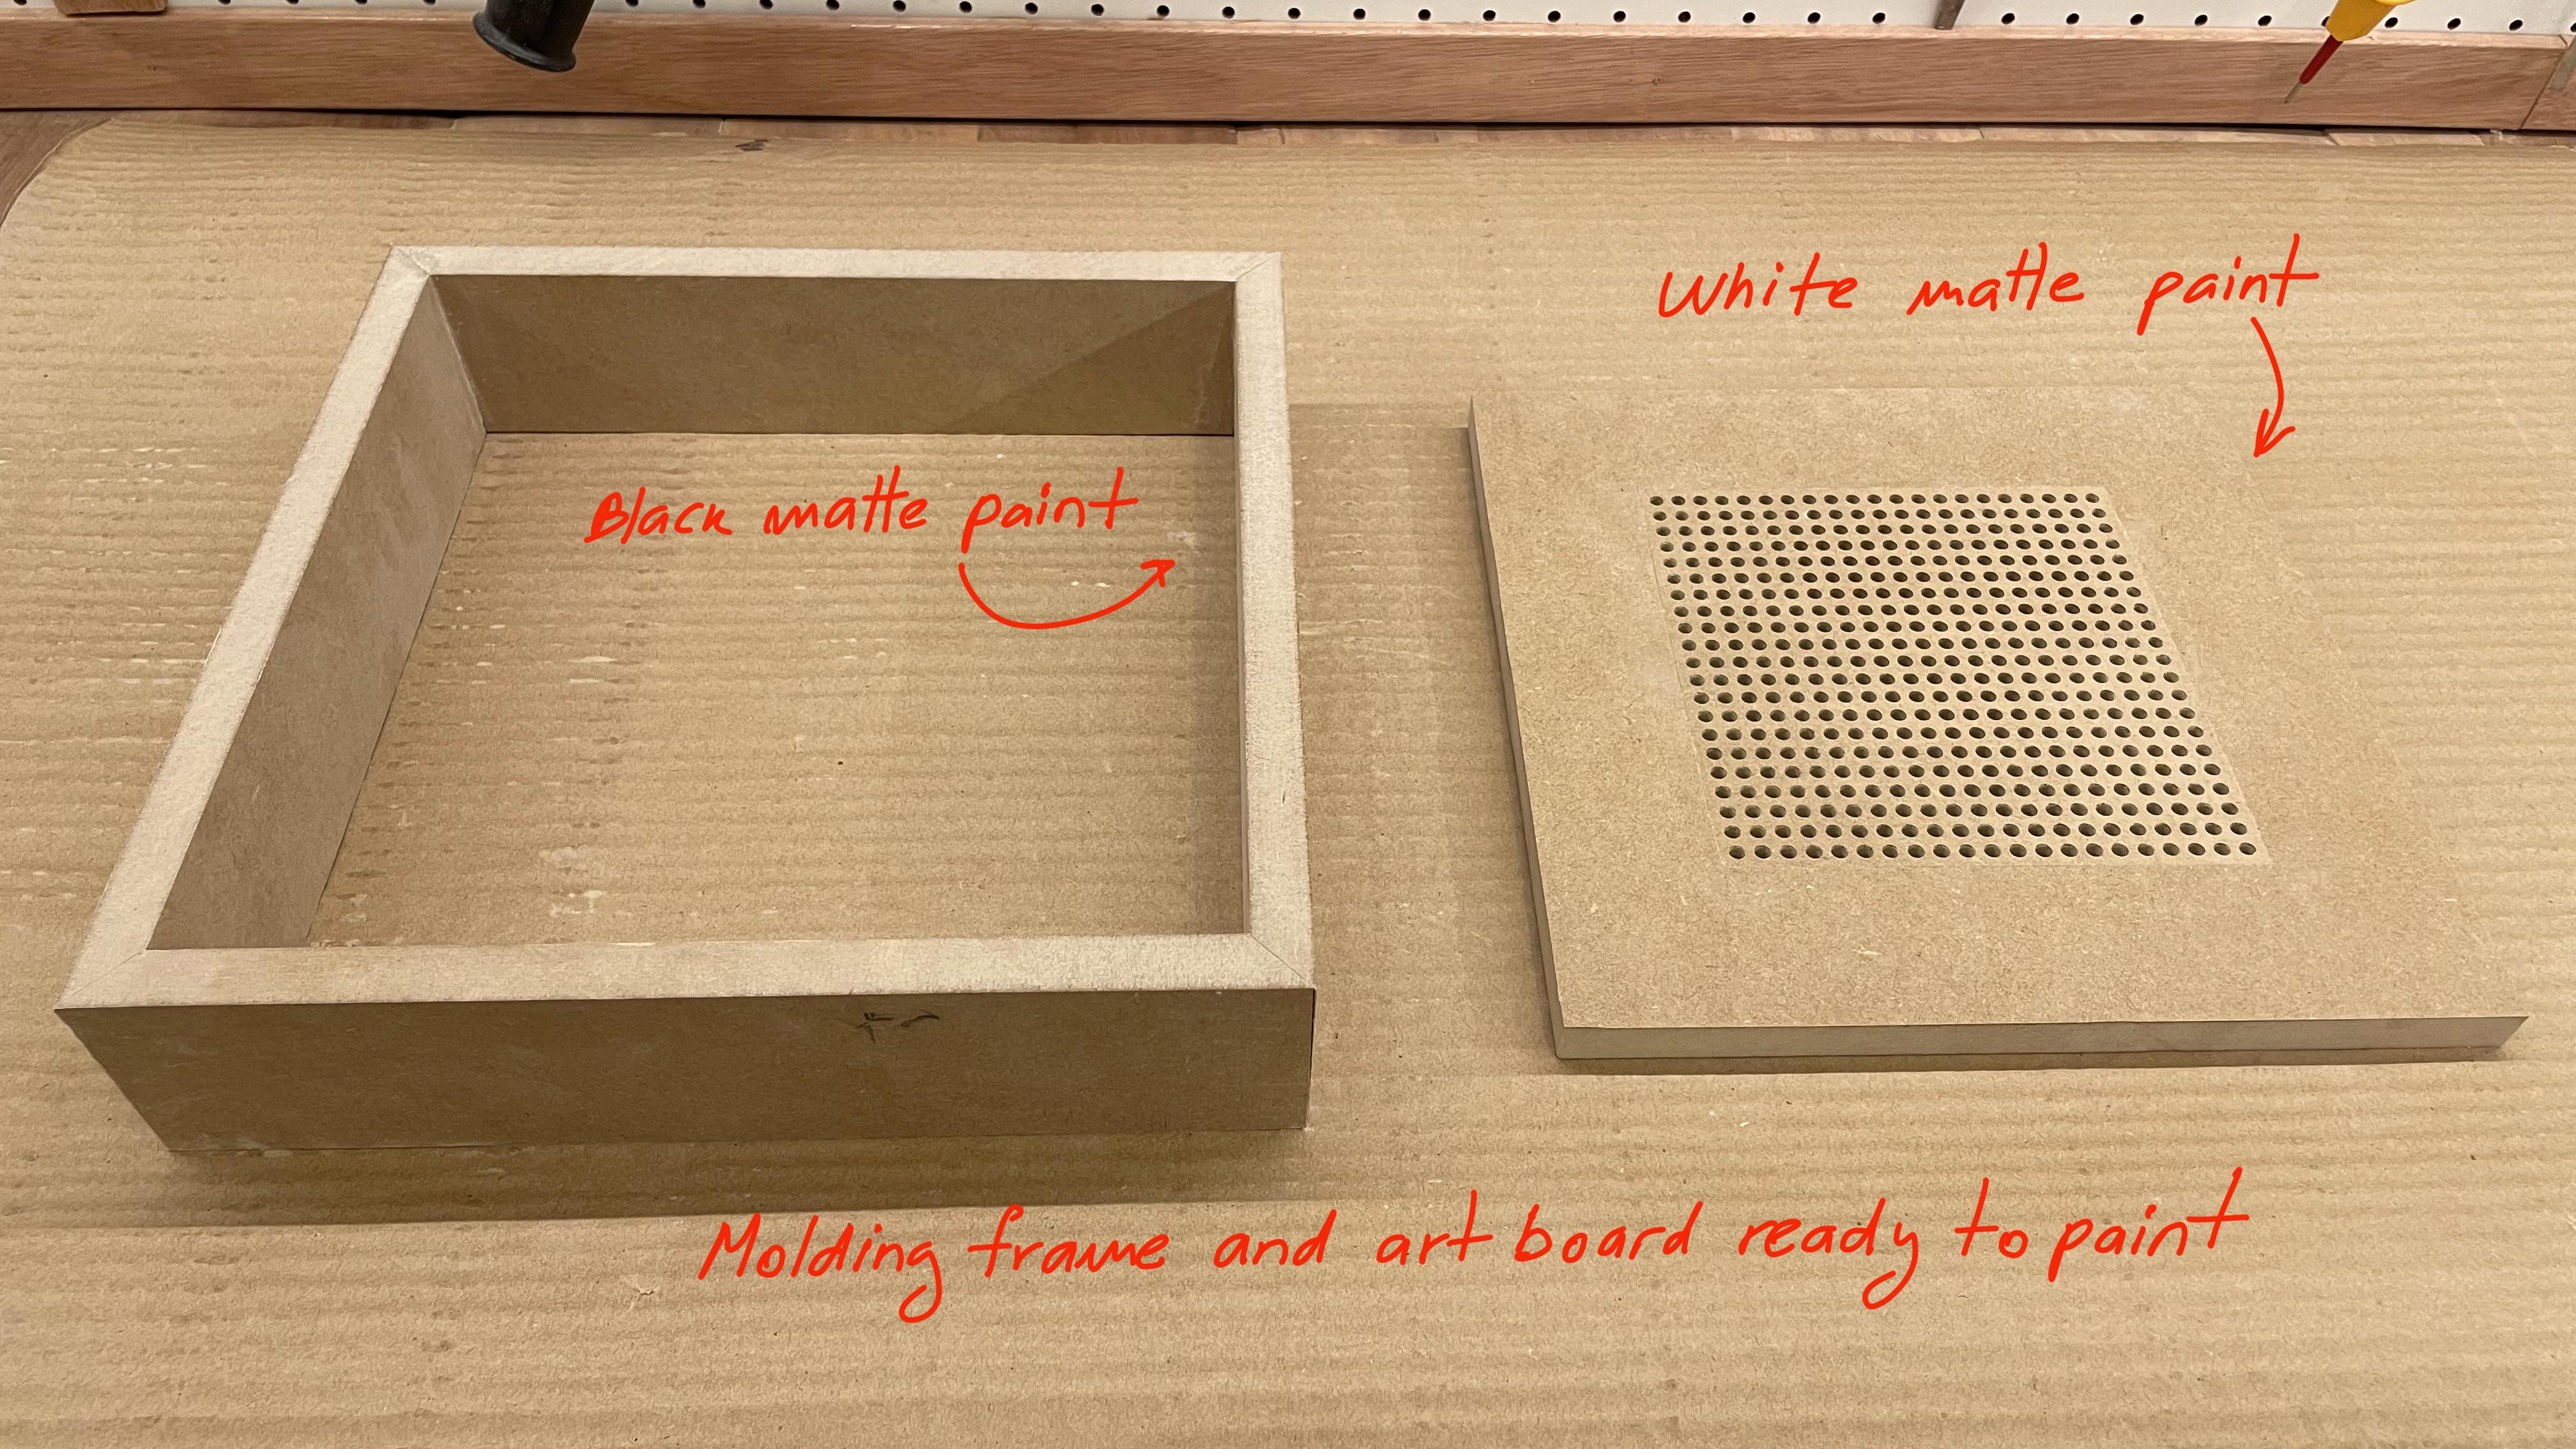
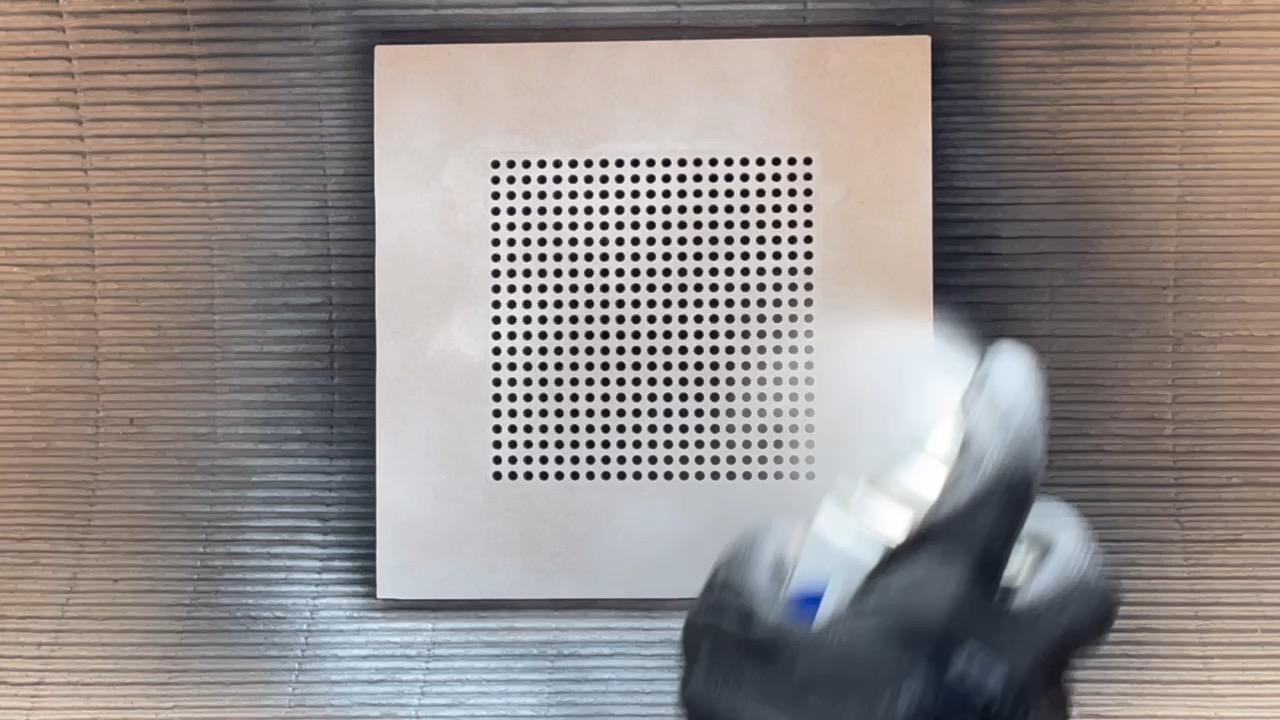
b) Painting:
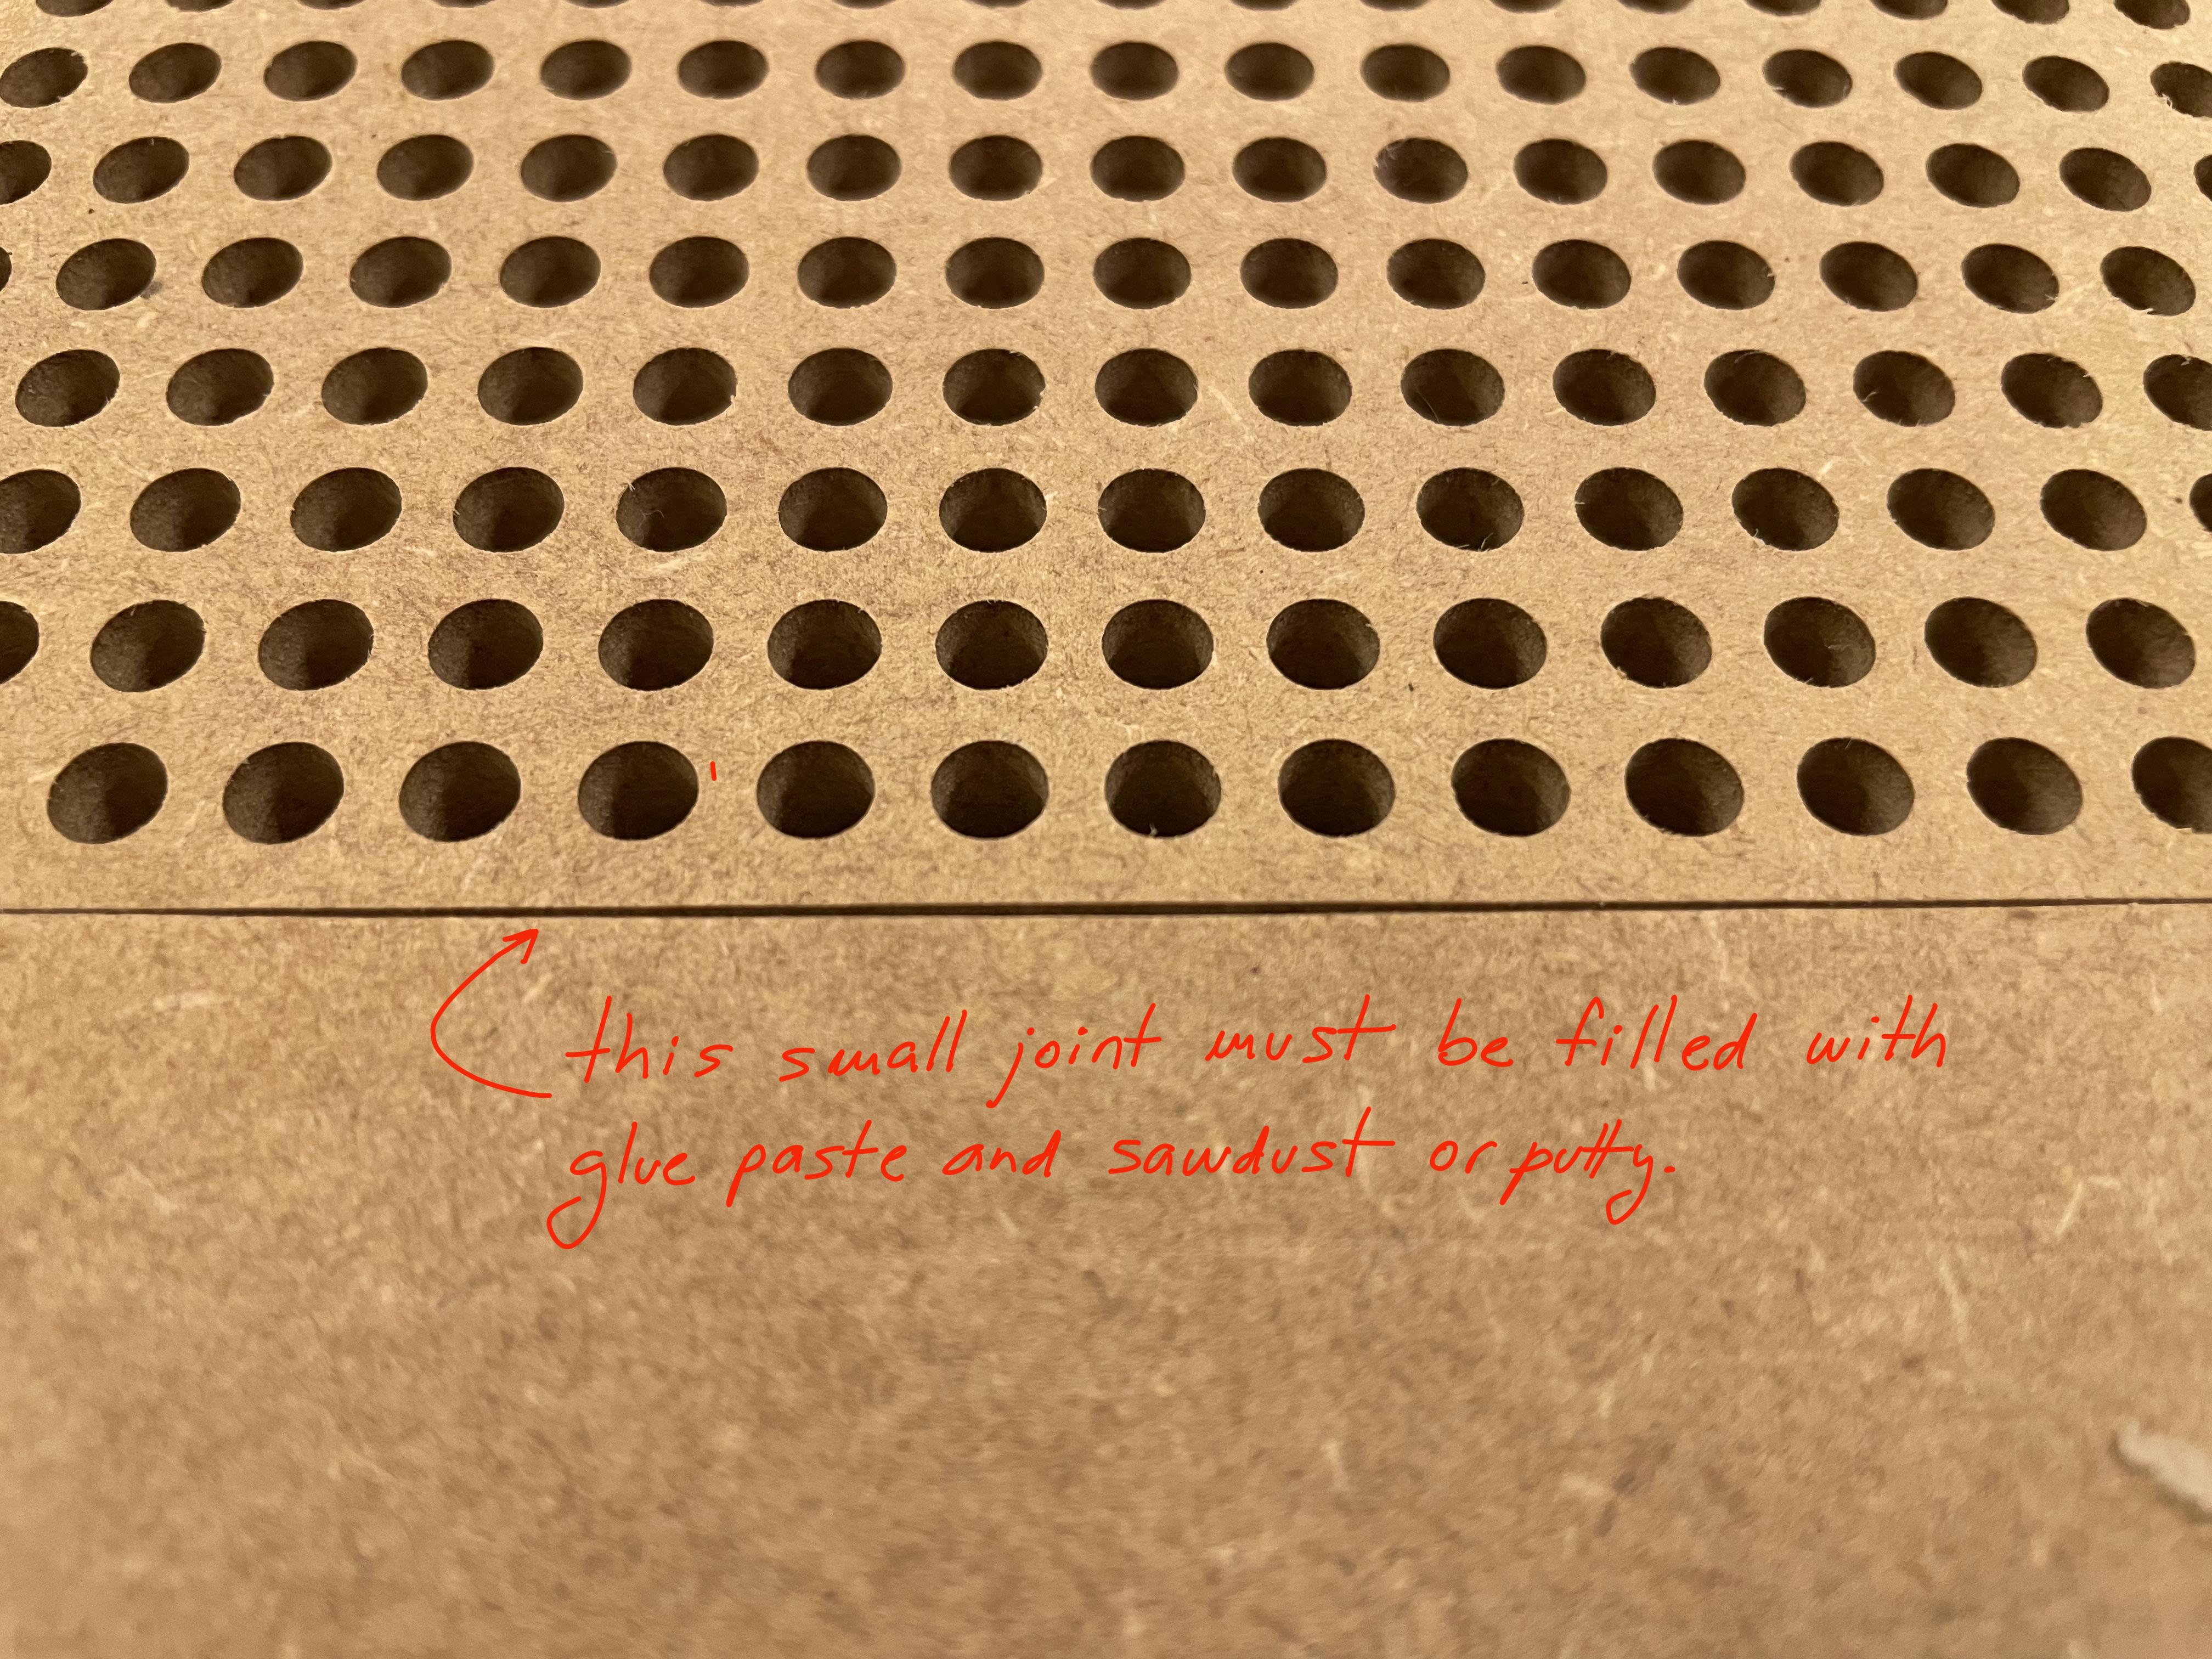
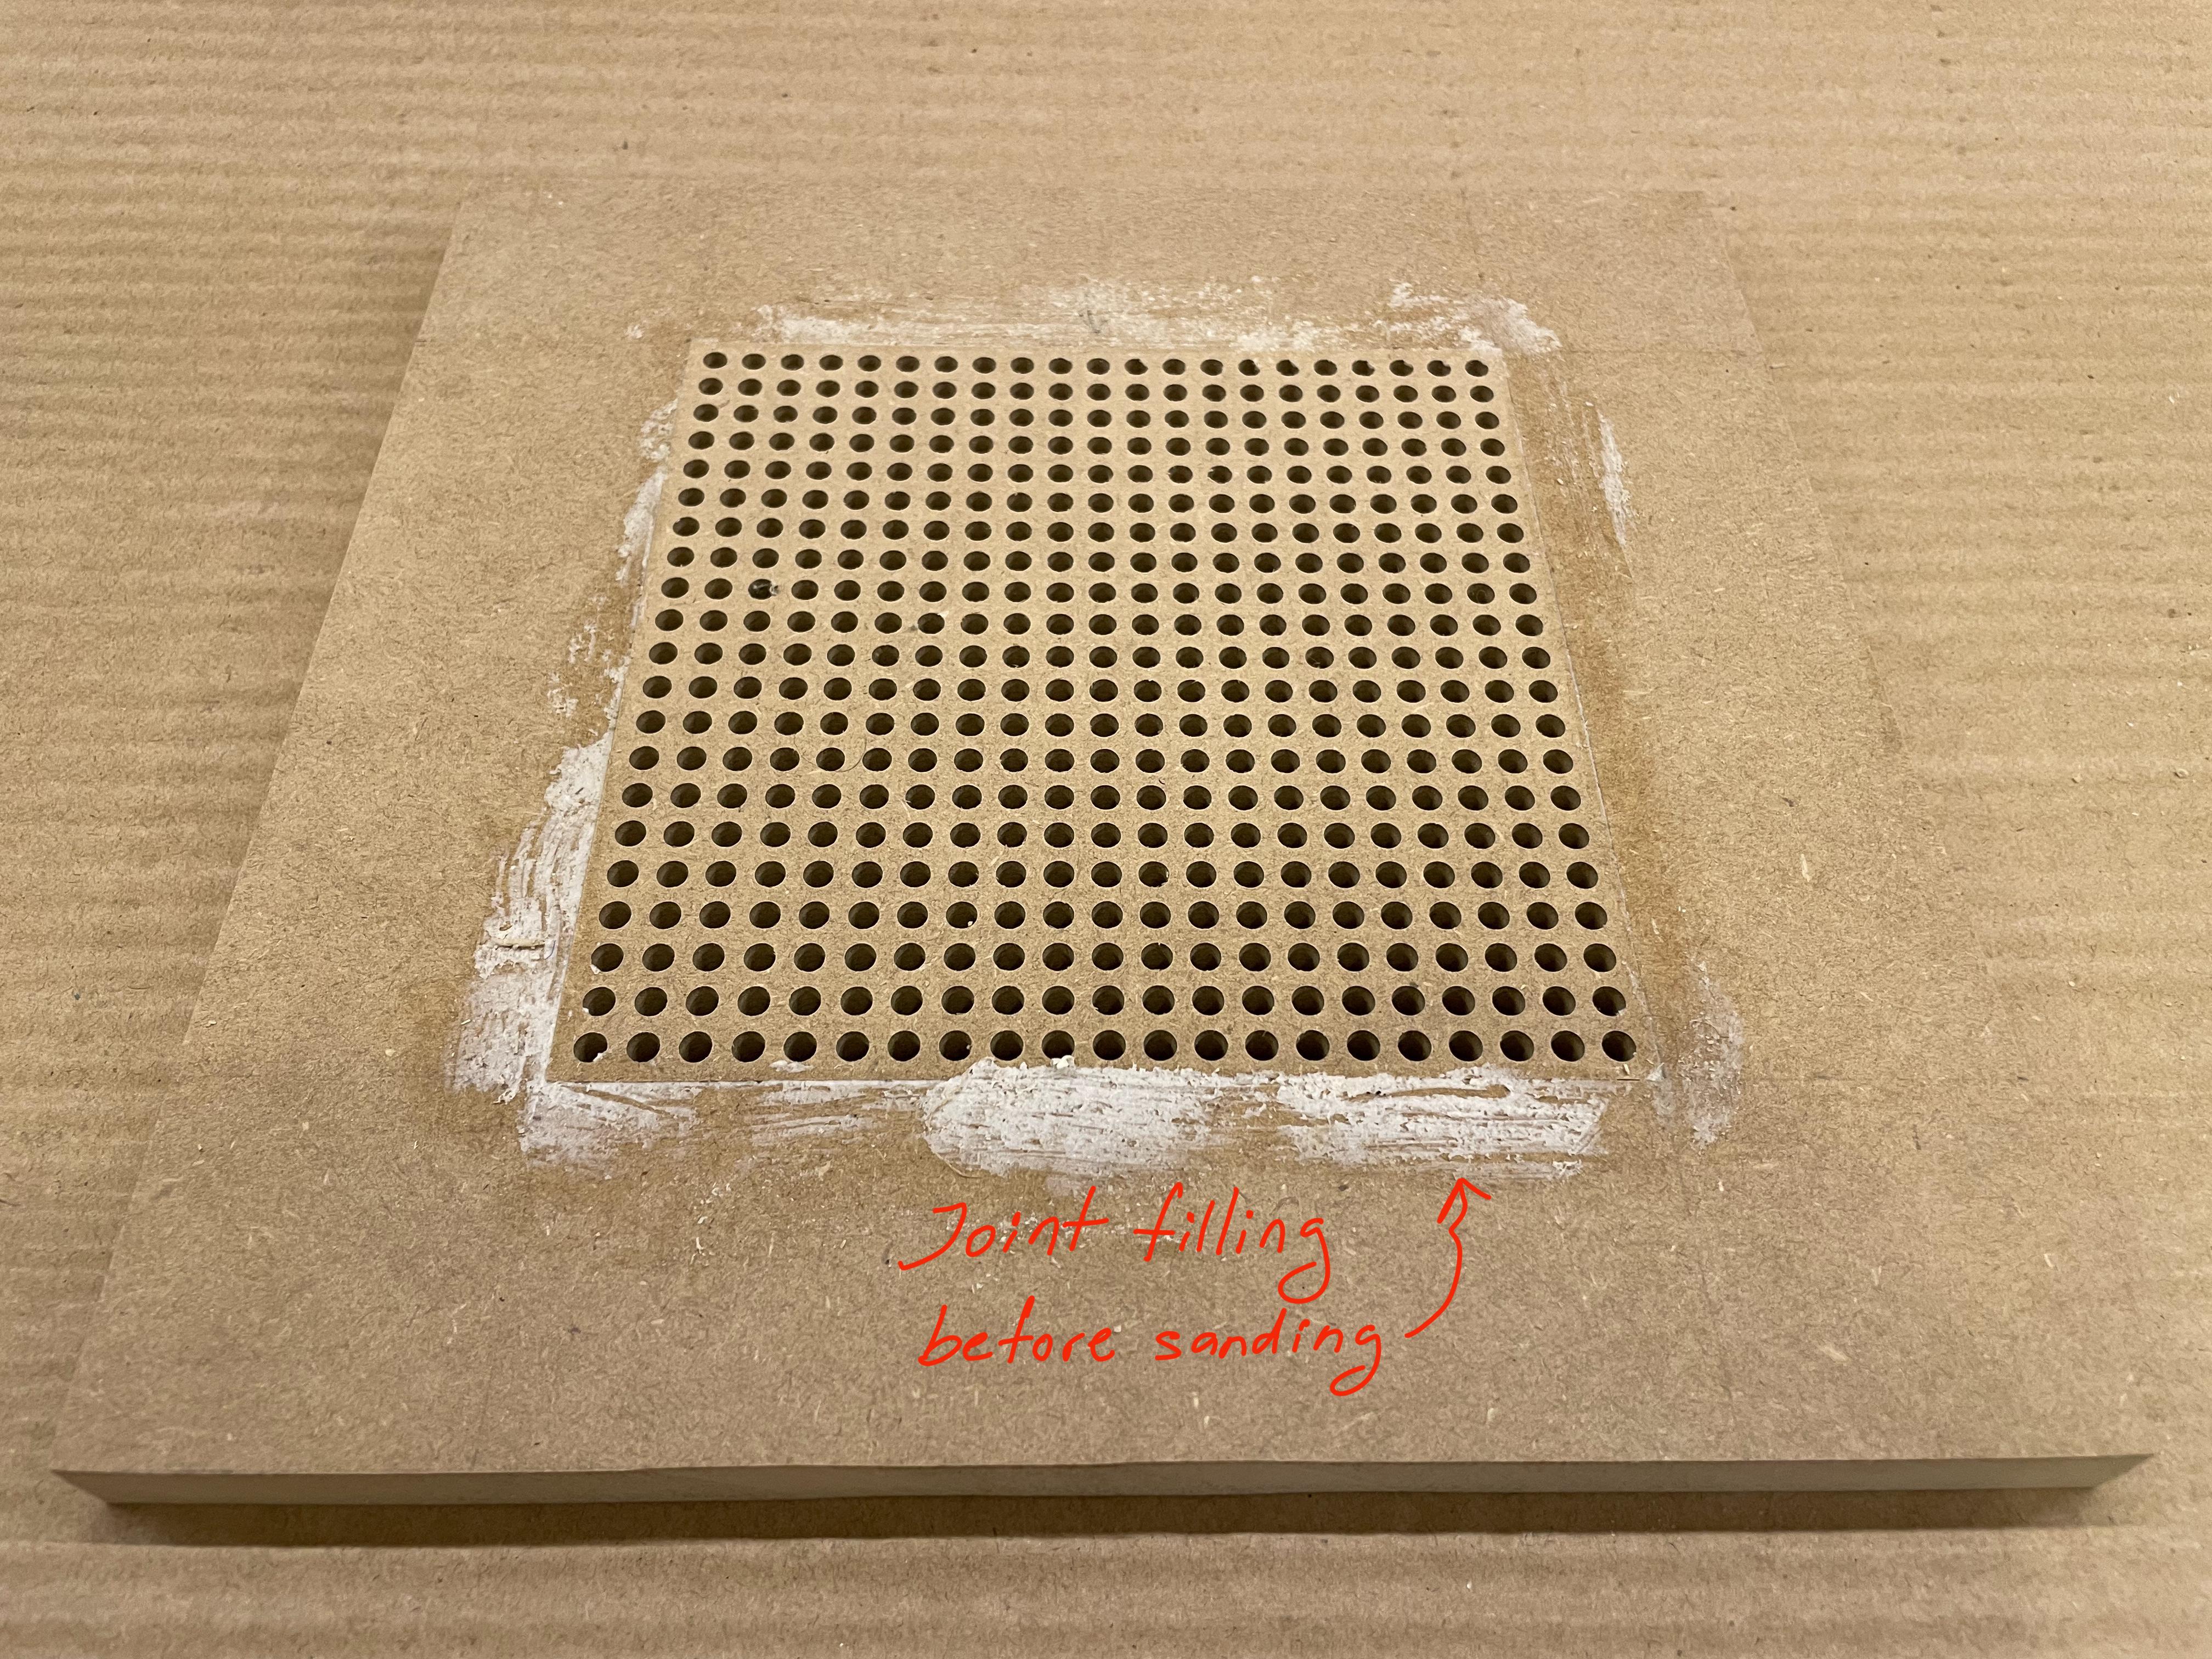
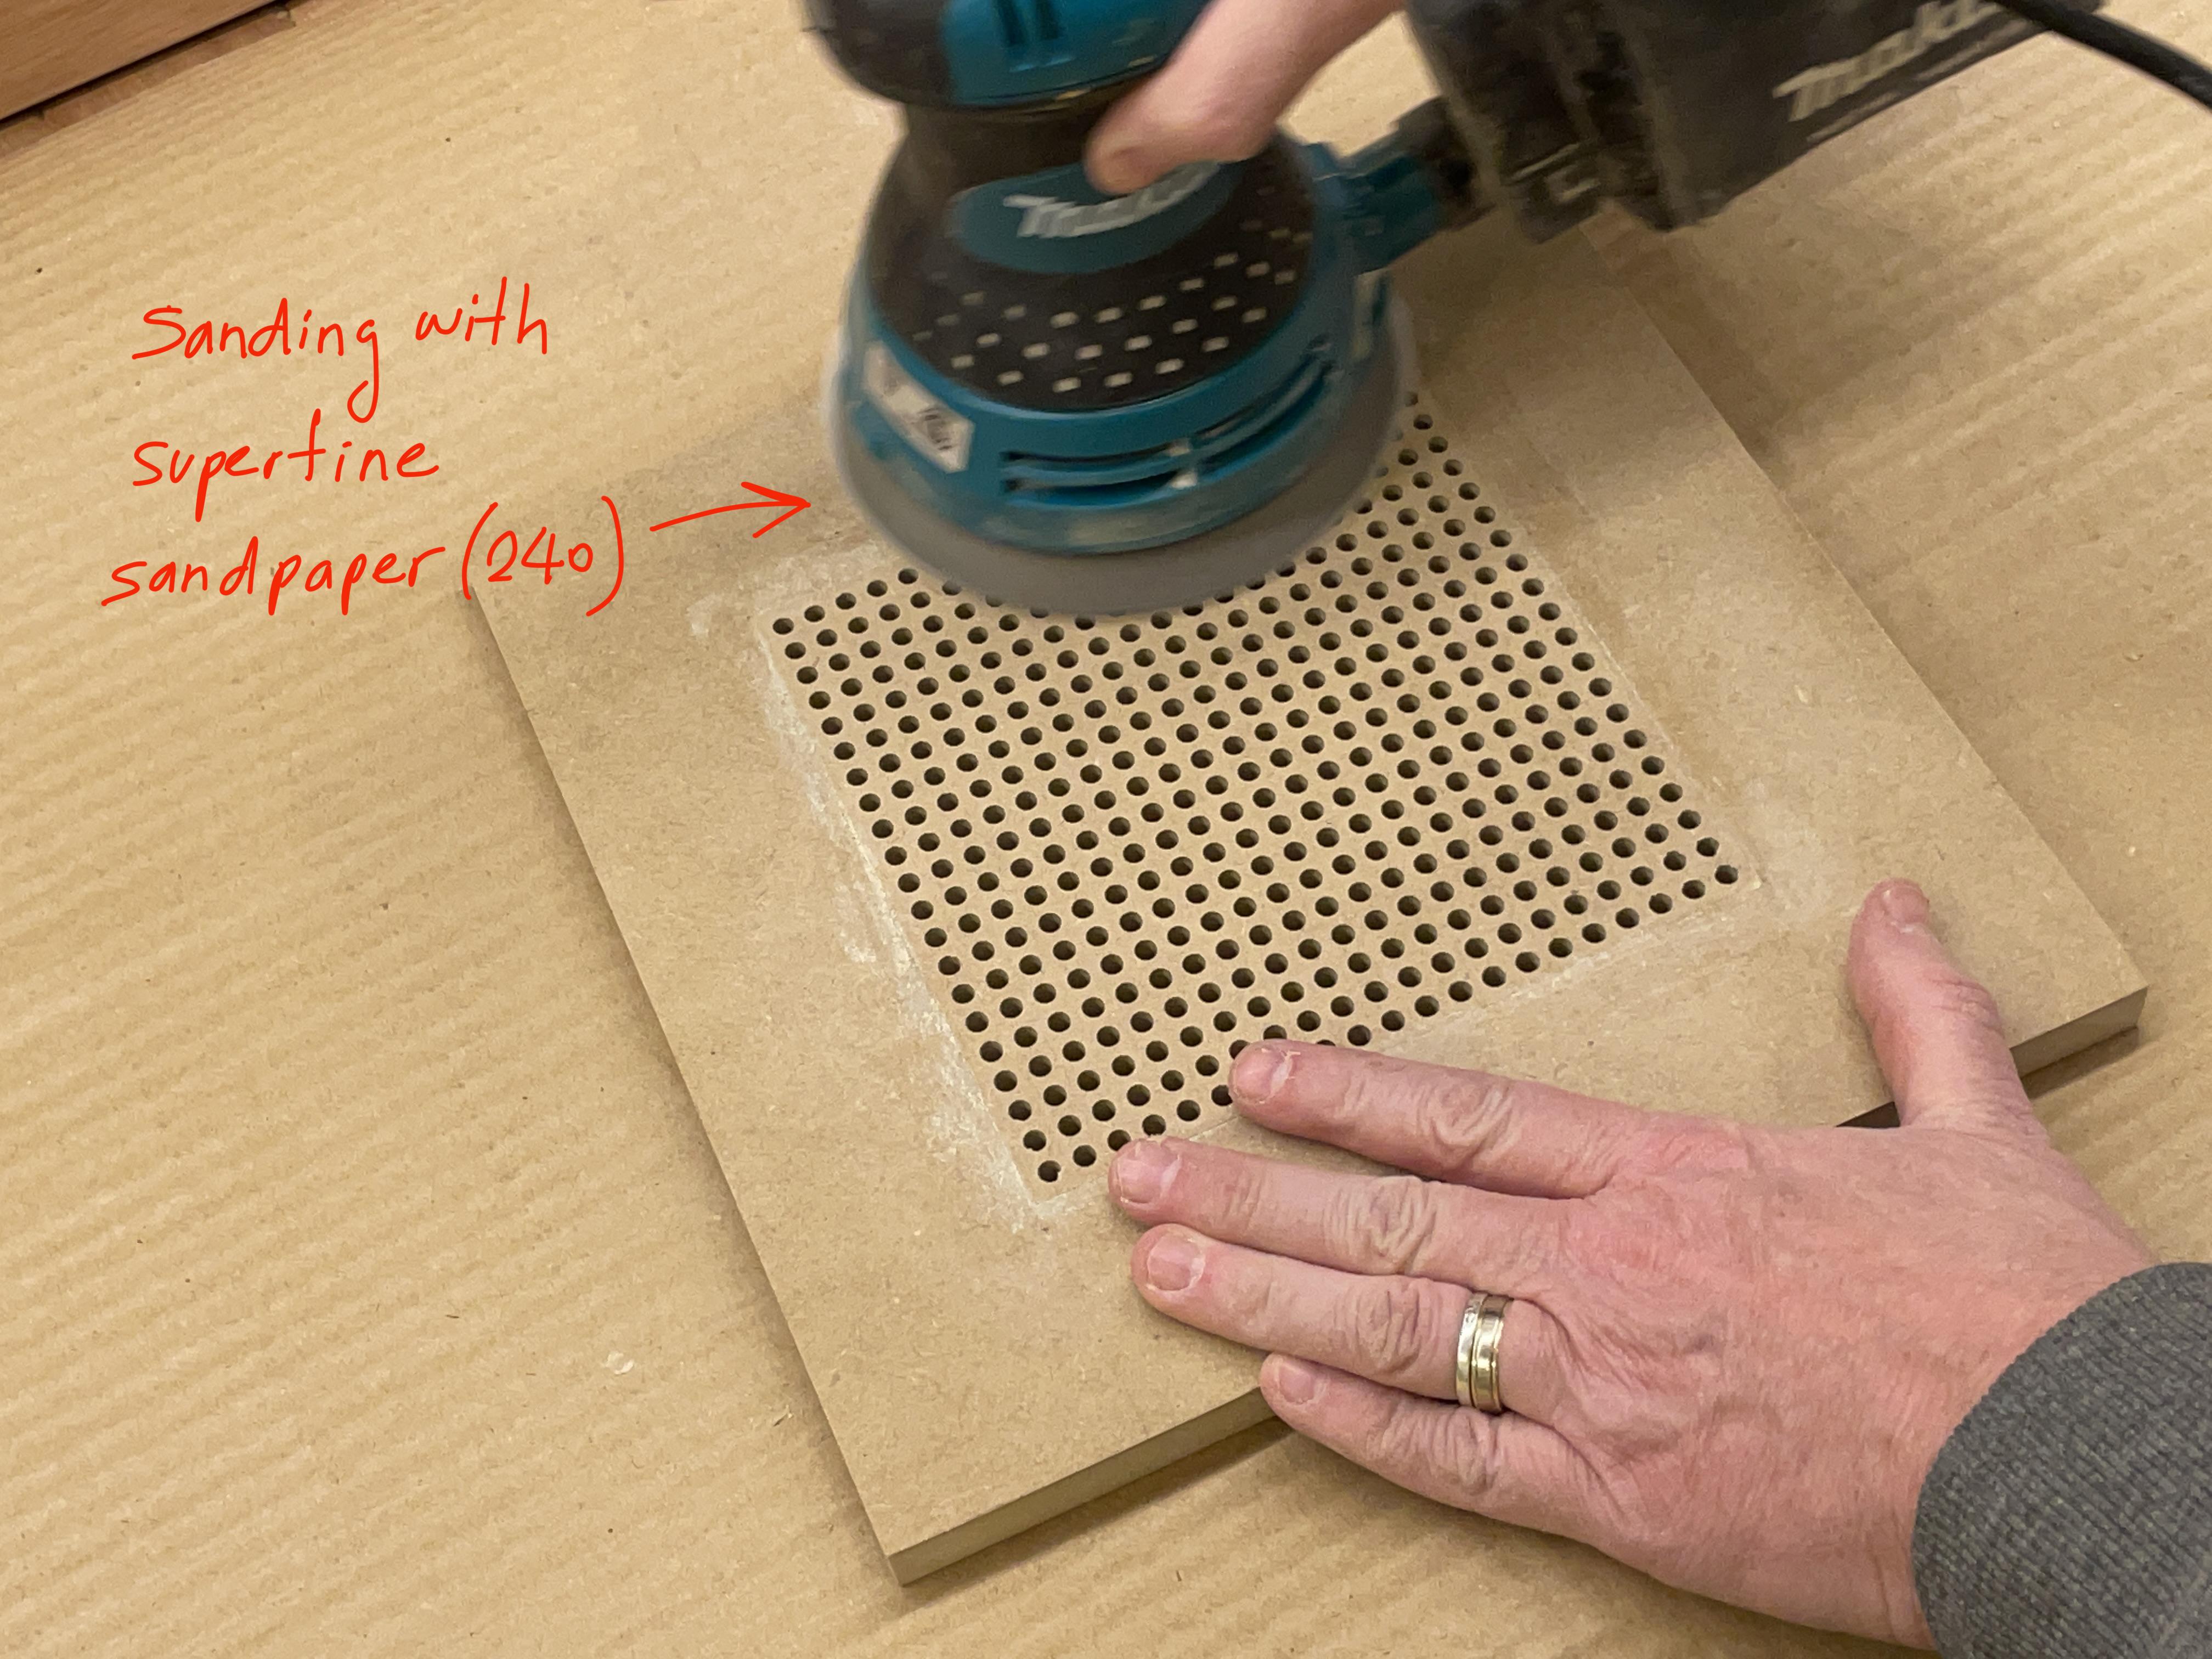
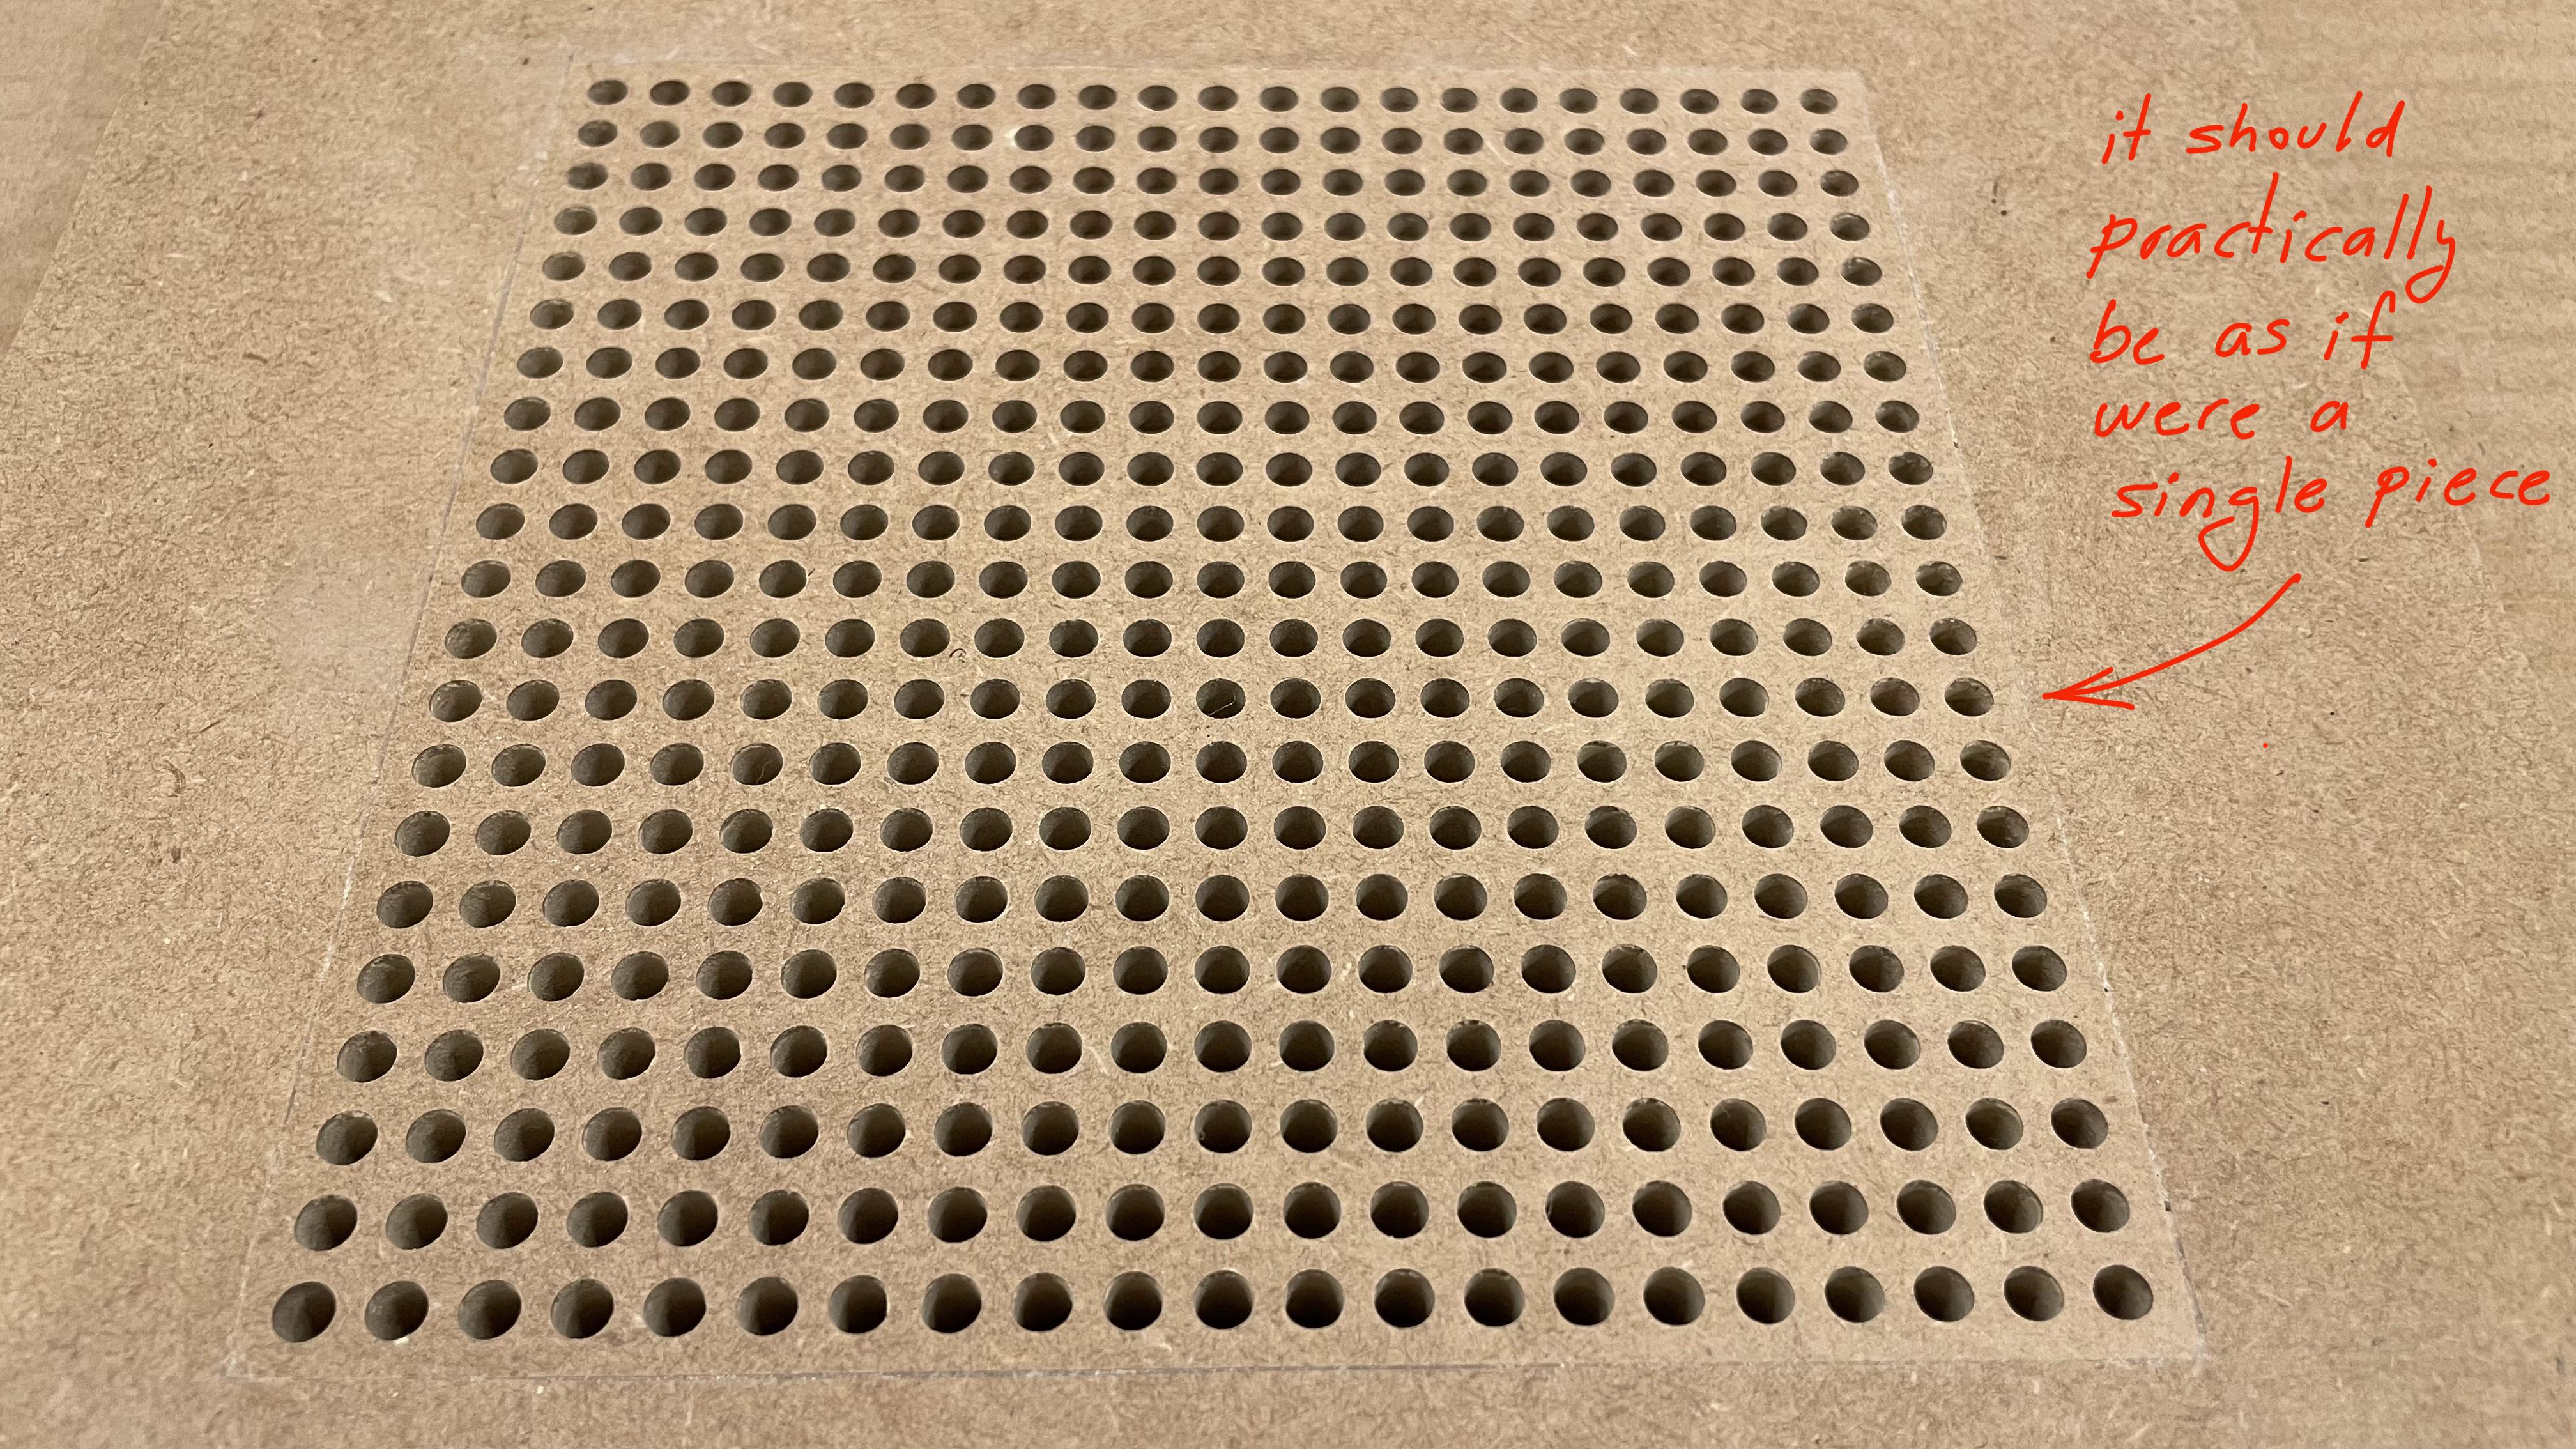
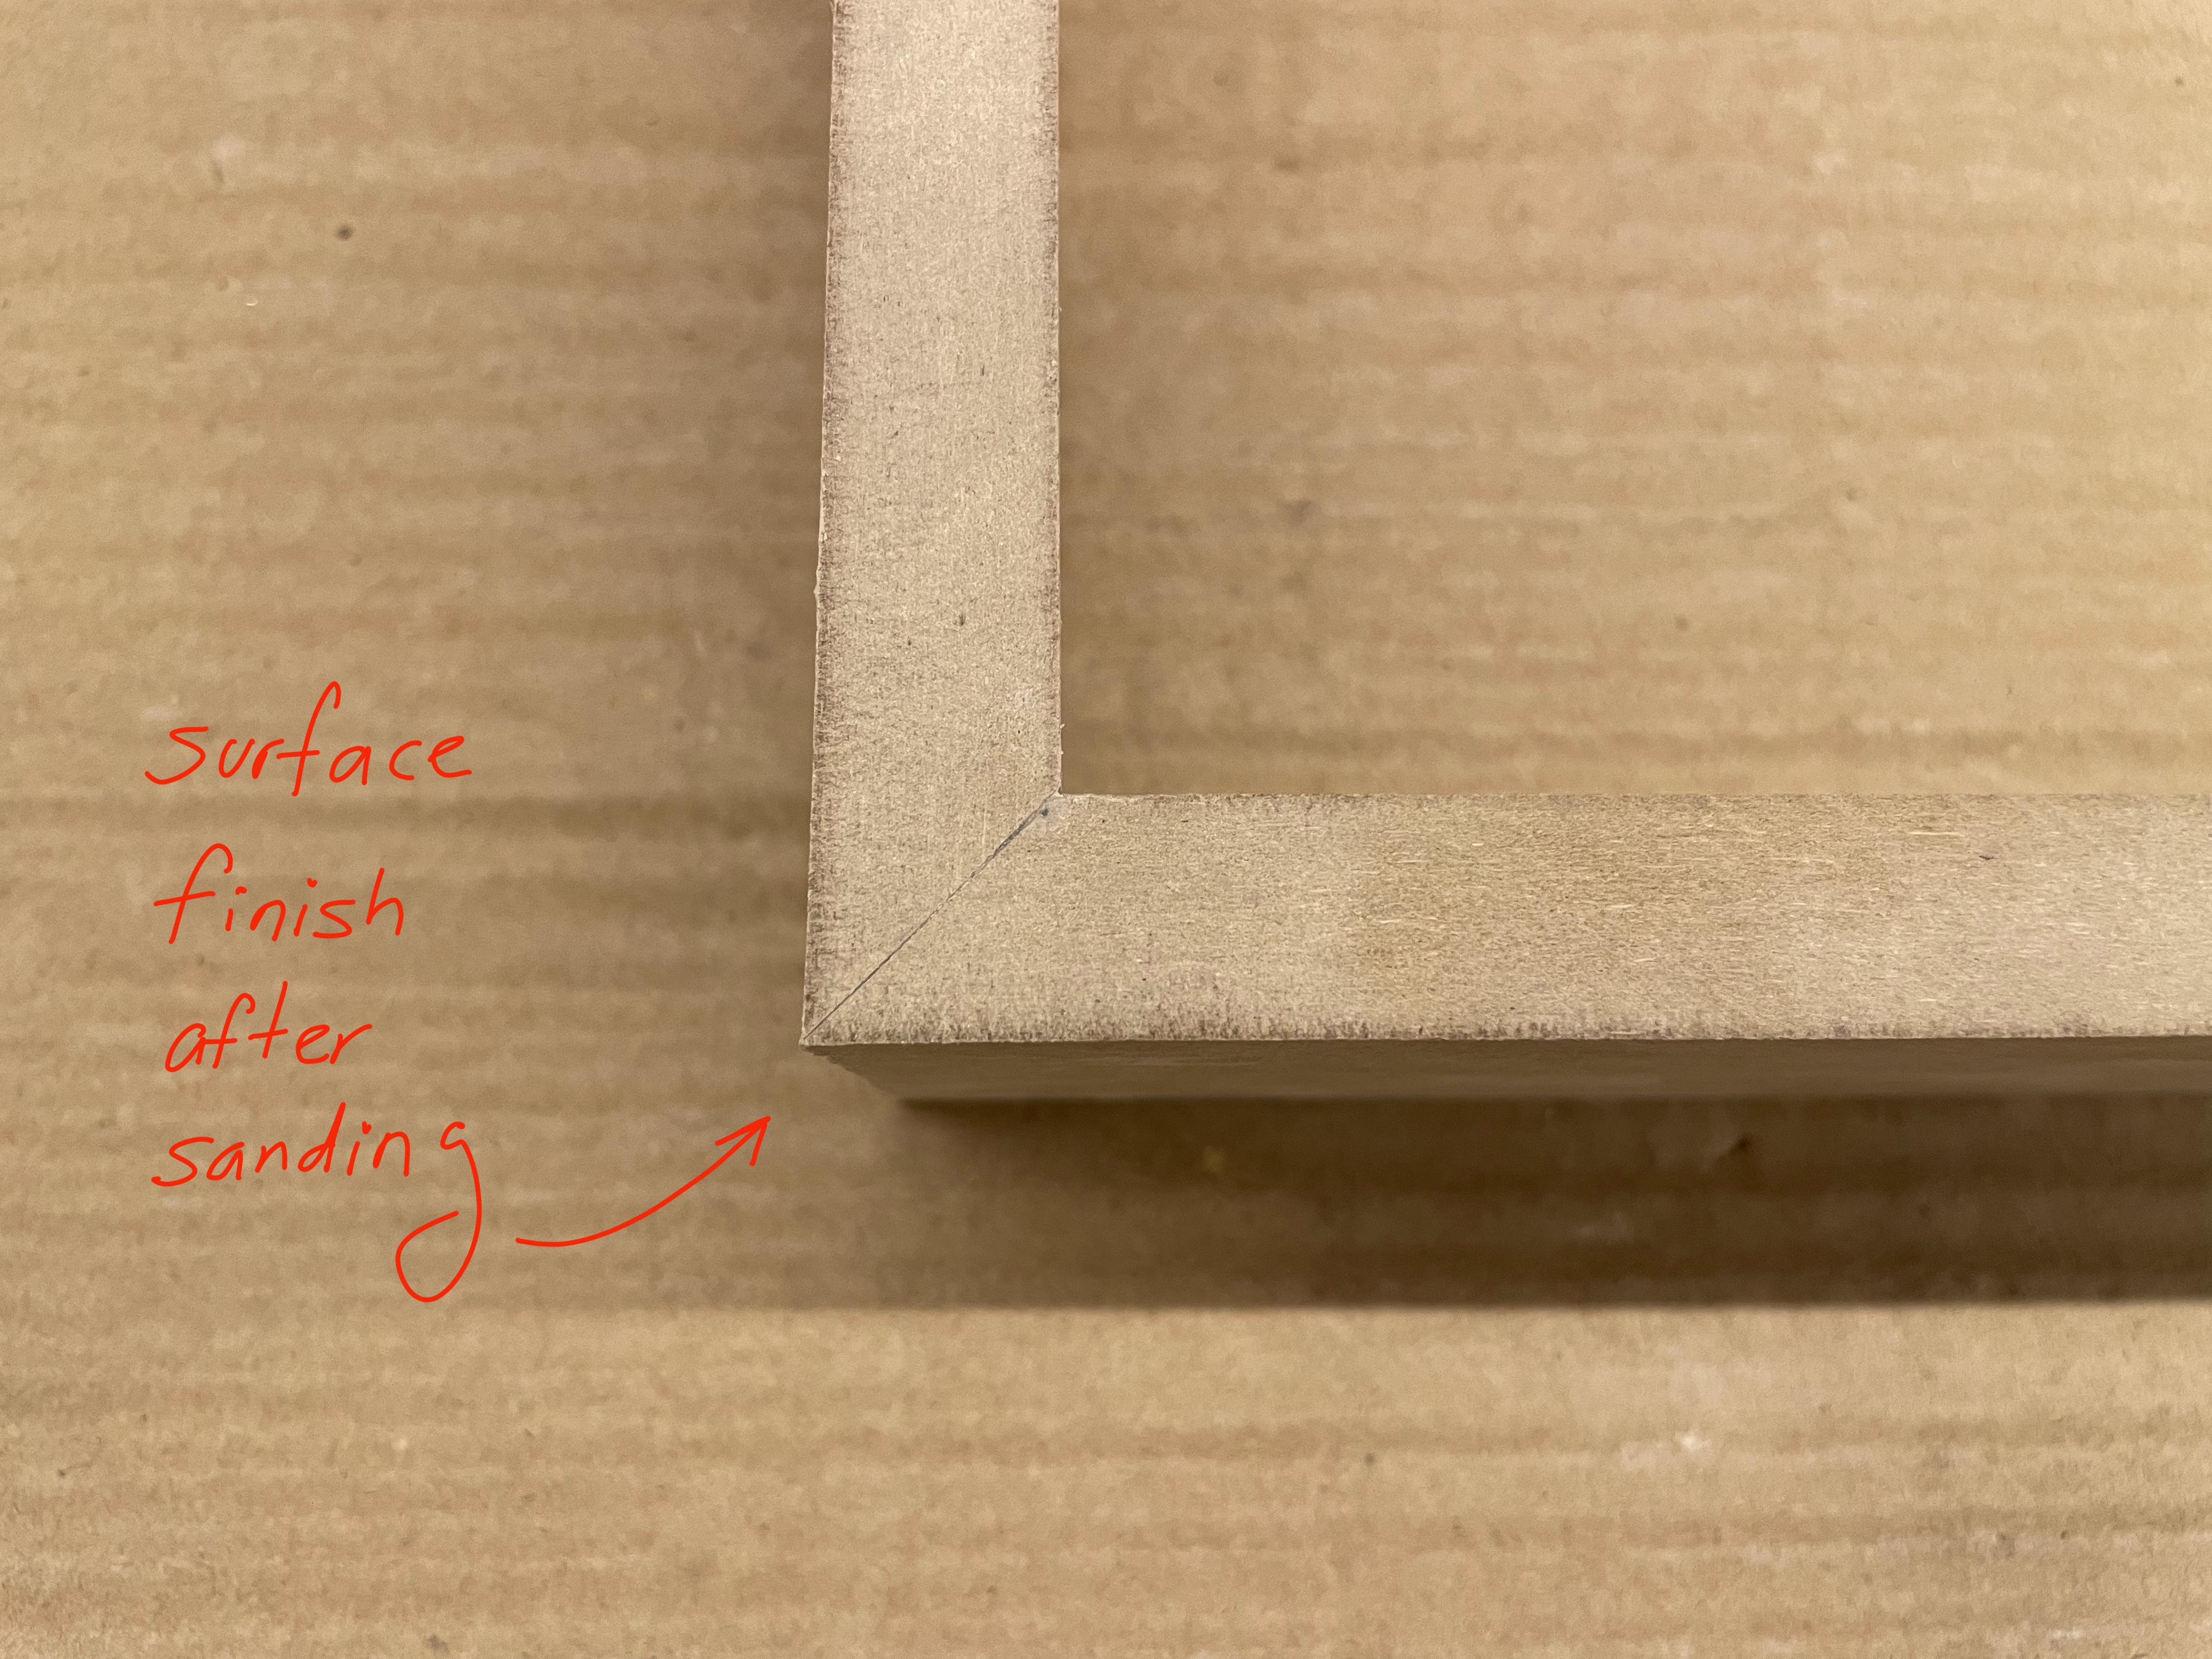
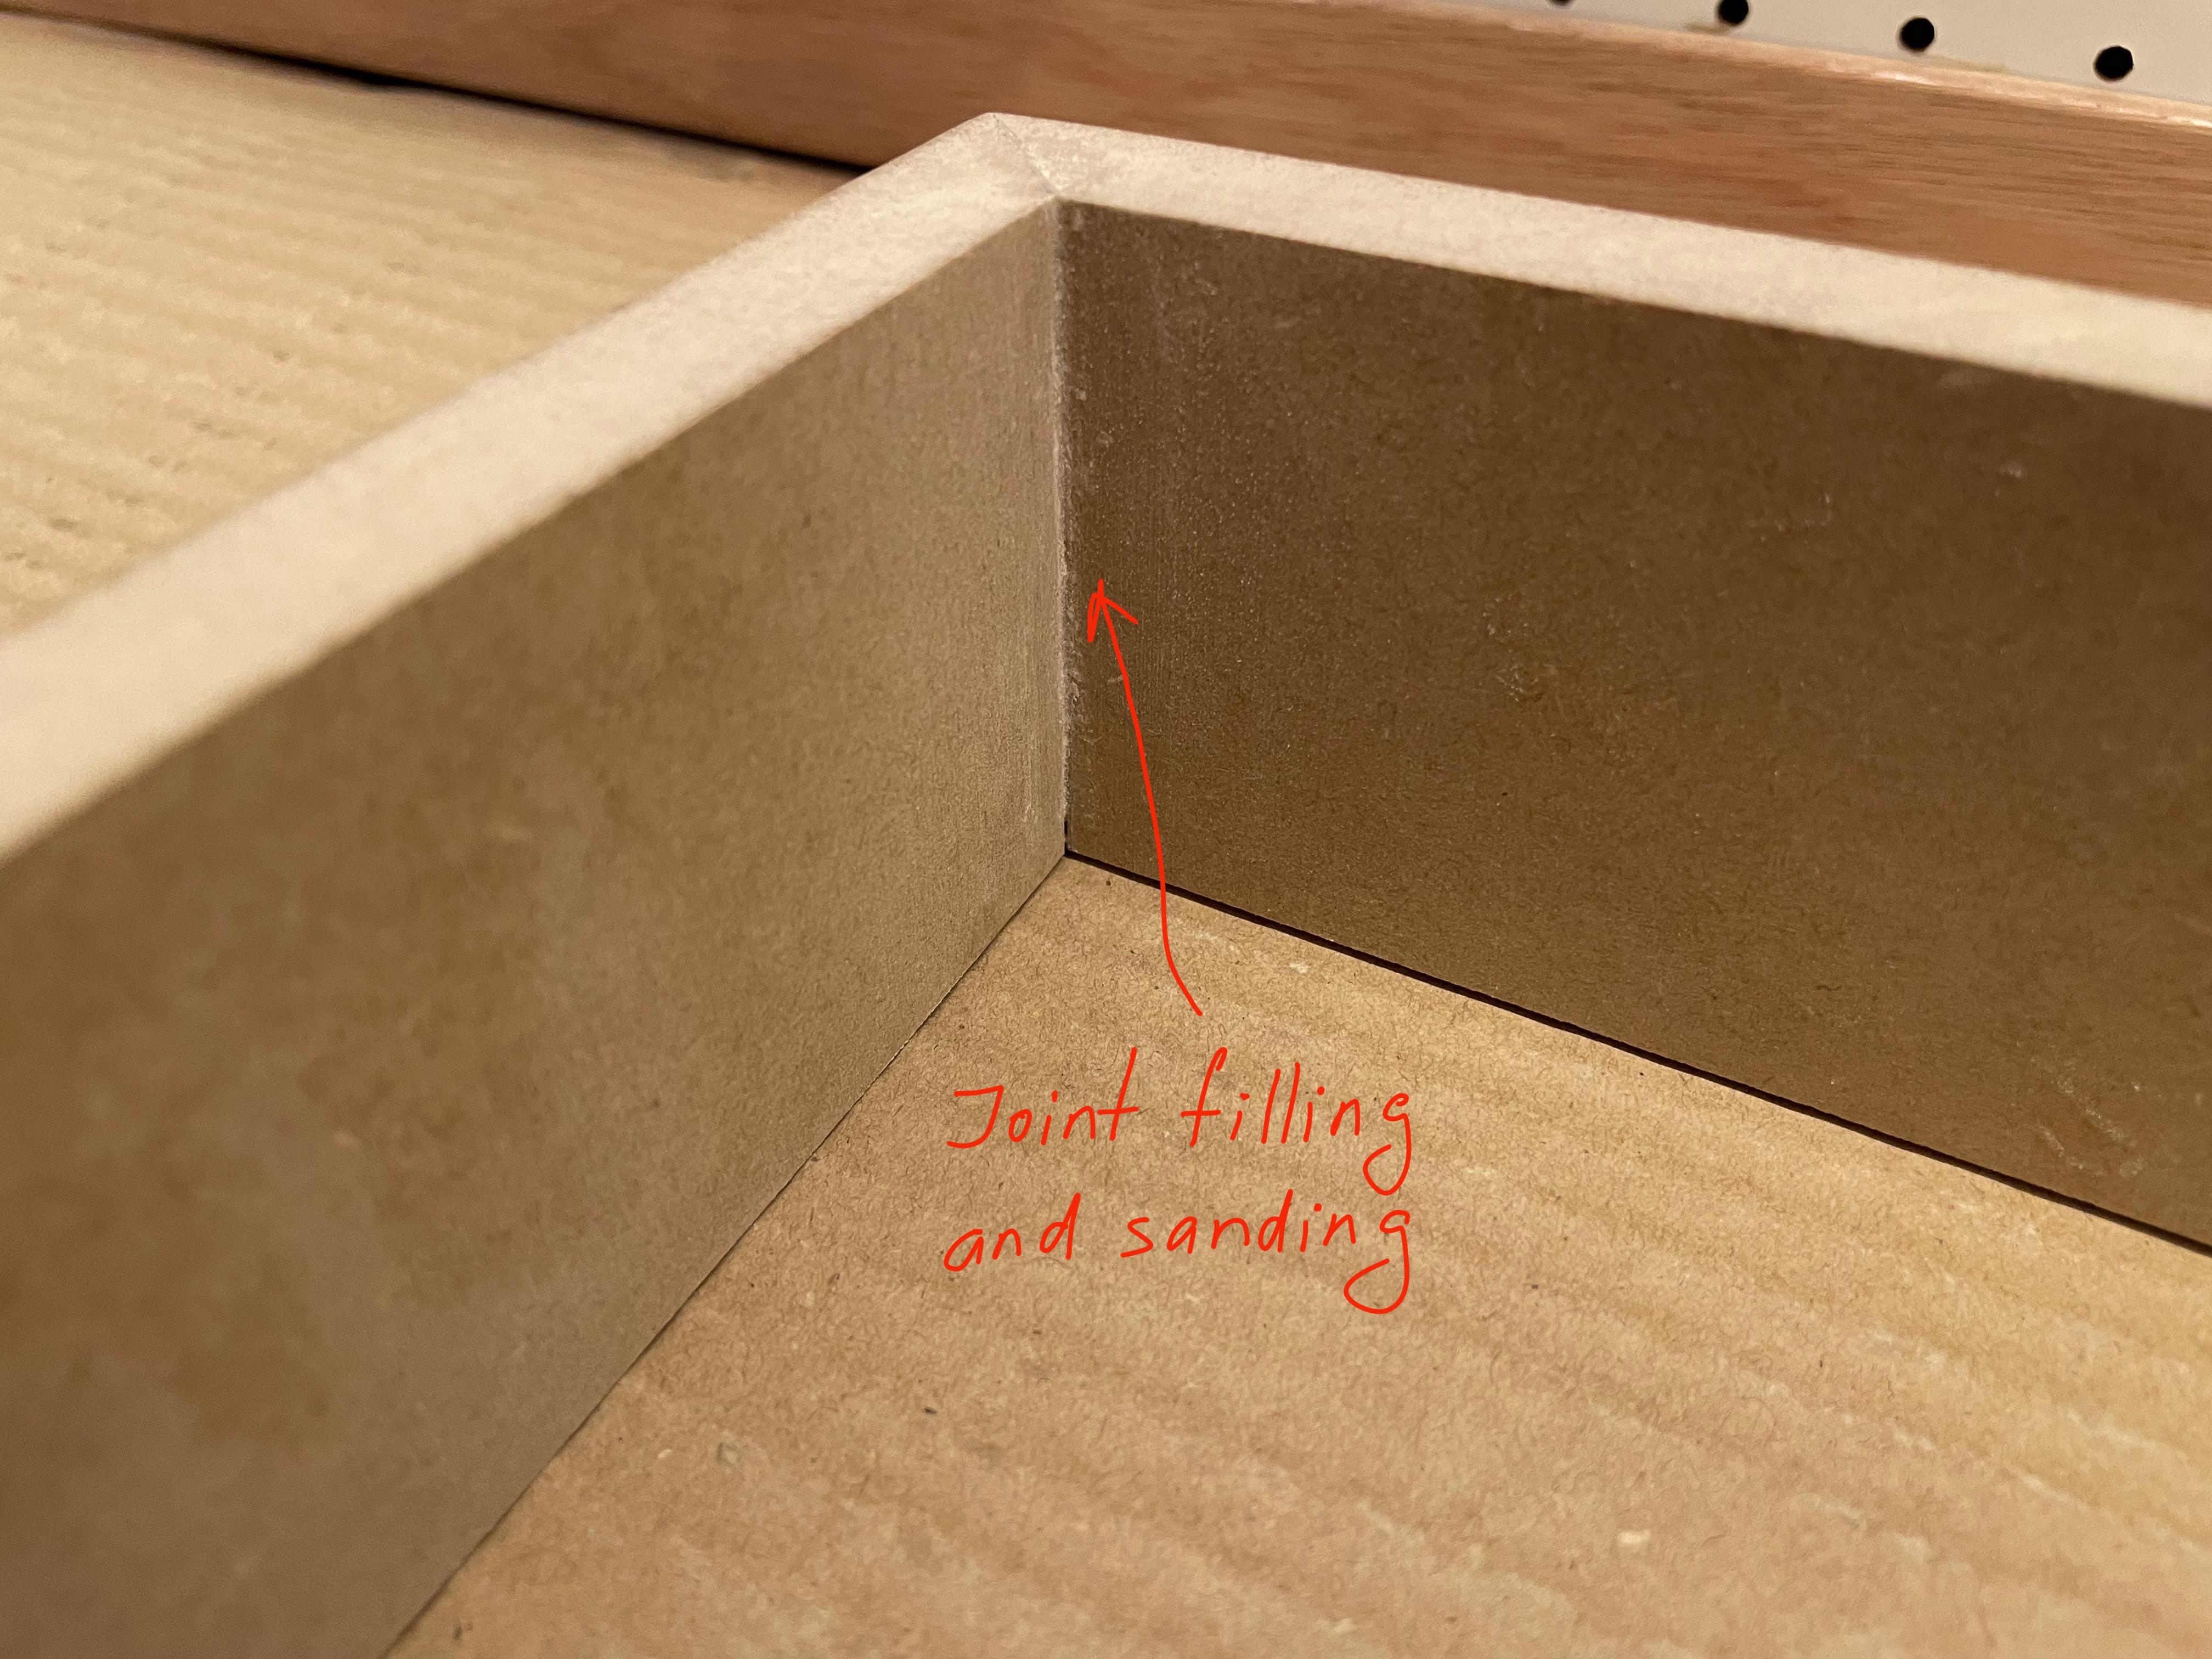
- Proceed to sand the entire assembly to remove glue residues, etc.
- Apply putty if necessary, let it dry and then proceed to sand before painting.
To ensure a perfect paint job, vacuum all parts, but also use a blower to remove any remaining dirt. It can also help, the use of a slightly damp cloth.
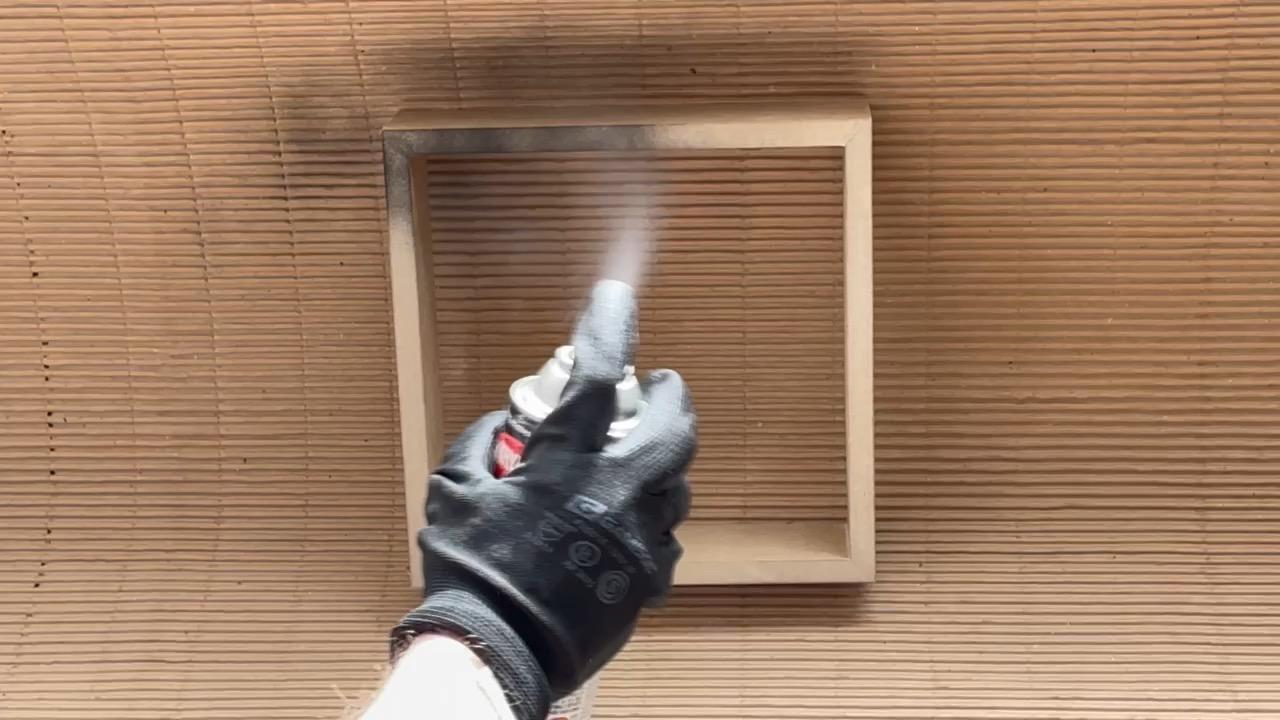
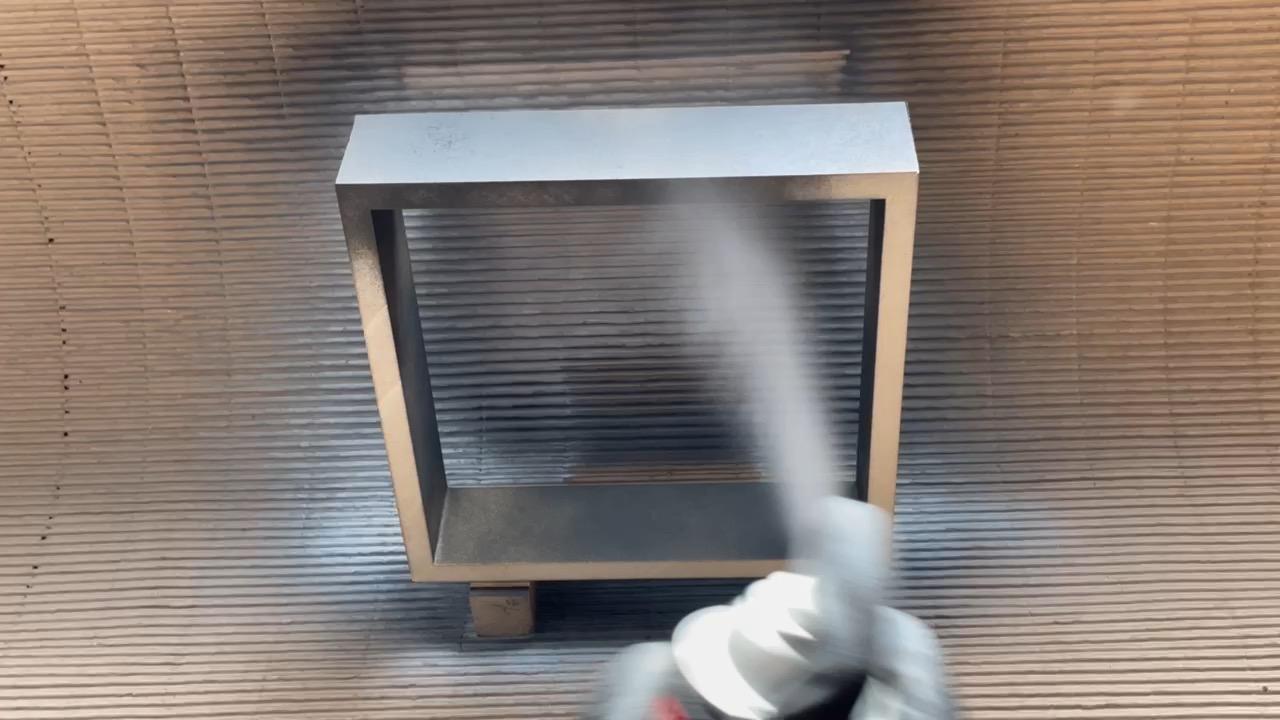
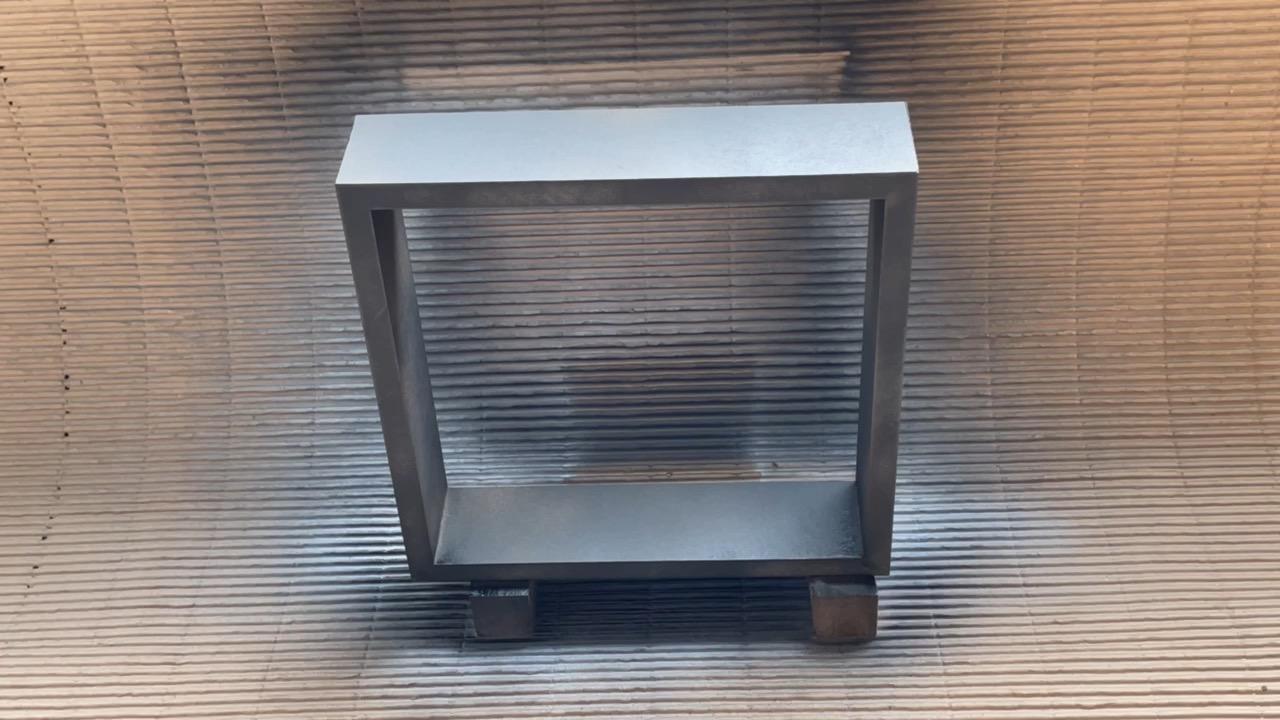
- The final finish of the Moulding will be black matte paint applied in a spray.
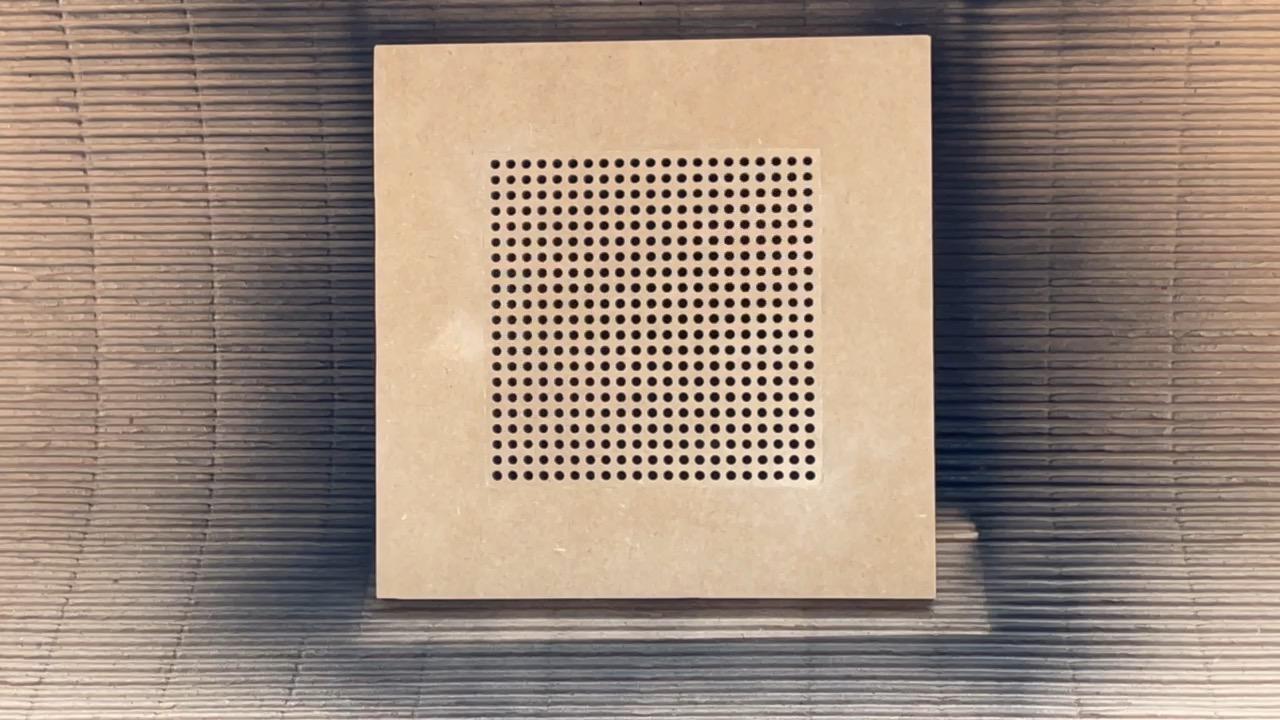
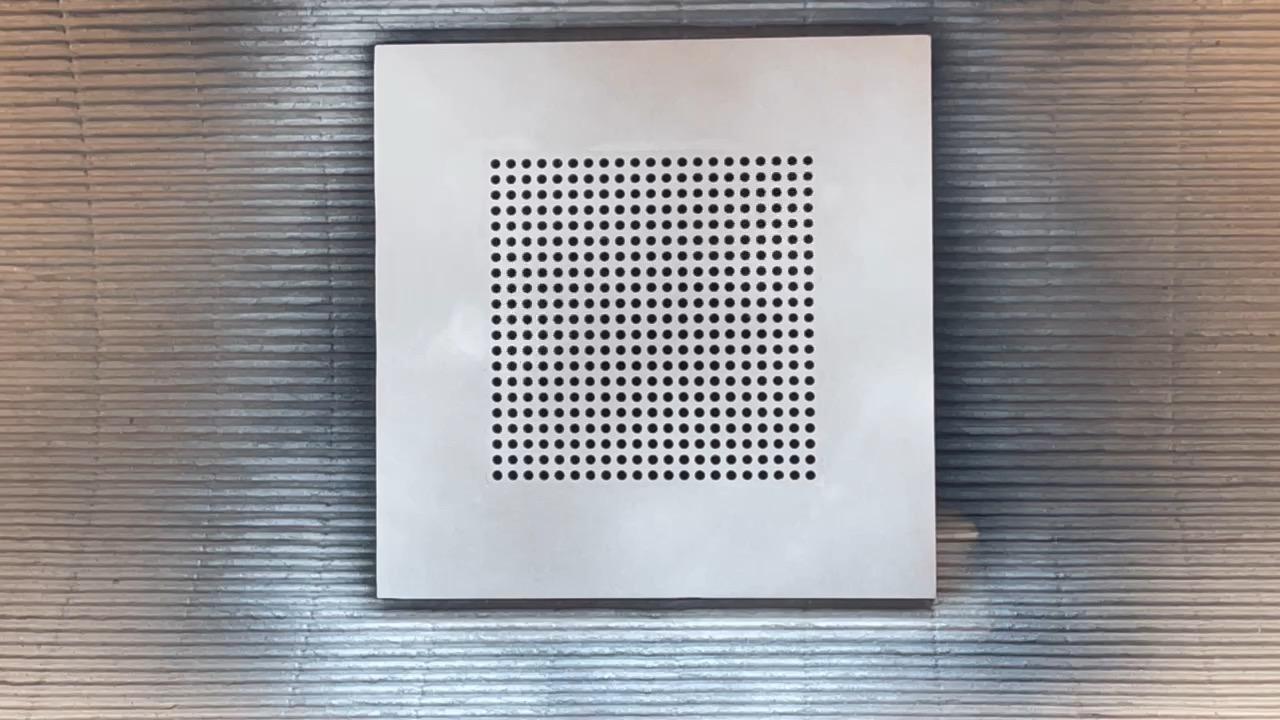
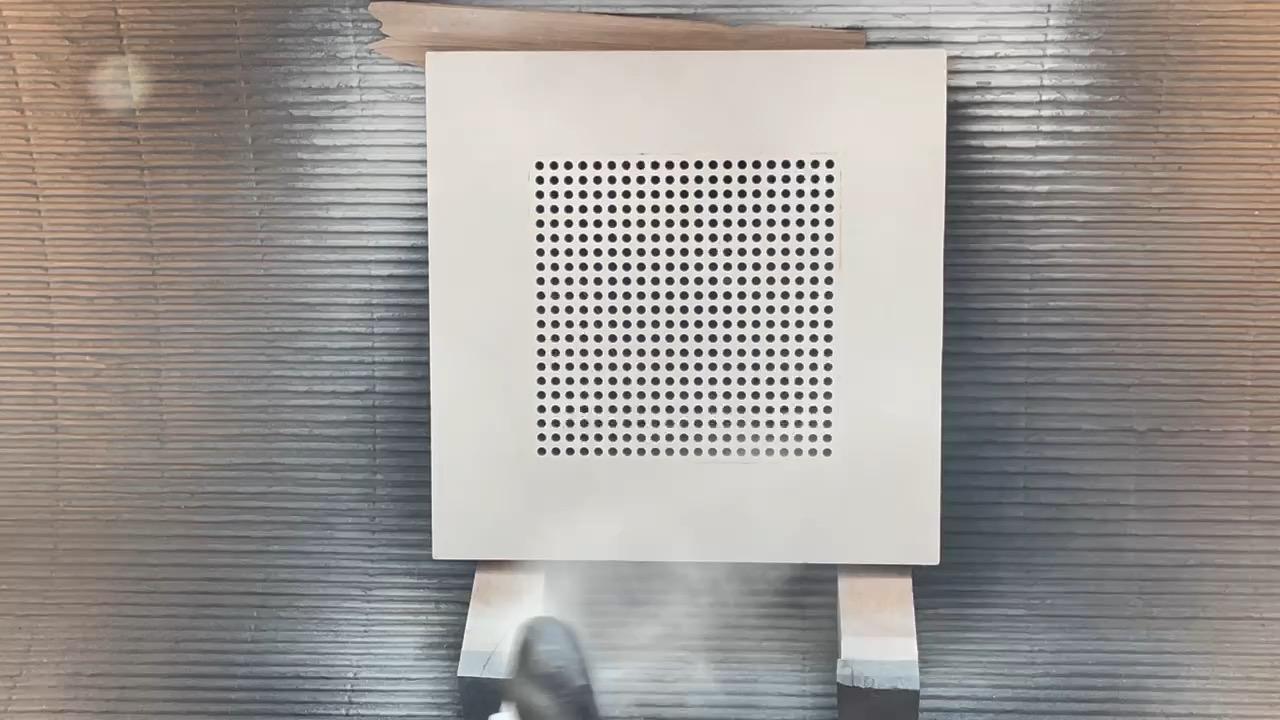
- The final finish of the ArtBoard+ArtMatrix Holes will be white matte paint applied in a spray.
- Before painting make sure that the piece is free of dust and dirt.
- Apply two coats of paint, allowing it to dry properly between each application.
- To paint, place the wood on a support and turn the piece so that the paint reaches the wood in its entirety.
- Wearing latex gloves or similar is good advice to avoid dirtying your hands and cleaning with thinner or similar.
- Be careful that the paint enters the holes of the matrix as little as possible (to prevent the internal diameter from changing)
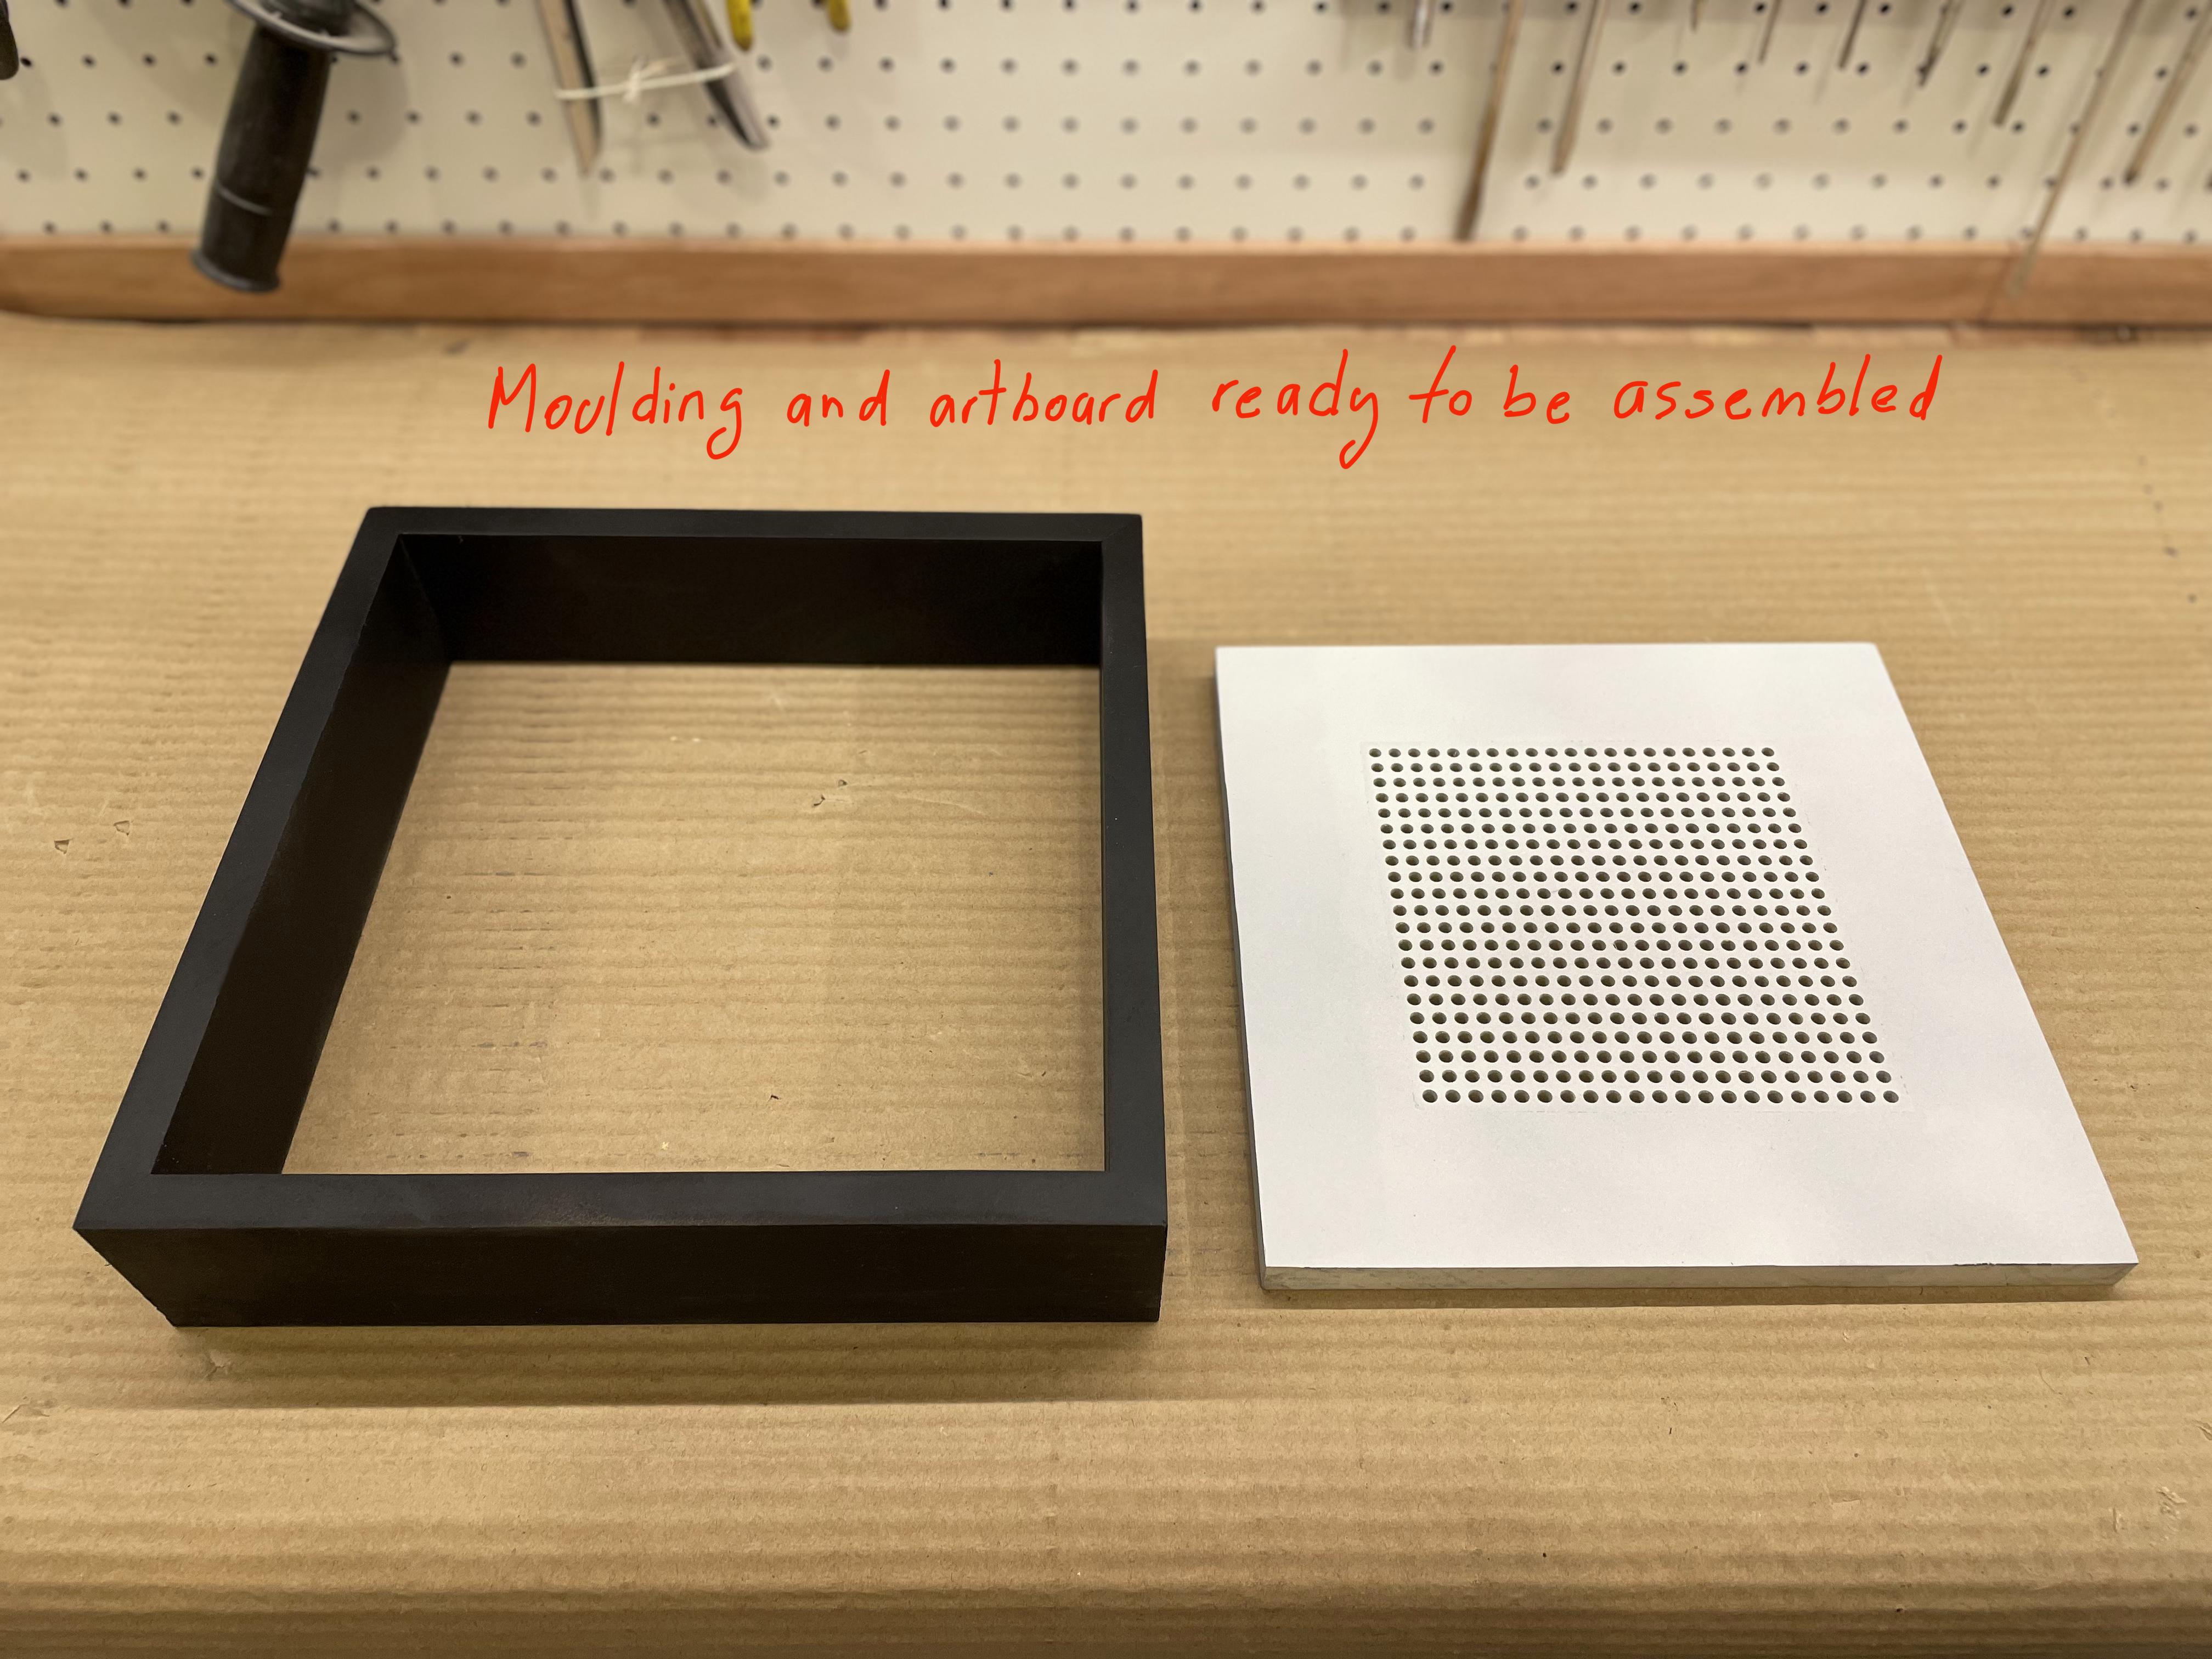
c) Final assembly of the set:
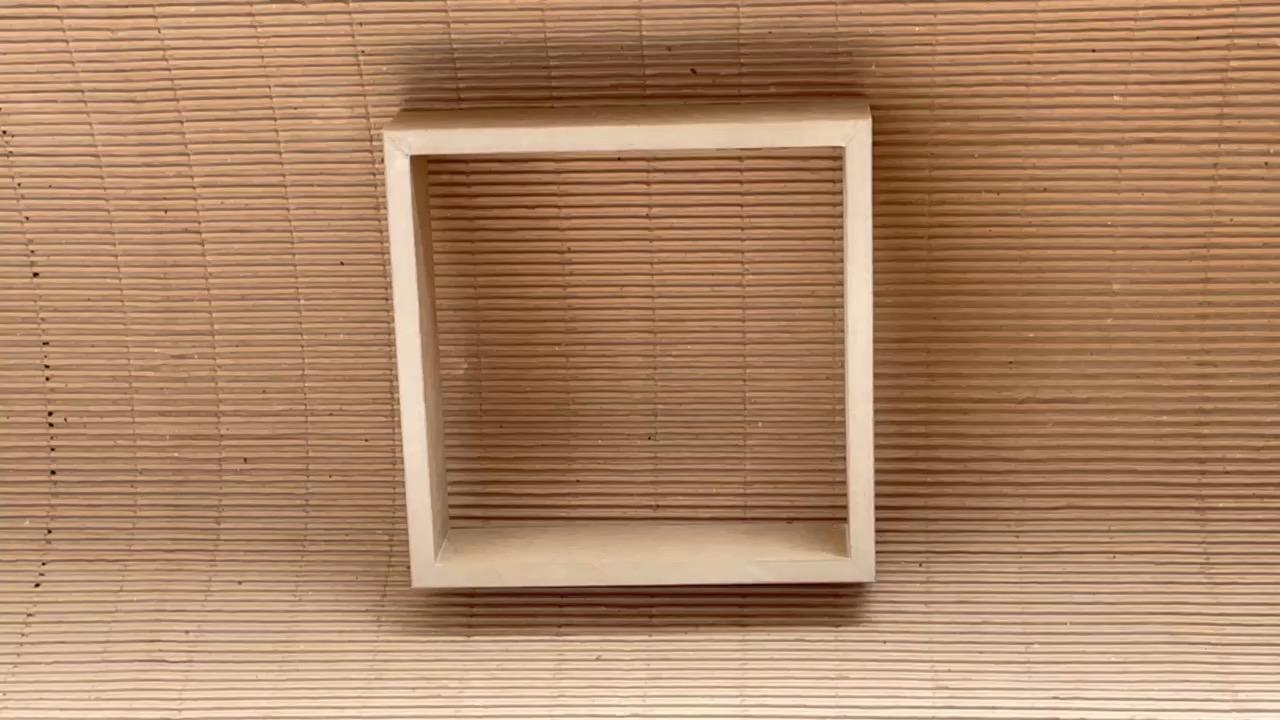
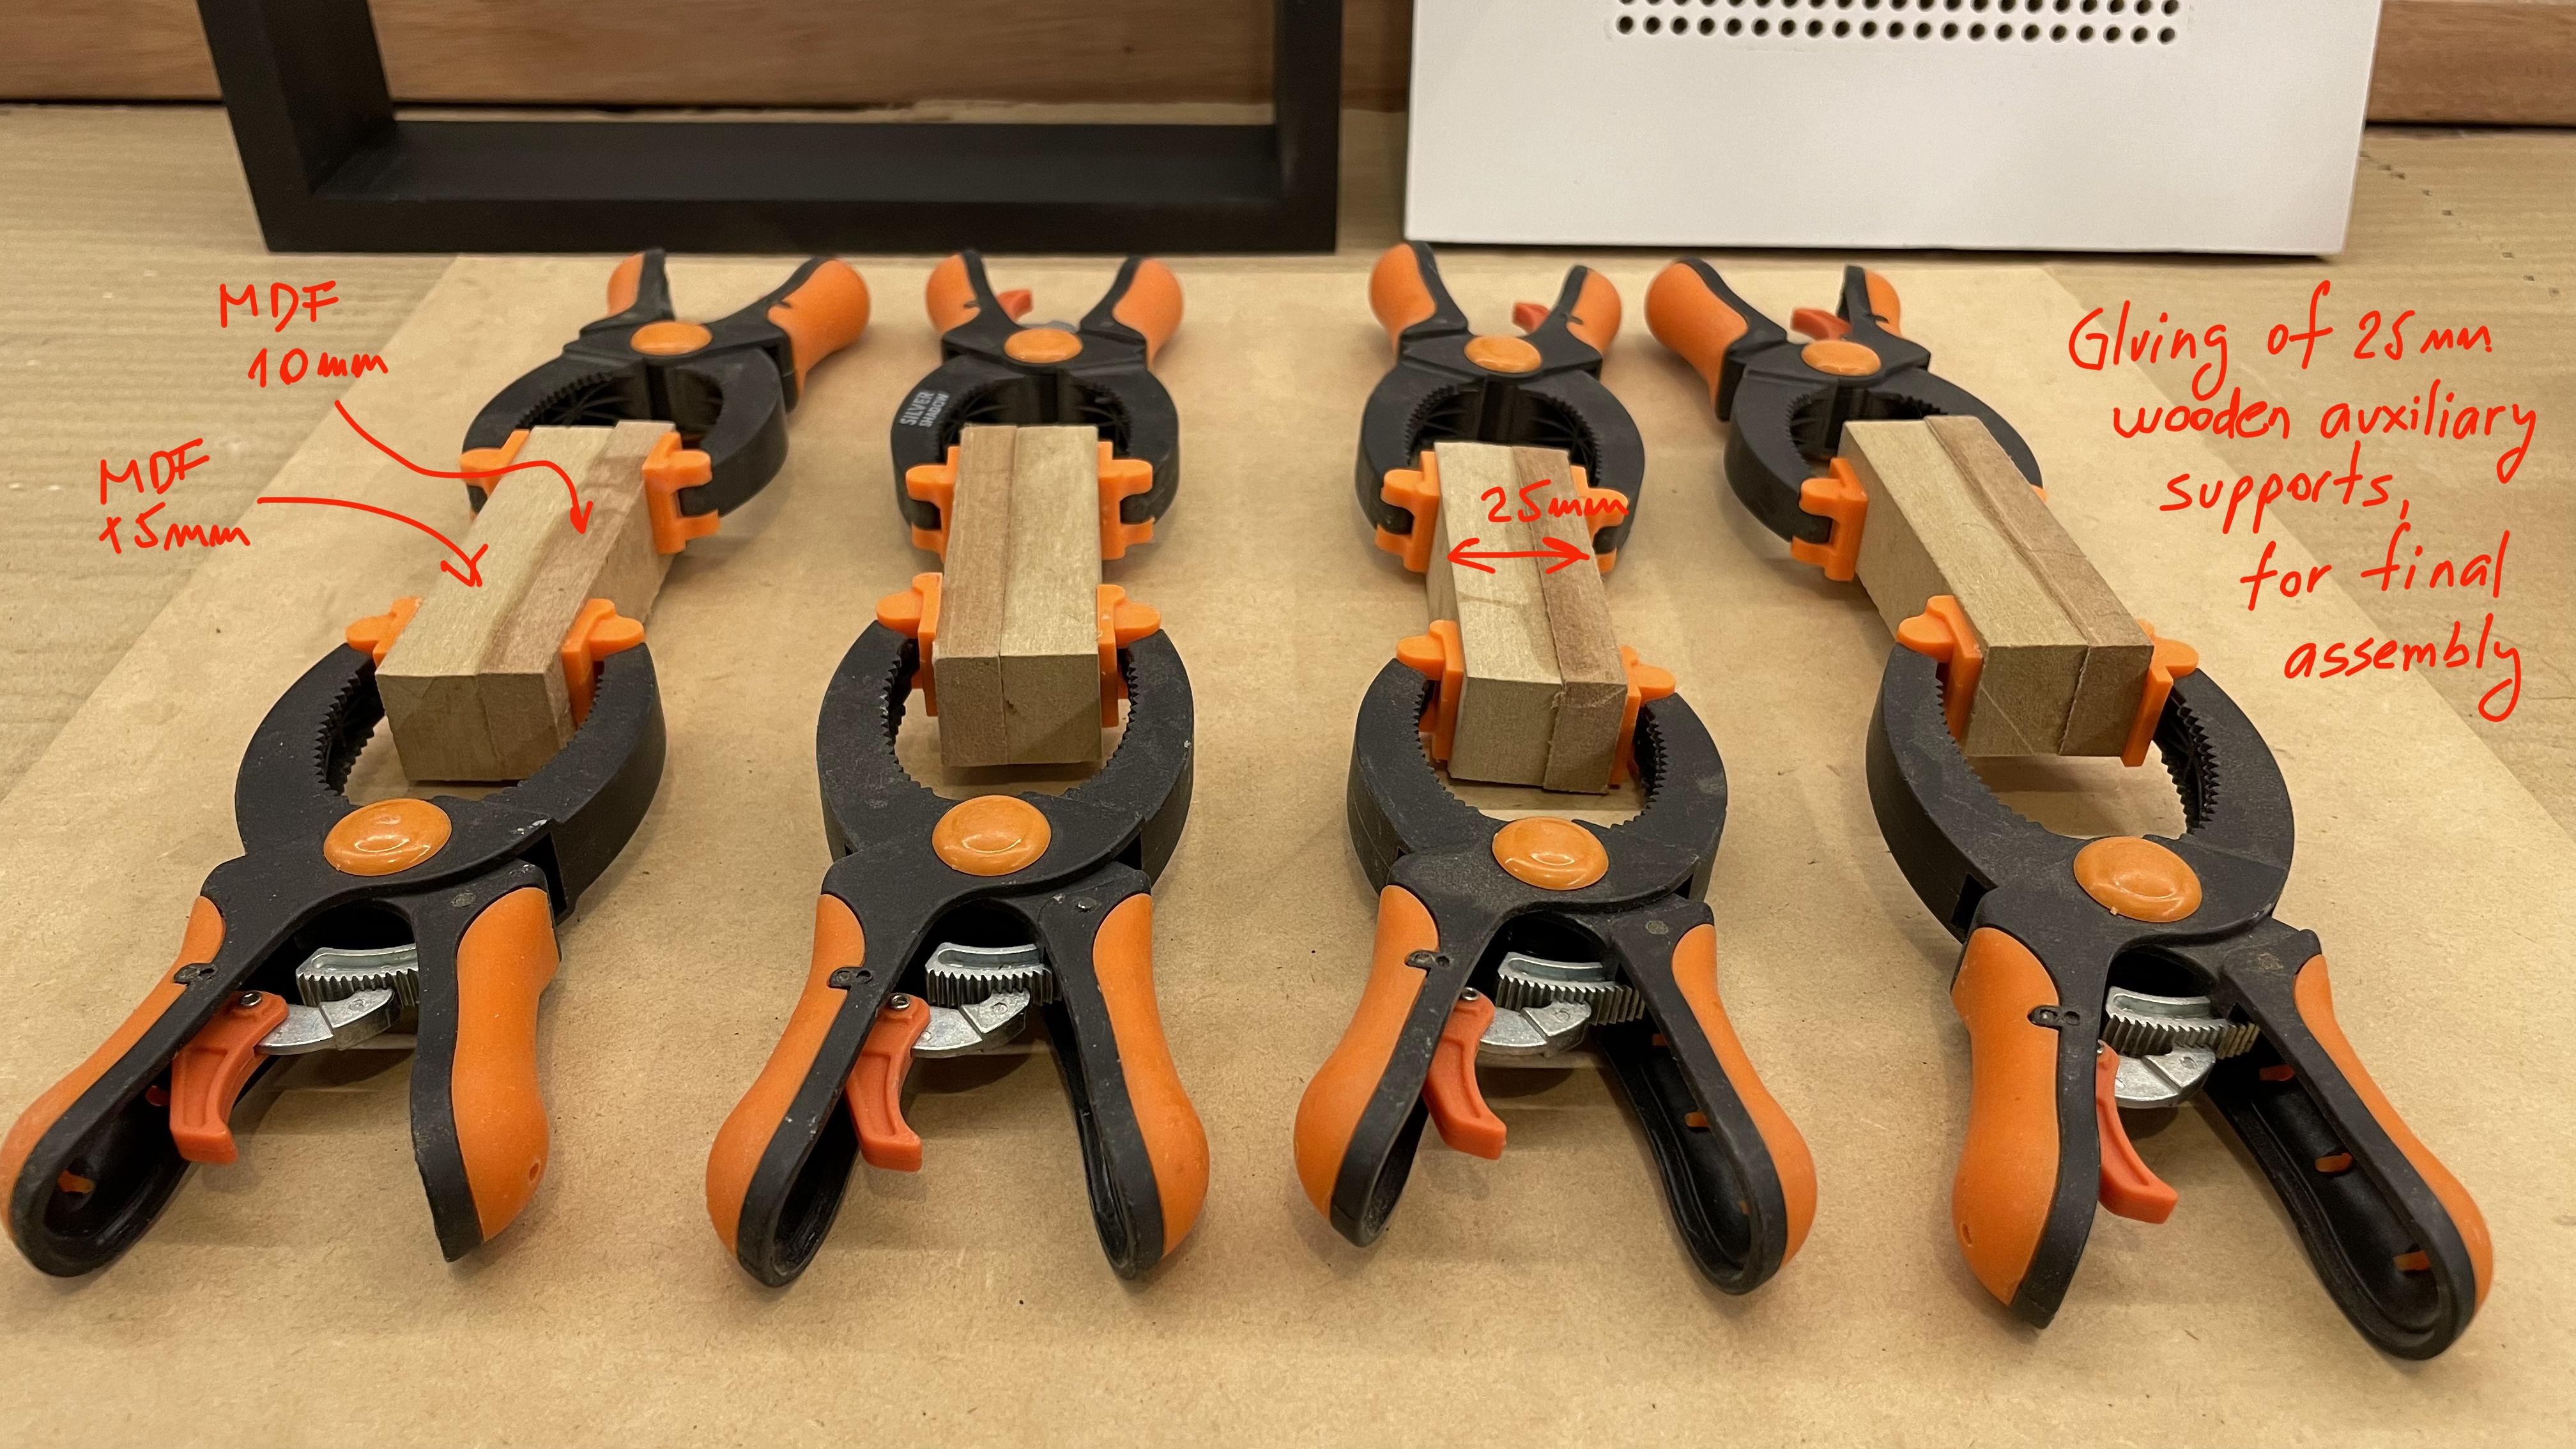
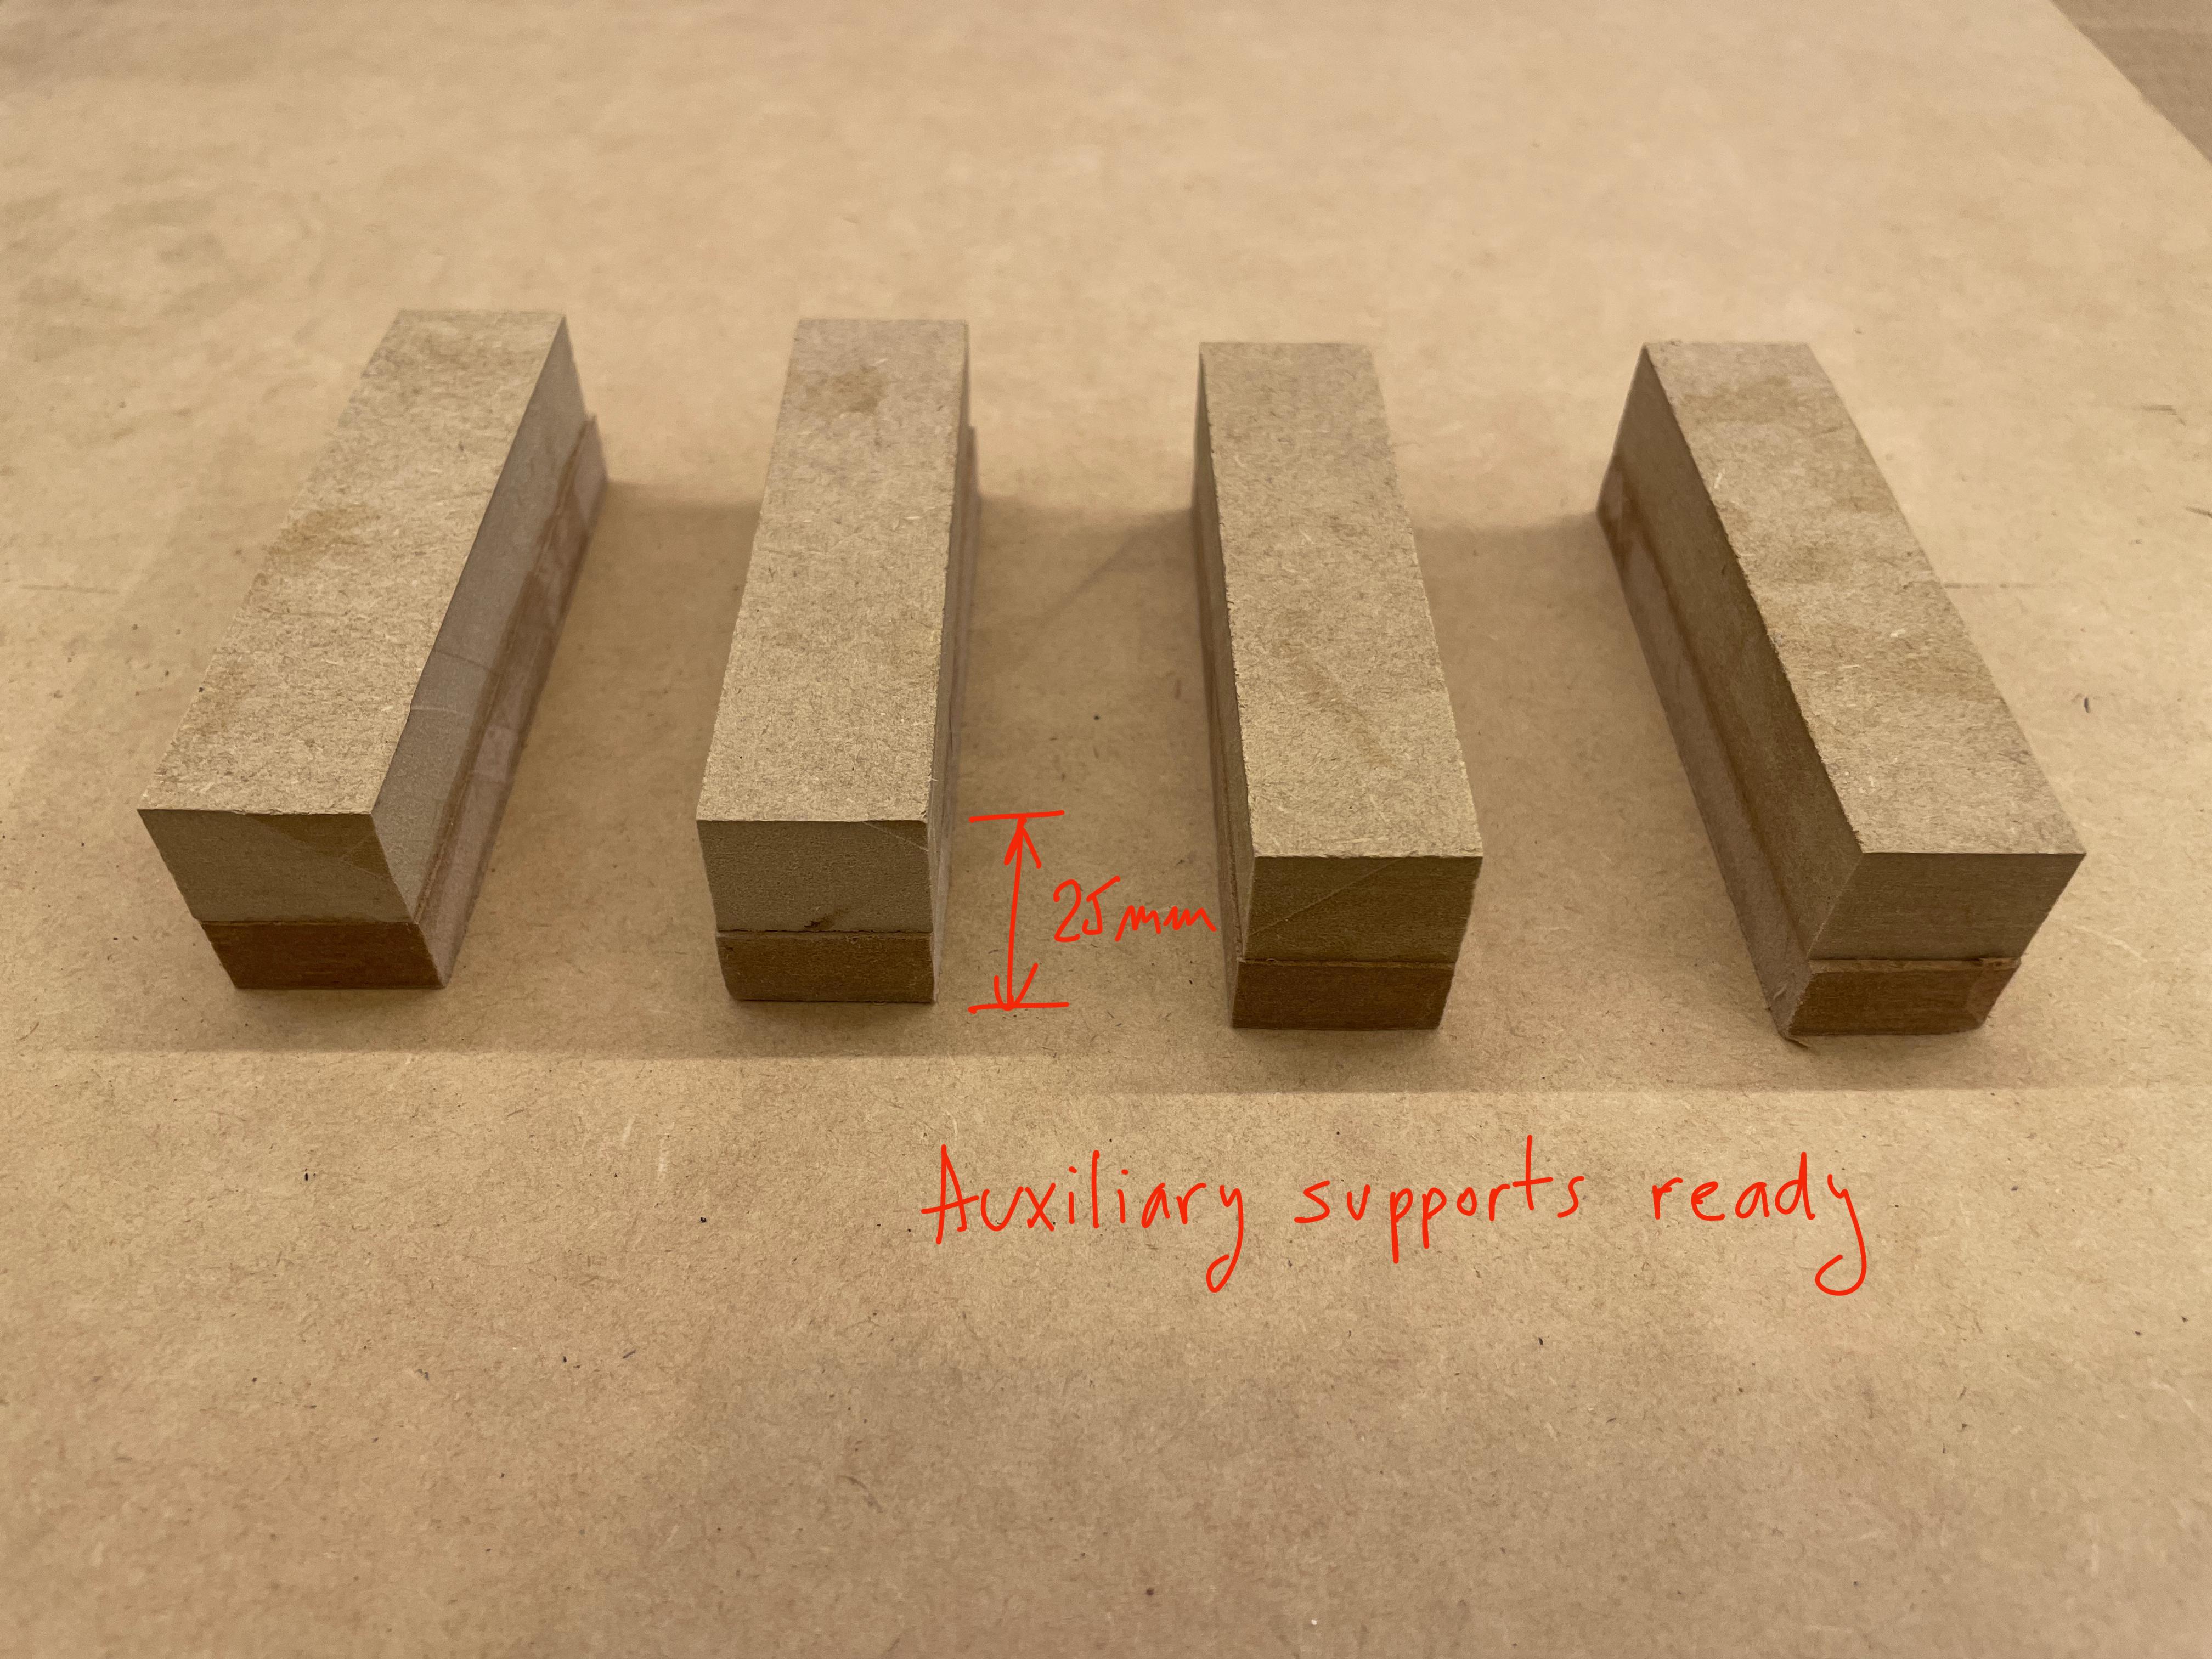
- Prepare four auxiliary supports 2.5 cm high (in my case I glued two MDF pieces of 15 and 10 mm respectively). These supports will serve to set the final depth where to insert the art board panel.
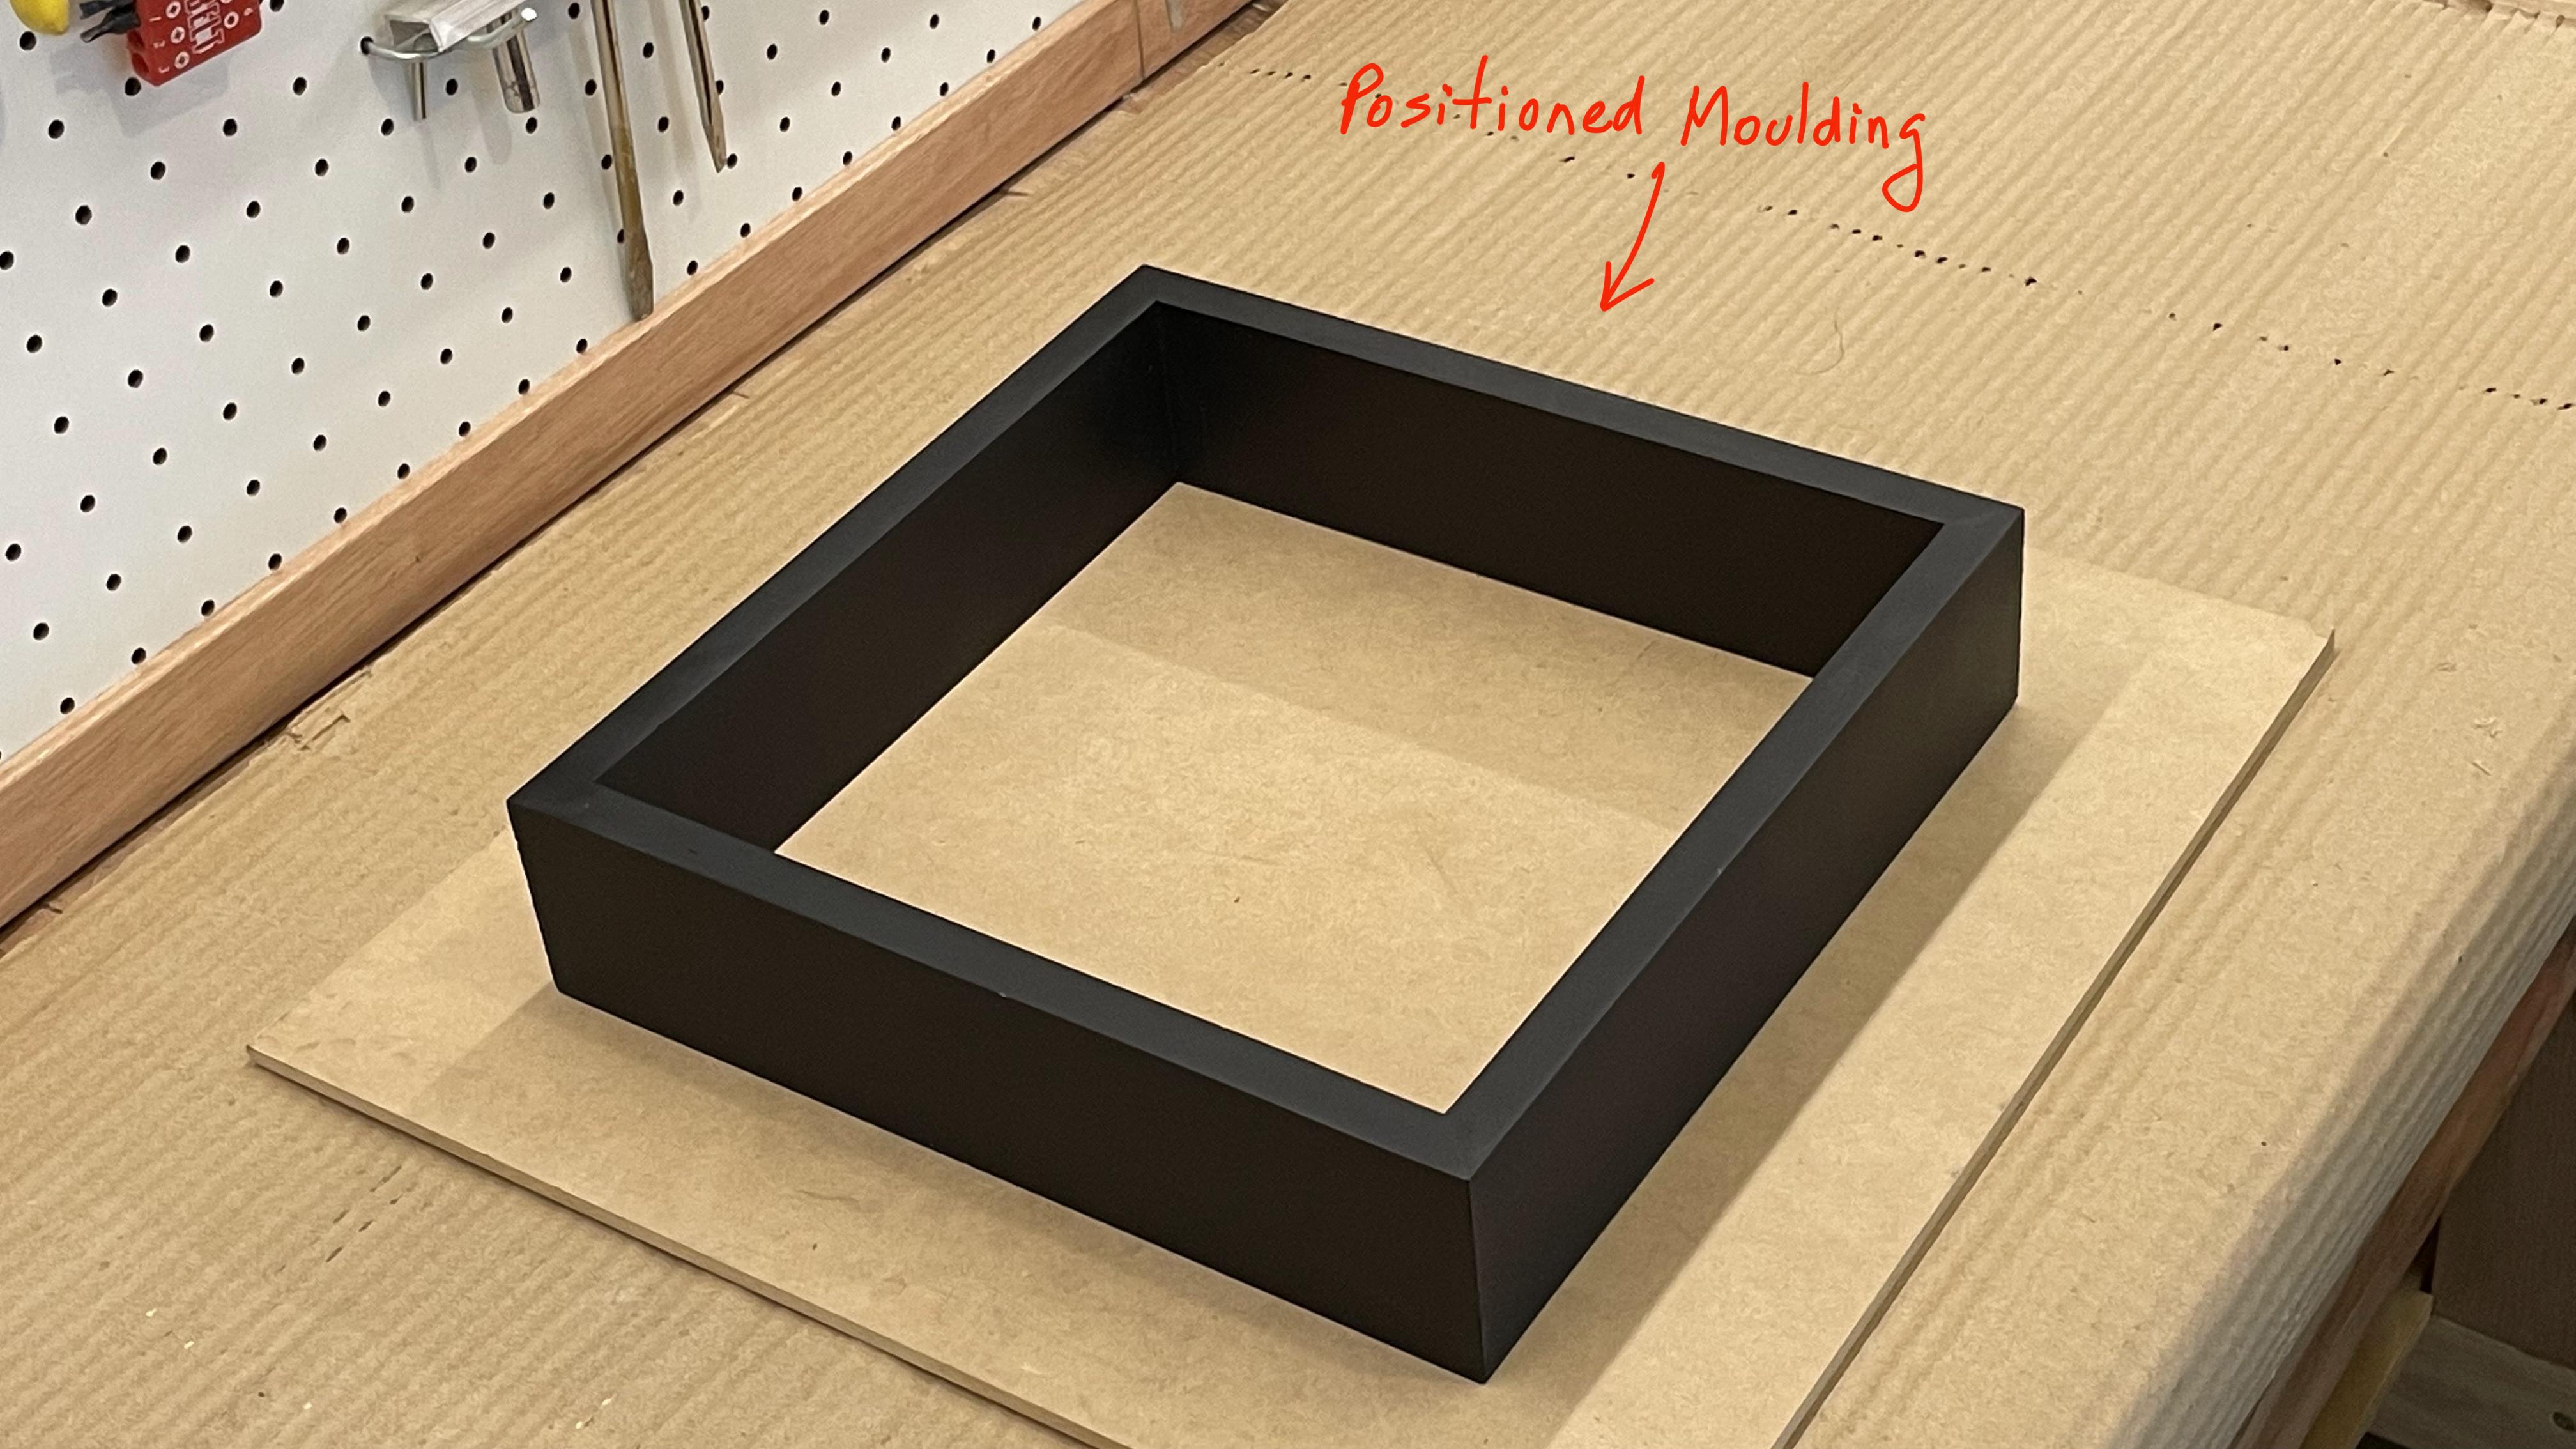
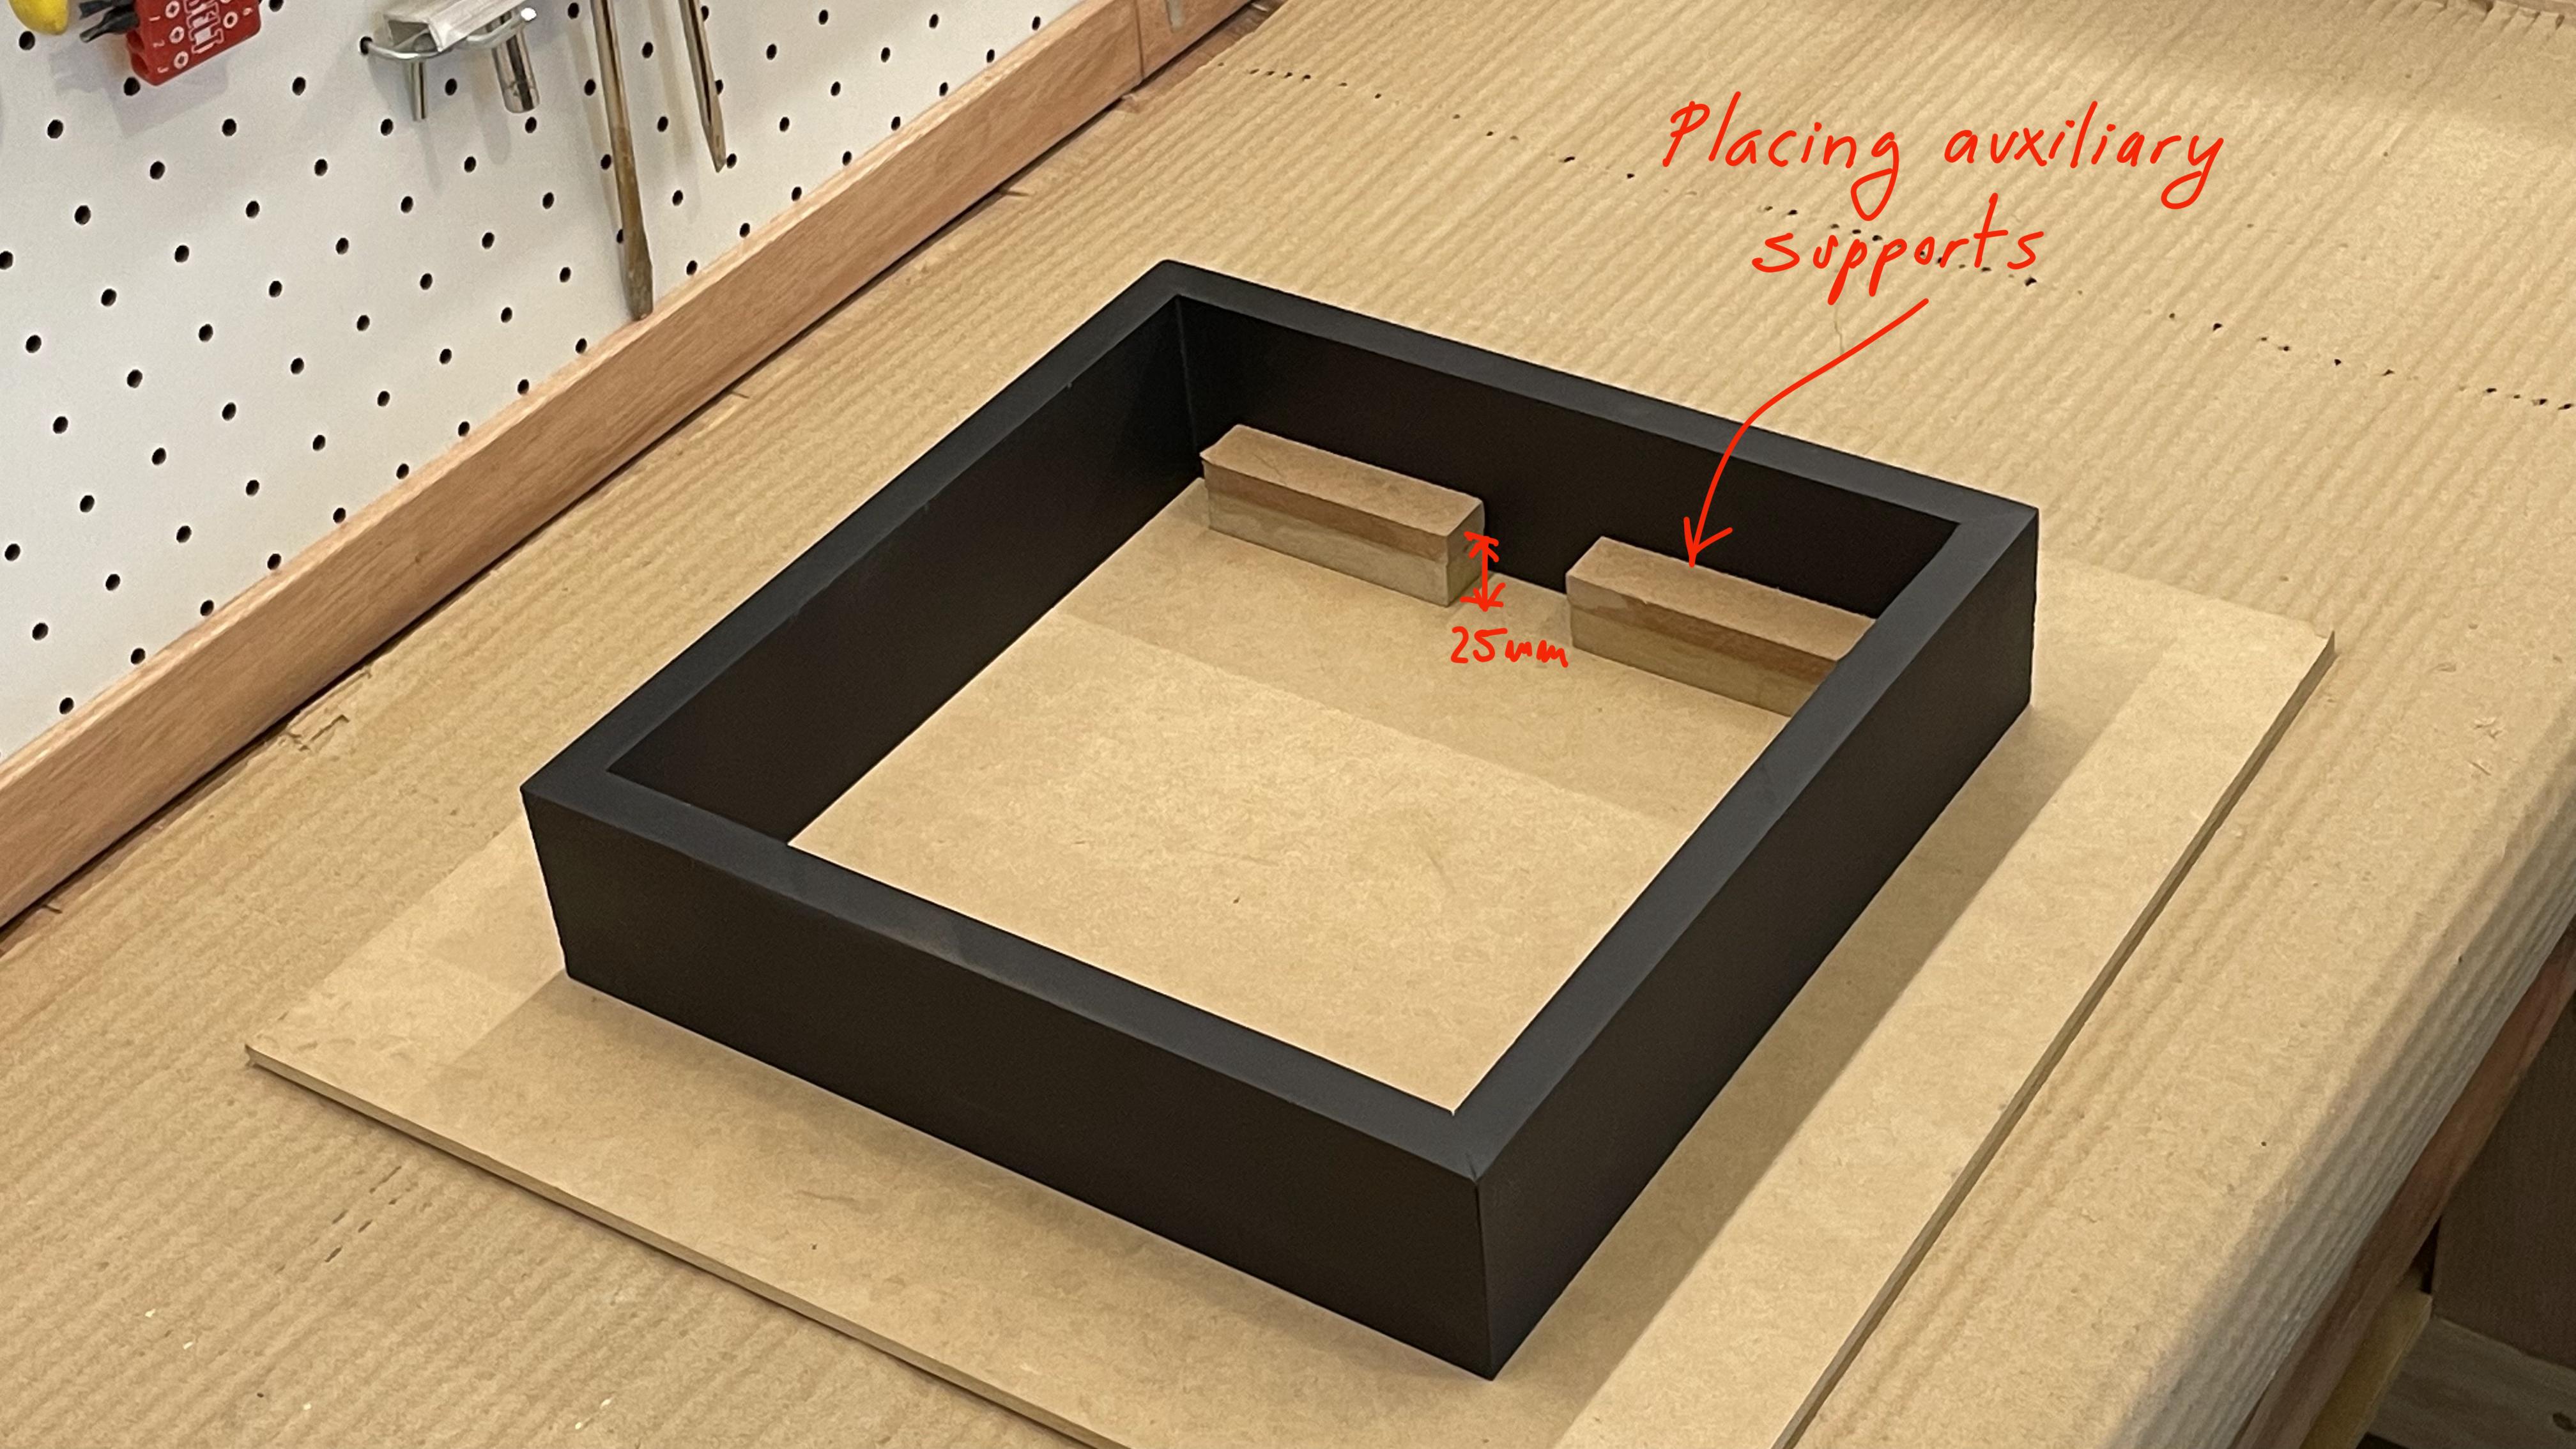
- Place the four auxiliary supports as seen in the photo.
- Apply glue to the Art board and insert it into the moulding carefully and with even movements at all ends, applying slight pressure with your hands (or rubber hammer) until the panel is level on top of the auxiliary supports.
- The art board panel must be perfectly level and now let it dry.
- Once dry, apply any wall hanging device at the top back of the artwork.
Printing Plastic Parts
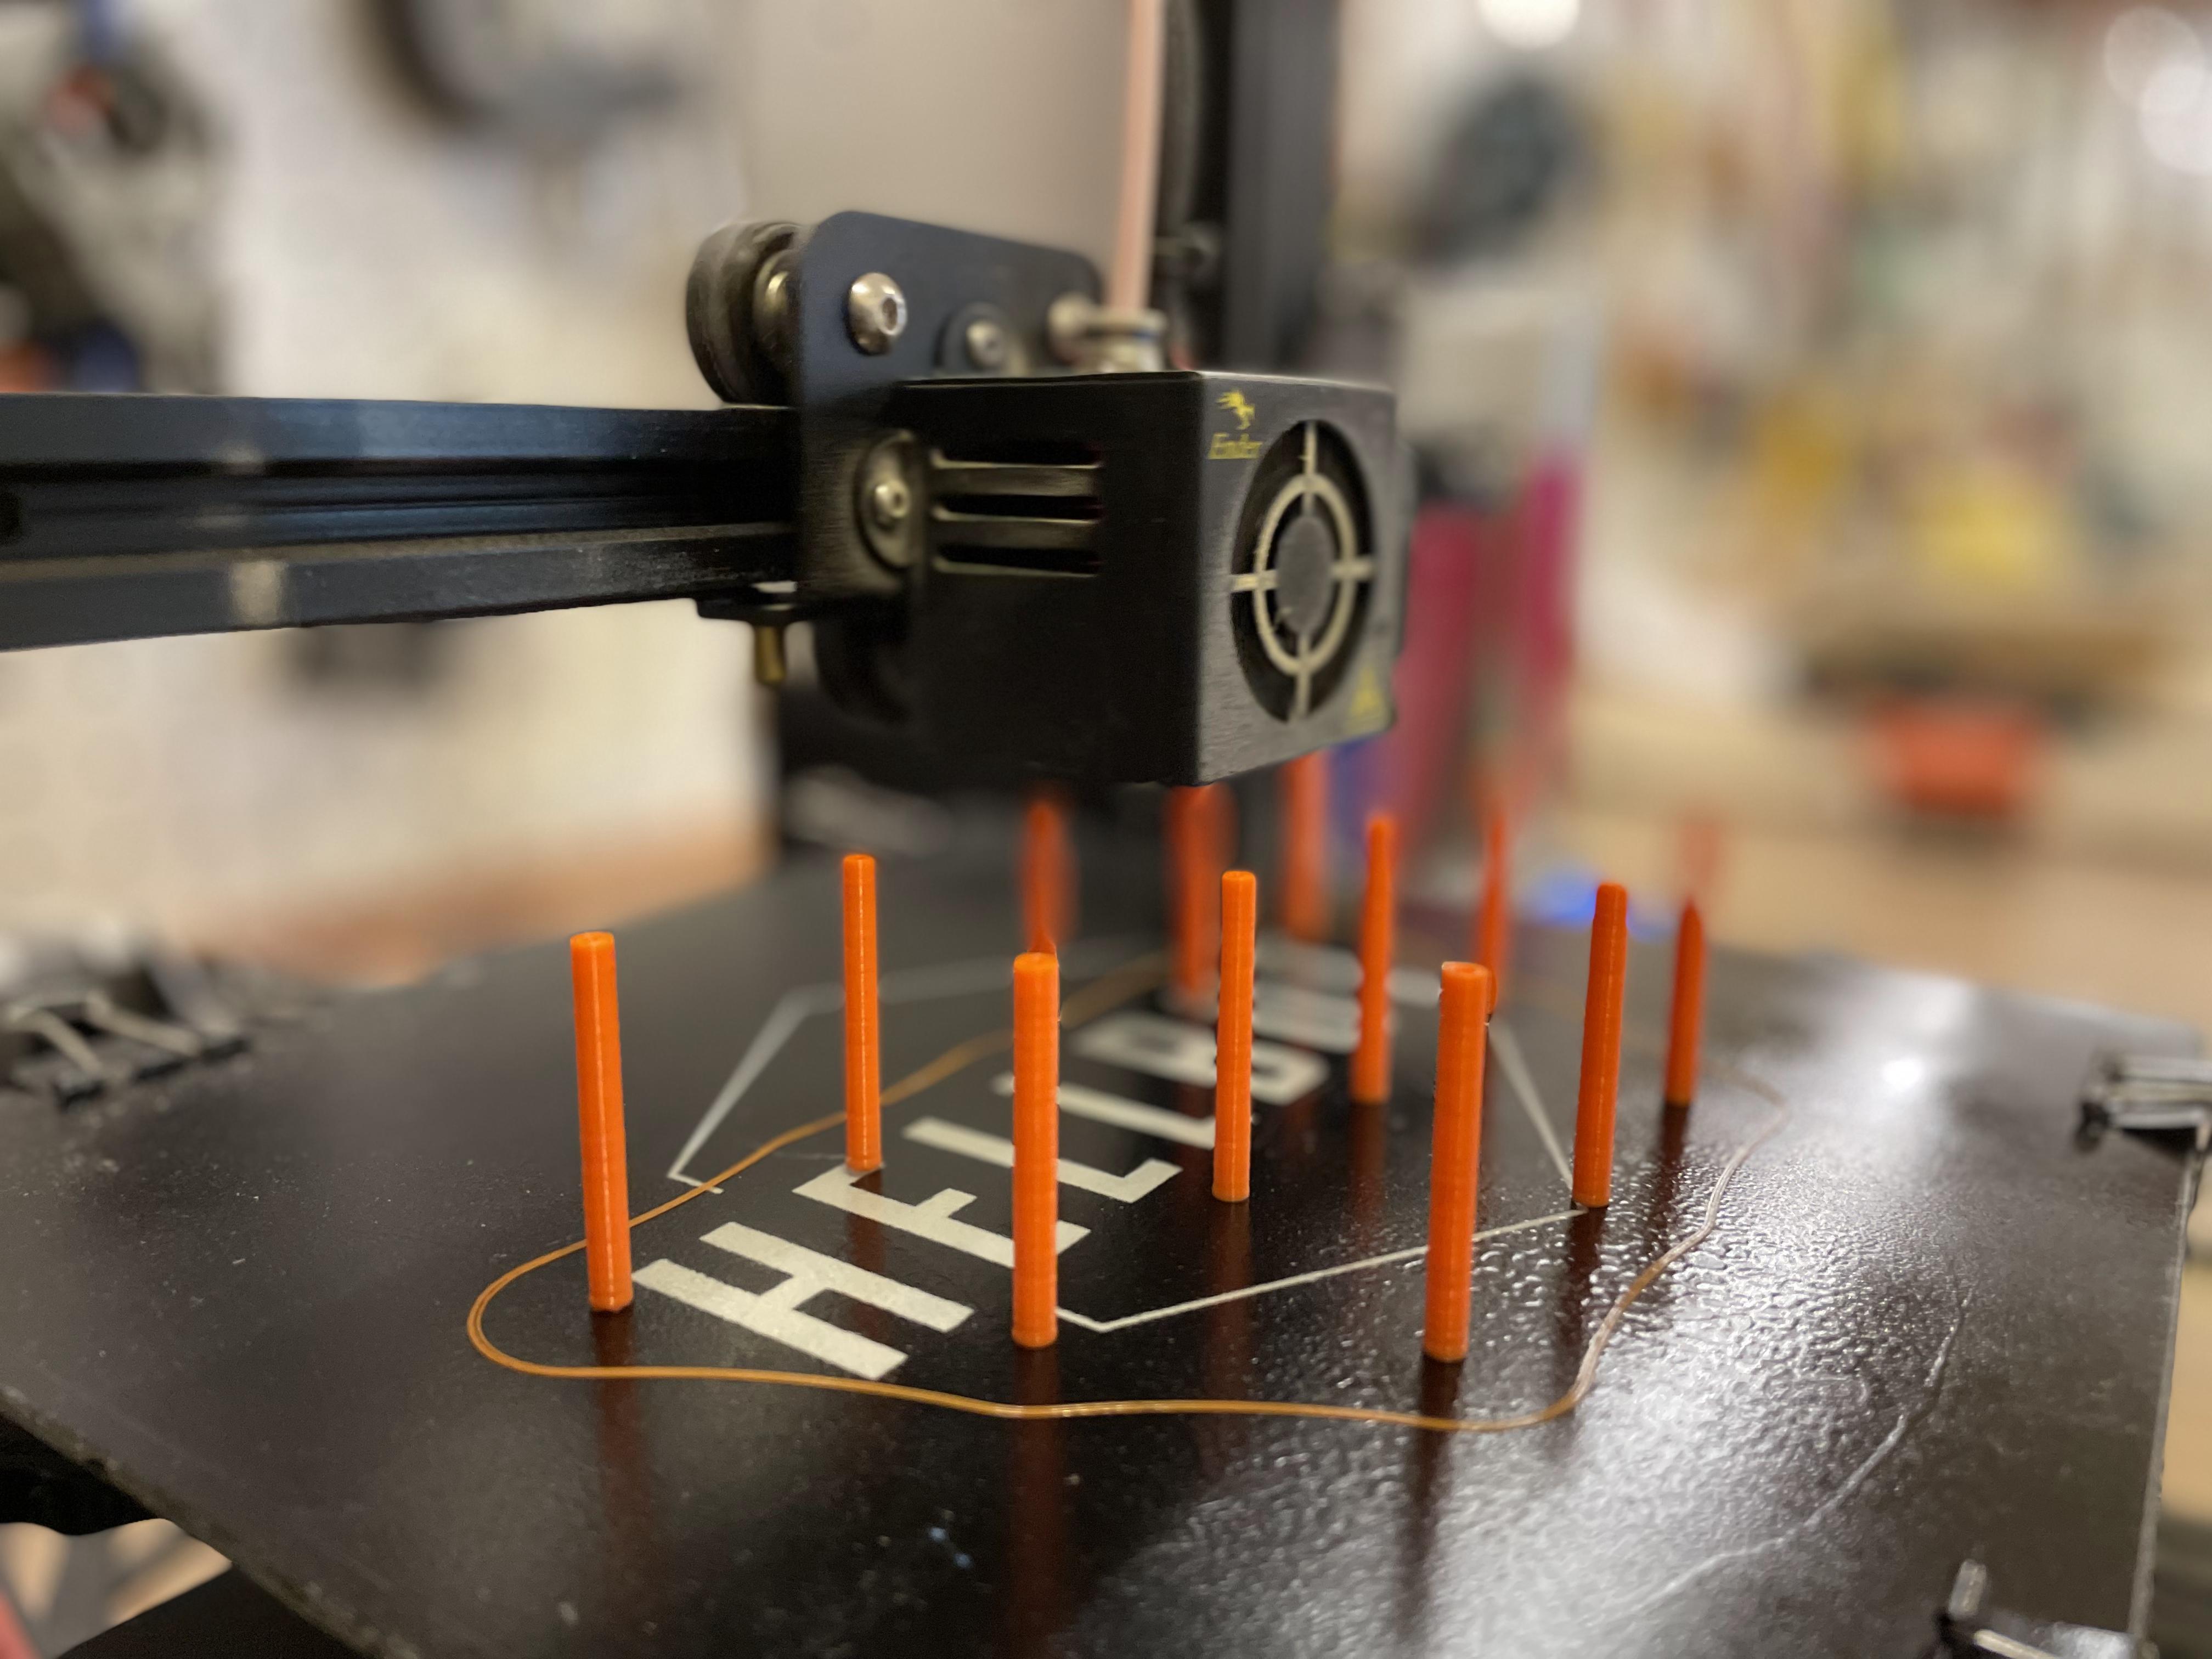
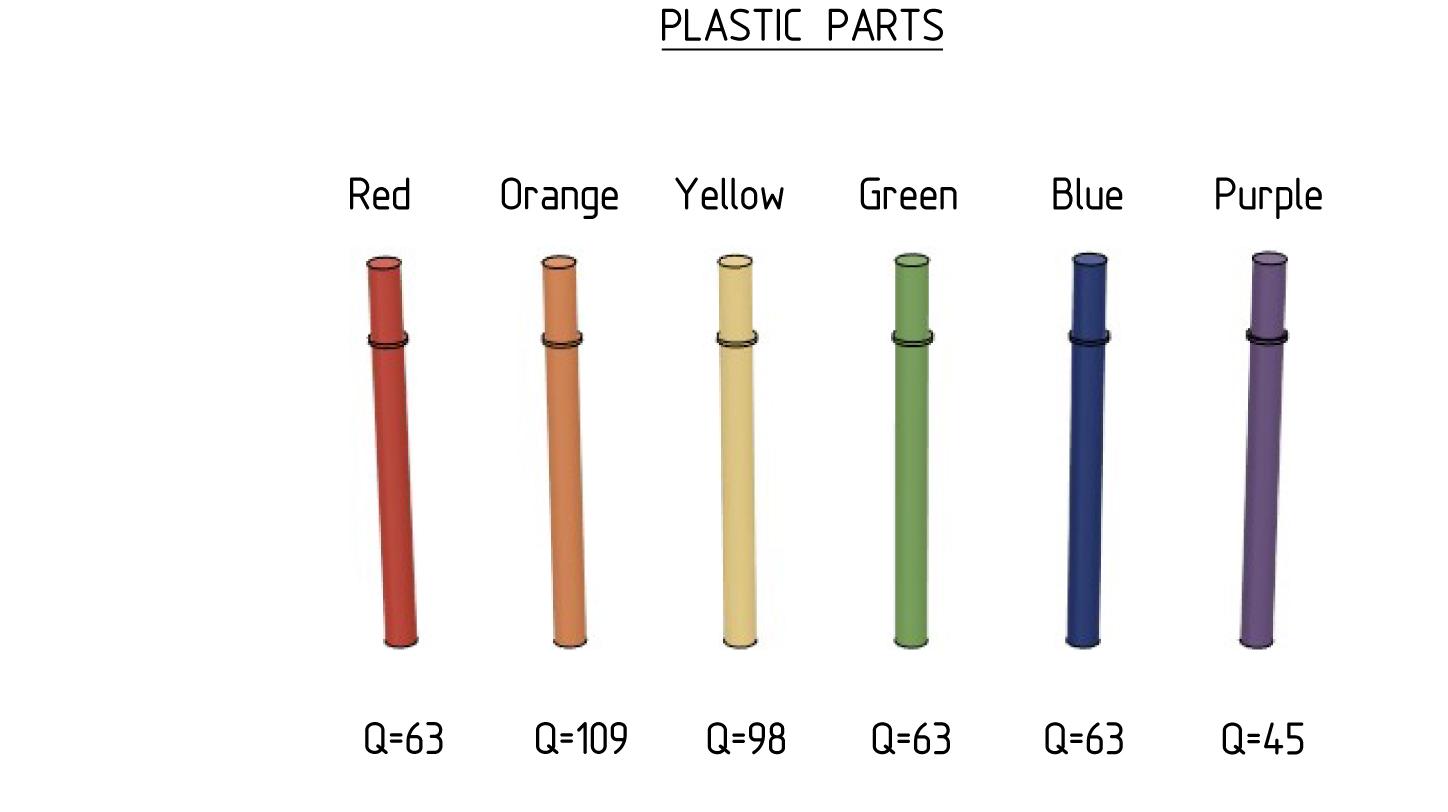
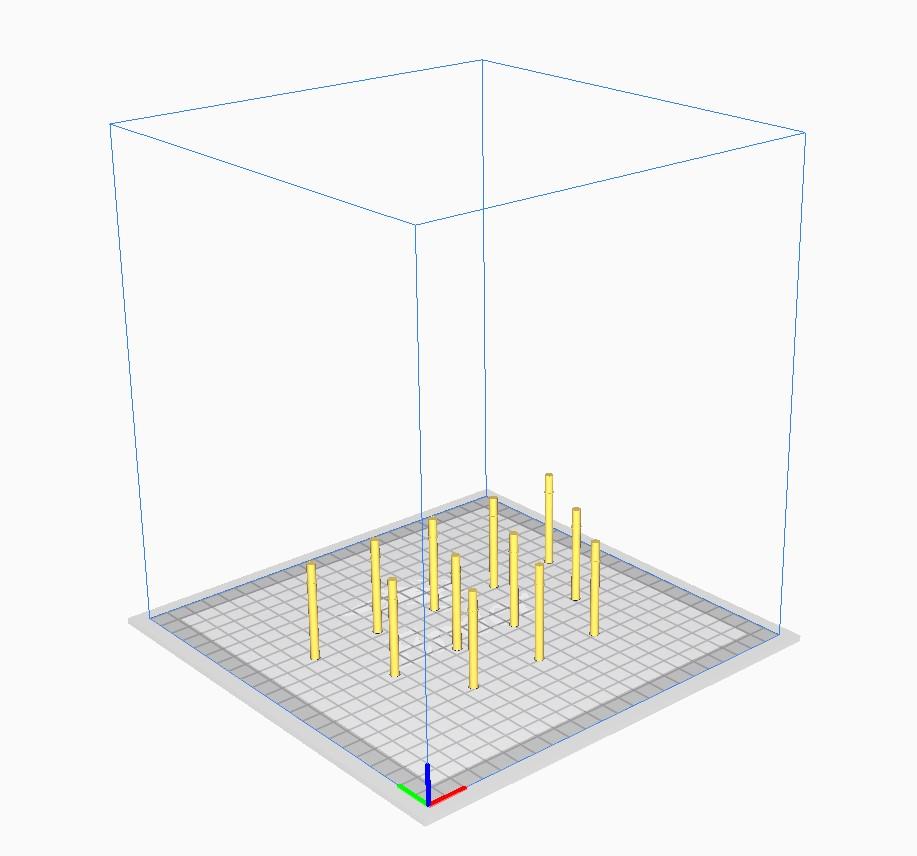
The original 441-piece plastic design in this instructable (see step 5) consists of:
- Red pieces quantity= 63
- Orange pieces quantity= 109
- Green pieces quantity =63
- Yellow pieces quantity= 98
- Blue pieces quantity= 63
- Purple pieces quantity=45
In this step, have a lot of patience for printing because there are many plastic pieces with different colors.
With the attached STL files you can export to the program you use to define the printing parameters (CURA, etc.) and export to GCODE:
The print was made with PLA filament on a 3d printer.
The main parameters that I used were:
- Layer Height = 0.16 mm.
- Infill = 20%
- Bed temperature = 60 degrees.
- Nozzle temperature = 200 degrees.
- Printing speed = 50 mm / min.
- Generate support = no
Due to the small diameter of the plastic piece, when printing (I have an Ender 3 Pro printer) you will probably have to do tests adjusting the scale of the object so that the dimension after printing is exact. In my case I had to multiply the object in width and length by a factor 1,10. Do tests with your printer before starting all the printing
Once the parts are printed, use fine sandpaper or tweezers to remove any damage or printing failure on the plastic parts. They must be able to slide perfectly into the holes of the Art Matrix Holes.
The STL file is attached so that you can use any program like CURA or similar to export to g-code.
I placed the pieces vertically, printing up to 12 units of the same color at the same time.
Due to how the pieces are placed on the bed (vertical position), it is very important that there is adherence to prevent the pieces from falling off, and causing a mess to the entire assembly you are printing. I used his preferred method, in my case I used hairspray. It is also very important to regulate the retraction to avoid the formation of small threads that can also cause problems when printing (apart from natural printing defects).
Downloads
Plastic Parts Assembly and Use
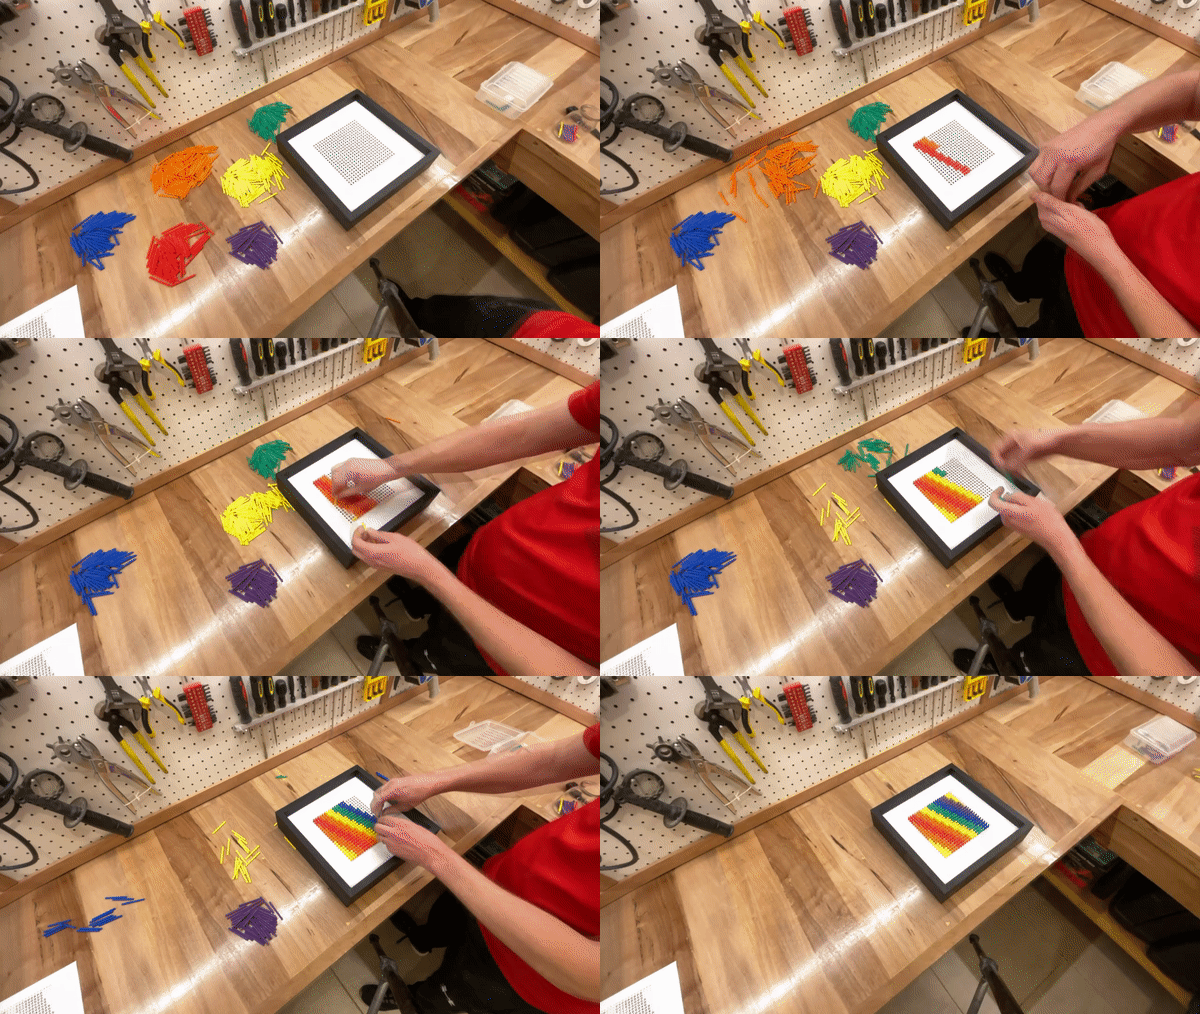
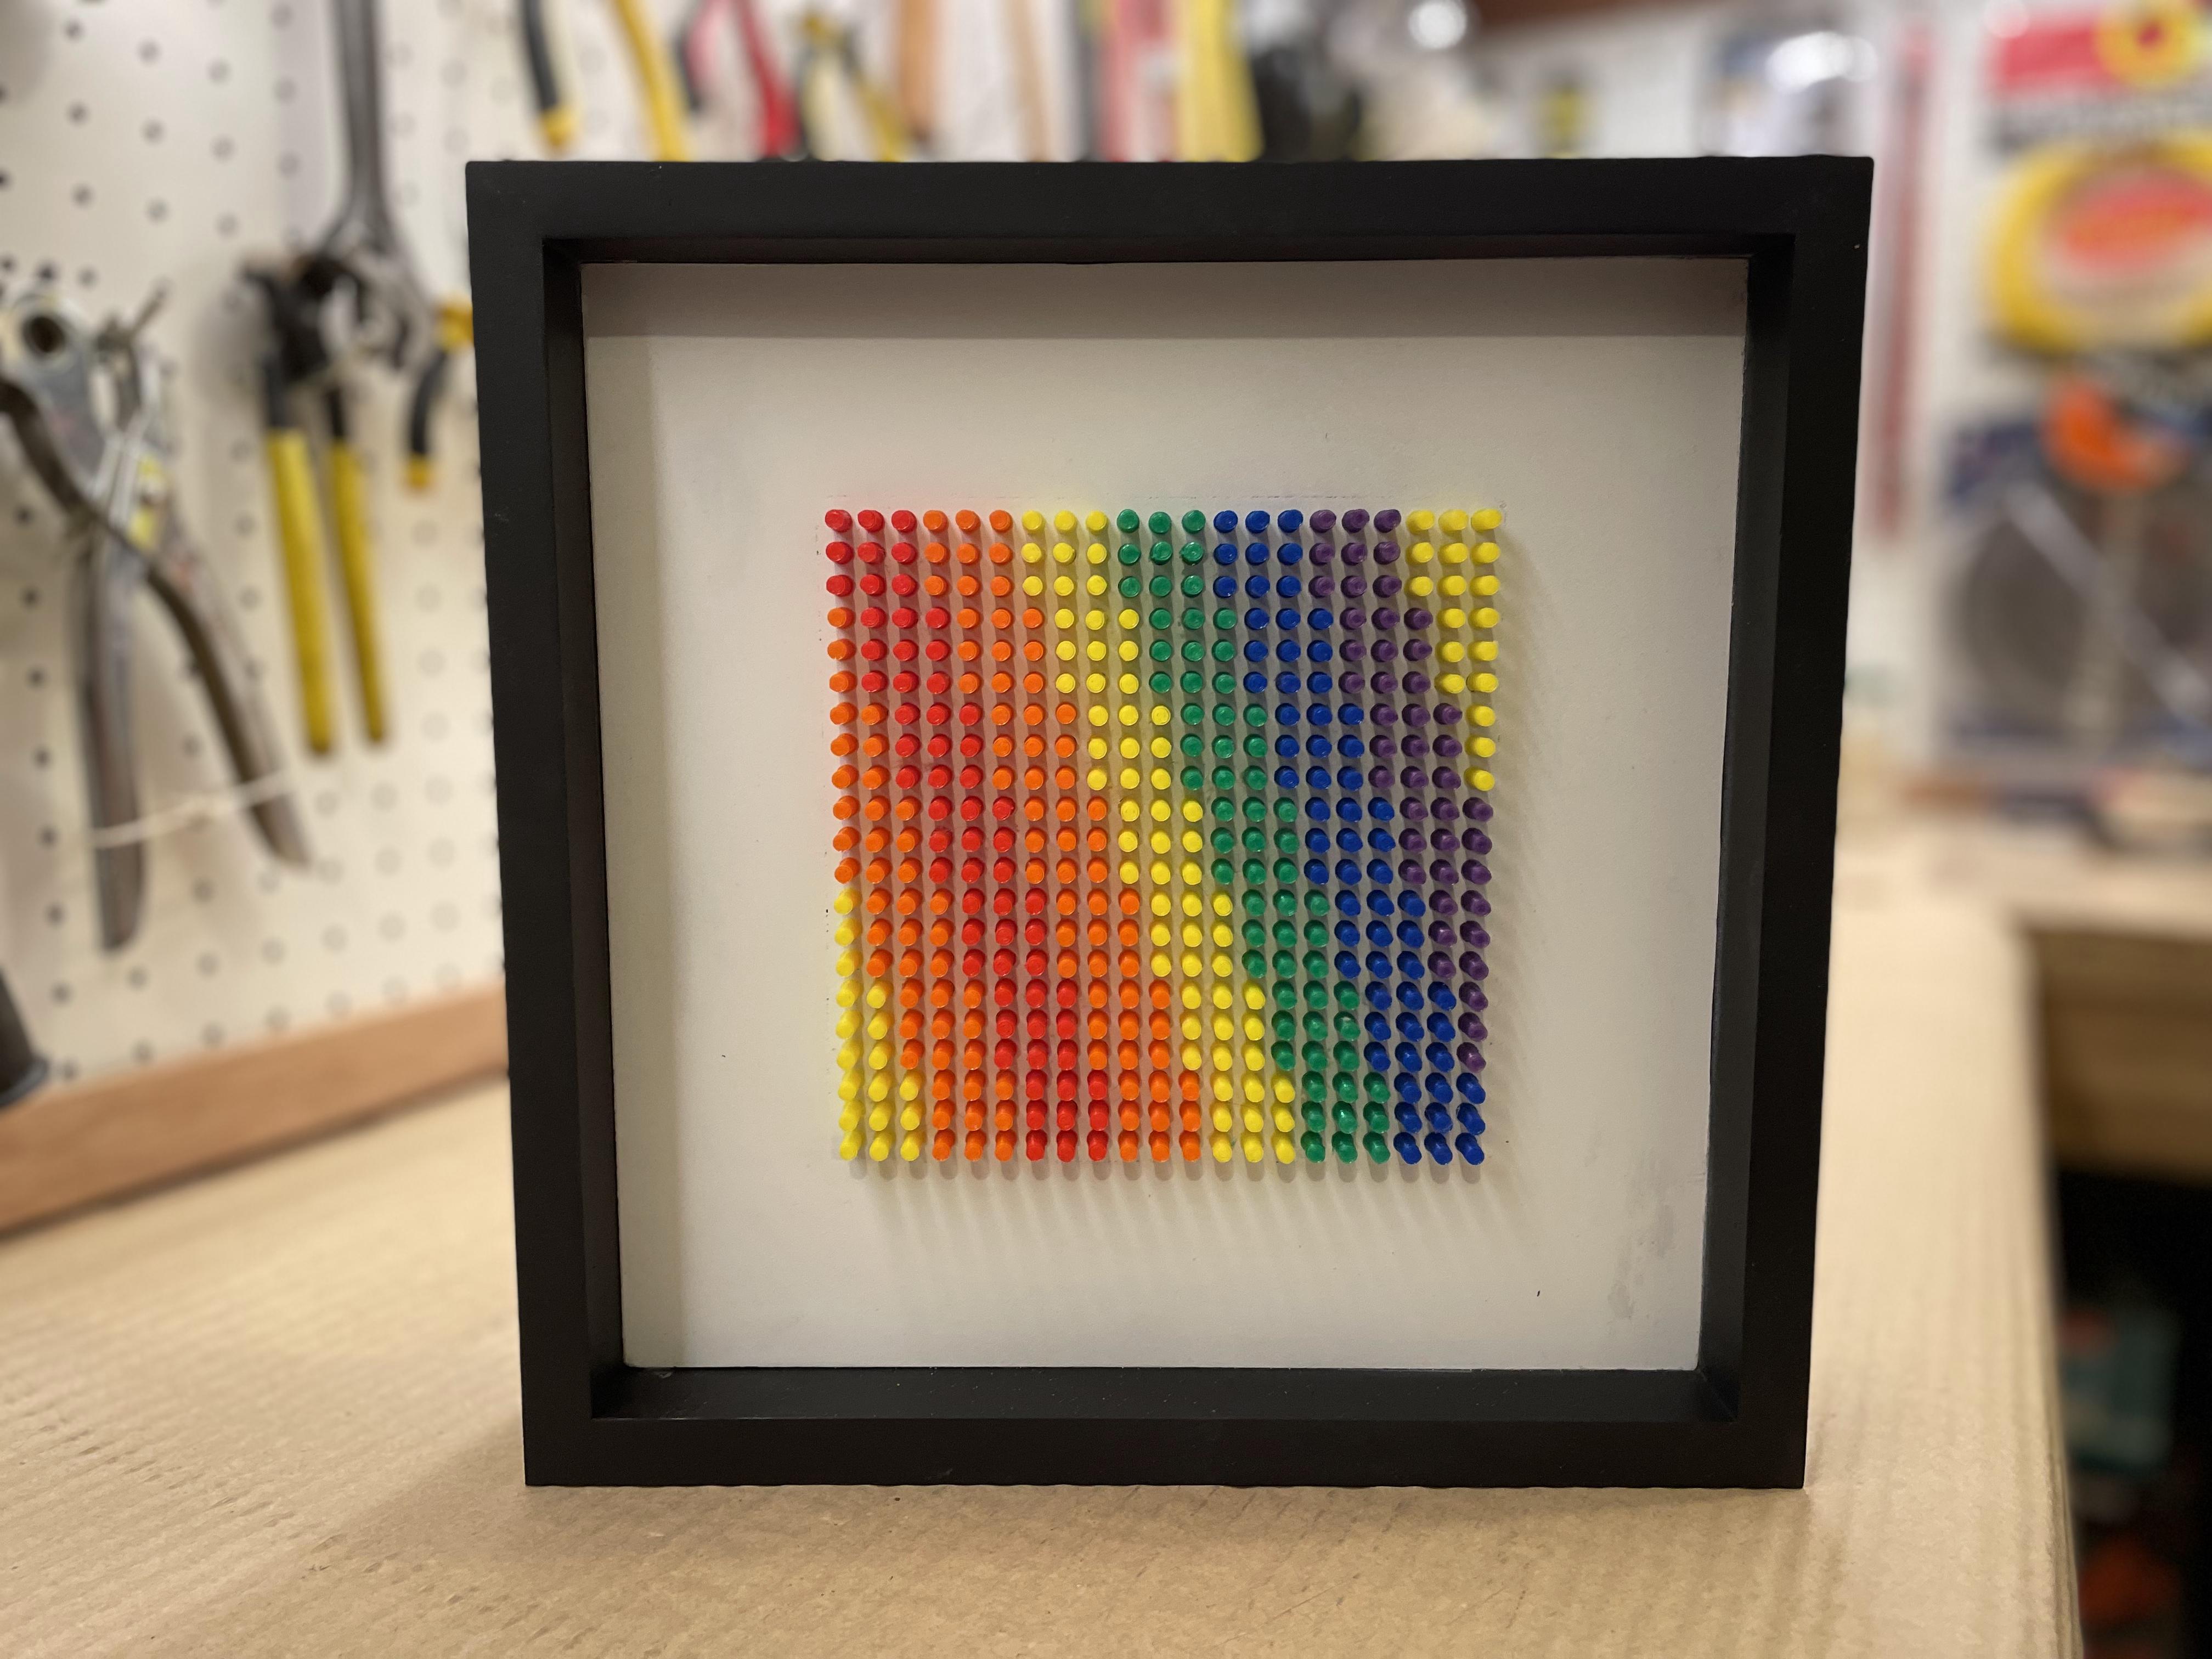
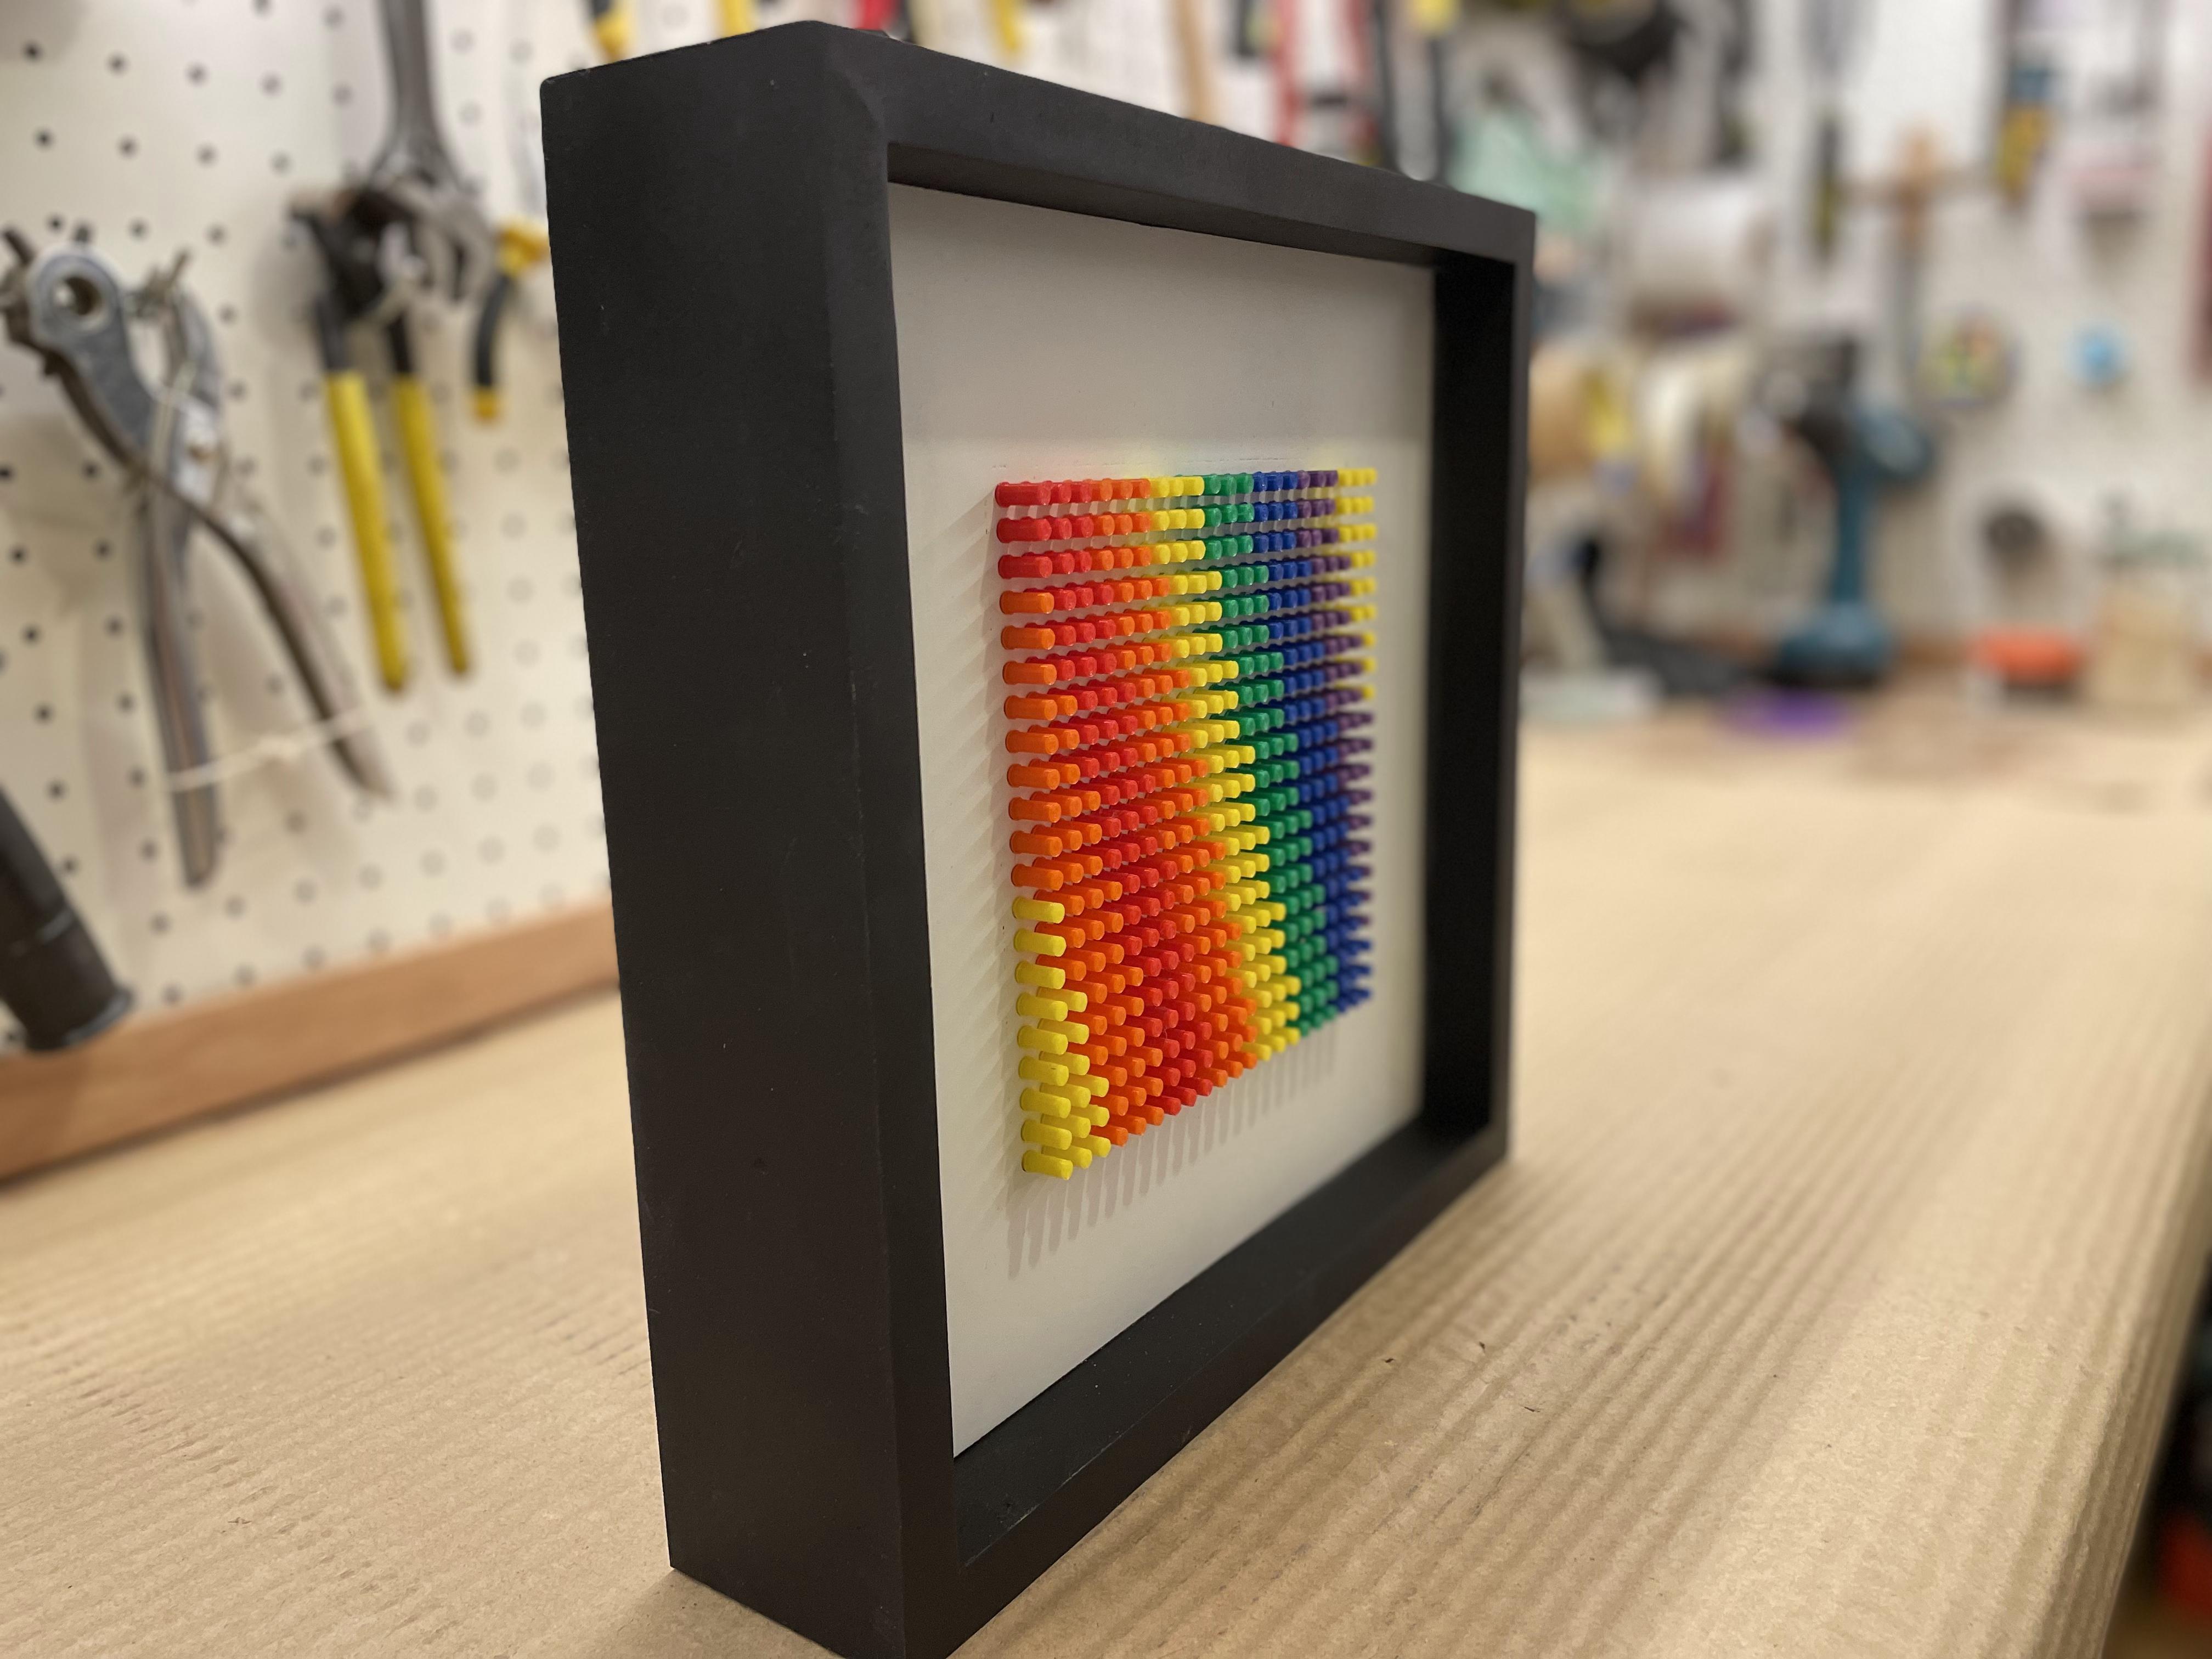
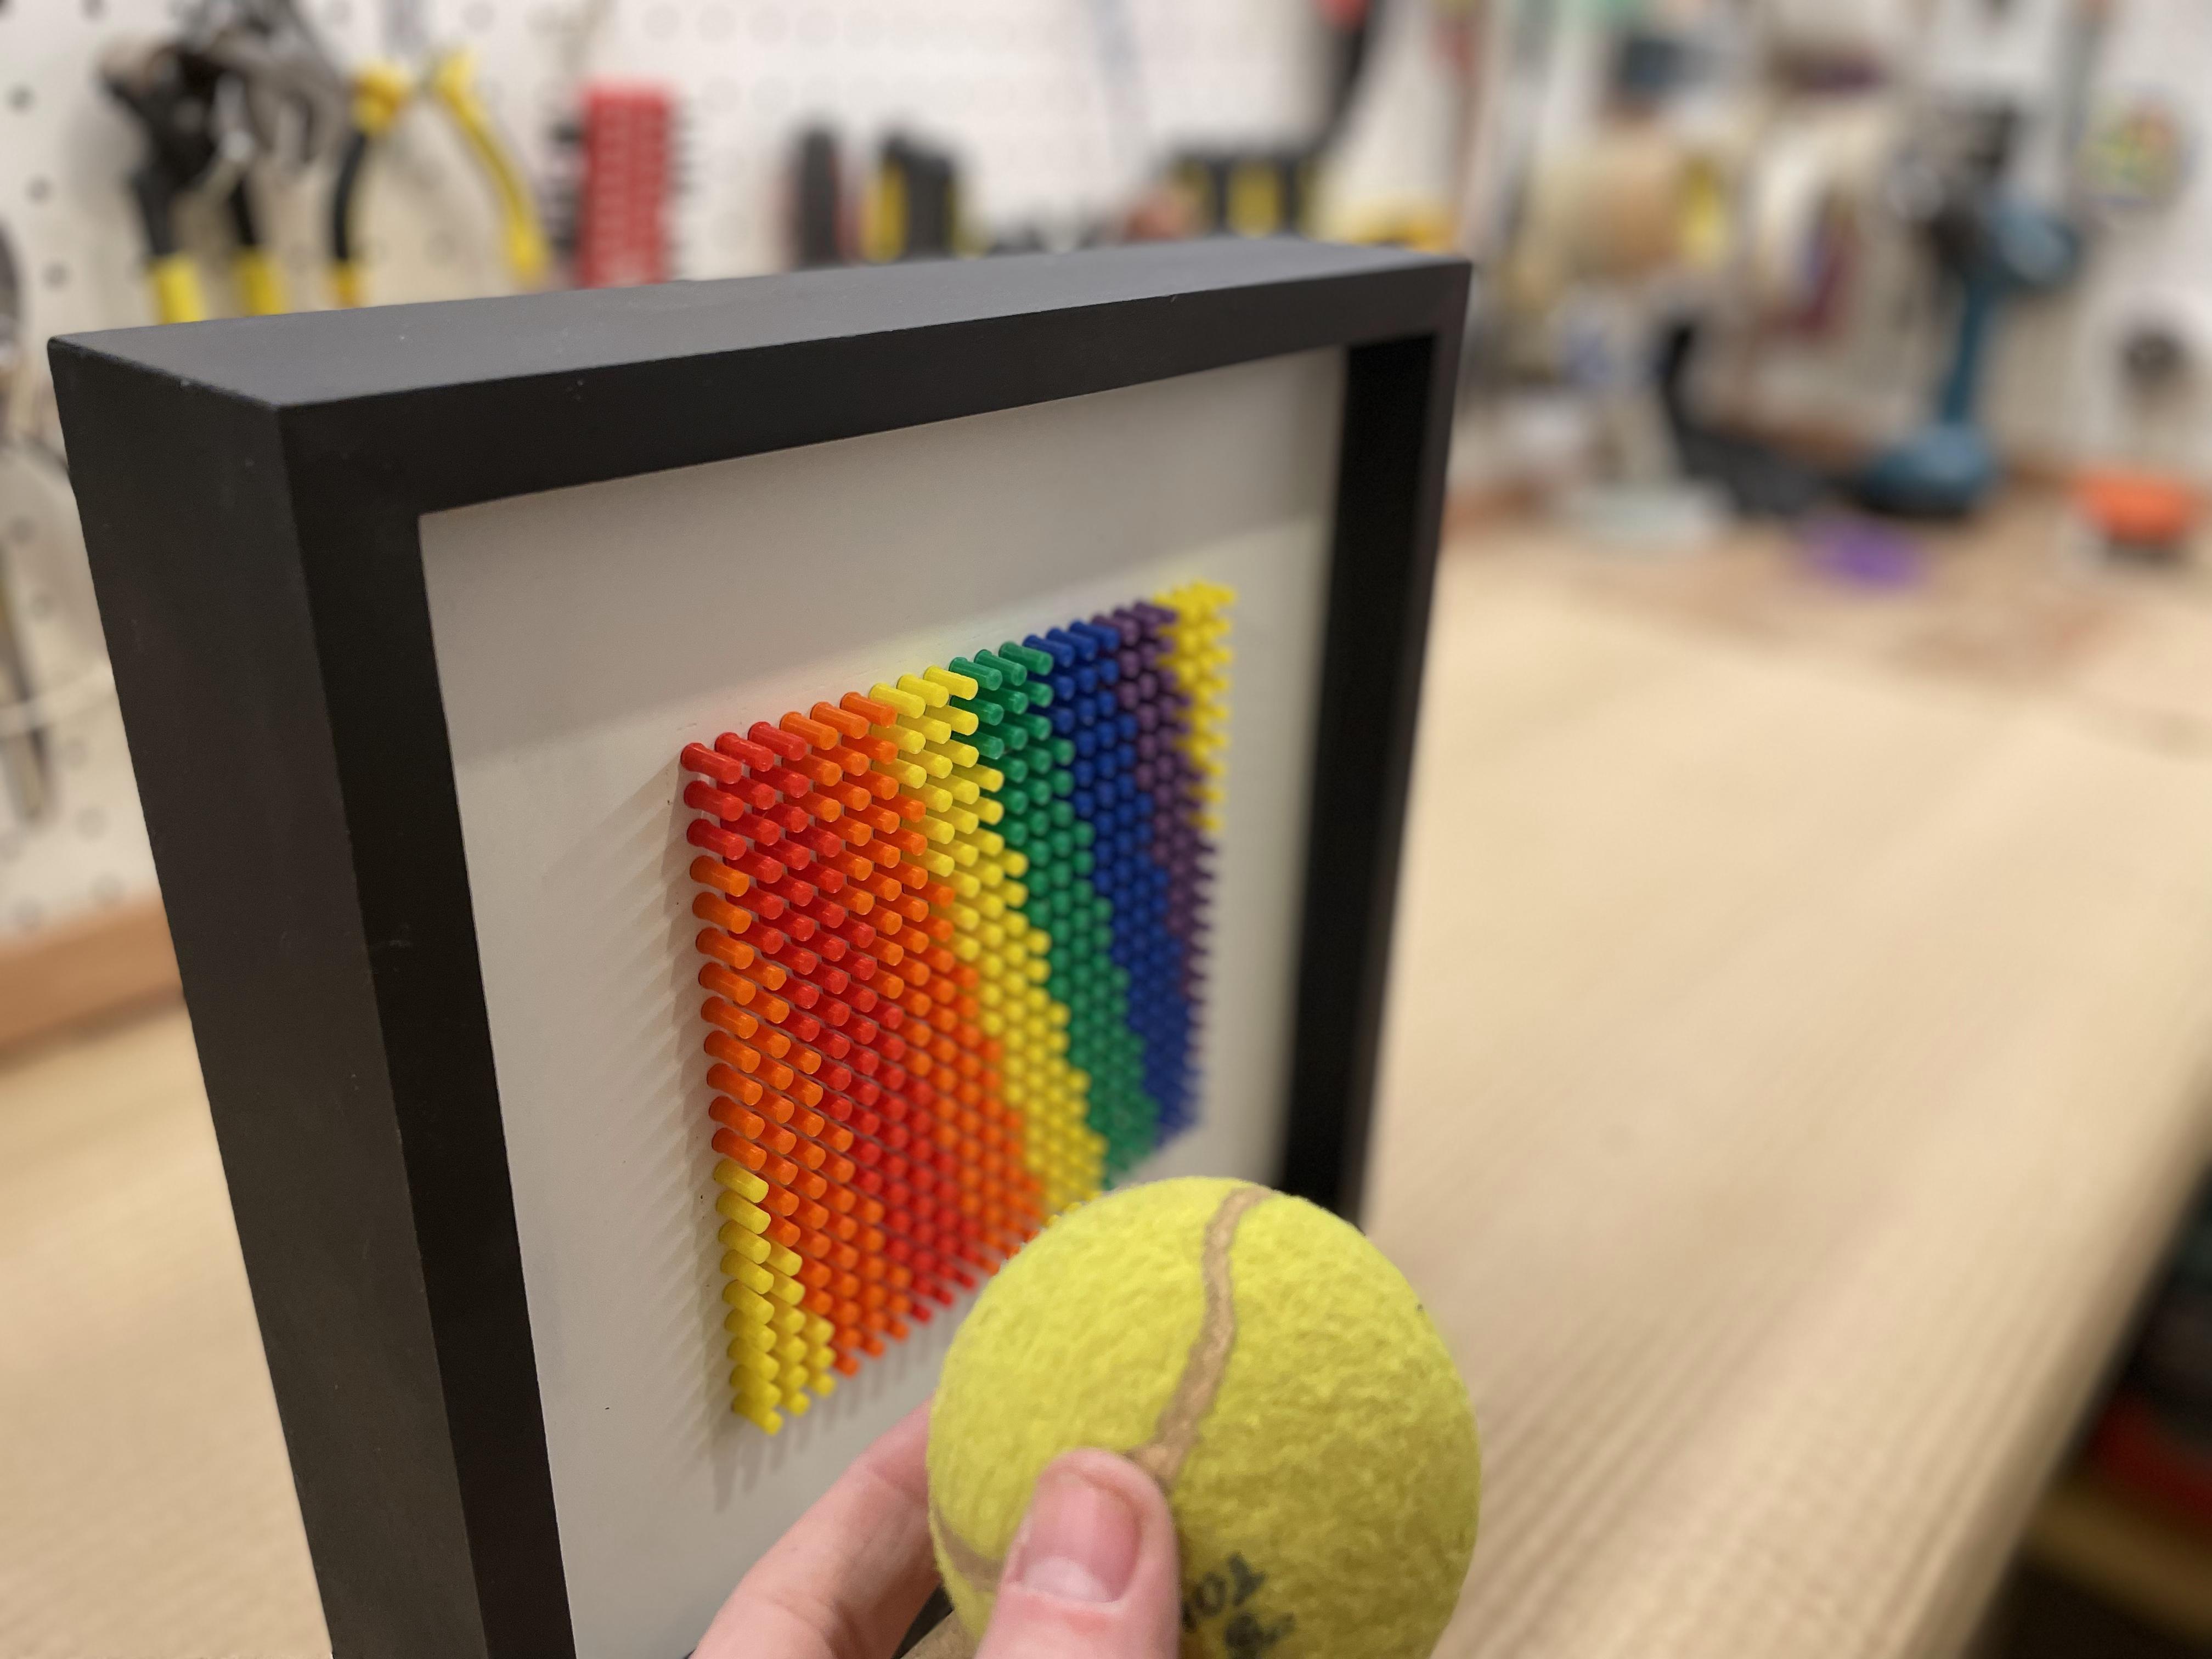
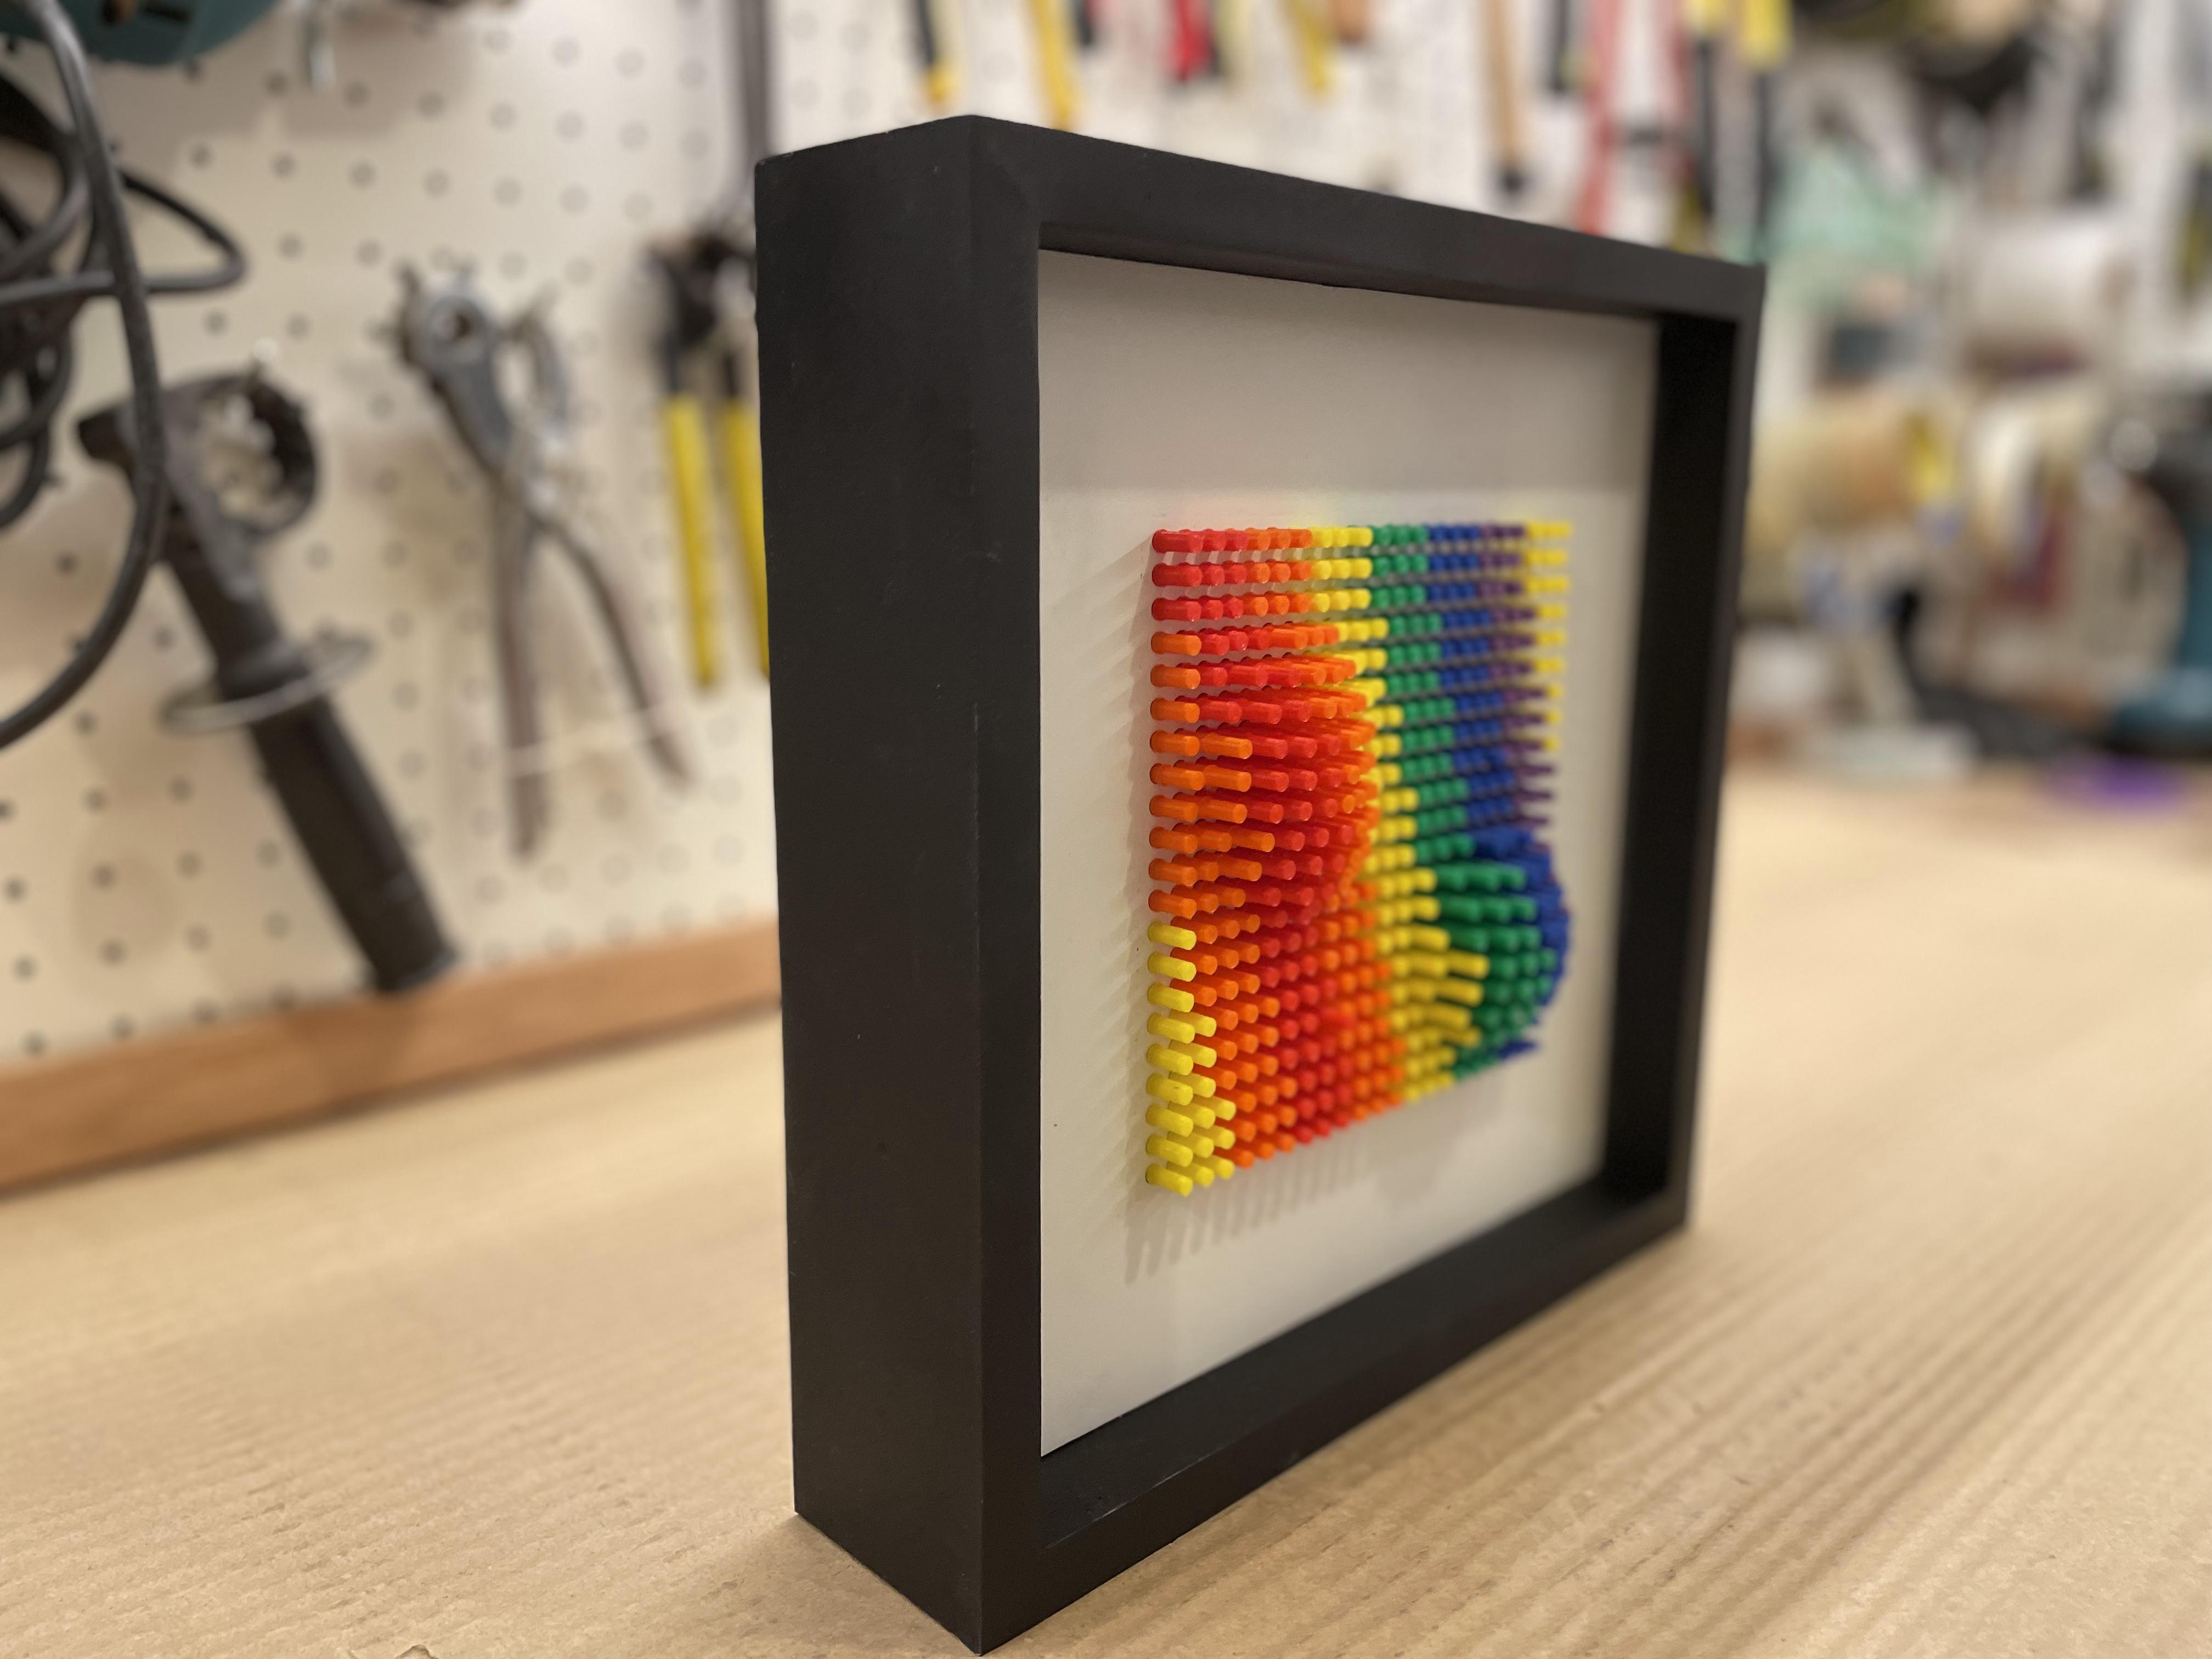
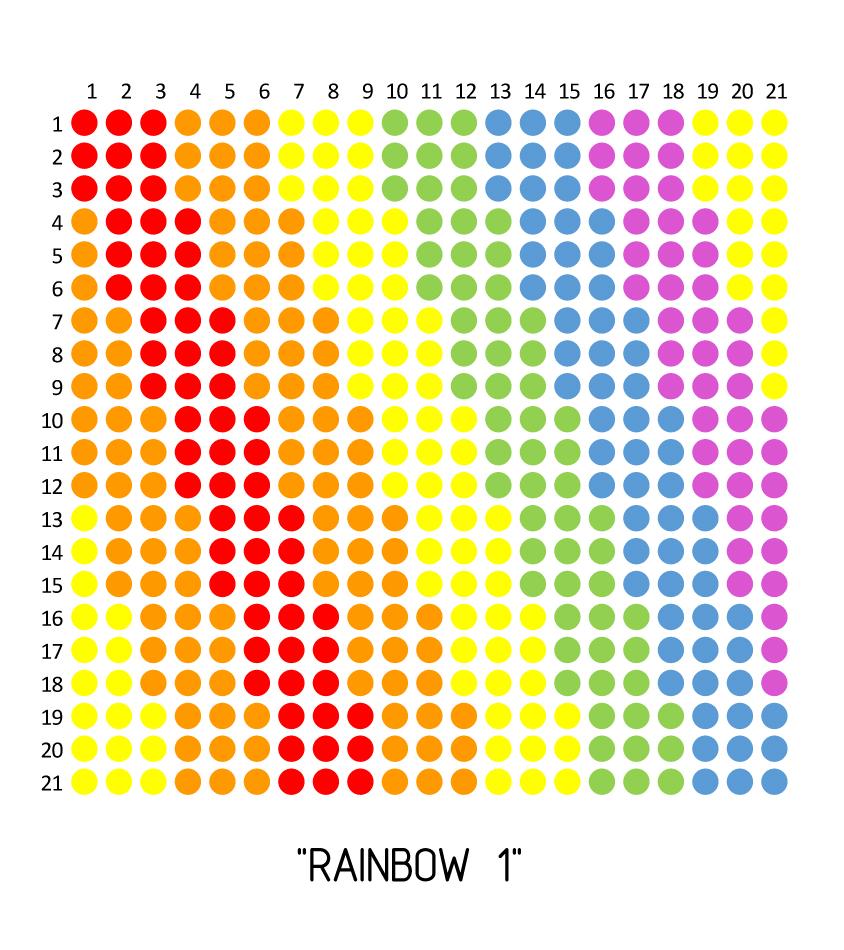
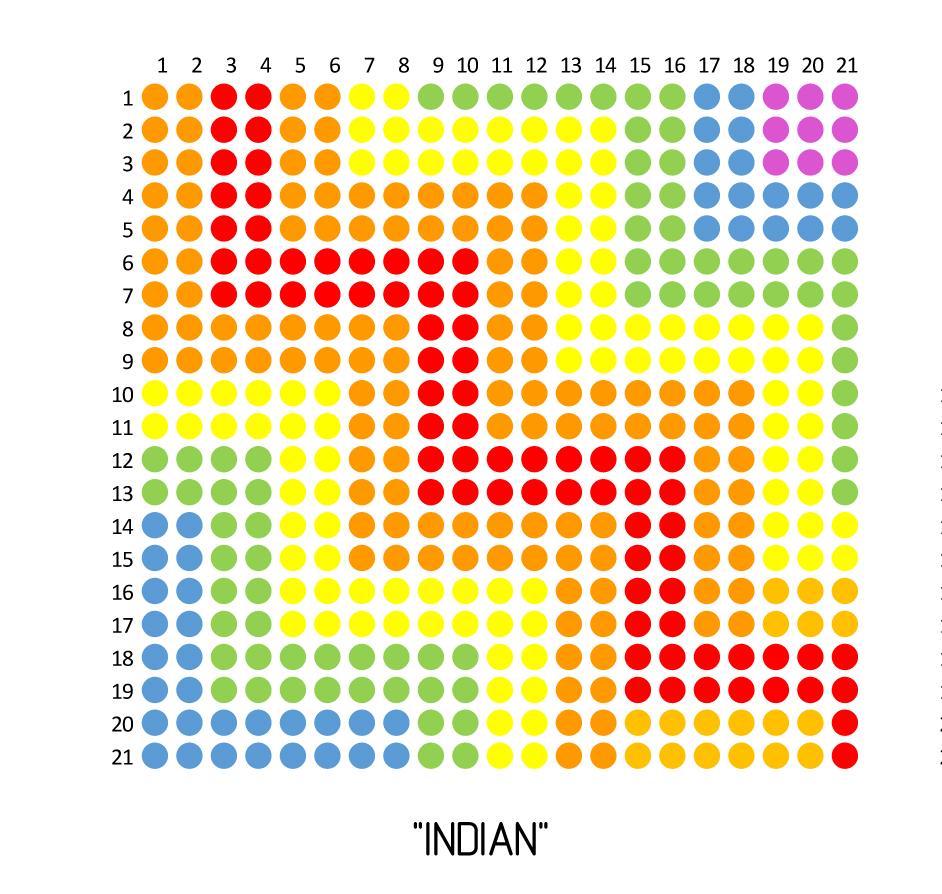
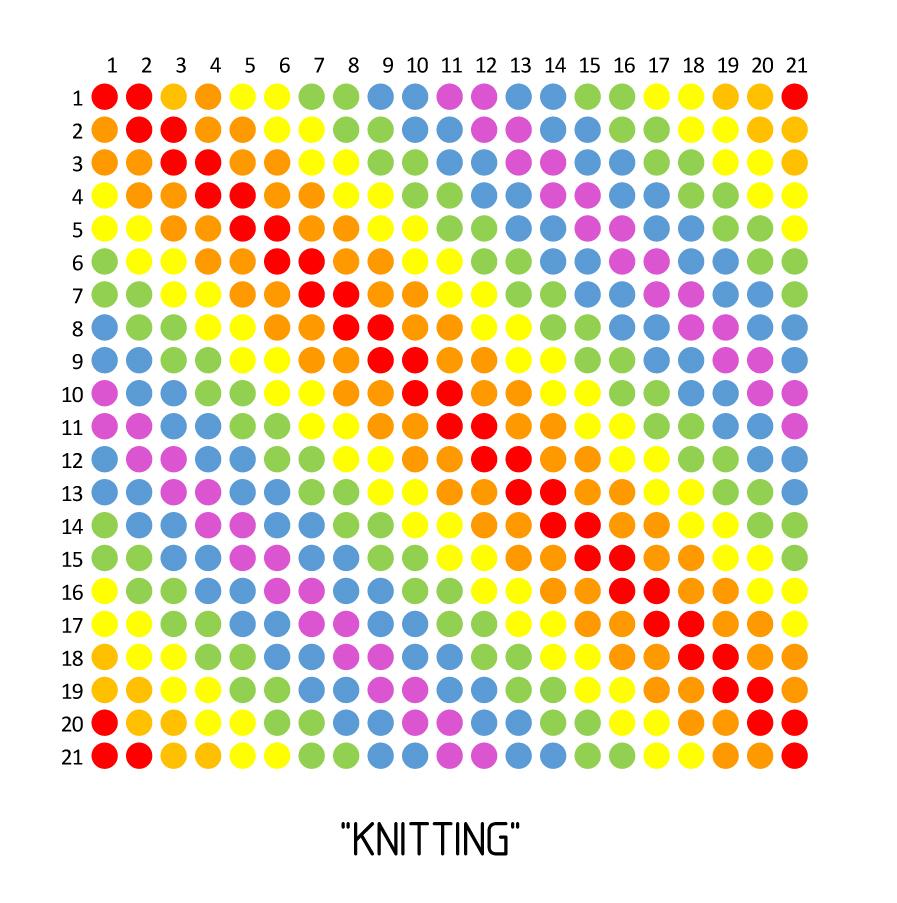
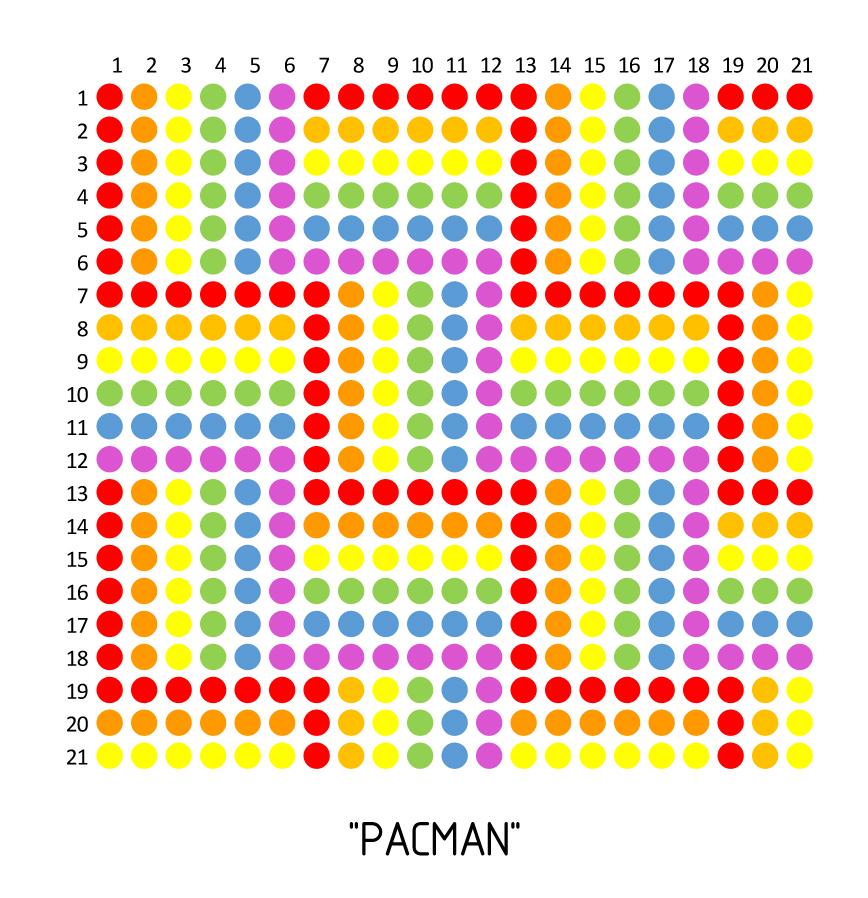
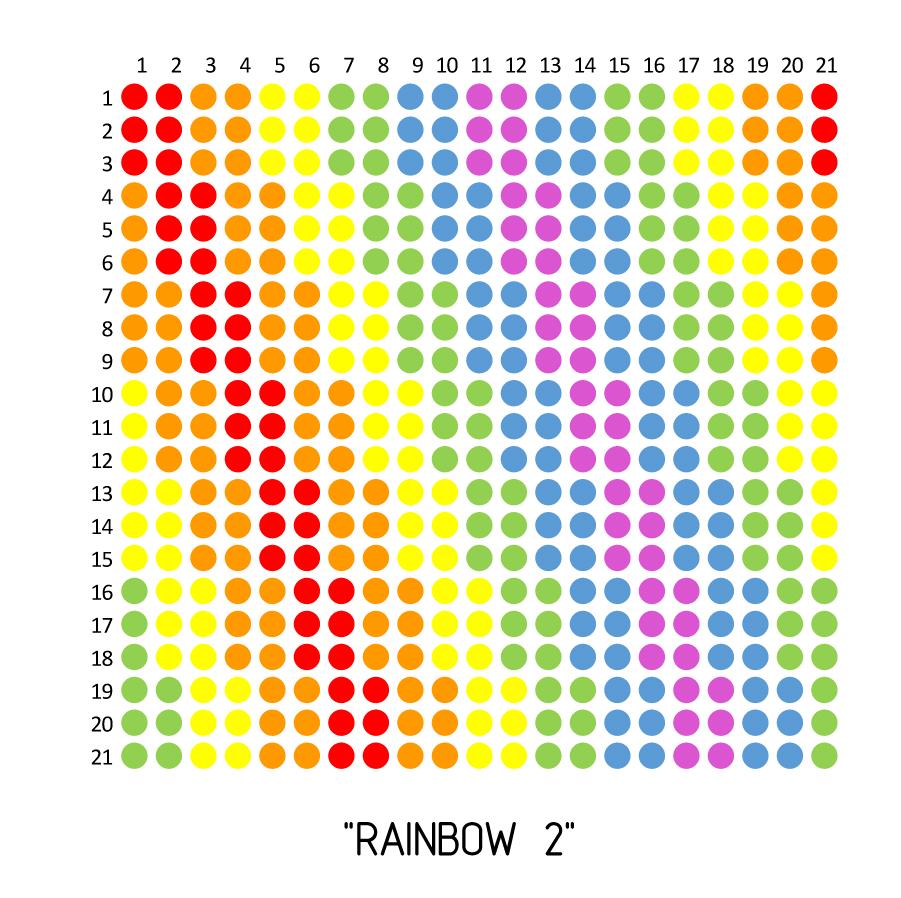
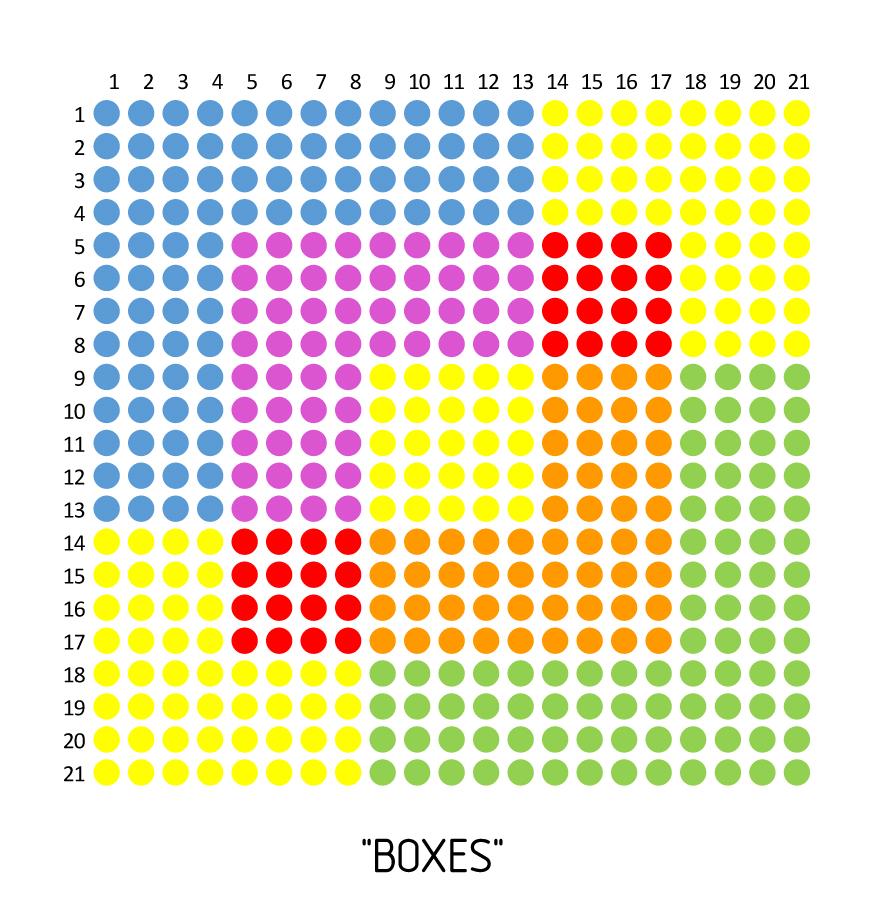
This was one of my favorite parts, it consists of placing each of the plastic pieces following the attached pattern (Rainbow 1).
Alternatively, other proportions of plastic parts can be printed that allow other types of drawings to be made, such as the ones attached (see fotos knitting, indian, pacman, rainbow2, boxes).
The pieces have a small surface notch that allows them to enter up to a certain limit when introduced.
On the back of the box, if you press with an object or your hand on the grid of plastic pieces, the pieces will move forward.
To return to the starting point, you only have to put the assembly in a horizontal position.
I attach an Excel file here with all the designs, and the possibility that you build the one you like.
Final Assembly and Enjoy
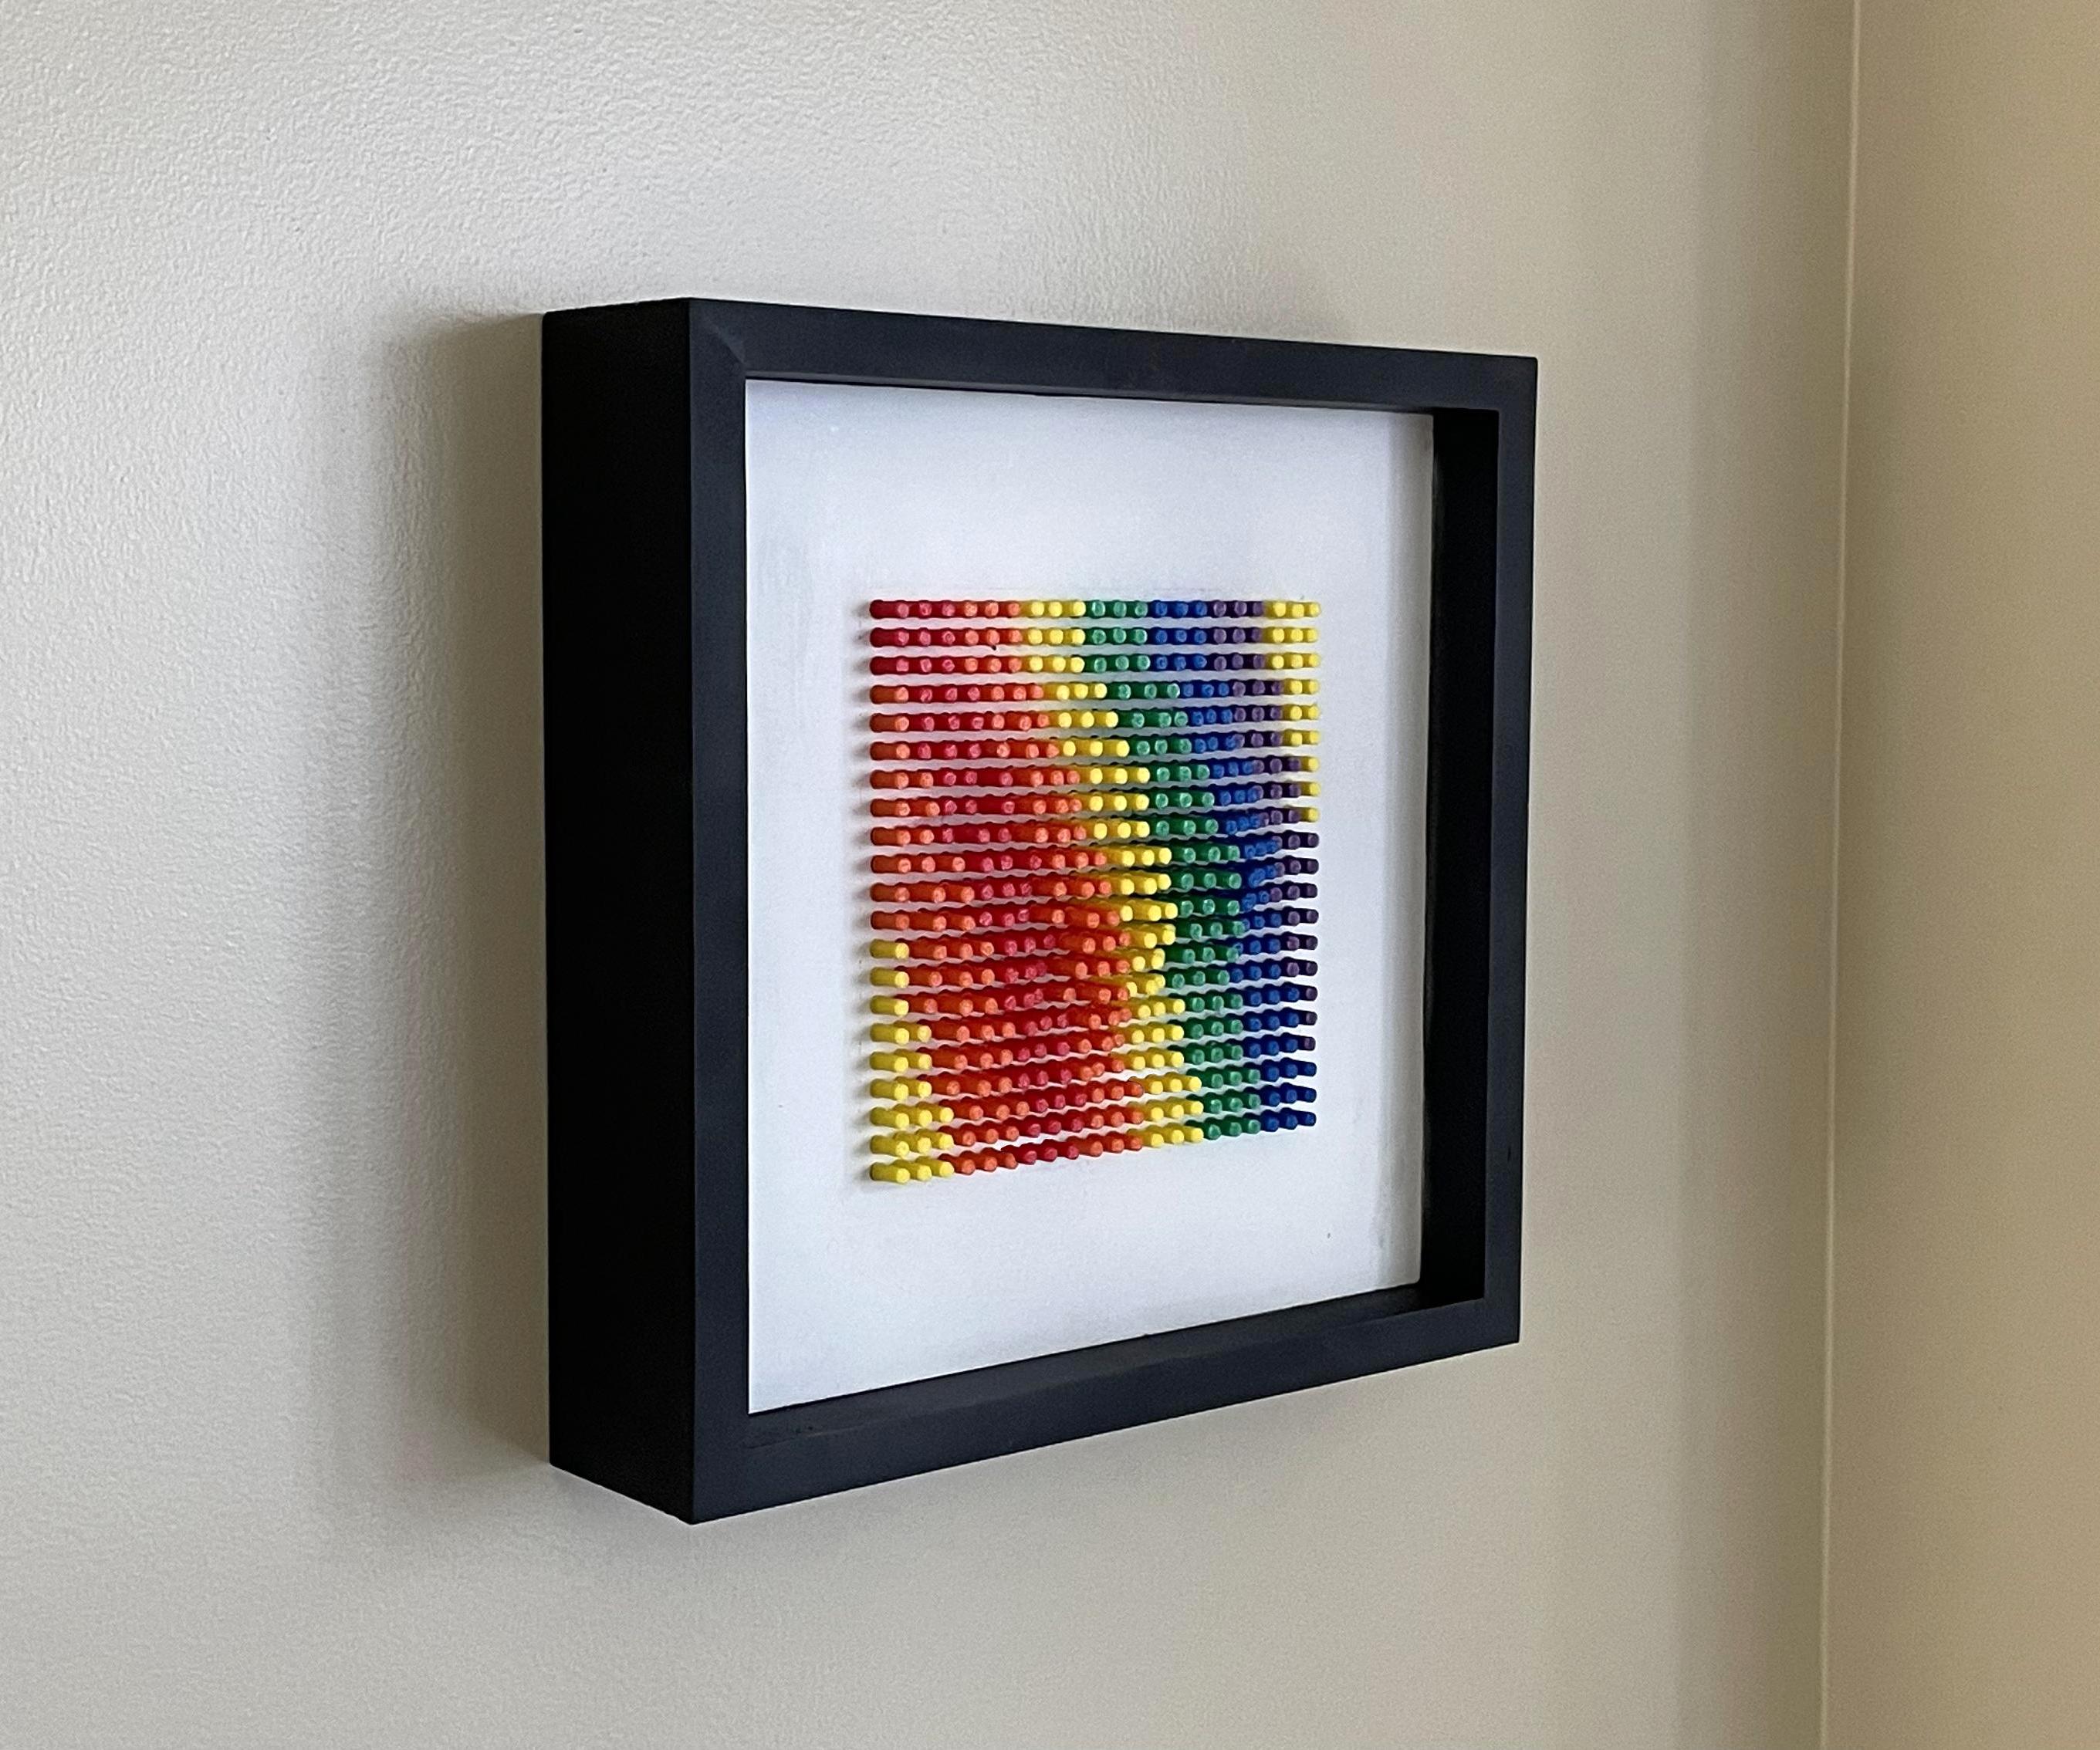
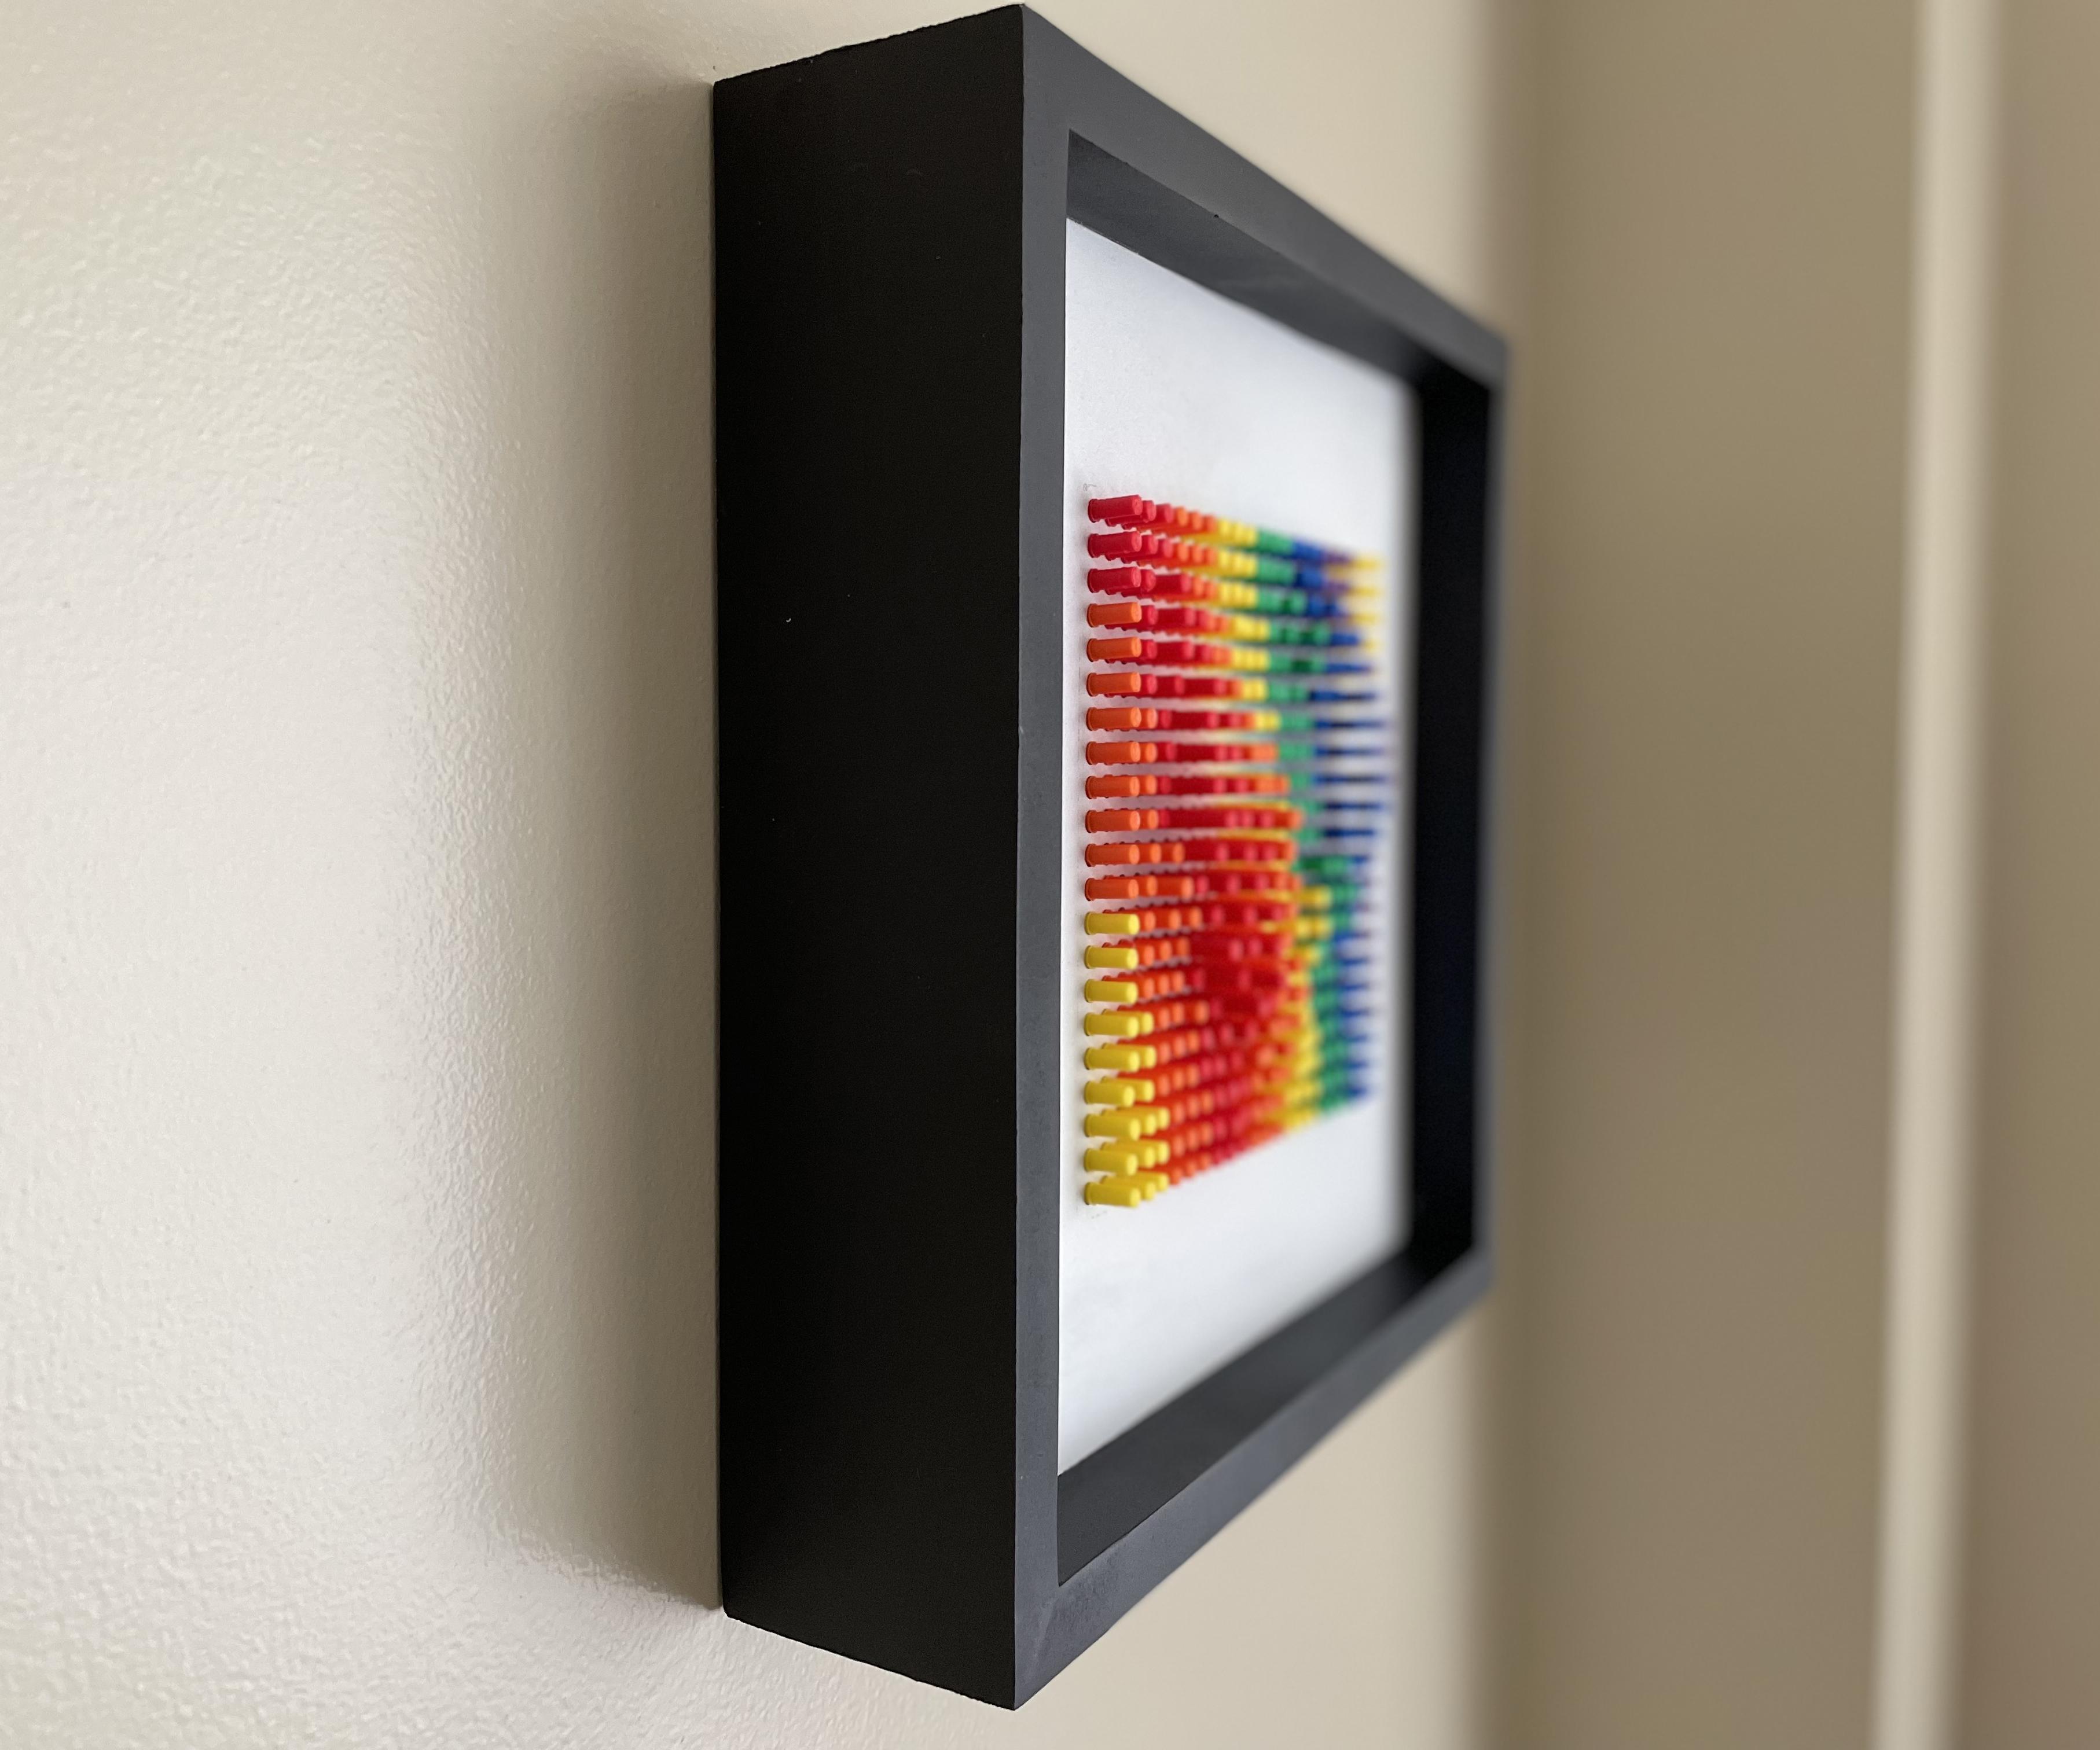
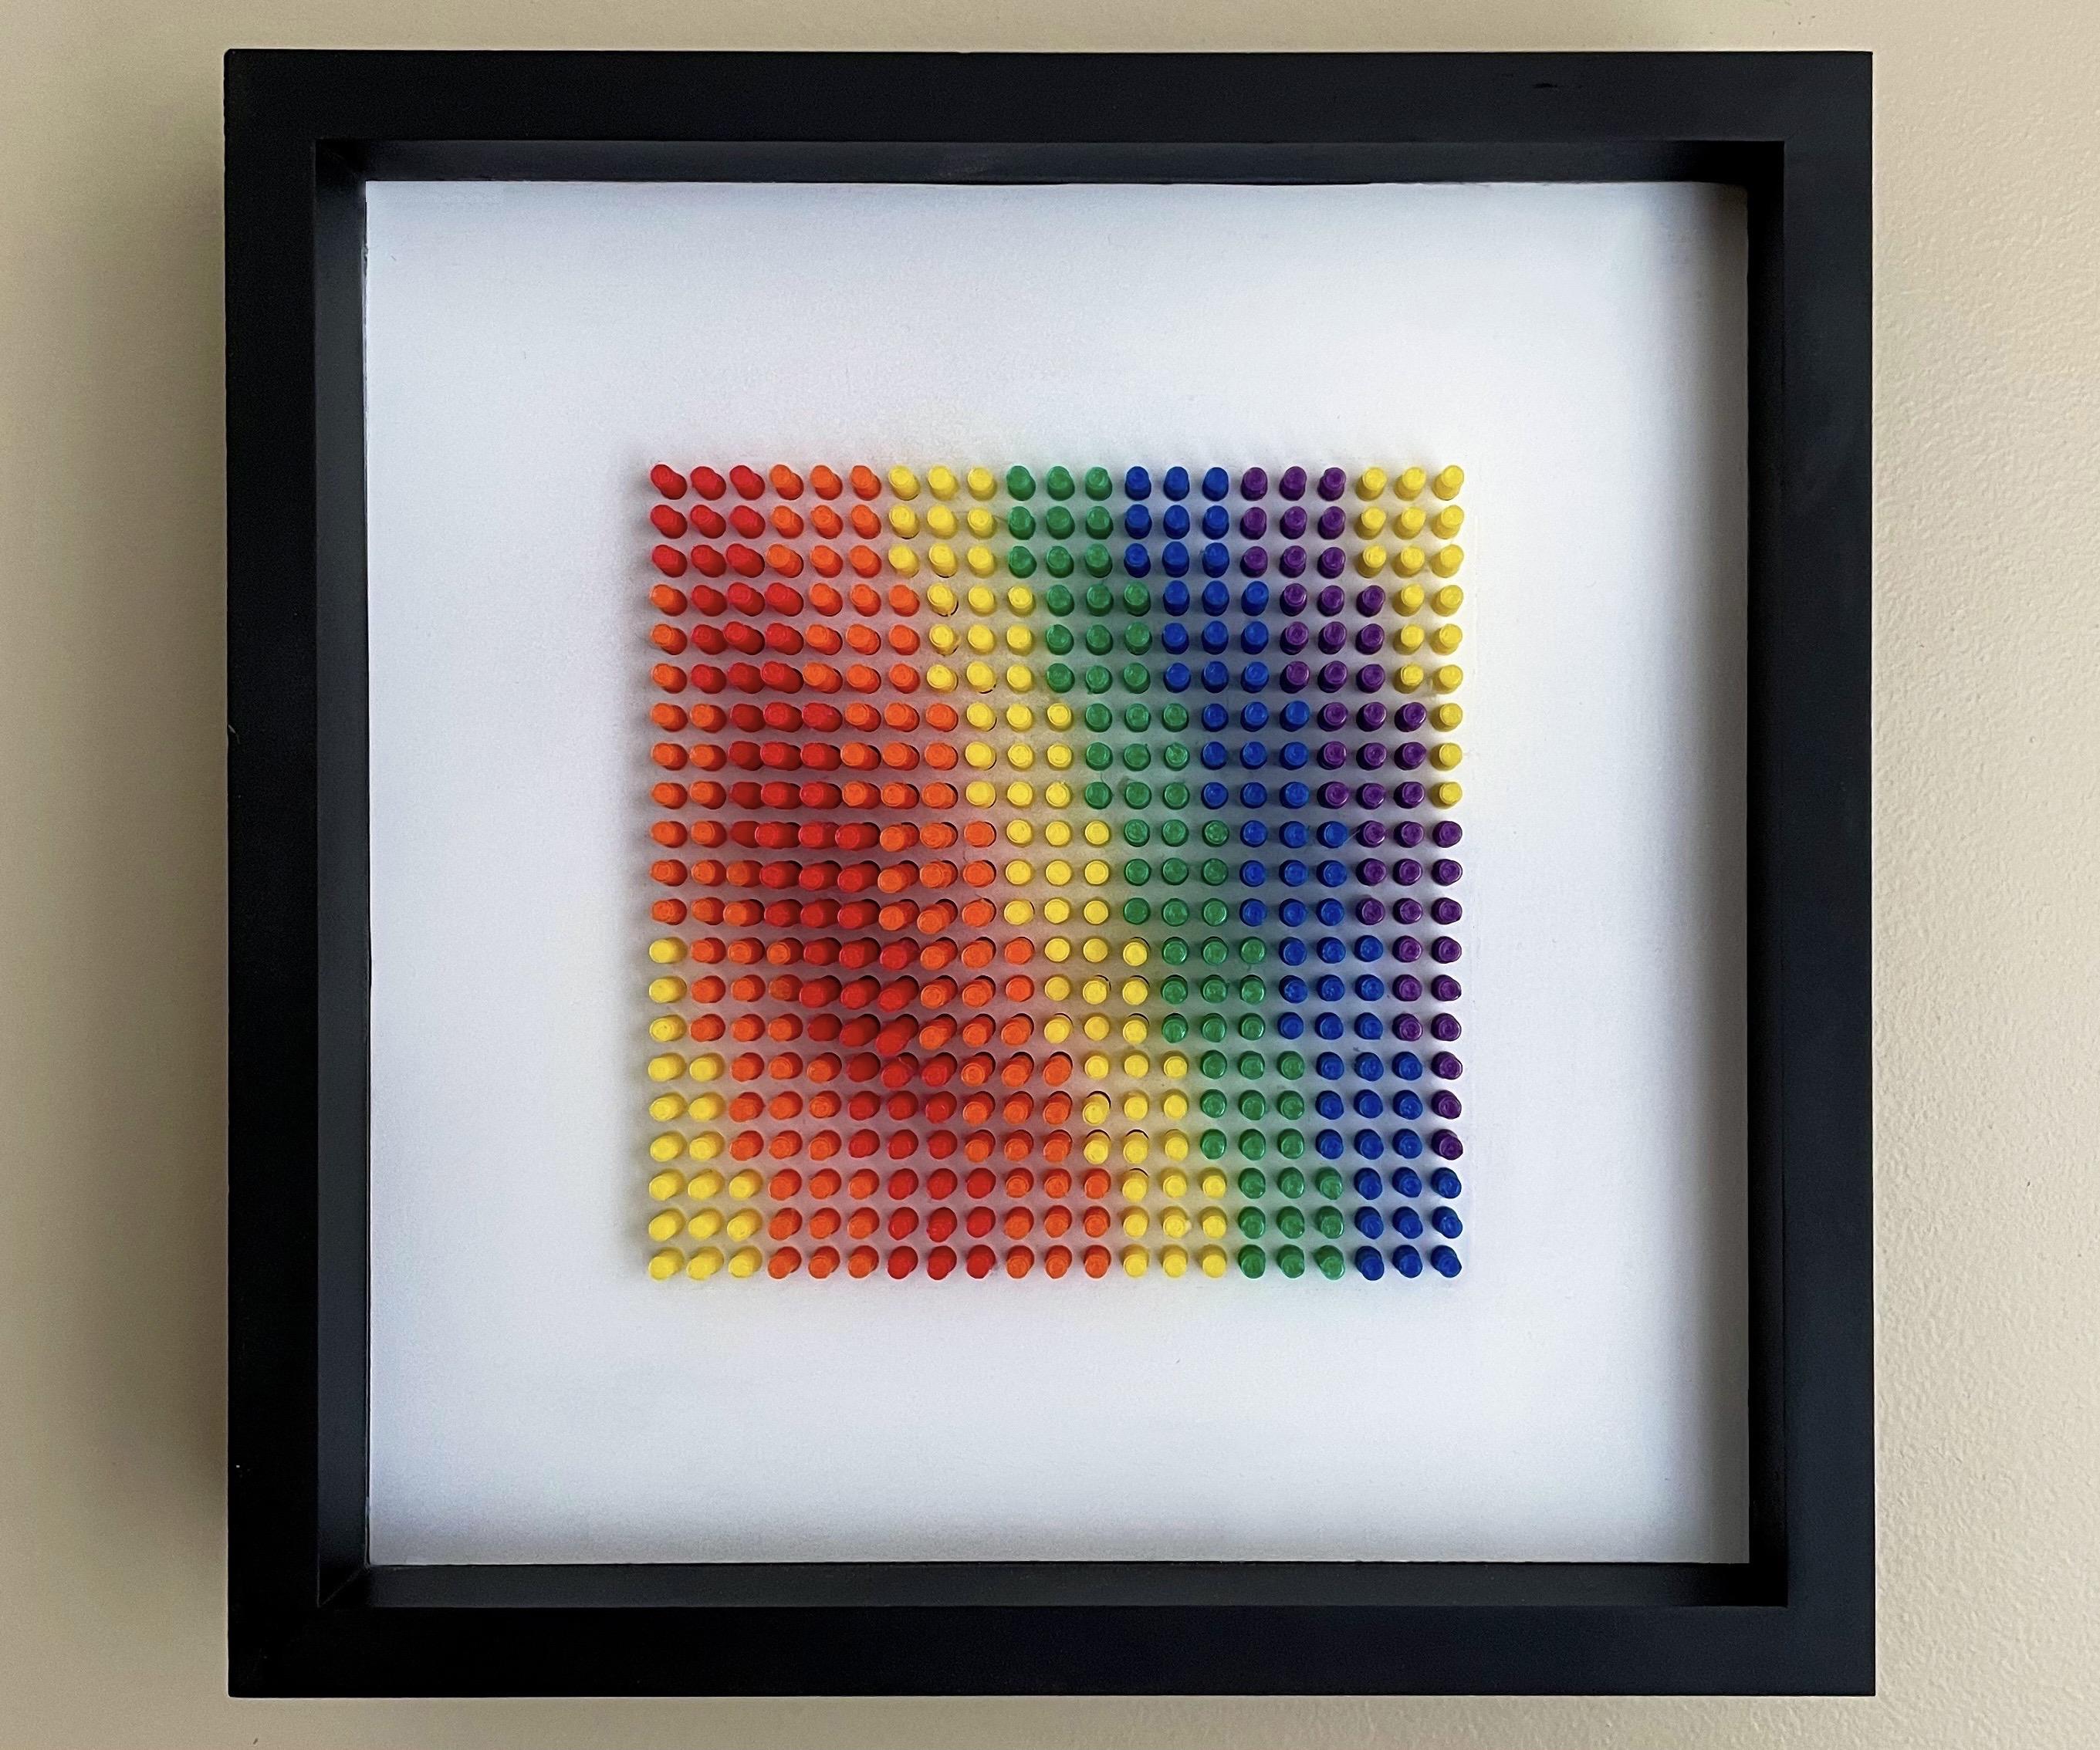
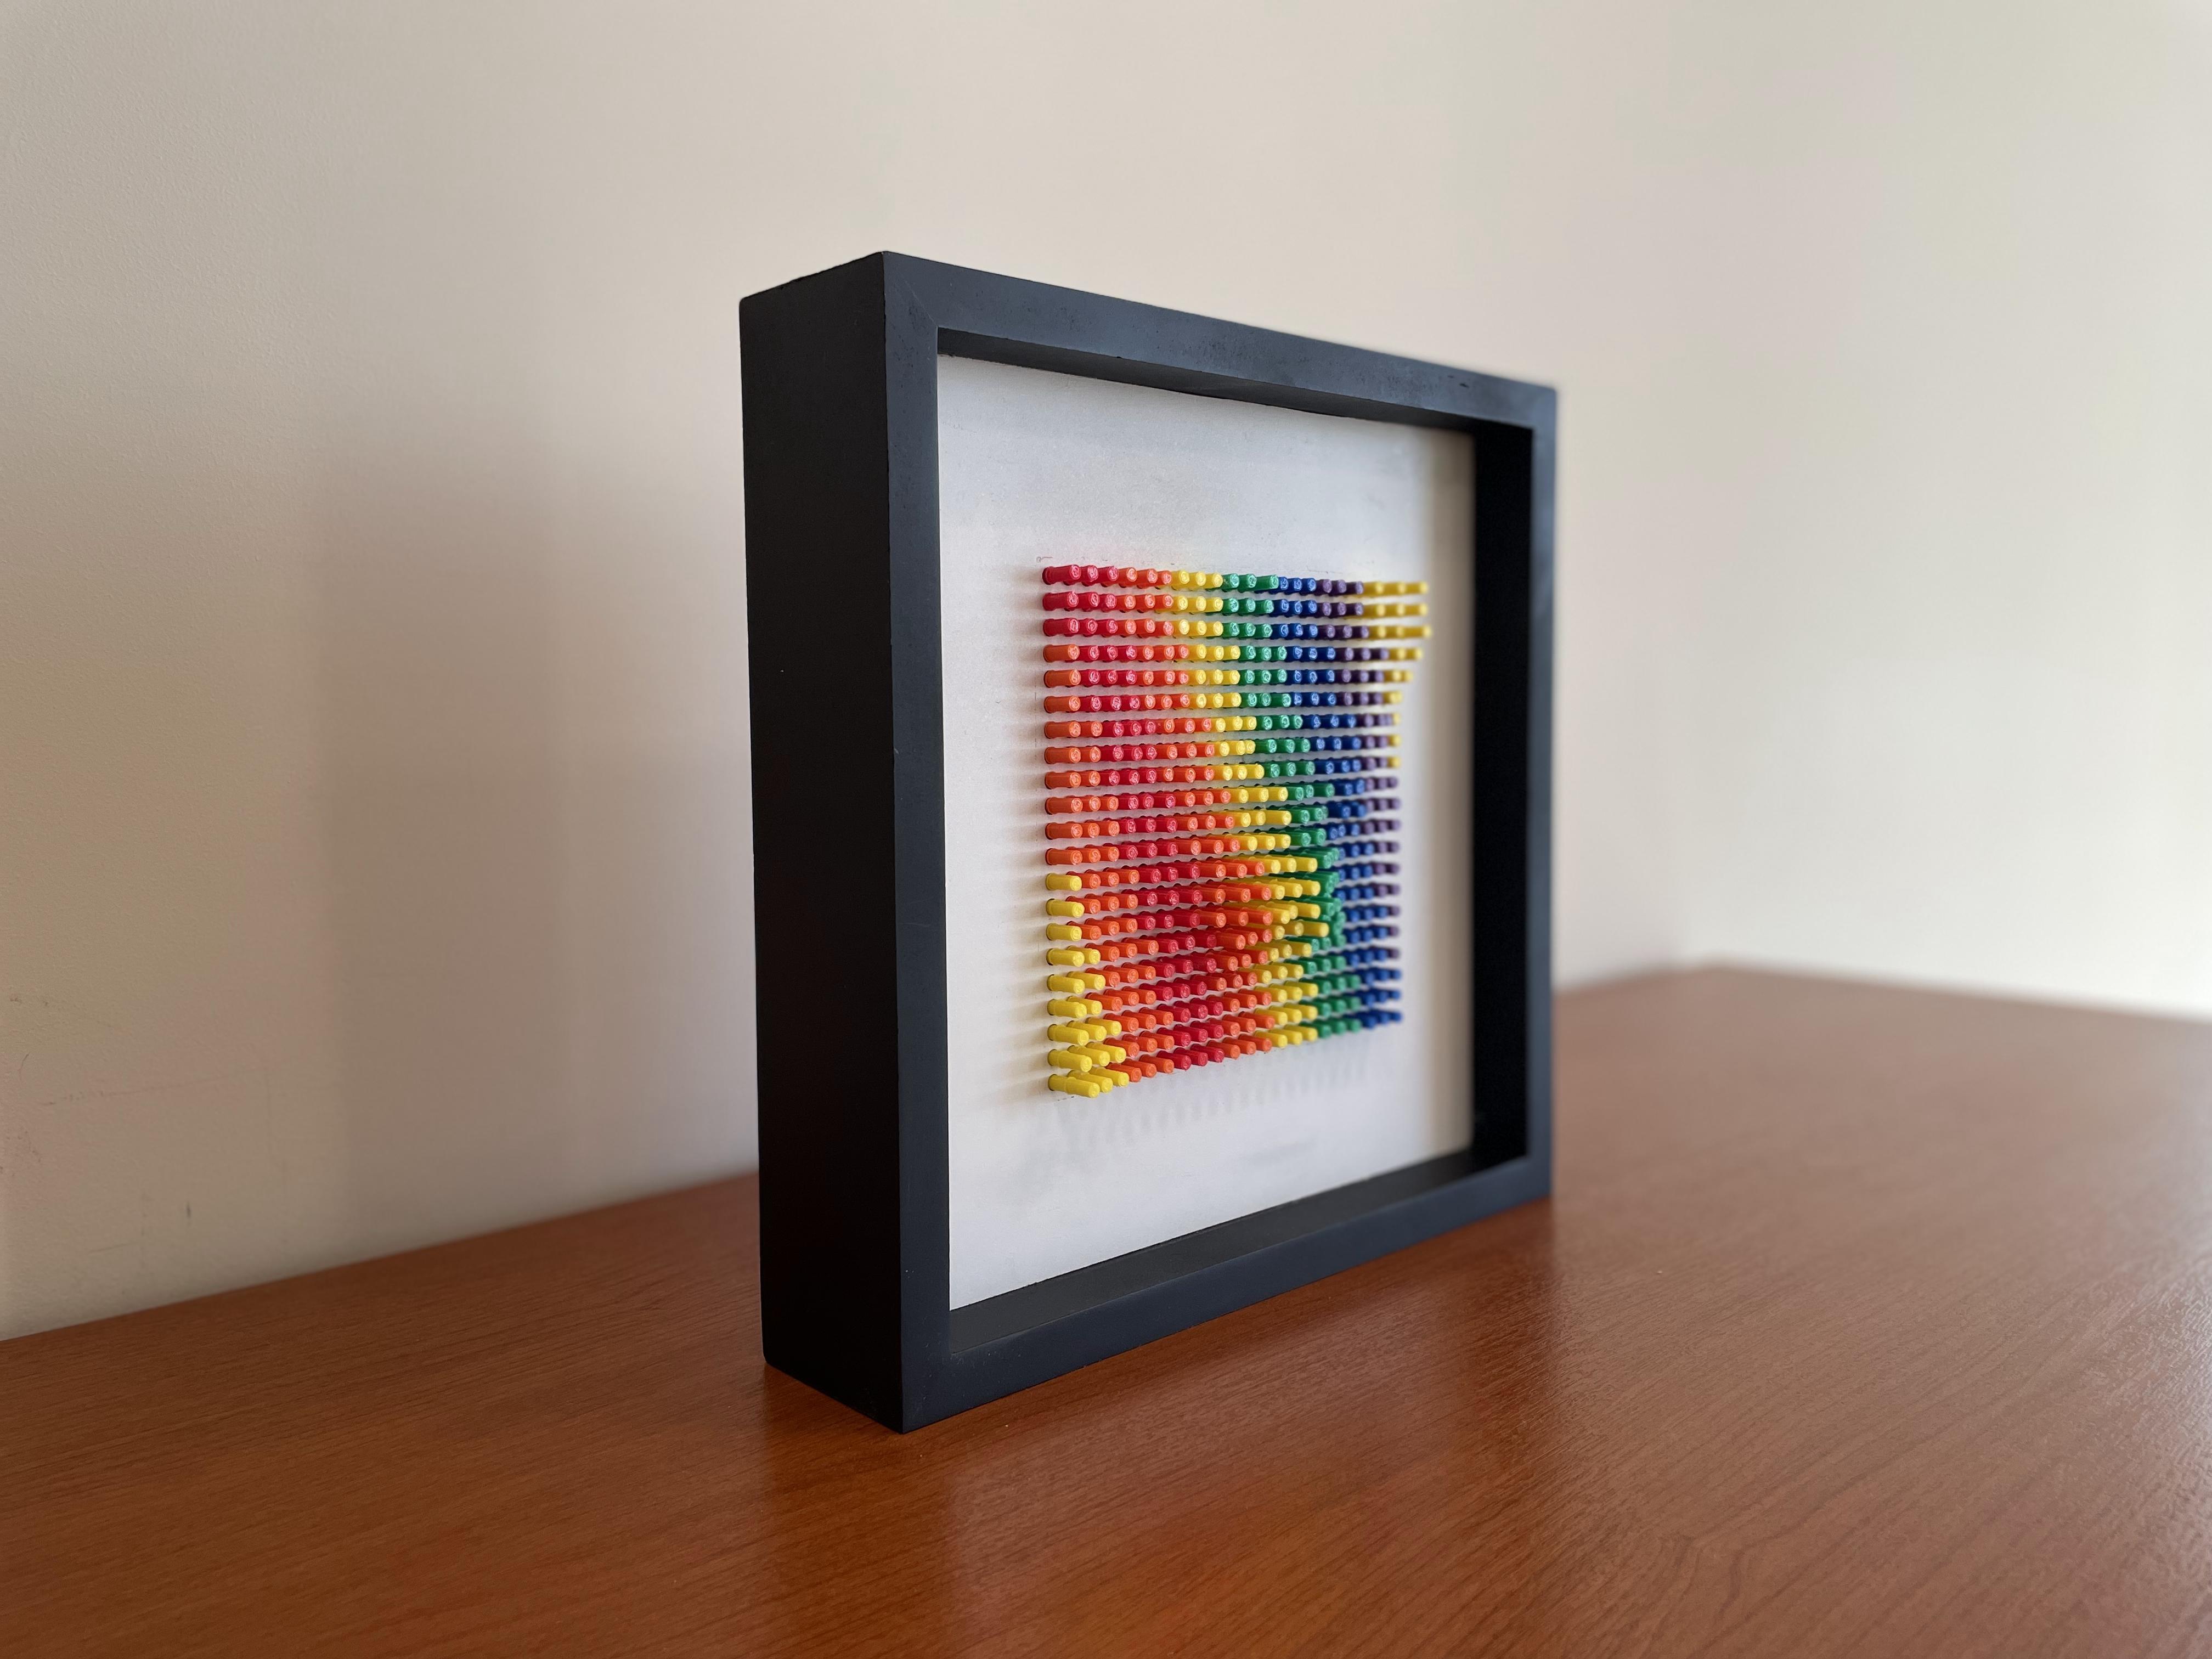
If you came to this place on the instructable and also built this piece of art, now is the time to fix it to the wall and enjoy the finished work:
- Choose a wall in your house to install it.
- In my case I made a hole in the wall and installed a fisher wall plug S5 (choose the right model for your type of wall). Height from the floor approximately 1.65 / 1.75 m.
- Then I put in a 2.5mm self drilling screw.
Alternatively it can be placed somewhere other than the wall, especially if you want to play around with changing the position of the plastic parts.
Surprise your family and friends with this peace of art built by yourself.
Final Words

Thanks!
That's all for this project.
We have created a work of art with a very low cost.
I hope you enjoyed this instructable as much as I have enjoyed it.
If you have any question ask them in the comments below!
I would also love to hear what you think about the project.
Happy making!
cfb70 - Instagram @cfb70ok
PS1: if you like the project, please choose it as a favorite ♥️ == THANKS
PS2: If you want to see my other works on instructables look here:
https://www.instructables.com/member/cfb70/instructables
PS3 / Credits: (bow and arrow) logo vector created by makyzz - www.freepik.es