How to Make your Own Custom Chess Pieces
First we will go over how to make a template for these pieces. The bases of the pieces are quite simple. First go to the Sketch feature, then click on the front plane (the plane doesn’t matter). Then, use the line tool to make a line 0.75 inches long (To simplify, I will do all other measurements in inches, so sorry to anyone using the metric system). Then, make another line 0.2 inches tall on the right side. Then on top of that, make a horizontal line 0.5 inches long going the same direction as the previous line. Then, make a three point arch between the two horizontal lines. Then make it tangent to the top line. This will be the base for the chess piece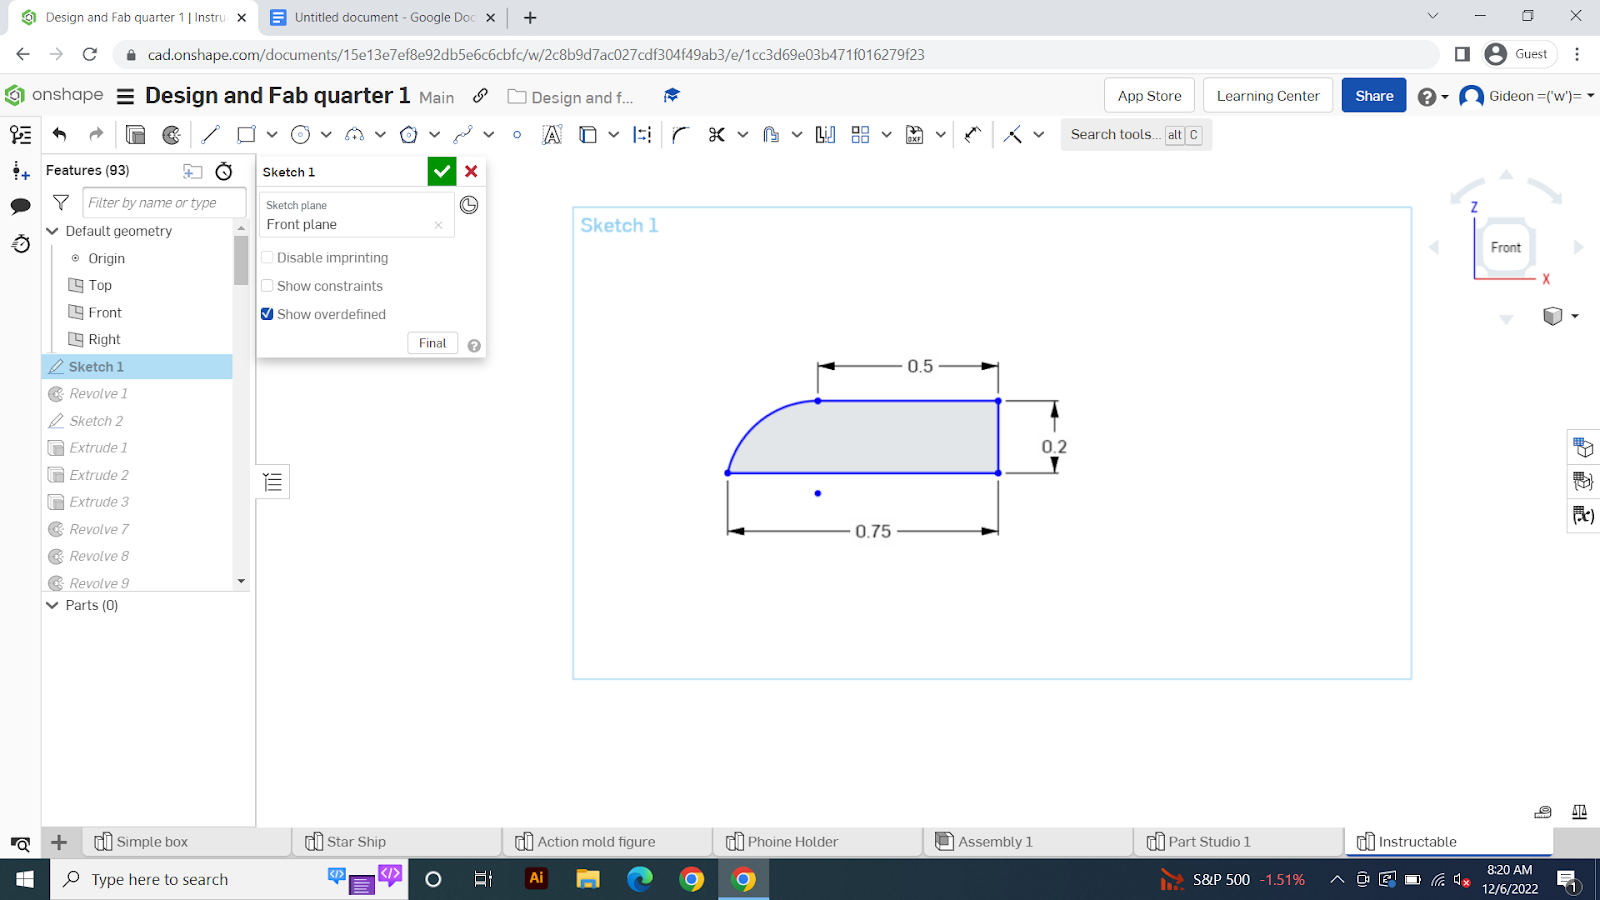
Once this is done, finish the sketch. Then, select the revolve tool and make it solid and new. Select the face of the sketch to be the face that's rotated, then for the axis of rotation, select the vertical line. Finish the rotation.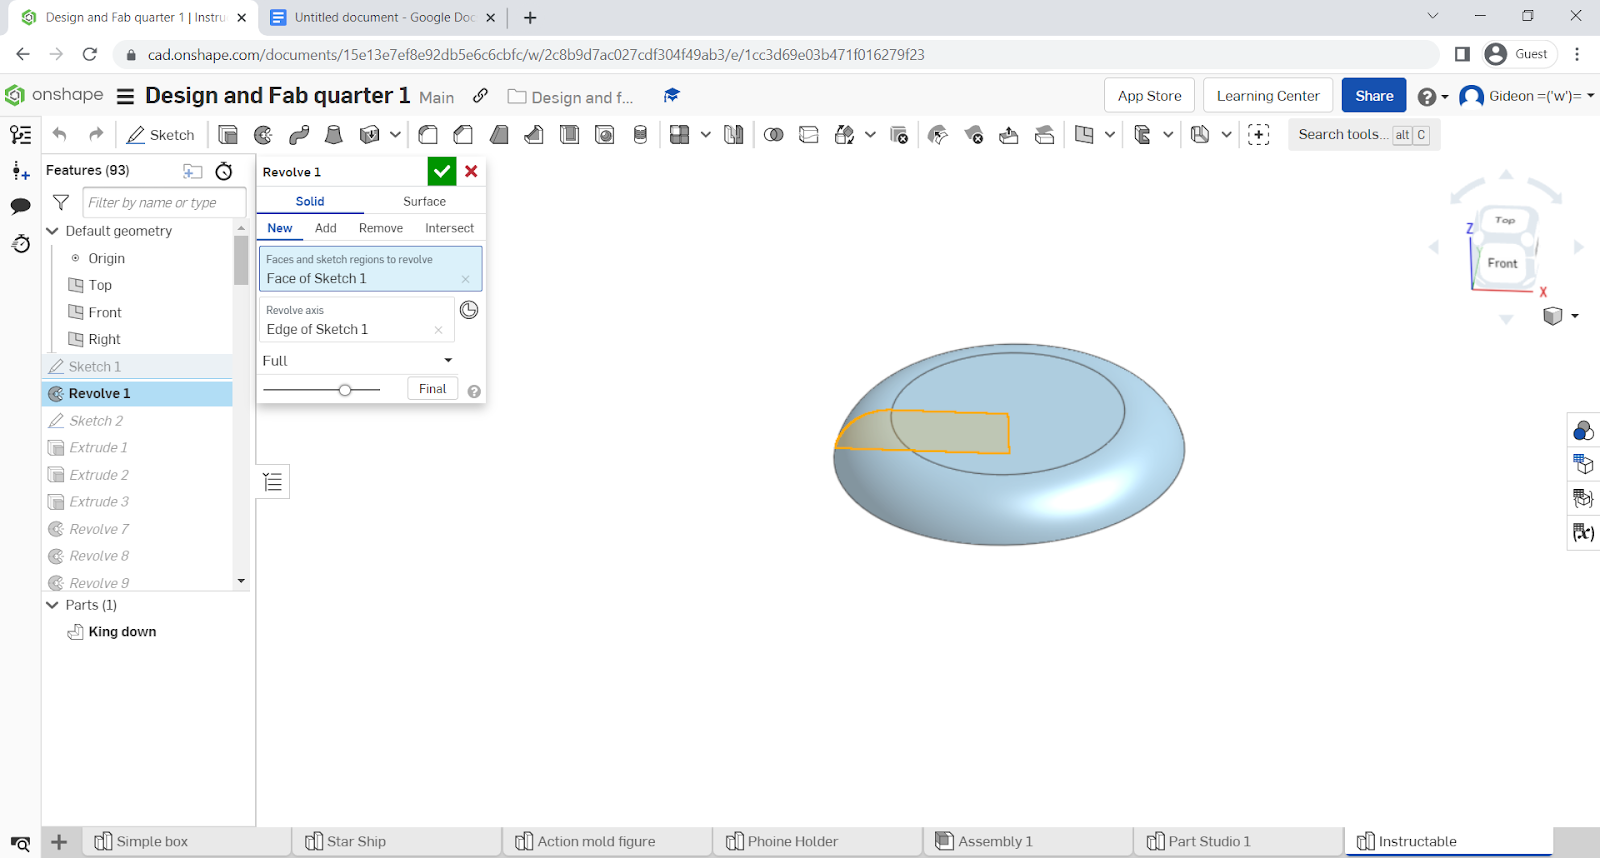
Now we will start on the actual chess peice. First we will make the legs by going back to our first sketch. Then, make a line where the top line of the base meets the arch. Make this line 0.8 inches tall. Next, make a horizontal line 0.3 inches long on both ends, facing towards the right (I am assuming that you are looking at this sketch from the front plane). Then, make a line between them, forming a rectangle.This is the first leg. Then, make it again 0.4 inches away.
 Next, the torso. First, make a rectangle where the bottom most corners touch the legs. Make the rectangle 1 inch tall and 1 inch wide.
 Next we will make the head. First make a rectangle where its bottom point is 0.3 inches away from the edge of the torso. The rectangle will be 0.3 inches tall, and 0.4 inches wide.
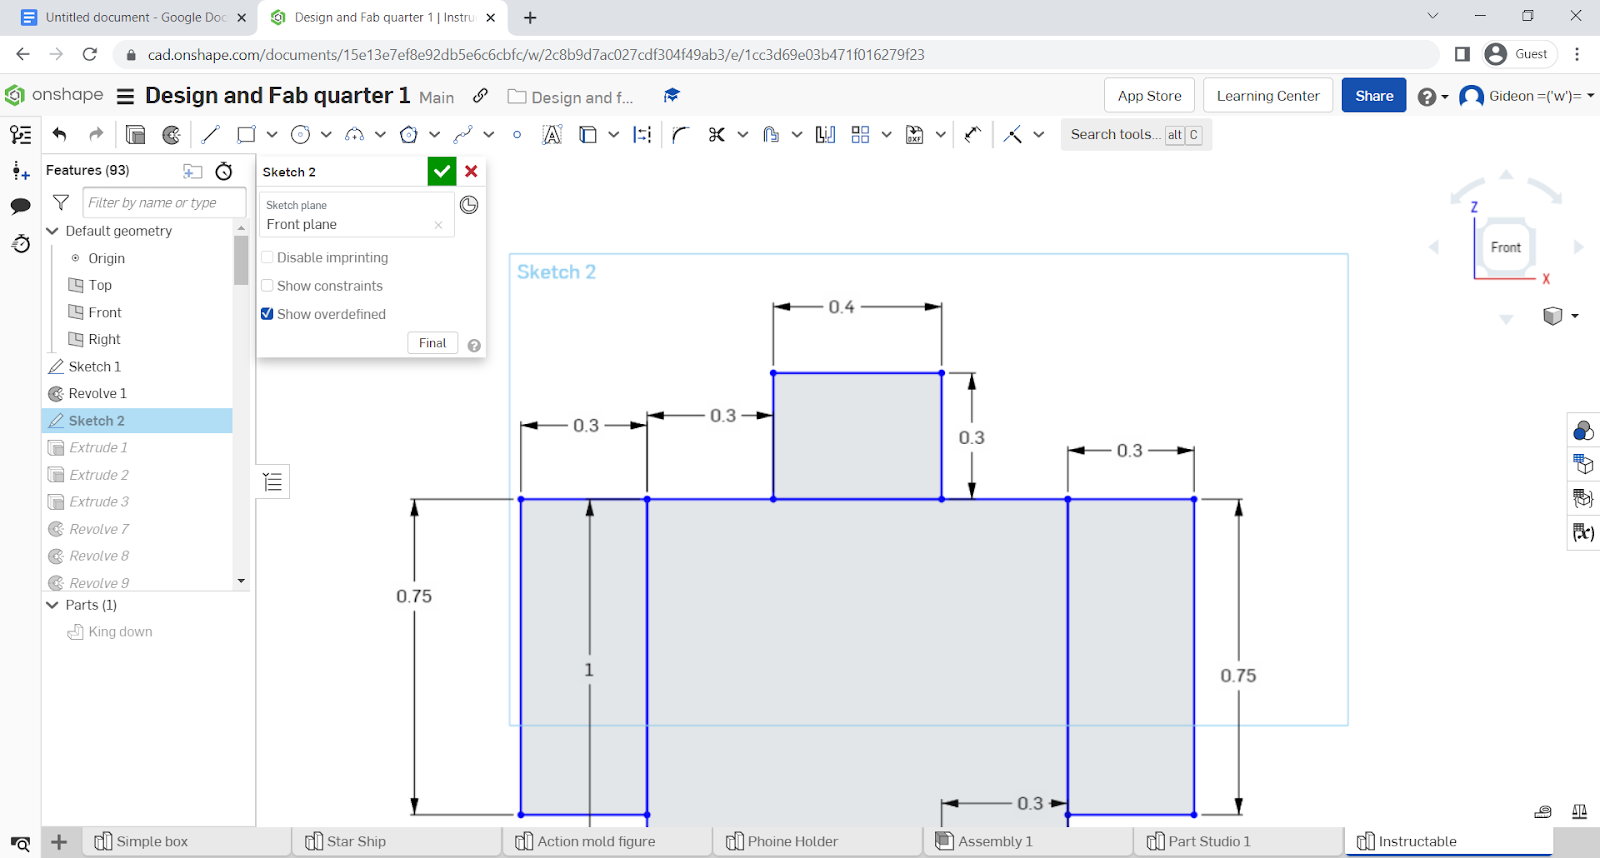 Next we will make the arms.In this case, there are two different template options. The arms to the side, and the one arm raised.
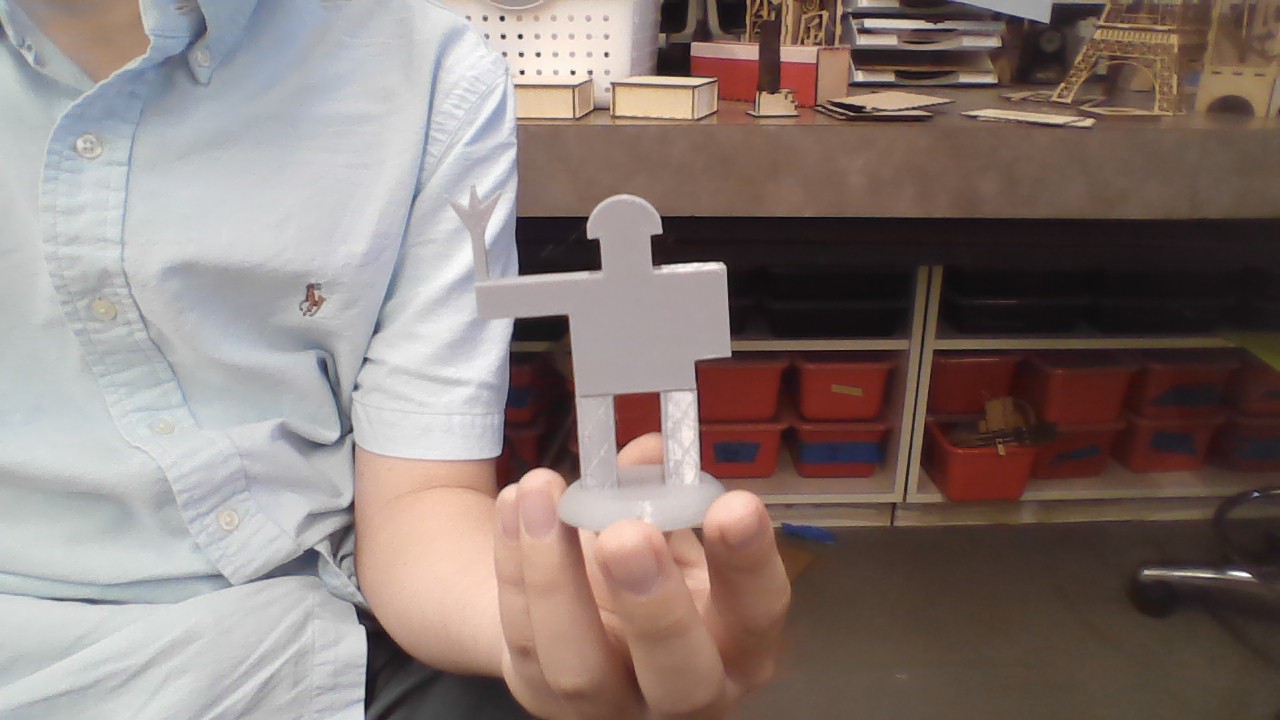
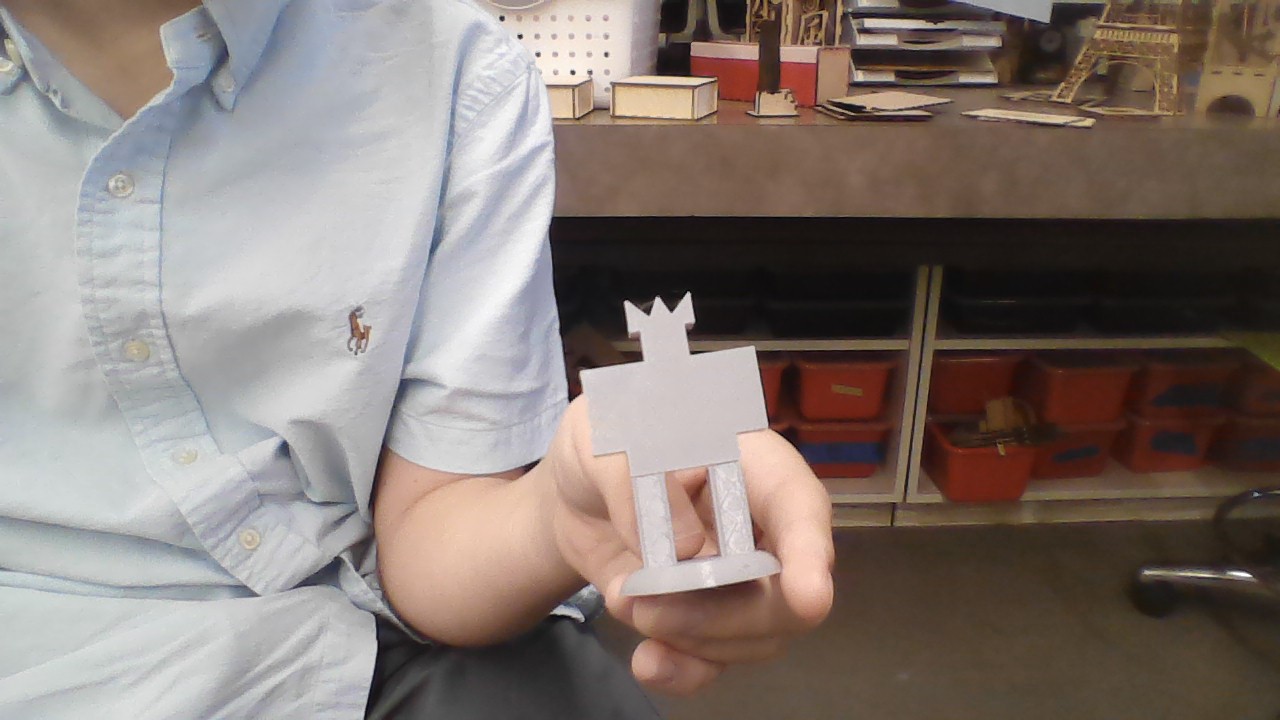
 First, for the arms down template, we will make two rectangles. Attach one rectangle to the right shoulder, and one to the left shoulder. Each of these rectangles will be 0.75 inch long and 0.3 inches wide. For the arm up variant, do the same but rotate one arm 90 degrees to the left. We will now get to customizing these templates. These chess pieces are best customized in terms of hats for everyone and weapons for the arm up variant. I will give two examples for hats and weapons. For hats, a crown is good due to the amount of royalty in this game. First we make a horizontal line 0.6 inches long, which is centered on top of the head. Then, at the two ends, make a vertical line 0.3 inches tall. Then from both top points, make a diagonal line sloping down and inward until it is 0.1 inch from the bottom line, and 0.2 inches from the start point. Then from these to inner points, make both slope up until they meet in the middle of the crown, exactly in line with the top two points.
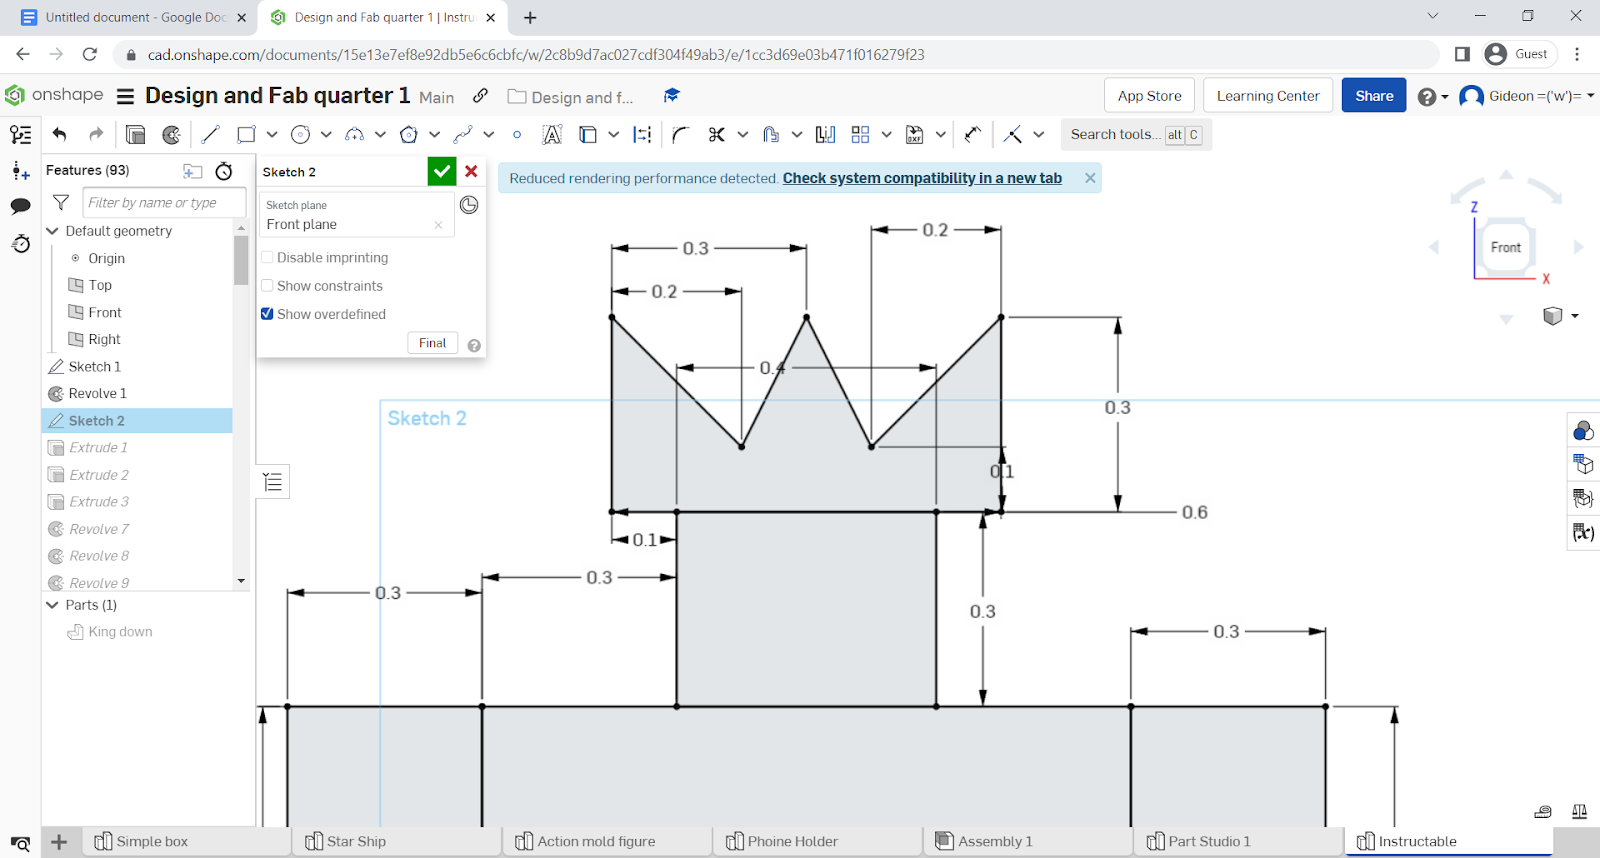
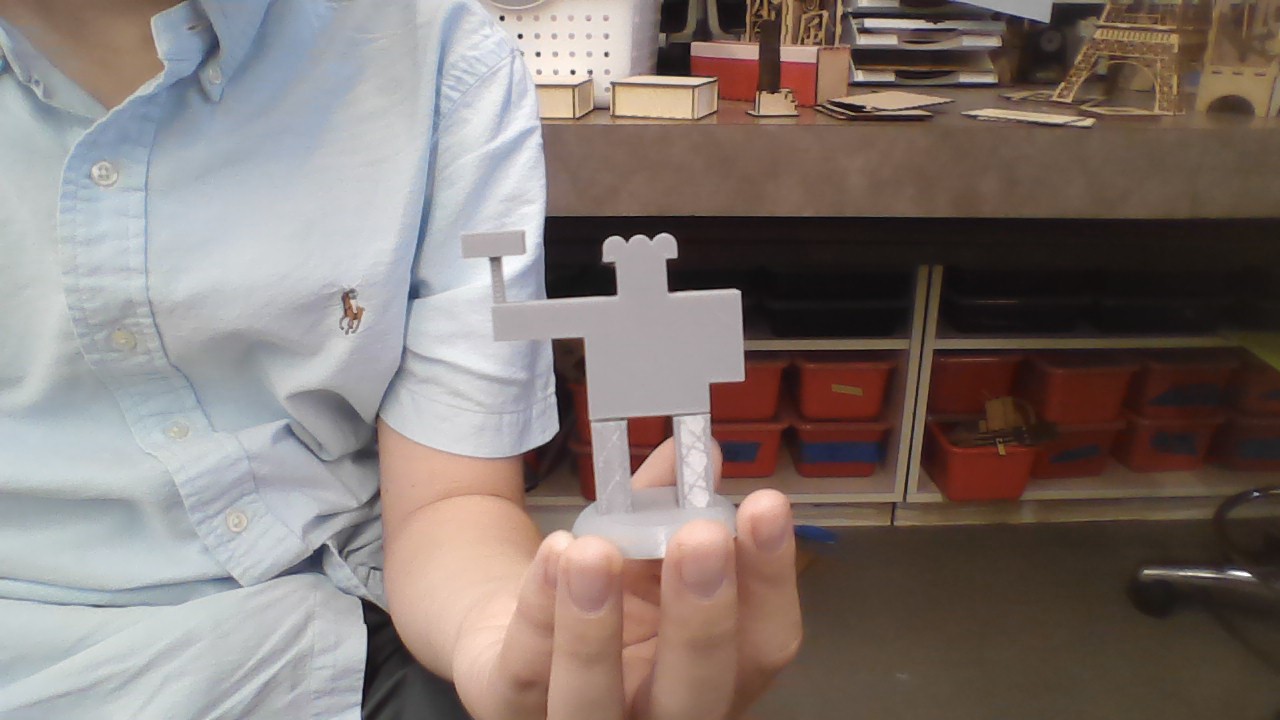
Next, we will make a helmet. First, make the same 0.6 inch long line as before. Then from the outermost point, make two vertical lines 0.1 inches tall. Then, make a three point arch whose third point is in horizontal line to the tops of the previous lines.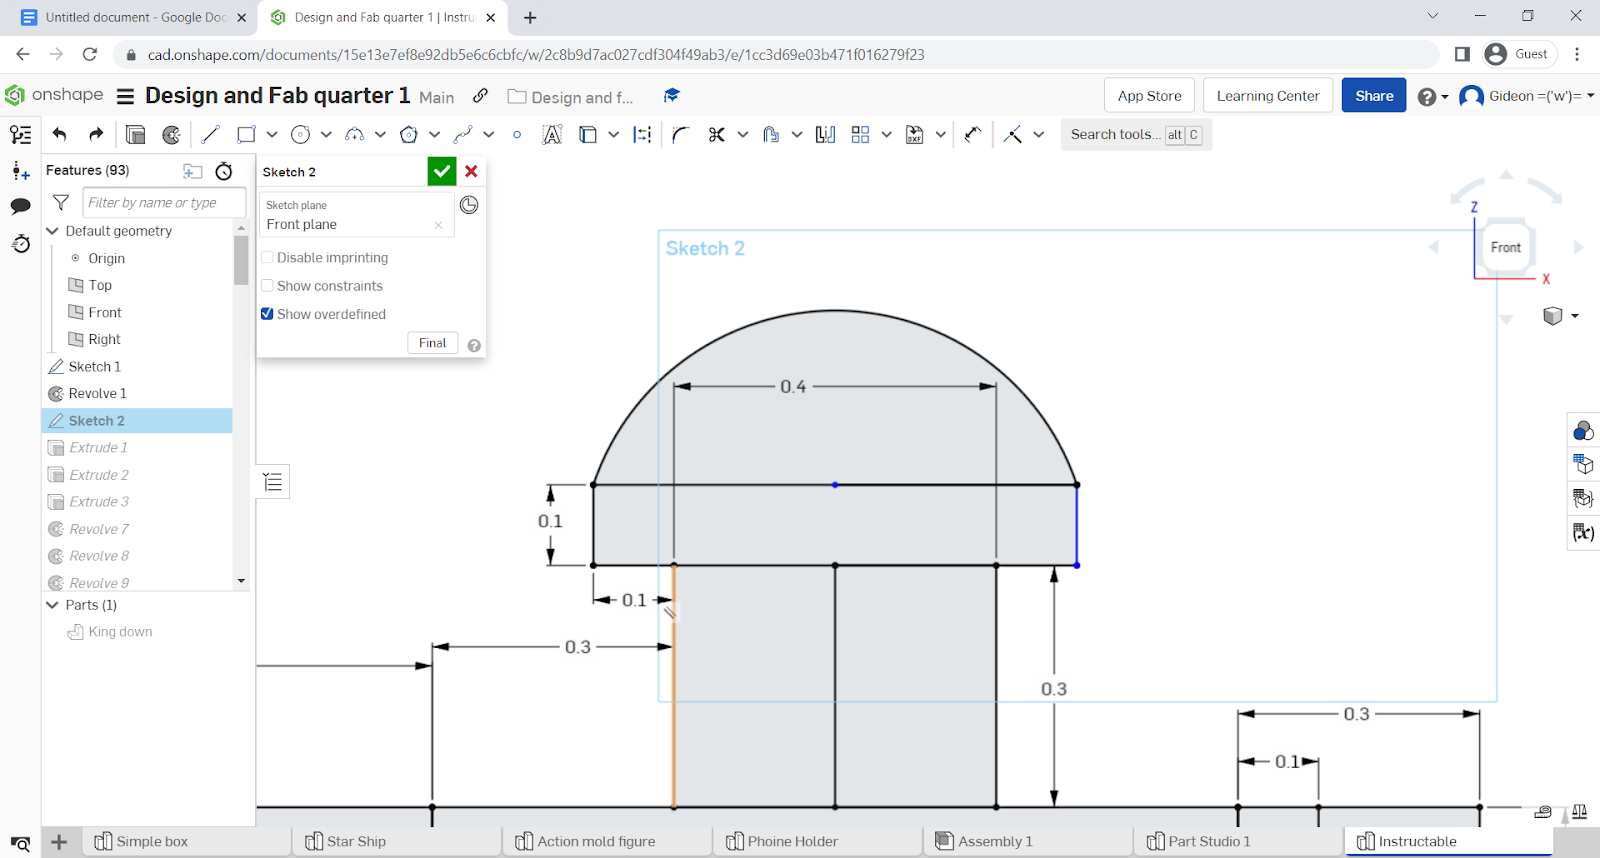 Next for the weapons (or just stuff they are holding if you are a wimp) we will start with a hammer. To make it, first go to the edge of the outstretched arm and make a rectangle on top of it. It should be 0.4 inches tall and 0.1 inches wide. On top of this, make another rectangle which is 0.2 inches tall and 0.5 inches wide. It should be centered for aesthetic purposes.
 Next, we will do a sword(It is a war game after all). First, make a rectangle 0.9 inches tall and 0.1 inch wide at the end of the arm. Then for the cross guard, make another rectangle 0.15 inches away from the arm. This rectangle will be 0.1 inch tall and 0.5 inch wide, with it centered on the blade. Then for the tip, make an isosceles triangle 0.1 inches tall.
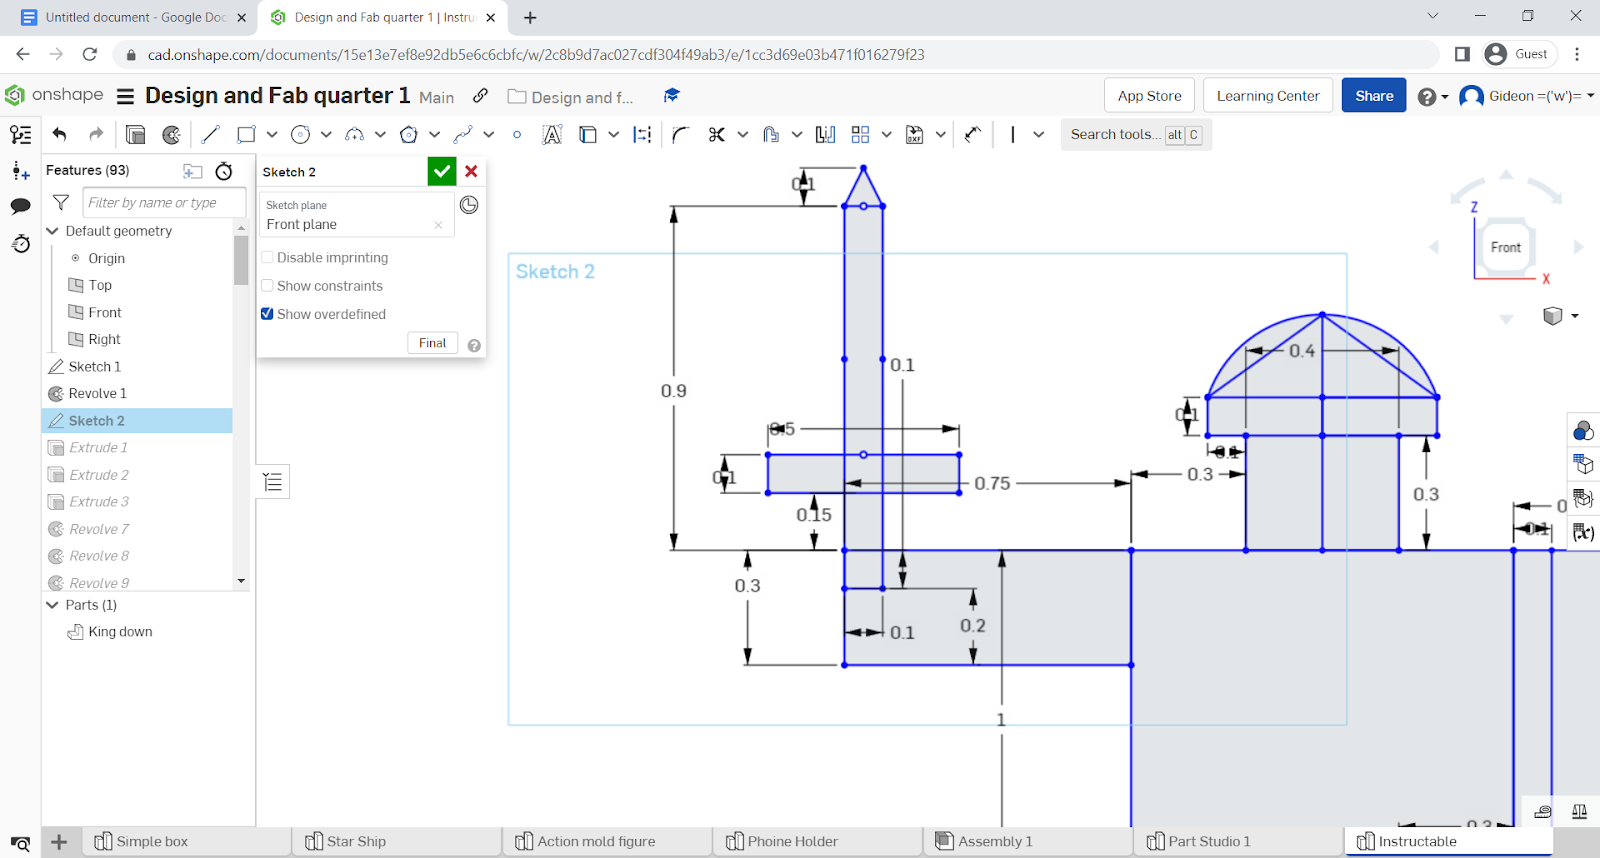 Now we will start extruding by selecting the extrude tool, then selecting symmetric, then setting the length to 0.3 inches. Select everything except the weapon with this, and boom there’s your figure. If you have weapons, change the extrude length to 0.1, then that is good.
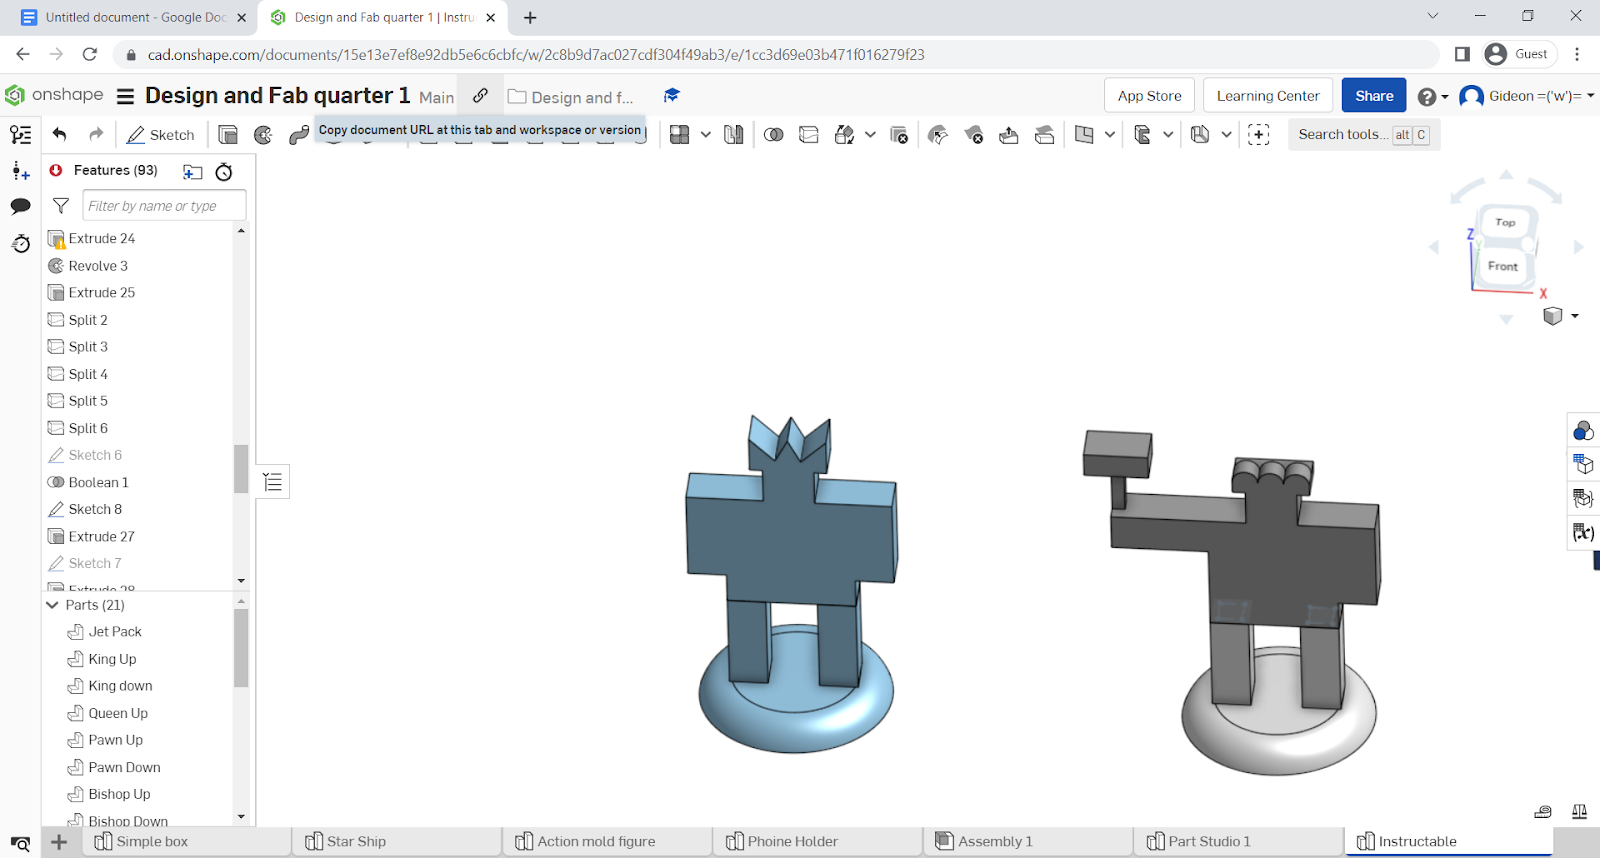
 Now you could just print this like it is, however, if you want a lot less support, then you could split it in half and arrange it better. I will walk you through on how to do this. First, select the split feature, select the chess figure for the part, and the area between the legs to be the place the split happens.
  To make sure the chess piece holds together, we will make joints in the legs and torso. First, make a sketch on the bottom of the torso, (Which is the plane where the split happened). Then make two squares 0.2 inches across. Position these 0.05 inches from the edges of the torso, then make some smaller rectangles inside. These will be 0.18 inches by 0.18 inches and 0.01 inches from the inside edge.
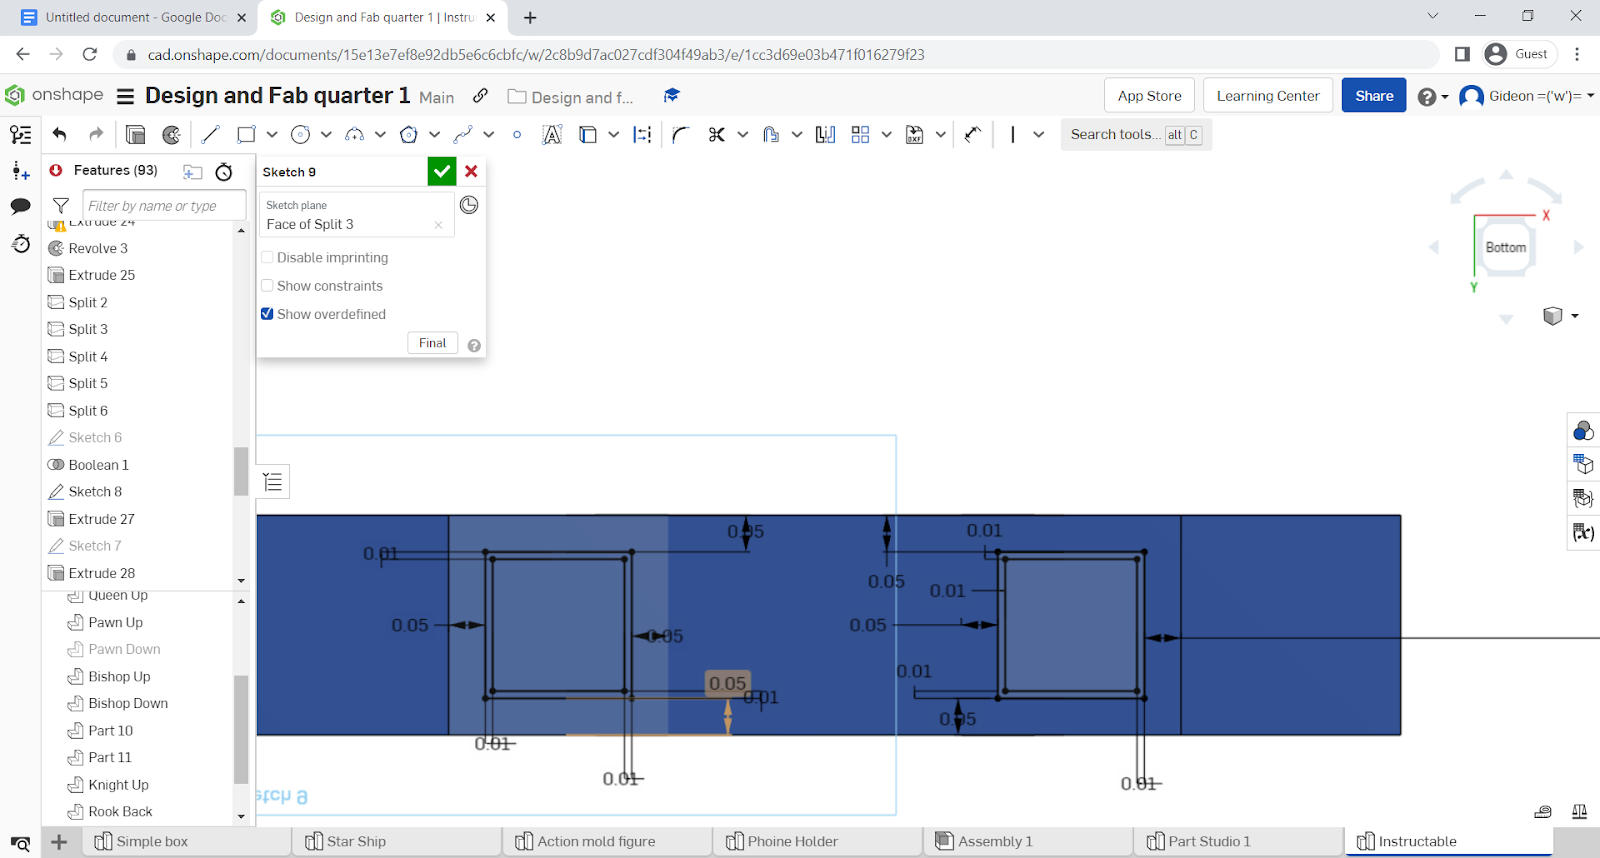 These will be used for the joints. First, make a remove extrude down into the legs using both the outside and the inside squares. This will have a length of 0.25 inches.
 Then, make an actual extrude going down into the legs only making use of the inner square. This is because the printer is not as precise as your designs and if you try to make something fit exactly you will find it doesn't fit.
 Finally, you may export these parts and print them. I suggest lying the top half of the chess piece on its back to minimize support.
