Custom Characters With Raspberry Pi Pico and LCD 16*2 Display
by ammupandu77 in Circuits > Raspberry Pi
8798 Views, 88 Favorites, 0 Comments
Custom Characters With Raspberry Pi Pico and LCD 16*2 Display
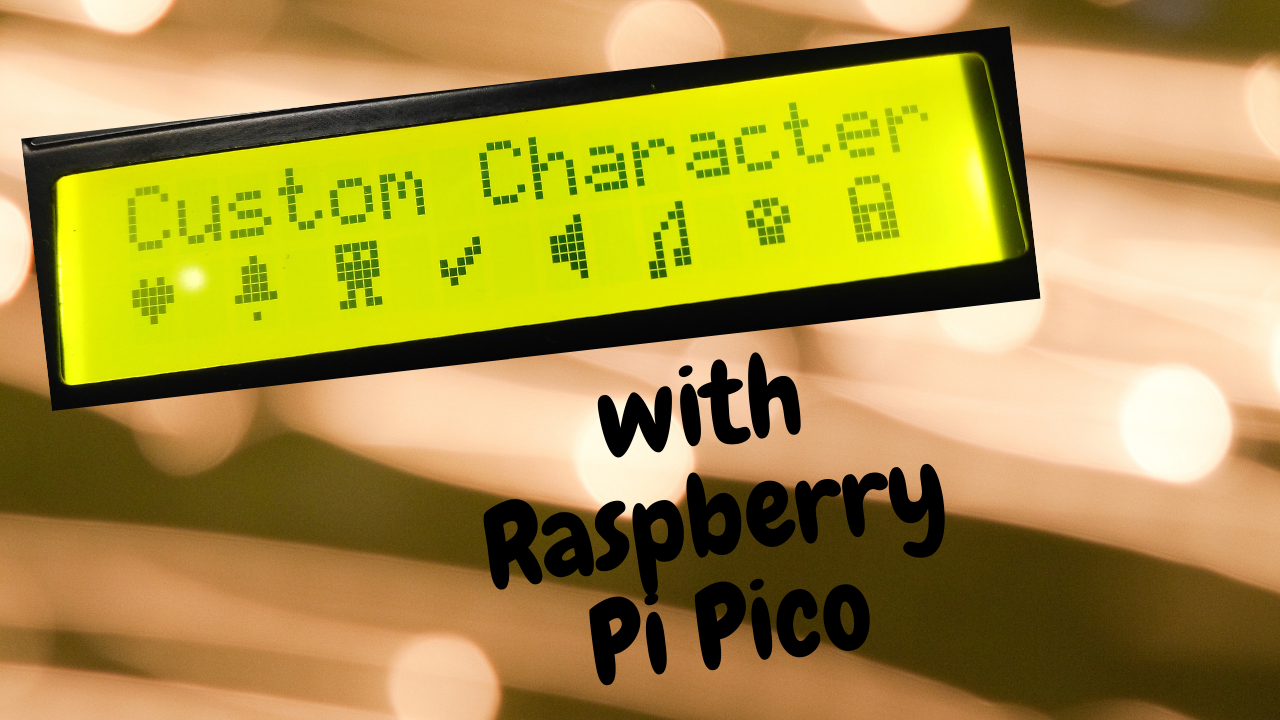
Writing your own custom characters on an LCD display is fun, so i will teach you how to do it by yourself.
Let's begin.
Required Components
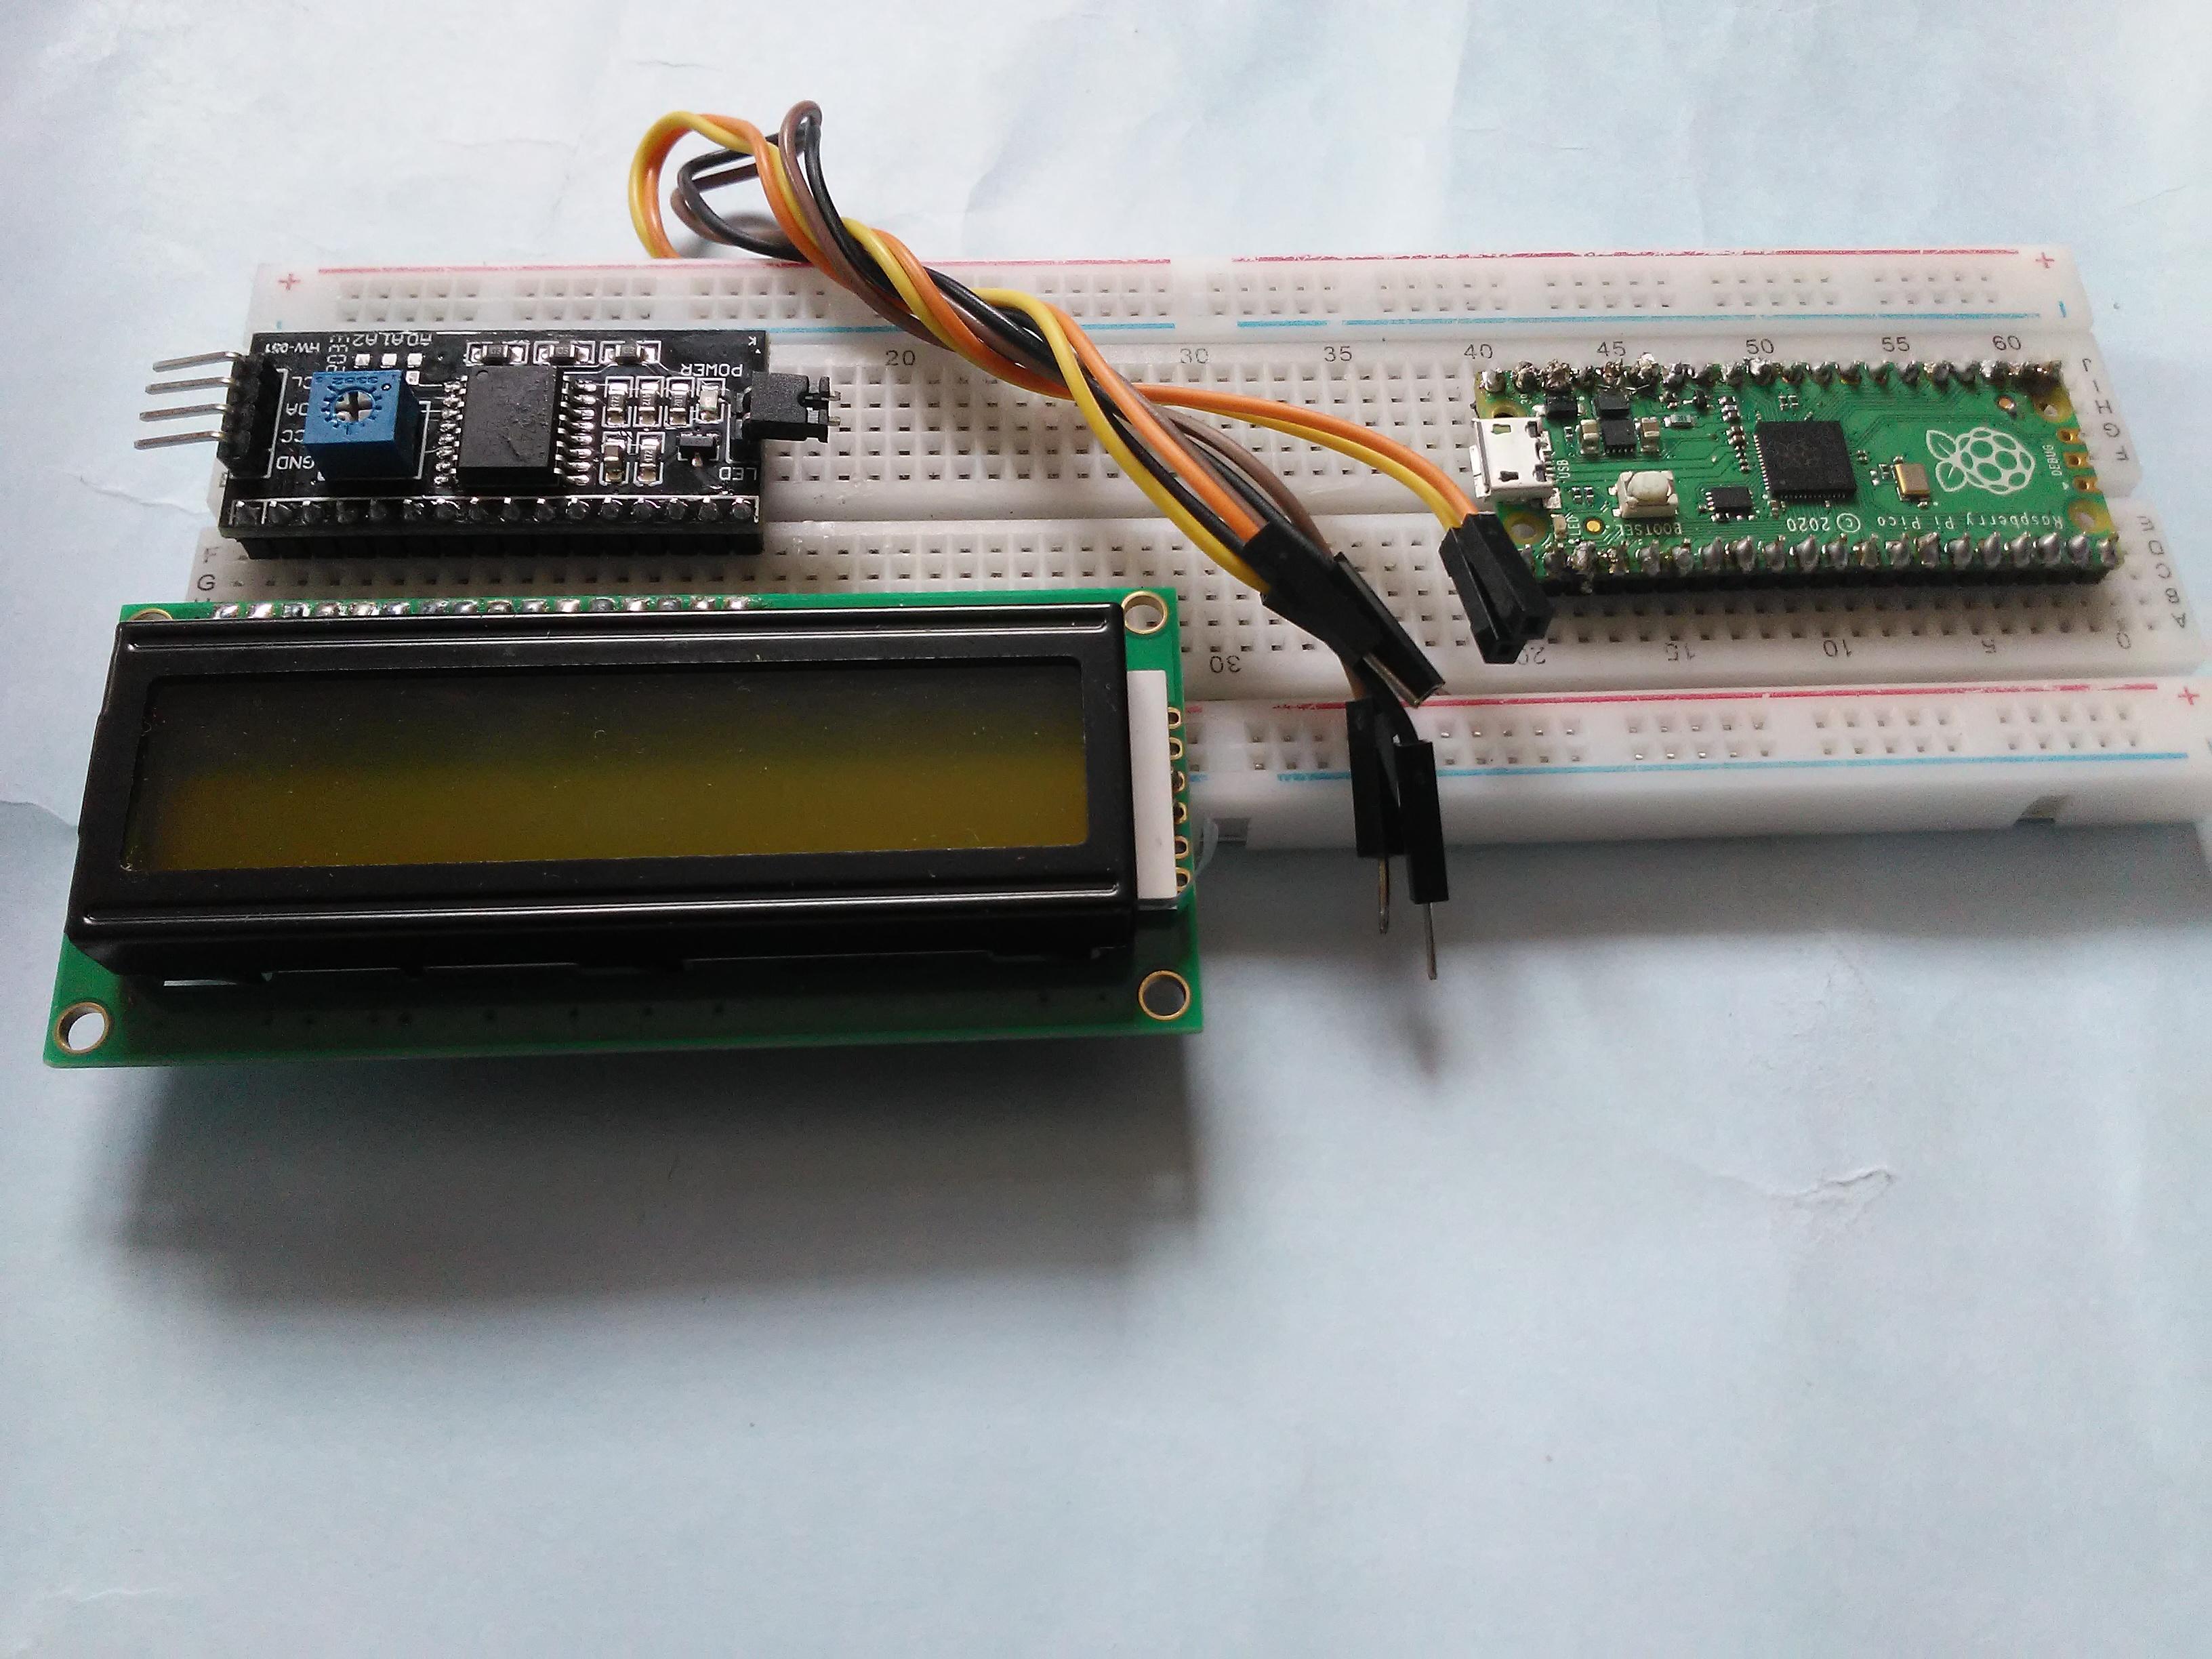
- Raspberry Pi Pico
- 16*2 LCD Display and its i2c adapter
- breadboard
- Some Jumper wires
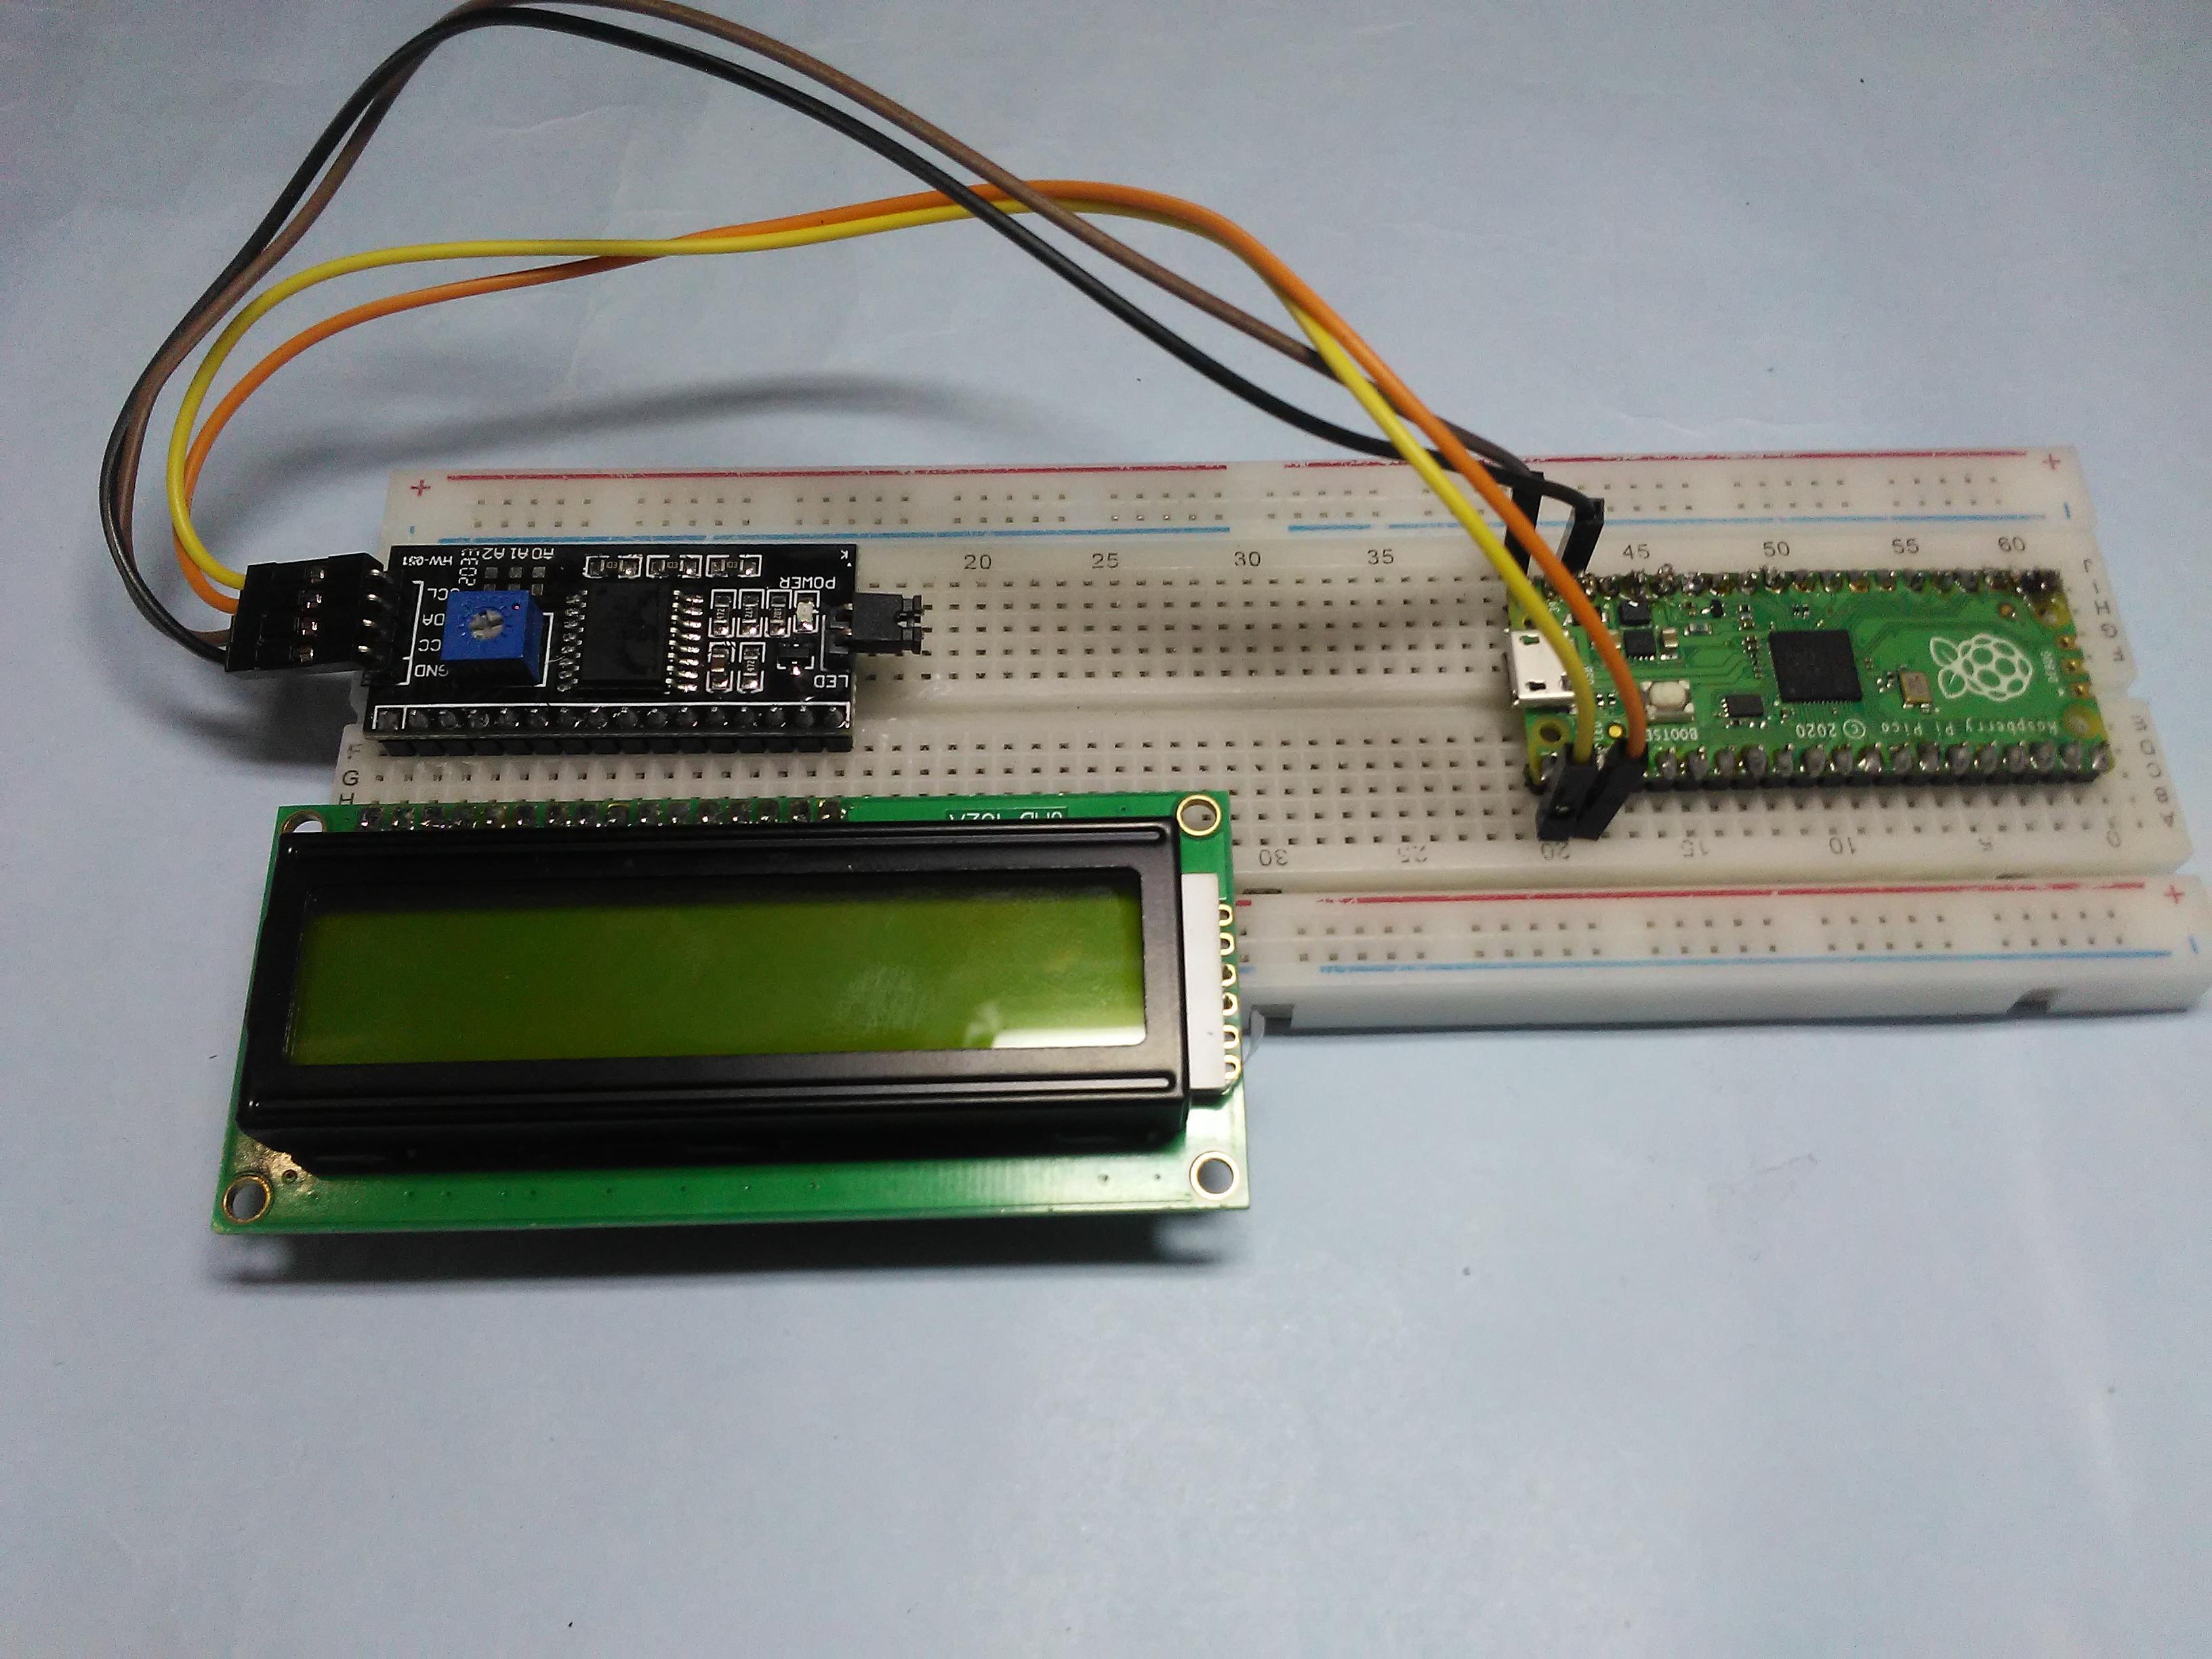
Wiring
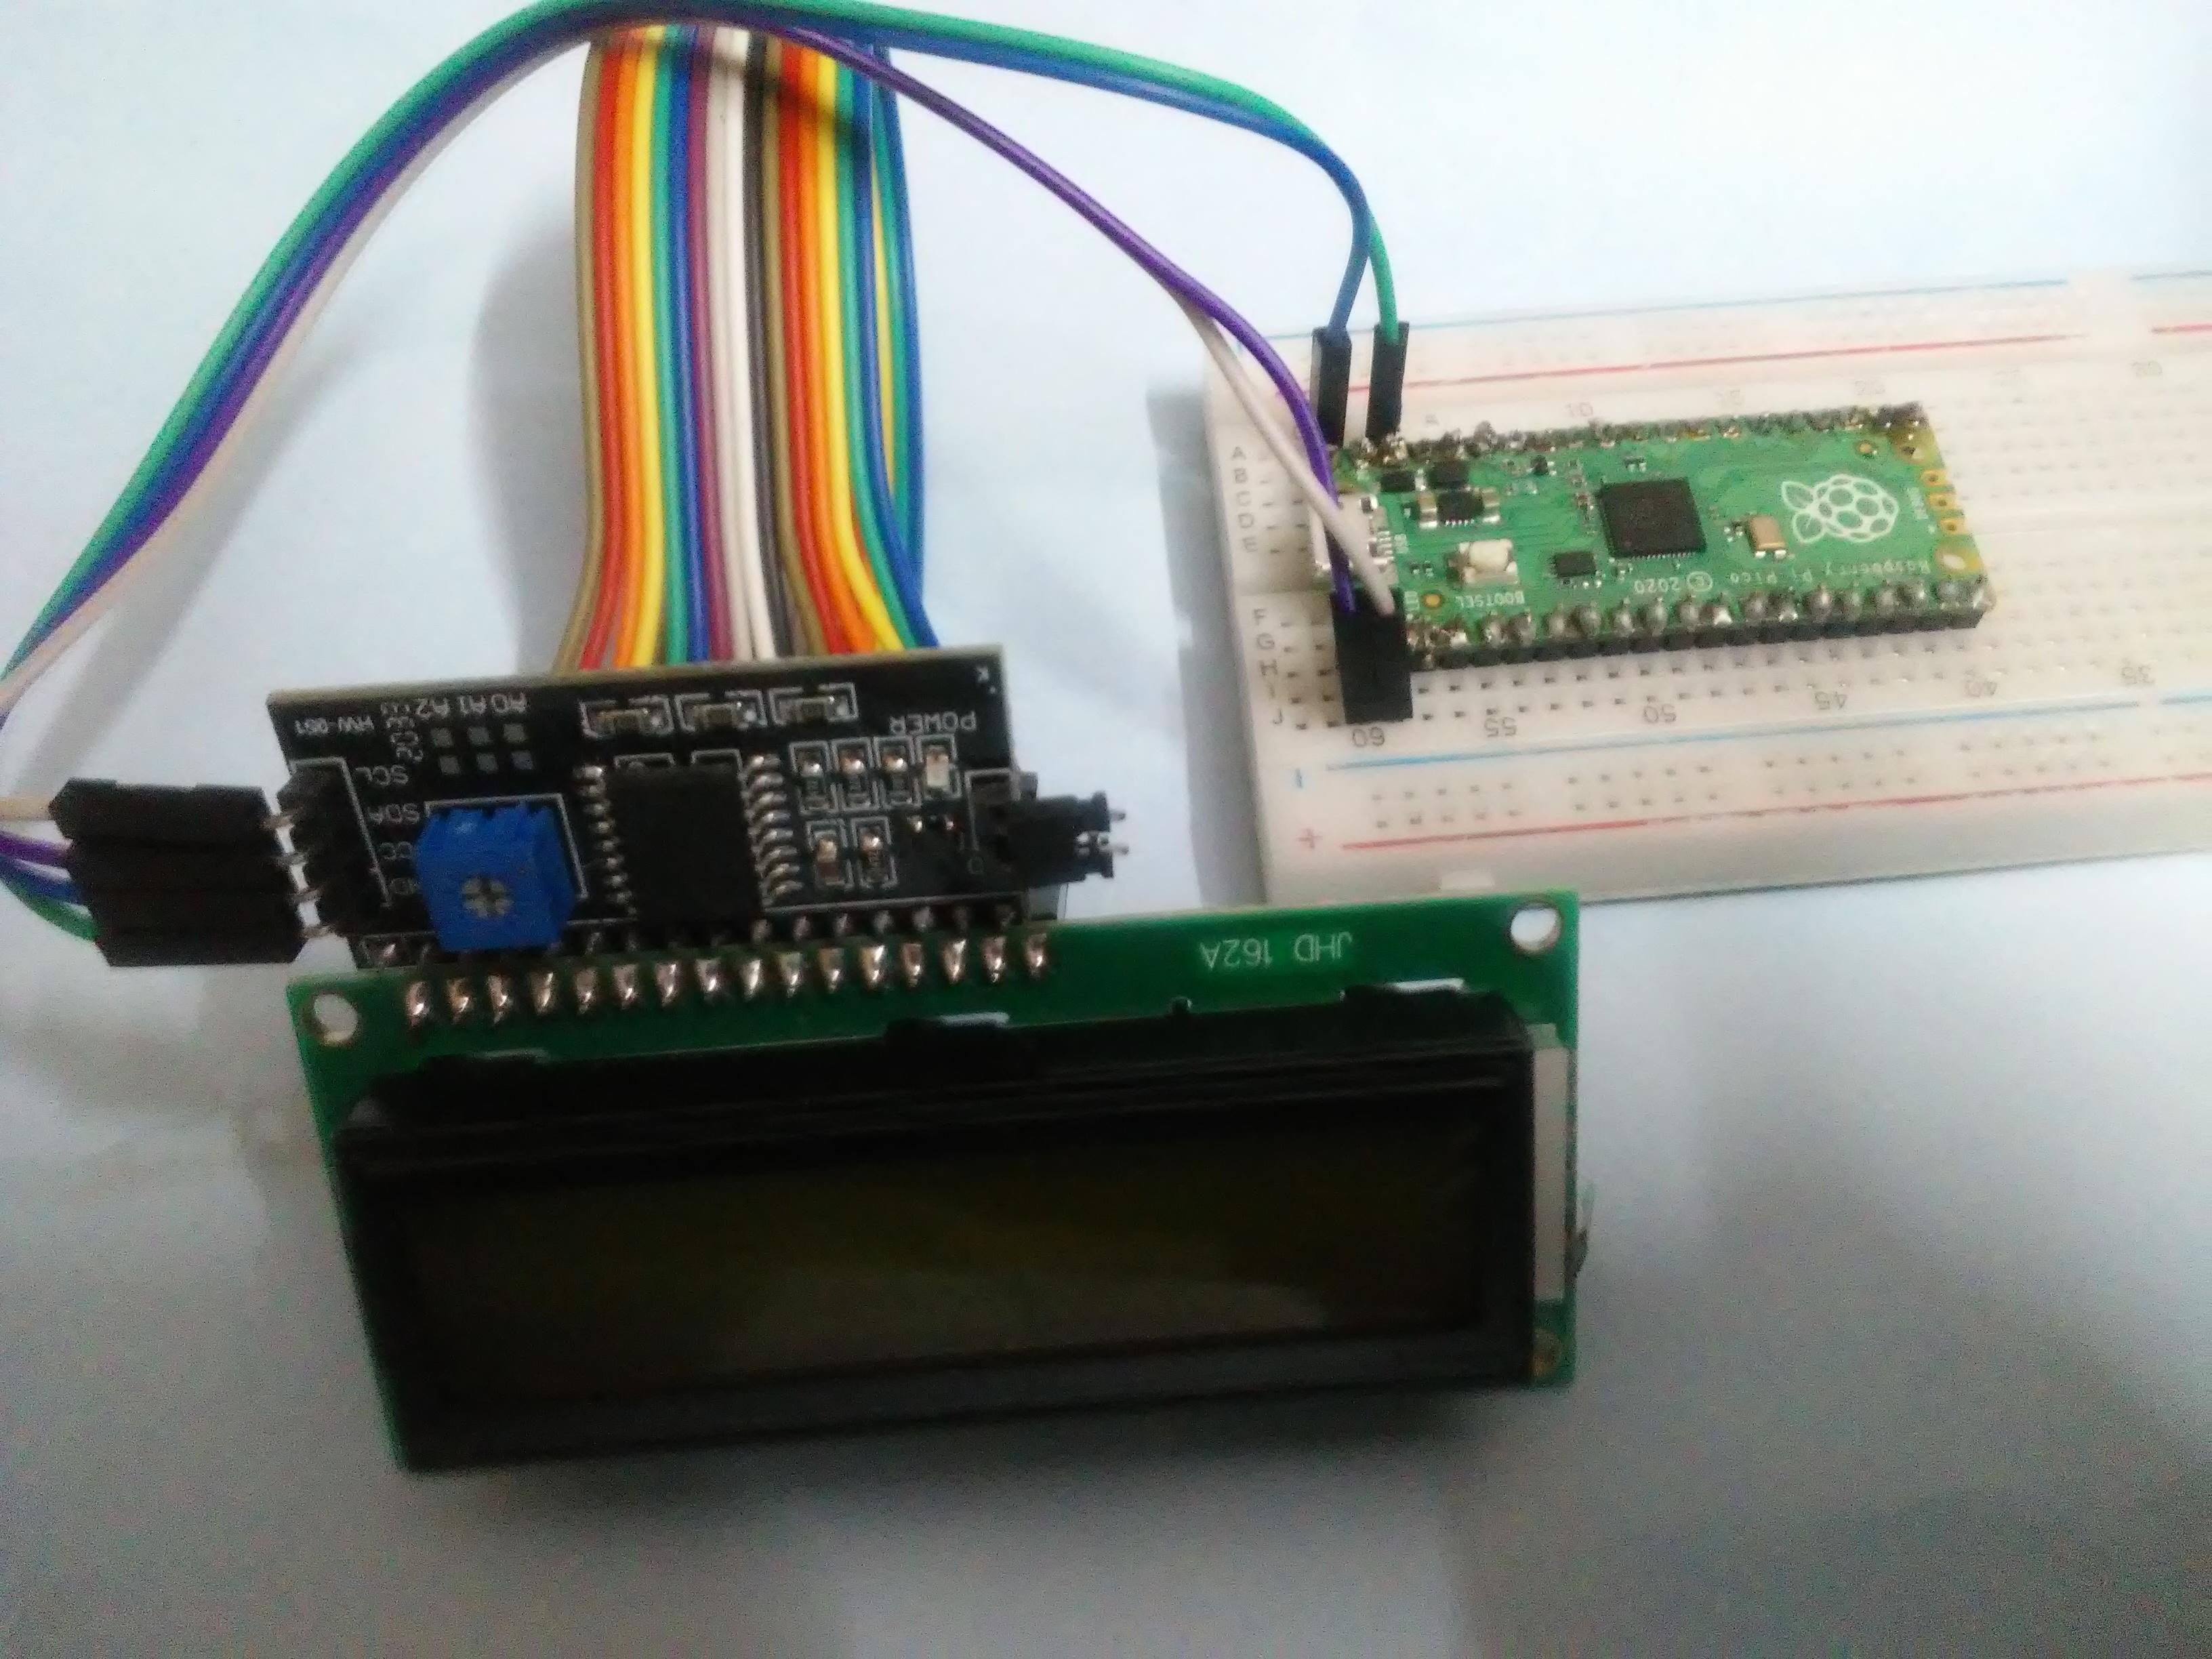
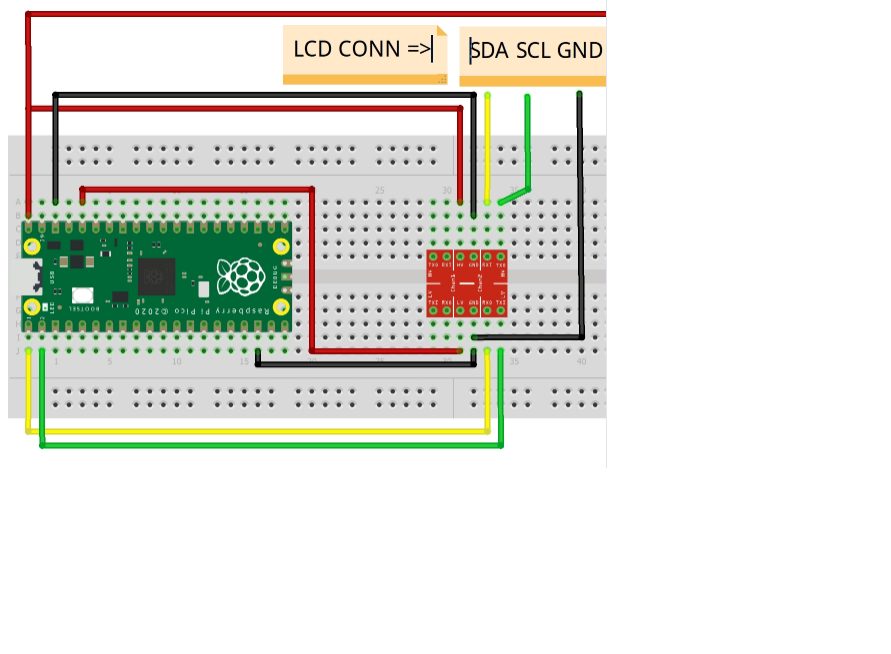
Connect the i2c adapter to 16*2 LCD display
- SCL-Pin 2 (GP1)
- SDA-Pin 1(GPO)
- VCC-Pin 40(VBUS)
- GND-Pin 38 (GND)
Coding
We are done with the wiring, so let us startthe coding of pi pico
1. You can download Thonny for programing your pi pico.
2. After opening Thonny go to>Tools> Options> Interpreter, select Raspberry Pi Pico as the Interpreter.
We need Libraries and drivers to control the LCD display.
You can download the libraries from
https://github.com/T-622/RPI-PICO-I2C-LCD
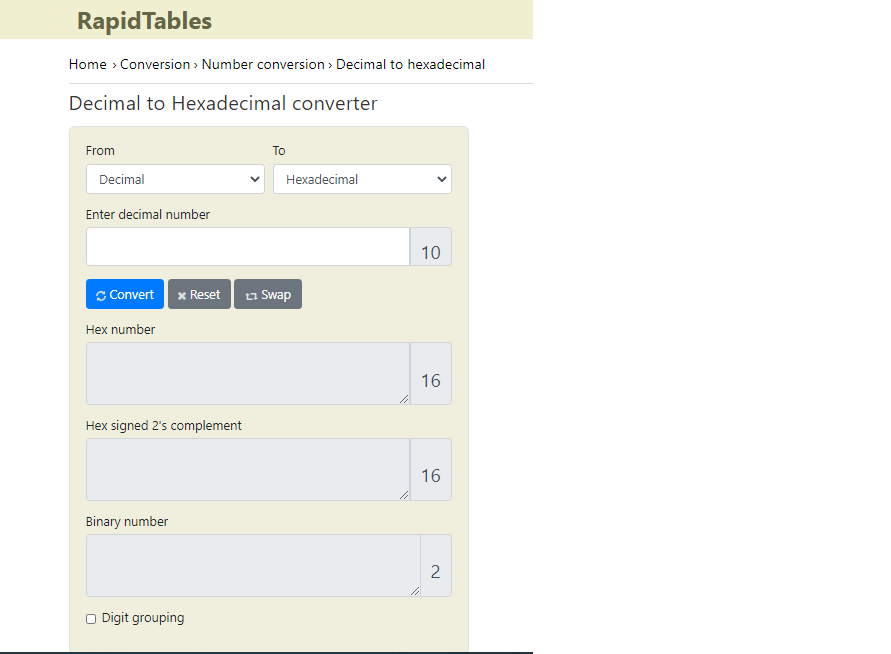
· Before running the test code we need to check one thing that is, using the i2c protocol requires us to enter the address of the LCD. So let us check the address of your LCD, so let's begin.
Download this Code to check the address. After saving it to your file and running it, your computer displays a number but this is in decimal form but we need it in the hex form.
Type your address in the test code and run it. If it works then you can create custom characters of our own.
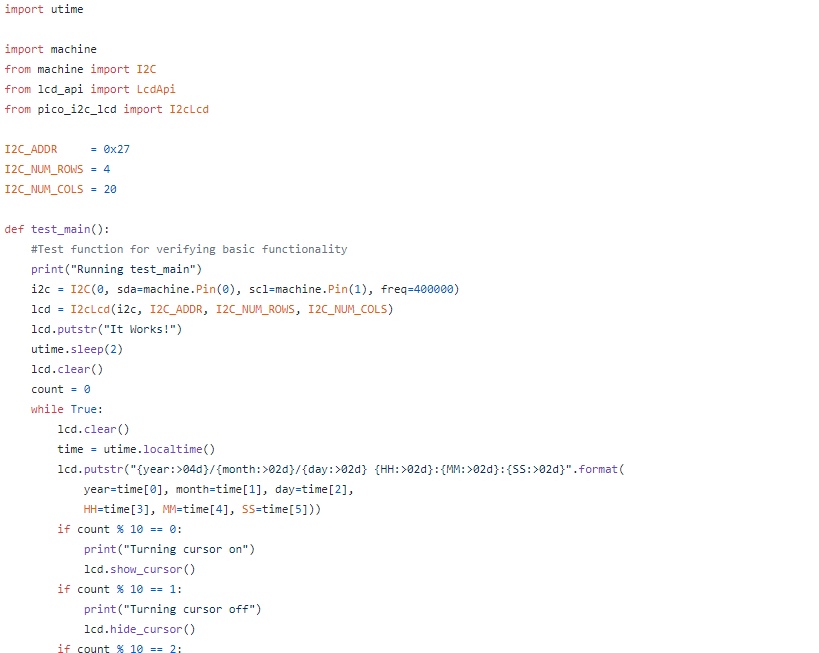
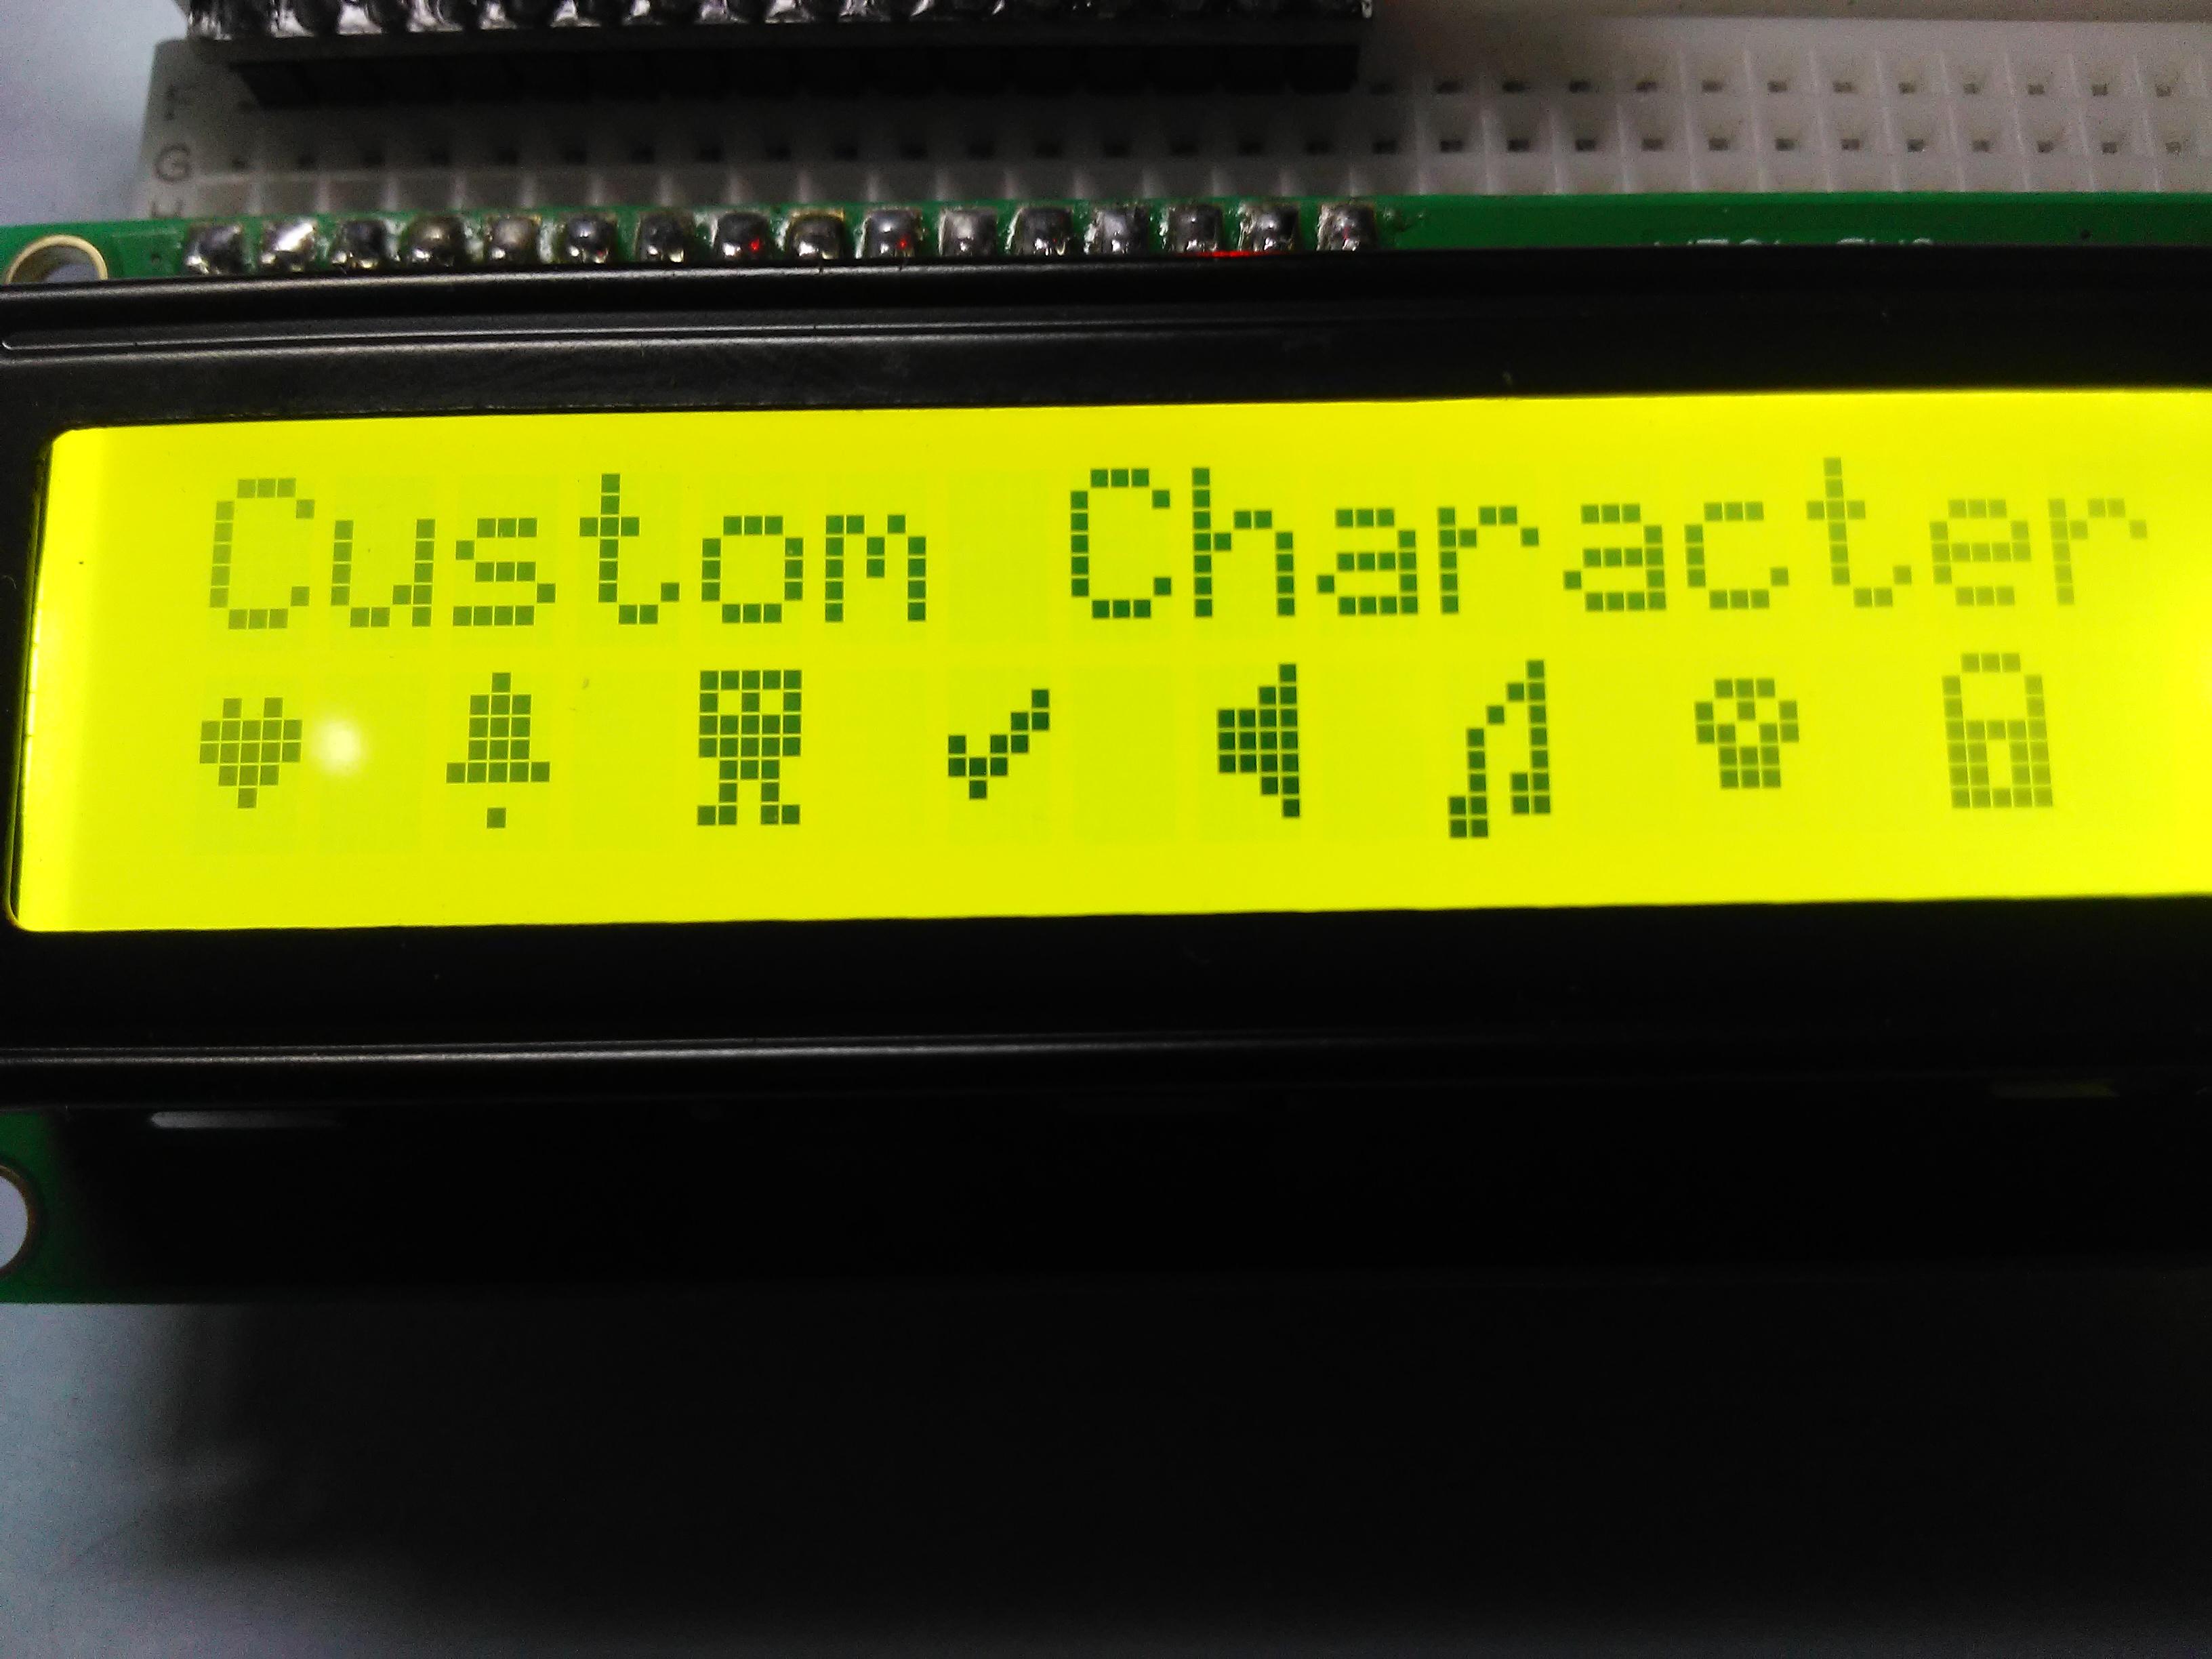
Custom Characters and Letters
Use this code to write your custom letters
import machine
from machine import I2C
from lcd_api import LcdApi
from pico_i2c_lcd import I2cLcd
I2C_ADDR = 0x27
I2C_NUM_ROWS = 4
I2C_NUM_COLS = 20
i2c = I2C(0, sda=machine.Pin(0), scl=machine.Pin(1), freq=400000)
lcd = I2cLcd(i2c, I2C_ADDR, I2C_NUM_ROWS, I2C_NUM_COLS)
lcd.clear(_)
lcd.move_to(0,5)
lcd.putstr("Hello")
lcd.move_to(0,5)
lcd.putstr("World!")
You just need to change the last four lines to write your own words or letters.
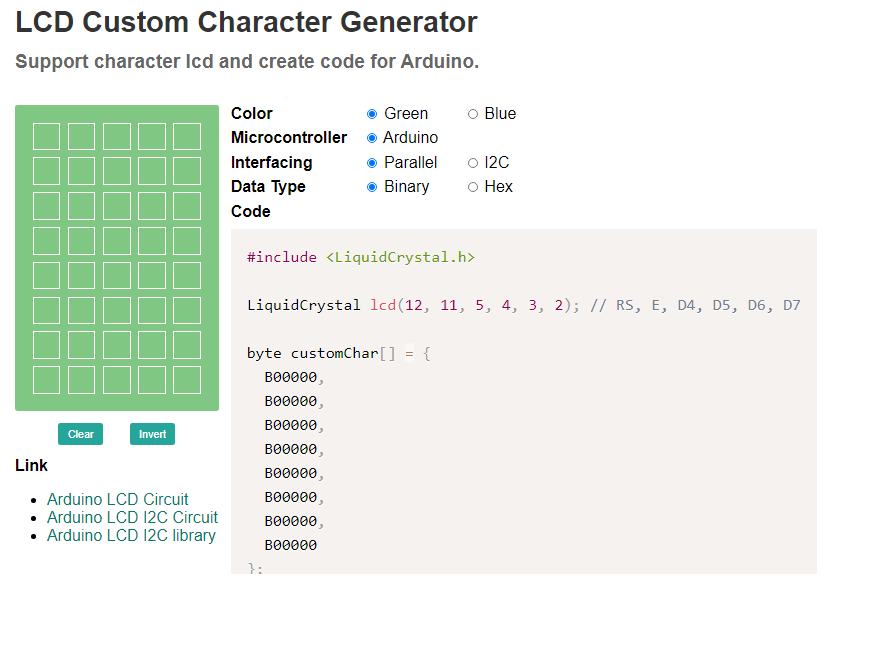
You can use LCD custom character creator for your ease.
write the given code in the main loop of the code and that's it.
You can create your own custom words and letters with Raspberry pi pico and 16*2 LCD display.