Cube Puzzle
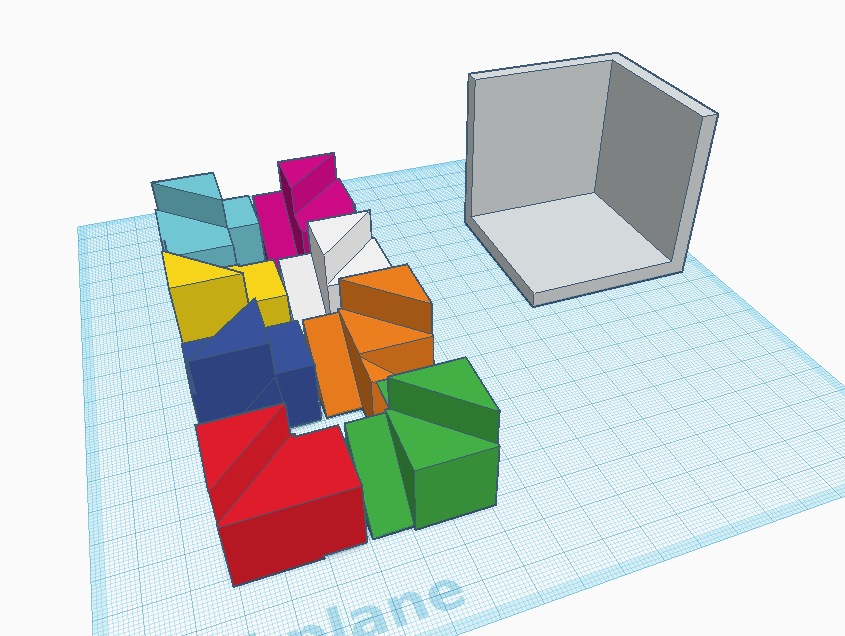
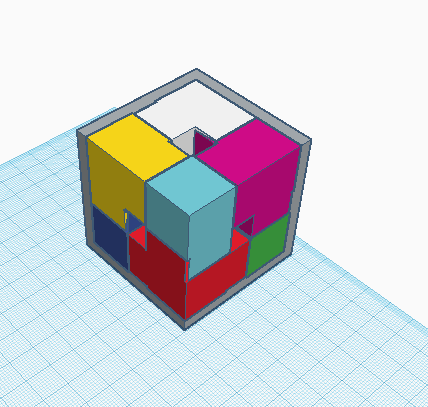
Puzzles are meant to fun and challenging, but there are only so many puzzles and when you see the same puzzle over and over again it gets boring especially when you know how to do it. So I decided to find a new and improved puzzle to give you a puzzle not only challenging but out of the ordinary.
The puzzle I'm going to show you how to make is a cube puzzle and no I'm not taking about a rubix cube because that's a way too common puzzle and its super complicated to make. Anyway I hope you enjoy this puzzle that is not difficult to make and even better is FUN!!!
Materials


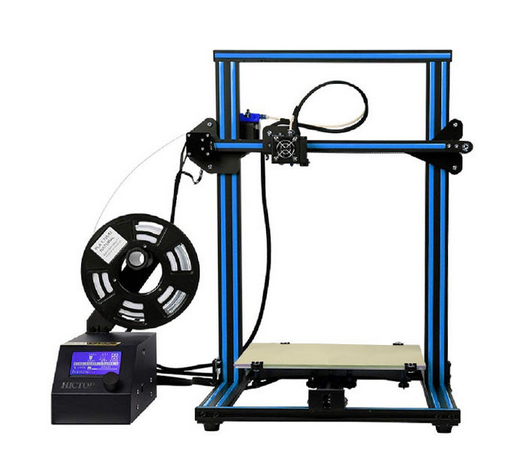
So to make this puzzle you will need:
- A computer with internet access
- A Tinkercad account
- A 3D printer ( if you want to print the puzzle )
Puzzle Design
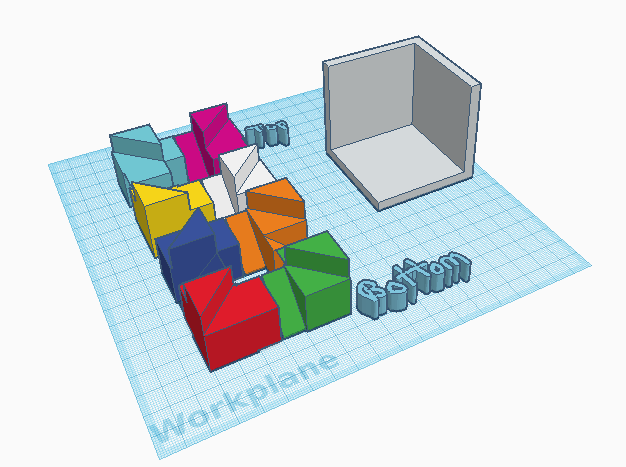
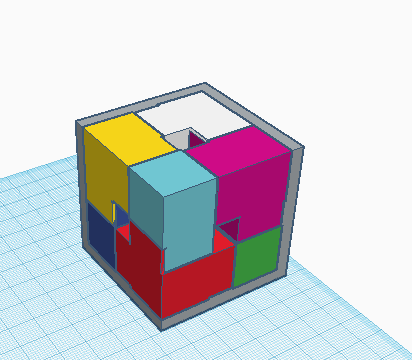
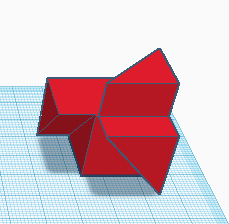
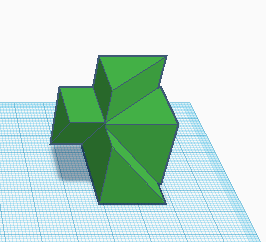
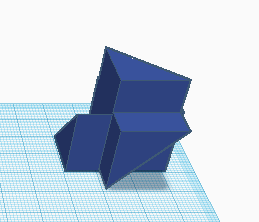
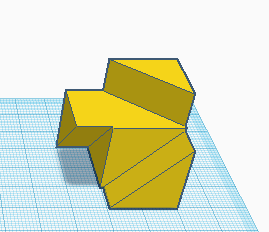
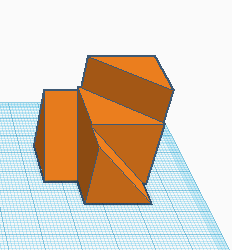
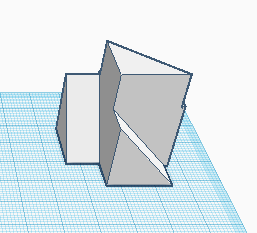
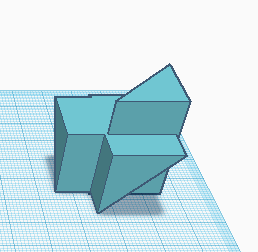
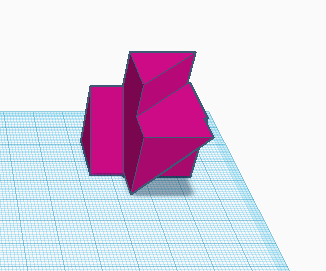
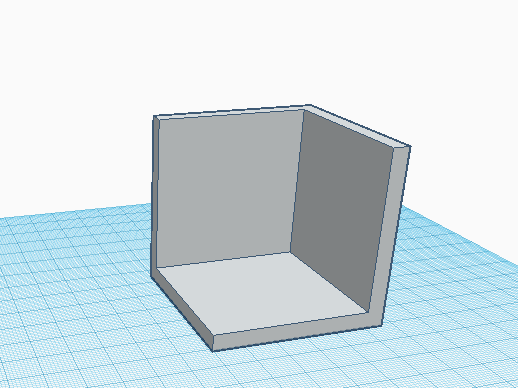
So for the puzzle design I used Tinkercad to make the different parts of the puzzle. If you are supper lazy you can just take the files I uploaded and print your puzzle (there are 10 files one with all the parts and the rest are the parts individually), but if you dare a fun adventure you can create the puzzle by following my steps.
Tinkercad


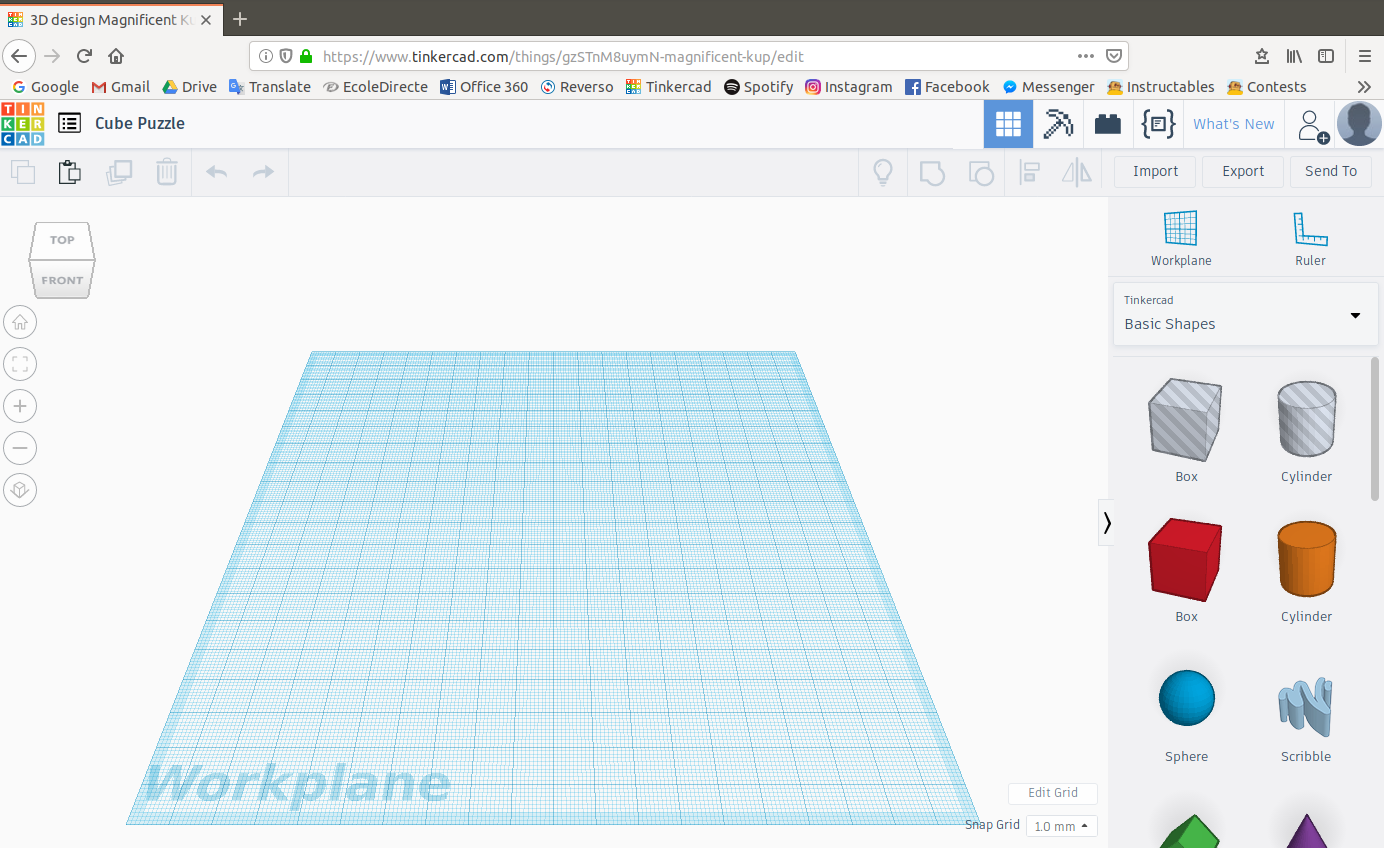
So before you start you will need to go the site below and either sign up or sign in if you all ready have an account
Once you have accessed your account it will show you your dashboard, and you will have to click on the button that says "Create new design". Once you have clicked the button it will open the "Workplane" on which you will be able to create you 3D designs.
Making the Base for the Puzze Pieces
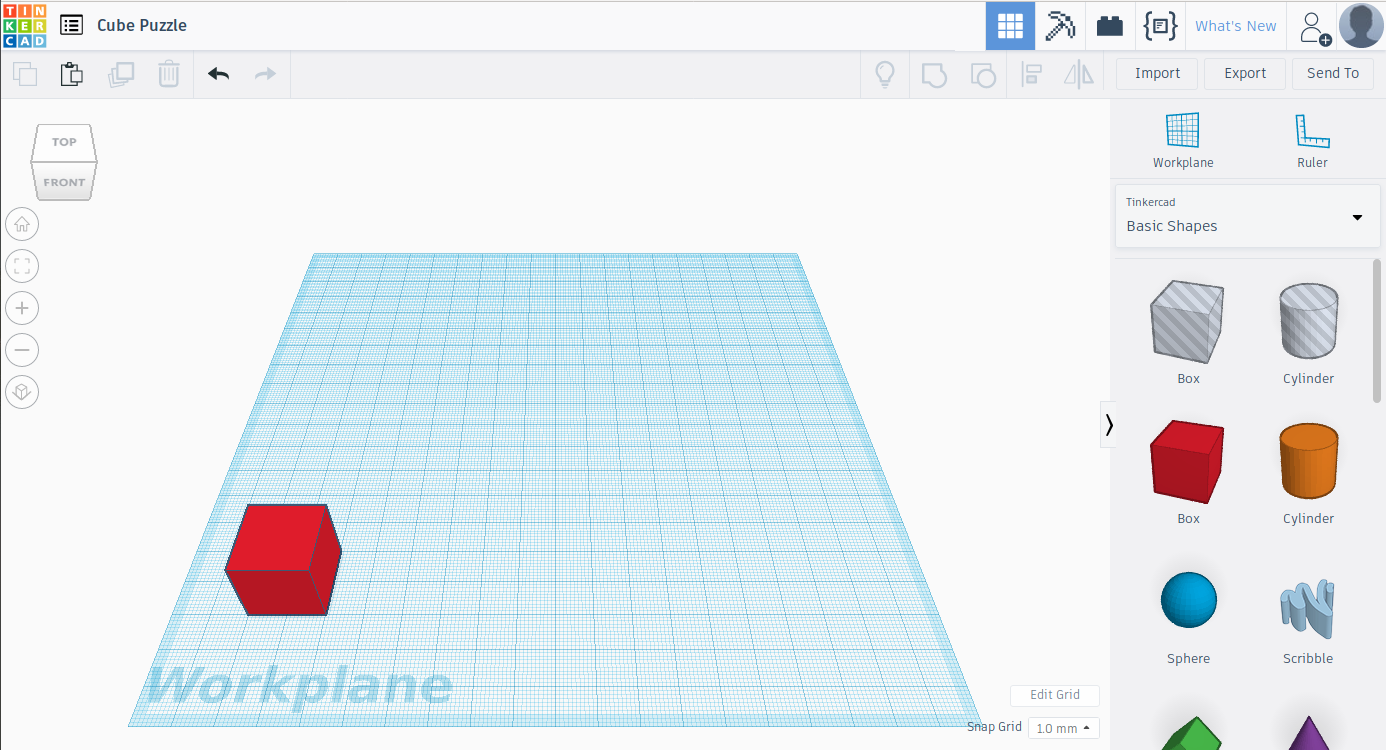
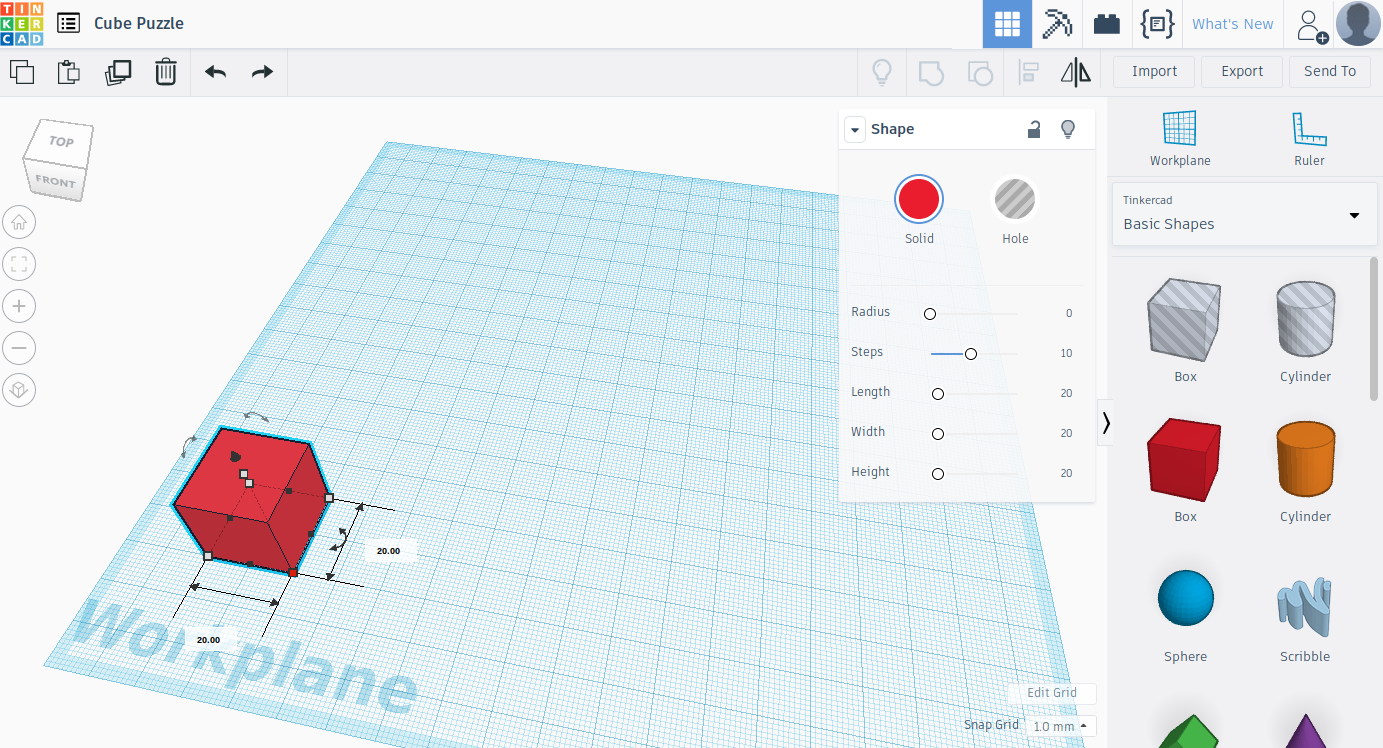
So you will need to insert a cube and give it the dimensions of 20 mm by 20 mm by 20 mm that you should pace at an angle of the thicker grid lines so that it is easier to see and measure.
Duplicating the Cube
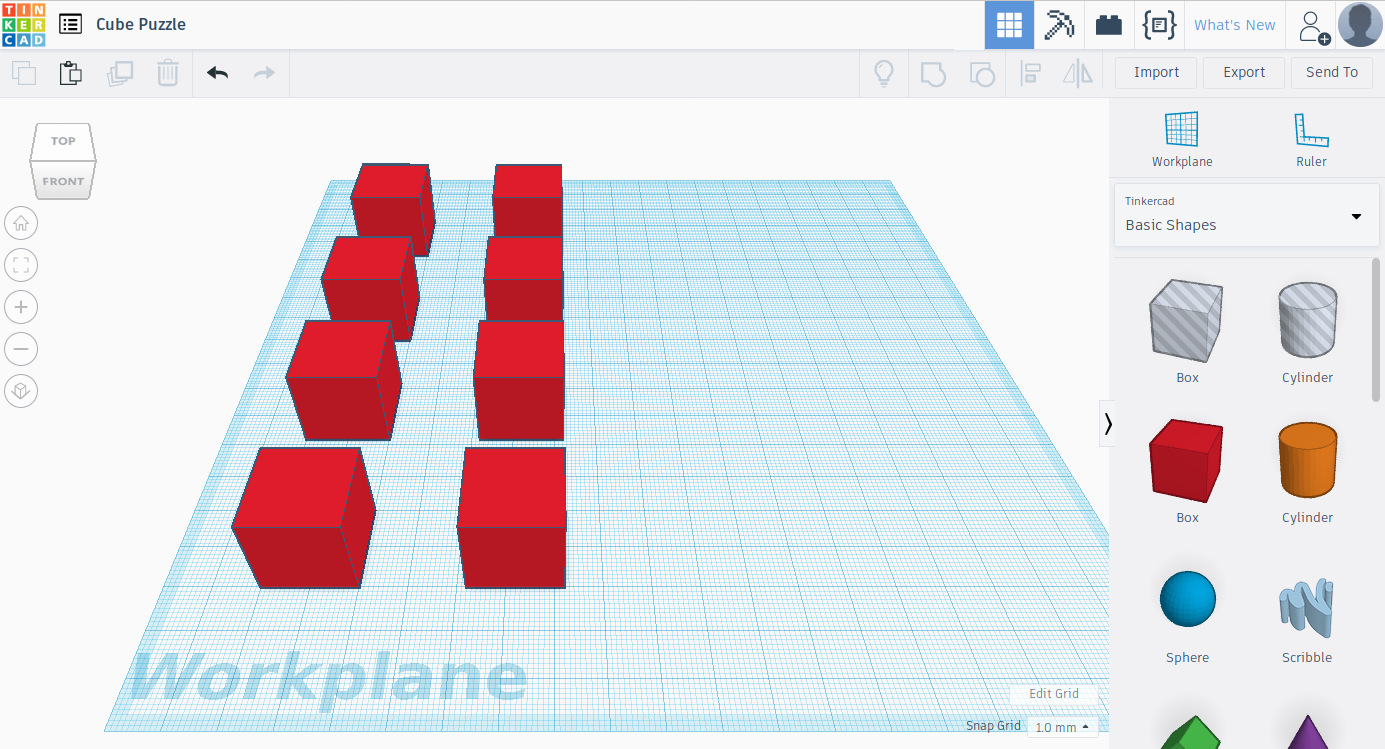
You will now need to copy and paste the cube 8 times putting them in groups of 4 with 22 mm in between them.
Inserting the Wedge
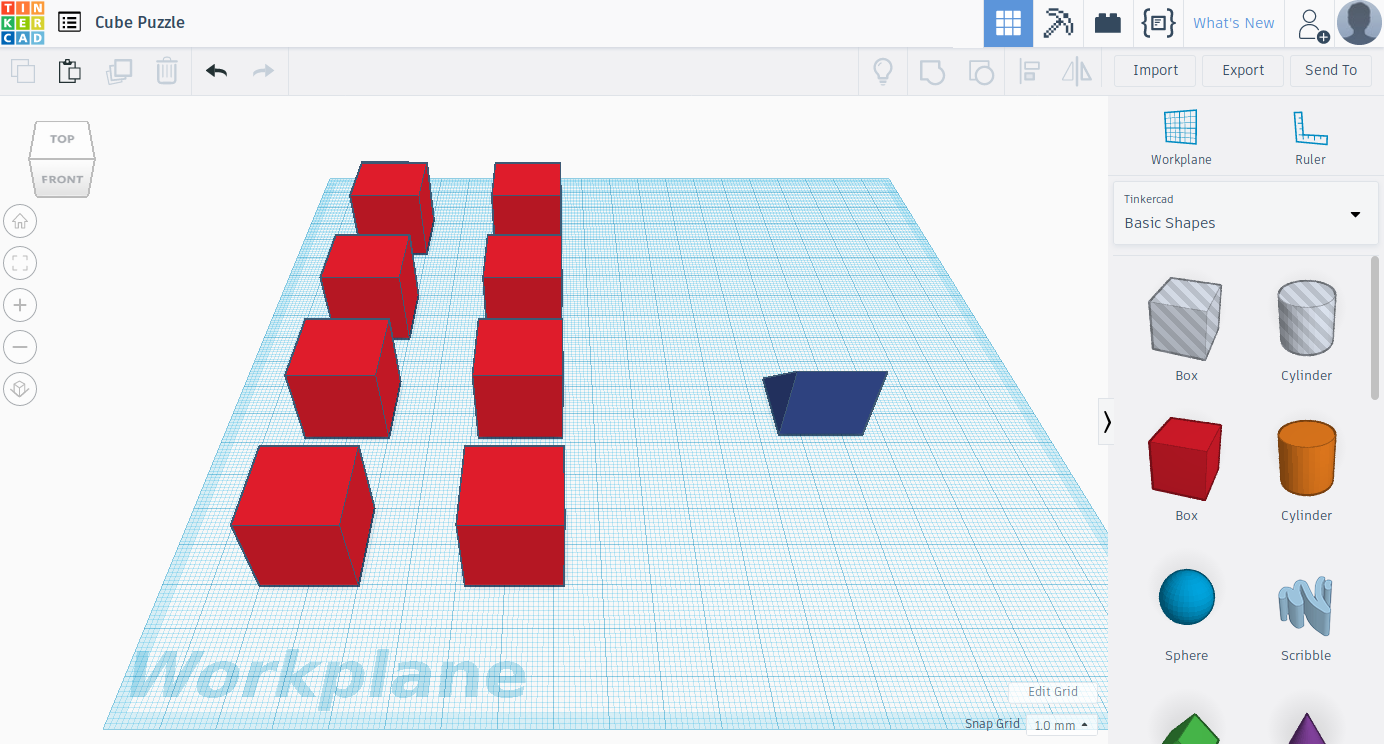
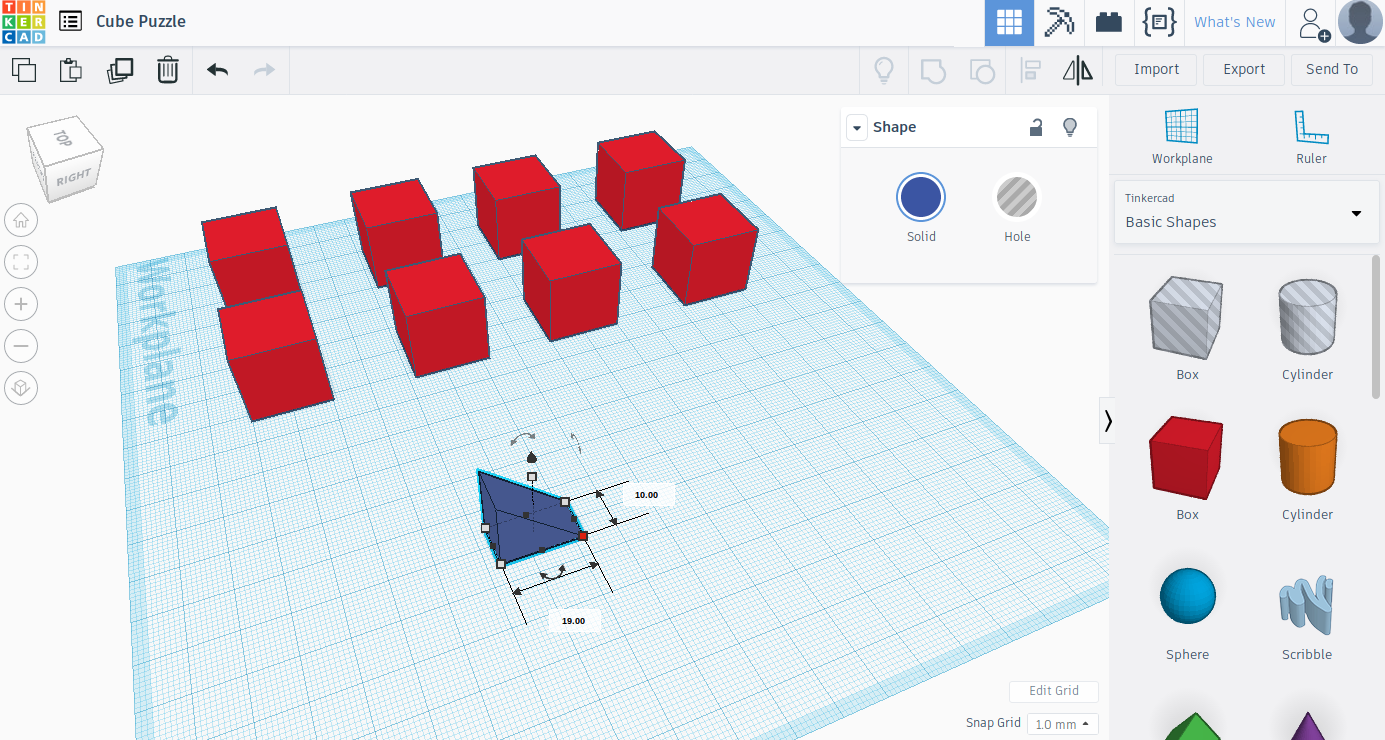
Then you will need to insert a wedge an give it the dimensions of 19 mm by 19 mm for the height and length and give it a width of 10 mm. The reason I put the dimensions for the height and length a 19 mm is so that when you 3D print the puzzle they will be able to fit in one another.
Positioning the Wedges
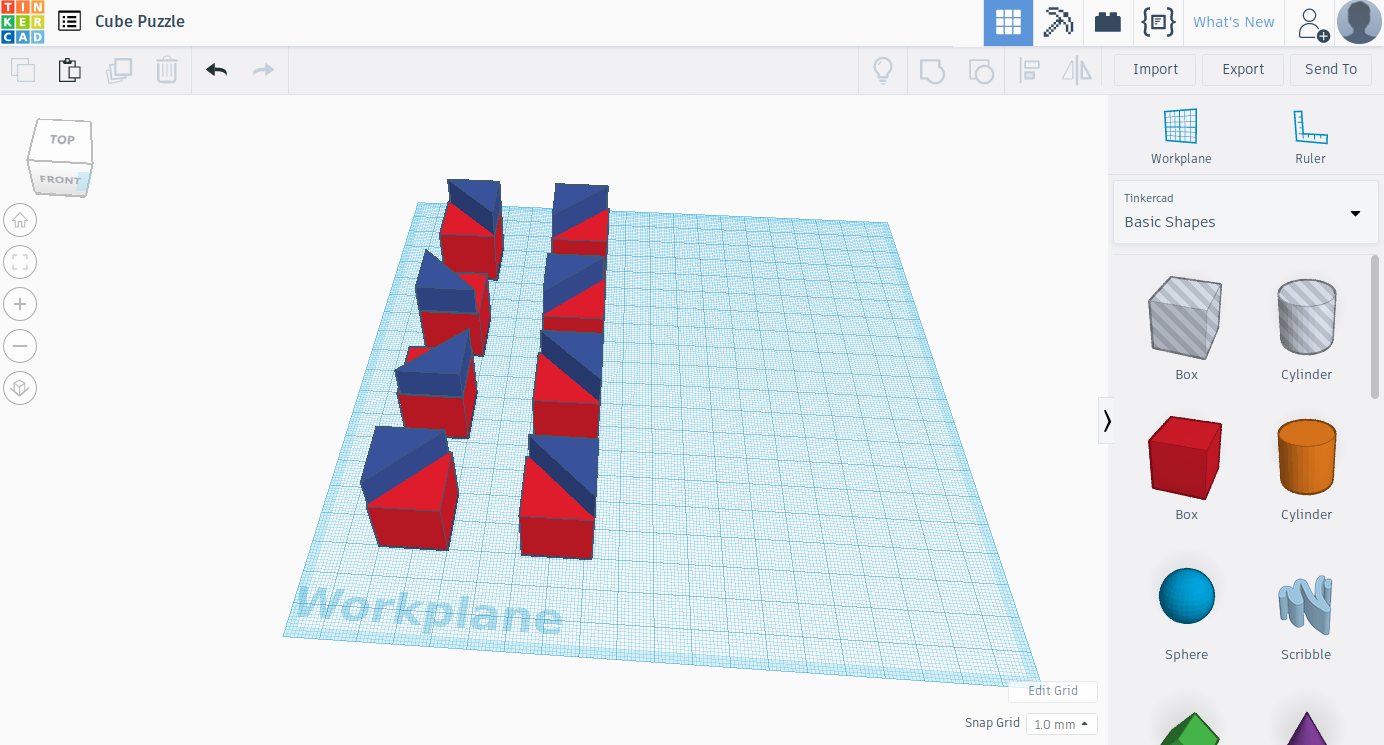
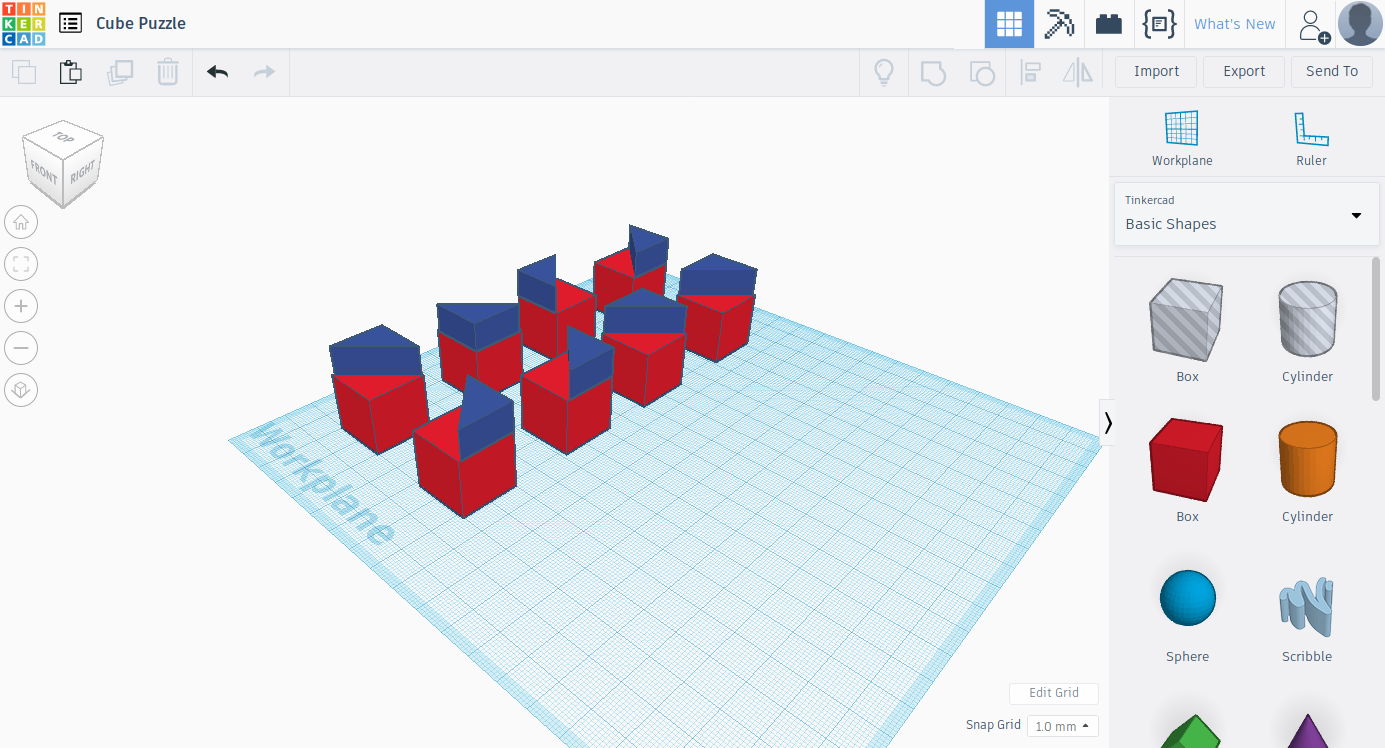
Then you will need to tilt the wedge on its side and lift it 20 mm off the workplane and copy and paste the wedge 8 times, then based on the the images orient the pieces so that they match the image above and make sure that the edges are next to the edges of the cube. If you are creative you can orient them the way you want to have your own solution for the puzzle.
Placing the Front and Back Wedges
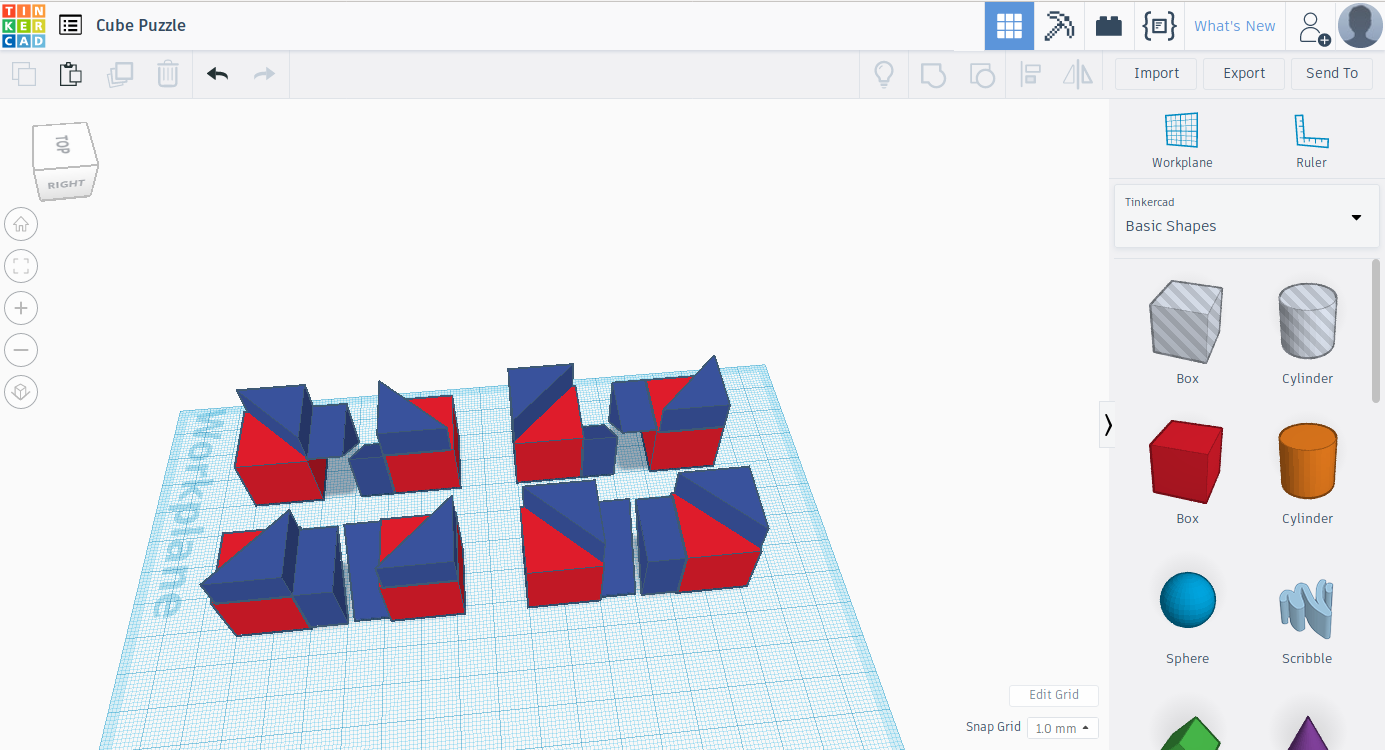
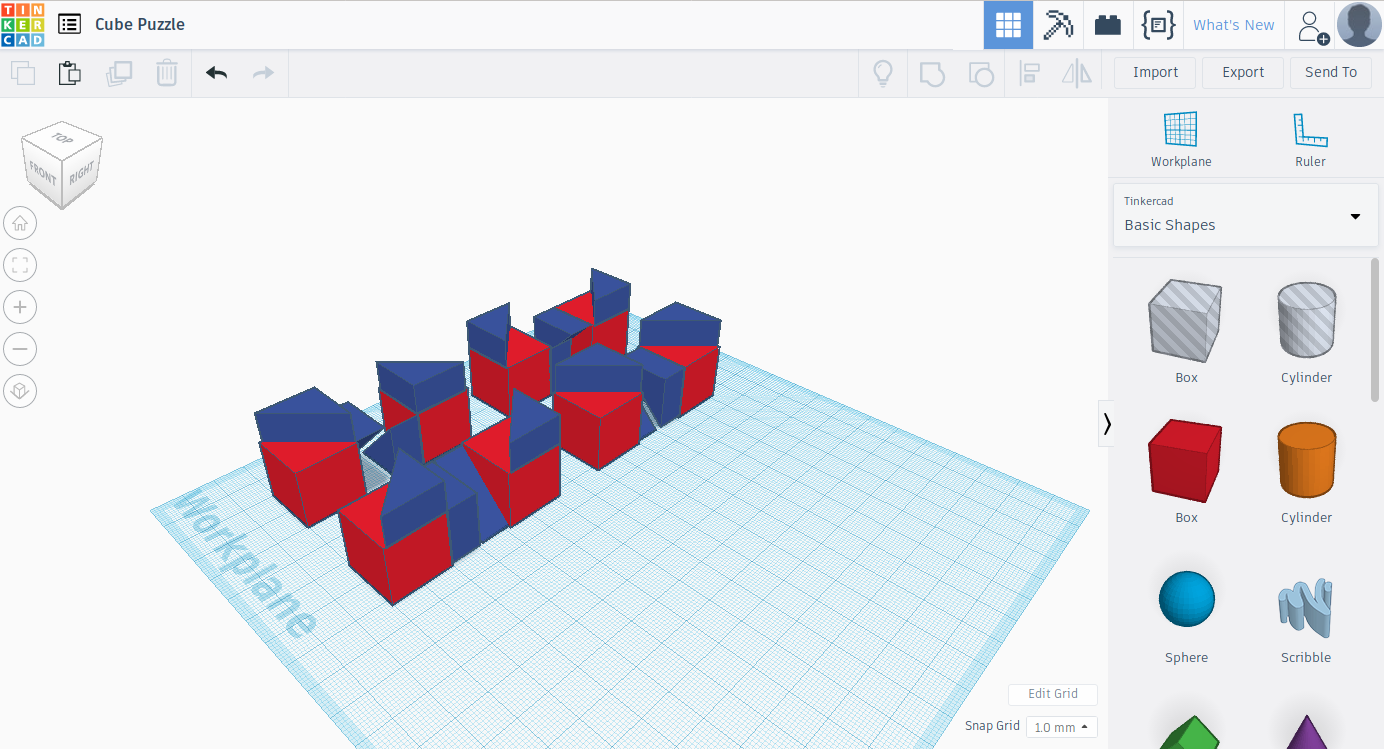
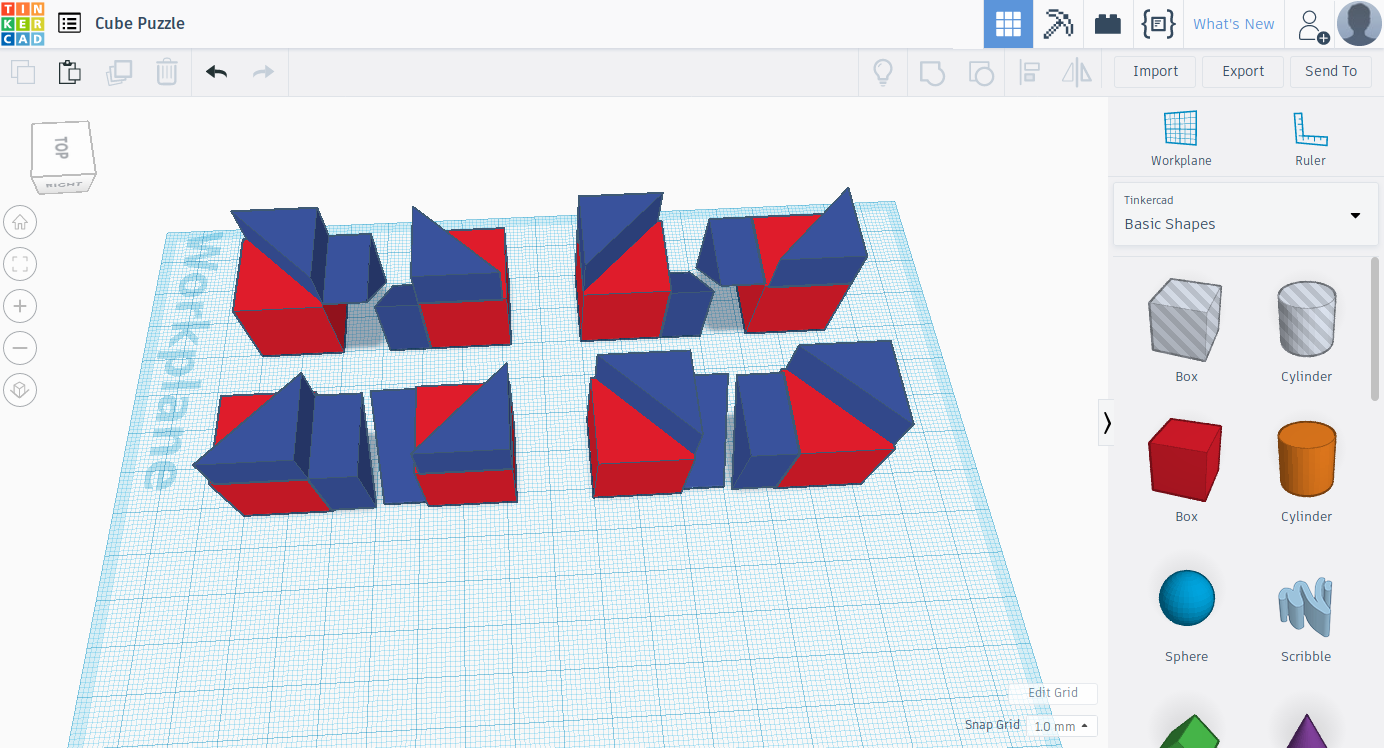
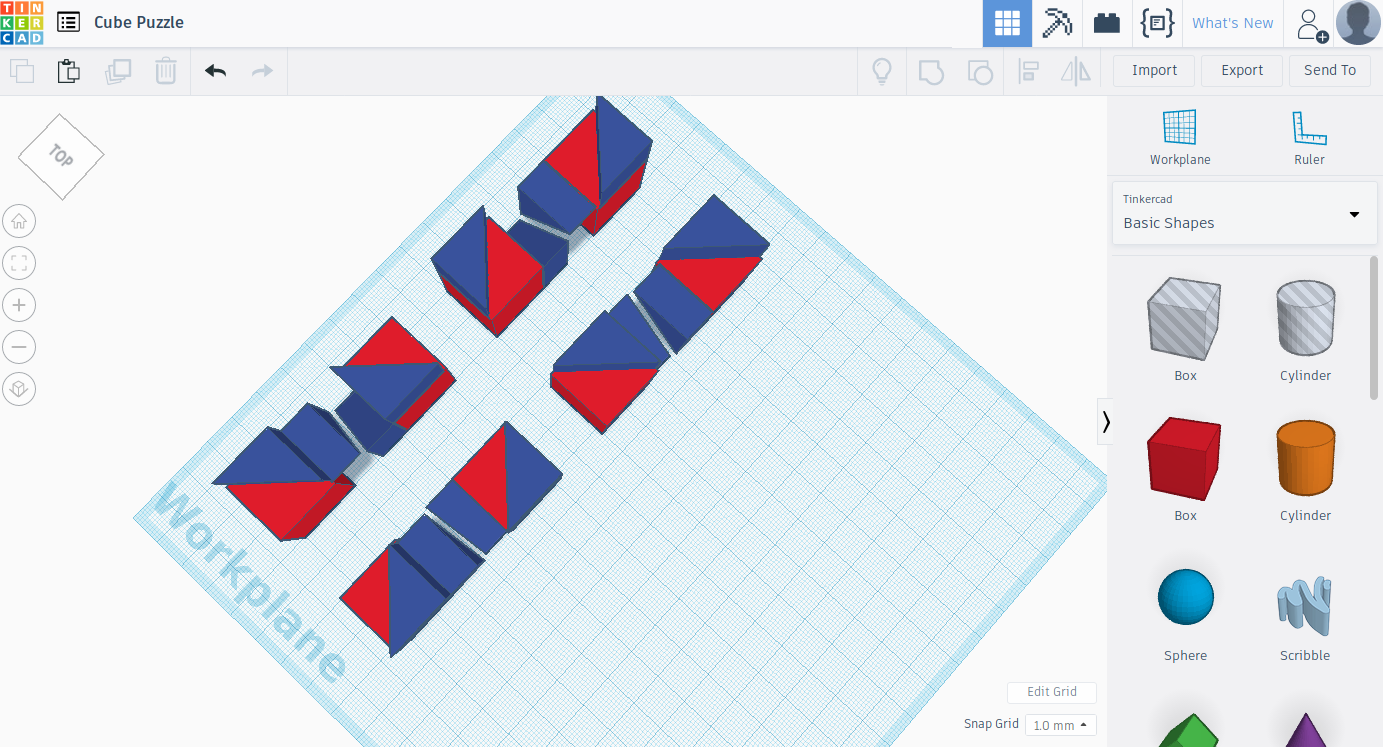
Then you will need to insert another wedge and give it the same dimensions as the other wedges and orient it so that its side is facing the top of the workplane then copy and paste the piece and rotate it 180 degrees so that the base of the wedge is facing up and then lift it 1 mm off the workplane so that it will be at the same level as the top of the cube. Then copy each piece 4 times and then based on the the images orient the pieces so that they match the
image above and make sure that the edges are next to the edges of the cube. If you are creative you can orient them the way you want to have your own solution for the puzzle.
Placing the Right and Left Wedges
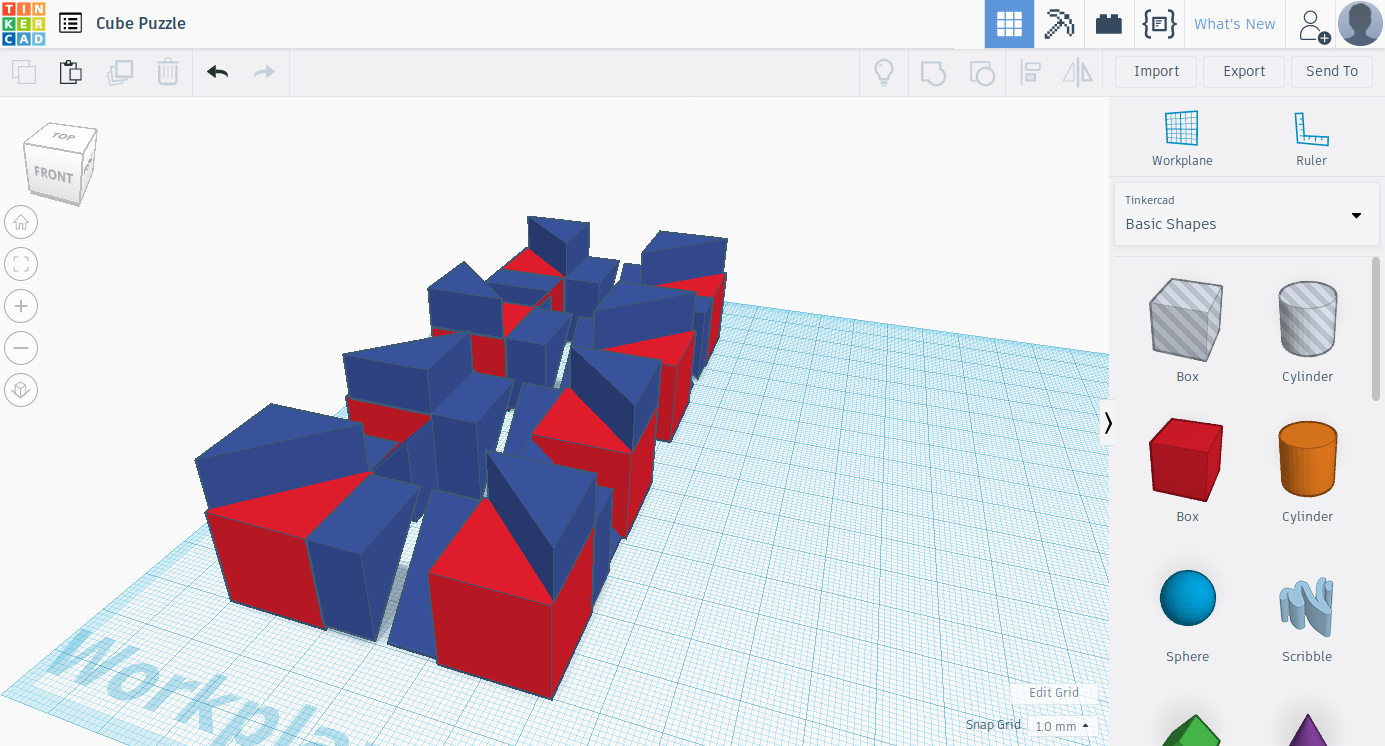
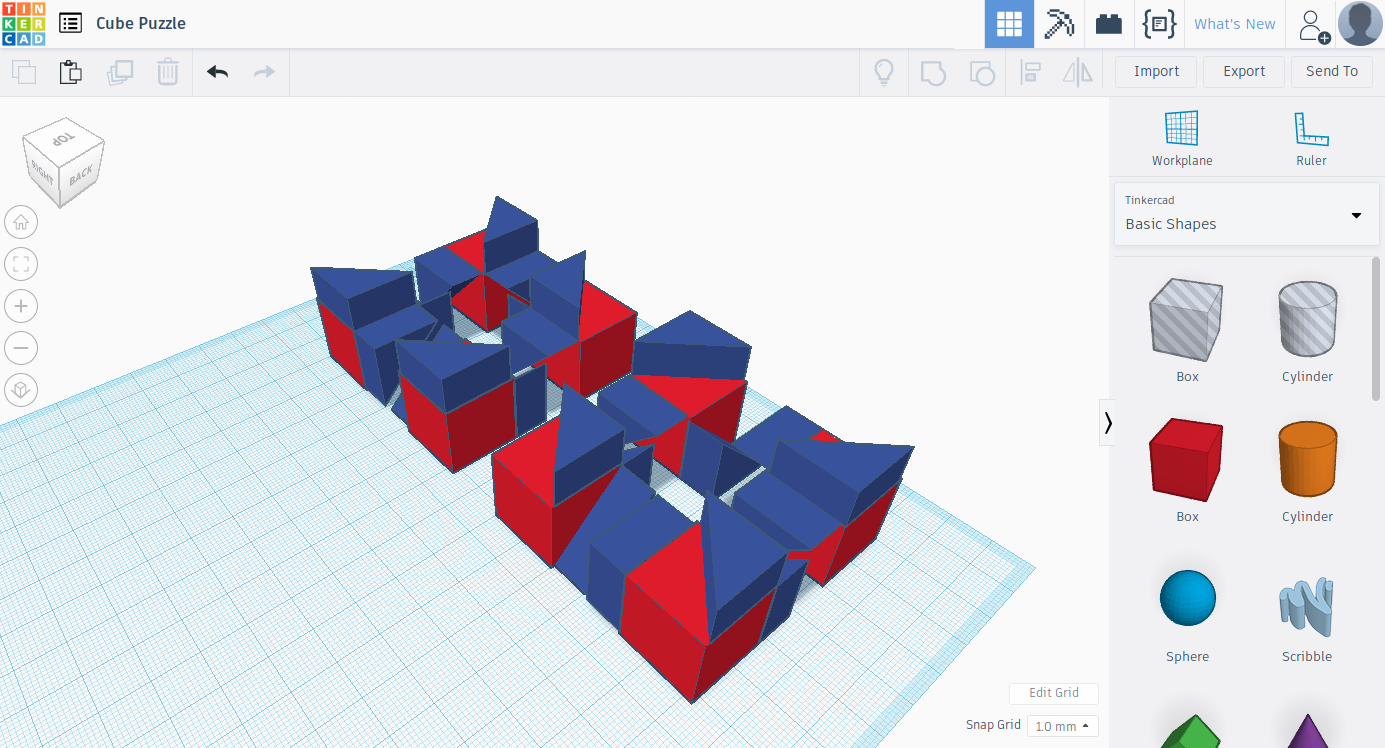
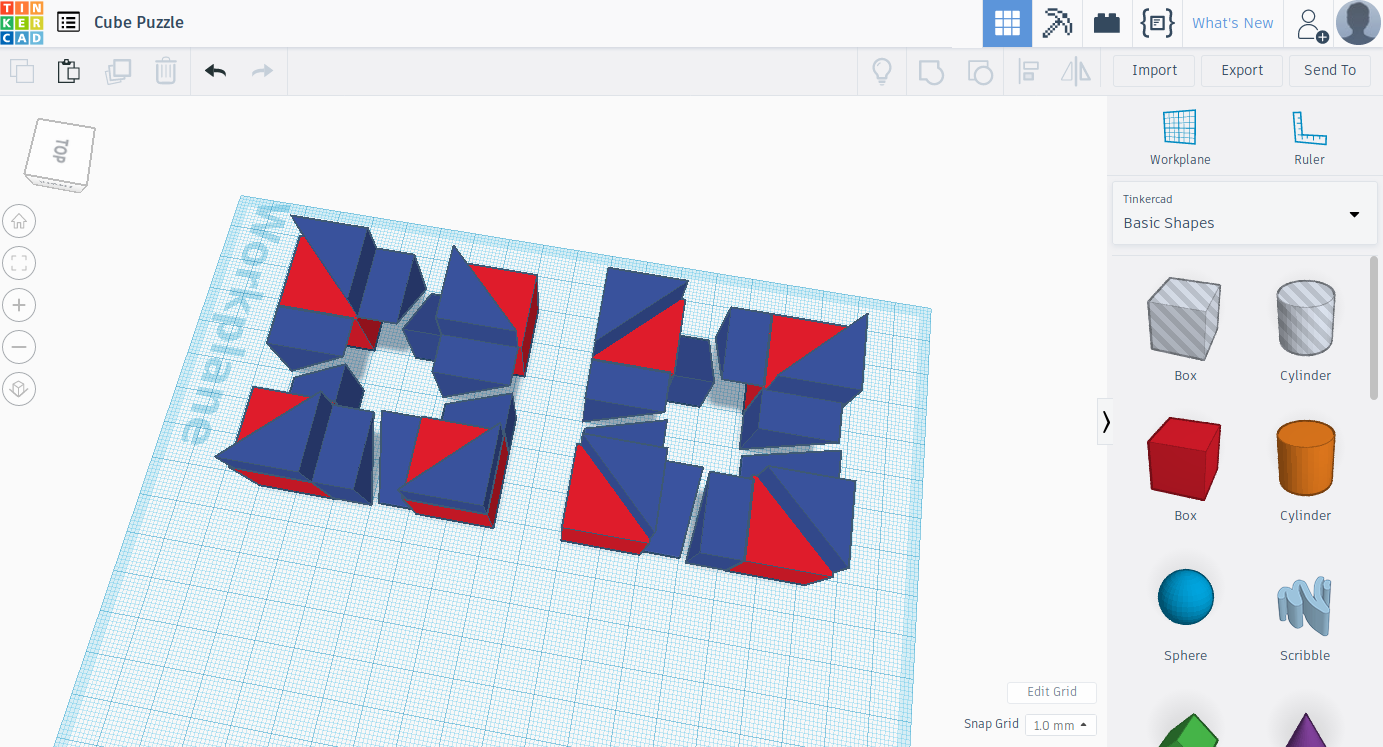
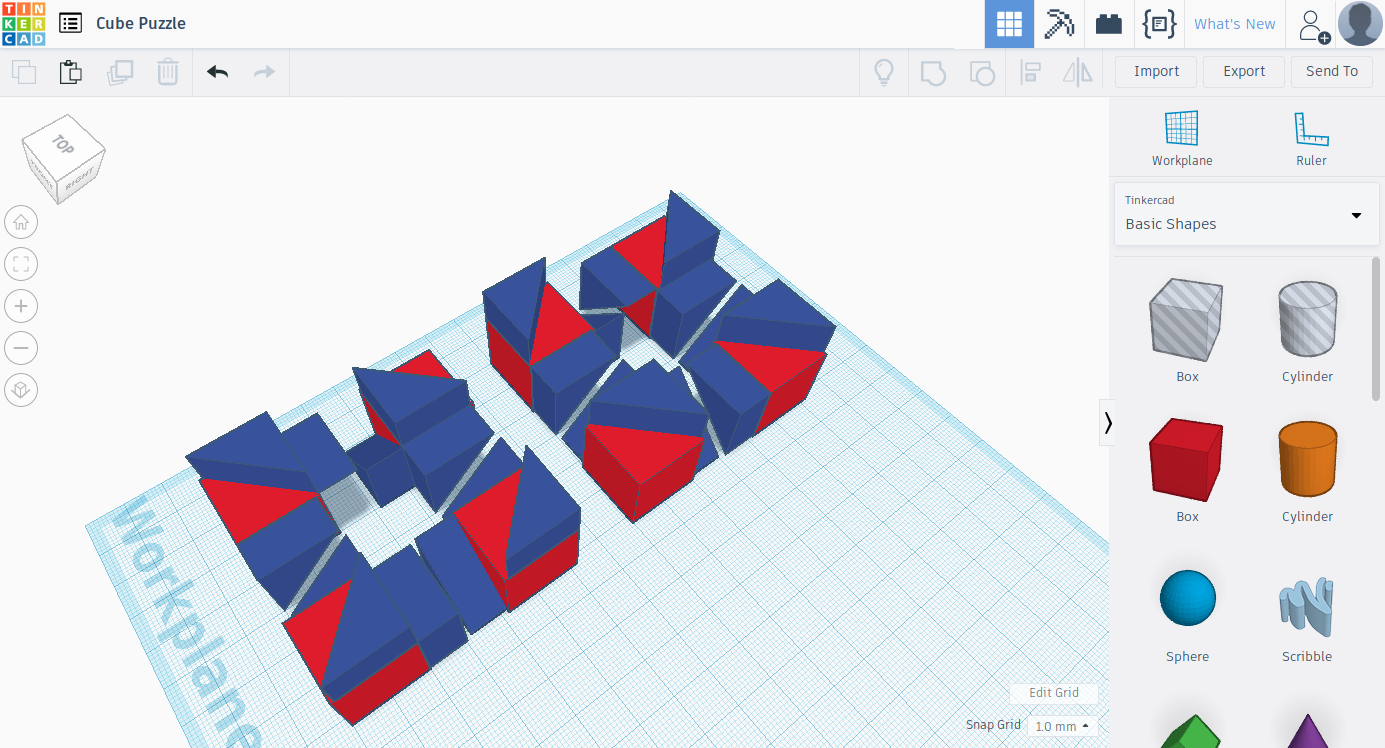
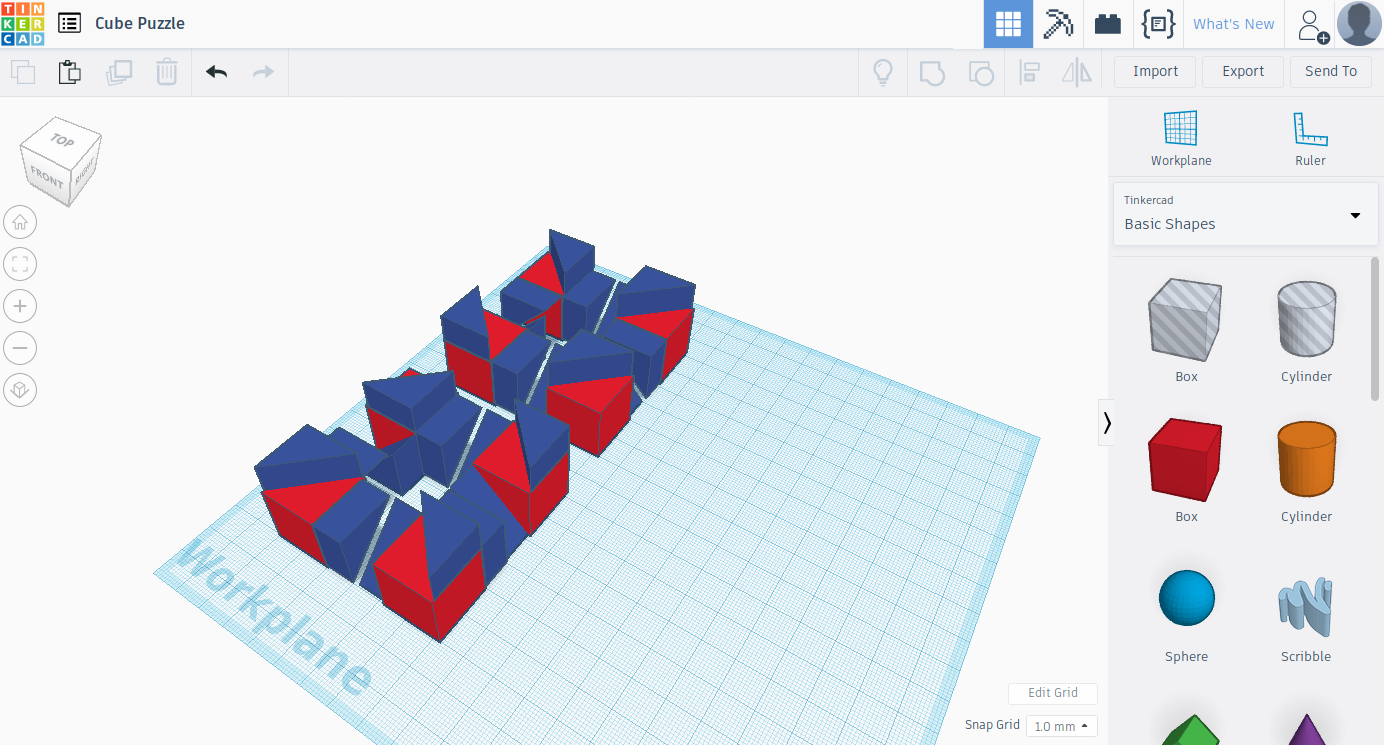
You will need to insert another wedge (same step as the previous step but you will need to orient the wedge in another direction) and give it the same dimensions as the other wedges and orient it so that it is facing the top of the workplane then copy and paste the piece and rotate it 180 degrees so that the base of the wedge is facing up and then lift it 1 mm off the workplane so that it will be at the same level as the top of the cube. Then copy each piece 4 times and then based on the the images orient the pieces so that they match the image above and make sure that the edges are next to the edges of the cube. If you are creative you can orient them the way you want to have your own solution for the puzzle.
Grouping the Pieces
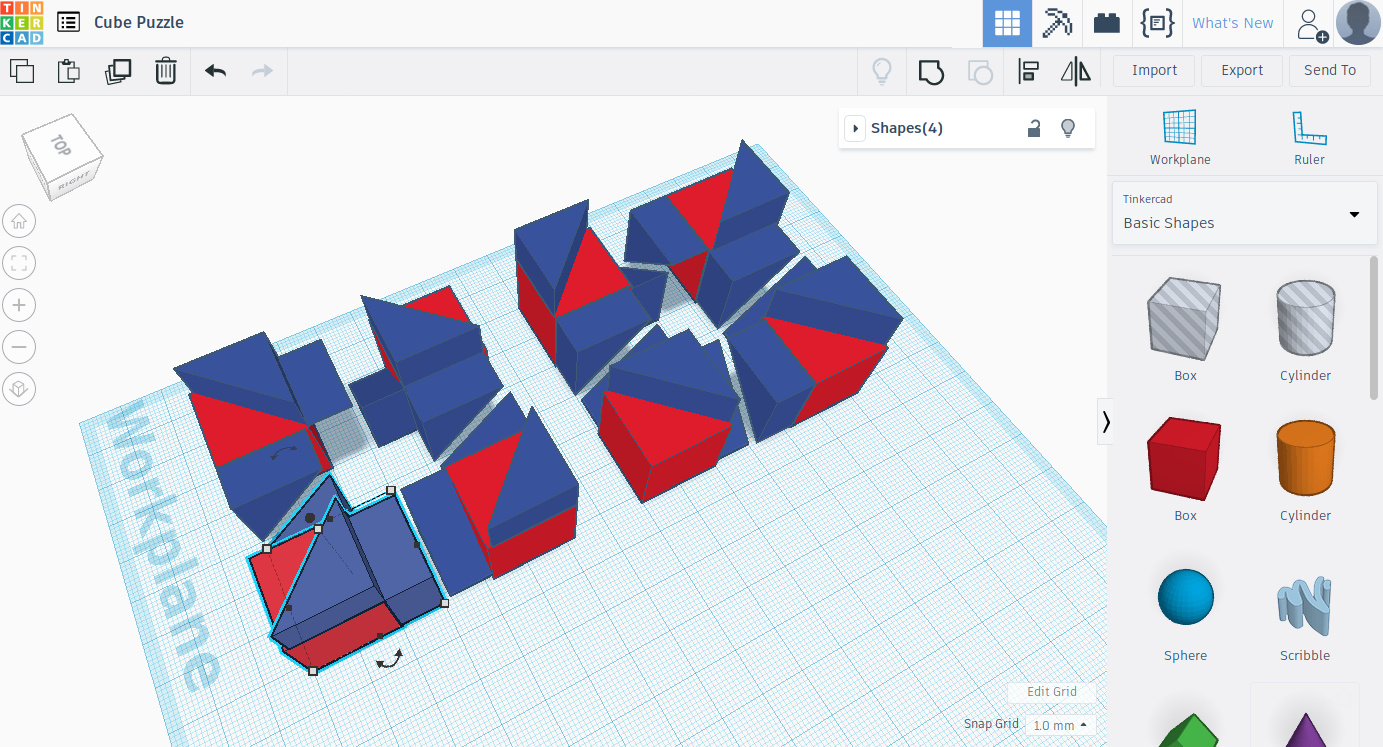
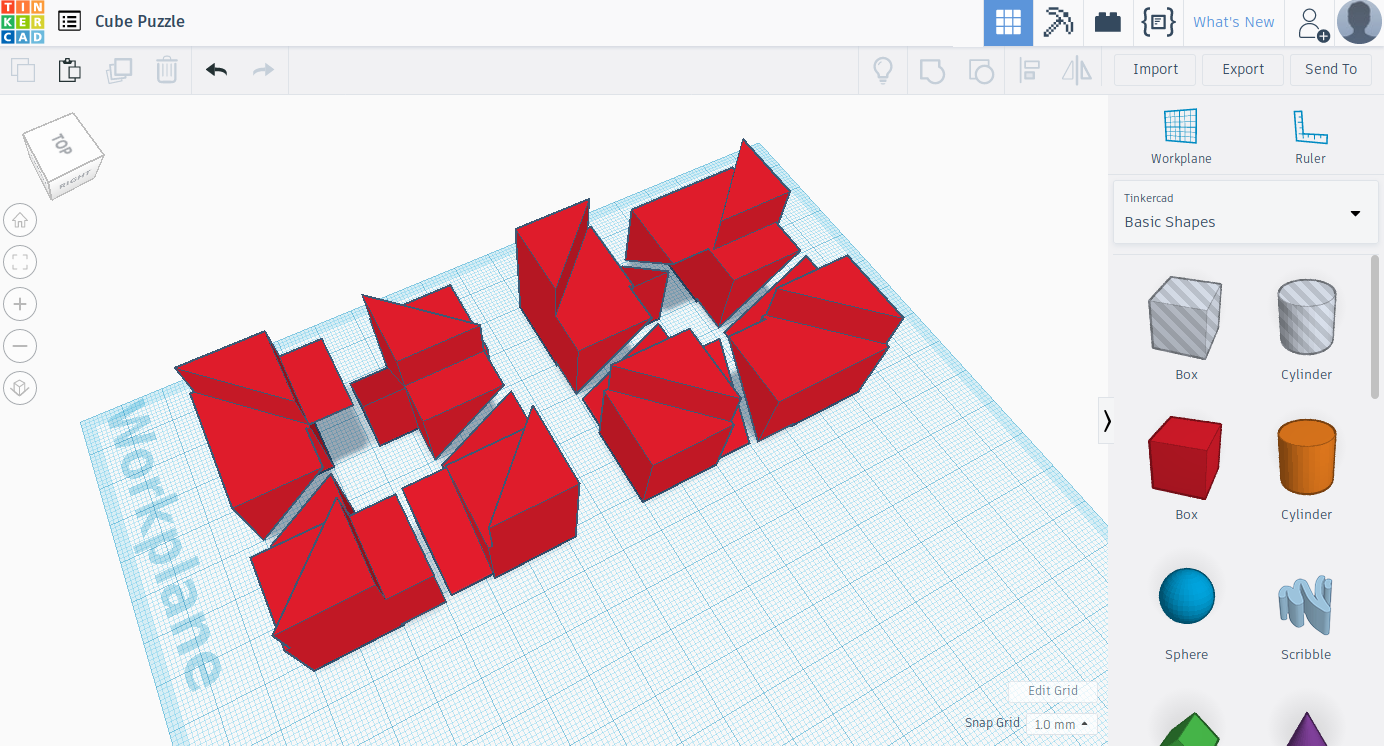
Next you will need to group each of the different pieces together so that you can move them around individually with out leaving behind the wedges. To group the pieces together you will select the cube and the 3 wedges around it and click the group button ( Ctrl + G ) do this 8 times for all the different pieces.
Coloring the Different Pieces (optional)
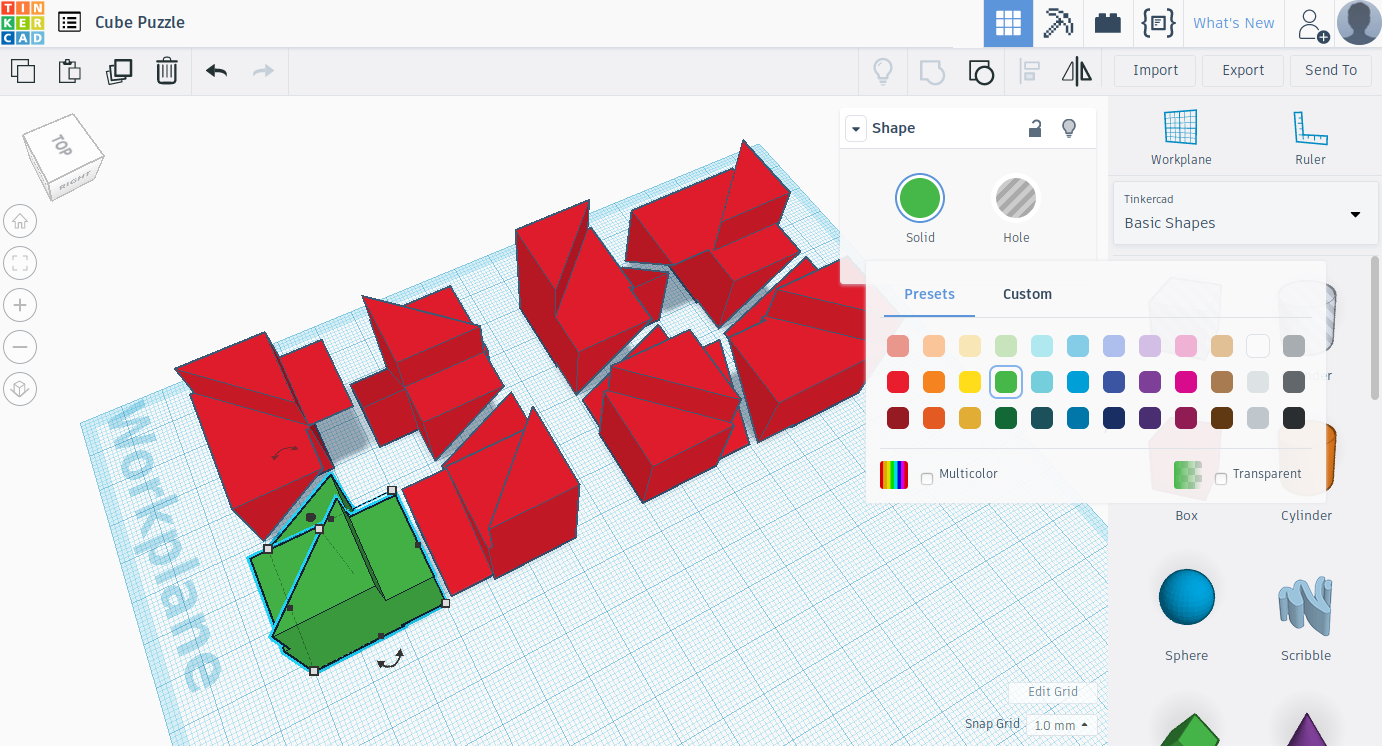
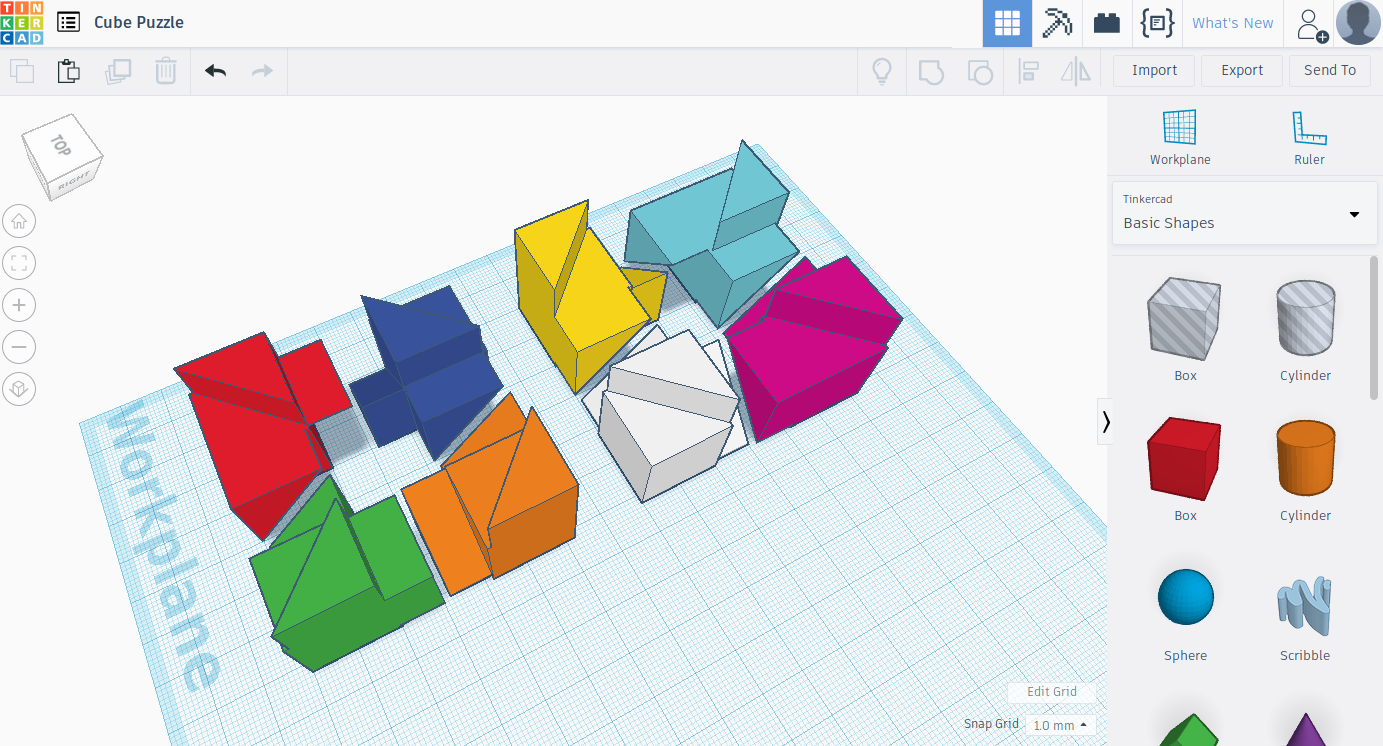
Ten you will need to color the different pieces so that you can differentiate them (optional step) you can color them the way you want it does not make a difference. To color them select the piece a menu will pop up, click on the circle with solid written under it and it will show you a menu with all sorts of colors for you to pick.
Making the Puzzle Holder
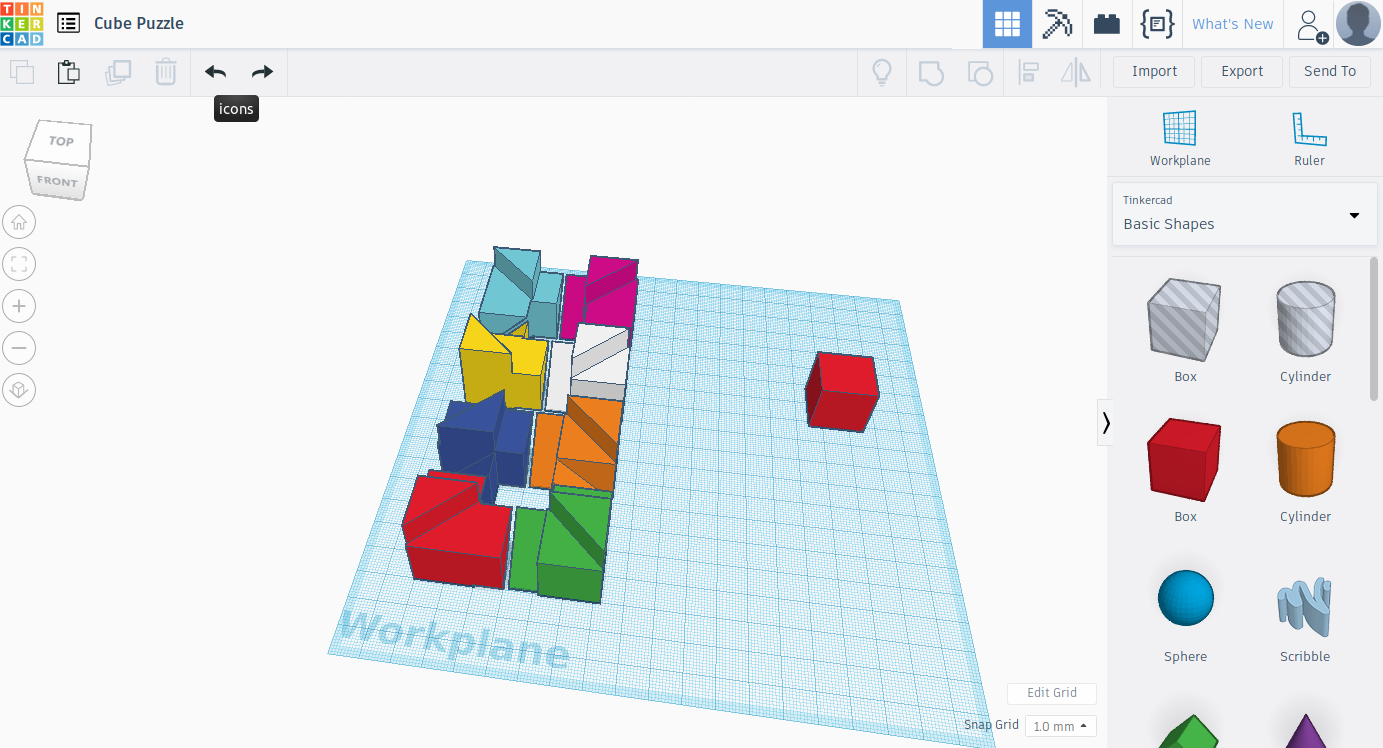
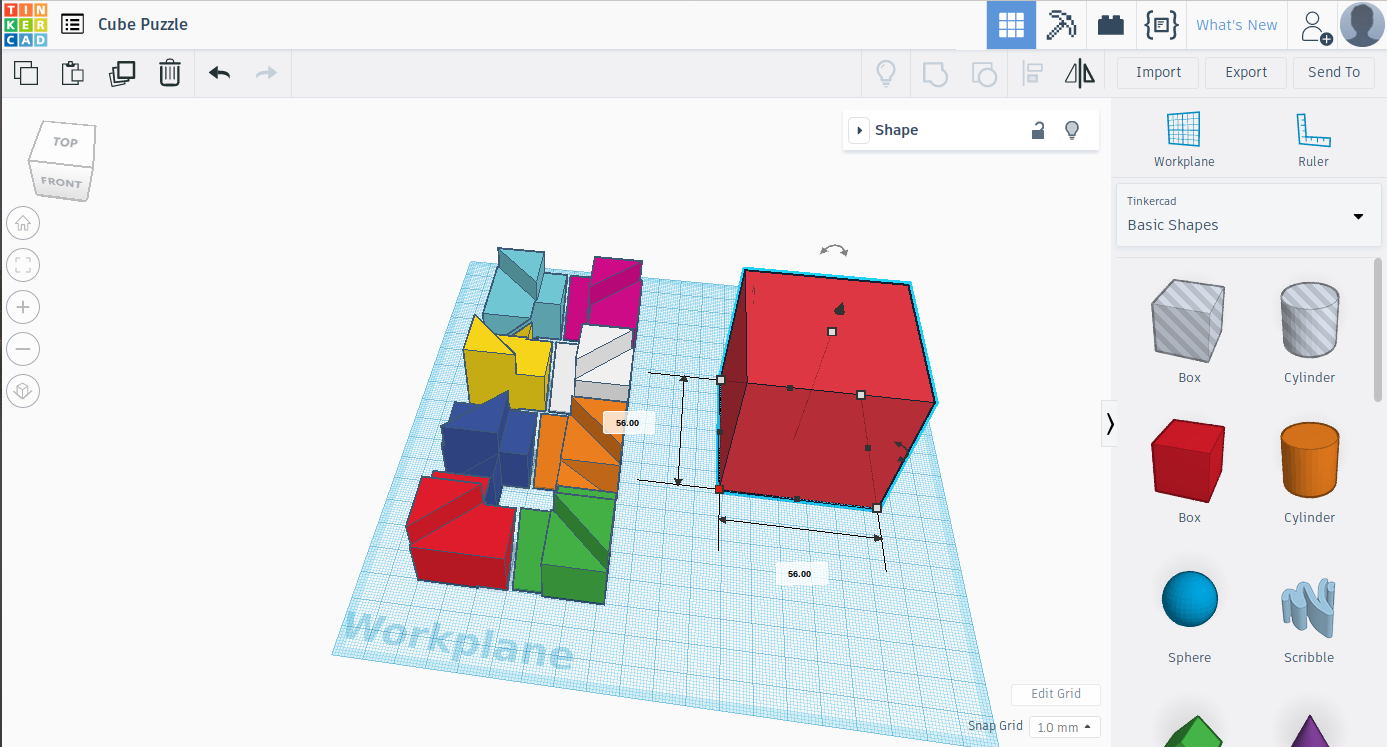
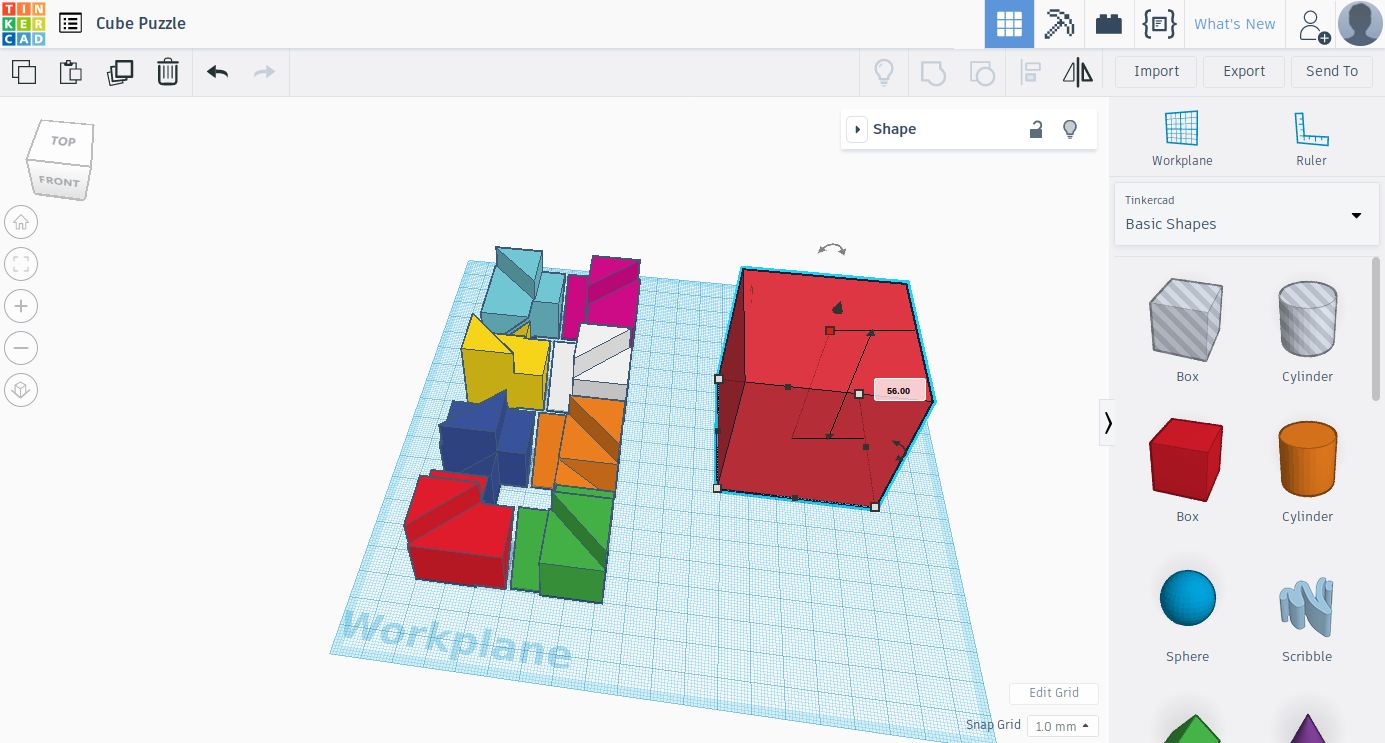
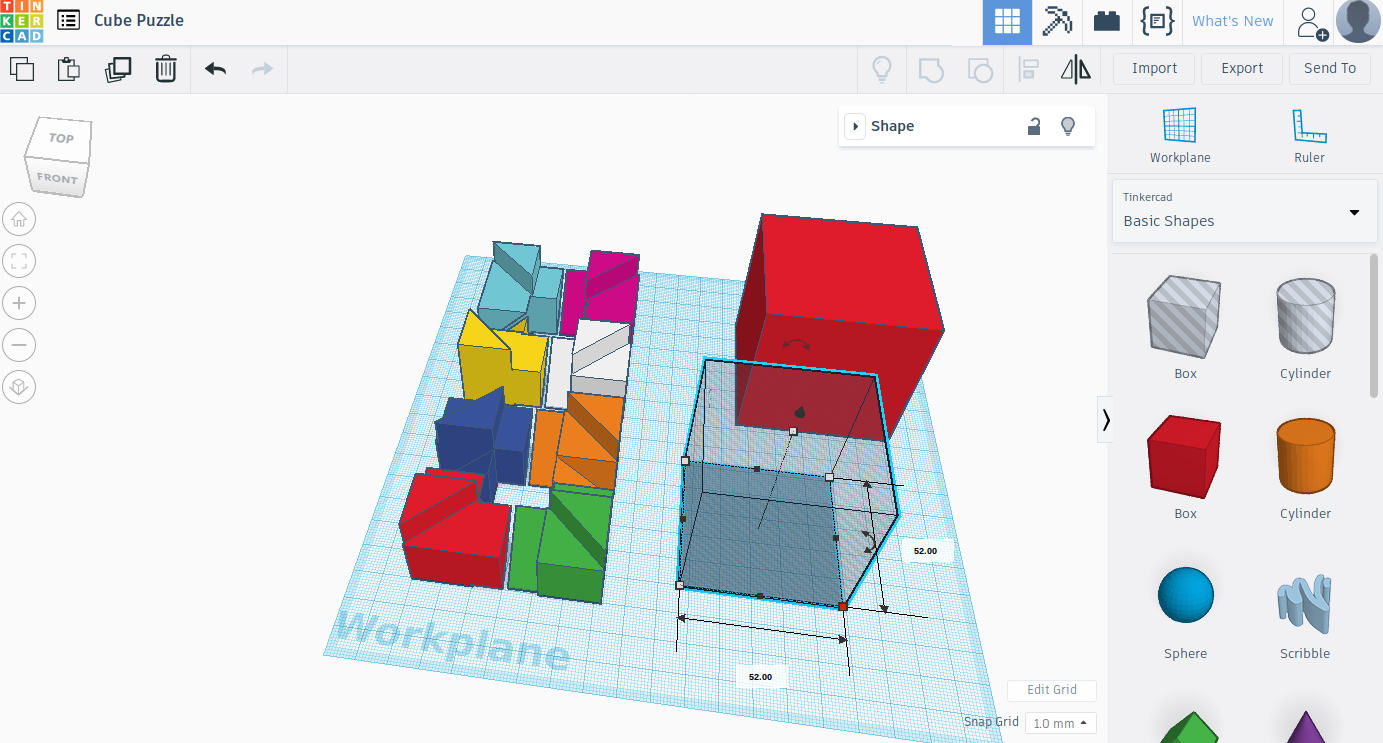
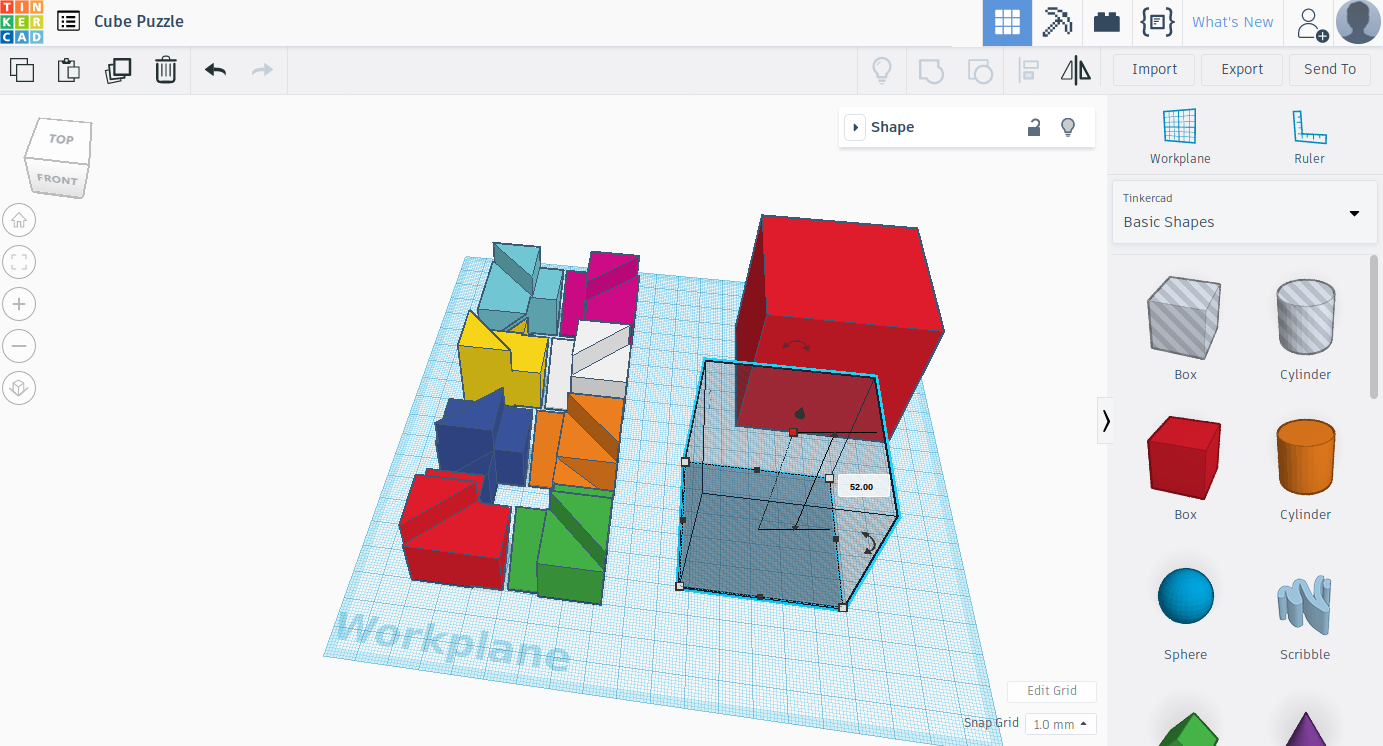
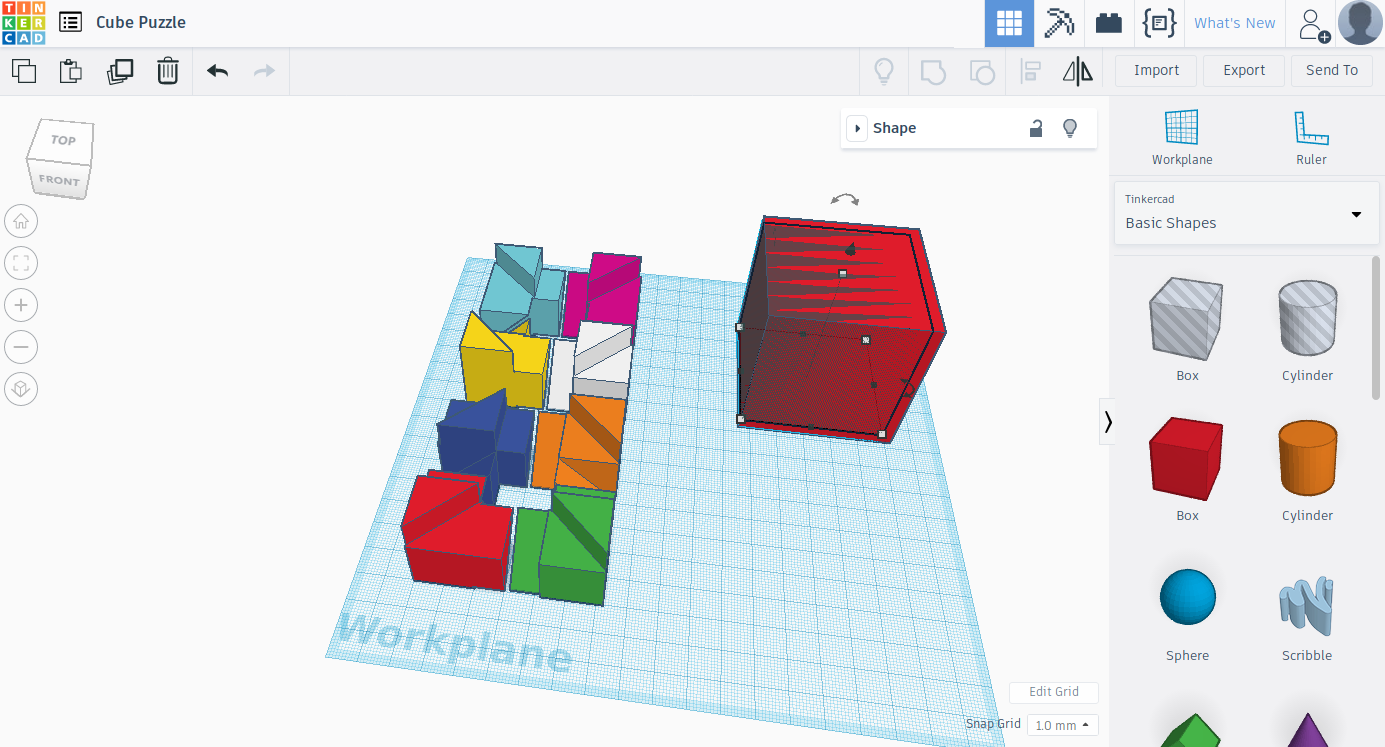
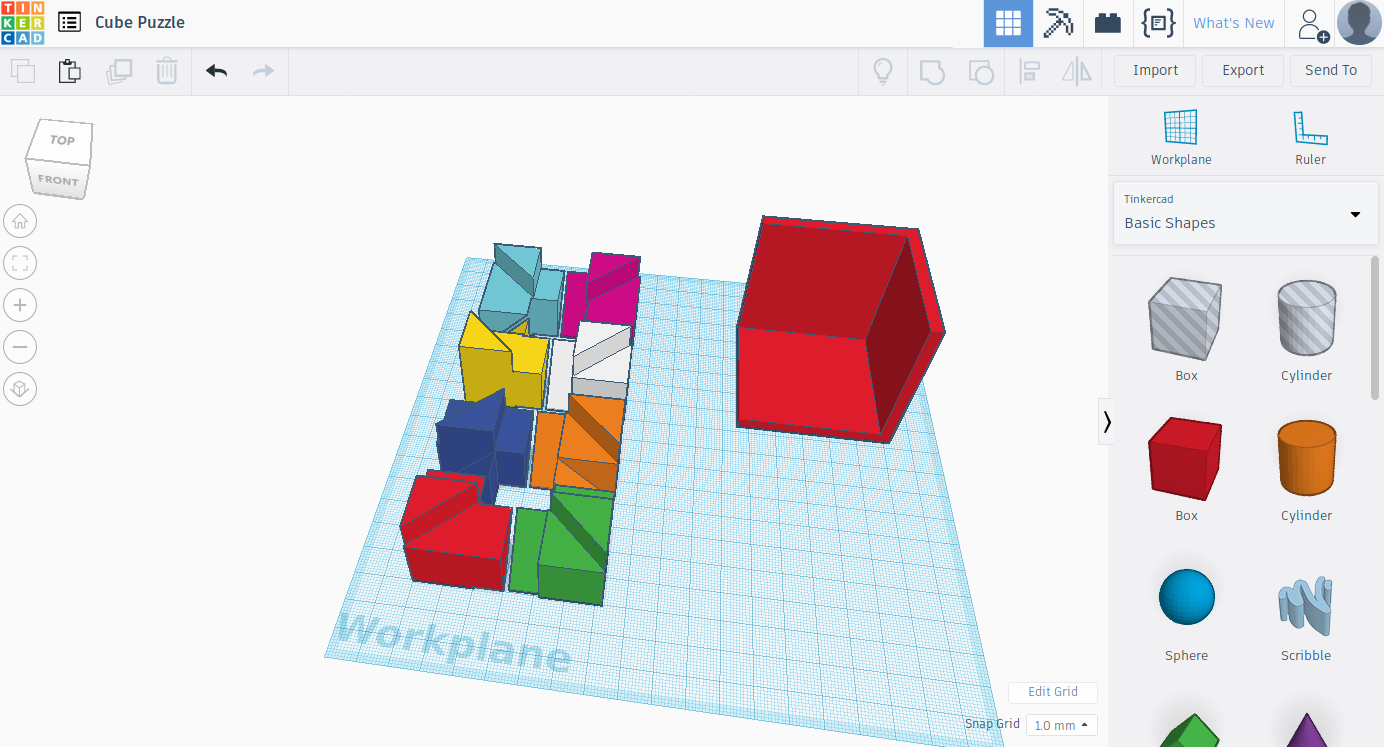
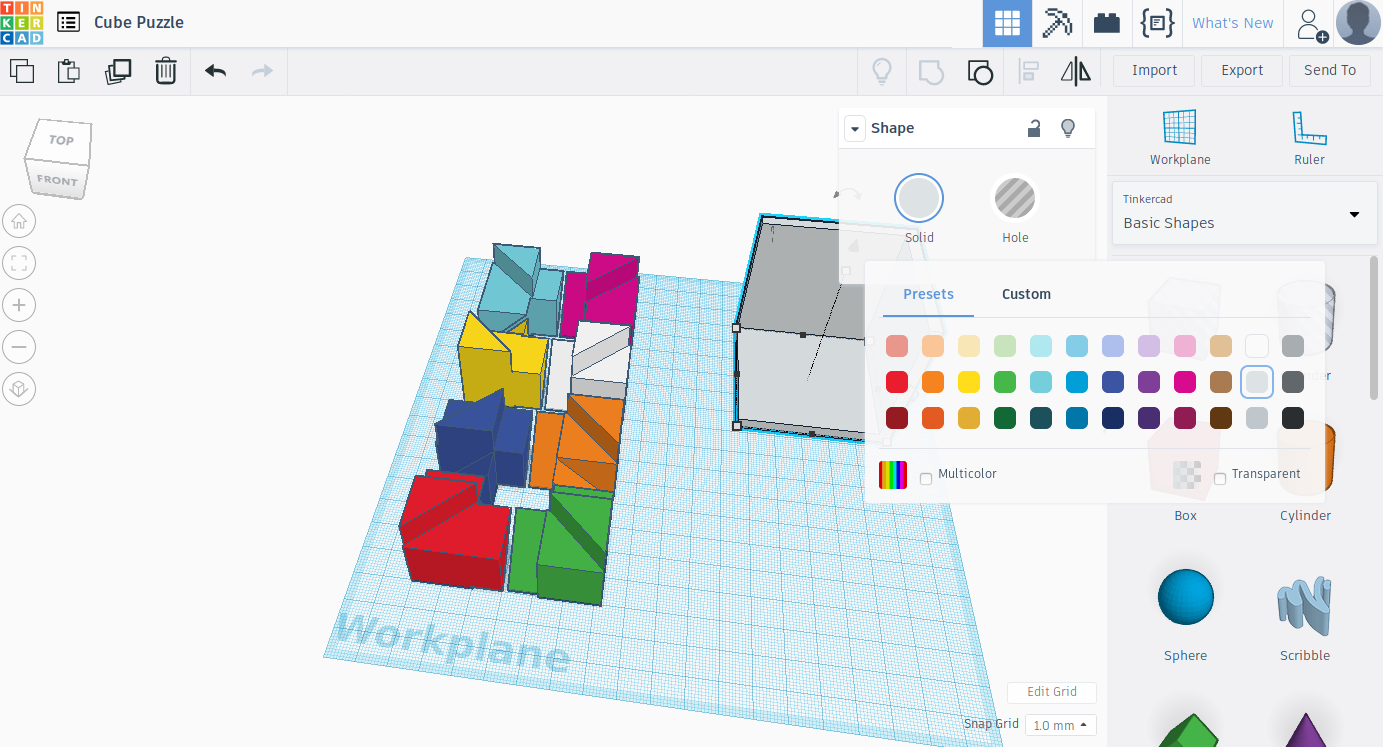
Then you will have to make the puzzle holder which is also optional. So to make it you will have to insert a cube and give it the dimensions of 56 mm by 56 mm by 56 mm. Then you will need to insert another box but this one to make the hole and give it the dimensions of 52 mm by 52 mm by 52 mm. After that you will need to place the box to make the hole so that one of its top corner touches one of the bigger boxer top corner. Finally select the two boxes and group them together. For the people who like color you can also color the puzzle holder.
Finishing the Puzzle Cube
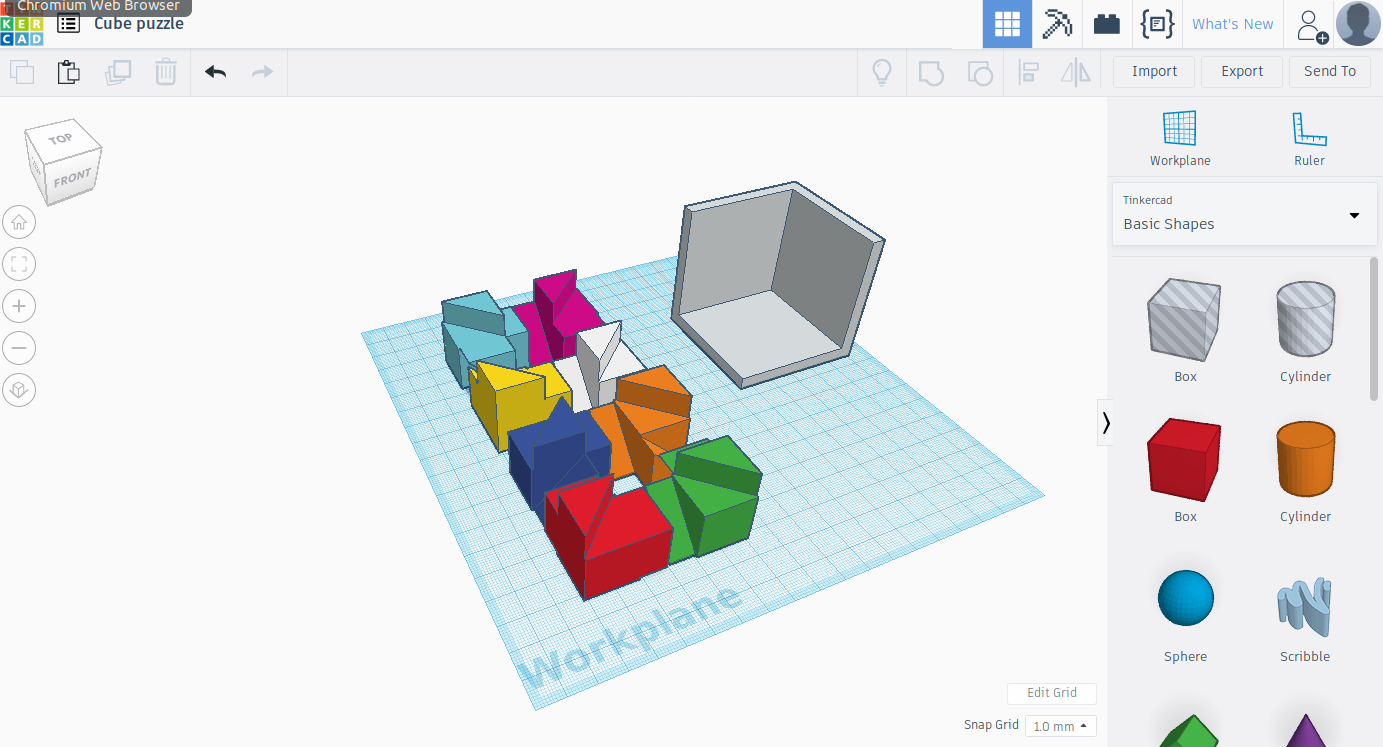
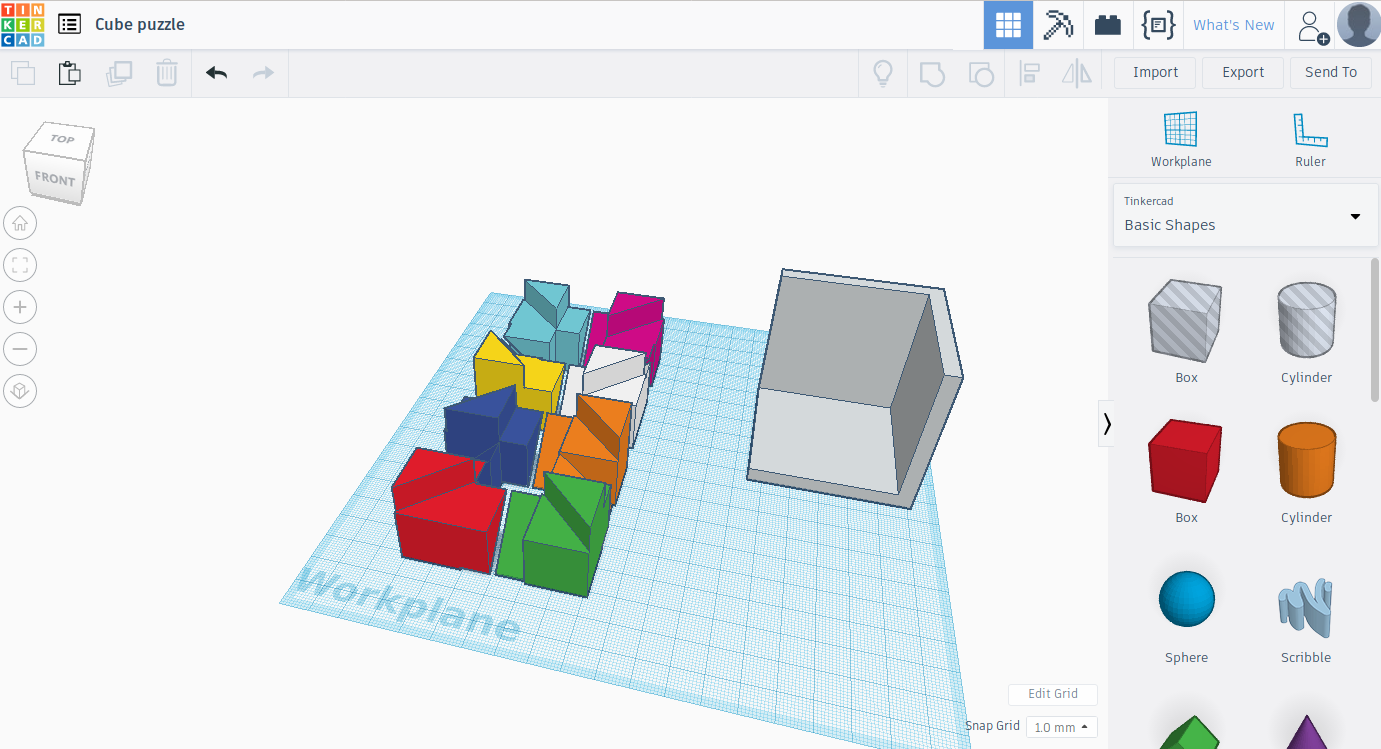
So there you go, you have finished making the puzzle cube and all you need to do is download it for 3D printing. Make sure before you 3D print that the pieces are oriented in a way to make sure that the upside down wedges don't collapse or consume a lot of plastic just to support the upside down wedges.
Solving the Puzzle Cube

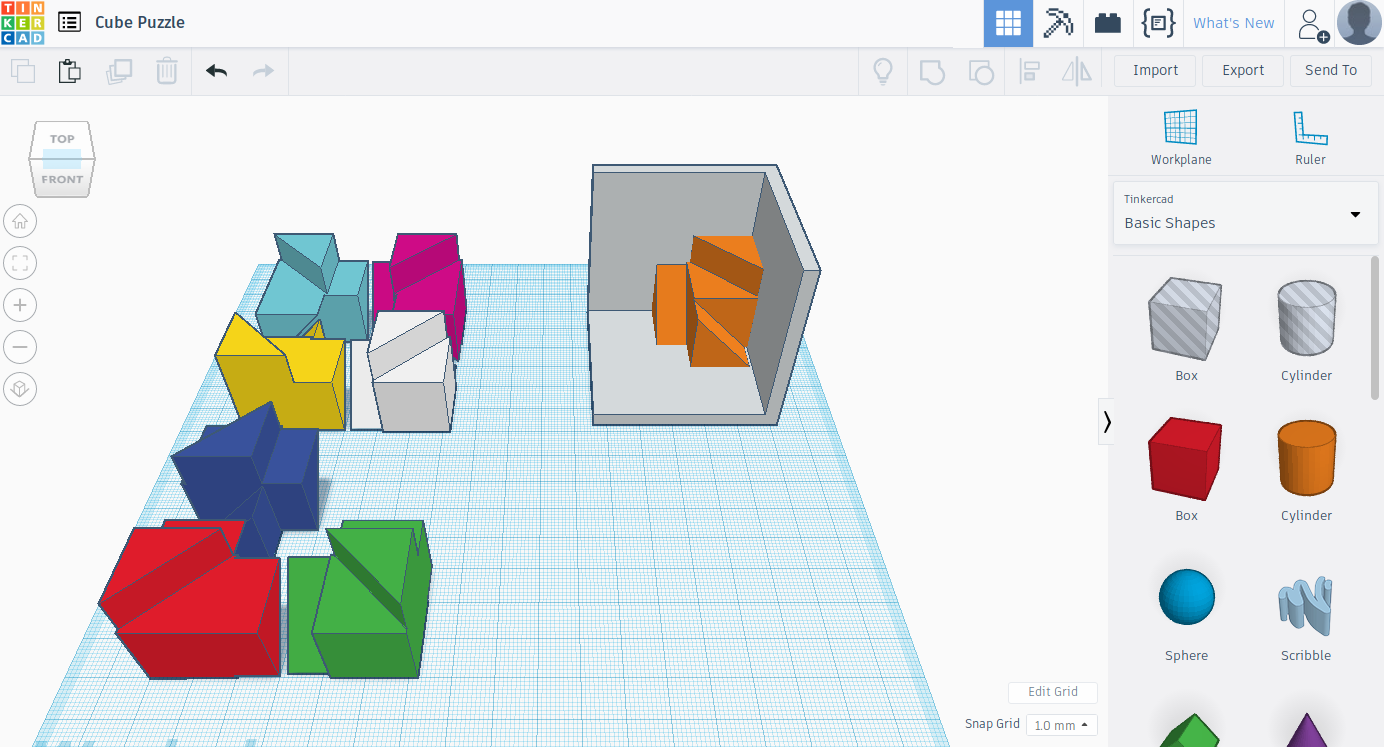
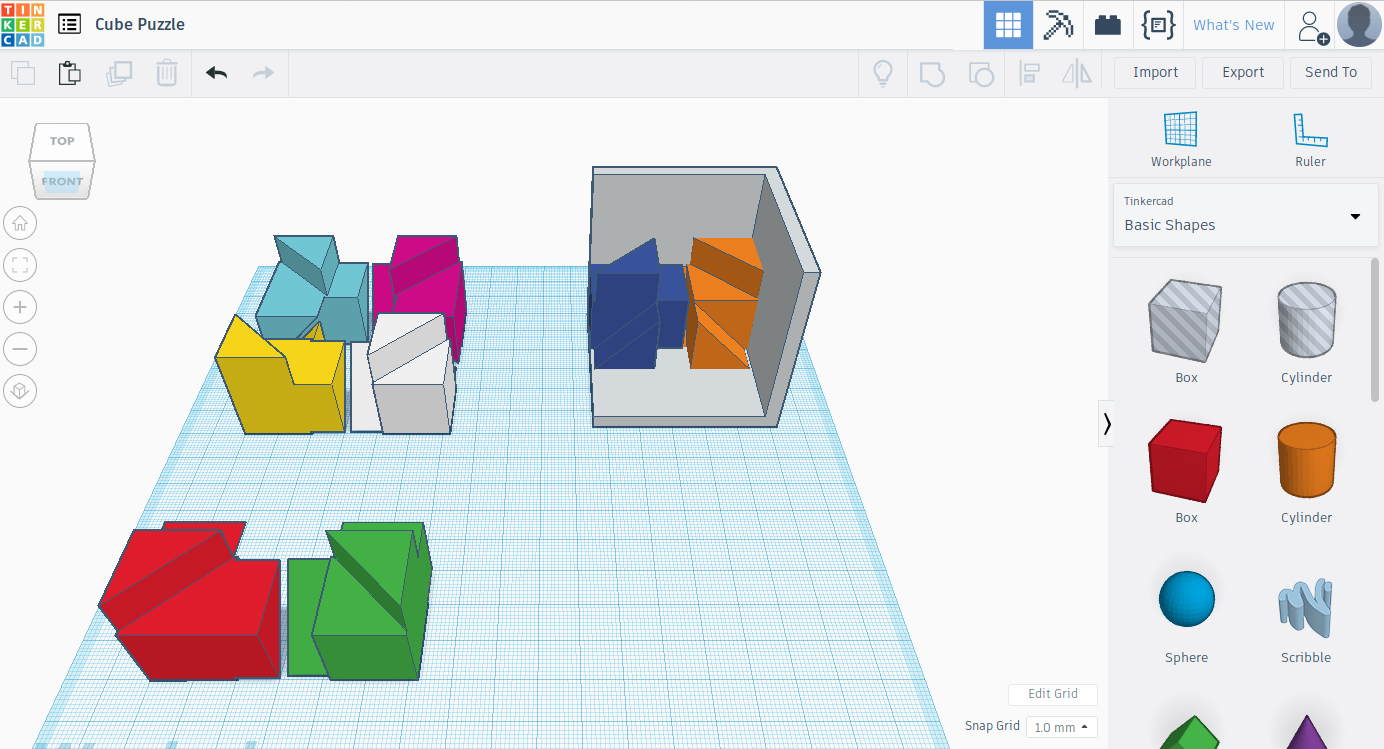
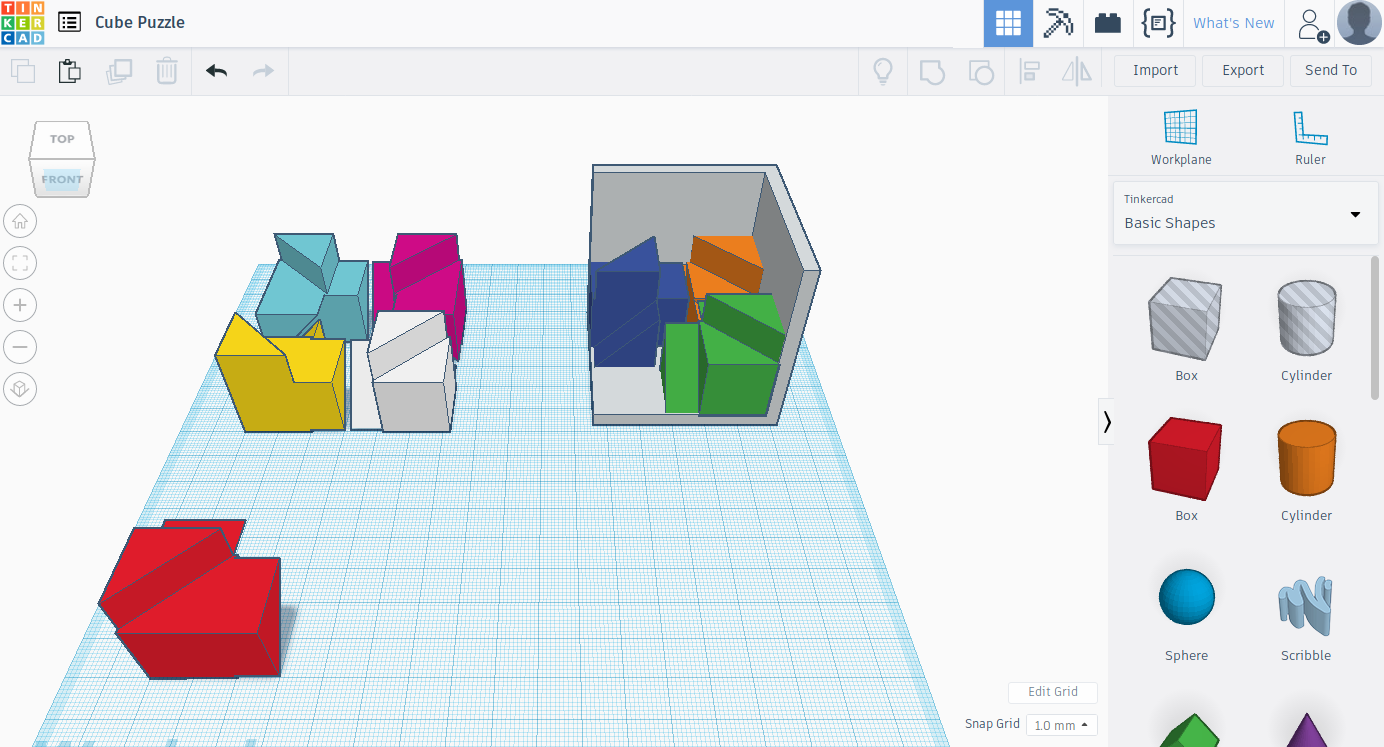
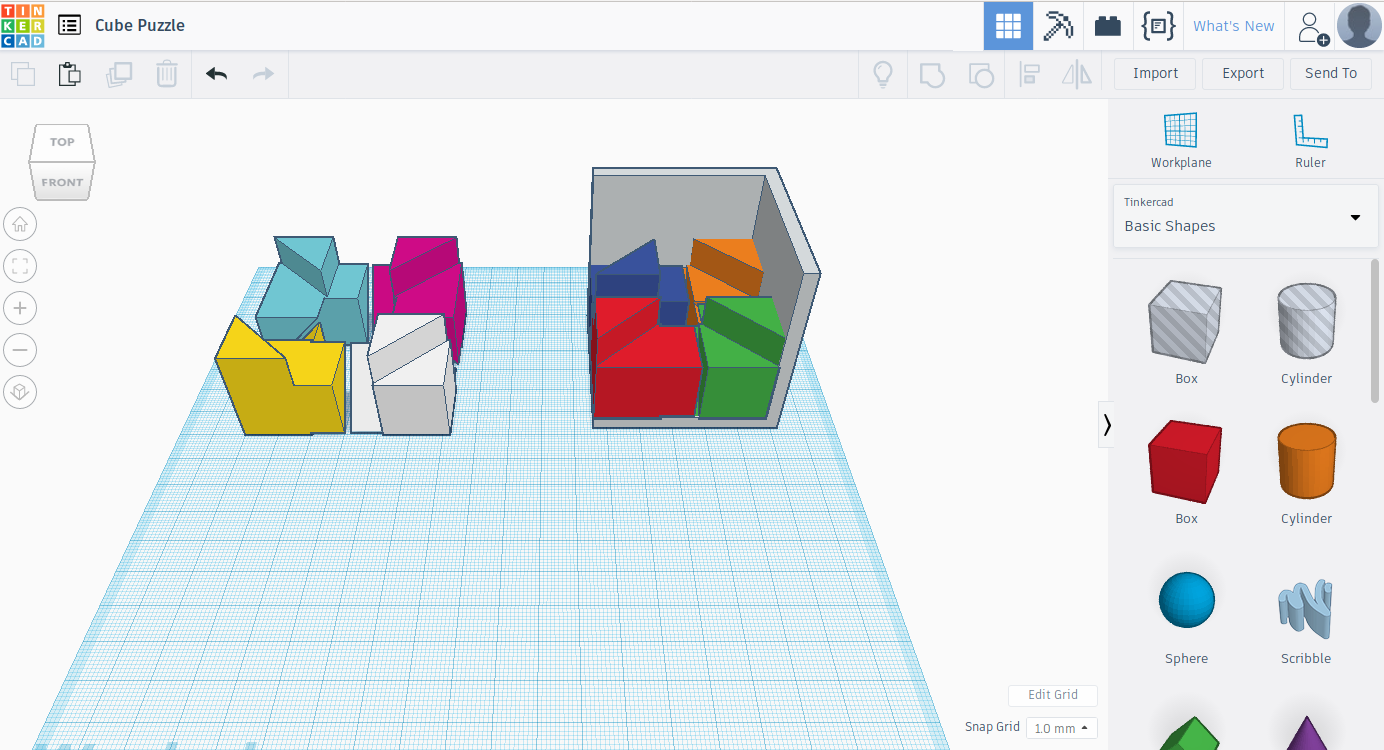
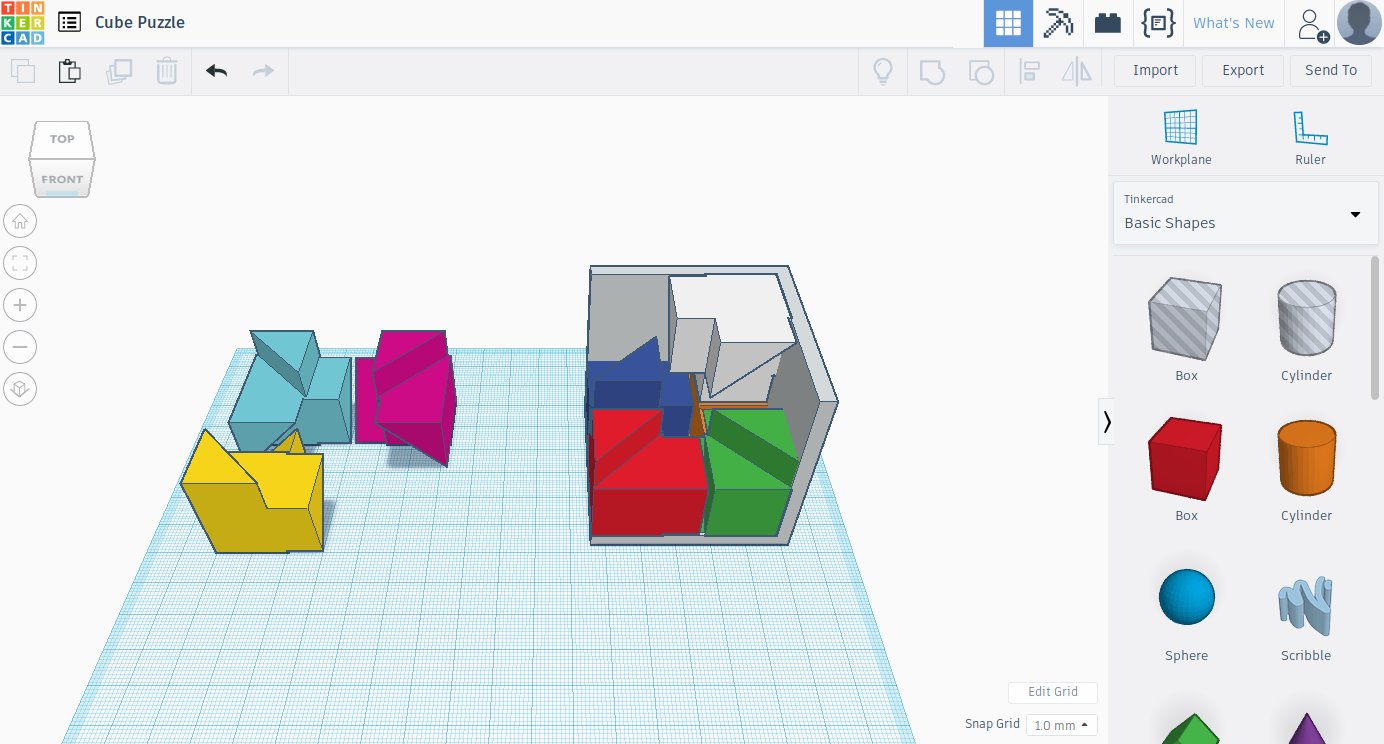
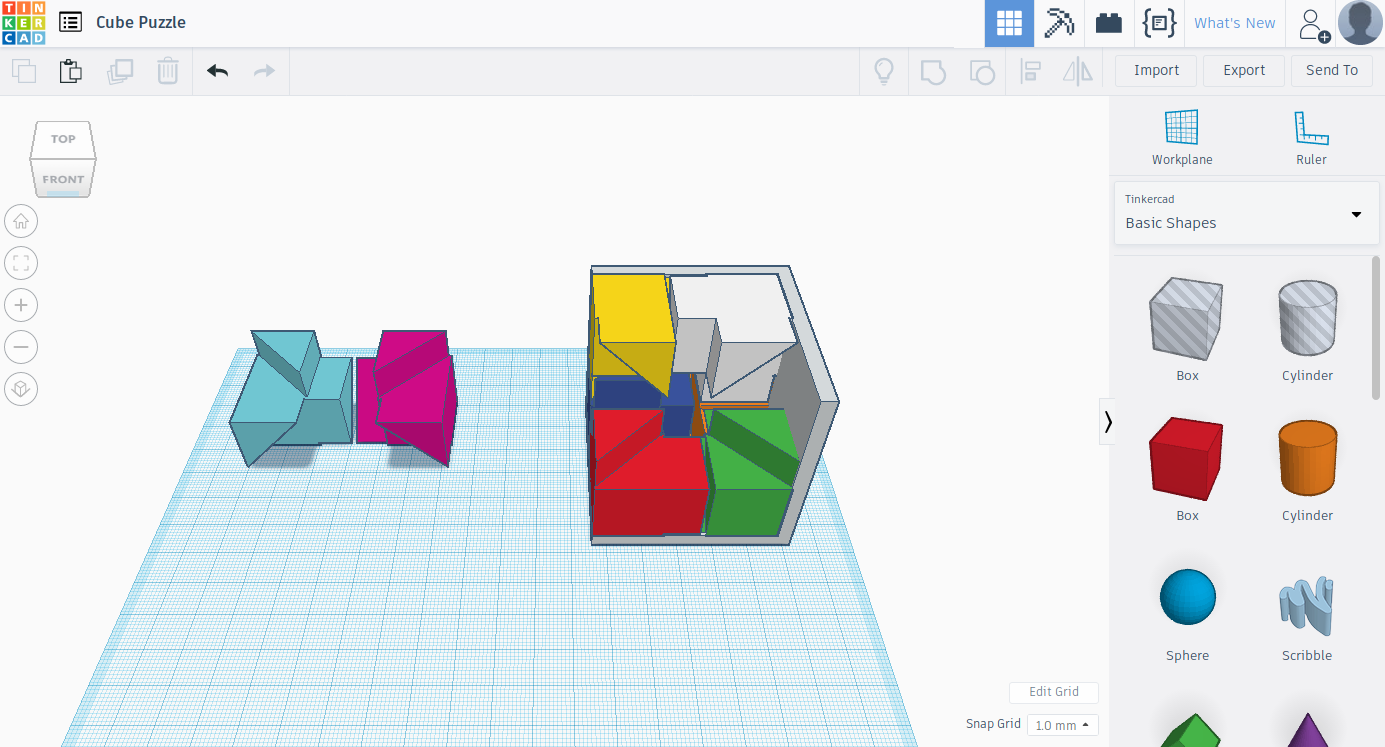
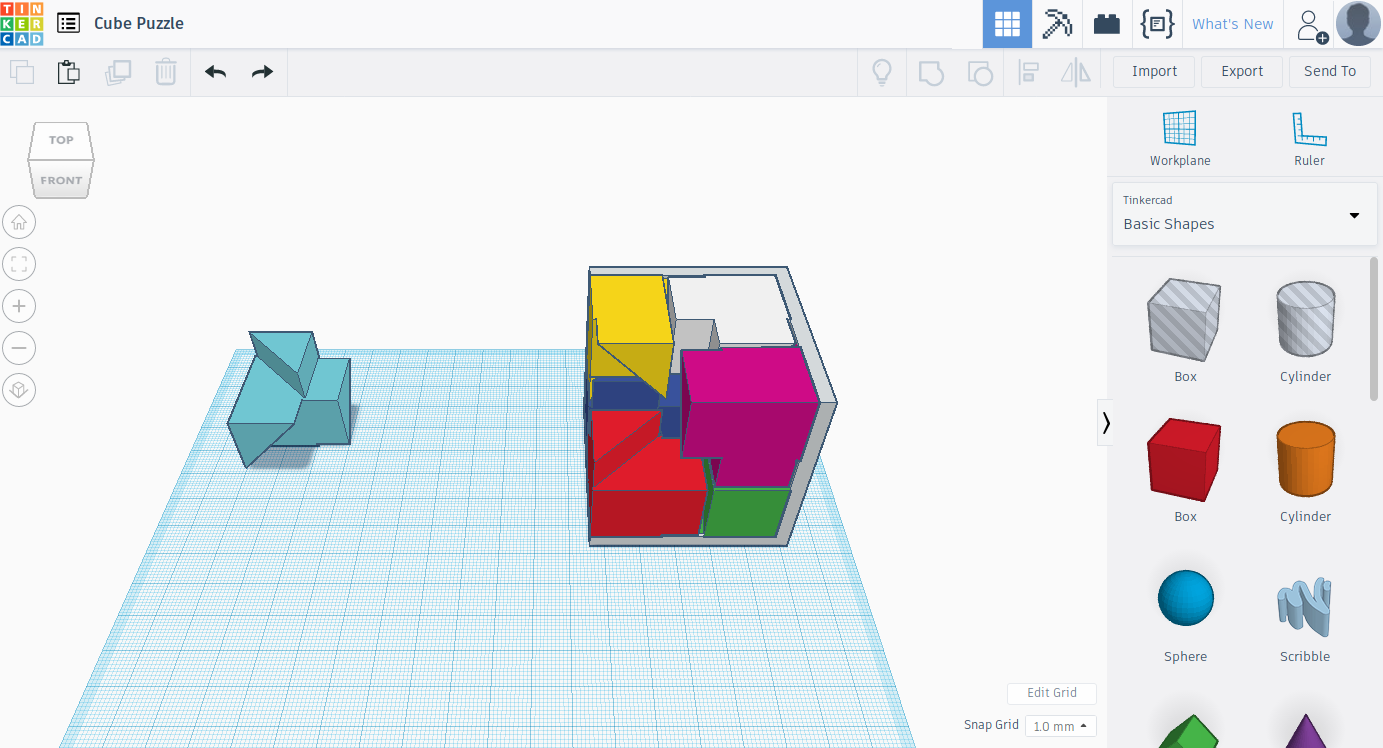
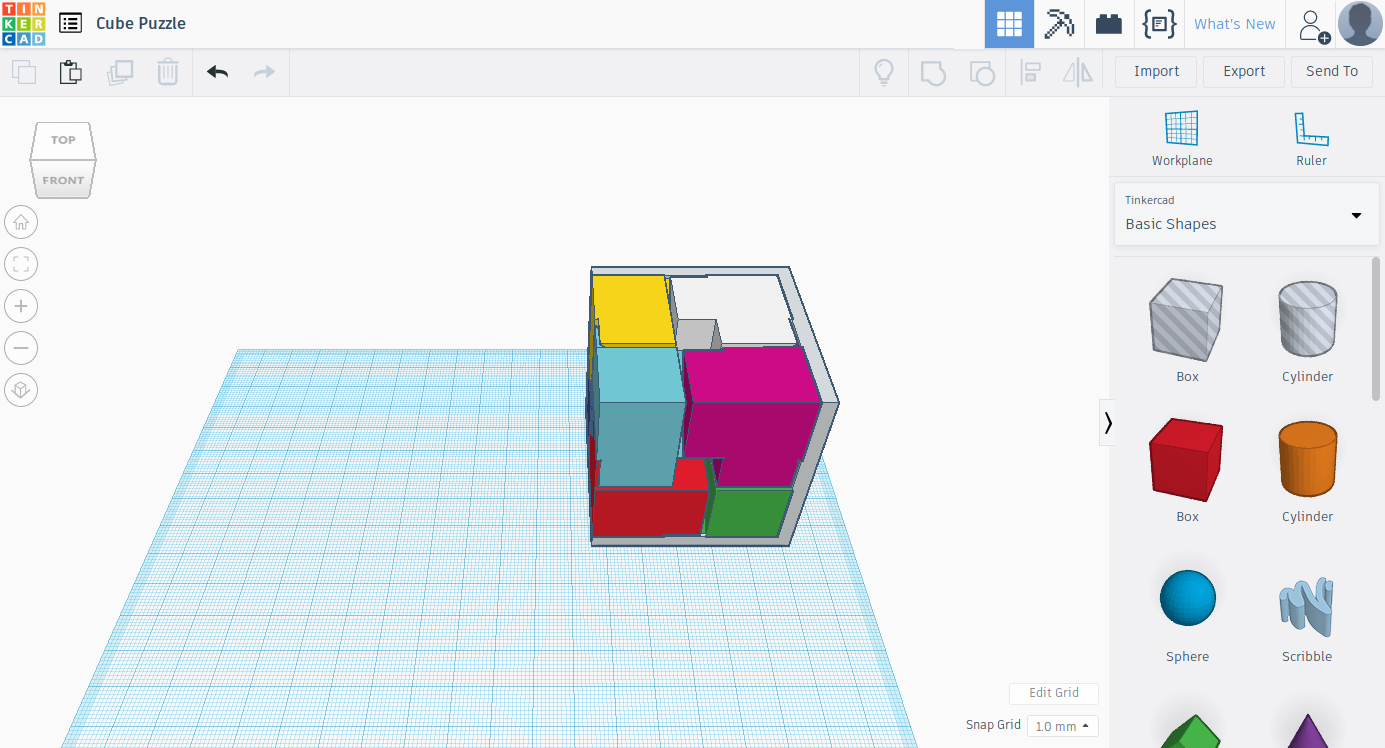
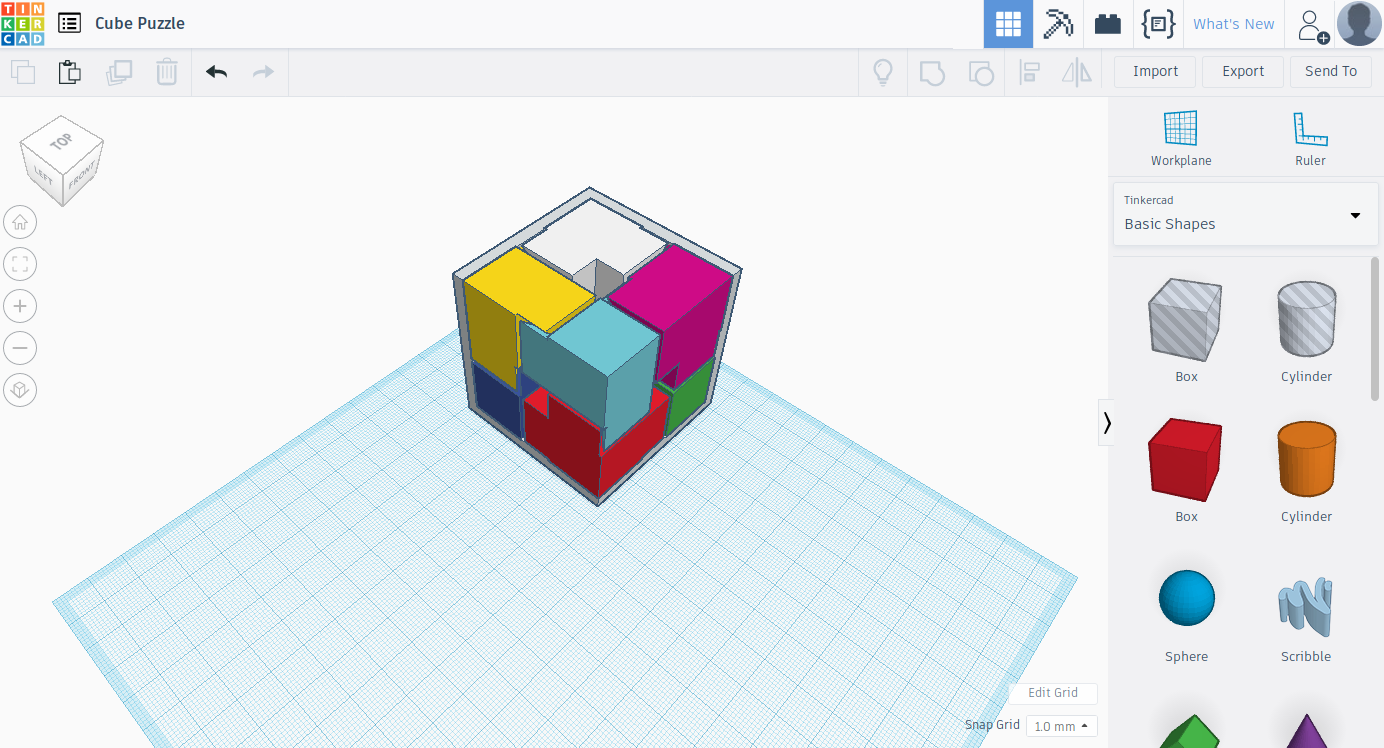
Now that the cube is finished I think that you should know how to solve the puzzle. So first of all take the orange piece and insert it in the back right corner of the puzzle holder, then take the blue piece and insert it to the left of the orange piece, then put the green piece to the right of the orange piece. Next you will need to place the red piece in the front left corner and place the white piece on top of the orange piece, then you will need to place the pink piece to the right of the white piece and the yellow piece also next to the white piece but to its left. Finally you will need to place the light blue piece in the the last available corner which is above the red piece. If you followed every step you should have a finished puzzle cube that fits perfectly.
Conclusion


I'm not sure if I was clear enough in explaining the steps, but I think the photos will help. Also if you have any questions please don't hesitate to ask. Suggestions and corrections are appreciated. I hope you enjoyed making this Puzzle Cube.