Crius “Vertical Infinity Control V1.0” USB MIDI Controller
by Crius Digital Studio in Circuits > Arduino
1769 Views, 22 Favorites, 0 Comments
Crius “Vertical Infinity Control V1.0” USB MIDI Controller


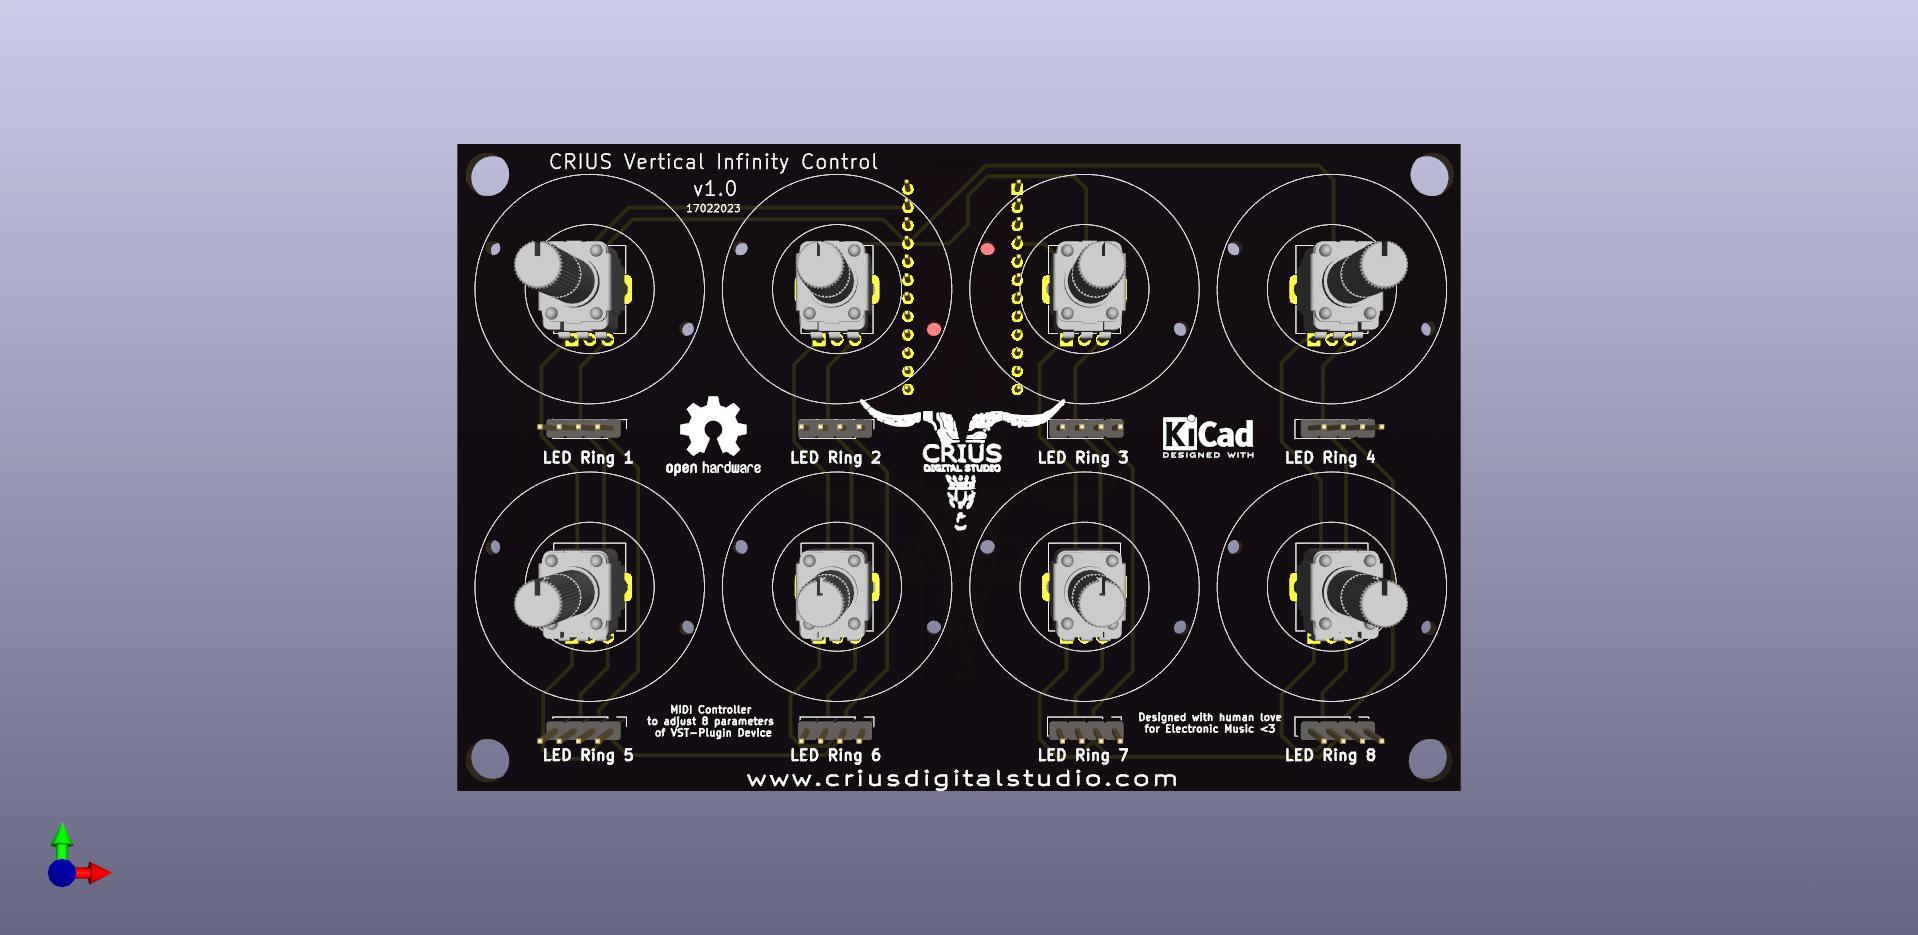
The Crius “Vertical Infinity Control” USB MIDI Controller consists of 8 potentiometers with which we can control the parameters of the VST-Plugin or the DAW we play music and 8 RGB LED Rings around the perimeter of each potentiometer that illuminate and change color depending on the position of the corresponding potentiometer.
- MIDI Controller is an electronic device for the operating parameters and control VST-Plugin ( V irtual S tudio T echnology) or program DAW ( D igital A udio W orkstation) which play and ichorgrafoume music through keys, potentiometers, touch screens and a multitude of sensors.
- DAW programs are available for PC (Windows, MacOS, Linux) for Tablet and Smartphone.
- * ( ATTENTION !!! It does not work independently and this is because it does not affect the audio signal but uses the MIDI communication protocol to communicate with the device we have connected it).
- MIDI Controllers are mainly used in music production programs to control VST-Plugins such as musical instruments and effects. However, they are also used in video editing and for the control of professional lighting systems.
- A potentiometer is an analog electronic component that can give us many values as opposed to a simple on-off switch that gives us only two values on and off respectively. It is essentially a variable resistor commonly used as a voltage divider such as a dimmer. to adjust the brightness of a lamp or a volume change washer on an amplifier.
- The MIDI protocol was created in 1982 for communication and synchronization between electronic musical instruments, computers and other electronic devices regardless of the manufacturer.
- MIDI does NOT transmit audio messages other messages that contain information such as the tone, volume of a note, tempo of a track, etc.).
Supplies
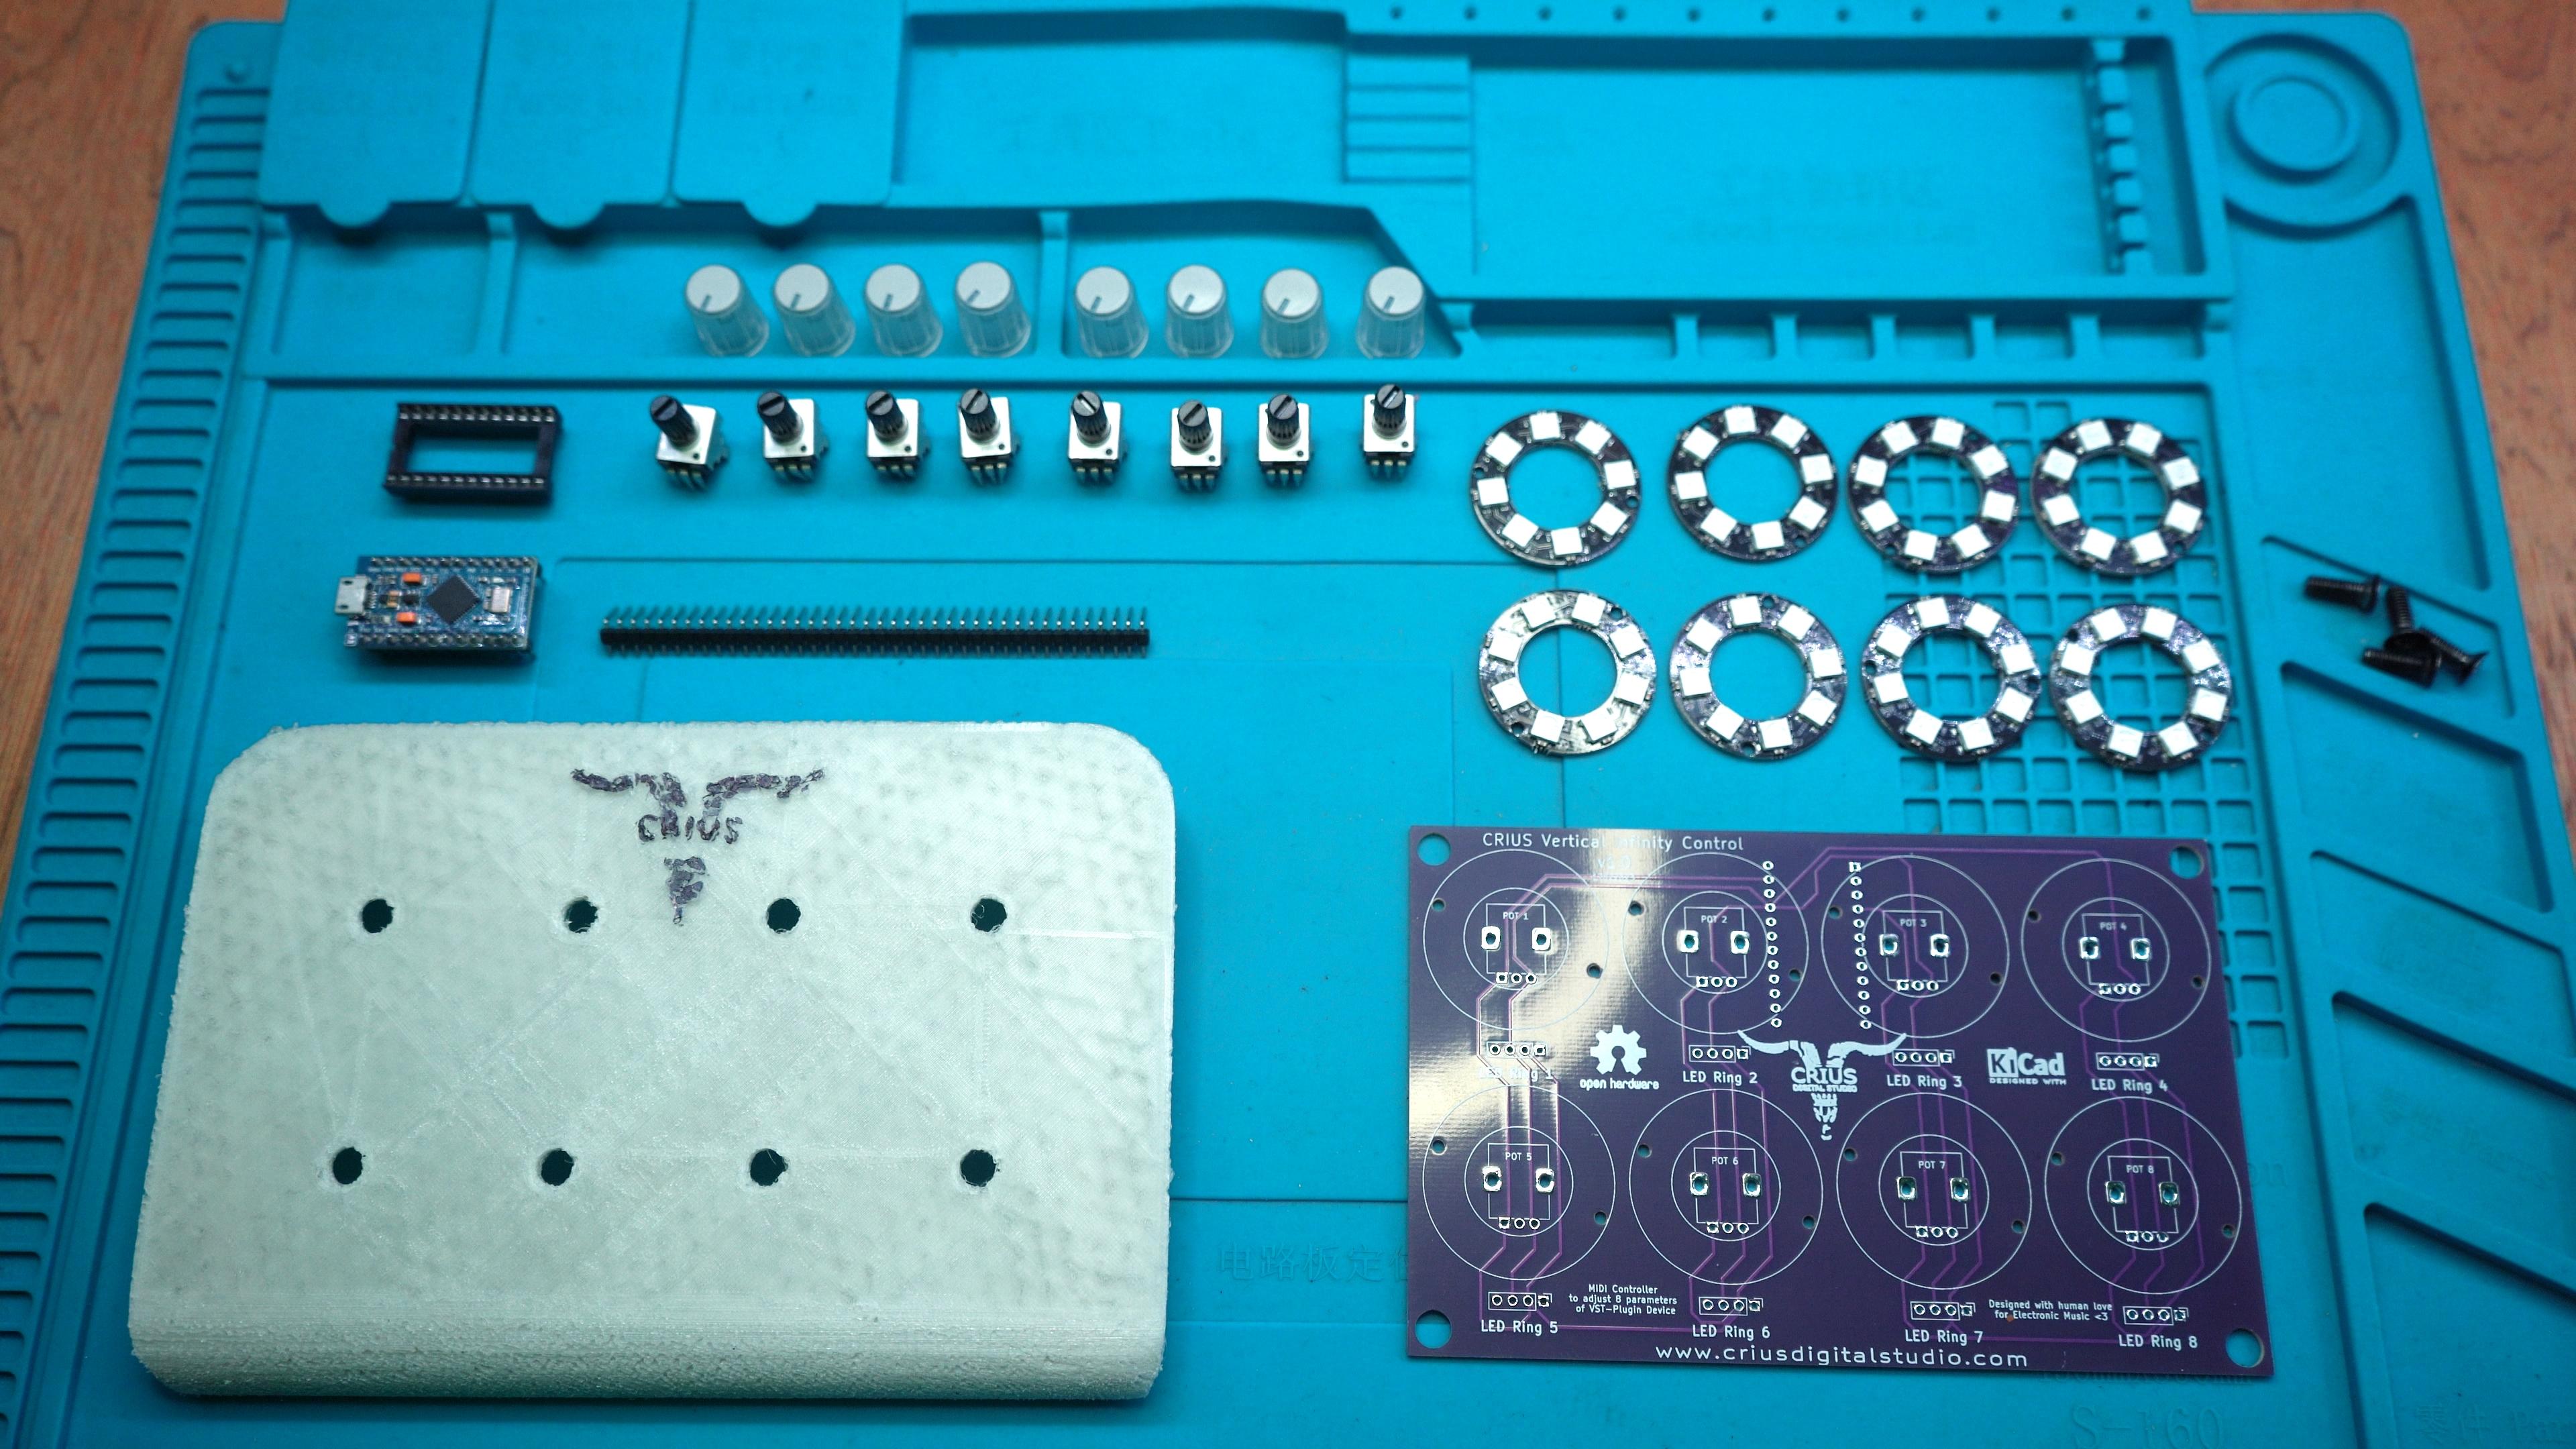
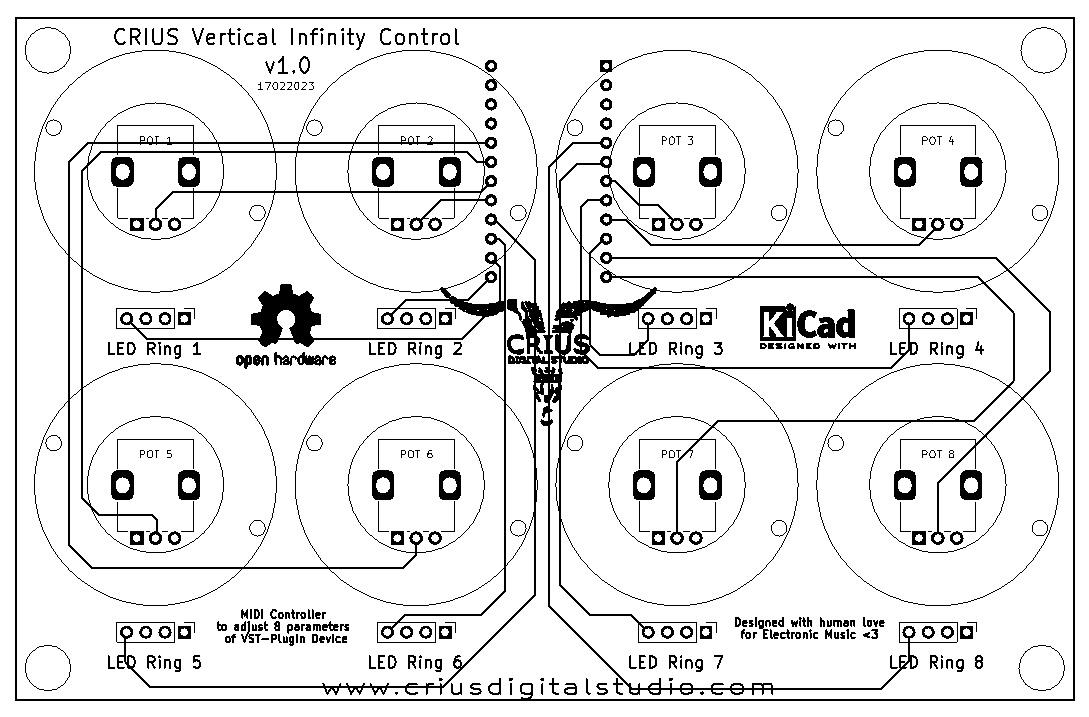
- 1 Crius Vertical Infinity Control v1.0 PCB
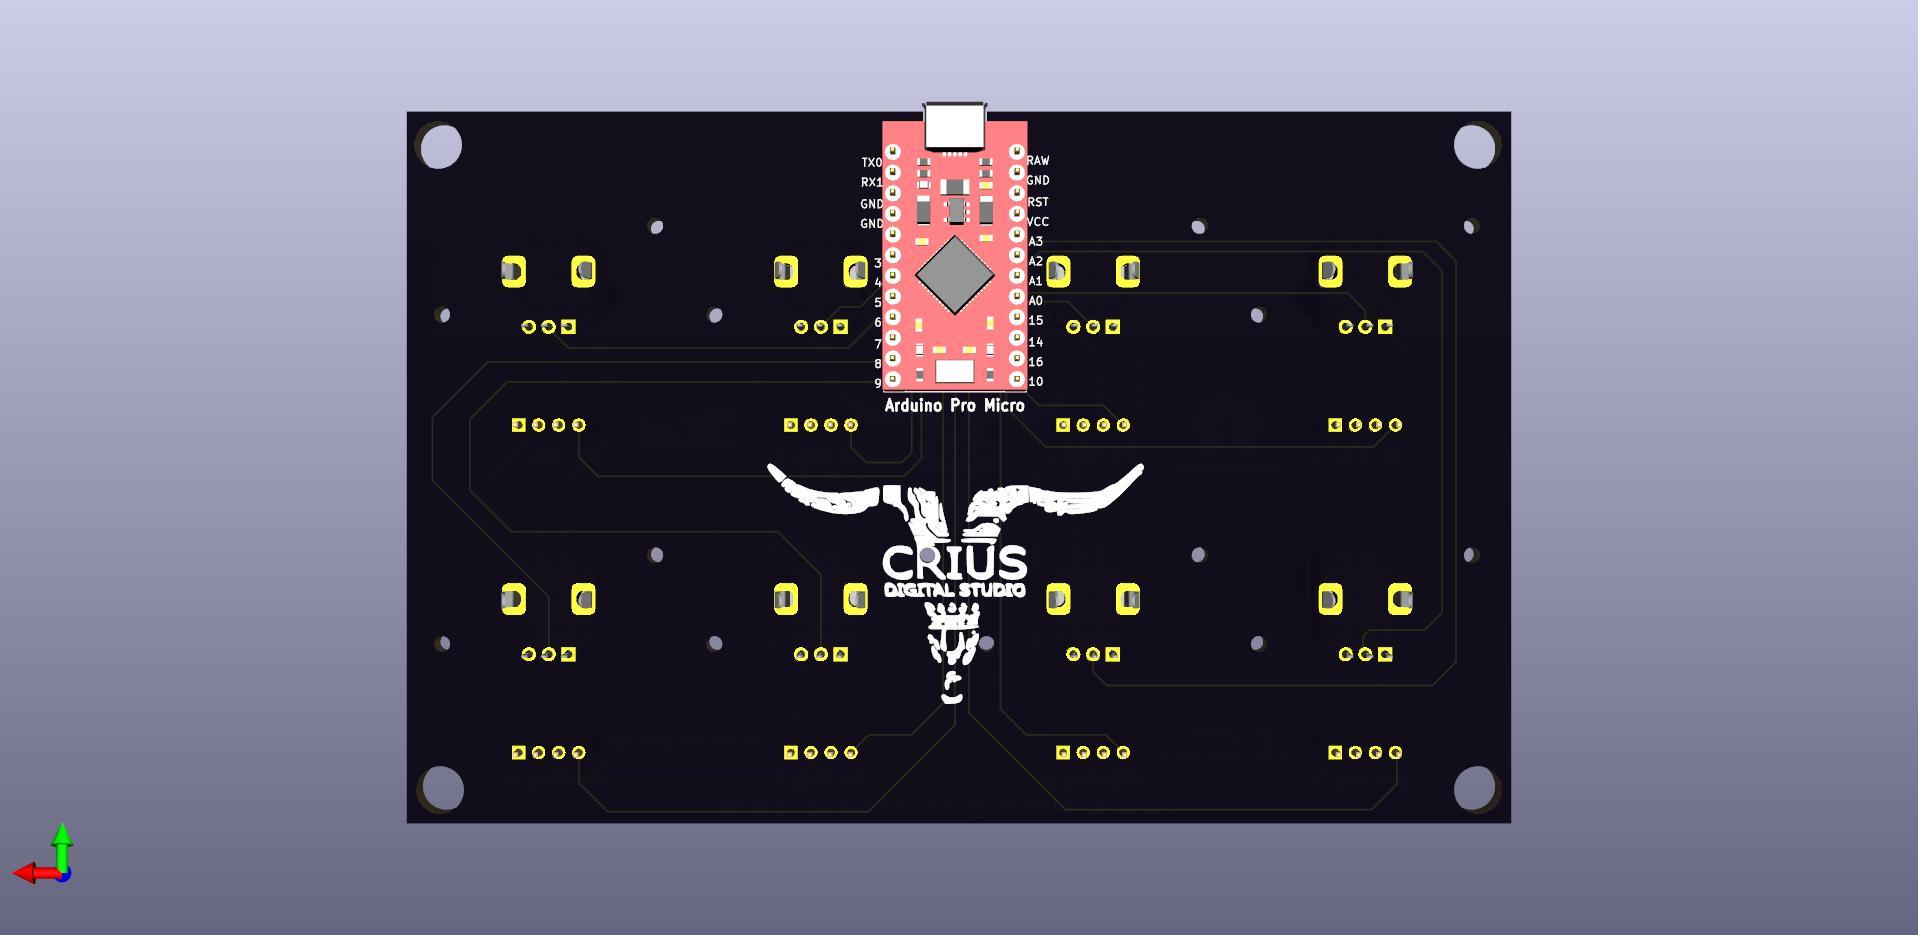
- 1 Arduino Pro Micro
- 24-pin DIP Socket (Optional)
- 8 Linear Potentiometers 10kOhm RV09 Vertical
- 8 Transparent Knobs
- 32 Male Header Pins Angled
- 8 WS2812B RGB Led Rings 8-bits
- 4 M6 Screws [10mm long]
- 3D Printed Case
For the PCB board pcb manufacturing process I chose PCBWay which is sure to find quality and economical boards with the features and color I want.
You can order the Crius Vertical Infinity v1.0 PCB at the following link:
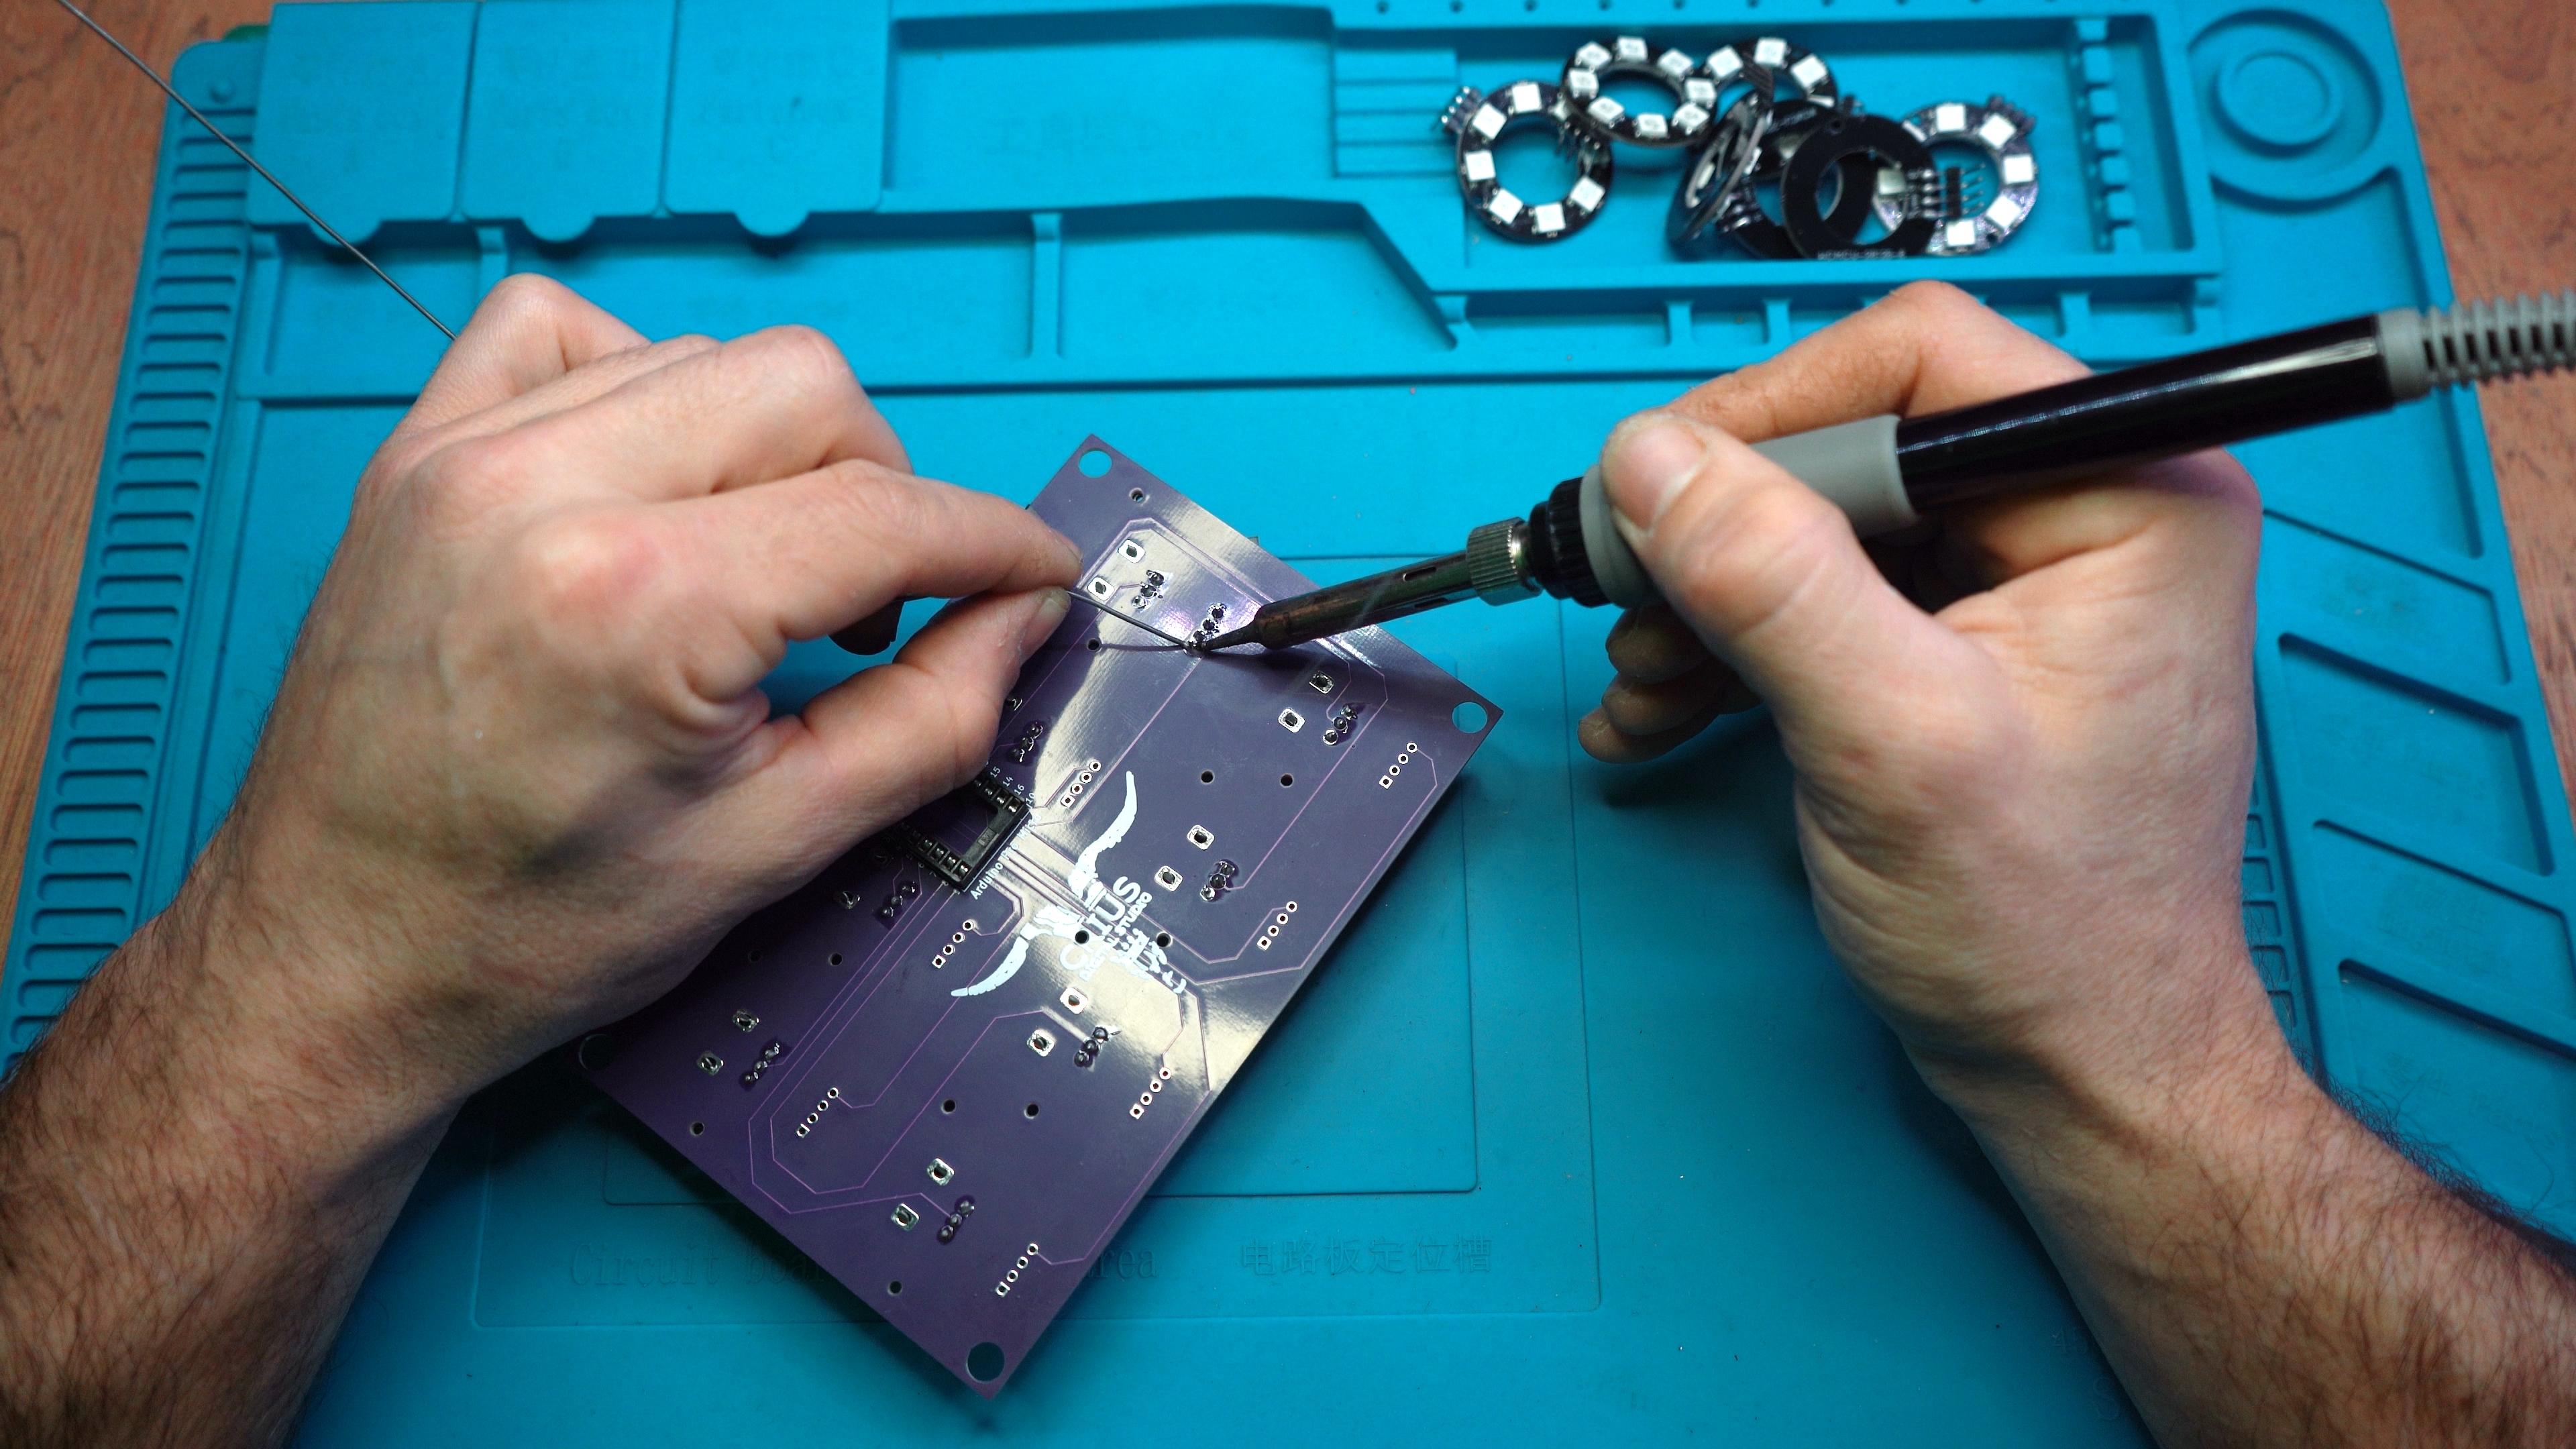
Solder the Header Pins to the Led Rings
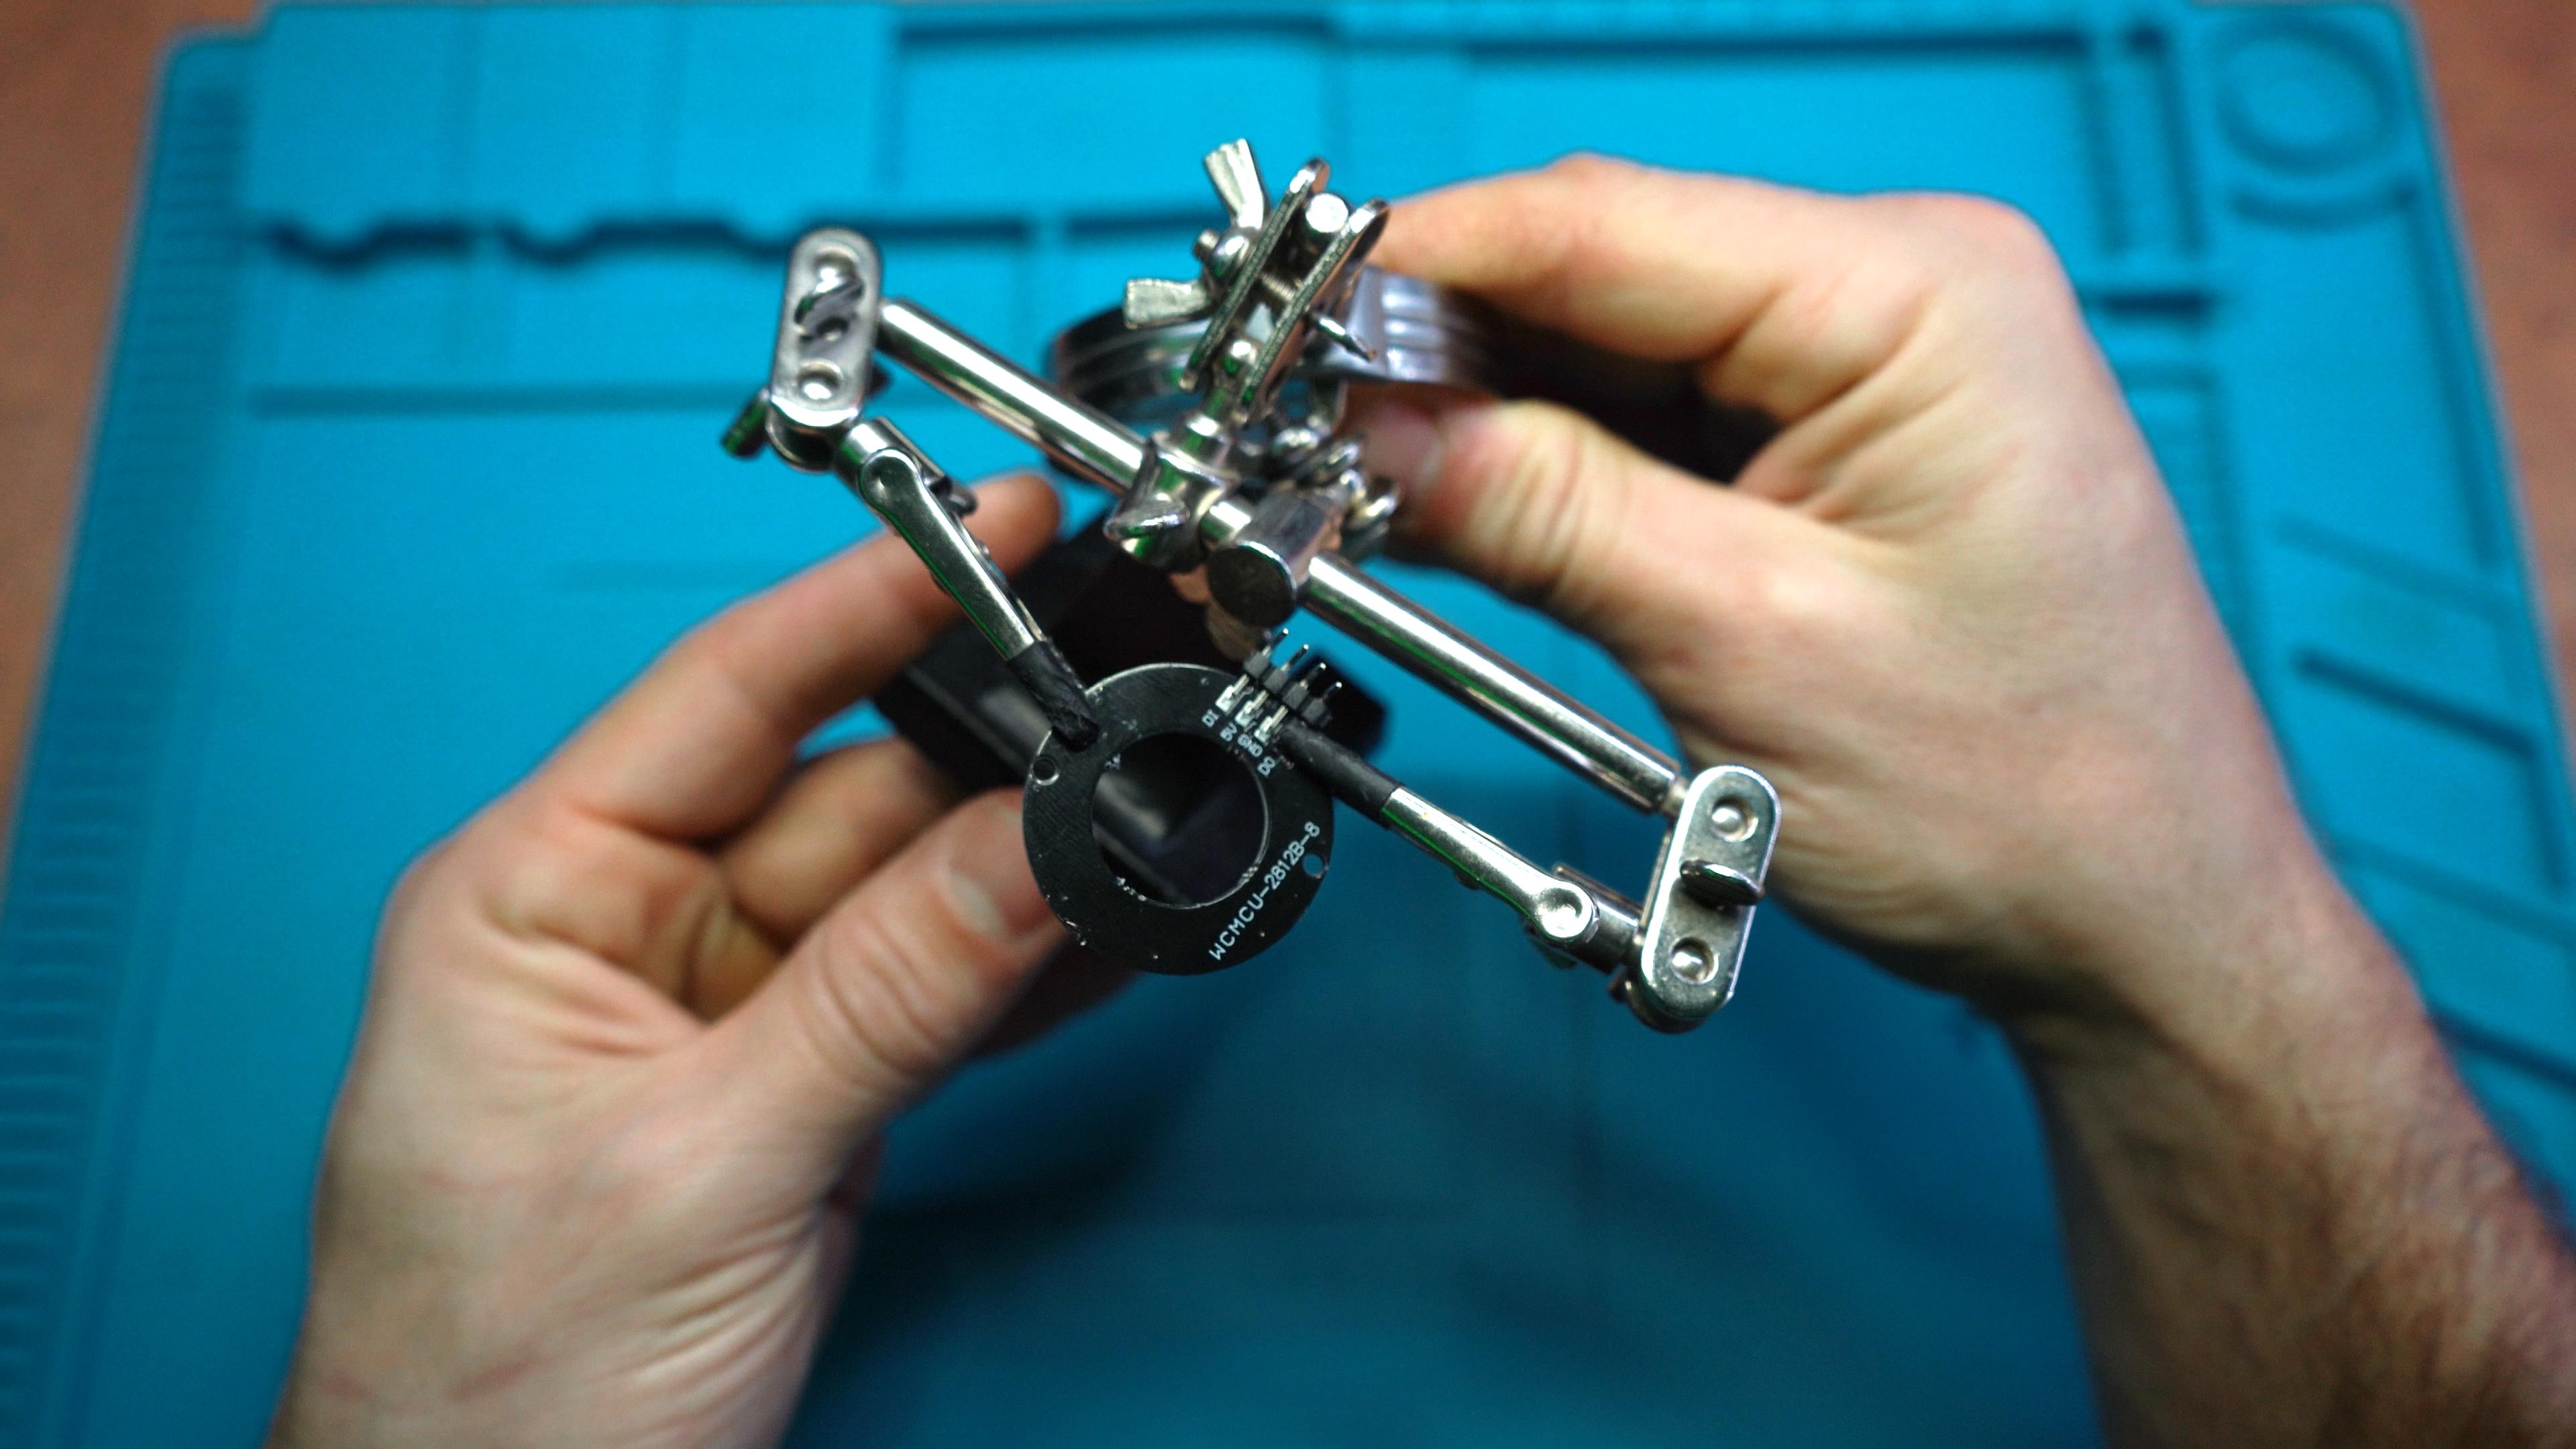
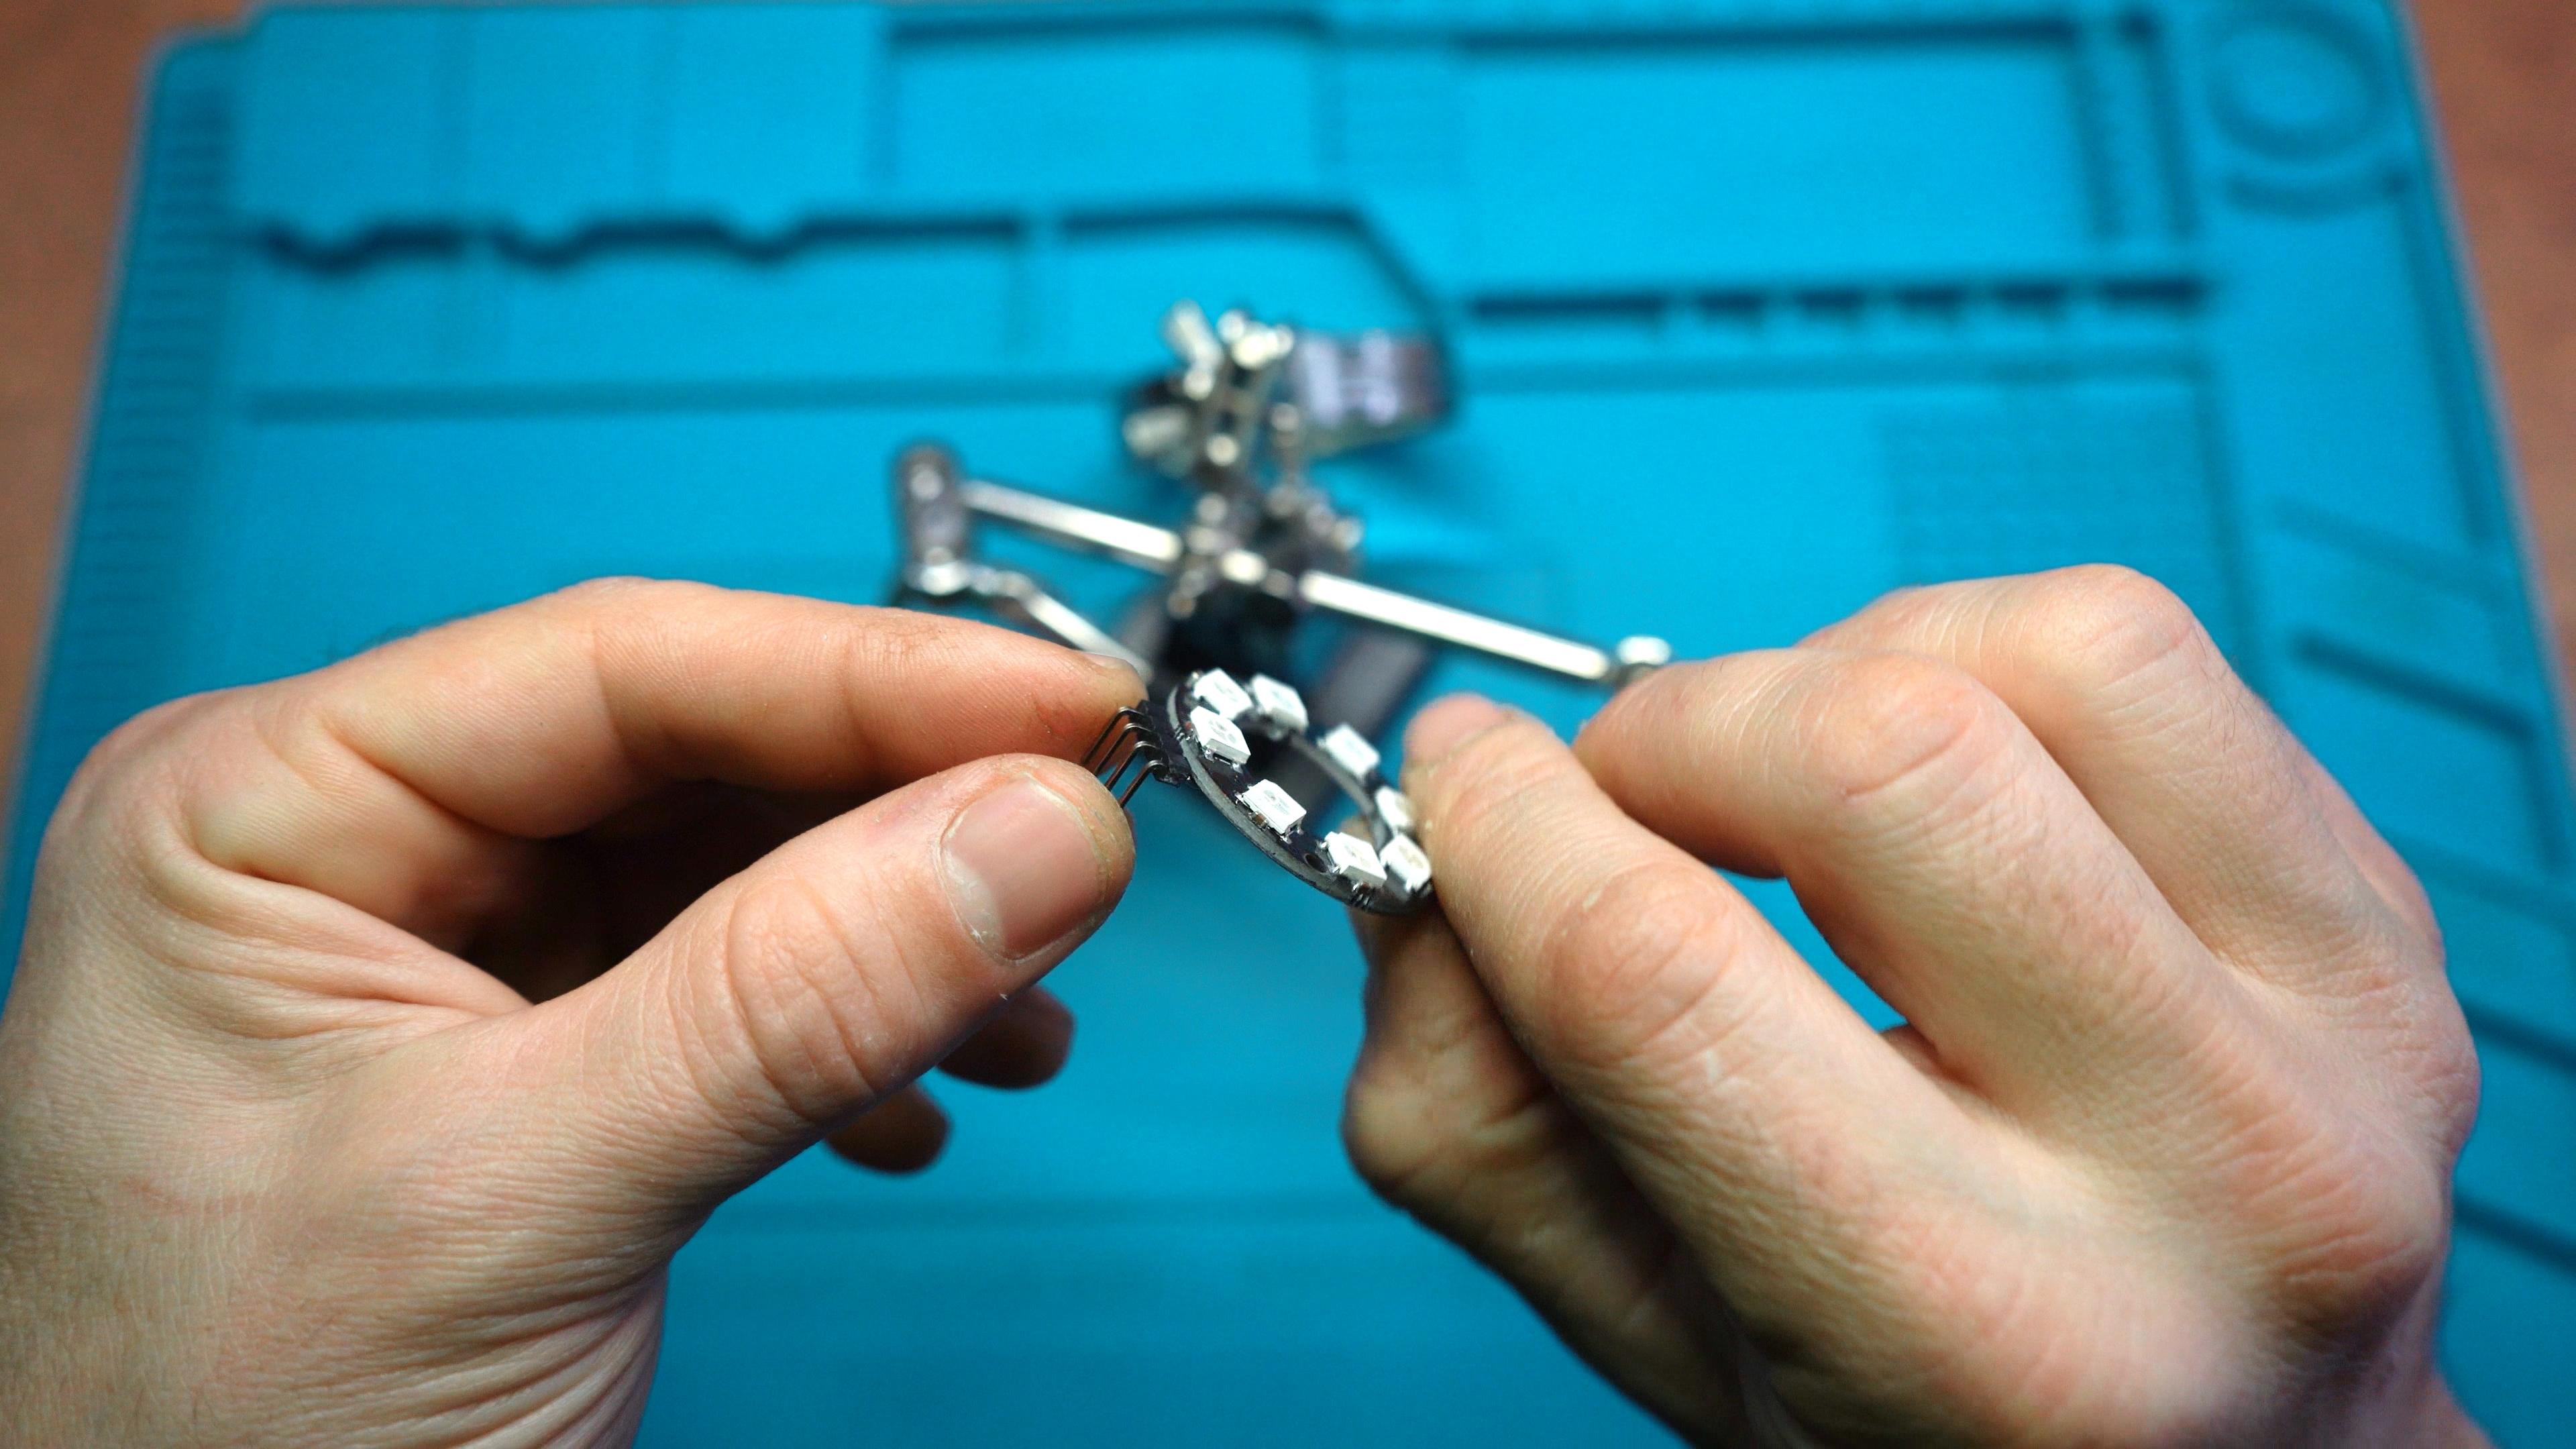
I'll start by soldering the angled male header pins to the Led Rings
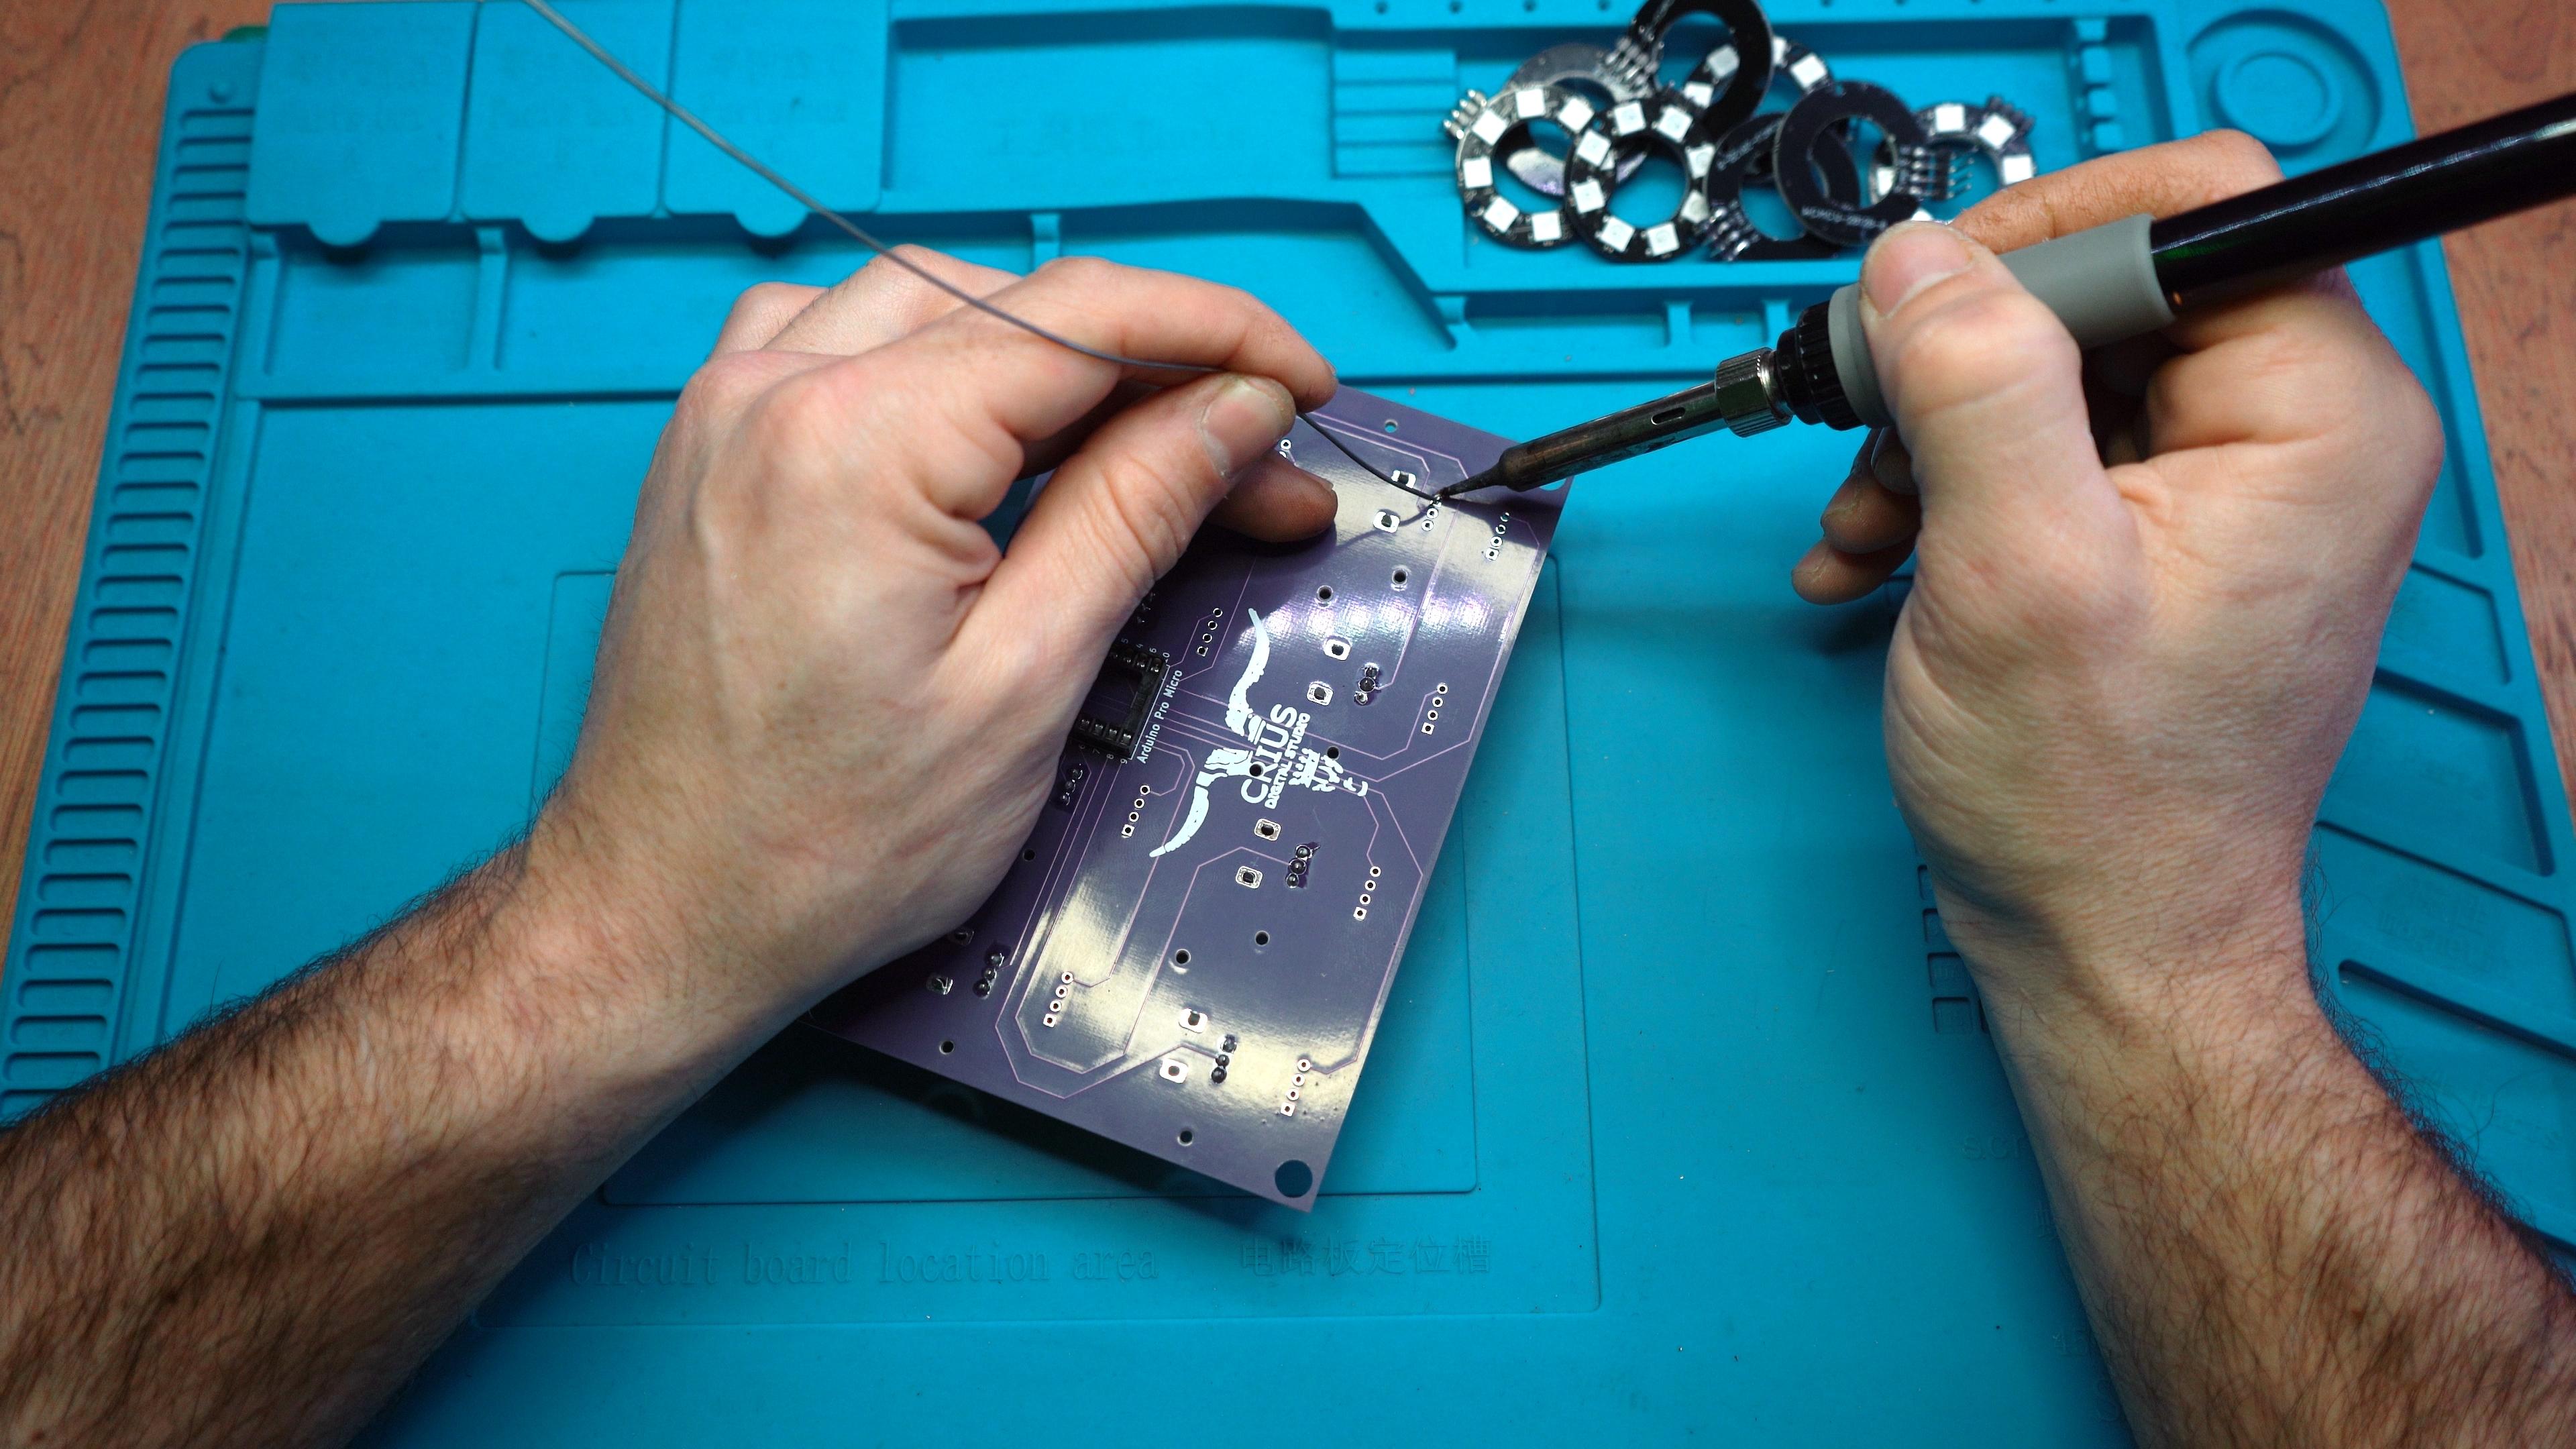
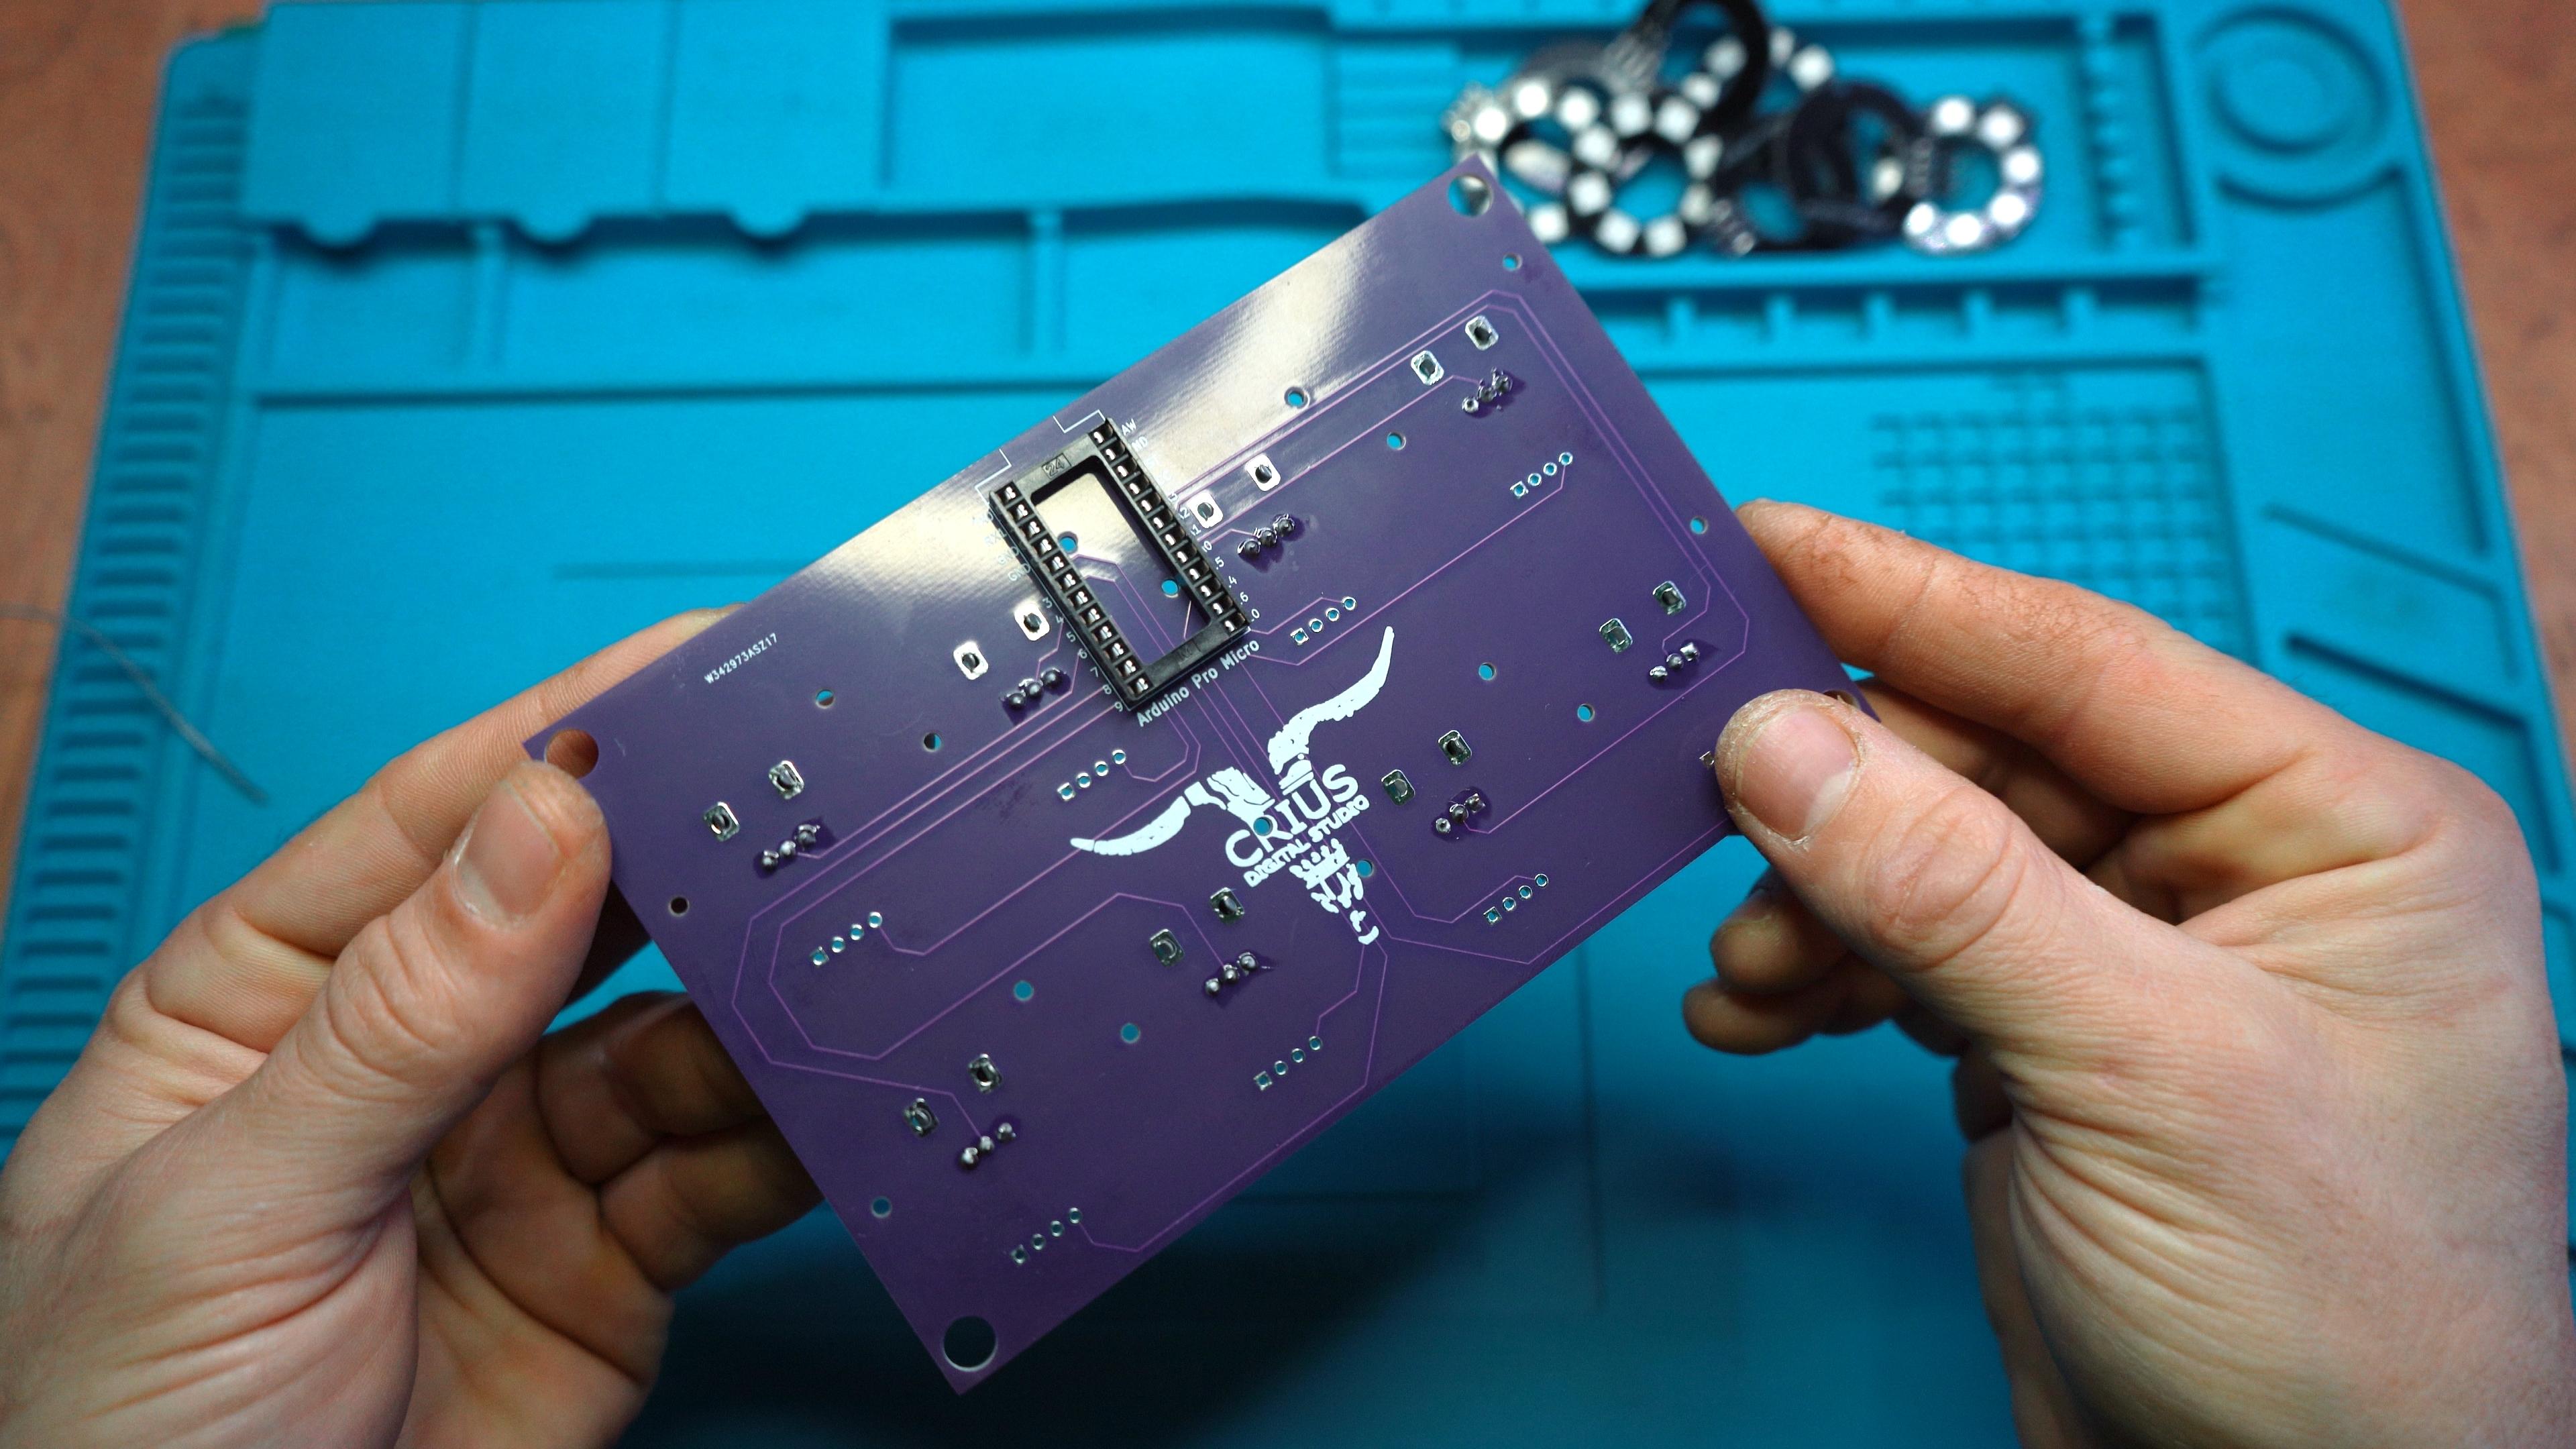
Solder the Arduino
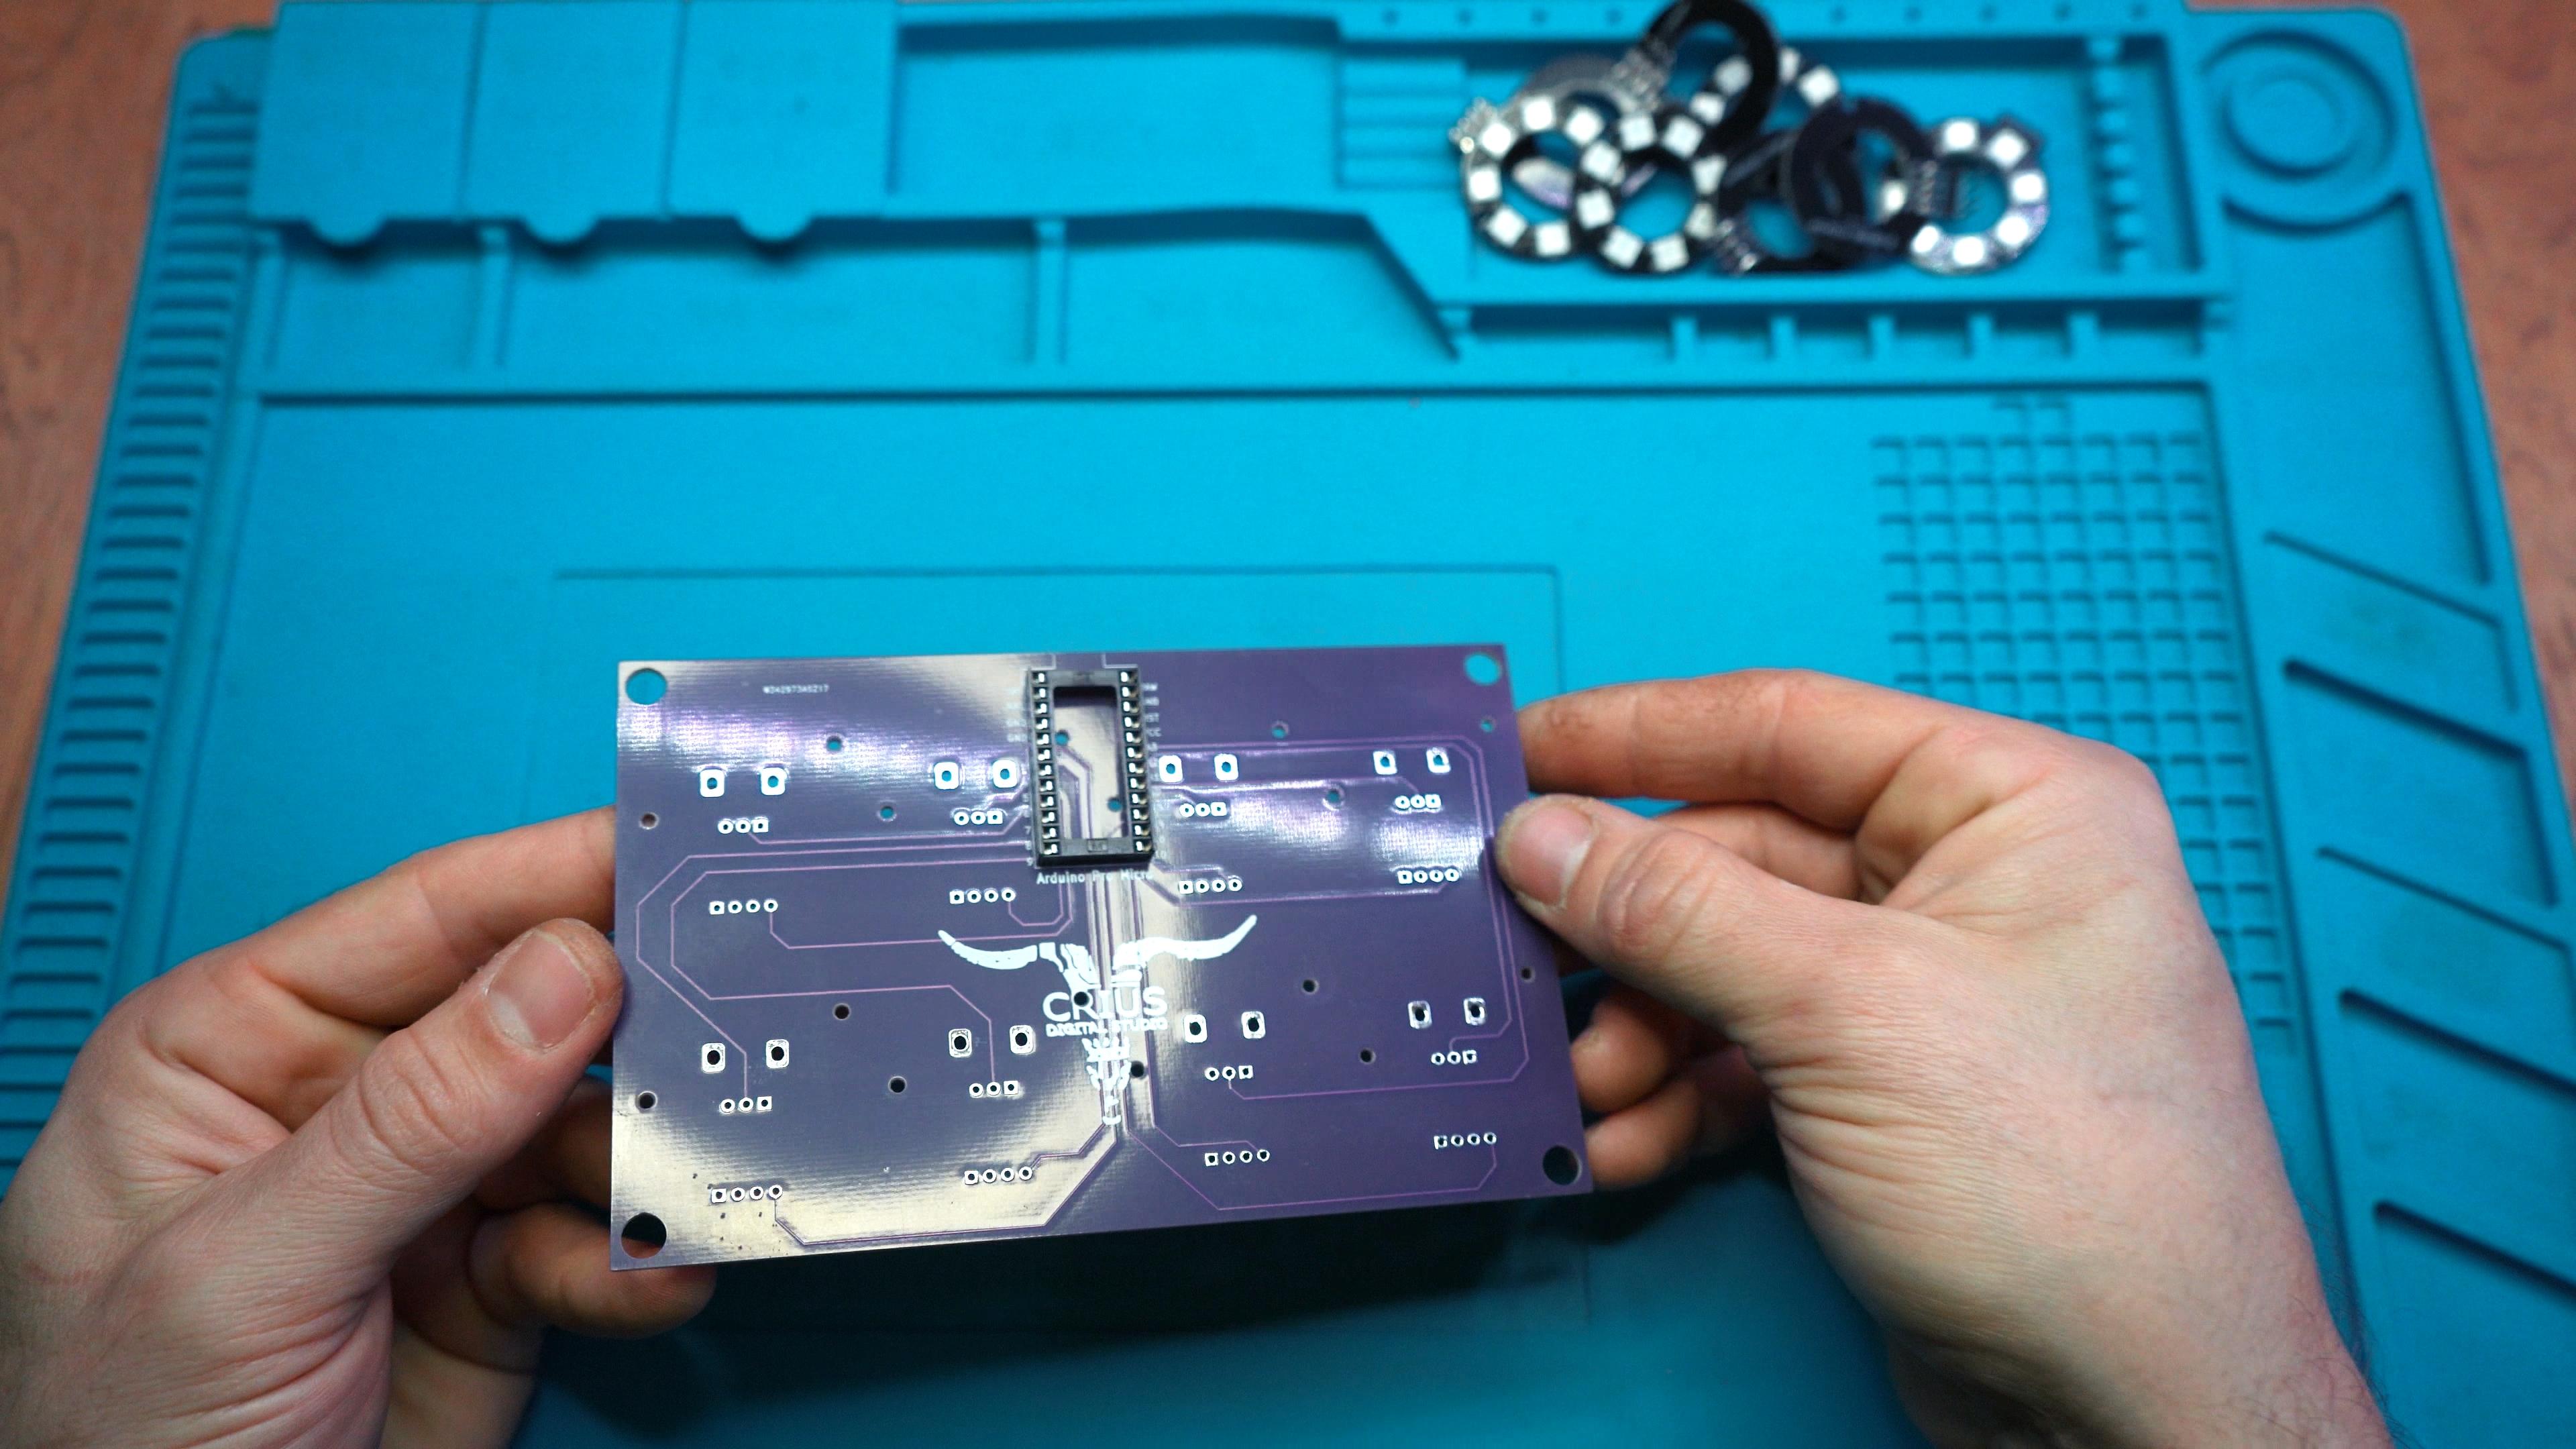
Next I will solder the Arduino on the PCB or optionally the 24-pin DIP Socket in order to be able to replace the Arduino in the future.
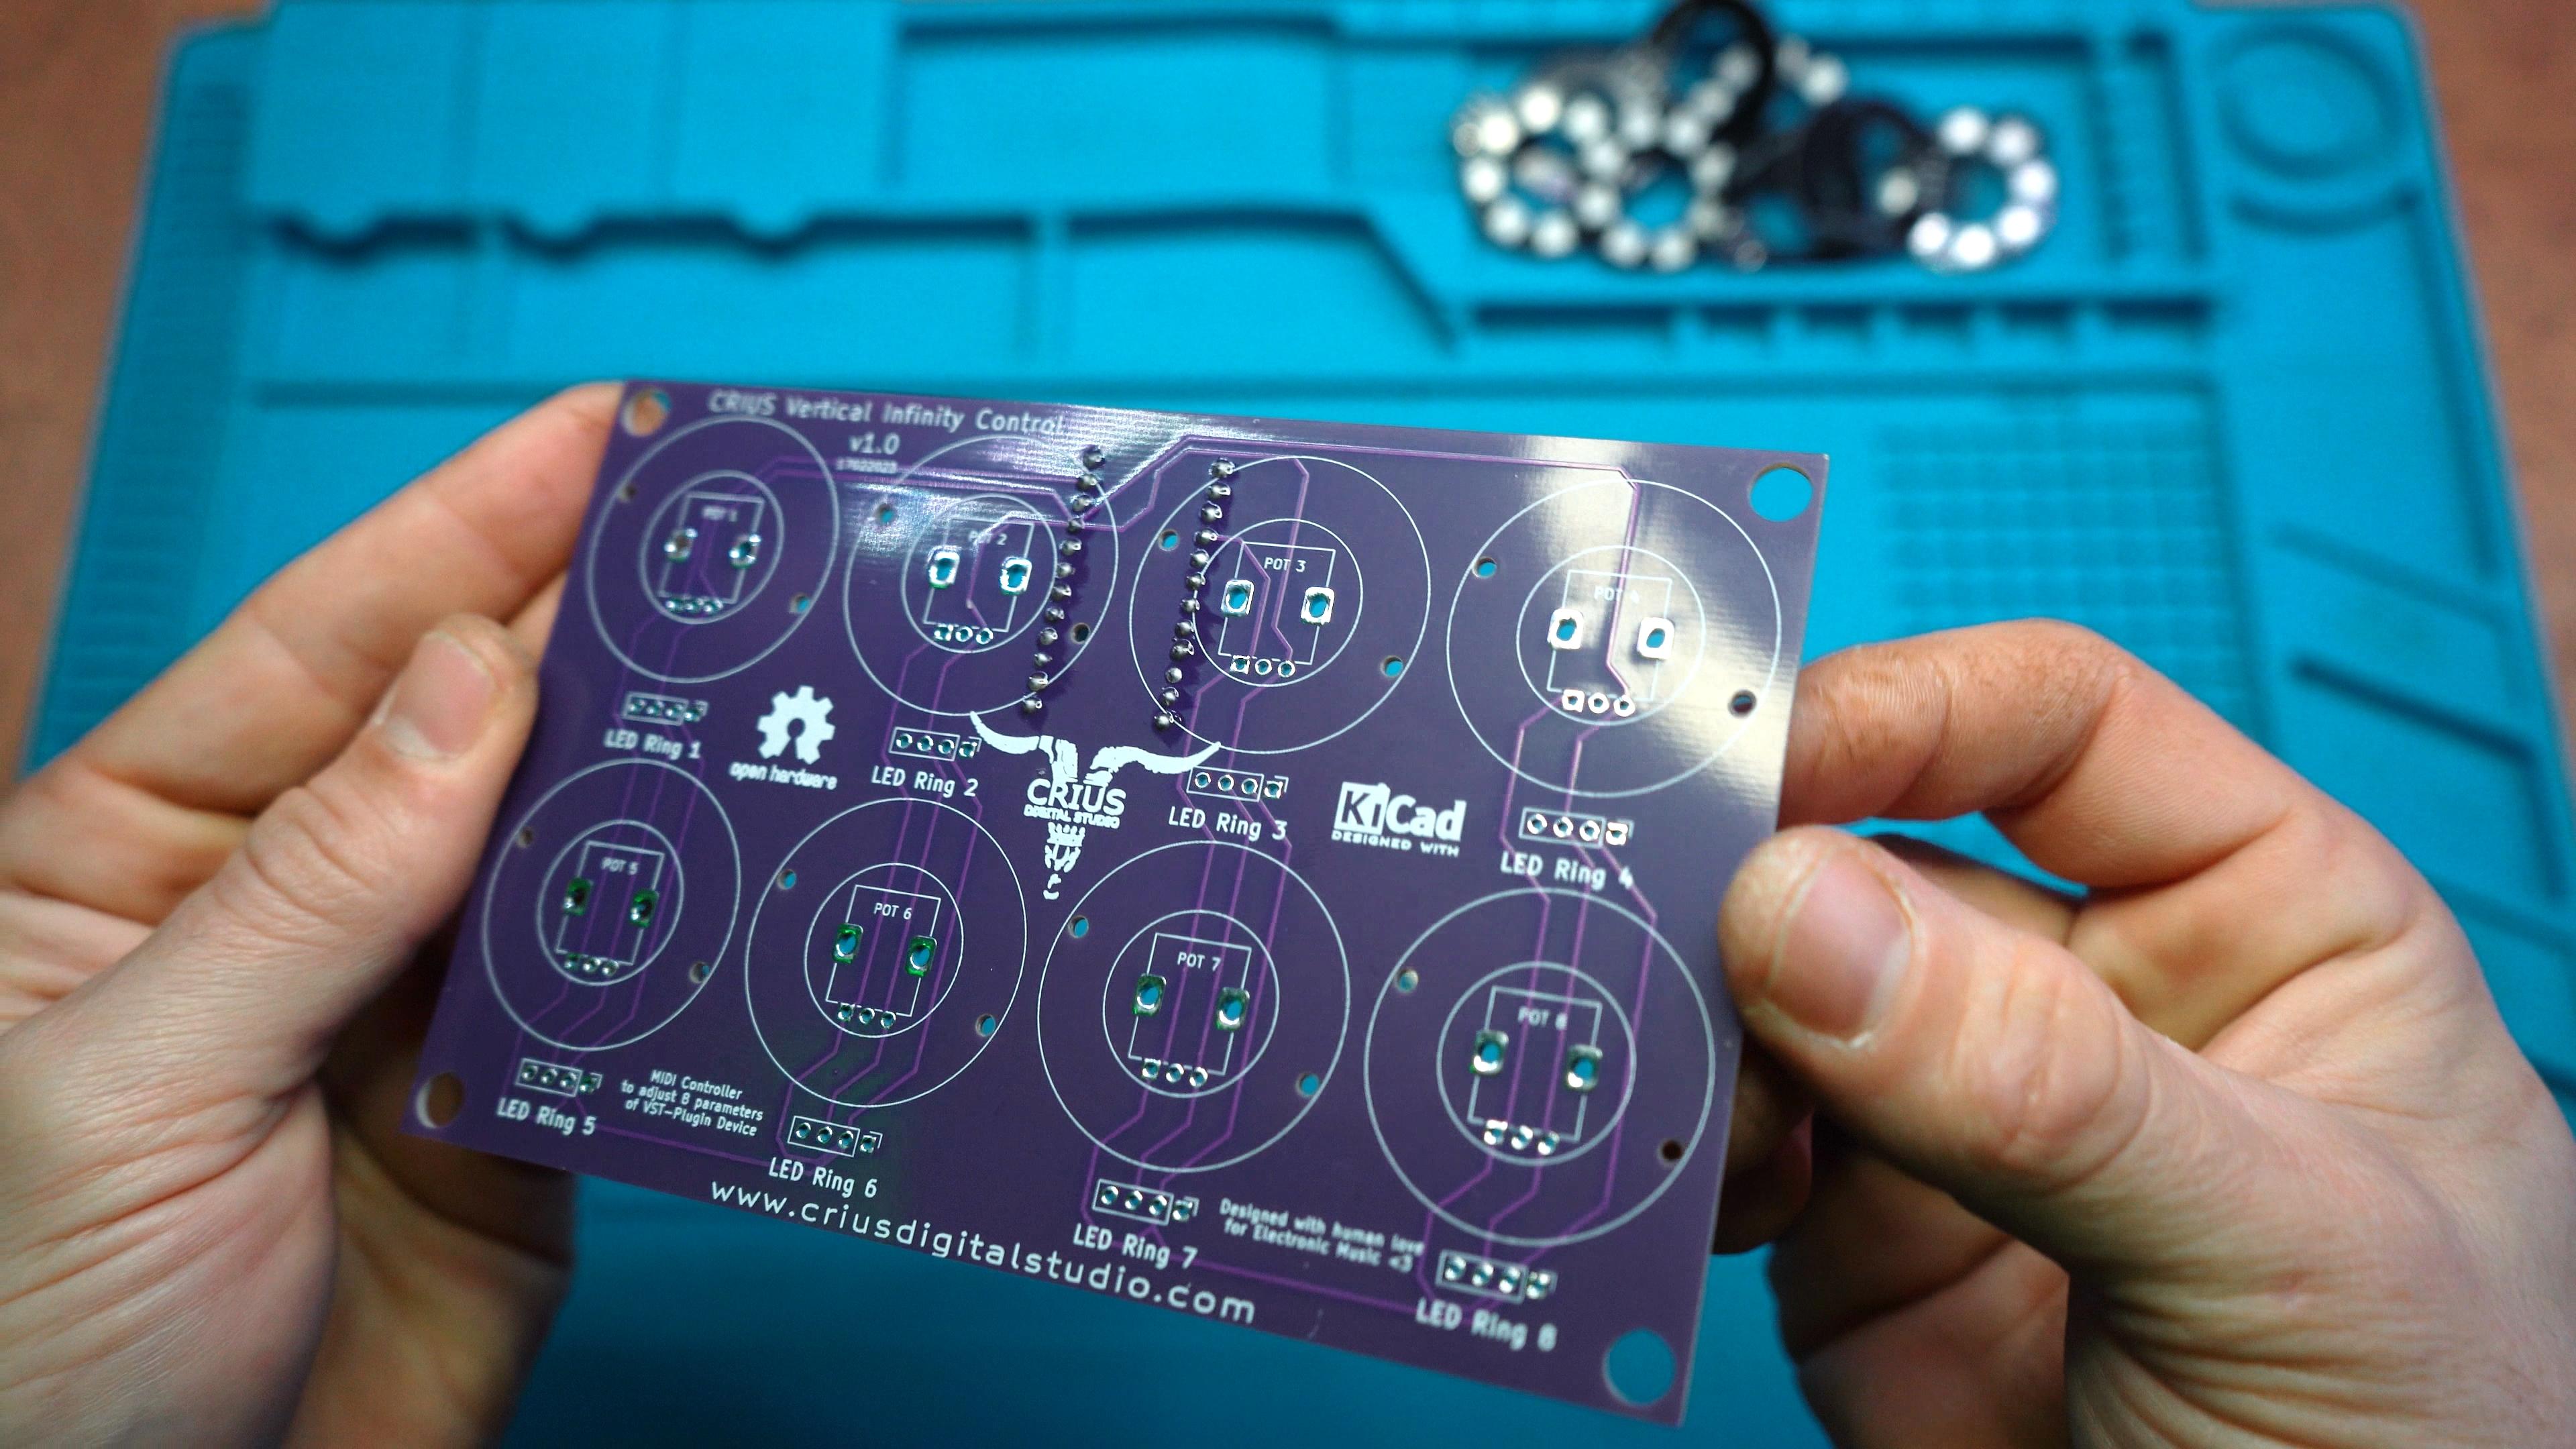
Solder the Potentiometers
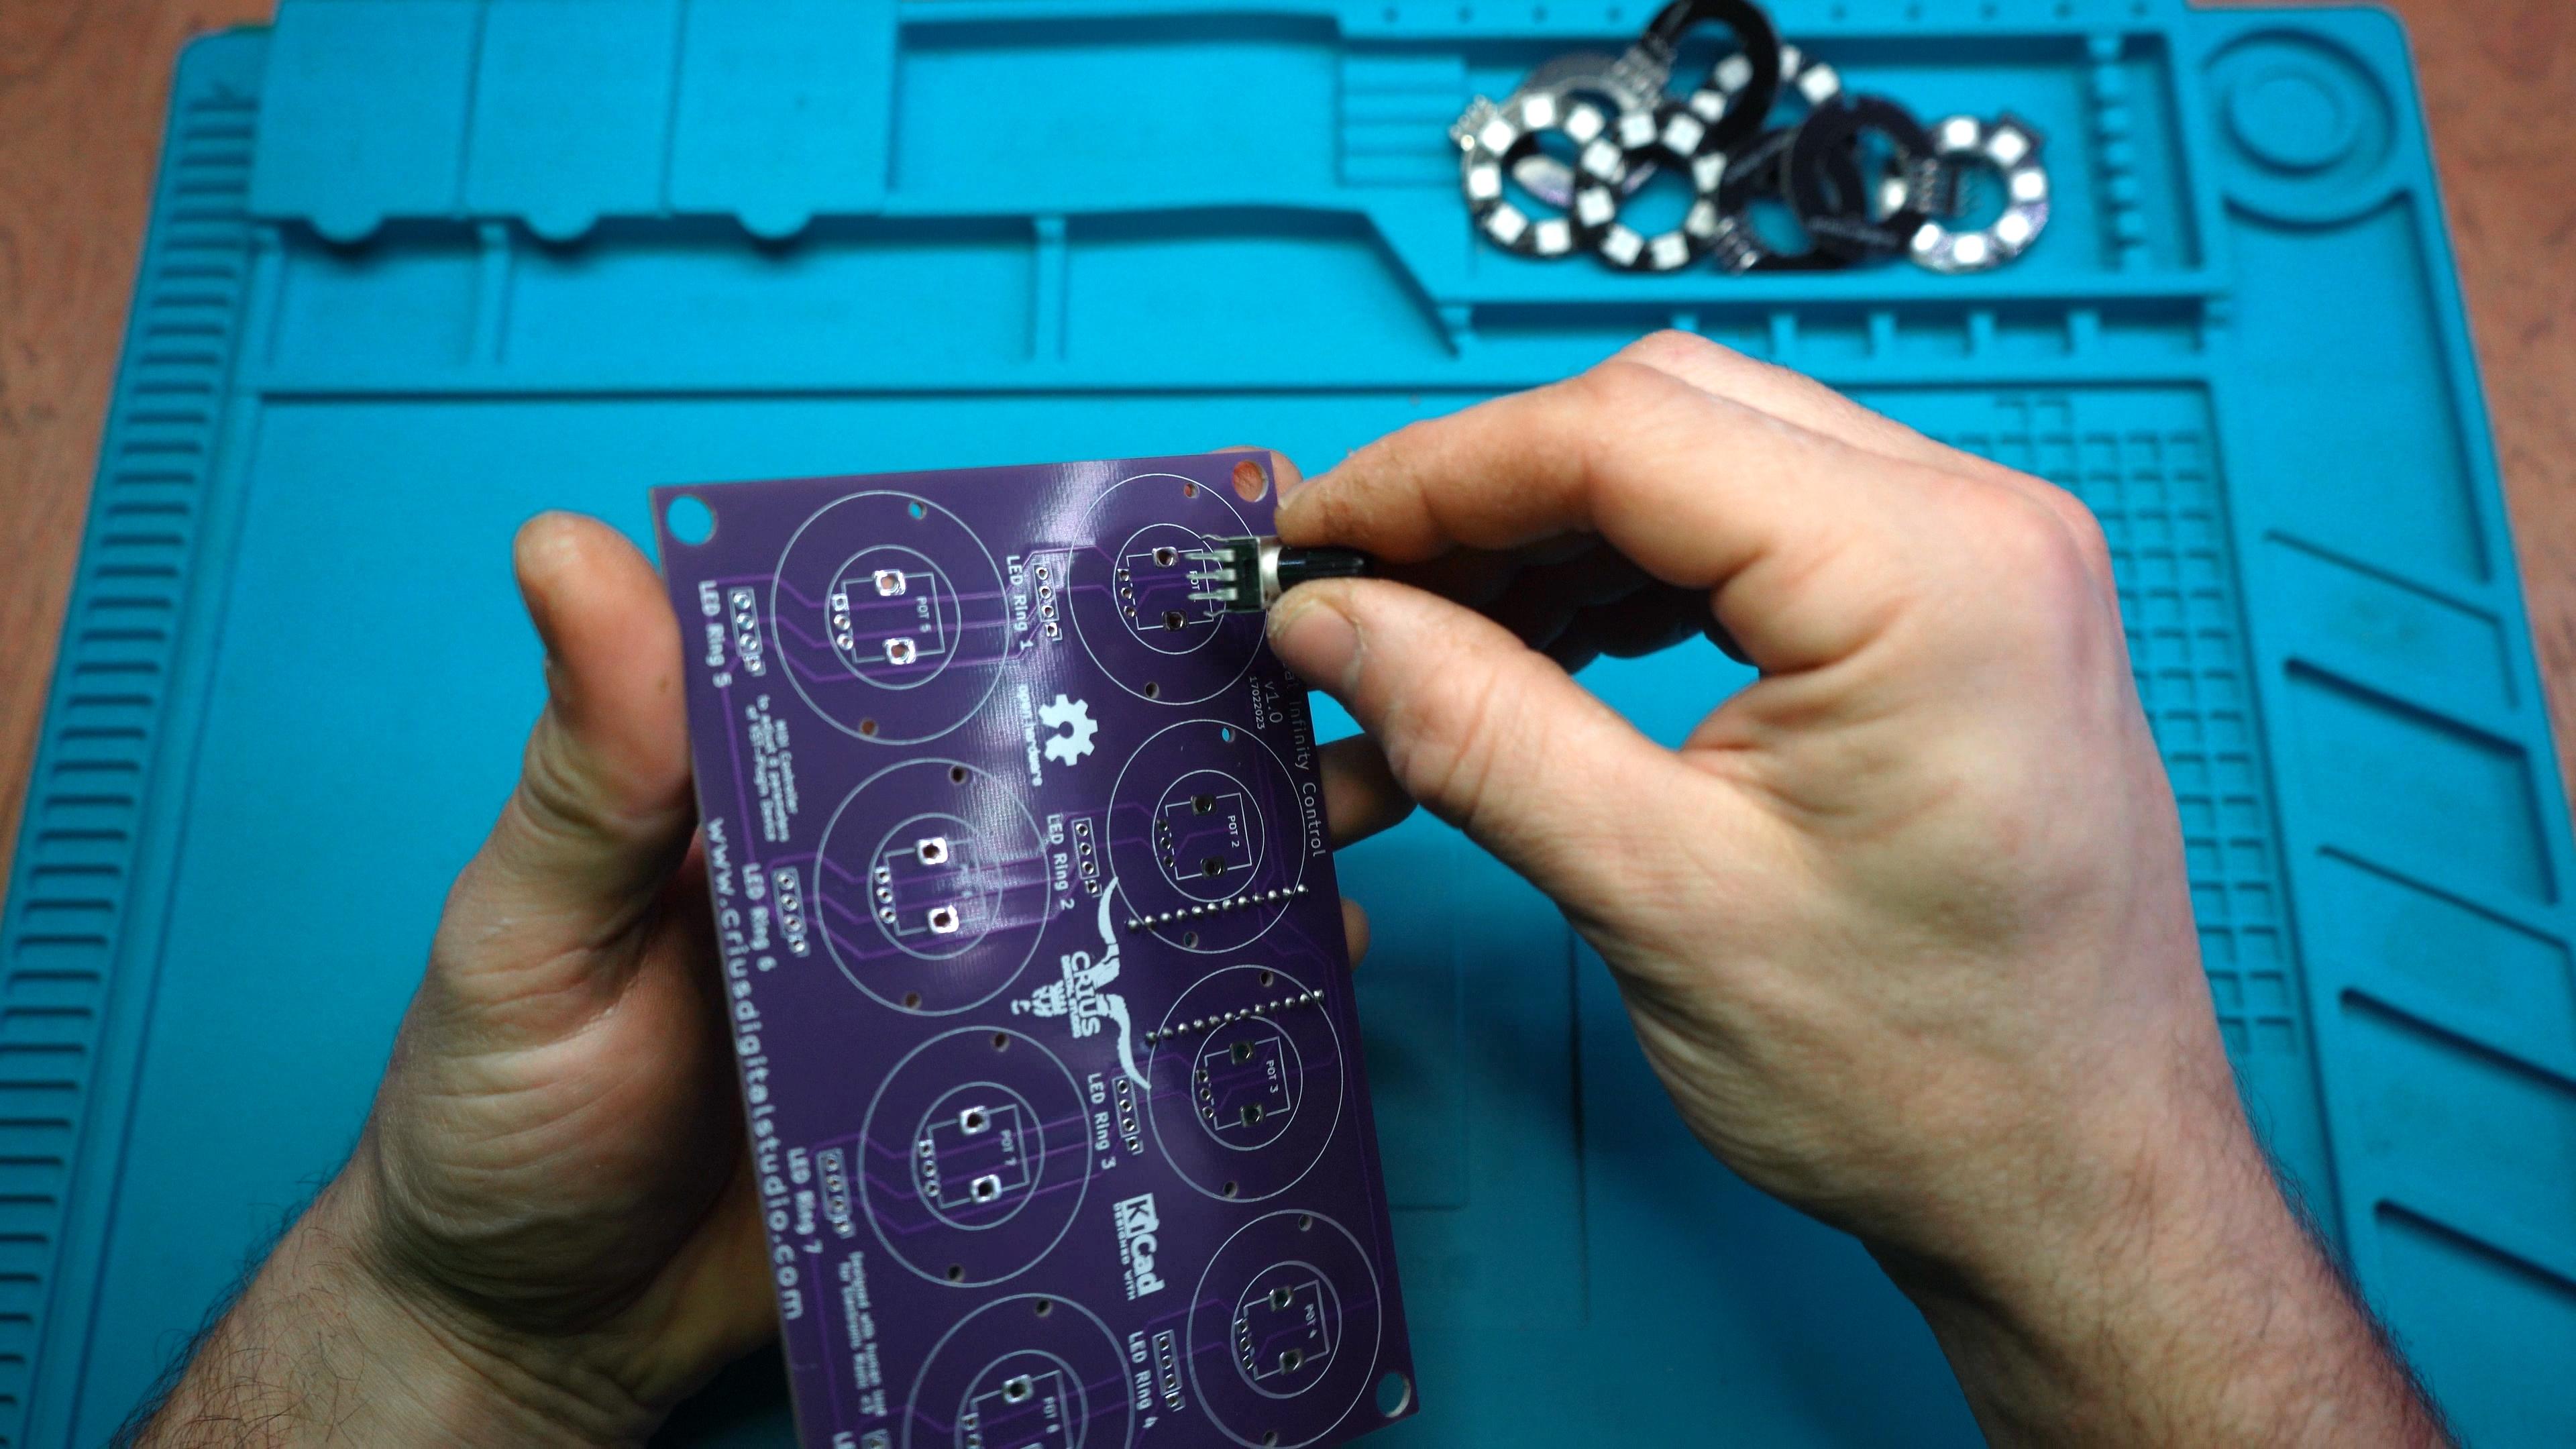
Now I will solder the 8 potentiometers on the PCB board.
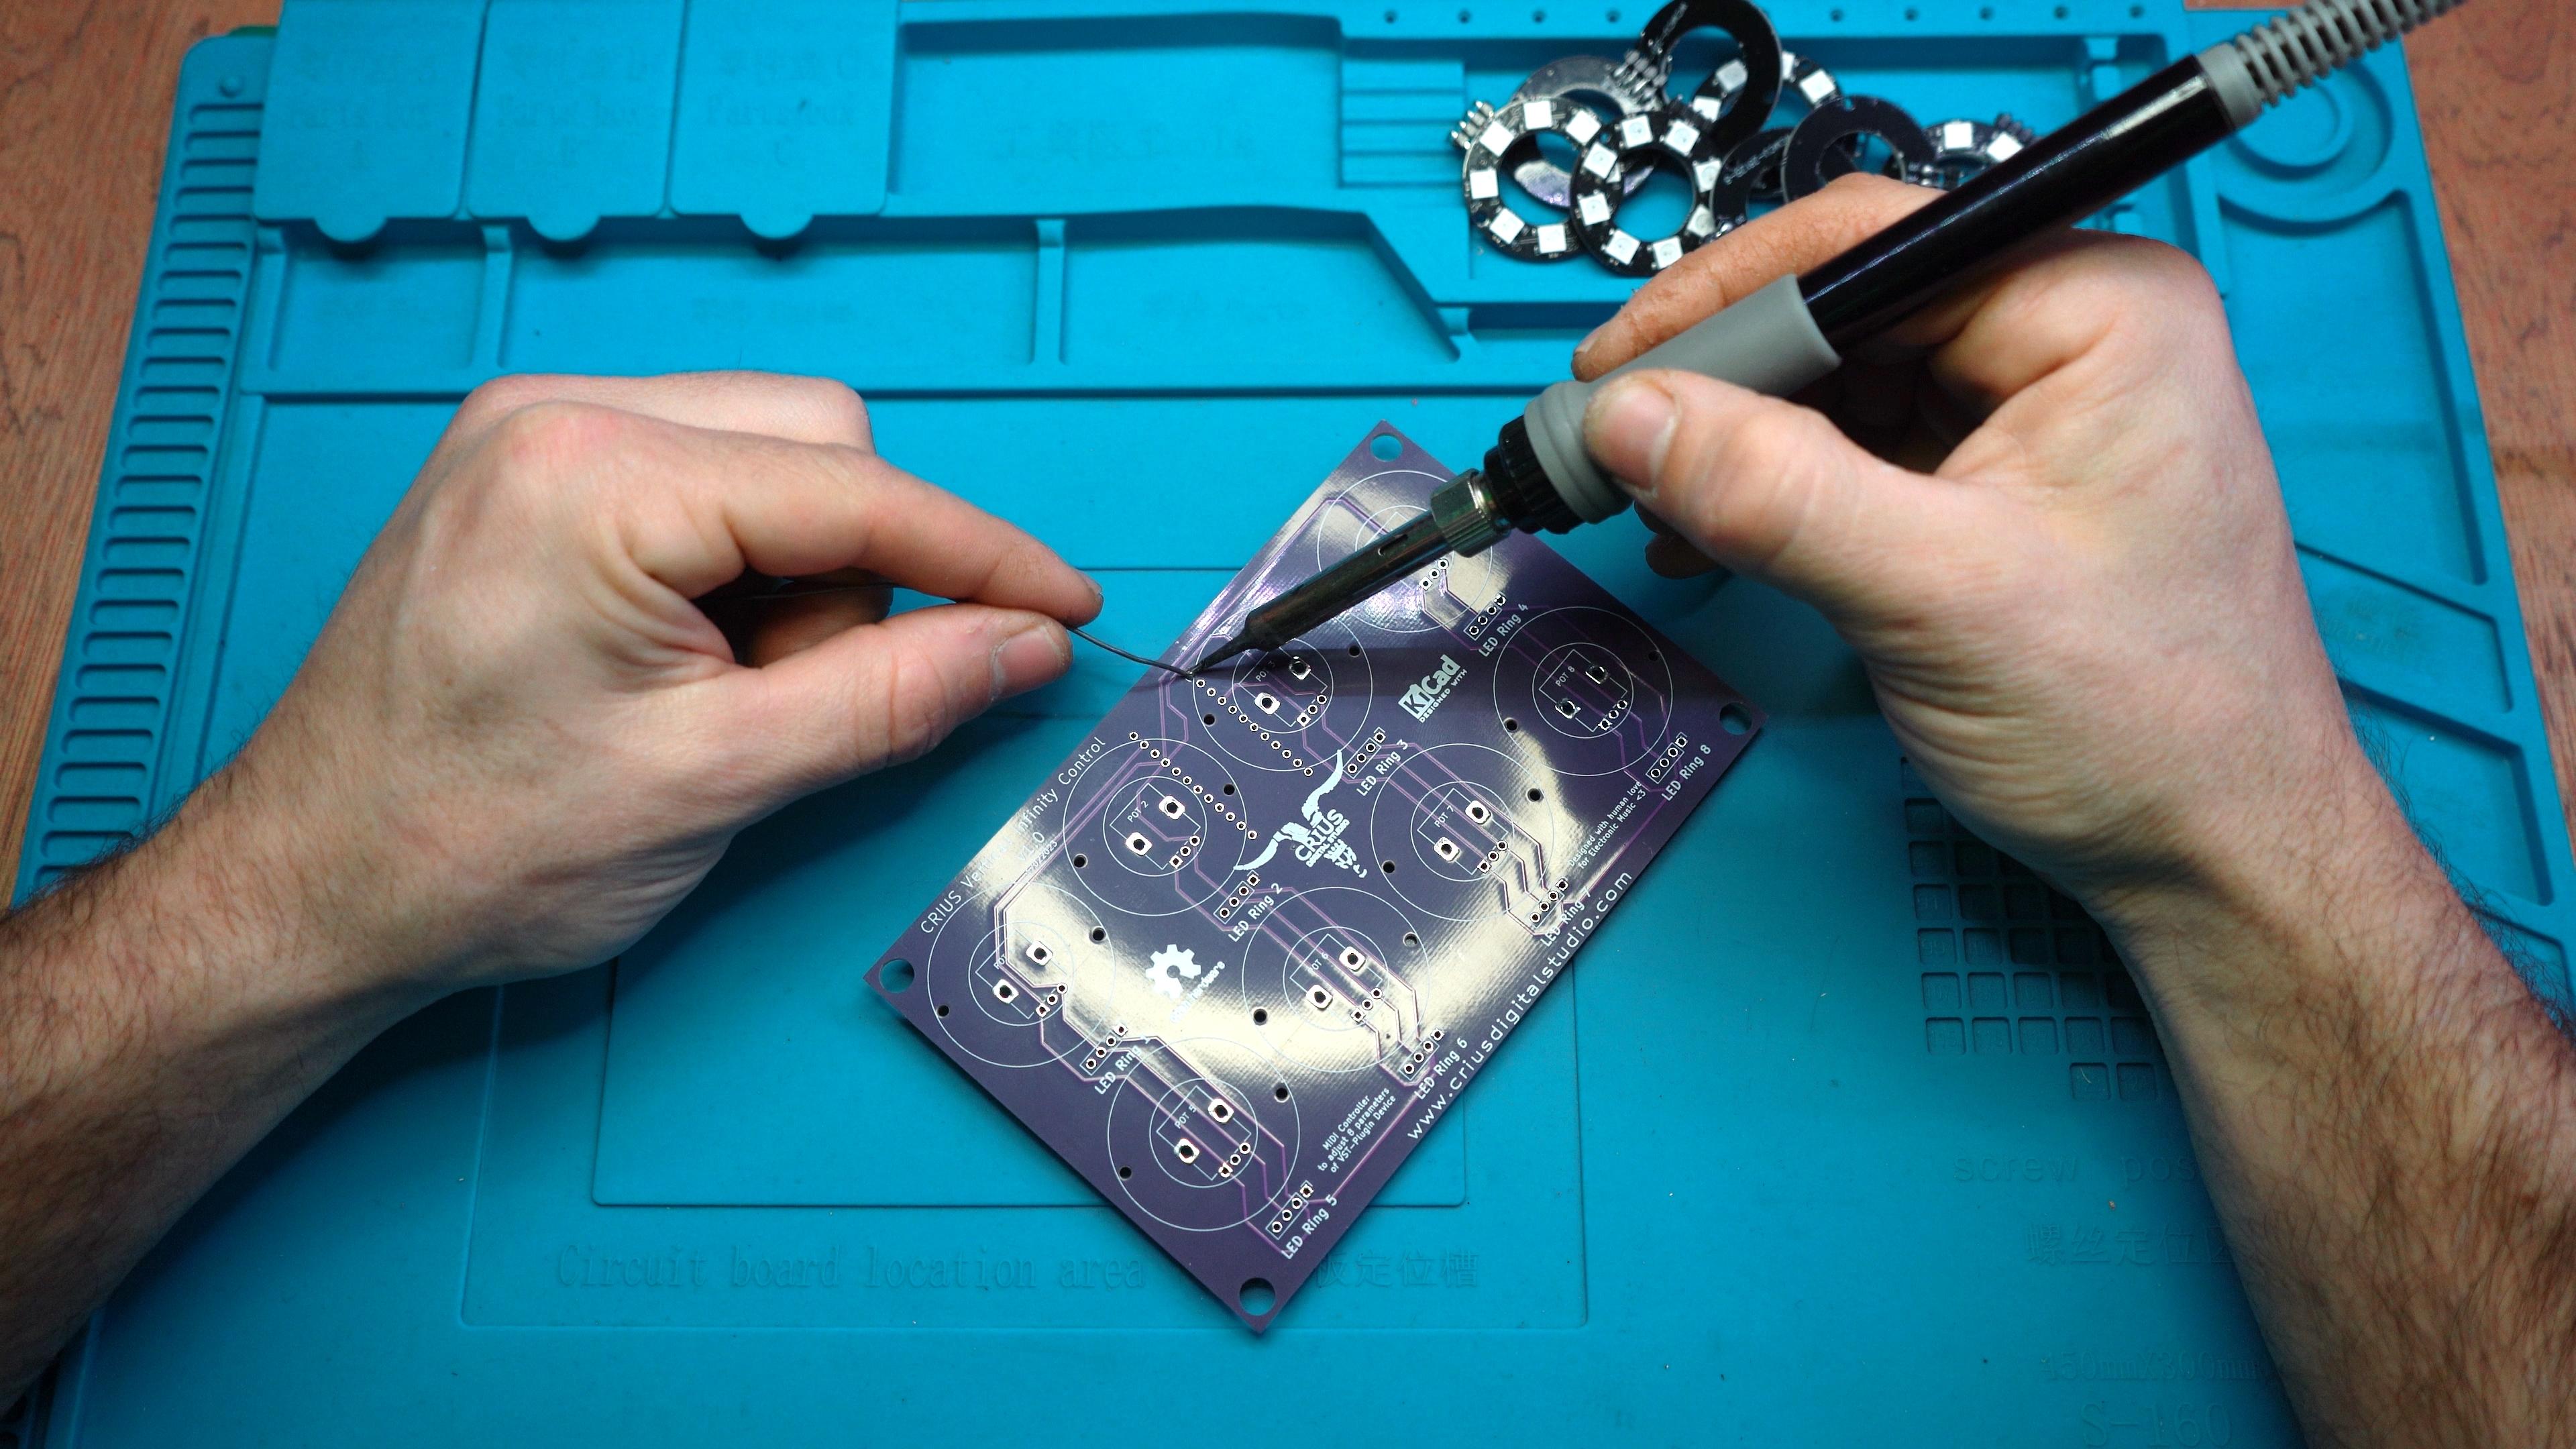
Solder the Led Rings
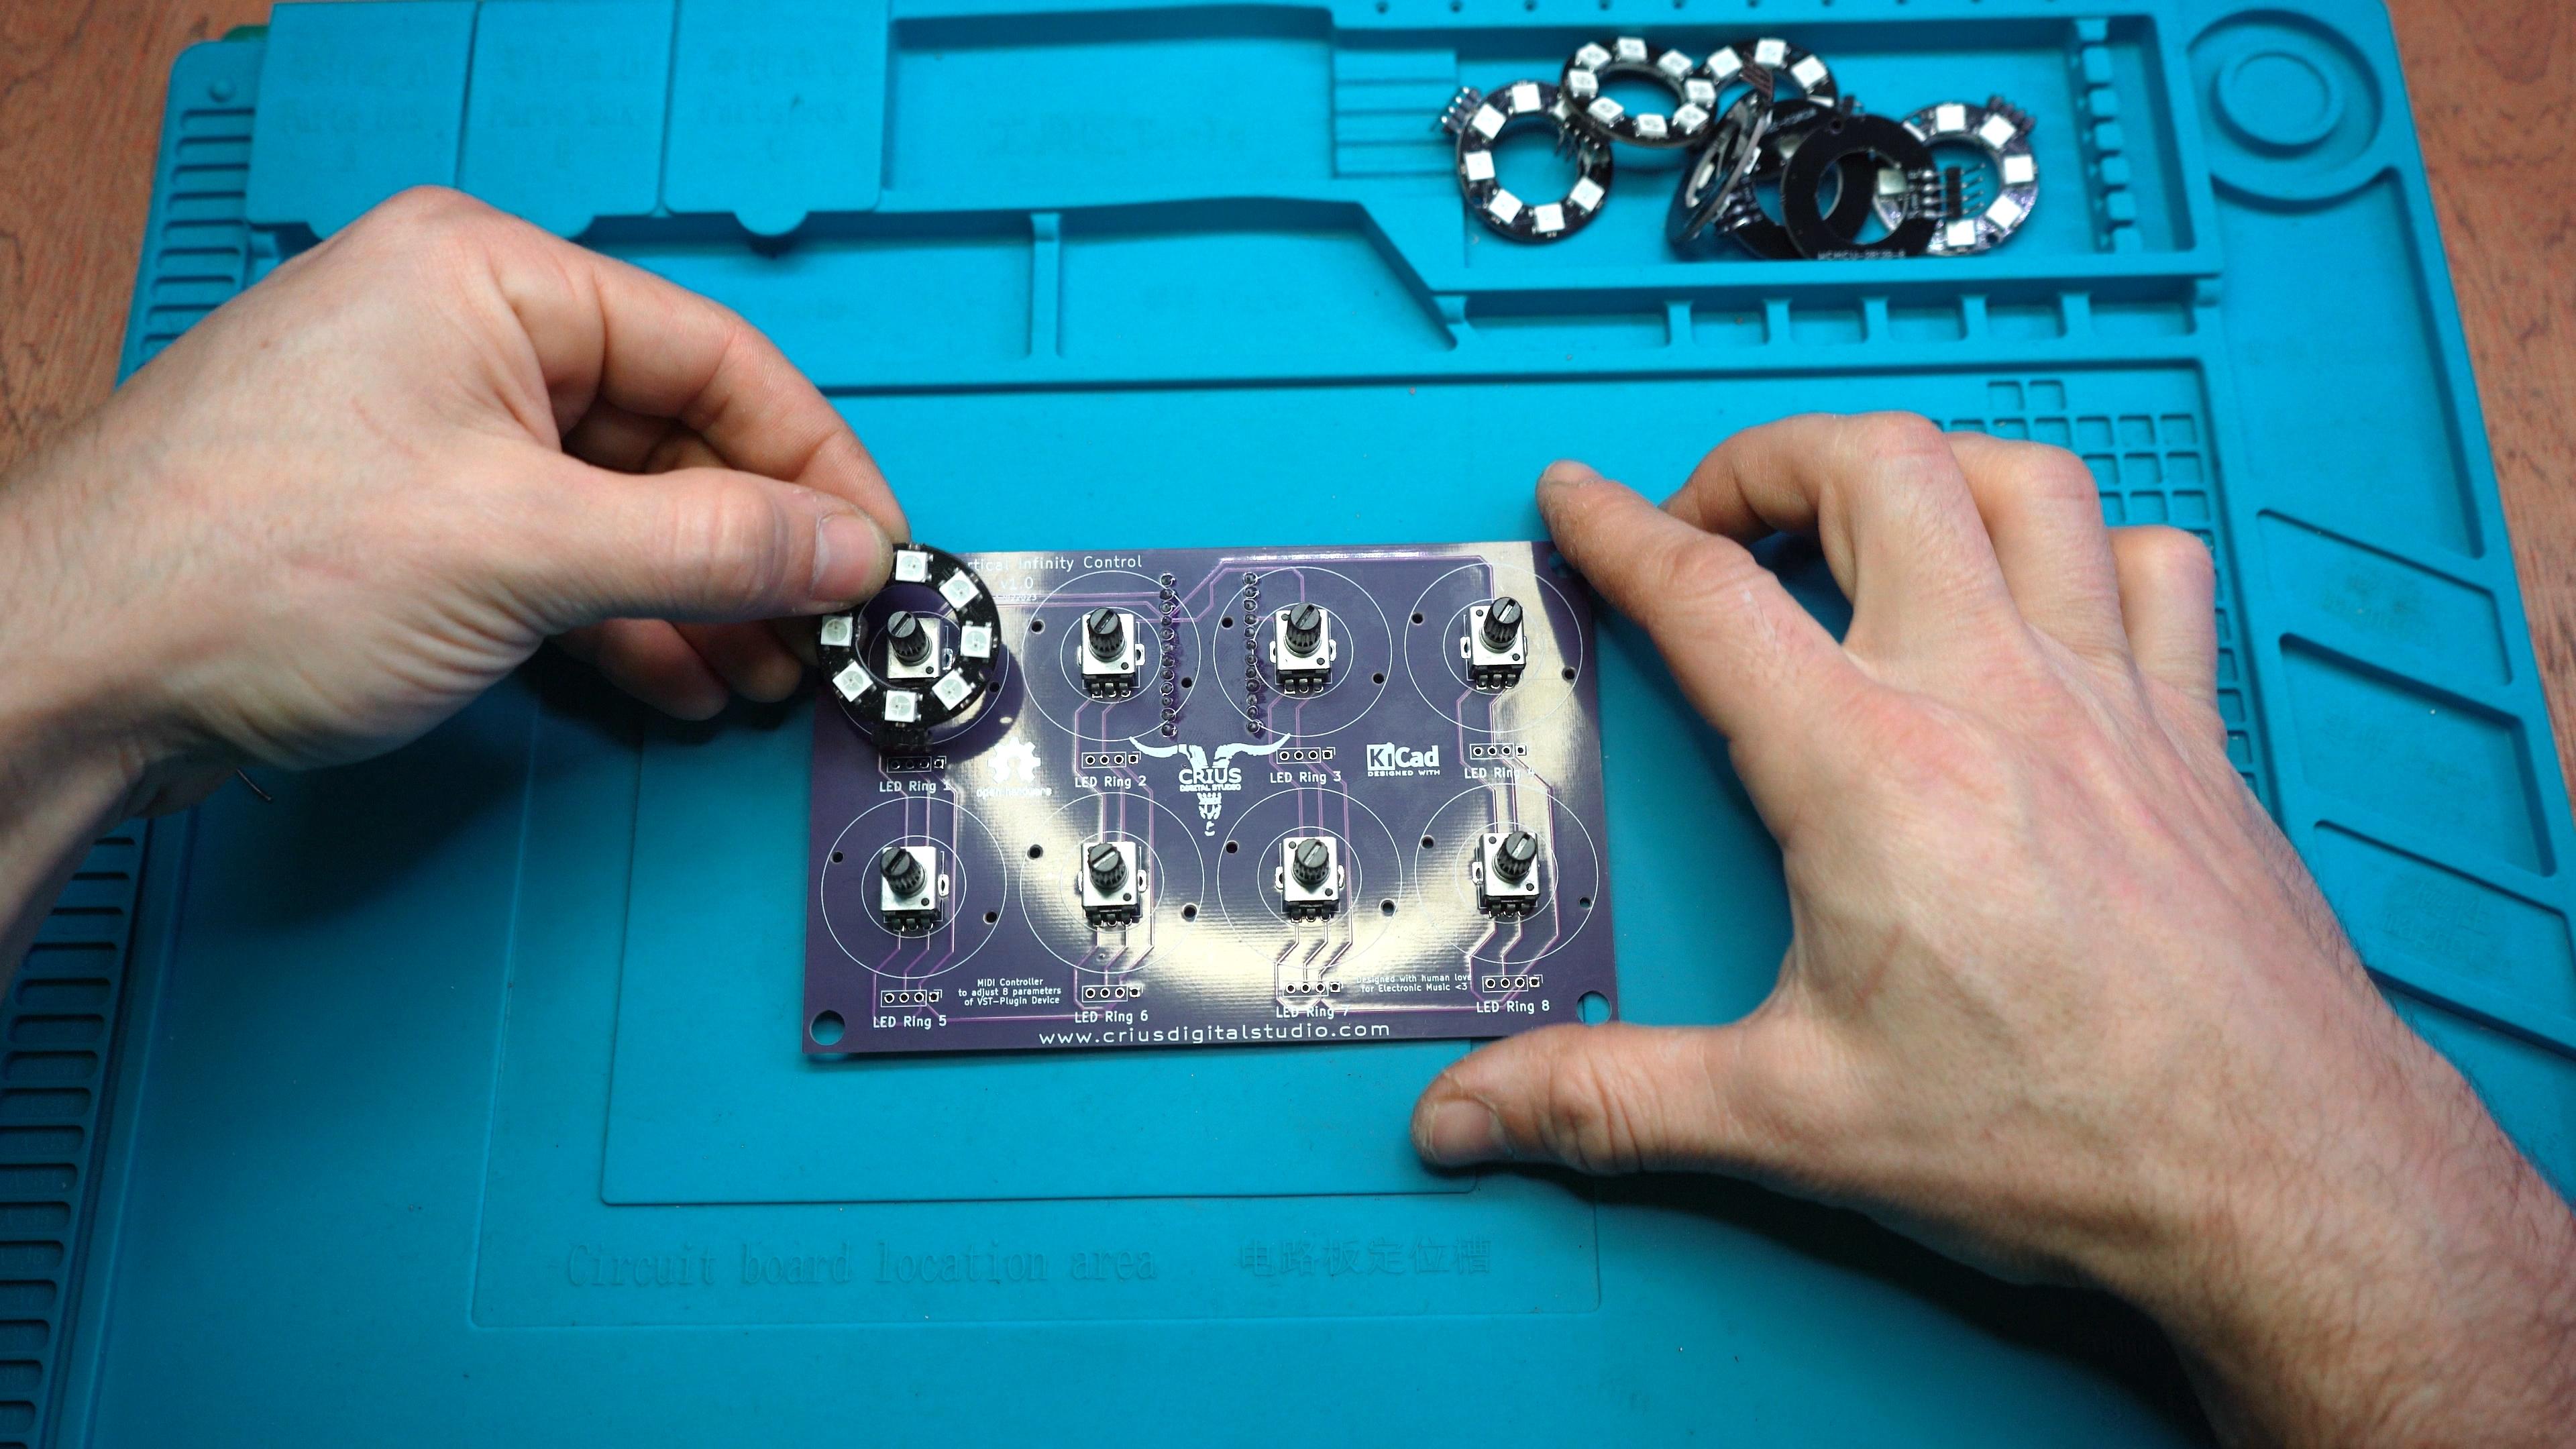
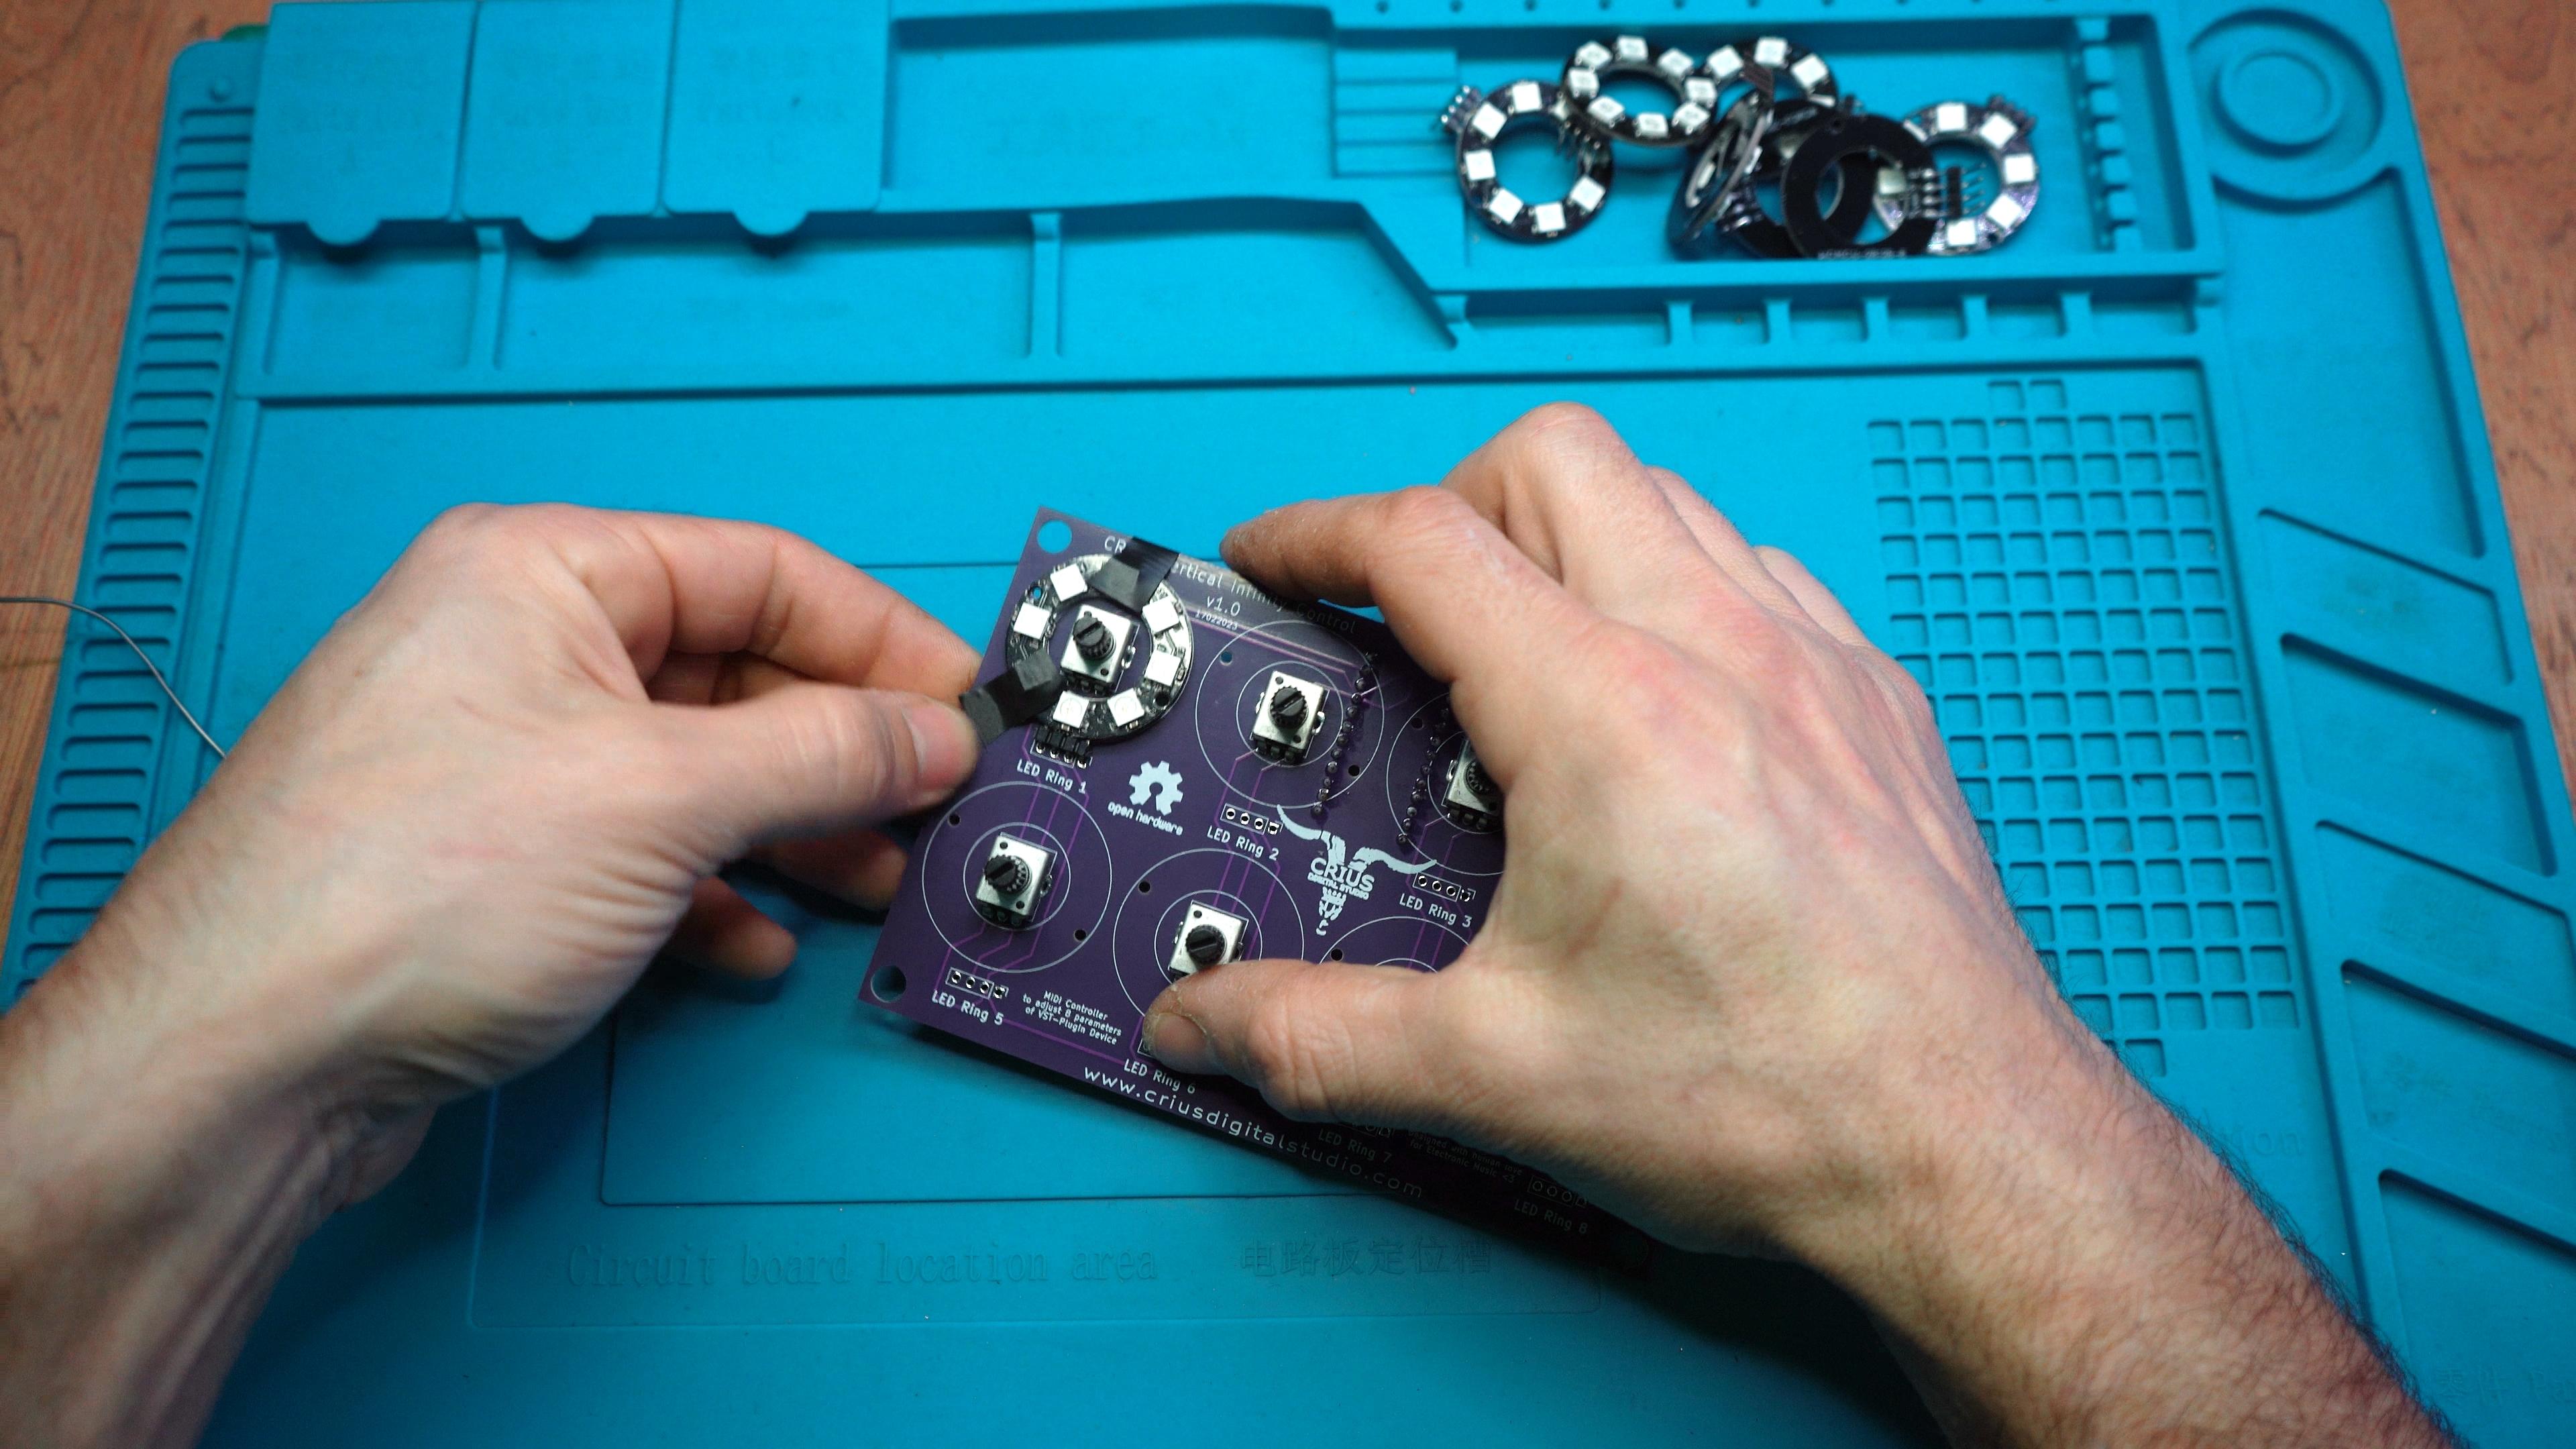
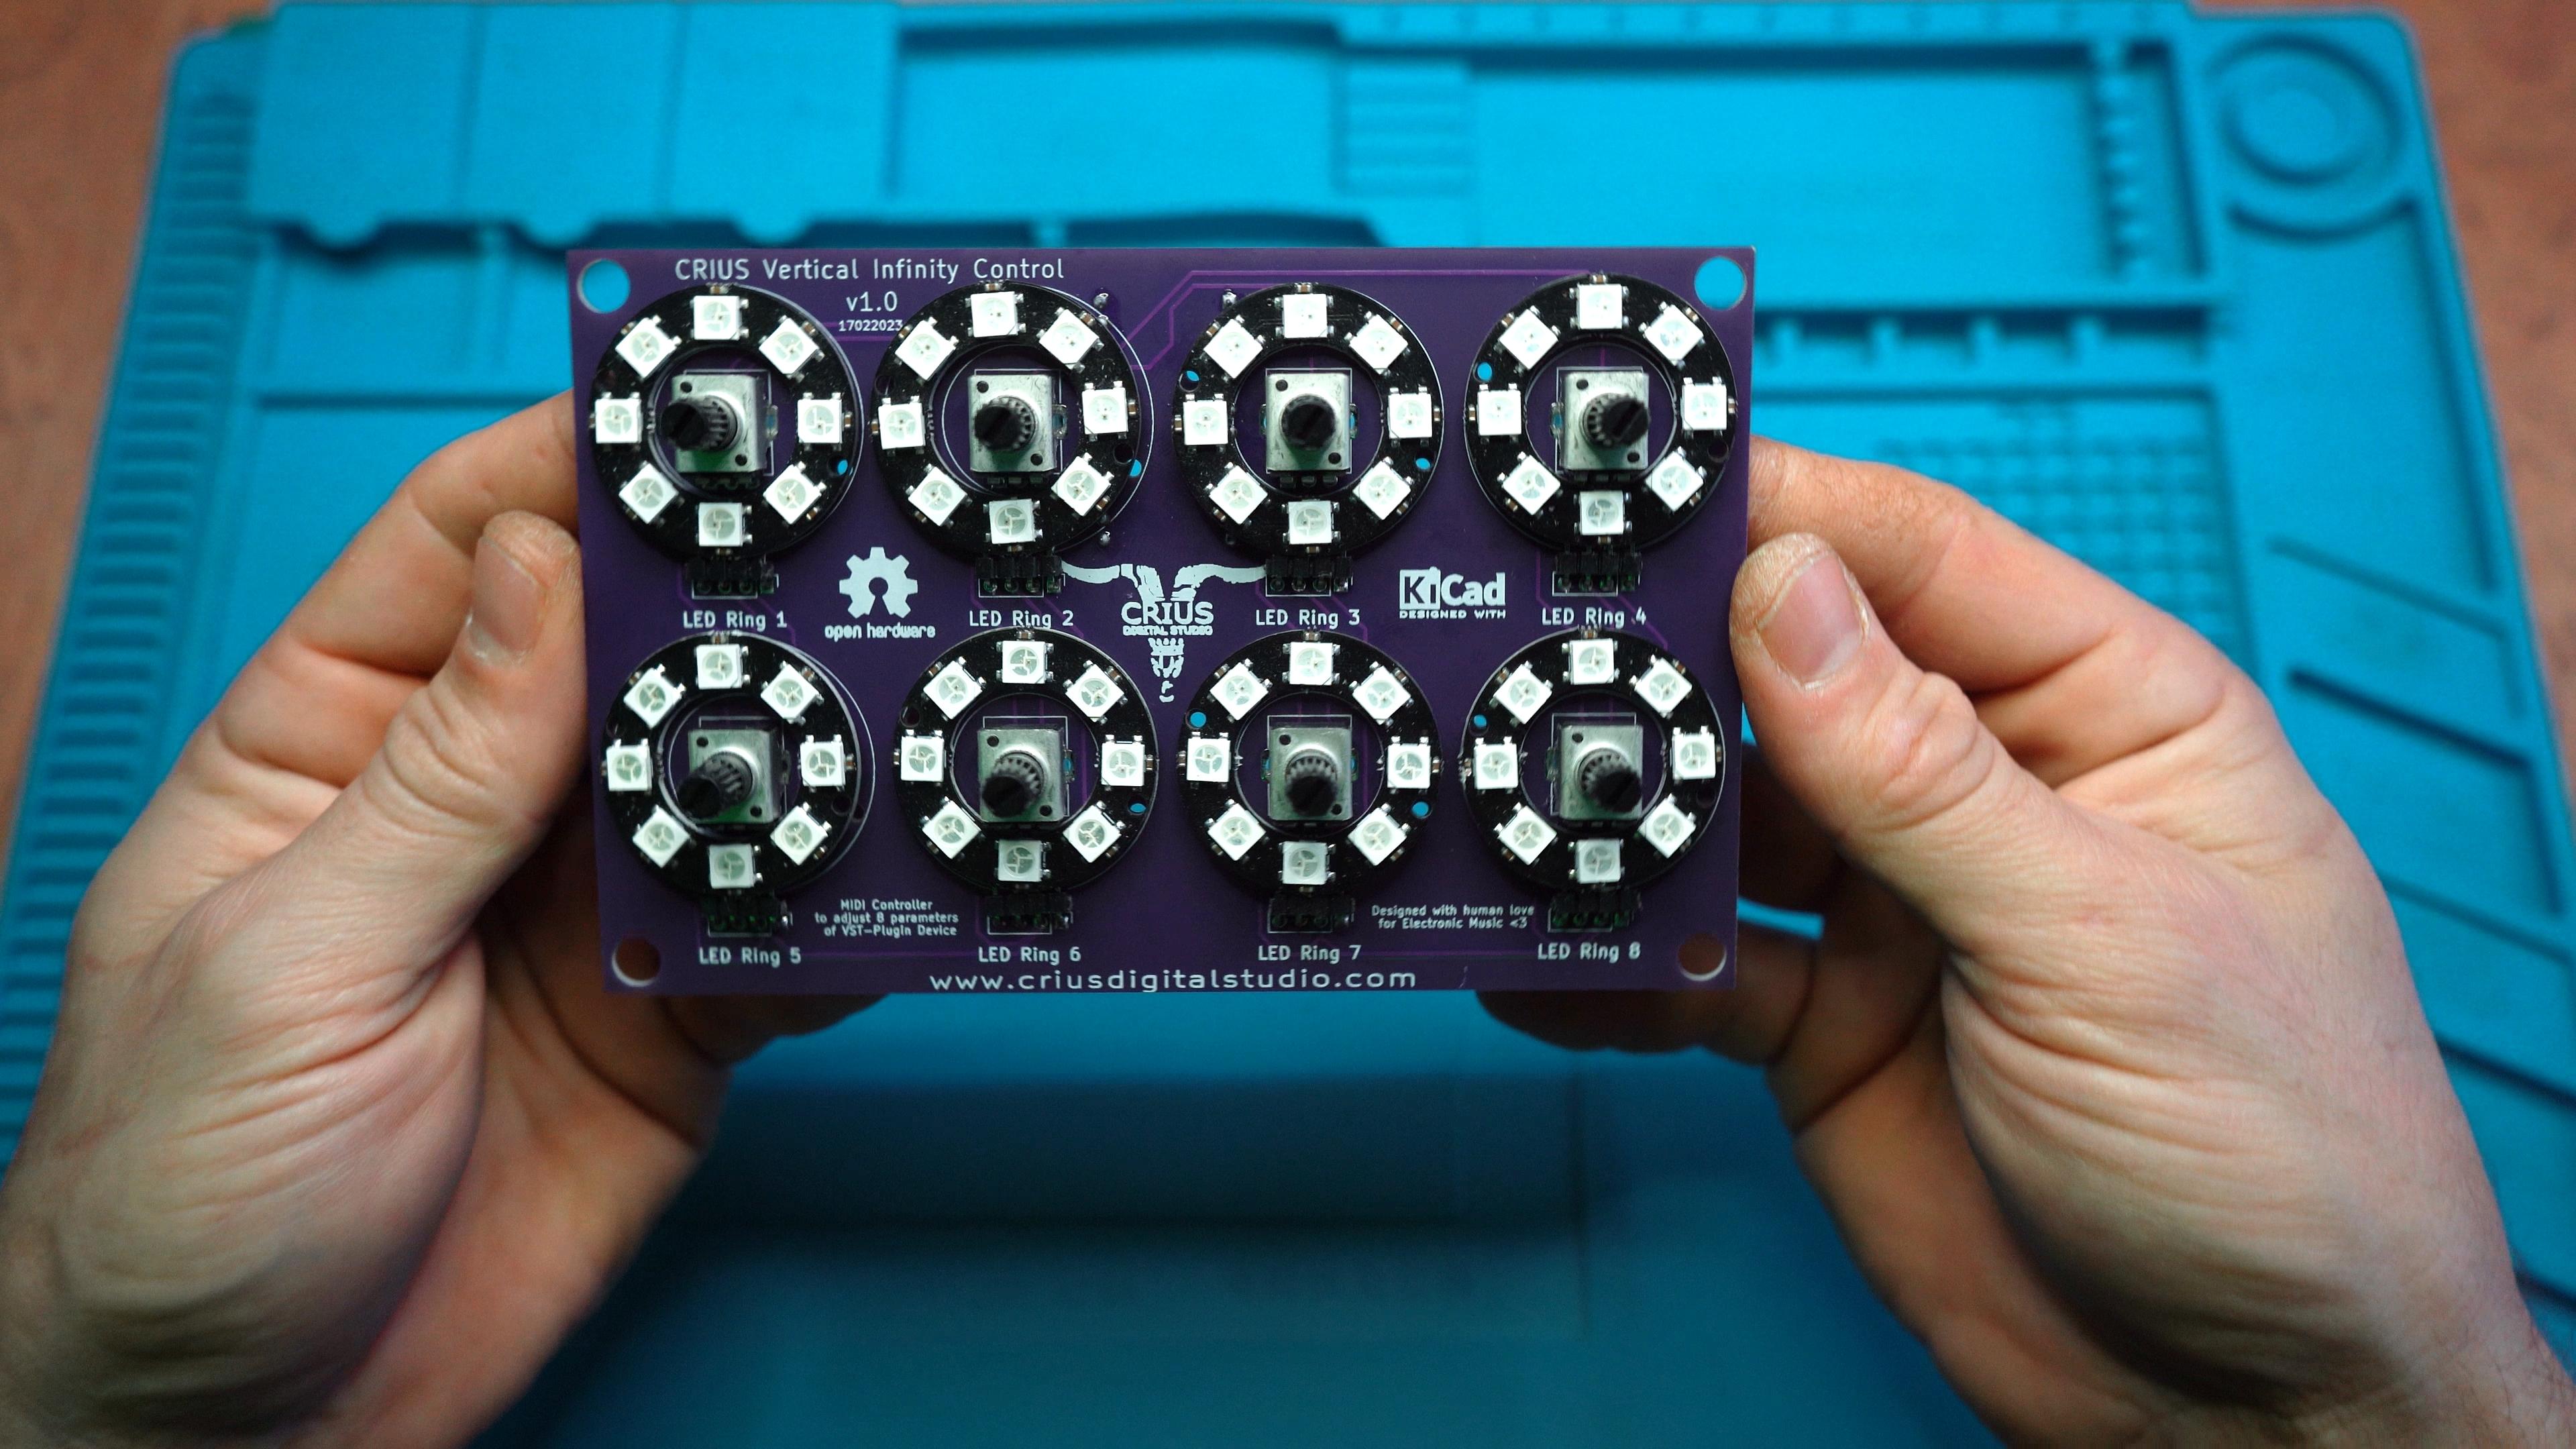
I will solder the WS2812B RGB Led Rings to the PCB board.
I will use some tape to stabilize the Led Rings so that I can turn the PCB upside down and solder the pins on the back.
Place the Arduino
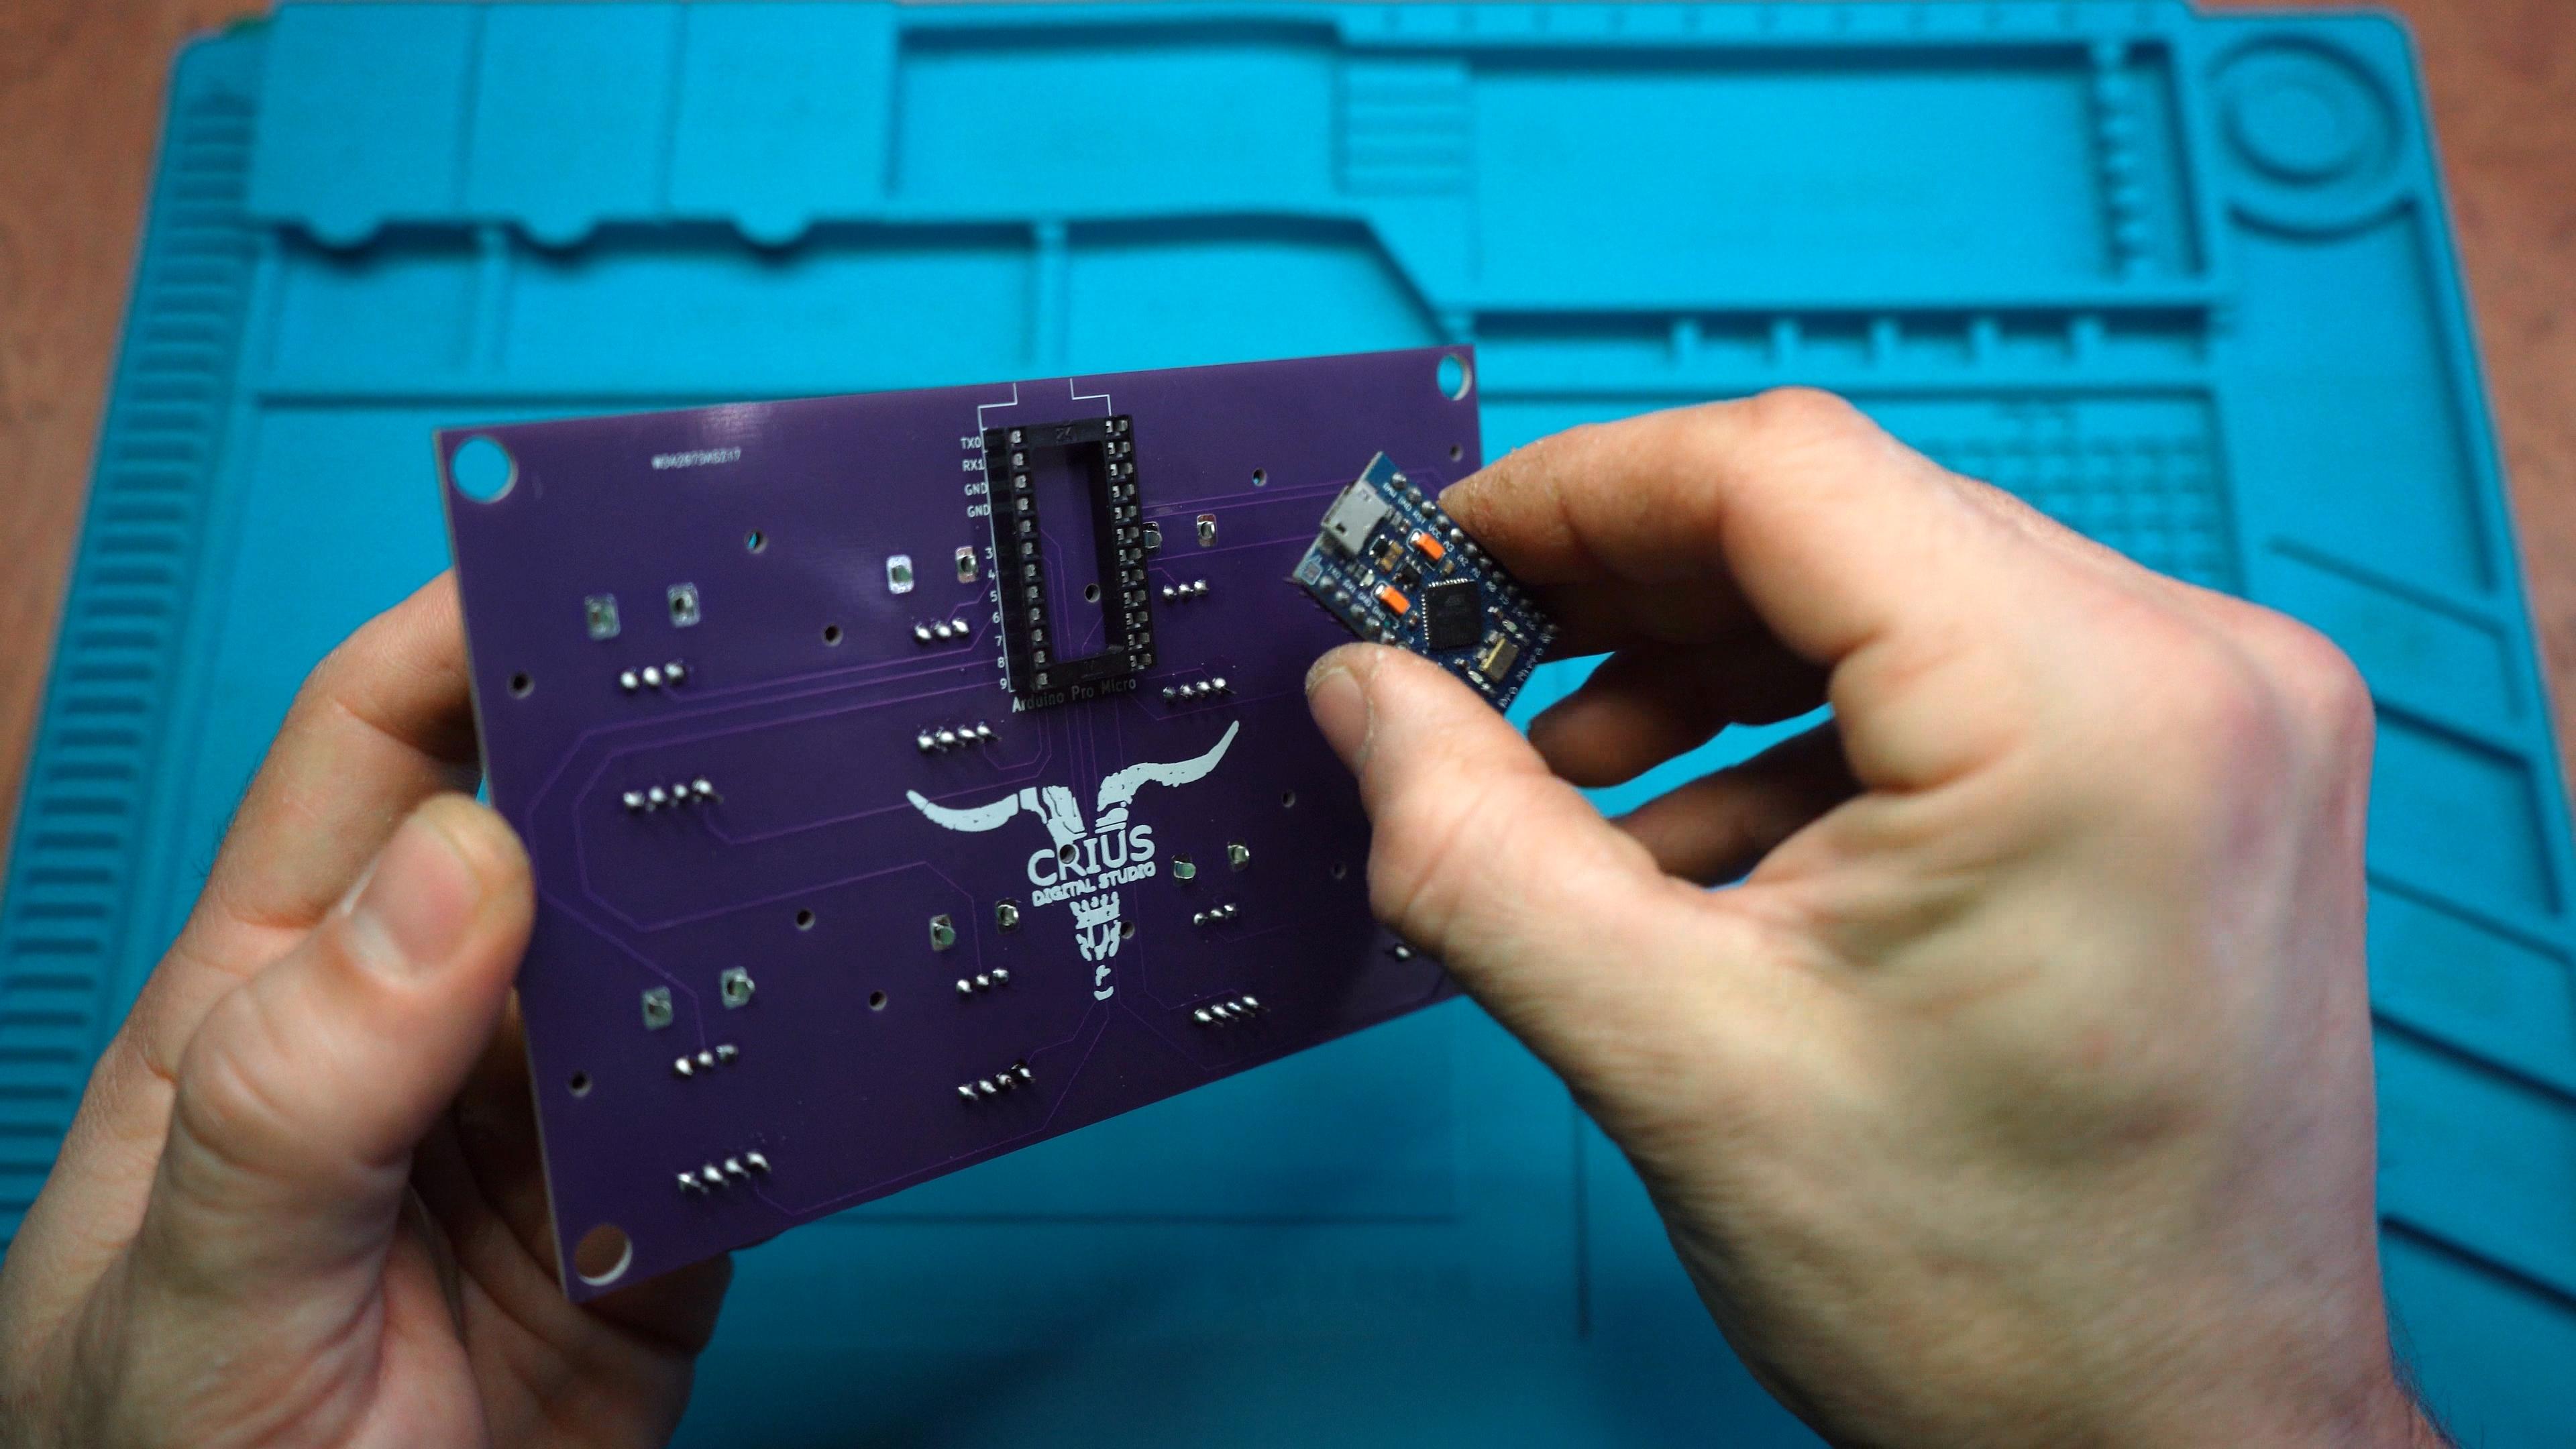
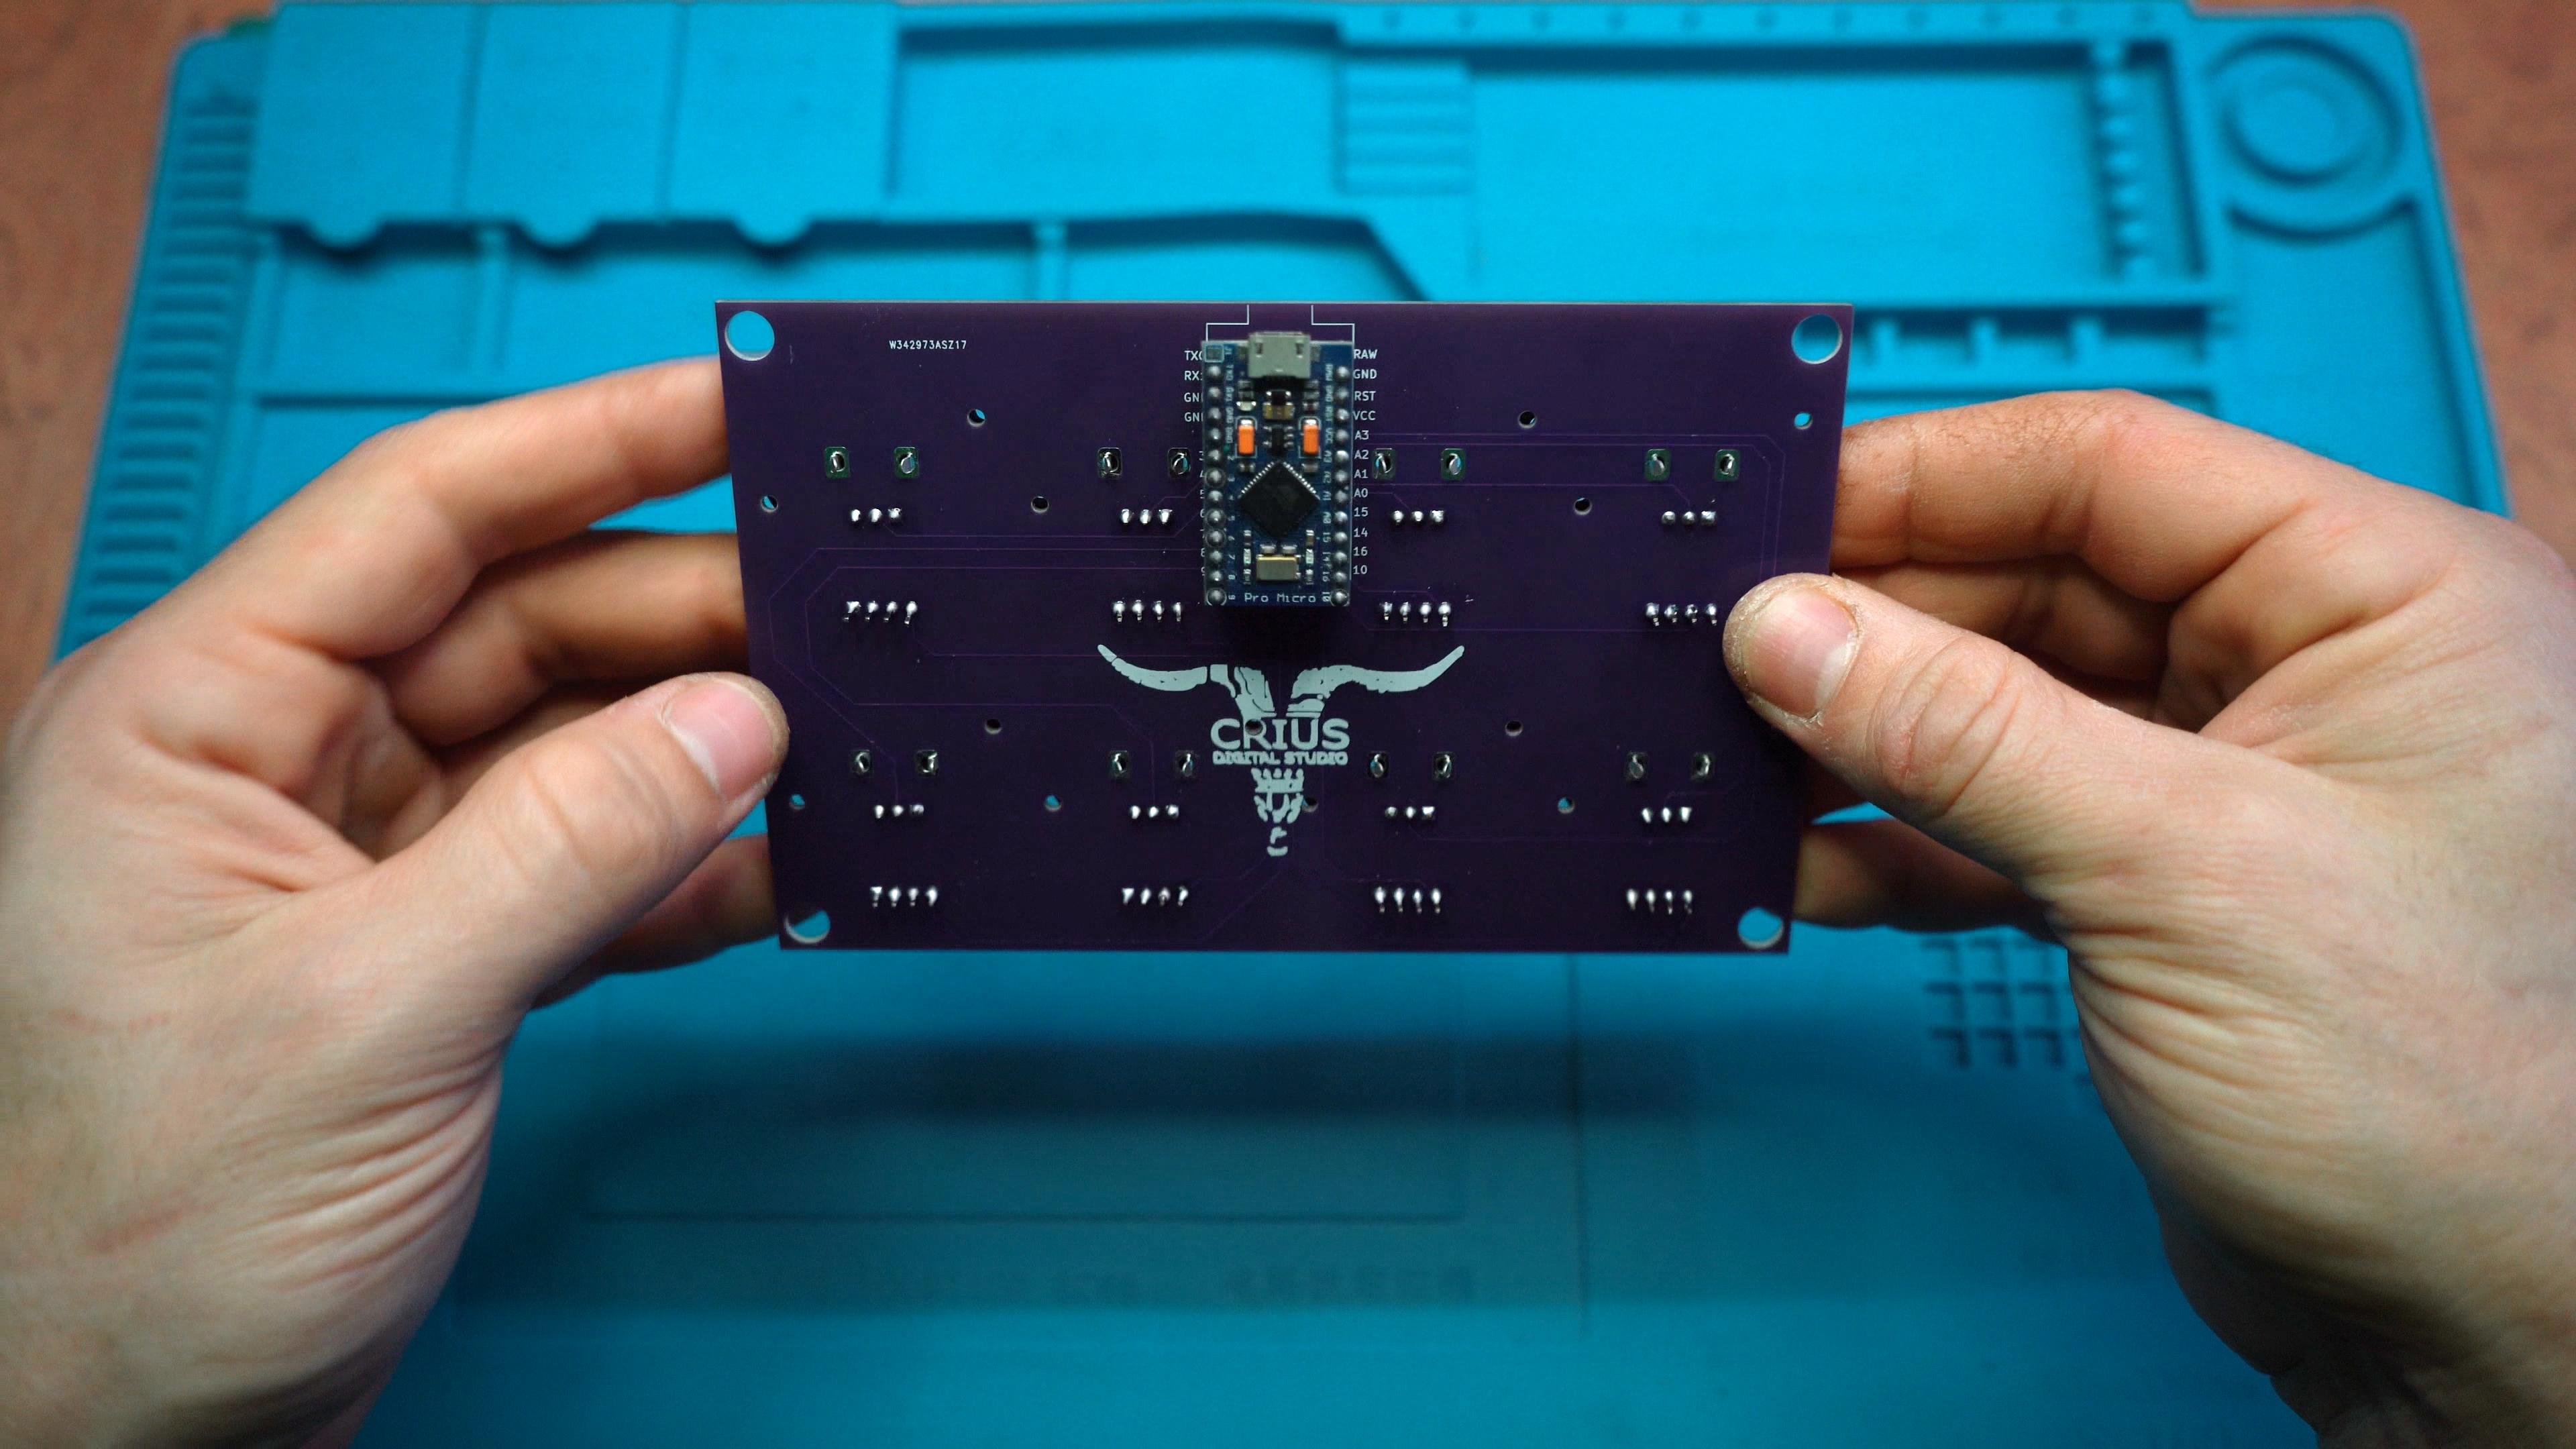
Place the Arduino Pro Micro on the socket as shown above if you didn't solder it directly on the PC at Step 2.
Upload the Code to the Arduino
- To upload the code to Arduino we need to download the Arduino IDE from the Arduino site: https://www.arduino.cc/en/software
- After you install the Arduino IDE, open the Crius_Vertical_Infinity_Control_v1.0.ino file so we can Upload the code to the Arduino
- We need to download the Control Surface library from Github

and install it to the Arduino IDE from the menu Sketch -> Include Library -> Add .Zip Library

4. Then we have to select Board from the menu Tools -> Board -> Arduino Leonardo

5. and finally the Port from the menu Tools -> Port -> the port we have connected the Arduino
Now we can click Upload and upload the code.
Order the PCB
 PCB SIDE.jpg)
 PCB FRONT.jpg)
 PCB BACK.jpg)
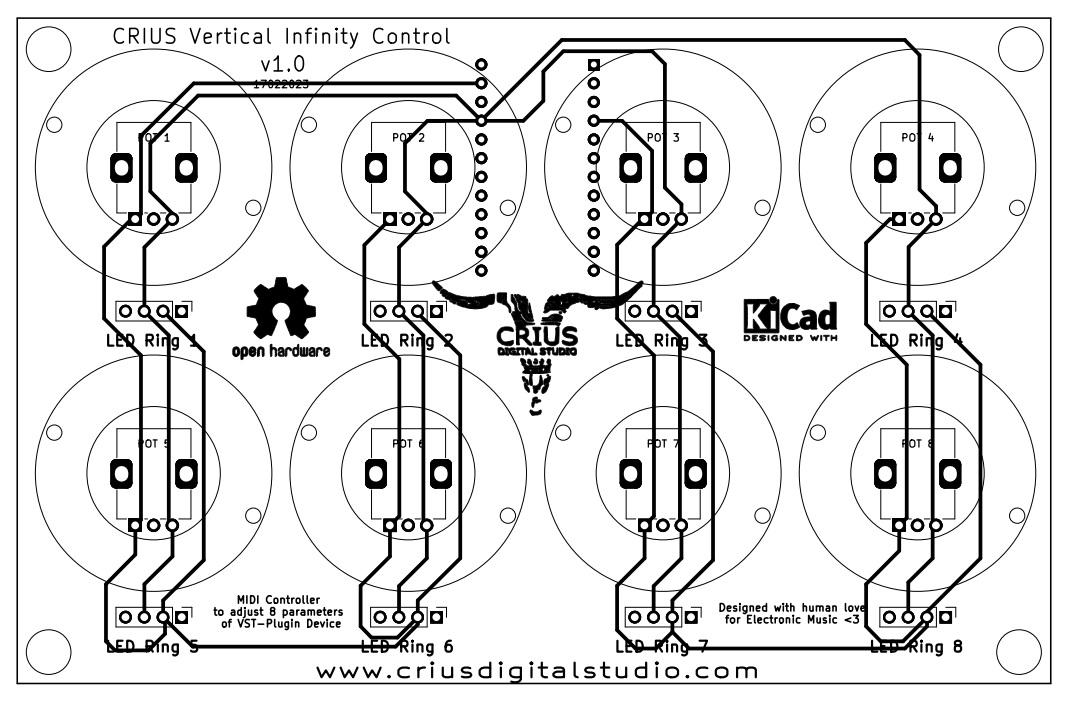
Here you see the PCB design from Kicad
For the PCB board pcb manufacturing process I chose PCBWay which is sure to find quality and economical boards with the features and color I want.
You can order the Crius Vertical Infinity v1.0 PCB at the following link:
www.pcbway.com
To order the PCB from PCBWay you will need the Gerber files
3D Print the Case
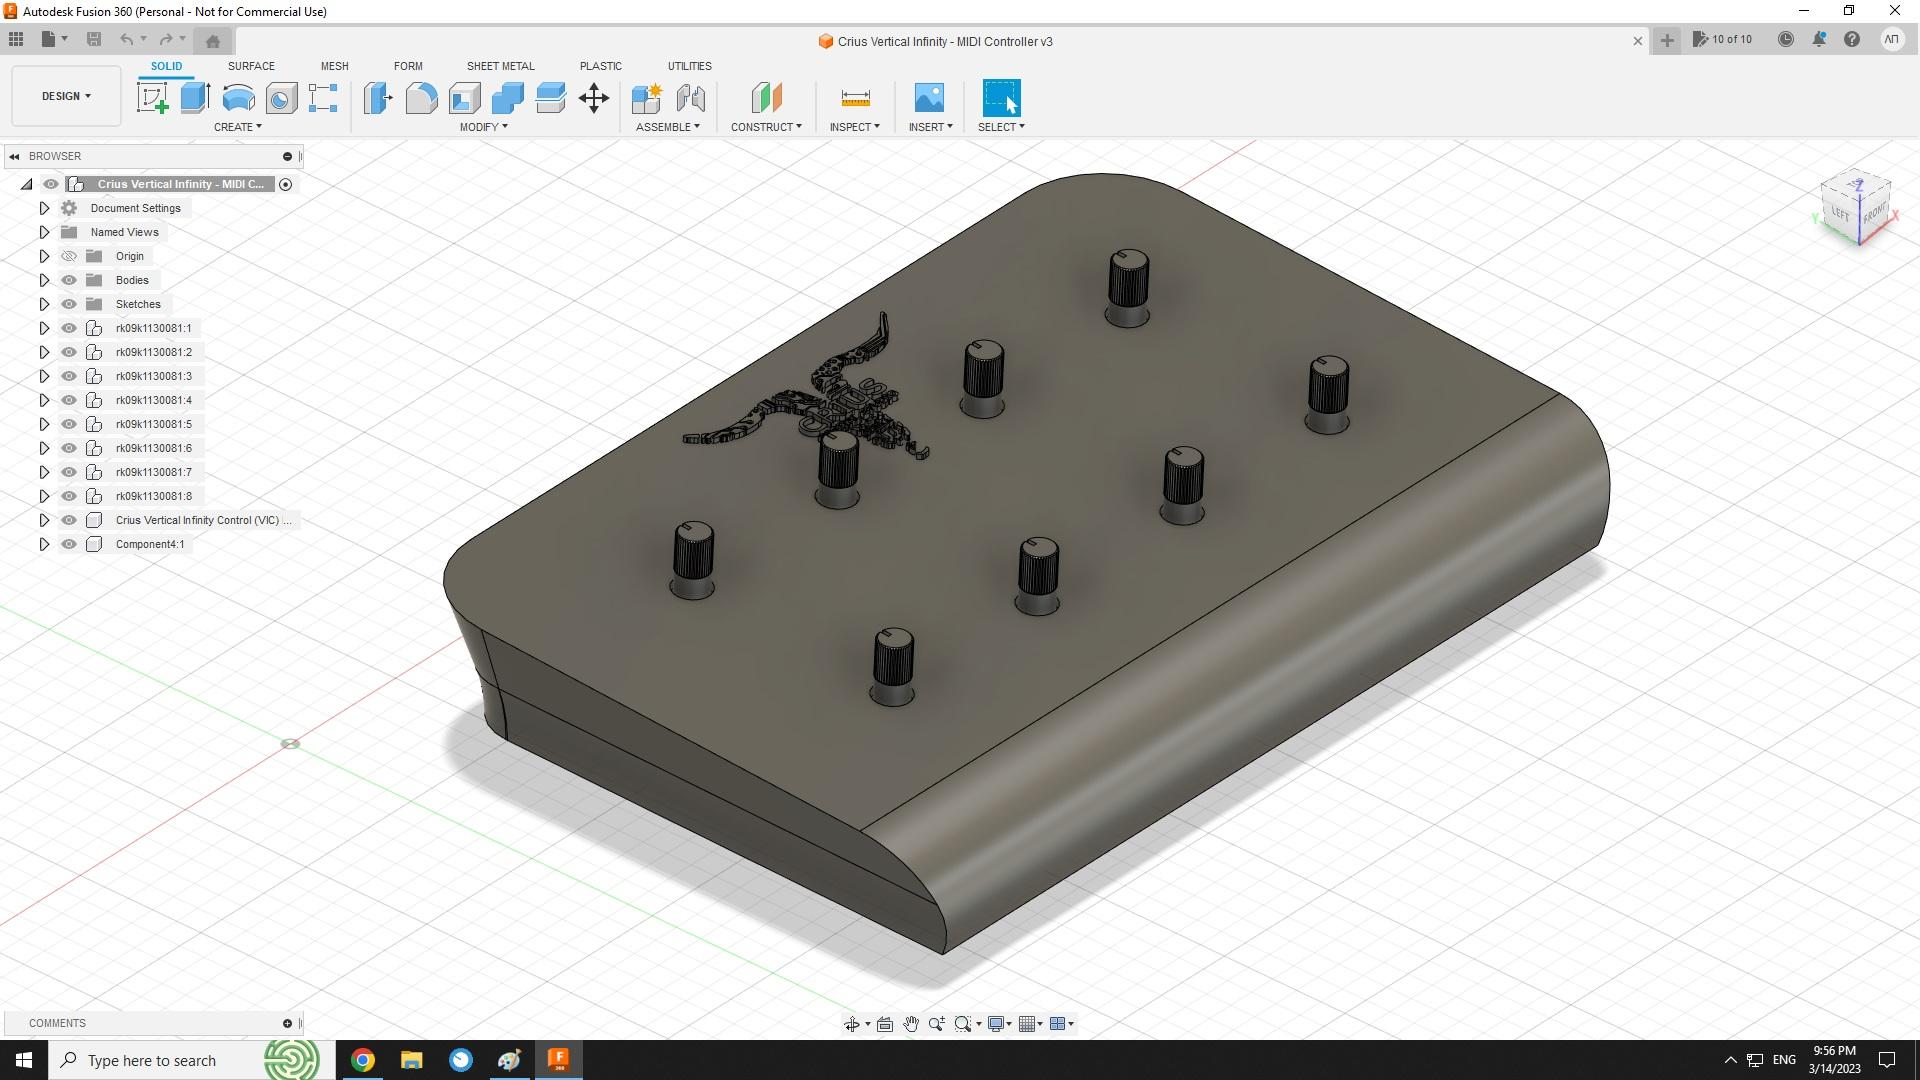

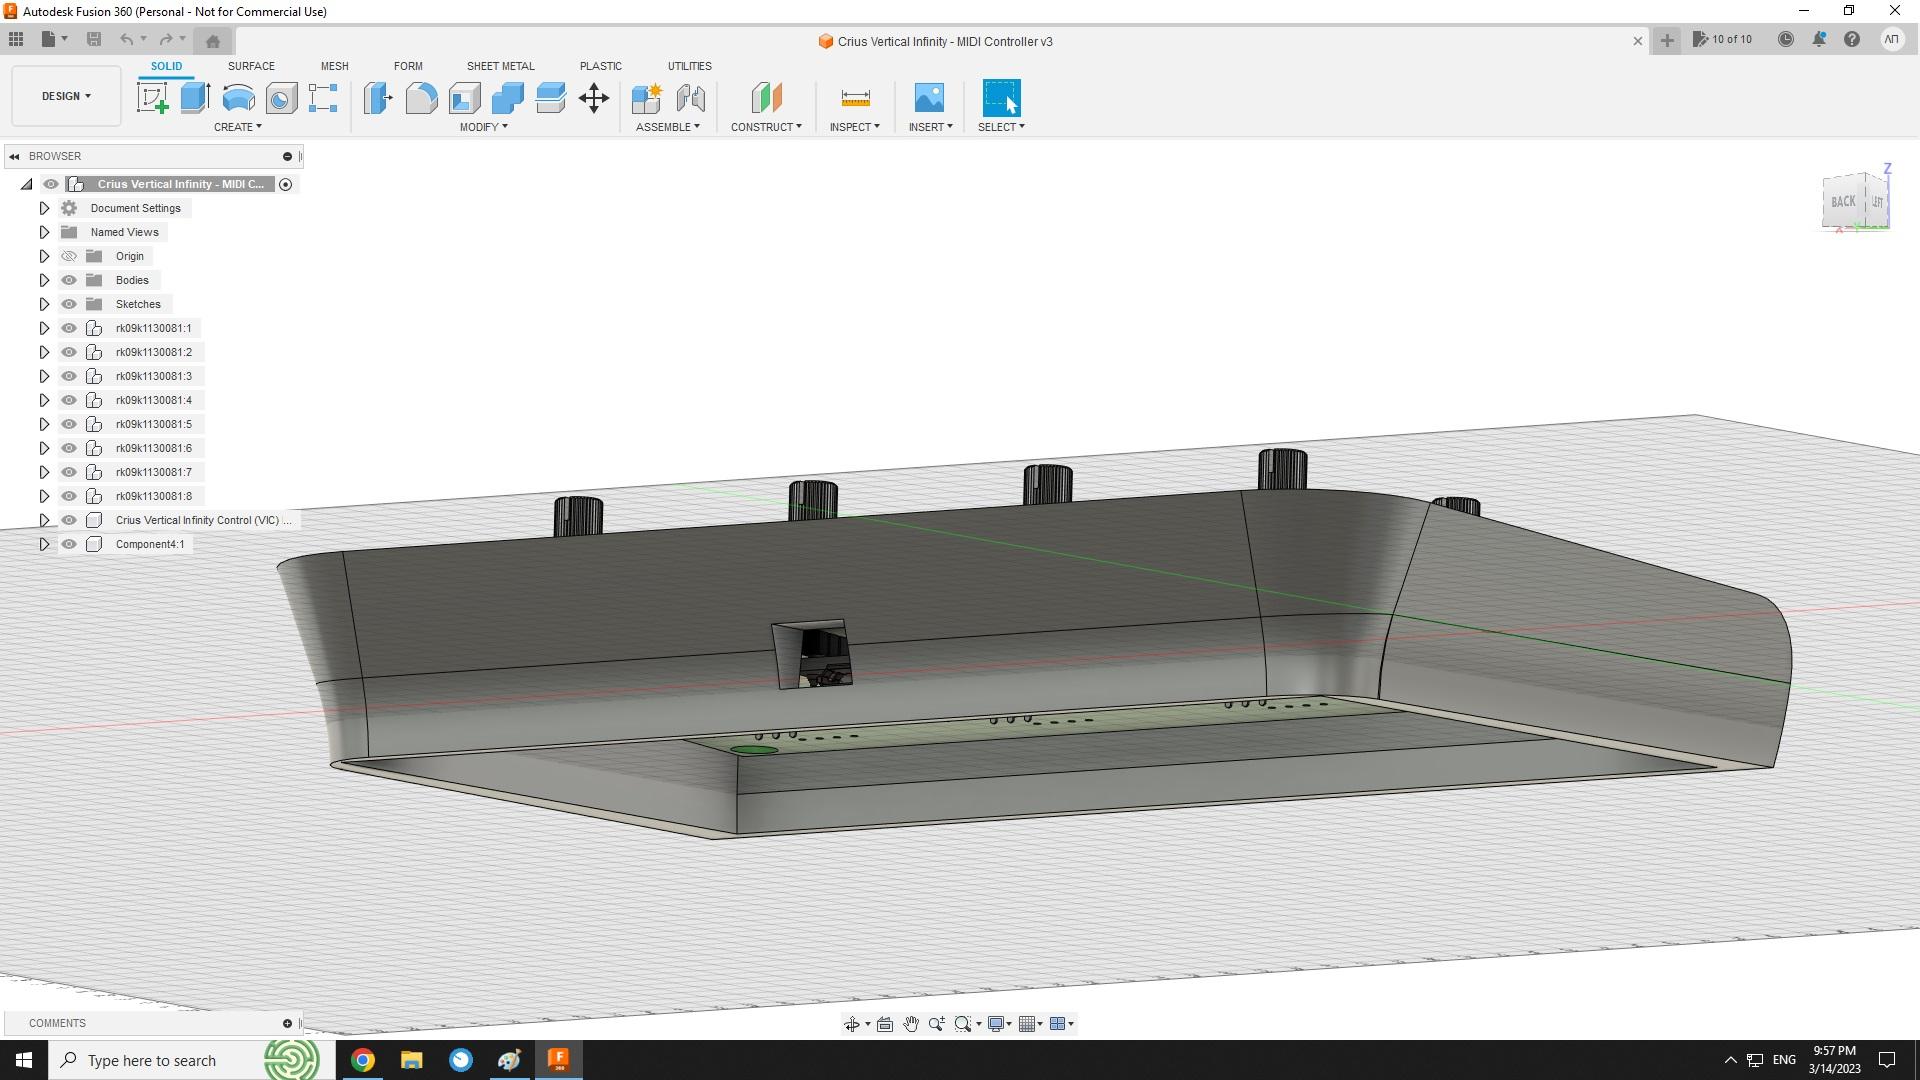
I used Autodesk Fusion 360 to design the case because its free for personal use , easy to use and incudes some awsome features like to import a 3D PCB Design from KiCad in our case , so I can build the case around the PCB which make the whole construction feel more durable and professional.
Here you will find the design of the 3D Printed case
ABLETON Setup

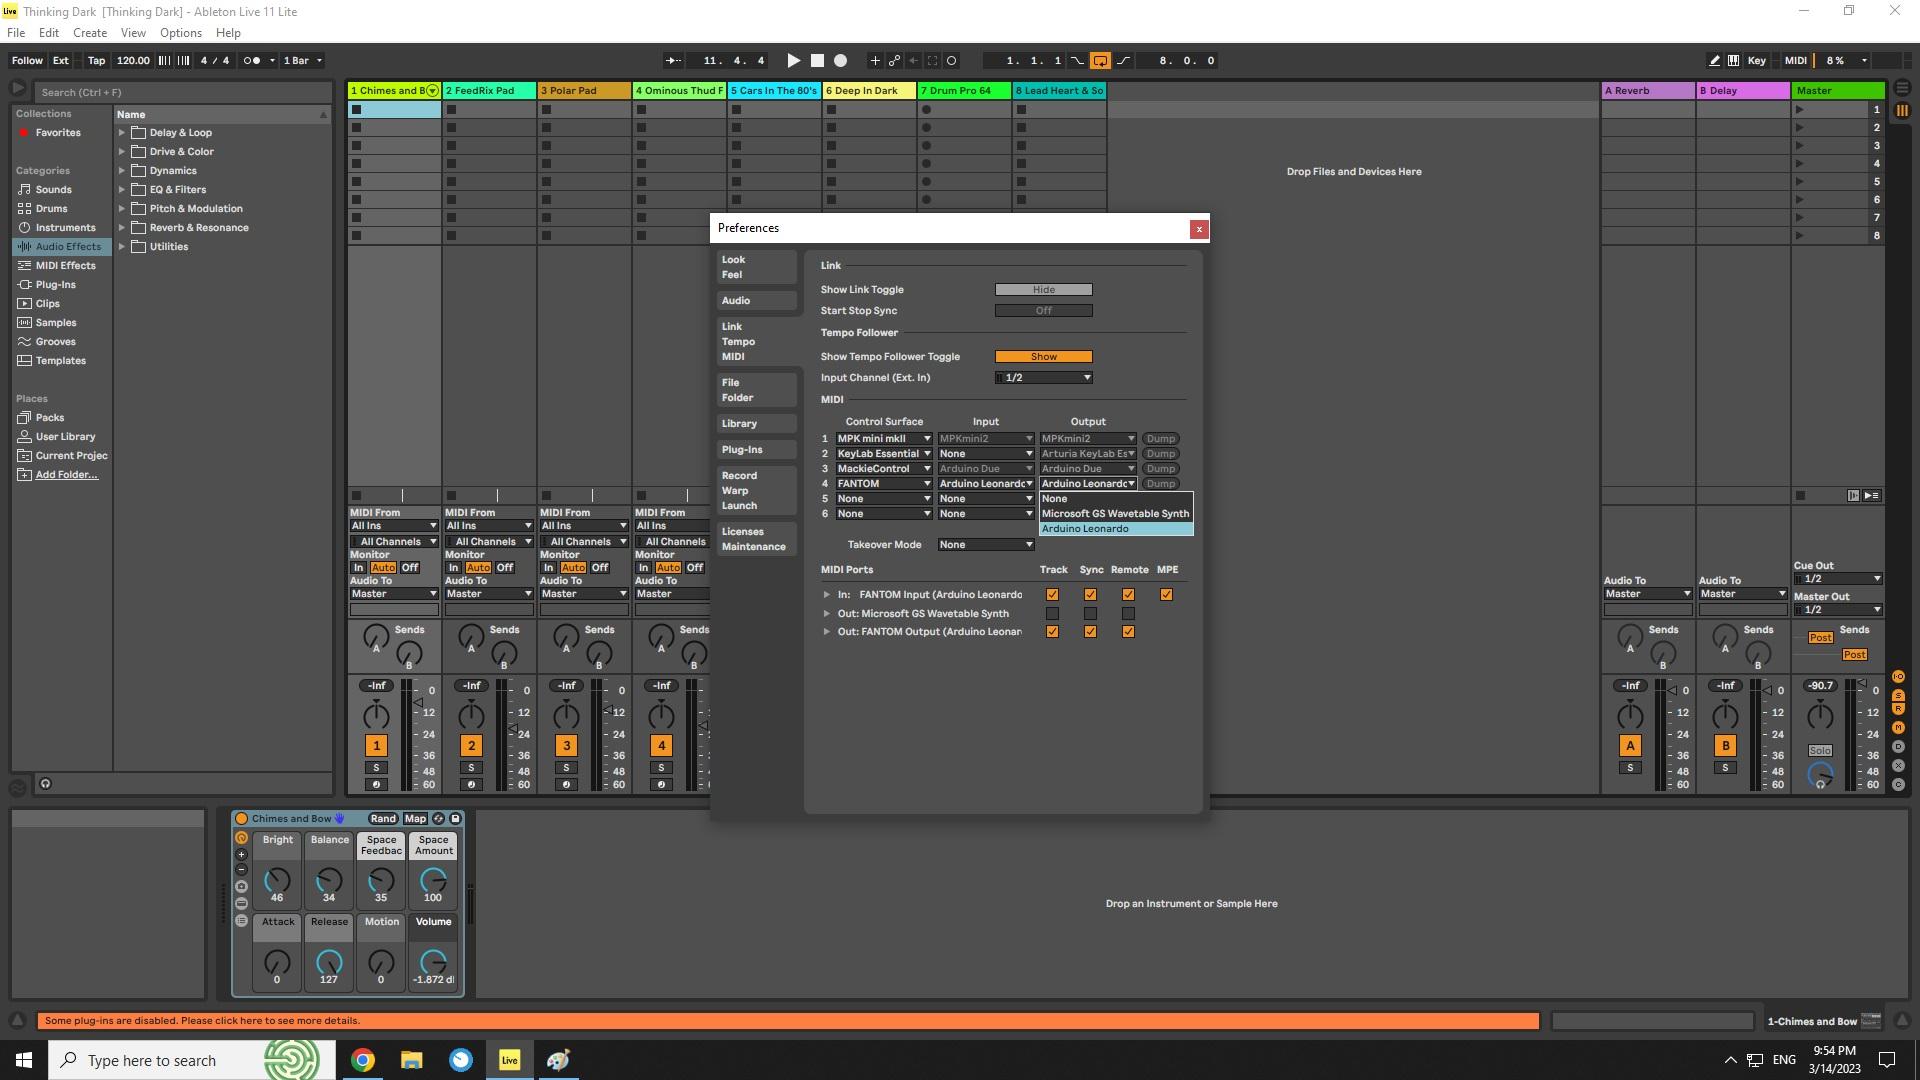
Here the only thing we need to do is to connect the Crius Vertical Infinity Control with our computer , open the Preferences menu and select from the MIDI tab :
- Conrol Surface - Fantom
- Input - Arduino Leonardo
- Output - Arduino Leonardo
We are READY to go!
END
I hope you enjoyed the proccess and made one for your self!
You can find everything you need for this project INCLUDING INSTRUCTIONS IN ENGLISH to my website : www.criusdigitalstudio.com
You can find my projects and support me at the following social media and websites:
1.Crius Digital Studio Youtube Channel