Creating Scotch Tape Photograph Using Photoshop
by Dinesh Kodai in Circuits > Cameras
4251 Views, 7 Favorites, 0 Comments
Creating Scotch Tape Photograph Using Photoshop

Creating a scotch tape photograph, using Photoshop with any picture desired ..
Scotch tape brushes are easily available on the net , but using this tutorial you can make your own ..
enjoy this demo ..
Step 1

First of all create a new document sized 600 x 400 pixels. Select some appropriate color, for example #7ca213 and fill your canvas with it.
Step 2
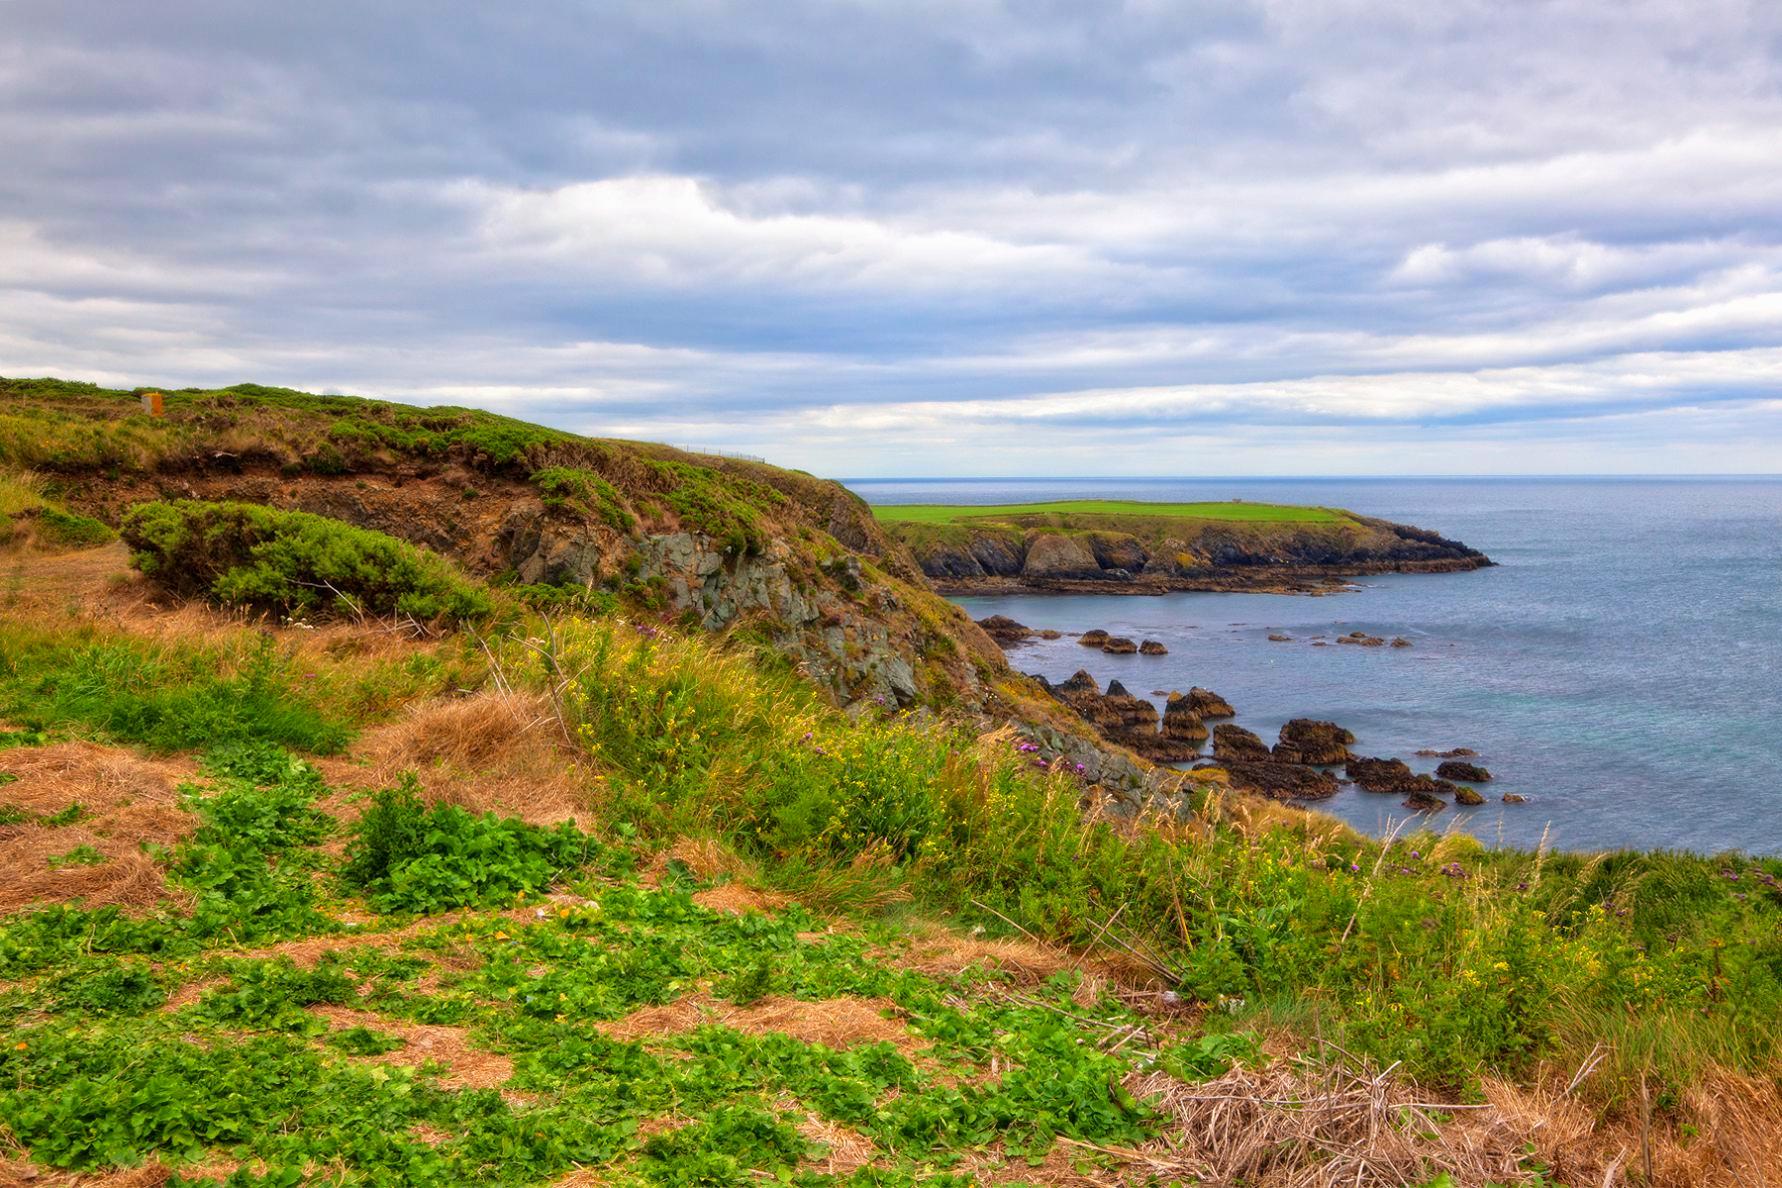
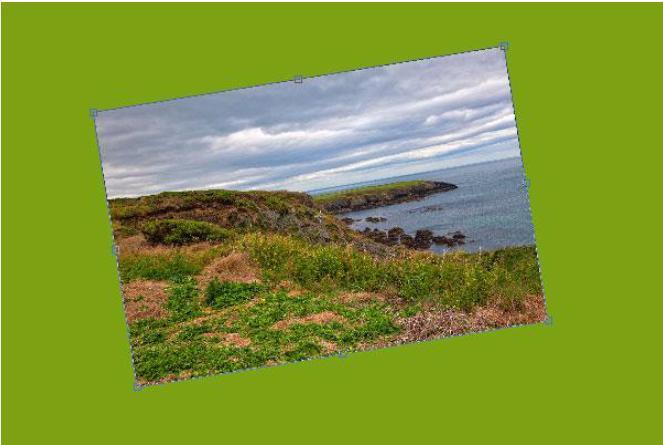
Open a photo and copy it to your canvas. After that use Ctrl+T to reduce it and then rotate it a little bit.
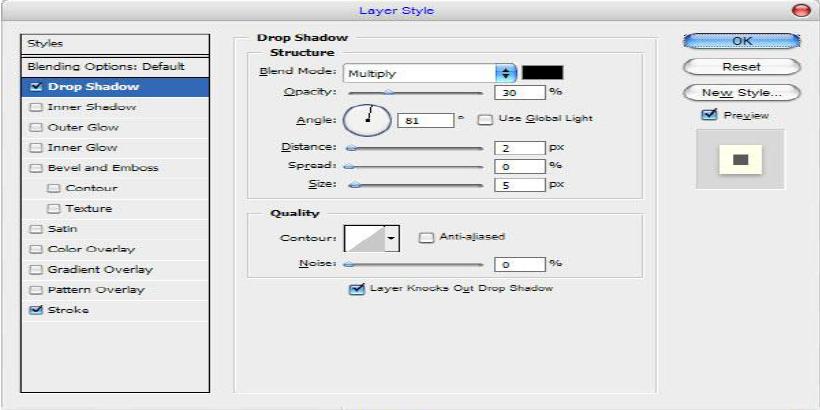
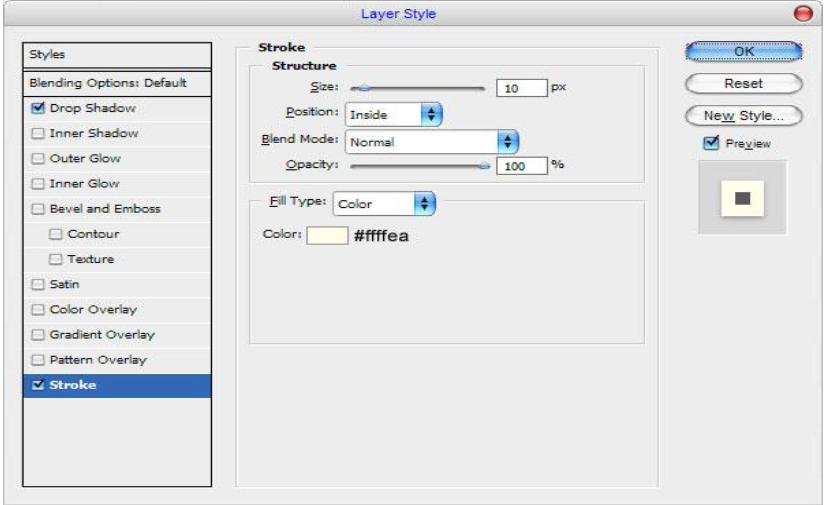
Apply Layer > Layer Style > Blending Options to this layer.
Step 3

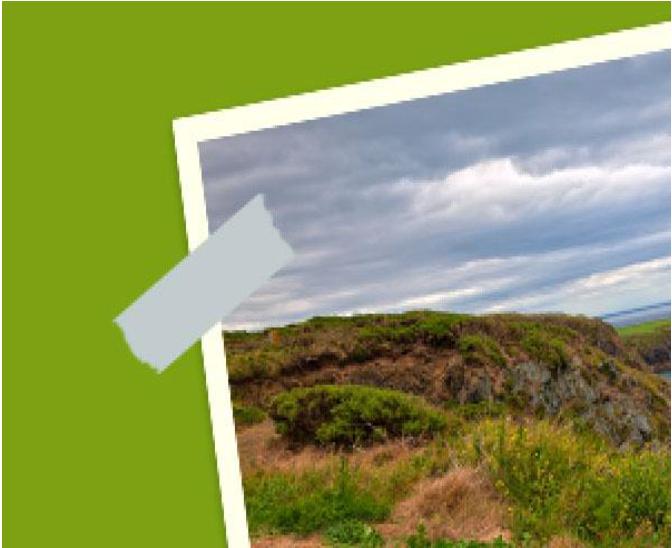


Now we are going to create the Scotch tape. Use the Polygonal Lasso Tool to make a selection which you can see on the picture below. Create a new layer and fill the selected area with #c1cccd.
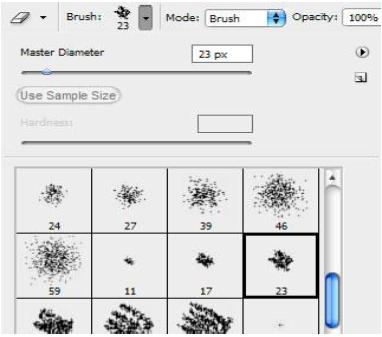
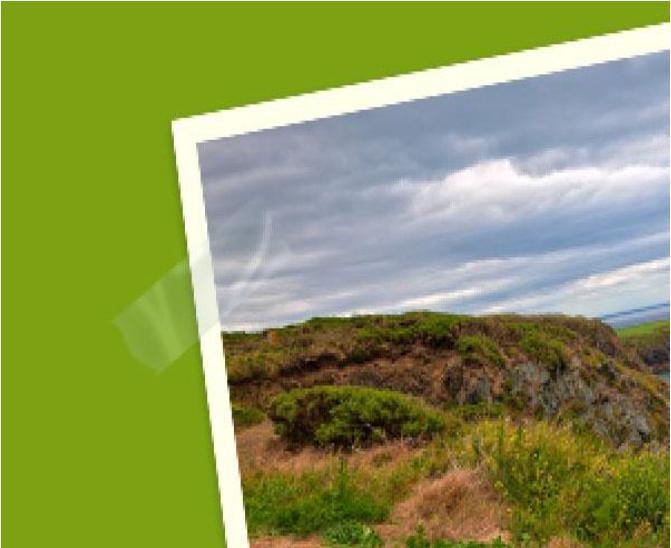
Remove the selection with Ctrl+D. Now, we need to process the Scotch tape borders. Start by selecting the Eraser Tool and use one of the standard Photoshop brushes.
Gently erase the edges to achieve a similar result to that shown onto the third image
Set the opacity to 22% for the current layer..
Time to add some defects to make our Scotch tape look realistic. Use the Dodge Tool (Brush: 7px, Range: Highlights, Exposure: 50%) to add a few light lines.
Looks better now, doesn’t it? Then use the Burn Tool (Brush: 30px, Range: Shadows, Exposure: 100%) to darken some areas.
Step 4
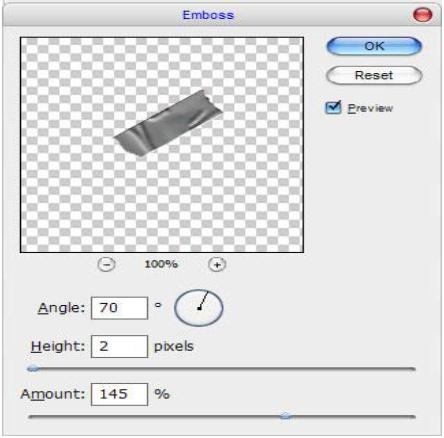

To finish off creating this Scotch tape effect, duplicate the layer using Ctrl+J and change layer mode to Overlay for the copied layer. Don’t be surprised that the layer becomes a bit brighter, It is normal.
Then apply Filter > Stylize > Emboss with similar settings to these:
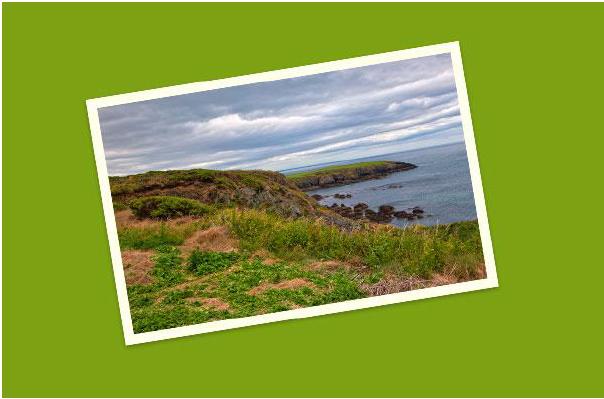
Final Image
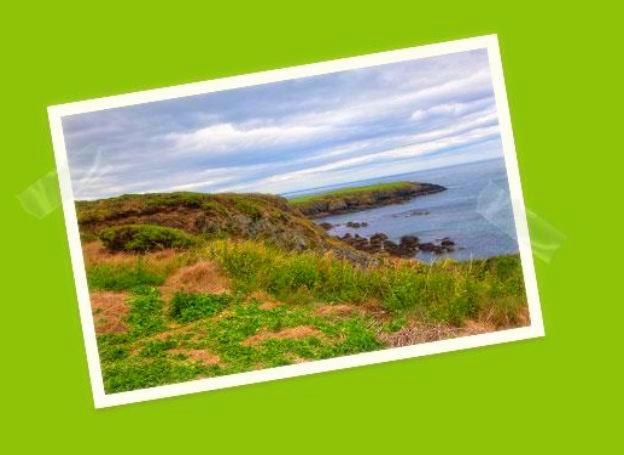
That is it – your Scotch tape is complete. You can add more tape if you want. Feel free to experiment to get the best results! Good luck!