Creating and Cutting Designs for the Carvey
by jocomakerspace in Workshop > CNC
5059 Views, 43 Favorites, 0 Comments
Creating and Cutting Designs for the Carvey
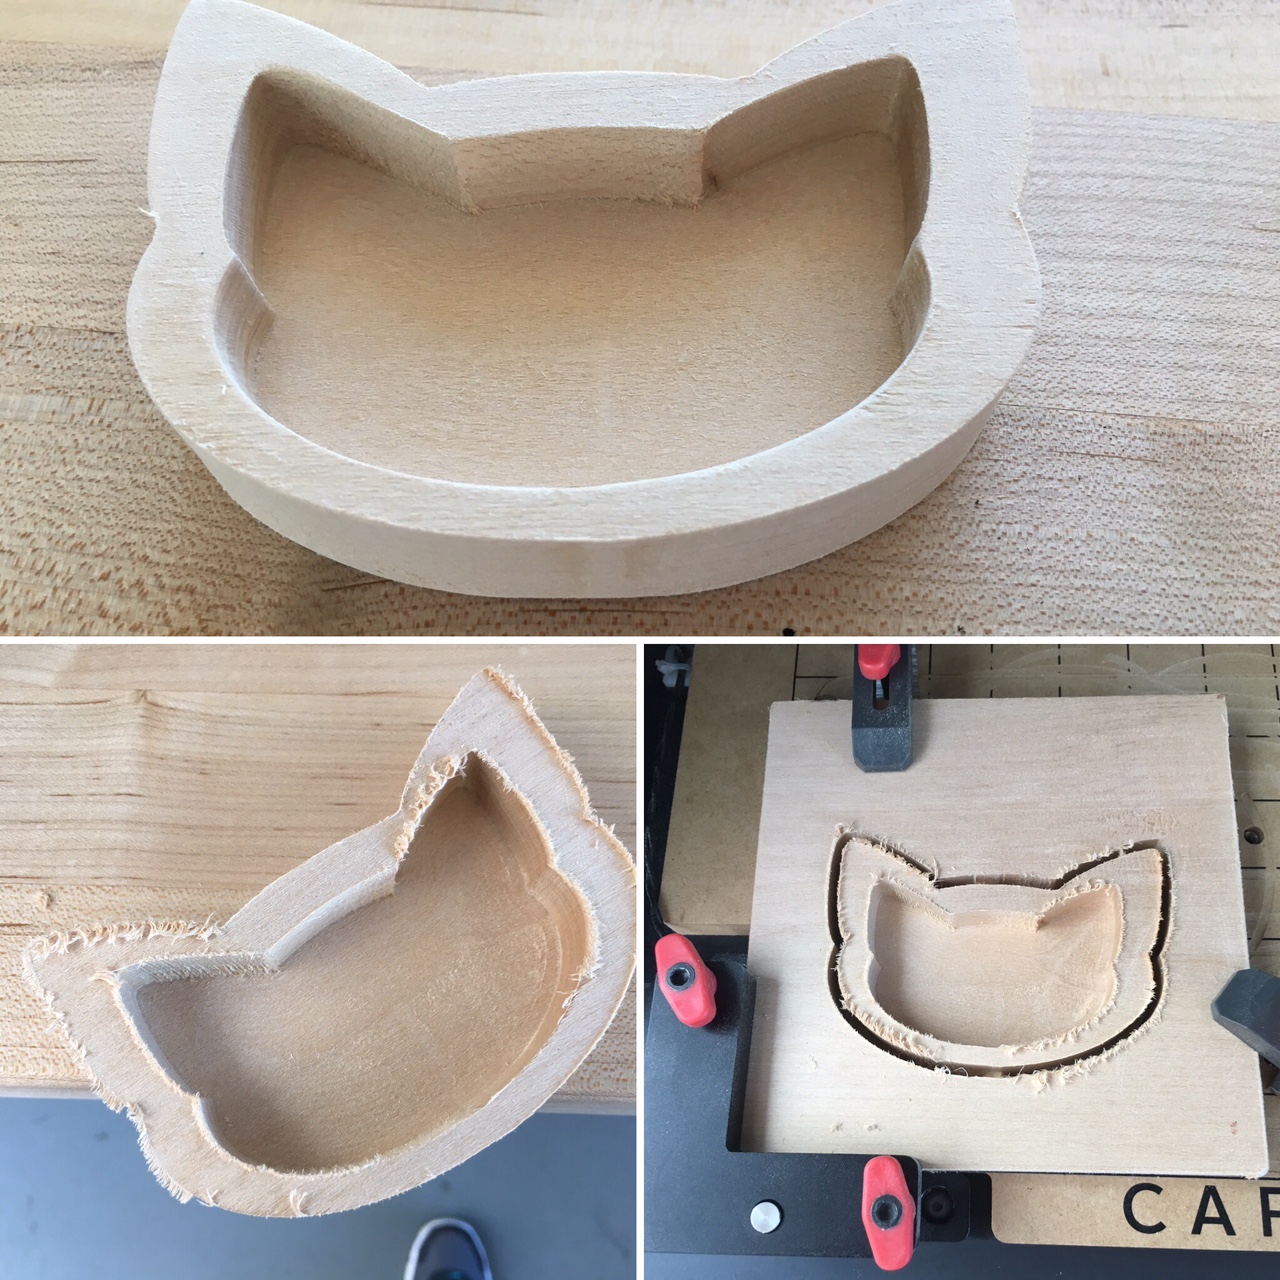
Want to cut something on the Carvey, but aren't excited about the preloaded designs? You can make you own! I'll be using Inkscape to create my own SVG file that I will cut on the Carvey, and you can too.
The Carvey is free for anyone to reserve and use at the Johnson County
Library's MakerSpace. Bring in your materials and file, and leave with a finished piece! Materials need to be no larger than 8x11 inches.
And, as always, there is always a friendly person in the MakerSpace to help out. All you need to do is ask!
Create a Design in SVG Format
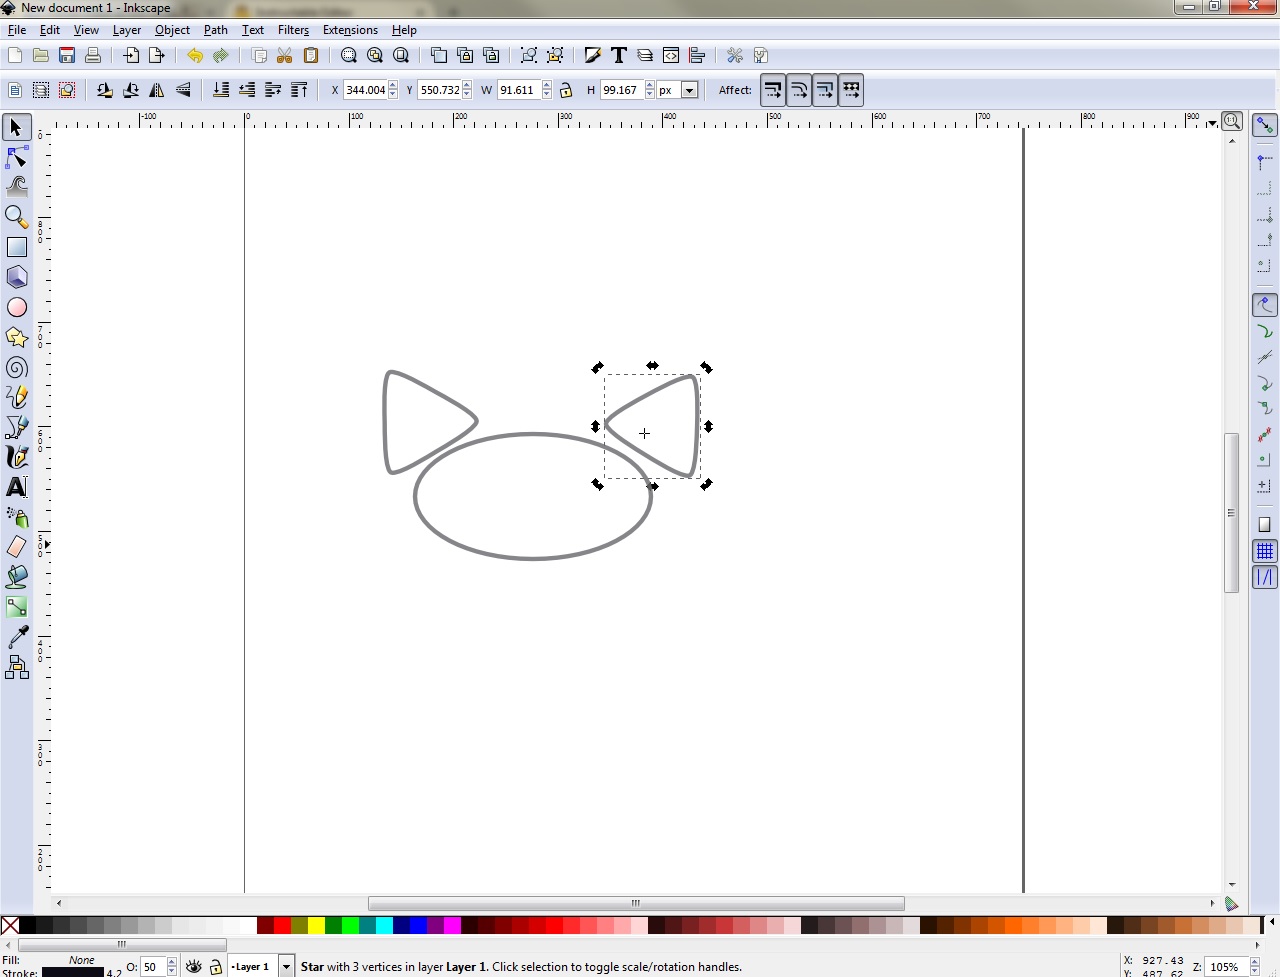
Here, I used Inkscape to create a basic cat design by using three basic shapes.
Inkscape is a graphics editing software, that you can download and use for free.You can download a copy from the Inkscape website. If you have access to a different software, you can use that too, as long as you can save your file in SVG format.
Combining Shapes to Make One Design and Saving
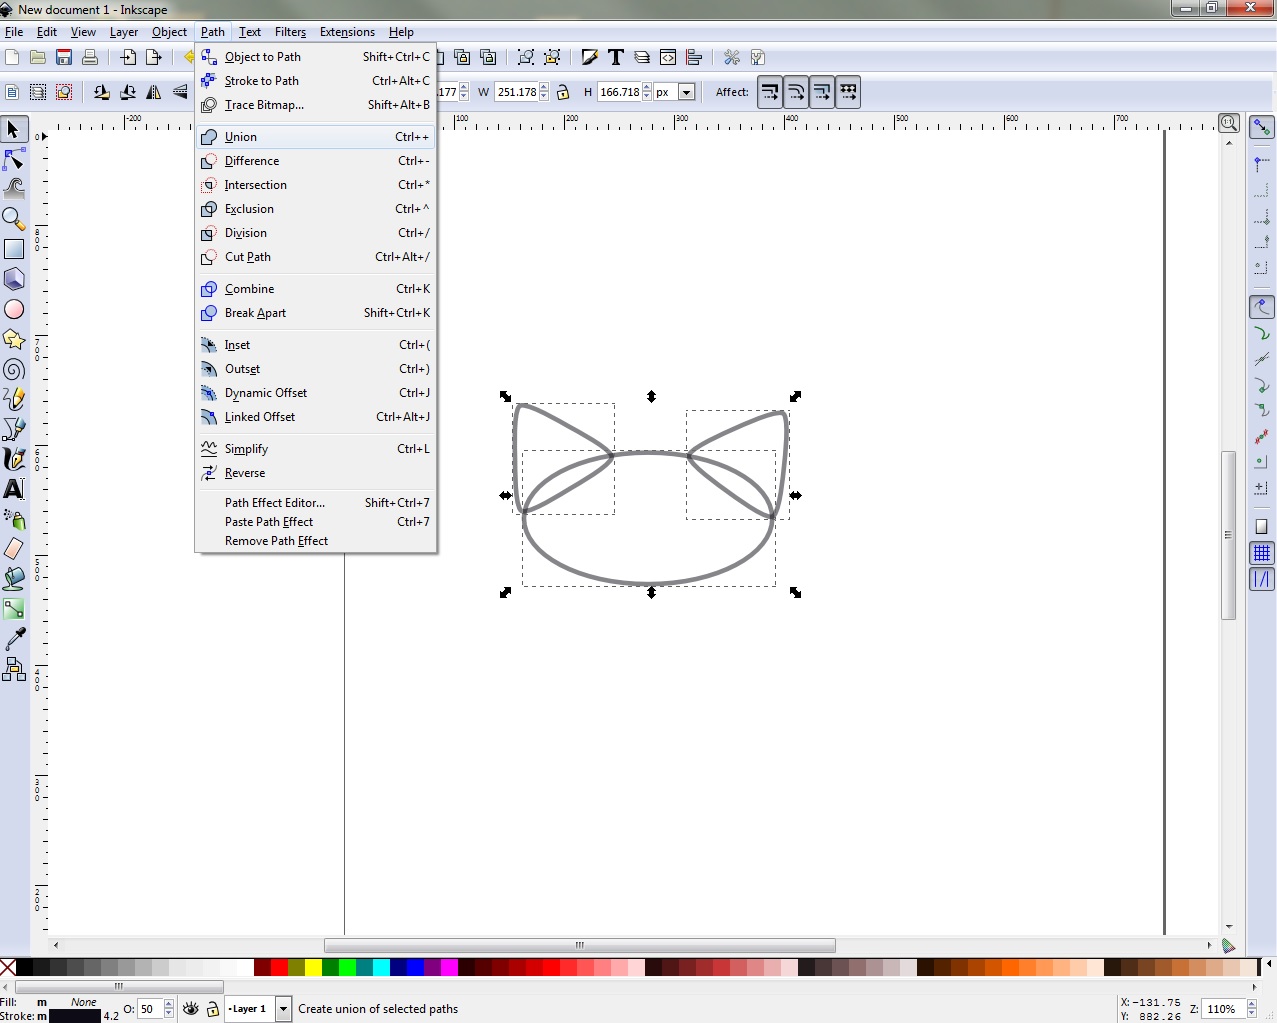
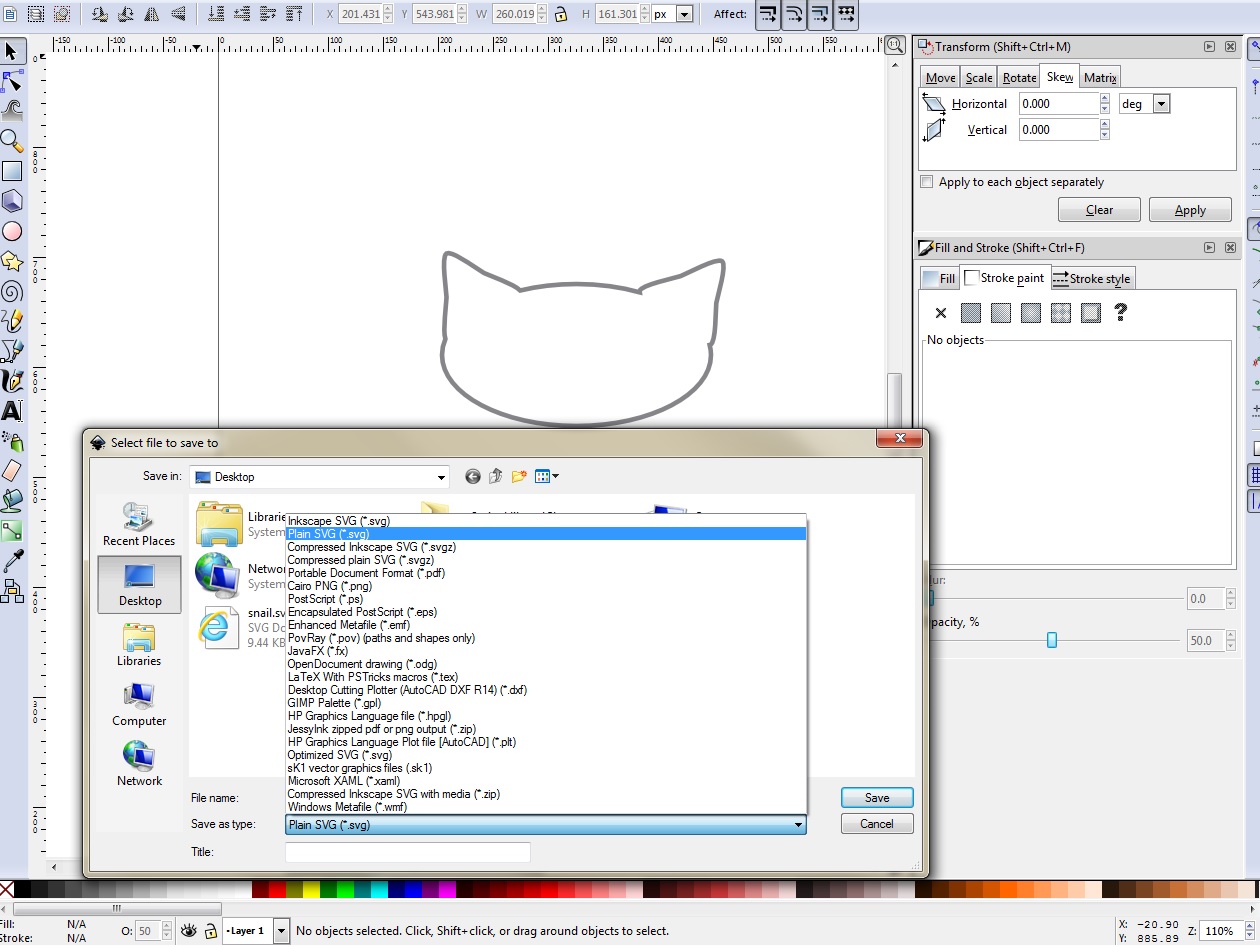
Once you have all of your shapes on screen and in place where you want them to overlap, we are going to combine them into one shape, instead of three overlapping shapes.
- First, select all of your shapes. In Inkscape, choose the "Path" menu at the top of the screen, and then choose "union" to combine the shapes. Other software may call this welding or combining.
- Once you are happy with your design, save the new shape as a SVG file. In Inkscape, you have two options - Inkscape SVG and Plain SVG. We want the Plain SVG file.
Importing Your Design Into Easel
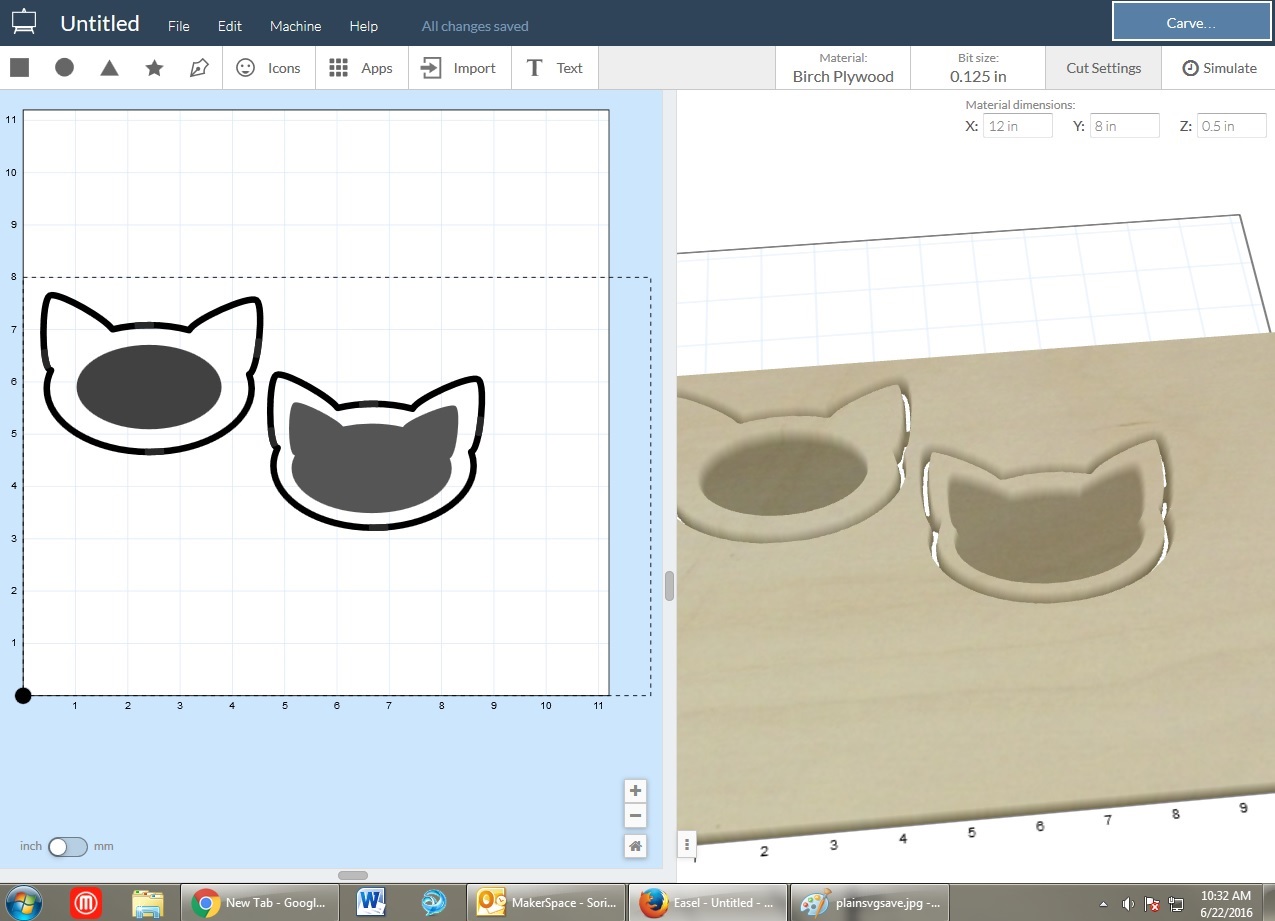
Go to the Inventables website to launch Easel. If you do not have an account with Inventables, you can create one. It's free. This will allow you to save your projects online, and pull them up later for editing or cutting.
- Once you are logged in and Easel is open, you can start a new project. Import your new SVG file.
- Here, I imported it as an "outline," for the outer perimeter of my dish. I set the cut depth to the same thickness as the material I am cutting. - You may need to adjust the depth of your cuts after you measure the thickness of your material. We have digital calipers at the library for you to use, and adjusting the cuts takes almost no time.
- For one dish, I used an oval for the shallow part of the dish, for the other, I imported the same SVG file, set it as "fill" and reduced its size to leave a border for my dish. The fills of the dish have the depth cut set less deep than the outline cut.
- Adjust the material type and bit size for the Carvey to match your material and fit your design.
- Use the "Simulate" button to see an estimate for how long it will take to carve your design.
Make sure you reserve a spot on the Carvey from the library's website to guarantee that it will be available when you visit. Now that you have a time estimate, you know how much time you will need. If it's your first visit, be sure to reserve a little extra time that you might need to measure and secure your material or ask questions.
Cutting Your Design
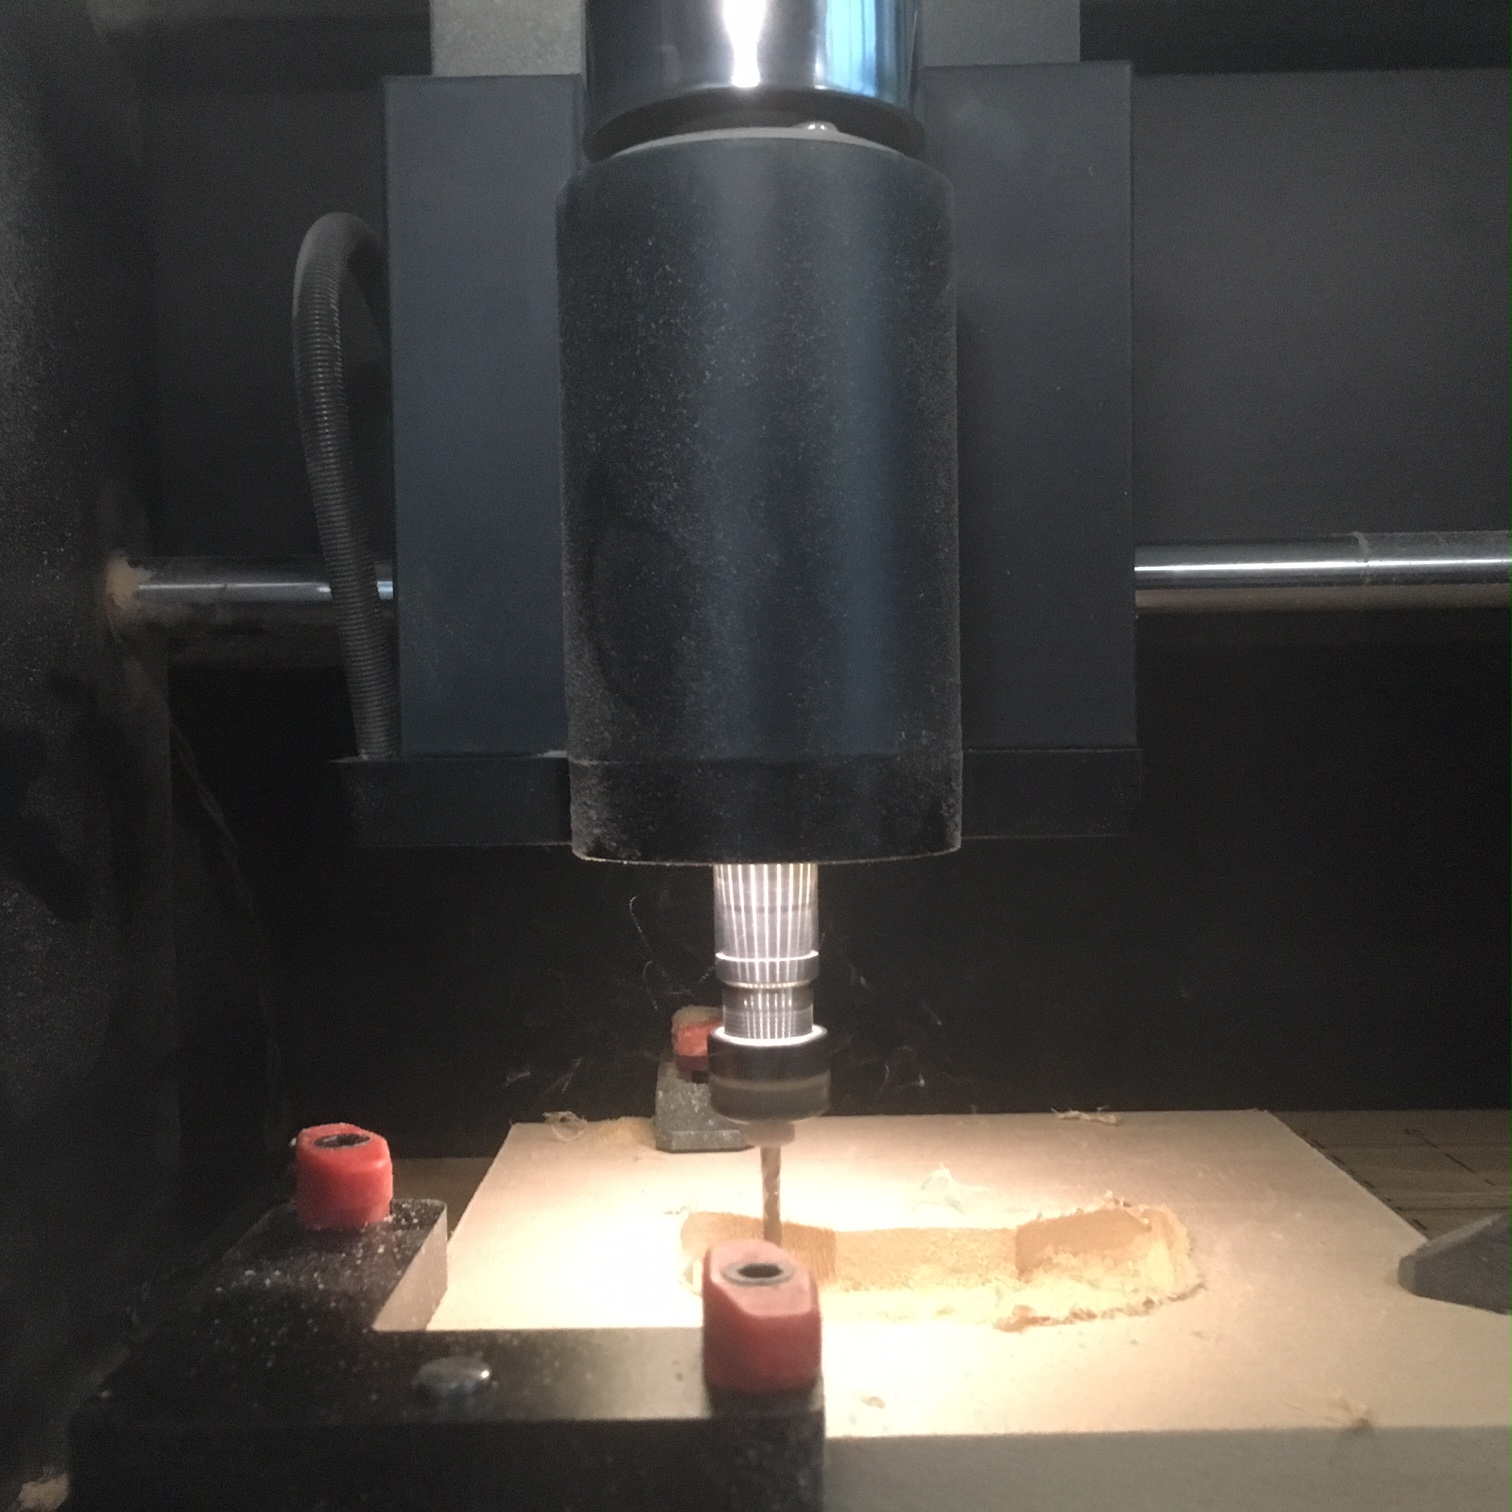
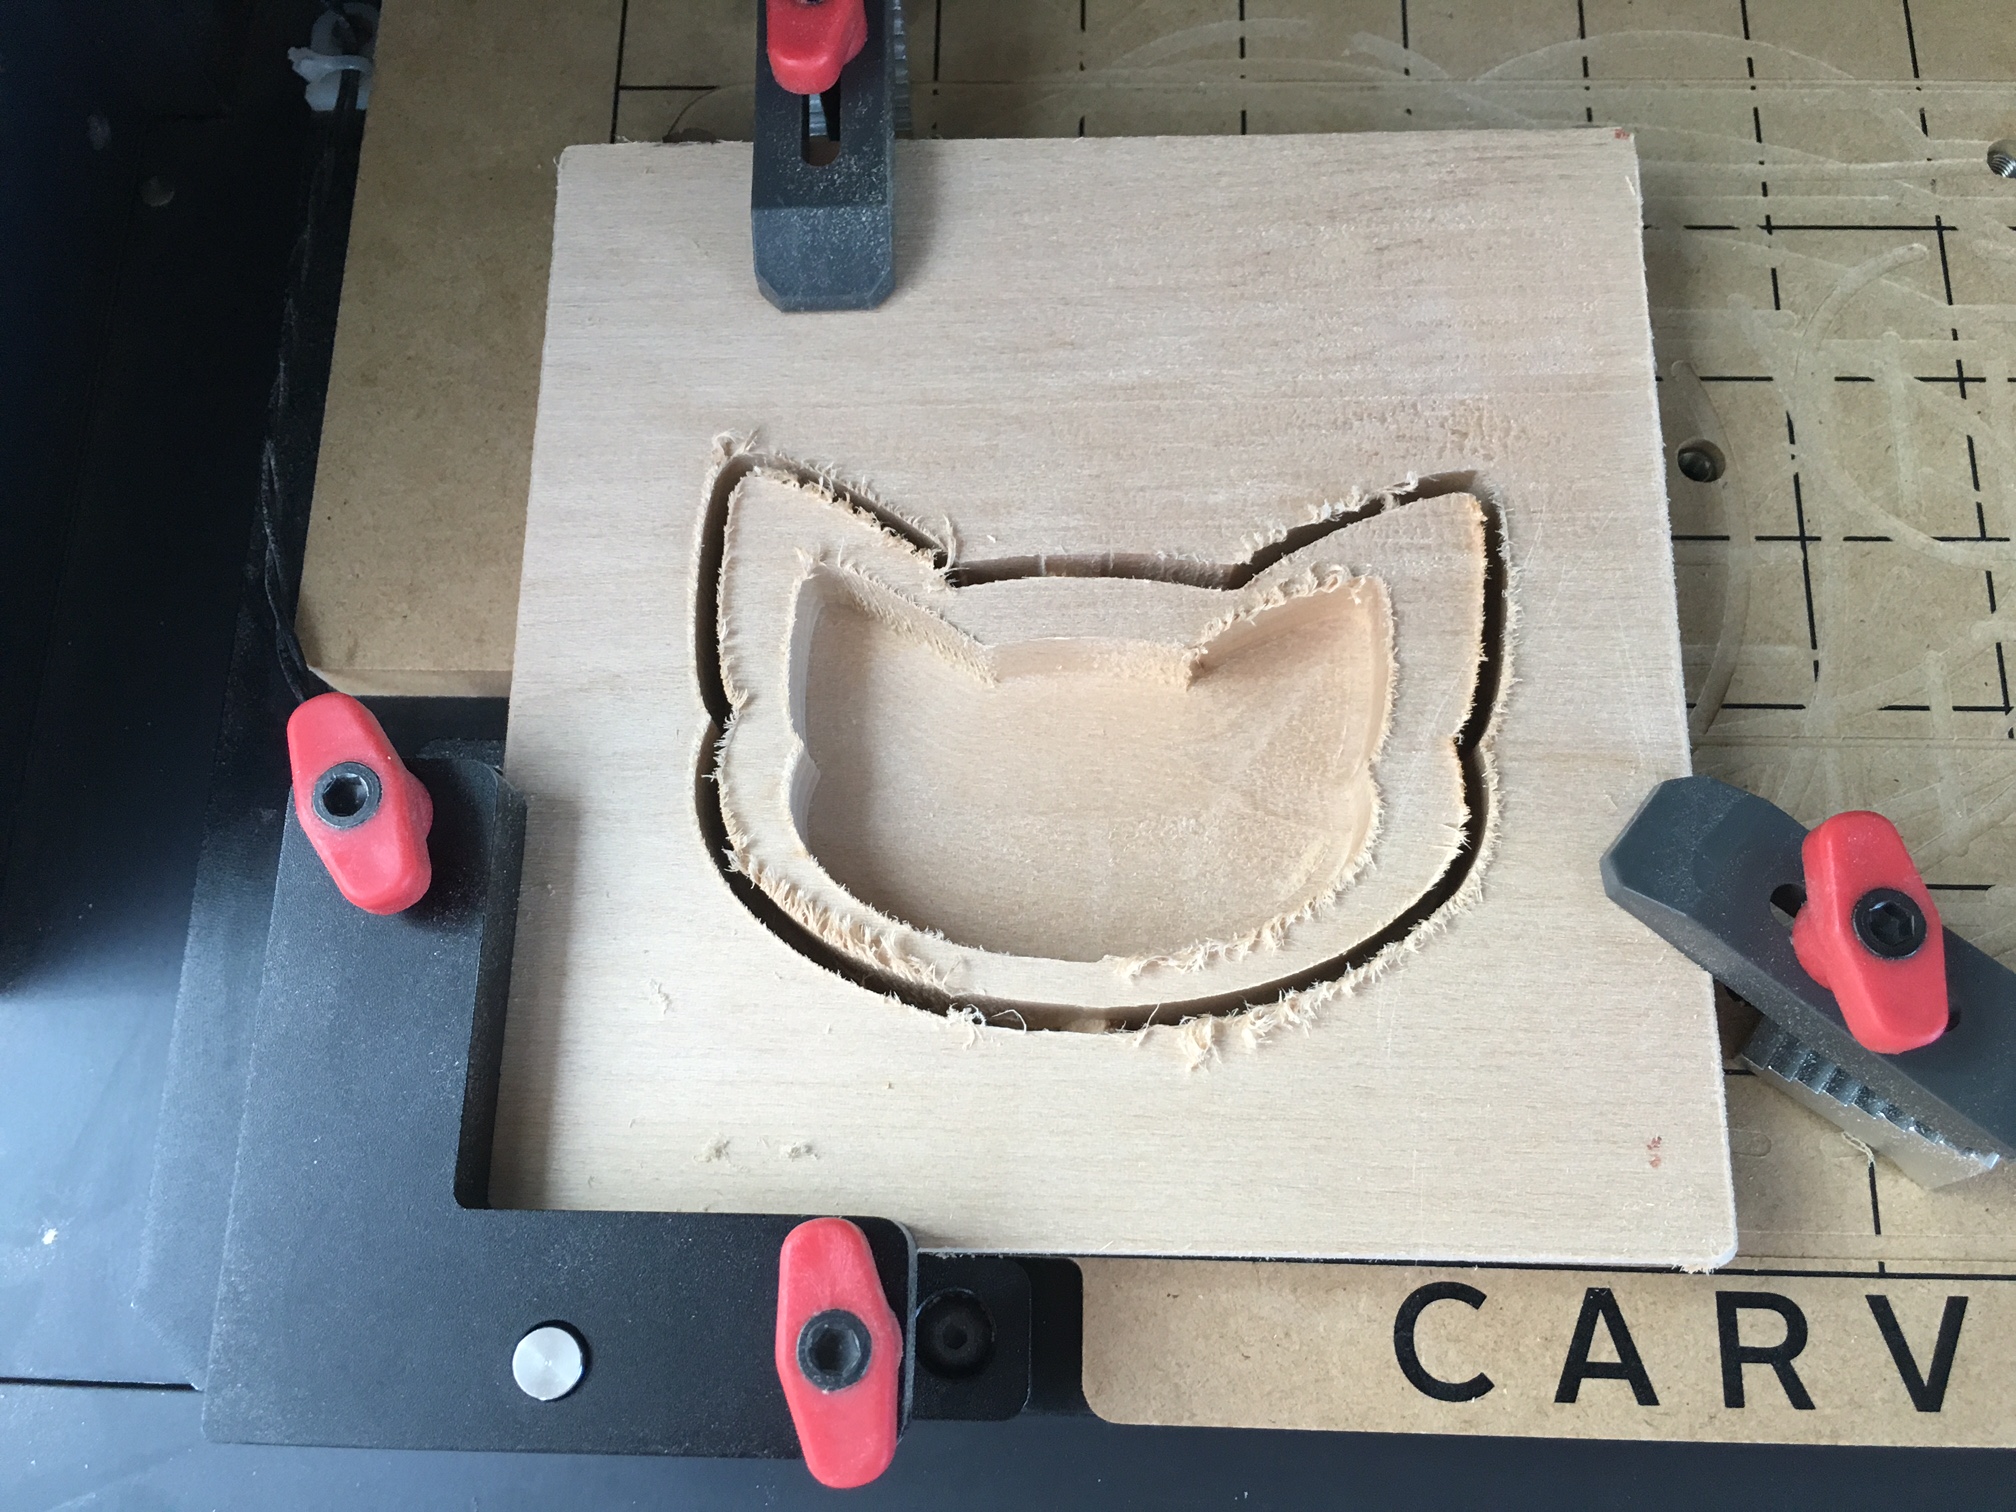
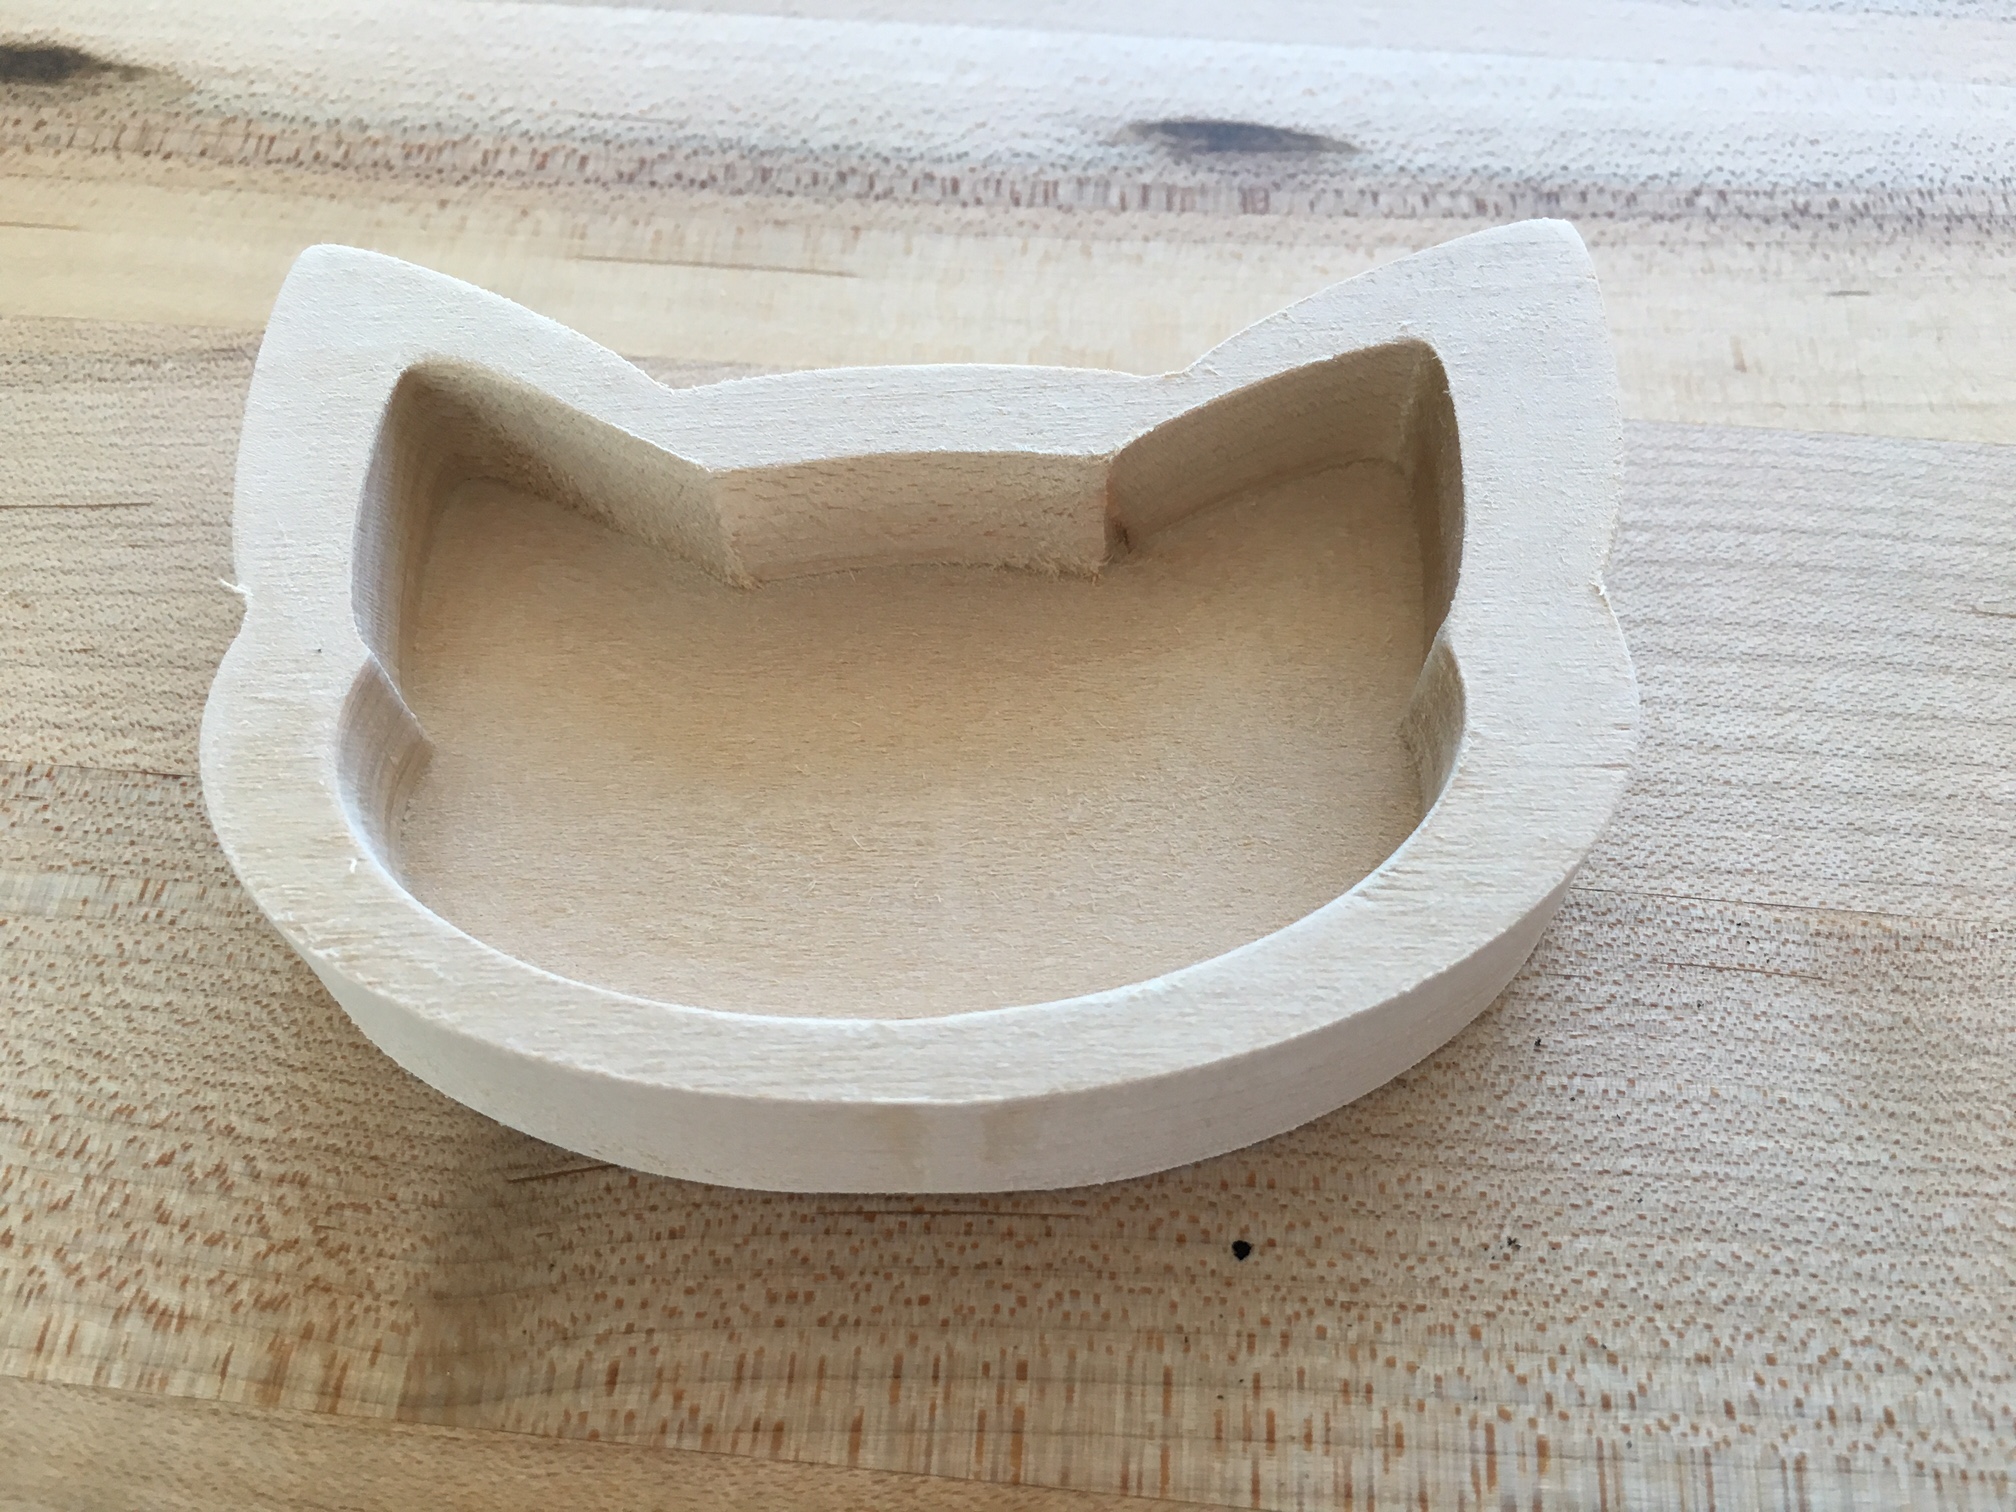
When you come for your reservation, bring your material, and have your design ready to go and saved in Easel.
For the Carvey, your material should be 8x11 or less to fit within the machine.
- Clamp your material to the front left corner of the Carvey.
- Use clamps to secure the other edges of your material. Make sure that none of the clamps interfere or overlap with your design. Close the lid, and carve your design!
- When the Carvey cuts your design out, it will leave a few tabs, adhering the piece to the block of material. This prevents shifting of the material while the Carvey makes several passes to cut the design. These are easy to break through with a chisel or screwdriver and hammer.
- Sand your design to smooth out rough edges. It's ready to be painted, stained, or just rubbed with a finishing oil.