Creating an MLA Format in Word Styles
by beachamt1998 in Teachers > University+
552 Views, 1 Favorites, 0 Comments
Creating an MLA Format in Word Styles

MLA is a standard format used in a number of academic settings, for example, research papers, application essays, lab reports, etc. We are often taught to put our thoughts down on paper and to format the writing after the fact. While this is useful, reformatting indentations, font sizes, and spacing in a paper can be time consuming, especially when done often. Today, I will guide you through setting up an MLA Format Style for Microsoft Word so you can format your writing to MLA standards with the single push of a button. You can also apply this Style set up to other writing formats, or create new formats for to fit whatever writing you do.
Supplies
All that is needed is the Microsoft Word application. I will be using the most recent version of Word, however you can apply these settings to any version of Word. Keep in mind that the images used today are from Microsoft Word 365.
Open Word
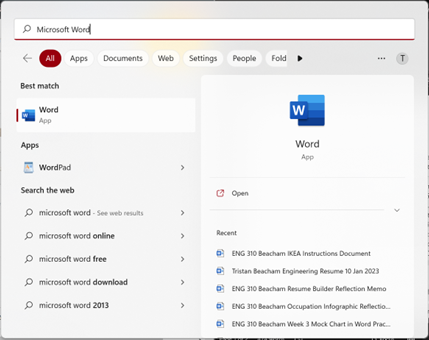
Go to your start tab and open Microsoft Word and open a new blank document.
Enter the Styles Settings

Locate styles section under the Home tab and expand it using the arrow in the bottom right corner of the tab.
Create a New Style
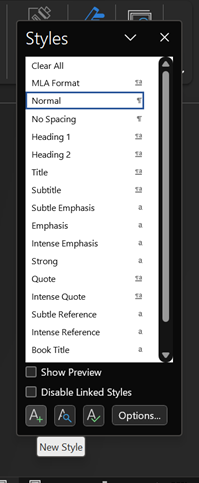
A new window will open on the right side of the screen. In the bottom left of the styles window, click “New Style.”
Getting Your New Style Ready
A new window called “Create New Style from Formatting” will open. Here you can begin editing a new style, which you can save as a permanent feature of your Word application.
Adding MLA Format to Future Documents
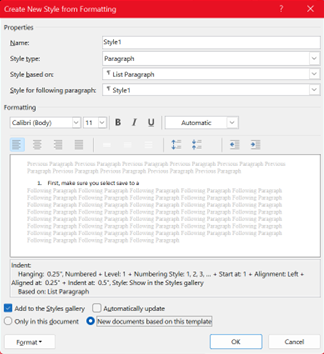
Make sure you select “Add to the Styles gallery” and “New Documents based on this template” at the bottom of the window. Otherwise, your style will only available in the document you are working on, making it difficult to access in the future.
Name Your New Style
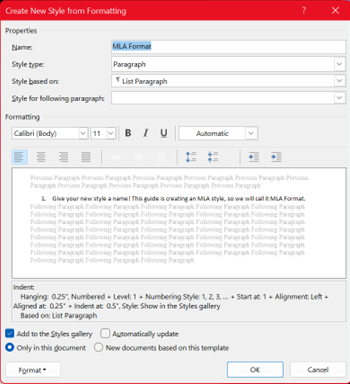
Give your new style a name! This guide is for creating an MLA Style, so we will call it MLA Format. If you are creating a different Style, make sure you choose a name that is descriptive, so you know what it is in the future.
Selecting Your Settings
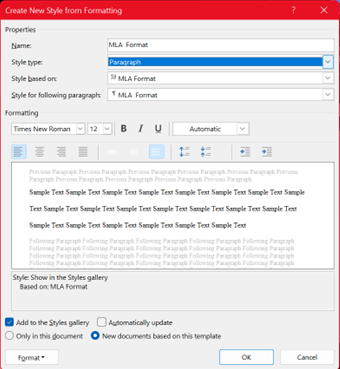
For the “Style Type” you will want to choose “Paragraph.” This will make each paragraph format the same, which is most ideal for MLA. Do not worry about the “Style based on” or “Style for following paragraph” because these will apply settings from other styles, which we will alter in the following steps.
Font Choice and Style
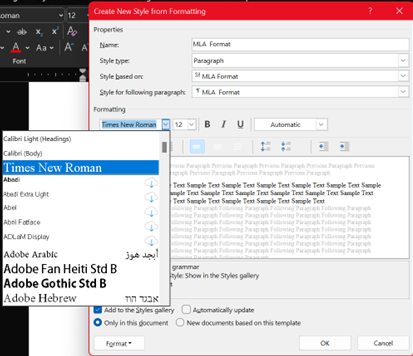
Click on the Font box, and select “Times New Roman,” which you can type into the box. Next to the Font style, click the Font Size and select “12,” as shown in the picture. This is the standard font and size used in MLA.
Paragraph Alignment
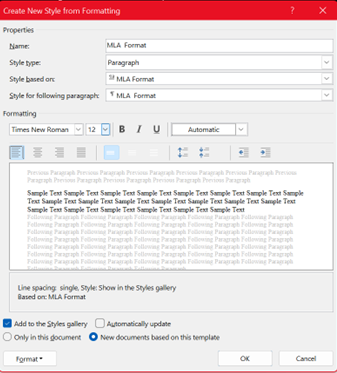
Under the font selections, make sure to choose the left alignment, as designated under MLA formatting guidelines. Later on, we will make sure to indent each paragraph.
Double Spacing Lines
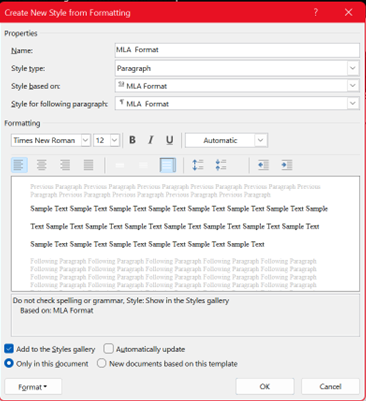
Next to the alignment selection, select the right most spacing selection, which will set the spacing to double spaced.
Remove Space Before/after Paragraphs
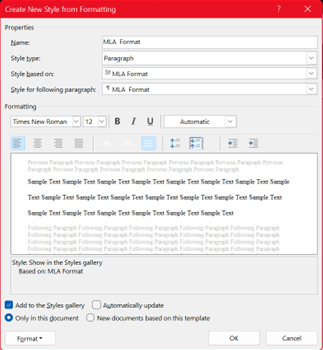
Next to the spacing options, make sure to select remove spacing between lines/paragraphs. Depending on your default settings, this may already be applied, but select it anyways to prevent spacing errors in your MLA format.
Indenting the Start of Each Paragraph
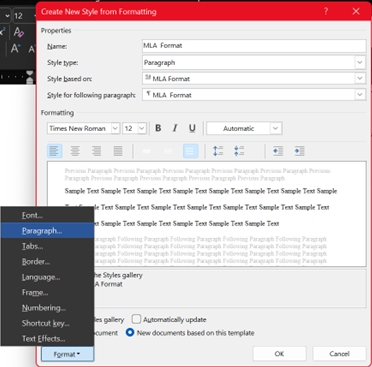
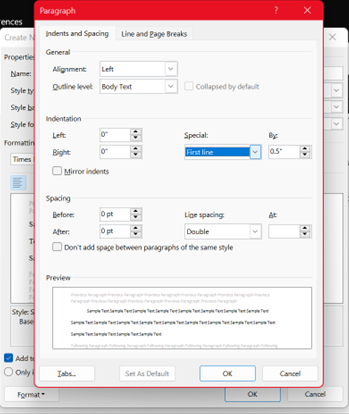
Now, to add indentations at the start of each paragraph, click “Format” in the bottom left corner and select "Paragraph.” This will open a new window. Now, click “Special” under the “Indentation” section and choose “First Line.” This will automatically set to a one-tab indentation, which should be a 0.5" indent. Once finished, select “OK.”
Save Your MLA Format Style
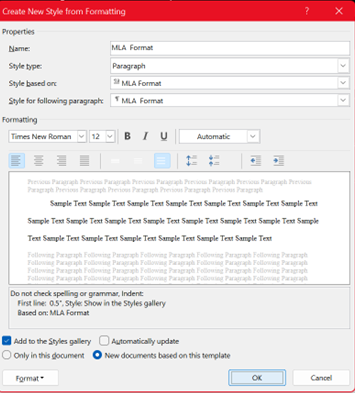
You have successfully created a Style that follows MLA formatting guidelines! Click “OK” to save the Style to your word application.
Accessing Your MLA Format Style

Styles appear under the home tab based upon how often you use them. You can apply the Style at the very beginning of your document, when you first open it. Or, you can write your paper, highlight all your text, and select the “MLA Format Style” once you are finished and ready to format your paper. Doing all this set up now will save you hours of formatting later on!