Creating an IoT Button With M5StampC3U for HTTP Post Notifications Via InformaCast: a Step-by-Step Guide
by mikerace30301 in Circuits > Arduino
208 Views, 0 Favorites, 0 Comments
Creating an IoT Button With M5StampC3U for HTTP Post Notifications Via InformaCast: a Step-by-Step Guide
In this step-by-step guide, you'll learn how to create an IoT button using the M5StampC3U, which sends an HTTP Post request to InformaCast, triggering a notification. For this project, we've chosen the M5StampC3U for its simplicity and compatibility. While we won't be going over the setup process for M5StampC3U, we encourage you to visit the M5's website, where you'll find comprehensive tutorials on this matter.
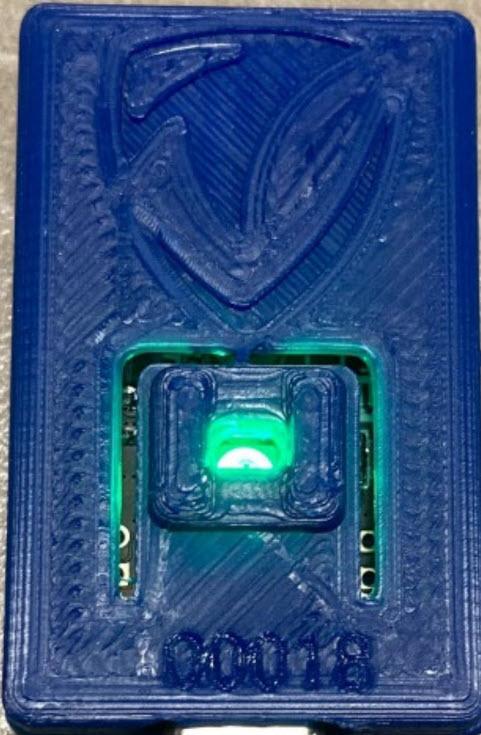
The IoT button we'll be designing connects to a WiFi network and communicates with InformaCast when the button is pressed twice, sending a notification. Upon switching on, the LED on the device should display a white light, indicating that it's trying to connect to WiFi. Once connected, the LED will turn green, indicating readiness. When the button is pressed twice, the LED will turn blue and will proceed with the HTTP Post request. A single press initiates a 30-second countdown; if the button isn't pressed a second time within this interval, the device will reboot, and the press counter will reset. We've introduced this feature to eliminate accidental presses.
Downloads
Supplies
- M5StampC3U: This is the IoT device you'll be programming to create your button. It's a small and powerful microcontroller.
- Computer: You'll need a computer to program the M5StampC3U.
- USB Cable: This is for connecting your M5StampC3U to your computer for programming.
- WiFi Connection: Your device will need to connect to the internet to send HTTP Post requests to InformaCast.
- InformaCast Account: You'll need access to InformaCast's services for your button to communicate with.
- Arduino Software (IDE): This is the program you'll be using to write your code and upload it to the M5StampC3U. Make sure to have the Arduino IDE installed on your computer.
Setting Up the InformaCast Application:


- Open your InformaCast Admin Console and log in.
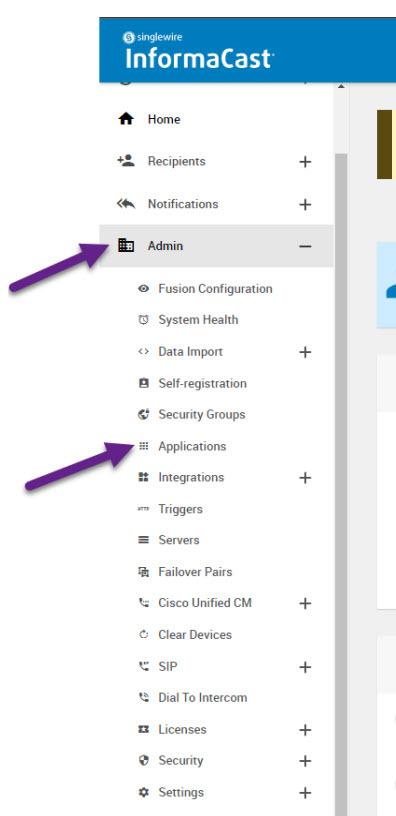
- From the left-hand side menu, select "Admin" followed by "Applications".
- Click on "Create Application" found at the top-right corner.
- Assign a custom name to your application. Under the "Application" drop-down menu, ensure "Custom API" is selected, then hit the "Save" button.
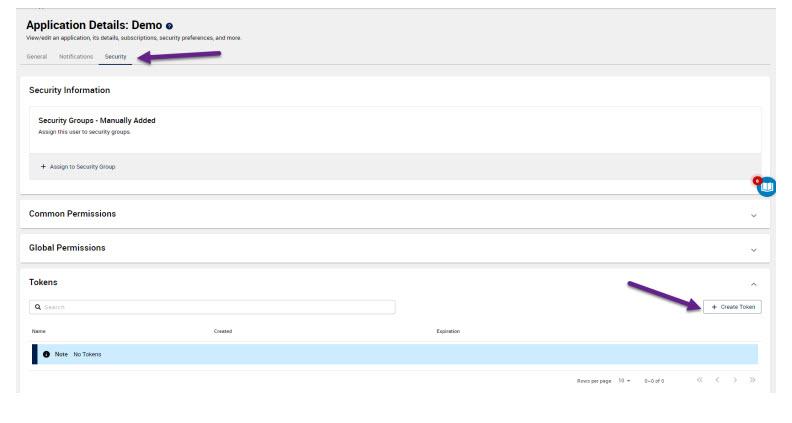
- Now, you should see a "Security" tab within the "Application Details". Select it.
- Scroll down and open the "Tokens" section.
- Click on "Create Token", name it, then click "Save".
- Your new Bearer Token should be visible now. Copy it and store it safely – this is the only time you'll be able to access it.
Working With the InformaCast API Explorer:
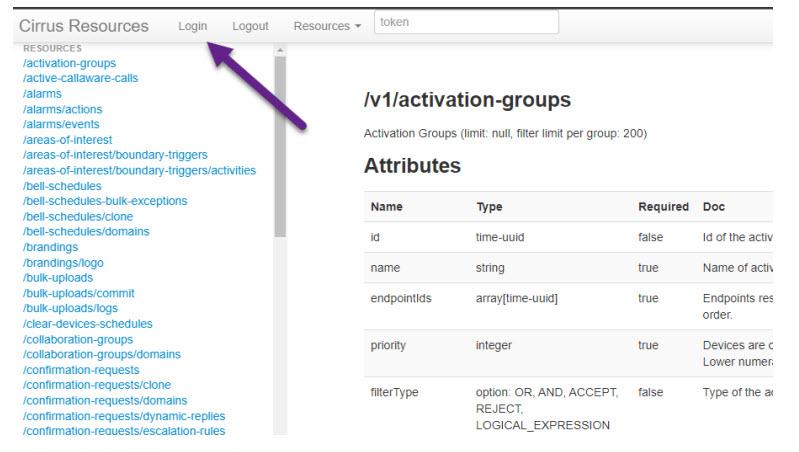
- Visit the InformaCast API Explorer: https://api.icmobile.singlewire.com/api/docs
- Log in at the top of the page to generate a temporary Bearer Token.
- Identify the messageTemplateId, subject, and distributionId.
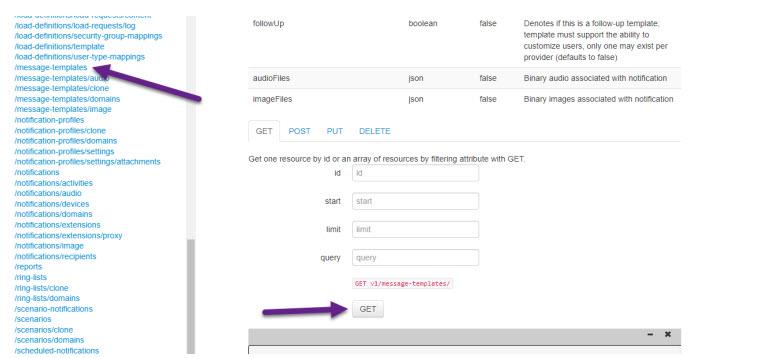
- To find the messageId, click on "/message-templates" on the right-hand side, then hit "Get".
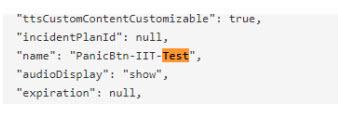
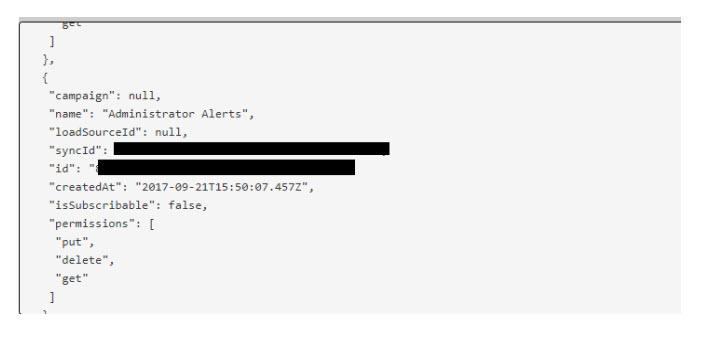
- Look for your preferred message and scroll down until you find the "syncId". Note it down as your messageTemplateId. A bit further down, you'll find the "subject"; note it down as well.
- Your distributionId is found under "/distribution-lists" on the right-hand side. Click on "Get" to list all your distributions.
- Find the distribution of your choice and note down its "id" value.
- At this stage, you should have your Bearer Token, messageTemplateId, subject, and distributionId - essential elements for the Arduino.ino file.
Working With the Arduino Sketch:
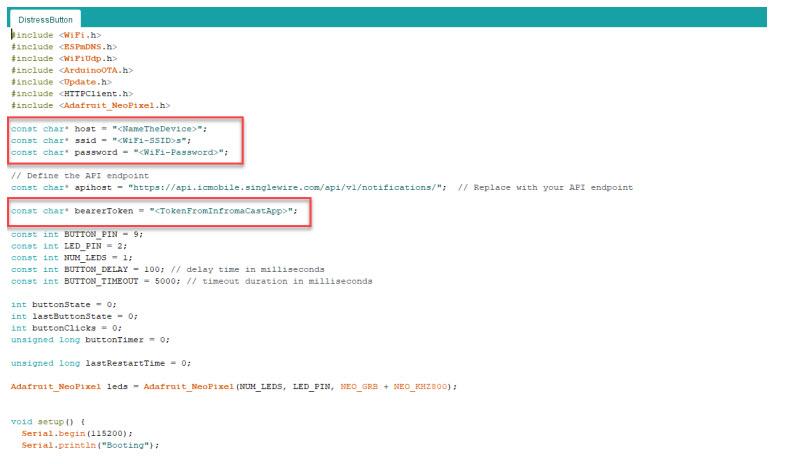
- Open the DistressButton.ino file.
- Name your device, enter your WiFi details and the Bearer Token you obtained from InformaCast.
- Locate the String payload in the void loop(). It should resemble this: String payload = "{"messageTemplateId":"<messageTemplateId of the message you want to send>","subject":"<The Subject of the Message, Needs to be the subject of the messageId>","distributionListIds":"<Insert the ID of the Distribution>"}";
- Input the messageTemplateId, subject, and distributionId you noted down earlier.
- Finally, upload the sketch to your M5Stamp and test it out.
By following these steps, you should now have a functioning IoT button capable of sending notifications via InformaCast!