Creating a New Tiva Project in Code Composer Studio
by drewmay in Circuits > Microcontrollers
31380 Views, 10 Favorites, 0 Comments
Creating a New Tiva Project in Code Composer Studio
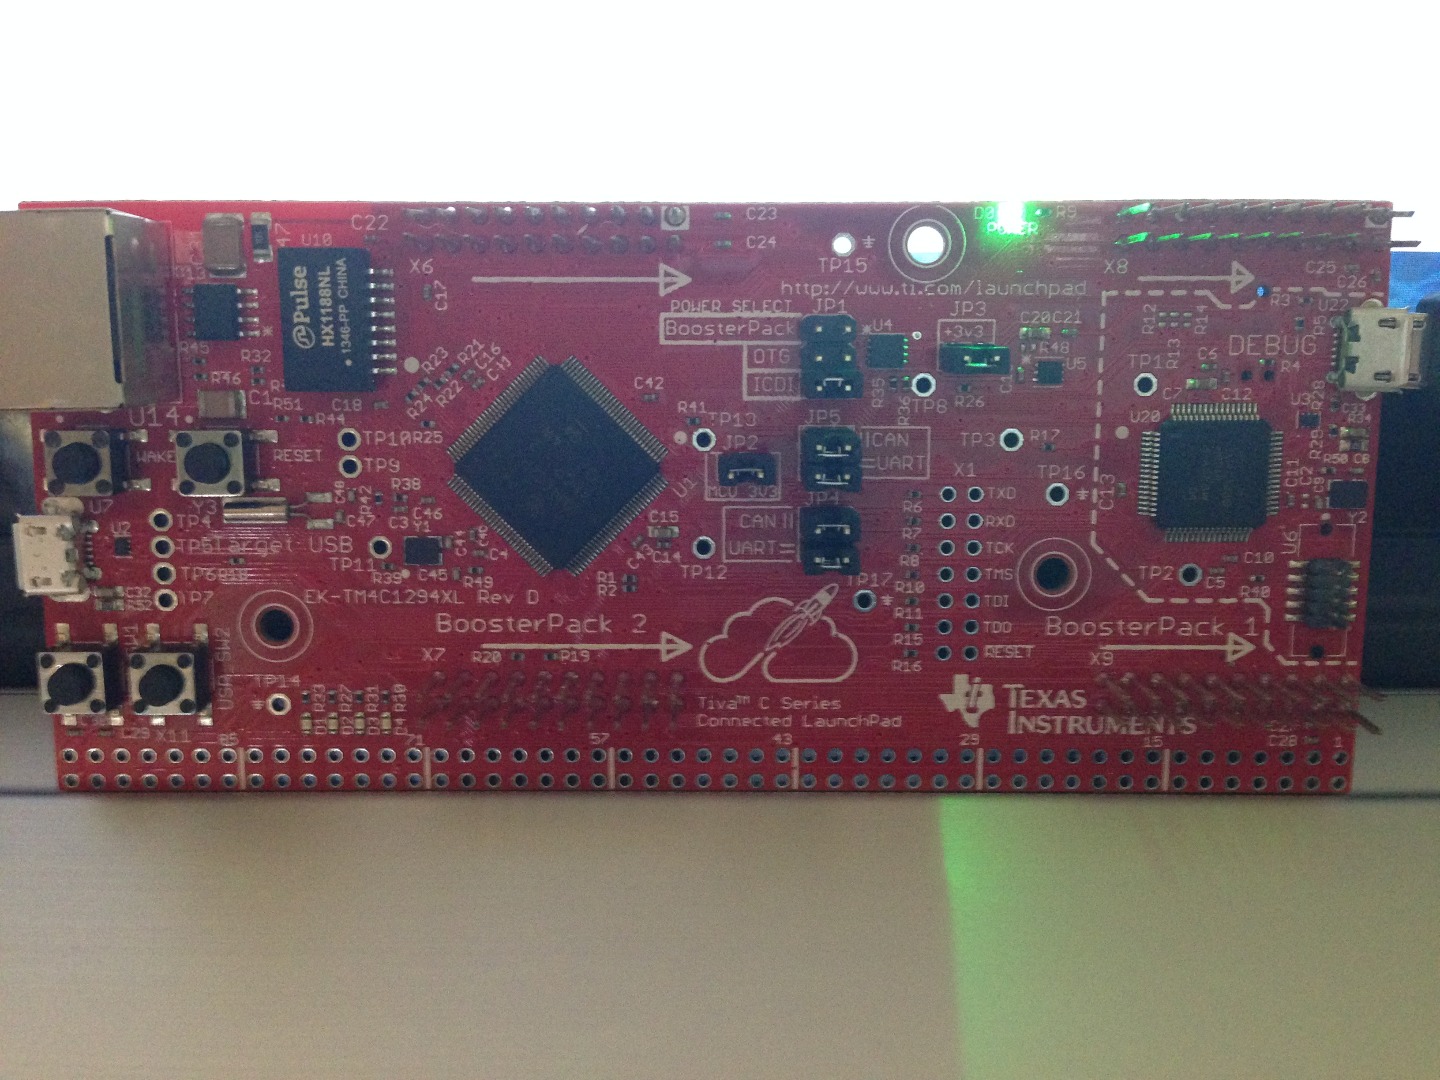
This instructable will walk through creating a new Texas Instruments Tiva project from scratch in Code Composer Studio with TivaWare!
You will need several things.
- Tiva Microcontroller (Such as a TM4C1294XL from http://www.ti.com/tool/ek-tm4c1294xl)
- Code Composer Studio (A free download from http://processors.wiki.ti.com/index.php/Download_C...
- Texas Instruments TivaWare Library (http://www.ti.com/tool/sw-tm4c (You'll want the complete library)
After Code Composer Studio (Or CCS) and TivaWare have been installed we'll move on to Step 1.
Start Up CCS and Choose a Workspace!
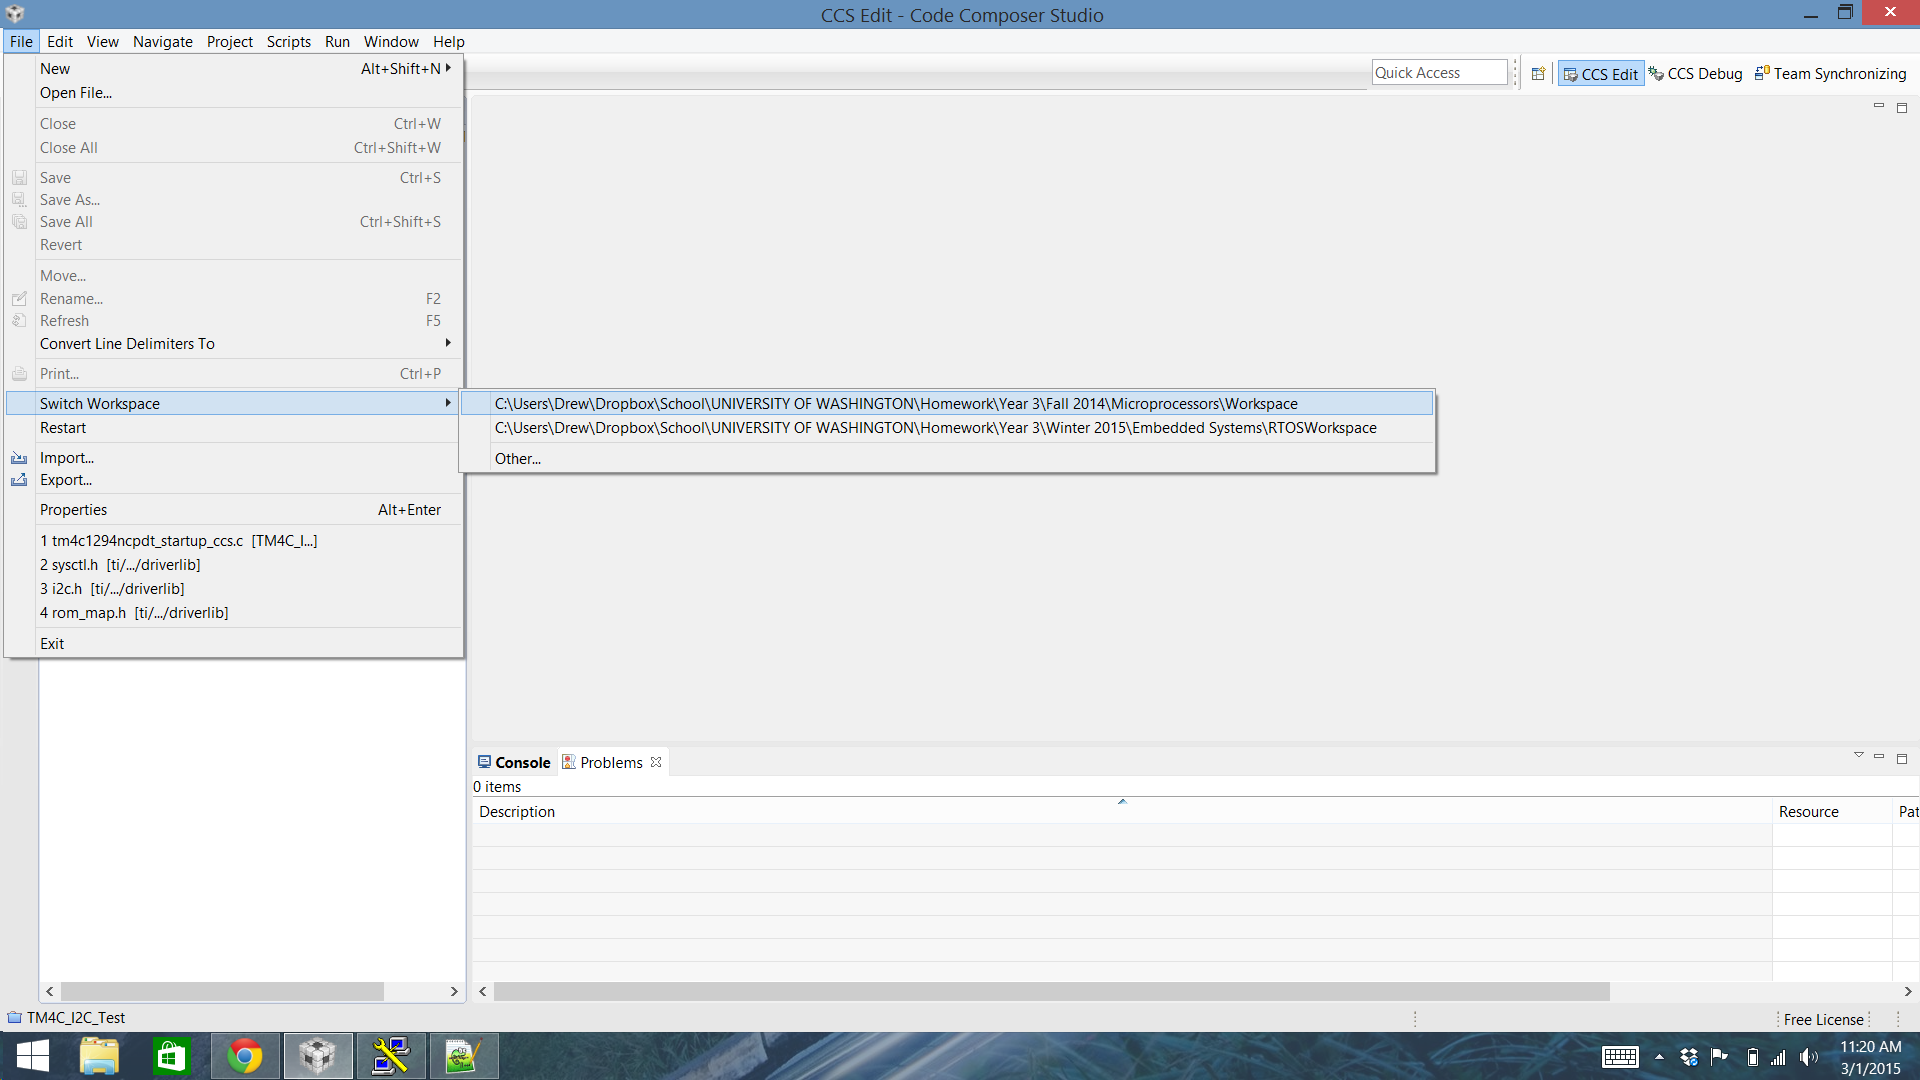
Once you start up CCS for the first time you will be asked to create a new workspace. The workspace is not too important. It is just the location on your hard drive where your new projects will be placed.
Here are the locations of a couple of my workspaces for reference.
Create a New CCS Project
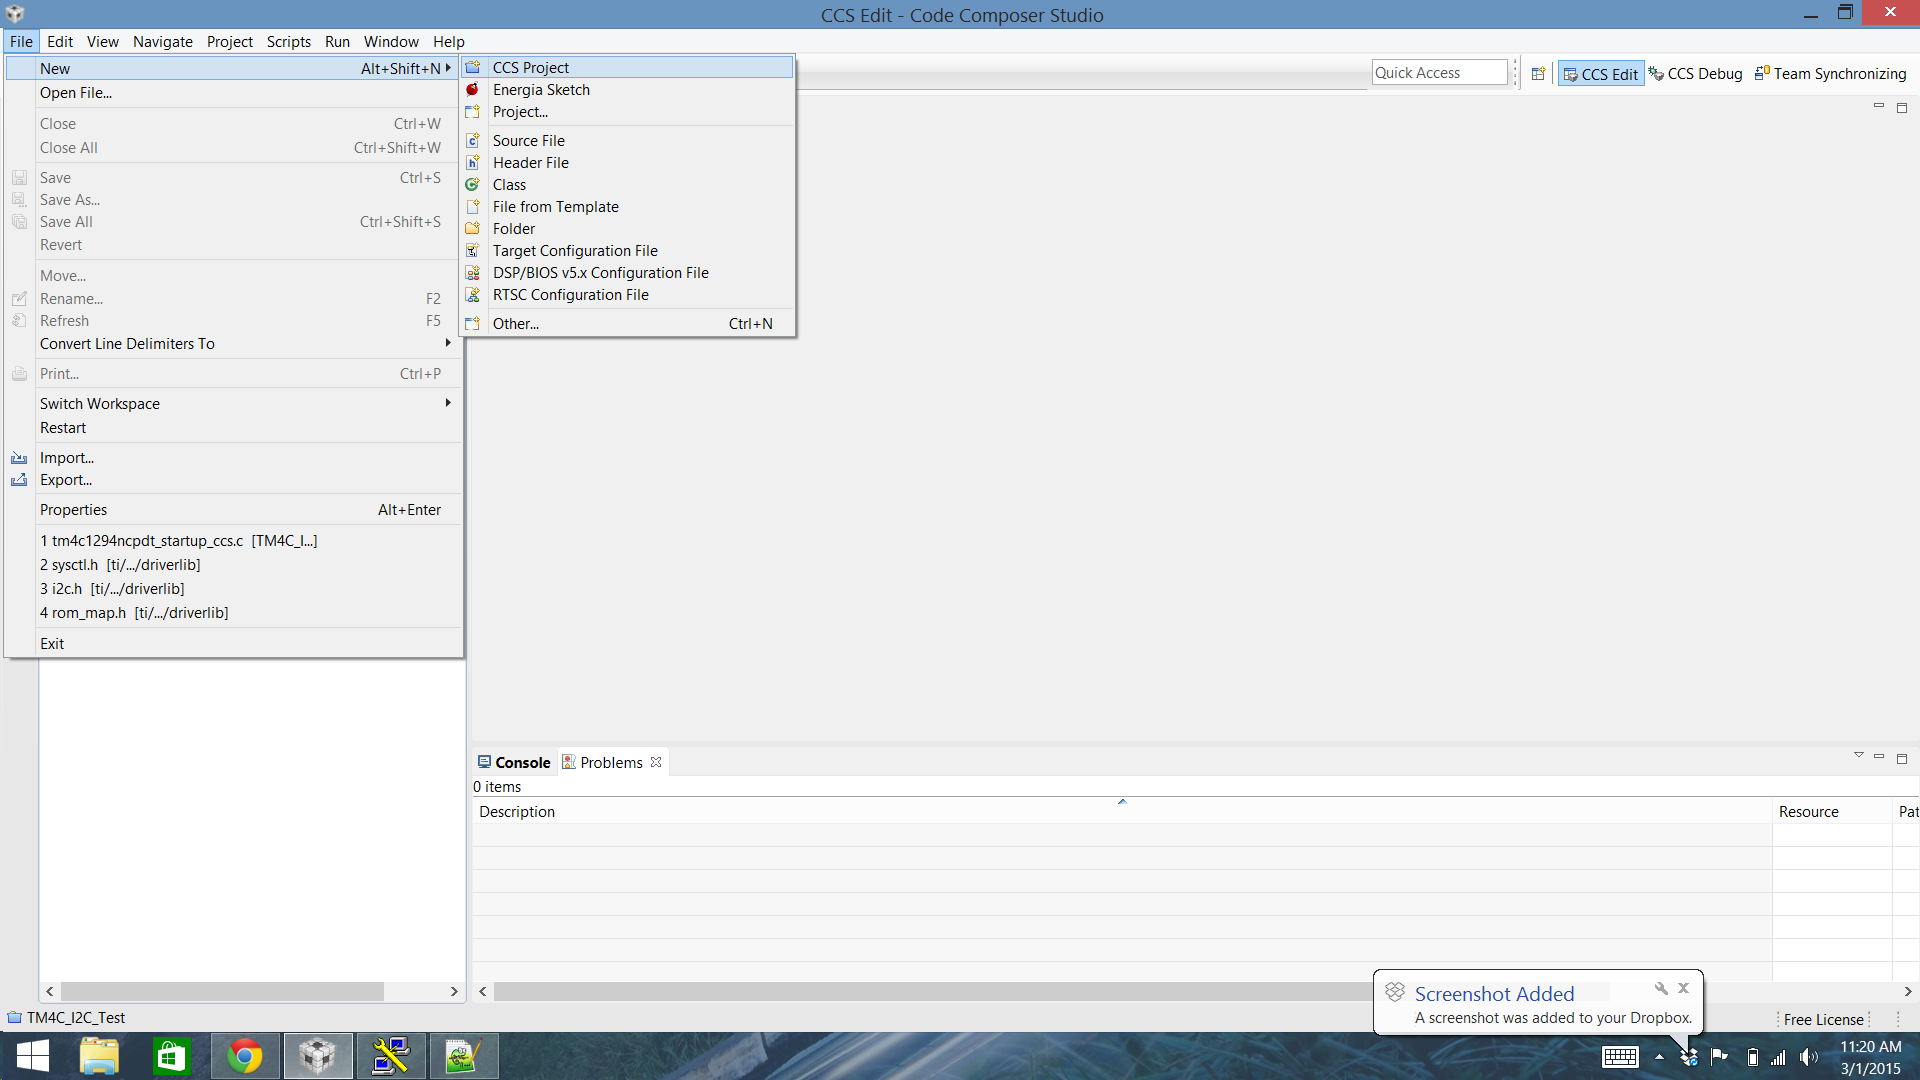
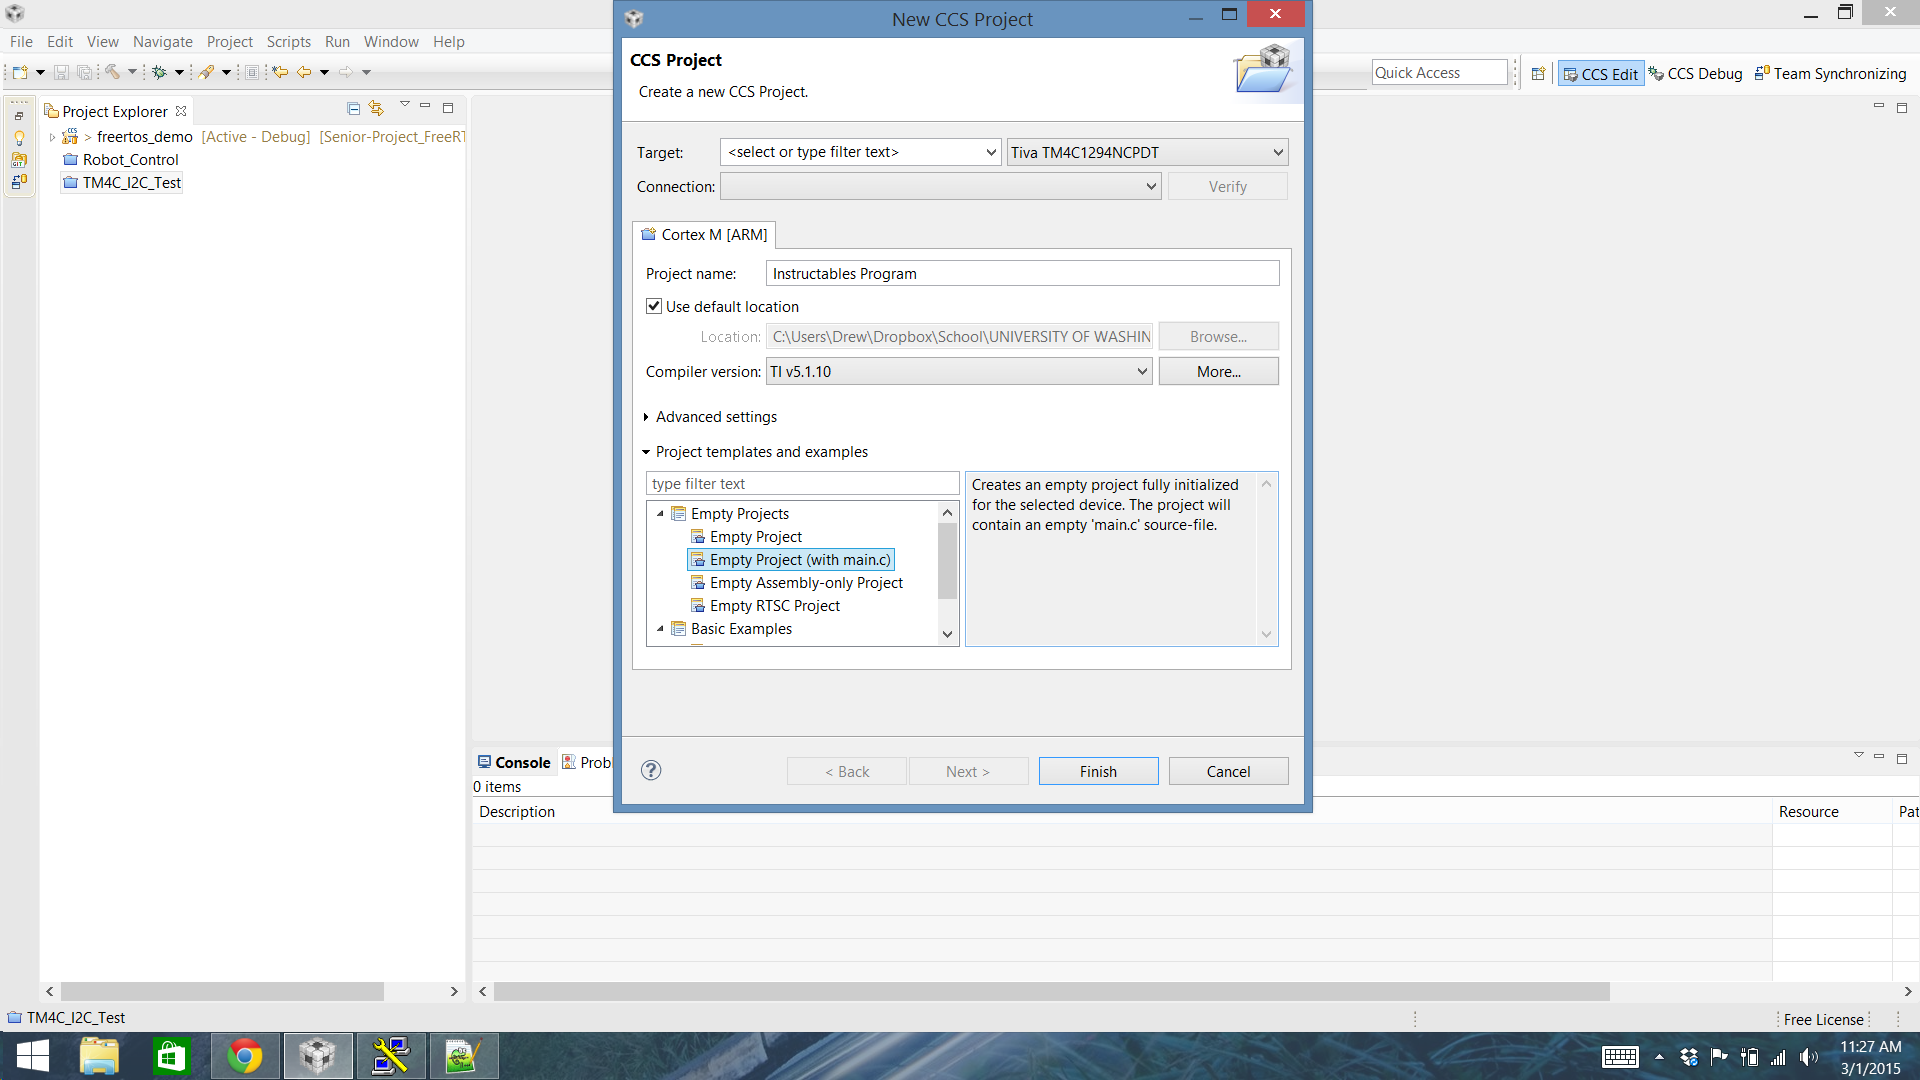
Now that CCS is up and running go ahead and click on the File menu, then New, and finally CCS Project.
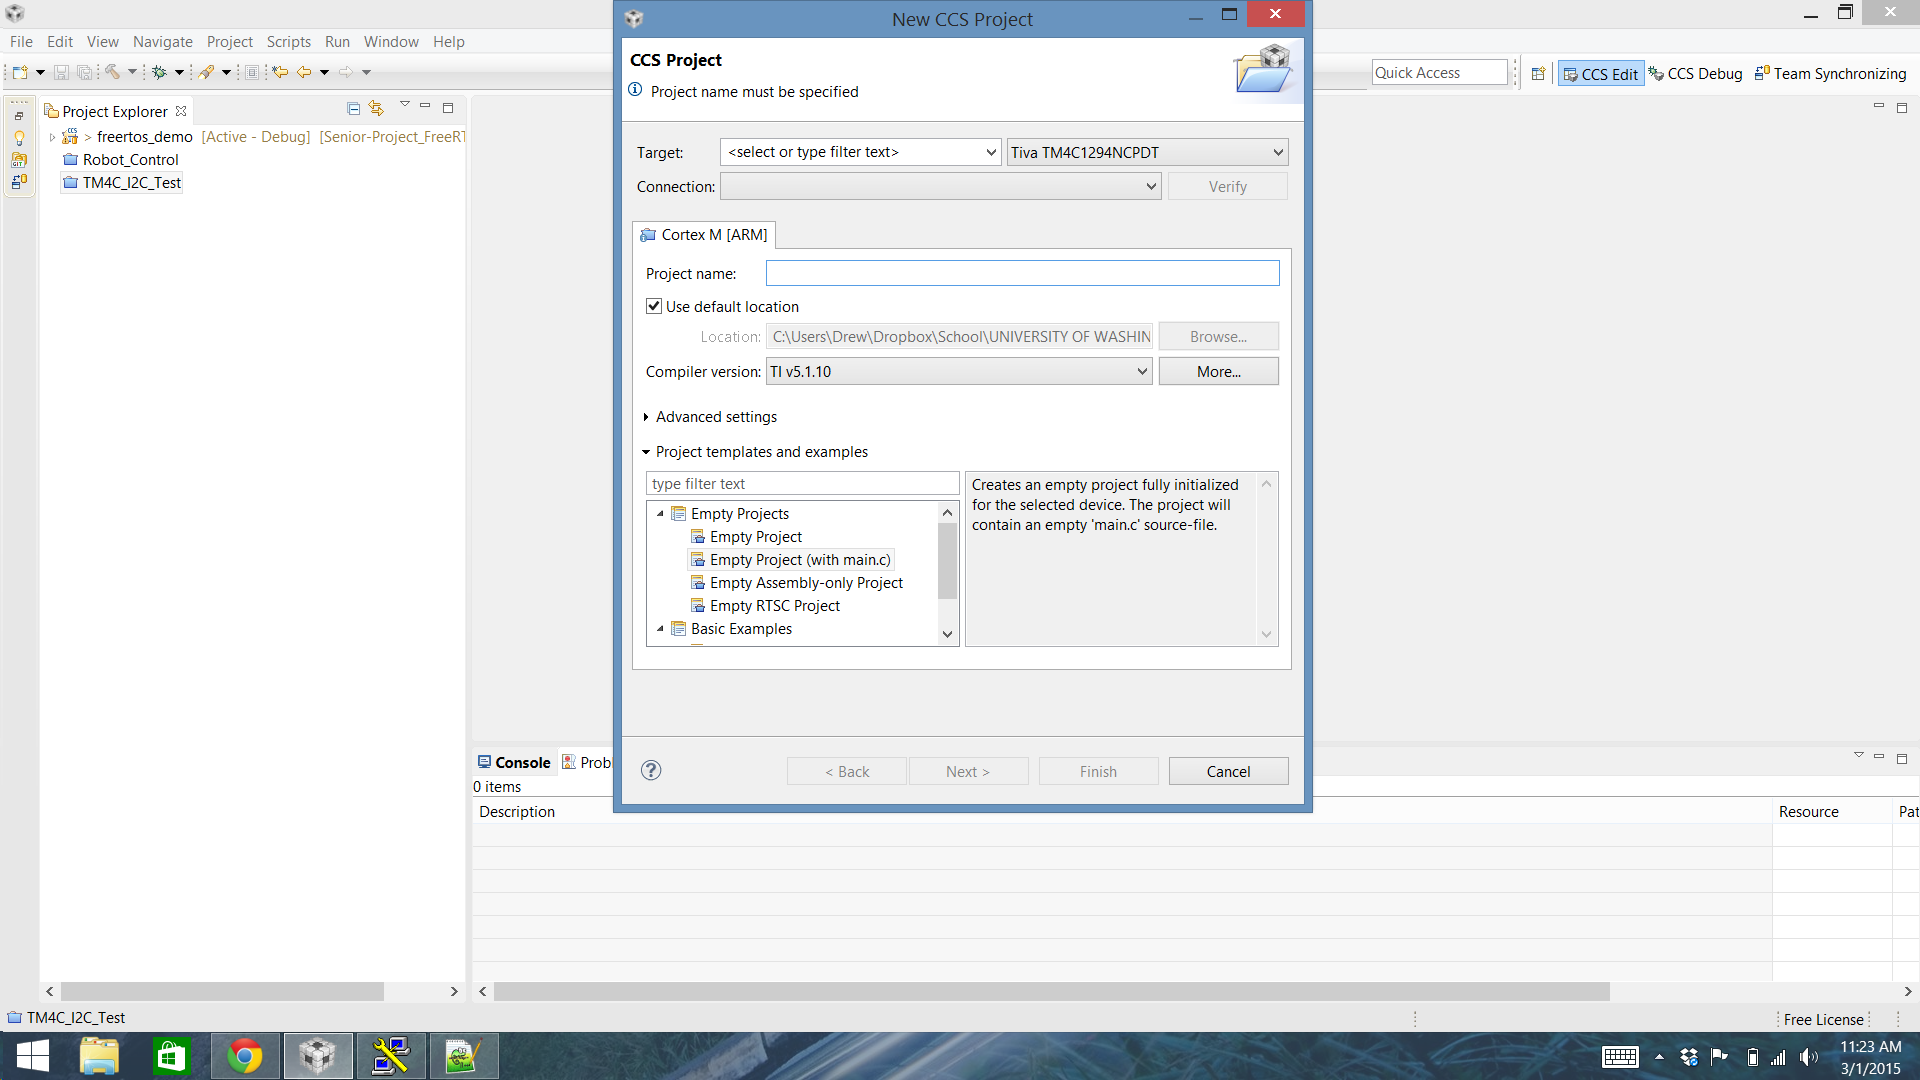
Once you do this you should have a screen similar to the one shown above.
In my case my target is the TM4C1294NCPDT but this will be different according to what board you are using. If you're not sure look at the datasheets for your microcontroller.
In this example I chose the latest compiler version, named my project Instructables Program and chose the empty project with main.c template.
Once everything is filled out as shown in the last image go ahead and click finish!
Link in the TivaWare Libraries
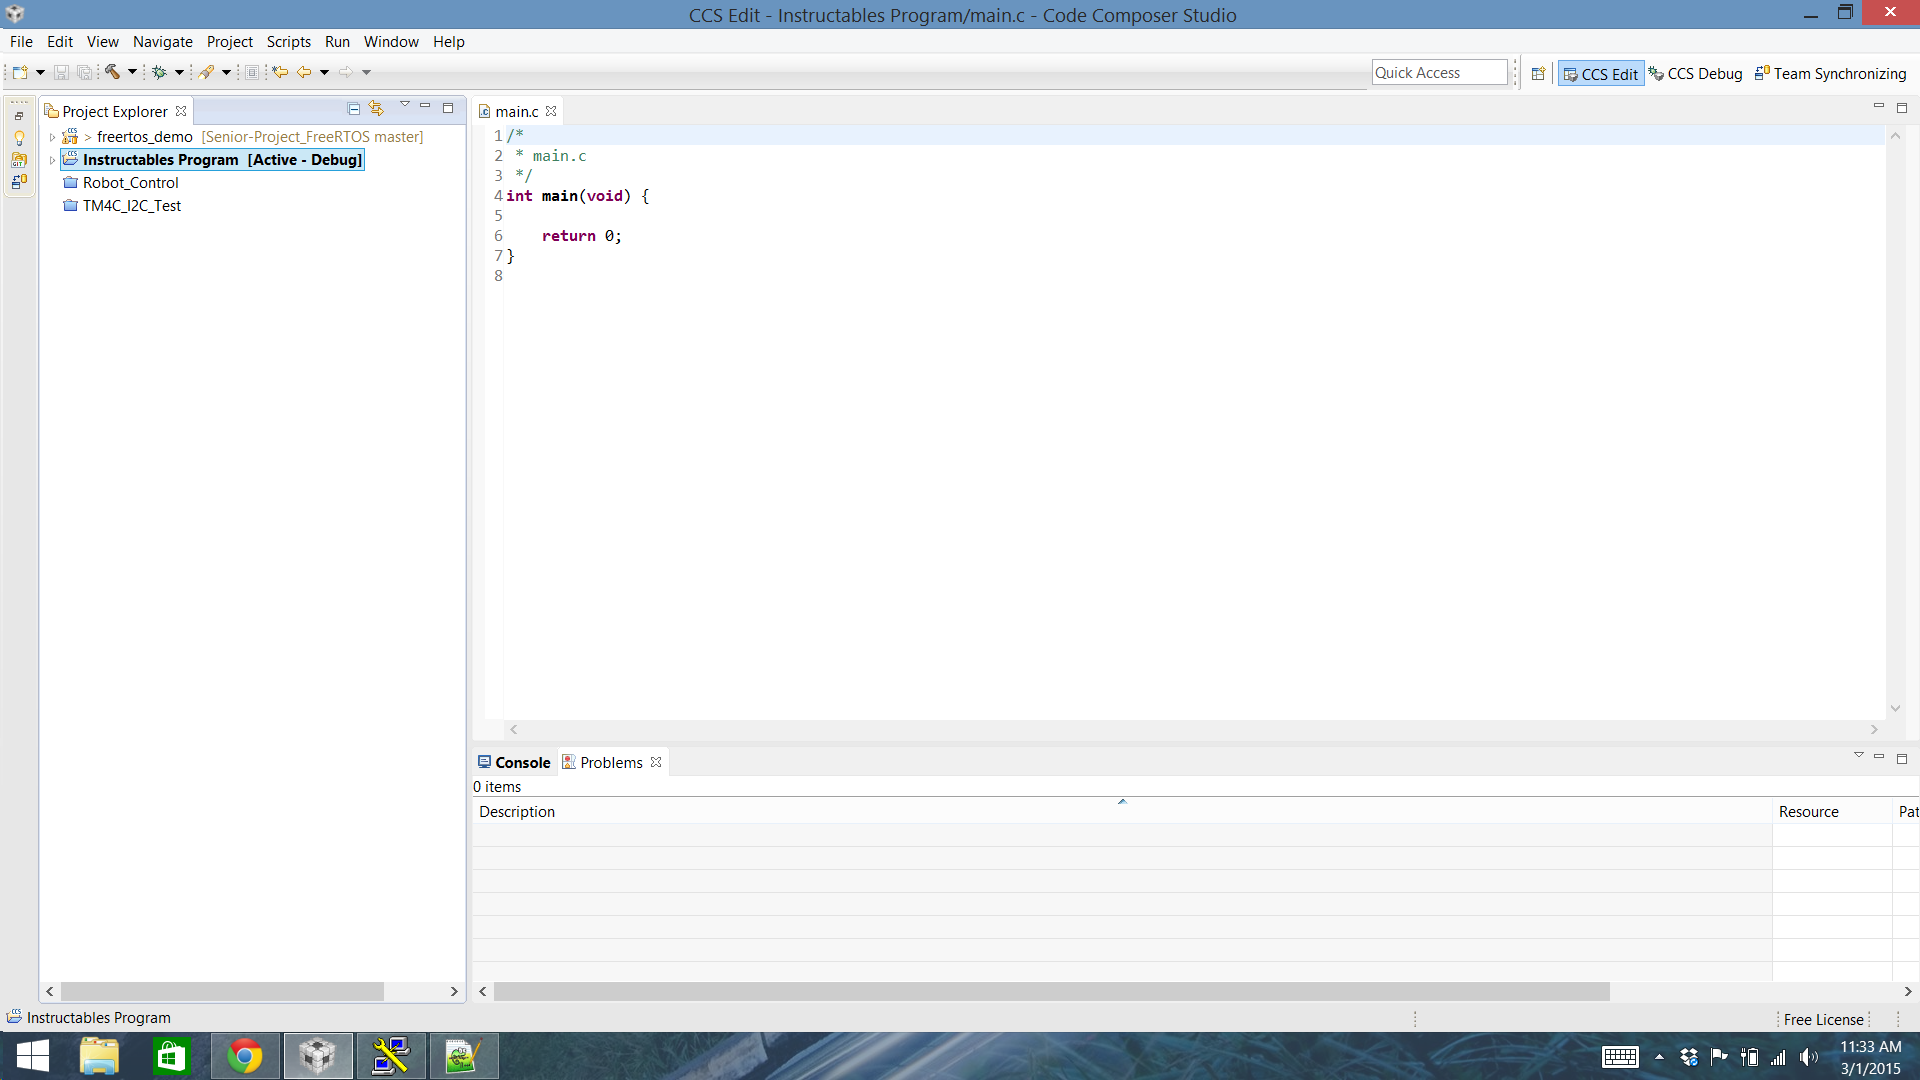
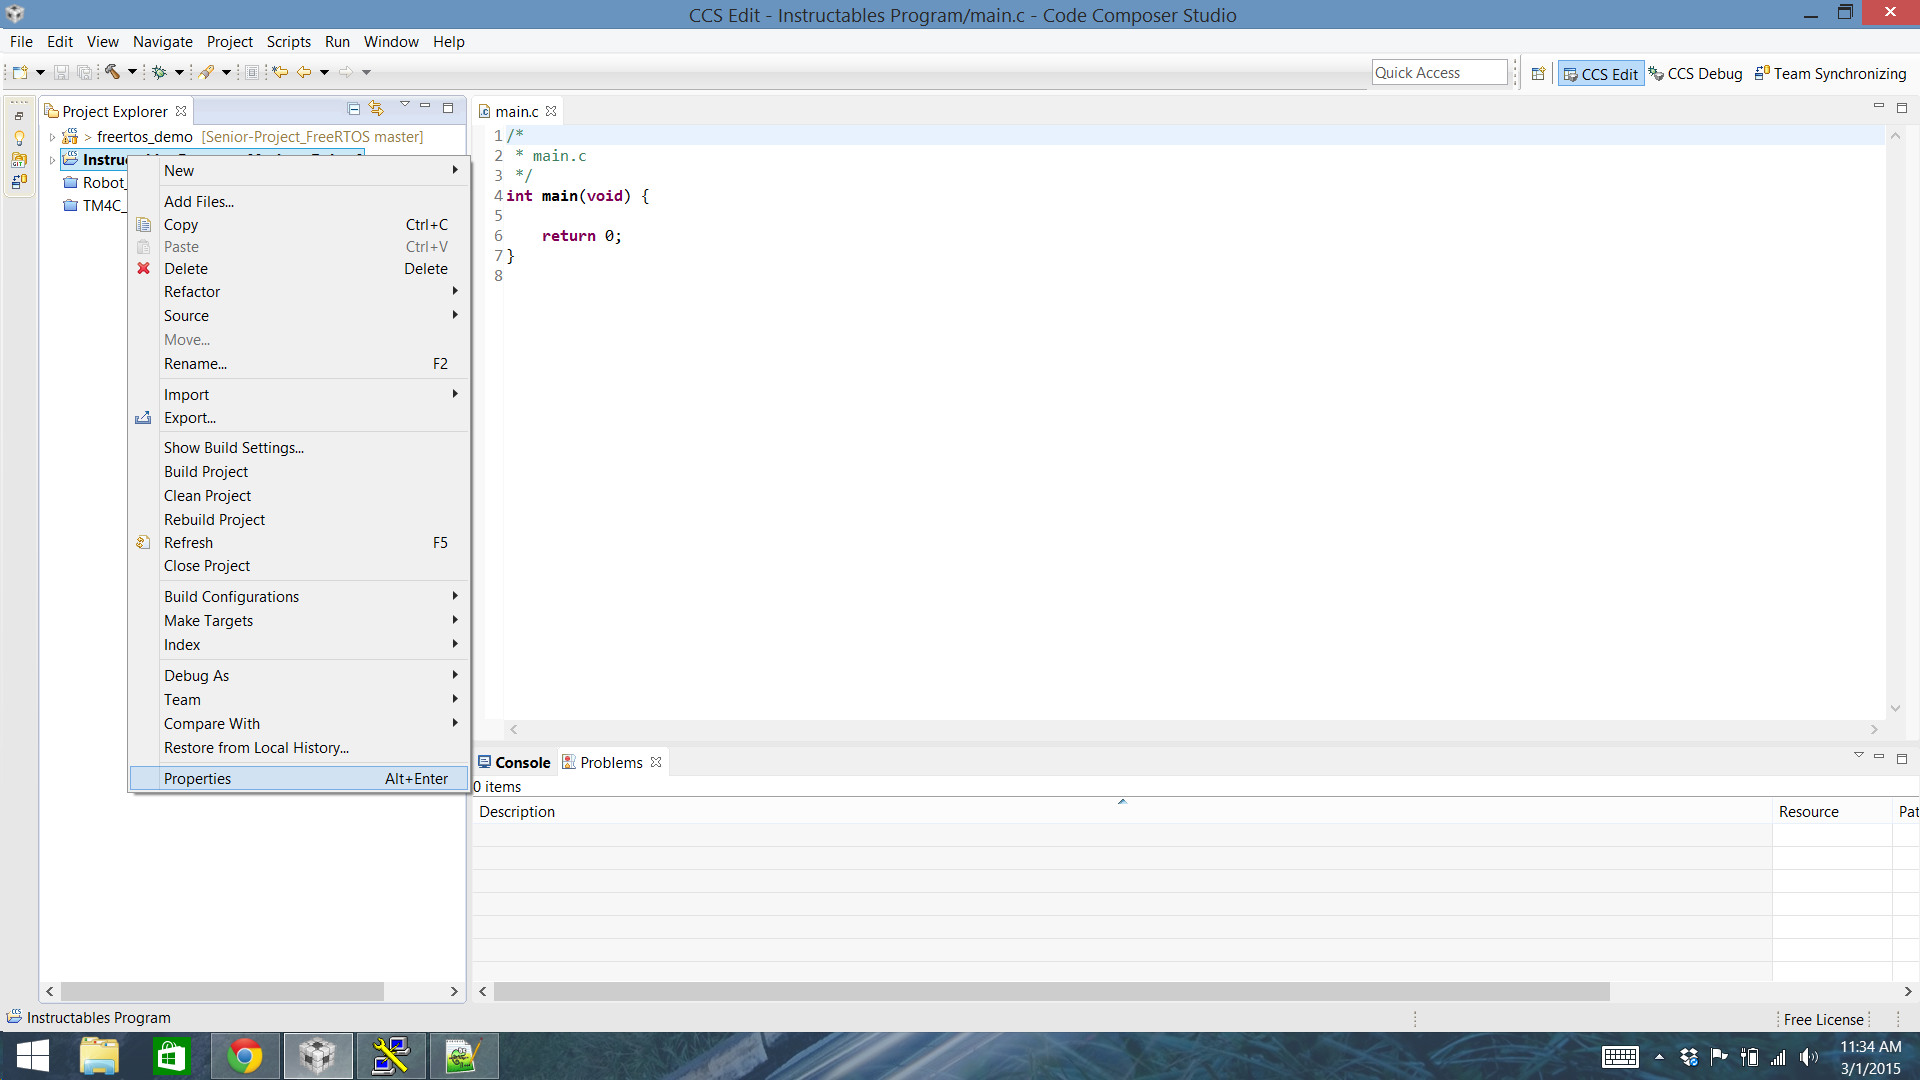
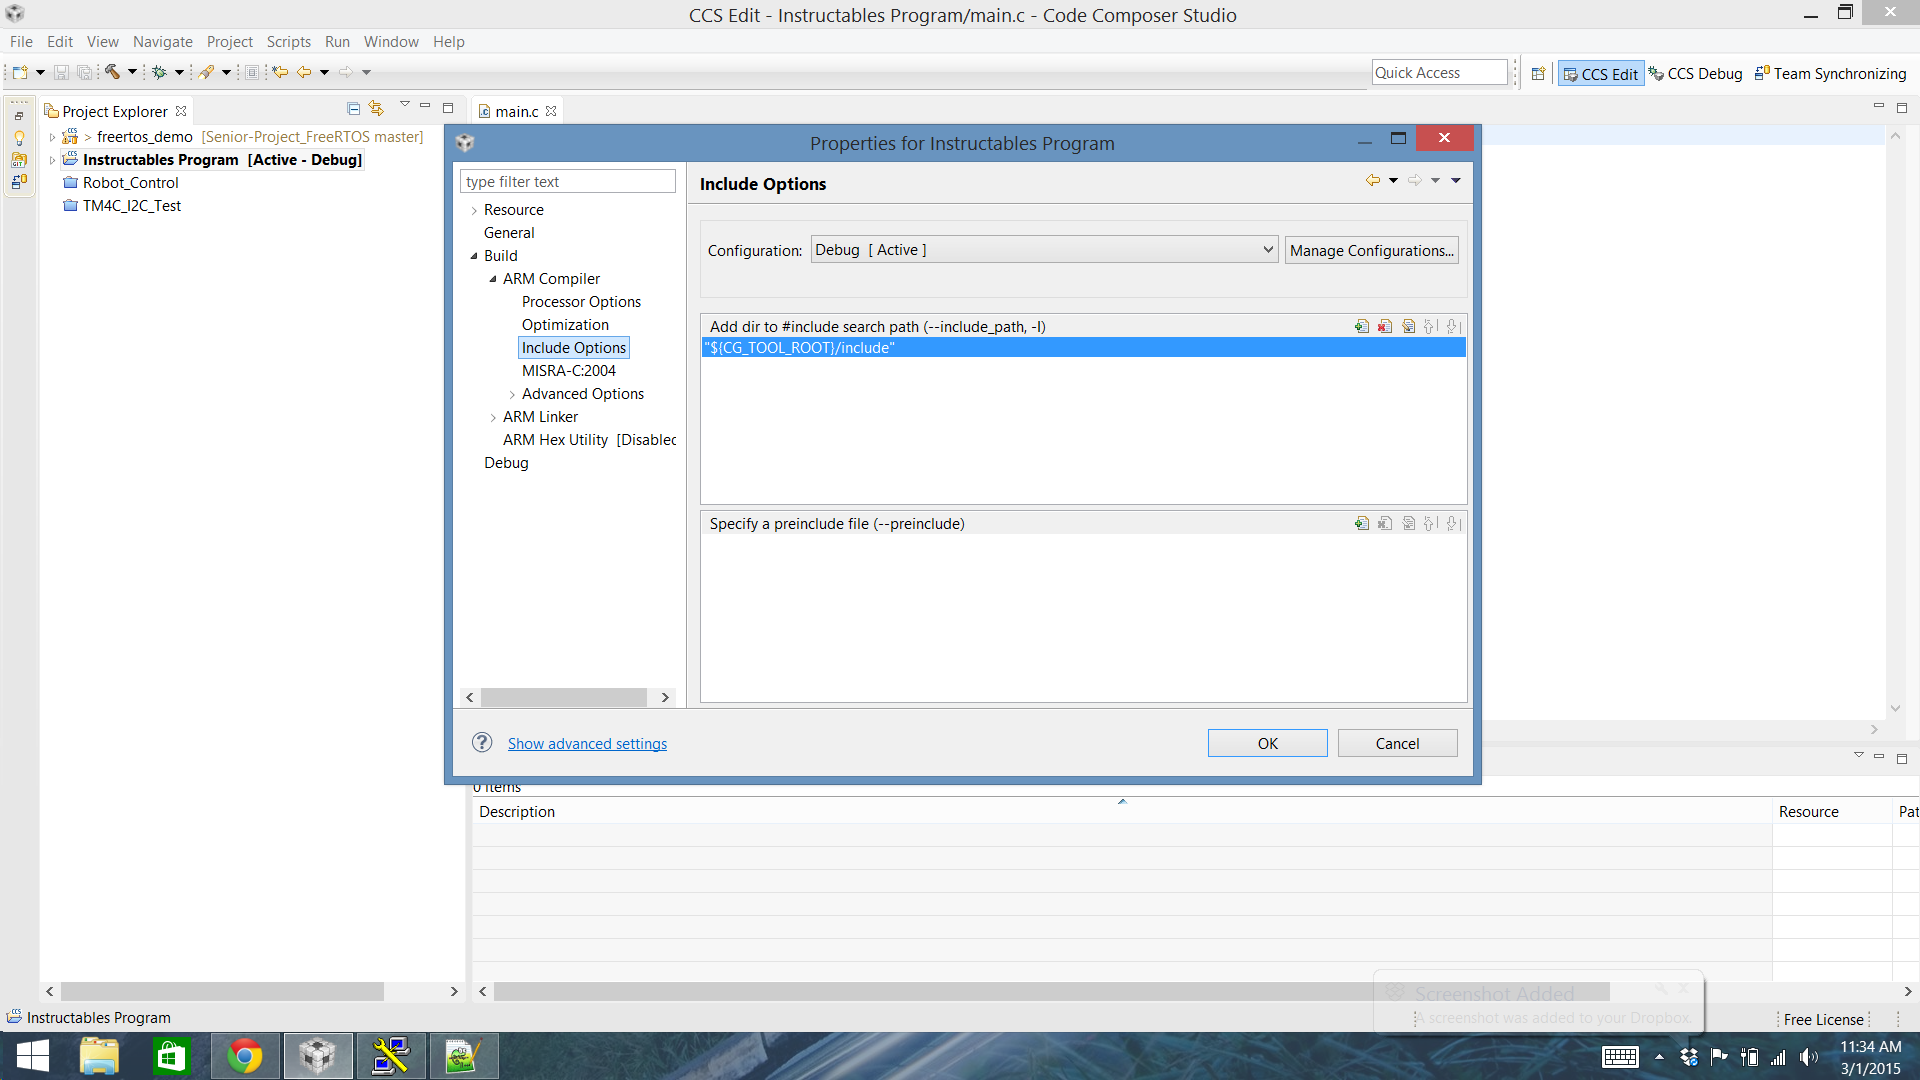
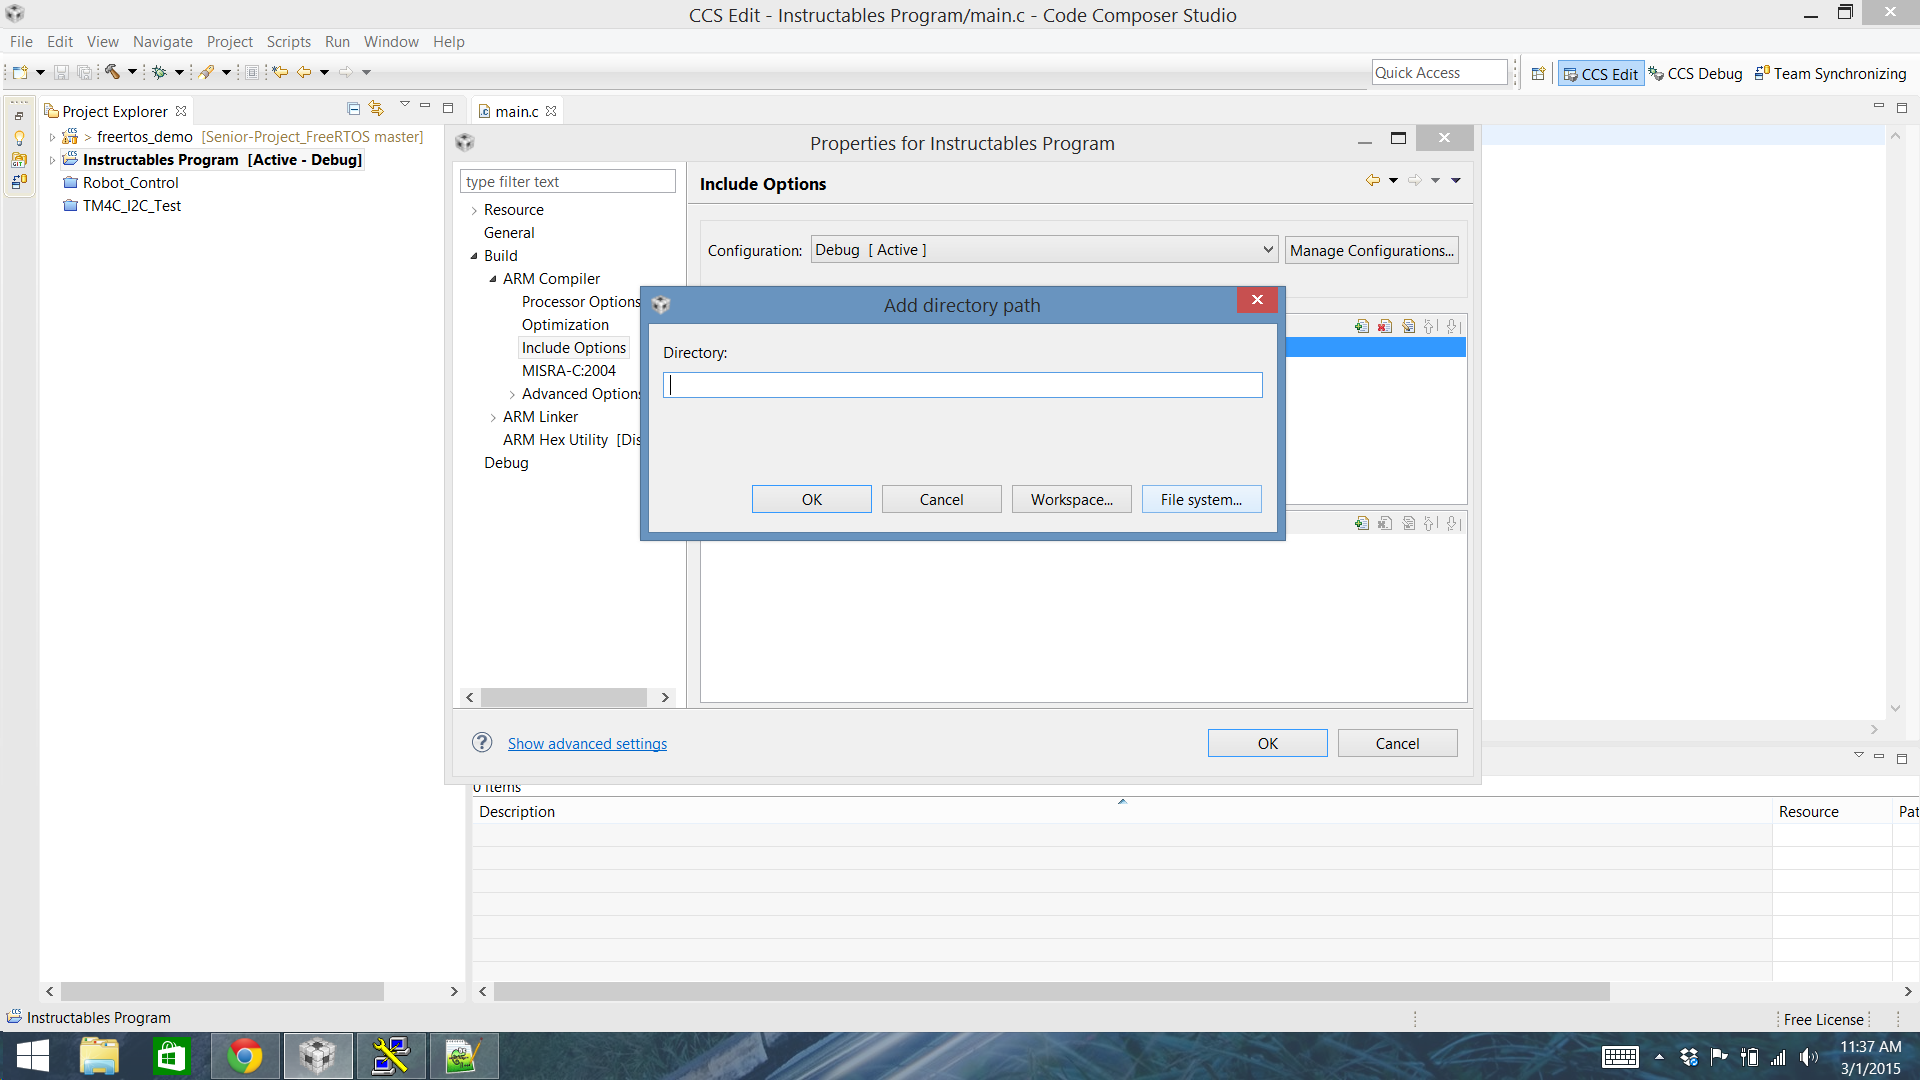
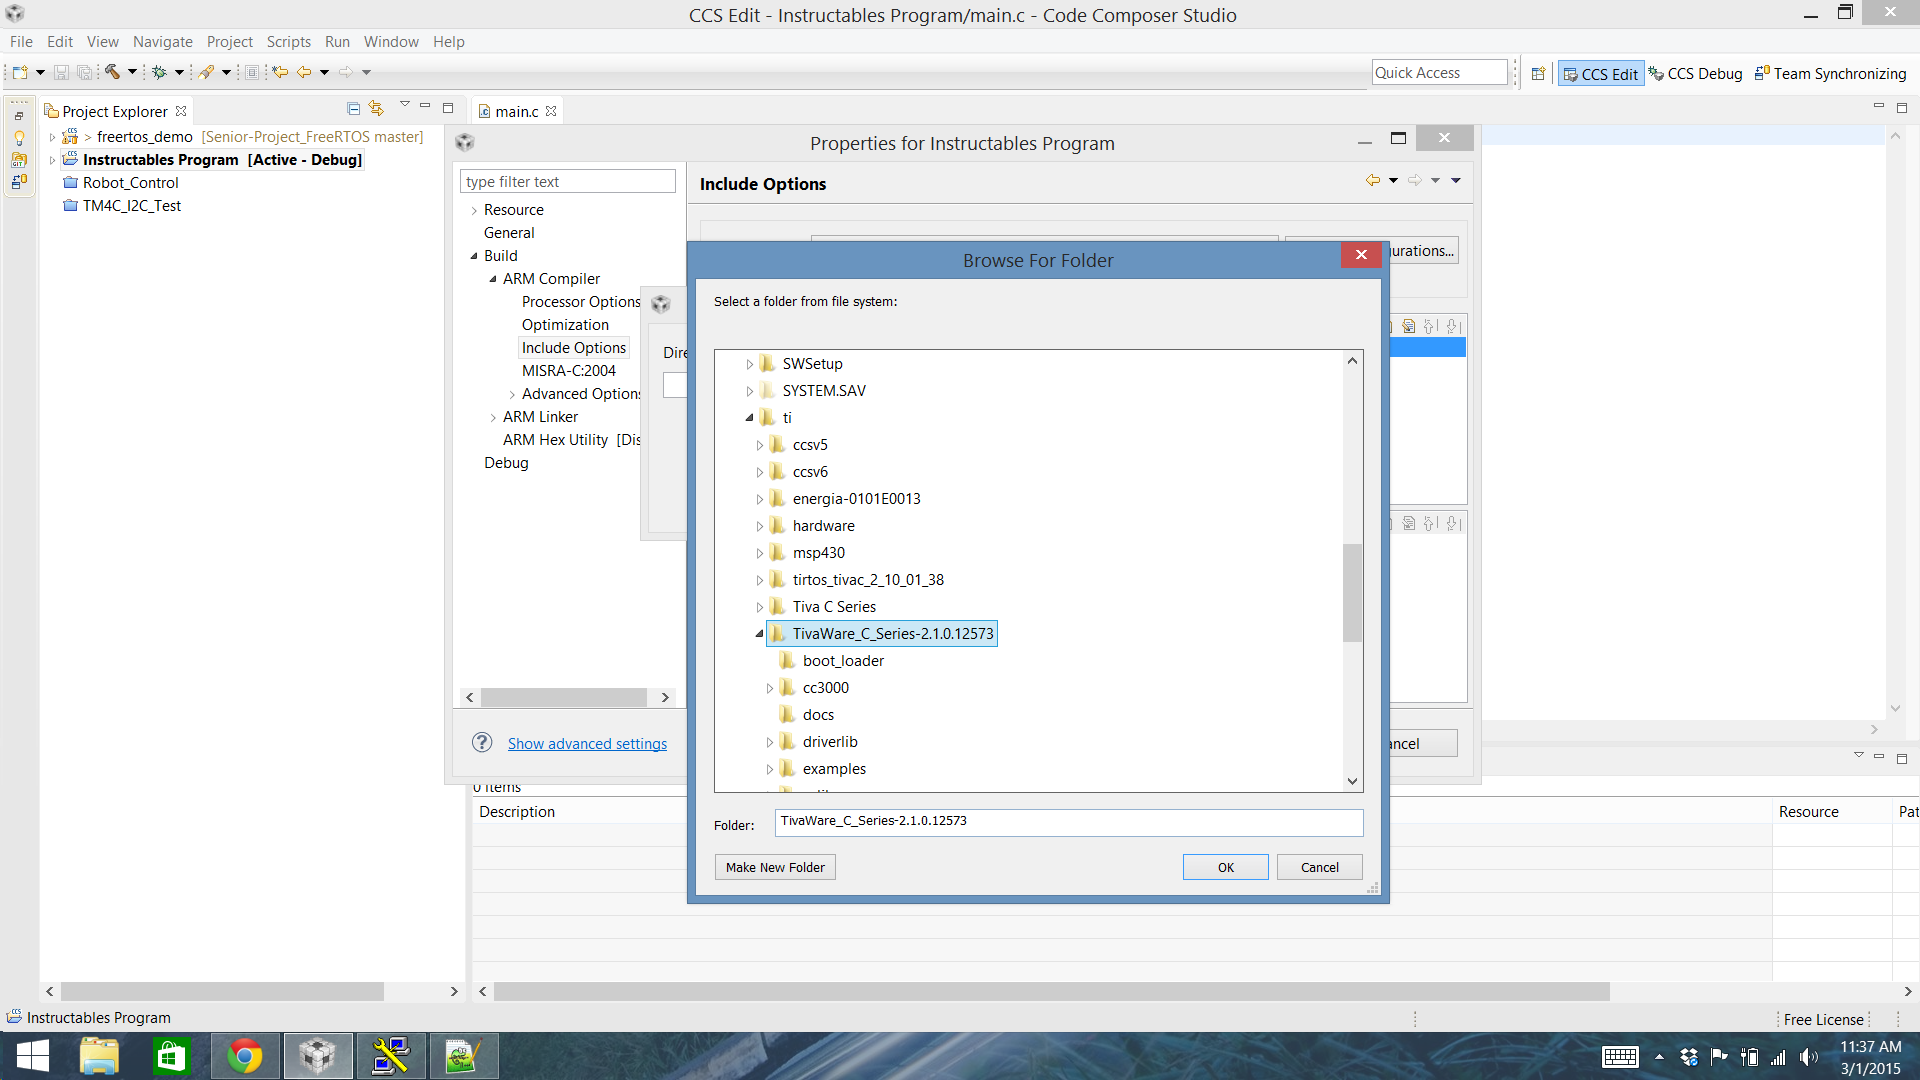
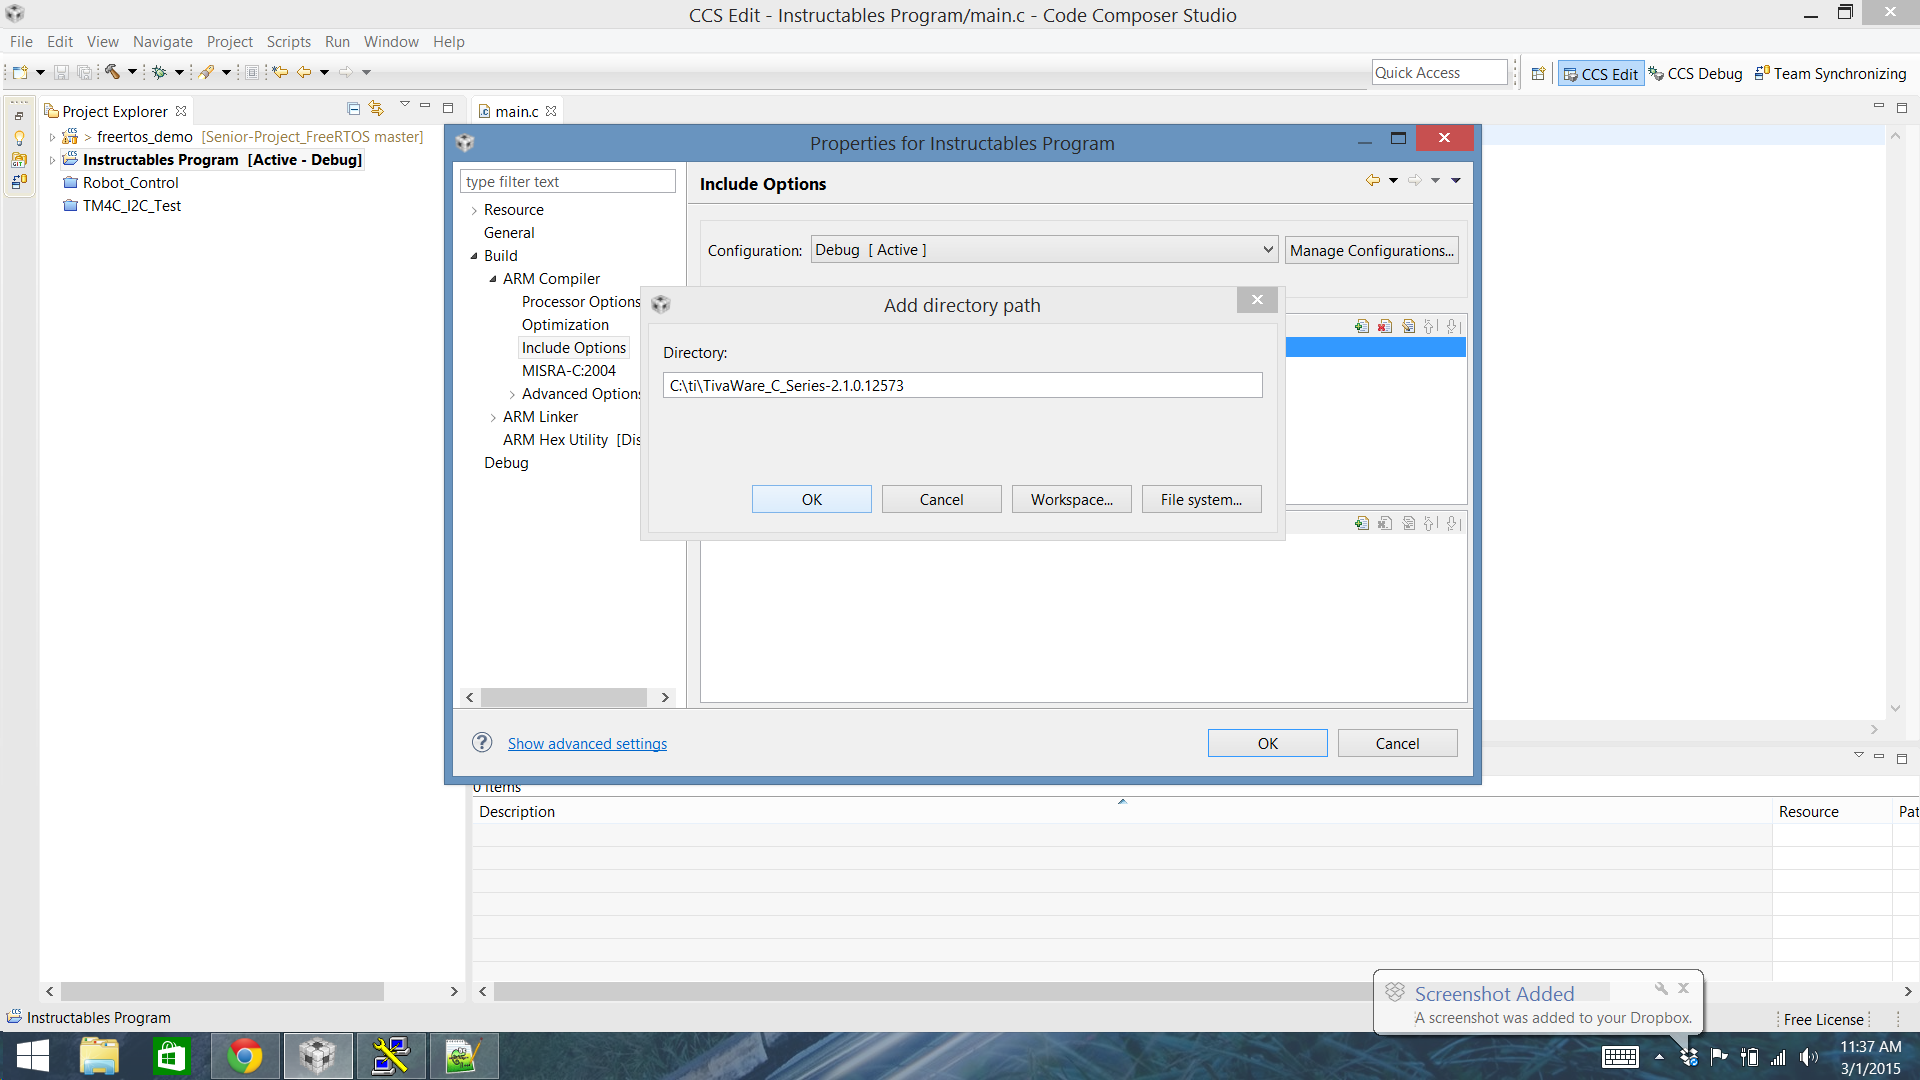
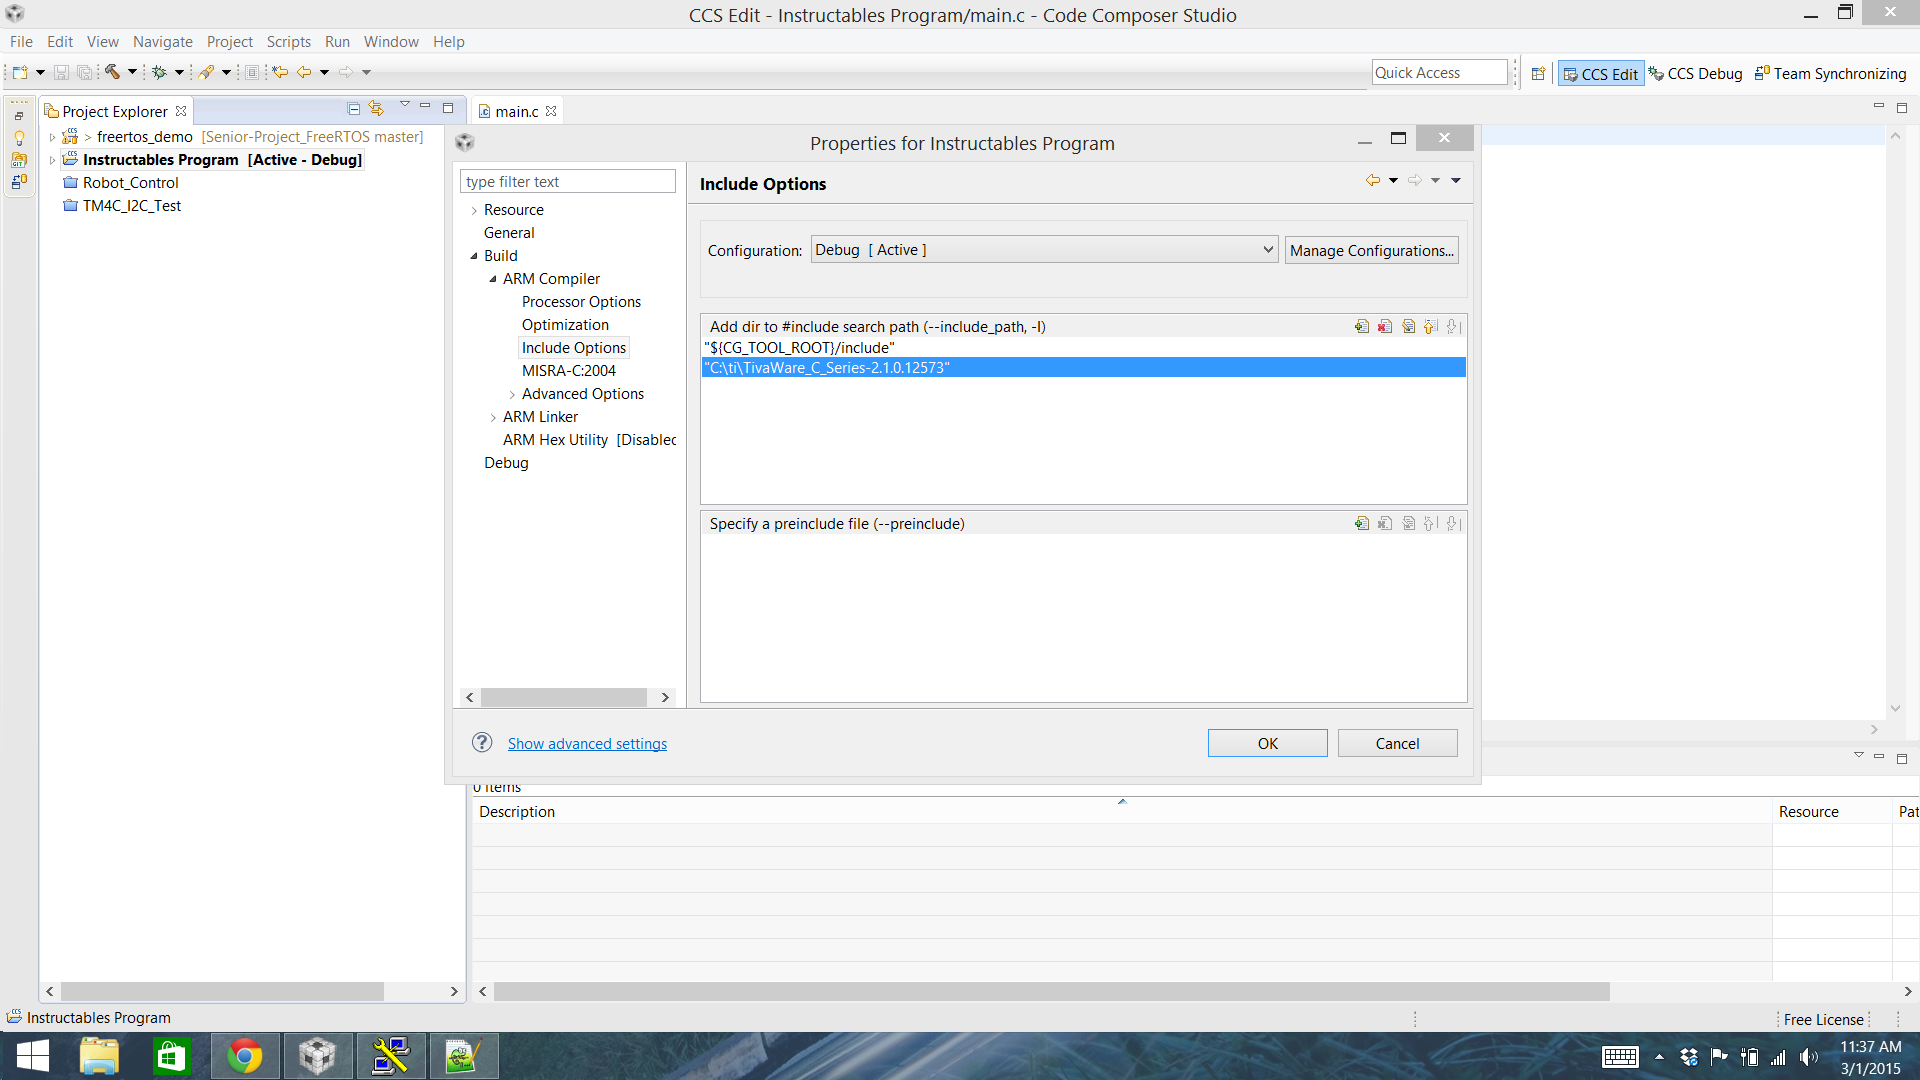
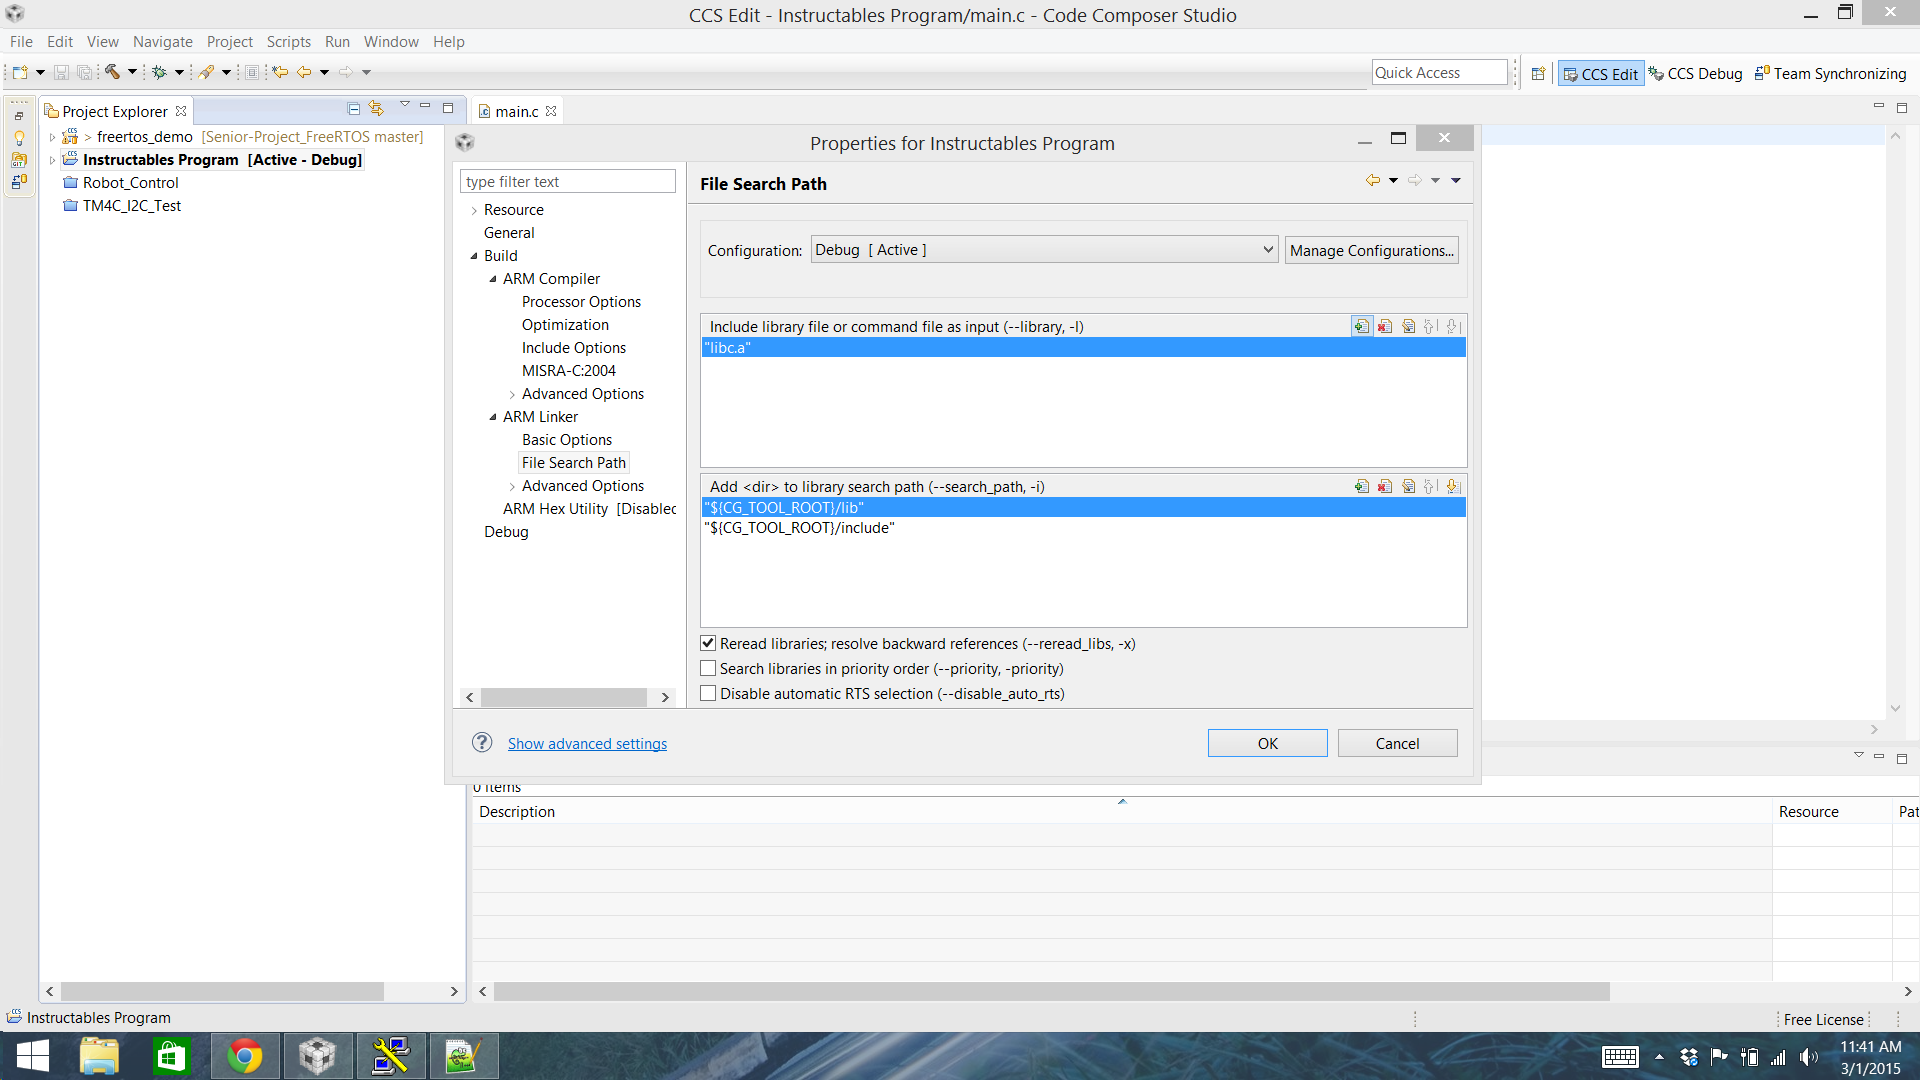
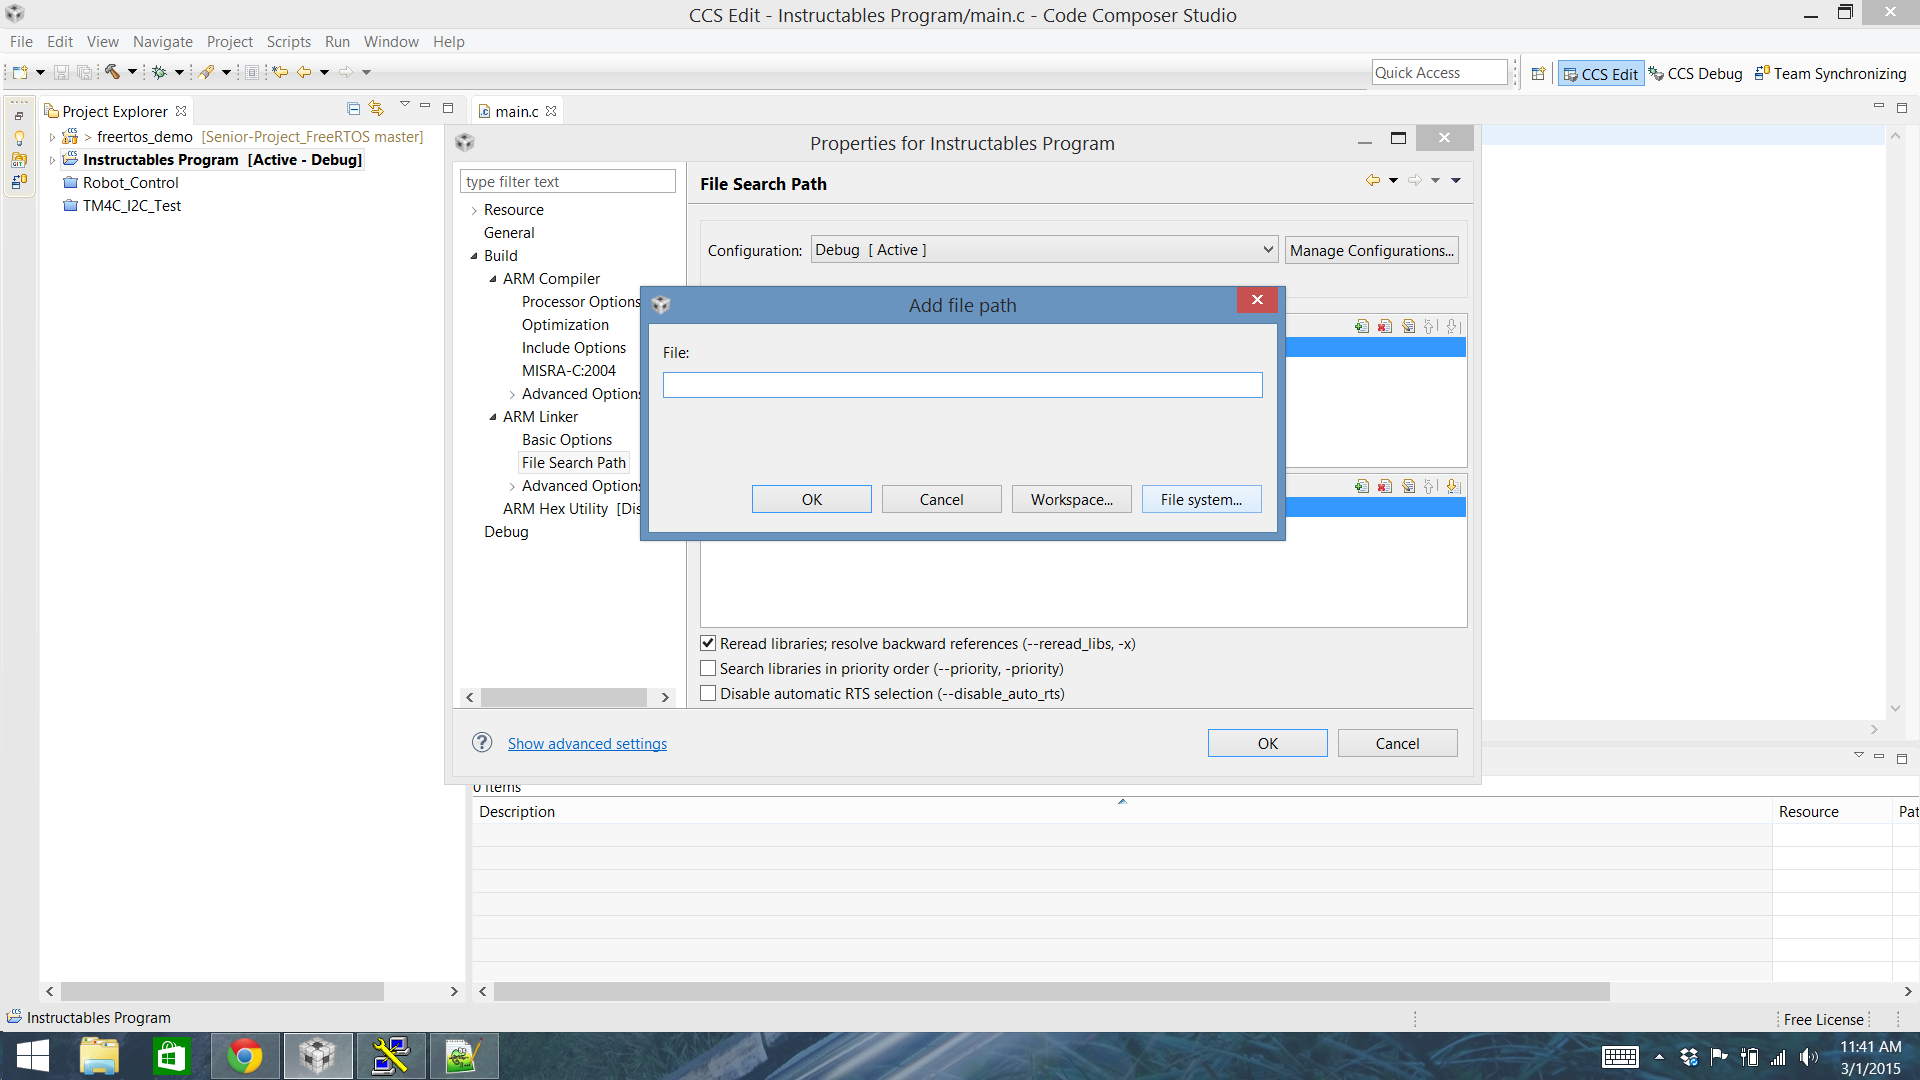
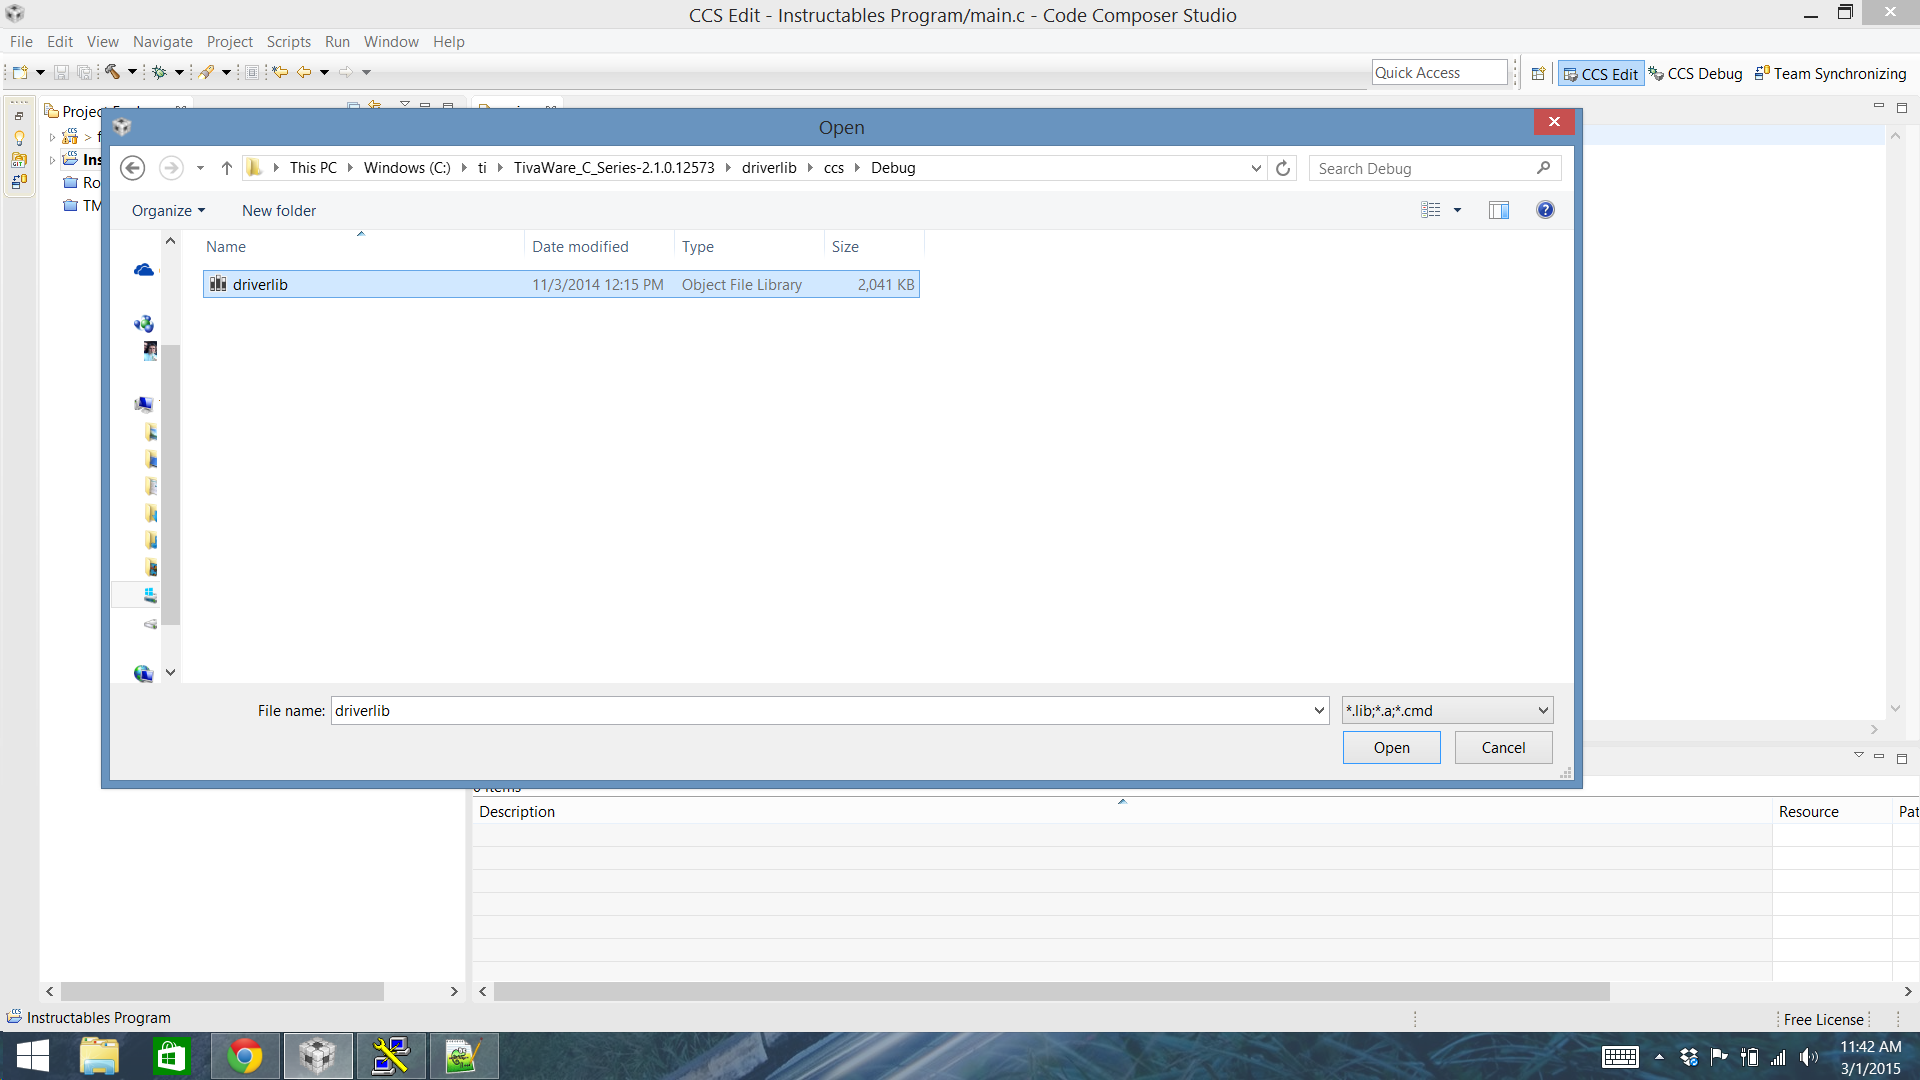
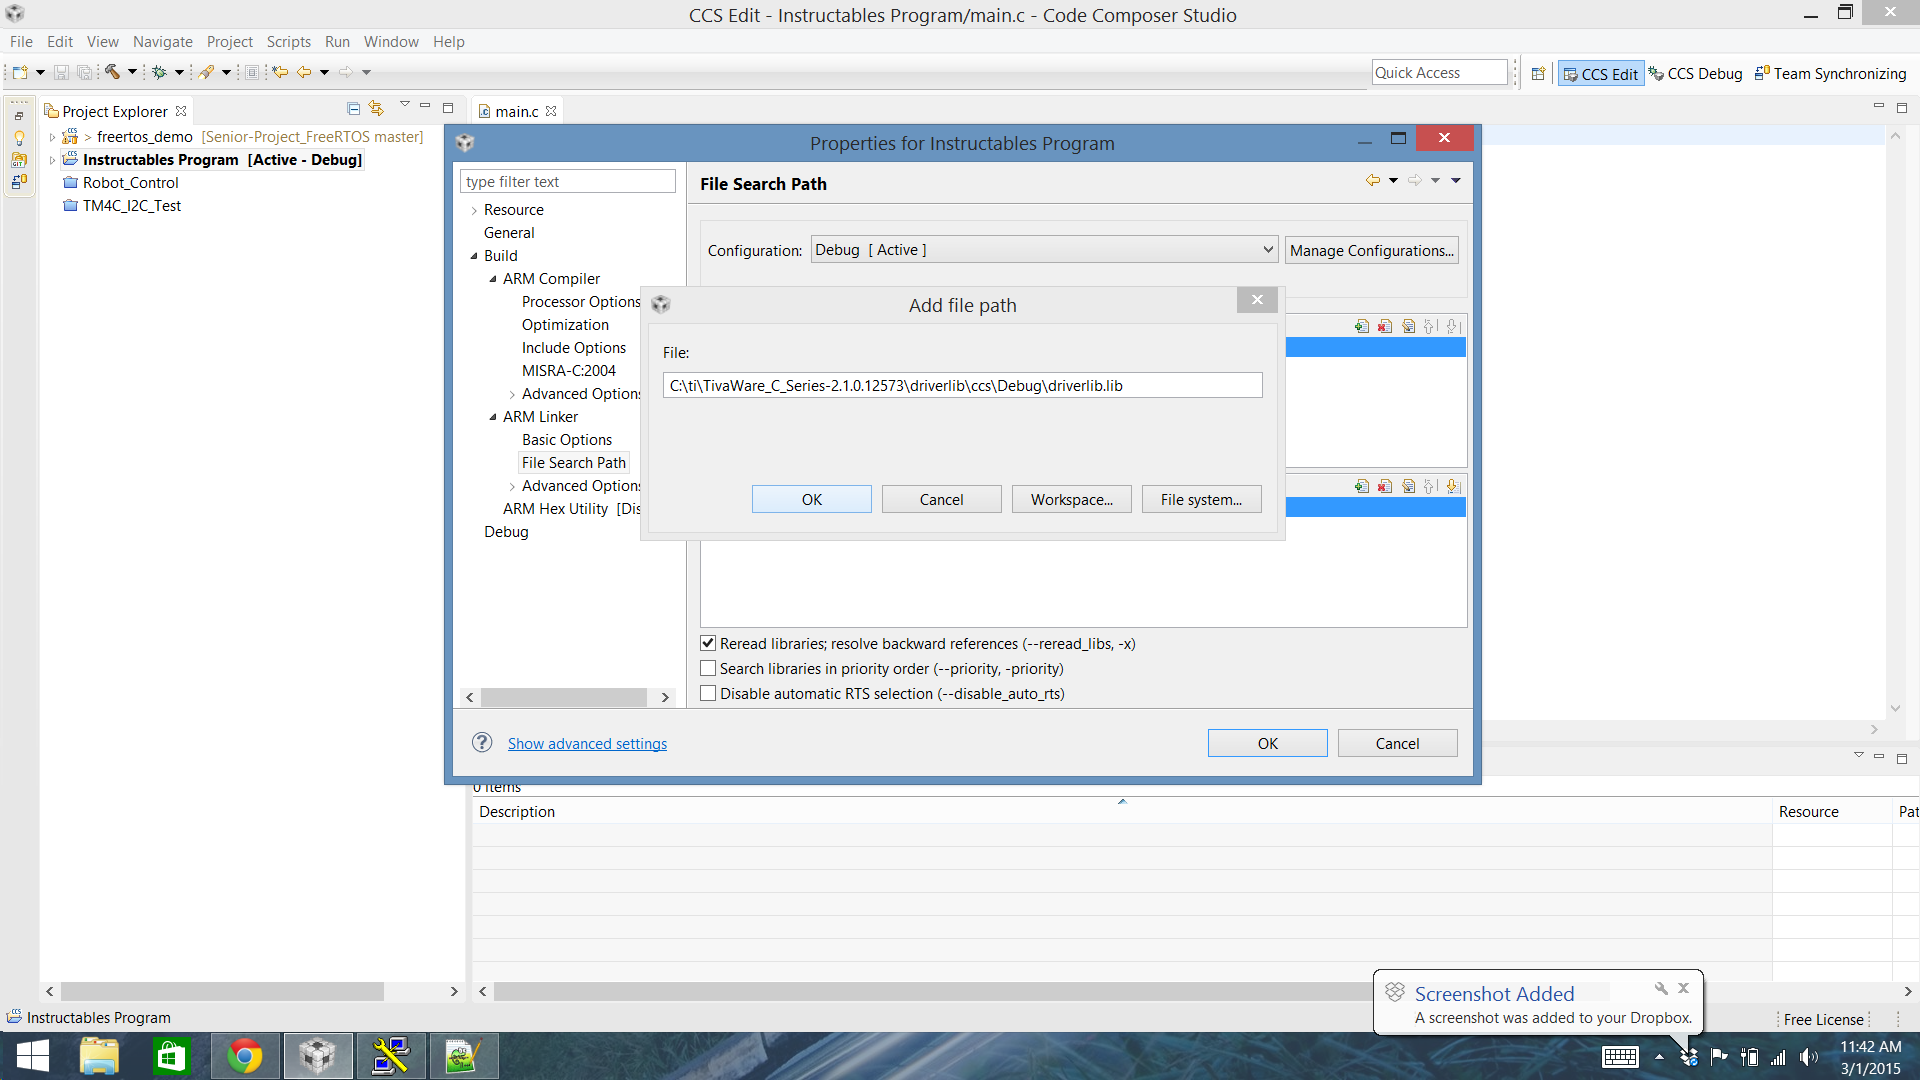
Ok now comes the tricky part. We are going to start linking in everything needed for the TivaWare libraries.
Now that you've created the project you should see it appear in the left hand column. You can see above that it is sandwiched between the freertos_demo and Robot_Control demos.
Now right click on the project and select properties.
From here go to the ARM Compiler section and click on the Include Options.
In here we are going to click the paper with a plus sign icon to add a new directory to our project. In this case we want the TivaWare Library. For me it is included in the ti folder on my C drive.
After selecting the TivaWare location and adding it we will need to include the lib file as well for the linker.
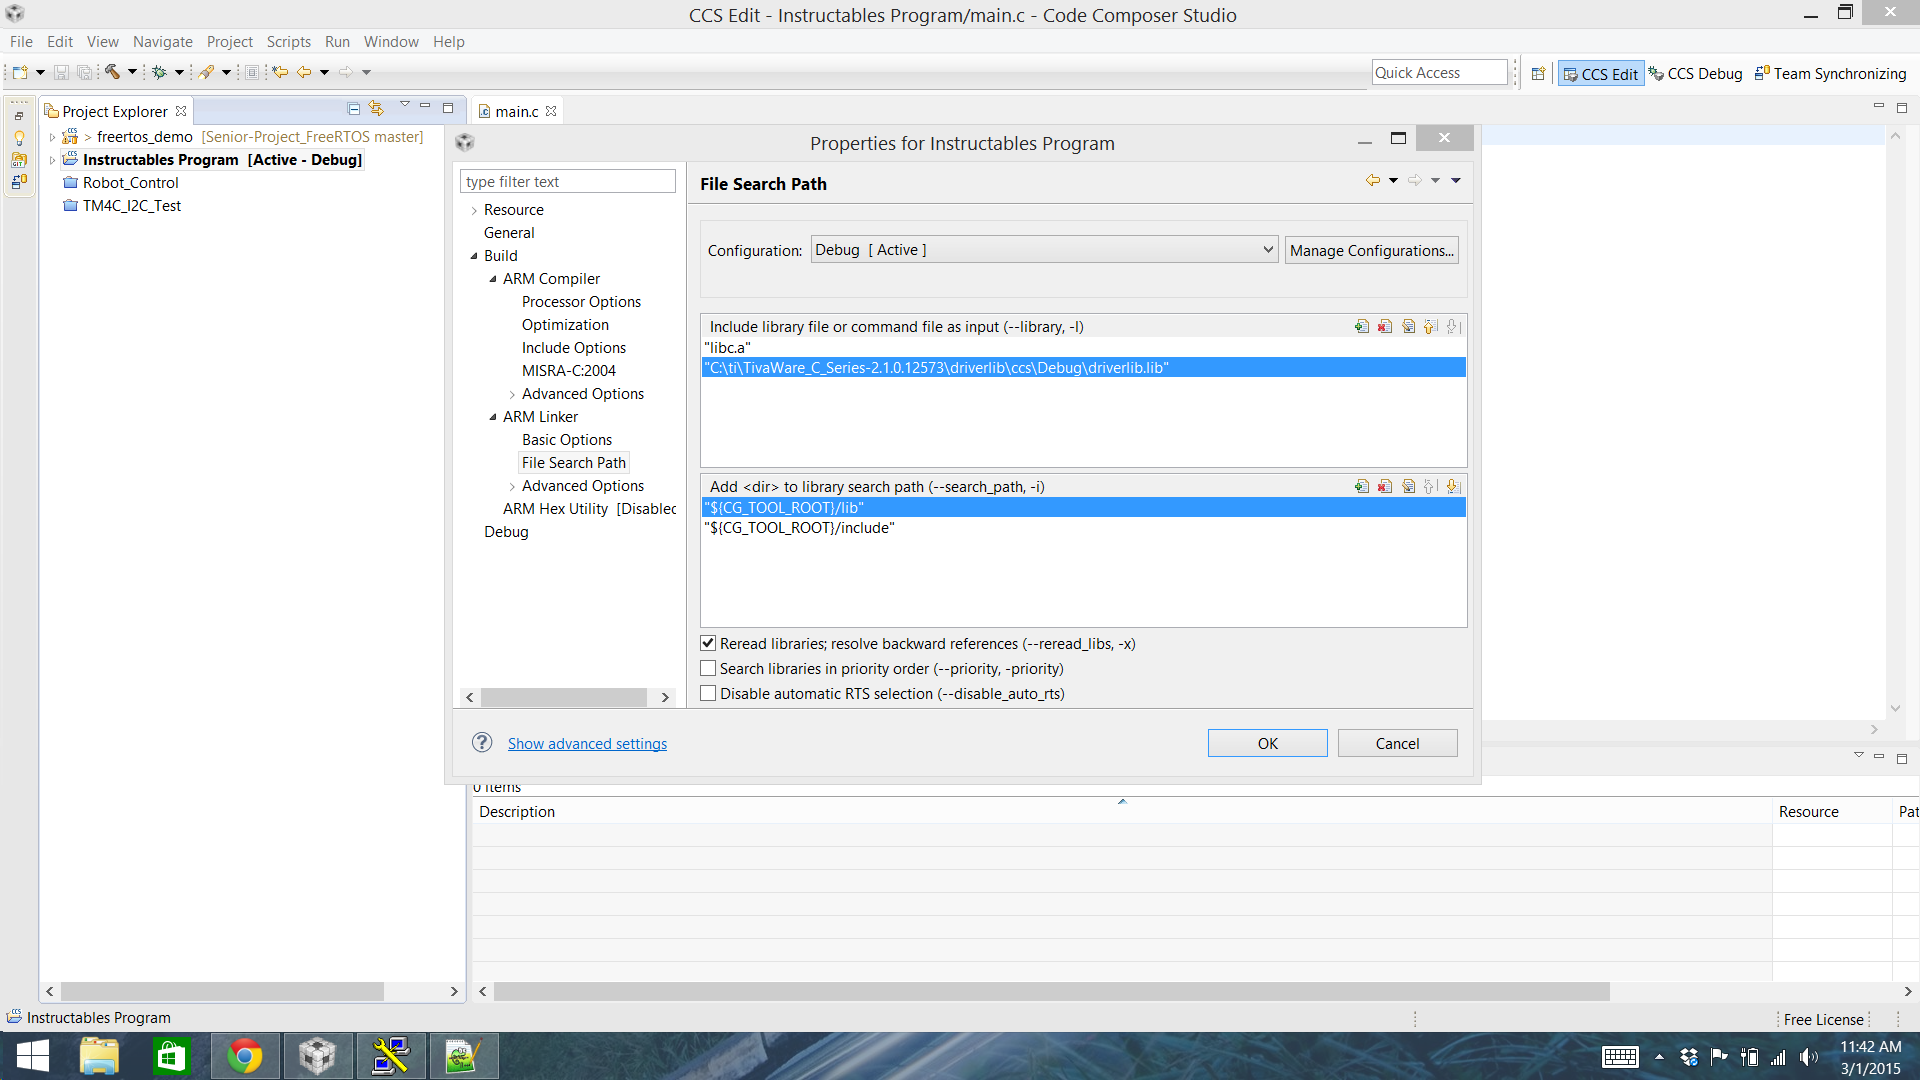
This time we will navigate to ARM Linker section and click on File Search Path. Similar to last step we will hit the paper with a plus sign icon to add a new library file. For me this file was in the TivaWare folder under driverlib->ccs->Debug.
Now let's make sure we can use ROM function!!!!
Enable ROM Functions
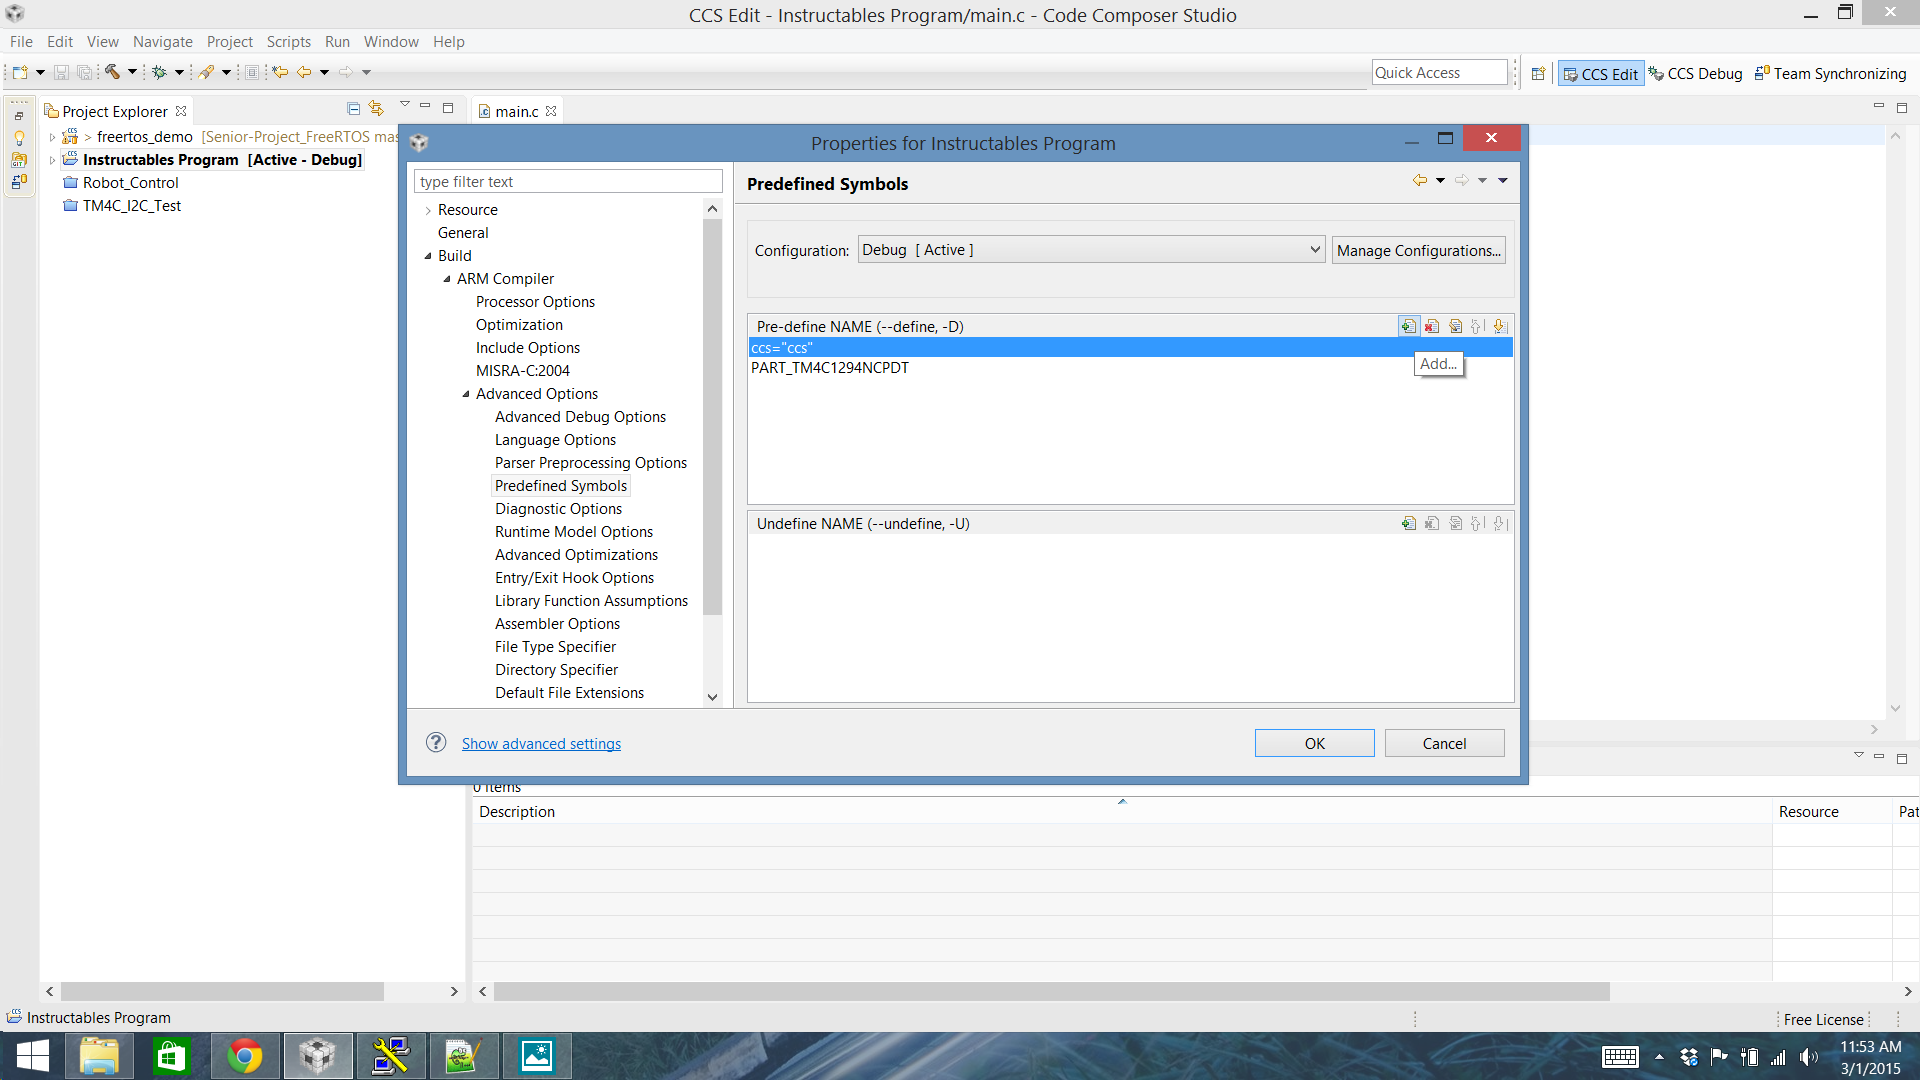
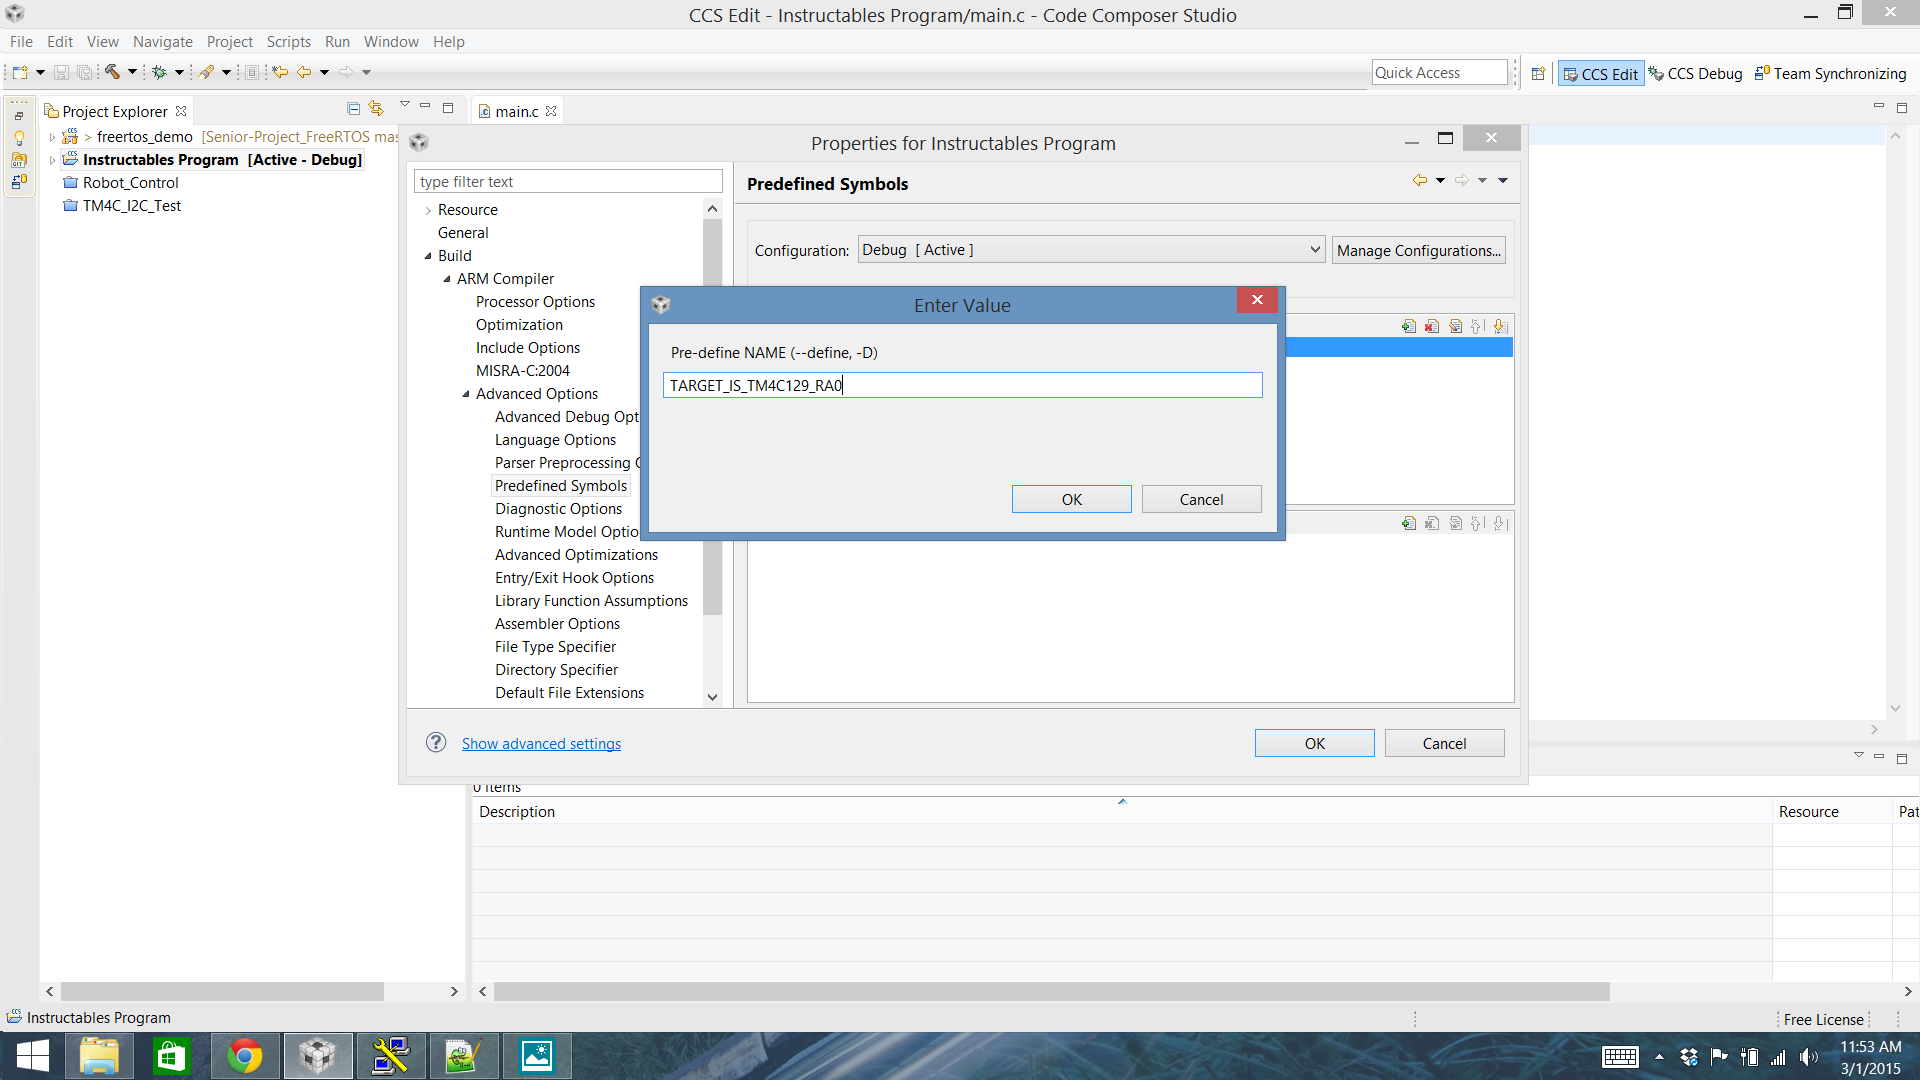
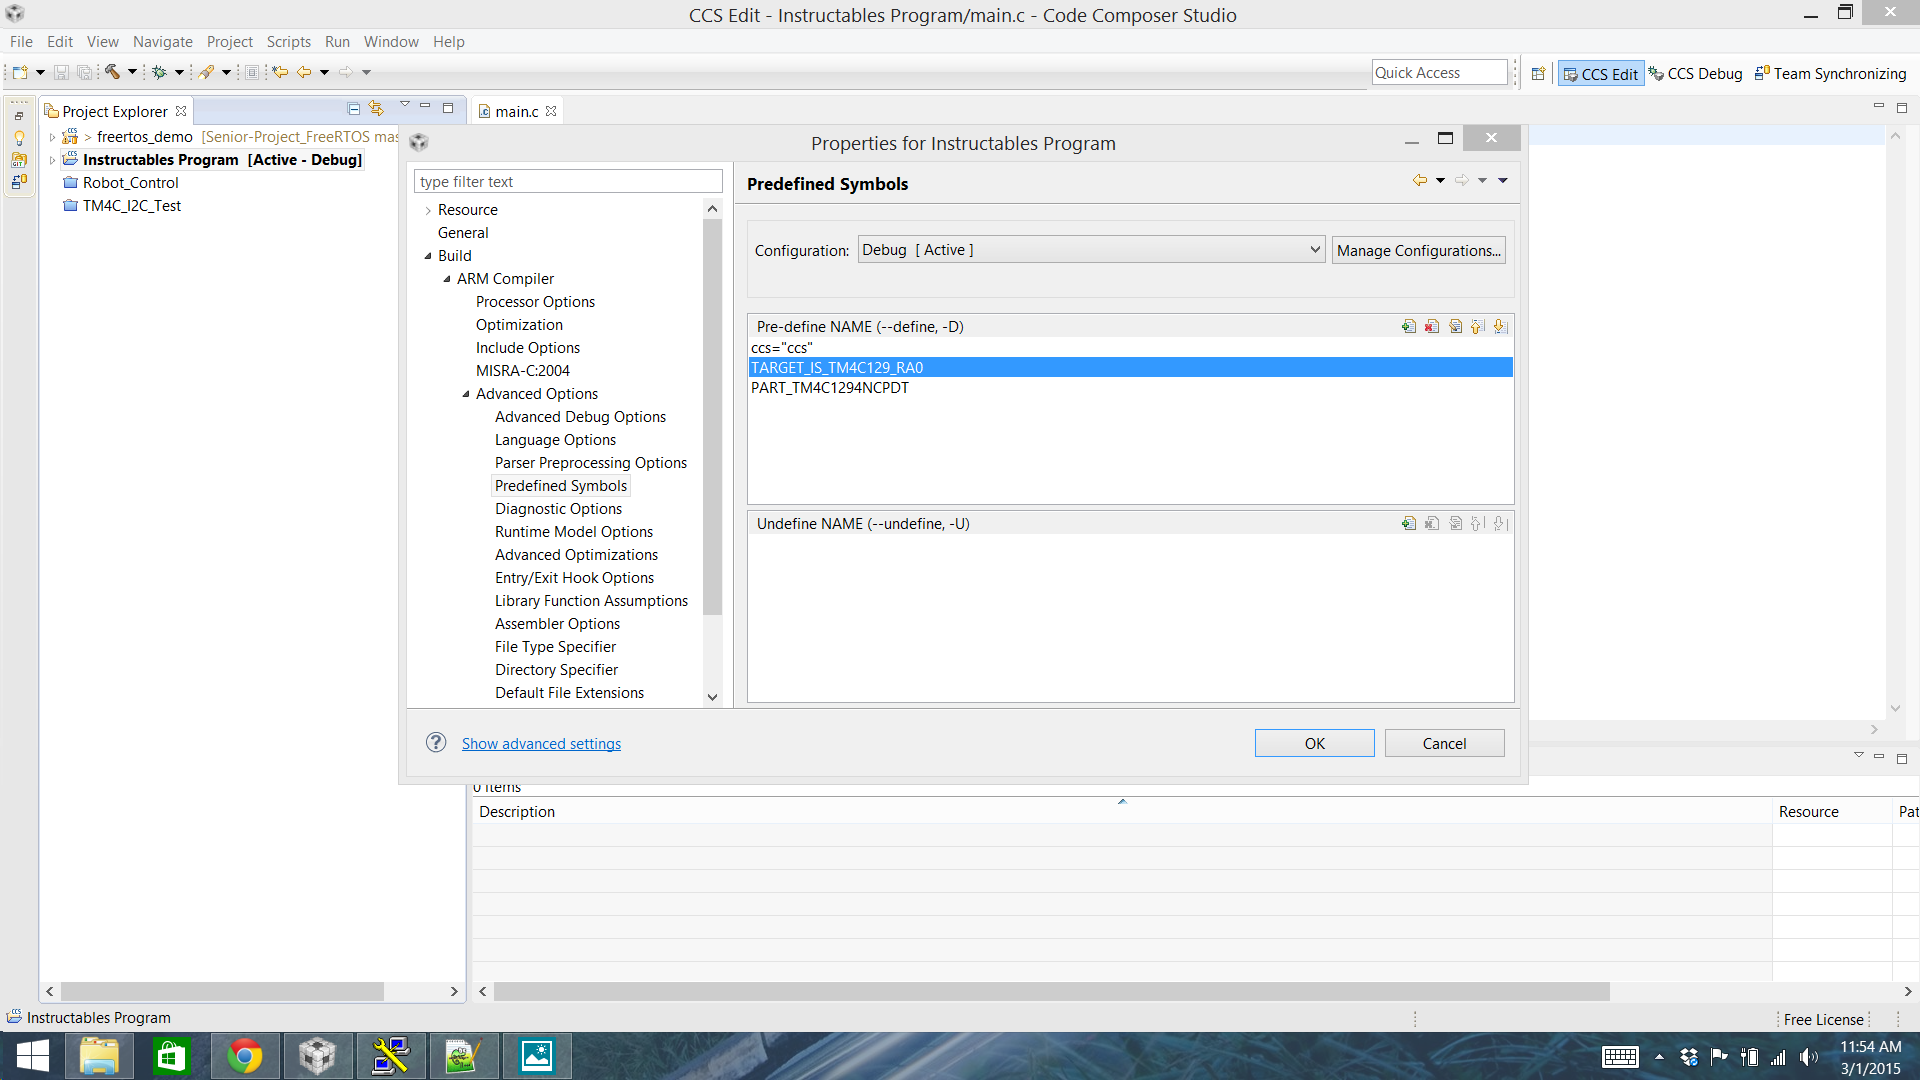
There is one small step needed to allow ROM functions to be used from a new project.
We need to go the Advanced Options section of the ARM Compiler and click on Predefined Symbols.
By default the target symbol is not included in a project which won't allow the ROM functions to compile for your microcontroller. This line varies according to your microcontroller! It is best to open up a TI example program for your board and see what there predefined symbol is and copy it. For my particular board the TM4C1294NCPDT we need to add the line TARGET_IS_TM4C129_RA0 here.
Configure the Debugger
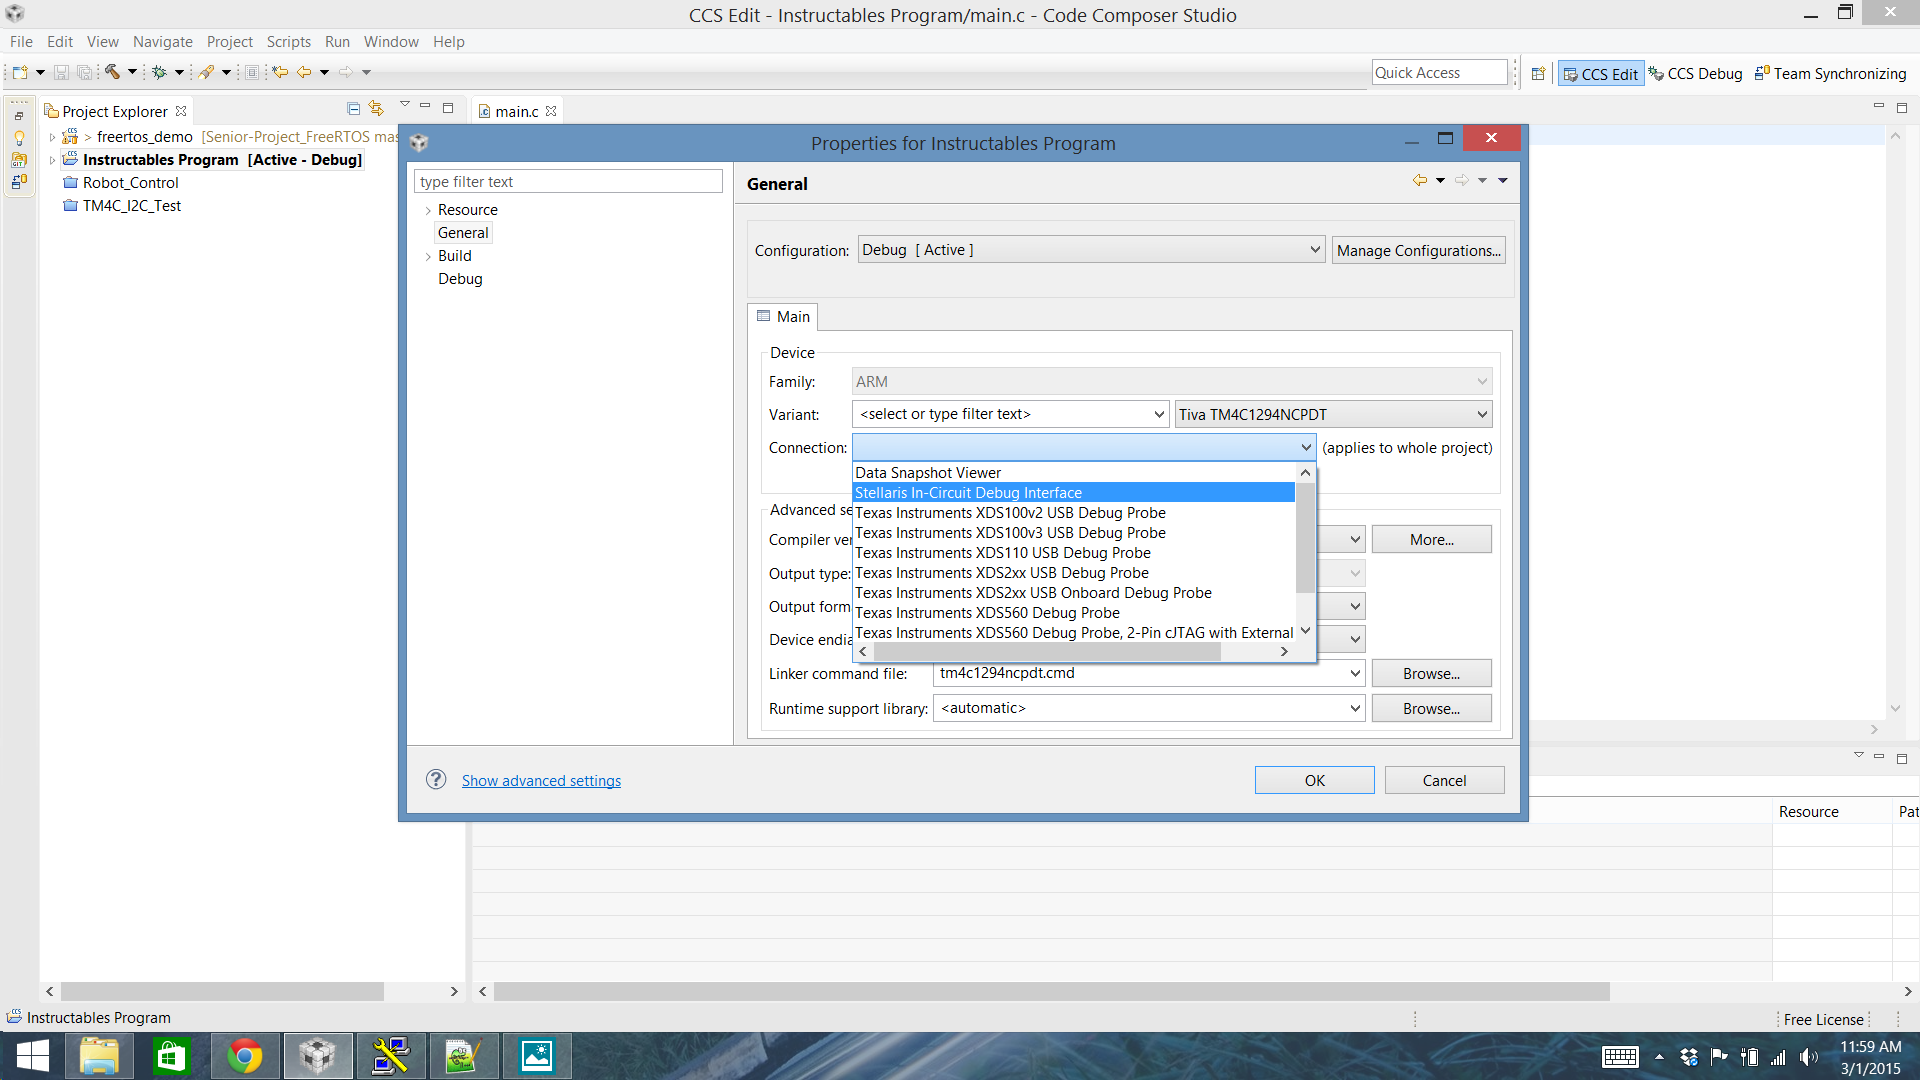
Ok almost done!
Now we need to tell CCS how we want to debug! In most cases such as a TM4C123 or TM4C1294 we will use the Stellaris In-Circuit Debug Interface. This option is under the General section.
A Code Example
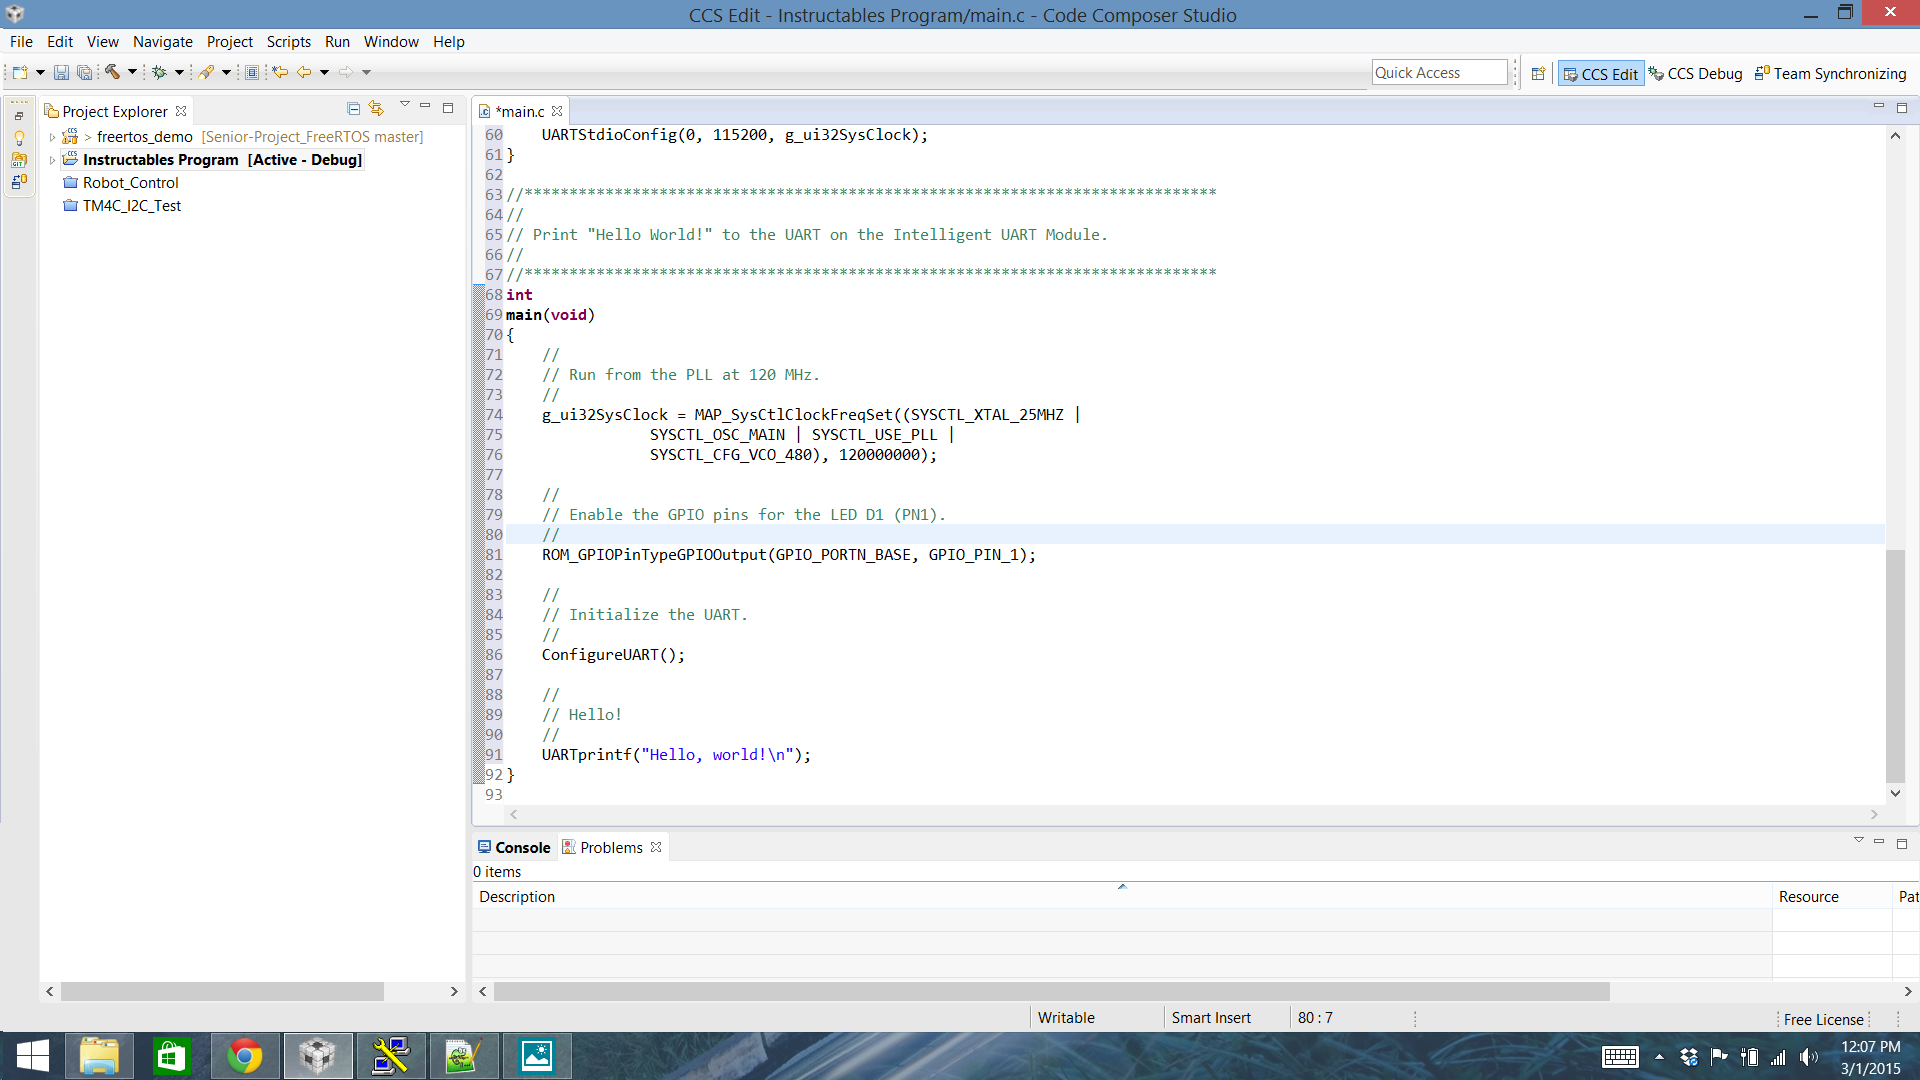
I want to make sure the project can work correctly now so I'm going to use a simple example using TivaWare to test it out. The code is slightly modified by Texas Instruments Hello example and is placed below.
#include <stdint.h>
#include <stdbool.h> #include "inc/hw_memmap.h" #include "inc/hw_types.h" #include "driverlib/gpio.h" #include "driverlib/pin_map.h" #include "driverlib/rom.h" #include "driverlib/rom_map.h" #include "driverlib/sysctl.h" #include "driverlib/uart.h" #include "utils/uartstdio.h"//***************************************************************************** // // System clock rate in Hz. // //***************************************************************************** uint32_t g_ui32SysClock;
//***************************************************************************** // // The error routine that is called if the driver library encounters an error. // //***************************************************************************** #ifdef DEBUG void __error__(char *pcFilename, uint32_t ui32Line) { } #endif
//***************************************************************************** // // Configure the UART and its pins. This must be called before UARTprintf(). // //***************************************************************************** void ConfigureUART(void) { // // Enable the GPIO Peripheral used by the UART. // ROM_SysCtlPeripheralEnable(SYSCTL_PERIPH_GPIOA);
// // Enable UART0 // ROM_SysCtlPeripheralEnable(SYSCTL_PERIPH_UART0);
// // Configure GPIO Pins for UART mode. // ROM_GPIOPinConfigure(GPIO_PA0_U0RX); ROM_GPIOPinConfigure(GPIO_PA1_U0TX); ROM_GPIOPinTypeUART(GPIO_PORTA_BASE, GPIO_PIN_0 | GPIO_PIN_1);
// // Initialize the UART for console I/O. // UARTStdioConfig(0, 115200, g_ui32SysClock); }
//***************************************************************************** // // Print "Hello World!" to the UART on the Intelligent UART Module. // //***************************************************************************** int main(void) { // // Run from the PLL at 120 MHz. // g_ui32SysClock = MAP_SysCtlClockFreqSet((SYSCTL_XTAL_25MHZ | SYSCTL_OSC_MAIN | SYSCTL_USE_PLL | SYSCTL_CFG_VCO_480), 120000000);
// // Enable the GPIO pins for the LED D1 (PN1). // ROM_GPIOPinTypeGPIOOutput(GPIO_PORTN_BASE, GPIO_PIN_1);
// // Initialize the UART. // ConfigureUART();
// // Hello! // UARTprintf("Hello, world!\n"); }
In this example we are also using a file called uartstdio.h. This is a great time to explain how to include an external file not in the driverlib portion of the TivaWare Library.
Adding a External File
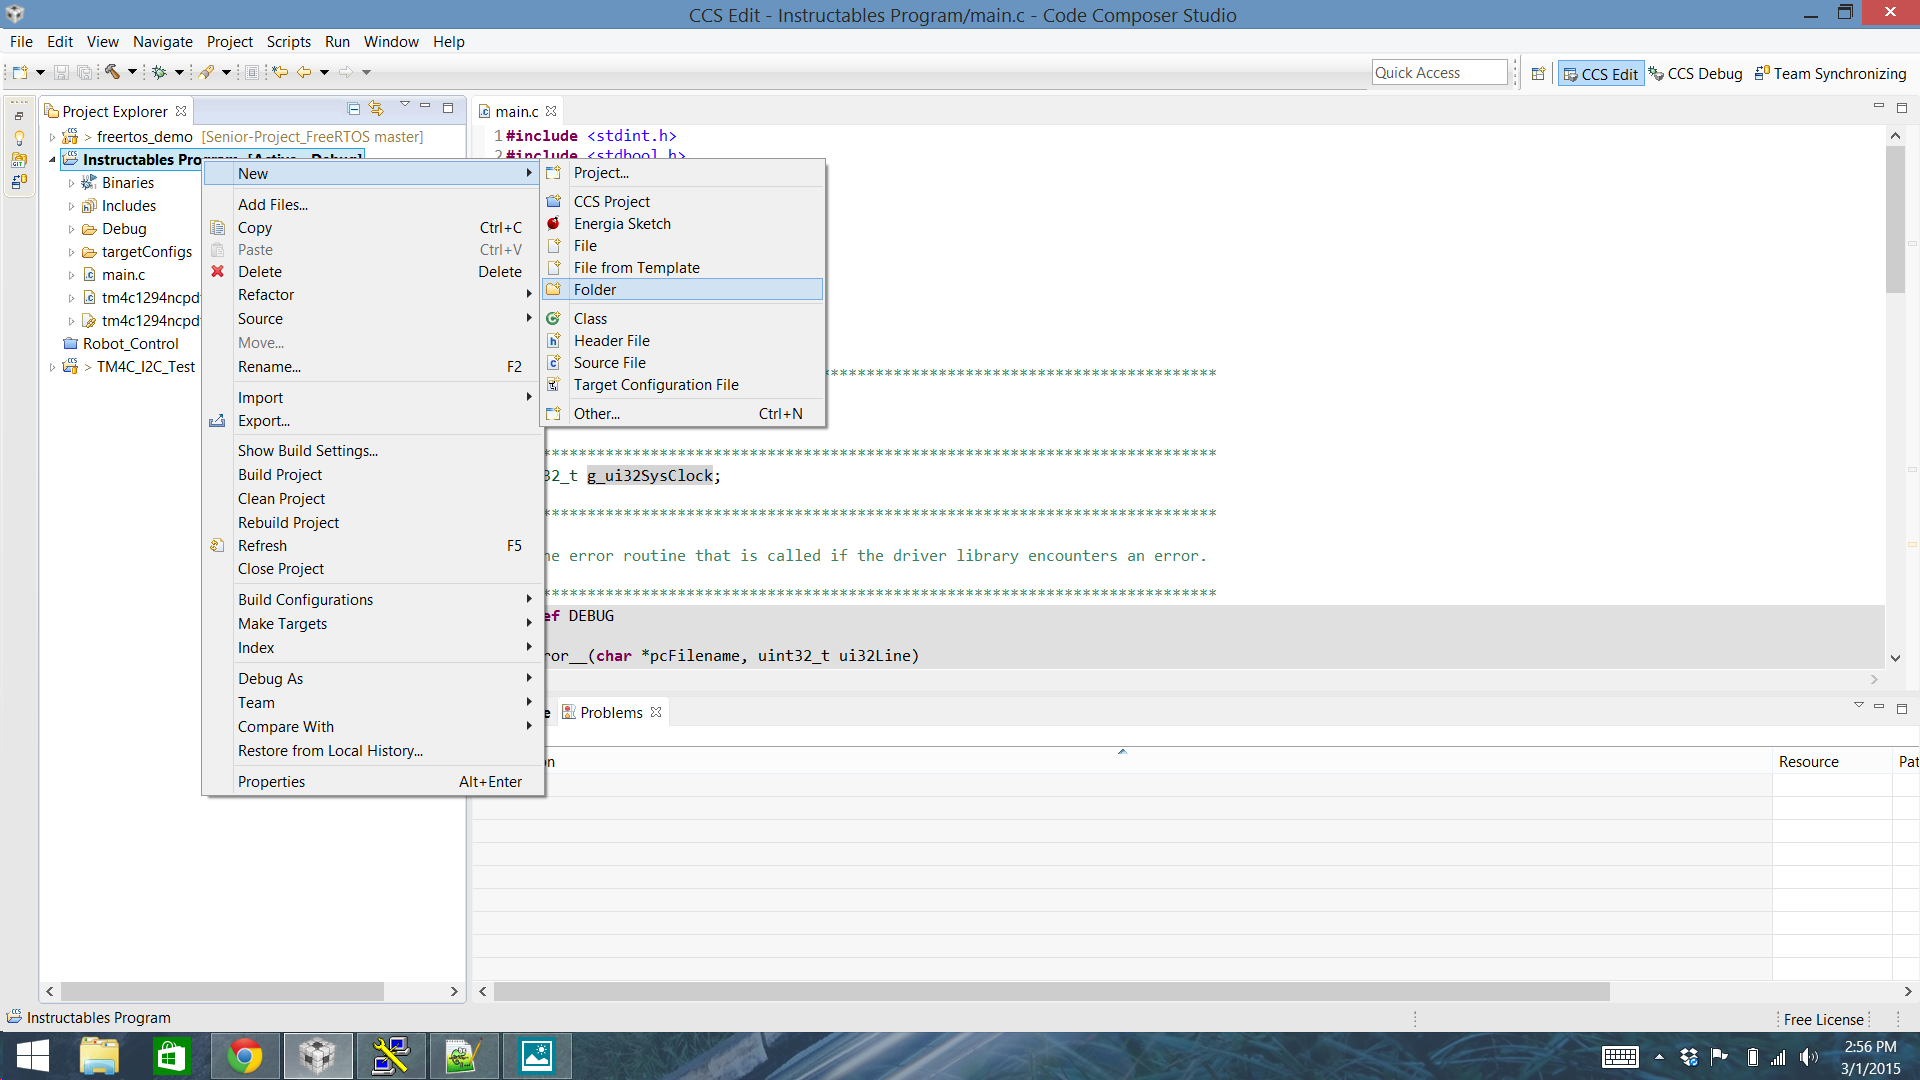
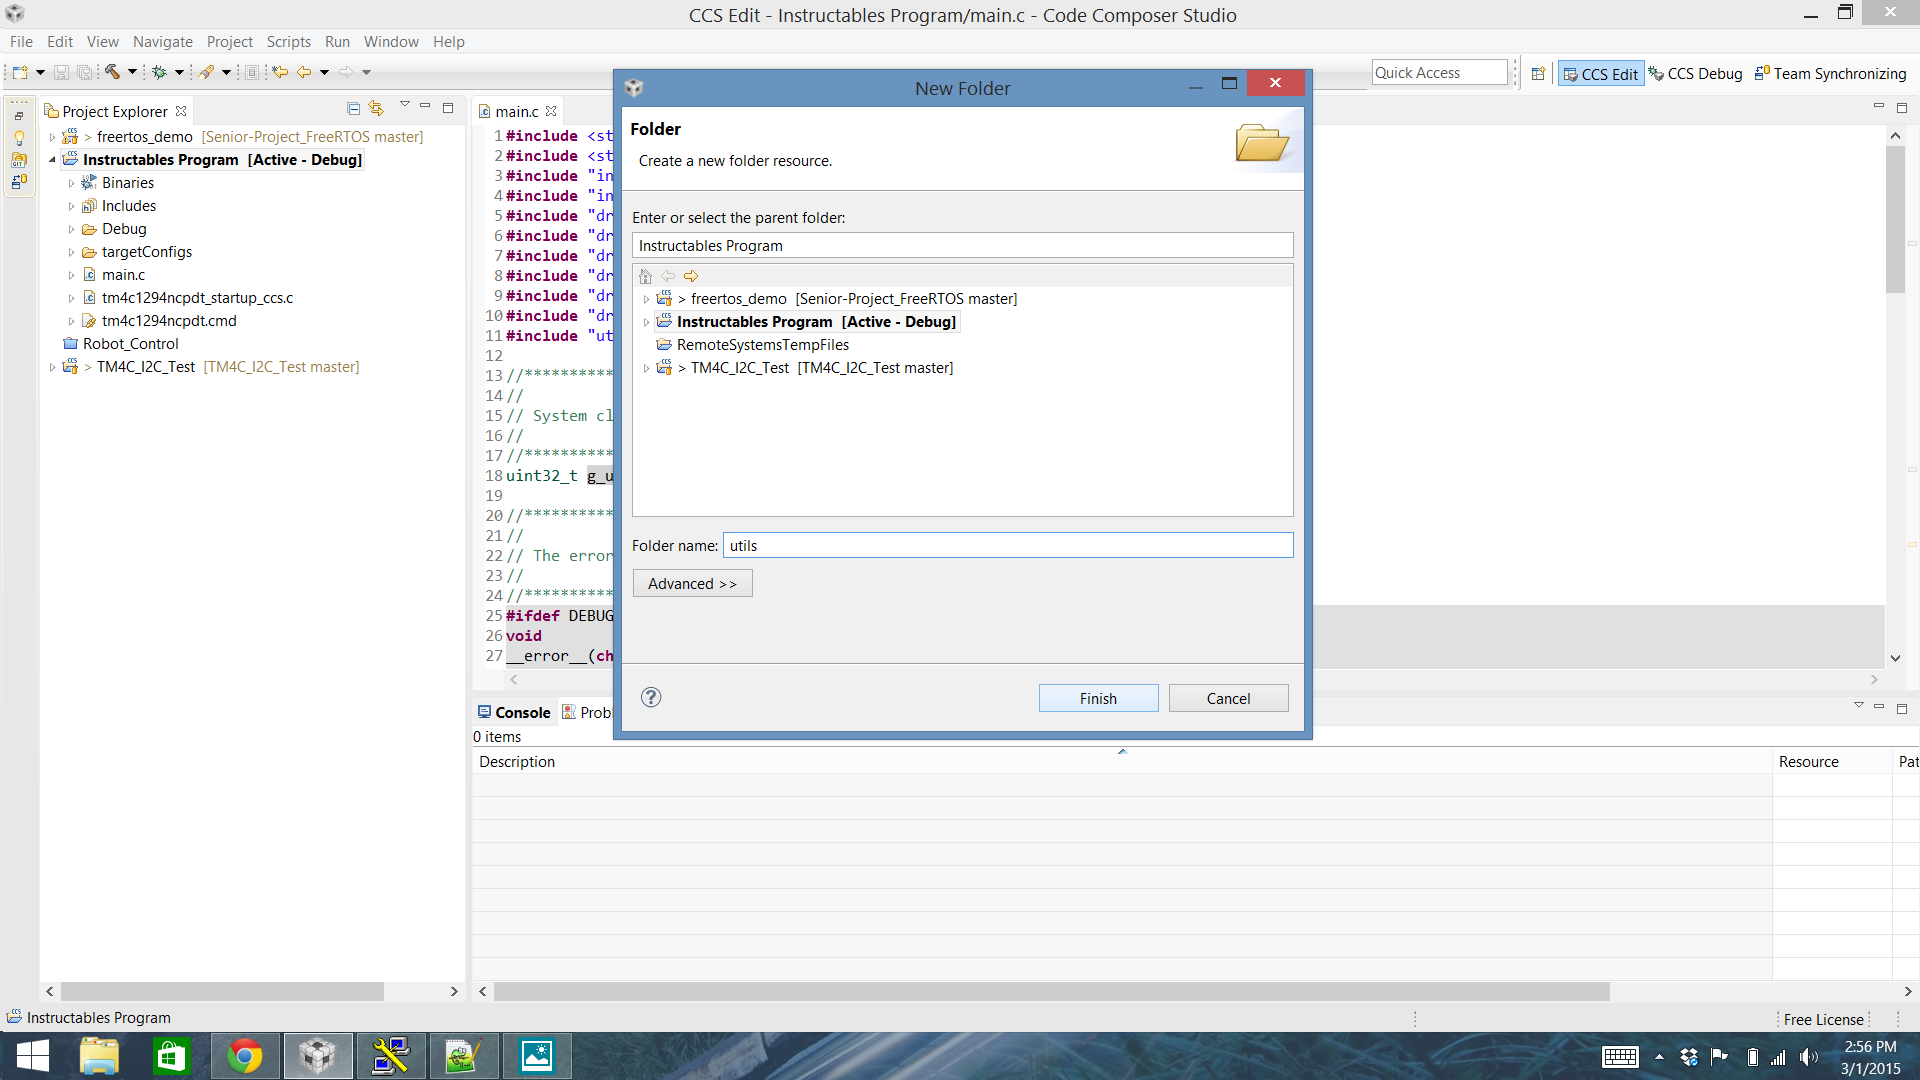
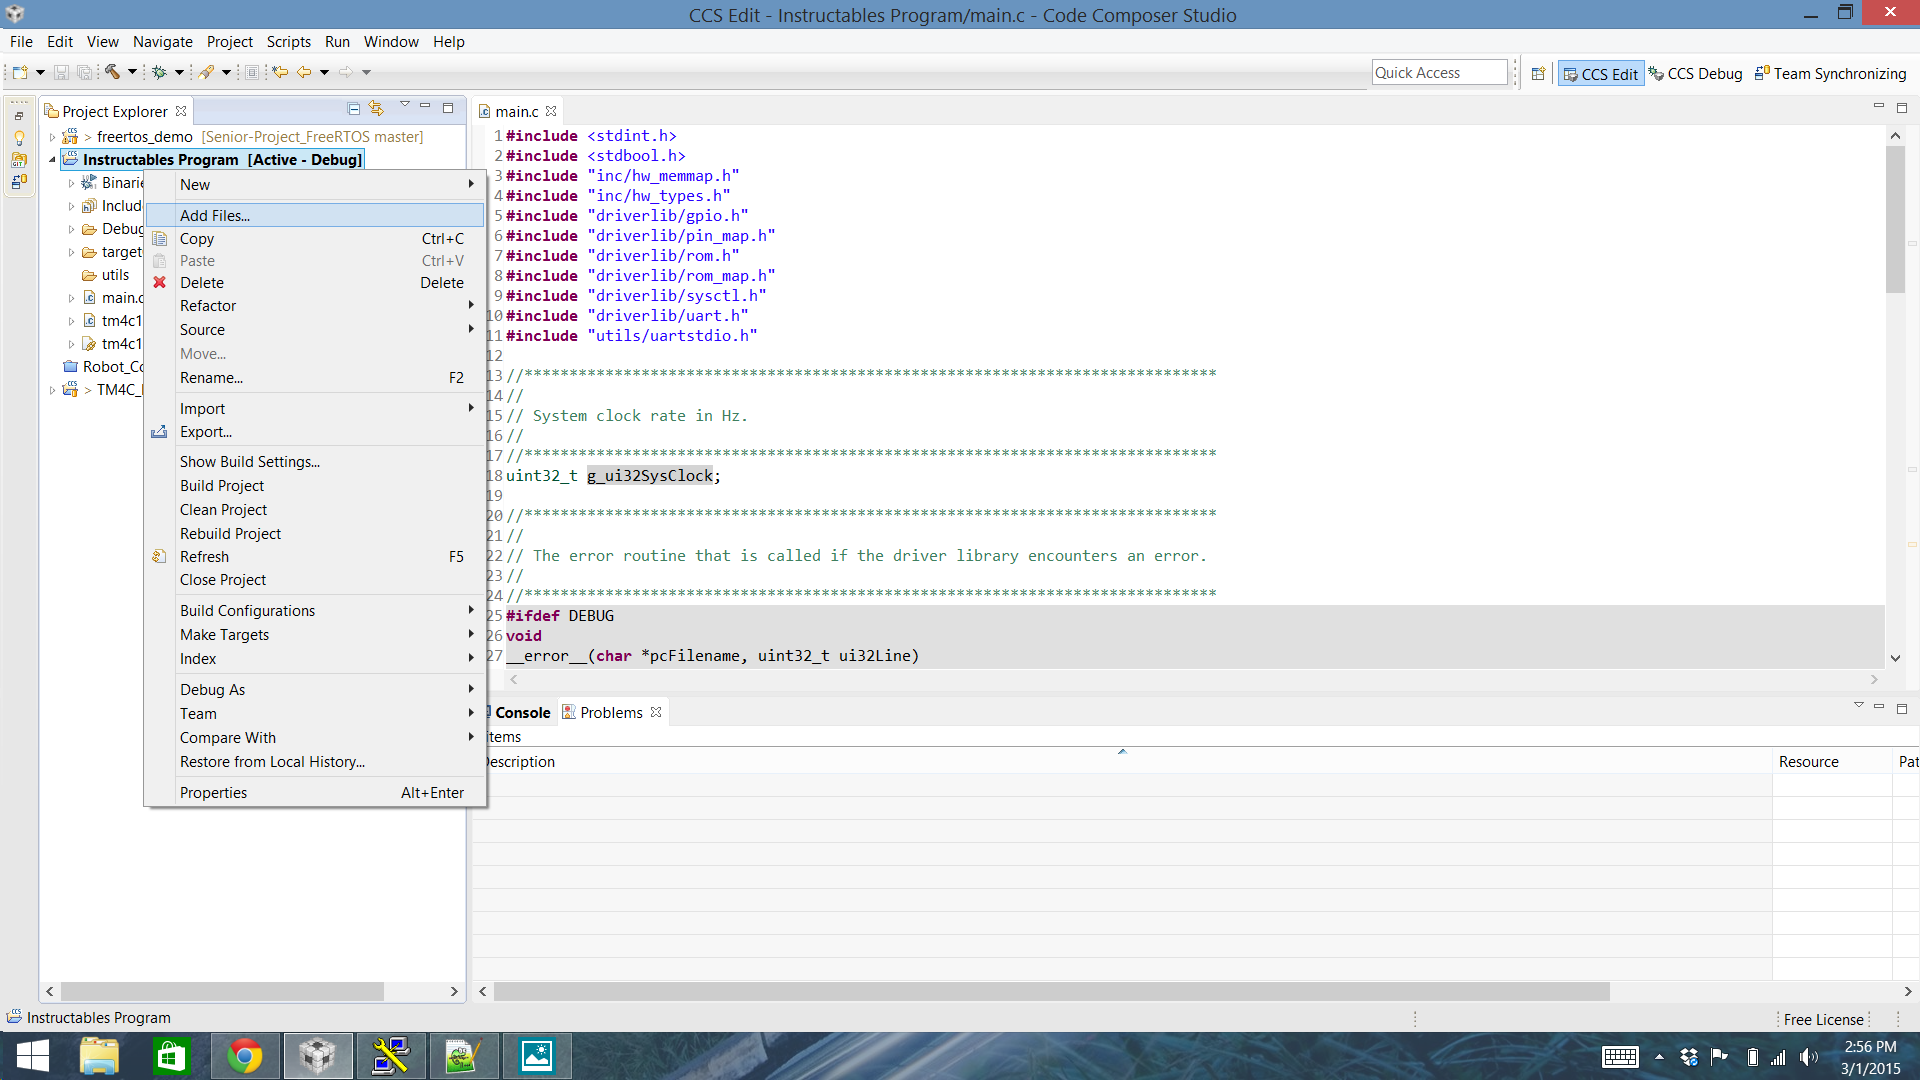
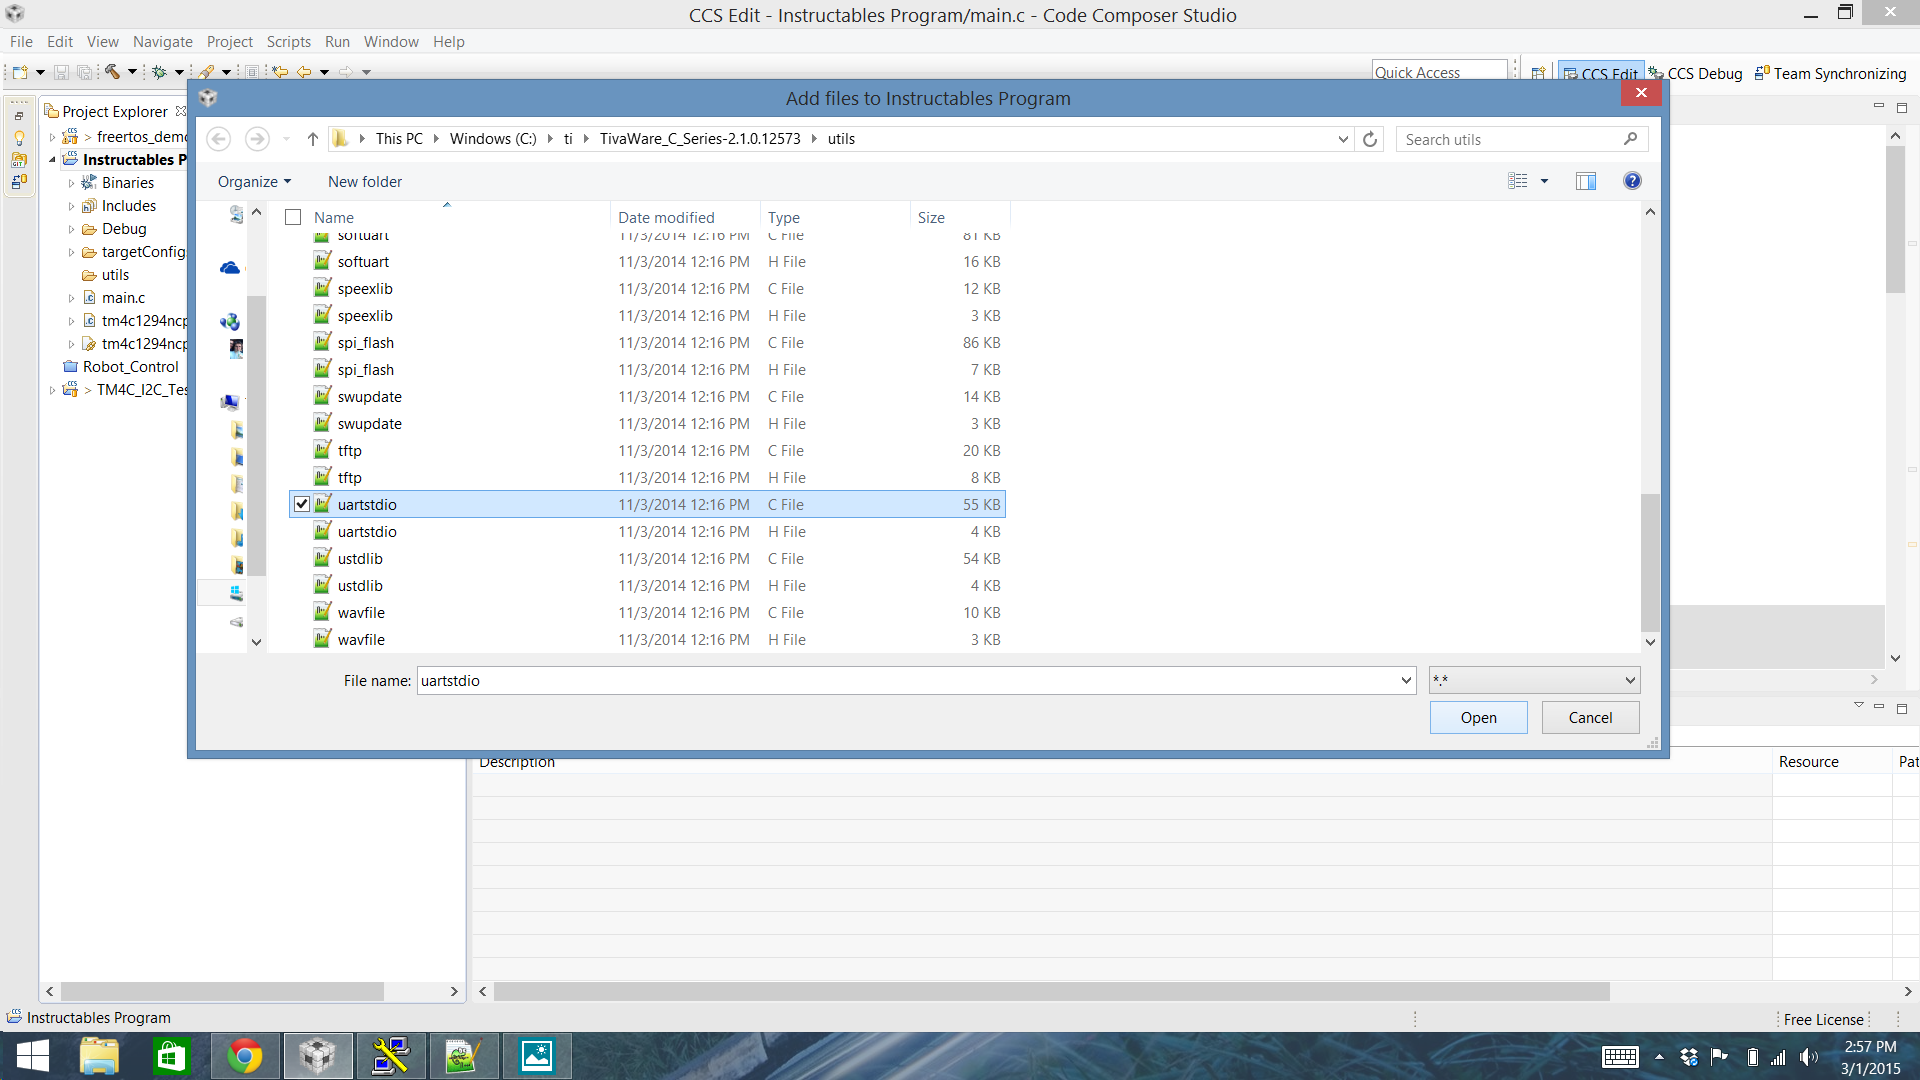
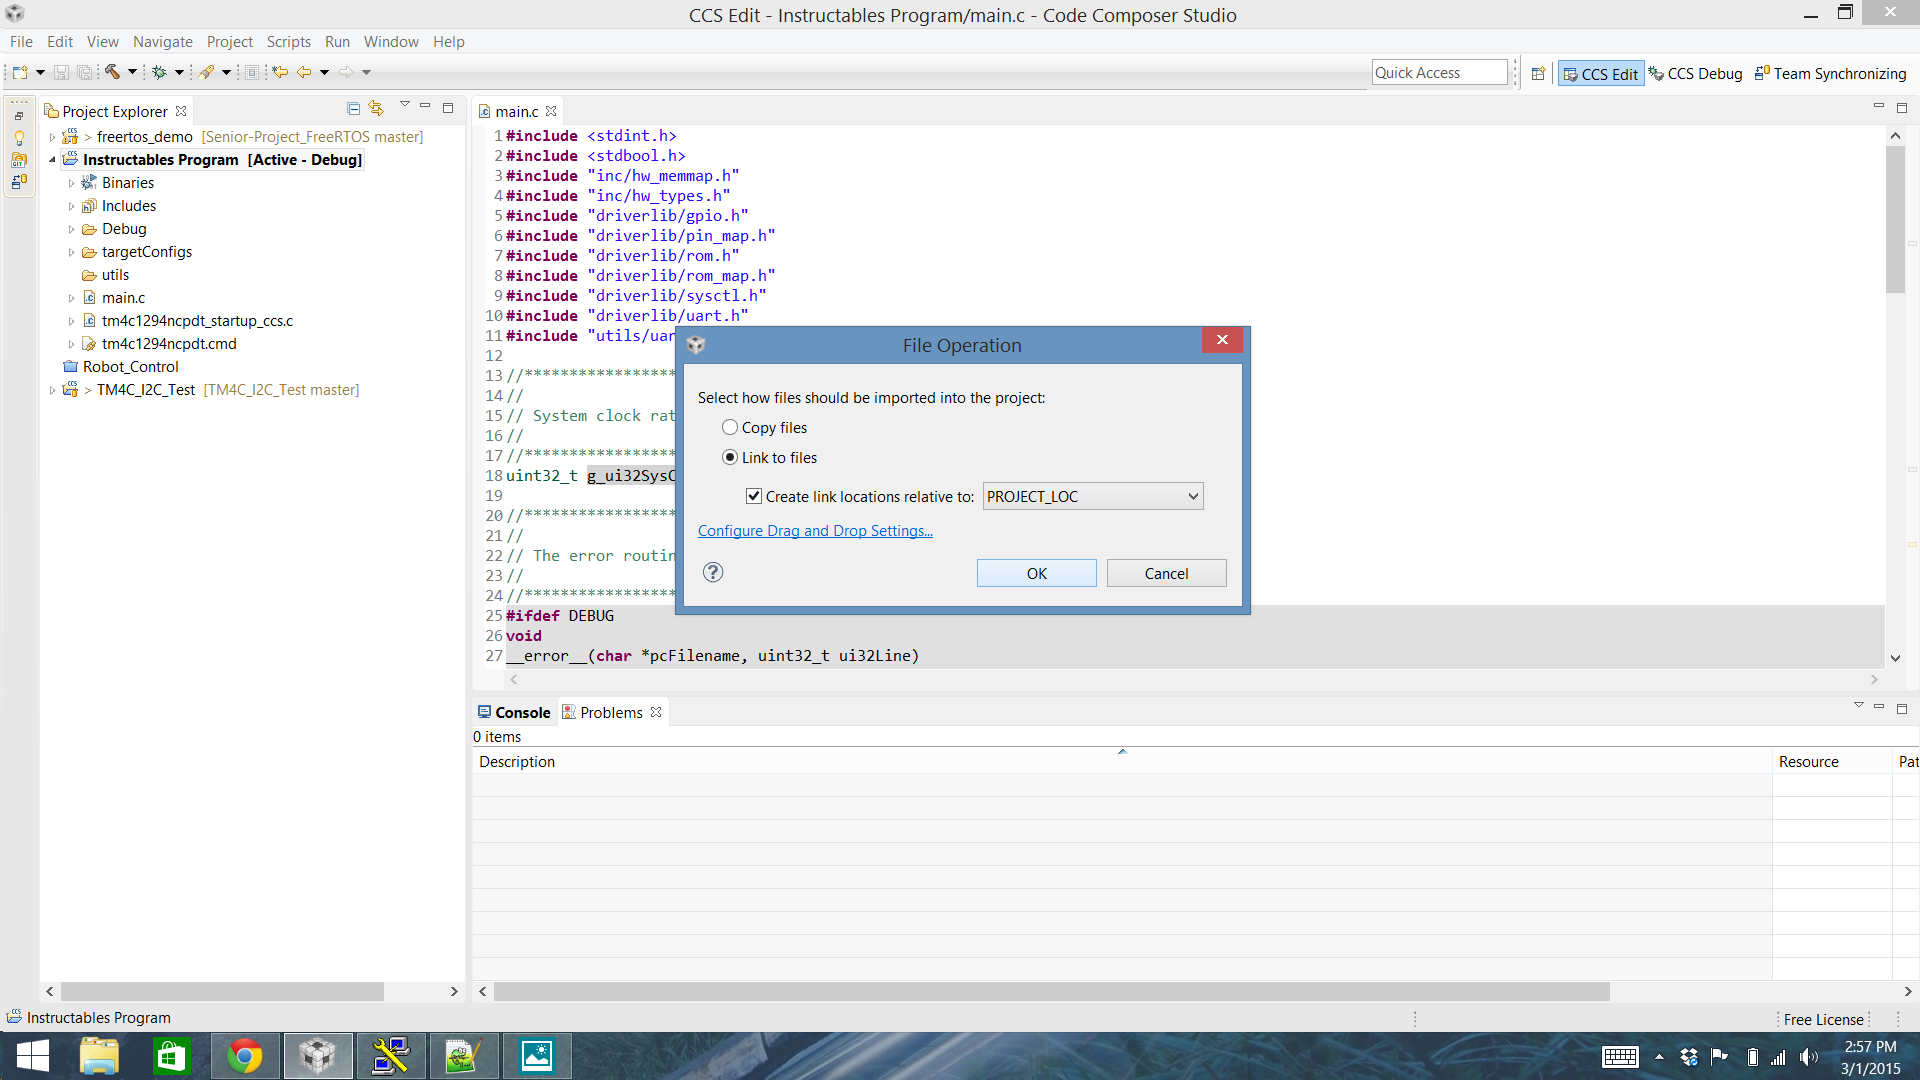
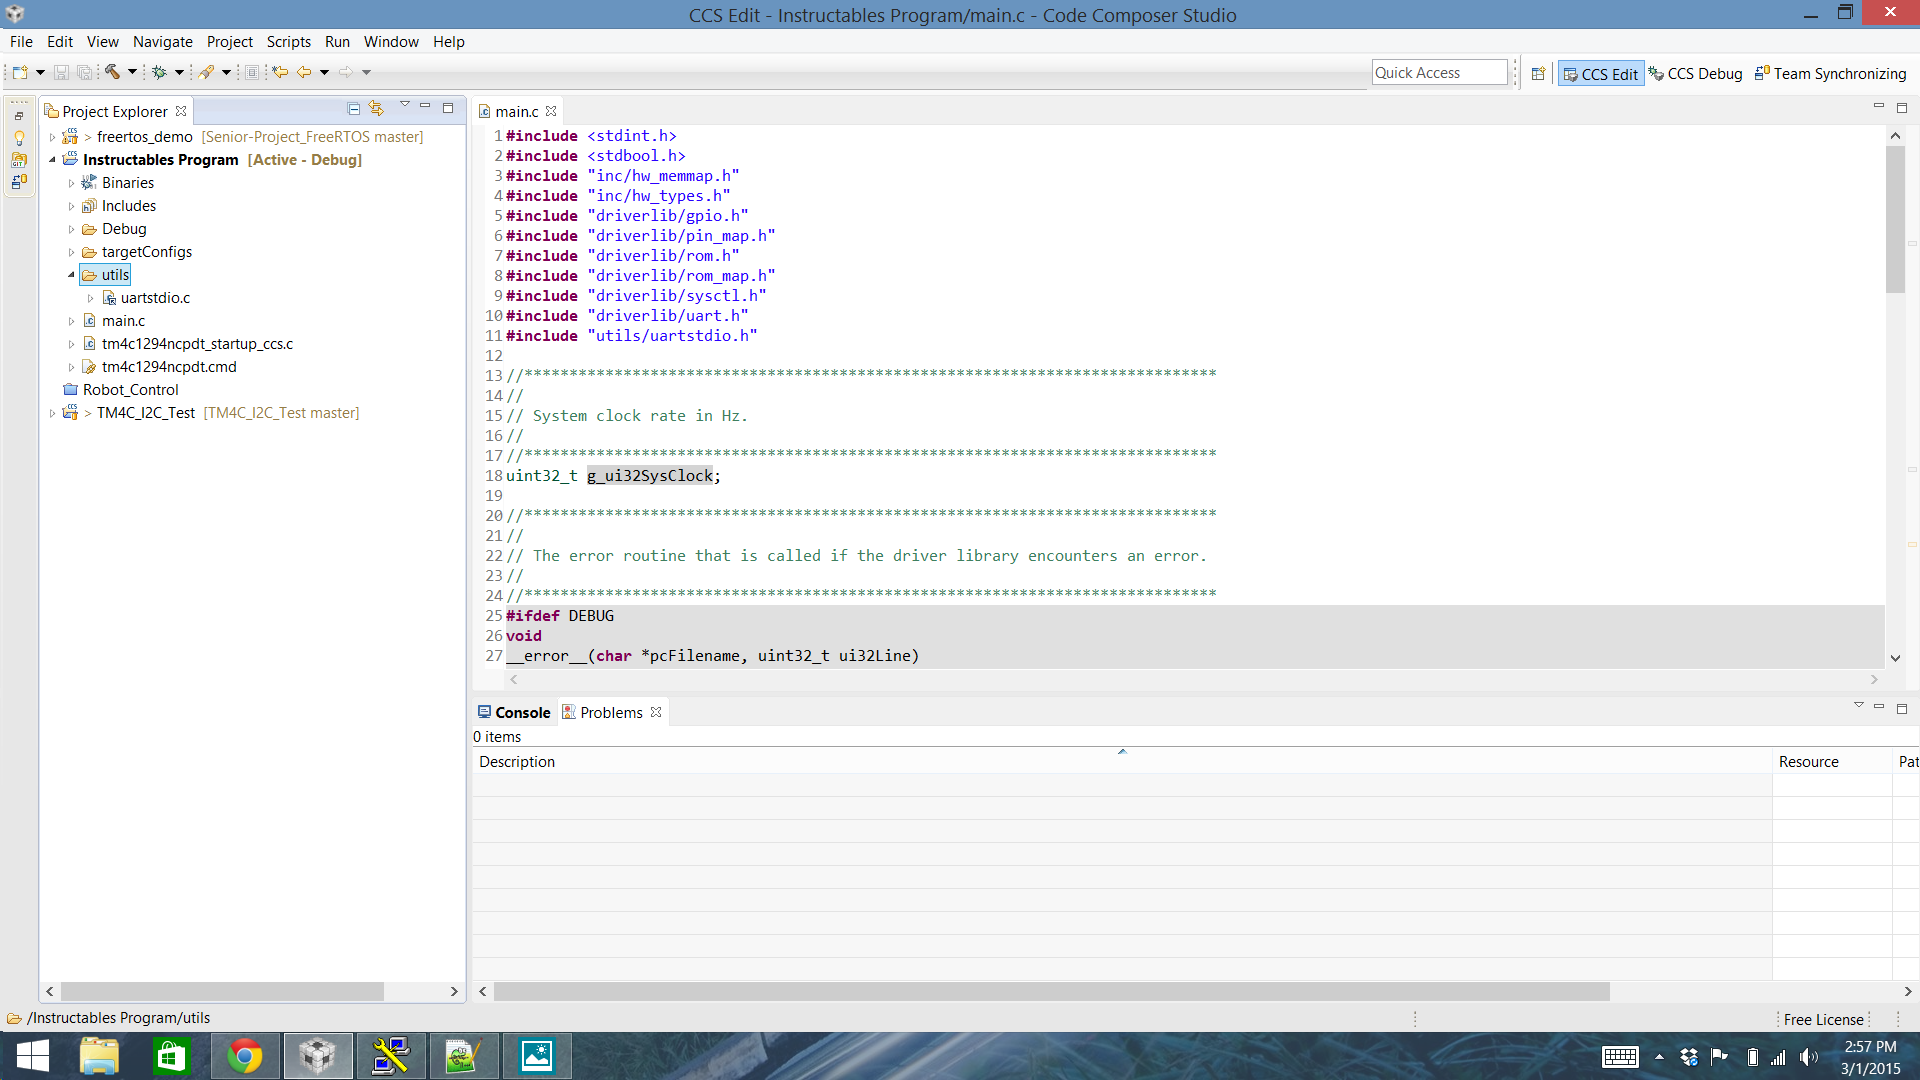
We have an extra file called Uartstdio.h we want to reference in our project. We have it in included in the top of our file and thankfully it is included with TivaWare. First notice the file is in a folder called utils. We are going to right click on our project and create a folder with that same name "utils".
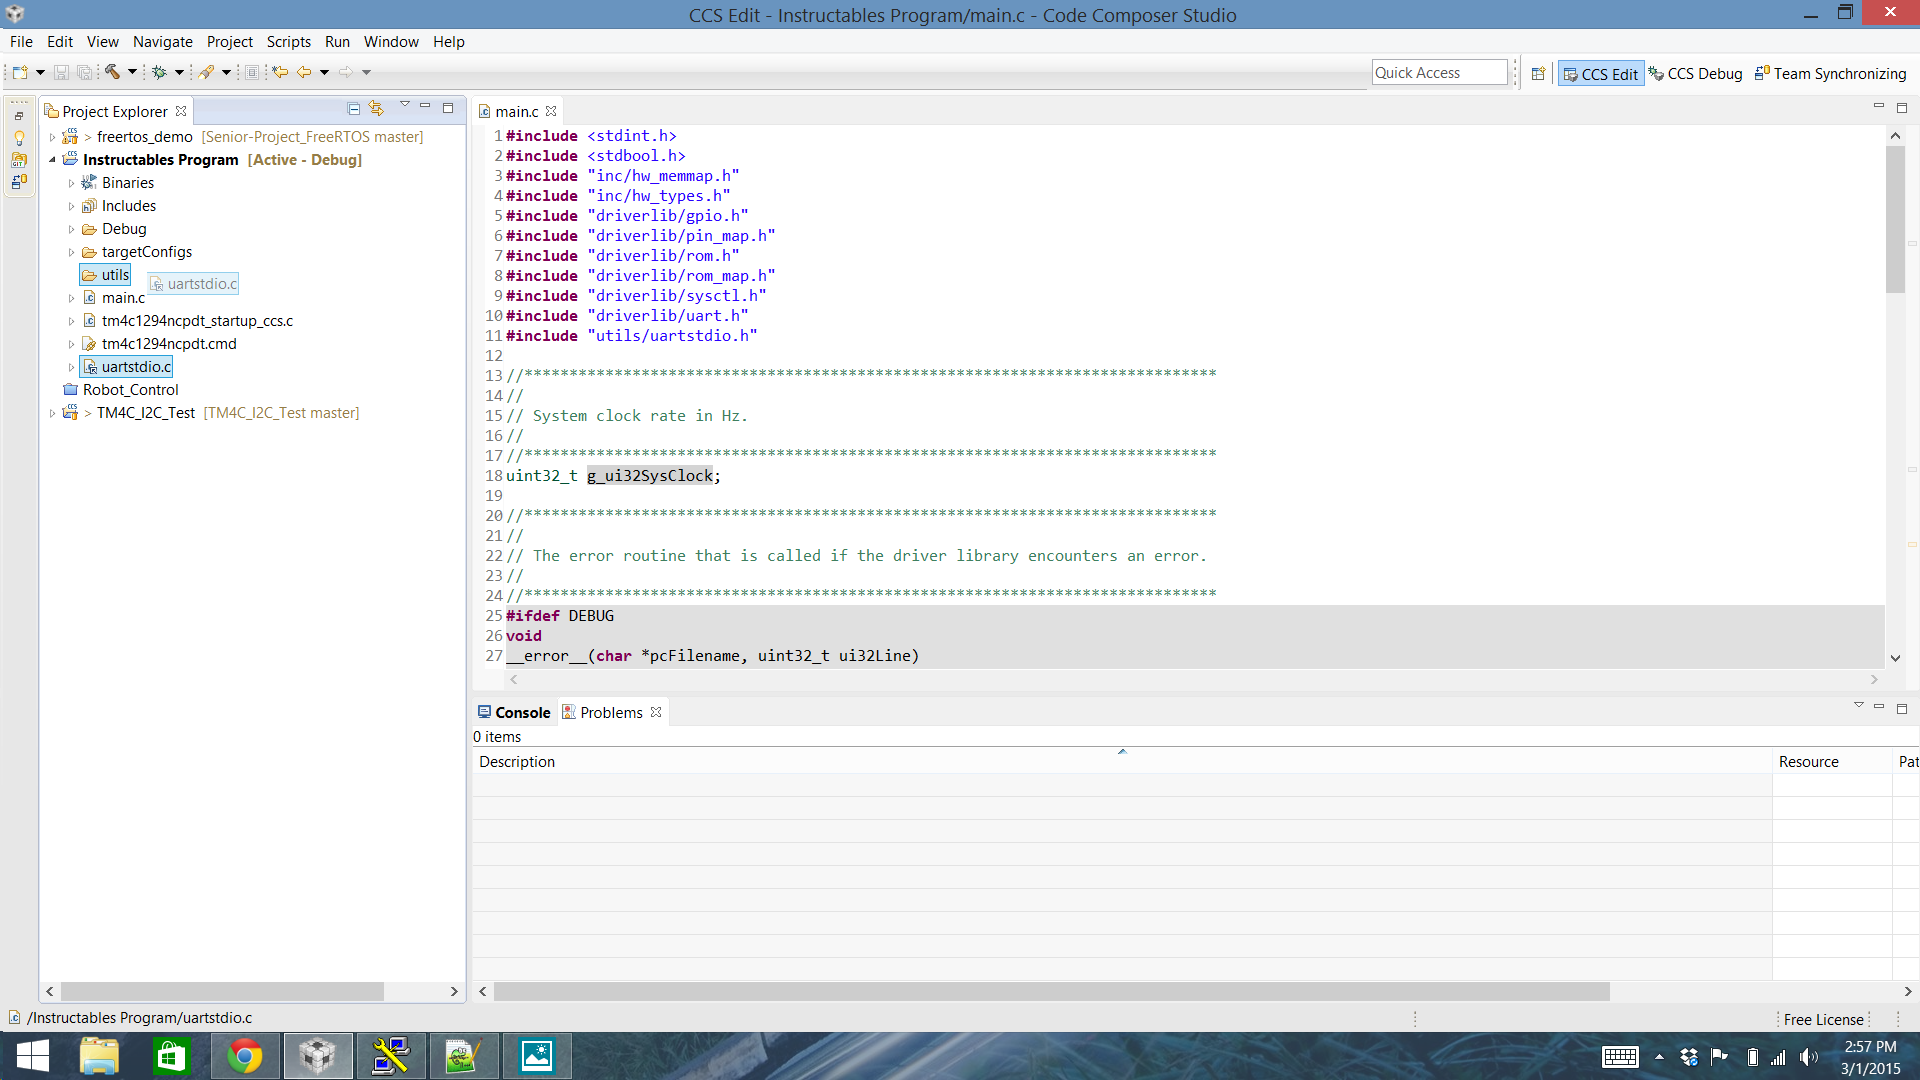
Next we will add the uartstdio.c file to our project. Once it is added drag it into the utils folder we created. That is all we need to do!
Build and Test!
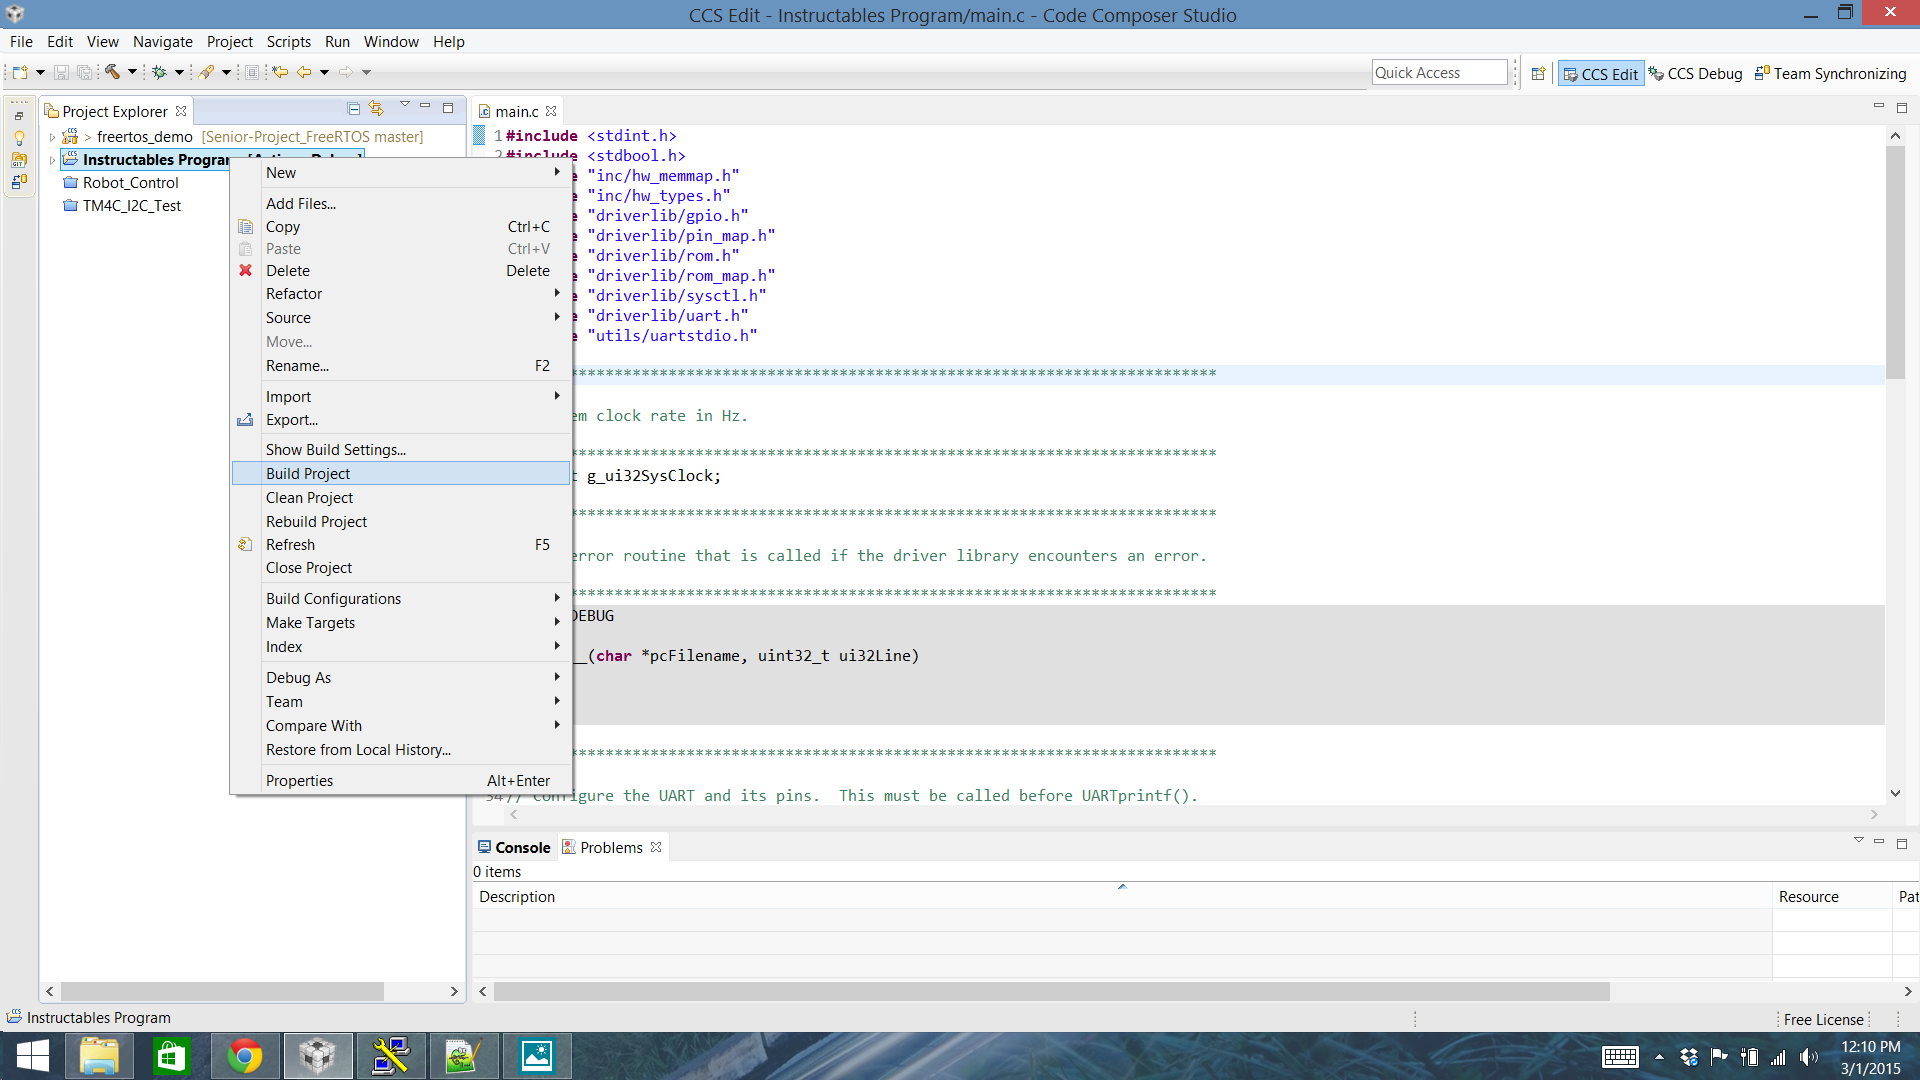
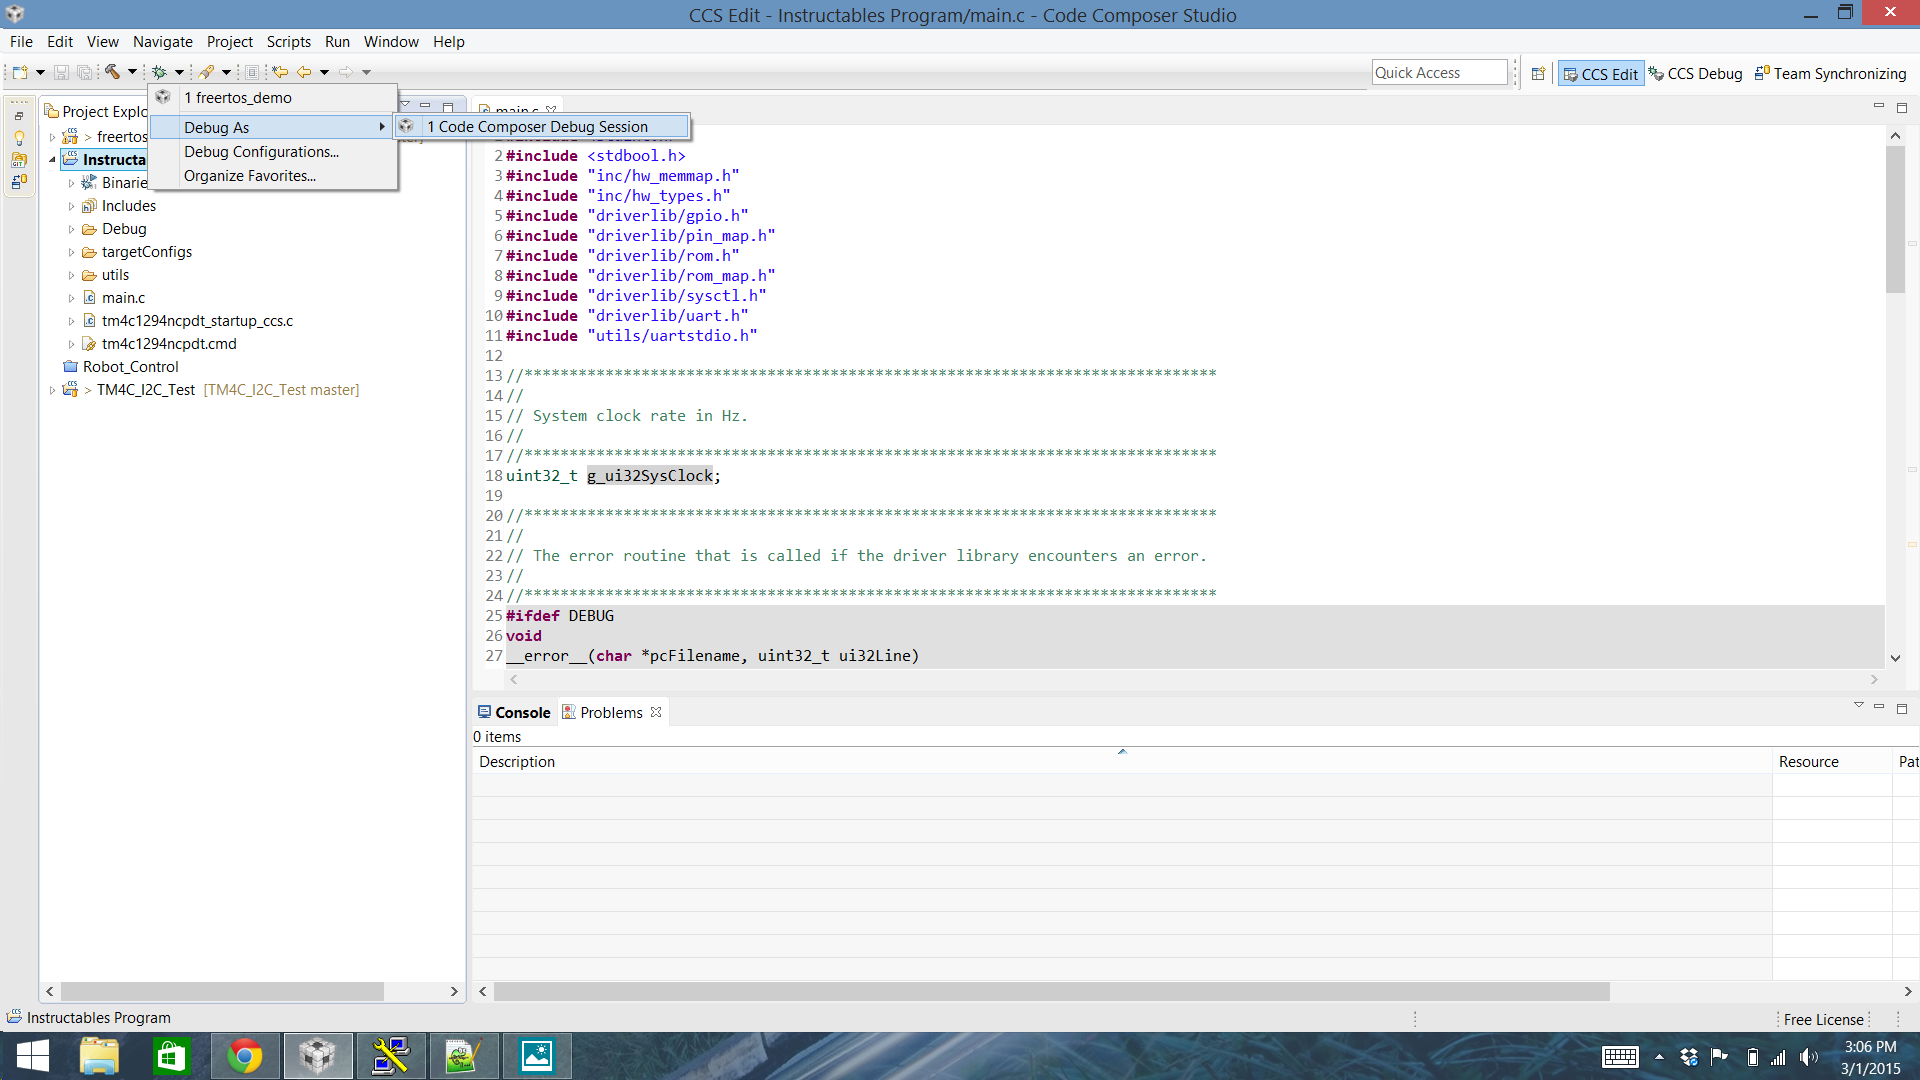
If all has gone correctly we should be able to right click on our project and hit Build Project. If we are lucky the project will build successfully with no errors or warnings.
If you want to test our project straight on the board go ahead and plug in your relevant microcontroller and start the debug session for the project.
We did it! We have created a project from scratch in Code Composer Studio!
Please comment with any questions regarding clarity or issues that come up.