Creating a Simple Webpage Using HTML and CSS
by bzanto1 in Circuits > Computers
4504 Views, 29 Favorites, 0 Comments
Creating a Simple Webpage Using HTML and CSS
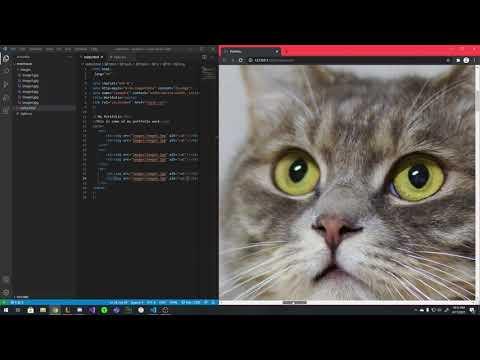
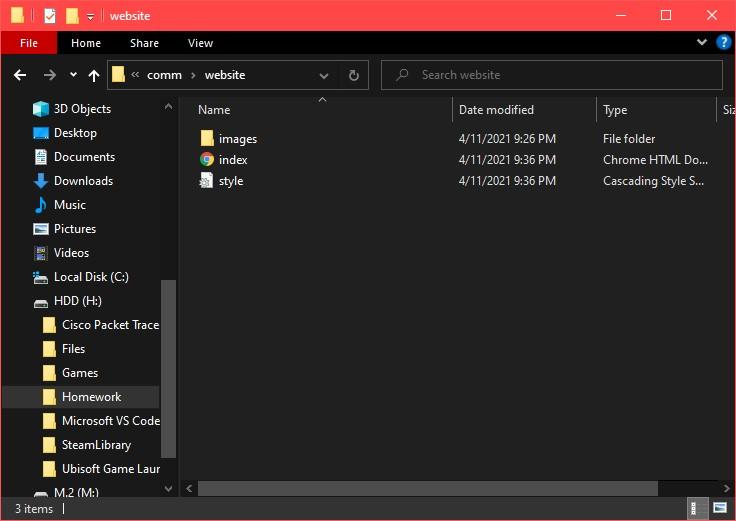
Before the coding begins, a few things must be done. First, a program used to create the code must be downloaded and install. Notepad++, Visual Studio Code, and Brackets are three programs that are easily used. This guide will be using Visual Studio Code, as it is very beginner friendly. Next, a folder and files must be created. Open Visual Studio Code and create a new folder, naming it something simple like “portfolio”. Then create an HTML file named “index.html” and a CSS file titled “style.css.” We also need a folder named “Images” and we should also put a few images in the folder. After this is done, the coding can begin.
Supplies
HTML Coding IDE
Creating the Head
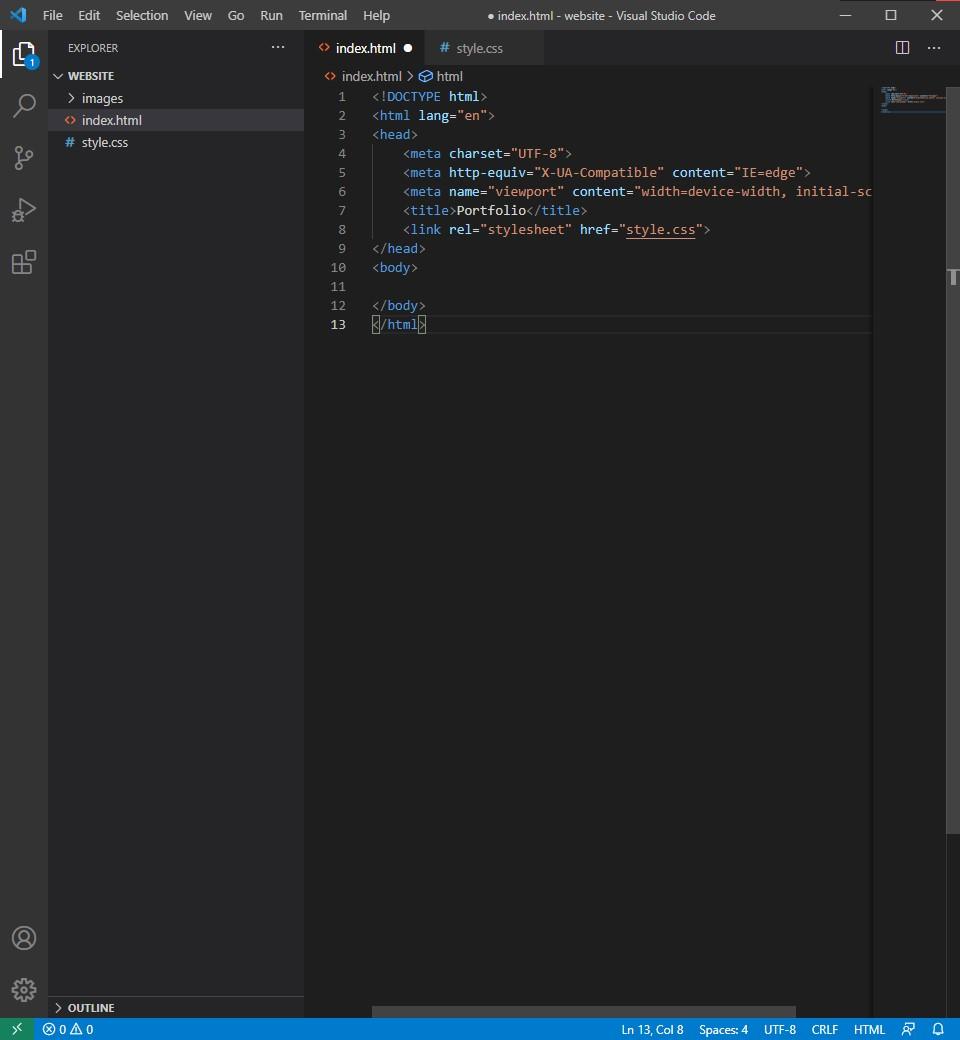
The first step to creating a webpage is by creating the outline of the site. In Visual Studio Code, we can simply press “!” and then the enter key. This will automatically add an outline for our webpage. You will notice a header section and a body section. These are the two main parts of our webpage. In the head section, information about the document will be placed, and in the body, the actual content of the page will be added.
Now we will start changing the head information. To add anything in code, you must have these three parts: The opening tag, the content, and the closing tag. This will look something like this, Hello World.
All tags are in sets of two, and the only difference between opening and closing pairs is a “\” right before the tag’s title. The first thing we are going to change is the document title. So in between the title tags, insert a name for the page. For this example we will use, “Portfolio” The only other thing we have to do for the head section is add in a reference to our stylesheet, site.css. Our site.css document changes the appearance of our webpage, so we need to make sure the HTML document can reference it. Right after the document title we will add this code, “ This link tag is special, and does not need an ending tag. The other parts inside of the ending bracket are special instructions for our tag to follow. That wraps up everything we need to do in the head section of our webpage, so now we move on to the body.
Creating Our Text
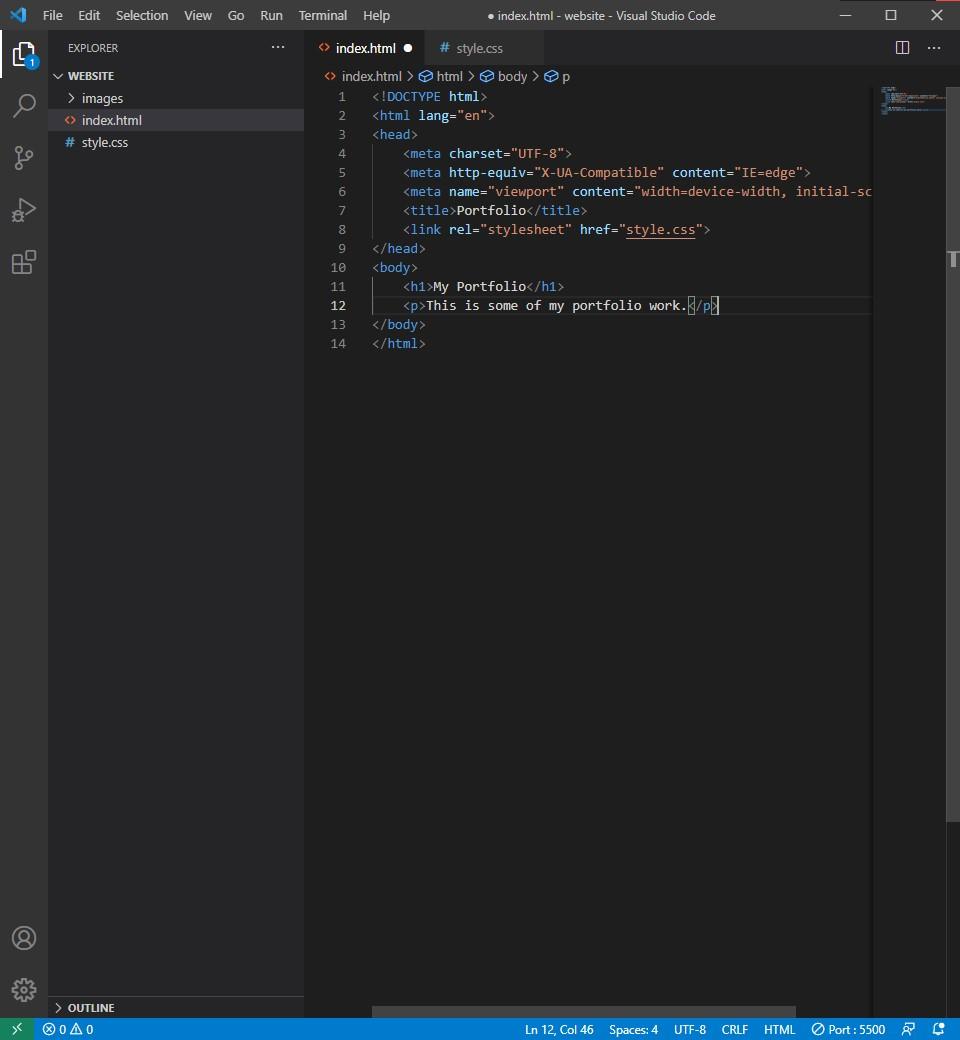
First, we will add the h1. H1 is for header text on our webpage. Right underneath the opening body tag ( ) we will add the h1 opening tag, the text, “My Portfolio” and the closing tag. This makes a large opening header for our page. After the closing tag, we will add in our p tag. P is a paragraph tag that we will use for standard text. You could use this tag to put some information about yourself, general info you would like to share, or anything else text related. In this example we will just have a simple sentence inside of our paragraph tag. Create the opening tag, then type the phrase, “This is some of my portfolio work.” then type the closing tag. This text will appear on the line below and create a big of a subhead for our page.
Creating Our Table
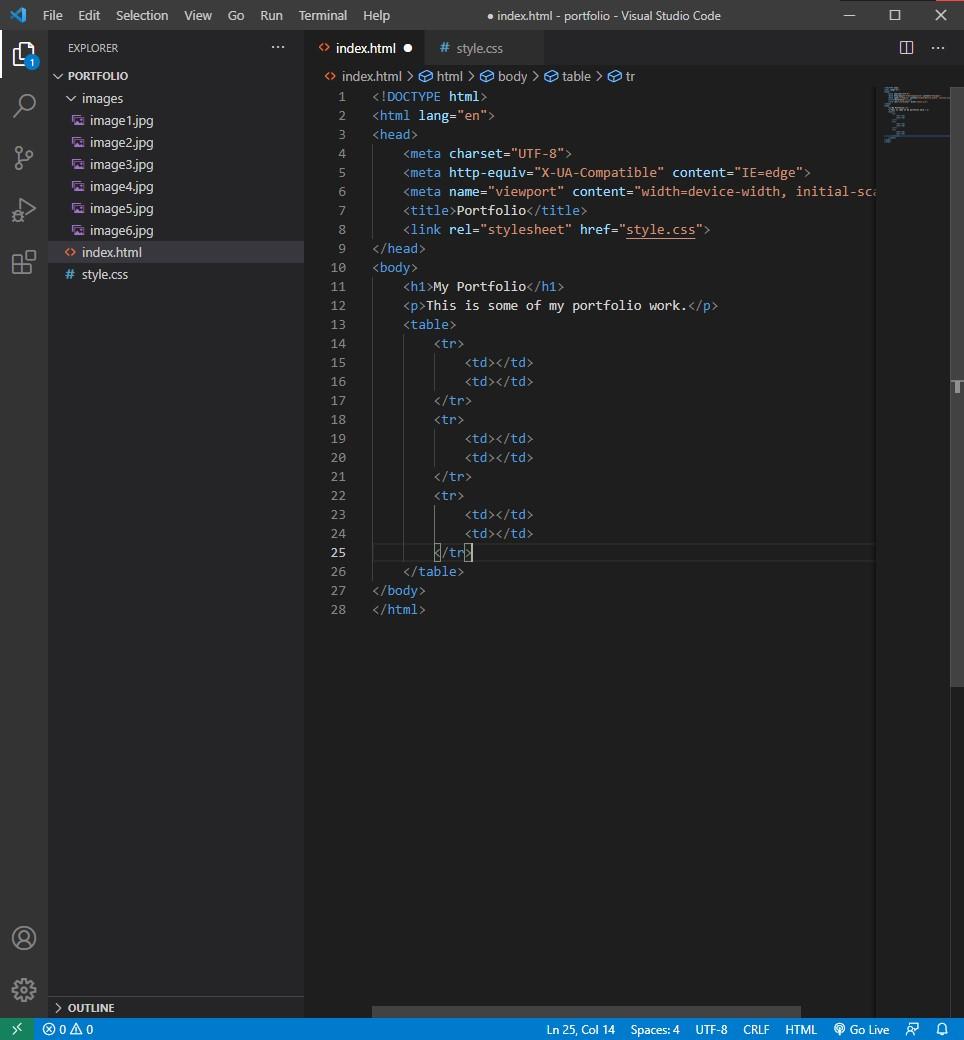
The last part of our webpage will be the table. The table will begin with the table tags. On the line after the closing p tag, we will create our opening tag. After the opening tag we will be going to the next line. Don’t worry about closing it yet! We have to insert more data to create the format of our table. We are going to add the opening tag for our tr. Tr stands for table row. We will use multiple rows with two items in each row for our table. Before closing the row, let’s go to the next line and add two sets of opening and closing td tags. Td stands for table data, and will be the content of our table. After we add our two td’s let’s add the closing tag for the tr. We have to make sure all of our content is closed, or it won’t function correctly. Our table row is complete, but we want multiple rows. Let’s copy and paste all of the content within the tr two more times after each tr closing tag. Now our table format should be complete with three rows and two columns, but it doesn’t have any content yet. This is where we use the tag.
Adding the Images to the Table
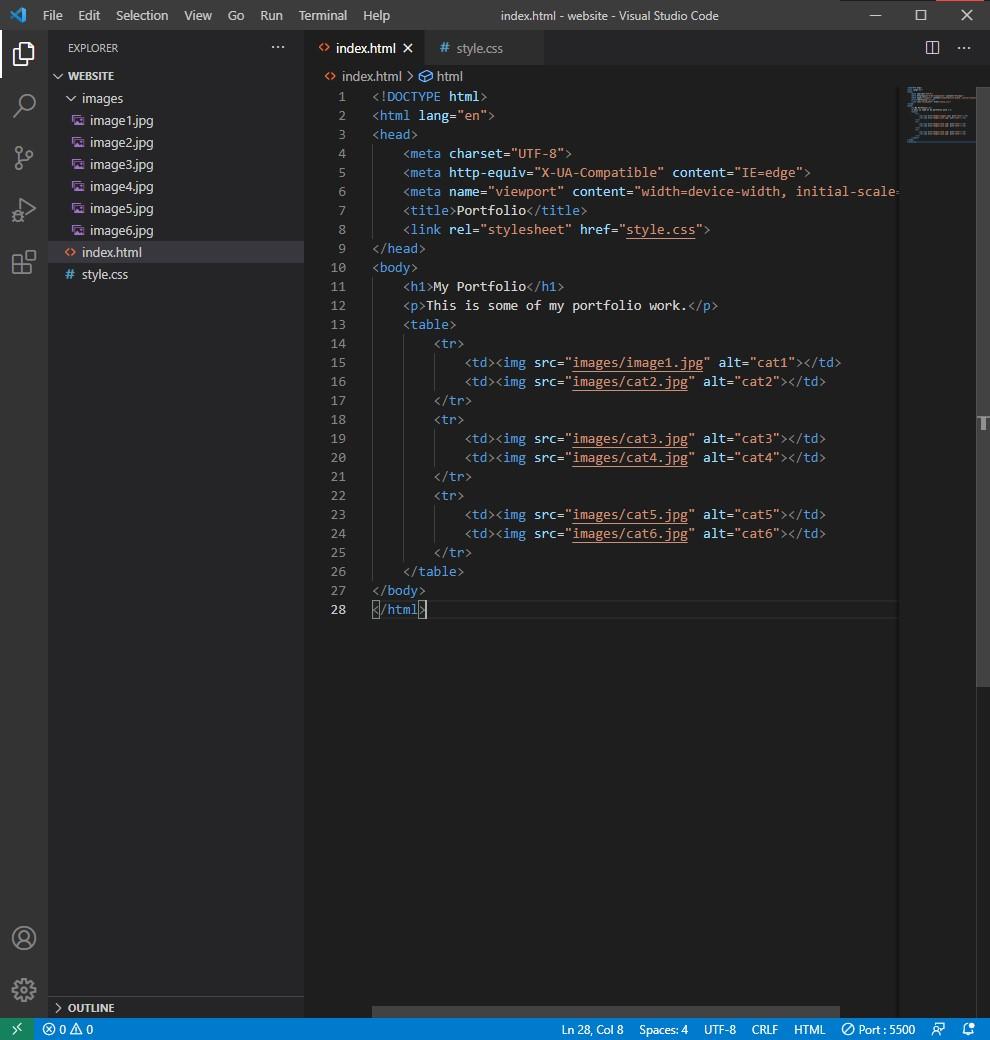
The tag is special and has a few elements inside of it. These elements are href, and alt. Href is used to locate the image in our folder and alt is a name for the image that will show up if the image doesn’t load. The basic format we will use is . For our portfolio we have six slots to place portfolio work. So we will place six jpg images in our normal folder. It is important to keep track of what their names are and to keep them simple. We will just use image1.jpg, image2,jpg and so on. Now we will place the image tag inside of each td on our table using the aforementioned format. The location will simply be the name of each image file, and the alt will just be a name that describes each picture. Our first td should look like this: , and the rest will look very similar. After adding these images, our table is completed!
Starting Our CSS
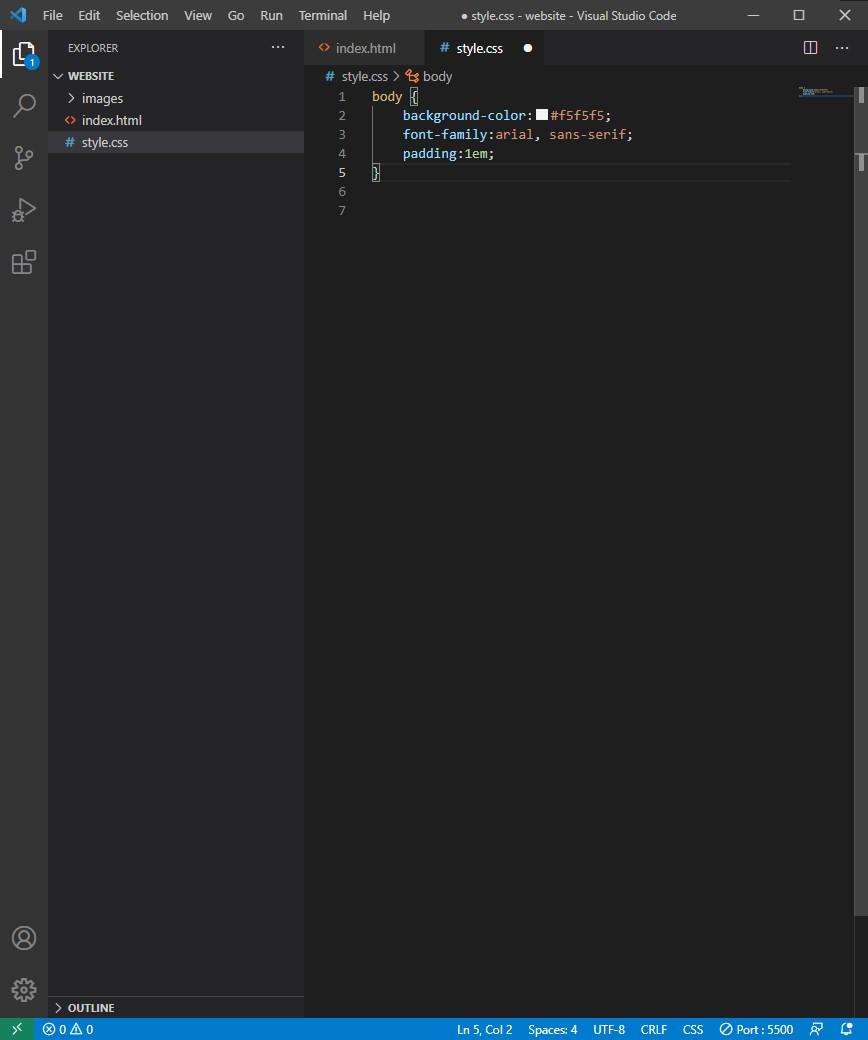
CSS format is slightly different in that we don’t use opening and closing tags. We simply type the element we want to change, then a curly bracket, the property we want to change, a colon, the property setting, a semicolon, and an ending curly bracket. So each property might look something like this: p { text-size : 12pt; }. We won’t change too much on our page for simplicity but we will do some simple things. First of all, let’s use the above format to change our background color. We will use the body element, followed by an open curly bracket, then the property “background-color”. We will set this property to “#f5f5f5” to give it a very light gray background. After we close that off with a semicolon, we will go to the next line and change the font-family property to “arial, sans-serif”. After we close that, we will change padding to “1em”. The font-family property sets what font will appear on the website and the padding property sets a box of padding around the item. These are properties that are used on every webpage. Close off our body styling with a closing curly brace and now our body is correctly styled.
Styling Our Text
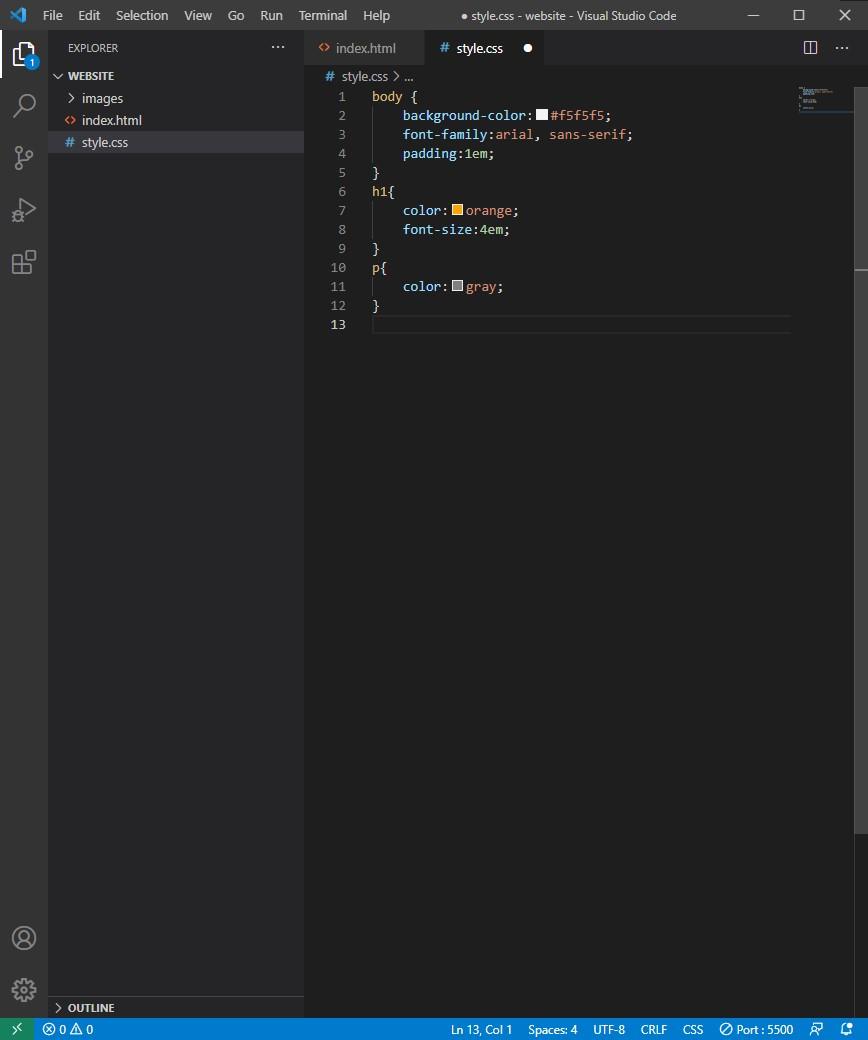
Next up is the text. We will begin with the h1. Inside the braces we will use the “color” property to change our text color. We will set the color property to “orange”. Next we will change the size of the text using “font-size” set the font size to “4em” and then we are done! Close off the h1 with a curly brace and now move on to the p element. All we will change here is to set the “color” property to “gray”. And with that, our text is completely styled.
Styling Our Images
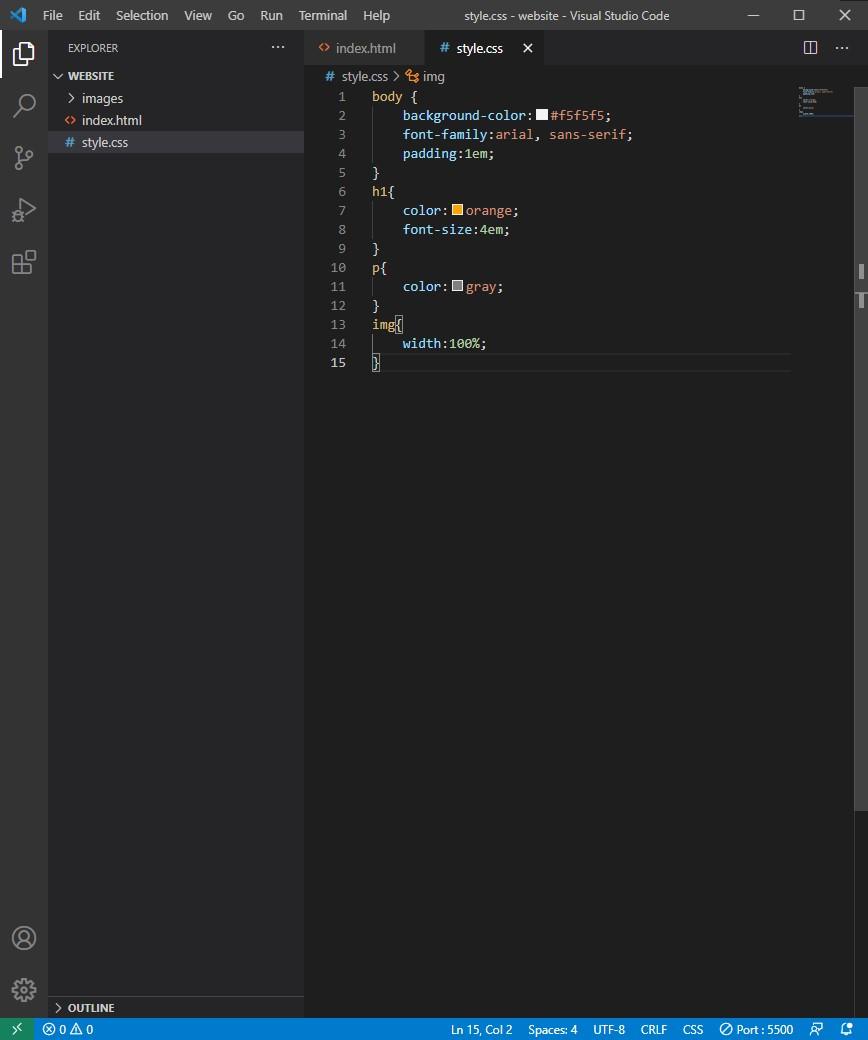
Our last element to style is the “img” element. We will only do one thing to our img element and that is to set them to a specific width. This way they will scale with the size of our page and not overflow off. Since our images are in a table, we want our images to completely fill up the table slots. So if we set our “width” property in our “img” element, our images will fill in the table completely and scale with our page. Once the width property is set, our basic, styled, HTML page is complete!
And That's It!

HTML is an incredible tool for creating outstanding designs and layouts for websites. This essay only explains very basic things, but HTML can be incredibly complex, and the possibilities in design are endless. This guide has given you the basic understanding of how HTML and CSS work, but there is always more to learn. If you love to design, give HTML and CSS a try, dig deep and create to your heart’s content.