Creating a Simple Online Portfolio Using a BootStrap Template
by LatifM1 in Design > Websites
9225 Views, 8 Favorites, 0 Comments
Creating a Simple Online Portfolio Using a BootStrap Template
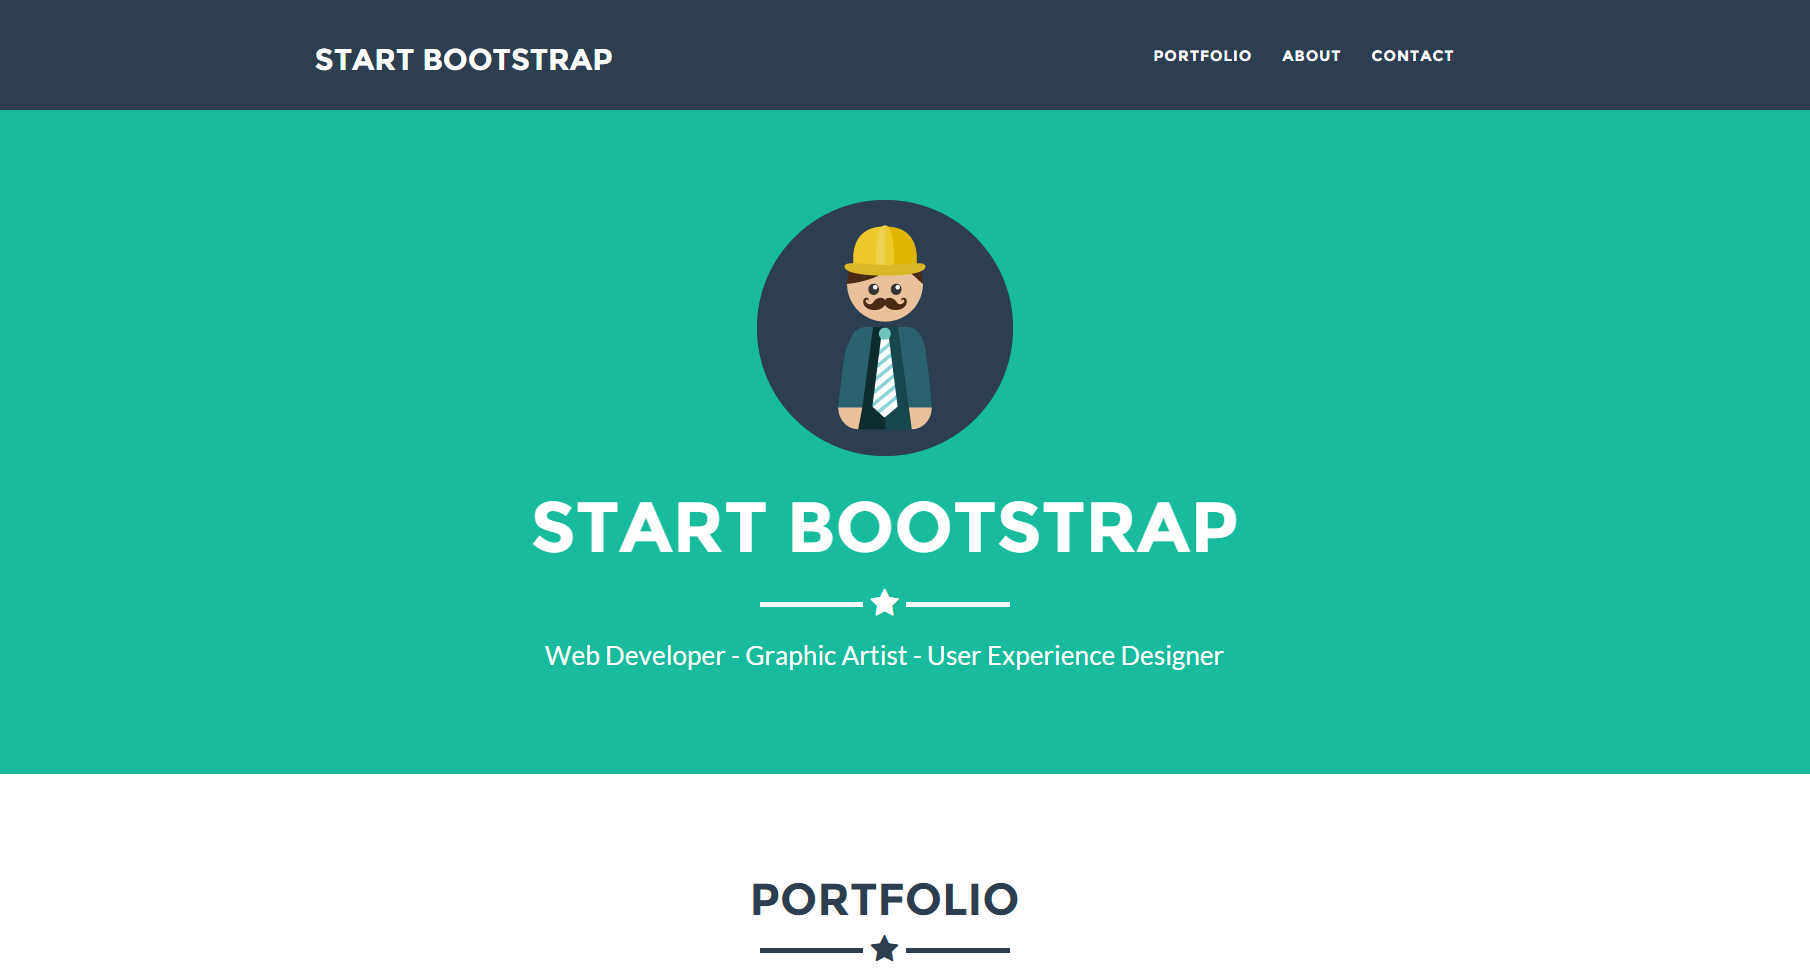
Creating an online portfolio can be a great extension to a resume as it allows potential employers to view previous projects a person has worked on. This Instructables tutorial will teach you how to create your own portfolio without having any web design skills. Depending on the person, this tutorial should take 2-4 hours to complete.
The guide will walk you through making a portfolio with a modified BootStrap template for learning purposes. BootStrap is a web design platform that allows users to create modern and responsive web pages with very little effort or knowledge of web design principles. Once you have successfully made your portfolio using this template, you should have the necessary skils to use other BootStrap templates as well.
Required Technical Knowledge
No technical knowledge is required for this Instructable, although you are expected to have basic computer skills.
Required Tools
- Notepad++: This is a text editing tool much like Notepad on Windows.
Download Link: https://notepad-plus-plus.org/download/v6.7.9.html - Learning Template: This is somewhat modified BootStrap template that we will use for learning how to design a portfolio using BootStrap.
Download Link: https://goo.gl/1WP7uR \
Downloading Learning Template
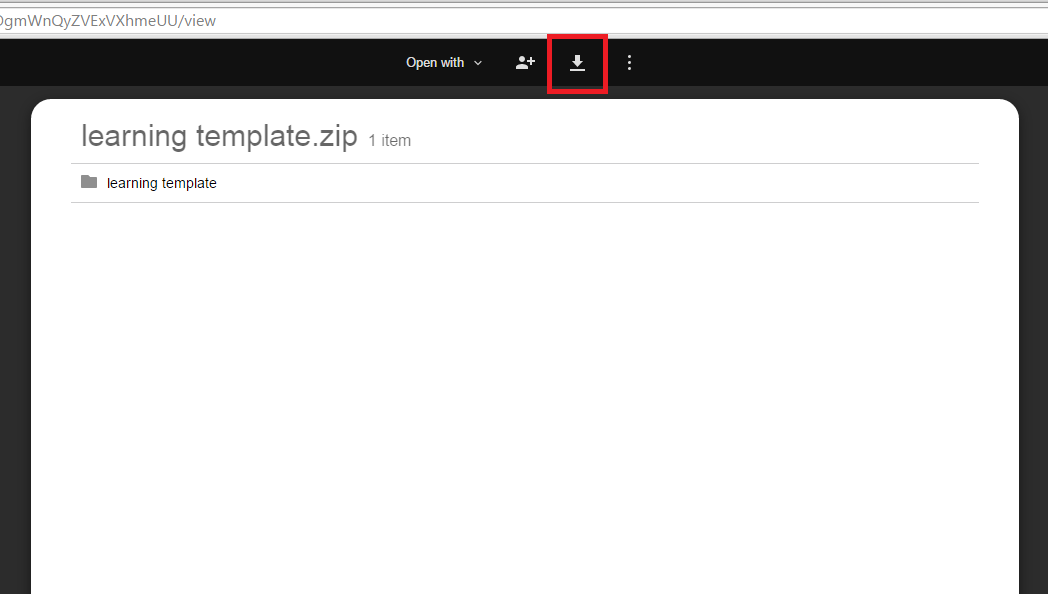
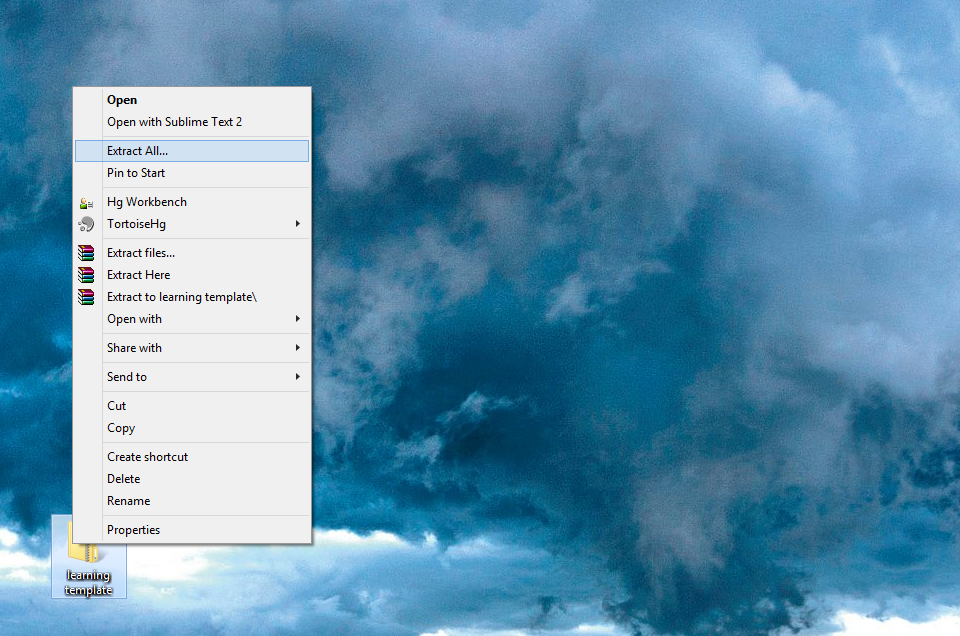
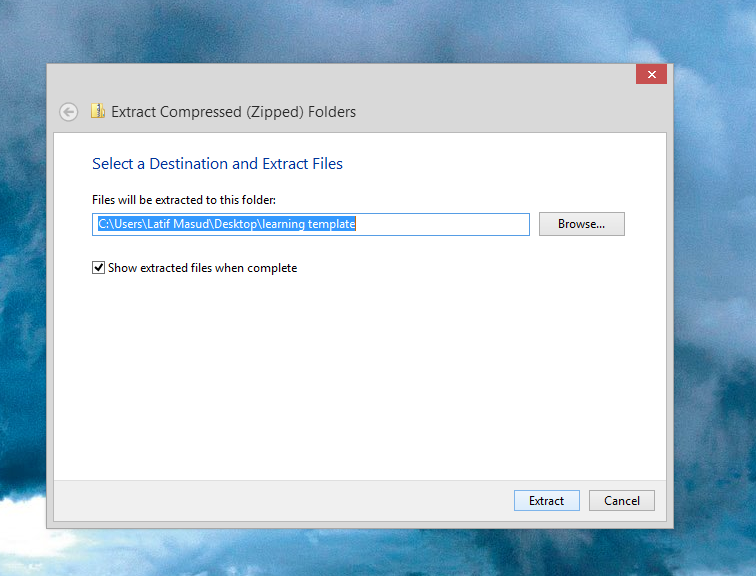
- Click the following URL: https://goo.gl/1WP7uR \
- Click the download button to download the "learning template" zip file as shown in the first figure.
- Right click on the downloaded "learning template" zip file and click the "Extract All" button as shown in the second figure.
- Click the "Extract" button in the window that opens to extract the contents as shown in the third figure.
Installling Notepad++
- Go to the following link: https://notepad-plus-plus.org/download/v6.7.9.html
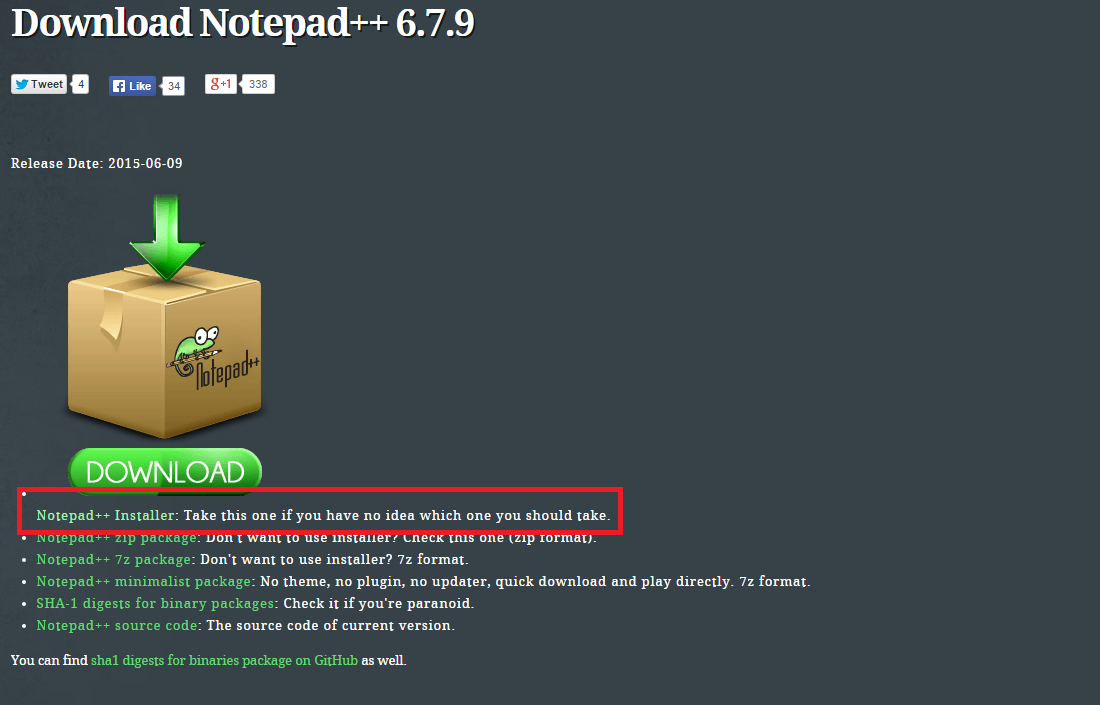
- Click the "Notepad++ Installer" link on the page as shown in the red box in the first figure.
- Find the "npp.6.7.9.Installer.exe" file in your Downloads folder, and double click on it.
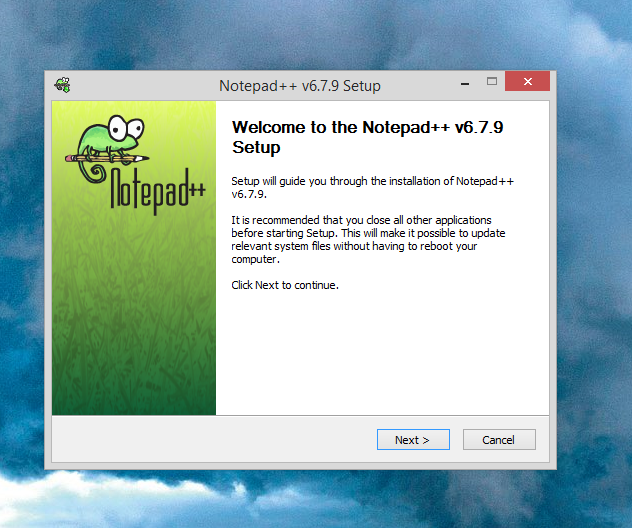
- Follow the instructions and prompts on screen to install Notepad++ as shown in the second figure.
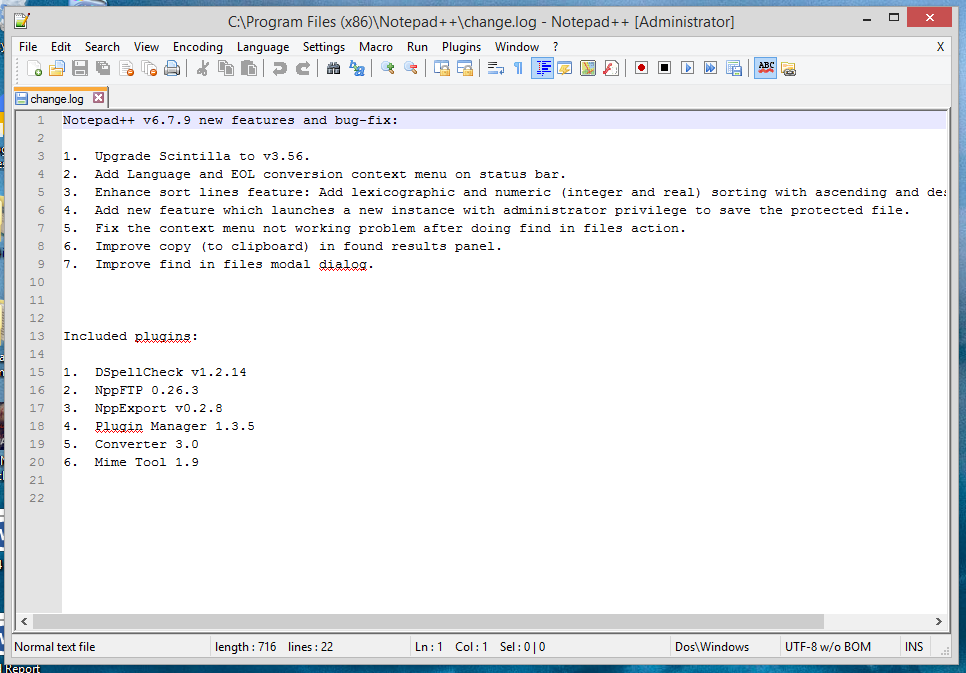
- Once done installing Notepad++, you should see the screen in the last figure.
Opening Required Files
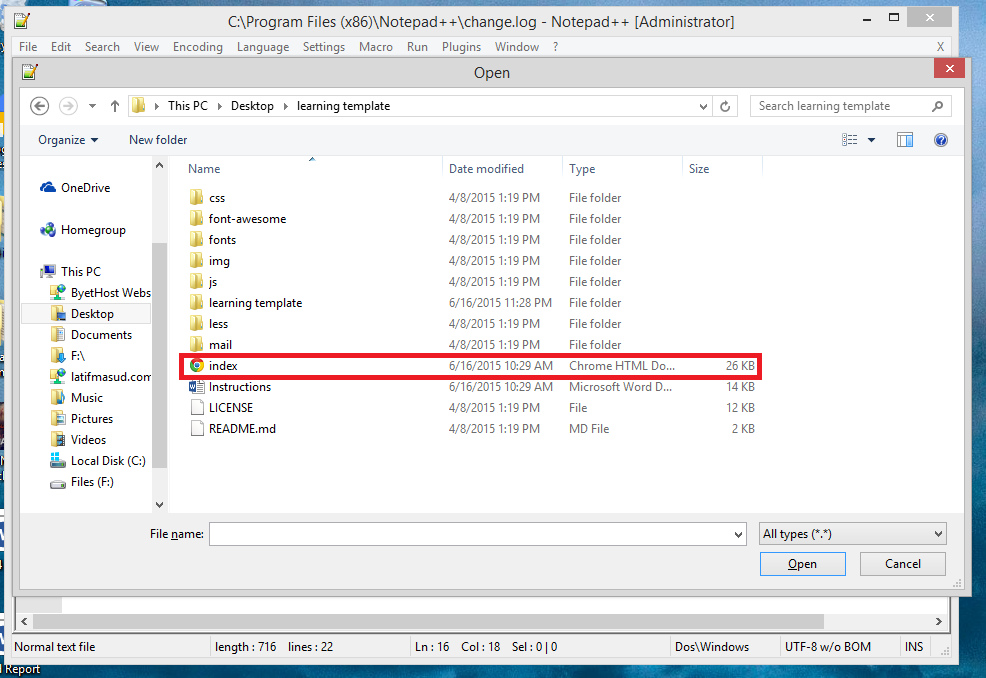
- With Notepad++ open, press "Control" and "O" together on the keyboard. This will bring up the opening window.
- Navigate to the "learning template" folder and double click on "index.html" to open it as shown in the first figure.
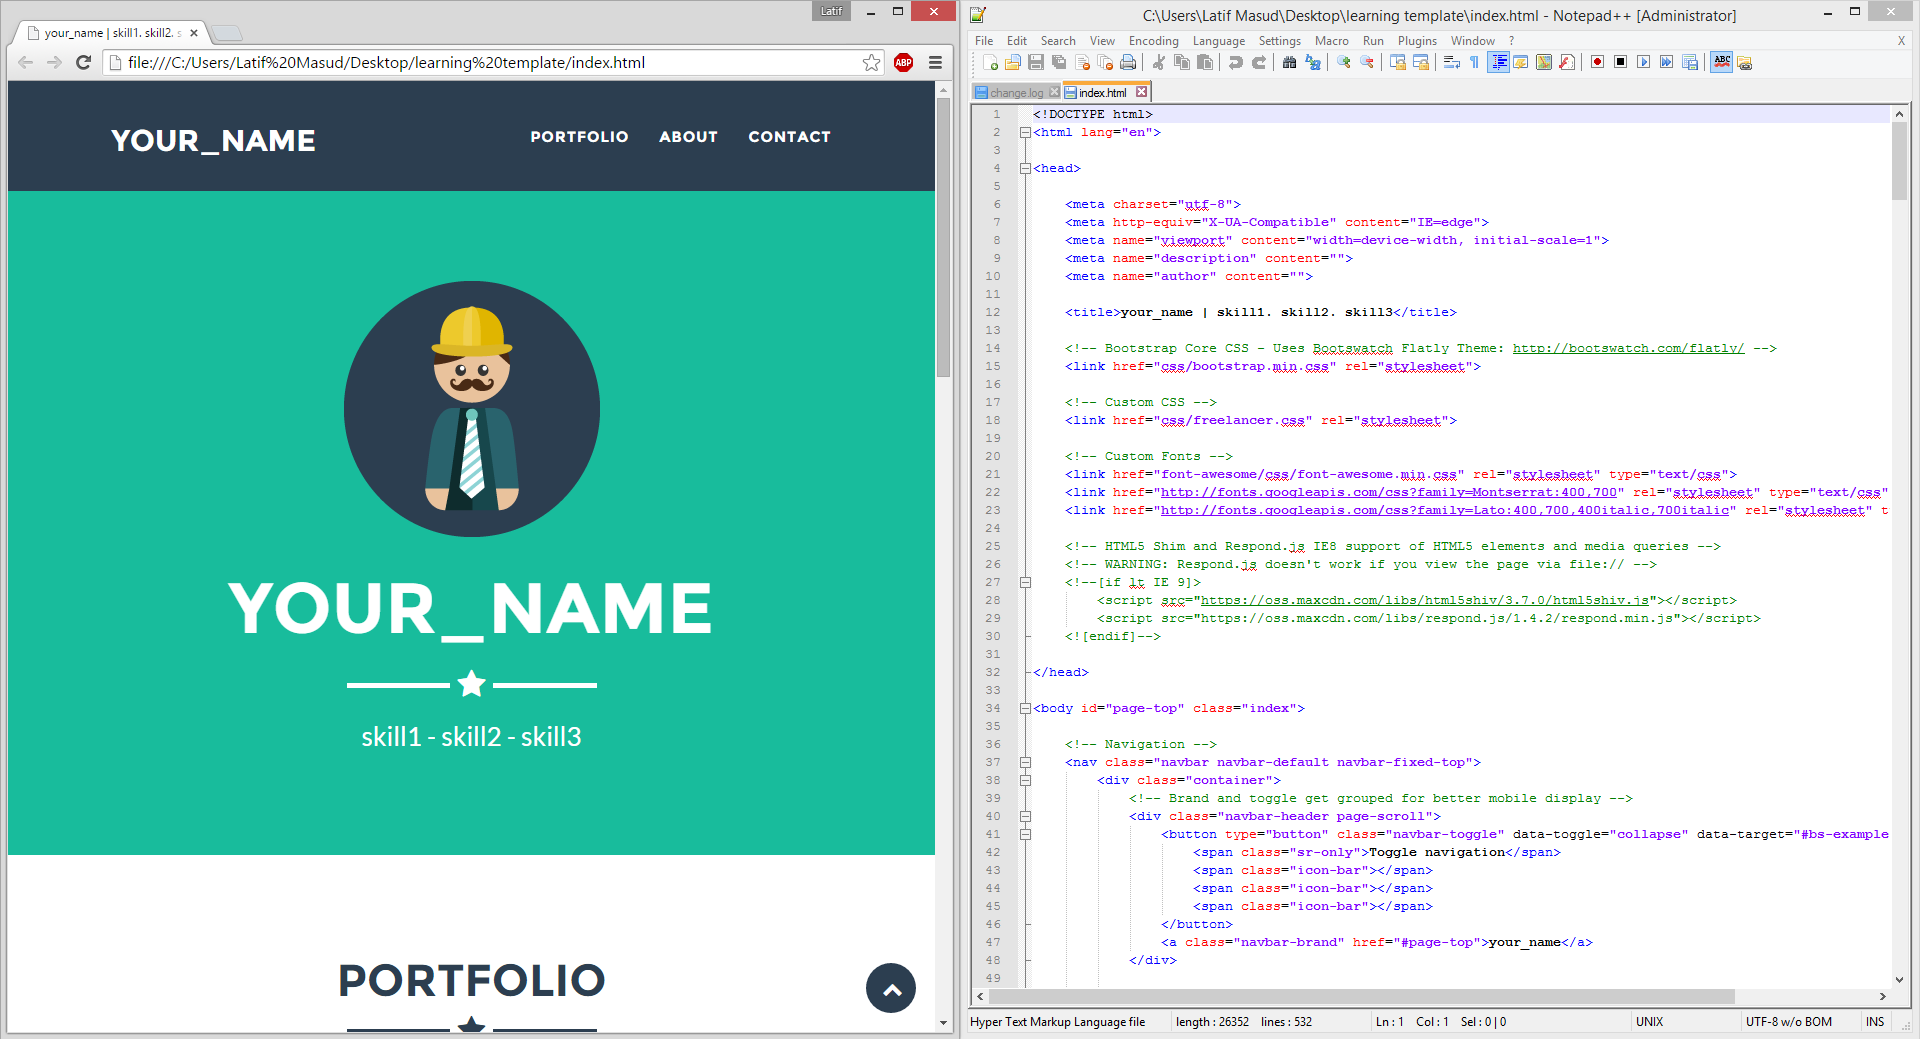
- Press the "Windows" key and "Right key" together to dock the Notepad++ window to the right of your screen.
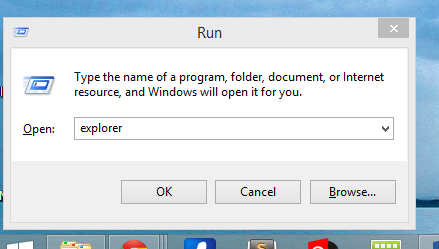
- Press "Windows" key and "R" together to bring up run menu.
- Type in "explorer" in the Run window as shown in the second figure and press Enter on keyboard.
- Navigate to the "learning template" folder in the Windows Explorer that opens.
- Double click on "index" to open in your web browser.
- Press "Windows" key and Left key together to dock it your browser on the right side of your screen. After this step, your screen should look the same the last figure.
Adding Your Basic Information
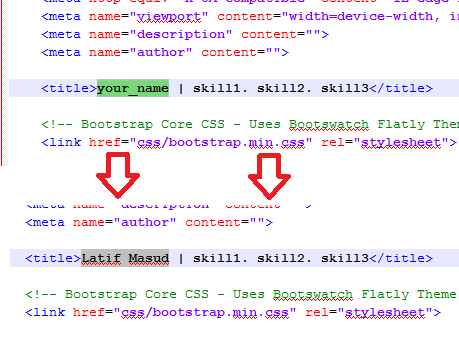
- In Notepad++, replace “your_name” in lines 12, 47 and 79 with your actual name as shown in the first figure.
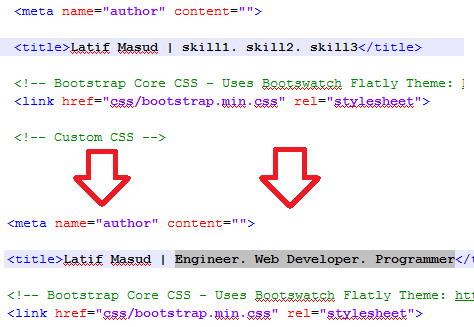
- Replace “skill1”, “skill2”, and “skill3” with your three preferred skills in lines 12 and 81 as shown in the second figure.
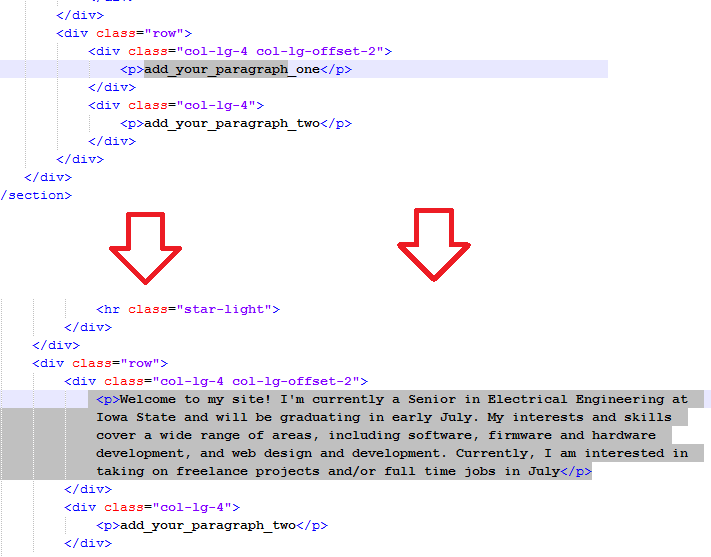
- Replace “add_your_paragraph_one” in line 173 and “add_your_paragraph_two” in line 176 with your own paragraph about yourself.
Add Your Social Media Links


The following lines contain the following social media links:
Social Media Platform Line Number
Facebook 251-253
Google Plus 254-256
Twitter 257-259
LinkedIn 260-262
Dribble 263-265
To add each social media link, follow the following steps:
- Remove the "<!--" and "-->" tags from the desired social media. For example, for Facebook, "<!--" was removed from line 251 and "--> was removed from line 253 as shown in the first figure.
- Replace the "facebook_link" in line 252 with the actual link of your Facebook page as shown in the second figure.
- For other social media, it would be a similar process. For example, for Google Plus, "<!--" would need to be removed from line 254, "-->" removed from line 256, and "google_link" replaced by actual link on line 255.
Adding Items to Your Portfolio
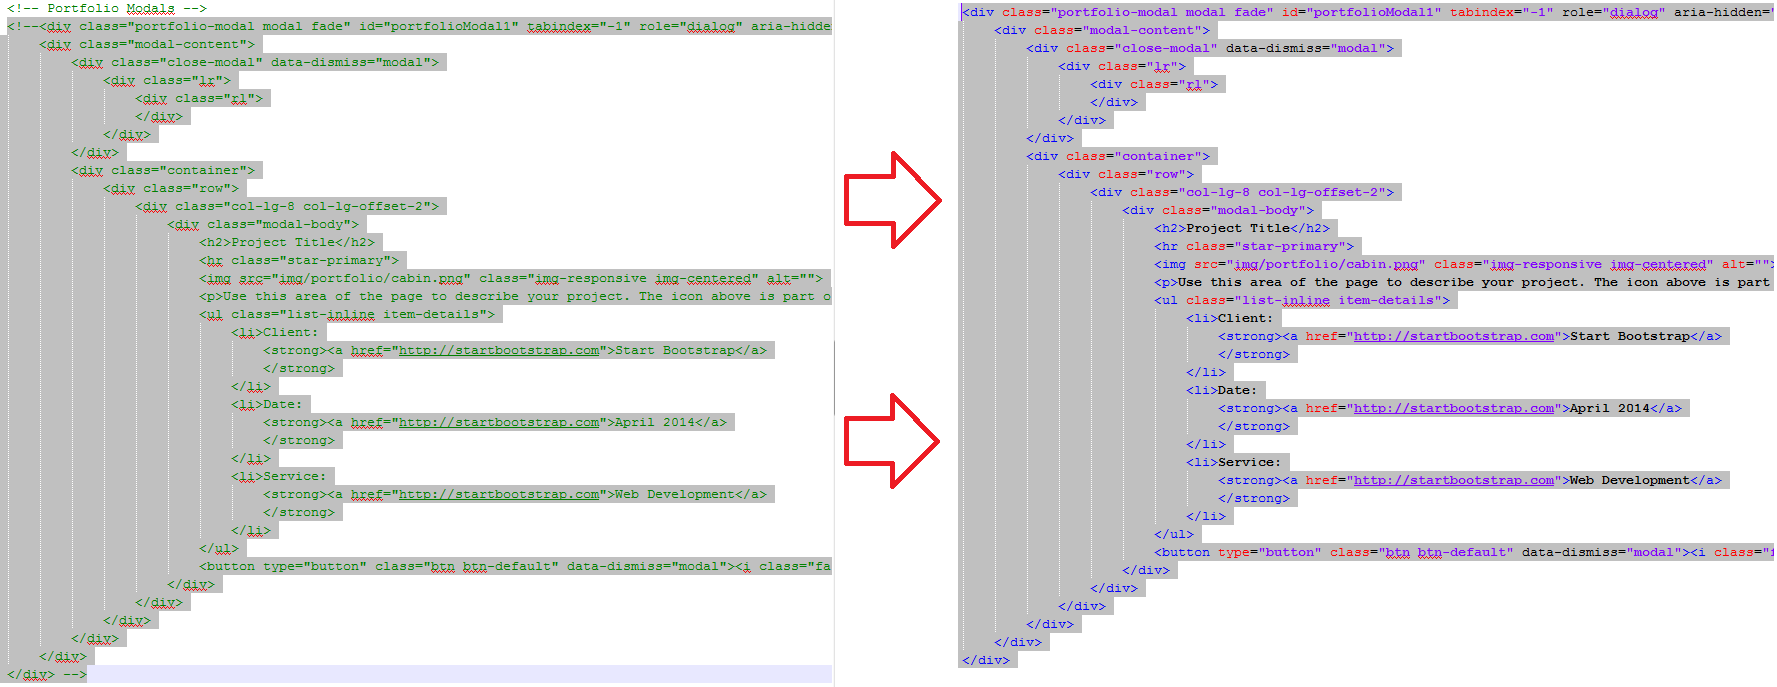


There are six portfolio modals with this template. They are located between the following lines:
Modal 1: 292-328
- Project Title: Line 304
- Description: Line 307
- Client: Line 310
- Date: Line 314
- Service: Line 318
Modal 2: 329-365
- Project Title: Line 341
- Description: Line 344
- Client: Line 347
- Date: Line 351
- Service: Line 355
Modal 3: 366-402
- Project Title: Line 378
- Description: Line 381
- Client: Line 384
- Date: Line 388
- Service: Line 392
Modal 4: 403-439
- Project Title: Line 415
- Description: Line 418
- Client: Line 421
- Date: Line 425
- Service: Line 429
Modal 5: 440-476
- Project Title: Line 452
- Description: Line 455
- Client: Line 458
- Date: Line 462
- Service: Line 466
Modal 6: 477-513
- Project Title: Line 489
- Description: Line 492
- Client: Line 495
- Date: Line 499
- Service: Line 504
Using Portfolio Modals
Follow the steps below to use each modal:
- Uncomment modal by removing " " tags from the starting and ending lines. For example, " " removed from line 328 as shown in the first figure.
- Replace "Project Title" in line 304 for first modal as shown in the second figure. Lines for other modals are listed above.
- Replace the project description in line 307 with your own as shown in the third figure. Lines for other modals are listed above.
- Follow similar procedure to replace Client, Date and Service information, using the lines listed above for the modals. For Modal 1, the line for client would be 310, Date would be 314, and Service would be 318.
Adding a Picture for Your Project
Location for Pictures for Portfolio Modals
Modal 1: Line 308
Modal 2: Line 345
Modal 3: Line 382
Modal 4: Line 419
Modal 5: Line 456
Modal 6:Line 493
This step assumes that you have a pre-selected image for your portfolio.
Steps to follow:
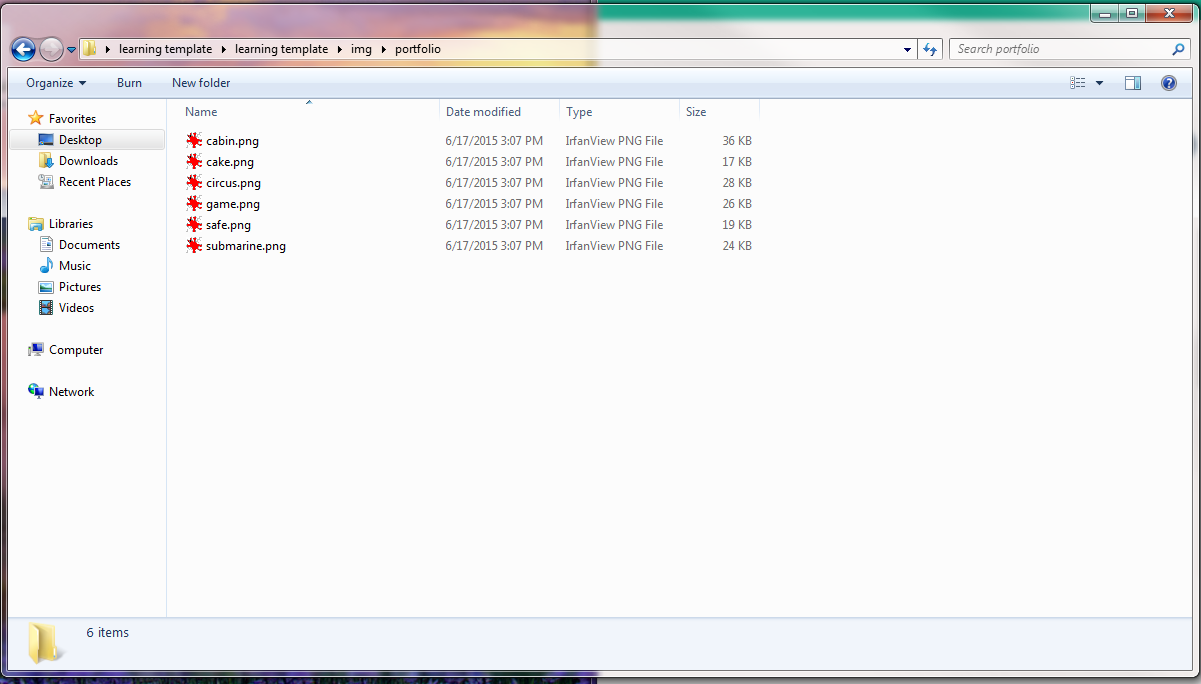
- Navigate to the "learning template" folder, and double click on the "img" folder, and then the "portfolio" folder as shown in the first figure.
- Copy the image of your choice into this folder.
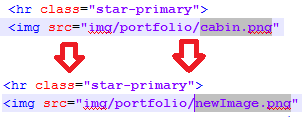
- In Notepad++, replace the image name for the modal you are working on with your image name. For example, for modal one, we replace "cabin.png" with "newImage.png" in line 308 as shown in figure two.
- Repeat steps above for other modals.
Conclusion
Once you have added your personal information, social media links, a paragraph or two about yourself and your portfolio items, you have officially made your first online portfolio and designed your first webpage. This page can be launched via various web hosting services such as Web.com, iPage, Bluehost, or FatCow. These services can help you with the complexities of getting website on the web. You may also want to purchase your own domain name. A domain name is what the user enters into the web browser to get to your page. For example, we type in "google.com' to get to Google. Services such as GoDaddy and Domain.com are popular options for such domain purchasing services.