Creating a LiveBinder for the Classroom: by Allison Borowitz
by aborowitz in Design > Websites
1360 Views, 8 Favorites, 0 Comments
Creating a LiveBinder for the Classroom: by Allison Borowitz
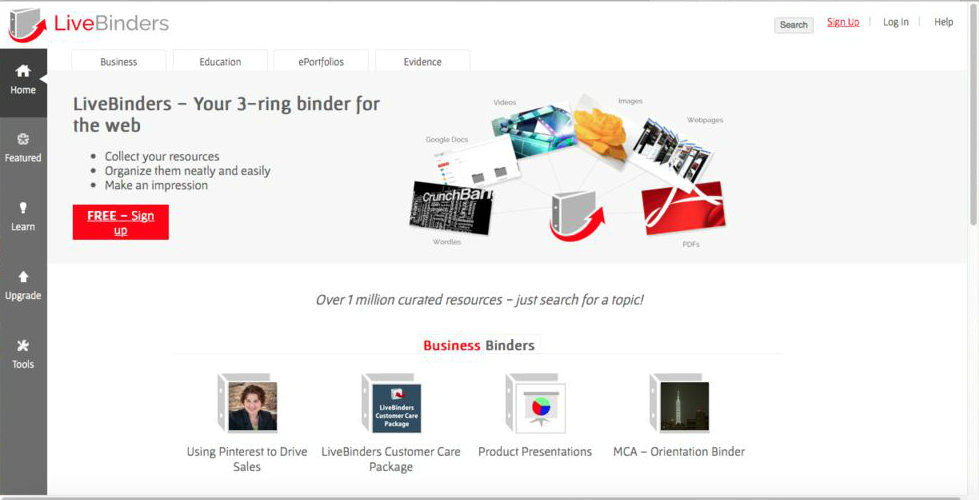
This tutorial will show you how to create a LiveBinder for use in your classroom. In addition to this, you will also learn about some of things you must consider when constructing your LiveBinder.
Create a Profile on LiveBinder
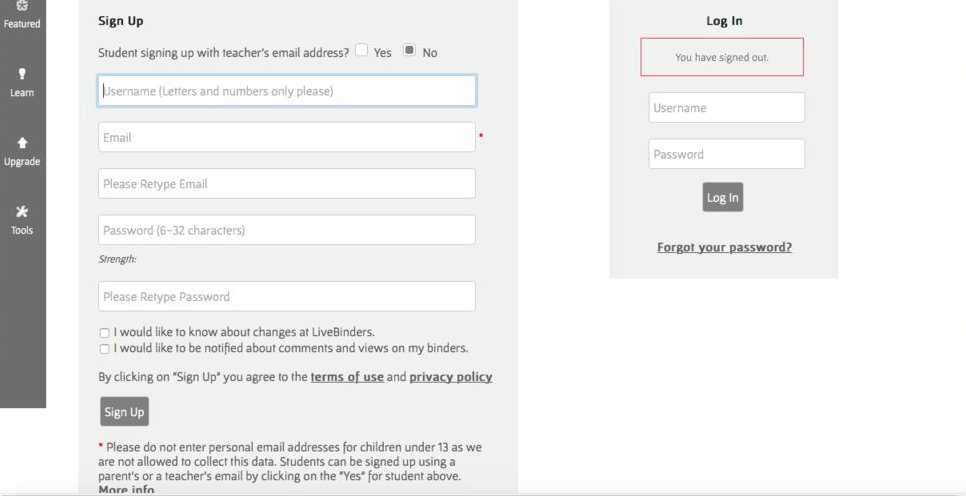
If you do not already have a live binder account you will need to create one. You can do this by going to LiveBinder.com and clicking the “Sign Up” button on the top right hand corner of the pages and filling in the required information fields.
Opening Your First Binder
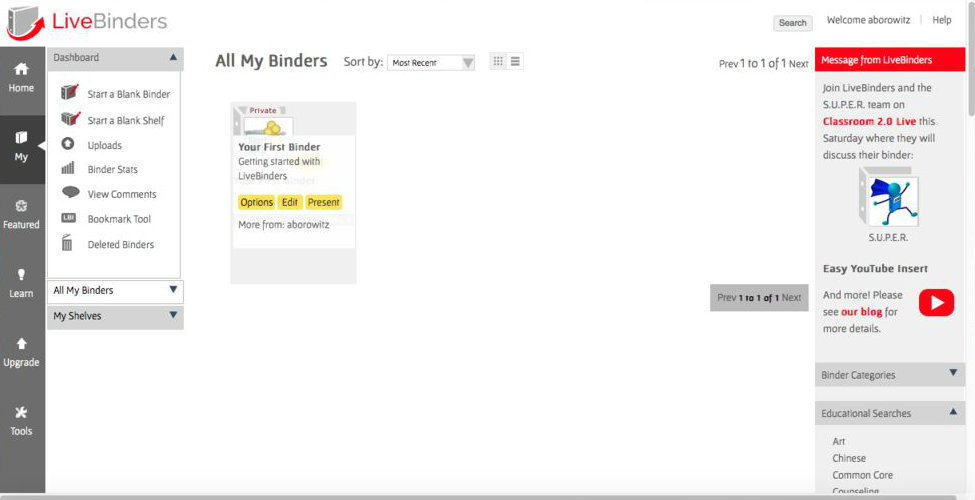
After creating your account you will be taken to your LiveBinder dashboard. Here you will find your first binder which is titled “Your First Binder”. To begin editing, move your cursor over the binder and click the yellow button labeled “Edit”.
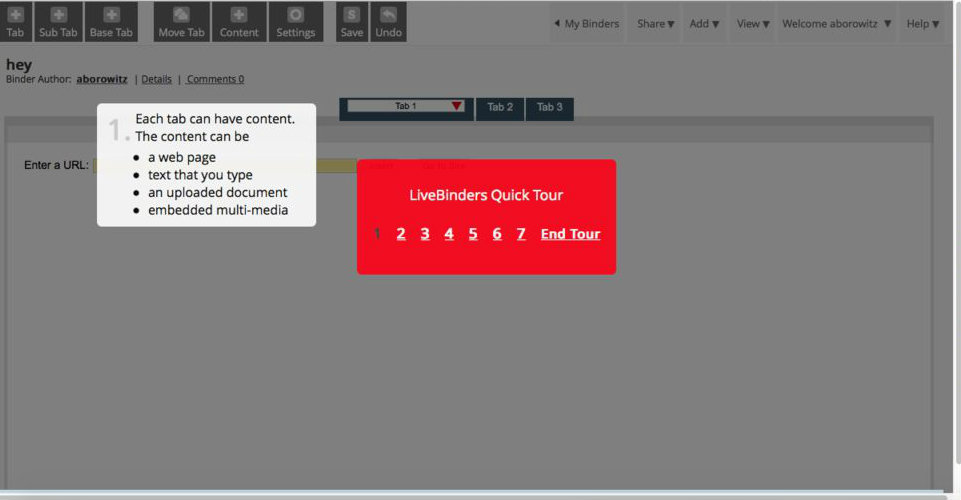
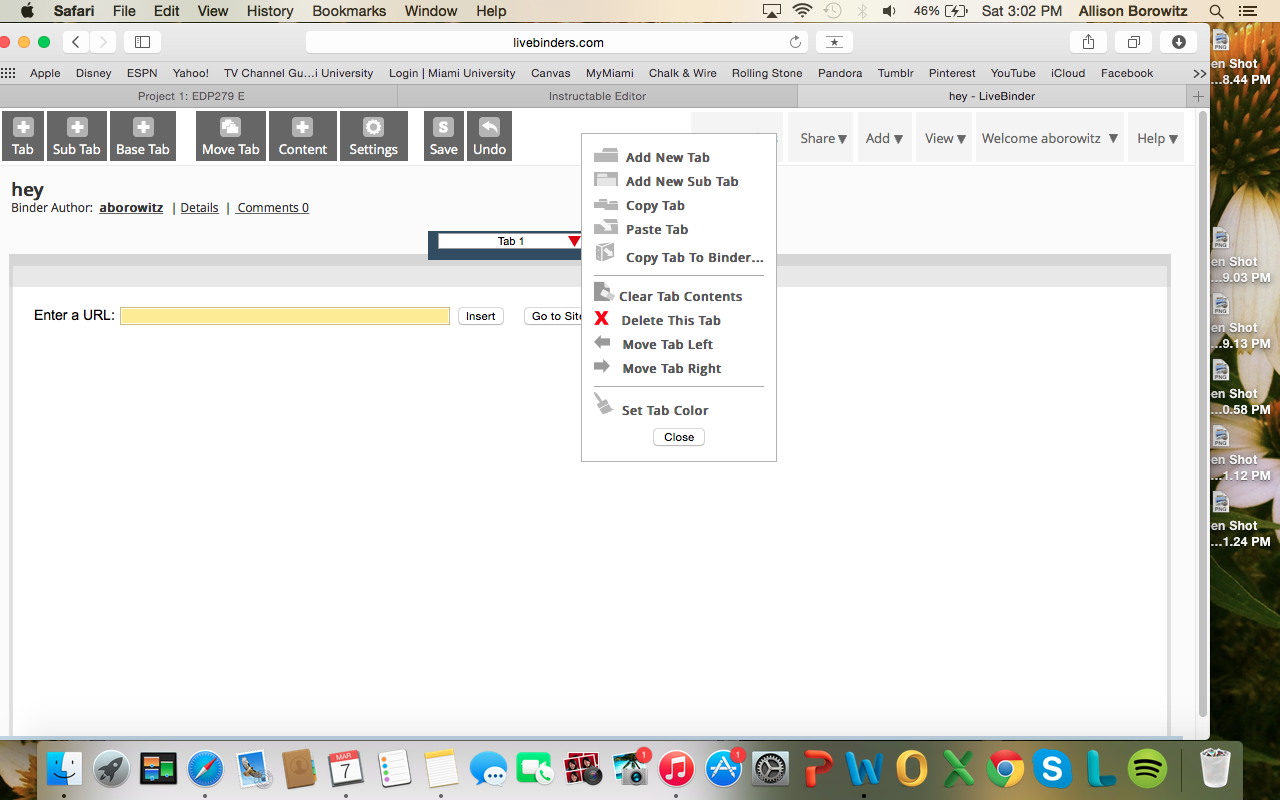
Next you will be brought to a page with a tutorial provided by the website. You have the option to end the tour or continue to read through it. With your first live binder there is also an information tab. After reading through some of the information on the tab you can delete it by clicking on the red arrow on the tab labeled “Tab 1” and clicking “Delete this Tab”.
Learning the Controls Pt. 1, Formatting Your Binder

All the controls necessary for creating your binder are located at the top, left hand corner of the web page.
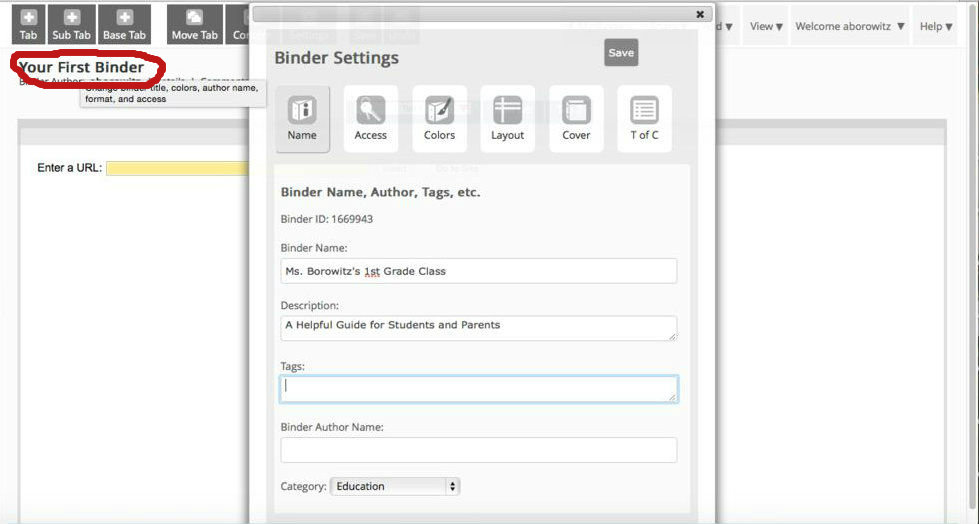
To begin by changing the name and description of your binder, you can click the name of your binder (circled in red).
From this window, you can change the color, layout, and cover of your binder as well as who can access your binder.
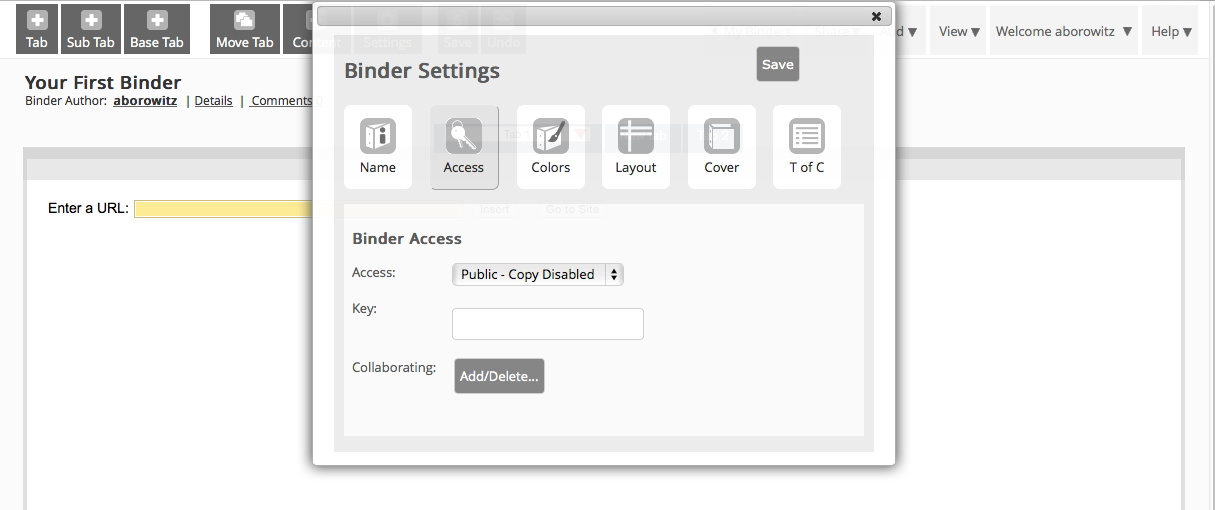
In order to make your binder viewable for your students and their parents, it is important to make sure that your binder is for public use. You can change this by clicking on the tab labeled "Access".
All these settings can also be accessed from the tab at the top of the page labeled "Settings".
Learning the Controls Pt. 2, Adding Tabs

The rest of the controls that you can use to create your LiveBinder are located in grey boxes at the very top of the left side of the page. The ones we will be focusing on in this step are underlined in red for reference.
The first three are labeled "Tab," "Sub Tab," and "Base Tab". These control the number of tabs or pages in your LiveBinder.
The "Tab" button adds another tab or page to your binder.
The "Sub Tab" button add a tab/page within a tab. This is useful for when you want to have multiple related pages under one tab, in one location. For example, if you have a tab labeled "Homework Helpers" you can add multiple sub tabs, each with a different link to a different website.
The "Base Tab" button adds a tab/page within a sub tab. While this feature is listed, it is only available to use by those who have a paid subscription to the website.
Learning the Controls Pt. 3, Moving Tabs and Adding Content

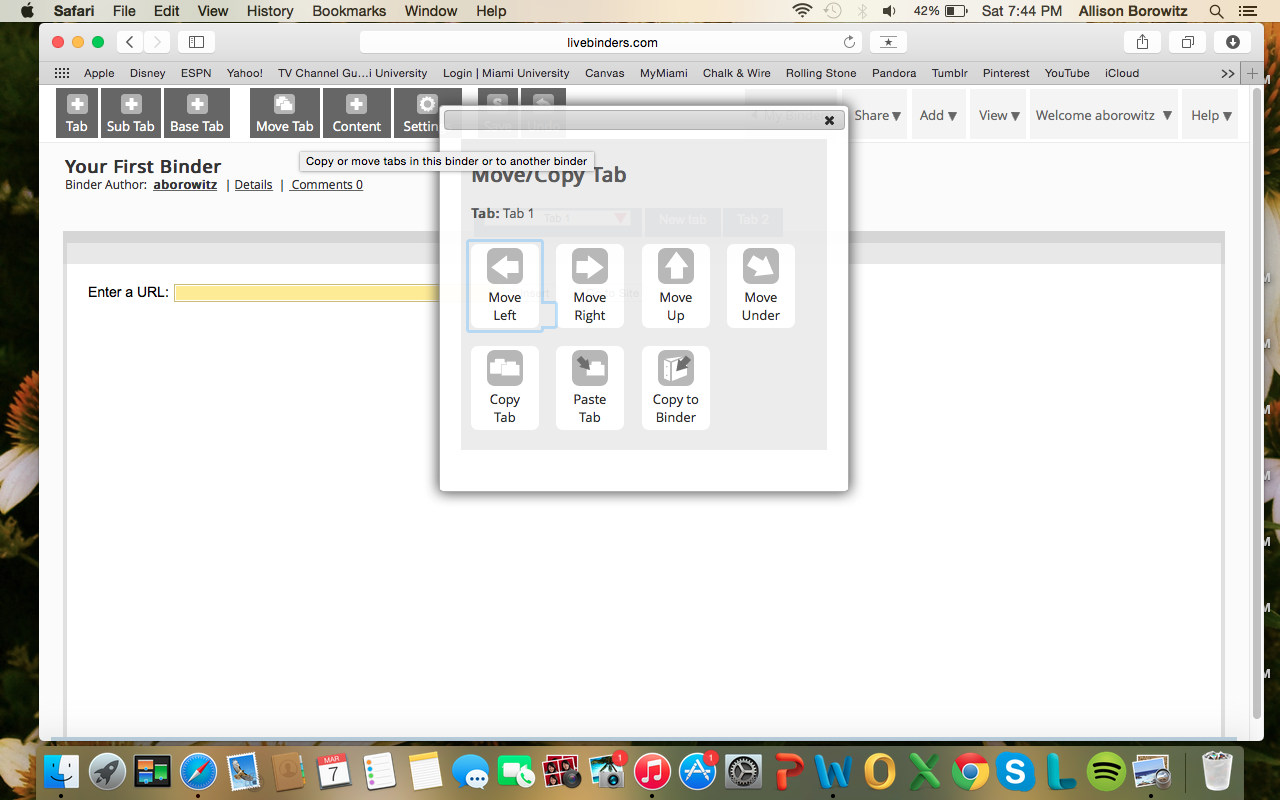
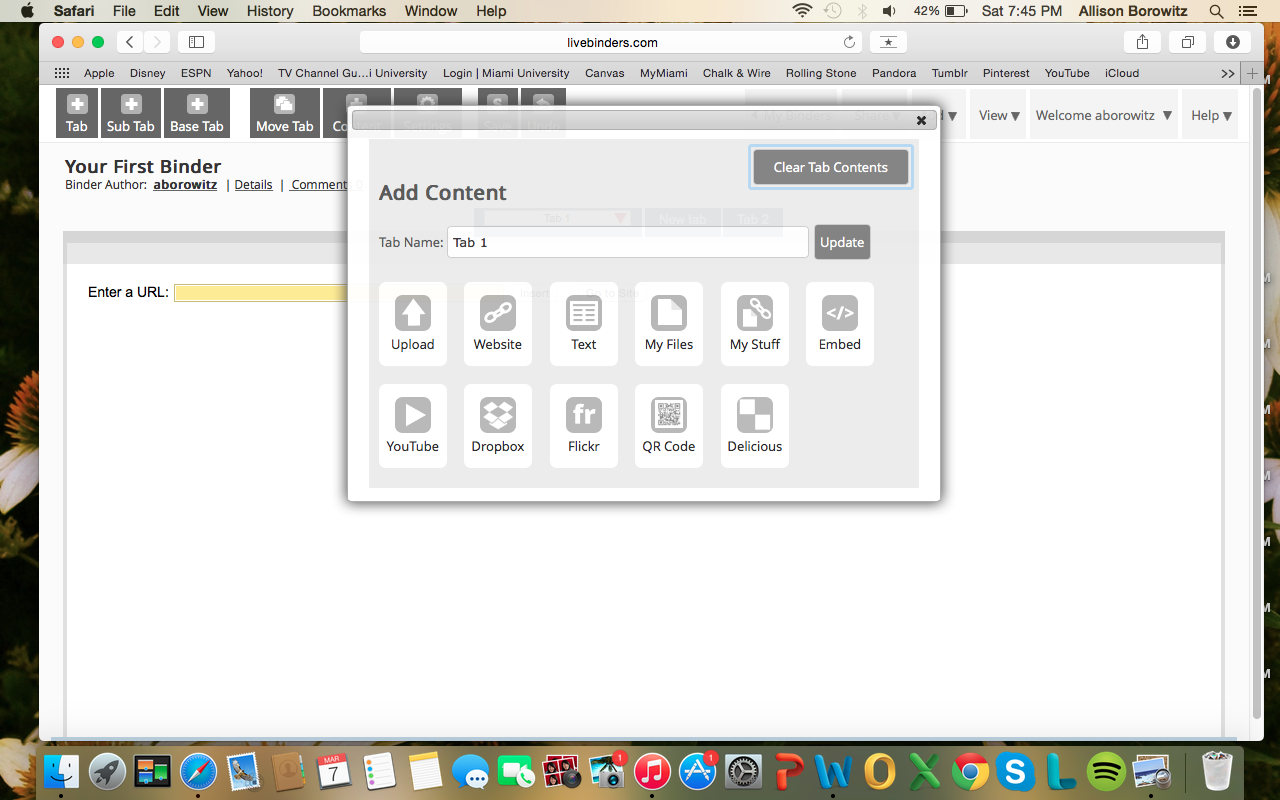
The controls that we will be working with the most in this step are the buttons labeled "Move Tab," "Content," and "Settings". These are underlined in red for reference.
The "Move Tab" button allows you to change the order of tabs. Whatever tab you are currently viewing when you click this button will be the one you have the option to move. A window opens when you click this button that gives you the option to move the tab left or right (Using the buttons "Move Left" or "Move Right"), as well as up (if it is a sub tab) or down (if it is a normal tab). This is done using the buttons "Move Up" and "Move Under". You also have the option to copy the tab you are on, using the "Copy to Binder" button, so that you can move it to another binder. You can also copy and paste tabs that you have copied from within the binder you have open using the "Copy" and "Paste" buttons, respectively.
The "Content" button allows you to add a wide variety of materials to the tabs on your LiveBinder. From this window you can also edit the name of the tab you currently have open. Under the "Upload" button you can choose files from your computer that you want to add to the tab. Under the "Website" button you can copy and paste the URL of another website that you want to make accessible on the tab. Under the "Text" button you can choose the size and shape of the text box you want to include on the tab. "My Files" shows you all the files you have uploaded for use on your LiveBinder. "My Stuff" gives you the option to search for content in all your binders and "Embed" lets you embed codes from other websites. The "Youtube" button lets you add videos from youtube to the tab by pasting the video's link or searching for it within the window. "Dropbox" allows you to upload files from your dropbox account. "Flickr" lets you search for images on flickr that can be added to your tab. "QR Code" allows you to insert a QR code on the page by pasting a URL or you can create a QR that links to your live binder. This can be useful for parents or students as a tool to help accessing your binder easier. "Delicious" allows you to add bookmarks using your Del.icio.us account.
The "Settings" button is simply another way to access the controls as previously dressed in Step 3.
Learning the Controls Pt. 4, Extra Controls


The last two buttons in the top lefthand corner we will be discussing are "Save" and "Undo". These are underlined in blue for reference.
"Save" allows you the save any changes you have made to your binder. "Undo" works by undo-ing the last change you made to your binder.
The rest of the controls for working on your binder can be located in the upper righthand corner of the page.
"My Binders" takes you back to your dashboard of binders.
"Share" gives you a variety of ways to share your binder. The most helpful way is by accessing the binder's URL, which can then be shared with parents and students. When typed into the search bar, it will take them directly to your binder.
"Add" allows you to add your binder to a "shelf" or collection/category of binders that you have created. You can also made an additional copy of your entire binder.
"View" allows you to view your binder as someone using your binder would see it. From here you can also change the layout of the tabs in your binder.
"Welcome" allows you to view your binders, uploaded files, and profile. From here you can also log out.
"Help" provides tours and a link to the website's help page.
What Should I Include in My LiveBinder?
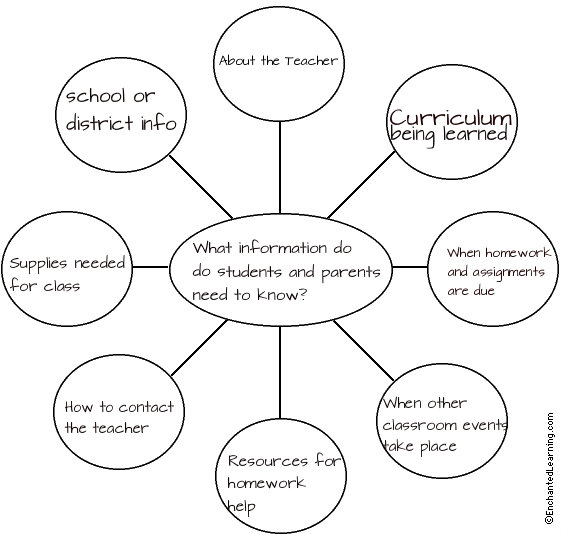
Now that you know how to create a LiveBinder it's time to think about what you want to include in your Classroom LiveBinder.
Begin by asking yourself, "what information do students and parents need to know?"
From there, your answers to this questions should guide how you organize your LiveBinder and what you add to it.
For instructional pursposes, a graphic organizer has been included which explores this question further.
Blank graphic organizer taken from: EnchantedLearning.com
Some suggestions include:
- Information about the Teacher
- Curriculum being learned
- When homework and assignments are due
- When other classroom events take place
- Resources for homework help
- How to contact the teacher
- Supplies needed for class
- School or school district information
Now that you have explored these ideas, you are ready to create your own classroom LiveBinder!