Creating a Home Media Streaming Center With Ubuntu
by mdkelsh in Circuits > Linux
231672 Views, 73 Favorites, 0 Comments
Creating a Home Media Streaming Center With Ubuntu
Let's face it. Discs are a thing of the past, and external hard drives are bulky and inconvenient. With this guide, I will show you how to create a Home Media Center, capable of streaming movies and music straight to you PC. The best thing is, this is free, or cheap, project!
Gathering the Supplies


What we will need
- An unused PC
- Ubuntu 9.04 Desktop Edition
- A DVD-R(optional)
- Media
Download Ubuntu 9.04
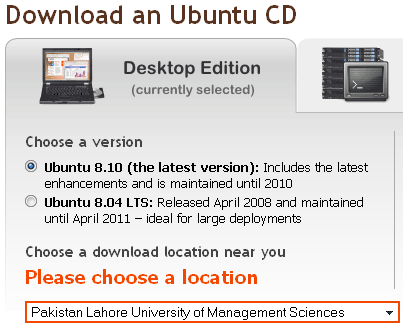
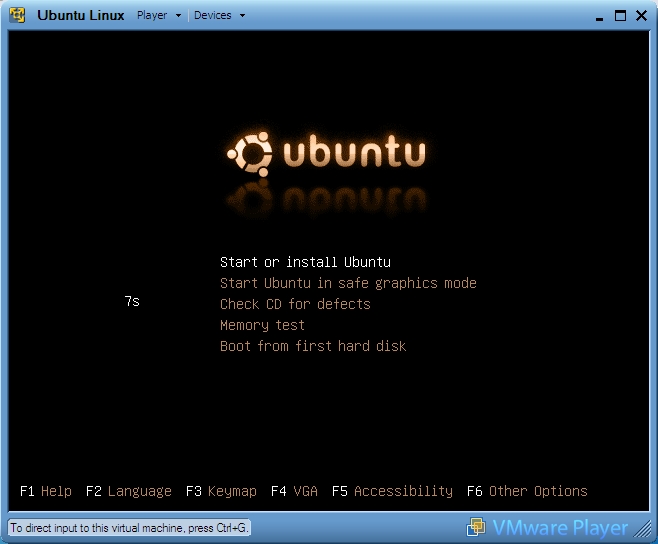
Can be acquired here http://www.ubuntu.com/getubuntu/download. I have a fairly decent internet speed, so it took me about an hour to download. Download time may vary, so sit back, relax, grab a cup of coffee, or learn the metric system.
Burning the ISO
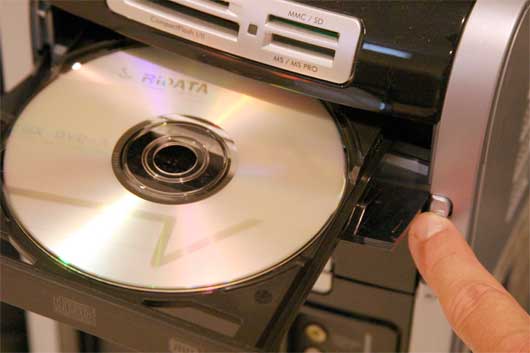

After you are done downloading the file, we must burn it to a disc. http://www.imgburn.com/index.php?act=download is a pretty good program for the job. If you know how to burn an ISO, then you are on the right track. Once you have burnt the disc, it is time to install!
Installing Ubuntu


I won't go over this step, for it is pretty self explanatory, but if you need assistance, it can be found here https://help.ubuntu.com/community/GraphicalInstall
SSH
Once you have installed Ubuntu, it is time to configure you server! In the upper left-hand corner, click on Applications>Accessories>Terminal. A window should pop up, similar to Mac OS X terminal, or Windows CMD Prompt.
In this window, type
sudo apt-get update
Then
sudo apt-get upgrade
Reboot the install OpenSSH-Server in terminal using
sudo apt-get install openssh-server
Find your local IP address. MIne is under eth1.
On another Linux machine, ssh into the client using
ssh your_username@local_ip
On Ubuntu 9.04, ssh has been replaced with OpenSSH, which comes pre-installed
If you are using a Windows machine, or Mac, go grab a copy of putty http://www.chiark.greenend.org.uk/%7Esgtatham/putty/ which serves as a ssh client.
Configuring Samba
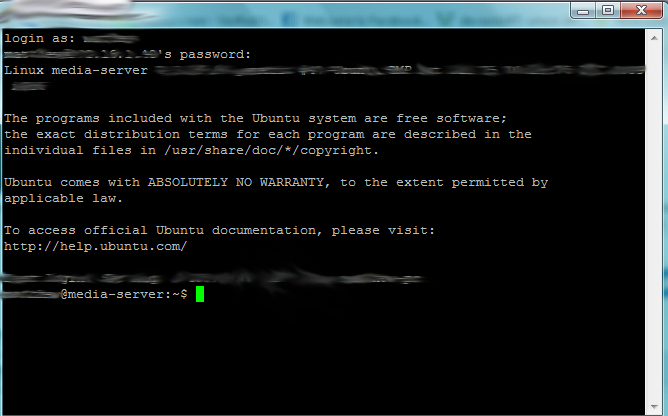
Install Samba in terminal using,
sudo apt-get install samba
and
sudo apt-get install samba smbfs
Stop Samba
sudo /etc/init.d/samba stop
Move
sudo mv /etc/samba/smb.conf /etc/samba/smb.conf.orig
Create
sudo touch /etc/samba/smb.conf
Edit
sudo pico /etc/samba/smb.conf
Copy this filehttp://rubbervir.us/projects/ubuntu_media_server/smb.txt into the window
Replace "YOUR_HOSTNAME" with "Media"
Replace "YOUR_WORKGROUP" with the name of your Windows workgroup
Replace "/media/samba/" with "/"
Replace "YOUR_USERNAME" with your username
Save
Hit CTRL+X, Y, Enter
Set permissions
sudo chmod 0777 /
Restart Samba
sudo /etc/init.d/samba start
Add/edit/delete network users
Add user
sudo smbpasswd -a system_user (system_user, being the user you created in the installation"
sudo pico /etc/samba/smbusers
Insert following line into new file
system_username = "network username"'
Save
Edit user
sudo smbpasswd -a system_username (system username being the one you chose in the installation)
Delete user
sudo smbpasswd -x system_username
Reconfigure Sharing
sudo pico /etc/samba/smb.conf
and add this to the file
[Media]
path = /mediaserver
browseable = yes
read only = no
guest ok = yes
create mask = 0644
directory mask = 0755
Now Restart Samba
sudo /etc/init.d/samba stop
sudo /etc/init.d/samba start"'
Add Media

Find you Media server over the network, login, find the folder "Media". And drag and drop the media you want into the folder.
Adding Server Dependencies
First we must install some web-server dependencies.
Run each of these separately (DO NOT COPY AND PASTE THE WHOLE BLOCK OF TEXT!!!)
sudo apt-get install apache2
sudo apt-get install php5
sudo apt-get install mysql-server libapache2-mod-auth-mysql php5-mysql
sudo apt-get install php5-gd
Run each of these separately (DO NOT COPY AND PASTE THE WHOLE BLOCK OF TEXT!!!)
sudo apt-get install apache2
sudo apt-get install php5
sudo apt-get install mysql-server libapache2-mod-auth-mysql php5-mysql
sudo apt-get install php5-gd
Getting the Files to Play Nice
In you ssh window, run this command
wget http://filenice.com/demo/fileNice.zip
Next we need to unzip the folder
unzip fileNice
Now we need to put it in the files at the web-root directory
sudo cp -a fileNice /var/www
you can now test your server by navigating to your server via web browser using the url
web_server_local_ip/fileNice
(replace web_server_local_ip with the ip assigned to your server by your router)
Customizing You Prefs
Now to get you server working the way you want it, you must customize some code, allowing for certain file types and directories. To do so, run this command in the ssh terminal
sudo cd /var/www/fileNice/fileNice
then
sudo pico prefs.php
Find the line that says $embedTypes, and add the file extensions you want to the list.For mp3s, you simply remove it from the "$embedTypes" and add it to the "$miscTypes" list array. This makes it easier for a mobile device to use the mp3 file.
Press Ctrl+X, Y, then Enter
Add Files

in the ssh terminal run this command
sudo /etc/samba/smb.conf
And add this block of text to the bottom of the file
[Streaming]
path = /var/www/fileNice
browseable = yes
read only = no
guest ok = yes
create mask = 0644
directory mask = 0755
[MediaStreaming]
path = /MediaStreaming
browseable = yes
read only = no
guest ok = yes
create mask = 0644
directory mask = 0755
Press Ctrl+X,Y,Enter
Restart Samba
sudo service samba restart
Now you can browse it over the network, and transfer files to your server. You make need the run these commands in the terminal to obtain the proper folder permissions.
sudo chmod 775 /MediaStreaming
sudo chmod 775 /var/www
(optional)Create a Domain Name With No-ip
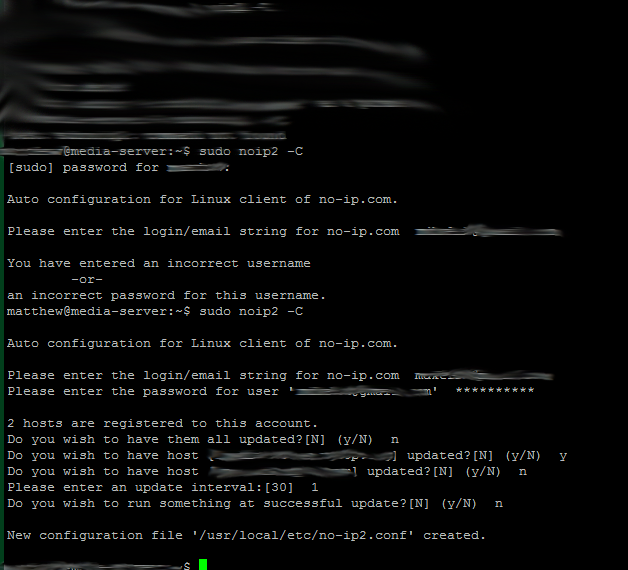

Go to http://no-ip.com and create a free account, and a domain for your server. Next in your ssh terminal type:
sudo apt-get install no-ip
then
noip2 -C
Follow the prompt, and then you should be able to use that domain name to connect to your server.
sudo apt-get install no-ip
then
noip2 -C
Follow the prompt, and then you should be able to use that domain name to connect to your server.
Setting Up Darwin Streaming Server
Many of us have phones and iTouches, some like me are lucky enough to have an iPhone. In any case, Darwin Server will satisfy your general streaming needs. Unlike before in which we used progressive download, I believe that DSS will enable you to have true streaming capabilities.
First we must create the necessary user requirements
Enter these commands in the terminal
sudo addgroup -system qtss
and
sudo adduser -system -no-create-home -ingroup qtss qtss
This will add the user and user groups needed by DSS
Now enter the directory we need
cd /usr/local/src/
Download the latest version of DSS
http://github.com/lstoll/dss/tarball/master
Now decompress the file
tar -xvf lstol*
Enter the new directory
cd lstoll*
Build it!!
./Buildit install
Now sit back and enter the matrix, this step may take a while, so sit back, relax and enjoy. I recommend these comics here,here and here
When it is done
cd DarwinStreamingSrvr6.0.3-Linux
Then install (If you haven noticed, case sensitivity is important!)
./Install
Follow the prompts for a Admin username and pass. When it is completely installed, visit your new server at server_ip:1220, enter your username and pass you just created, and configure your server, making /MediaStreaming your streaming directory.
Creating a Start/Stop Script
We must now create a script which will allow you to start/stop your sever. First, we must create the script file.https://www.instructables.com/id/edit?instructableId=E2YCHZ6FXA2ZASS#
sudo touch /etc/init.d/dss
Then edit it
sudo pico /etc/init.d/dss
Courtesy of ruman of Ubuntu Forums, we have a script to use. Paste this into your terminal
#-------------------------------------------------------------------------------------------
#!/bin/sh
#
# chkconfig: 35 92 12
# description: Quicktime Streaming Media Server
#
# init script to start up the quicktime (Darwin) streaming server
case "$1" in
start)
if test -r /var/lock/dssd
then
echo "Lockfile /var/lock/dssd exists. Server not started."
failure
else
echo "Starting Darwin Streaming Server: "
/usr/local/sbin/streamingadminserver.pl
touch /var/lock/dssd
echo "Darwin Streaming Server started..."
fi
;;
stop)
echo "Stopping Darwin Streaming Server: "
[-f /var/lock/dssd] || exit 0
echo "stopping..."
killall streamingadminserver.pl
rm -f /var/lock/dssd
echo
;;
restart)
$0 stop
sleep 1
$0 start
;;
*)
echo "Usage: $0 [start|stop|restart]"
exit 1
esac
exit 0
#--------------------------------------------------------------------------------------------------
Make it executable
sudo chmod +x /etc/init.d/dss
And make it start at boot
update-rc.d dss defaults
Like before, you can drag files from any computer on your network to your server, courtesy of samba, which will automatically show up on your servers.
Adding Playlists to DSS
Go to server_ip:1220 in your browser, and in the left-hand bar, click "Playlists". Name it and add files, be sure to un-check Send this Playlist to a broadcast server, unless you plan to create a broadcast server, or already have one. After you finish, push the play button next to the playlist to stream it.
Now you can view your streaming in Quicktime Player by entering you streaming URL into the player, the URL should be in this format,
rtsp:// server_ip /MediaStreaming/ file_you_want_to_stream
Now you can view your streaming in Quicktime Player by entering you streaming URL into the player, the URL should be in this format,
rtsp:// server_ip /MediaStreaming/ file_you_want_to_stream
Enjoy
The sky is the limit, Google to find out more about streaming, and the potential things you can do. Your media is worldwide now, just create a proper firewall so that hackers do turn your friendly media server, into an evil hack machine. If you have stuck with this guide, kudos to you, it will prover to be worth it.
Now go outside, play some games, or do something fun, you'll probably need a pick-me-up after the tediousness of this guide.
Now go outside, play some games, or do something fun, you'll probably need a pick-me-up after the tediousness of this guide.