Creating a Makey Makey Guitar in Scratch or Soundplant!
by MakeyMakey in Teachers > 8
5126 Views, 10 Favorites, 0 Comments
Creating a Makey Makey Guitar in Scratch or Soundplant!
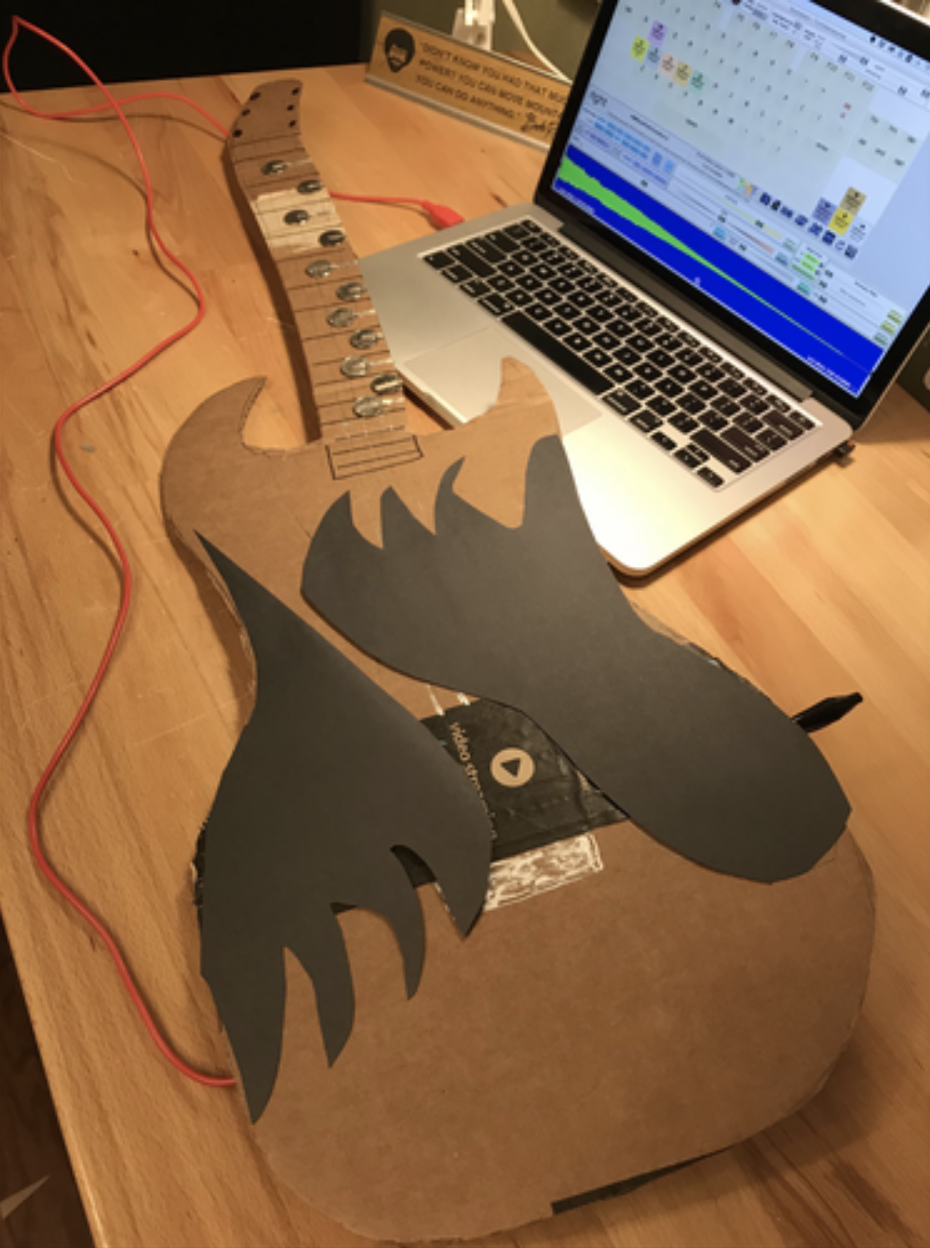
Learn to create your own guitar sounds in Scratch or Soundplant and turn cardboard into a musical instrument!
Supplies
Makey Makey Classic, Scratch or Soundplant, cardboard, conductive tape or foil, quarters, nickels
Option 1: Use "Play Note" in Scratch
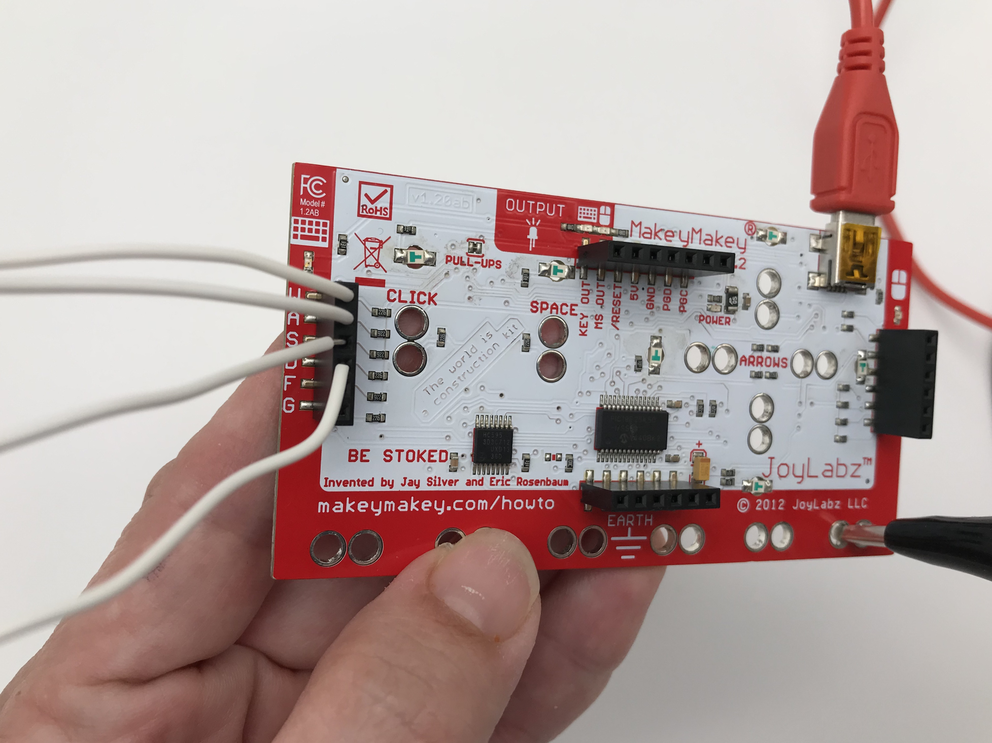
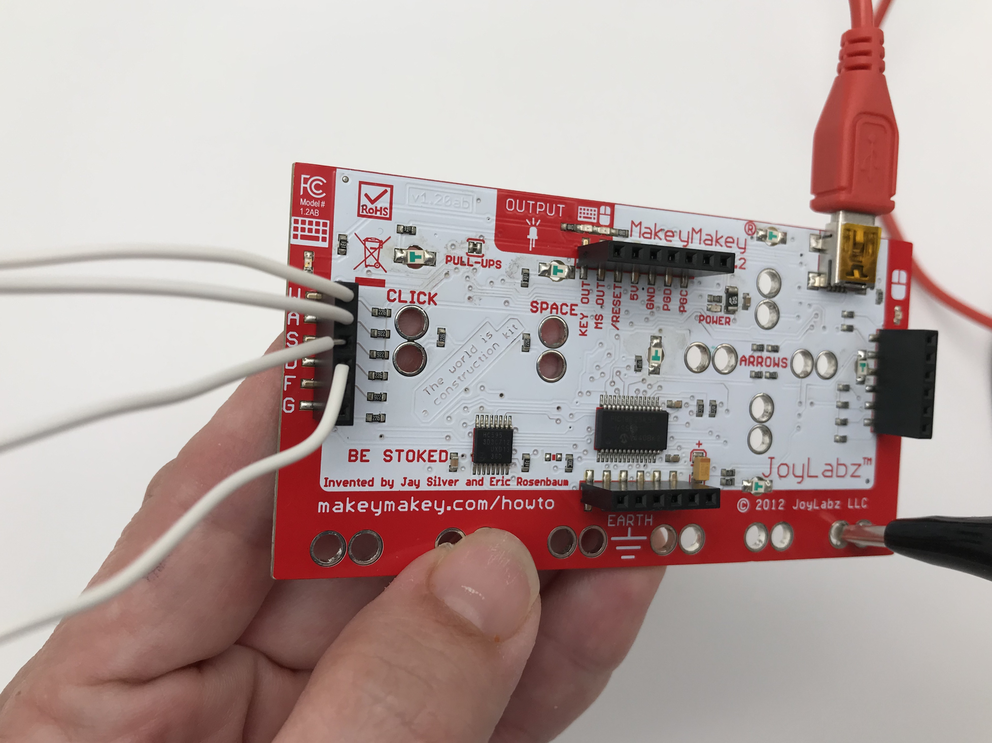
If you want to make a program that works with the key presses WASDFG, flip your Makey Makey over and use the small white jumper wires to attach to your alligator clips and the conductive spots on your guitar. (Picture 1)
You have multiple options for coding a guitar in Scratch. If you know about musical notation from playing a piano, you might find using the midi notes in Scratch a fun way to code your guitar.
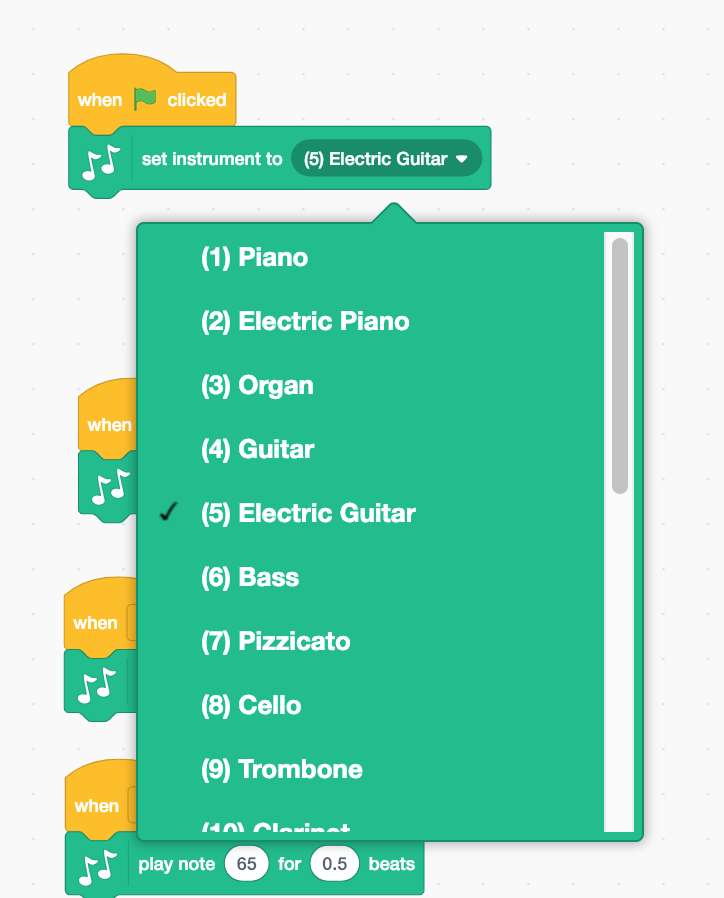
With this option, you'll want to use the "set instrument" block at the start of the game. (Picture 2)
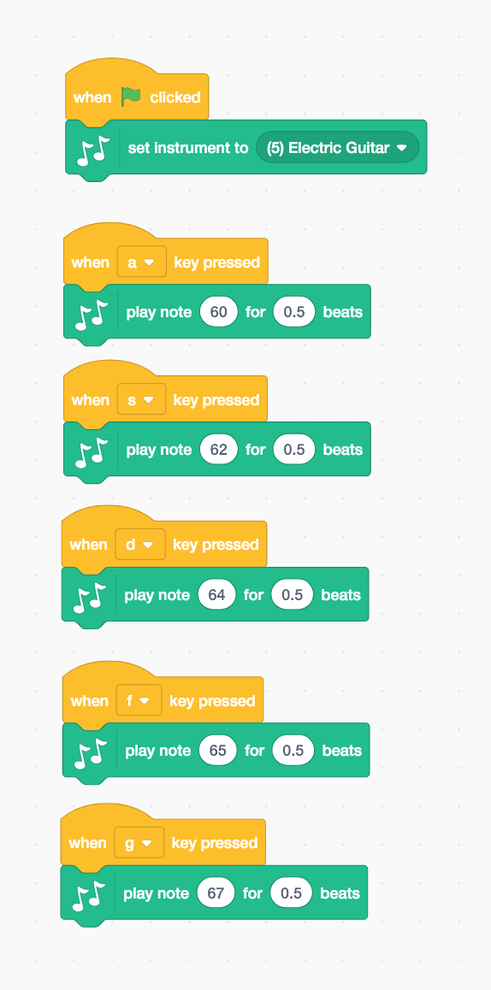
There are 21 instruments to choose from in Scratch and instrument 5 is an electric guitar. Add the "set instrument" block to the "When flag clicked" block to set your sprite to an electric sound! (Picture 2 and 3)
If you want the guitar notes to play when you press WASDFG, you will add a "when __ key pressed" for each note you want to program in your workspace. Attach a "play note __ for __ beats" to each key press block. (Picture 3)
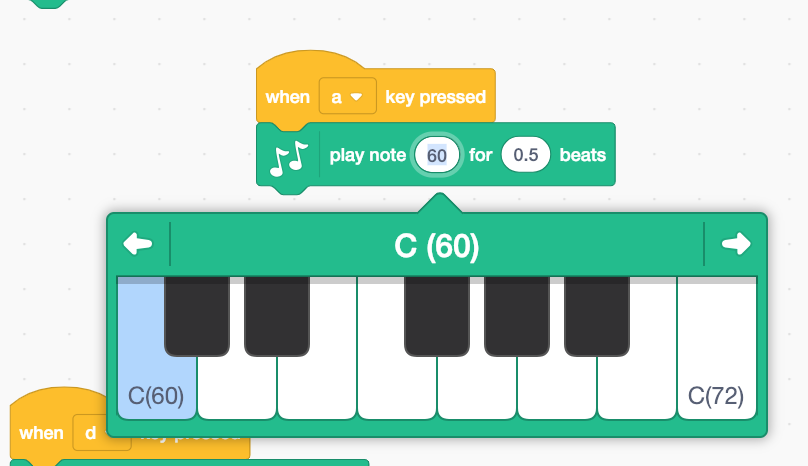
To change each note, click into the play note variable and a keyboard will pop up like in picture 4. Choose the key note you would like to program. Use the arrow keys to adjust the octave. (Picture 4)
If you programmed your guitar with this option, you can skip to step 5 now!
Educator Tip:
Wondering what the 60 means in Scratch? This denotes the midi number. Read more about midi notes in Scratch here.
Option 2: Use a Guitar Sprite in Scratch!
If you want to make a program that works with the key presses WASDFG, flip your Makey Makey over and use the small white jumper wires to attach to your alligator clips and the conductive spots on your guitar. (Picture 1)
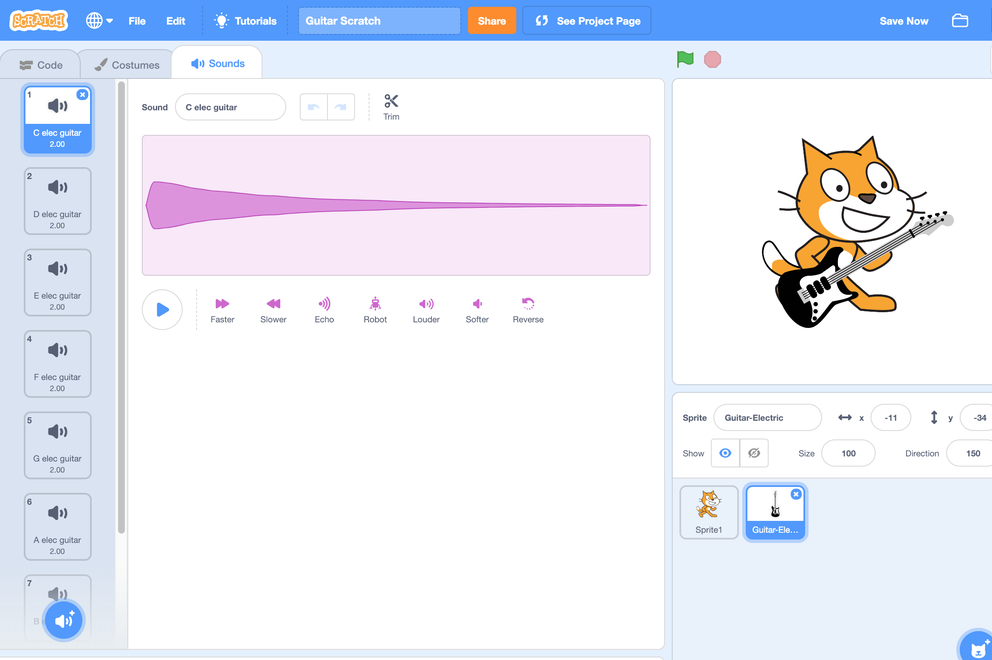
This is the easiest way to program an electric guitar in Scratch! Choose an electric guitar from the sprite menu and a full scale of guitar notes will magically appear in the sound tab! (Okay, it isn't magic, but still it's cool, right?!) (Picture 2)
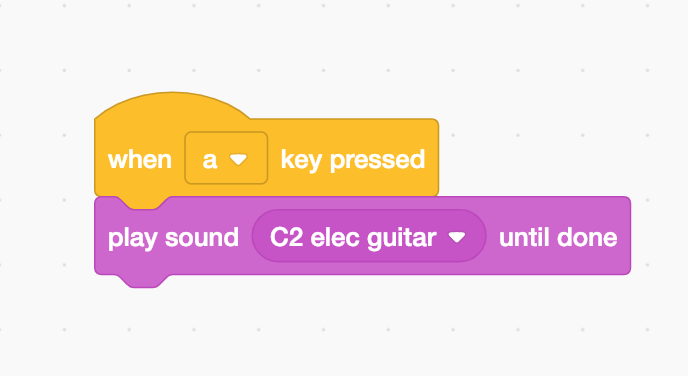
To program your keys, just drag a "when __ key pressed" for each note you want to program into your workspace and attach a "play sound __ until done" to each "When __ key pressed." (Picture 3)
If you programmed your guitar with this option, you can skip to step 5 now!
Option 3: Upload Guitar Sounds With Mp3 Files
You can add your own guitar sounds too by either playing a guitar and recording it, or looking for mp3 or wav files you can upload to your guitar sprite.
Look for a good guitar chord mp3 that is usable with a creative commons license, or available for free reuse. (In other words, make sure you have the right to use the file!)
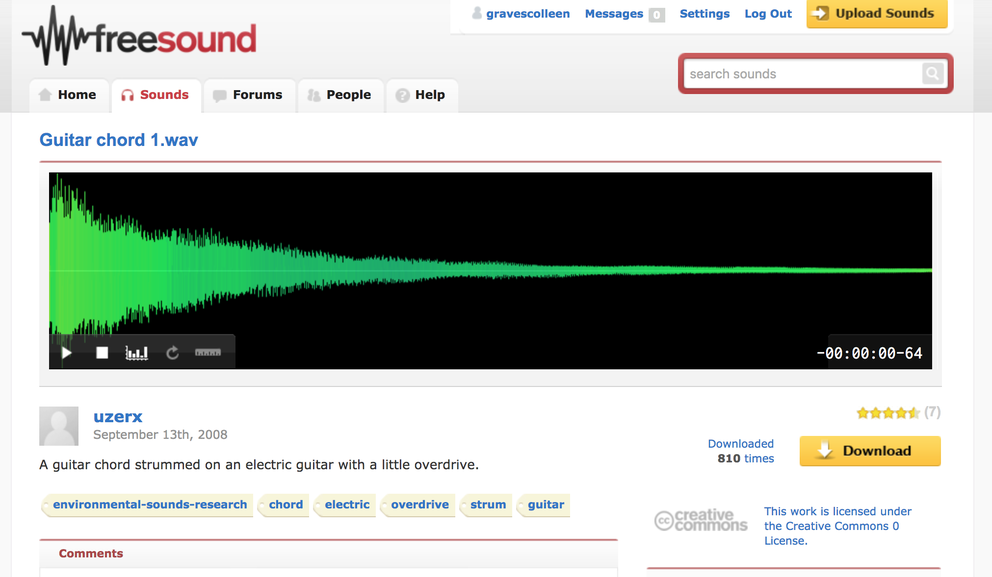
"Free Sound" has a good bank of guitar chords you can download for your games. Some files will upload to Scratch, but some won't. Download the mp3 or wav files from the website. (Picture 1)
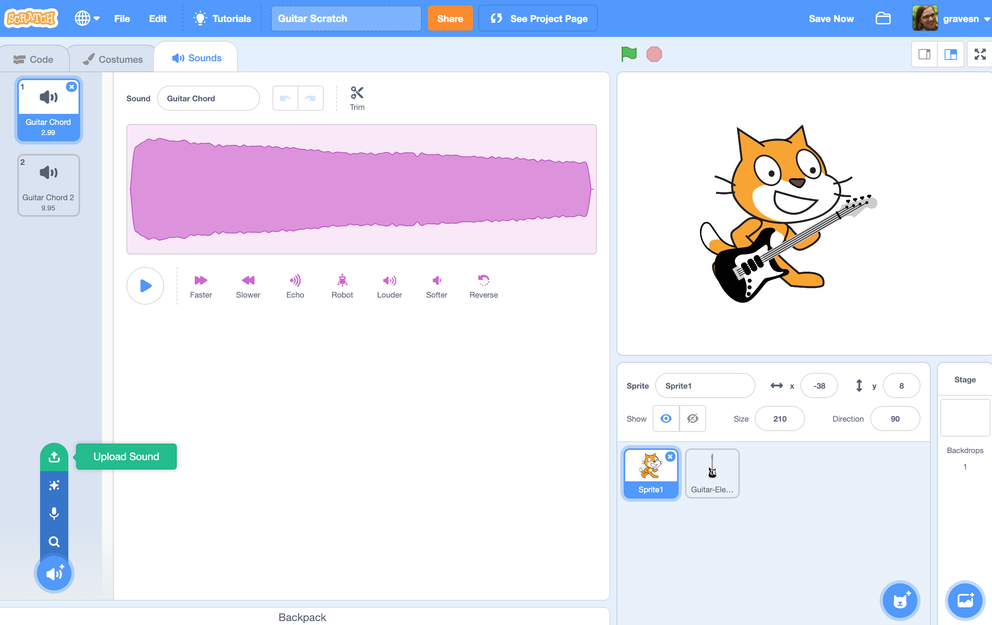
To add an mp3 or wav file to Scratch, click on the "upload" icon in the Scratch Sound pop-up menu, search for the file, click on it, and import it. (Picture 2)
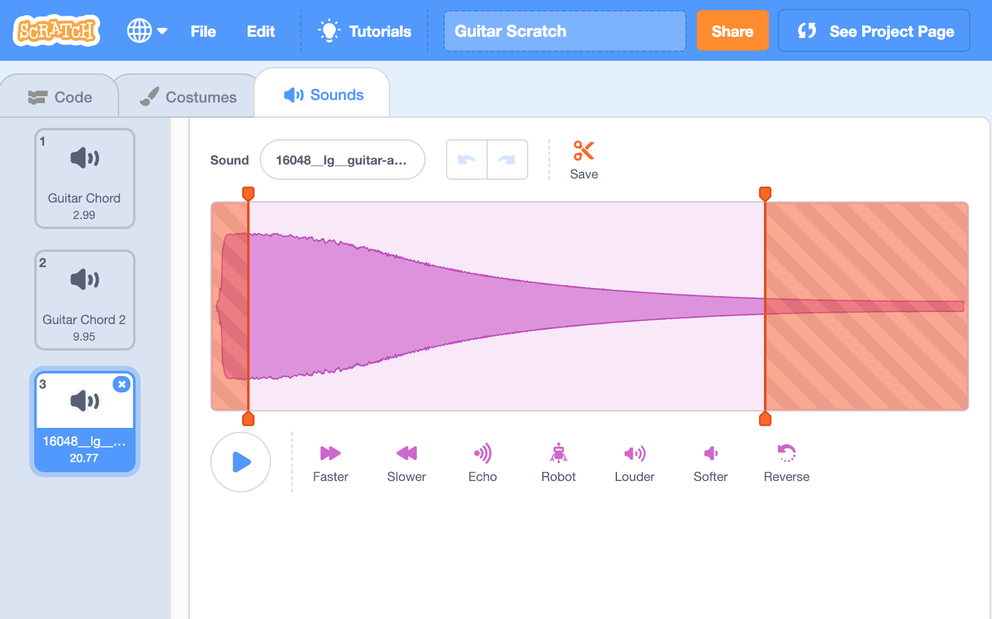
Once the sound is uploaded, you may want to edit the sounds as needed. You can shorten sounds by clicking on "trim" and adjusting the red areas to trim what you do not want. You can also adjust the full sound clip with these "effects": faster, slower, echo, robot, louder, softer, reverse. (Picture 3)
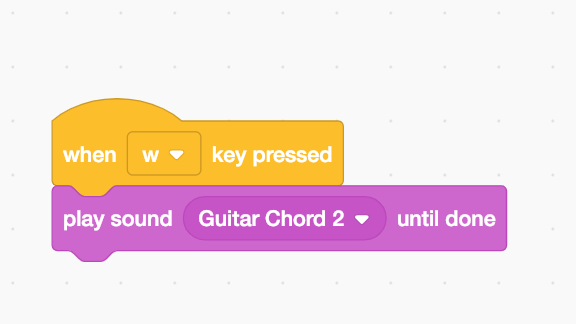
To program your freshly uploaded sound, add a "when key ___ pressed" block, and add a "play sound ____ until done." Make sure you click the arrow inside the block and choose the sound you just uploaded. Repeat for each key press. (Picture 4)
If you made a guitar program that works with the key presses WASDFG, flip your Makey Makey over and use the small white jumper wires to attach to your alligator clips and the conductive spots on your guitar. (See previous steps if needed)
If you programmed your guitar with this option, you can skip to step 5 now!
Option 4: Use Soundplant to Control Sound Effects
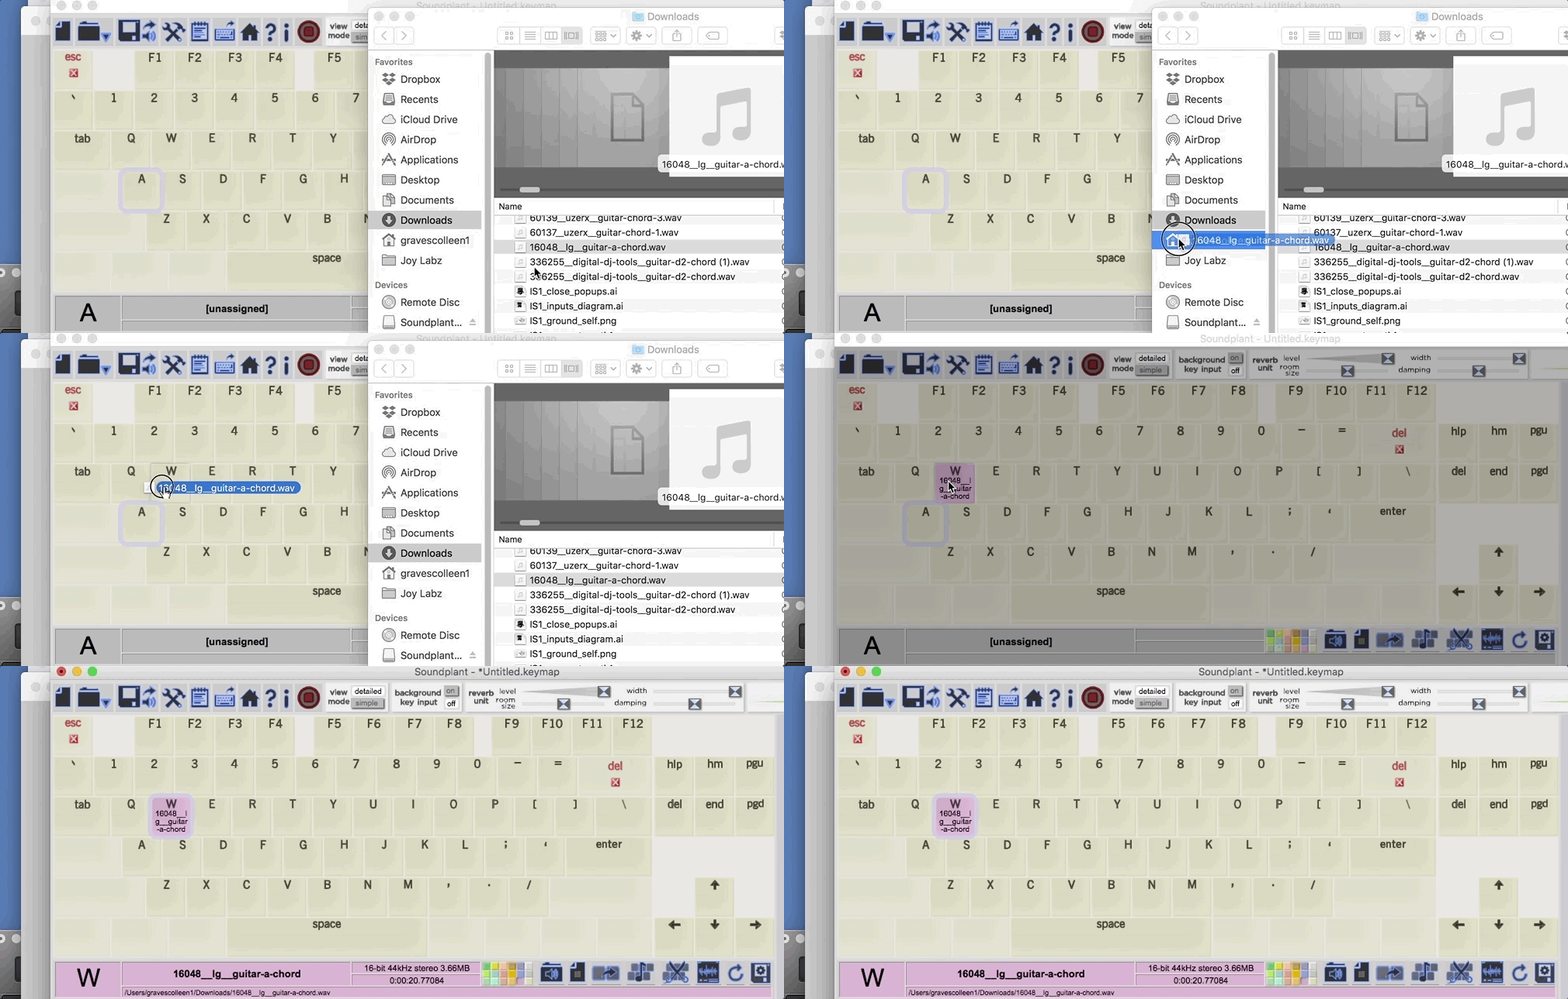
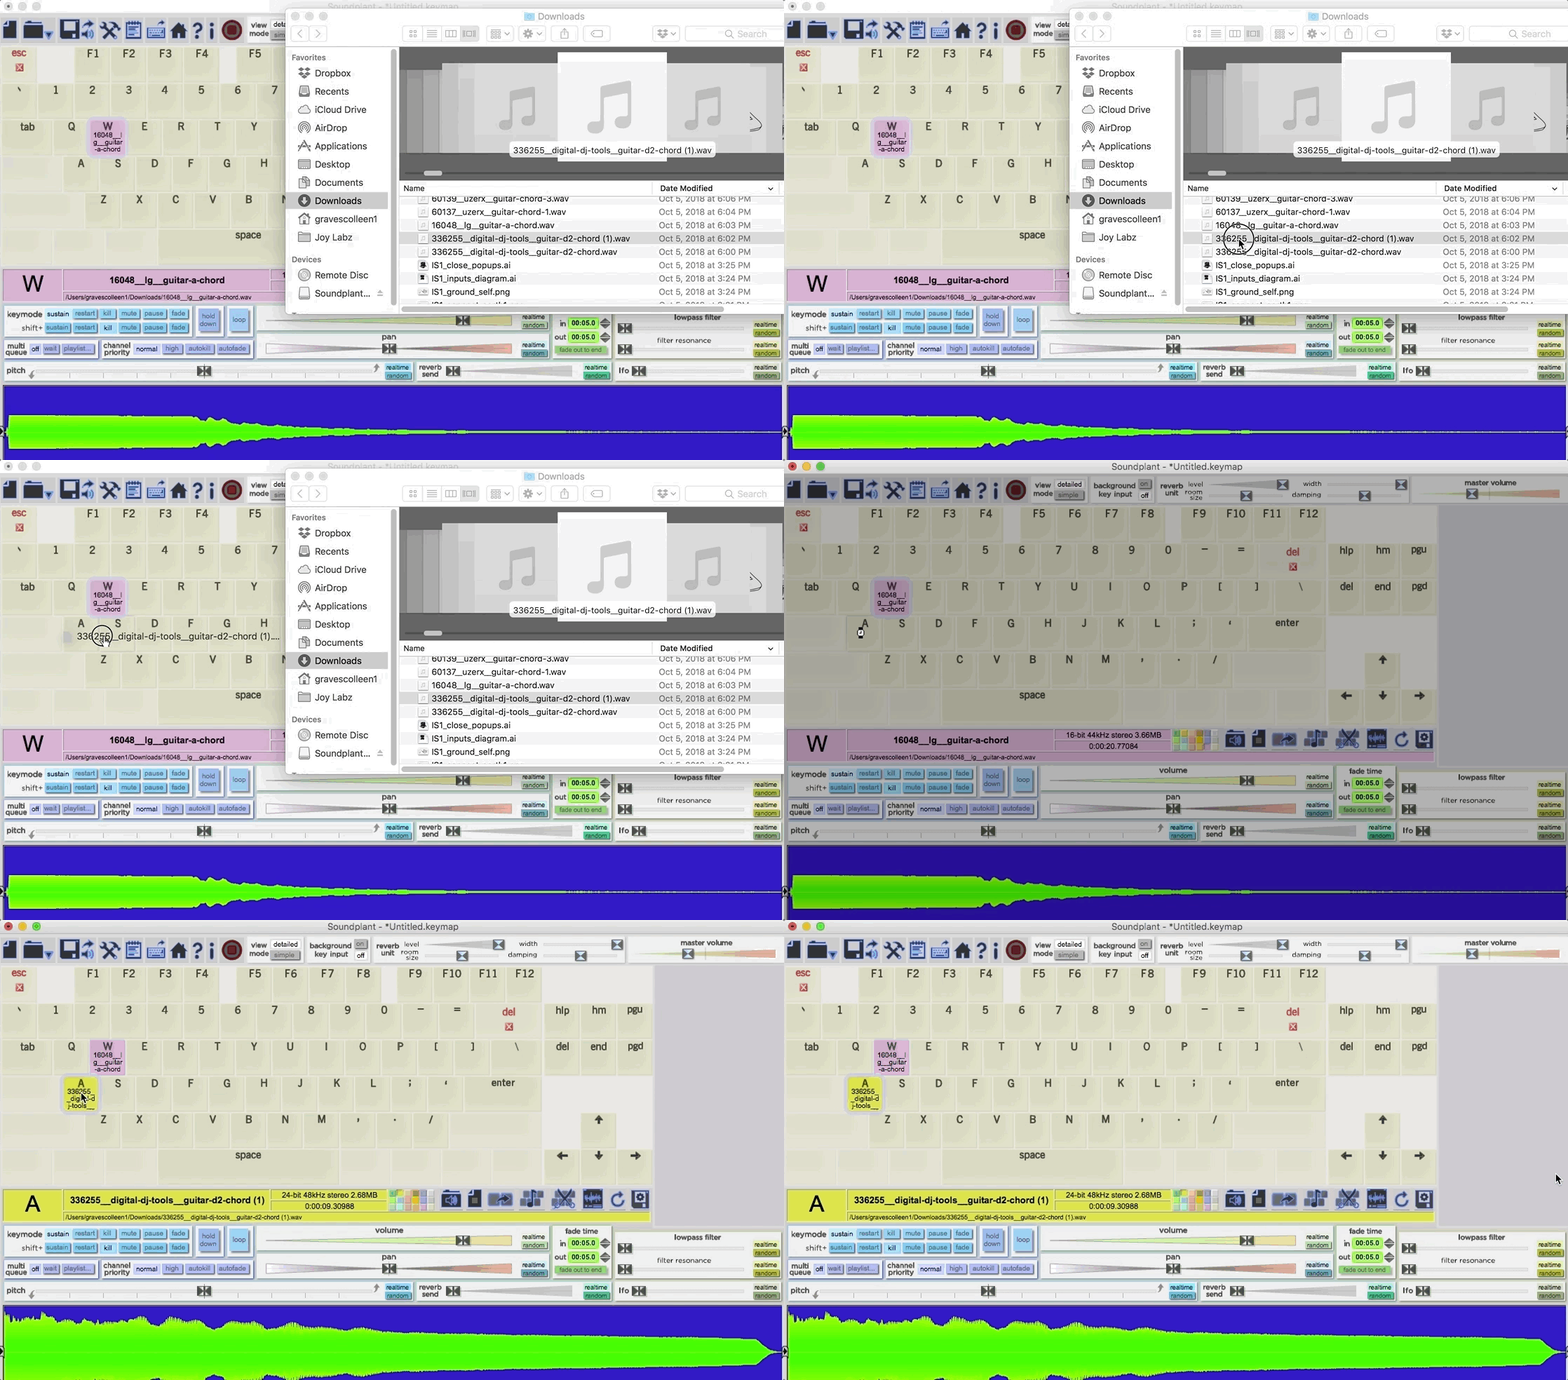
Soundplant is a free keyboard mapping software by Marcel Blum. It allows you to add any mp3 or wav file sound to every key on your keyboard. It's an excellent way to create a Makey Makey midi guitar without coding.
If you have a computer that can download applications, make sure to ask your teacher to download this software. (If you have a Chromebook, you'll have to program your guitar with a different option.)
Once you have the mp3 or wav files you want for your guitar, drag each file to the key press you want to program. When you drag your file to the key in Soundplant, it should highlight the key color like in picture 1. When you drag the next sound to a different key, it will be a different color. The sound wave also appears in the blue box at the bottom of the application. You can shorten the sound by dragging the black arrow on either side of the sound wave. Edit the sound as needed, and then get ready to plug in your Makey Makey!
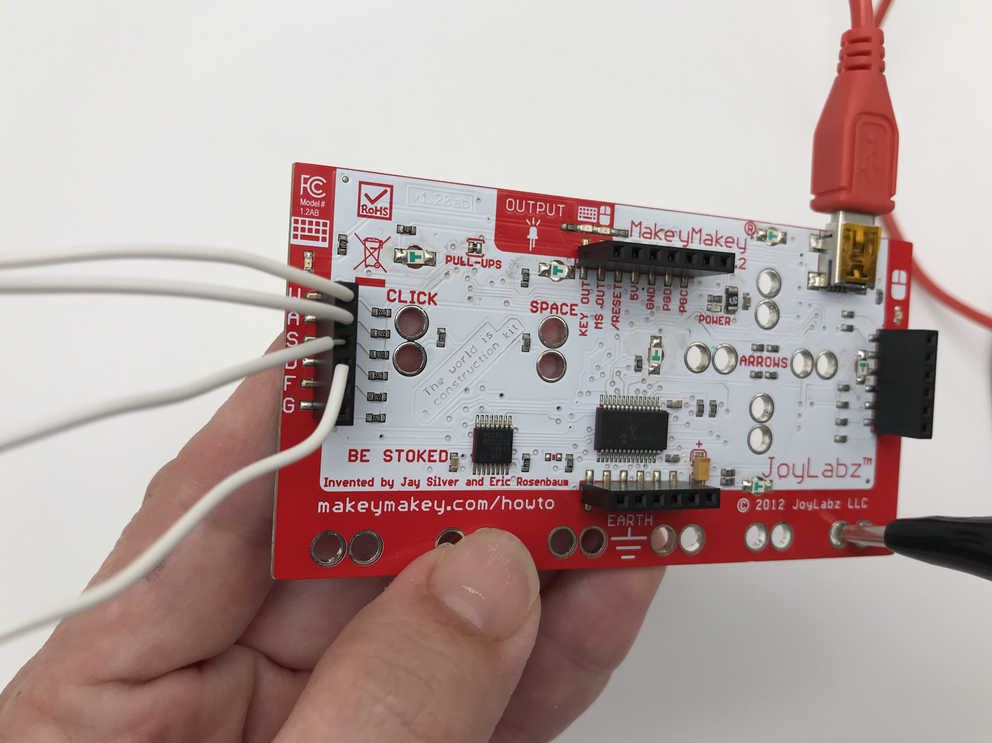
You can use the arrow keys and/or WASDFG! If you use the back of the Makey Makey, be sure to use your white jumper wires to plug into the left black header on your board (picture 3).
Educator Tip:
Soundplant is free and safe to use! Make sure you download it to your computer ahead of time. Sorry Chromebook folks, this is an application that requires a download.
Here are some free and fun guitar riffs you could pre-download for students.
Craft Your Own Physical Guitar
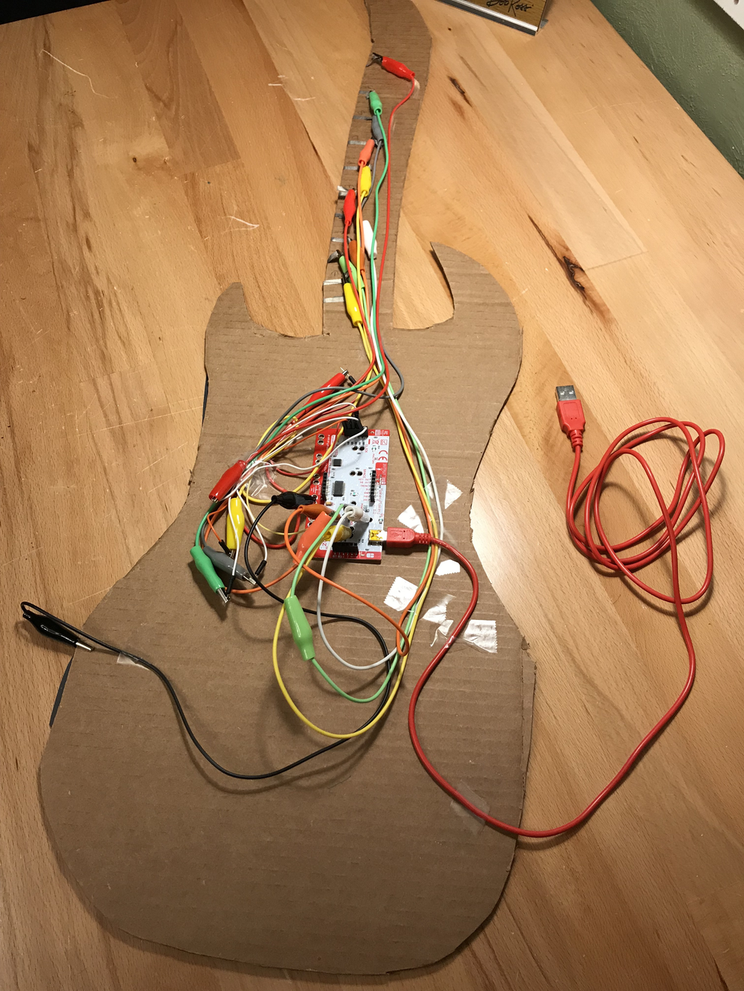
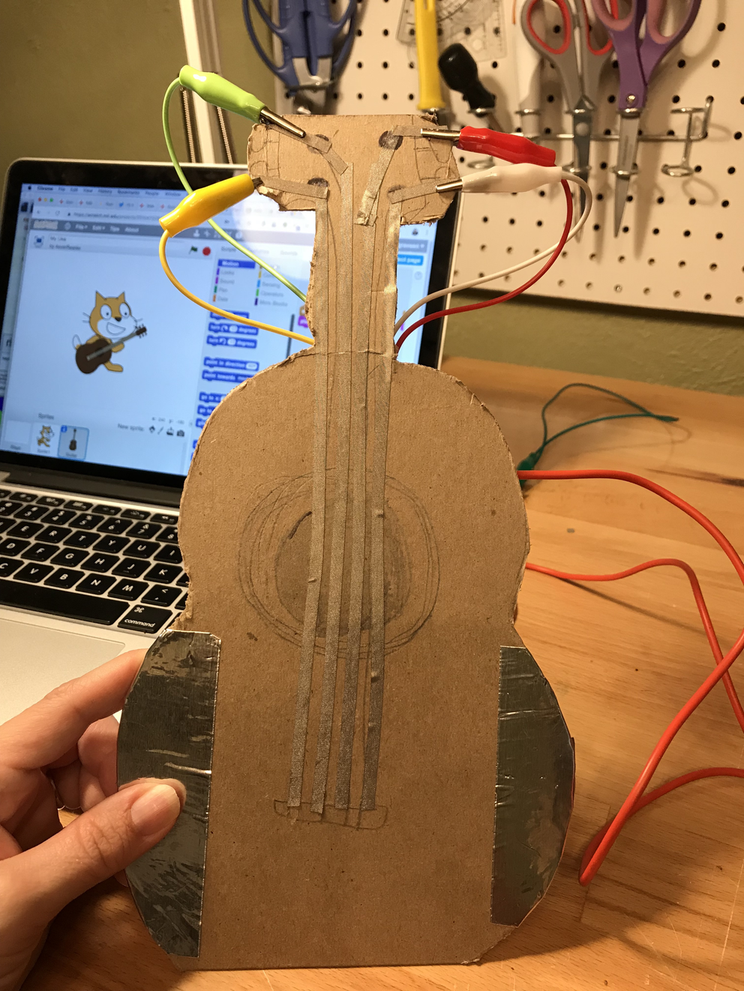
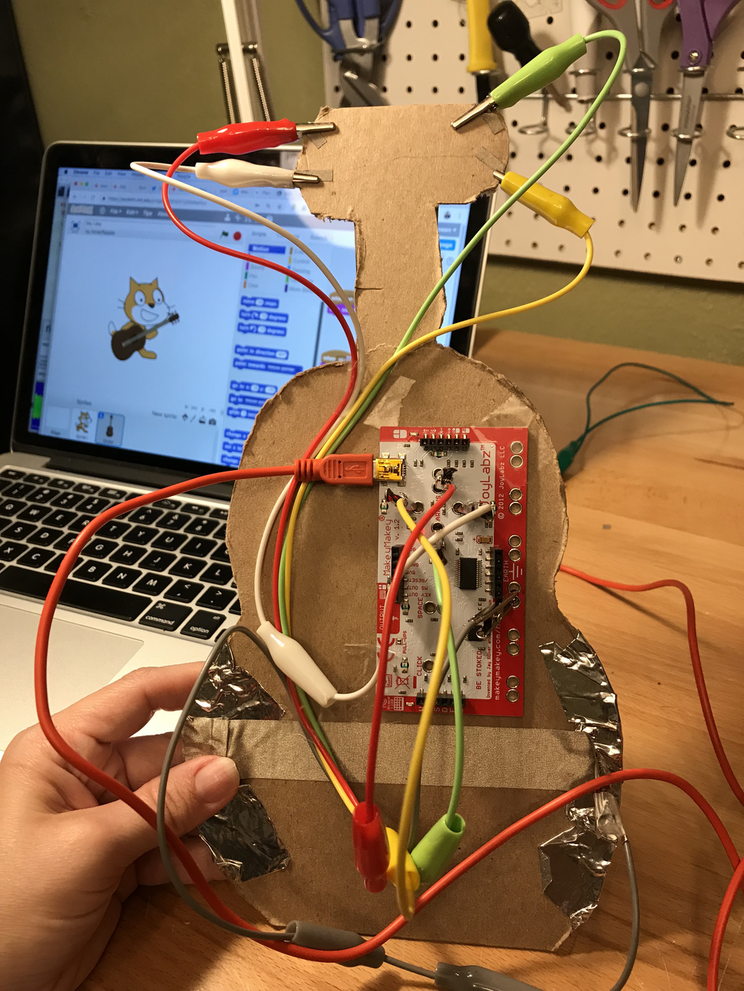
There are lots of great examples of Makey Makey guitars in the world! My daughter and I made these examples just for this guide. My heavy metal guitar is a more advanced build, while her ukulele is a great build for beginners!
Picture 1: Front of my Heavy Metal guitar with 11 inputs (Programmed in SoundPlant.)
Picture 2: Back of my Heavy Metal guitar (I wrapped conductive tape from the dimes on the front to the back so I could plug my alligator clips on the back of my guitar. I also used the tape that was on my Amazon box for earth- did you know the black tape on an Amazon box is conductive? Cool, right?) I used regular tape to hold all the wires in place.
Picture 3: My 9 YO's 4 string Ukulele (Programmed in Scratch.)
Picture 4: Back of my 9 YO's Ukulele (My daughter made her guitar with HVAC tape for earth and conductive fabric tape as the strings of the guitar.)
Here are a few more ideas to inspire you:
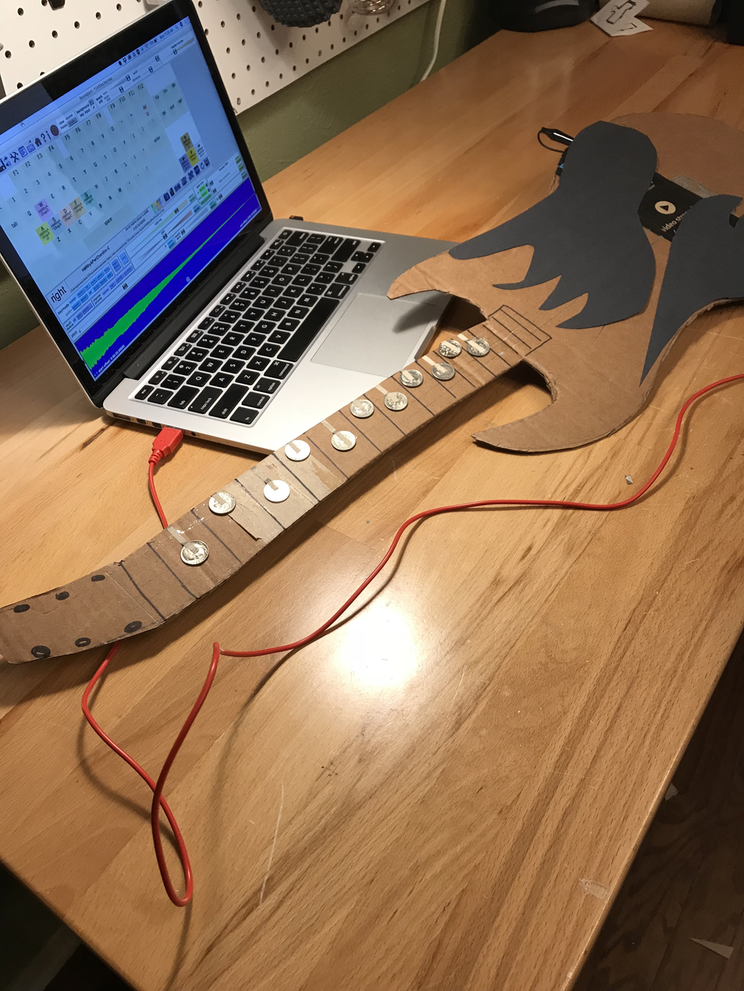
- Cut a guitar shape out of cardboard, add change for key presses like in the Makey Makey instructions (picture 1).
- Use foil along the neck of the guitar.
- Check out Josh Burker's workshop for a ton of whimsical designs and look at these too!
- Craft a guitar and use copper tape for the strings, wire each guitar string to a key press!
Educator Tip:
Show kids a lot of examples so they'll try to make a very unique design! Push them to craft their own guitar that means something to them! My 9 YO actually modeled her cardboard ukulele after her own real ukulele!