Creating a Budget in Microsoft Excel
by edragana in Workshop > Home Improvement
5650 Views, 40 Favorites, 0 Comments
Creating a Budget in Microsoft Excel
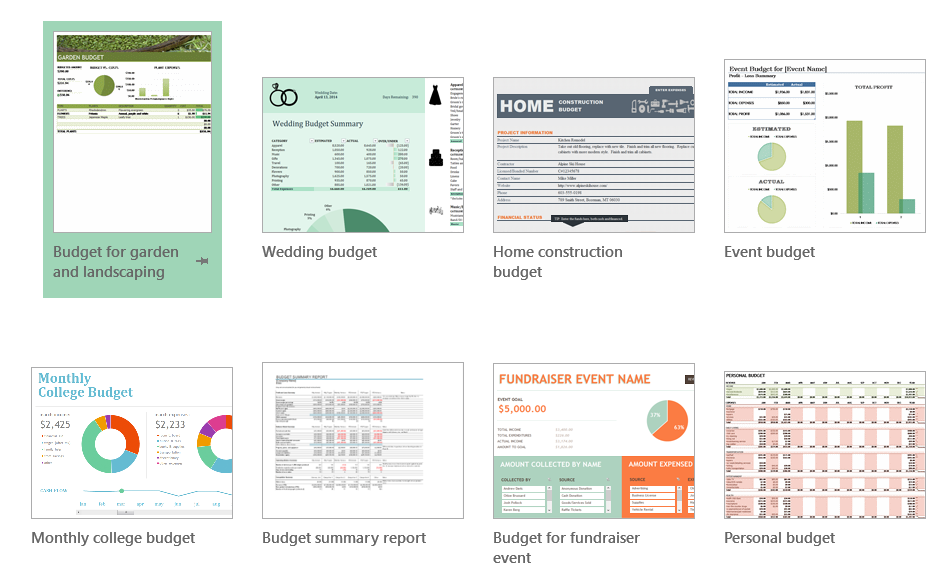
Budgeting and accurate accounting are vital skills within the construction and home improvement industry. This instructable will provide a step by step tutorial on how to use Microsoft Excel to create a budget for supplies and costs for a home remodeling project, in this case building a deck. The skills presented here apply to small and large projects. For this project all you need is a computer with a current version of Microsoft Excel installed, a pad of paper, a pen, and a calculator. It should be noted that It should be noted that this Instructable is intended for someone not familiar with Excel and is therefore very basic. Excel is a very powerful program and can be used to track enormous amounts of data as well as perform advanced mathematical functions.
Opening Microsoft Excel and Begining Your Workbook.
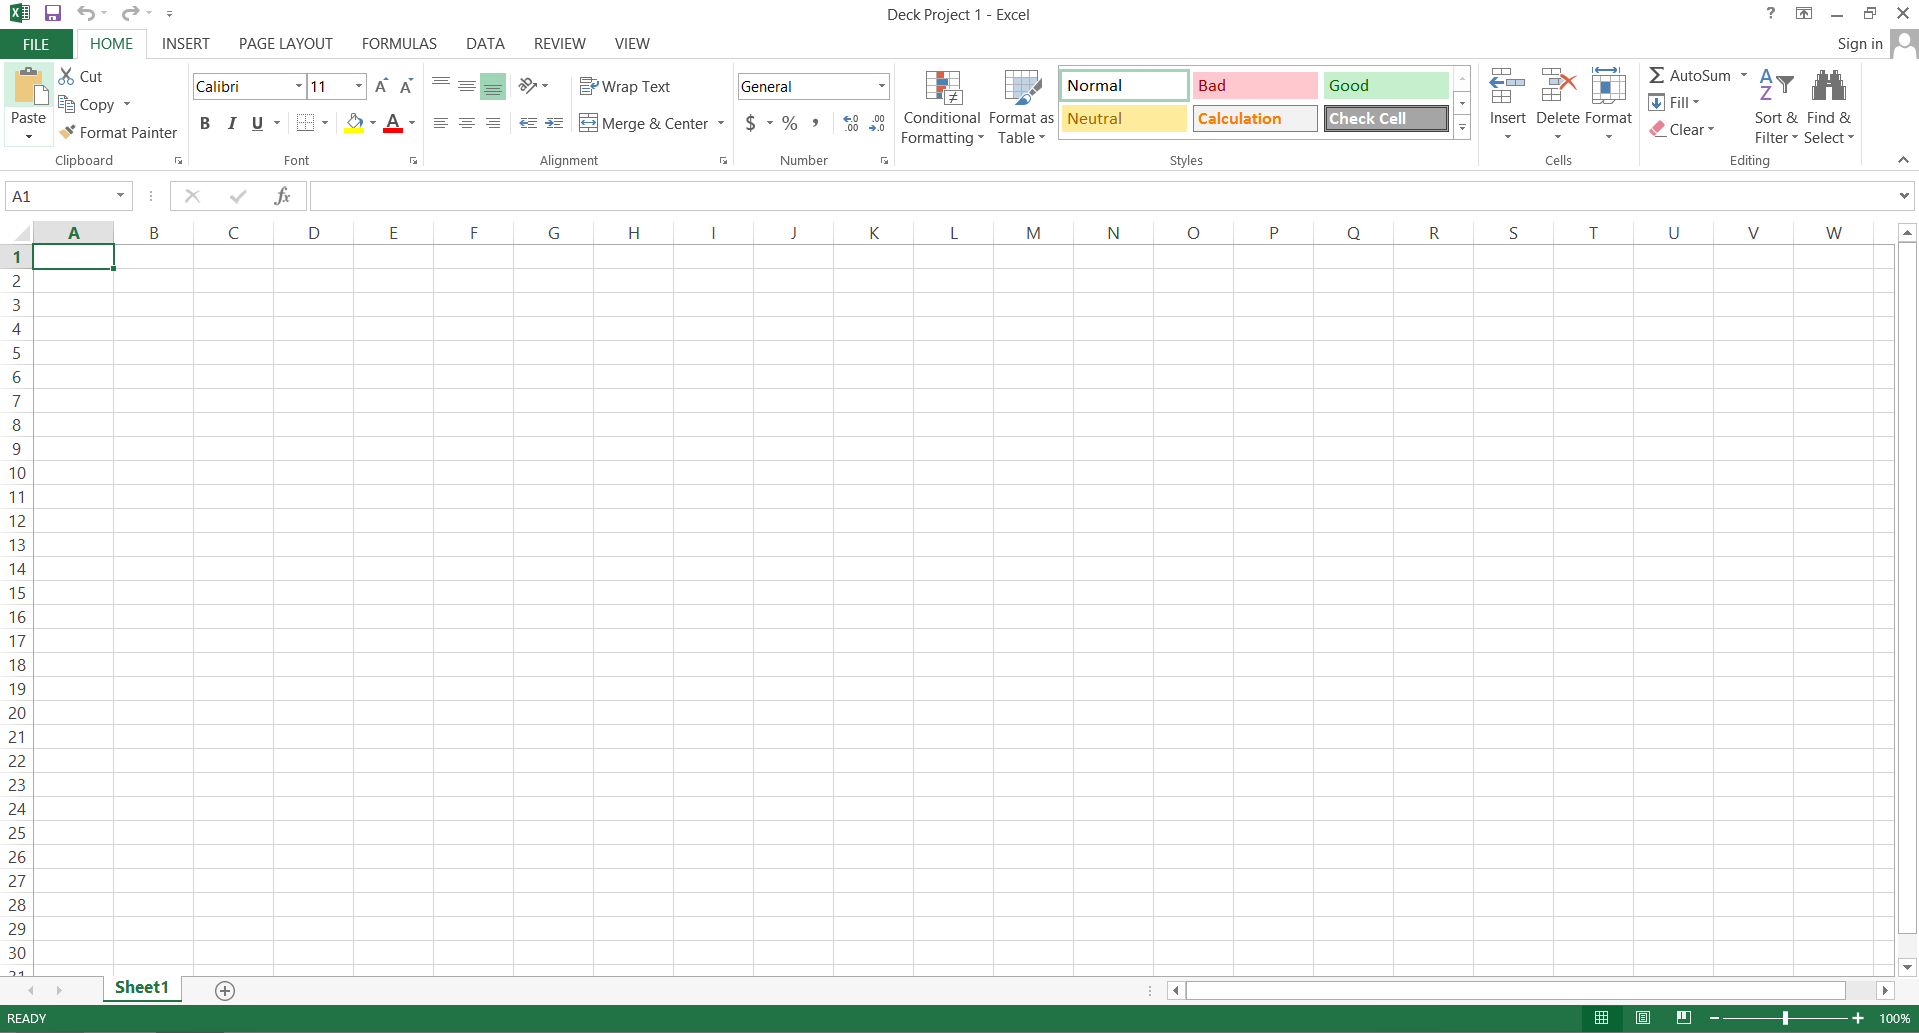
After choosing the project you will be completing make a list of what items you will need, the quantity, and the associated prices you are ready to begin. Sit down at your computer and open Microsoft Excel. If you use or will be using this program frequently it is helpful to save Excel to the desktop screen (the main computer screen) as an icon. If it is not saved to the desktop as an icon click start and in the search box type EXCEL. When the computer finds it double click it with the left mouse button and it should open. Double click BLANK WORKBOOK (I should be the first template on the top row to the left). Once your new workbook opens use your mouse to click FILE, SAVE AS, MY DOCUMENTS and then type your file name. For this project we will be using Deck project 1, press enter to return to your notebook. Figure 1 shows a blank workbook which is what you should see after saving your document.
Entering Your Initial Headings.
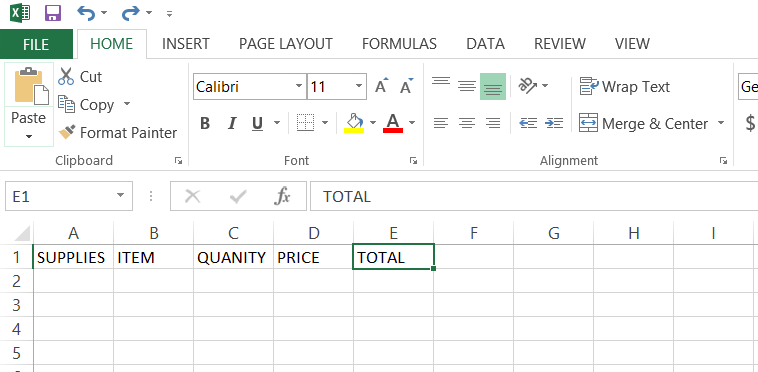
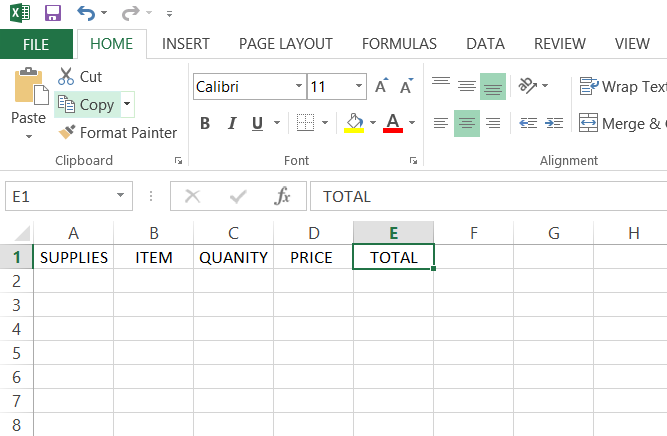
Click in cell 1 (top row and left most column) to select it and enter your first heading, in this case SUPPLIES. Press tab to select cell B1 and type in your second heading, ITEM. Press tab to select cell C1 and type QUANITY. Press tab to select cell D1 and type PRICE. Press tab to select cell E1 and type TOTAL. After entering these headings left click cell A1 and drag your mouse to cell E1 to highlight your headings and click the center text icon at the top of your screen (figure 2). When you are finished your screen should appear like figure 3.
Entering Your Initial Supply List
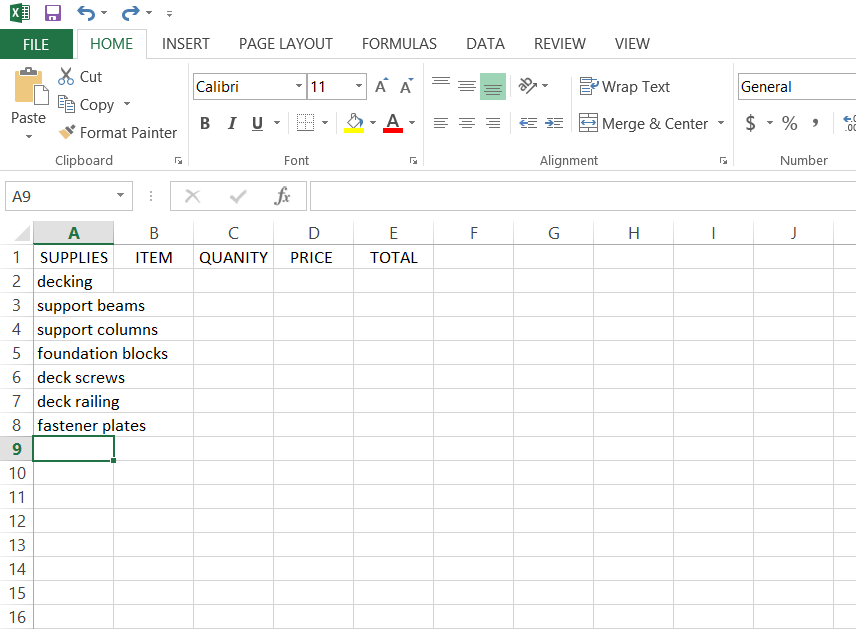
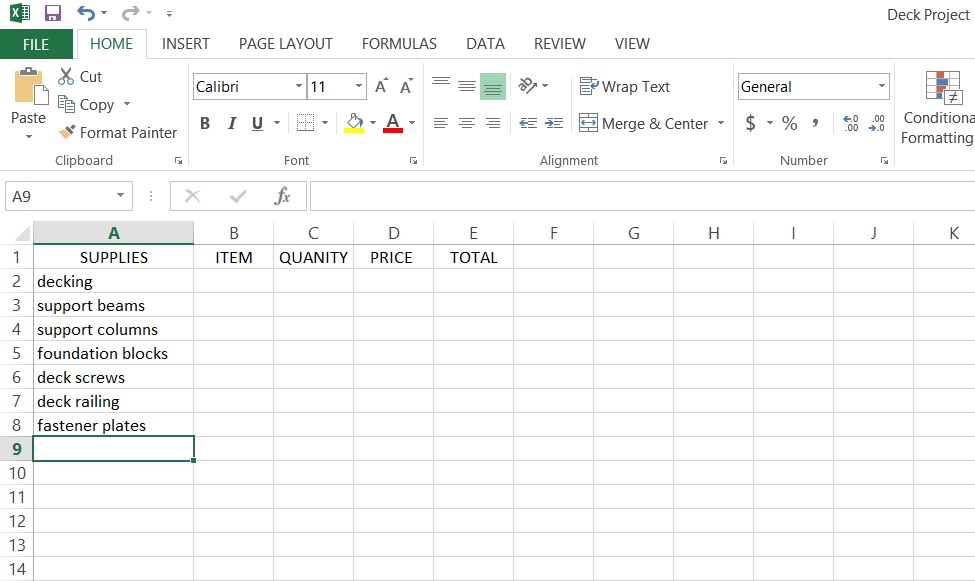
Press enter to select cell A2 and enter your list of supplies, after you type each item press enter to select the cell directly under the one you've just filled in. The supplies you will be entering in order are as follows: Decking, support beams, support columns, foundation blocks, deck screws, deck railing, and fastener plates. After doing this your screen will look like figure 4. In order to give the supplies column ample room click the dividing line between the cell headers shown in figure 4 and drag your mouse to the right, stop at 17.0 When you screen finished your screen should resemble figure 5
Entering Your Supply Types
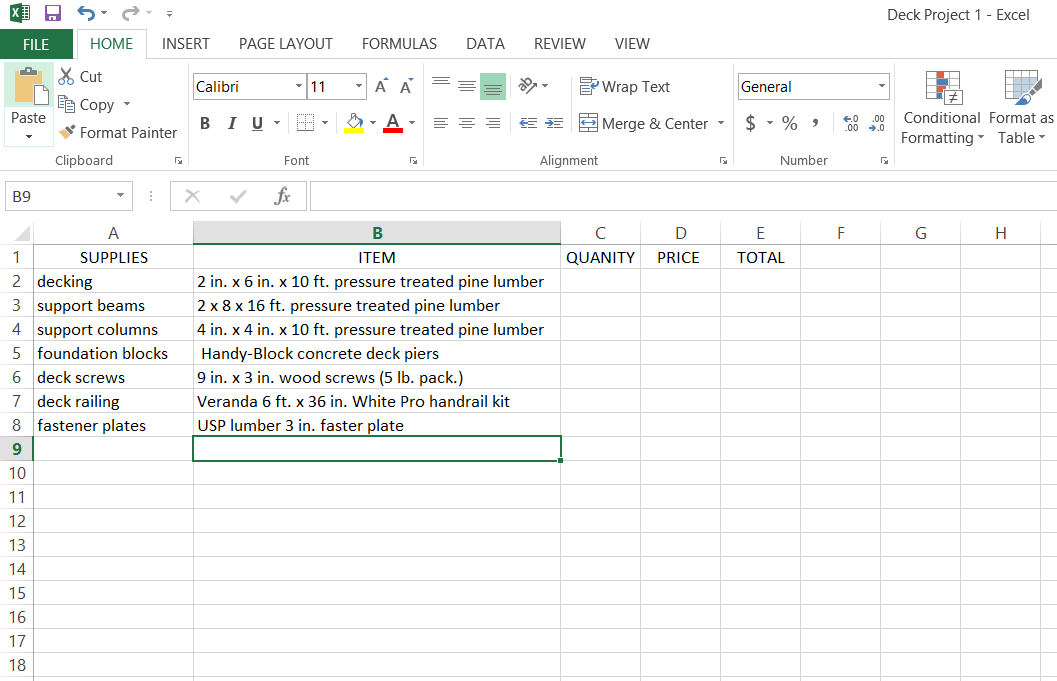
Use your mouse to navigate to the second column directly under the heading TYPE (cell B2) and enter the following items, after you type each one press enter to navigate to the cell directly under the one you just filled in. As you type the longer items you will notice that Excel will automatically stretch the cell to accommodate the text. The items in order are as follows: 2 in. x 6 in. x 10 ft. pressure treated pine lumber, 2 x 8 x 16 ft. pressure treated pine lumber, 4 in. x 4 in. x 10 ft. pressure treated pine lumber, Handy-Block concrete deck piers, 9 in. x 3 in. polymer plated flat head wood screws (5 lb. pack.), Veranda 6 ft. x 36 in. White Pro handrail kit, and USP Lumber 3 in. fastener plate. Select the cell title dividing line between cell B and C by left clicking it and dragging it to the right until its width is 40.00. When you are finished your screen should appear like figure 6.
Entering Your Item Quanity List
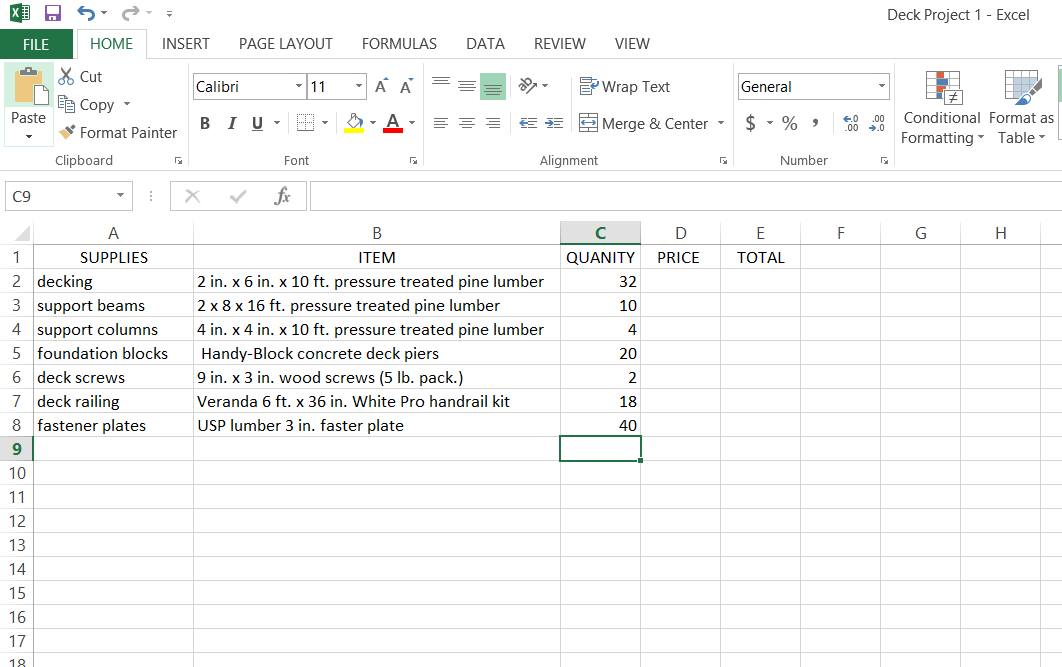
Move to cell C2 directly under the heading QUANITY and select the empty cell by cling on it with the left mouse button. Here, you will be entering the quantity list for your supplies, after typing each one press enter to move to the next cell. The quantities you will be entering are as follows: 32, 10, 4, 20, 2, 18, and 40. After entering the values highlight all of them and click the left align icon. When you are finished your screen should look like figure 7.
Entering Your Unit Price List
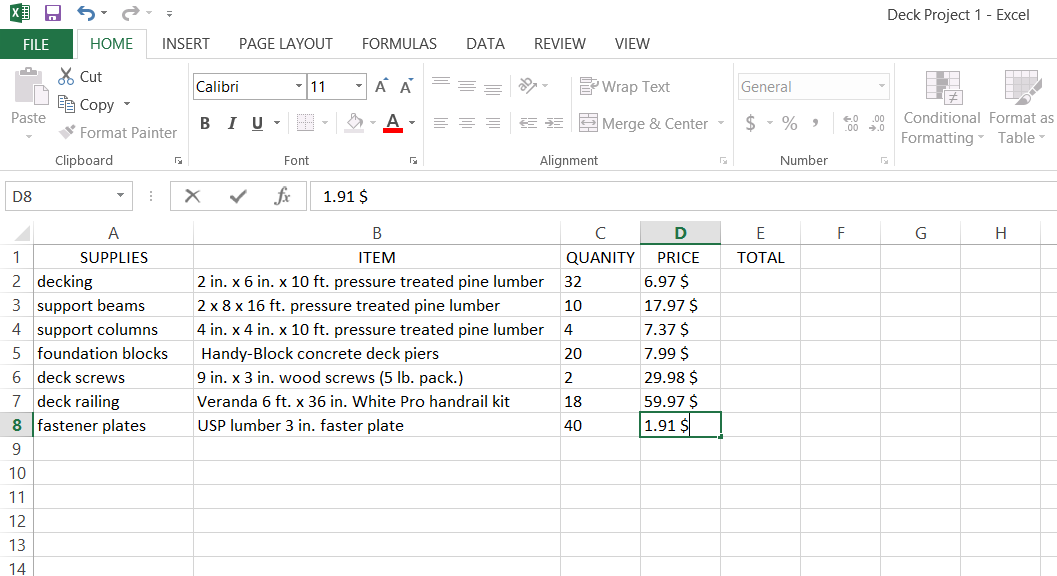
Left click in cell D2 (under the heading titled unit price) and enter the individual prices of your supplies. After typing each one press enter to select the next cell. The unit price list in order is as follows: 6.97 $, 17.97 $, 7.37 $, 7.99 $, 29.98 $, 59.97 $, and 1.91 $. When you are finished your screen should look like figure 8.
Entering the Total Price List.
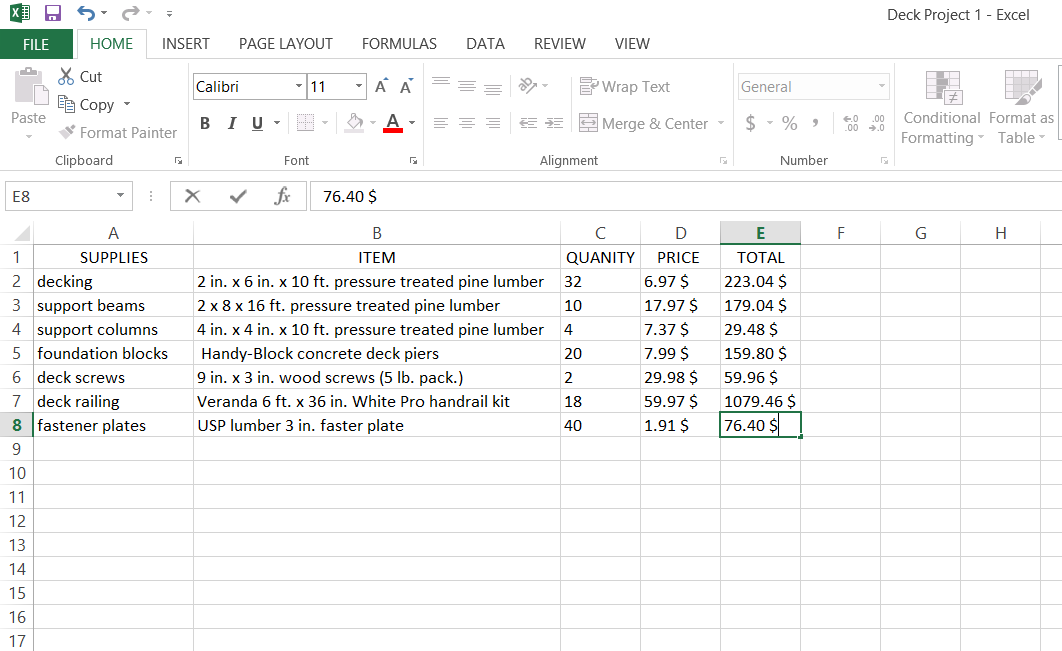
Select cell E2 under the title TOTAL PRICE and enter the following: 223.04 $, 179.04 $, 29.48 $, 159.80 $, 59.96 $, 1079.46 $, 76.40 $, and 223.04 $. When you are done check to resemble that your screen matches figure 9 and move to the next step.
Entering the Total Cost of the Project
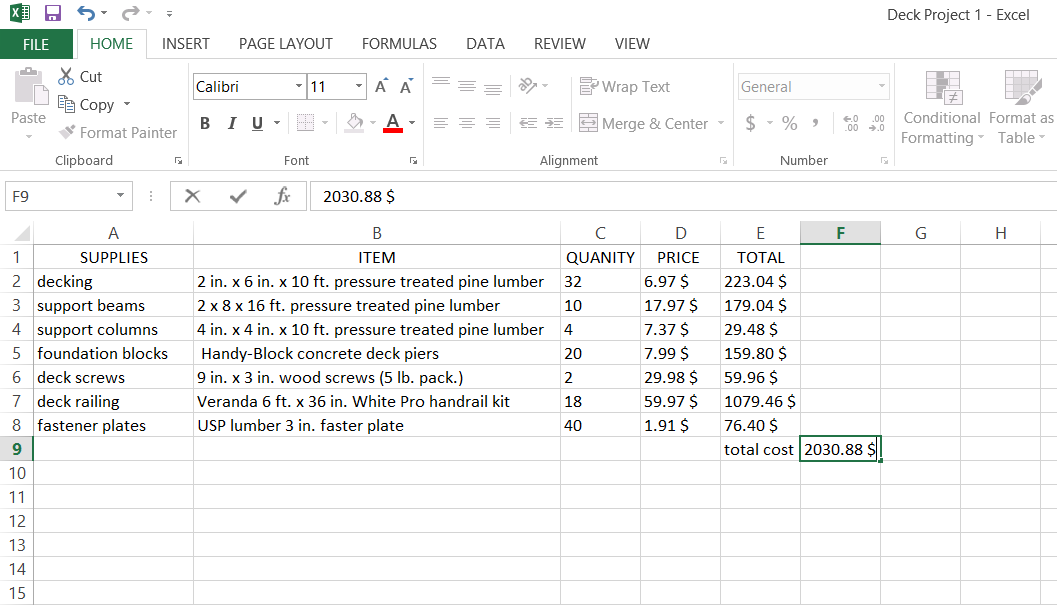
Select cell E9 under your spreadsheet and type TOTAL COST. Click cell E10 and type in the total cost of the project, 2030.88. Check to make sure that your screen resembles figure 10 and move to your last step !
Final Formating and Saving Your Document
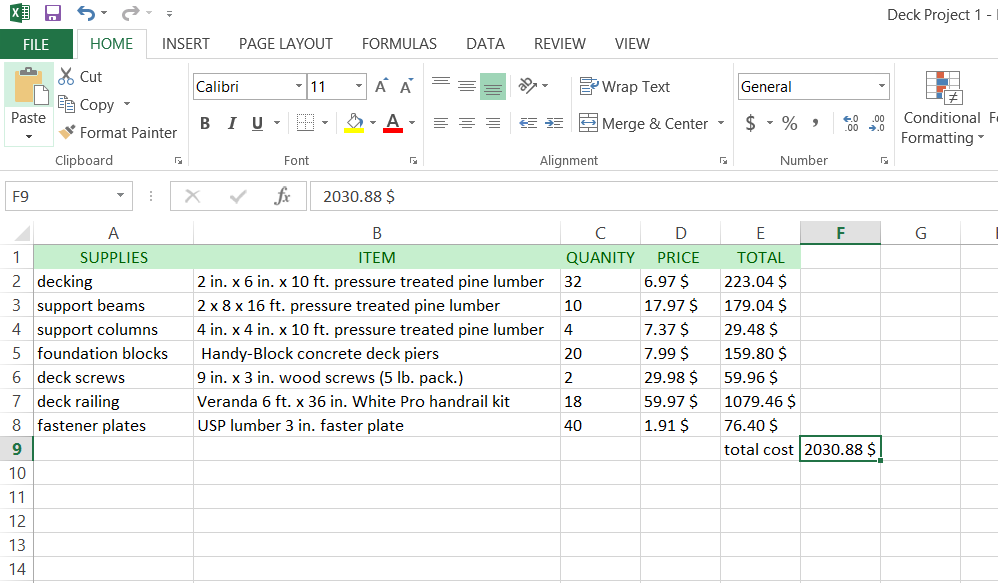
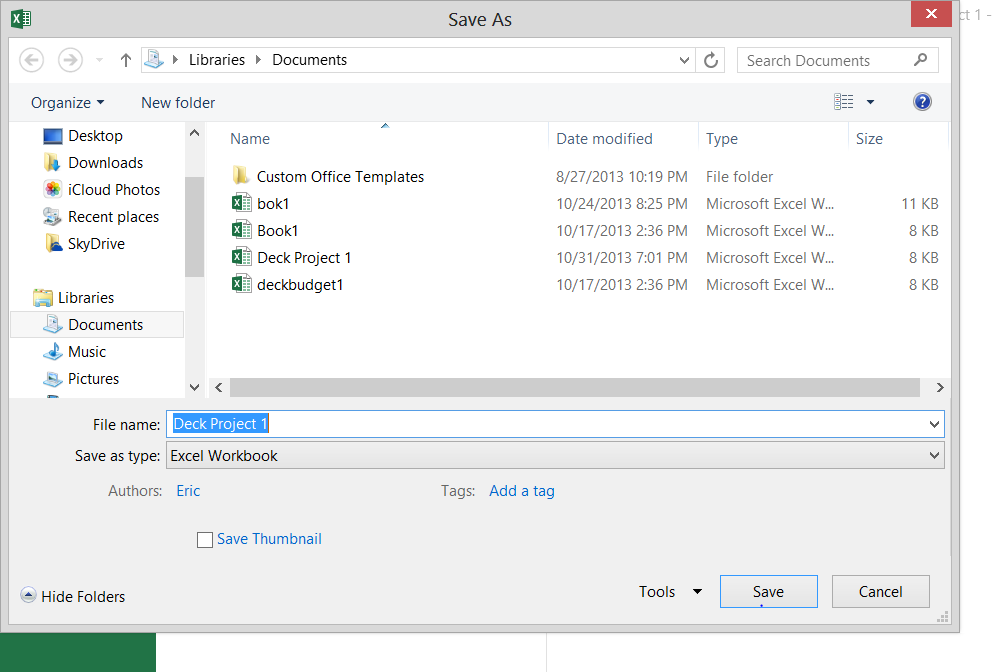
Left click cell A1 that says supplies, hold down the left mouse button and drag your mouse to the right to highlight all your headings. Release the left mouse button. On the top of your screen above styles left click the green box that says GOOD (figure 11), you will see your top row turn green. At the top left hand of the screen click FILE, SAVE AS, and MY DOCUMENTS. Check to make sure that the file name box still reads Deck project 1 and click SAVE (Figure 12). You have successfully completed your first Microsoft Excel Budget !