Tiny Online Community
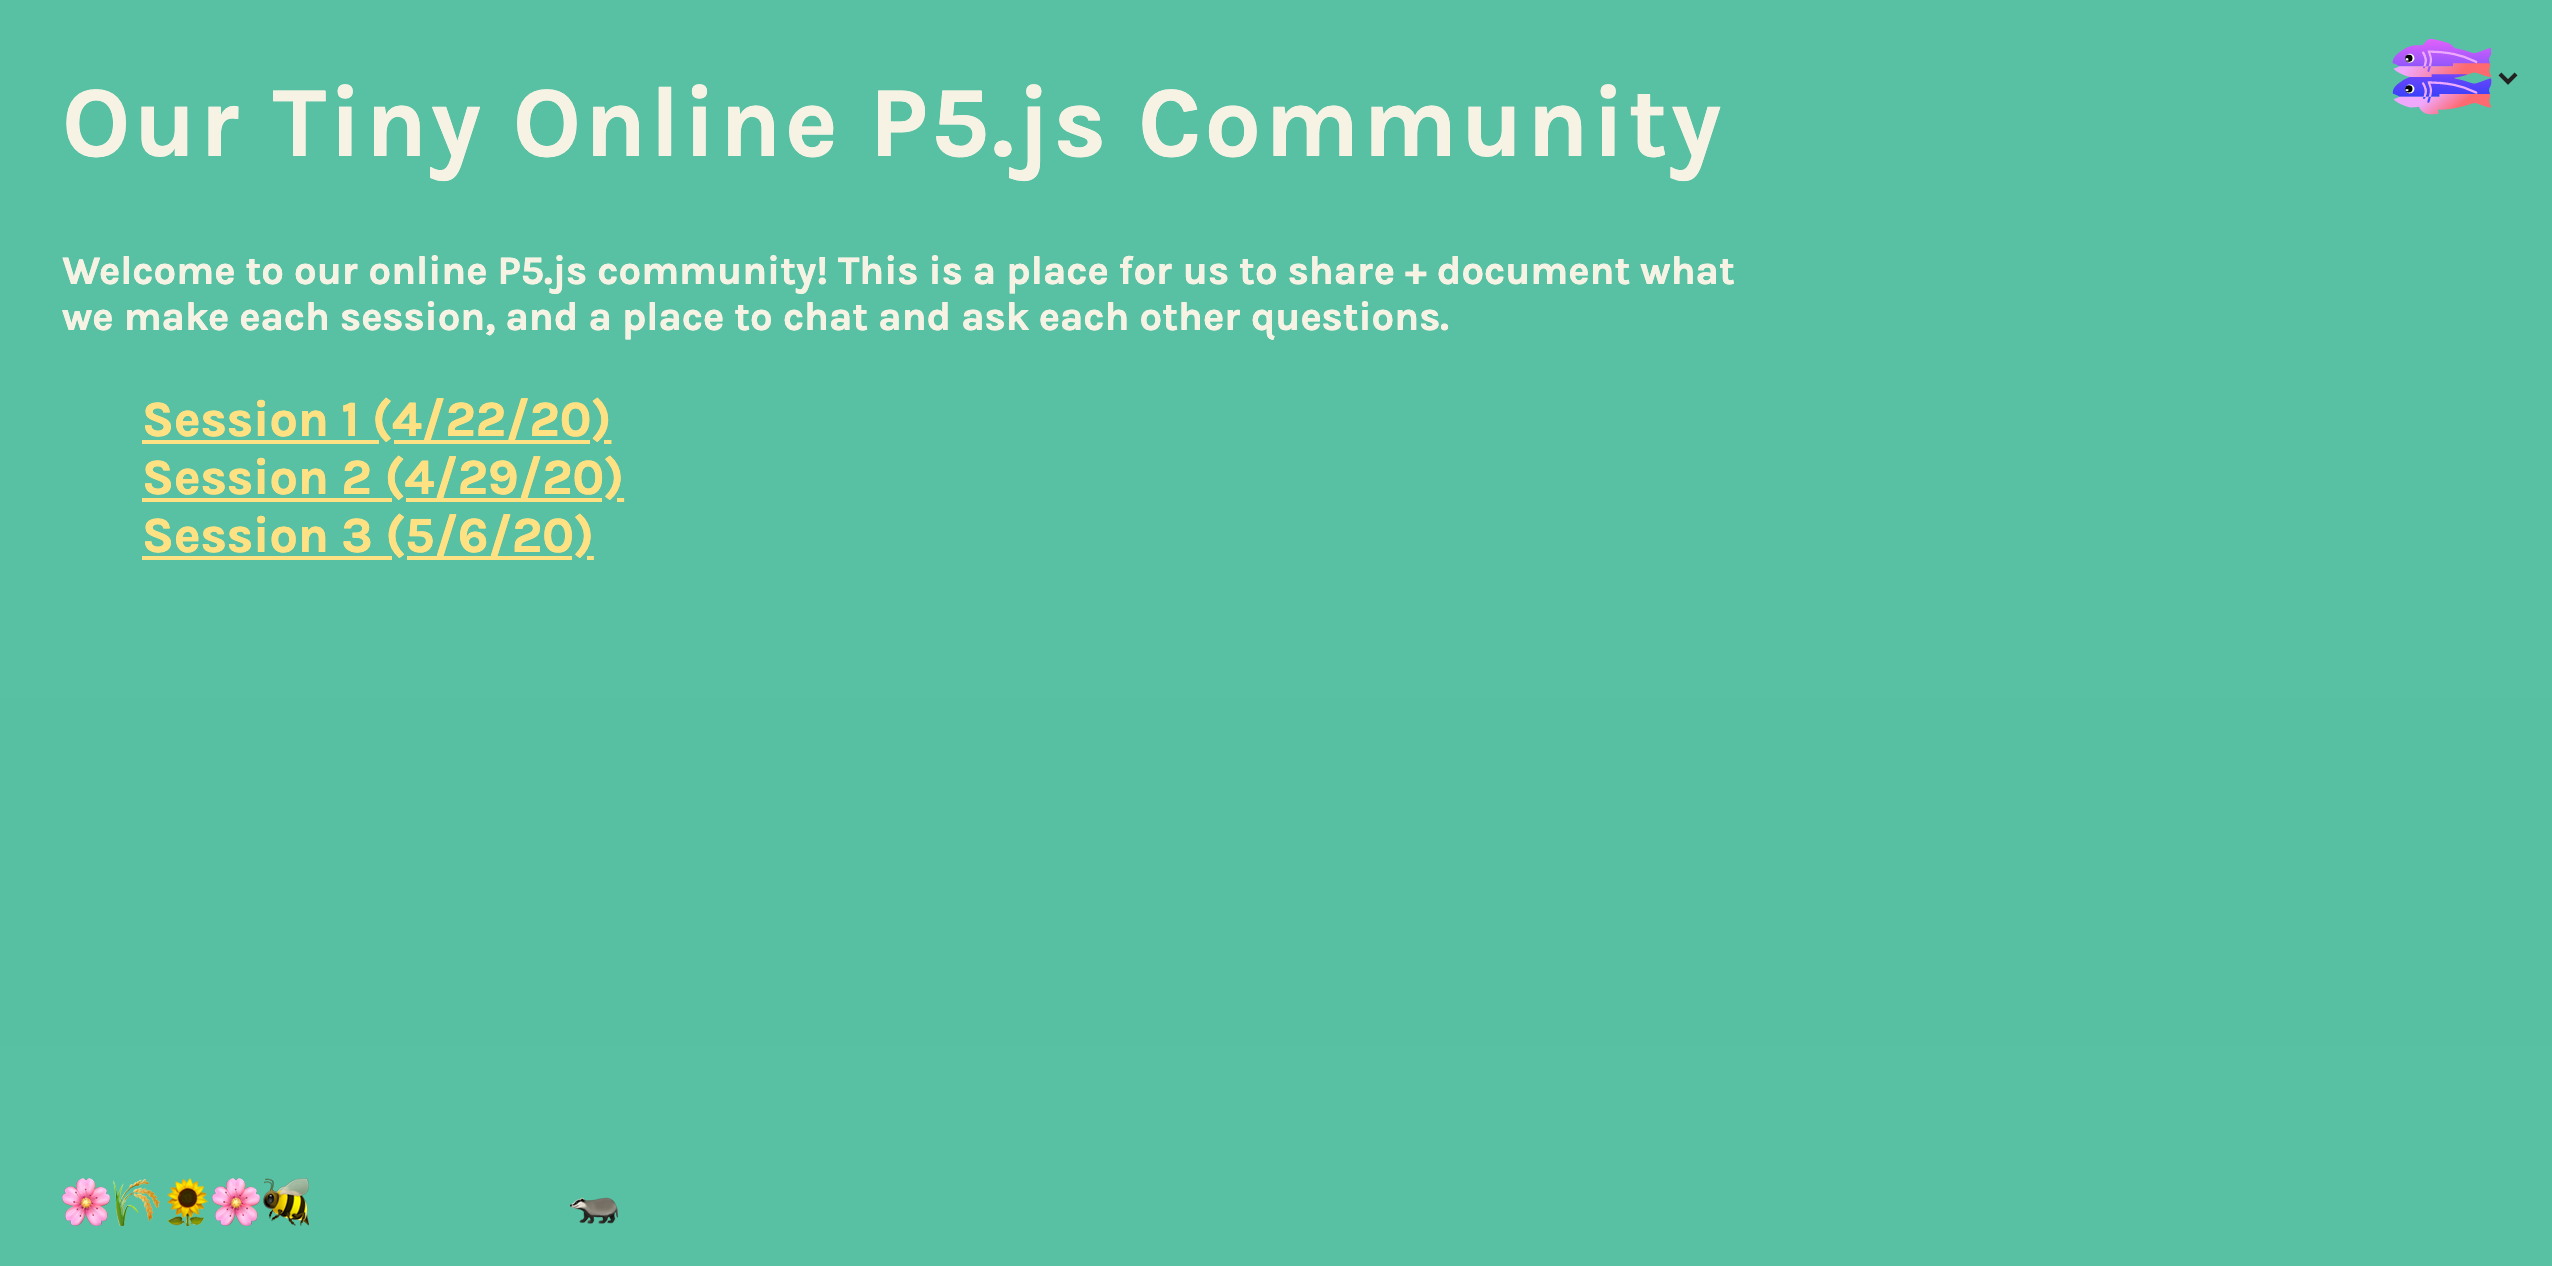
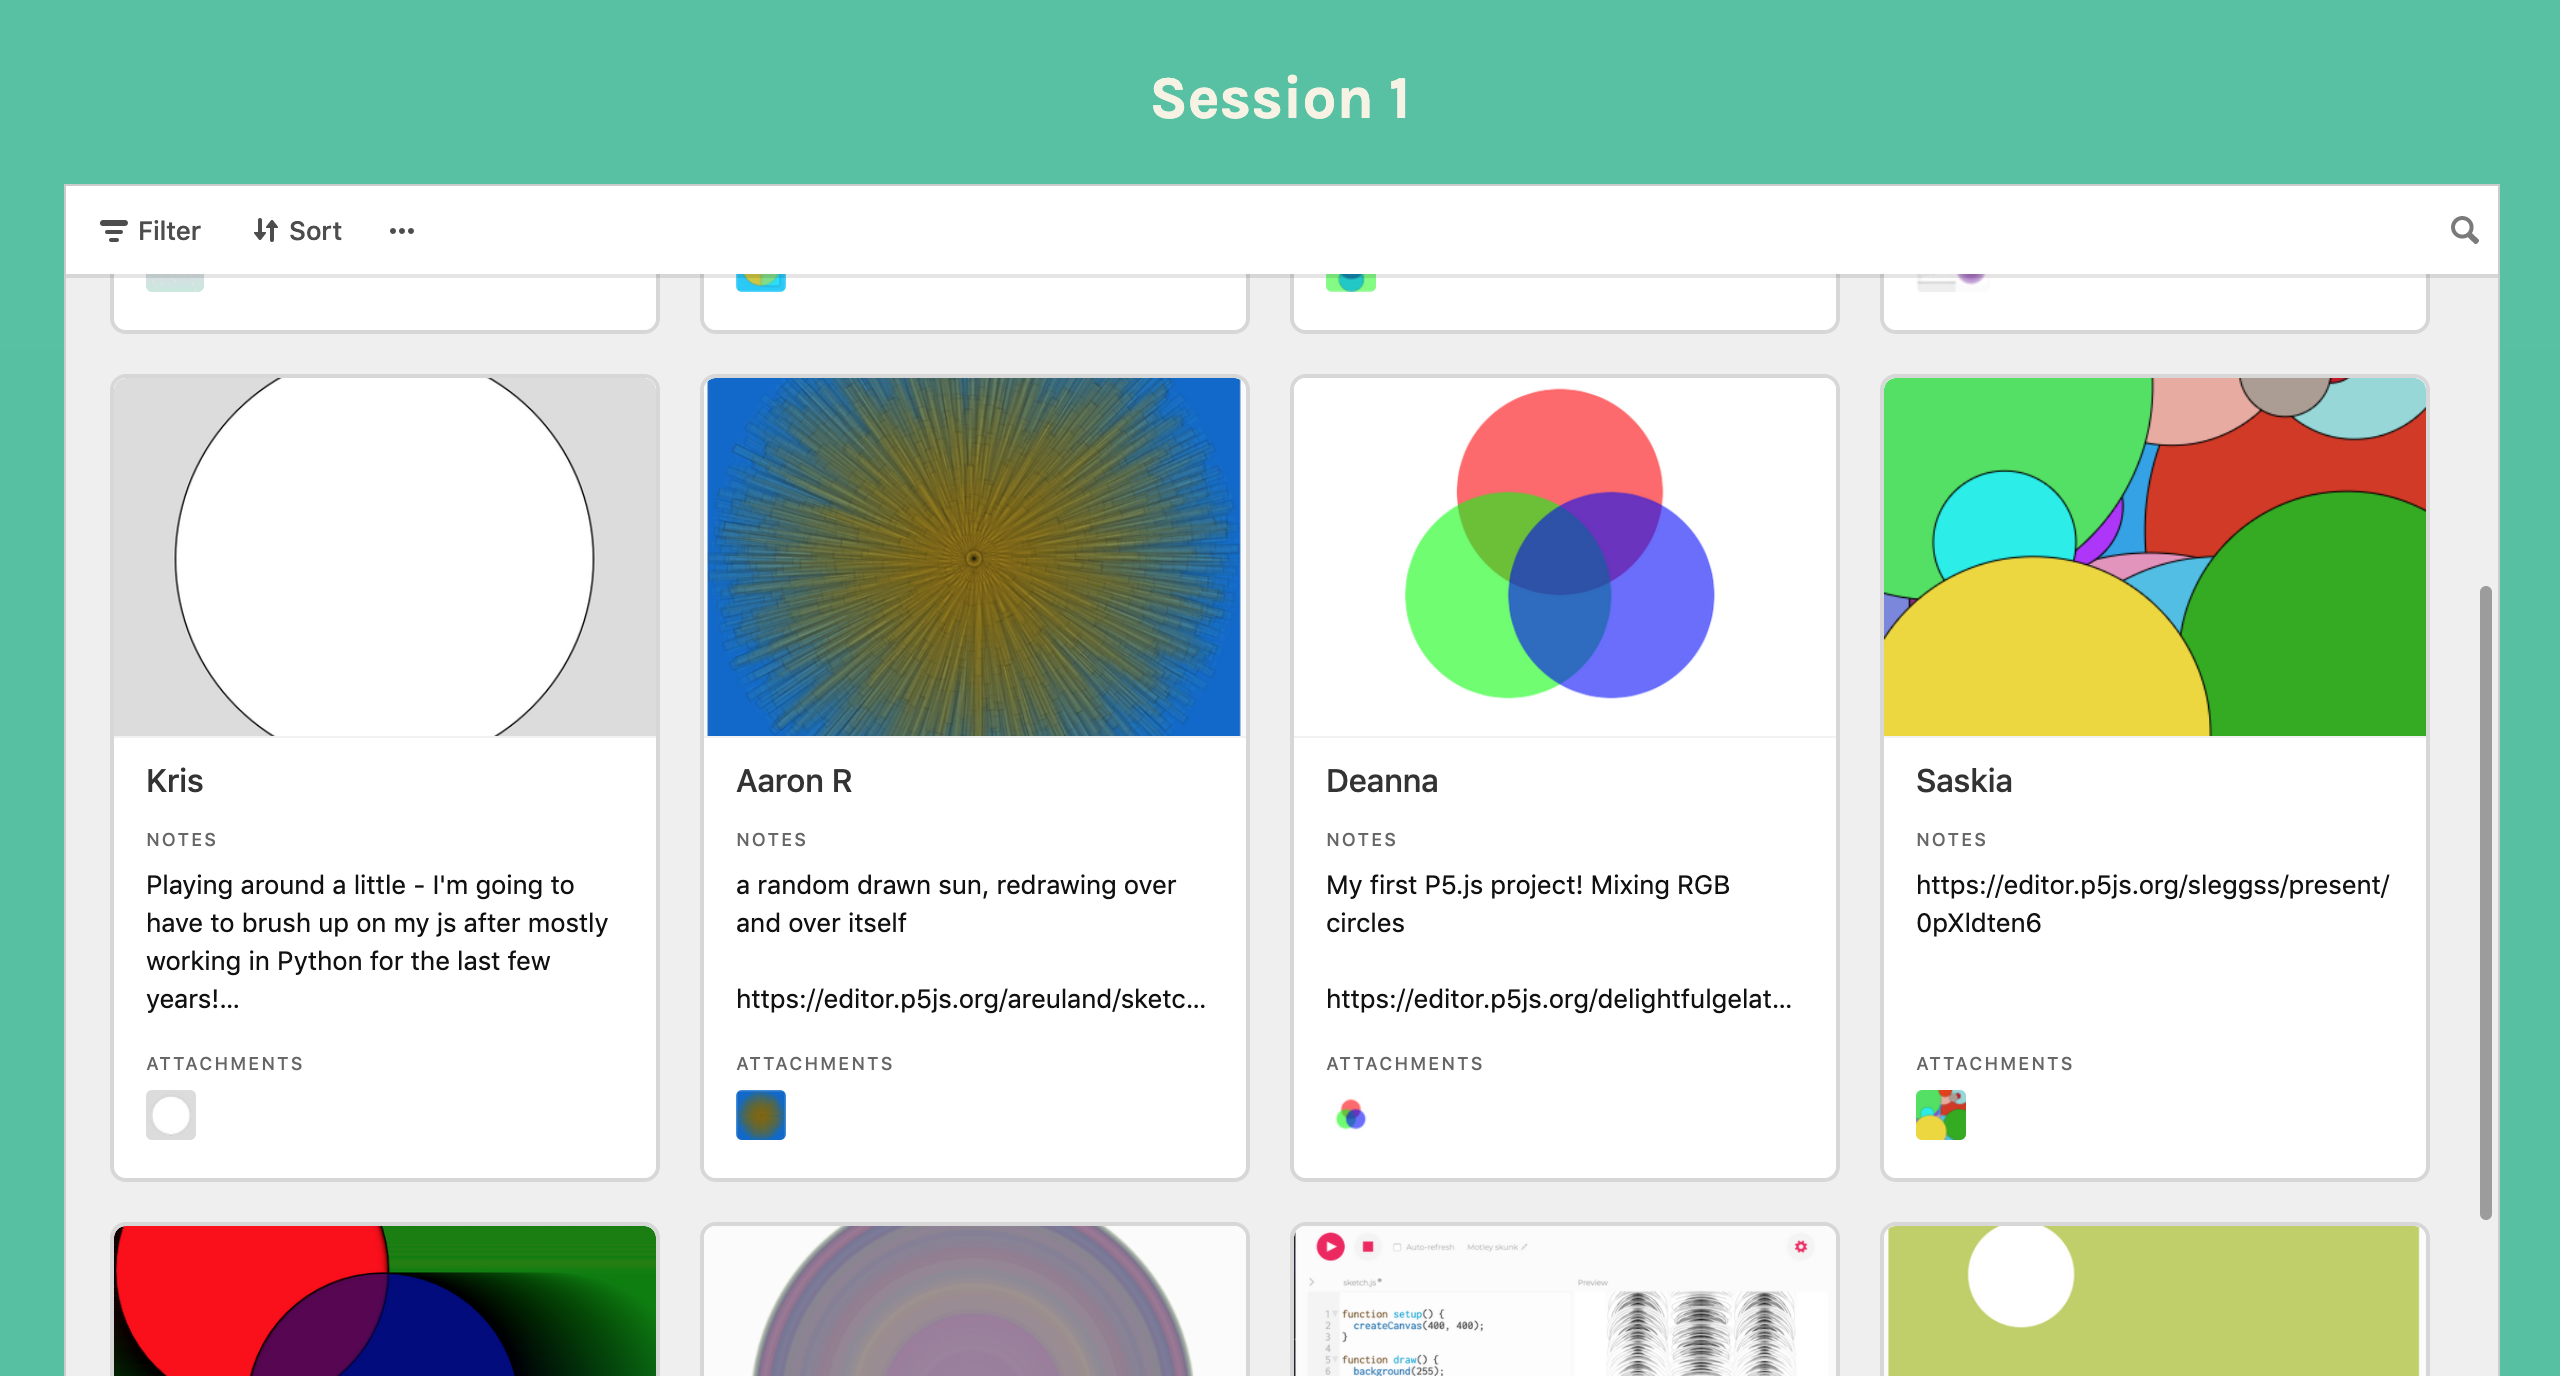
As many of us are staying at home nowadays because of COVID-19, I’ve been thinking about how to support online learning communities that have been forming. On a call with Ryan, we brainstormed ways people could document what they made during and between sessions, as well as a place for people to leave questions, thoughts, and ideas. We think that an important part of the tinkering process is being able to share what you do with other learners; in order to better support a culture of sharing and support, we built a prototype using Glitch, Airtable, and Riseup Pad for Ryan’s P5.js learning group (which you can check out here). If you want to start your own tiny online community, follow this step-by-step guide.
While building this resource, one of our goals was to make something other people could remix and use for their own learning communities. This guide is a work-in-progress, so not only do we appreciate any feedback, we’d love to see what you build. Share with us your tiny community, and any remixes you make.
A quick note: If you feel good about using HTML and CSS, try embedding different things into the Glitch app. One thing we’re working on is a better Question + Help section (currently we’re using Riseup Pad, which is not specialized for this). If HTML and CSS is new to you, no worries! Keep on reading.
Supplies
Remixing the Tiny Online Community Template on Glitch
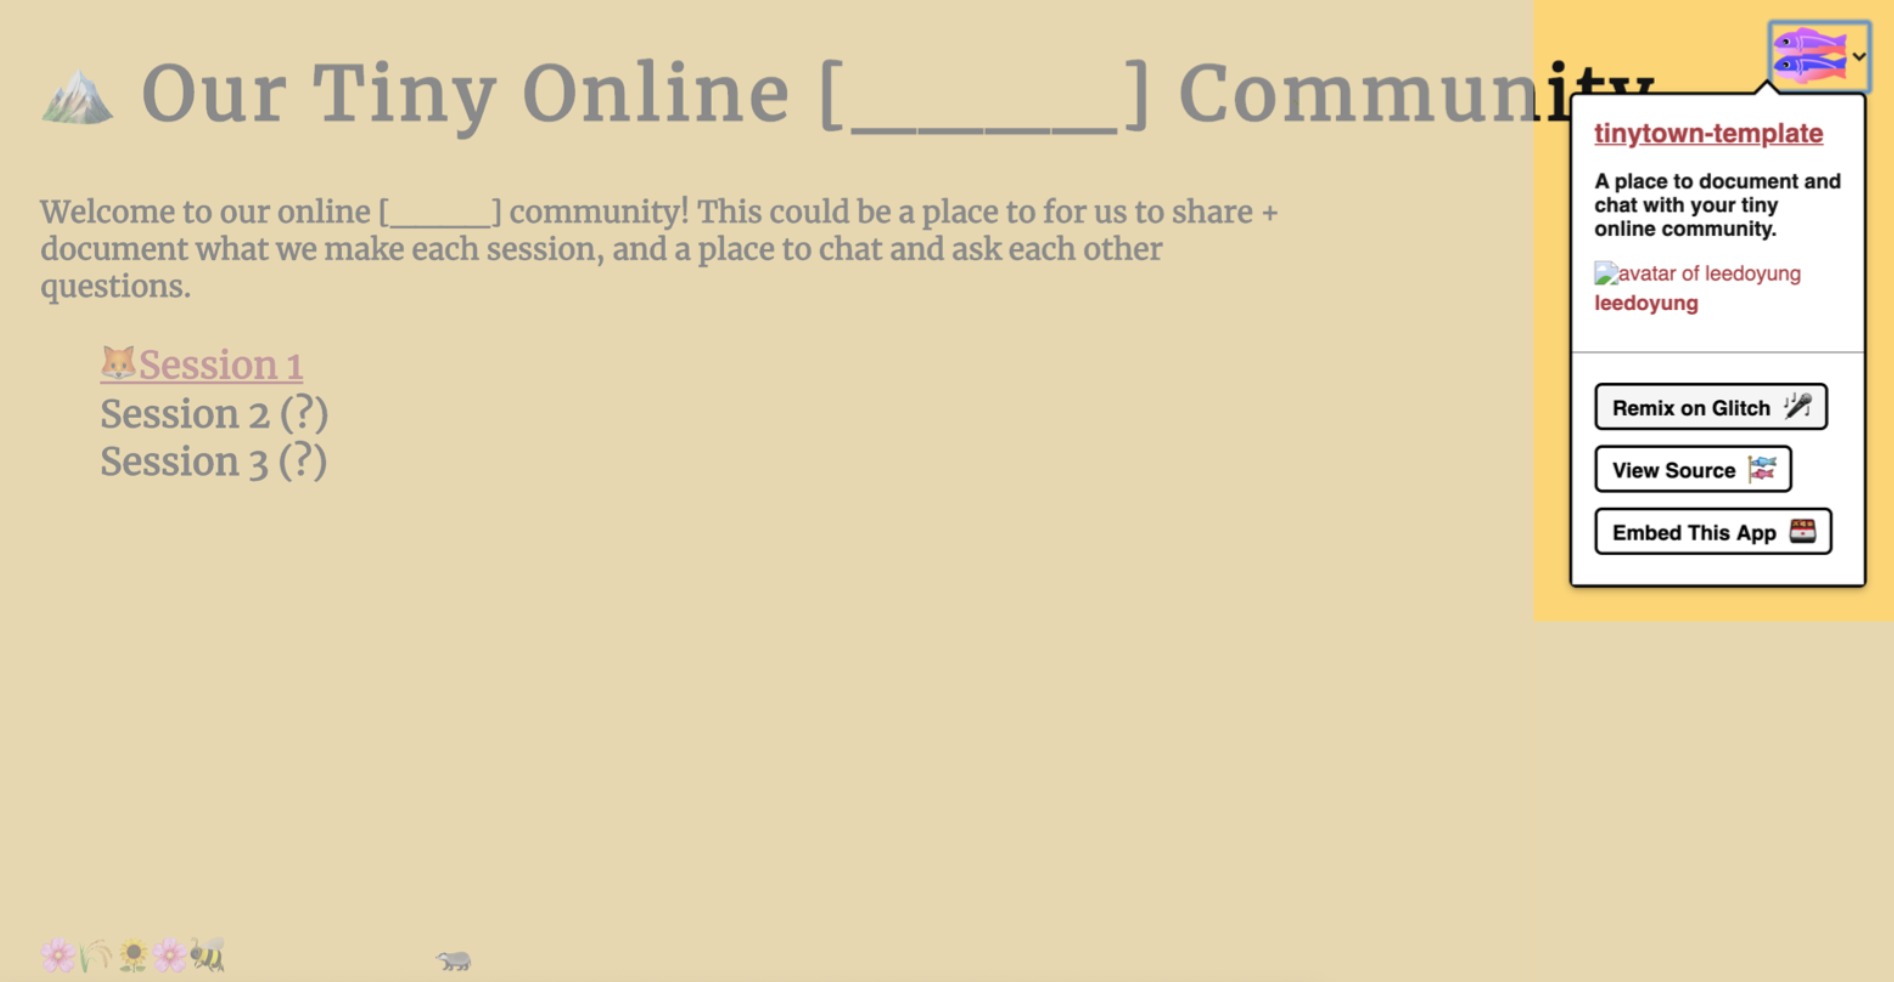
Here’s the template Glitch app. You can remix it by clicking on the fish at the top right of the screen. Once you have a new remixed file, you’ll probably want to change a few things:
- The website address
- The website text
- The website font
- The website color
- The airtable and Riseup pad links in Session 1
Changing the Website Address and Description
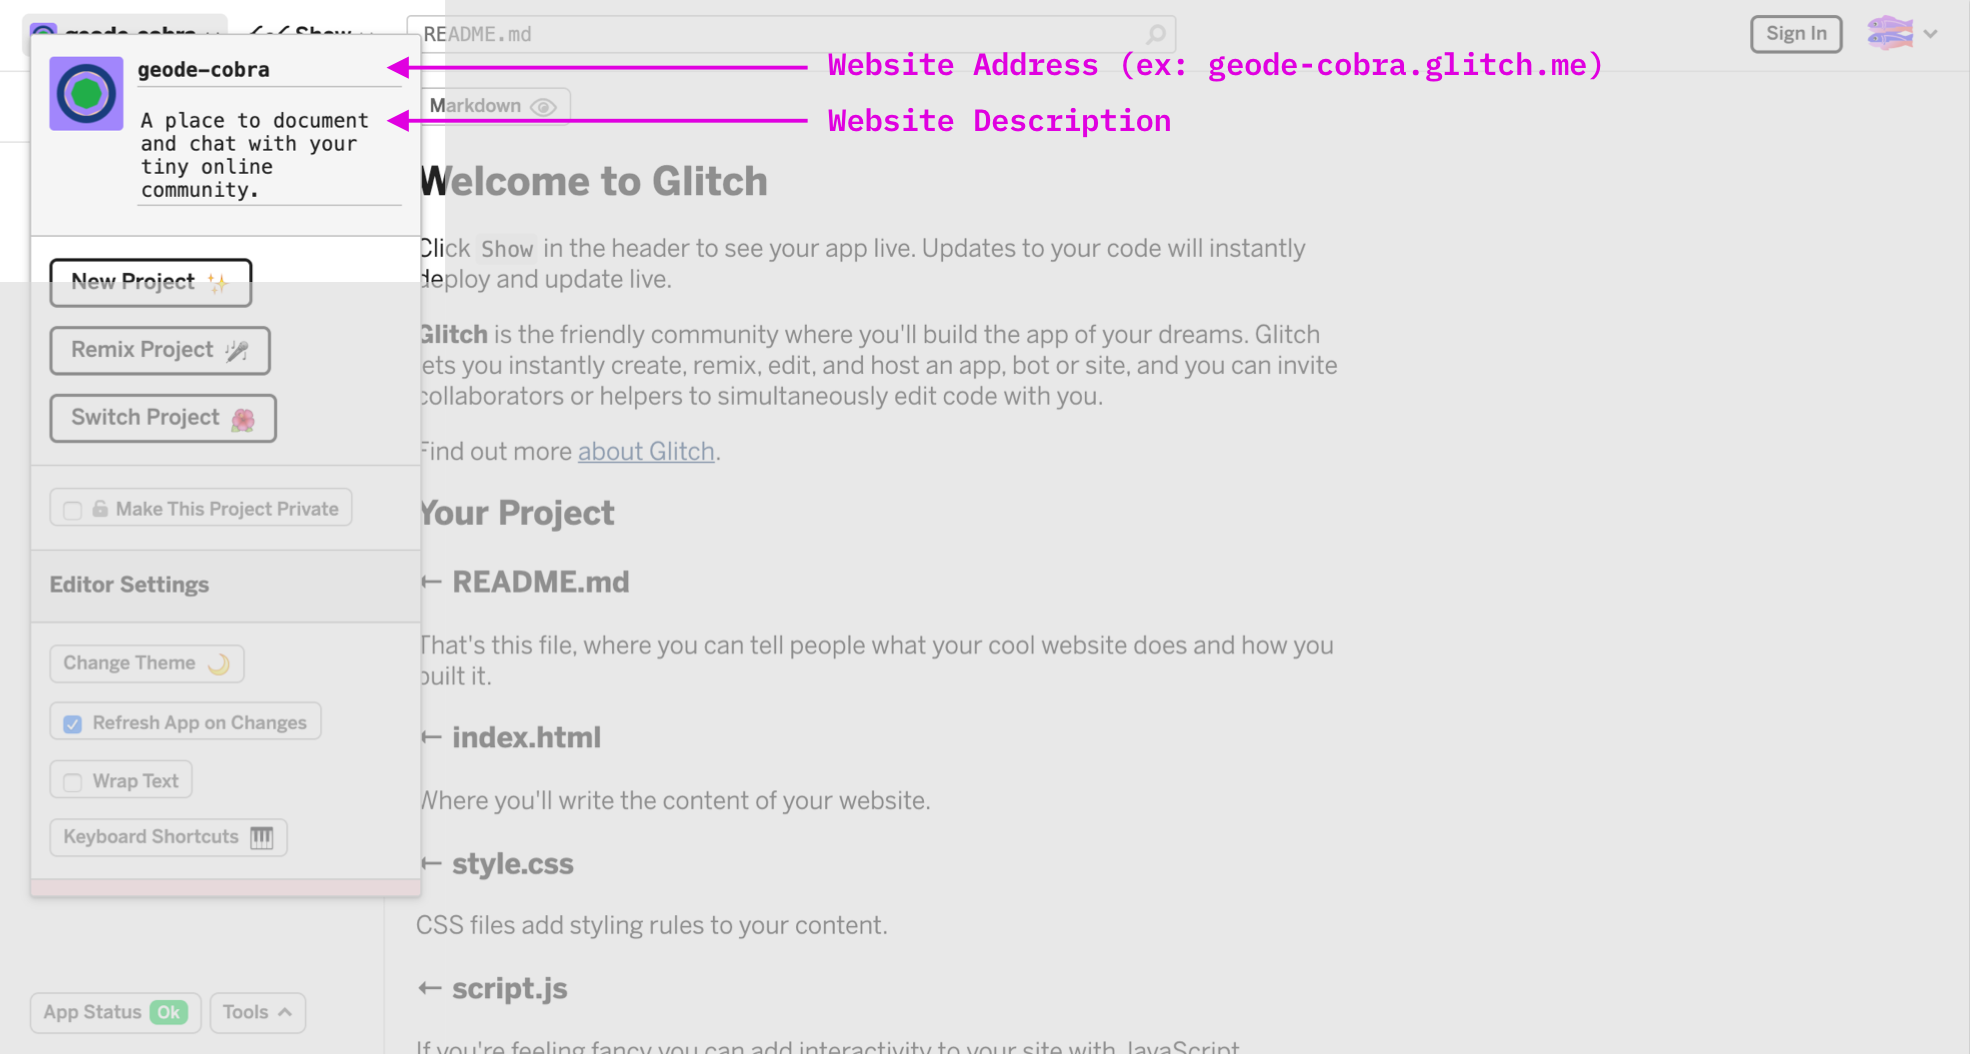
Once you remix the template, Glitch will create a random name for the remixed app. This name also becomes part of the app’s address, which you can change by clicking the name of the app on the top-left corner of the page.
In this example, the remixed app was named geode-cobra, so its address would be geode-cobra.glitch.me. You can also change the description of the app, which is shown when people look up different apps on Glitch.
Changing the Text on the Website (plus a Quick Intro to HTML and CSS)
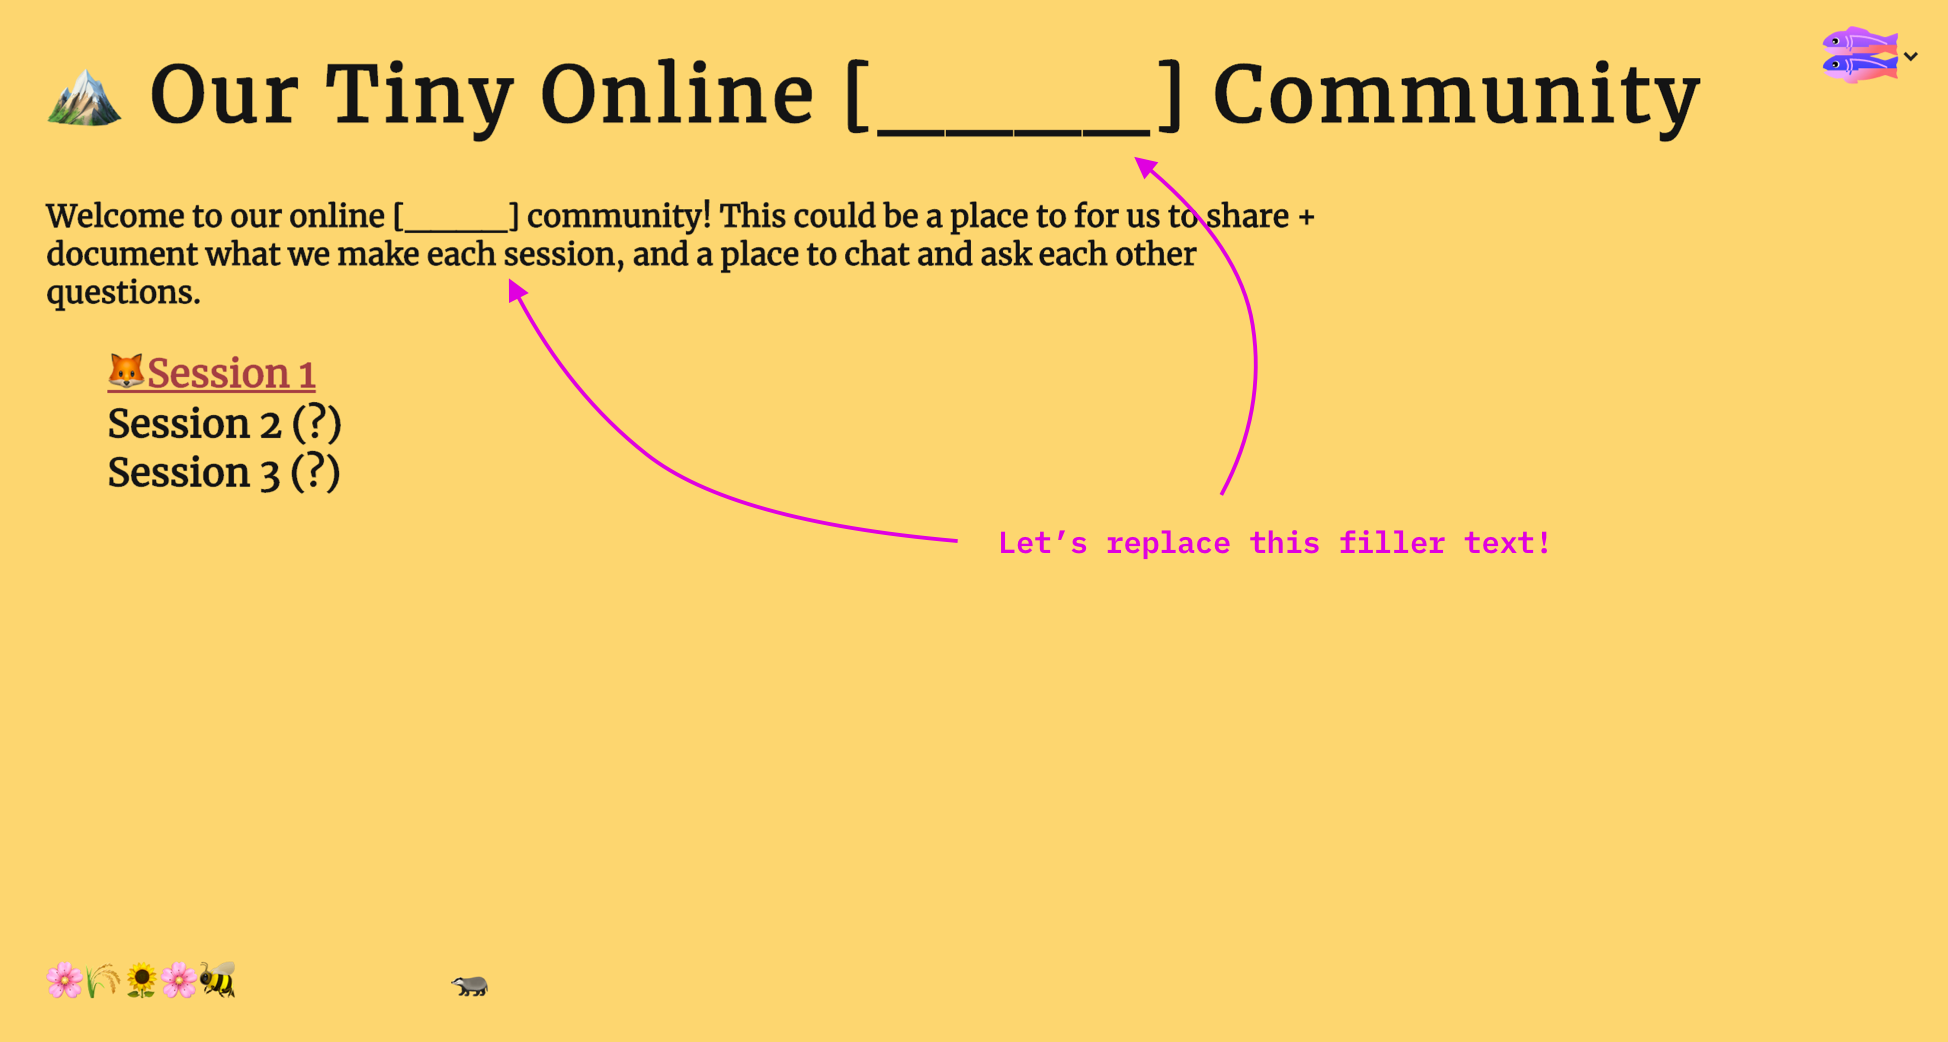
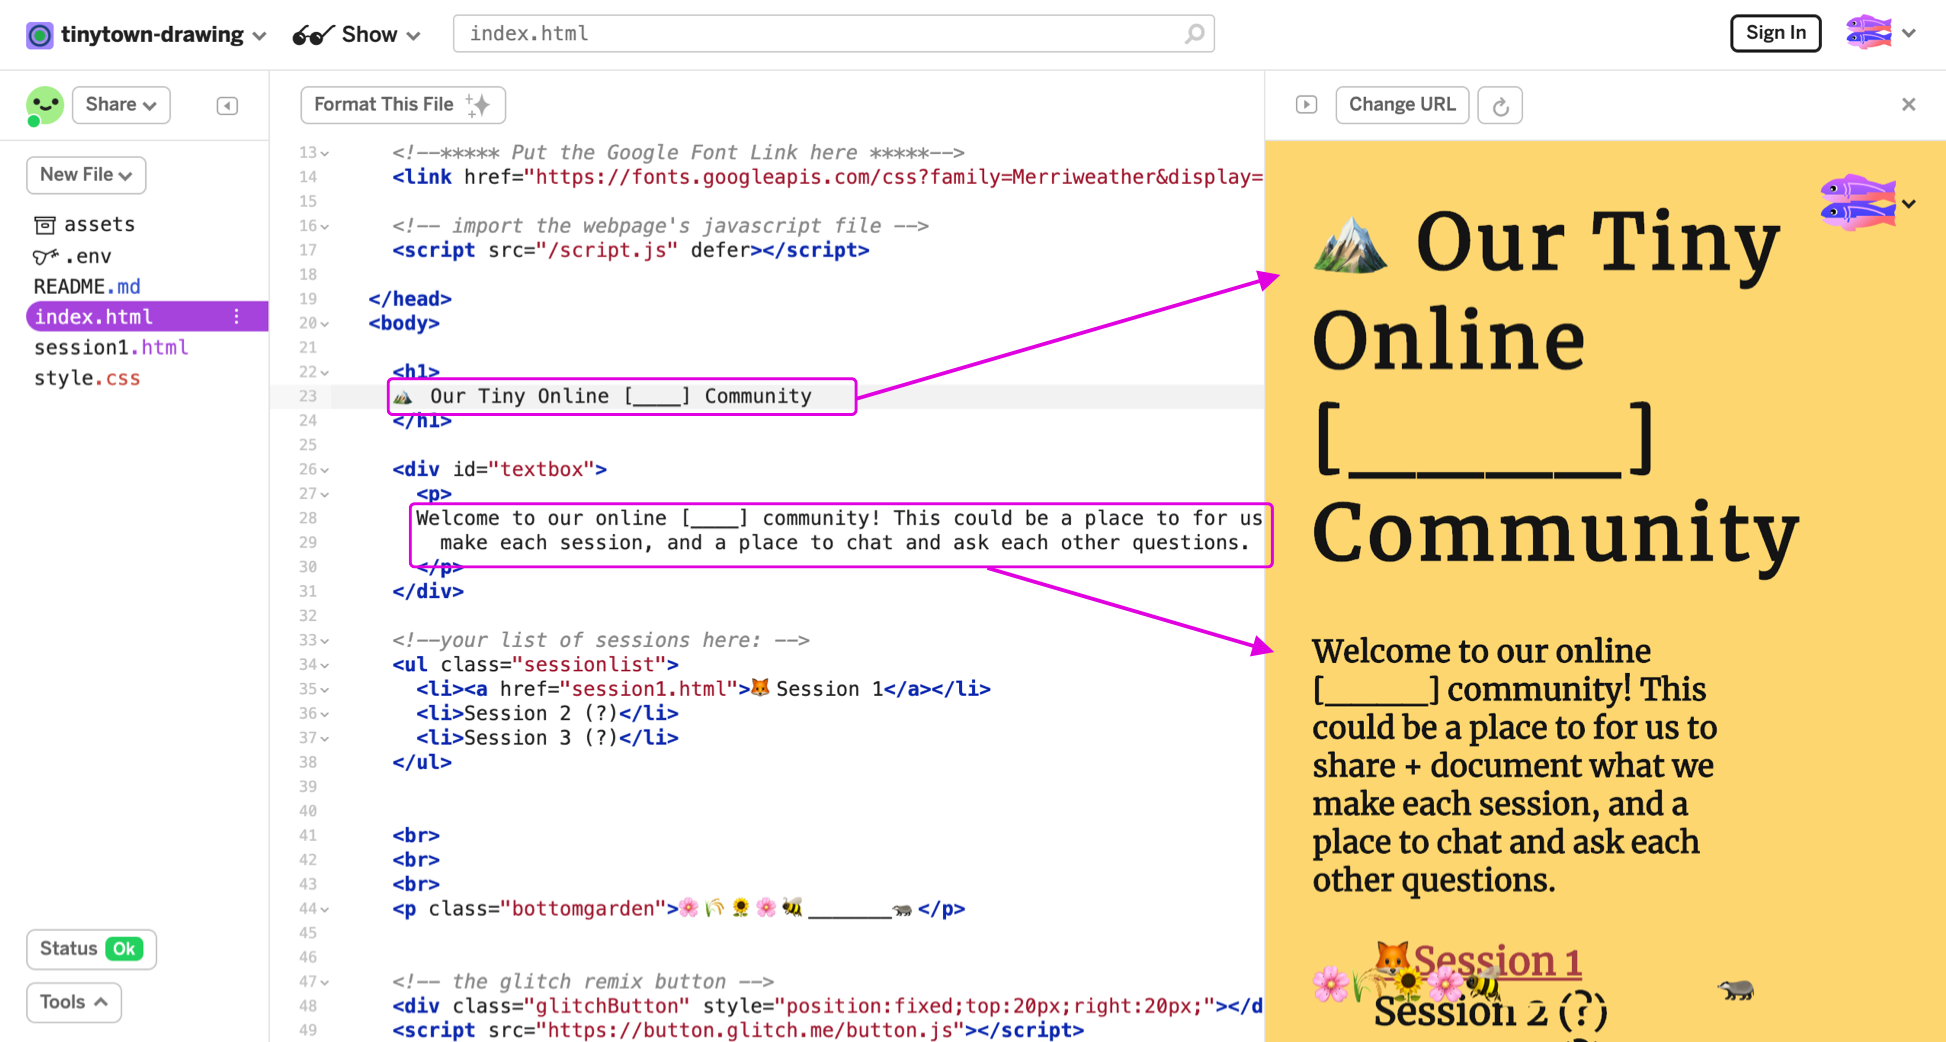
If you feel comfortable with HTML and CSS already, feel free to jump to the next section. If you’re completely new to it, no worries! Just follow along here (w3schools also has a nice introduction to HTML and CSS).
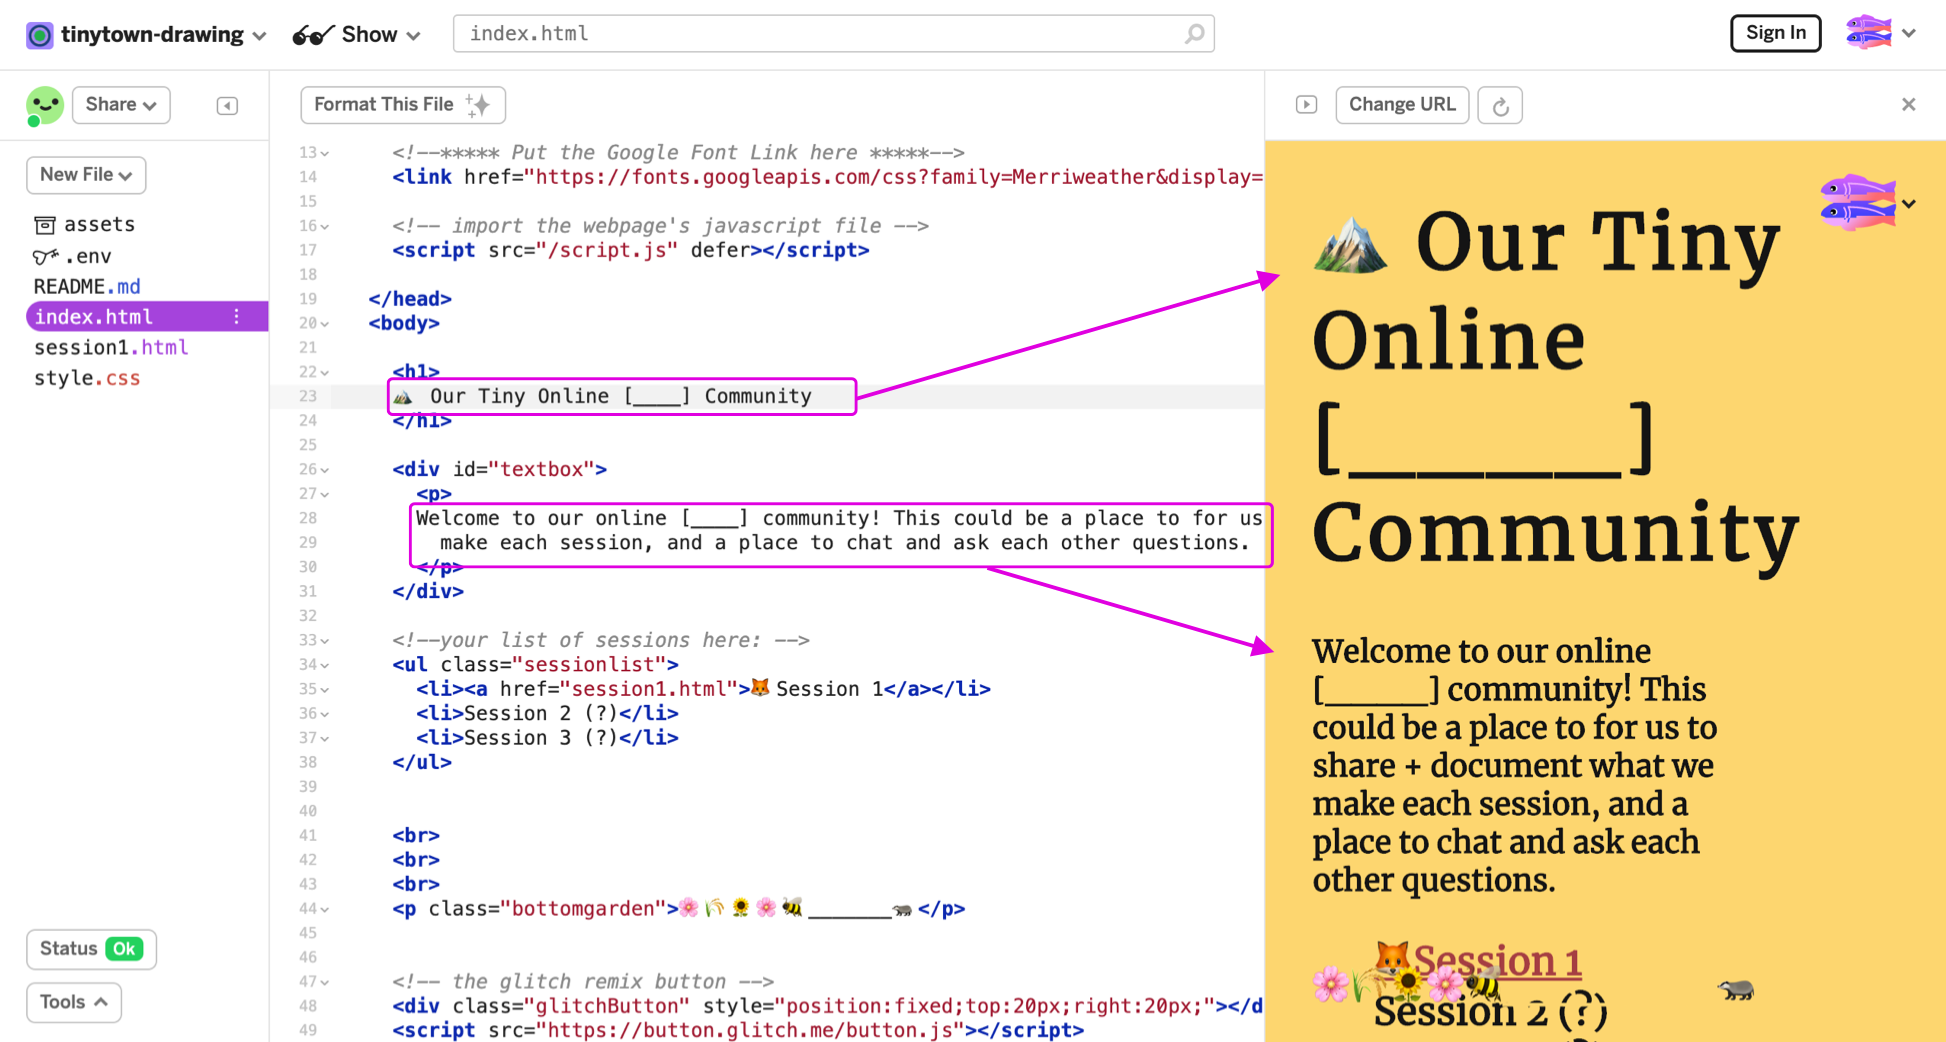
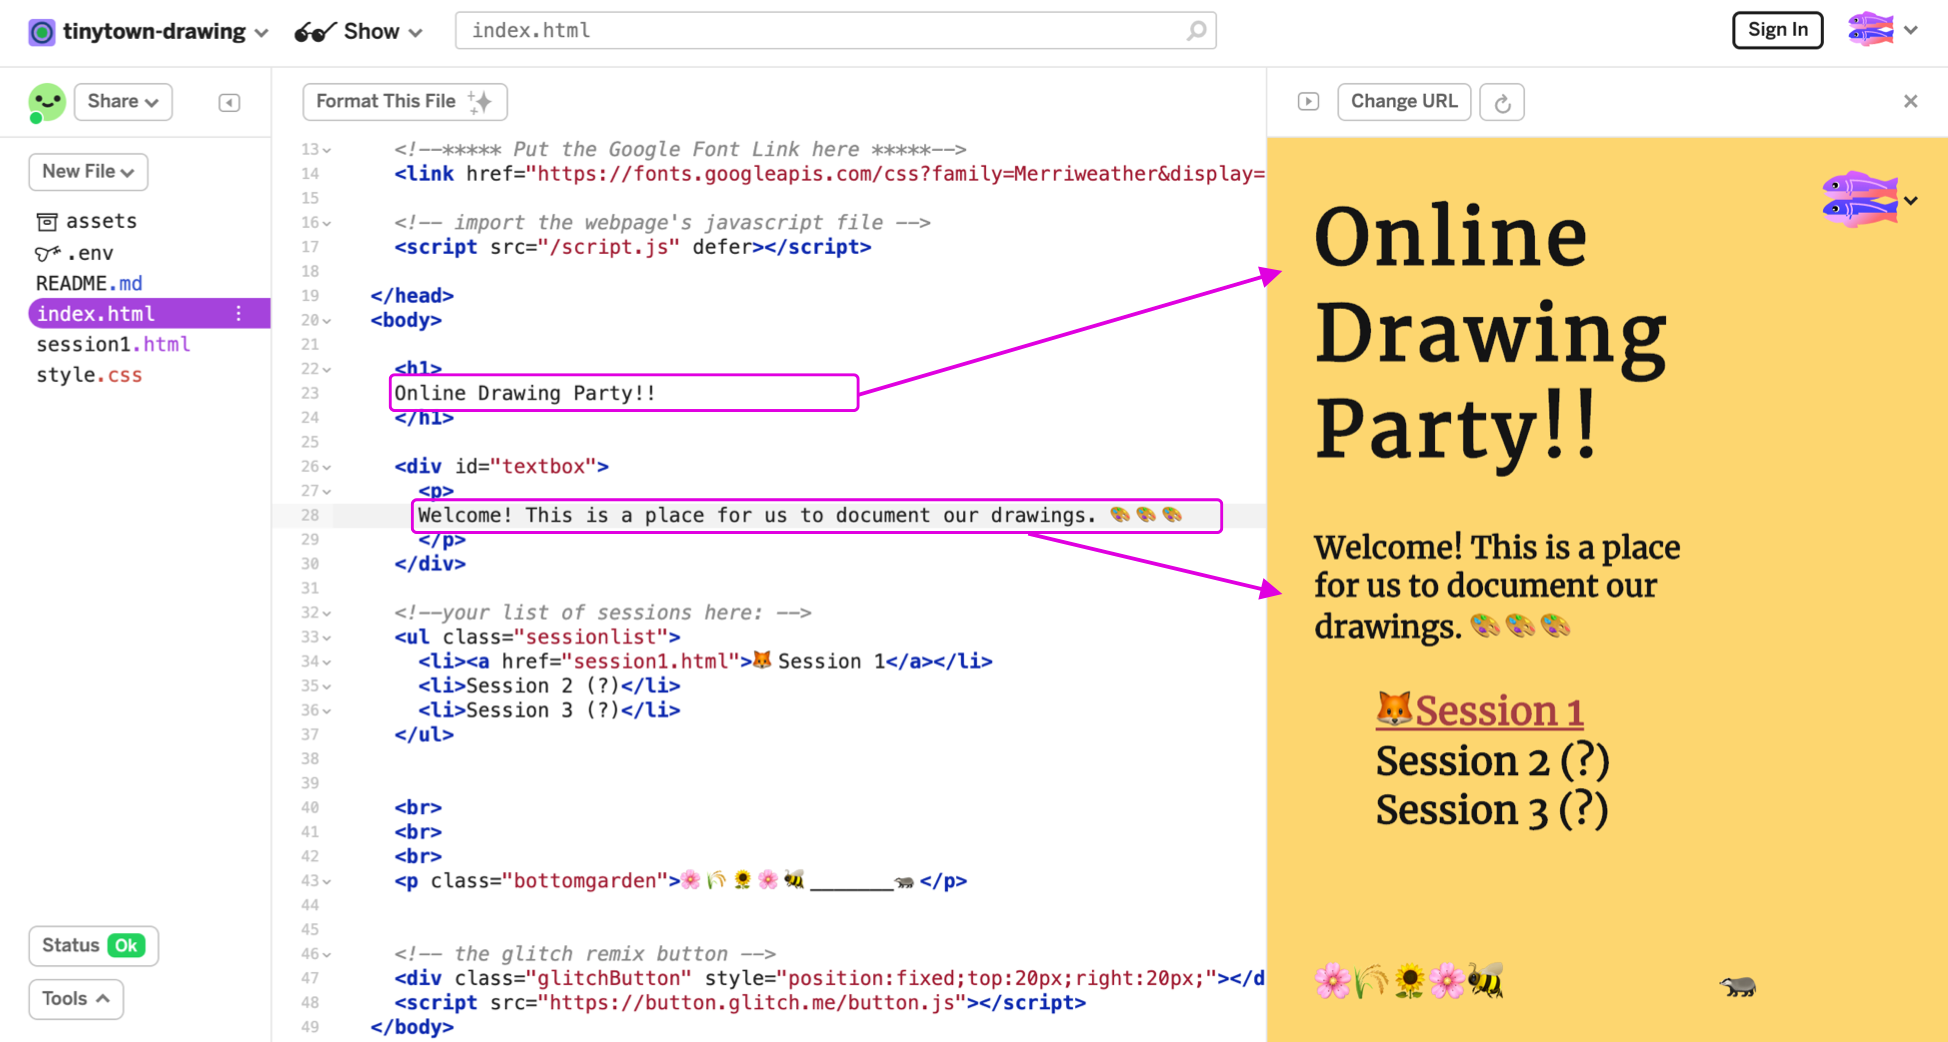
I want to make an online community for drawing. I renamed the app name to tinytown-drawing, and wrote a short description. Now I want to change what the text on the website says. Currently, the template text doesn’t have much information (you can replace the filler text and the empty [_____].
Our homepage’s filename is called index.html (see left sidebar). To change the main heading, simply change the text between the 'h1' tags, and to change the paragraph text, change anything between the 'p' tags. I changed my heading to "Online Drawing Party!!" and the paragraph text to "Welcome! This is a place for us to document our drawings."
Changing the Website Color
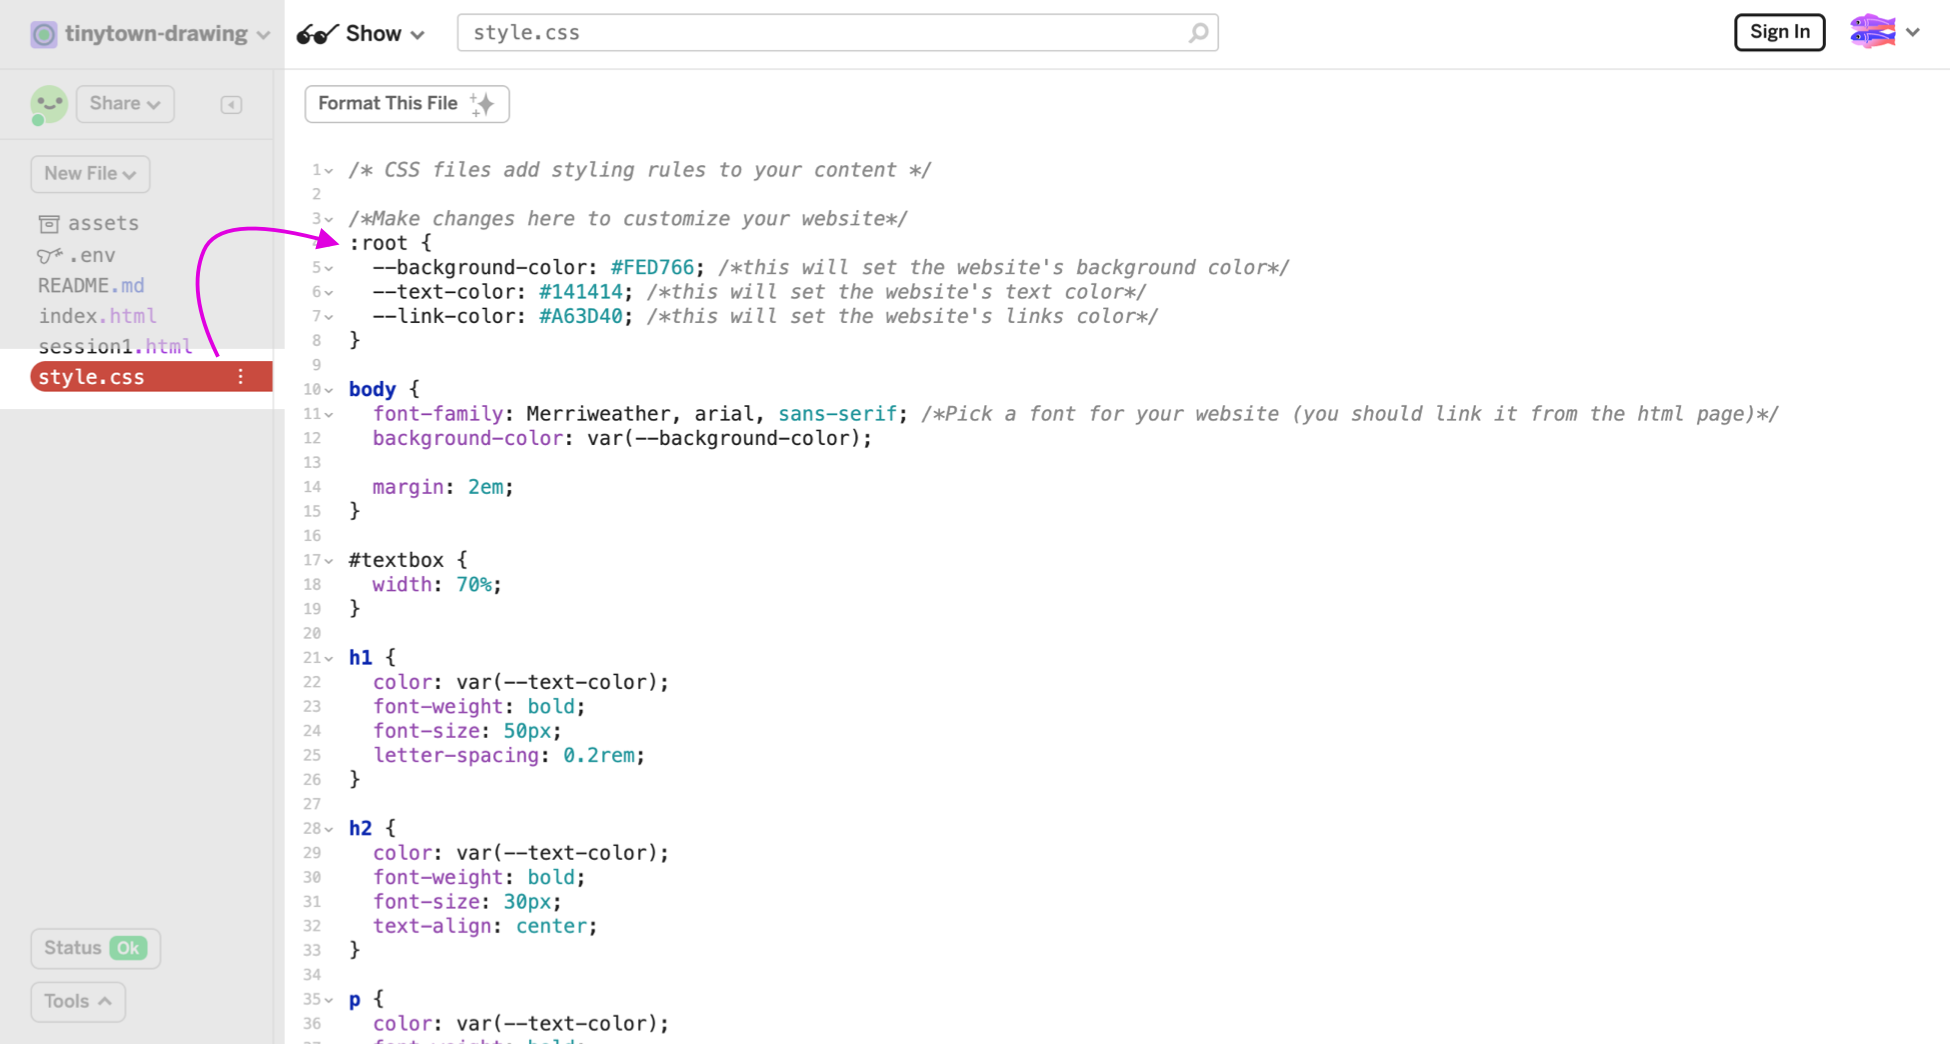
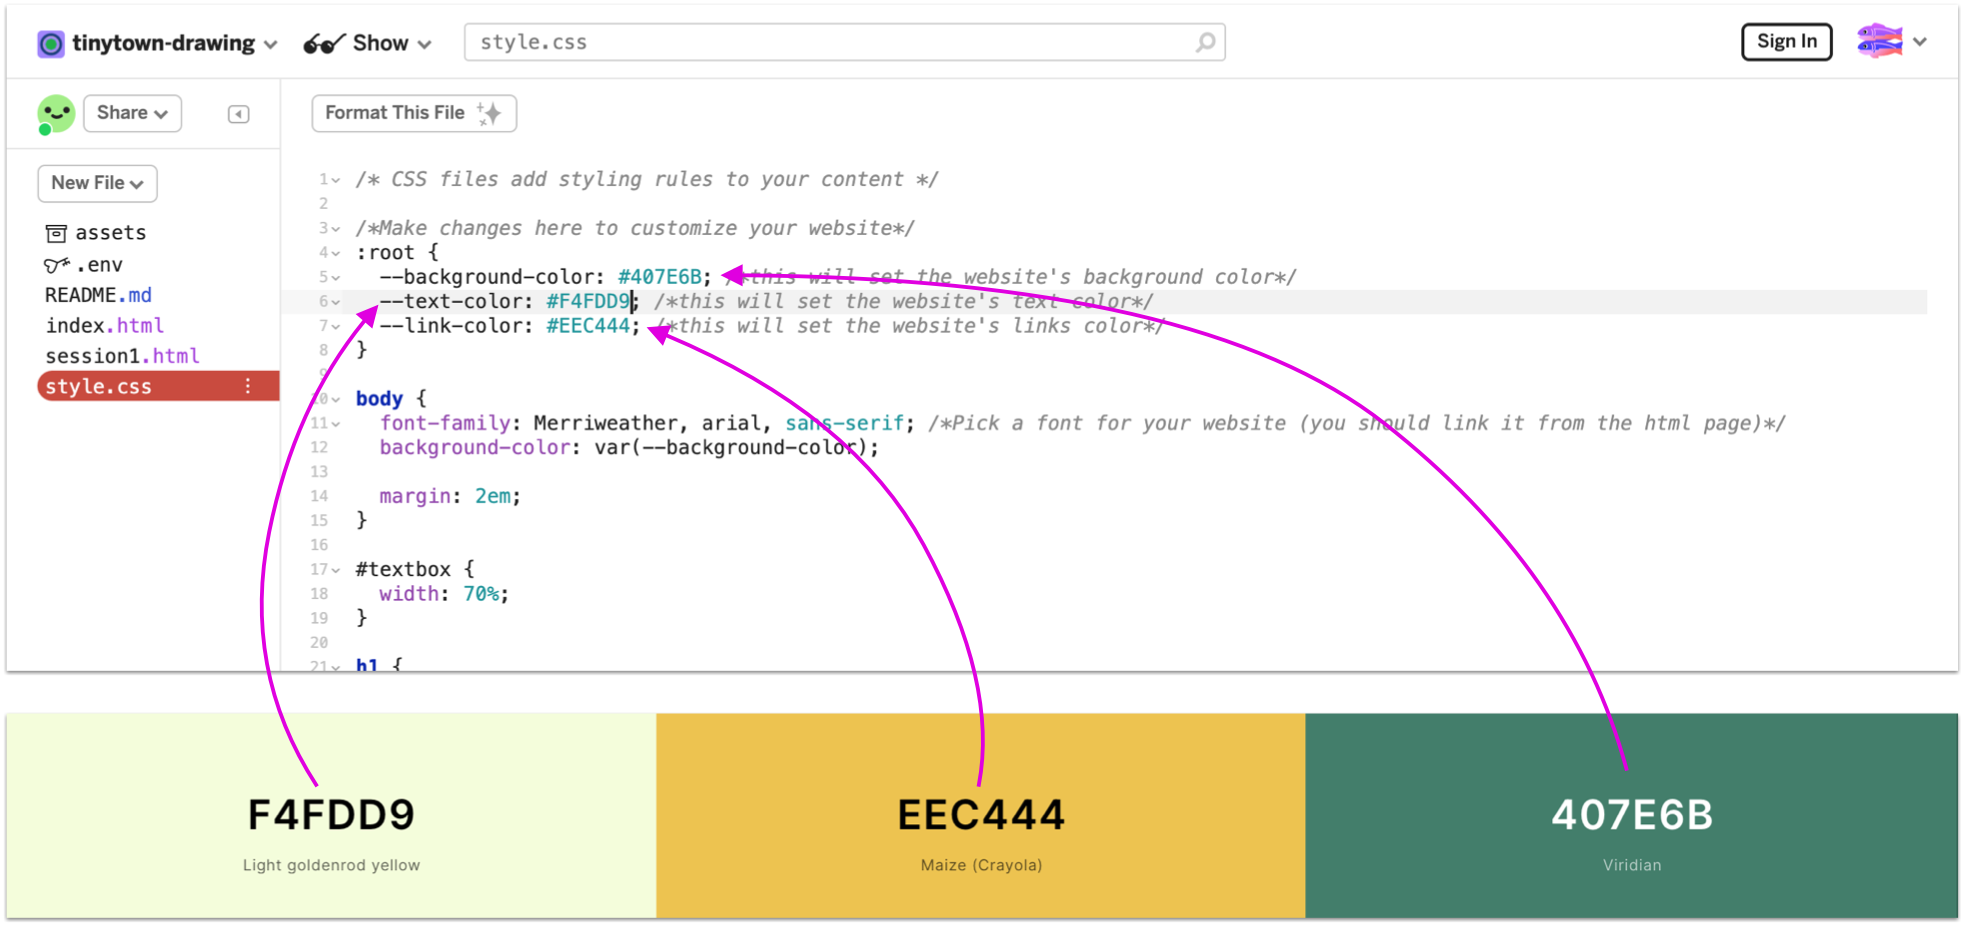
To make these changes, let’s go to the style.css file, in the same left sidebar we saw index.html. At the top of the style.css file, you’ll see things like “--background-color,” “--text-color,” and “--link-color.”
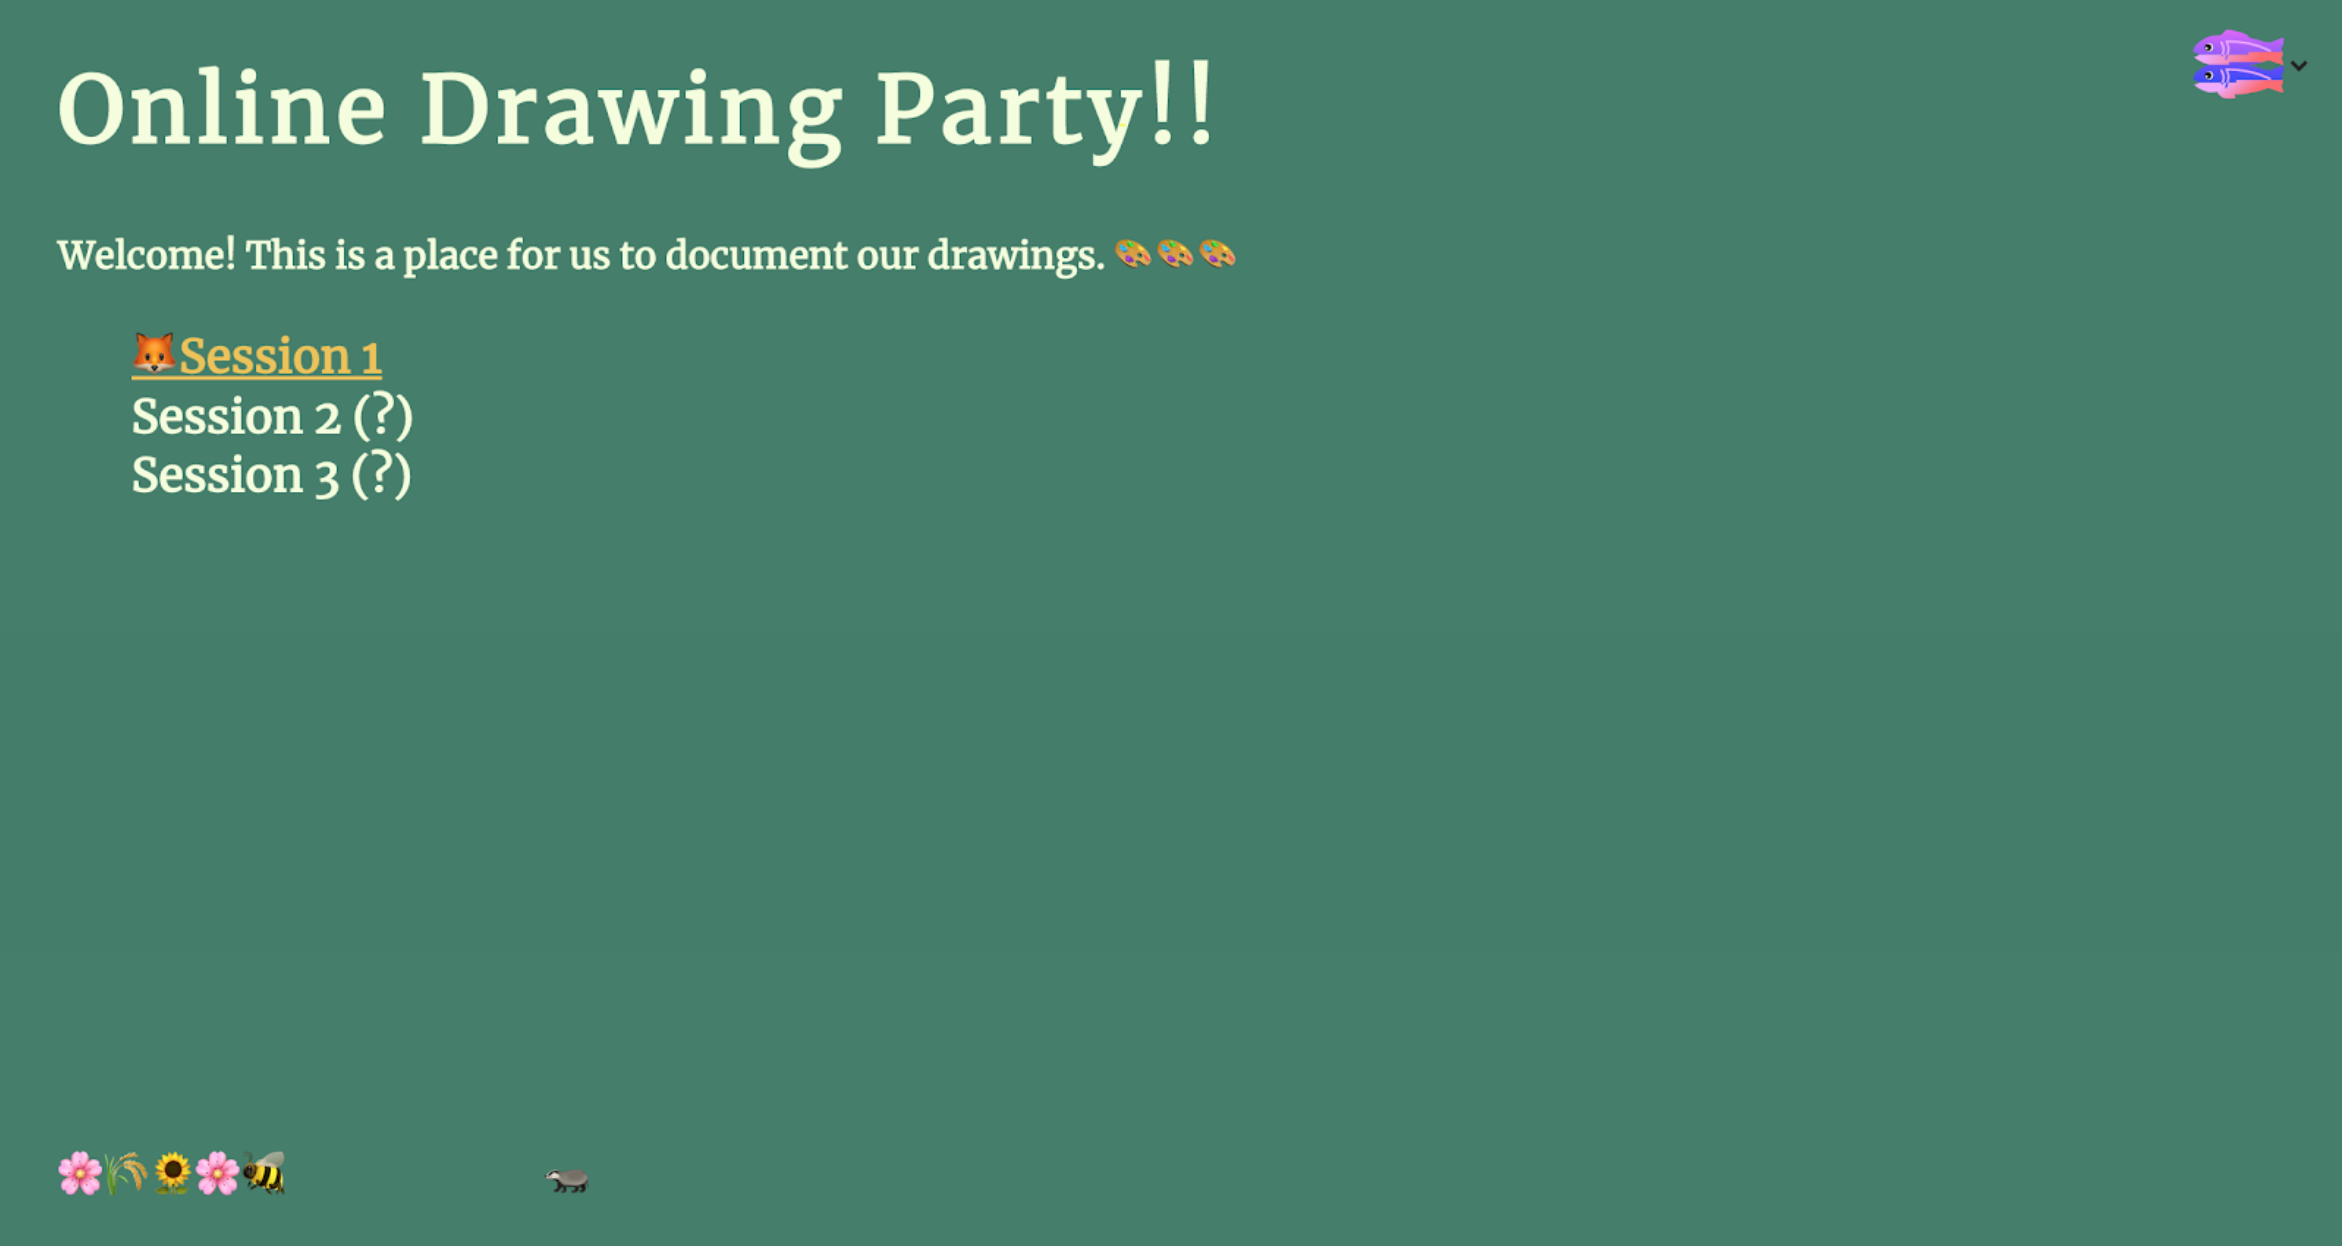
This is where you can change the colors for the different parts of your website. You’ll need a hex code (looks something like #ABC123) for the color you want to pick. You can learn more about hex codes and other ways to program color here. I personally like to use coolors.co to pick my website colors. I’m going to change my background color to a dark green (#407E6B), change the text color to cream (#F4FDD9), and change the link colors to a yellow (#EEC444).
Changing the Website Font
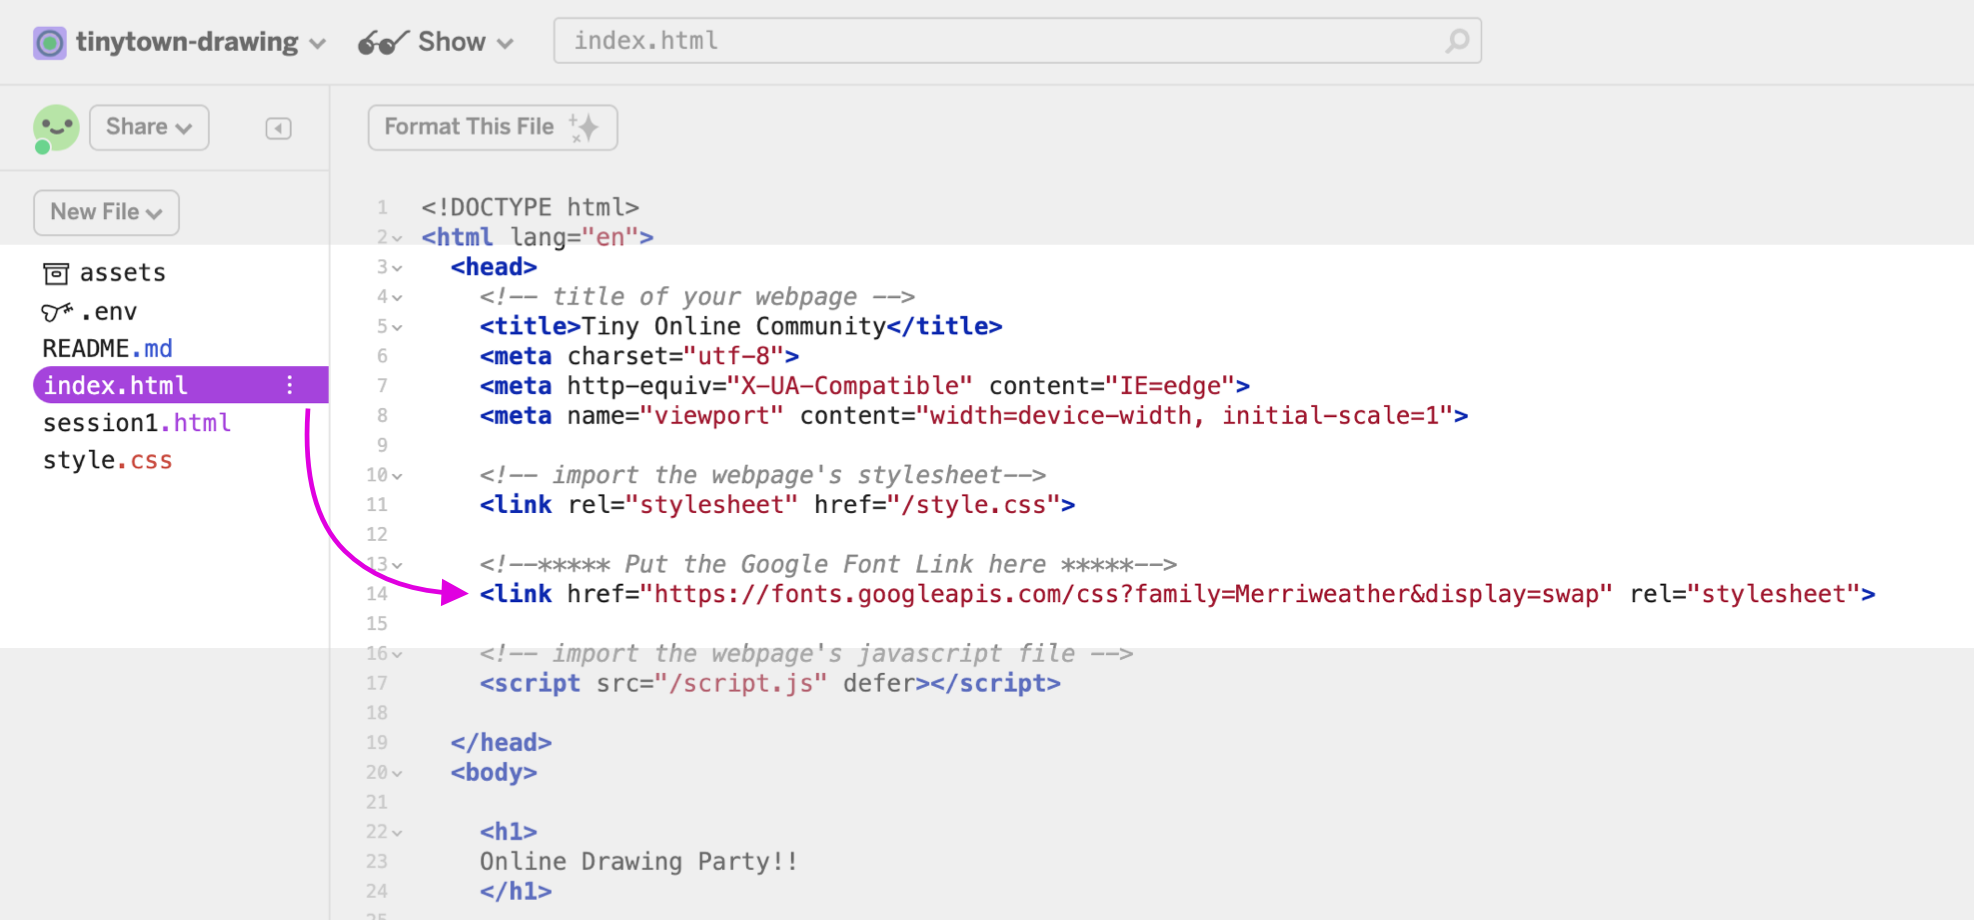
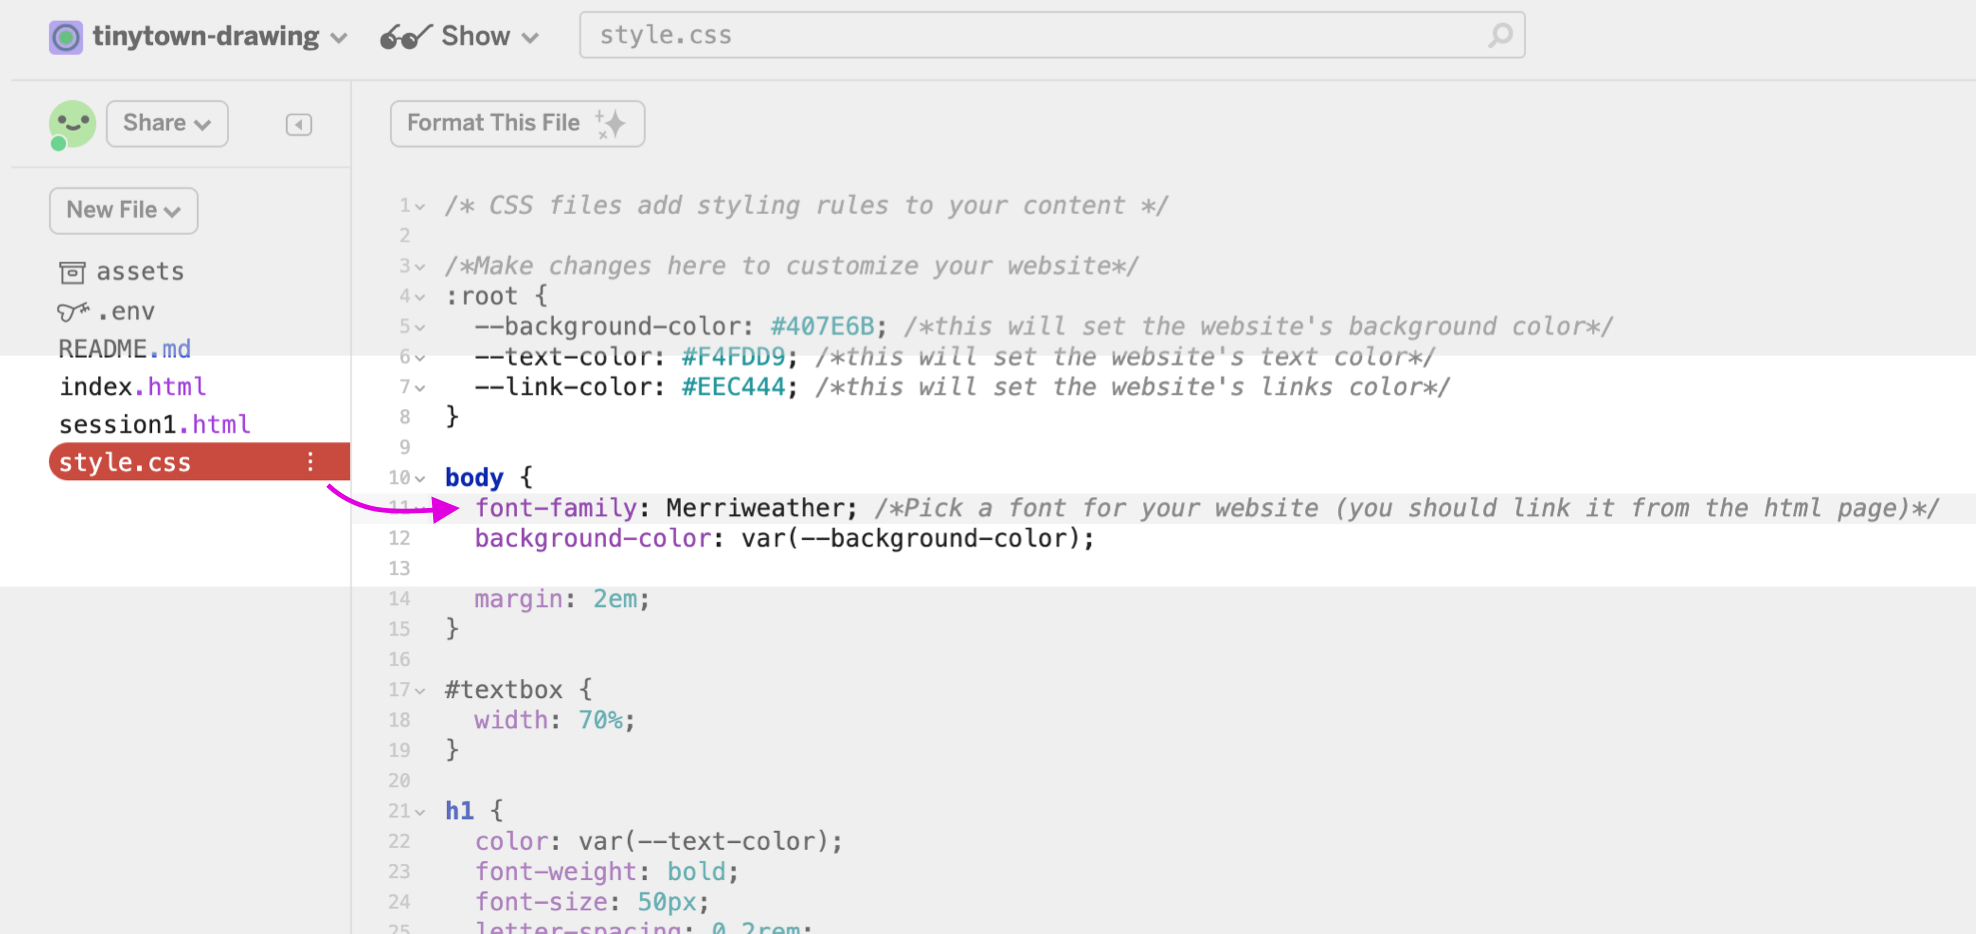
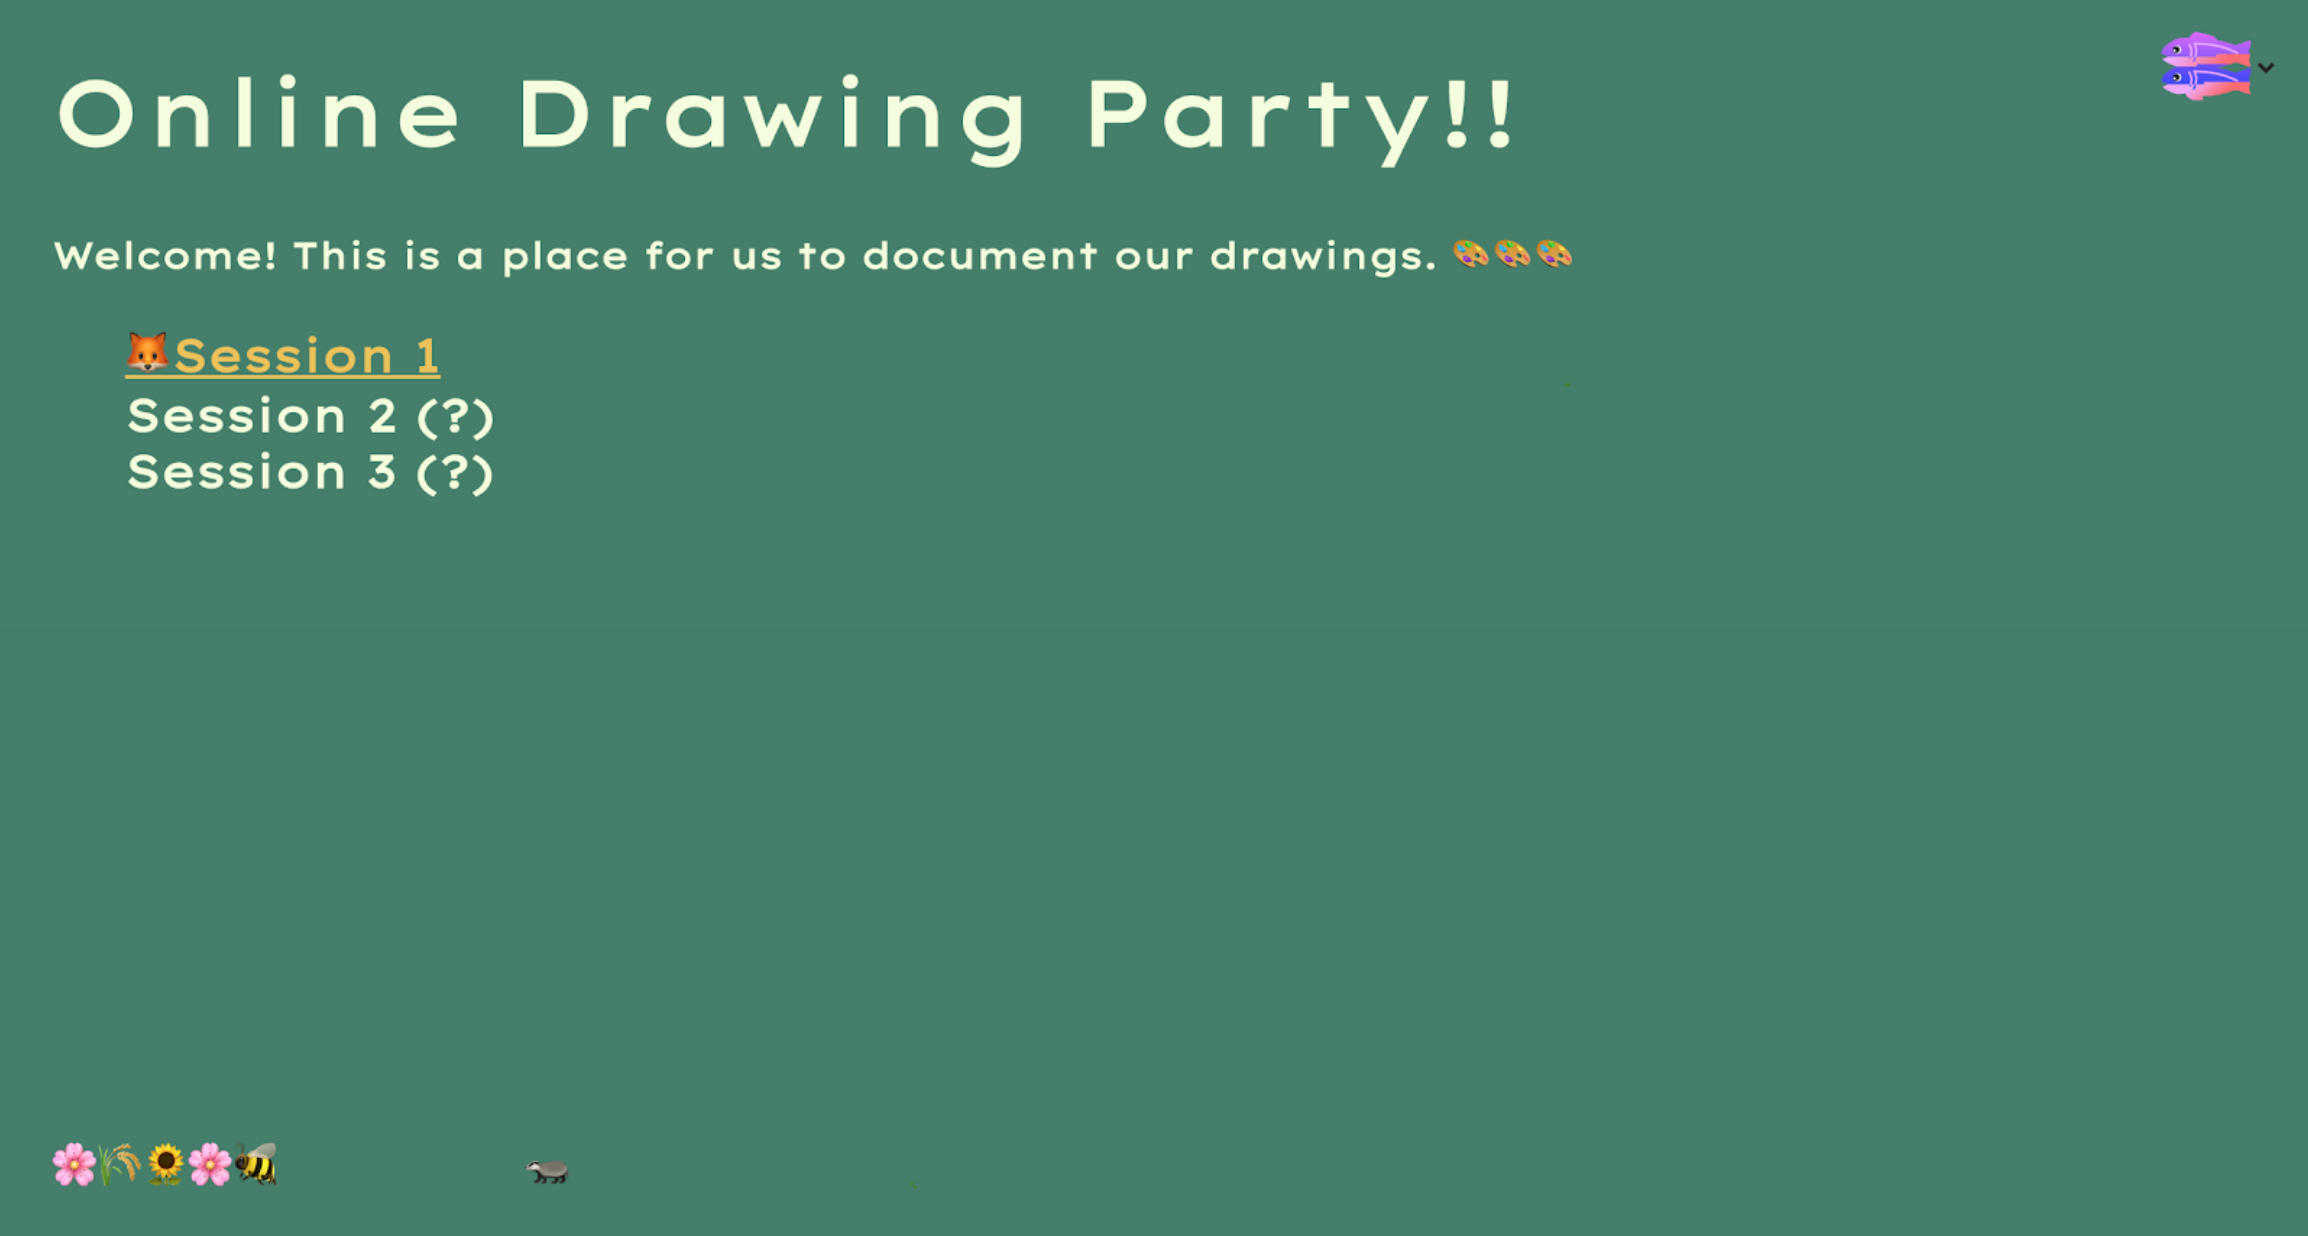
Currently, the website text font is set to Merriweather (from Google Fonts). You can see this in index.html and style.css.
To pick your own fonts, use this helpful tutorial by freeCodeCamp on how to use Google Fonts. I’m going to use the font Lexend Giga.
If you want to keep playing around with font size, adding boldness, italics, etc, check out these links. Have fun!
Creating an Airtable Gallery and Form
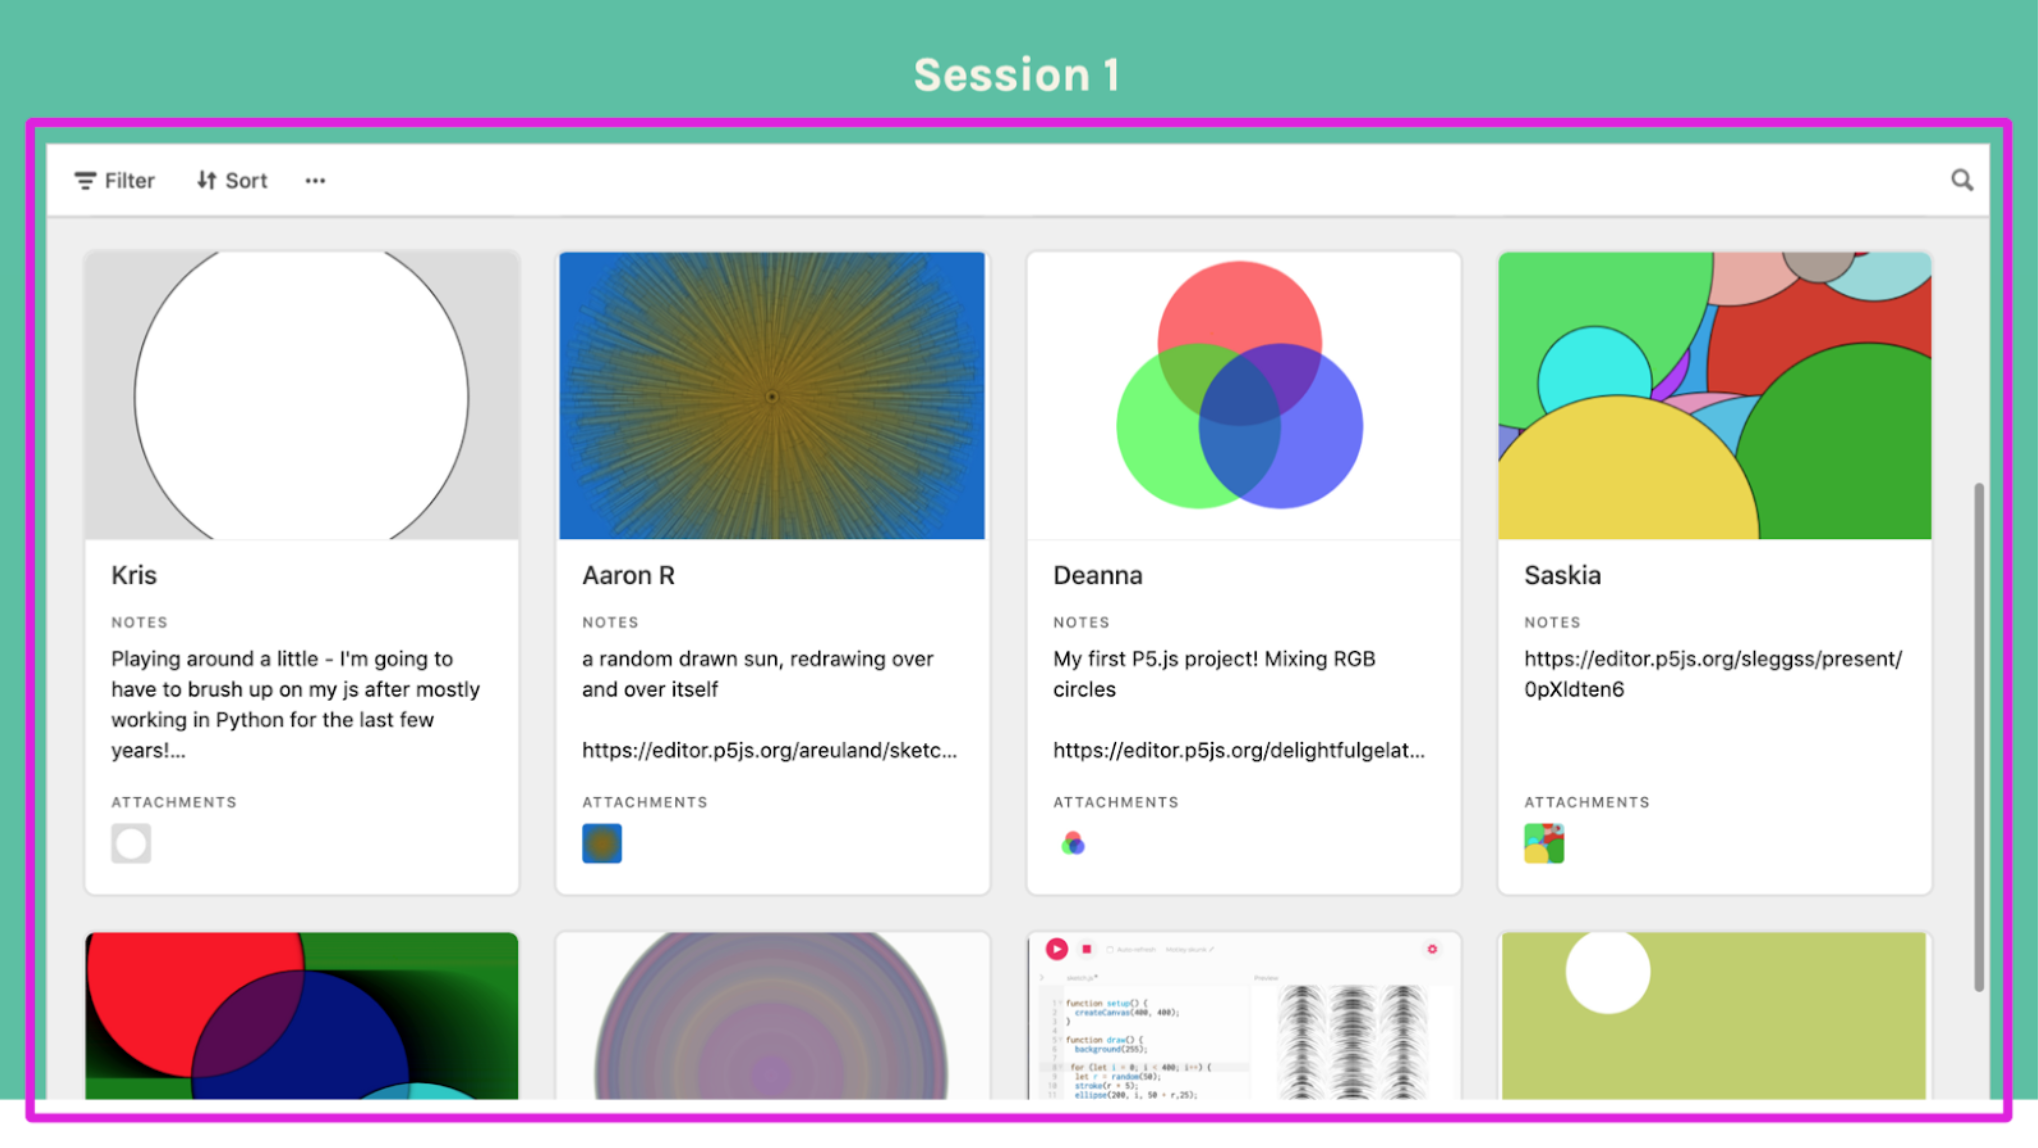
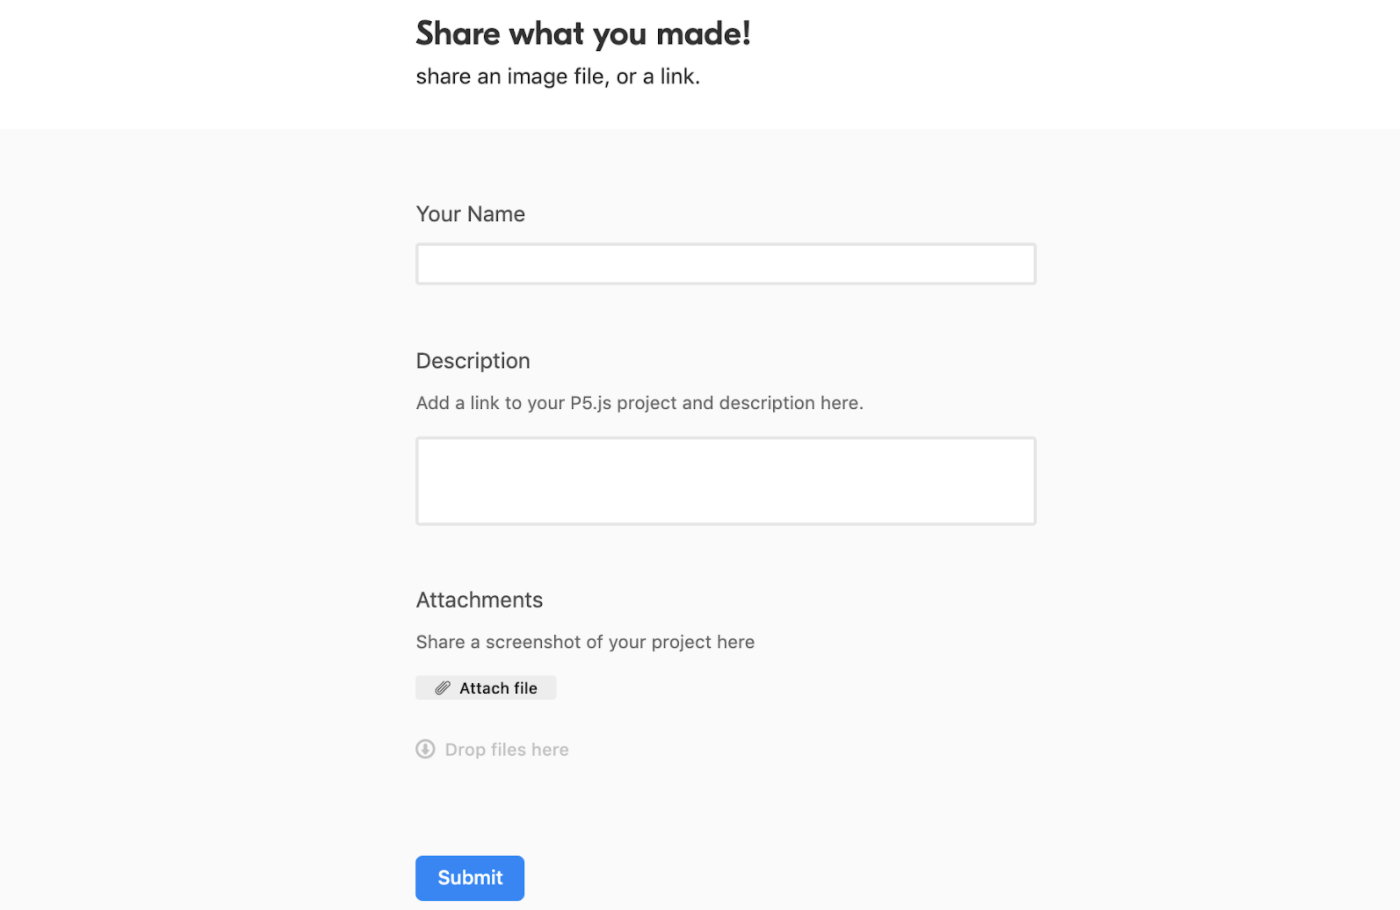
Now you’re ready to set up our Airtable! If you’re new to Airtable, no worries. It’s a way to collect and show data (very similar to spreadsheets). We're using Airtable so people can screenshot and share what they work on. For example, people can add descriptions, photos, and links to their P5.js projects. We have a ‘Gallery View’ where people can see all of the submissions from the ‘Form View’. To learn more about Airtable, check out their in-depth introduction.
Adding the Form Link
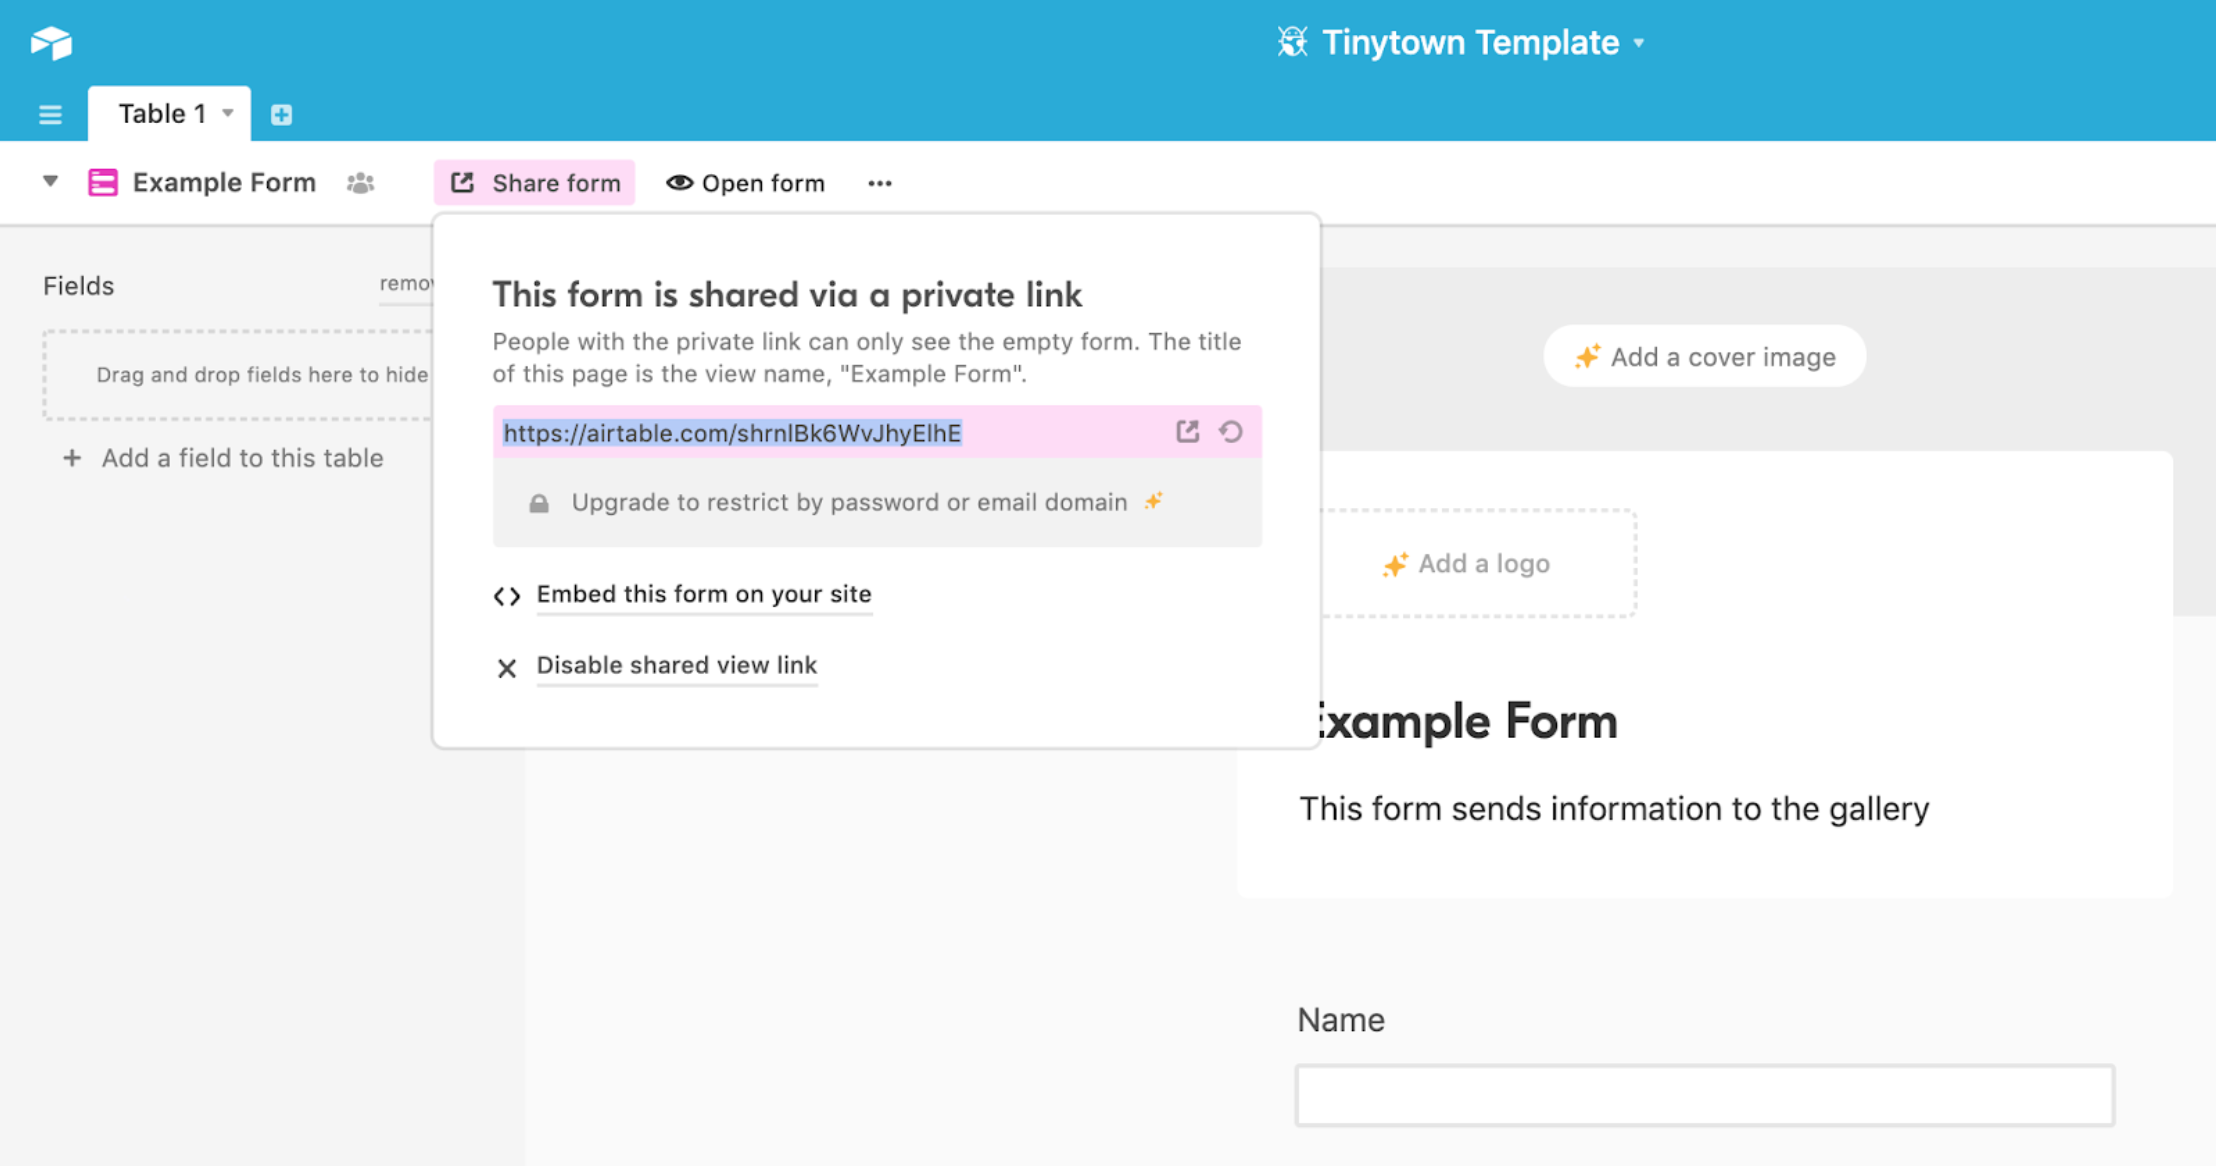
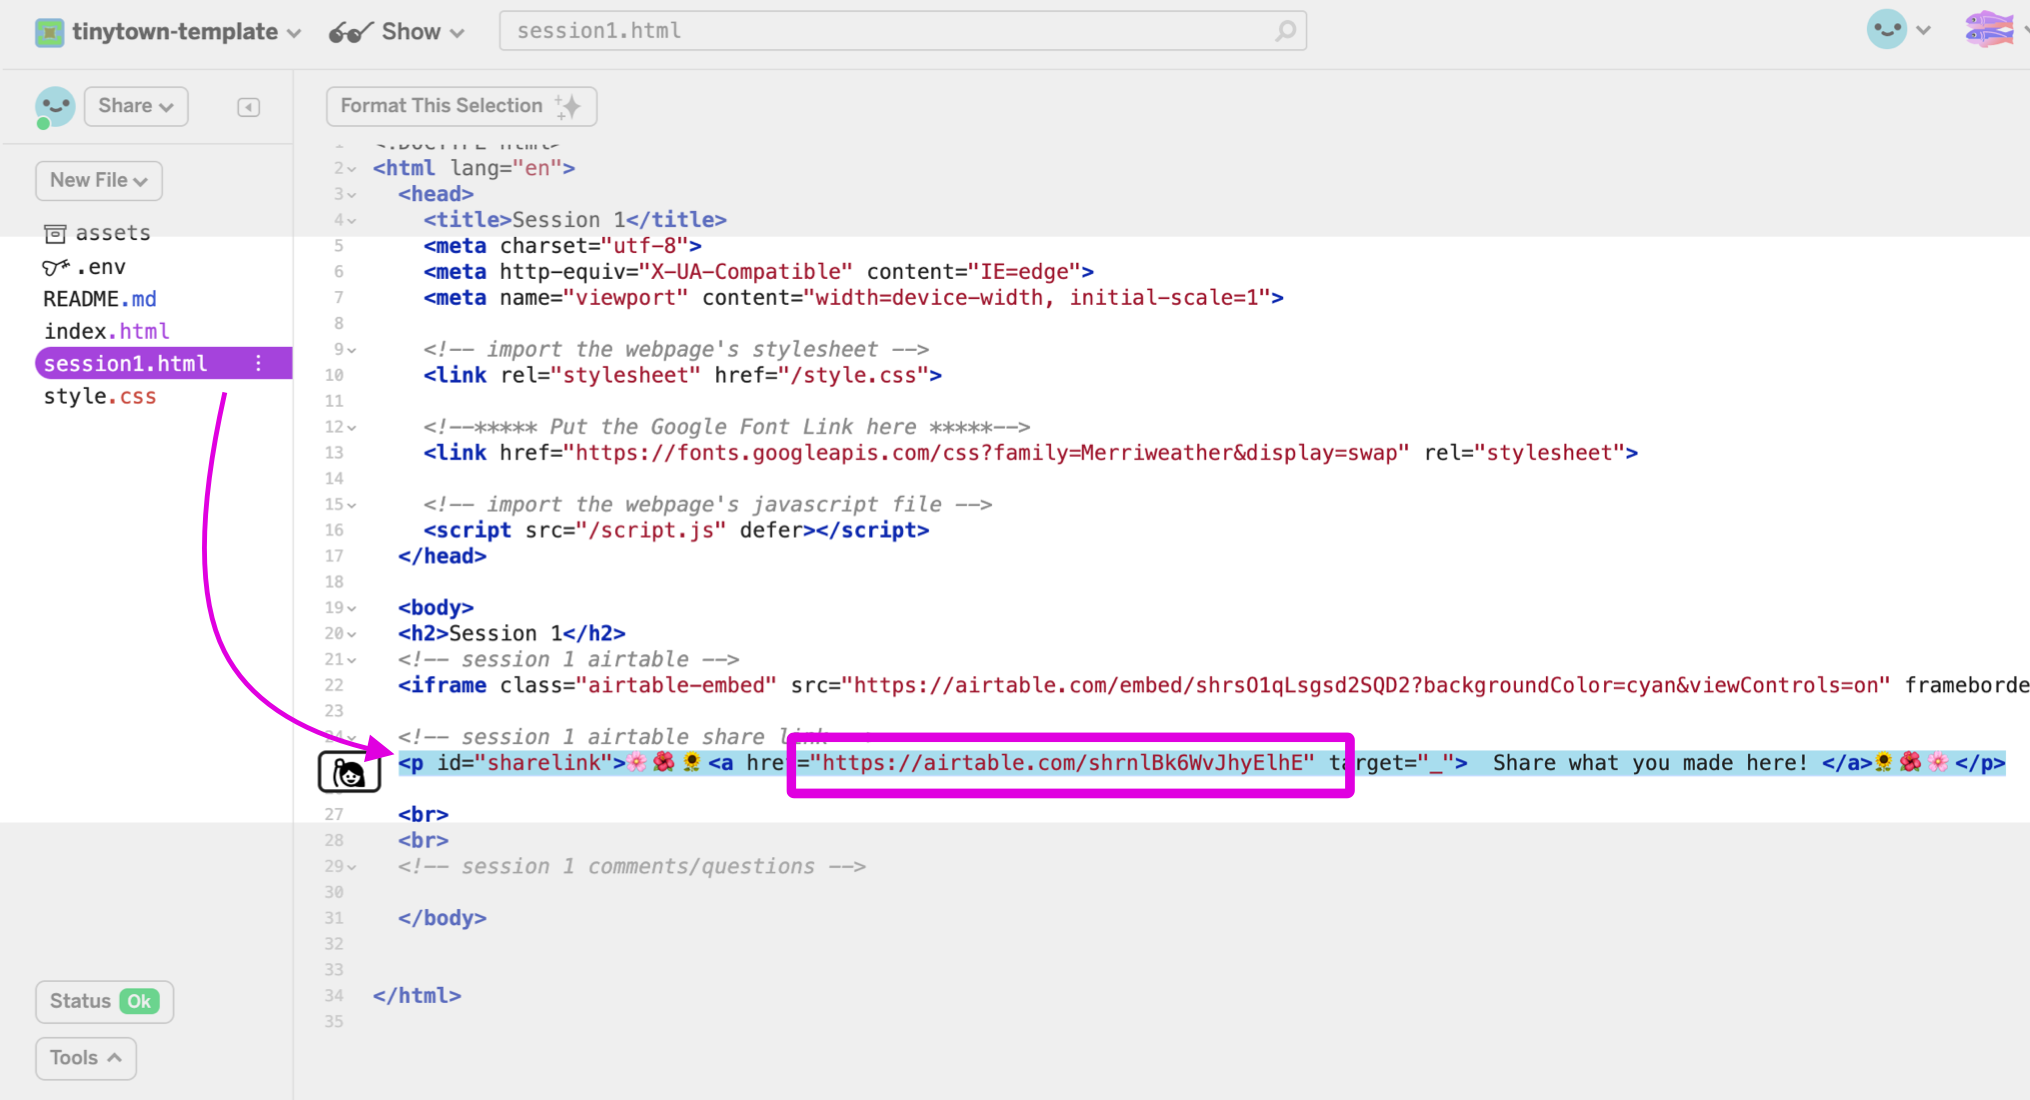
After creating a form in your Airtable base, find the “Share Form” button to find a unique website address to the form. Copy this link, go to your Glitch app, and add it to session1.html. Replace the template link with yours, between the 'p id="sharelink"' tags.
Embedding the Gallery View
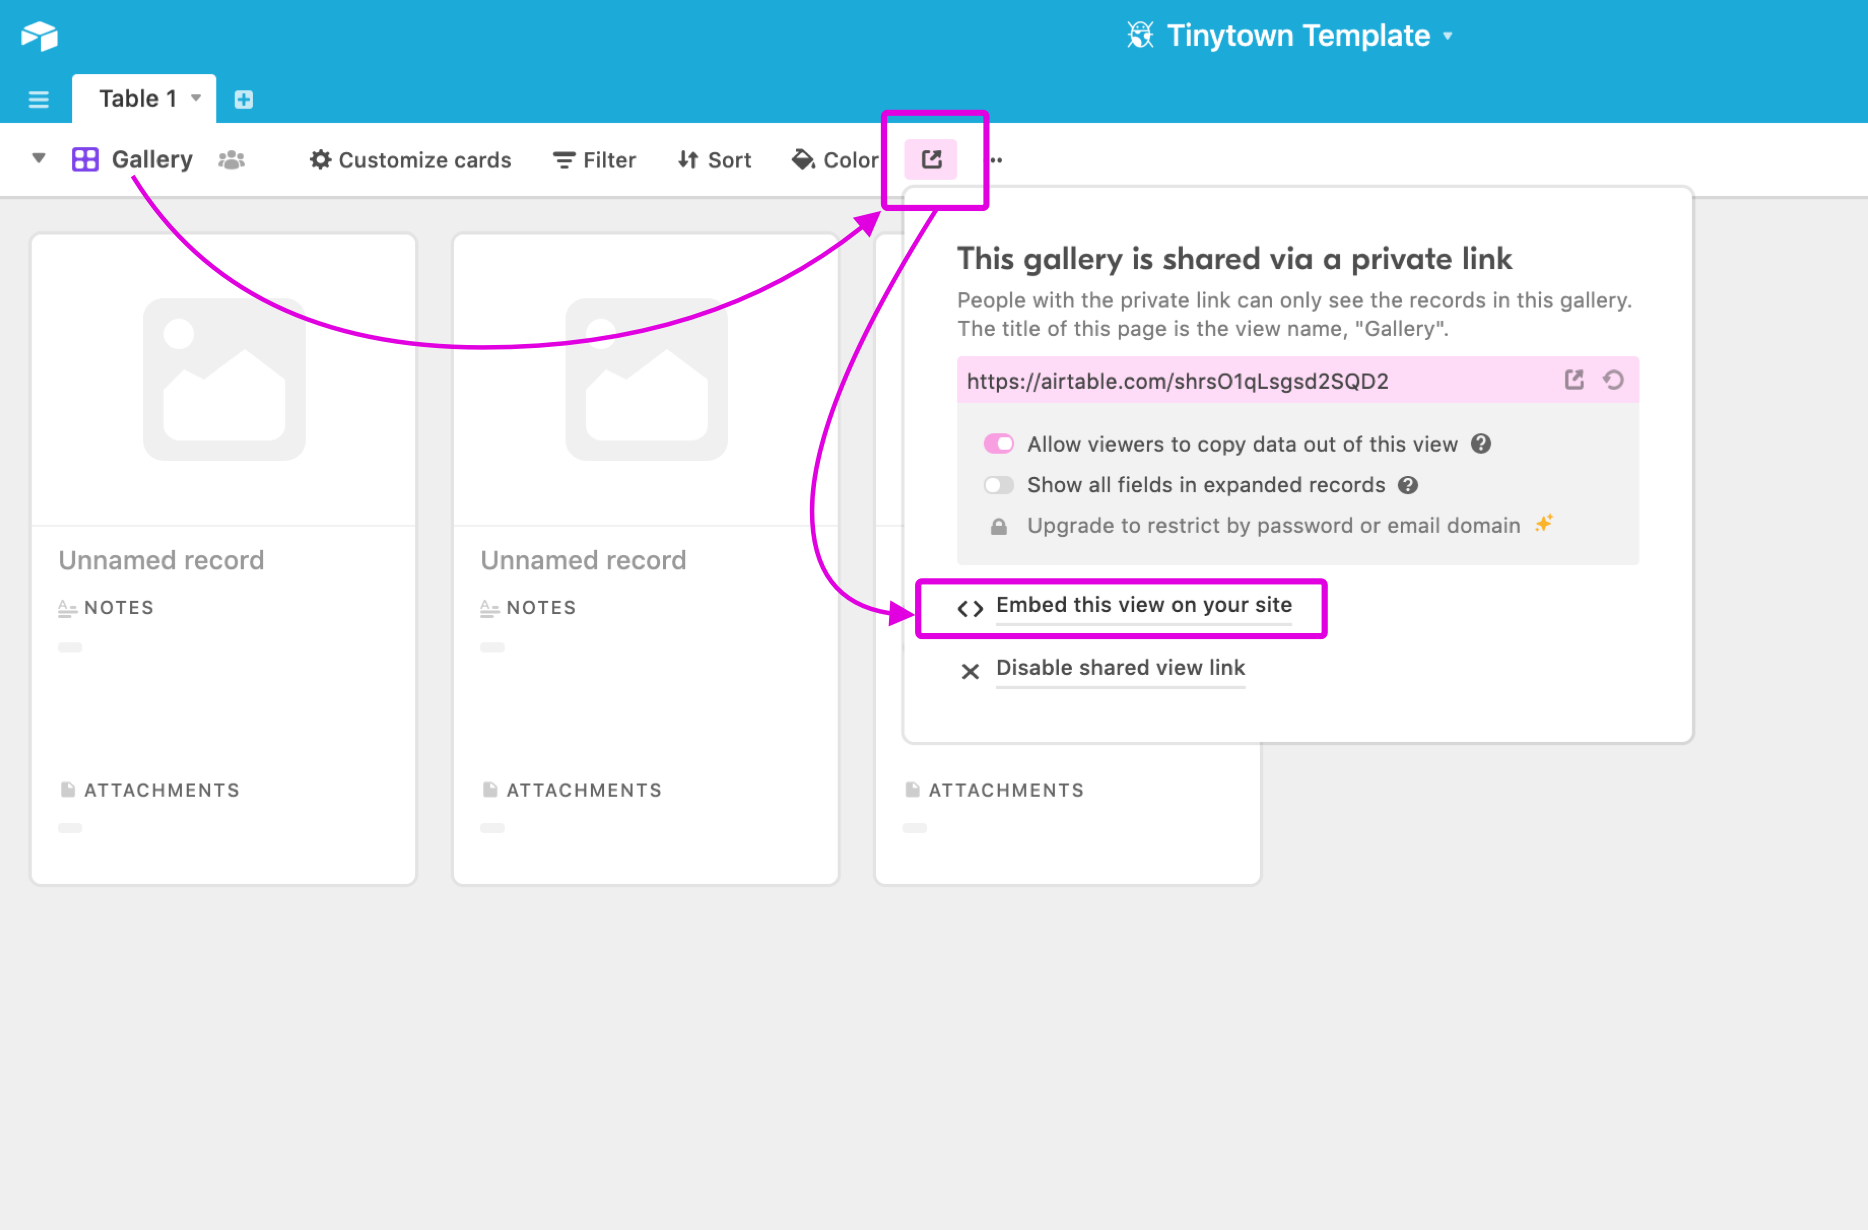
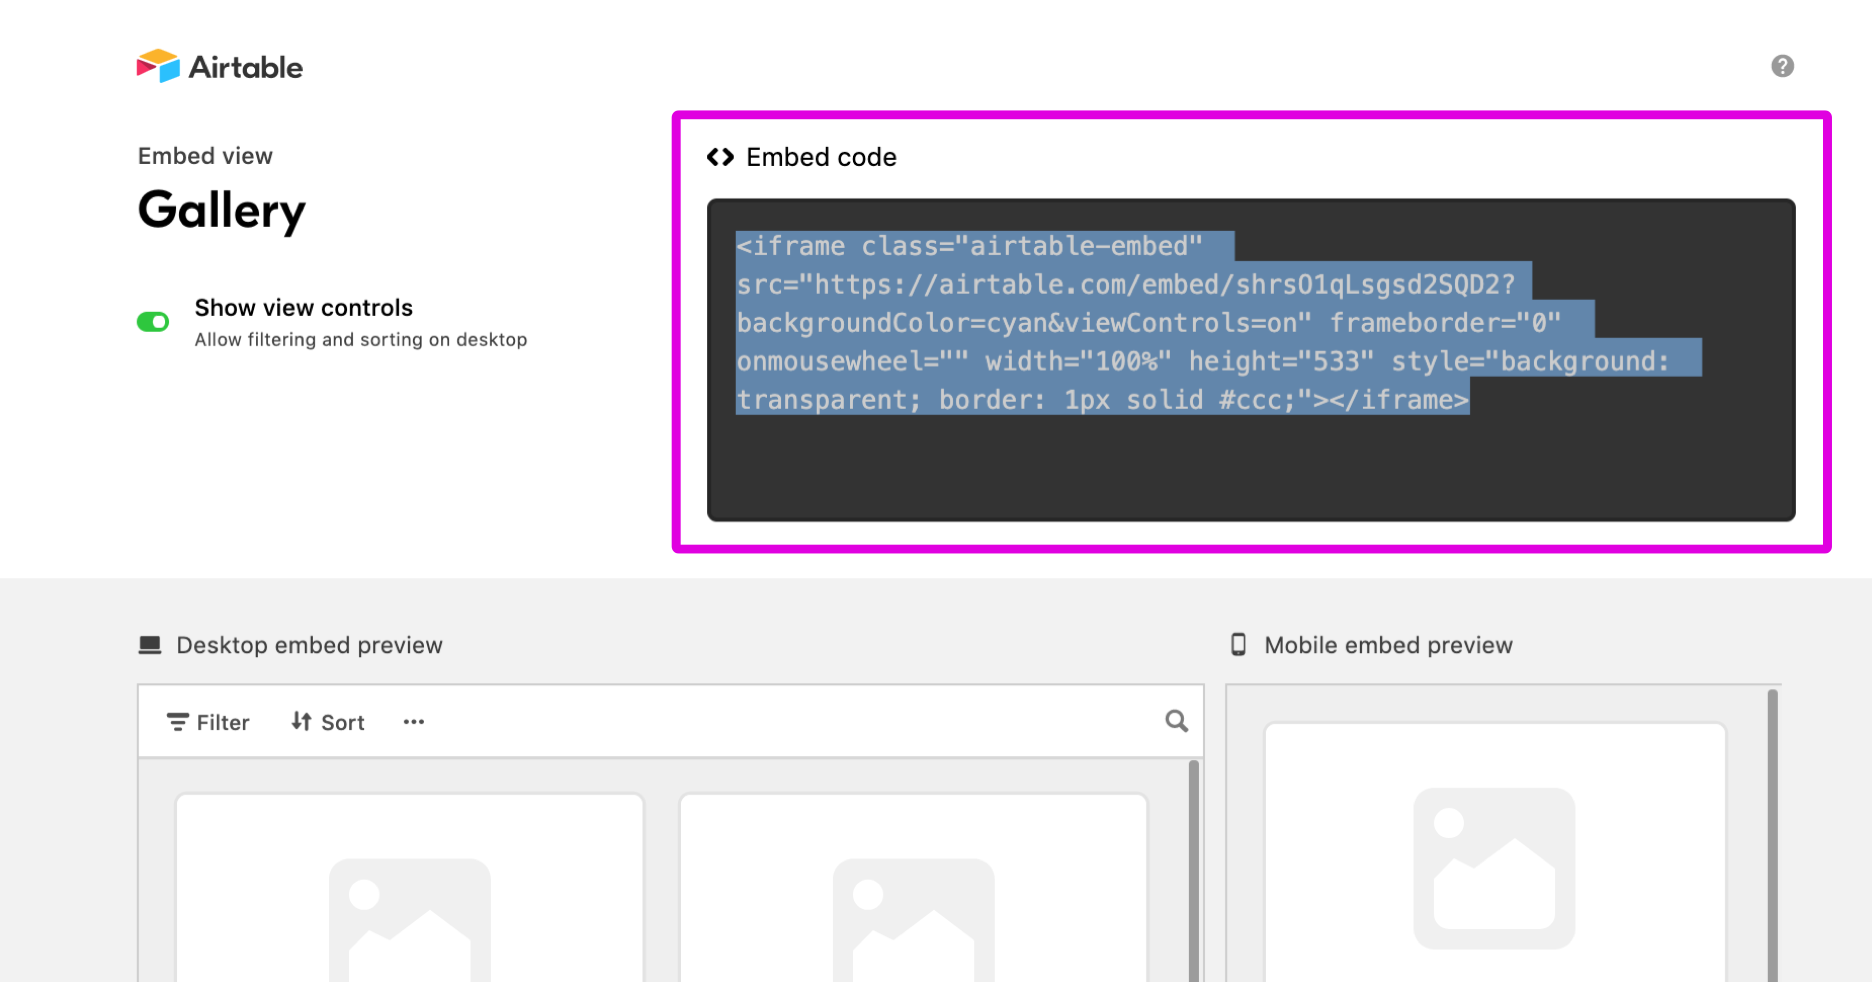
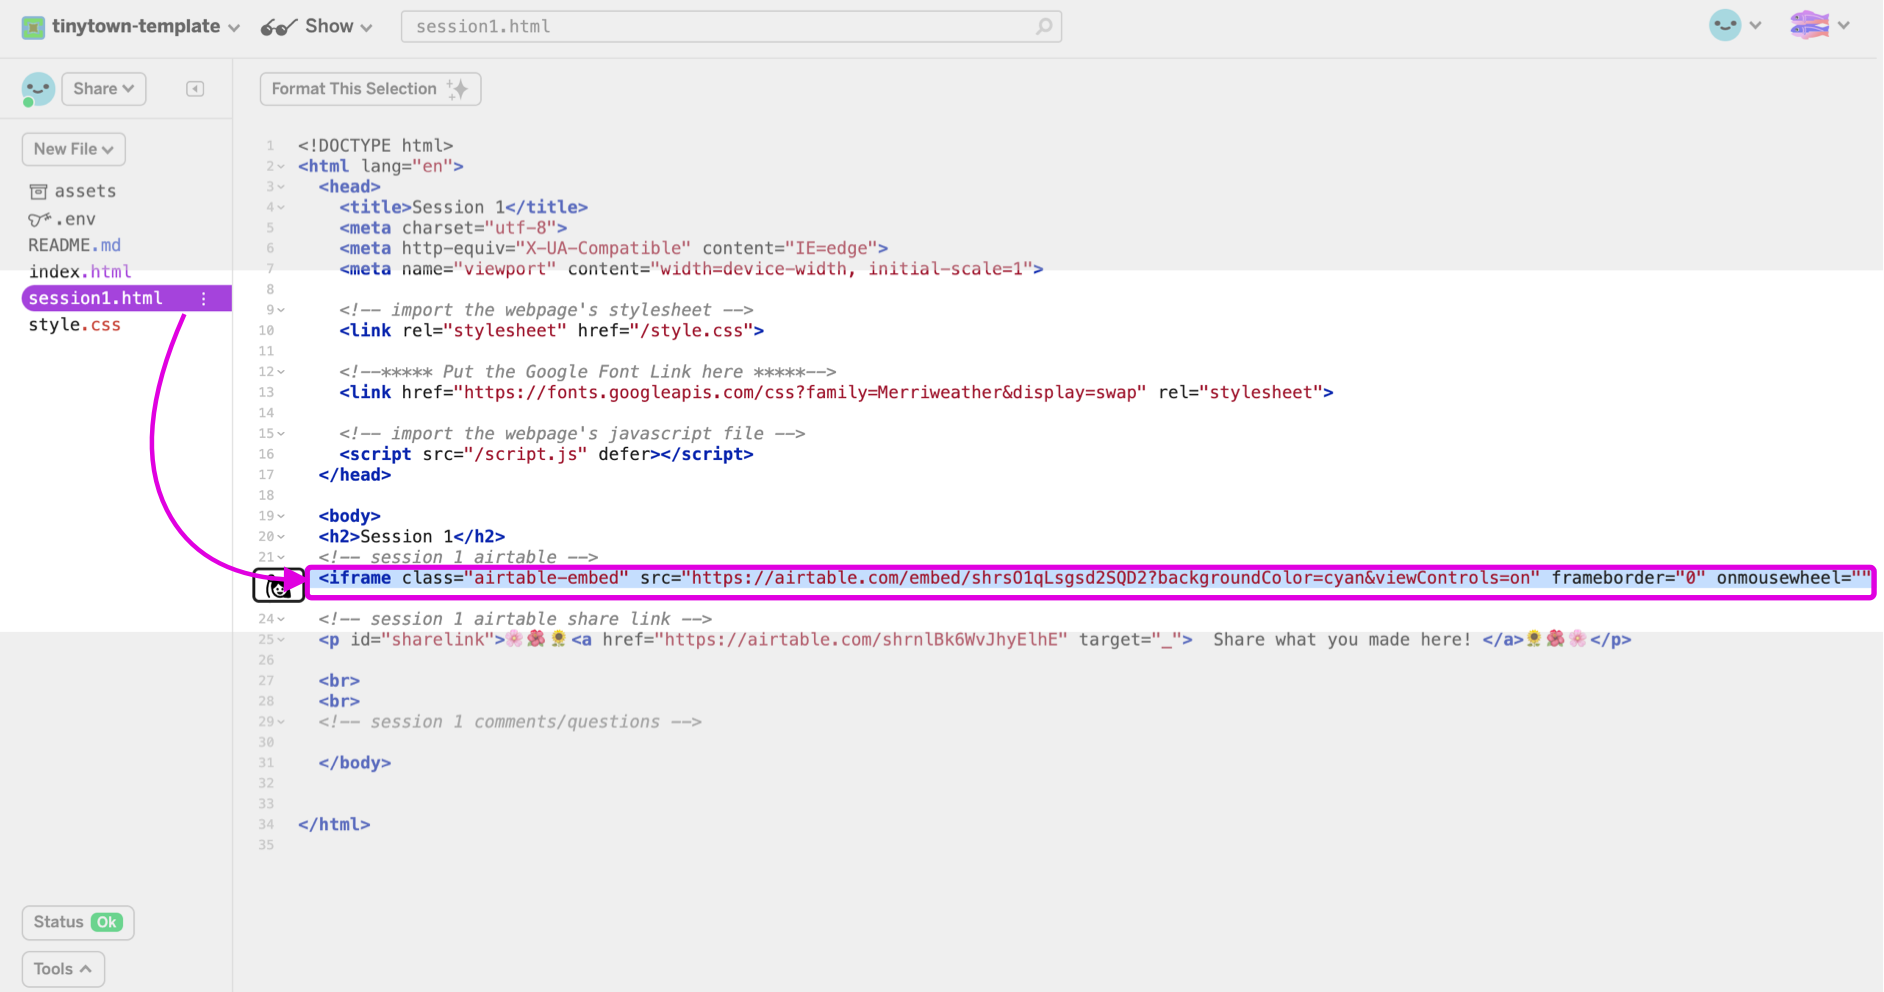
After creating a gallery view in your airtable base, find the “Share” link. This time, click “Embed this view on your site.” You’re doing this because we want to see the gallery in the Glitch app, not just a link to it. Once you have the embed link (it should start with 'iframe...") add it into session1.html in your Glitch app. Replace the entire line that starts with 'iframe class="airtable-embed"...' with yours. Now you're set with Airtable!
Creating a Riseup Pad Link
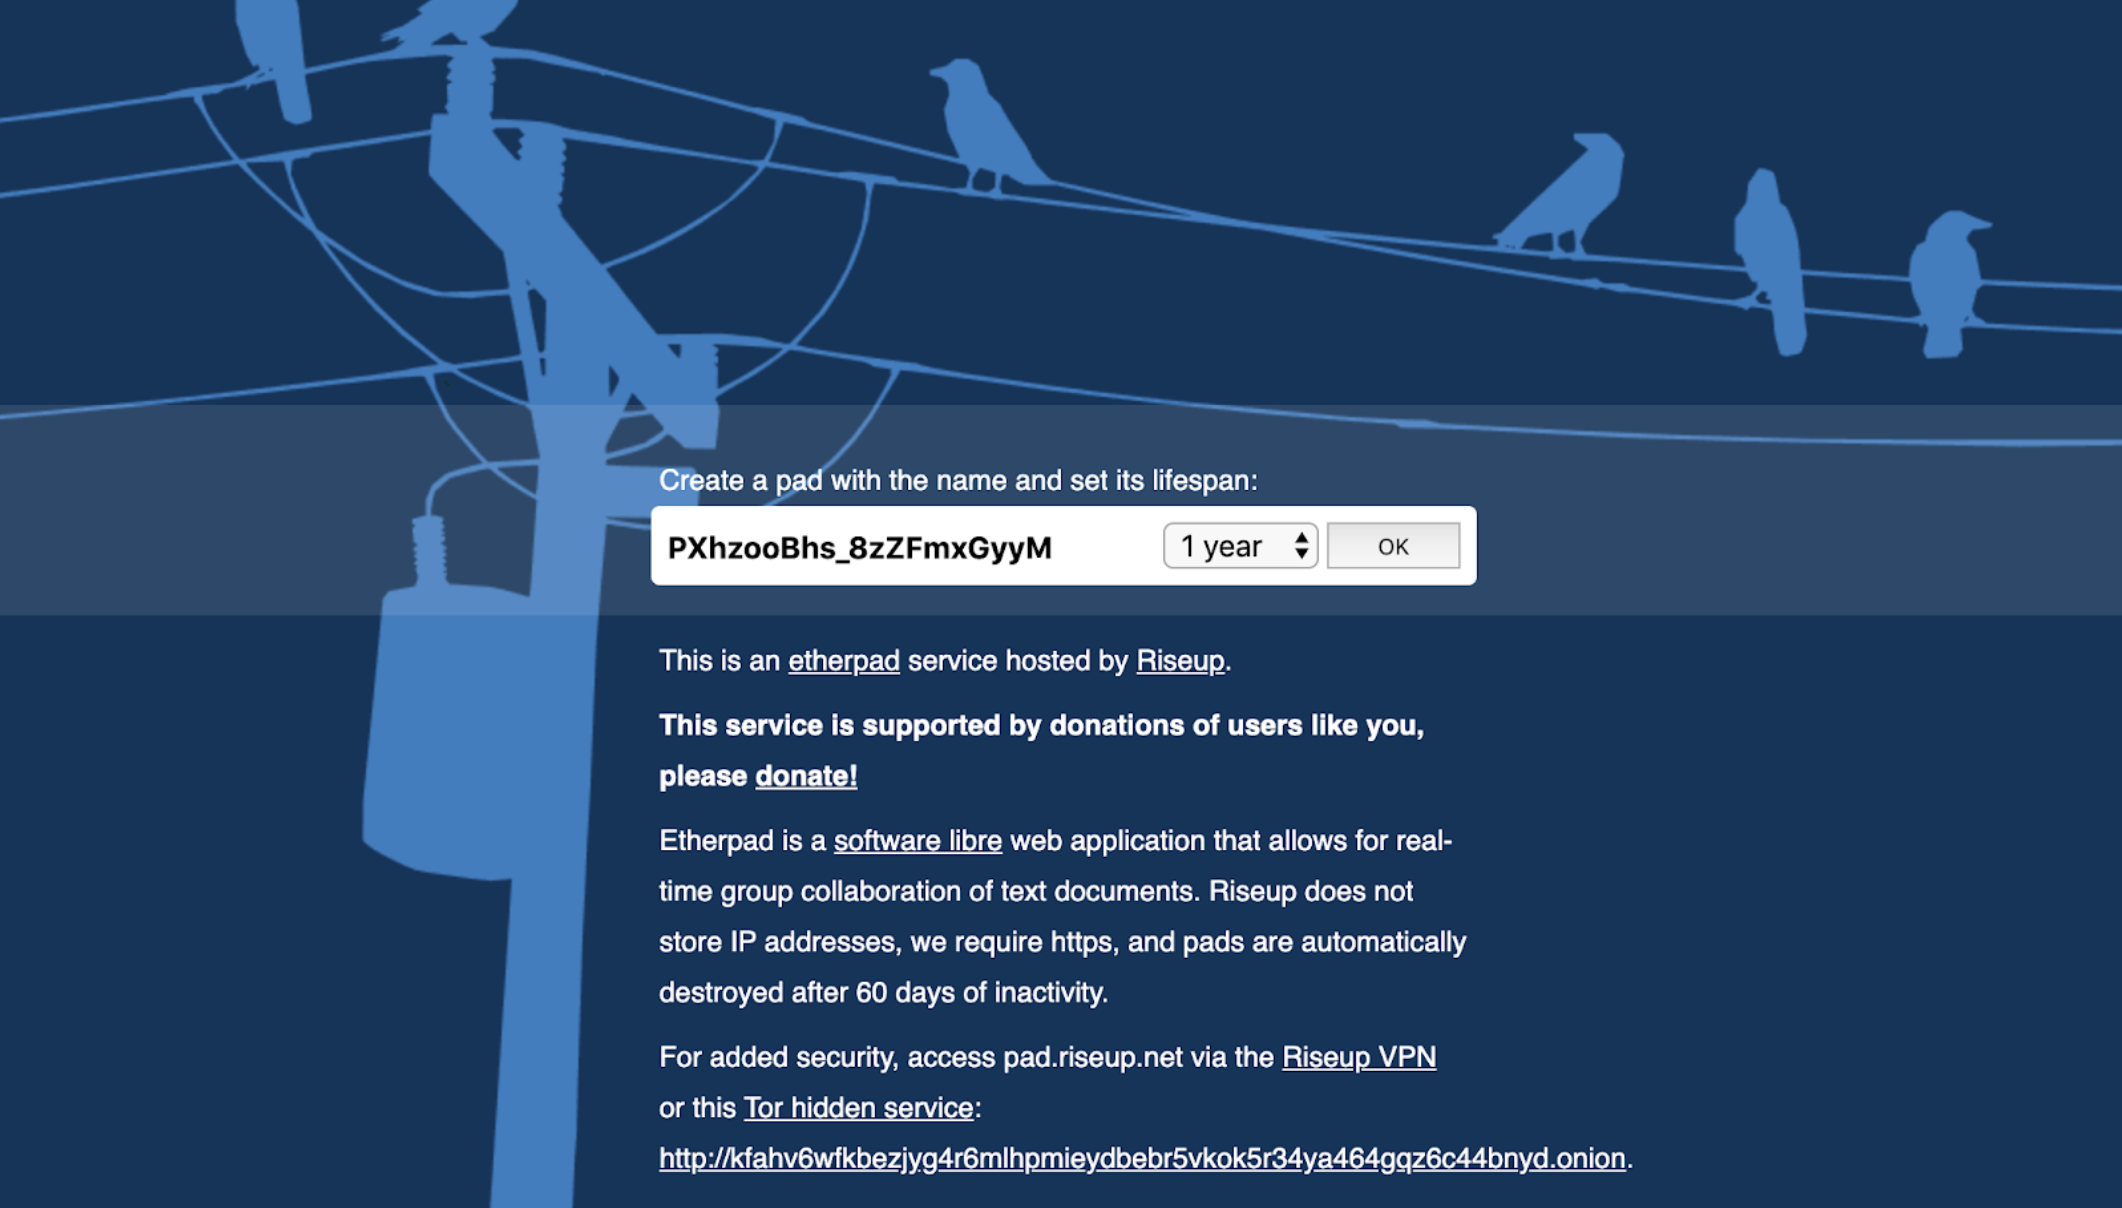
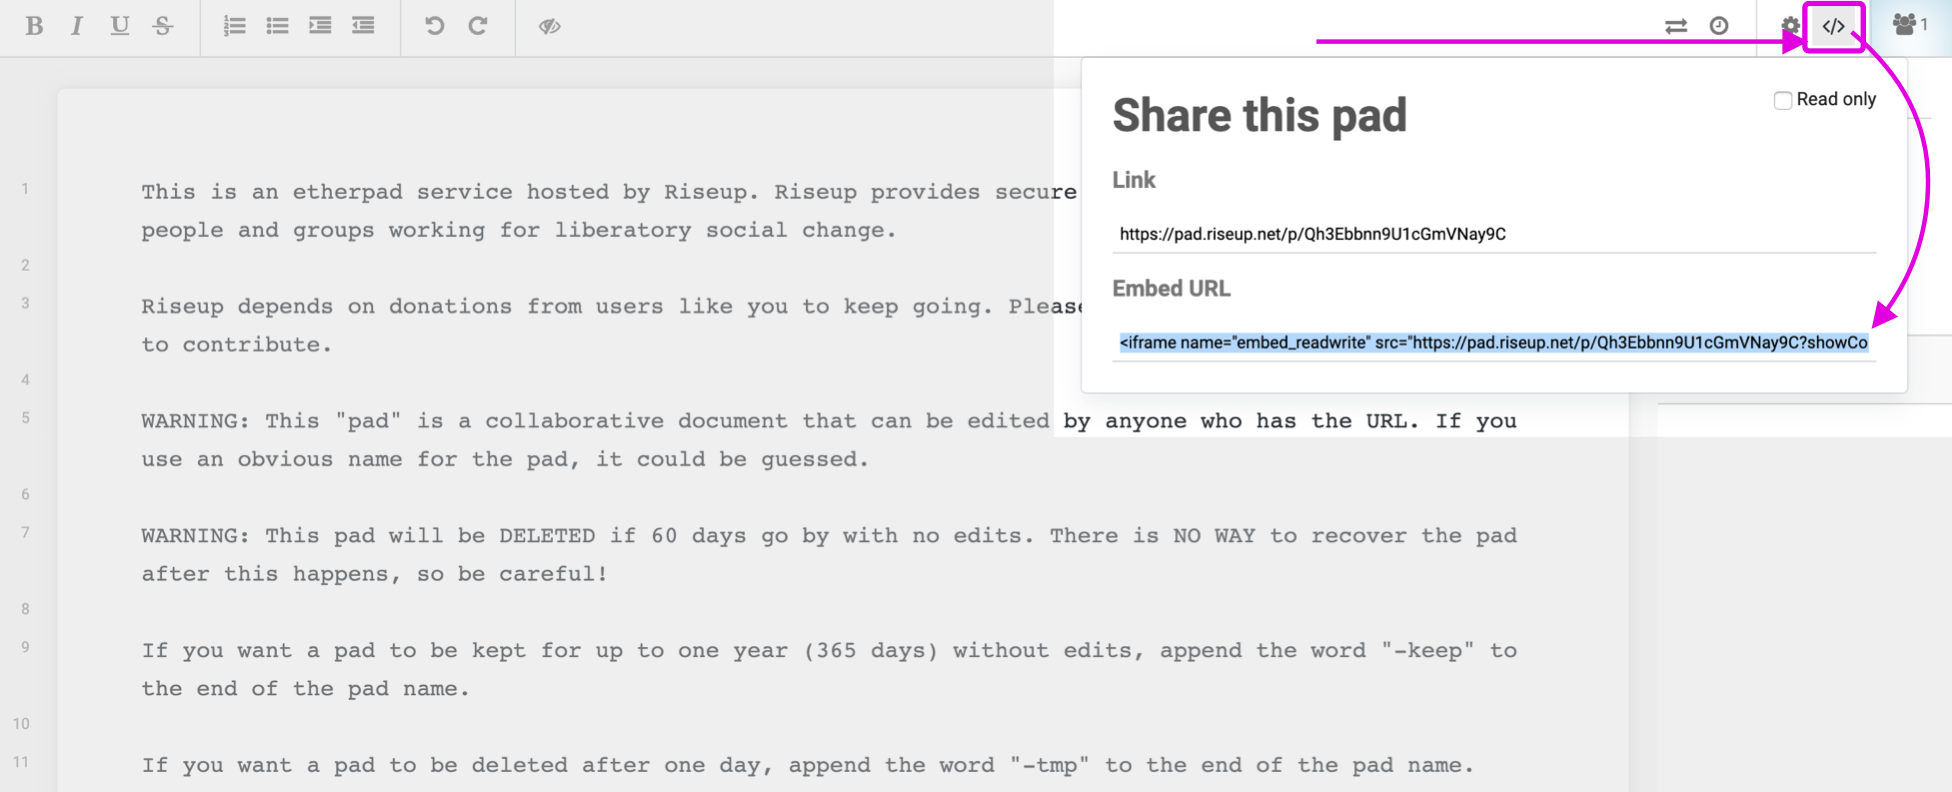
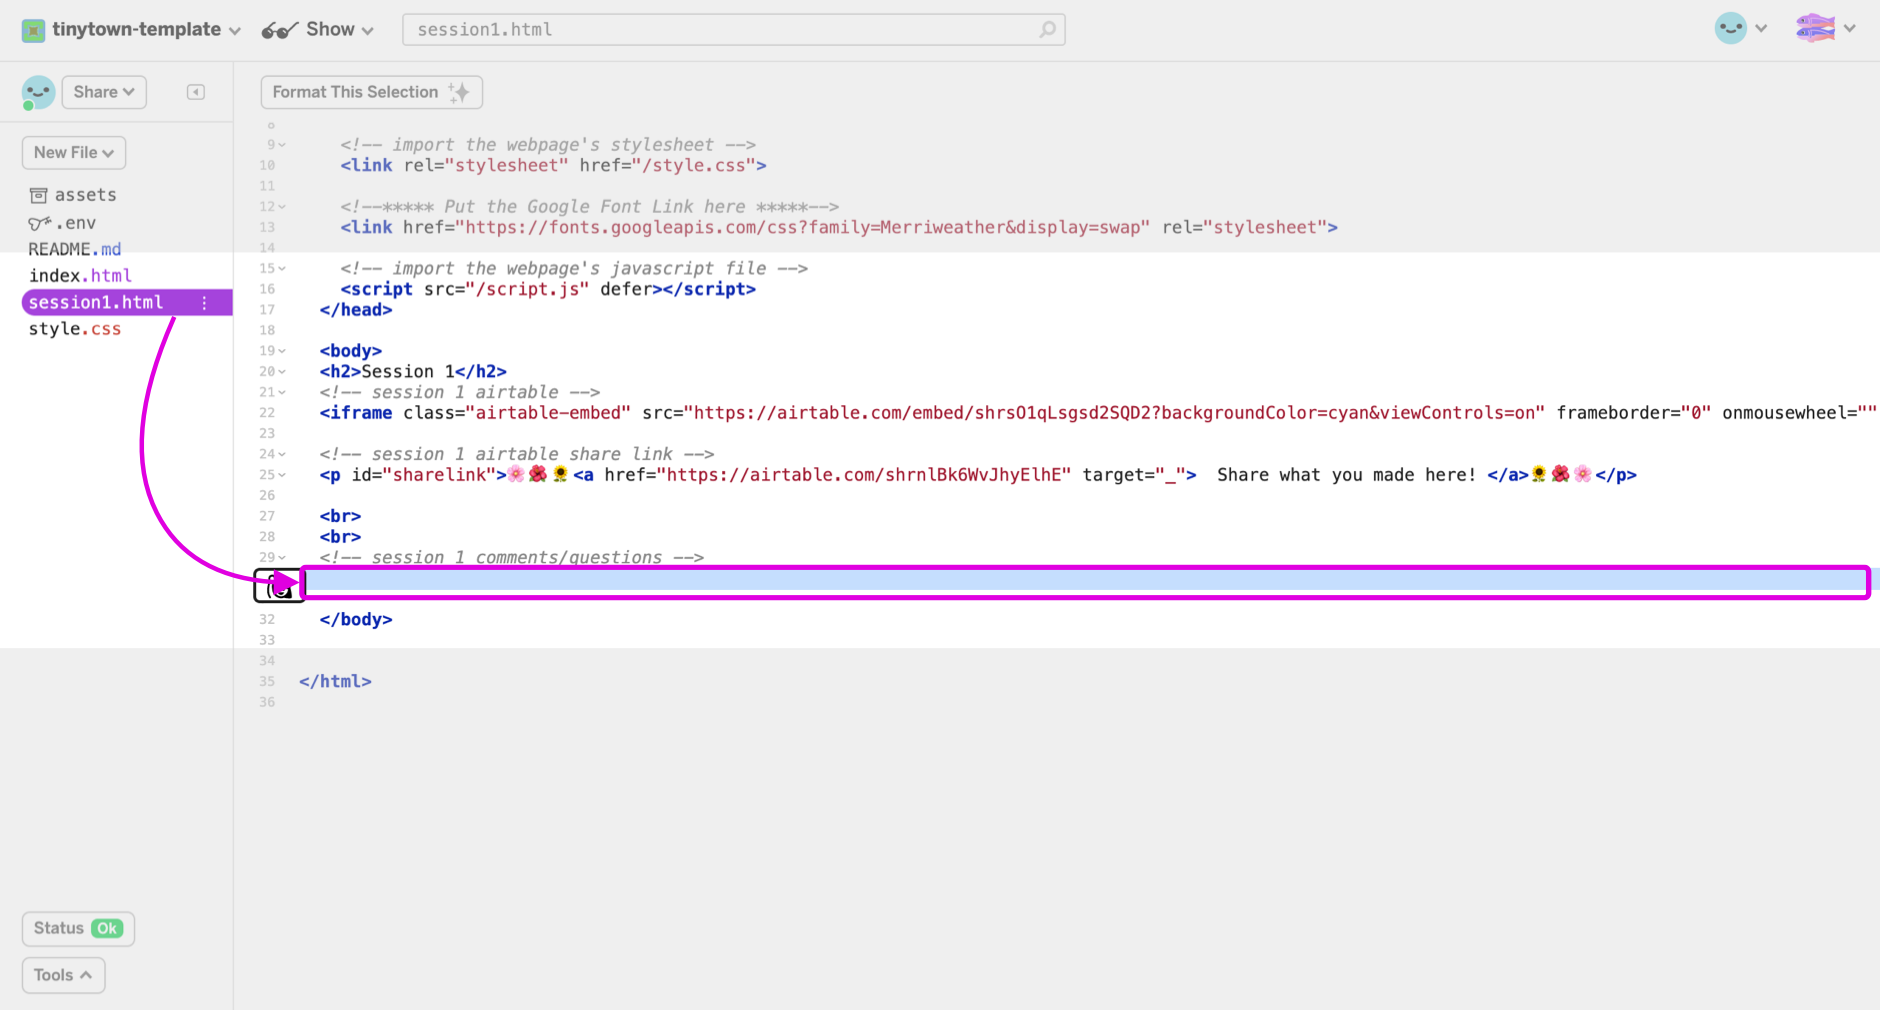
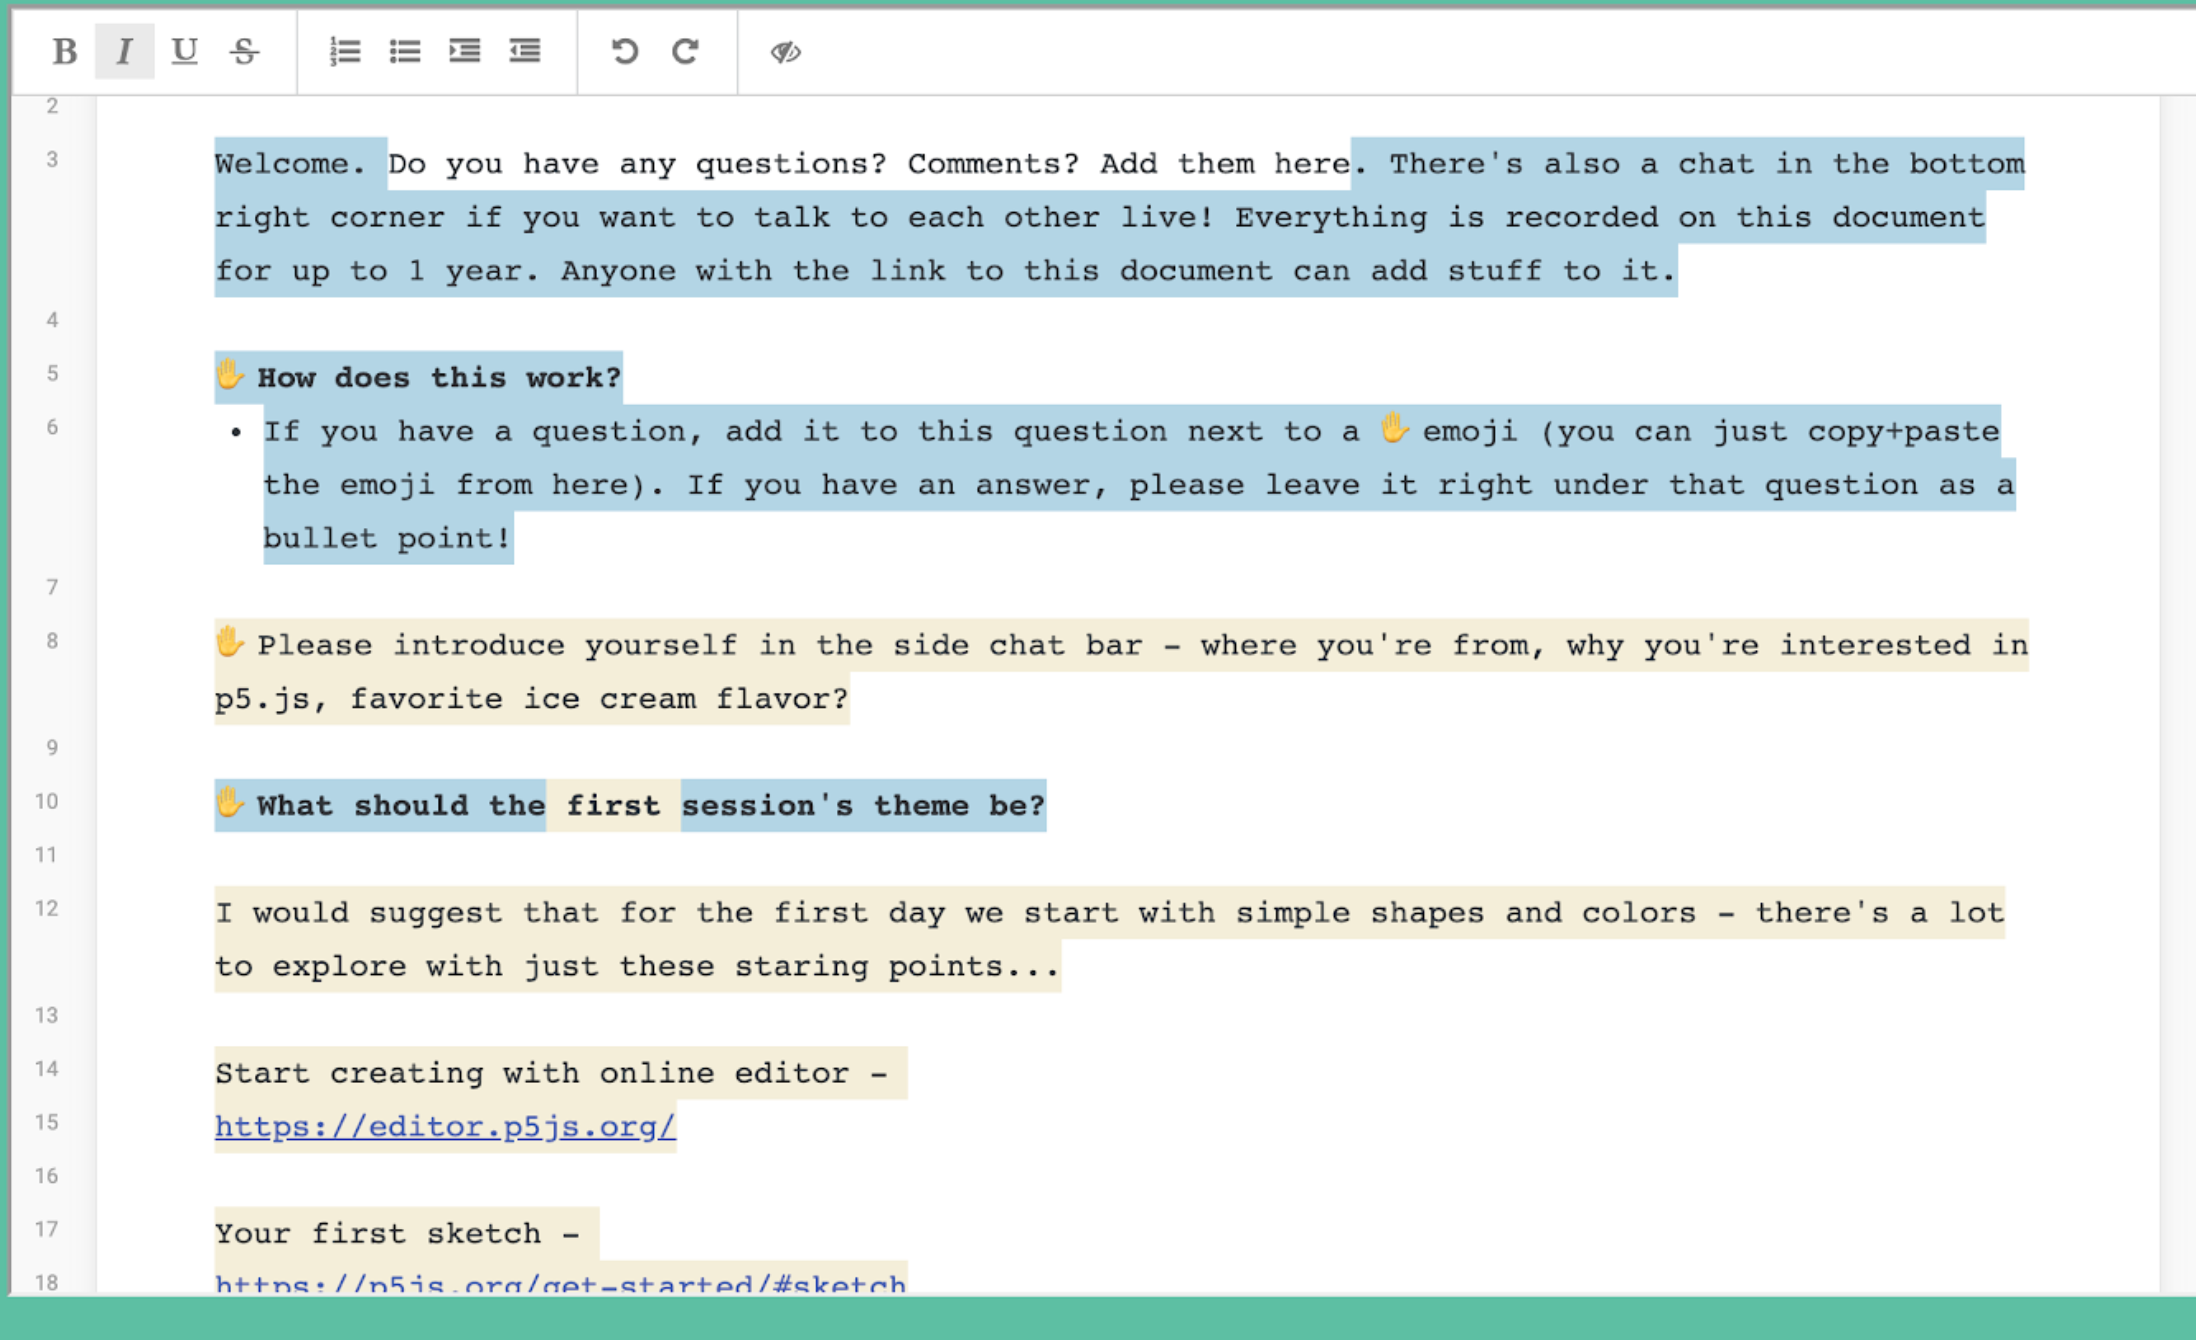
To create a Riseup pad link, go to this link here: https://pad.riseup.net/. You’ll be able to choose how long they’ll save your information for - we chose 1 year. Once you make your unique pad, find the embed link and copy it (located top right of the page). Once you have the embed link, go to your Glitch app and add it to session1.html. The template doesn't have an embedded link, so you can put your link after the '!-- session 1 comments/questions --' line. For Ryan’s P5.js learning group, we added some prompts and guidelines into our pad, which you can do as well. Now you’re all set up with Riseup Pad!
Adding More Sessions
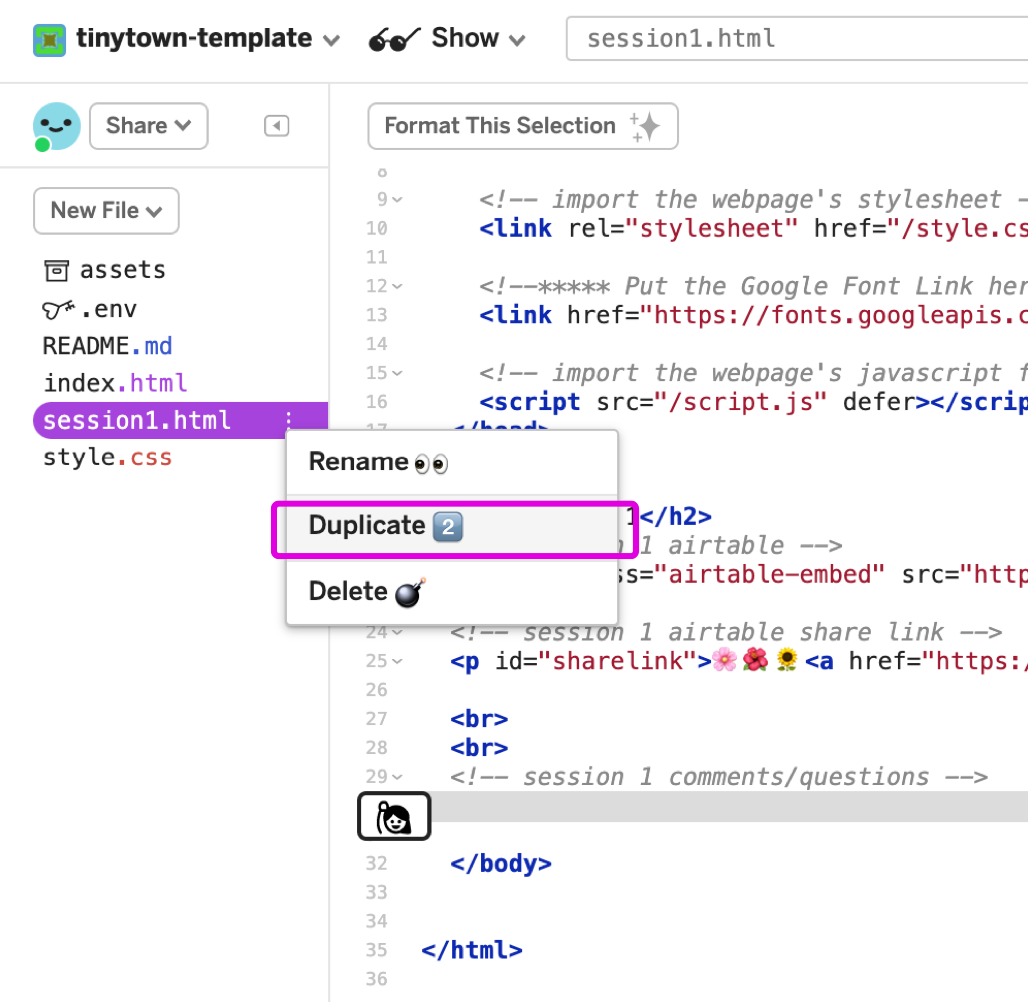
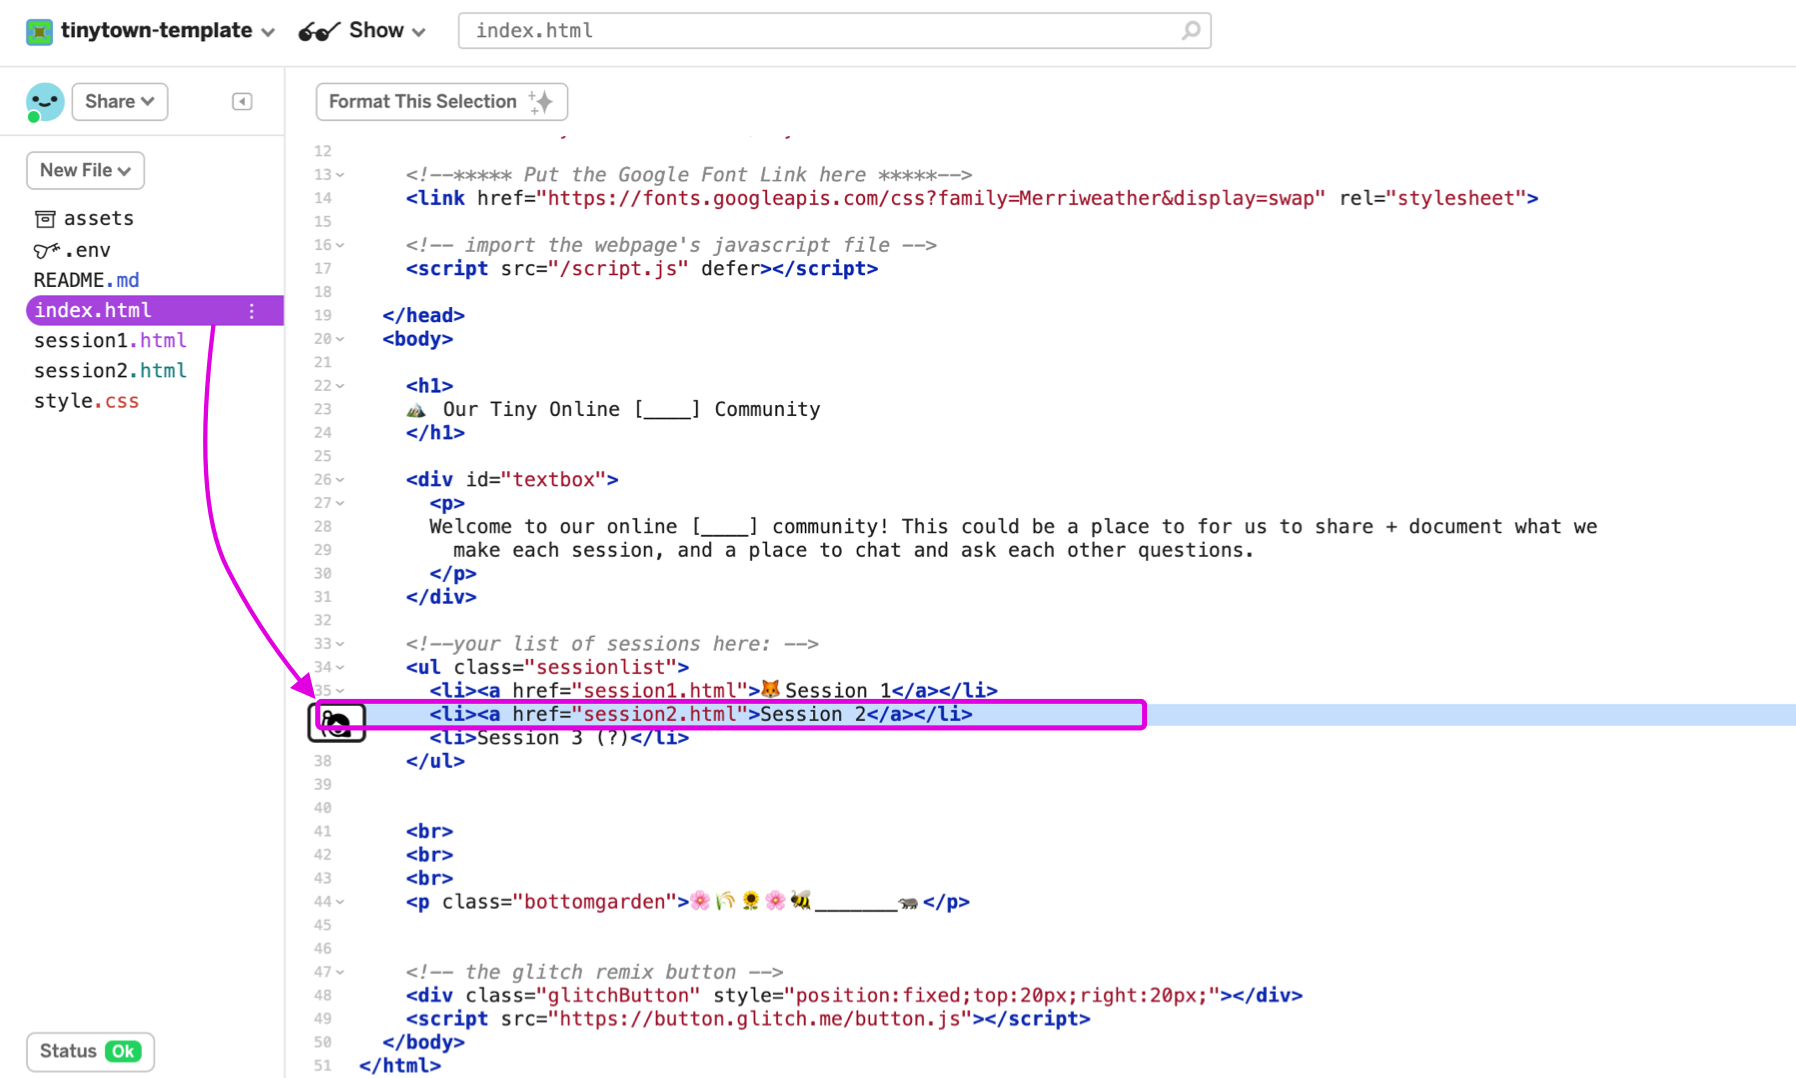
To add more sessions, just duplicate session1.html and rename it to something like “sesson2.html.” Then, go to index.html to add a link going to the session2.html page. You can see how session1.html is linked in index.html, and do the same thing with session2.html.
Taking It Further
Congratulations! Now you have a basic tiny online community Glitch app. While using this app for your learning groups, you can experiment with embedding different apps (not just Airtable or Riseup pad) to fit your needs. Let us know what you try!