Creating Your Own Java Project in Eclipse in Under 10 Minutes (For Beginners )
by emuhruru in Design > Software
439 Views, 1 Favorites, 0 Comments
Creating Your Own Java Project in Eclipse in Under 10 Minutes (For Beginners )

Eclipse is an extremely versatile and powerful IDE used by many Java developers. Whether you're an experienced developer or just starting, learning to work with Eclipse can significantly enhance your coding experience and productivity. By the end of this tutorial, you should have a fully optimized Eclipse and be ready to start your own Java project in this IDE.
Supplies
Step 1: Download Eclipse at https://eclipseide.org/ Make sure you are downloading the correct file for your computer system (Windows, iOS, etc.) and the latest version.
Step 2: Double-click the Eclipse icon to open the application
Choosing Your Workspace
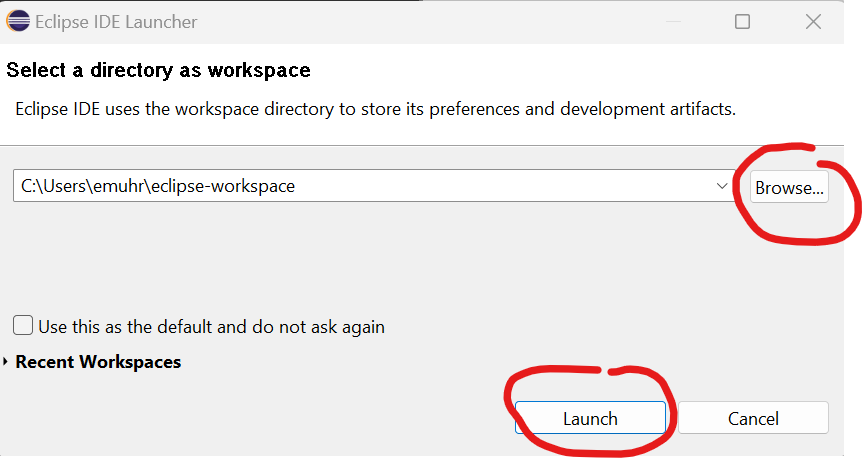
Step 3: After launching Eclipse, you must pick your workspace. Think of this as the place where all your Java projects will be saved to your computer.
Step 4: Click on the “Browse” button to choose a location for your workspace, as shown in image 1. If you're not sure which folder to choose, put it in the default location provided by Eclipse.
Configure Eclipse
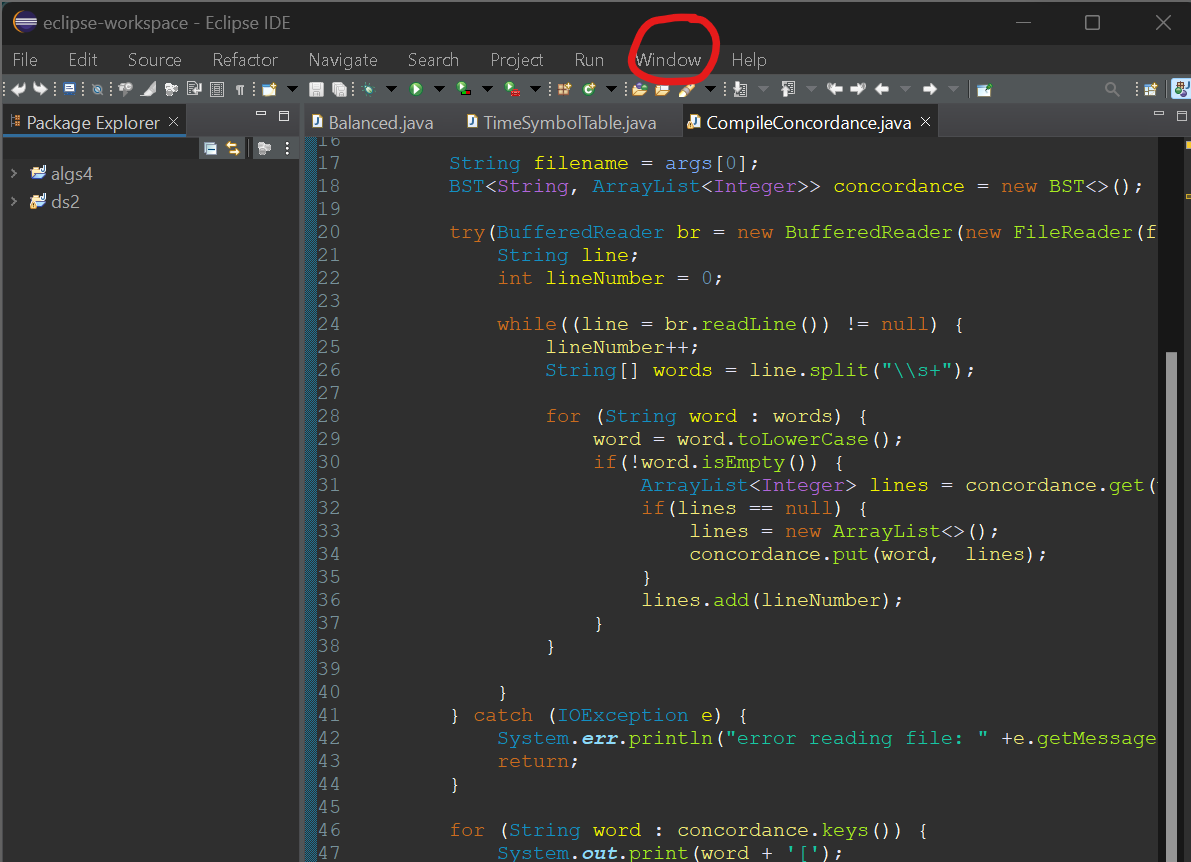
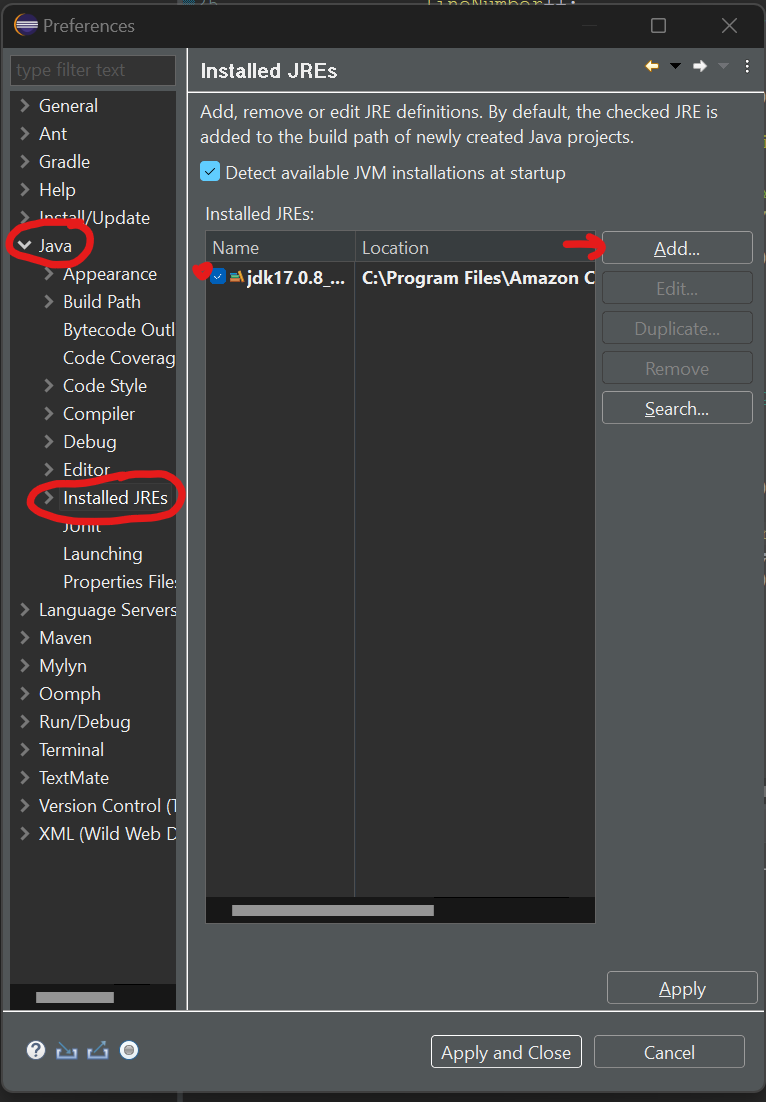
Step 5: Go to the Windows menu at the top of Eclipse and select preferences (see image 2)
Step 6: In the preference window, click on “java” in the left sidebar, as shown in image 3. Now, under Java, click on “Installed JREs.”
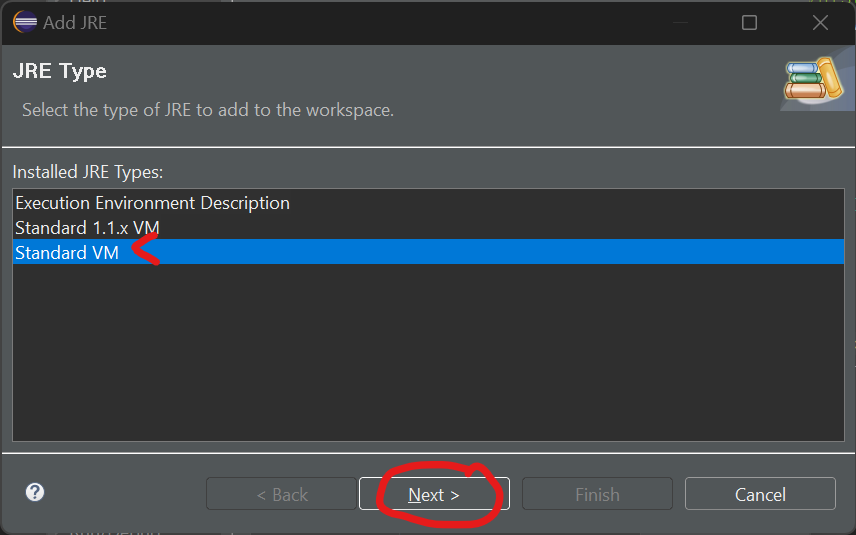
Step 7: If there are no Java installers listed, click “Add” and select “Standard VM” then click “Next”.
Step 8: Select “Java” and click “Finish”
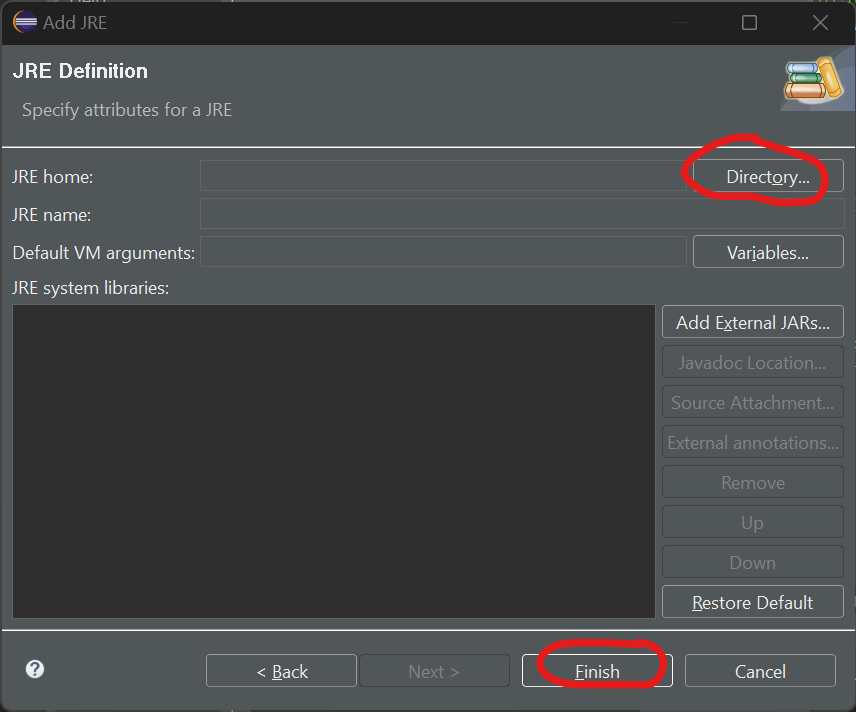
In the next window click the “Directory” button and navigate to where Java is installed on your system. Once you have selected the appropriate file press “finish” (see image 5).
the “Java” section in the preferences window. Click the “Compiler” sub-section to open the compiler settings. Ensure your “Compiler compliance level” matches the version of Java you are using as seen in image 6 (usually 17).
Step 10: Click “Apply and Close” to save all your settings.
Create a Java Project to Code In
Step 11: Now that your workspace is set up, you can finally start coding. To start your first Java project in Eclipse, go to File > New > Java Project (see image 7).
Step 12: Name your project
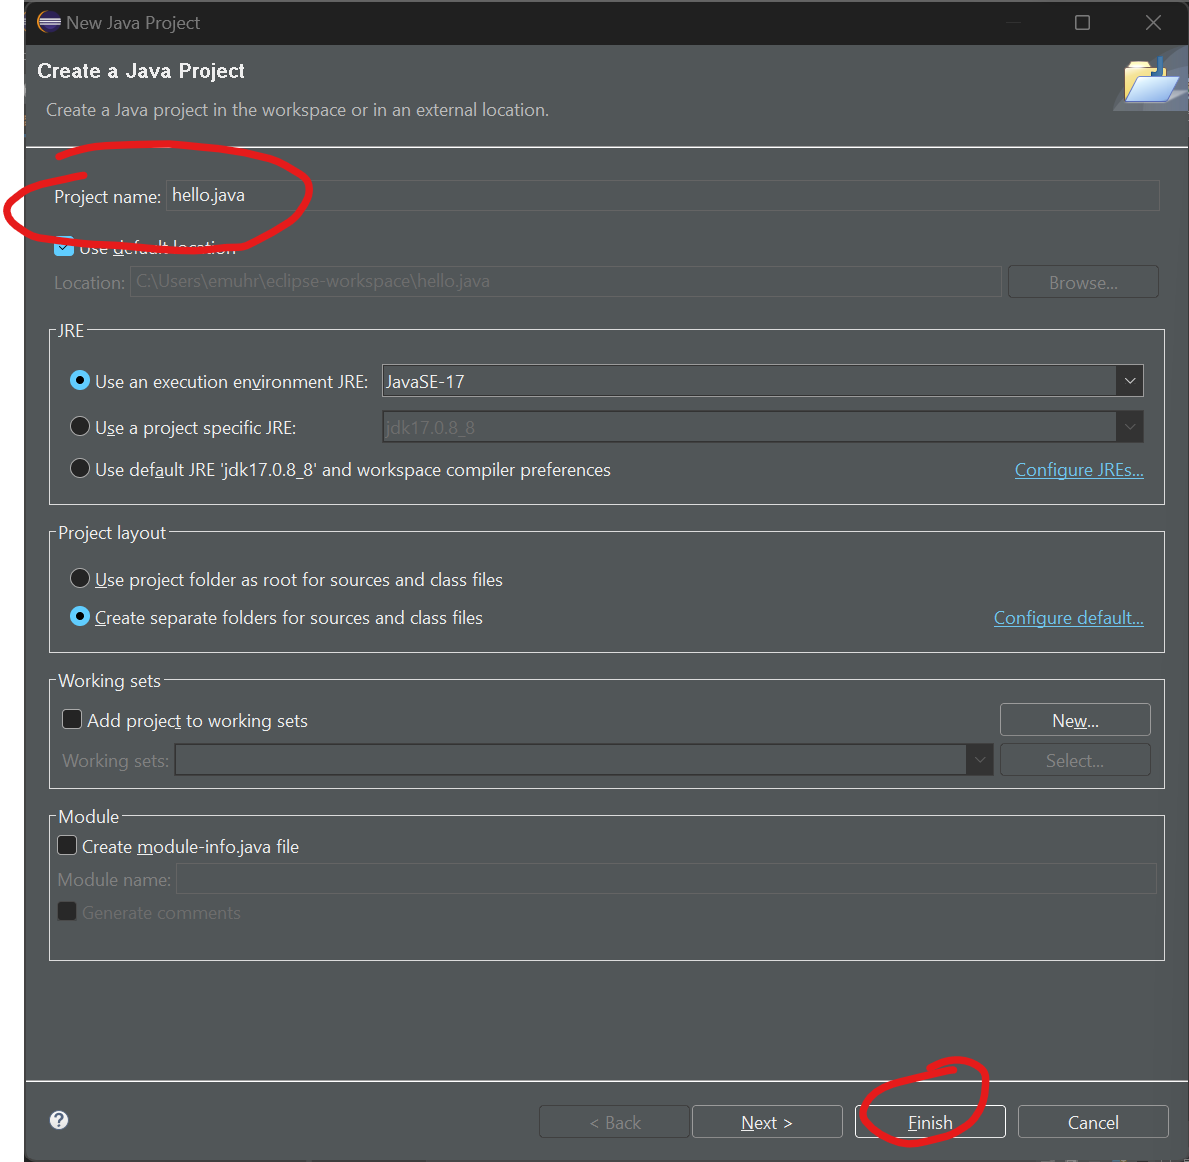
In the “New Java Project” window, give your project a name from the “Project name” box. You can keep all other settings Eclipse put in.
Step 13: Click “Finish” to create your project as shown in image 8. Eclipse will set up the basic structure and necessary folders for your code.
Step 14: Create a class to code in
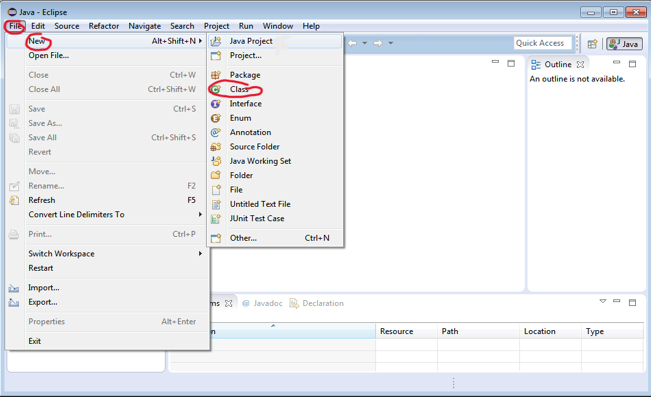
Under your new java project go to File > New > Class as seen in image 9. This will allow you to write in your project. After naming this class, Eclipse will set up the main file for you.
Conclusion
Congratulations! You now have a fully configured Eclipse ready for coding input. The class we created allows you to write and run your code. When you're ready to test your code, you can go to the top bar and click "Run" or press f5 on your computer. Remember to keep your eclipse installation up to date with the latest updates and plugins. This will ensure your eclipse stays bug free. If you ever encounter issues with your Eclipse project, make sure that your workspace directory is accessible and writable. Since Eclipse keeps your configurations and projects in the workspace directory, problems with the location or permissions of the direction may arise when creating your projects.
Enjoy Eclipse and happy coding!