Creating Windows Setup Installation Files (Setup.exe) Using ClickOnce Tool in Visual Studio
by xanthium-enterprises in Circuits > Microsoft
1013 Views, 0 Favorites, 0 Comments
Creating Windows Setup Installation Files (Setup.exe) Using ClickOnce Tool in Visual Studio
 using visual studio publish)
ClickOnce is a tool provided by the Microsoft Visual Studio to create installation files that can be user installable. It is primarily used for deploying .NET applications, including Windows Forms, WPF, and Console applications.

ClickOnce allows users to install and run applications with minimal effort, either from a web page, network share, or even directly from a CD/DVD or USB device.
CD/DVD are rarely used now a days but the tool maintains that option to refer to the physical media.
Here we will learn how to create installation media for your software project written in C# or Visual Basic.NET for the .NET Platform.
Supplies

Visual Studio Commuinty Edition IDE to create Windows Executable Setup file (Setup.exe)
Using the Publish Command to Create Windows Setup Files

To create executable files (setup.exe) that can be deployed on other people's computers, you can use the Publish option available in Visual Studio.
This feature is found under the Build menu and provides an easy way to generate deployment-ready packages for your application. When you select Publish from the Build menu,
Using this option, you can create a package that includes the executable file and all its dependencies, such as libraries and configuration files. The published output can be set to deploy in various locations, such as a local folder, a web server, or a network share,
On clicking Publish ,you will see below page

You can create a ClickOnce installation by Clicking on the ClickOnce button and Press Next.
Now we select the location at which our Setup files will be created
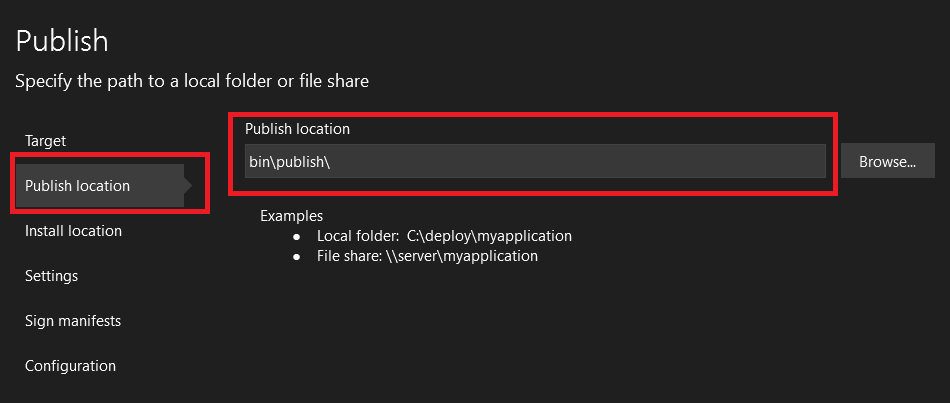
Select CD,DVD,USB as the option

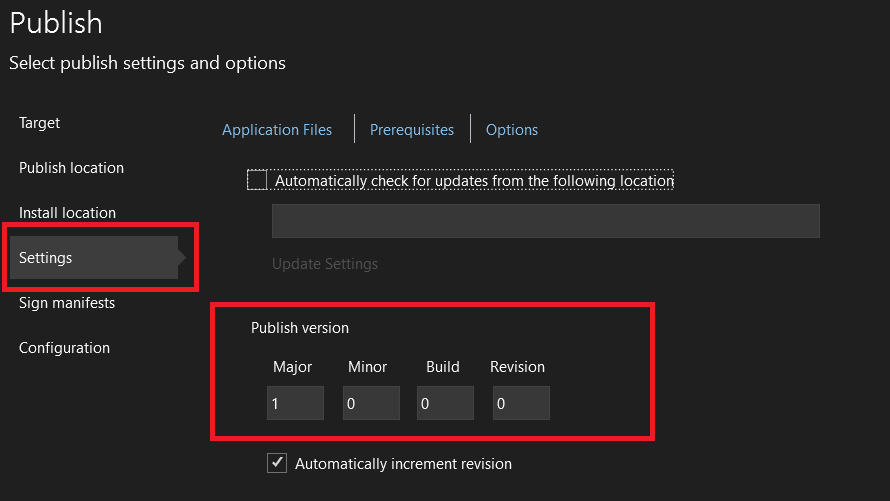
Select Version Number
Specify Project Configuration in Click Once Deployment

Now we have to provide what type of .NET Executable do we want to create and what sort of platform we have to target.
In the case of the type of the executable ,
We have two types.
- Framework Dependent Executable
- Self Contained Executable.
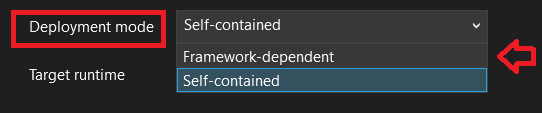
Framework Dependent Executable means that the executable relies on the .NET runtime being installed on the target machine in order to run. The generated executable only includes your project-specific dependencies and does not bundle the .NET runtime itself. This results in a smaller file size for the executable.
The key advantage of this approach is that it keeps the executable size relatively small, as it doesn't include the entire runtime. However, the downside is that if the correct version of the .NET runtime is not installed on the user's system, the application won't run, requiring the user to manually install the necessary .NET version.
Self-Contained Executable means that the executable file includes the necessary .NET runtime and libraries, along with your specific project dependencies. This ensures that the application can run independently of whether the correct version of the .NET runtime is installed on the target machine. In other words, the executable carries everything it needs to run, making it more portable and reducing the risk of compatibility issues.
The main benefit of this approach is that you don’t have to worry about whether the user has the right .NET version installed, as the application includes everything it requires. However, the downside is that the size of the executable becomes larger since it contains both your application and the .NET runtime and libraries, leading to a bulkier file.
Selecting the Processor Architecture

When publishing a .NET application, selecting the appropriate processor architecture (or platform target) is crucial to ensure the application runs on the correct hardware.
The processor architecture determines how the application will interact with the underlying system, specifically whether it will run on a 32-bit (x86), 64-bit (x64), or ARM architecture
- x86 (32-bit) - Select x86 if you need your application to run on older machines or systems that are limited to 32-bit architecture.
- x64 (64-bit) - Choose x64 if your application is designed for modern, high-performance systems and needs to handle large amounts of data or perform intensive tasks
- ARM - For targetting ARM based Computers like Raspberry Pi
- Portable. - Default option
Publishing Your Executable to Target

Once you have configured all the necessary parameters for your application, such as selecting the target runtime, processor architecture, and deployment method (self-contained or framework-dependent), you can proceed with publishing your executable.
To do so, simply press the Publish button in Visual Studio or the publishing interface you're using.
Once the Publish command had run its course, you can find the Windows Setup file inside your Publish folder.
More information about Creating standalone windows executables using Visual studio can be found here