Creating Sewing Holes in Leather
by MikaelaHolmes in Craft > Leather
44103 Views, 42 Favorites, 0 Comments
Creating Sewing Holes in Leather

When you hand sew leather, you almost always punch sewing holes in the leather before you sew. This makes sewing through thick leather much easier and ensures that you create evenly spaced stitches. There are a few different methods for marking sewing lines and punching sewing holes. I'll demonstrate the options and then show you how to apply them to the bag we're creating.
In this lesson I'll be using:

Marking Sewing Lines With a Stitch Groover

Before you actually punch sewing holes in your leather you have to give yourself a guideline to show where the sewing holes are going to go. There are a few methods for doing this, and different methods are better for different kinds of leather.
The Adjustable Stitching Groover is a great tool for marking sewing lines when you are working with leather that is fairly stiff. This tool is designed with one tip that creates a groove in the leather, and a parallel tip that rests on the edge of the leather as you mark, making sure your sewing line is always offset an even distance.
The stitching groover has two adjustable parts. Loosening the wheel at the base of the metal shaft lets you move the silver crossbar and adjust the position of the parallel tip in relation to the grooving tip so you can mark sewing lines at different distances from the edge of the leather.
Using a tiny allen wrench on the screw in the head of the groover lets you swap out the blunt grooving tip for a tip with a small gouging blade that creates a deeper groove. I'm using this tip in the video above.


The stitching groover is especially good for marking sewing lines on curved edges that might be hard to mark neatly any other way. When using the stitching groover, try to make each line with a single smooth sweeping motion. Stopping and starting has a tendency to create lines that are messy or uneven.

When you are using very thick leather you sometimes want an even deeper groove to contain your stitches. This can look nice, and also help protect the stitches from wear. To get a deeper groove like this, you can use your adjustable v-gouge to go over the line you've made with the stitching groover.
Marking Sewing Lines With a Ruler and an Awl

When you are working with any leather that is fairly pliable, like the leather we are using for our bag, I think the best method for marking sewing lines is to simply use a clear ruler and an awl.
To do this, take the clear ruler and and place it over your leather so it defines a line an even distance from the edge of the leather, in this case I am marking a sewing line a 1/8" in from the edge. Run an awl along the edge of the ruler to mark a line on the leather. At curves, you will have to slowly rotate your ruler around the curve as you mark, maintaining an even distance from the edge of the leather.


Punching Sewing Holes With an Awl

There are two main ways to punch sewing holes in leather, with an awl, or with a stitching chisel.
To punch holes with an awl, first you need to mark evenly spaced hole placement with an overstitch wheel. You can choose different stitch spacing by changing the head on your overstitch wheel (if you have one with interchangeable heads). Stitch spacing is a matter of both aesthetics and practicality. Smaller stitches (more closely spaced holes) are stronger, but will take longer to punch and sew. I usually choose my stitch length proportionally, using smaller stitches on smaller projects and larger stitches on larger projects.

Once you've chosen a spacing head for your overstitch wheel, run the wheel along the sewing line marks, pressing down to create a dotted line with the teeth of the wheel.


Now use your awl and mallet to punch a hole at each of these marks made by the overstitch wheel. Hold your awl straight up and down, and hit it gently with your mallet. Punch over a poundo board or other soft surface so you don't damage the tip of the awl. This process can be a bit tedious, but it allows you to create smaller holes than you can with the stitching chisel, and punch through tougher leather. You can also create different shaped holes by using different awl attachments.


Punching Sewing Holes With the Stitching Chisel

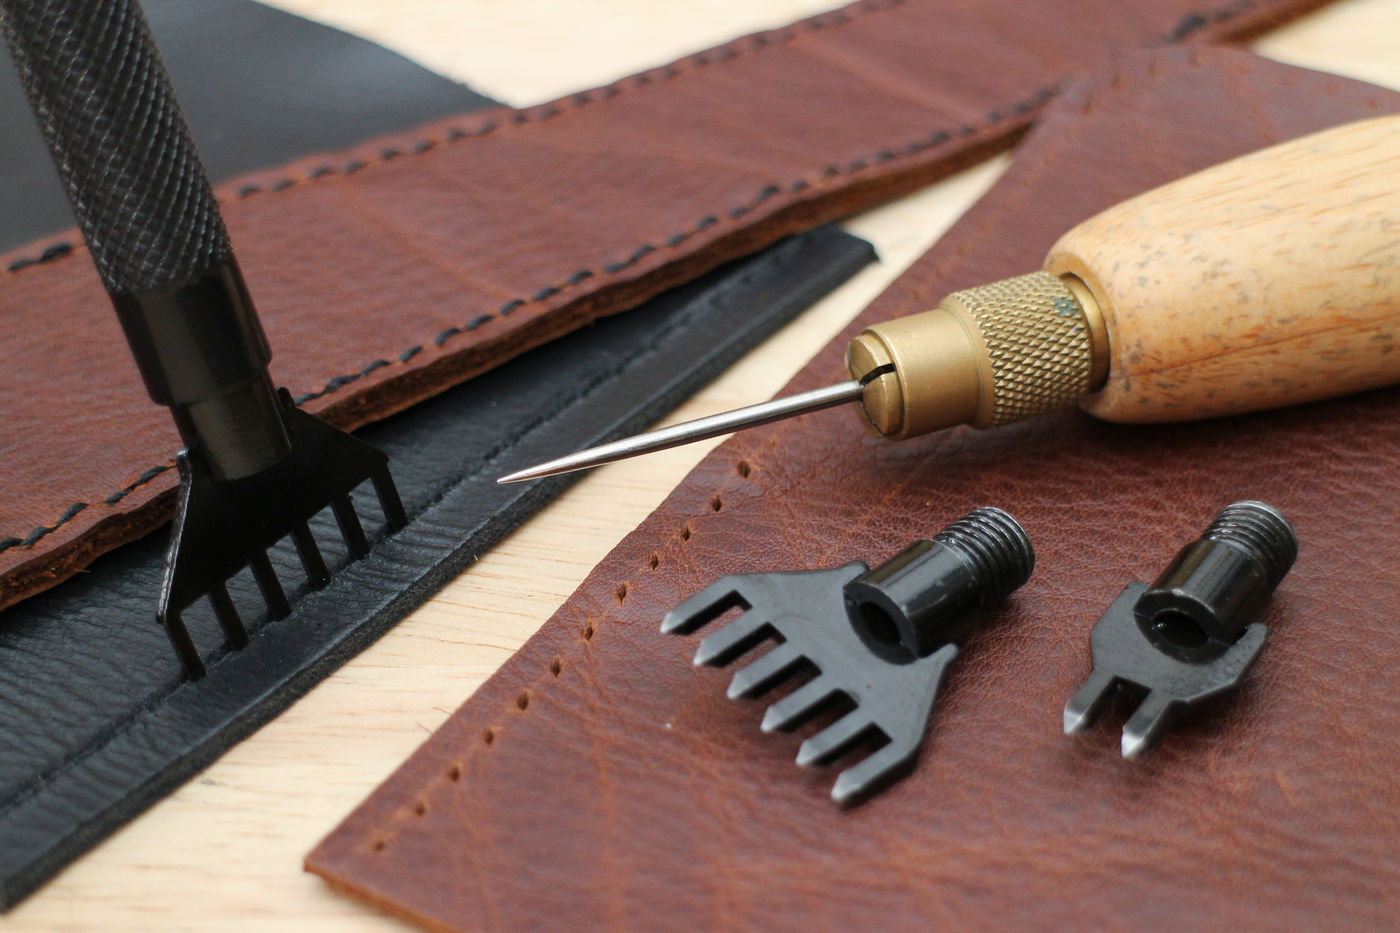
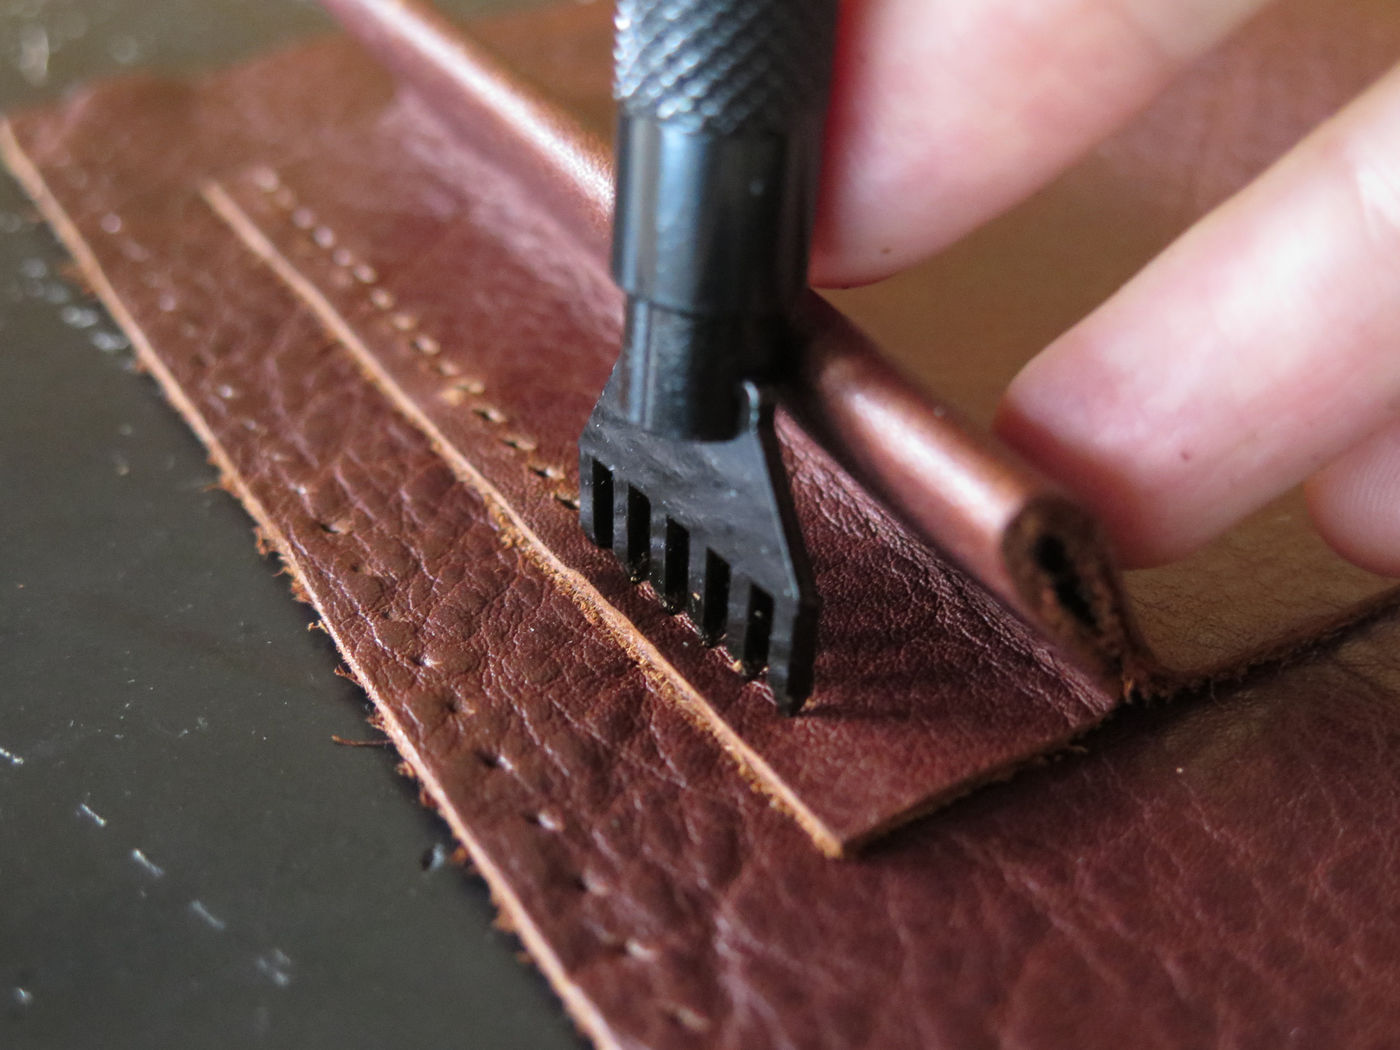
The stitching chisel is a more efficient way to create sewing holes because you can punch a few at once. You can also skip the step of marking with the overstitch wheel because the stitching chisel automatically creates evenly spaced holes. Stitching chisels also come with different prong spacing to create smaller and larger stitches. I like the set I have because it comes with three differently spaced sets of prongs.

You make holes with the stitching chisel the same way you would with an awl, by punching on top of a punching surface with a mallet. Follow the sewing lines you marked, and always put the first prong of the chisel in the last hole of the previous punch to maintain even spacing as you move the punch forward. Switching to heads with smaller numbers of prongs will allow you to maneuver around curves.


Sewing Holes Quiz
{
    "id": "quiz-1",
    "question": "An adjustable stitching groover works best on:",
    "answers": [
        {
            "title": "flexible leather",
            "correct": false
        },
        {
            "title": "stiff leather",
            "correct": true
        },
	{
            "title": "stamped leather",
            "correct": false
        }
    ],
    "correctNotice": "Yes!",
    "incorrectNotice": "Sorry, that's not right.  Try again!"
}
{
    "id": "quiz-2",
    "question": "To create sewing holes with an awl, first mark hole placement with:",
    "answers": [
        {
            "title": "an overstitch wheel",
            "correct": true
        },
        {
            "title": "a stitching chisel",
            "correct": false
        },
	{
            "title": "a stitch witch",
            "correct": false
        }
    ],
    "correctNotice": "Right!",
    "incorrectNotice": "Nope, try again."
}
{
    "id": "quiz-3",
    "question": "To punch holes around curves with a stitching chisel:",
    "answers": [
        {
            "title": "switch to an awl",
            "correct": false
        },
        {
            "title": "switch to a punch with more tightly spaced prongs",
            "correct": false
        },
	{
            "title": "switch to a punch with fewer prongs",
            "correct": true
        }
    ],
    "correctNotice": "You are correct!",
    "incorrectNotice": "Nope. Try again. "
}
Punch Sewing Holes in Your Bag Pieces

Now it's time to apply the skills you just learned to the bag we're creating. First refer back to your paper pattern to see where to mark sewing lines on your leather pieces. I've marked all the sewing lines on the pattern with dotted lines. You should have marked the end of each of these lines with your awl when you traced your pattern, but it's always good to double check.
Next, choose one of the options I've shown you for punching sewing holes, and use this method to create sewing holes in your leather. Always start your first hole at least 1/8" in from the edge of your leather. Also, when you are punching holes in pattern pieces that are going to be sewn together, make sure you are starting your line of holes at the same position on each piece so they will line up correctly when you sew. I often use a piece I have already punched to mark the correct starting point for holes on the corresponding piece.


Sometimes to ensure that sewing holes line up precisely, it is better to punch through both layers together after attaching them with glue or tape. I'll show you how to do this on your front pocket after we learn about leather adhesives in the next lesson, so don't punch the pocket piece yet, and only punch the outer seam holes on the front of the pouch, as you can see below.

Once again, if you are making the fringed variation of the bag, refer to the end of the lesson on Creating Fringe for a few additional punching instructions.
What We Learned

So, right now you might be thinking that punching sewing holes is a bit time consuming, but when we sew our project together, you'll see that having these holes in place makes the actual job of sewing leather fairly straightforward. Now that everything is punched, it should line up just right when you sew it all together! Also, the tools I've shown you, especially the stitching chisels, really help streamline the whole process of making holes, so I highly recommend having a good set.
Before we move on to sewing, I'm going to show you one more set of tools that will help a lot in leather construction: adhesives. In the next lesson we'll talk about the different kinds, and how they can help you with punching and sewing.