Creating Nighttime Photos
by KathyTackettPhoto in Craft > Photography
23829 Views, 206 Favorites, 0 Comments
Creating Nighttime Photos
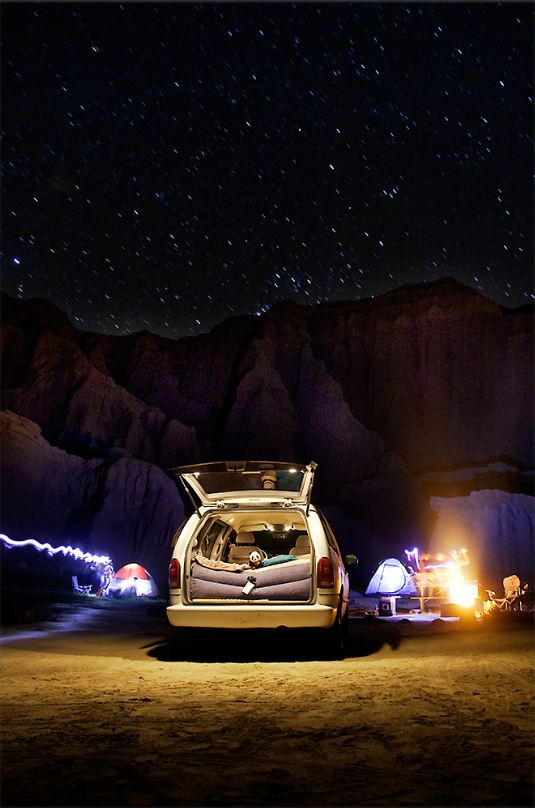
Ever wonder how photographers create perfect exposures in nighttime photos without losing details in the sky? Read on to find out how they do it!
Supplies
Supplies
- camera
- tripod
- cable release
- flashlight
- Photoshop (or similar editing program)
Exposing
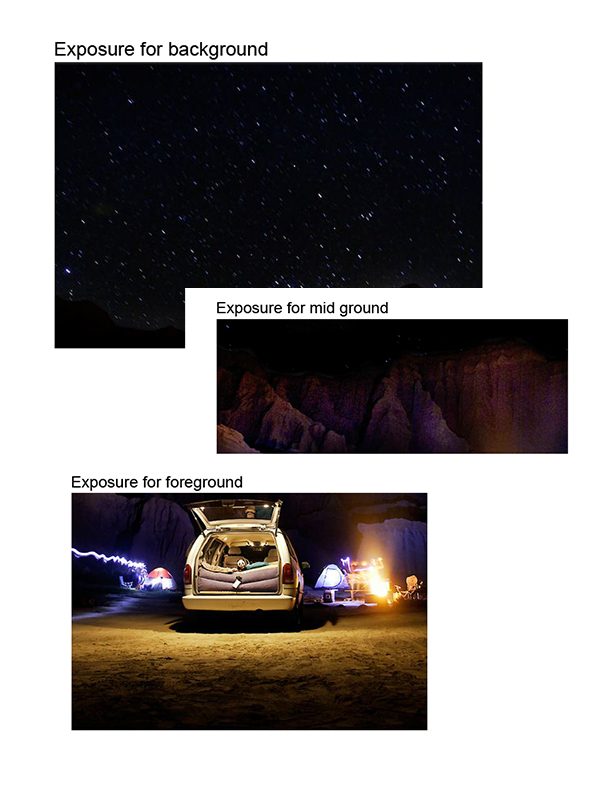
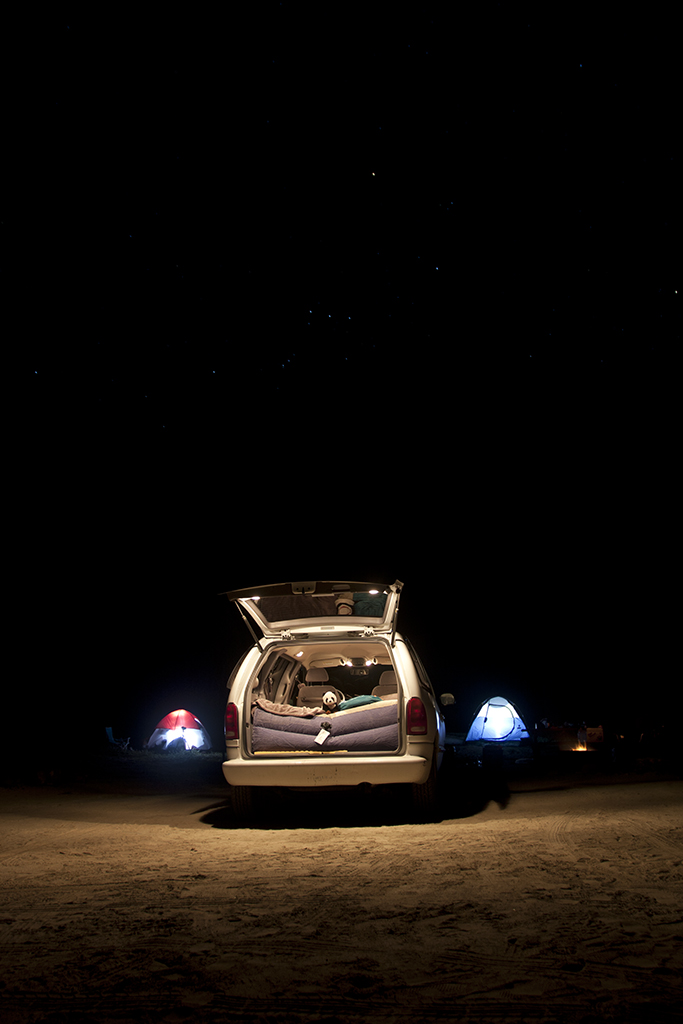
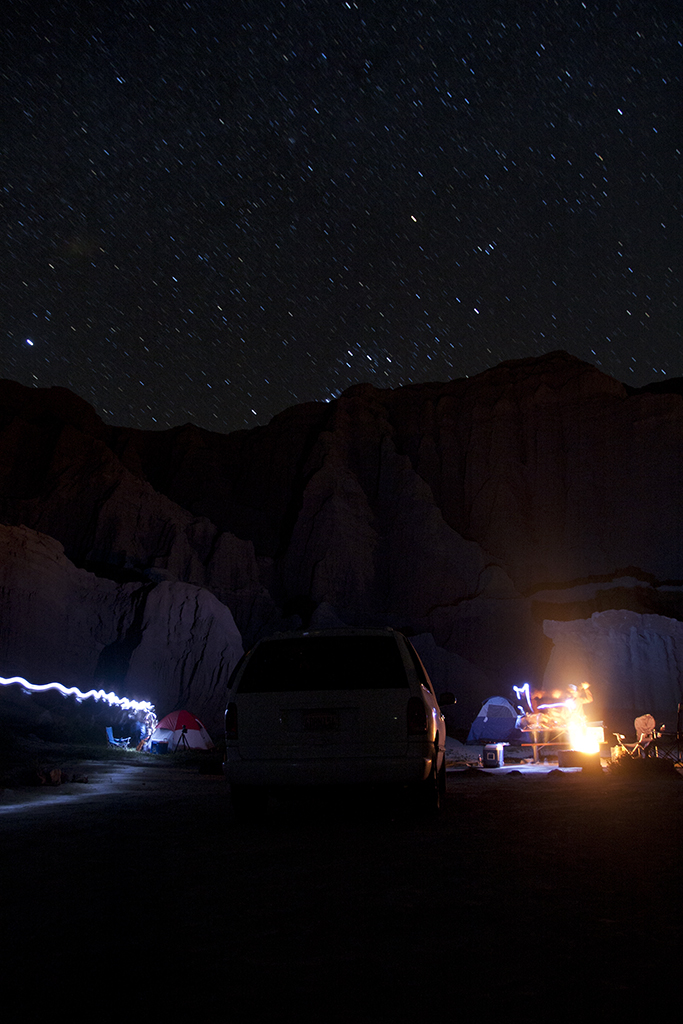
The first step is taking the initial photographs, (you'll notice that's plural).
In order to get the proper exposure for all three areas of the photograph, the background, mid ground and foreground, you actually have to take three separate photos. The easiest way to do this is to use a tripod and cable release for your camera.
Once you have figured out the crop you want, first expose for the sky, or background. This is where the cable release will come in handy. Because the exposure time is going to be longer than a simple snapshot to capture all the details in the stars, you're not going to want your camera to move at all, and the cable release will prevent any vibrations or camera shake that might be caused by the user. Don't worry about the rest of the photograph being underexposed, just concentrate on the exposure you want for the sky.
After you've exposed for the sky, get ready to take a separate photo for the mid ground. Be sure not to move the tripod or lens in any way, the photographs need to be from the exact same positioning and crop for this to work.
*In this particular example that I am showing, I actually created some of the light on the mountain to lessen the exposure time for the mid ground. To do this, I had a friend standing behind the van out of view with a flashlight shining it back and forth on the mountain to give it some shadows and brighten up the exposure.
Once the exposure for the mid ground is taken, continue on with exposing the foreground in the same way. Be sure to expose for your main subject, which in this case, is the van.
*To make the tents in the background look like they are glowing, I had someone sit in each tent and flash a portable strobe a few times for each.
Final result: 3 separately exposed photographs.
**Unfortunately I was unable to find my original "mid ground" photo, which is why there are only two exposures shown above. :/
Putting the Photographs Together
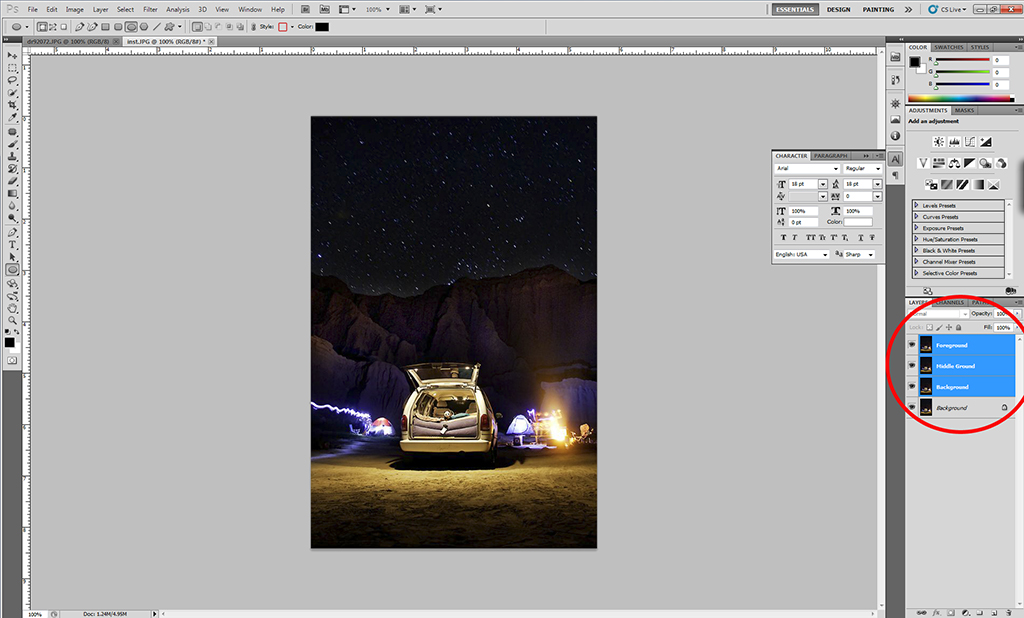
Once you've gotten your three exposures, the next step is to take them into photoshop to create one single image.
Create one photoshop file with the three images you have taken, set into layers. Whatever layer is on top is the layer you will see, however the layer order doesn't matter due to the fact that they will eventually be combined anyway.
Create one photoshop file with the three images you have taken, set into layers. Whatever layer is on top is the layer you will see, however the layer order doesn't matter due to the fact that they will eventually be combined anyway.
Making the Image
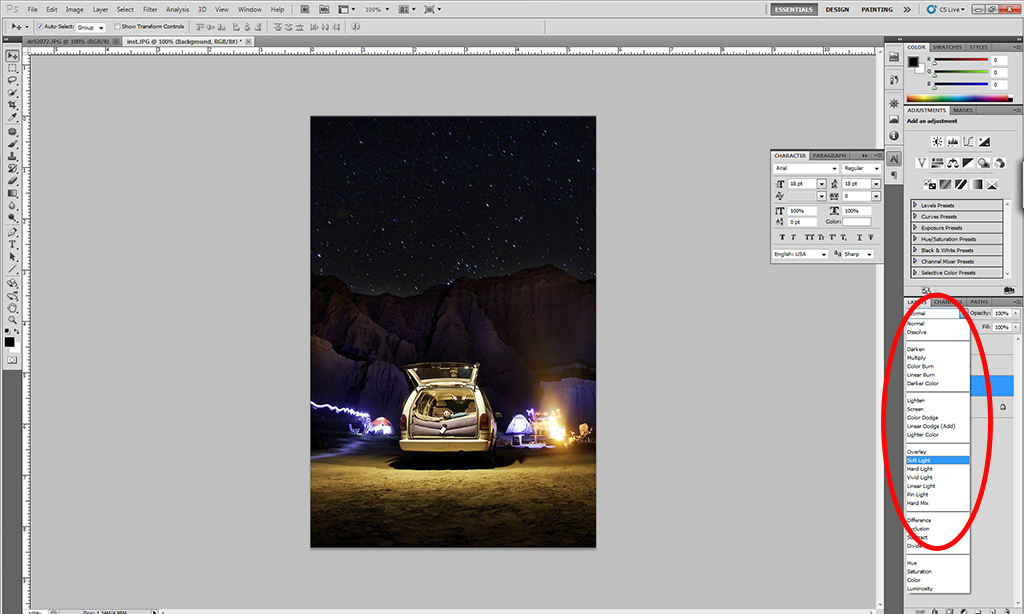
The next step is simple:
Go to your layers pallete and in the blend mode menu, select "soft light." This will combine the layers in a way that blends the three photographs together with the correct exposure for each part.
*You might need to do each layer separately, meaning you would have to select the second layer and put it on the "soft light" blend mode, and then afterwards select the third layer and put that one on "soft light" blend mode.
Final Touches
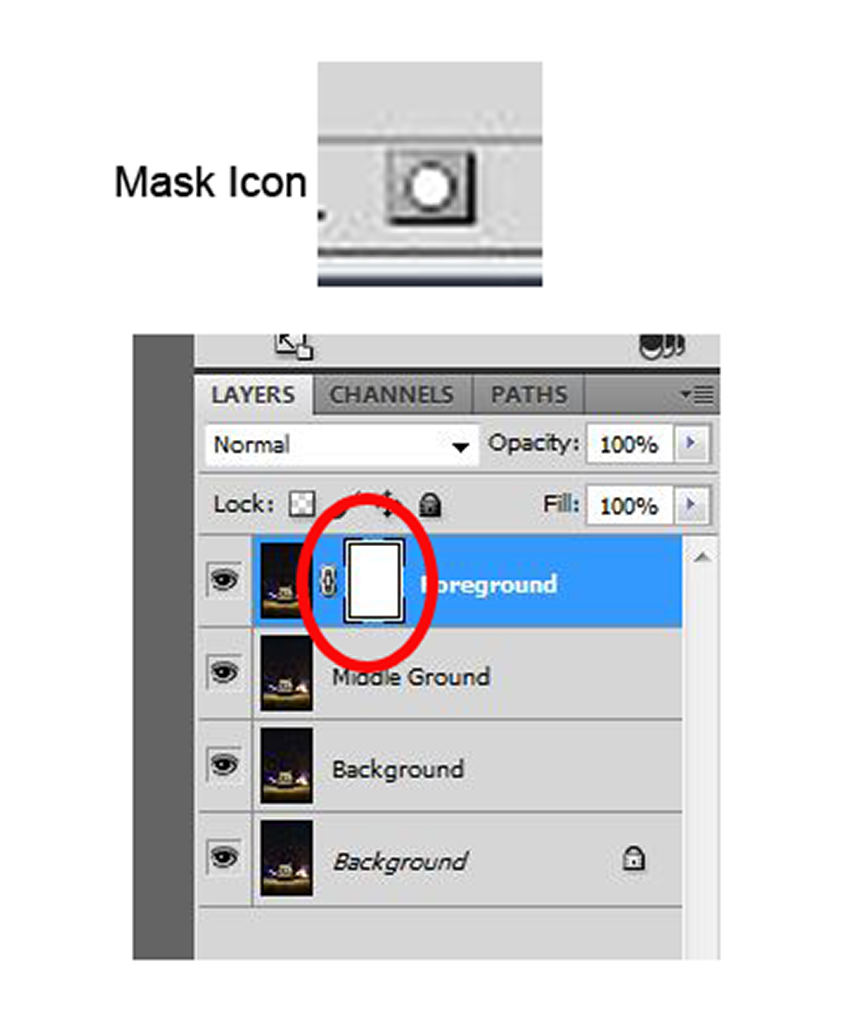
In some cases, you may need to create a masking layer and paint in any detail that was left out from one or more of the layers. In the particular example I used, I did not have to do this.
If something is missing from one part of your photograph and you'd like to put it back in, simply hit the "mask" icon at the bottom of the layers pallete. This will make a white box pop up next to the image icon on the layer you are on. Making sure that that white box is selected, you can paint with either black or white using the paint brush tool and bring back whatever forgotten detail was missed during the original blend.
**Remember, when masking, black conceals and white reveals, meaning that if you paint with black, you are painting something out, and if you are painting with white you are "erasing" a top layer to reveal what is underneath.
Once these details have been pieced together, you have a finished photo!