Creating KML Files for Your Custom Google Maps
226179 Views, 19 Favorites, 0 Comments
Creating KML Files for Your Custom Google Maps
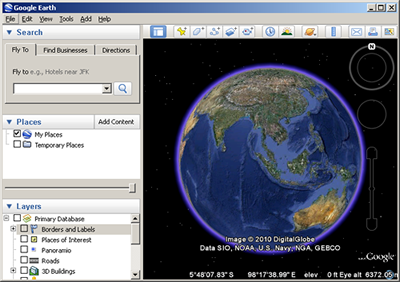
KML (Keyhole Markup Language) is an XML based file format used to display geographic data in an Earth browser such as Google Earth, Google Maps, and Google Maps for mobile.
With KML, you can display pretty much everything on a map. You can either email it to friends or you can upload it to Google Maps (Google My Maps feature) and share it with everyone.
But best of all, you can upload the file to an online host, and use the KMLs to be displayed on any of your custom maps (i.e on your blogs, websites, etc). This way, you can customize the maps' look & feel and its behaviour to suit your needs.
Check out my Demo Custom Map
There are several ways you can create KML files, but if you ask me, this is easiest.
Getting Started
Download and install Google Earth.
If you love codes, you might want to also check the KML primer first, but if you're anxious to start, then move on to the next step..
Creating Placemarks
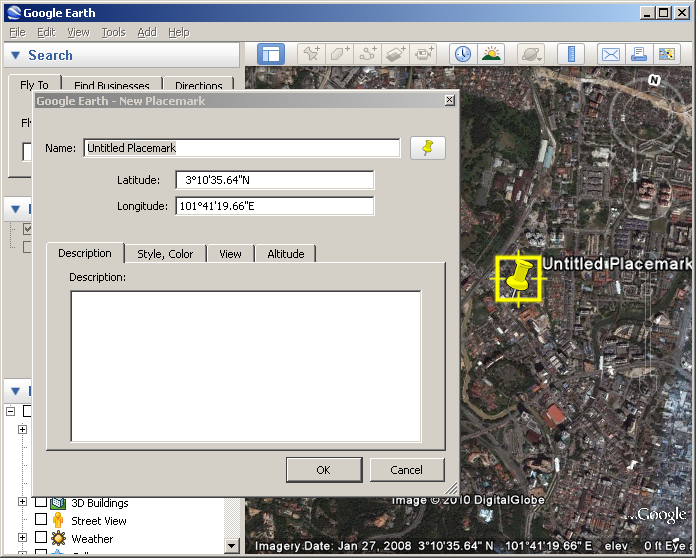
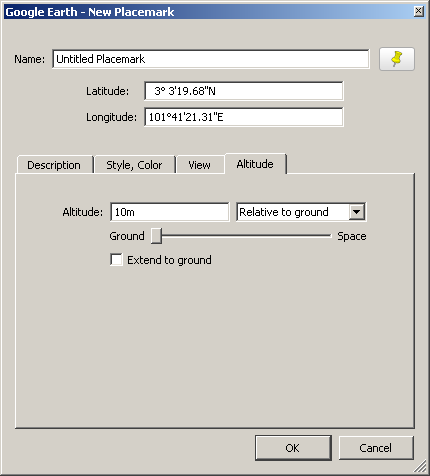
Placemark is simply a point on the map.
To create a Placemark, zoom in to the area where you want to place a placemark and click the Add Placemark button on the Google Earth toolbar (the yellow push pin icon).
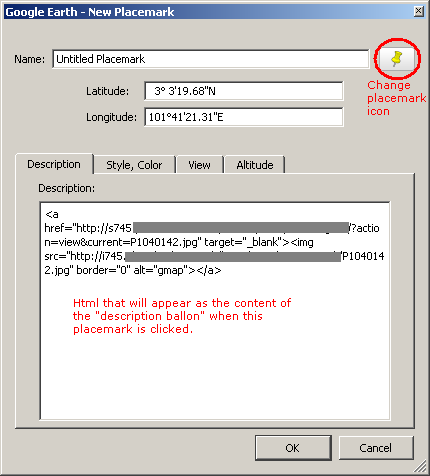
Drag the placemark to the exact location where you want it to be. For the Description you can actually add HTML codes that will be displayed as callout ballon when the placemark is clicked. You can add pictures, YouTube videos, Flash files, Internet links and even bookmarks into your balloon. click image to enlarge.
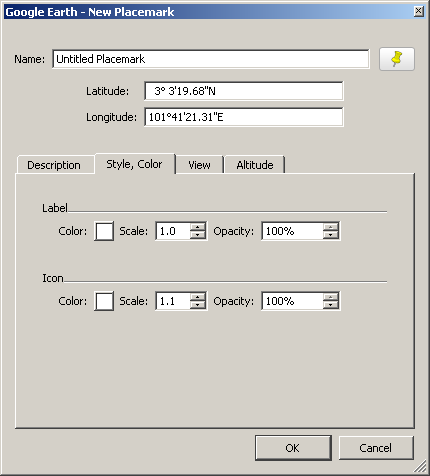
The Style, Color tab allows you to change the color of the placemark icon. Most importantly is the Altitude tab. Be sure to set it to Relative to ground as shown in the image. This will enable the KML file that you will later create to be able to be viewed on Google Maps.
Creating Polygons
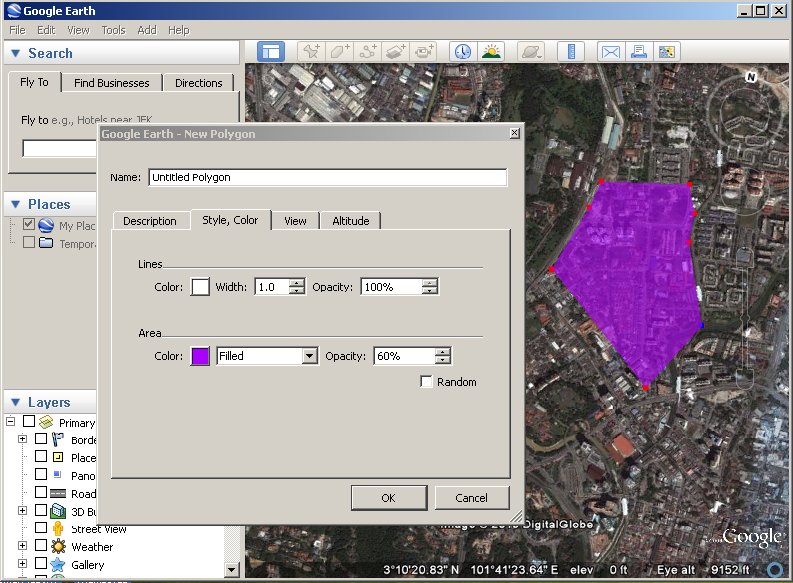
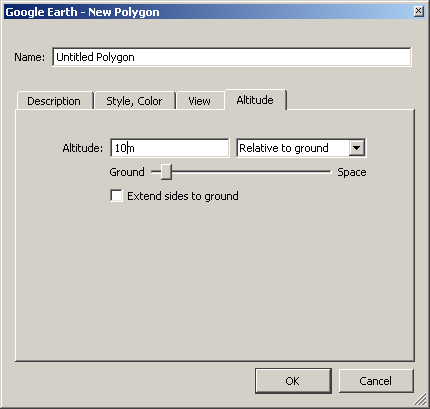
With polygon, you can create overlays on the map that denotes an area (i.e service coverage, public parks, parking spaces, etc).
Similar to adding placemarks, zoom in to the area where you want to overlay a polygon and click the Add Polygon button on the Google Earth toolbar. Click on the map to add multiple points that will form the polygon. Right click to remove points.
The Description tab allows you to add HTML codes that display texts, photos, tables, etc. The Style, Color tab allows you to change the color of the polygon overlay. Be sure to adjust the opacity so that it is semi-transparent. For me 40%-50% opacity is just nice.
Most importantly is the Altitude tab. Be sure to set it to Relative to ground. This will enable the KML file that you will later create to be able to be viewed on Google Maps.
Creating Paths
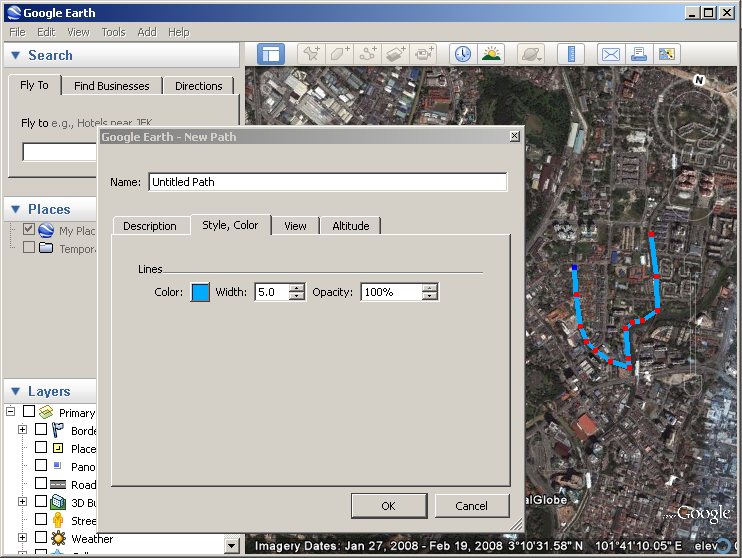
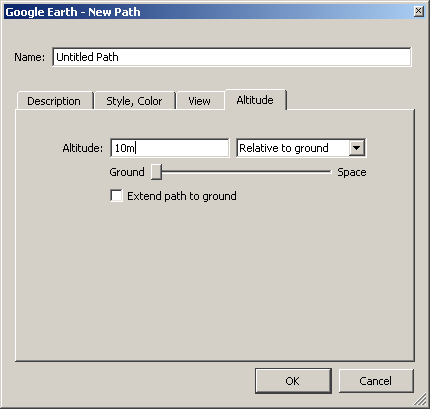
Paths are just lines.
Similar to Placemarks and Polygons, you can also add description, change style and color. Click on the map to place multiple points that will form the path, and right click to remove points.
Be sure to set the Altitude to Relative to ground. This will enable the KML file that you will later create to be able to be viewed on Google Maps.
Saving Your KML Files
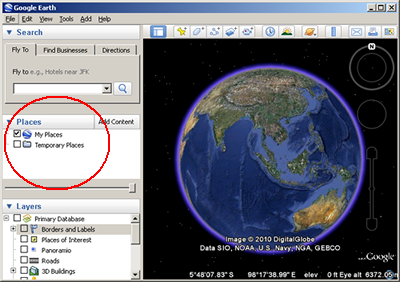
Once youre done adding Placemarks, Polygons or Path, right-click on the item in the Places section of the Sidebar and choose Save Place As.
Choose KML in Save as Type dropdown. Name it, and click Save.
NOTE: KMZ is a zipped version of KML. For this tutorial I'm sticking with KML.
You can save each Placemark, Polygon or Path individually, each into a separate KML file. Or you can group all of them in one folder, and save the folder as one KML file.
Download the Sample KML file I've created.
Cheers!