Creating Advertisement in Adobe Illustrator
by xenia003 in Design > Digital Graphics
14382 Views, 25 Favorites, 0 Comments
Creating Advertisement in Adobe Illustrator

This is an Instructable for any level of experiences; if you are a beginner in Illustrator it would take you about an hour to finish. I had used techniques from this tutorial before and found them both easy and useful.
To complete this tutorial you will need:
- Adobe Illustrator (I used Adobe Illustrator CC, but most of the previous versions would work)
- Vector capitals' landmark images from CreativeMarket: Creative Market link
- Desire to finish
In this tutorial you will learn how to:
- create a new document
- use shapes
- use .ai documents from another sources
- create patterns
- use pathfinder shape modes and pathfinders
- use layers in Adobe Illustrator
Therefore, there're a couple of big steps: creating a sphere with capital landmarks, creating background pattern, adding text and finishing up. It might seem lengthy but it is mostly due to detail explanations.
What You Will Need to Know in Adobe Illustrator
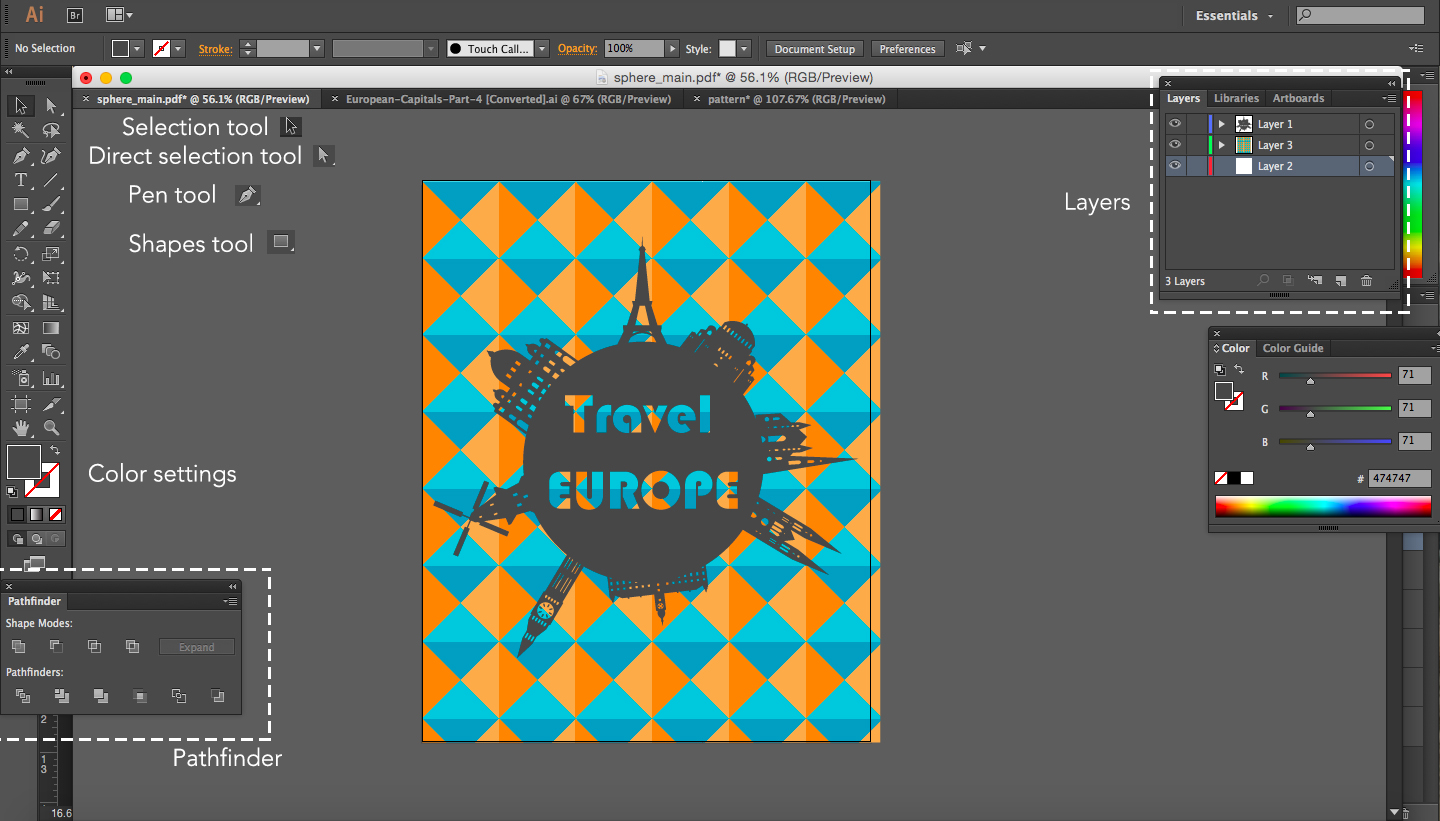
- Color settings: rather easy, double click on the color square and select a color. If you want to remove color (stroke or fill) select a white square with a red diagonal. To change shape color you need to select a shape and just change a color.
- Selection tool: allows you to select a shape. Useful fact - you do not need to keep track of the layer shape is located on
- Direct selection tool: allows to edit shape by double clicking on the anchor point. Not used a lot in this tutorial but is worth noting as one of the very basic tools
- Pen tool: drawing vector lines. Used briefly in this tutorial.
- Shapes tool: used a lot. Right click on the icon and you will get different possible shapes - rectangle, ellipse etc. Quick tip: hold Shift while using this tool and it will constrain it to the right forms (square or circle).
- Pathfinder: different shape overlay modes as shown. I will explain how it is used later
- If not shown as listed go to Effect > Pathfinder
Create New Document and Add Shapes
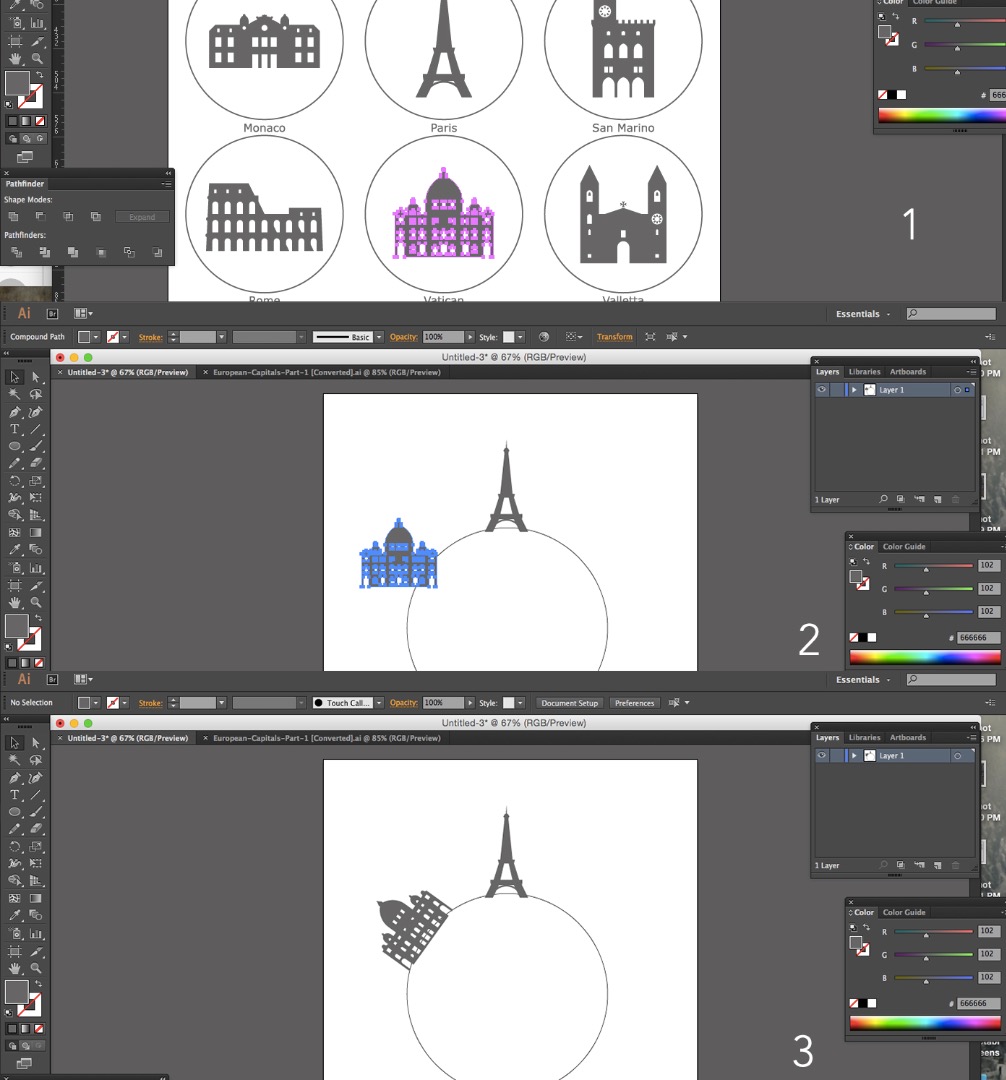
- Create a new document: File > New... I used width 800 px and Height 1000 px
- Select a Ellipse tool, hold Shift and draw a circle in the middle of the screen. You can use Selection tool to locate it whenever you wish.
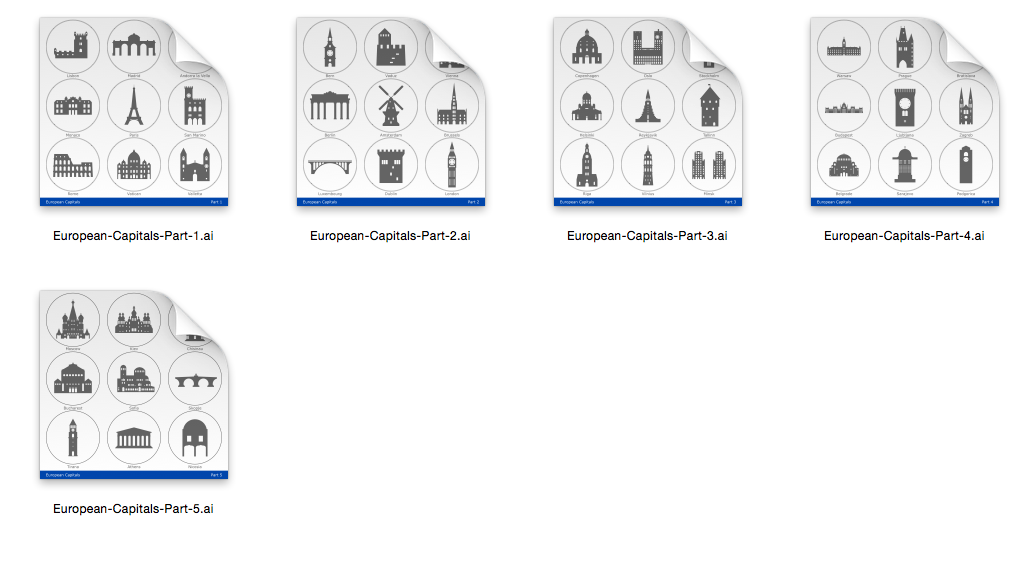
- Open .ai files from the folder you uploaded: European Landmarks > illustrator
- Select a shape, move it around the document. You can rotate it by moving your mouse to the corner. You should see two sided curved arrow.
- Continue adding these shapes until you've gone 360'
Merging Shapes
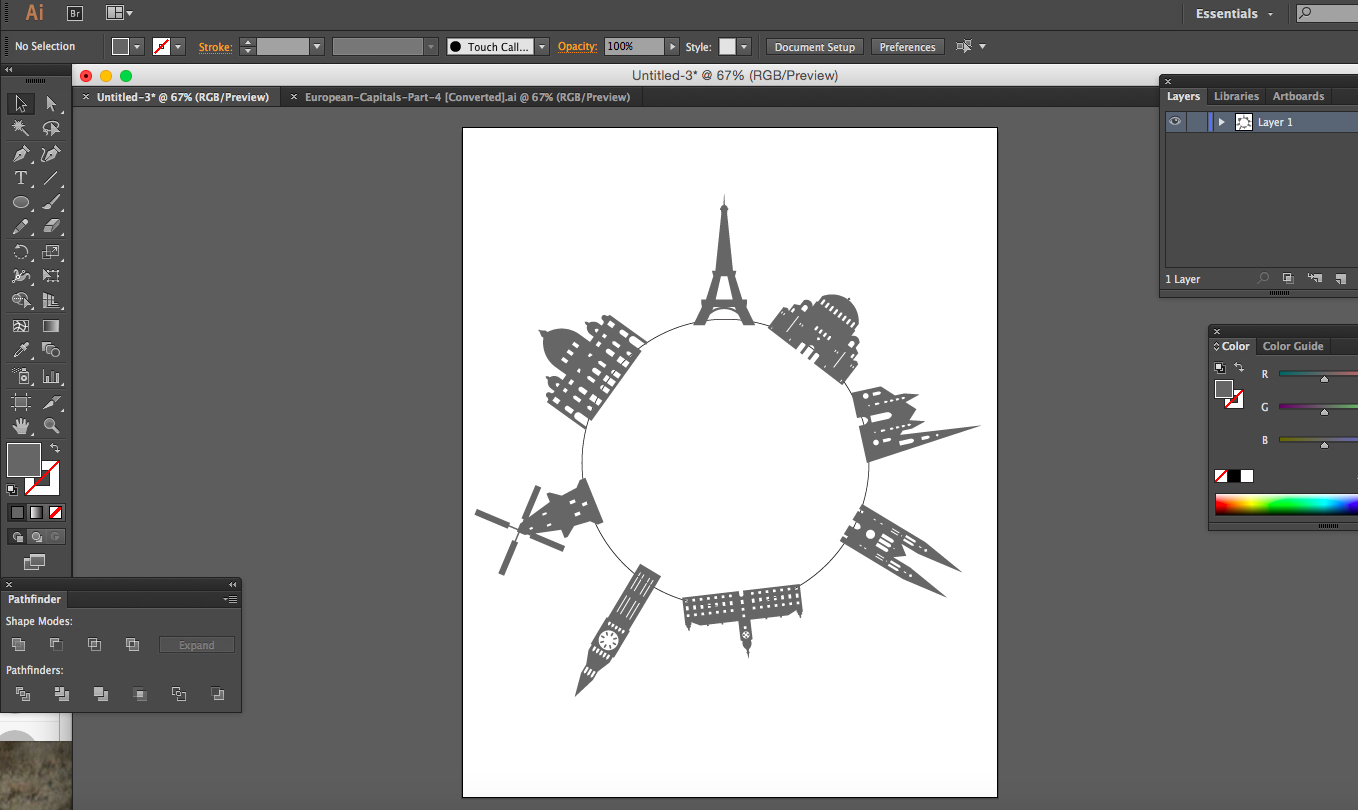
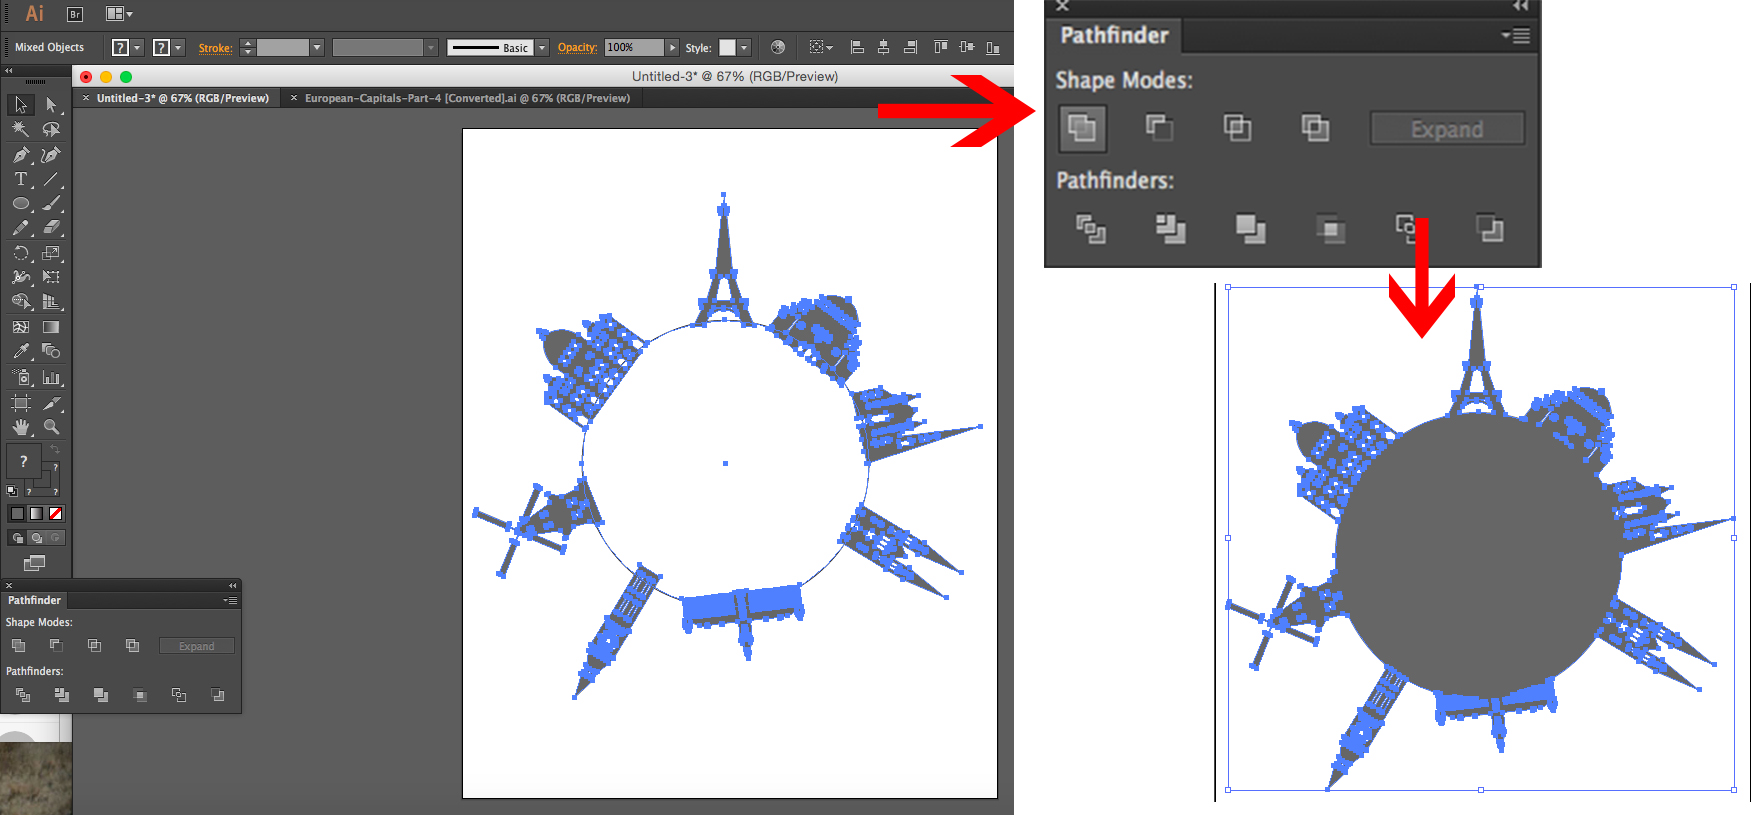
- By now you should have a picture shown on the first print screen
- Select all shapes by using Selection tool and drawing a rectangle around all shapes (you should see something alike second photograph)
- Go to Pathfinder > Shape Modes > Unite. (Note - if you can't find it go to Help in Illustrator)
- You should see what is shown in the picture
Creating Background Pattern
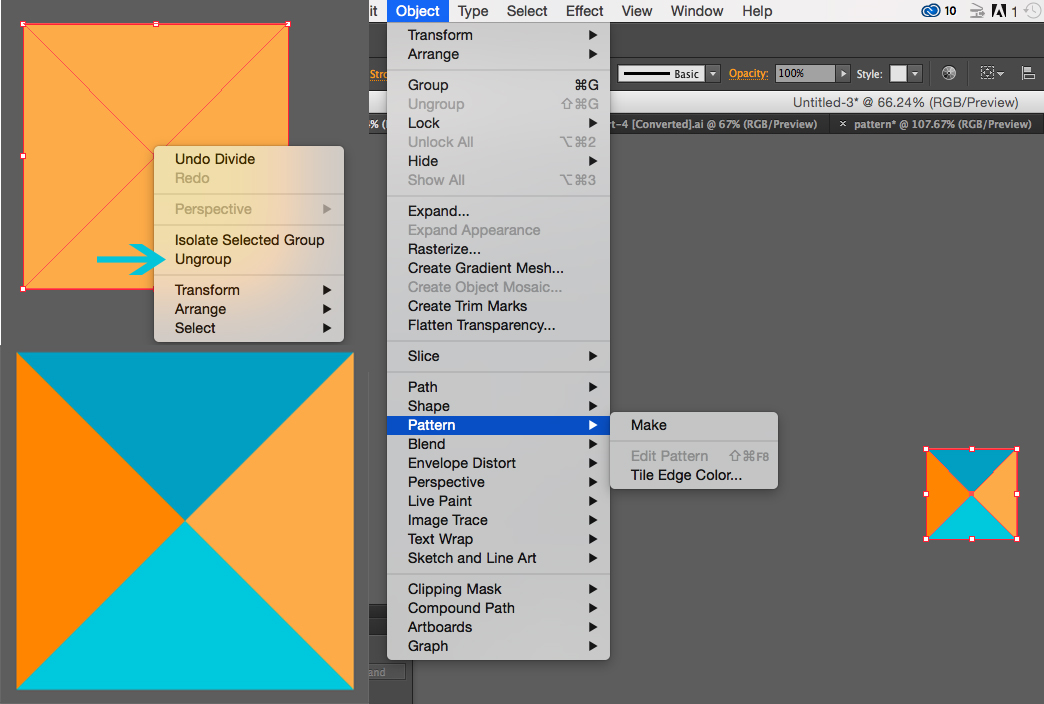
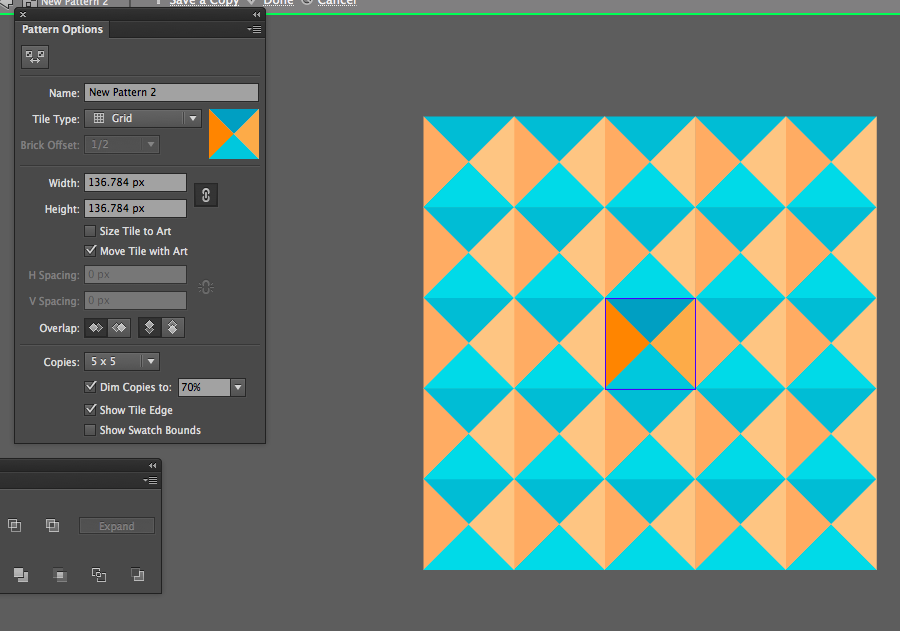
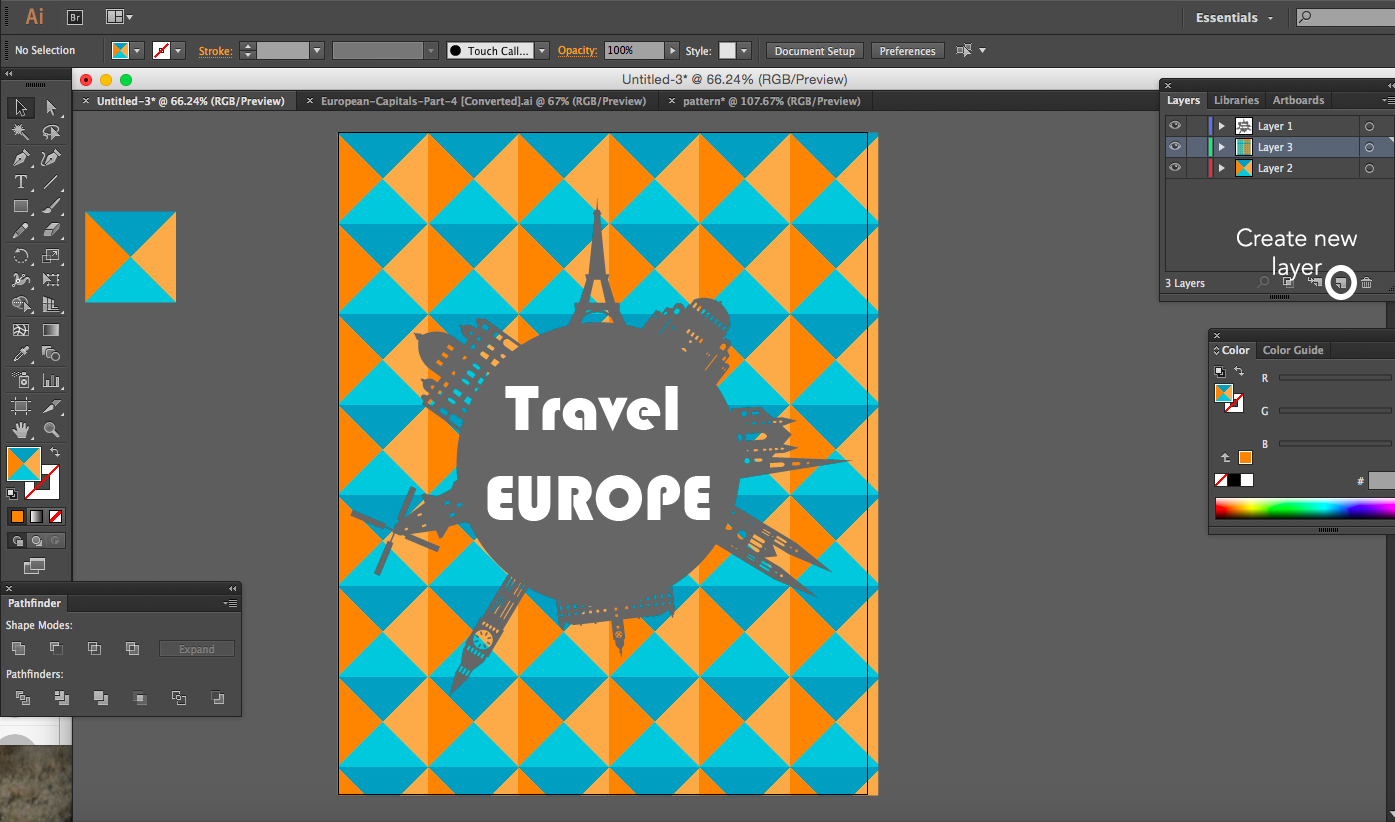
* Do not be discouraged by text over picture: I did it in a slightly different order, that made less sense to a new user
**To see a video of pattern creation go to Youtube page. I did this separately (so the colors and setting are a little bit different) but all the steps are exactly the same.
Steps:
- Select a couple of colors you like (I did 2 shades of blue and 2 shades of orange)
- Draw a rectangle in the grey area next to the main picture.
- Using pen tool click on the corner of the rectangle, then click on the corner diagonally from it. Click on the Selection tool, and go back to Pen tool (this way you throw off the pen tool connection). Do the same with 2 other corners.
- Select everything (same way as before) and go to Pathfinders > Divide.
- Click on Selection tool, click on the rectangle and right click on it. Click on Ungroup.
- Now you should have separate triangles forming square.
- Select shape, go to color option and select the color you picked. (refer to the picture if you get lost)
- Select all shapes and go to Object > Pattern > Make. Select default options (or experiment if thats what you want to do :) )
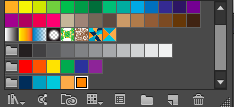
- Your pattern is now added to swatches (color) panel
- Add a new layer in the document (click on the folded paper icon in the ayers panel), drag the layer down below others. In the swatches panel select new pattern.
- Voila, you now have a shape and pattern behind!
Adding Text Over and Cutting It Out
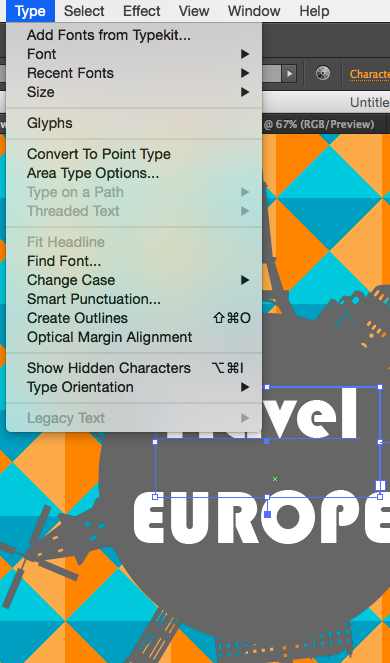

- Click on the 'T' button for the text option.
- Draw a rectangle in the area around center of the circle.
- Type what you want (this is a rather intuitive tool. In the panel above you can see different text options)
- Using Selection tool drag text around to position it.
- Select text and go to Type > Create outlines
- Select both outlines (text and shape) and go to Shape Modes > Exclude.
- Now you have cut out letters!
Only one step left, and to practice try to create it yourself. There's nothing new (Hint: use shapes and pathfinder). See solution on the next step.
Adding Inside Circle
- On the side draw a circle (hold shift)
- Draw a smaller circle on the side
- Drag smaller one on top of big
- To make them perfect concentric select Horizontal Align Center and Vertical Align Center (see picture)
- Select both again and go to Pathfinder > Exclude
- Overlay the "donut" over the shape, select both and repeat Pathfinder > Exclude.
You Have You Amazing Picture Ready!

Now you can go to File > Save...
Note: in Illustrator you can save .ai (Adobe Illustrator file) or .pdf. PDF is very convenient, since you can open it both in Preview (or other application) and in Illustrator (without losing shapes) and in Adobe Photoshop (as a smart object). You can also save .JPEG and other "normal" formats by going to File > Save for Web...