Create Your Own IPhone Ringtones
by implaxis in Circuits > Apple
12082 Views, 25 Favorites, 0 Comments
Create Your Own IPhone Ringtones
Here's how to create your own iPhone ringtones using GarageBand and iTunes.
Items Needed
iPhone
iTunes
Mac with GarageBand program
iTunes
Mac with GarageBand program
Open GarageBand on the Mac
Downloads
Click IPhone Ringtone
Downloads
Double-click Example Ringtone
Downloads
Name and Create Your Ringtone File
A new screen will pop up. Name the item what you like in Save As:, the save folder in Where: and click Create. The Tempo, Signature, and Key don't matter.
Downloads
Loops Window - Turn Off Looping
The Loops screen will appear with an item in the track.
Select the Cycle (loop) selector at the bottom to turn off looping. The Cycle indicator at the top (yellow bar) disappears.
(Depending on the length of your desired ringtone, you may need to leave Cycle on, just adjust it to the length of your sound by dragging each side of the yellow bar to match the length. The program may also ask to automatically adjust it for you.)
Delete the Existing Sample
Click on the audio data in the track, and select Edit/Delete from the menu to delete the existing sample.
Add Your Ringtone Source
This can be a wav or mp3 file. Use Finder, select it, and drag it into the track.
If you don't need to edit the file, skip ahead to Step 10.
If you don't need to edit the file, skip ahead to Step 10.
Edit From a Longer Track
Here is a track that is much longer than desired for a ringtone. iPhone ringtones are limited to 40 seconds, but here we will just extract a few seconds of audio.
Click on the top bar at the start of the selection you want to extract. Set Control/Snap to Grid = Off if you want to avoid snapping to the tempo markers and be more precise.
Select Edit/Split from the menu. The audio data will split at that point.
Do the same at the end of the clip you want.
Click on the top bar at the start of the selection you want to extract. Set Control/Snap to Grid = Off if you want to avoid snapping to the tempo markers and be more precise.
Select Edit/Split from the menu. The audio data will split at that point.
Do the same at the end of the clip you want.
Export Your Clip to ITunes
Click on the clip (only the part you want should be highlighted now).
From the menu, select Share/Send Ringtone to iTunes.
The Ringtone now appears in your iTunes Ringtones library under Ringtones.
From the menu, select Share/Send Ringtone to iTunes.
The Ringtone now appears in your iTunes Ringtones library under Ringtones.
Transfer to IPhone
Connect your iPhone to the computer. The iPhone sync window will appear.
In iTunes, select the Ringtones tab, Sync Ringtones, and the file you want, and Apply.
In iTunes, select the Ringtones tab, Sync Ringtones, and the file you want, and Apply.
Downloads
Back Up If Necessary!
This window appears. I did not have any of the other items on the iPhone at the time so I don't know if the simple act of adding a ringtone actually deletes that data. You might want to copy the songs/movies/TV shows out first just in case! (If you are going to do that, click Cancel!)
Click Sync Ringtones.
Click Sync Ringtones.
Downloads
Set the New Ringtone!
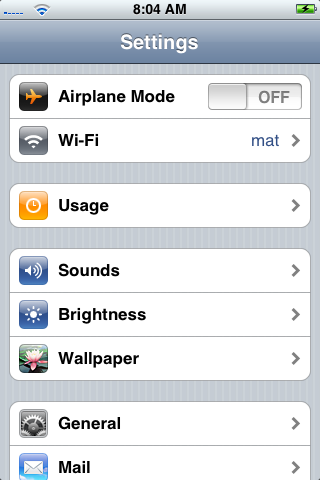
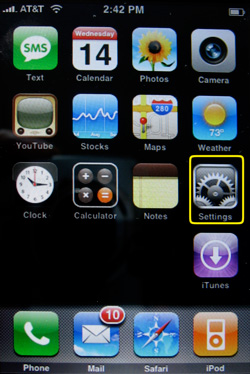
On your iPhone, touch Settings.
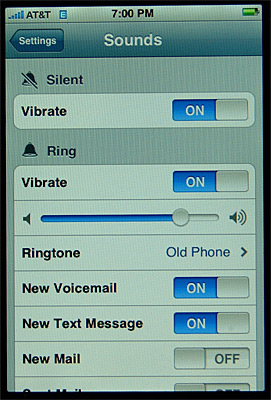
Select Sounds.
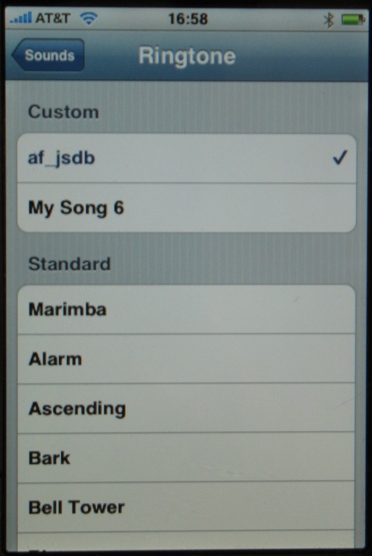
Select Ringtone.
Your new ringtone now appears in the Custom list. Tap that line to set your default ringtone.
Select Sounds.
Select Ringtone.
Your new ringtone now appears in the Custom list. Tap that line to set your default ringtone.
Set a Ringtone for Specific Contact.
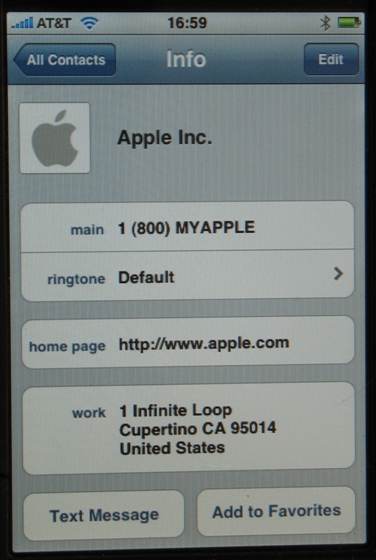

You can also set custom ringtones to specific Contacts in your Contacts list.
"Default" will be the master ringtone that you set for your phone in the previous step. To change it, pull up the specific Contact and tap the Ringtone line.
Select the ringtone to use for this person.
"Default" will be the master ringtone that you set for your phone in the previous step. To change it, pull up the specific Contact and tap the Ringtone line.
Select the ringtone to use for this person.
Enjoy Your Custom Ringtones!
A couple notes:
Even though the time limit is 40 seconds, nobody wants to hear your phone ringing for that long (and most people would hang up before that time limit anyway if they don't go to voice mail).
I like a short, unique tone that is not obnoxious if heard for more than a few seconds.
Even though the time limit is 40 seconds, nobody wants to hear your phone ringing for that long (and most people would hang up before that time limit anyway if they don't go to voice mail).
I like a short, unique tone that is not obnoxious if heard for more than a few seconds.