Create Your Own Business Cards Design From Scratch
by ElizarC in Circuits > Websites
3008 Views, 9 Favorites, 0 Comments
Create Your Own Business Cards Design From Scratch
Creating Personal Business Cards Designs with online tools often make it easy for anybody to get what they need. For this tutorial, we will focus on creating your own business card design with digitalroom.com Design Creation Tool.
Step 1. Things You Need
Here is a list of the things you might need to create the your own Business Card Design
- Pictures
- Business Logo
- Relative Picture
- Relevant Business Information
- Business Name
- Address
- Owners
- Contact Details (Phone, Emails, Websites, etc)
- Catchy Message to Engage Possible Customers
Step 2: Navigating to the DigitalRoom Website
This online printing websites allows any user to become an instant graphic designer with their powerful design-creator software. Upon completing the needed business information and relevant images for your envisioned business card, the next step is to navigate through the site and know your options in terms of print products.
- Navigating through the DigitalRoom website is easy.
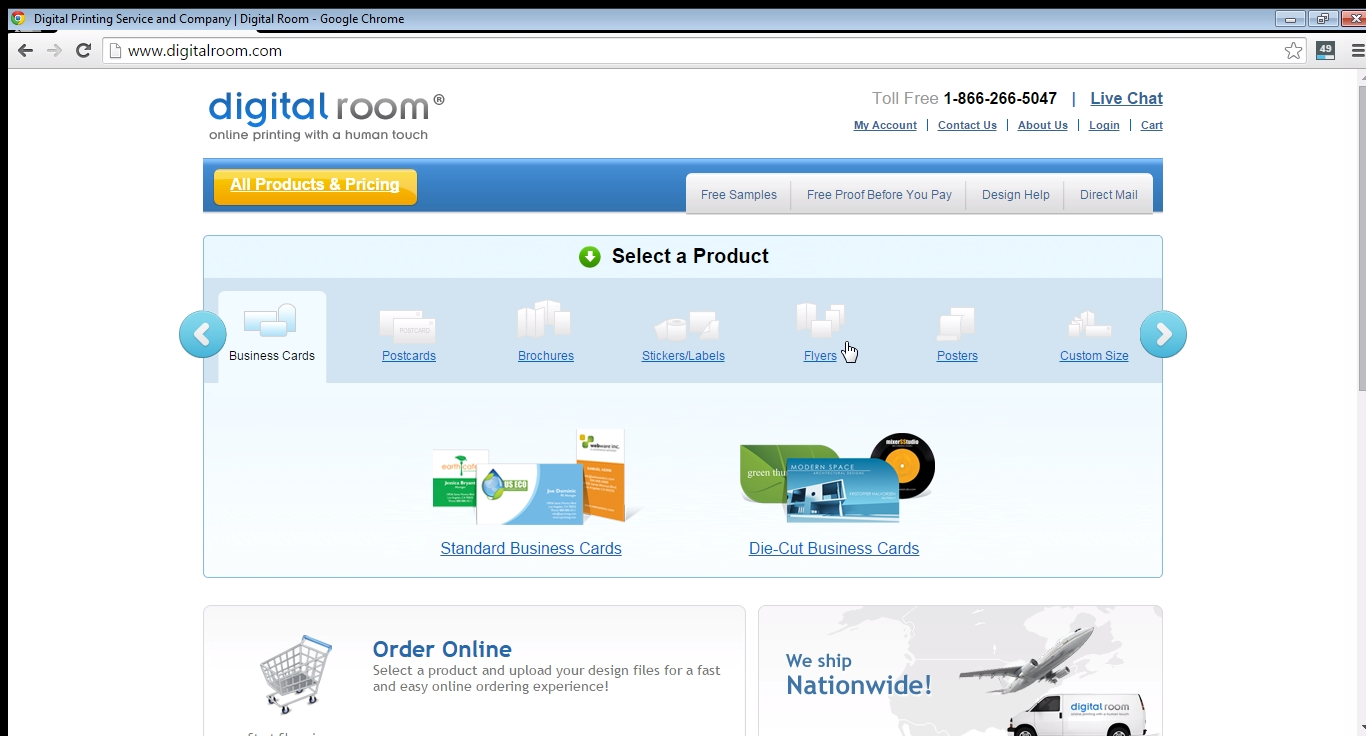
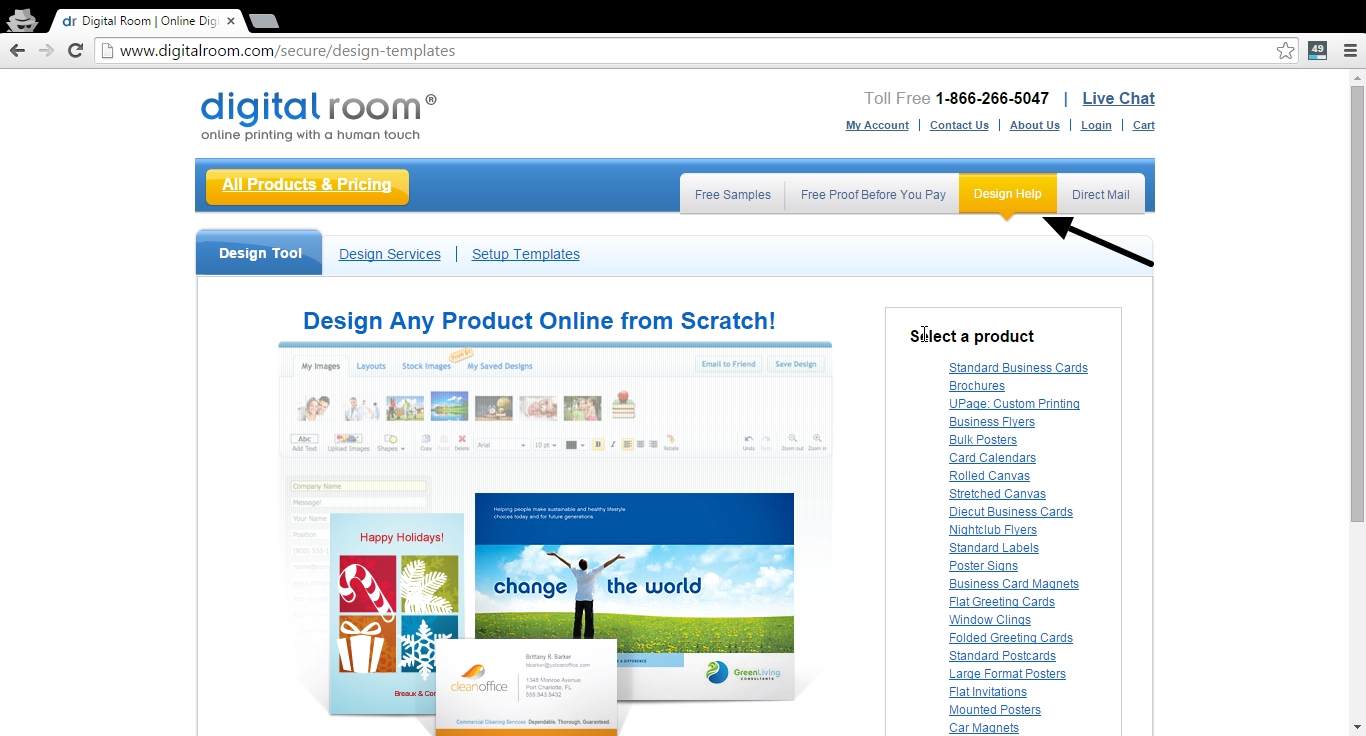
- Upon reaching the homepage select "Design Help" through the header menu options on the upper left corner of the page as presented on the first image above this step.
- Clicking on the design help button will lead you to the Design Templates page
- This page houses all the print products possible to create a design template.
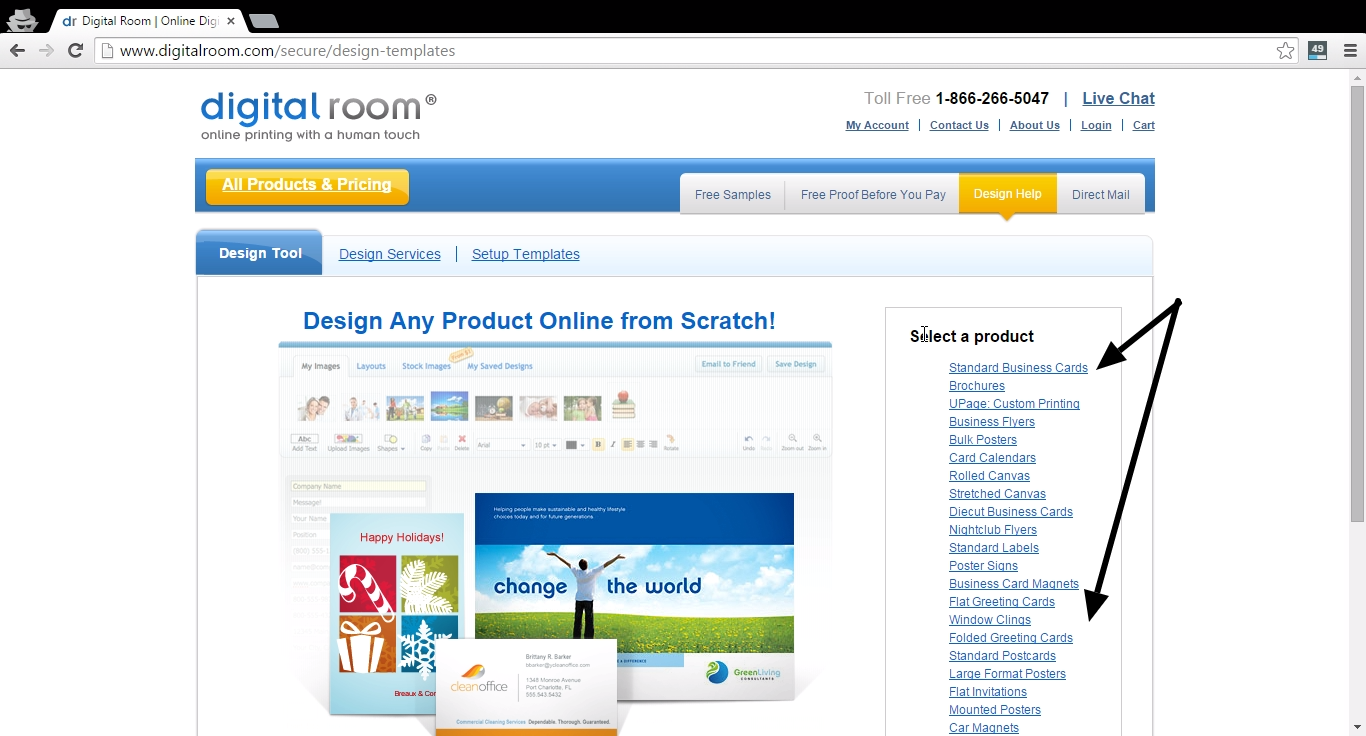
- As for this tutorial we will choose the "Standard Business Cards" product link as presented on the second image above.
Step 3: Choosing the Right Size and Orientation
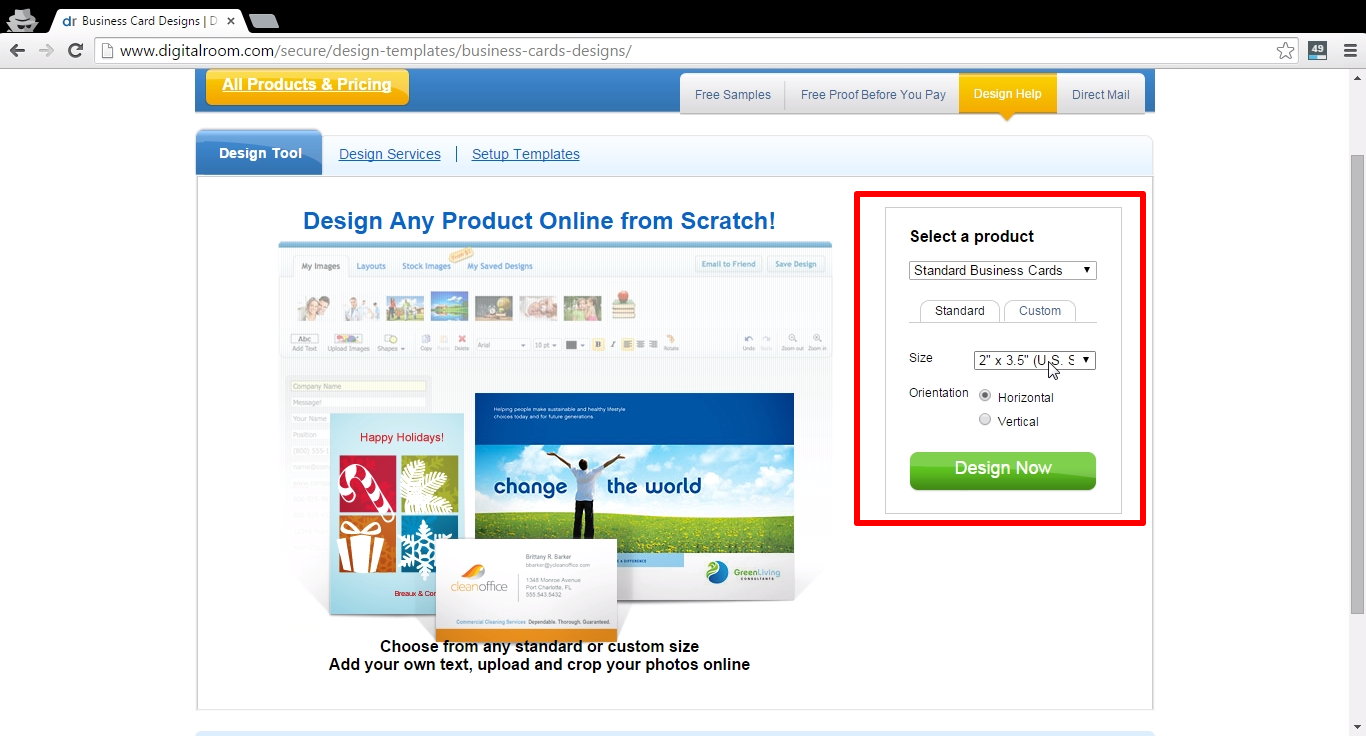
Most print products are attributed with elements such as Size or Dimensions and Orientation. This step is quite simple to understand, all you have to do is to set your specific size and orientation for your standard business cards and click the Design Now button. You can also choose to set custom sizes for your business cards limited to 2 inches minimum and 4 inches maximum. This is both for the length and the height.
These options are presented on the image above on the RED Highlighted Box.
Step 4: Select Design Layout
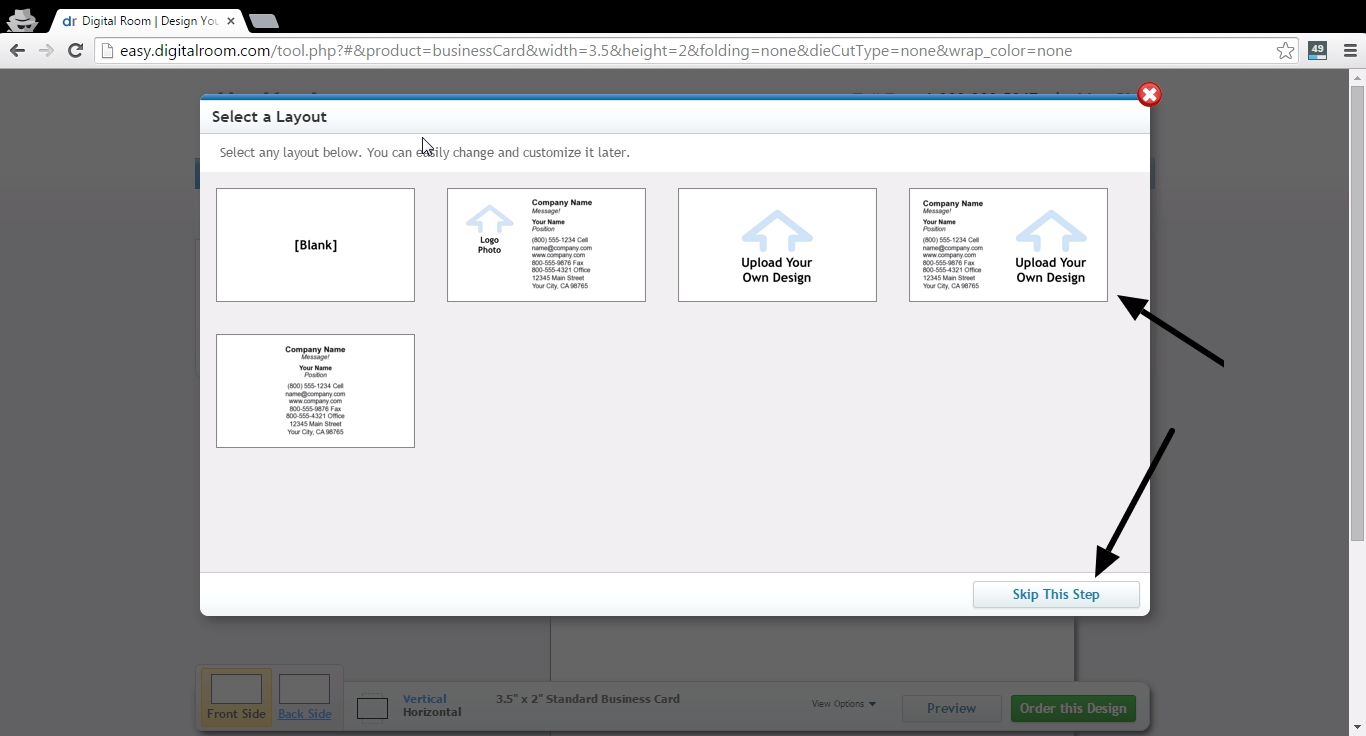
- Note: This step can be skipped and get a blank layout instead
For BusinessCard Designs, there are 5 possible design layouts to choose from.
- Blank Layout
- This is the default layout. You will have the freedom to add you own design elements and arrange them as you want.
- Logo + Company Details
- This layout offers users with the ability to add their own company or business logo on the right side plus the company information on the left side.
- Upload Own Design
- If you have your own design for a business card, then use this layout to directly upload it and get your template right away. You can always add more to the design with the design options present on the site.
- Company Details + Own Design
- As for this layout, you will have the combination of your Company Information and own business card designs.
- Company Details
- For a straightforward layout, try this company details business card layout.
Step 5: Business Card Main Design Window
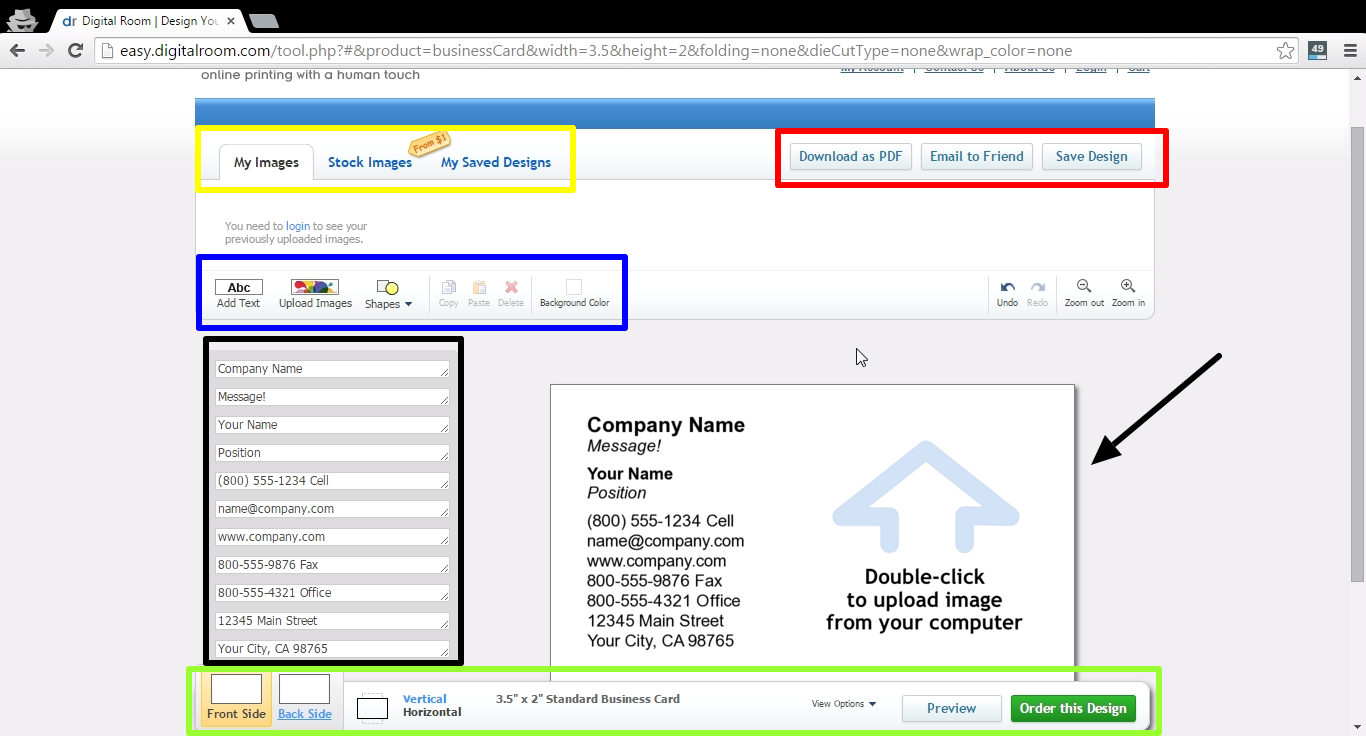
I made this the last step because this will hold most of the technical elements in creating your own Business Card Designs. I also highlighted the functions with colored boxes to better identify the features and for your convenience as well. Options can vary from Design Layout that you have chosen as for this tutorial
- Blue Box
- These section houses the Add text, Upload Images, Shapes, Background Color options, and other editing tools. This is basically the sections where you can manipulate the layout in terms of text elements, backgrounds, and additional shapes to your chosen design layout. Using these options is practically straightforward. All you need to is to click one of the options and additional editing settings will appear together with the option you chose. Explore on what is needed for your chosen business card layout and this section will be able to help you out in a big way.
- Red Box
- The red box section is all about what to do with your Business Card design. You will have 3 options - Save Design, Download as a PDf file, and Email to a Friend.
- Green Box
- In this section you will have the view options of the canvas as well as views on the back and front canvas of the business card layout. This section also provides two of the most important publishing buttons for your Business Card design - the Preview and Order this Design buttons.
- Yellow Box
- The yellow section is where you will find images that you have used before on your designs, purchase stock images, and your saved designs. Key requirement for this feature is to be registered and logged in to DigitalRoom.
- Black Box
- On the image above, you can clearly see that this section houses the text elements available in your chosen Business Card Layout. The changes you do here will show on the canvas section.
- Canvas Section
- The canvas section is where you will be able to see your work on the Business Card Design. This section practically gives you a clear view of what your Business Card will look like. What you see is what you get on this section.
Finishing and Publishing Business Card Design can be done in 4 ways.
1. Save Design
2. Email to Somebody you know
3. Download as PDF file
4. Print the Design as Business Cards through DigitalRoom.