Create a Stunning Panorama Like 1-2-3-4
by chalkstreet in Circuits > Cameras
335 Views, 1 Favorites, 0 Comments
Create a Stunning Panorama Like 1-2-3-4

Panoramic stitching allows you to make wide-angle views of multiple overlapping pictures of a subject in question.
Follow these 4 simple steps to create your very own panorama!
This Adobe Photoshop feature works best with photos taken with manual focus, white balance and exposure. Pictures should be taken on the same level of plane.
Photomerging
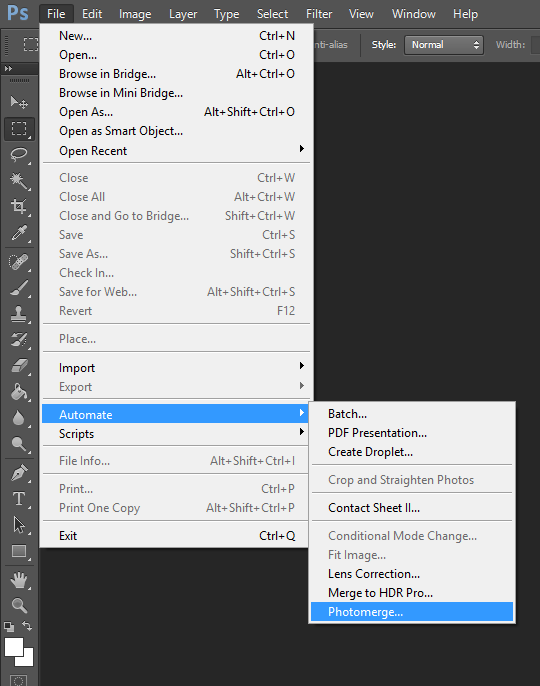
Select your set of overlapping pictures from File > Automate > Photomerge.
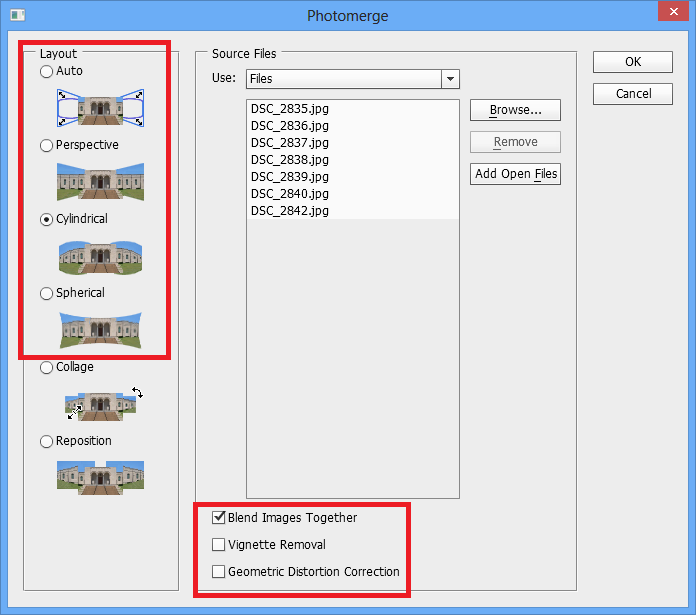
This will open the Photomerge window. Browse for your images and select one of the Layouts from the right-hand panel. In most cases, ‘Auto’ just works when you do not know which one to use. Play around with the top three options to see which one works best for you.
Perspective
Creates a composition by designating the middle image as the reference image. The other images are then transformed so that overlapping content across layers is matched.
Cylindrical
Reduces the “bow‑tie” distortion that can occur with the Perspective layout by displaying individual images as on an unfolded cylinder. Best suited for creating wide panoramas.
Spherical
Use this for 360-degree panoramas.
Make sure all the three options are selected
· Blend Images Together
· Vignette Removal
· Geometric Distortion Correction
Blend Images Together
Finds the optimal borders between the images and create seams based on those borders, and to color match the images.
Vignette Removal
Removes and performs exposure compensation in images that have darkened edges.
Geometric Distortion Correction
Compensates for the barrel, pincushion, or fisheye distortion.
Content Aware Fill Transparent Areas
Seamlessly fill the transparent areas with similar image content nearby. (This option was added with the later version of Adobe Photoshop. If you have the later version of Adobe Photoshop, you can use this and skip step 4, 5 and 6.)
I’ll be using the Cylindrical Layout for my subject
Depending on your system memory, it will take some time to analyze and merge your pictures.
Review and Flatten
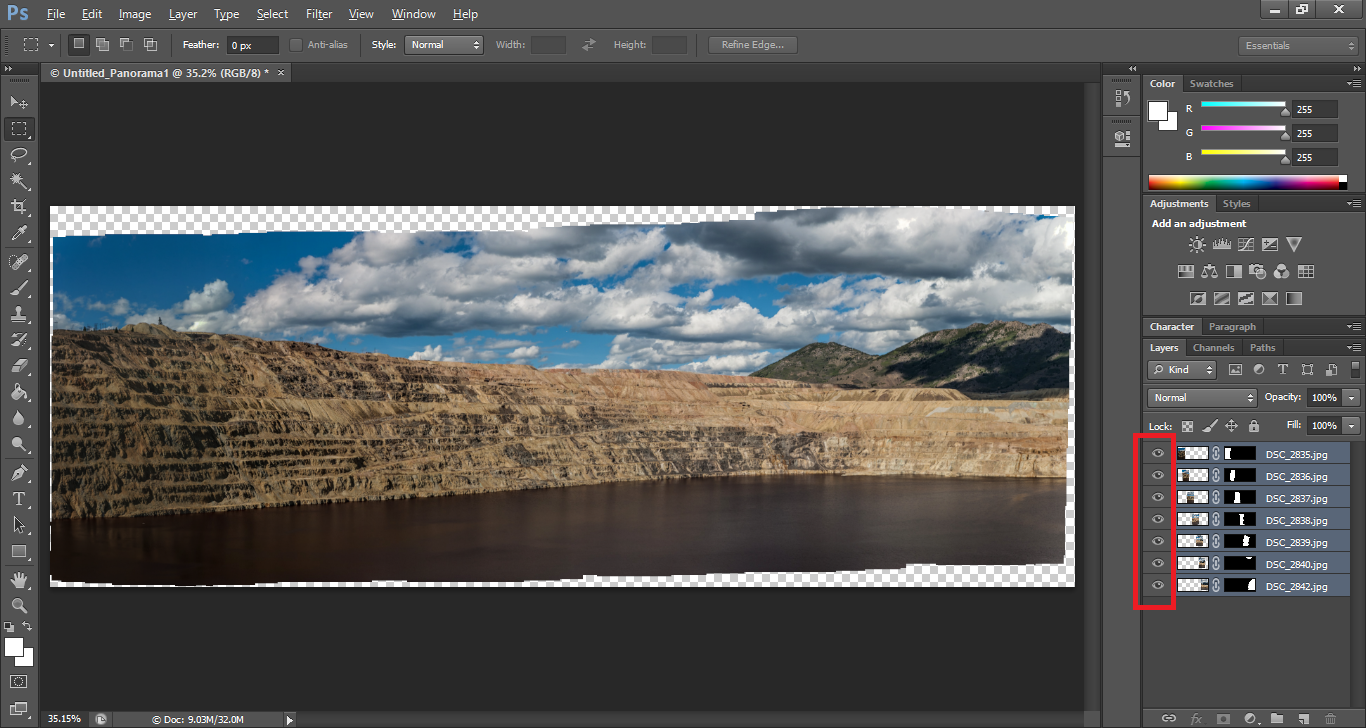
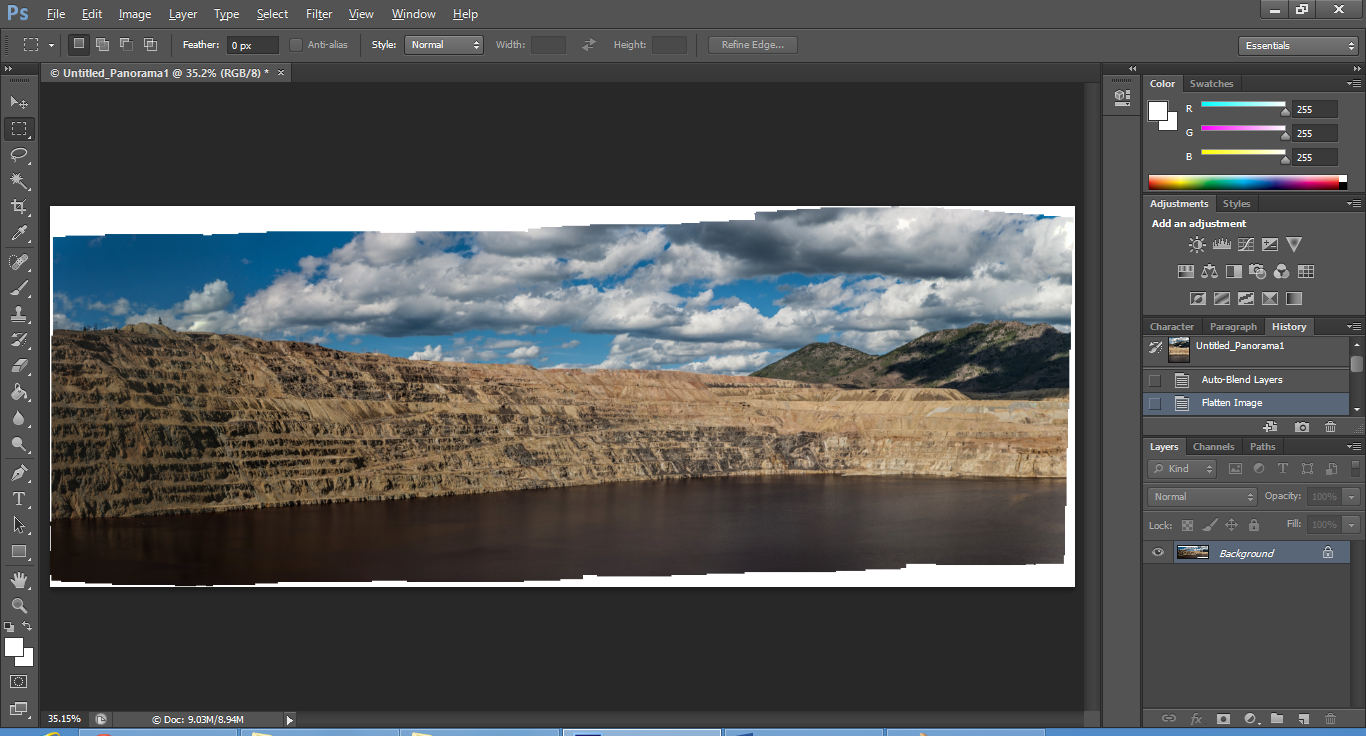
The new picture generated should look something like the image below. Don’t forget to view each image individually from the Layers panel on the right. You can select to view each layer individually using the ‘eyeball’ visibility button next to each Layer.
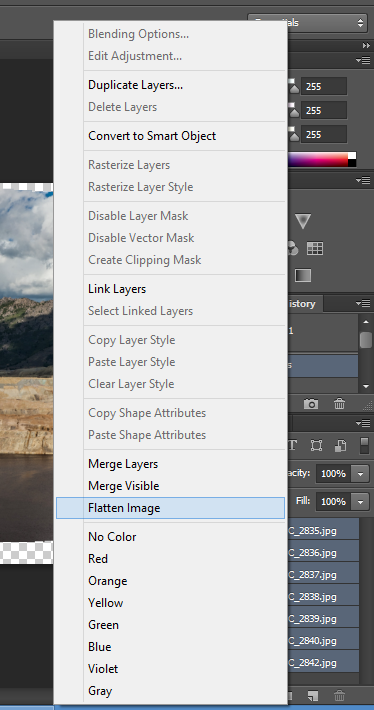
To convert several pictures into a single file, select all the layers using Shift. Right click on the layers and select Flatten Image.
Bring in the Magic

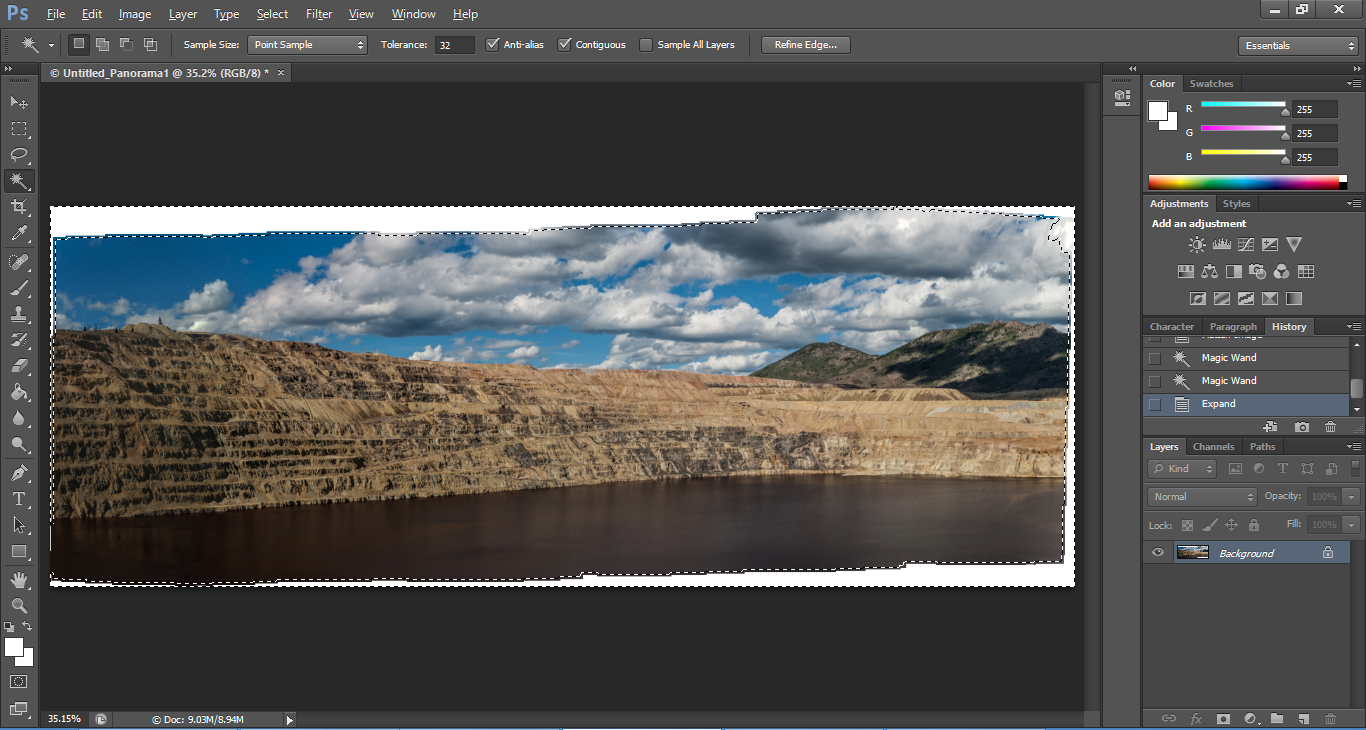
You’ll notice a lot of empty spaces around the edges, we can either choose to crop this using the Crop Tool from the toolbox or fill these white spaces using the Fill option and selecting Content Aware.
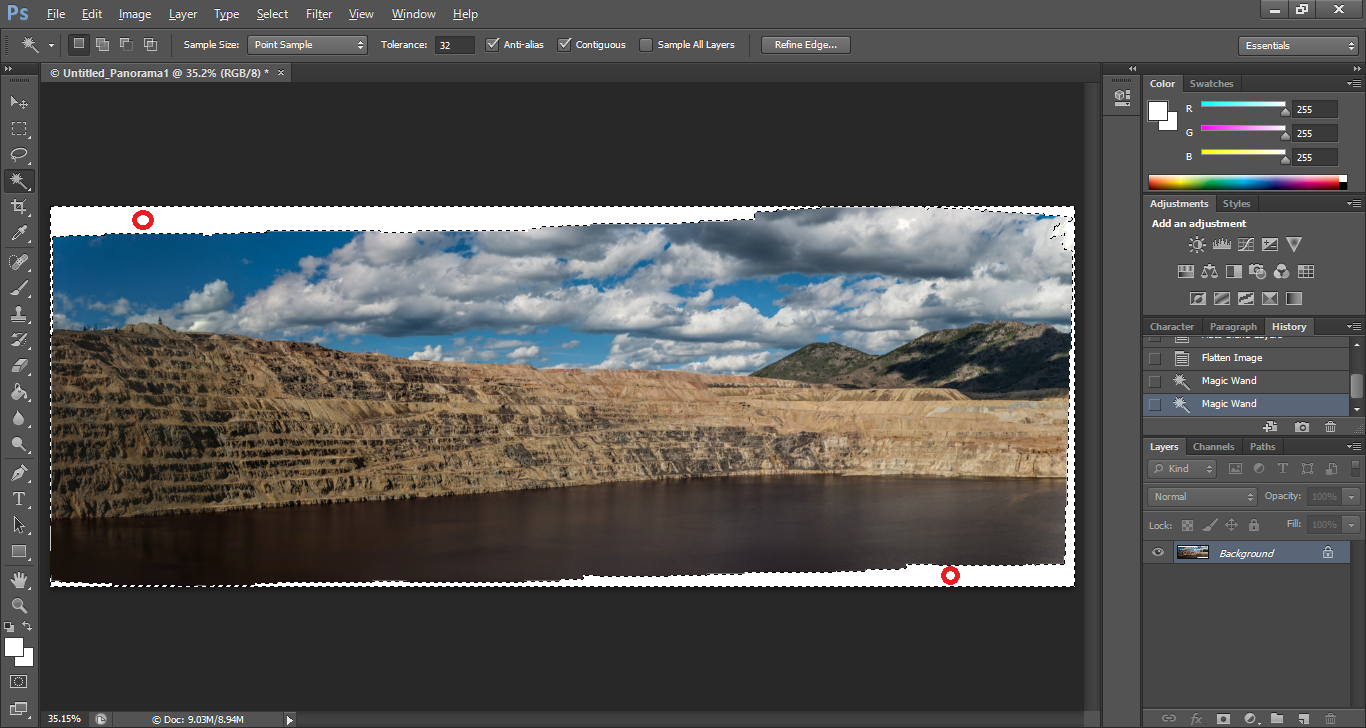
First, select the white spaces using the Magic Tool.
Next, hold Shift key and click on all the white spaces around the edges.
In this image, we have held the Shift key and clicked on the parts highlighted with red.
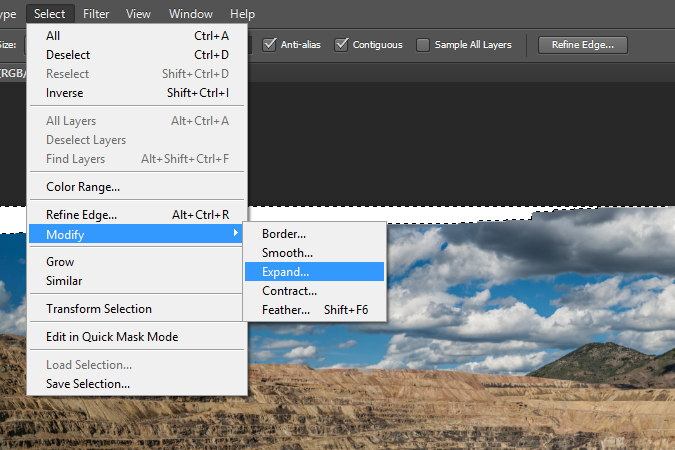
To use Content Aware, we need select a few pixels of the image in addition to the white space. We do this by going to Select > Modify > Expand.
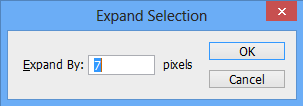
In the Expand Selection window, we can input a value of approximately 7 pixels but the value depends on the size of your image.
Touching Up
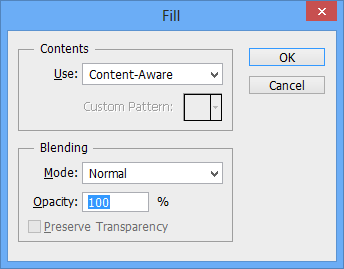
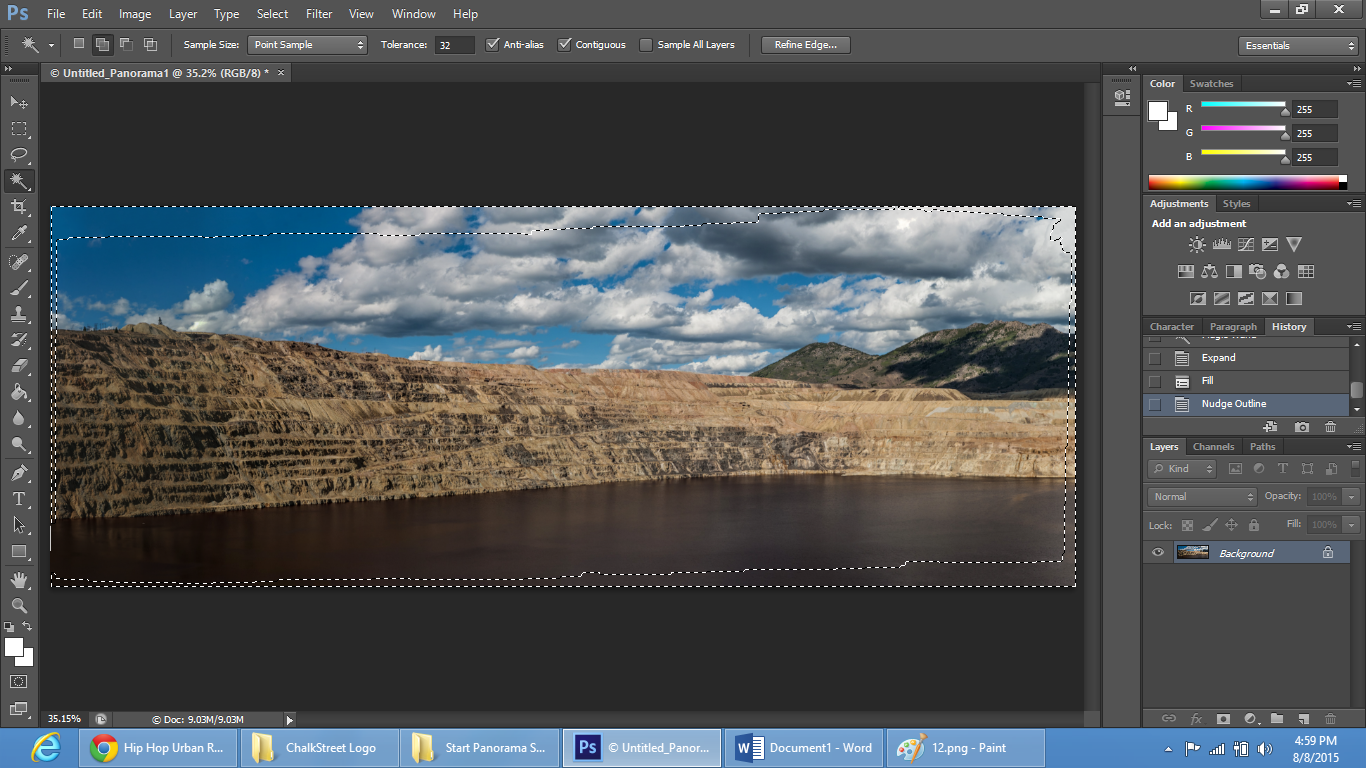
Now that we have the parts selected, we go to Edit > Fill (or Shift + F5)
Select Content-Aware and press OK.
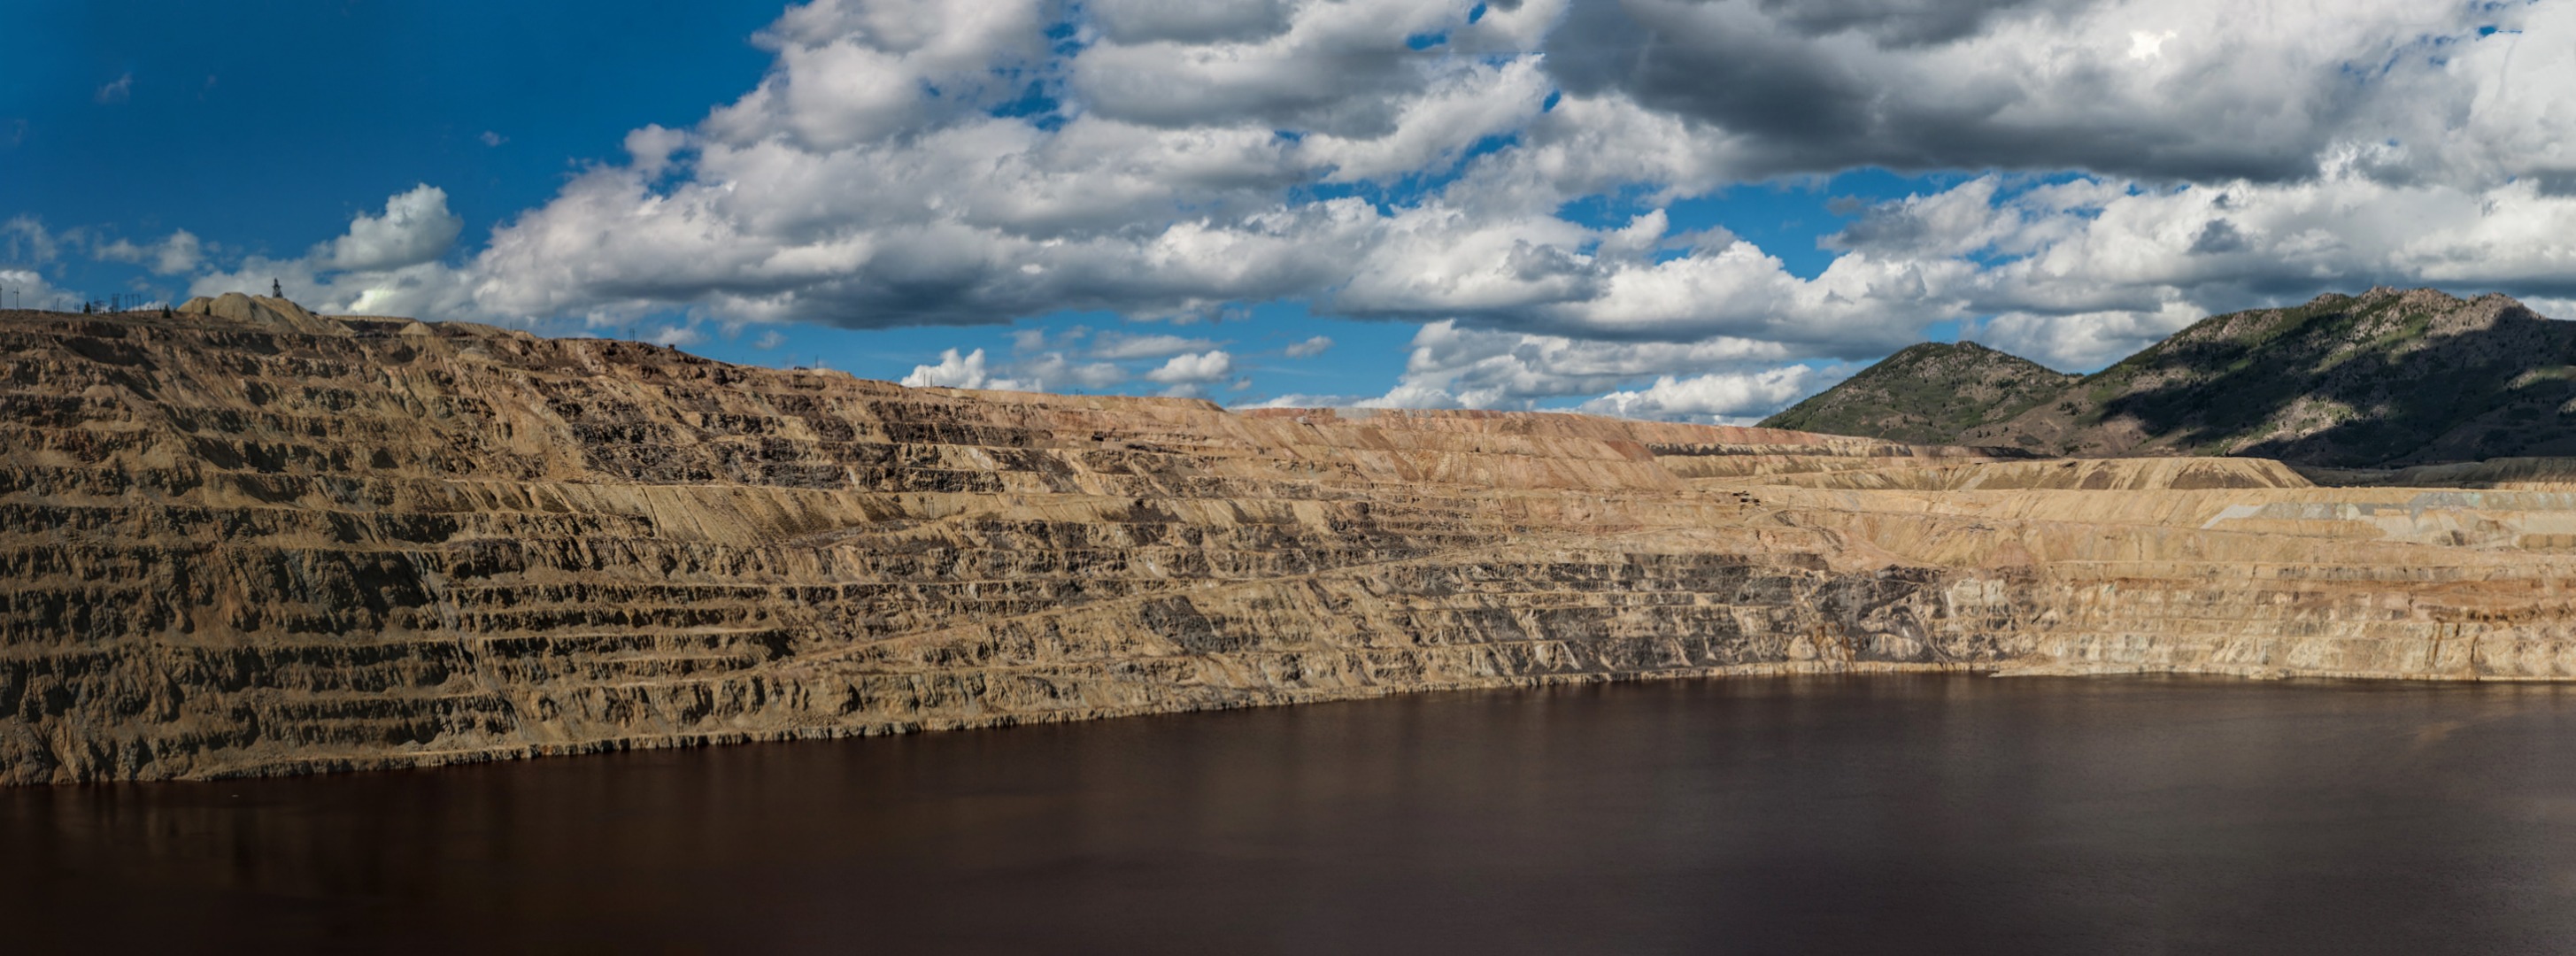
To remove the dotted lines, hit Ctrl + D.
And you have the final result: a stunning panorama. You can use some image colour correction to further process your image to make it a perfect image!