Create a Layered Cut Wood Landscape
by Patricia Knight in Workshop > Laser Cutting
3926 Views, 46 Favorites, 0 Comments
Create a Layered Cut Wood Landscape

As a digital art instructor, I am always trying to find ways for my digital artists to take their virtual art into the real world. This is a fun and successful project that as a teacher you could scale up or down in difficulty depending on your age group, but I also love making these for myself!
Why a landscape? Because a landscape (or seascape or cityscape) lends itself well to making multiple layers with a background, middle ground and foreground. Also, a landscape typically goes from edge to edge, which is what you need when envisioning how these layers will physically stack up into a solid piece at the end.
Although this was cut with a laser cutter because it is such a detailed piece, you could easily do a layered landscape design by hand. This also lends itself to thick cardboard and acrylic.
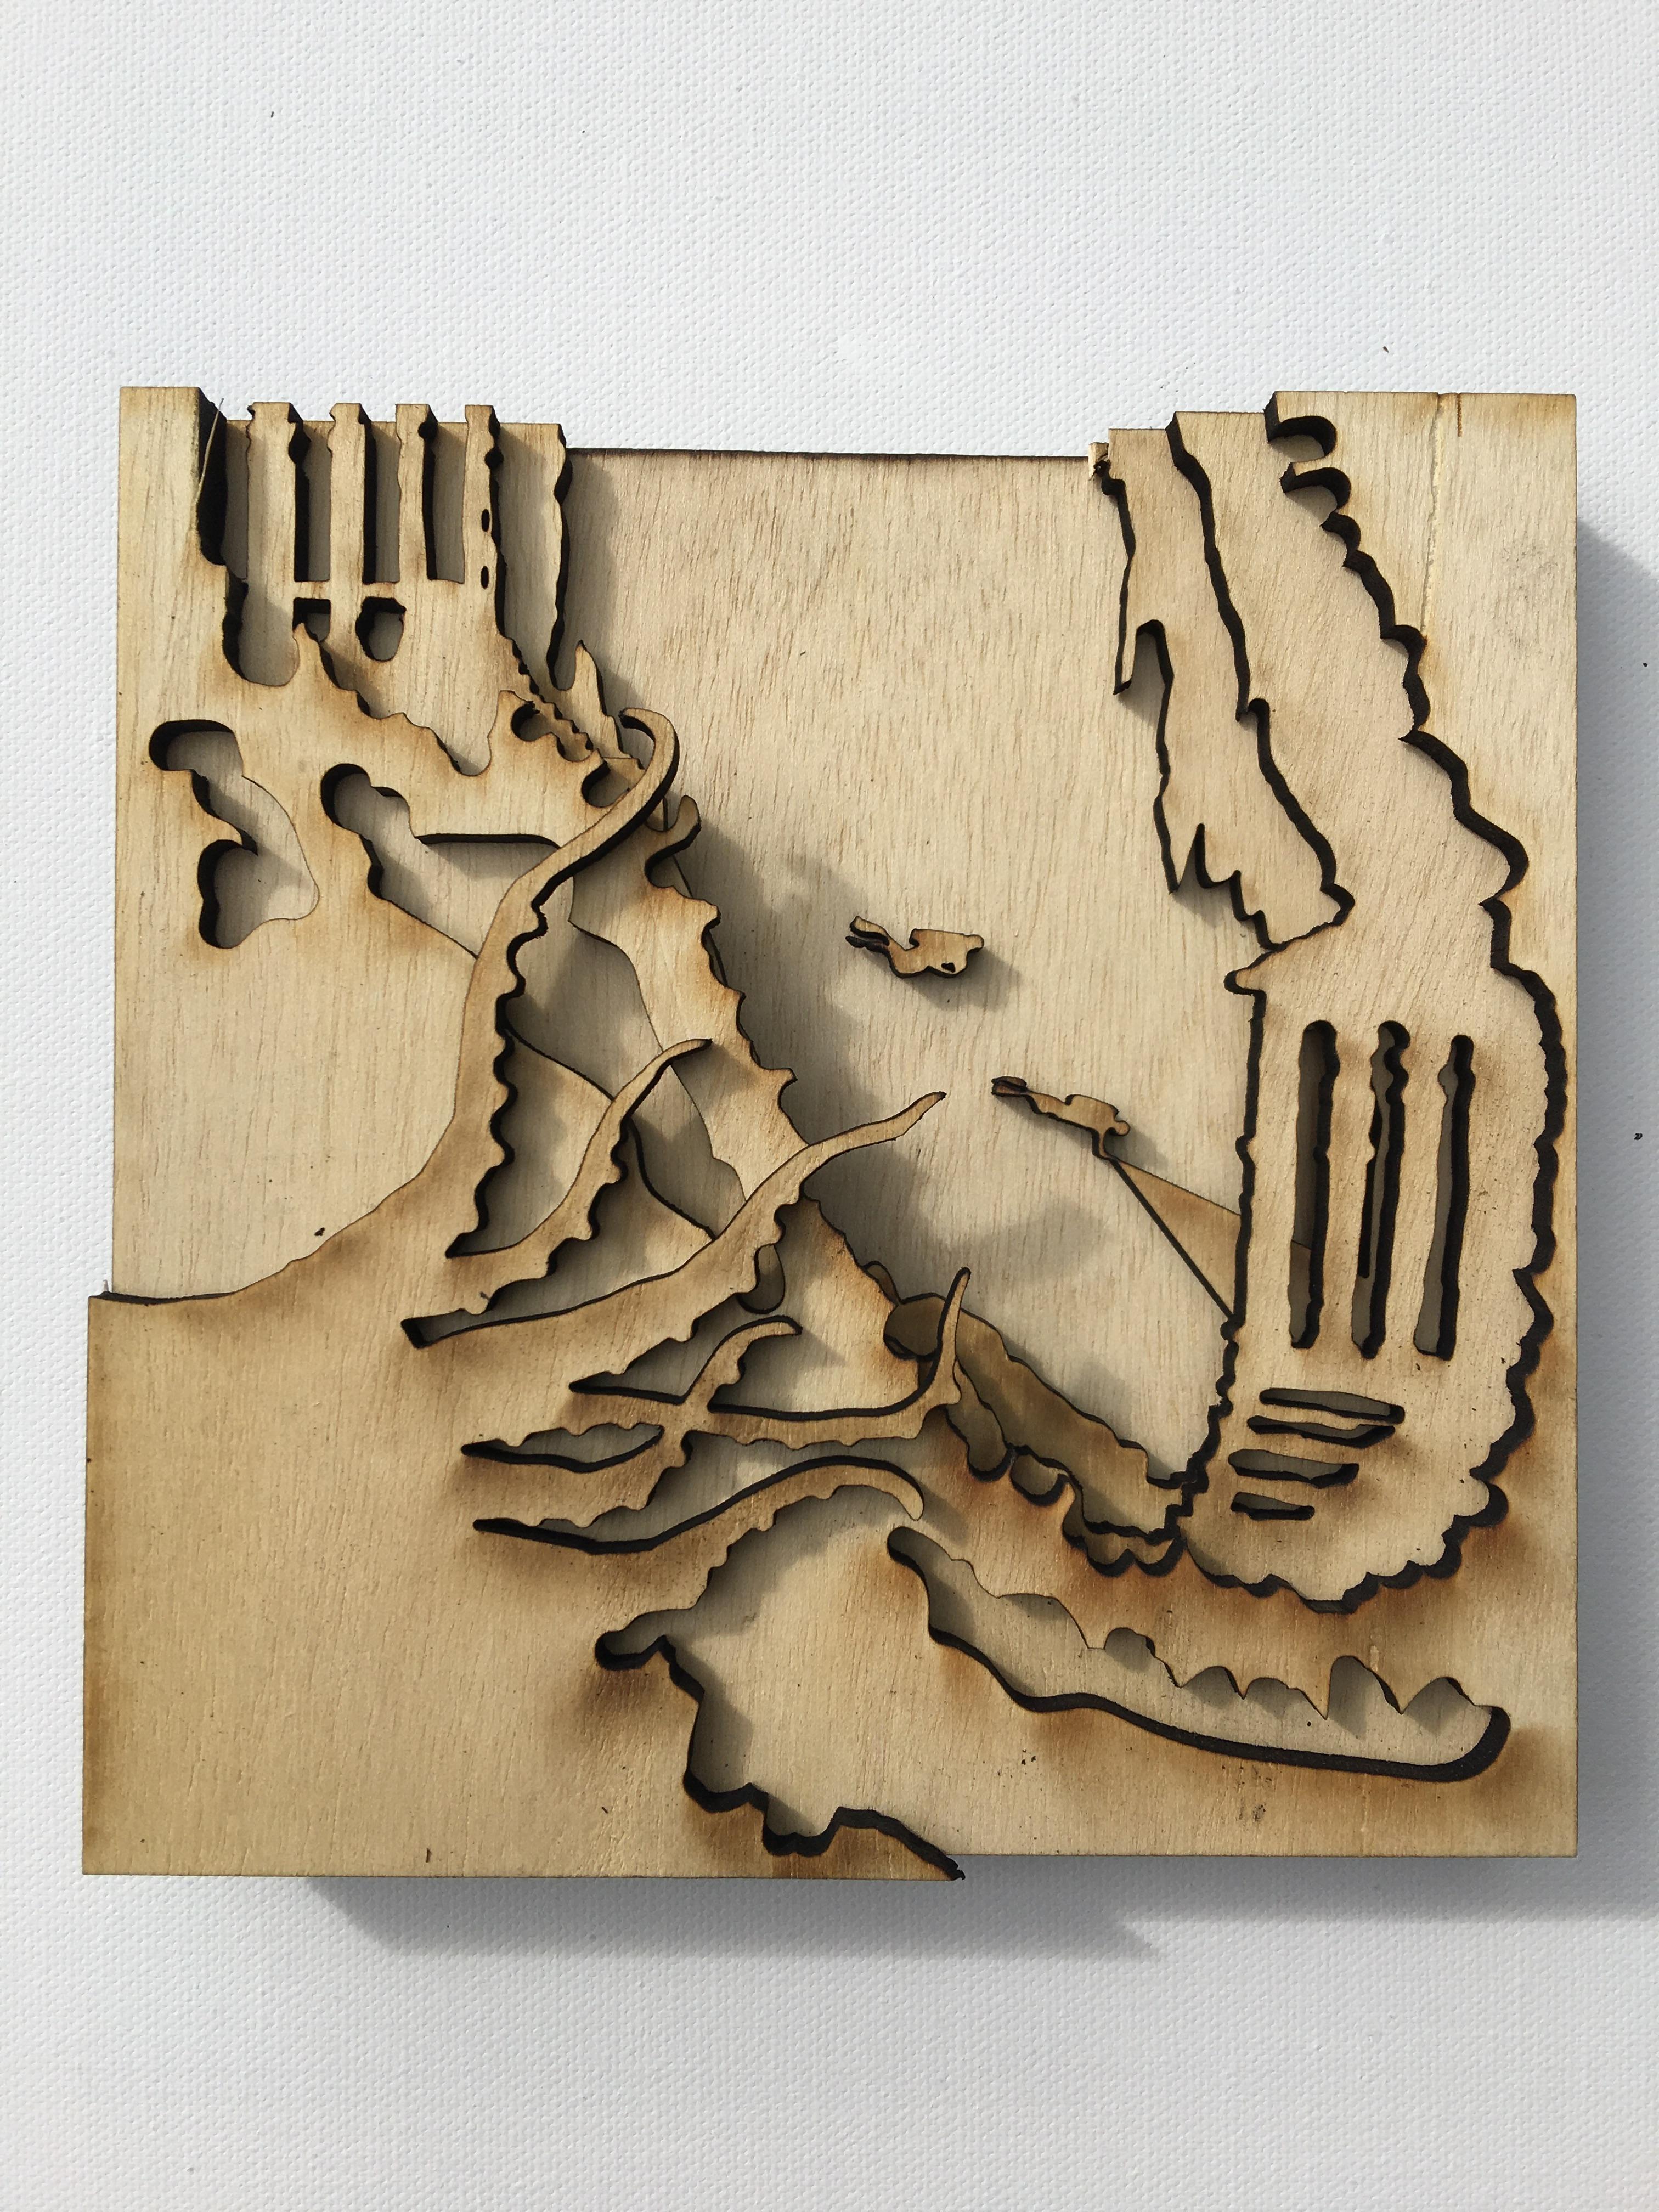
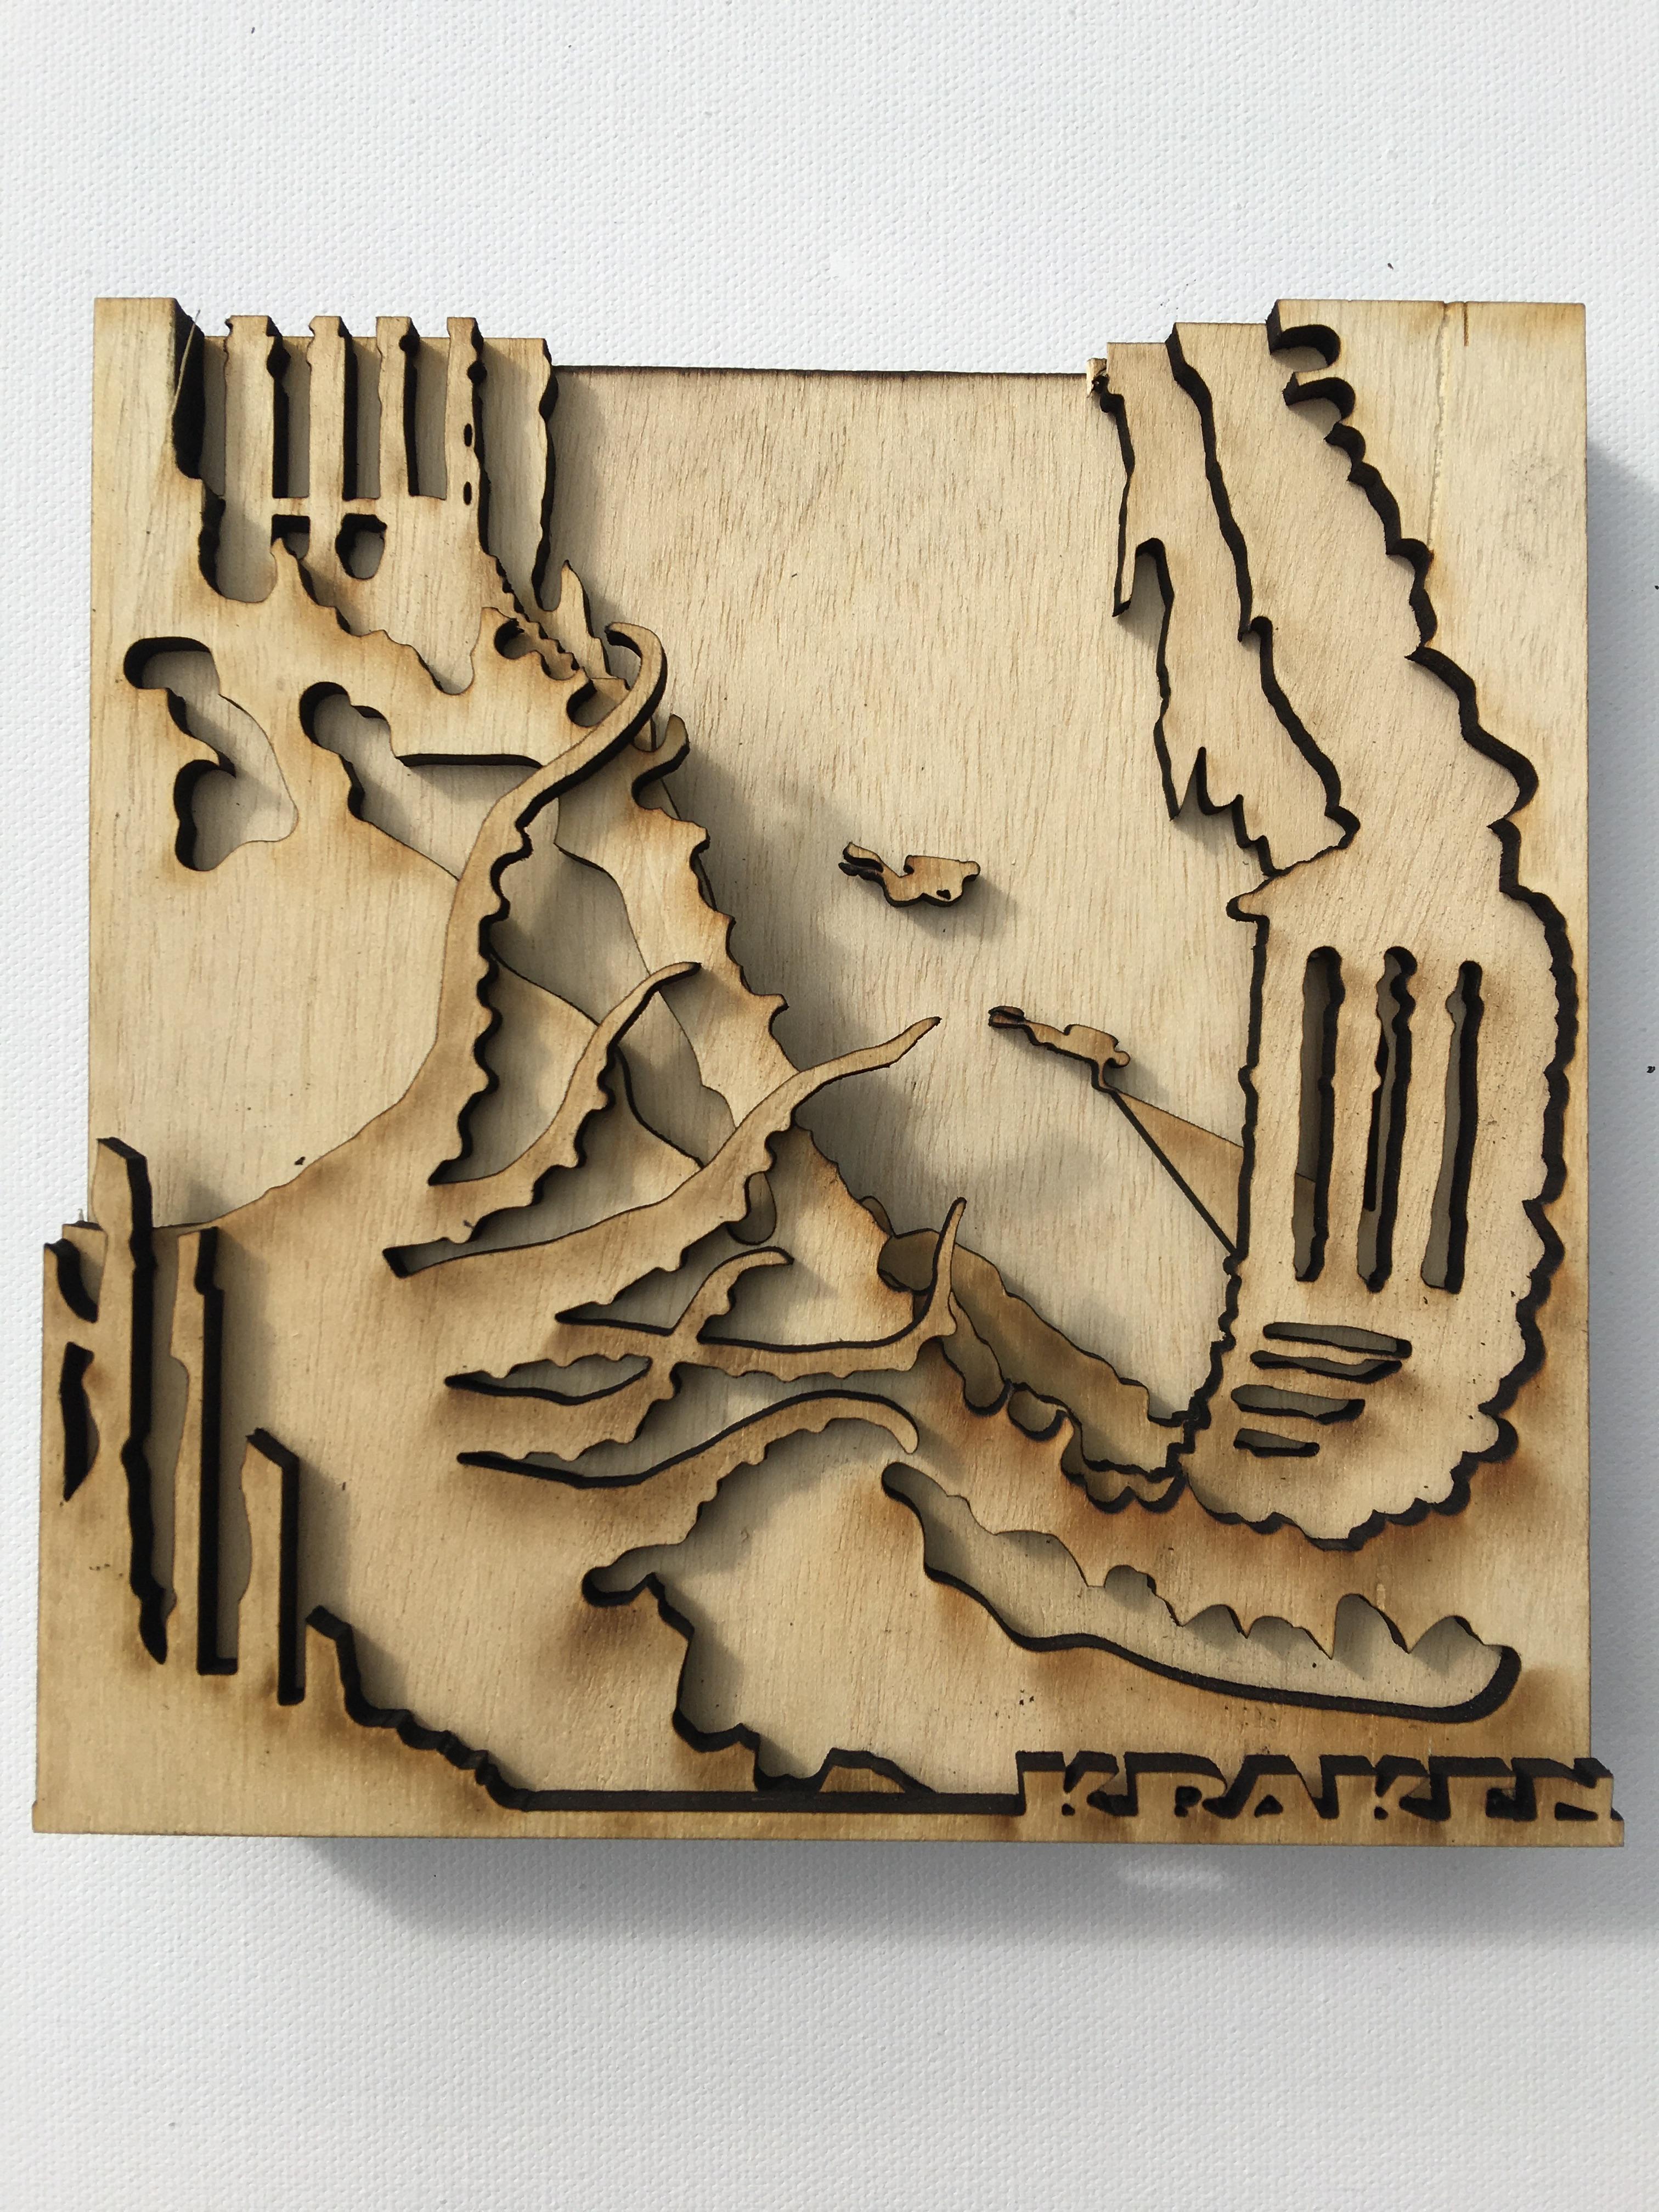
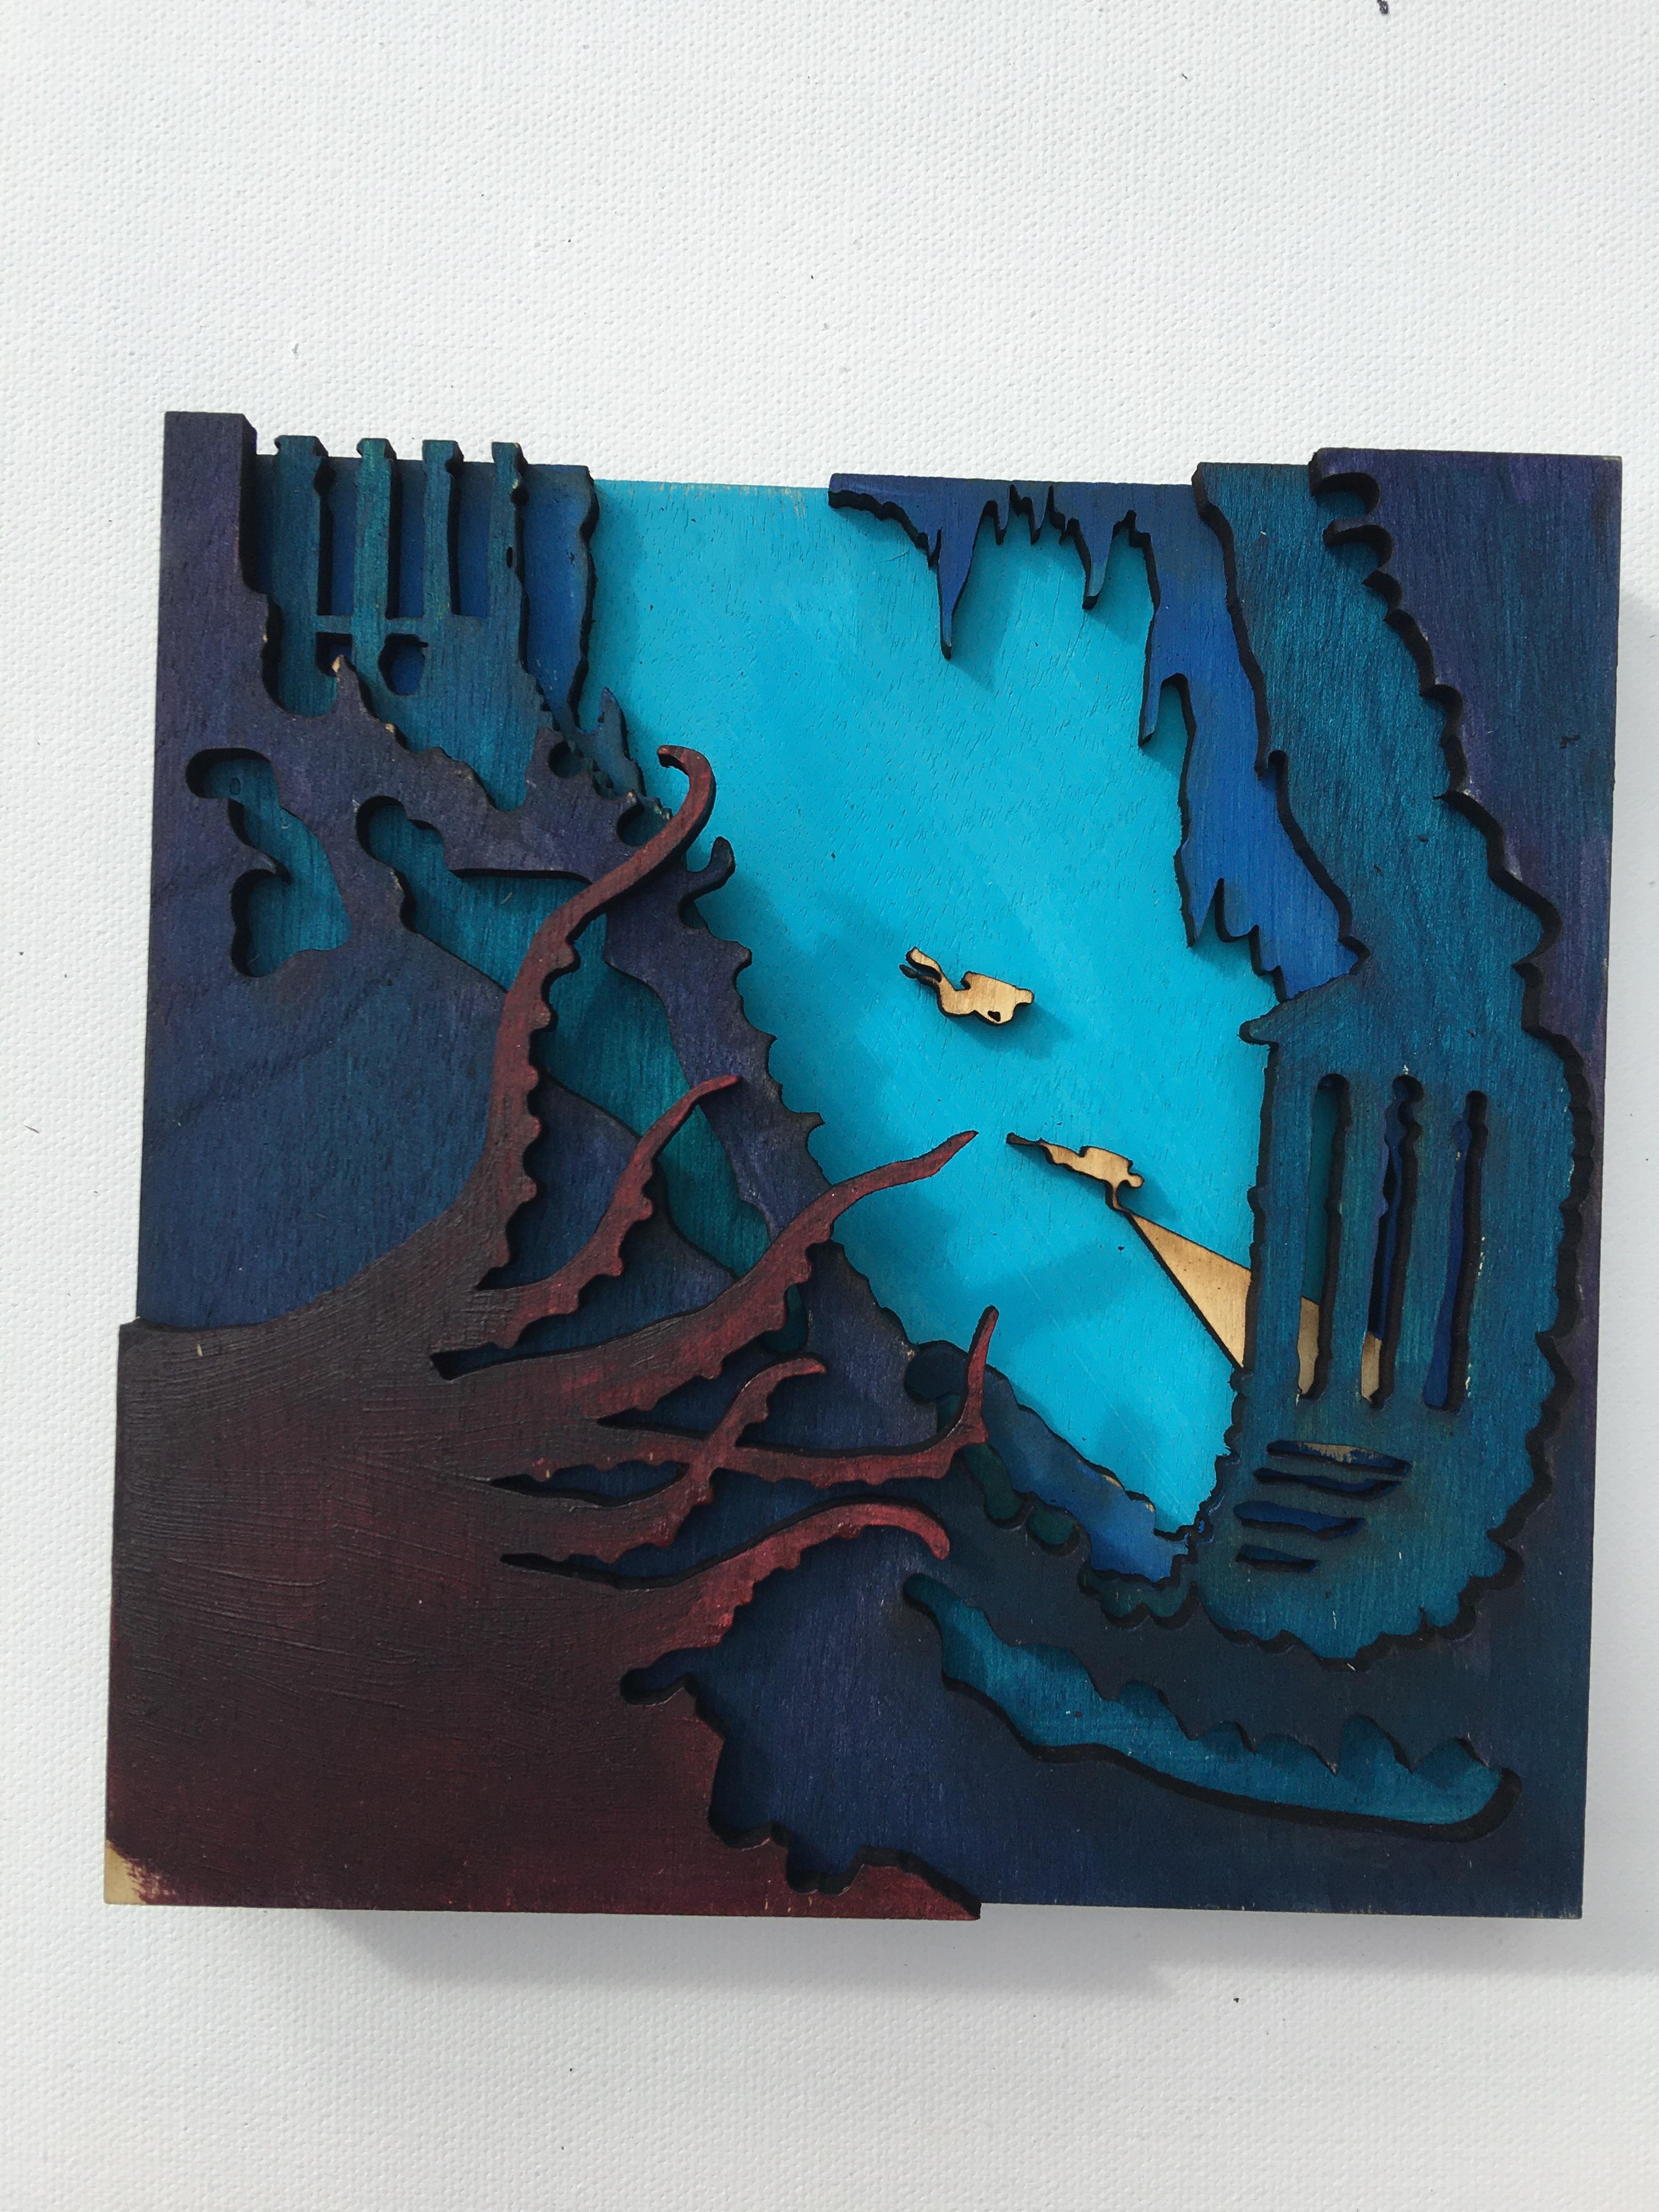
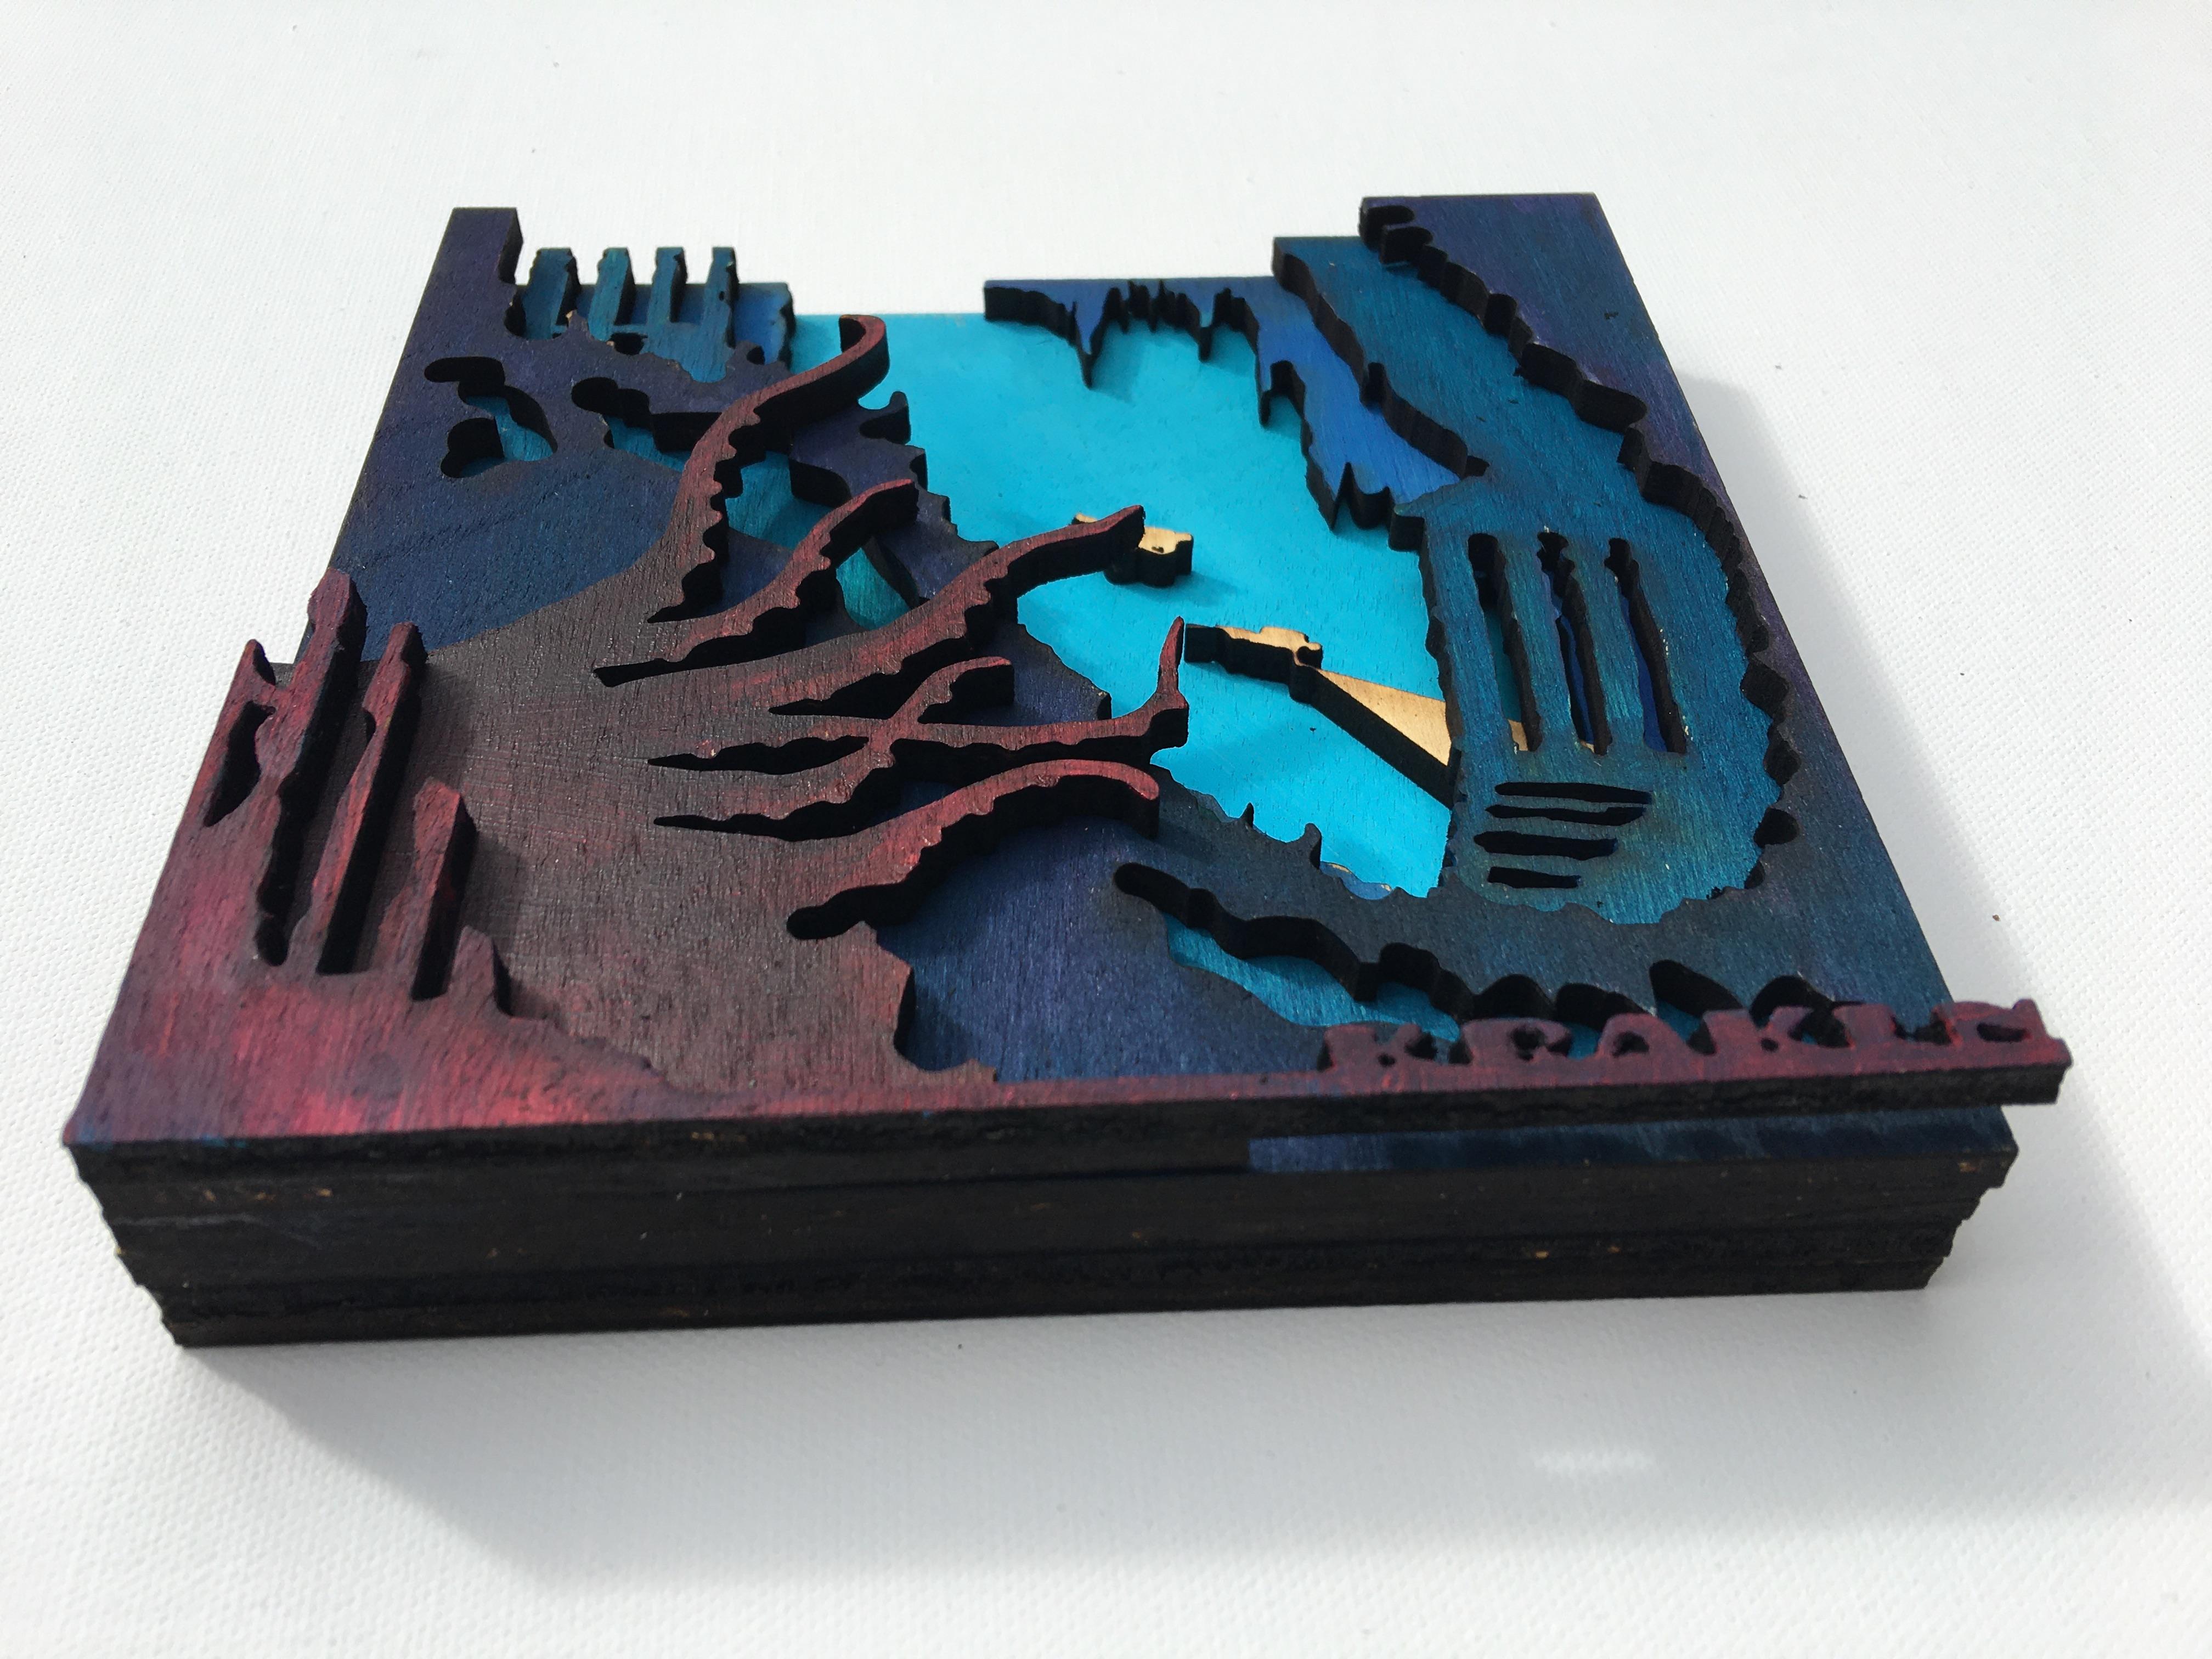
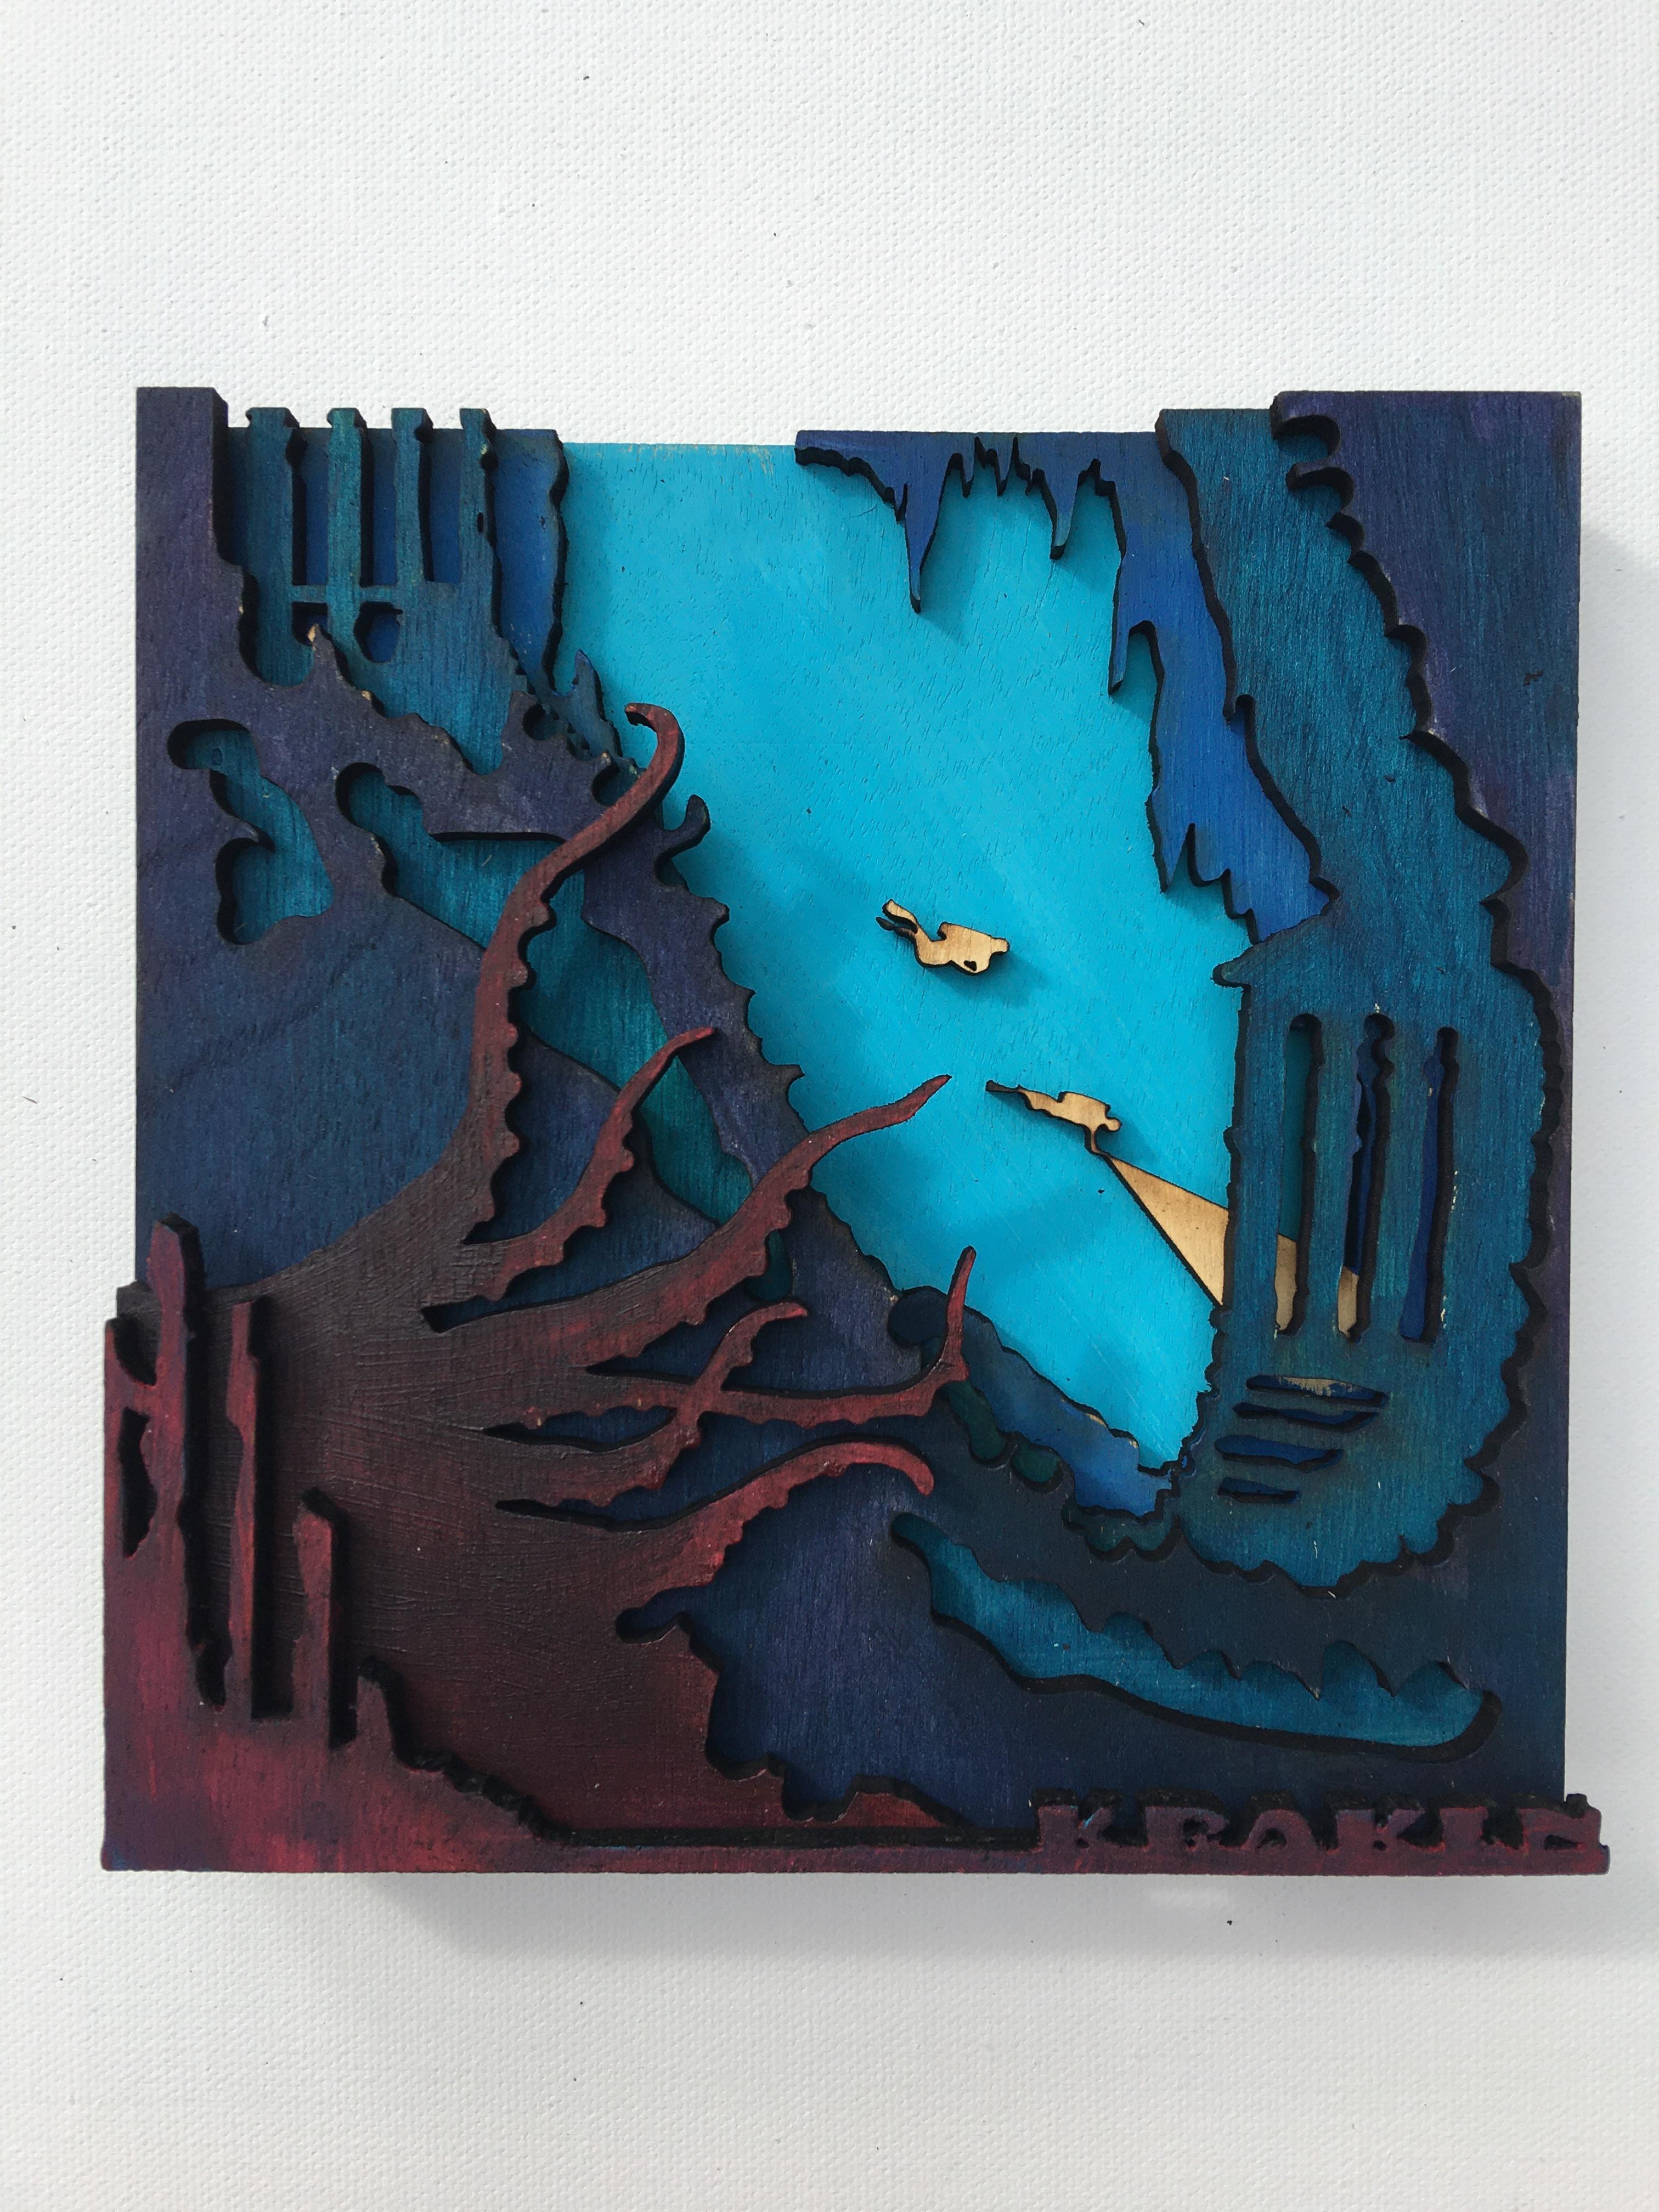
Basically this is simply using layers to create a more 3D looking scene because of the shadows cast by the physical thickness of the wood. I have chosen an underwater scene with a Kraken reaching from the depths of an Atlantean ruin toward some exploring scuba divers (because who doesn't love some sea monsters?).
Let's get started.
Supplies
Materials used in this project:
1/4" flat wood
laser cutter
wood glue
acrylic paint
brushes
Create Your Design
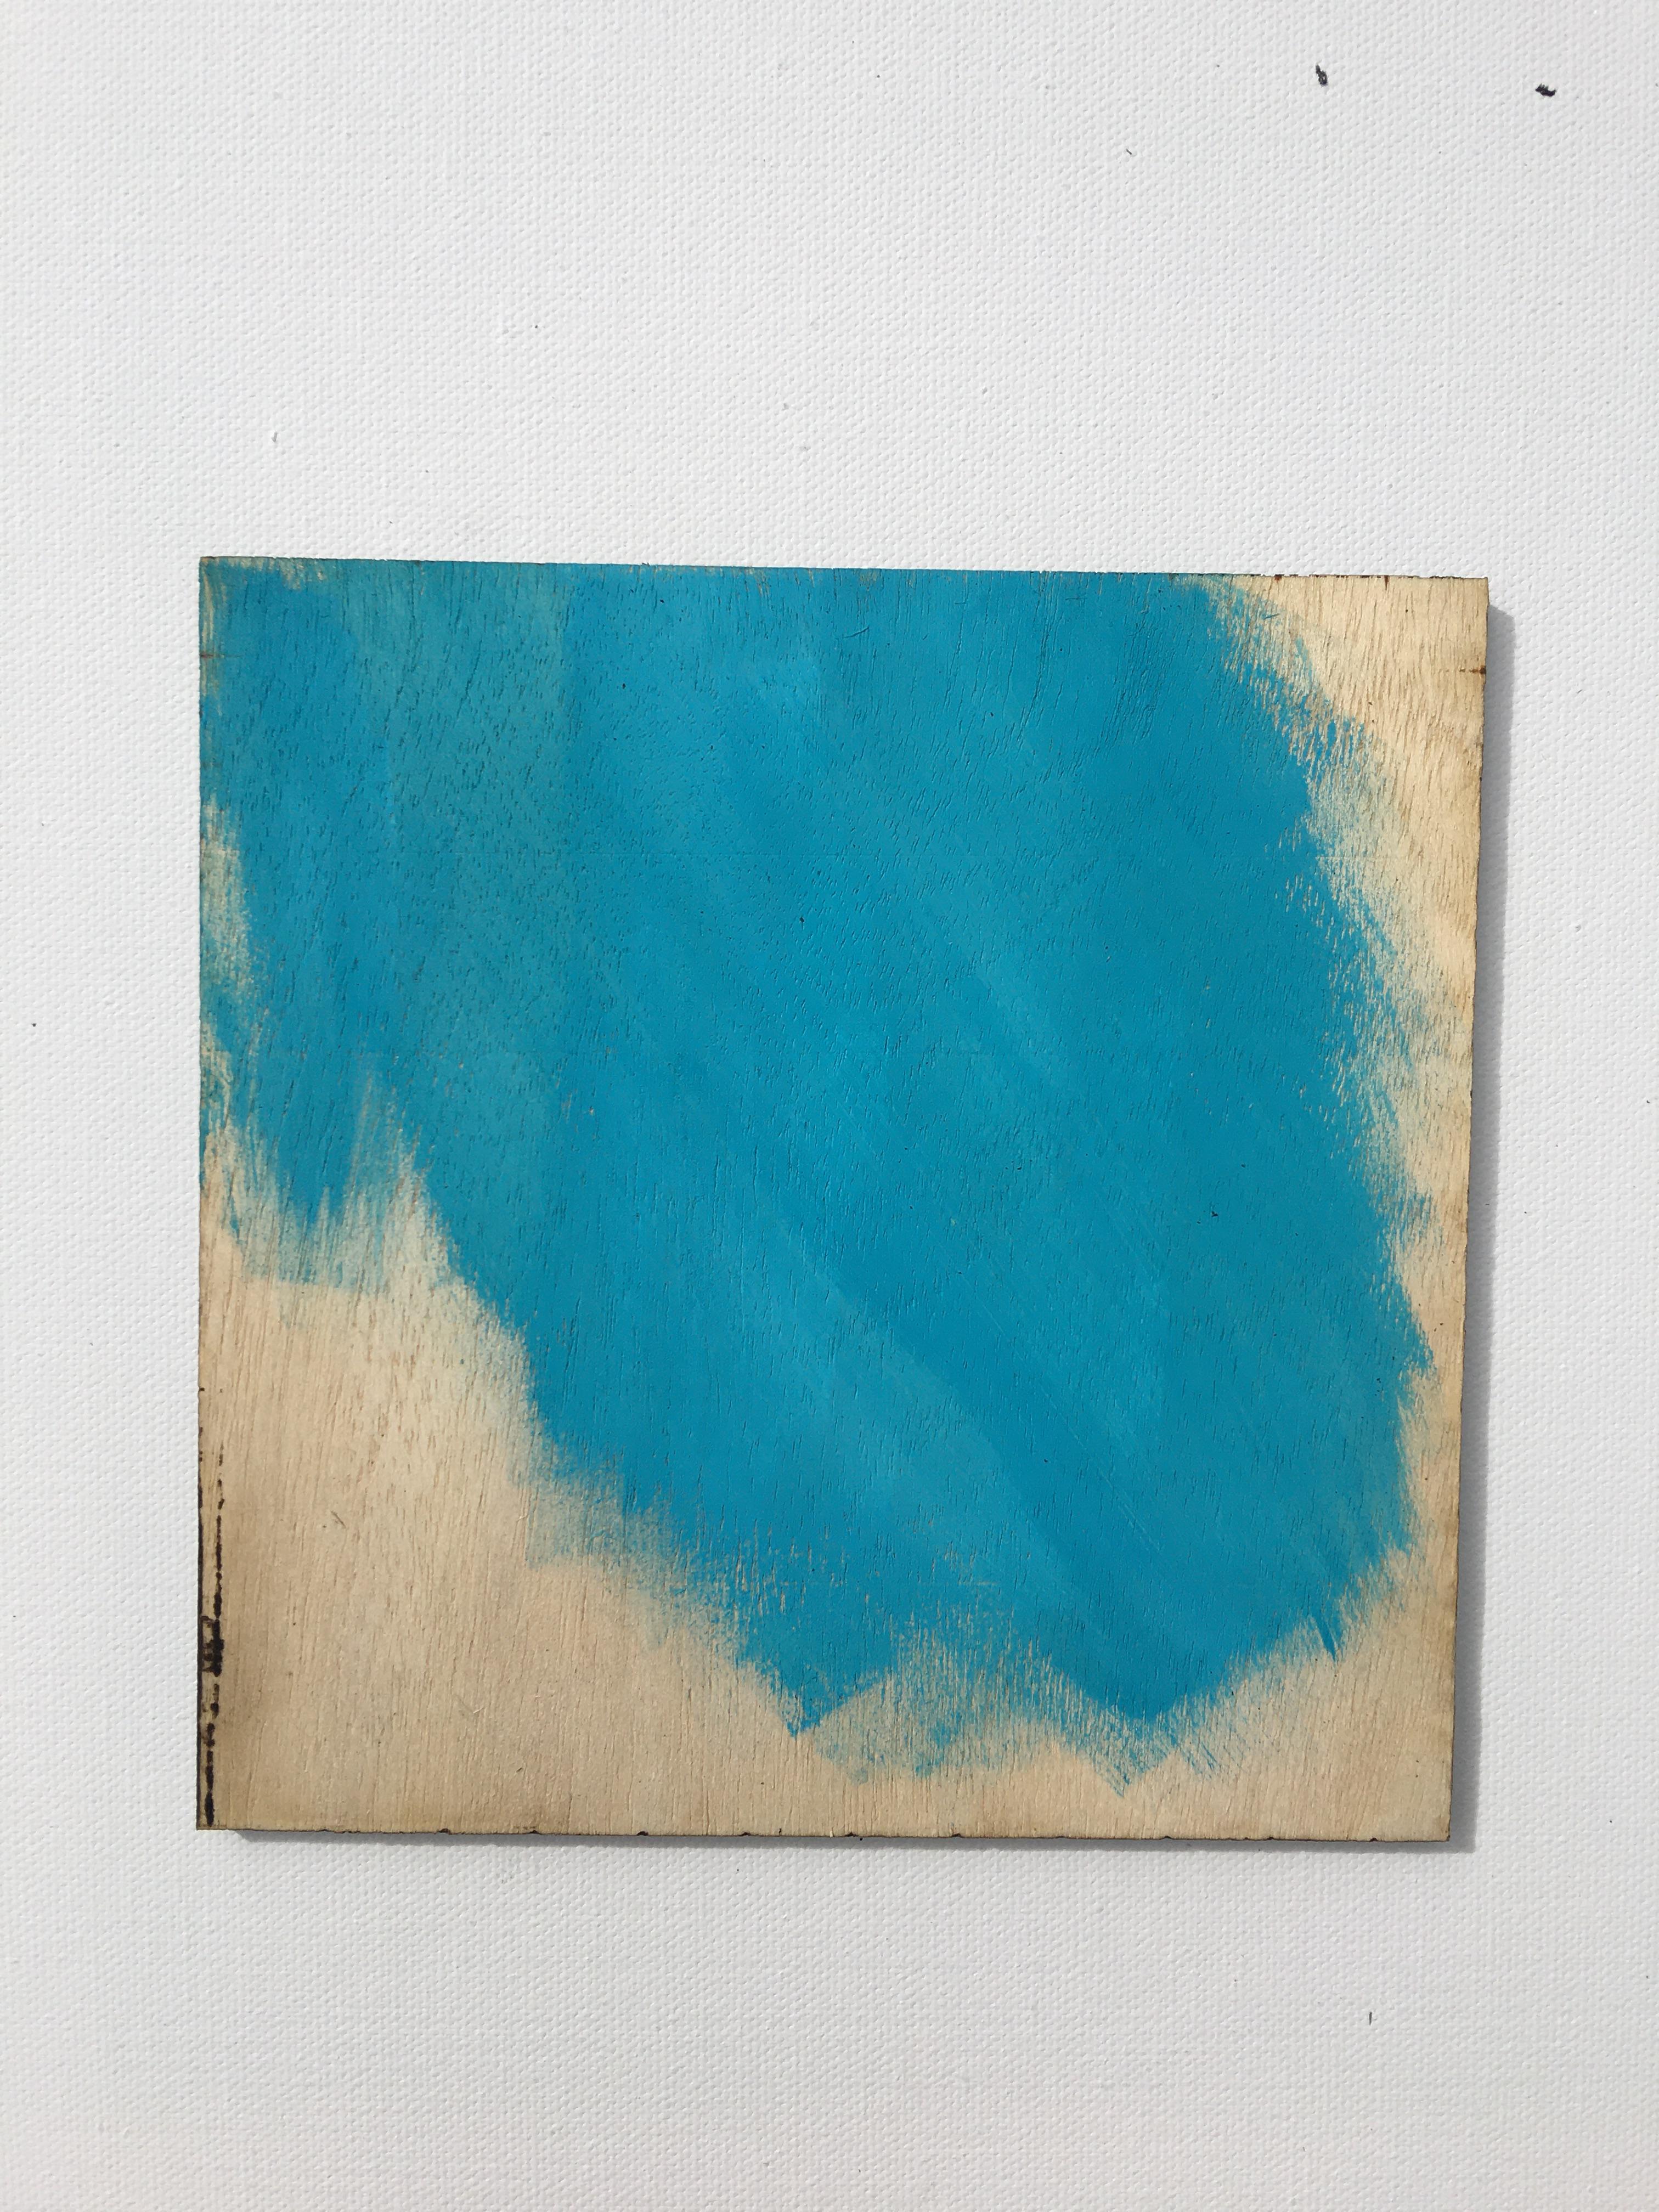
This is probably the hardest part. There are so many different things you could do! I've done some great abstract patterns and shapes and very realistic architectural pieces. The important thing is to remember that these pieces will be stacked on top of each other so you really need to keep track of what is going to be showing through with each layer. The layer in the very back is usually just a blank piece of wood, because it is just the background.
Think of each layer as a separate silhouette.
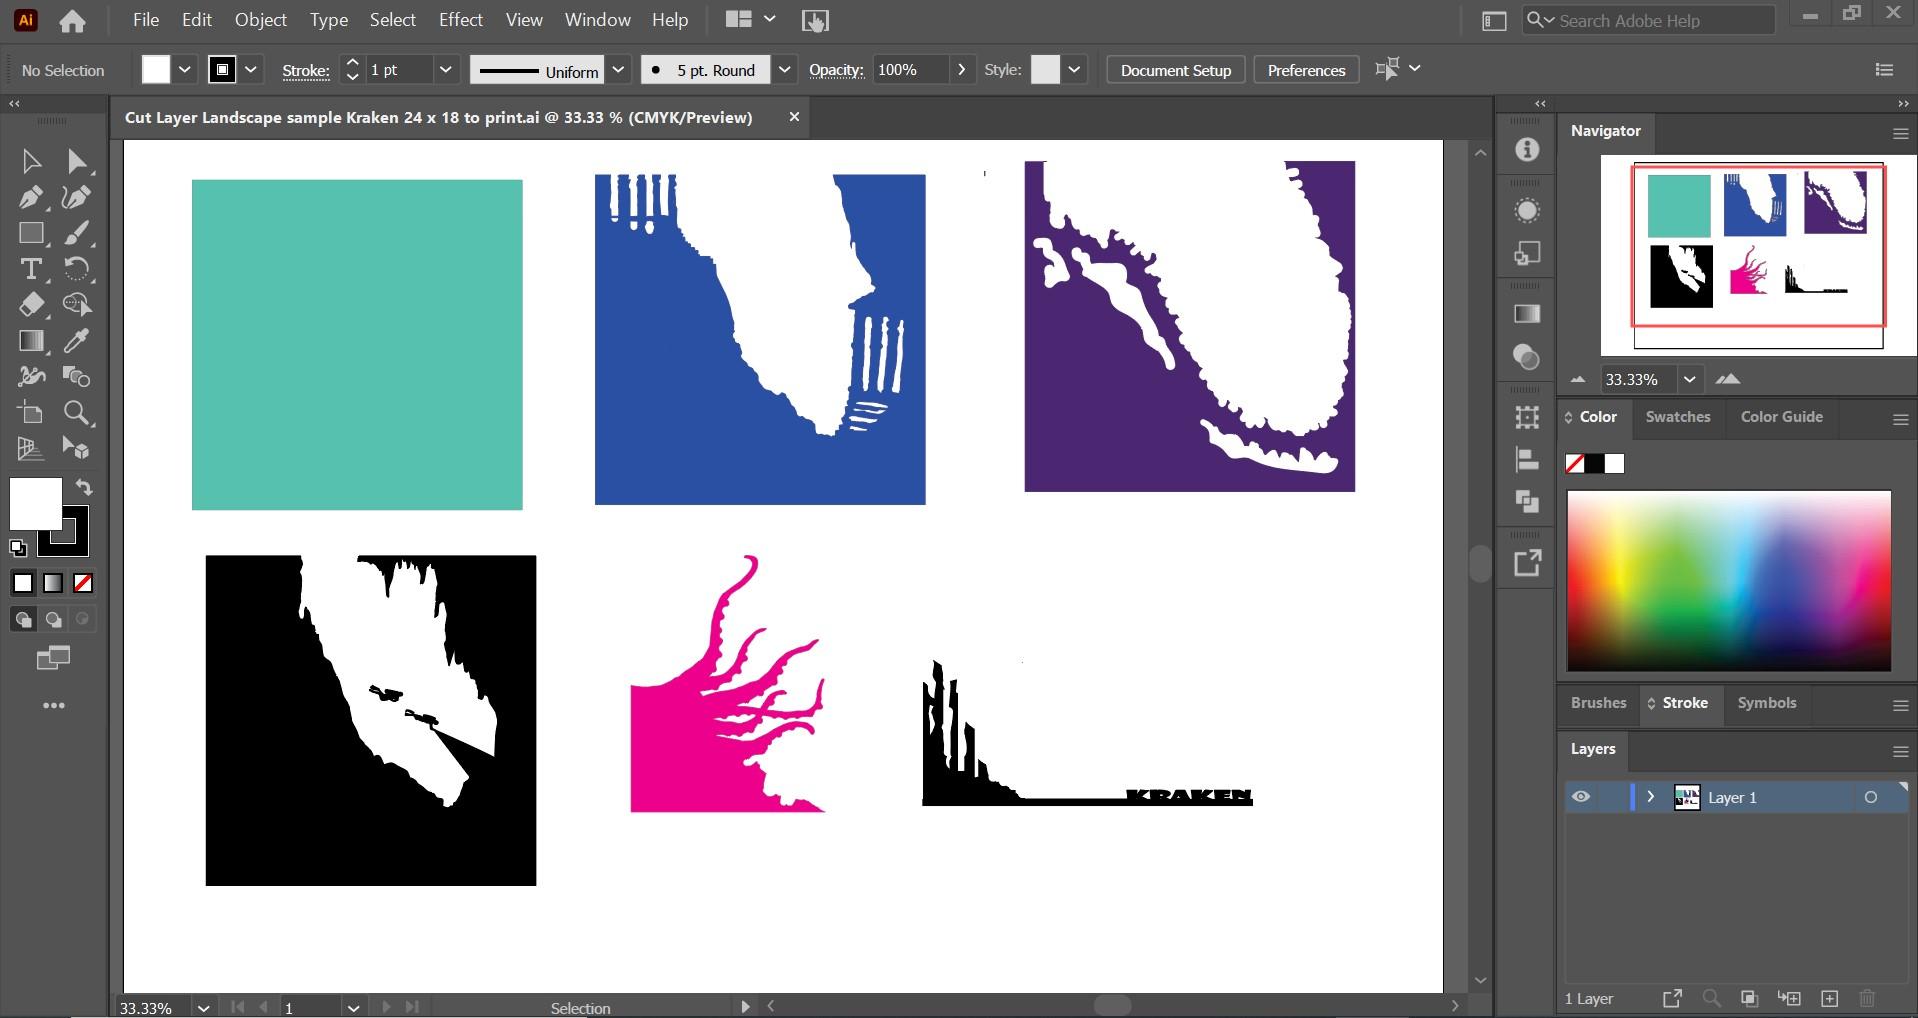
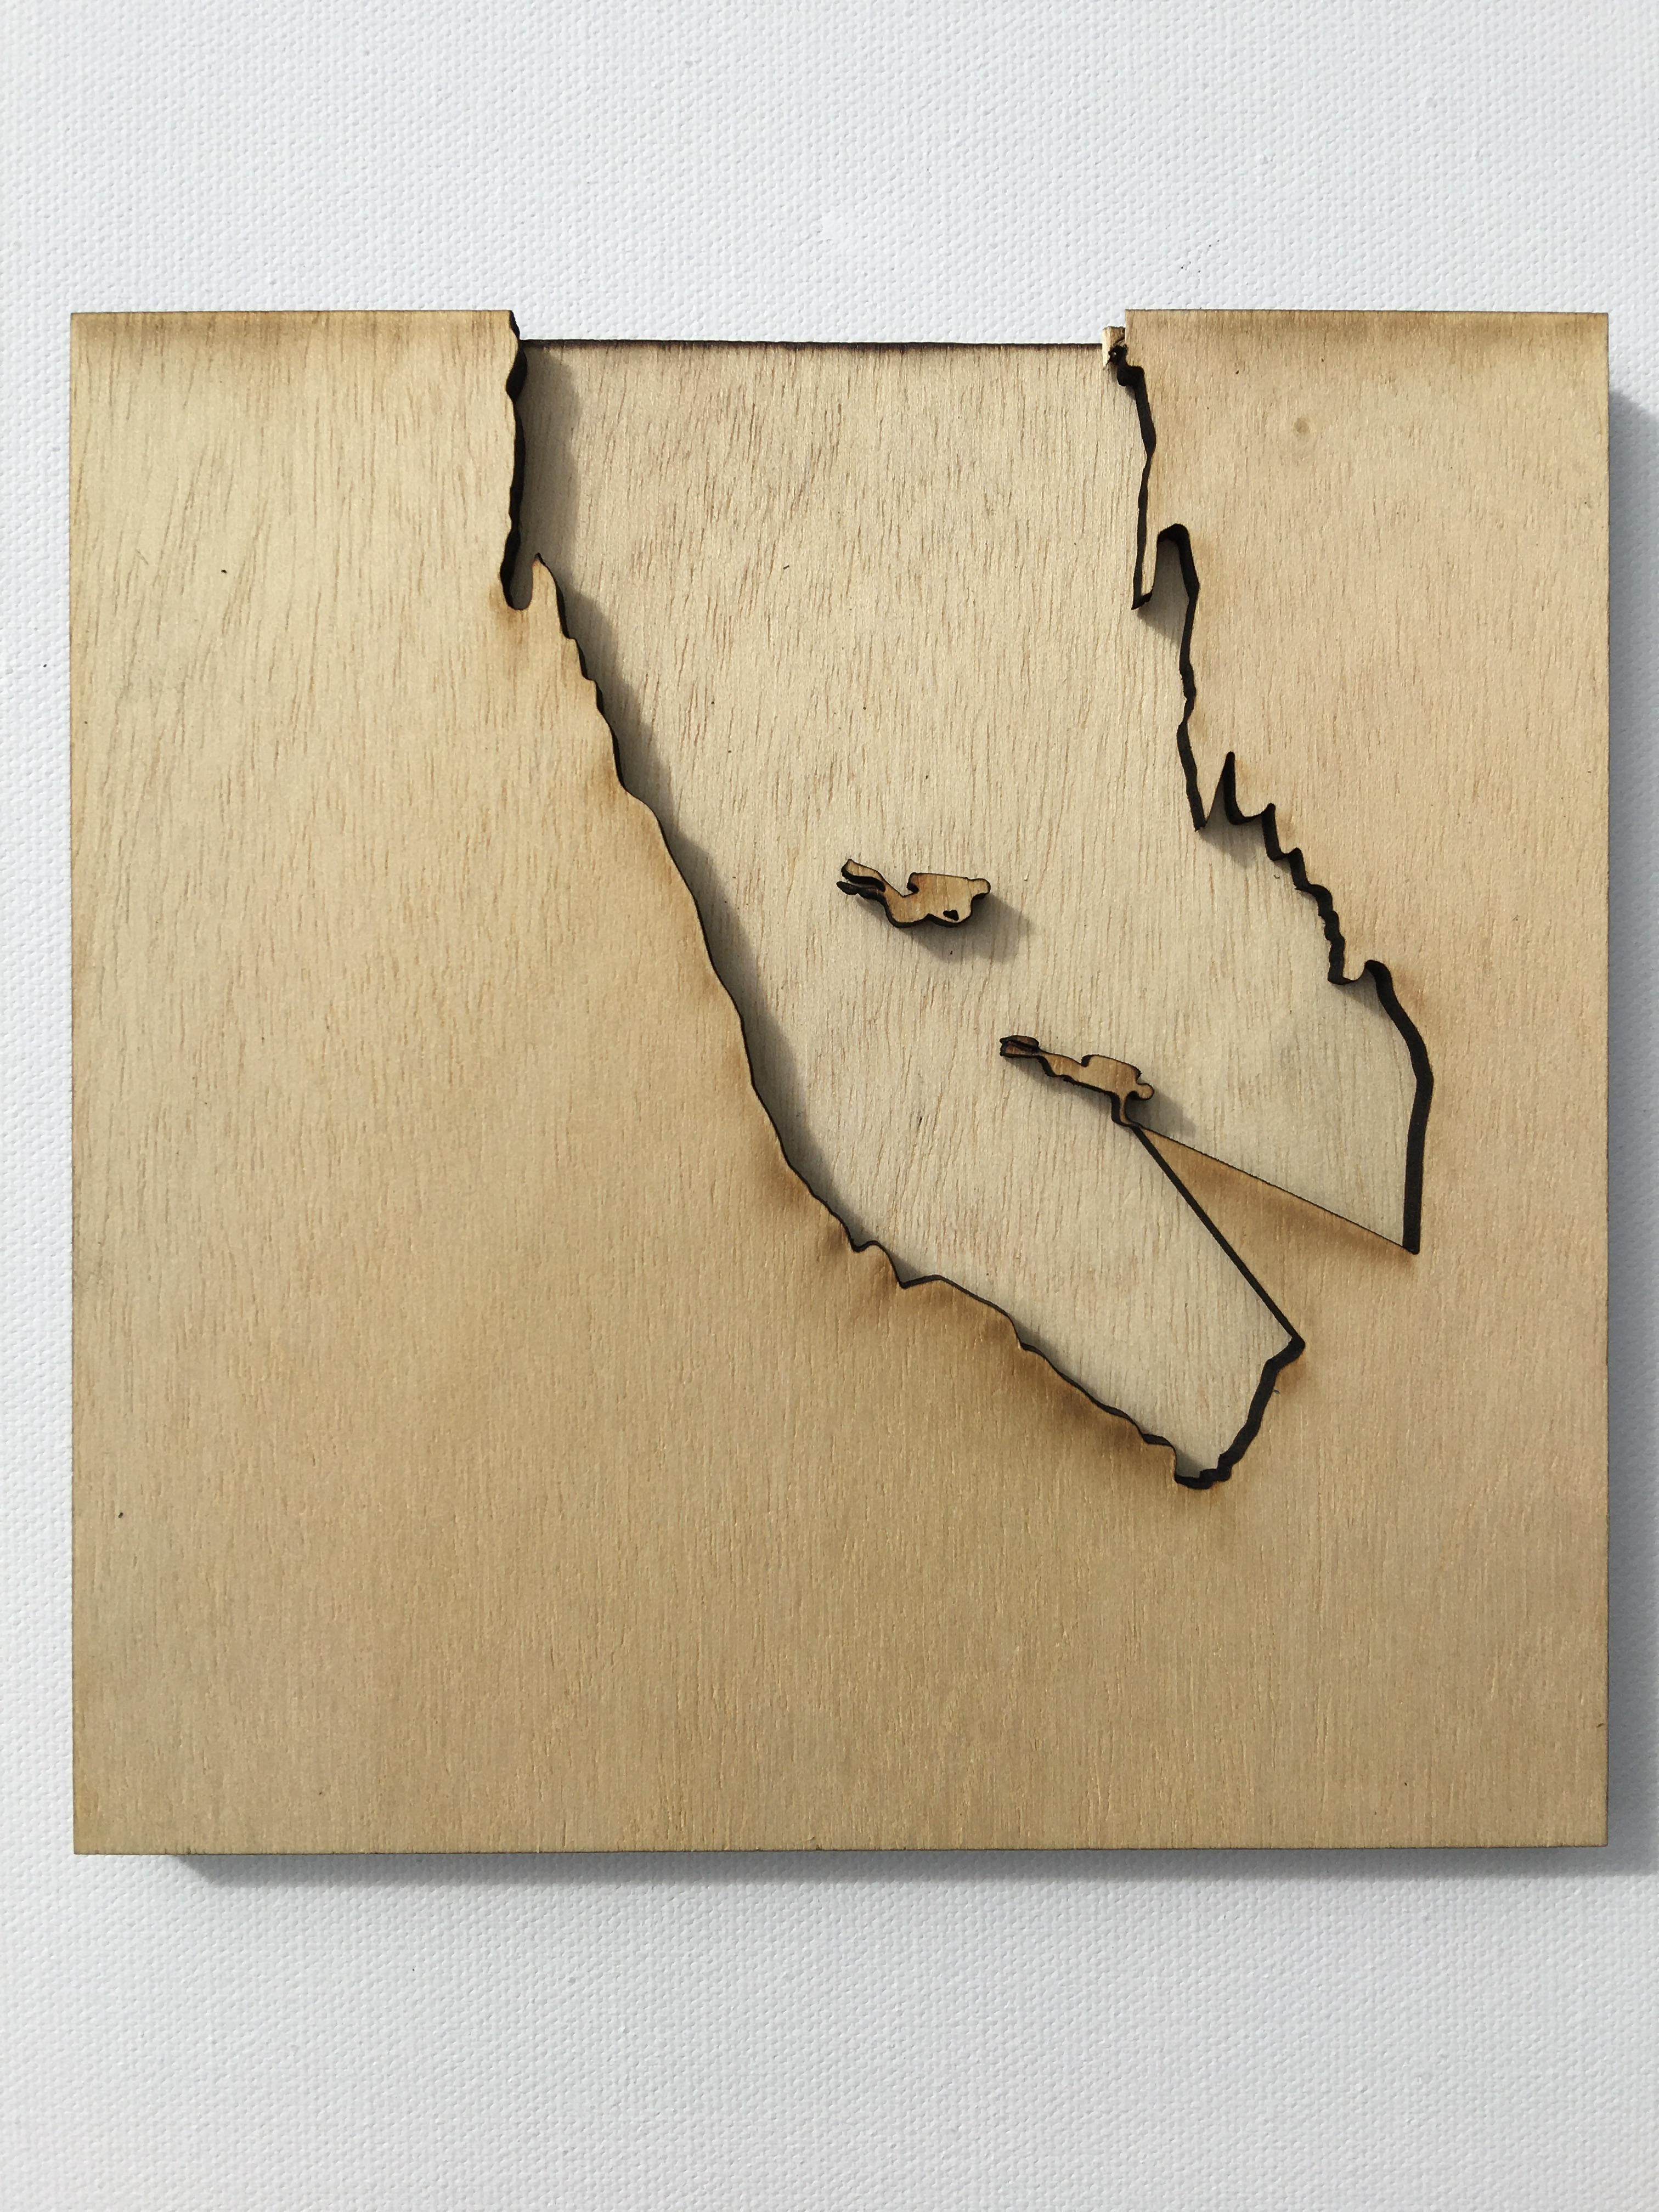
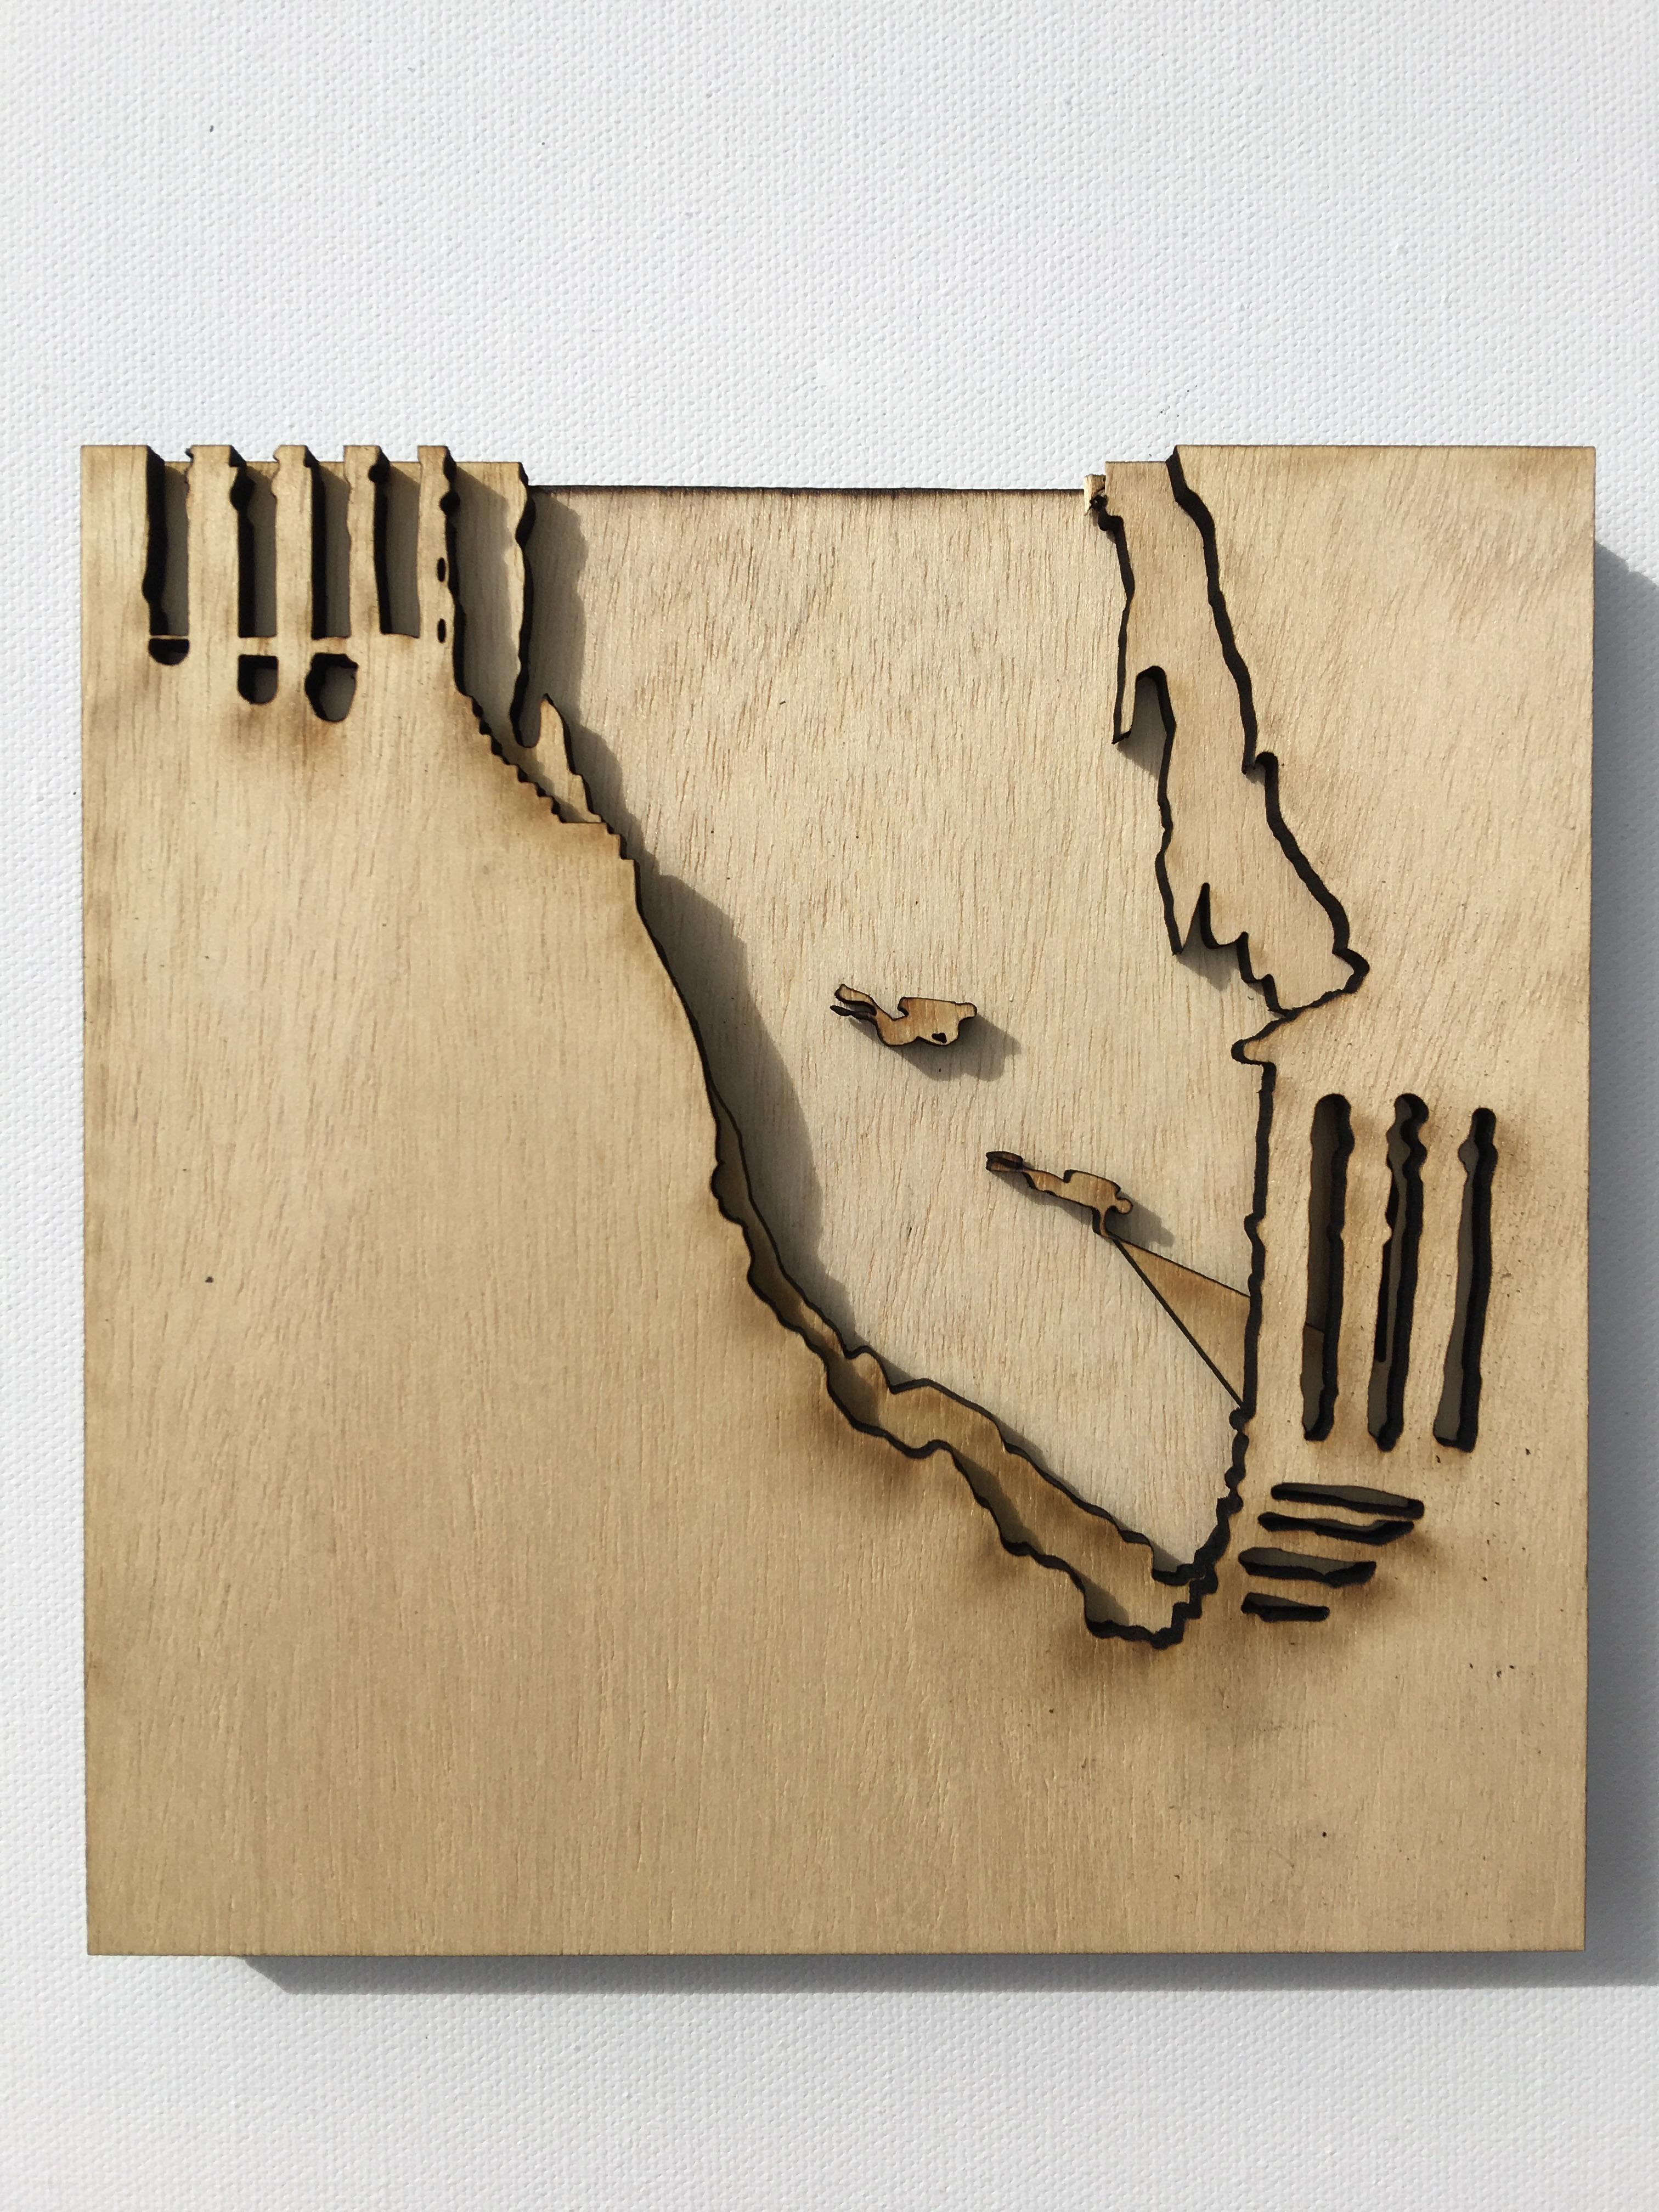
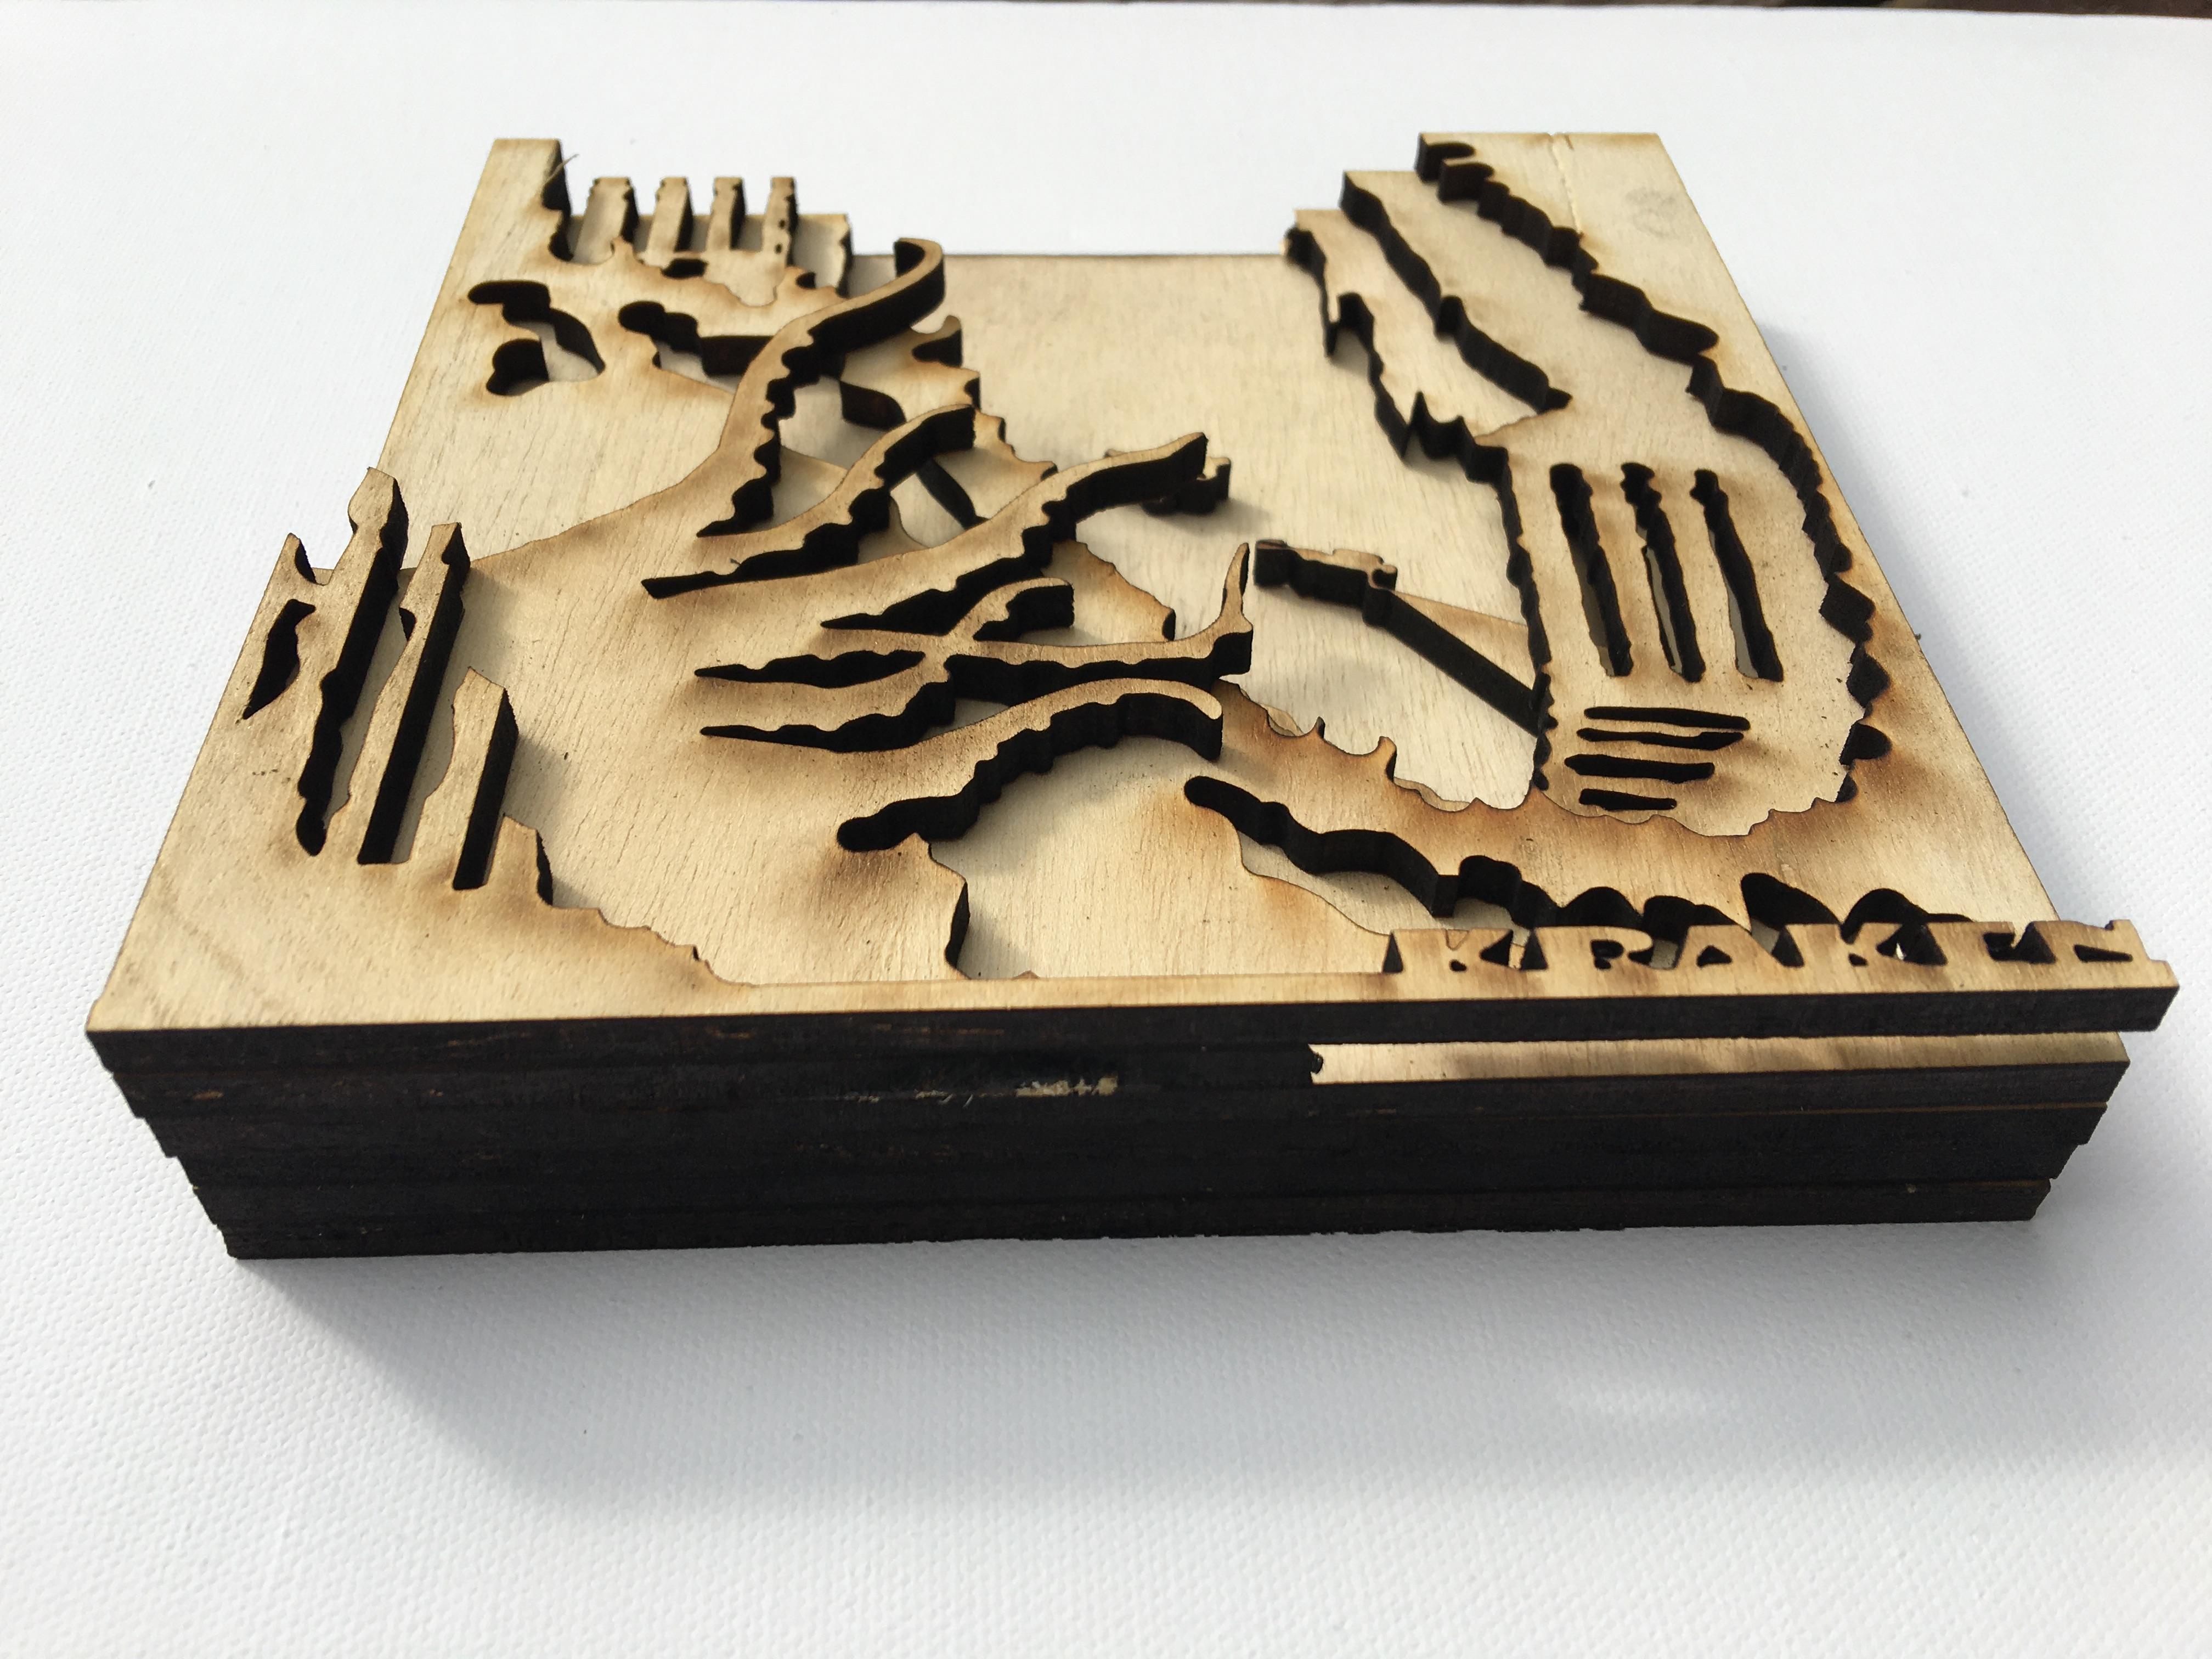
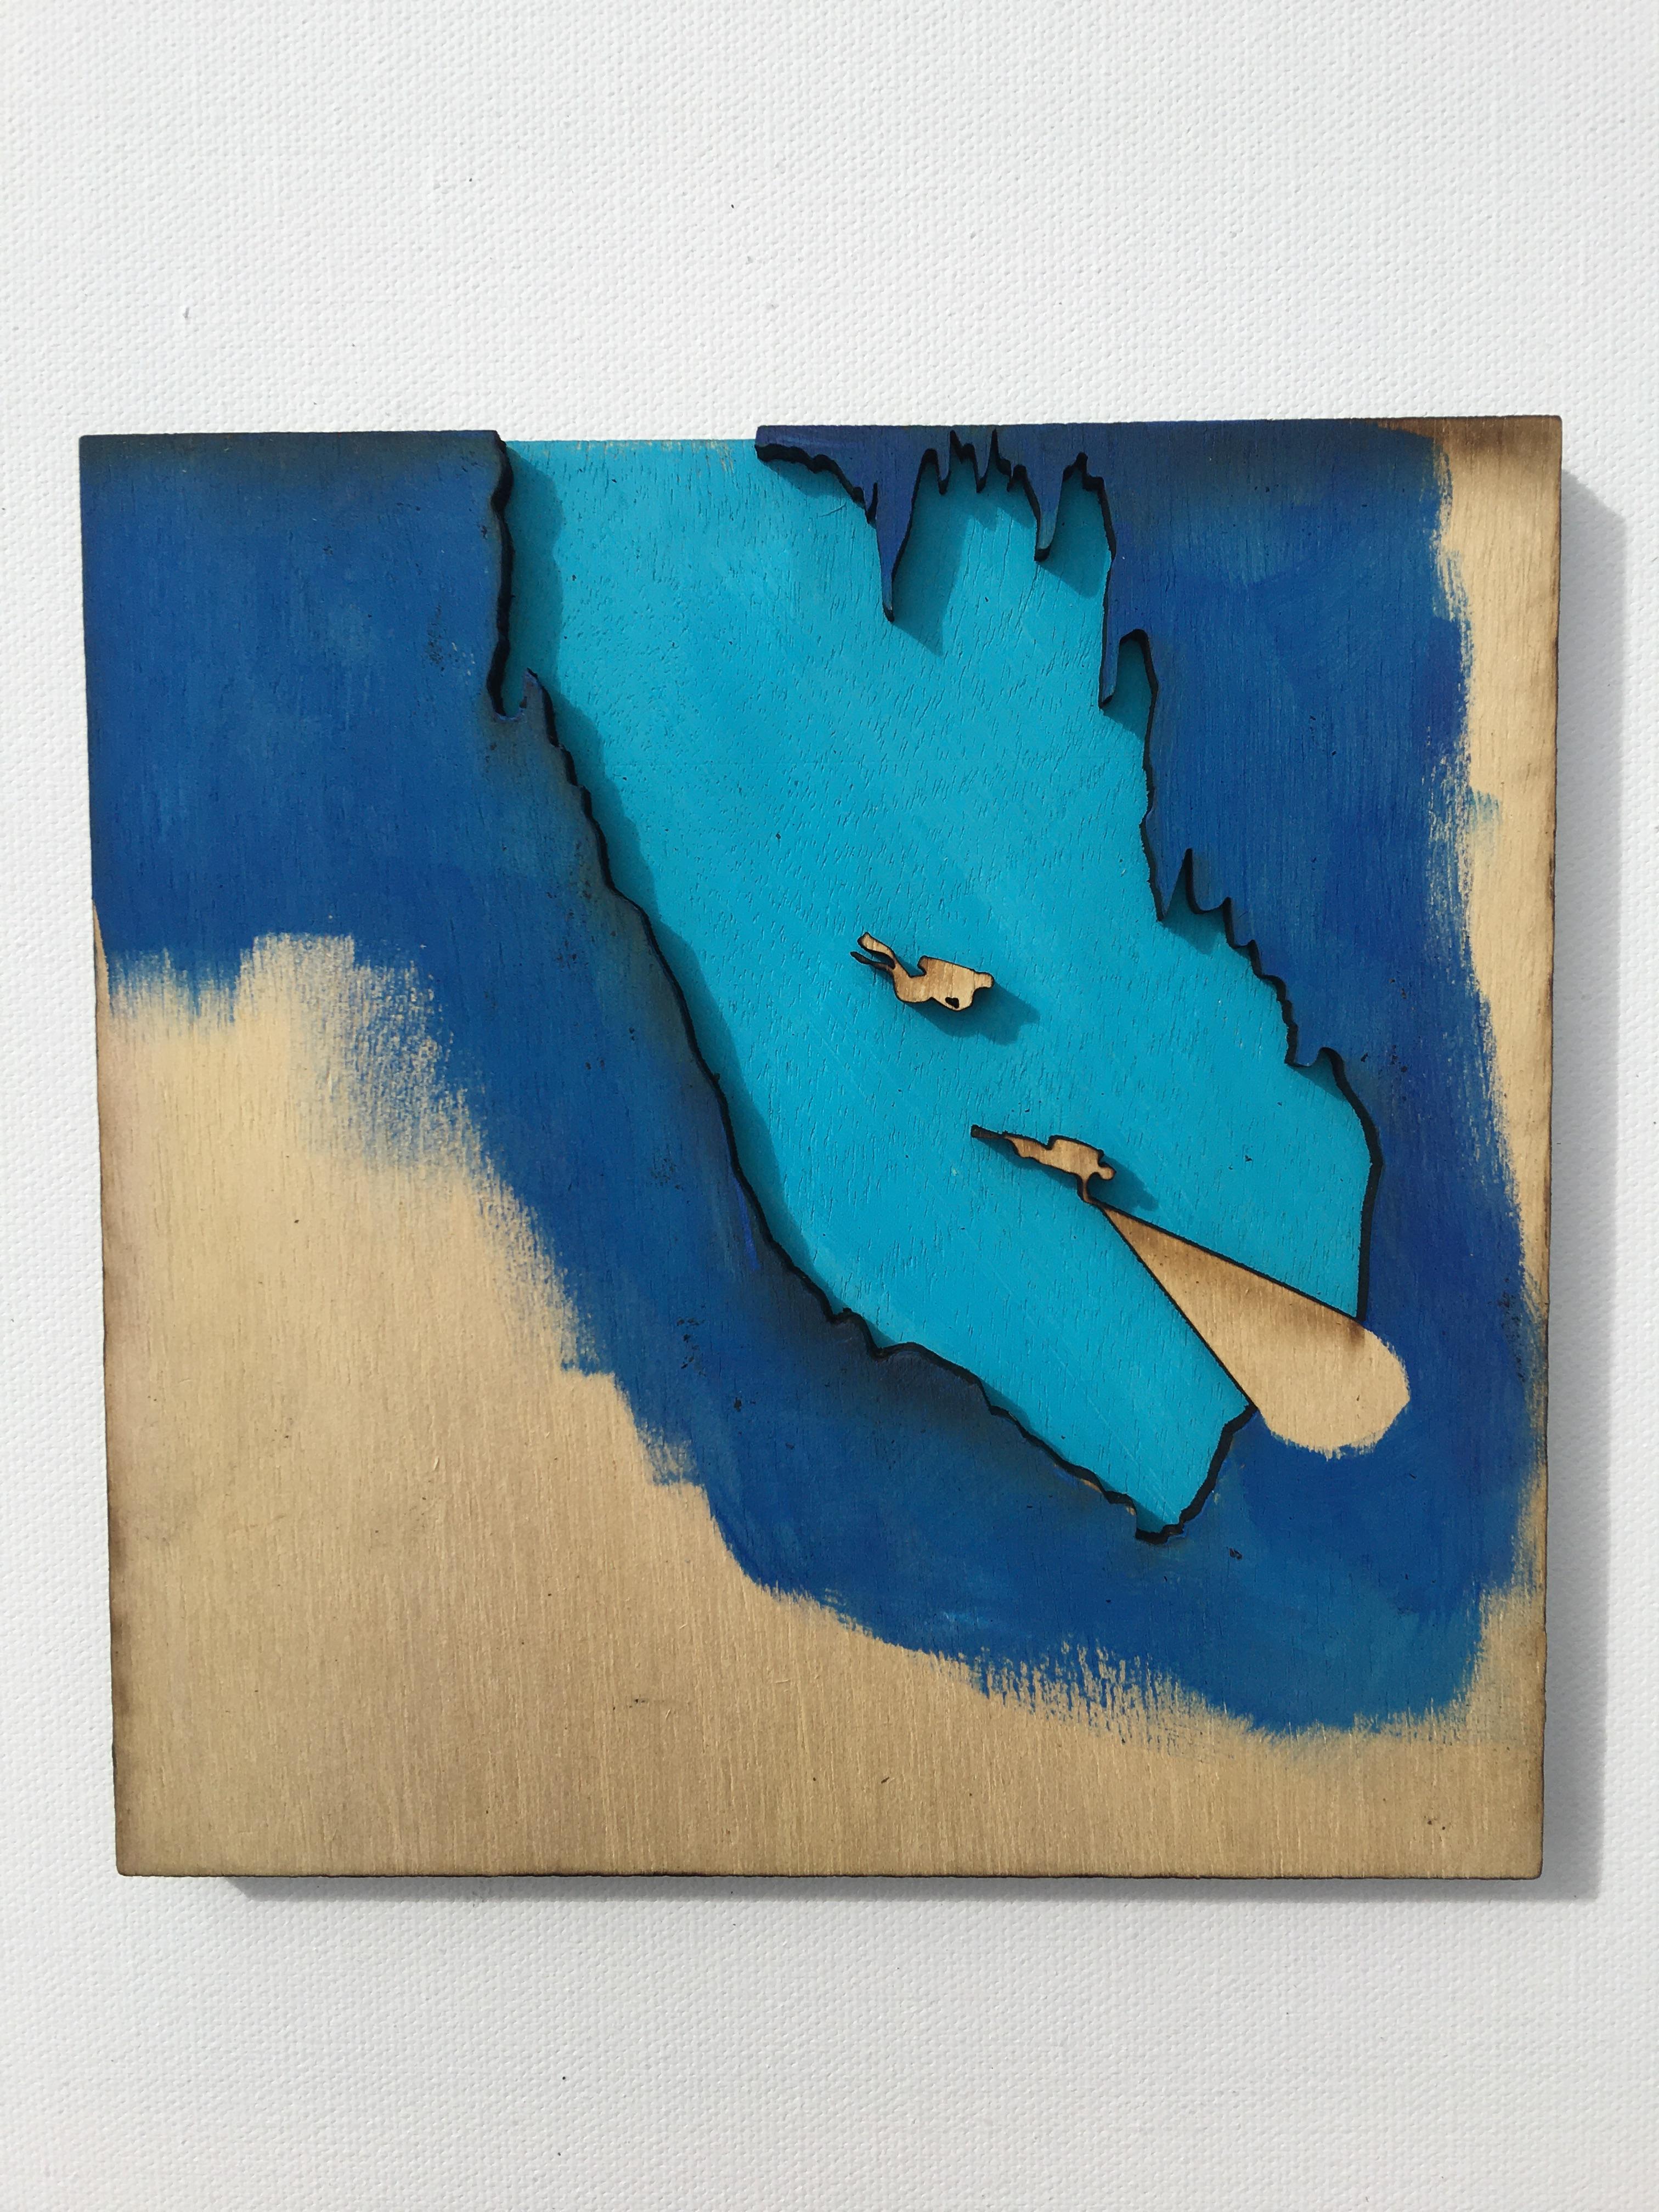
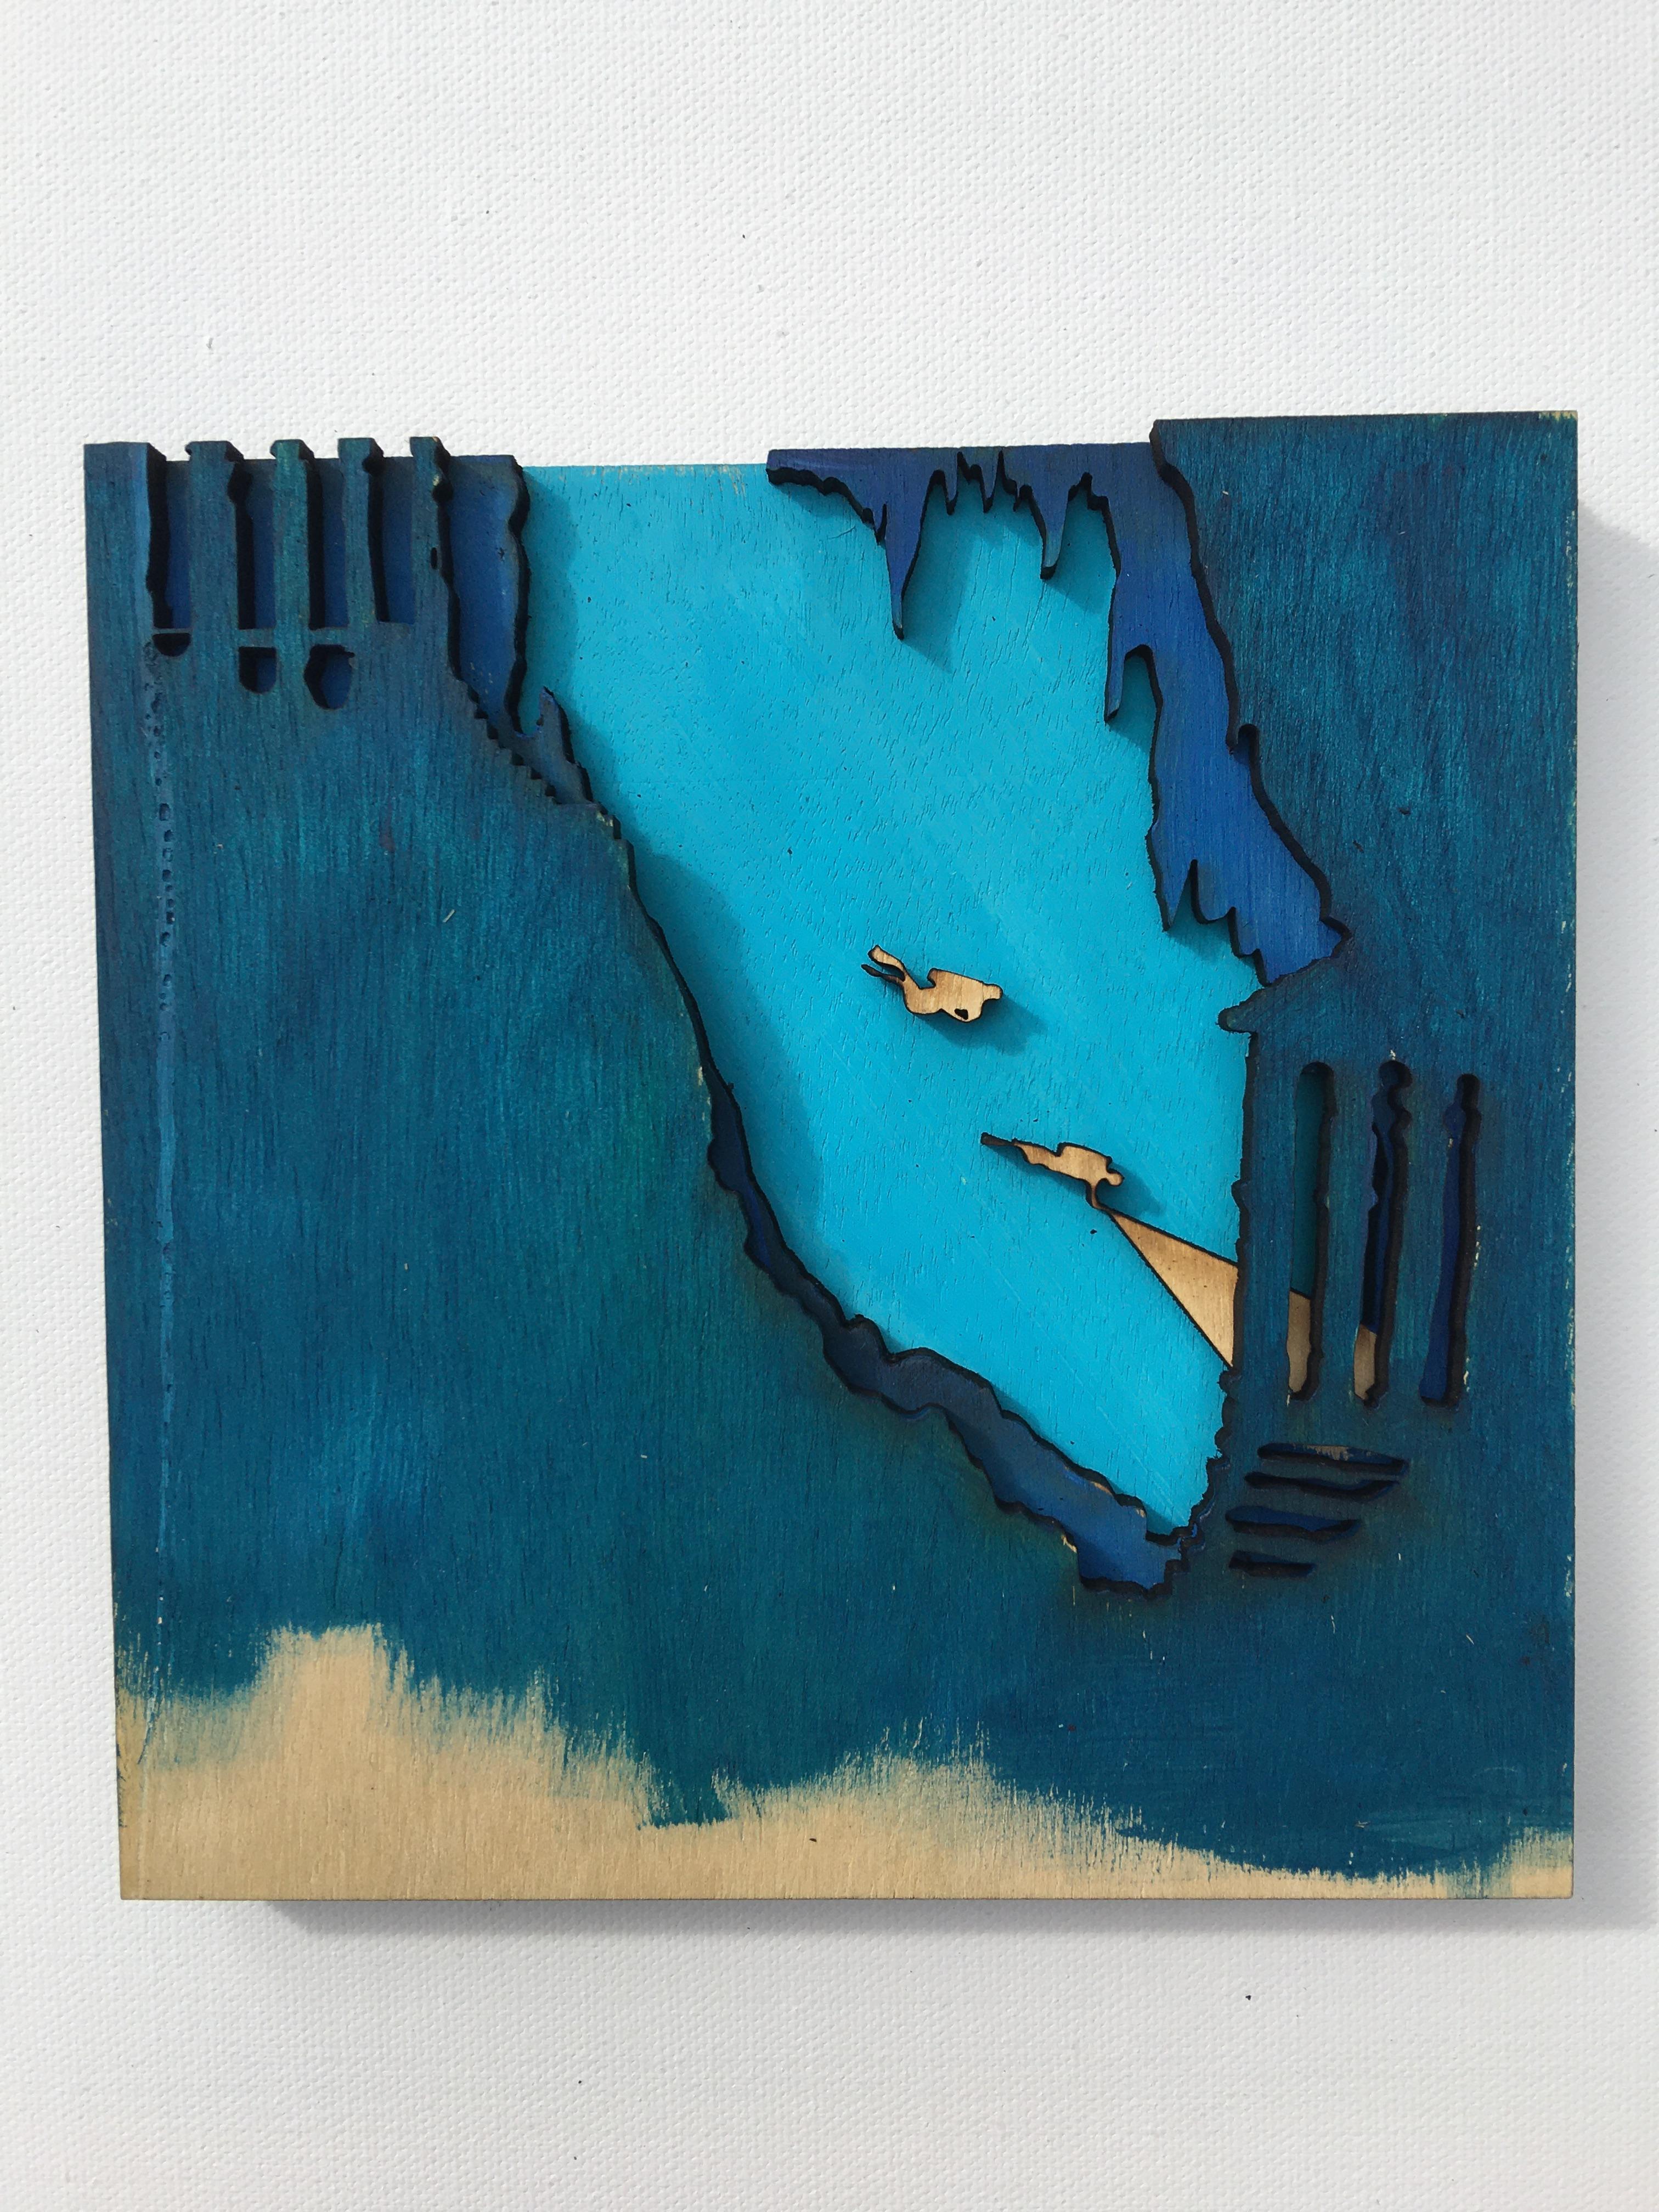
I sketched out my idea and used Illustrator to create each layer. (If you have access to a laser cutter, you will need to use whatever program necessary to start cutting with the laser.) If you were doing this by hand, simply draw your image directly on to the wood. It is important to make sure that each layer is EXACTLY the same height and width or your final piece won't line up correctly. My pieces were all 6 x 6" - this is nice size to use. Not too big and not too small. I usually try to have at least four layers of wood so that the finished piece can either be hung up or it can stand by itself.
To make this an easier, foolproof build, I have students keep their square edges as long as possible for each layer. Layers 2, 3, 4 still maintain their outer square frame even though some of those areas won't be seen on the finished piece. This aids in supporting the overall piece so that it will be strong enough to support itself no matter how many layers you put on. Even for the Kraken (the pink layer) I put it in the corner and kept the right angle.
You can see that each layer has been separated out and I can also experiment with some color combinations before the painting step.
Cut Your Pieces
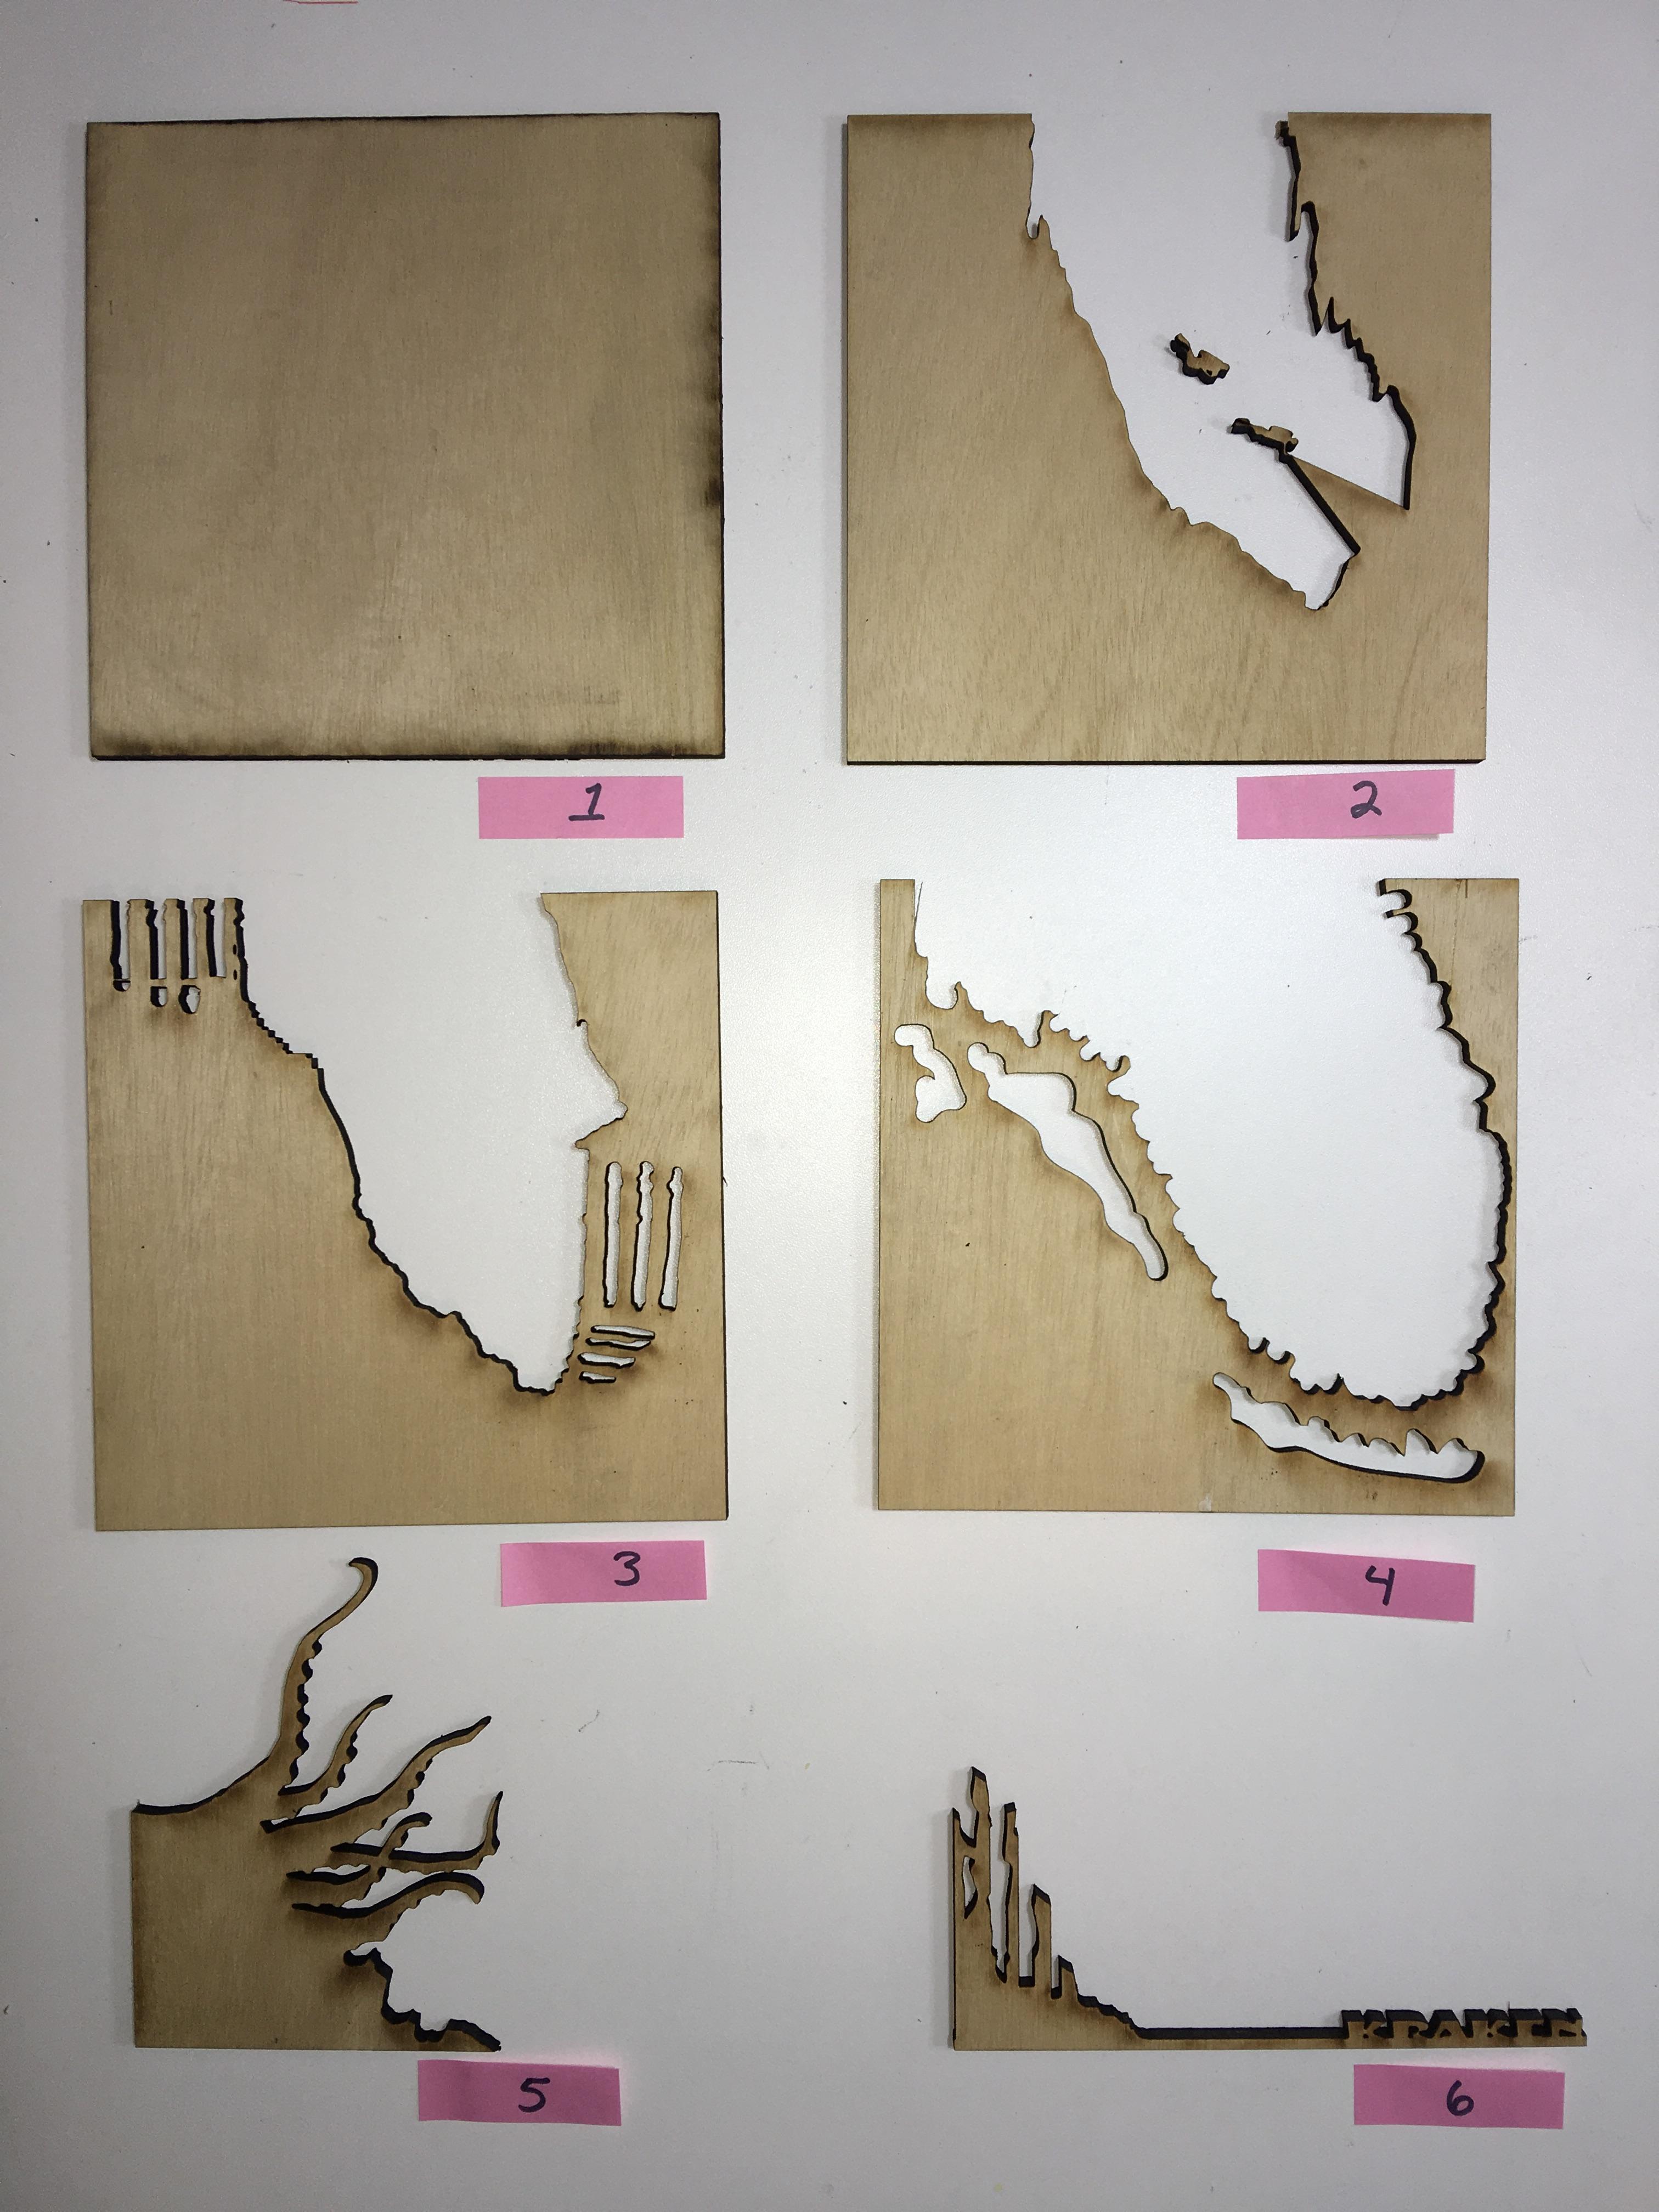
Whether you are cutting by hand or using a laser cutter, this is where you get to see if your measurements were correct and that your layers actually line up. I did cut my one tiny scuba diver as a separate piece that I could place anywhere. Again, be aware of what will be showing through all the holes you cut and keep in mind the actual width of your wood as you start to build up this piece.
Layer Up Your Pieces

Hopefully you have calculated all of them correctly and once you stack them up, they should line up perfectly. Stand them up to make sure all the edges are aligned. Double check that you have all the pieces that you need.
Because the laser burns the wood as it cuts, already you can see how the black edges gives a shadow effect for a nice 3D look.
Paint Your Pieces
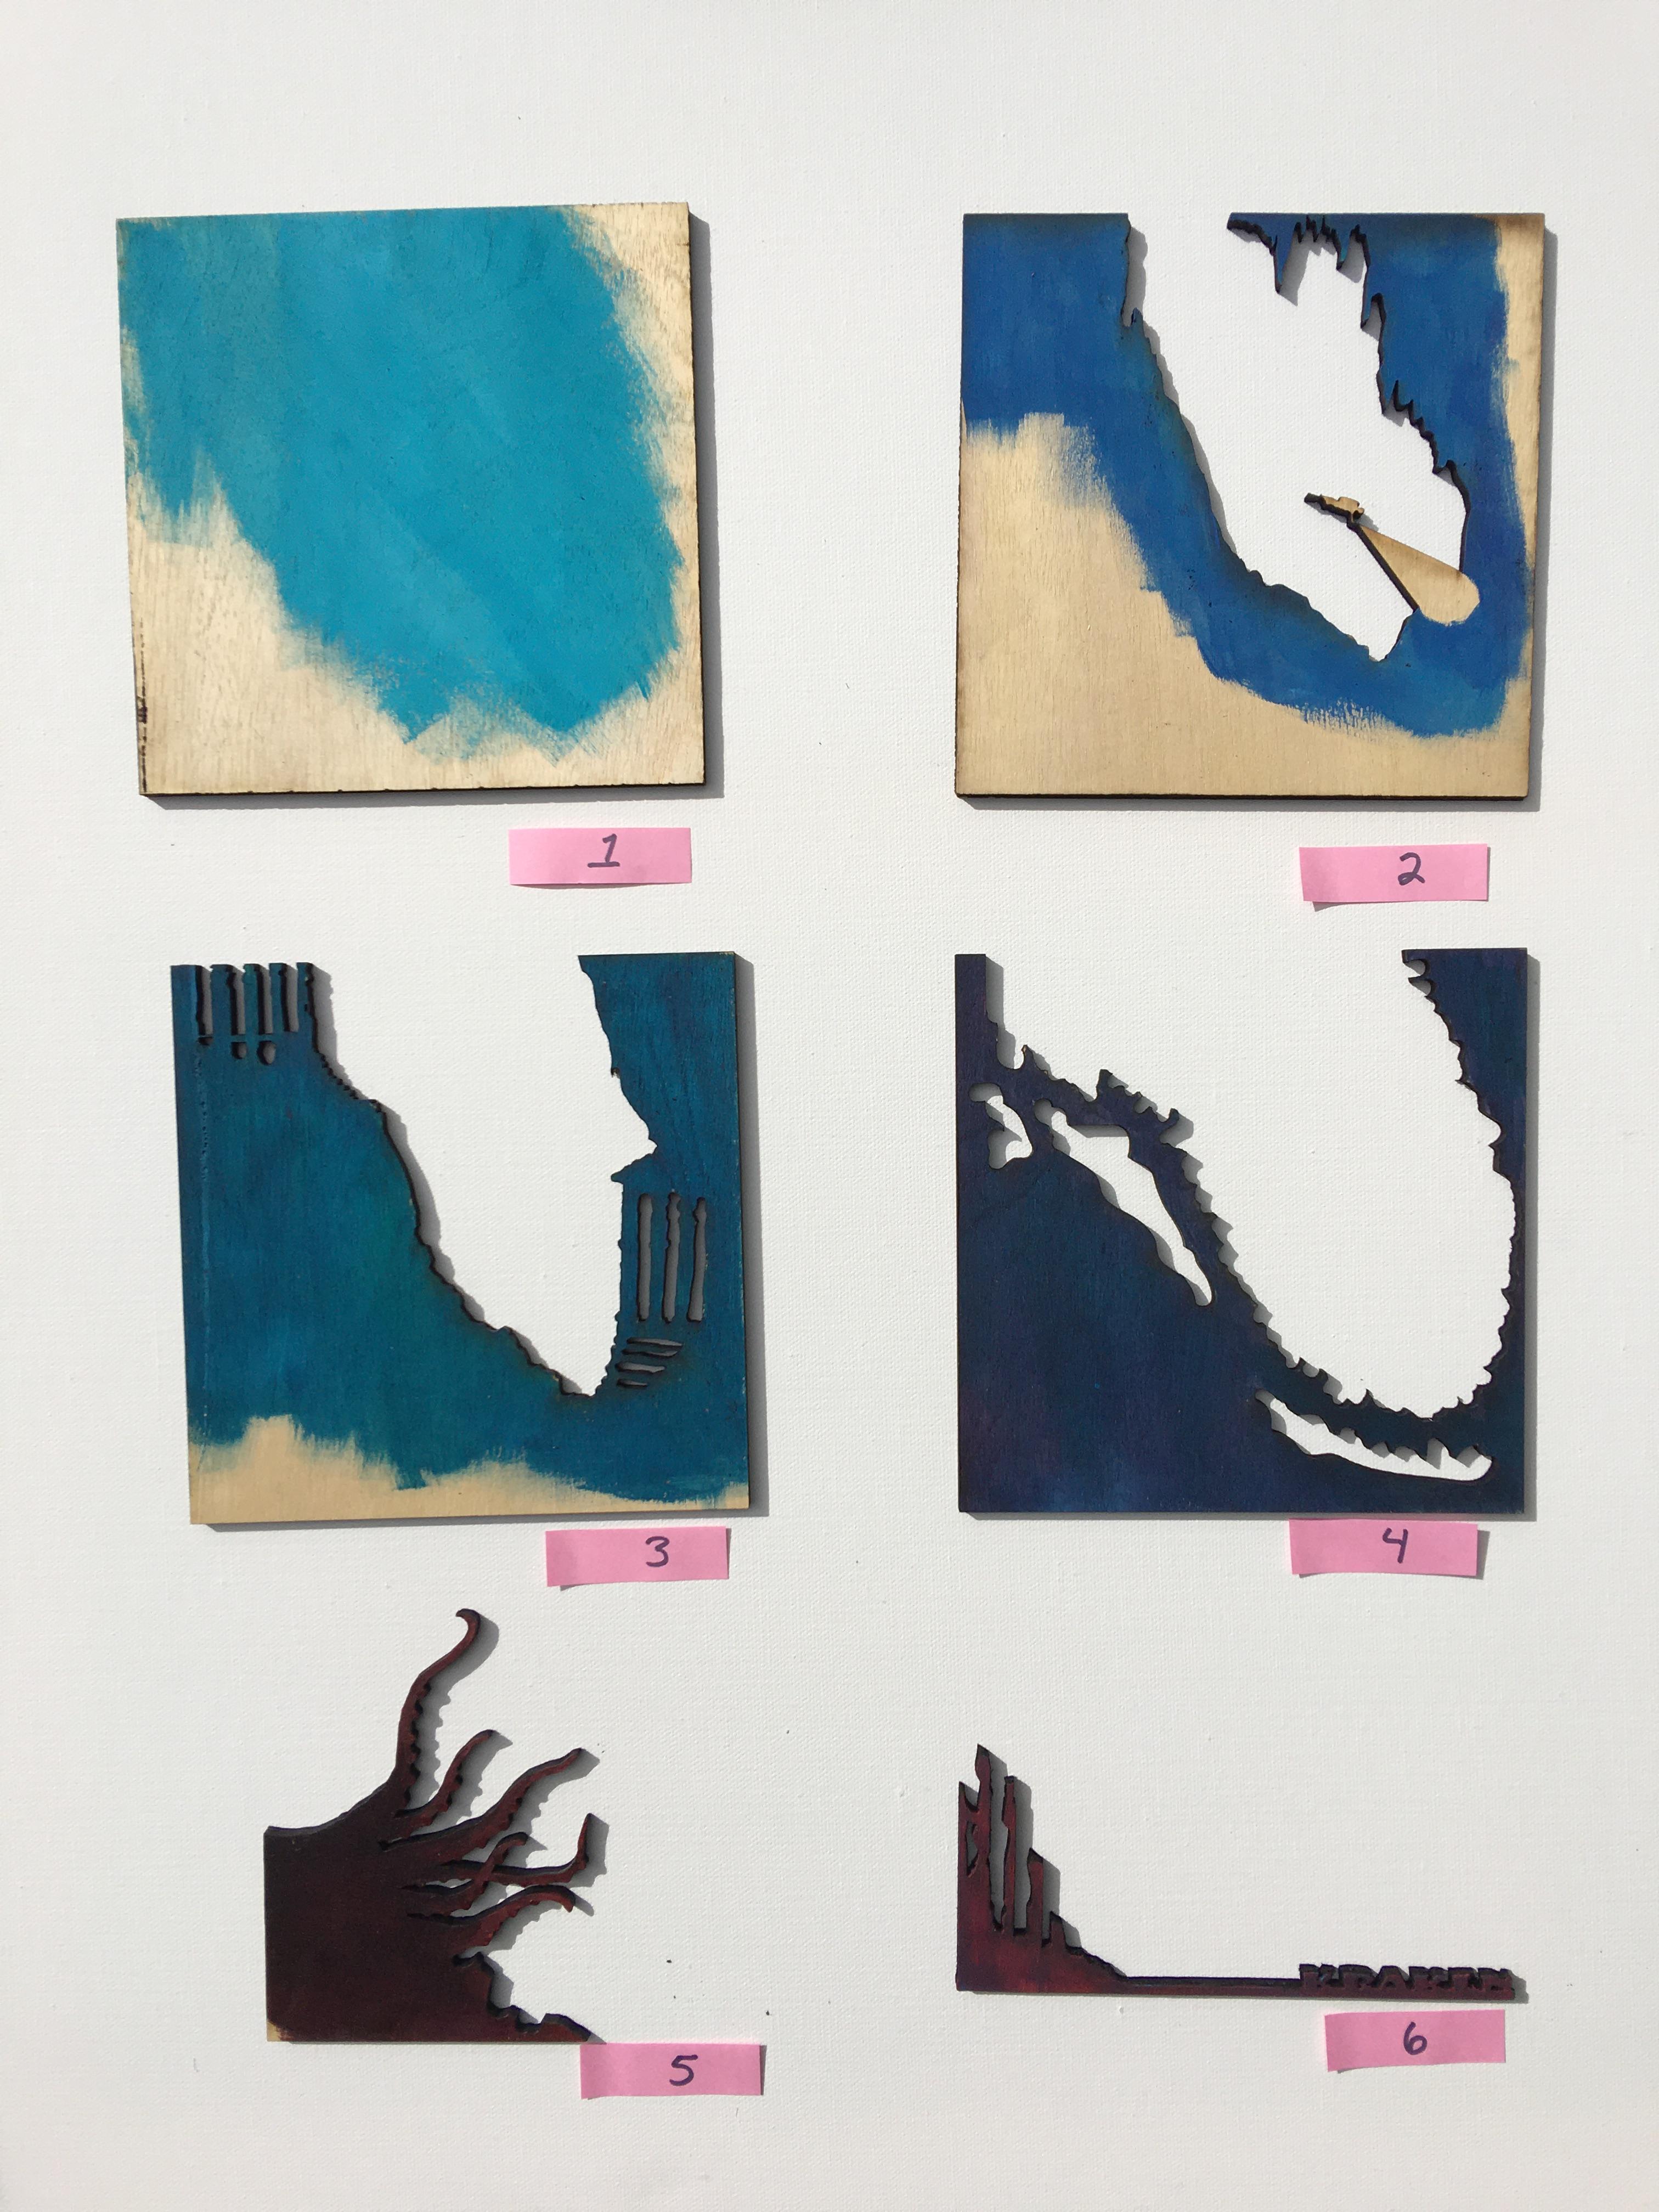


Now you get to choose your colors! I used acrylic paint for this, but I do find that watercolor also works, but the watercolor tends to soak into the wood more. I only had to do one coat of the acrylic paint for each of these. Permanent markers would be another coloring option.
You actually don't have to paint the entire layer - just paint the areas that are going to show. If you have a lot of layers, this can save you some time. If you are a messy painter, this can also cut down on accidentally painting the edges of your wood, if you are trying to paint from edge to edge for every layer.
I started with the lightest blue of the ocean in the background because I knew I wanted to get darker in my foreground. Typically, in a landscape, your background is lighter in color and objects are smaller, while your foreground (the objects closest to you) is brighter and bigger in proportion to the things that are way in the background.
Because I used a laser to cut the wood, each layer naturally has a very dark burnt edge that lends itself well to this type of shadow 3D layer effect. If you are cutting by hand, you may want to paint those edges to get the same effect.
Glue Your Pieces
The moment of truth! After your pieces are all dry, apply wood glue (or any glue that will adhere to wood) in a nice thin layer on each one of your pieces, starting from your back layer and work your way to the front. Don't spread the glue too close to the edge or you will get a 'jelly' squeeze of glue oozing out from between your layers that may dry in place. I keep toothpicks on hand to carefully scrape up any extra drips of glue. Although wood glue does dry clear, it is also shiny. I prefer not to have random shiny spots on my finished piece.
Use clamps or rubber bands to hold your pieces in place while drying. I also piled some heavy books on top. I let it dry overnight.
You can see that when I add my last layer with the "Kraken" text there is a gap behind it. I should have extended that little piece of wood all the way over from the Kraken in the corner to make up that gap.
Add a Frame
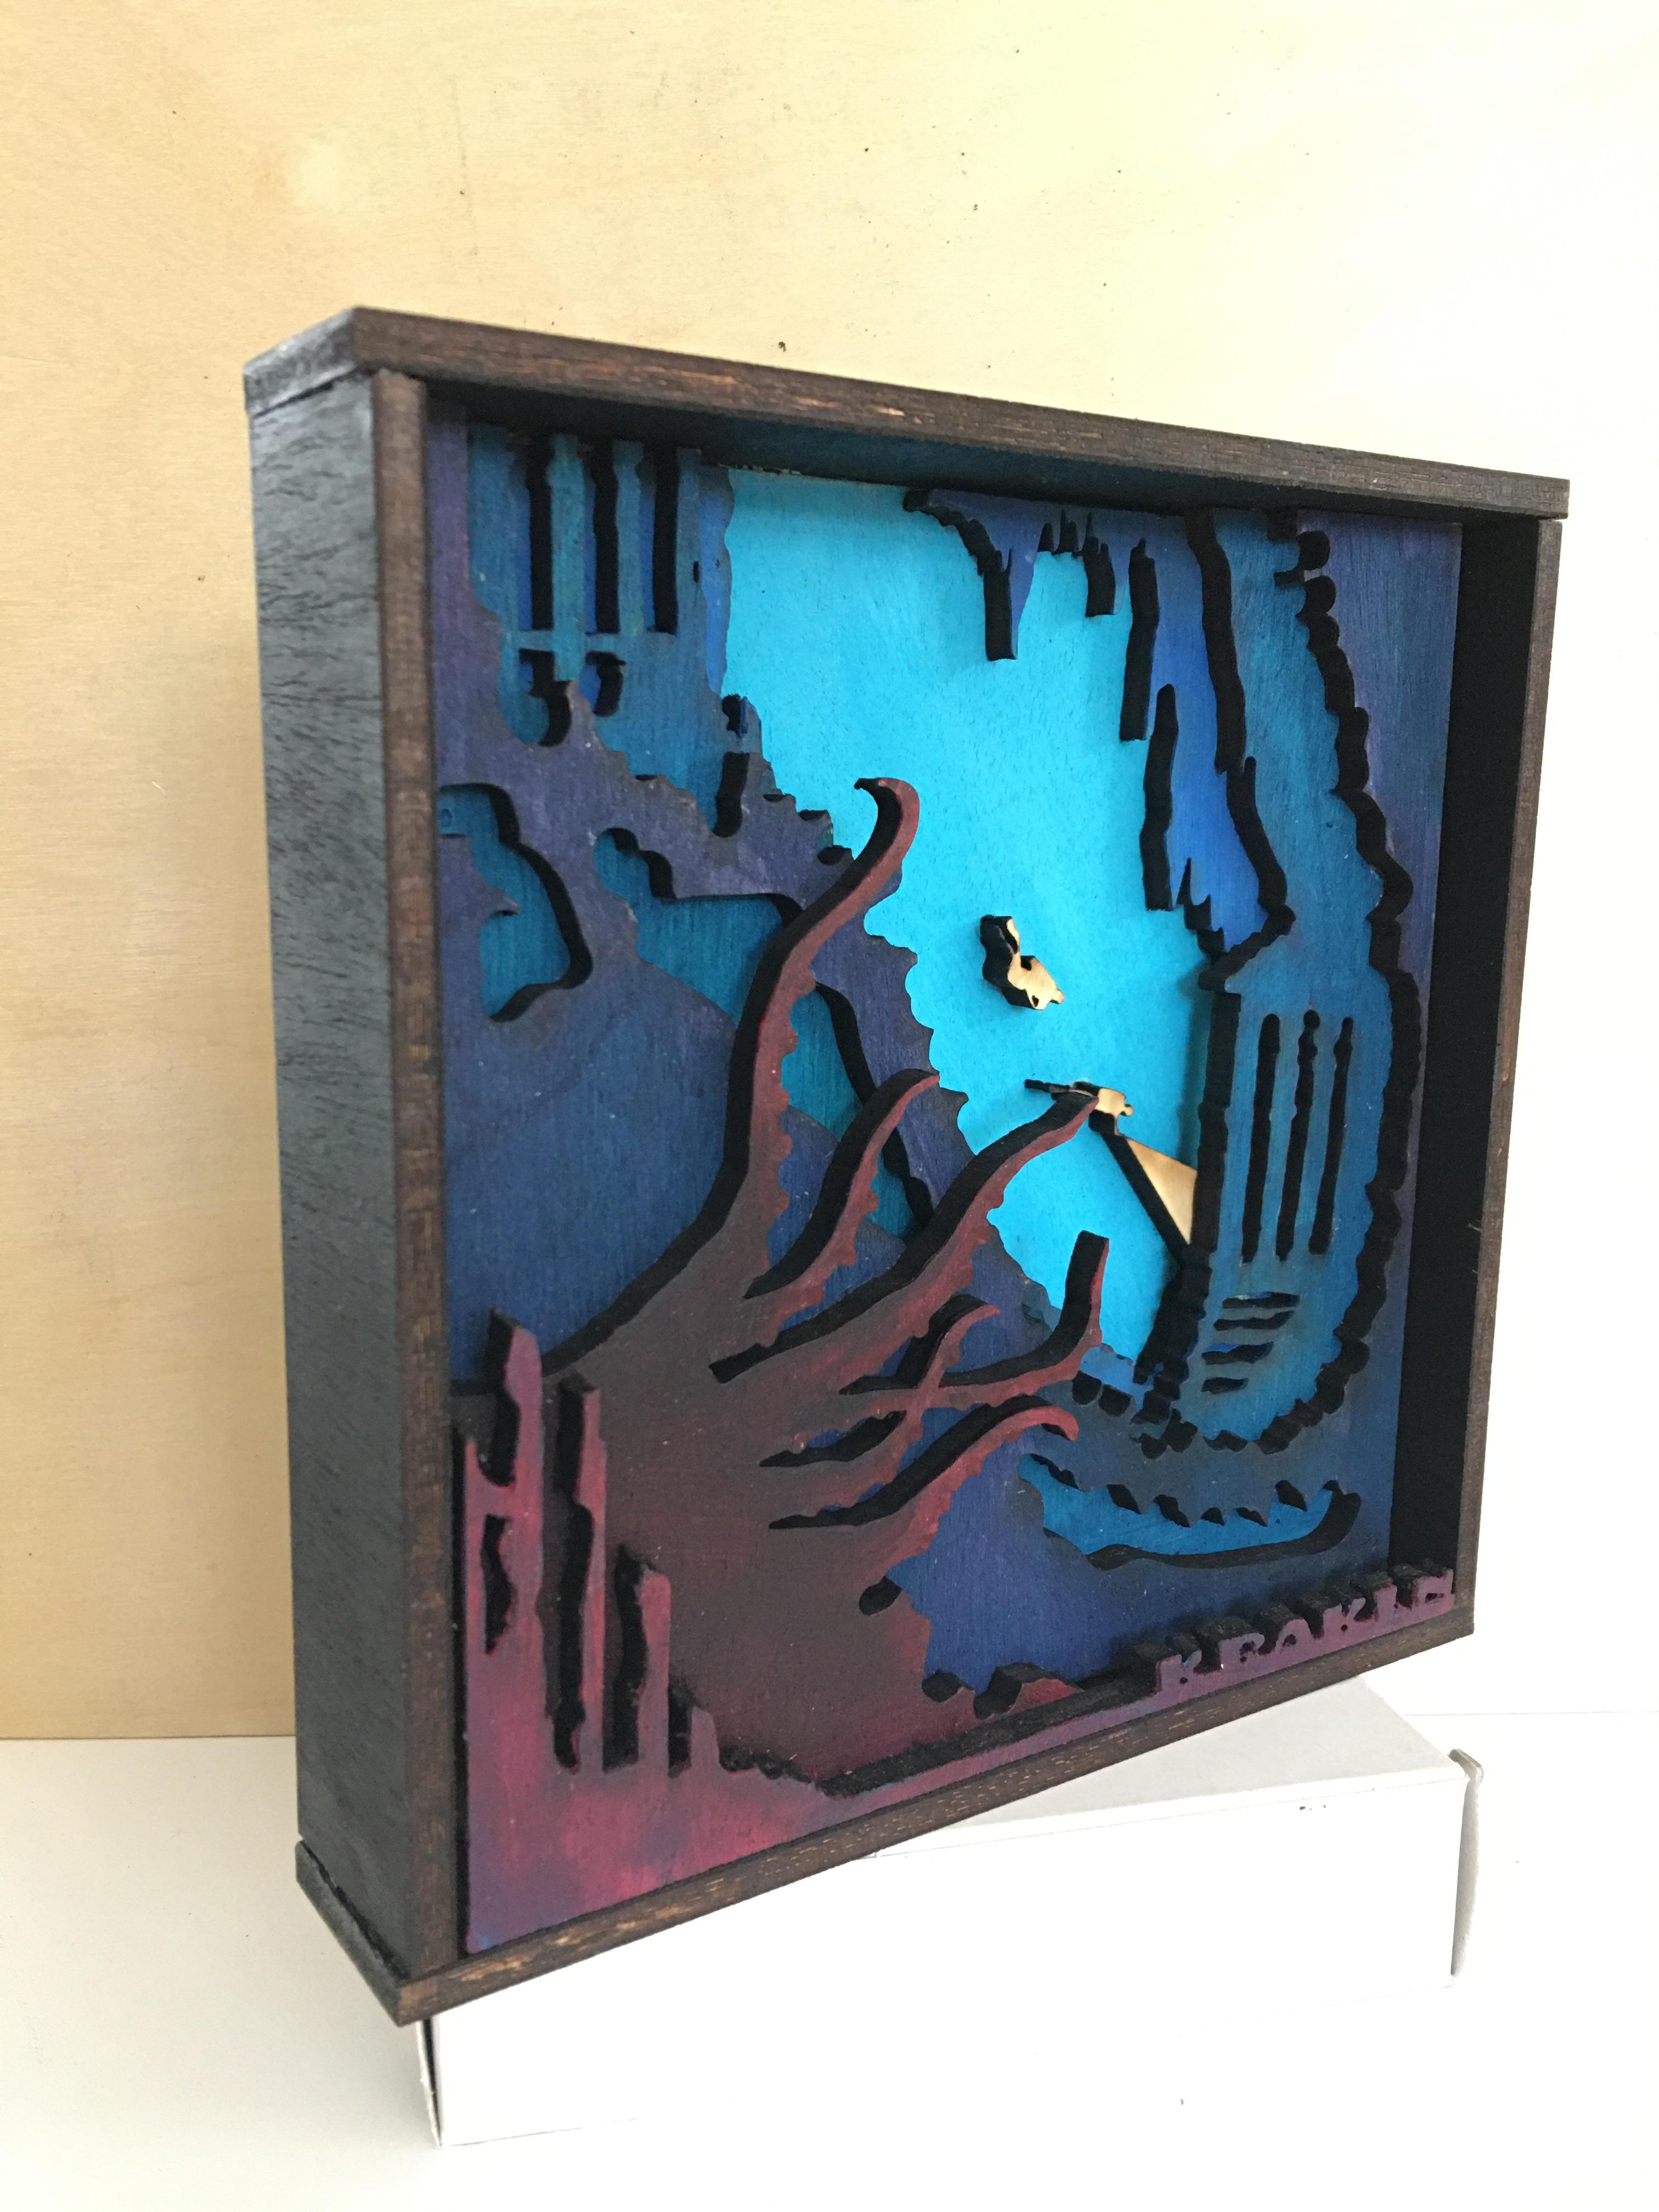
I like to add a frame to my finished pieces. Although it is not necessary for all designs, for this particular piece, because the Kraken and the Kraken text layer do not fill the whole space, I feel it needs a frame to close up that empty space on the right side.
For this piece, I painted the pieces of the frame black before gluing them onto the layers. When cutting your frame, take into consideration the width of your wood! Here's how to figure out a correct frame size. I kept my frame simple by just overlapping the top and bottom pieces and leaving the side pieces the same length as the layers.
Since my six layers were all 6 x 6" and the wood was .25" thick, the width of the frame is easy to calculate by multiplying 6 x .25 = 1.50.
The top and bottom need to be long enough to overlap the width of the two side pieces which are each .25", so I add an extra .5 inches (that's the width of the wood times two since there are two side pieces) to make the top and bottom 6.5" each.
So when I cut my pieces I will cut:
Two pieces that measure 6 x 1.5"
Two pieces that measure 6.5 x 1.5"
You can see in the photo how the top piece and the bottom piece each overlap the side pieces that fit snugly against my layers.
And that's it - the possibilities are endless for this project! I hope you will be inspired to try your own.