Create Your Own Webpage That Works Out the Circumference and Area of a Circle Using Pi!
by Joey18brindle in Circuits > Computers
619 Views, 14 Favorites, 0 Comments
Create Your Own Webpage That Works Out the Circumference and Area of a Circle Using Pi!


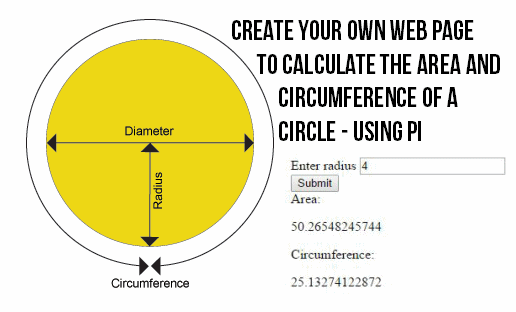
To celebrate the upcoming Pi day we are going to create a webpage that uses pi to work out the Circumference and Area of a circle.
Create a Html Document
We are going to be using html and JavaScript code languages. You can write this code in your default note app (For example on windows notepad) Or use a program to help, I'm using Microsoft expression web, a great freebie to help you code.
So we will start a new html document and start with the simple code for all webpages.
<!DOCTYPE html>
<html>
<head><title>
</title>
</head>
<body>
</body>
</html>
Adding Your Variables
Now we are going to add some Variables to define pi, area and circumference.
We will create a script tag within our header to start to create these variables.
<script></script>
In this script we need to create the variables - We do this by adding
var pi = 3.14159265359;
Var tells us we are creating a variable. "pi" is the name and "3.14159265359" is the value. We now need to assign a circumference variable and an area variable using what we know (Circumference = pi multiplied by 2 times the radius and the area = pi multiplied by radius squared.)
var area = pi * radius * radius;
and
var circumference = 2 * pi * radius
Using JavaScript is fairly easy. For multiplying we just use an asterix and we don't have to tell the page its working with numbers it will work that out.
Asking for the Radius
We want to know the radius of our chosen circle so we need a form and text input within our body tags.
<form> creates the form and we will end it with </form>Inside this form we want - A label - <label>Enter radius</label>An input - <input type="text" id="user_input"/>
outside the form we need a submit button which will eventually run our script. <input type="submit" onclick="showInput();"/>
This will give us an input - a title to our input and a button. But it doesn't tell us what to do with our new "showInput()" function.
Using the Radius
So now we've got our radius we need to do things with it.
In our <script></script> we need to add a function. This function will be called "showInput()" and will be triggered by the submit button.
function showInput() {
}
Now we need to say what the function does by adding a new variable - The radius
var radius = document.getElementById("user_input").value;
Here we've told the variable "radius" to be the value of the element in our html with the id "User_input" - This is the input box we made earlier.
Display Our Answers
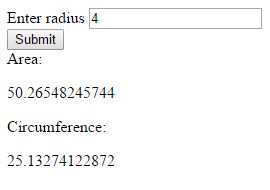
Now we need to display our answers.
first we want a label to tell us what we are displaying.
<label>Area:</label>Then a paragraph for the number - We will id this paragraph as Area_display as it displays the area. <p id="area_display"></p>Now we do the same for circumference.<label>Circumference</label><p id="circumference_display"></p>Now we need to hop over to our script tags where in our function we will add two commands to put the area and circumference in these paragraphs.
document.getElementById('area_display').innerHTML = area;
document.getElementById('circumference_display').innerHTML = circumference;
From what we've already covered you should be able to work out what they do!
And Done: Goodbye!
Well done our web page is finished... But there is definite room for improvement (comment your ideas)- I've uploaded my finished html document to this Google drive link: https://drive.google.com/file/d/0BxytTw2ktqK3bEpHSmk4QUszSlE/view?usp=sharing
If your one doesn't work check my finished version for corrections. Happy coding and merry pi day!