Create Your Own Nike Air Force 1 Using Recycled Cardboard Boxes ( Cocoa Version)
by VCreations in Craft > Cardboard
3326 Views, 17 Favorites, 0 Comments
Create Your Own Nike Air Force 1 Using Recycled Cardboard Boxes ( Cocoa Version)


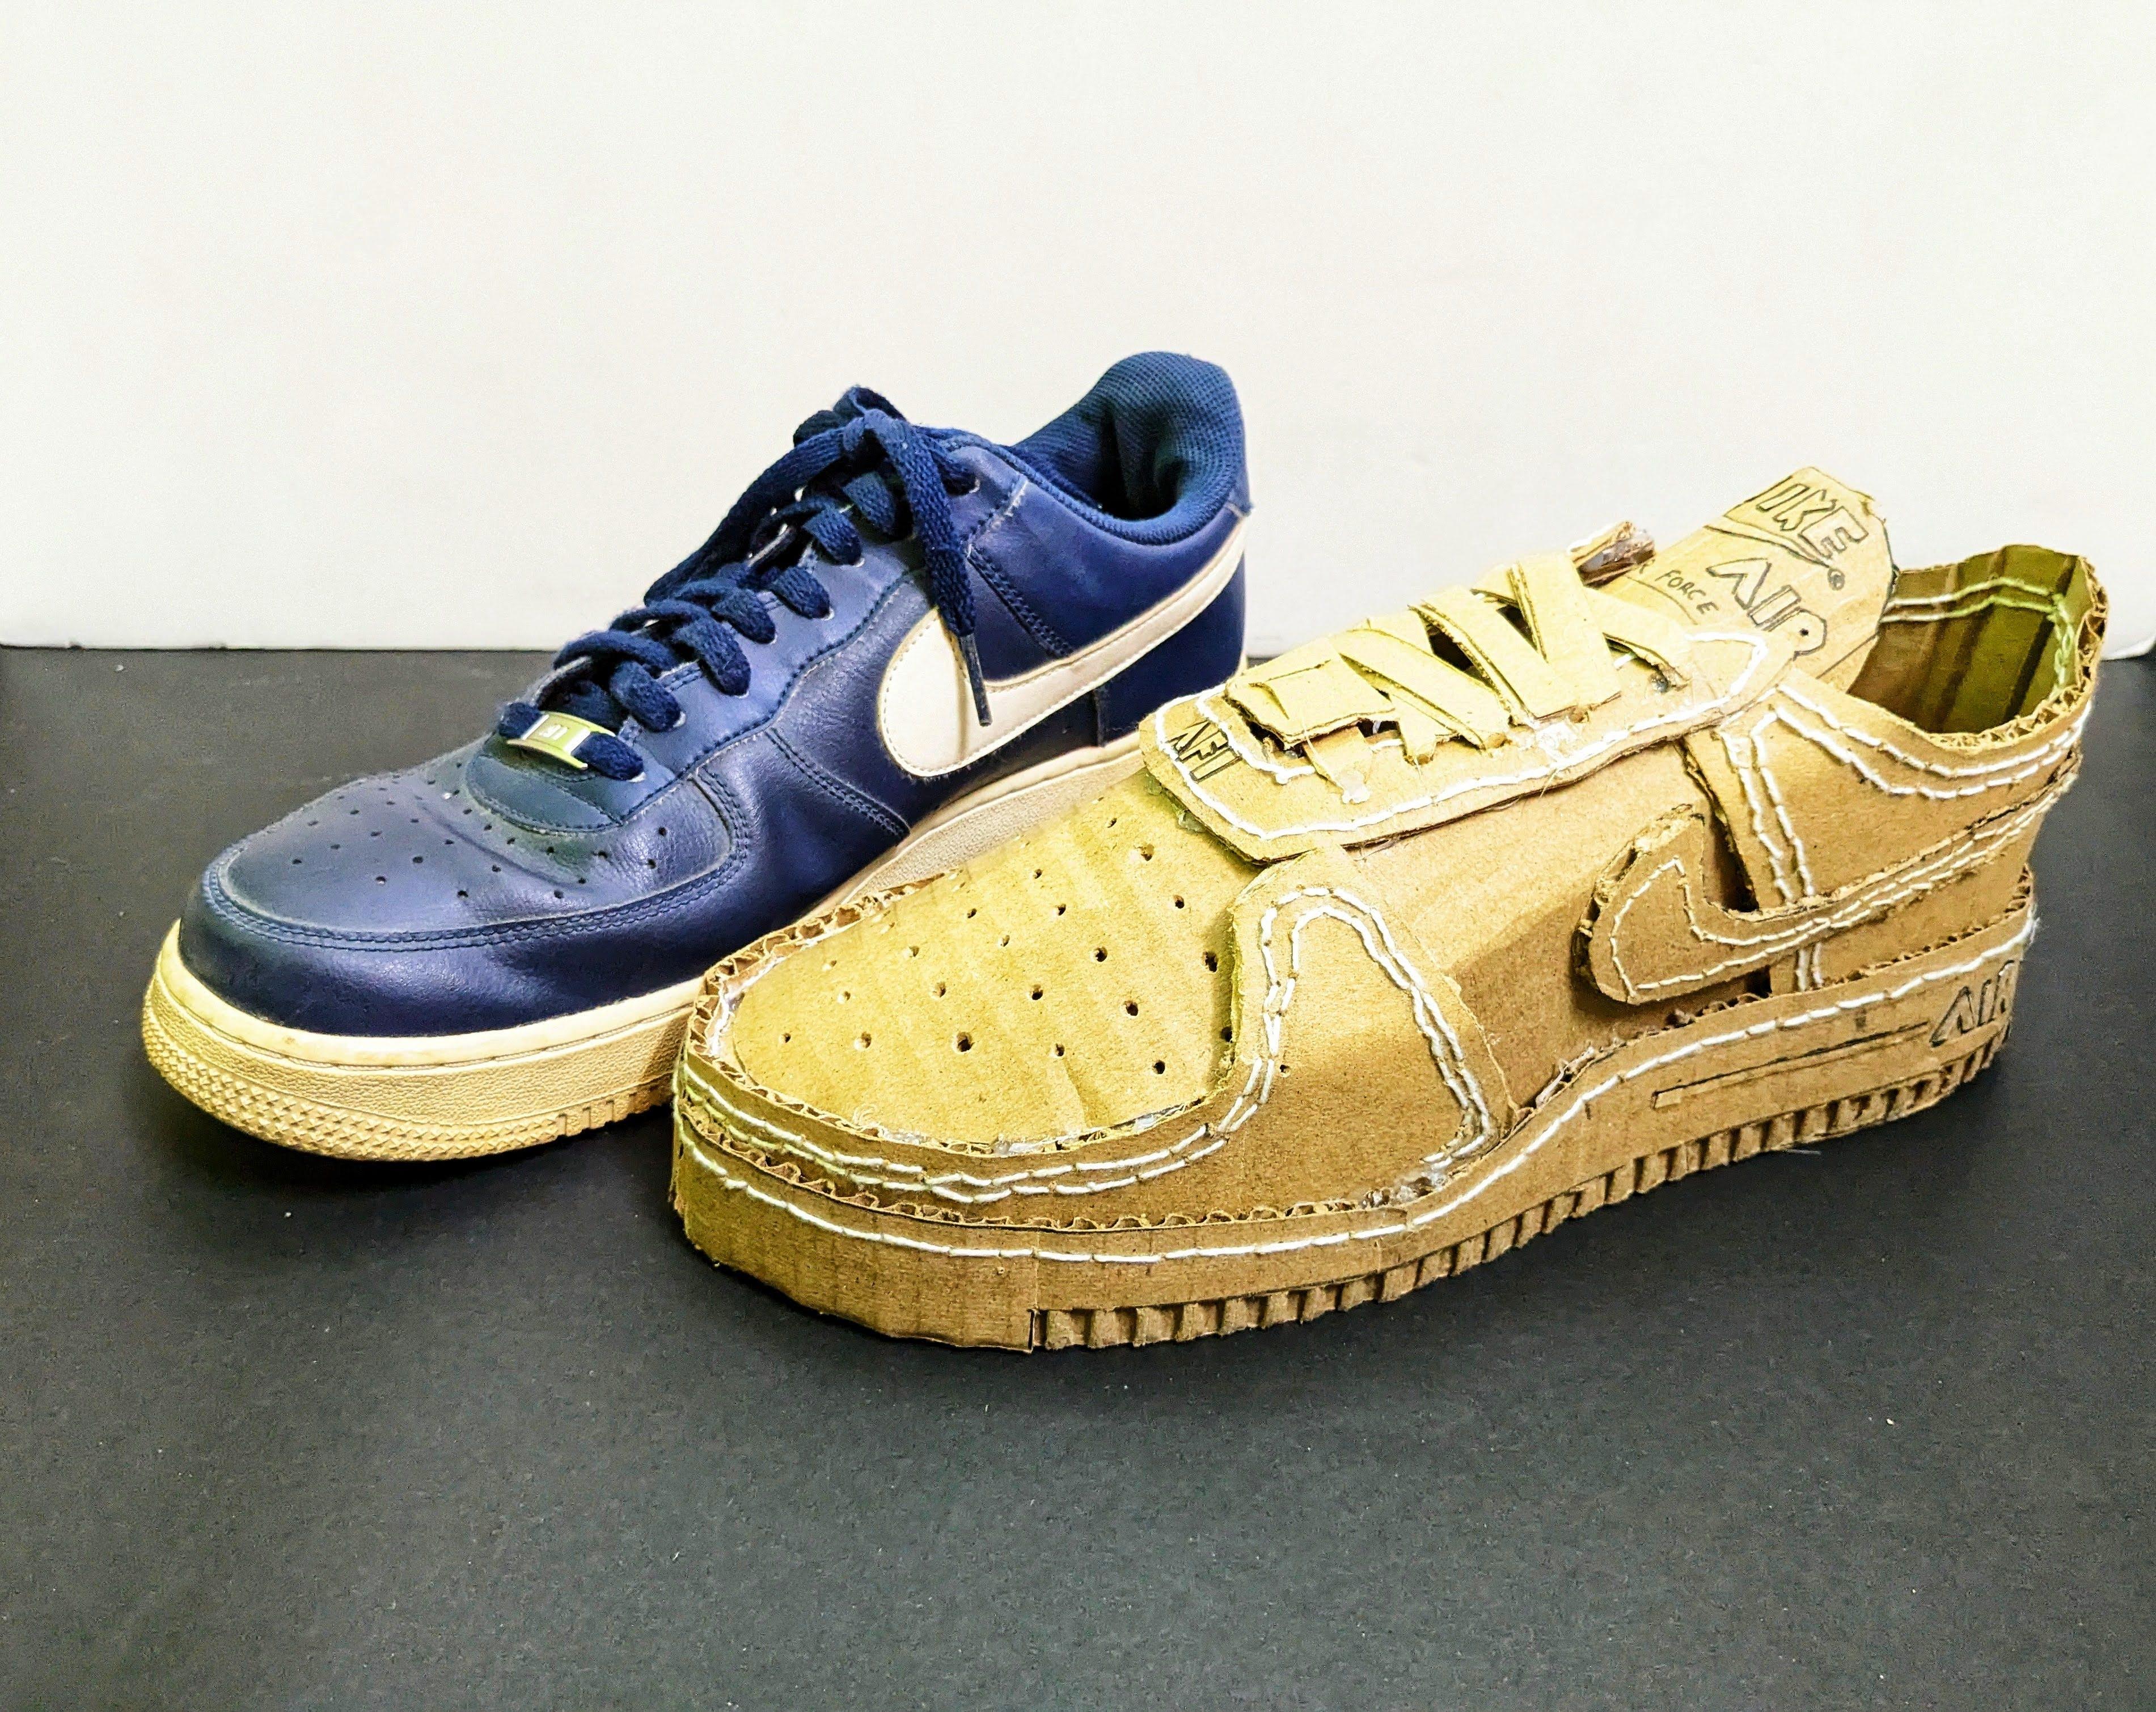

I wanted to do something that's eco-friendly yet stylish. Being a huge fan of Nike sneakers, especially the classic Air Force 1, I felt a strong attachment to this project. I thought, why not give these timeless kicks a new twist? So, I decided to create my own version using nothing but recycled cardboard boxes. With the help of Fusion 360, I got down to designing the sneakers, and then I rolled up my sleeves and got hands-on to bring them to life. It was a fun and rewarding experience, blending my love for sustainable design with my passion for iconic footwear.
Moreover, the best part is that they are completely recycled, making them an environmentally conscious choice. It's incredible how something as simple as cardboard can be transformed into stylish footwear that looks amazing. Not only do they contribute to reducing waste, but they also showcase the beauty of sustainable design. It's a win-win situation—you get to rock a fresh pair of kicks while making a positive impact on the planet.
Supplies


- Fusion 360 for designing
- Cardboard
- Cutter
- Black Marker
- Hot Glue
- Stitching thread & Needle
- Ruler
Getting Started


- To get started, Use Fusion 360 to create a digital model of the Nike Air Force 1.
- Take accurate measurements to ensure your design will be to scale.
- Make adjustments to the design to accommodate the cardboard material.
- Experiment with different textures and thicknesses of cardboard in your digital model to foresee how the final product will look.
Creating the Sole


- Trace your foot or your Air force 1 sole on the cardboard to create the basic shape of the sole.
- Don't worry if your initial drawing is rough and not perfectly smooth.
- Once you have the rough outline, refine it to make it look more like a Air Force 1 sole and less like a human foot.
- Ensure the shape includes the curves and structure typical of a sneaker sole.
- Cut out the refined sole shape from the cardboard.
- Layer additional pieces of cardboard to achieve the desired thickness, gluing them together securely.
- Cut cardboard strips measuring 2 cm in width.
- Securely attach these strips around the entirety of the sole using glue.
- Observe the distinct slant at the front border in the second image.
- You may opt to trim this slant either before or after adhering the strips.
- Execute the same procedure for both shoes.
Making the Front
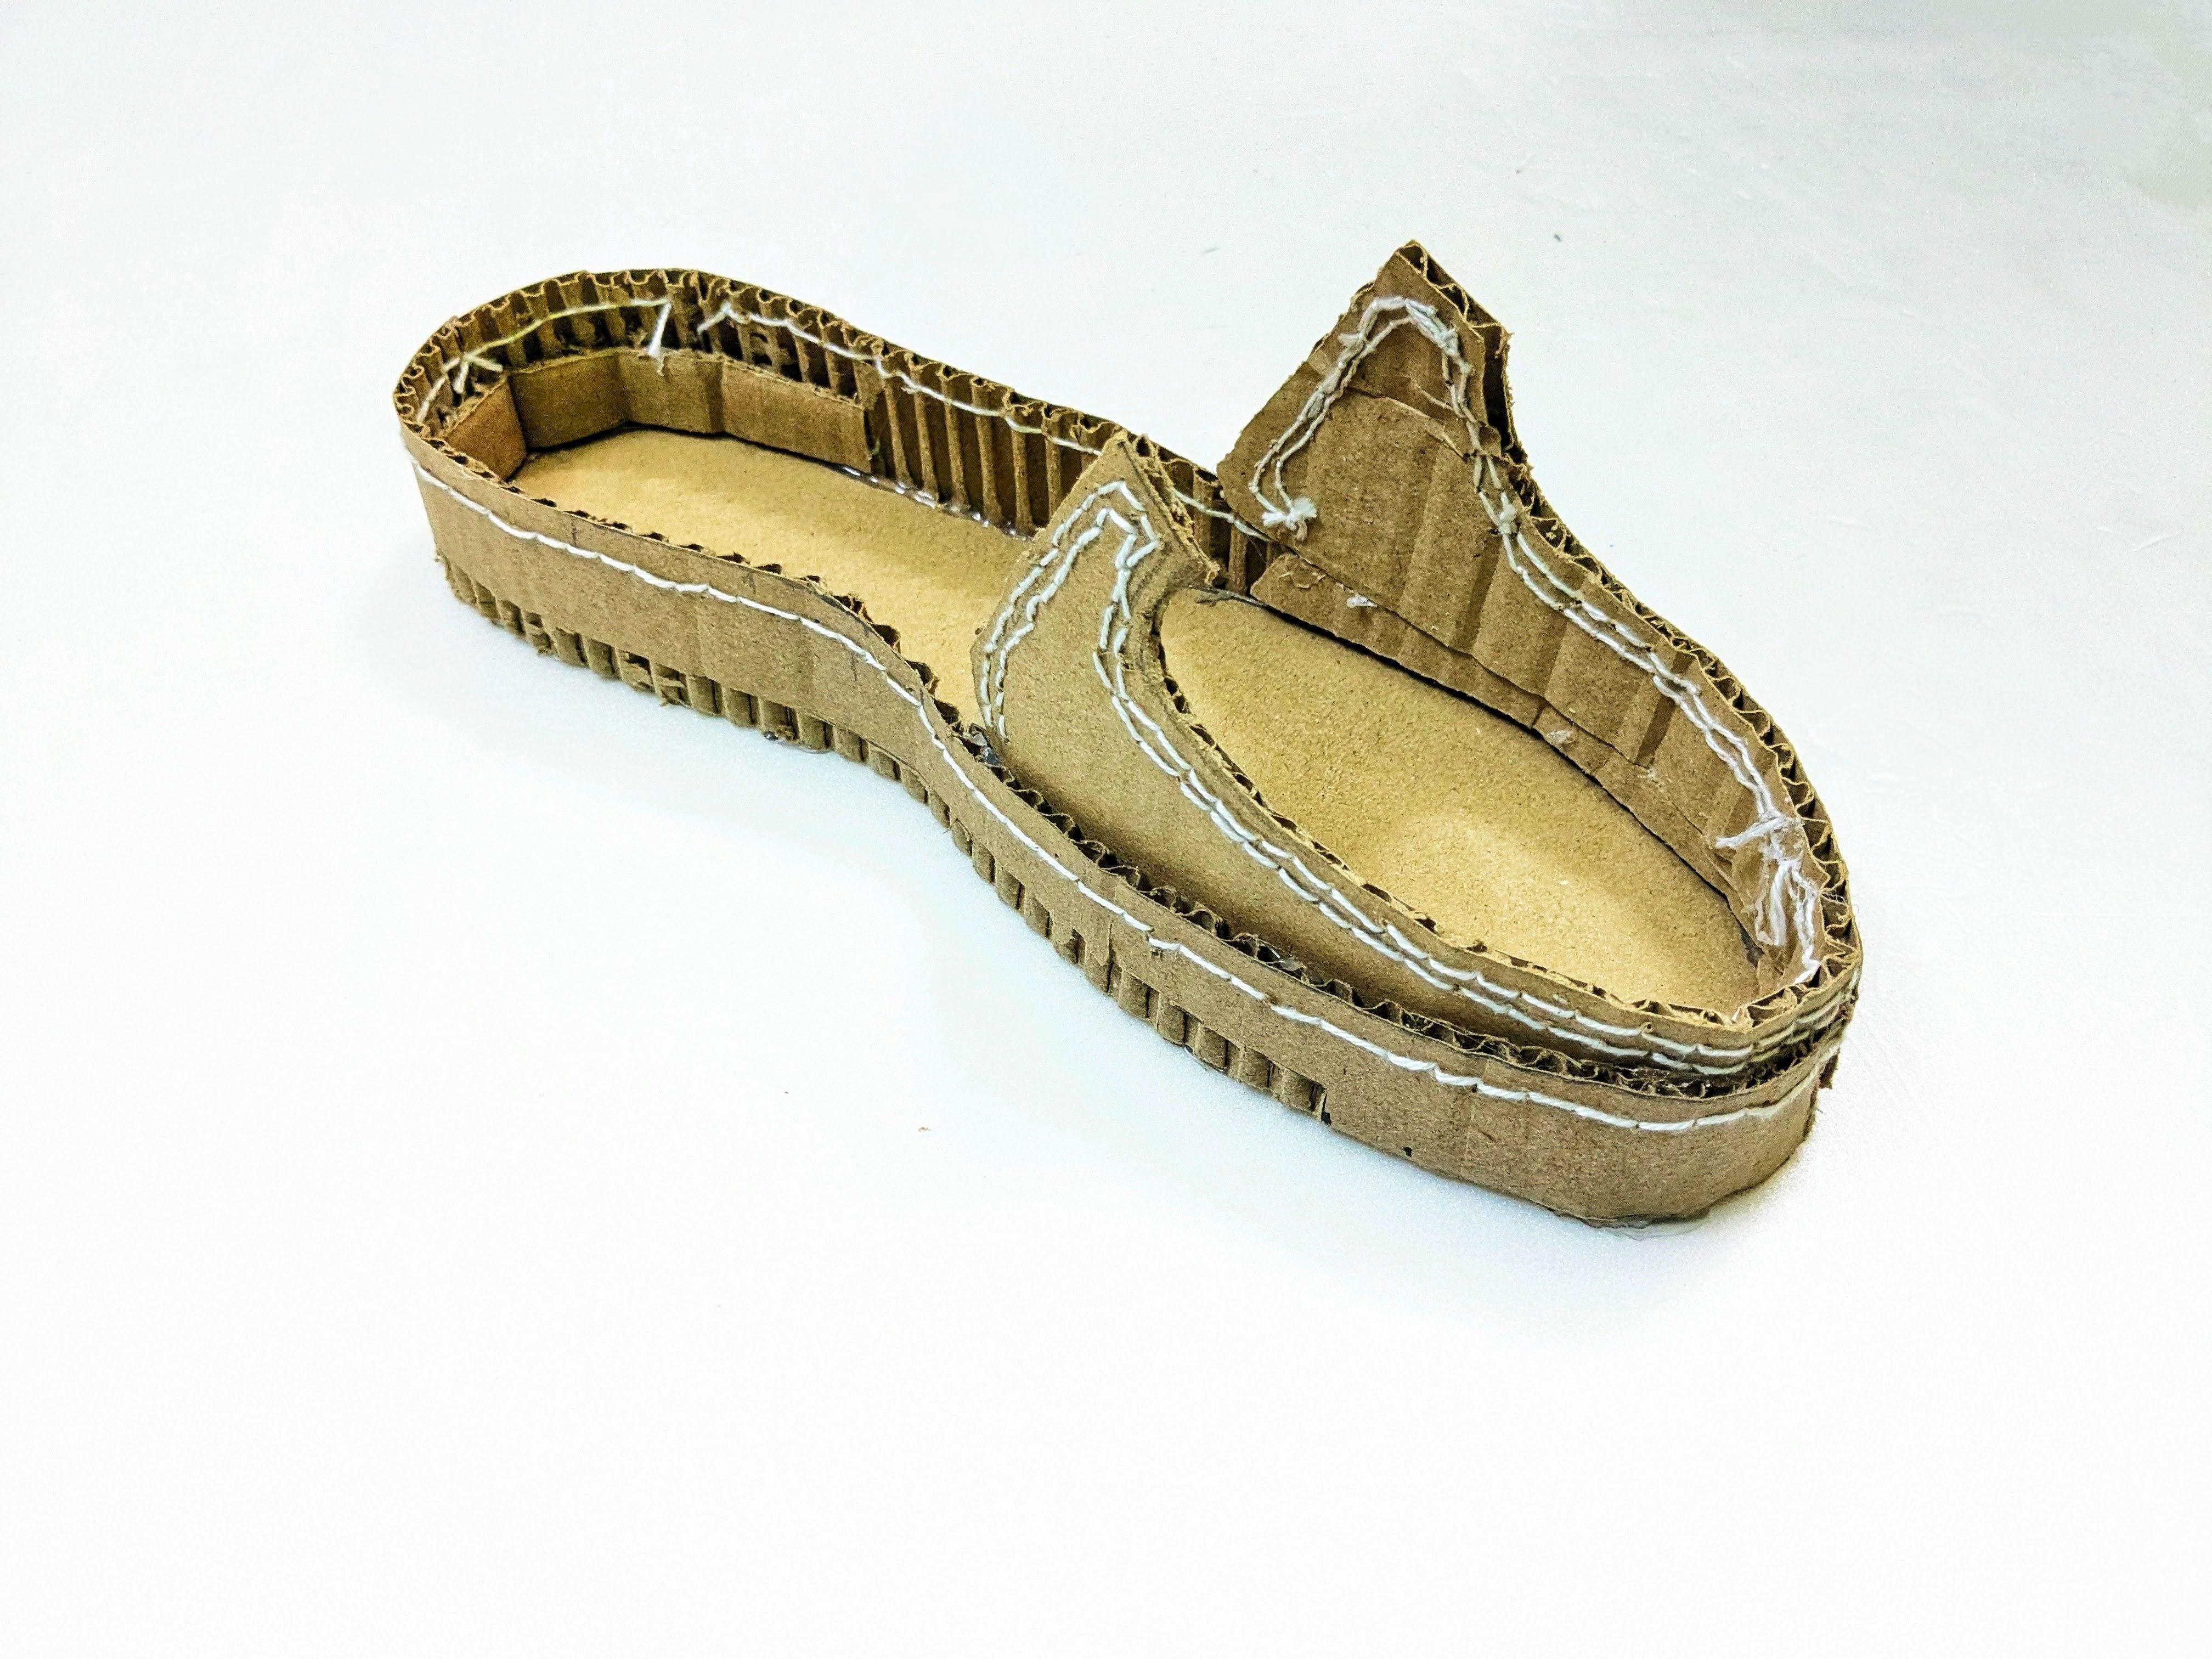
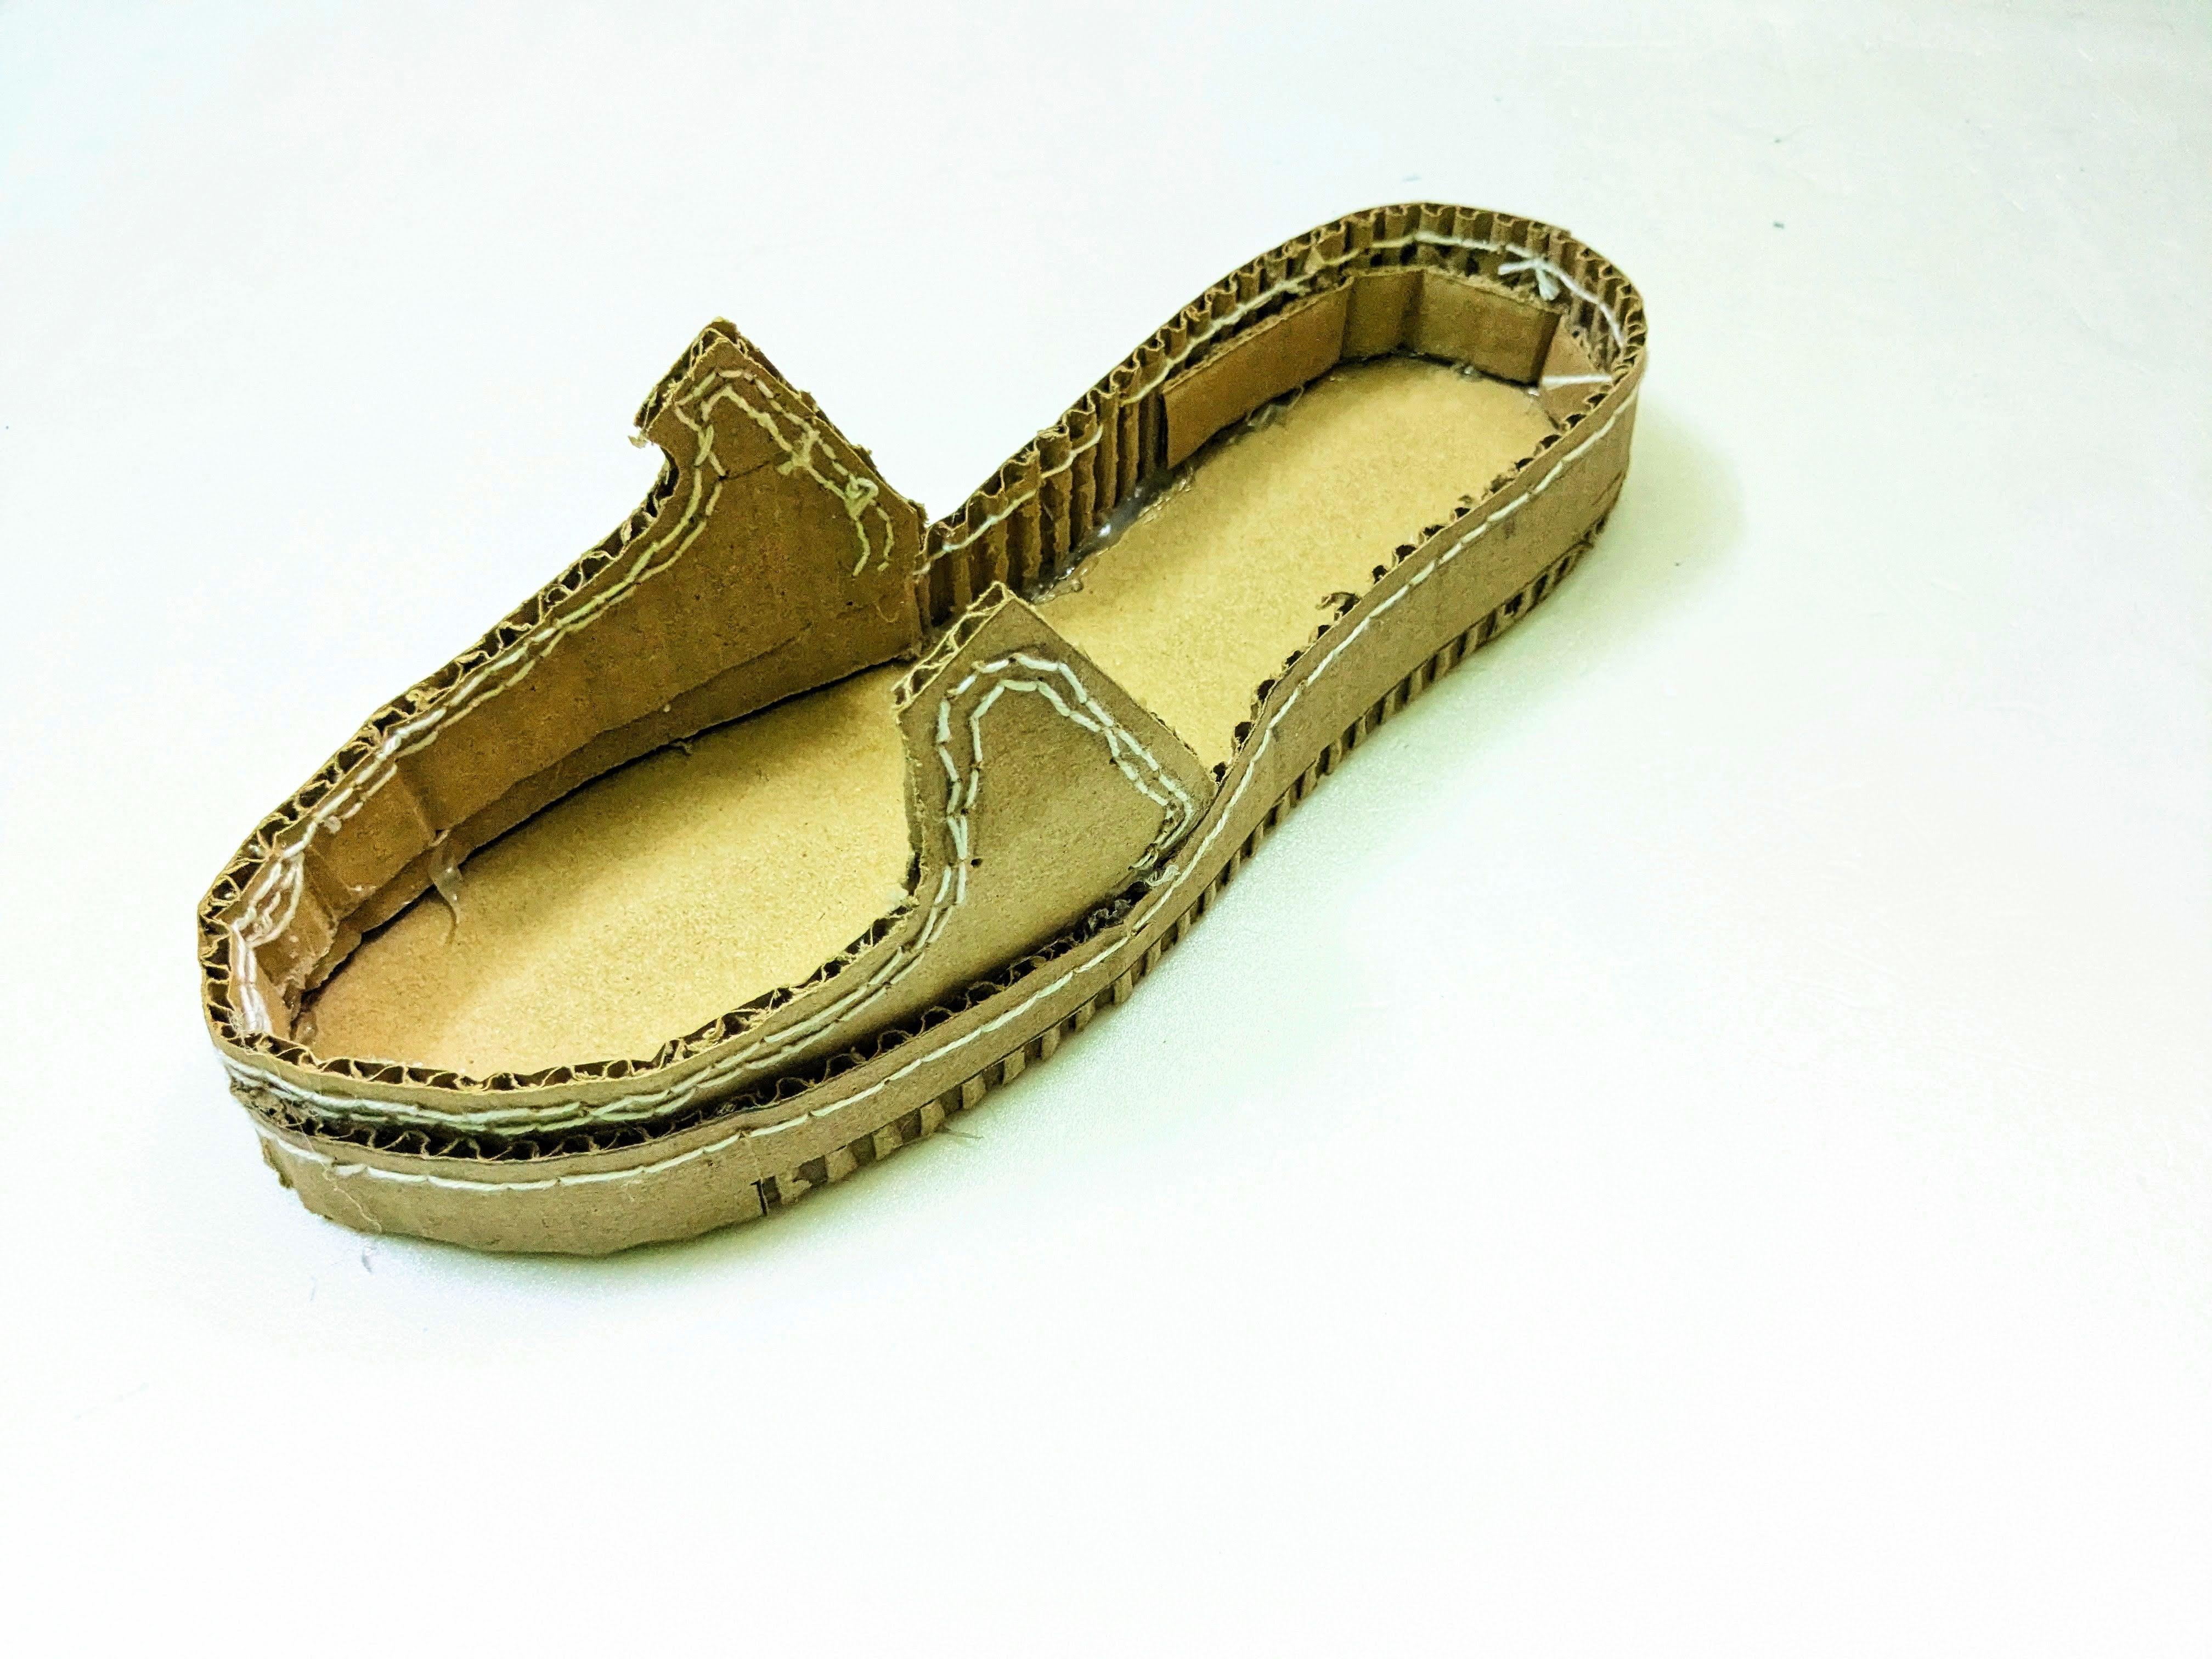


- Use the 5th template as shown above or freehand to trace the desired curve for the front border of the shoe onto the cardboard.
- Carefully cut along the traced curve using scissors or a utility knife, ensuring smooth and precise cuts.
- After cutting, refine the shape of the curve as needed to achieve the desired aesthetic and functionality.
- Apply glue to the cut edge of the cardboard curve and carefully attach it to the front border of the sole, ensuring a secure fit.
- Press down firmly on the curve to ensure proper adhesion, and hold it in place for a few moments to allow the glue to set.
- Once both curves are attached, inspect the shoes for any unevenness or gaps, and make any necessary adjustments for a seamless finish.
- Allow the glue to dry completely before proceeding to the next steps in the construction process.
Making the Back


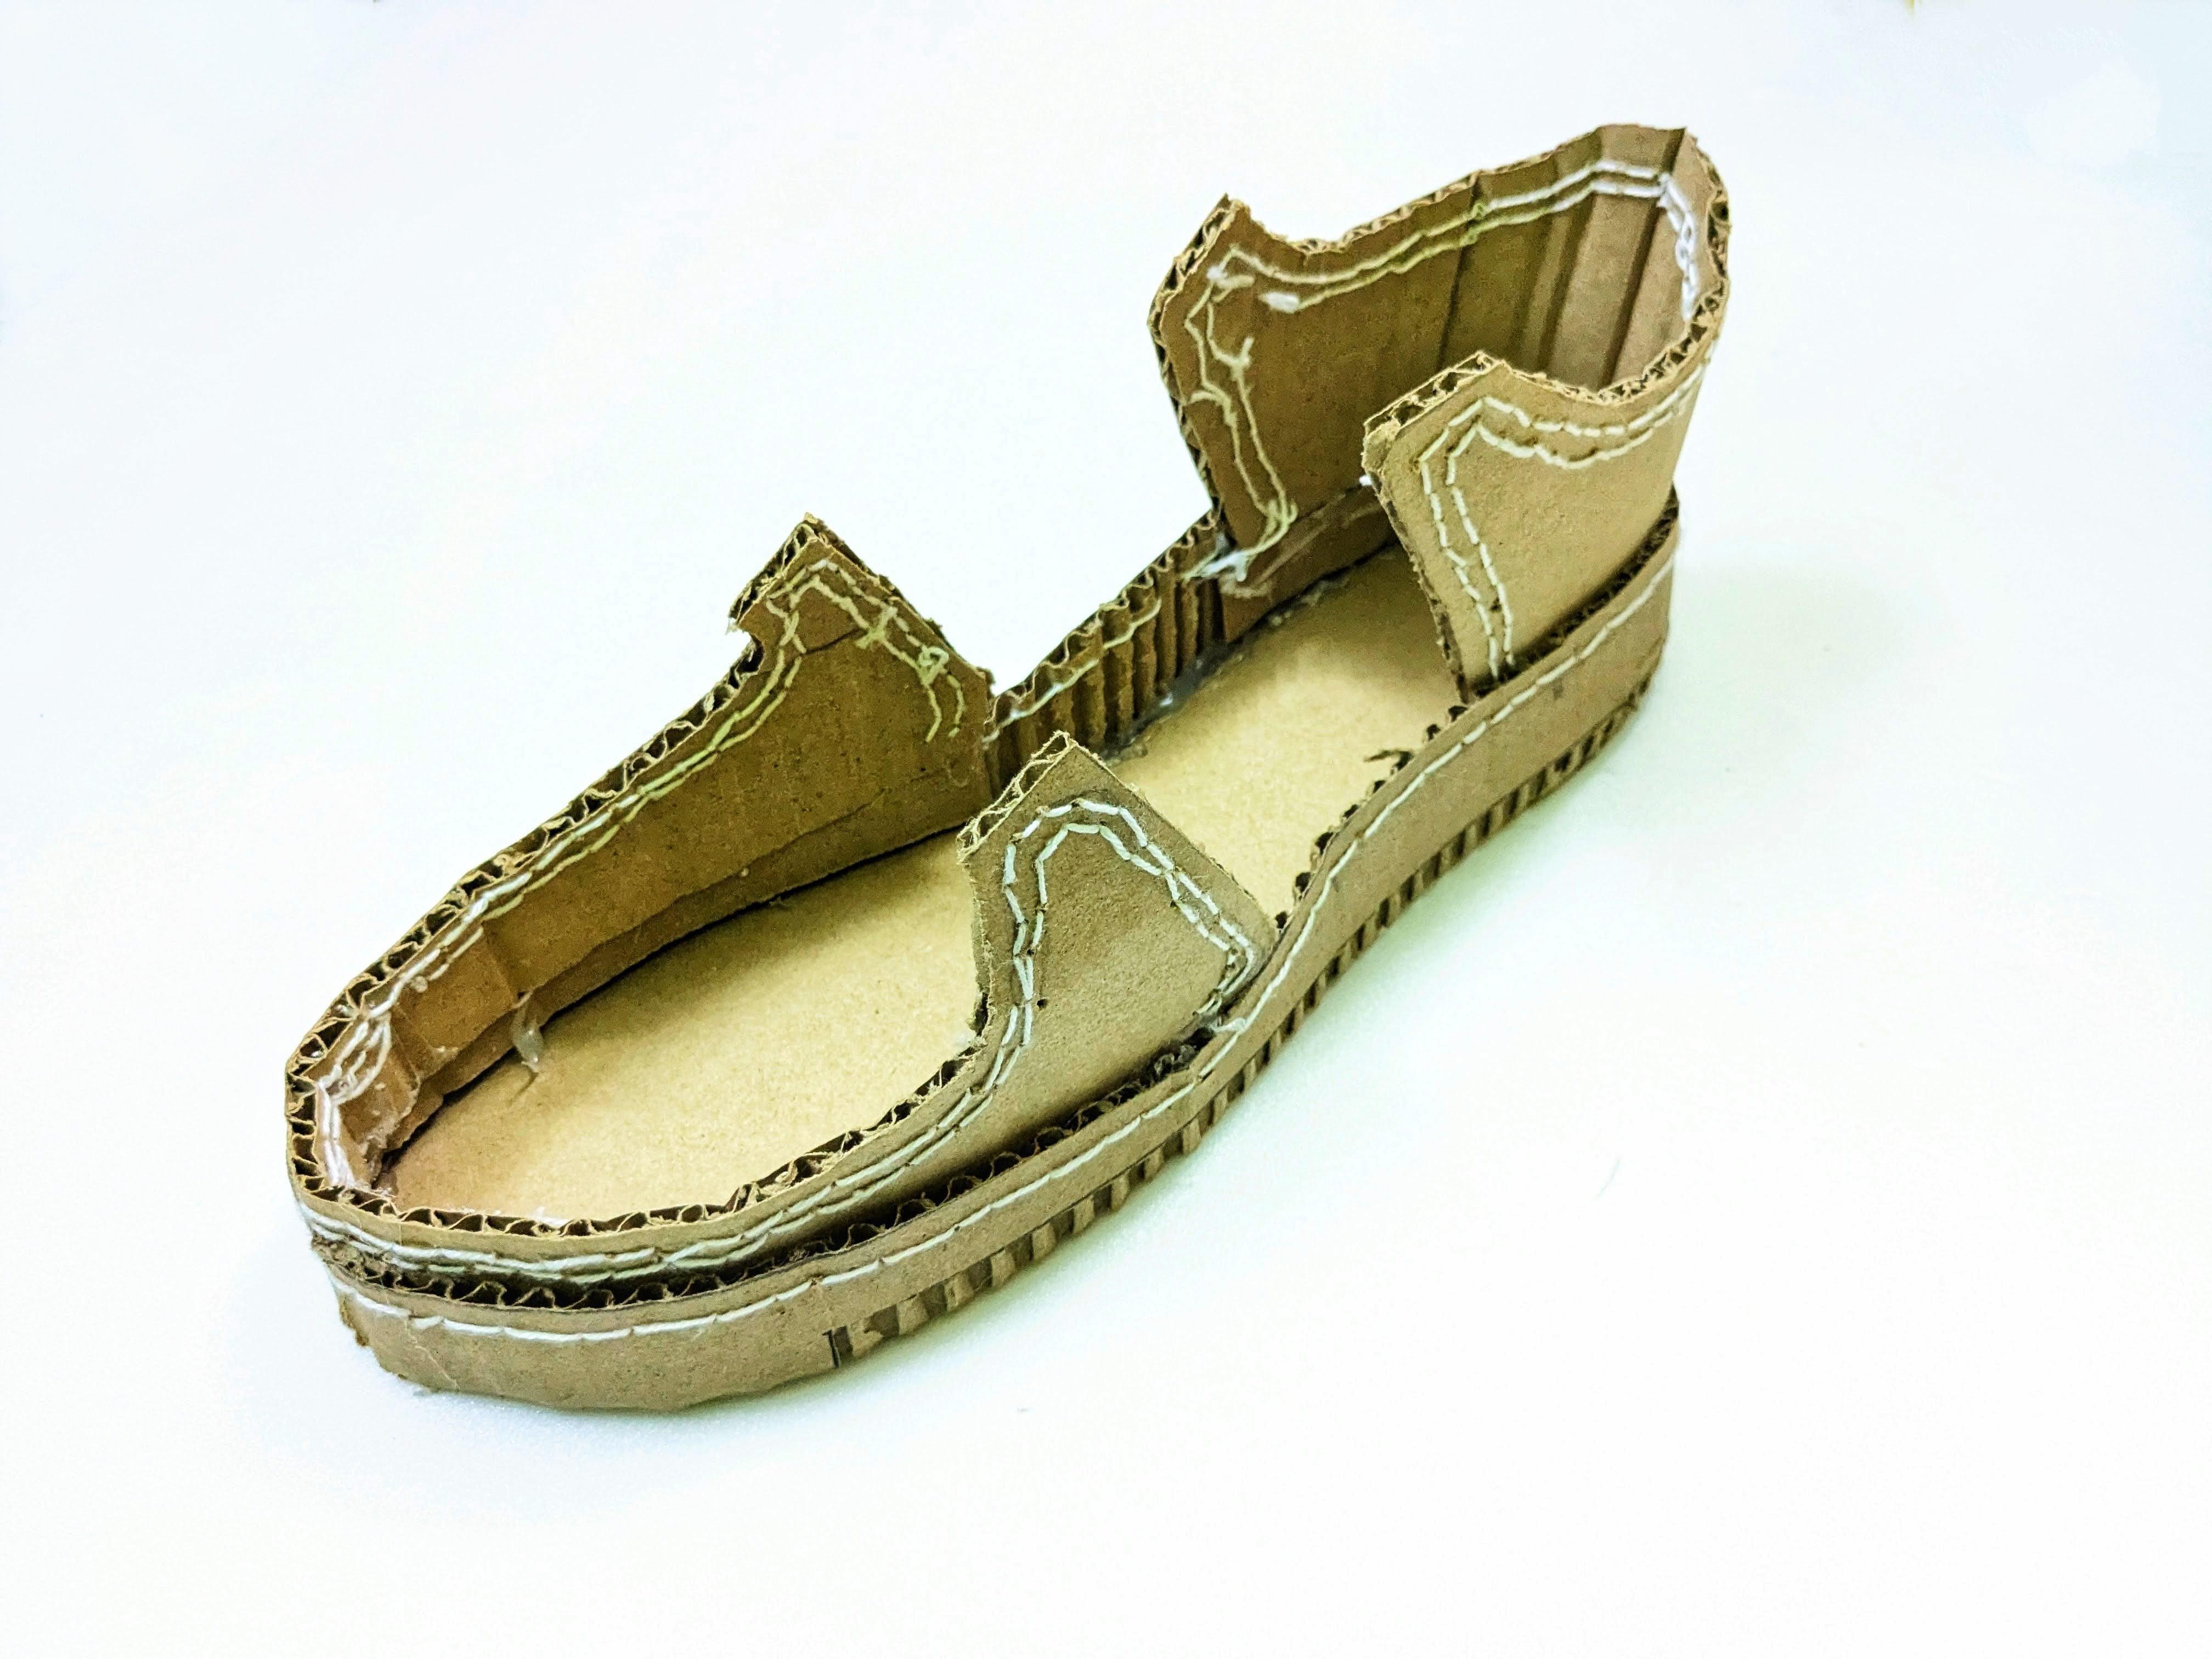
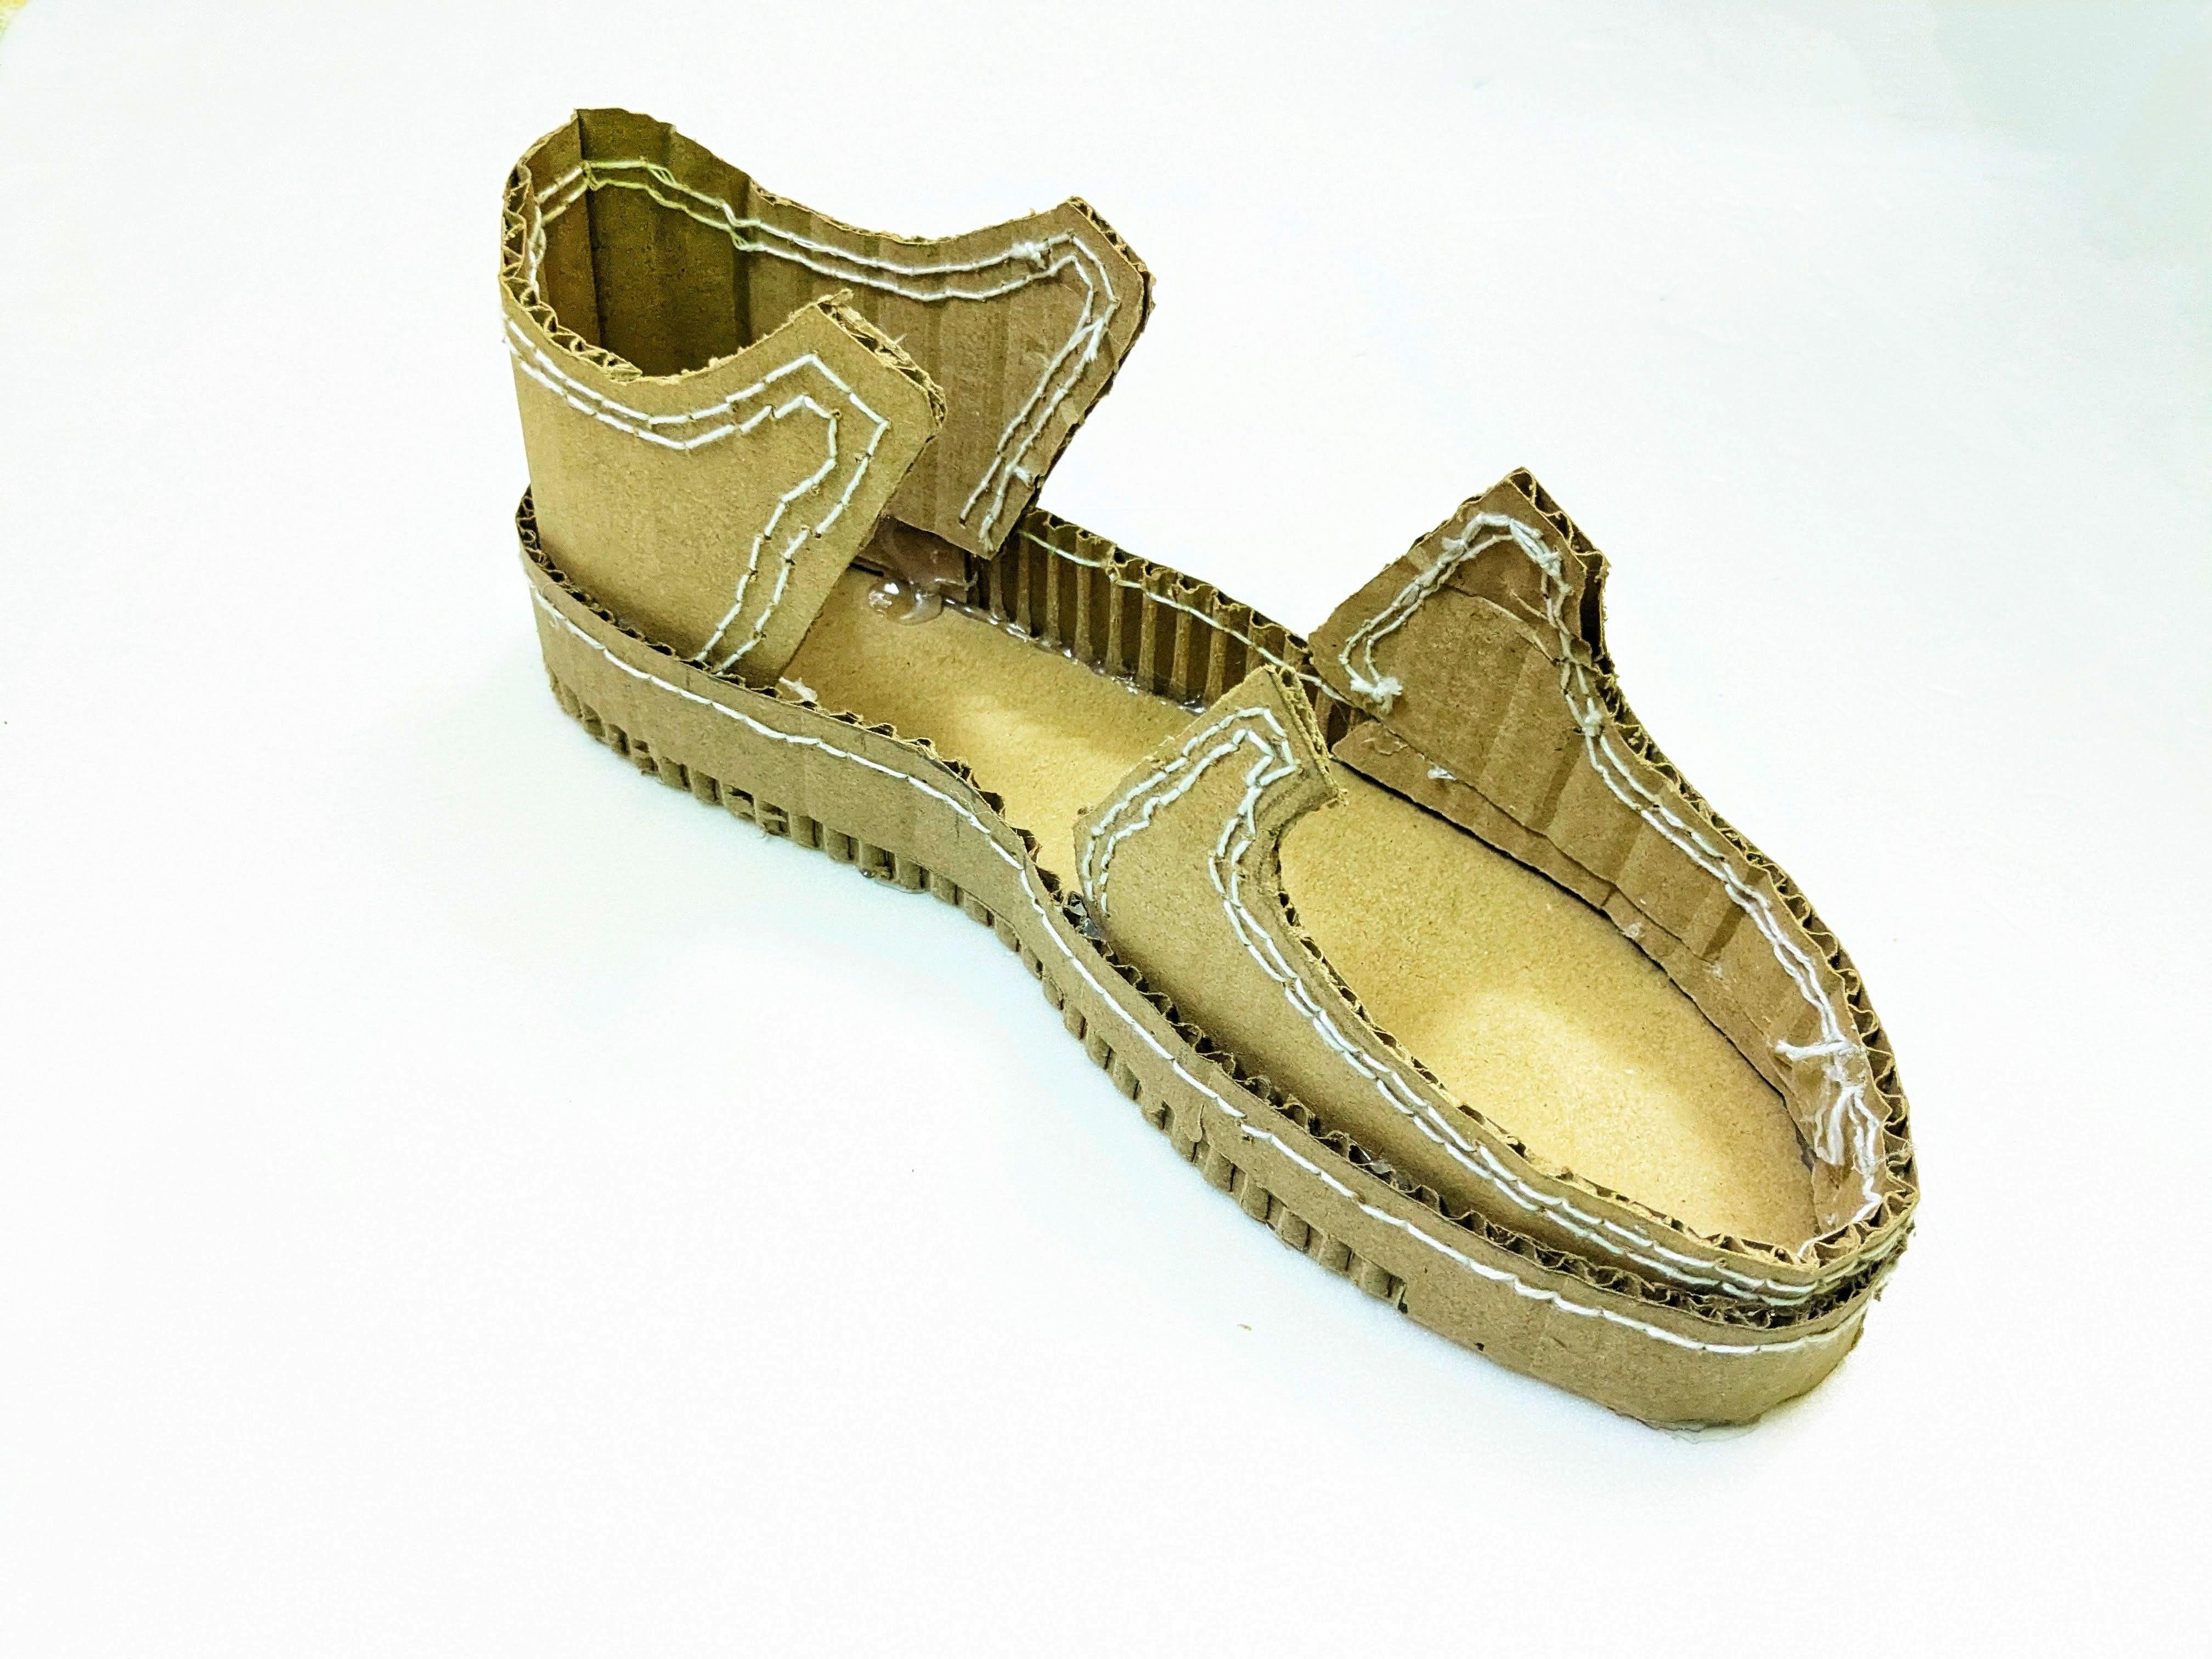

- Measure the desired height of the back portion of the shoe on the cardboard and mark it with a pencil or marker.
- Use scissors or a utility knife to carefully cut out the marked portion, creating the back section of the shoe.
- Refine the shape of the back piece to create a smooth and curved contour that matches the design of the Air Force 1.
- Apply glue along the bottom edge of the back piece and firmly press it onto the rear portion of the sole, ensuring proper alignment and fit.
- Hold the back piece in place for a few moments to allow the glue to adhere securely.
- Add additional strips of cardboard or extra glue to reinforce the attachment if needed, ensuring stability and durability.
- Allow the glue to dry completely before moving on to the next steps in the assembly process, ensuring a strong and secure bond.
Creating the Joint


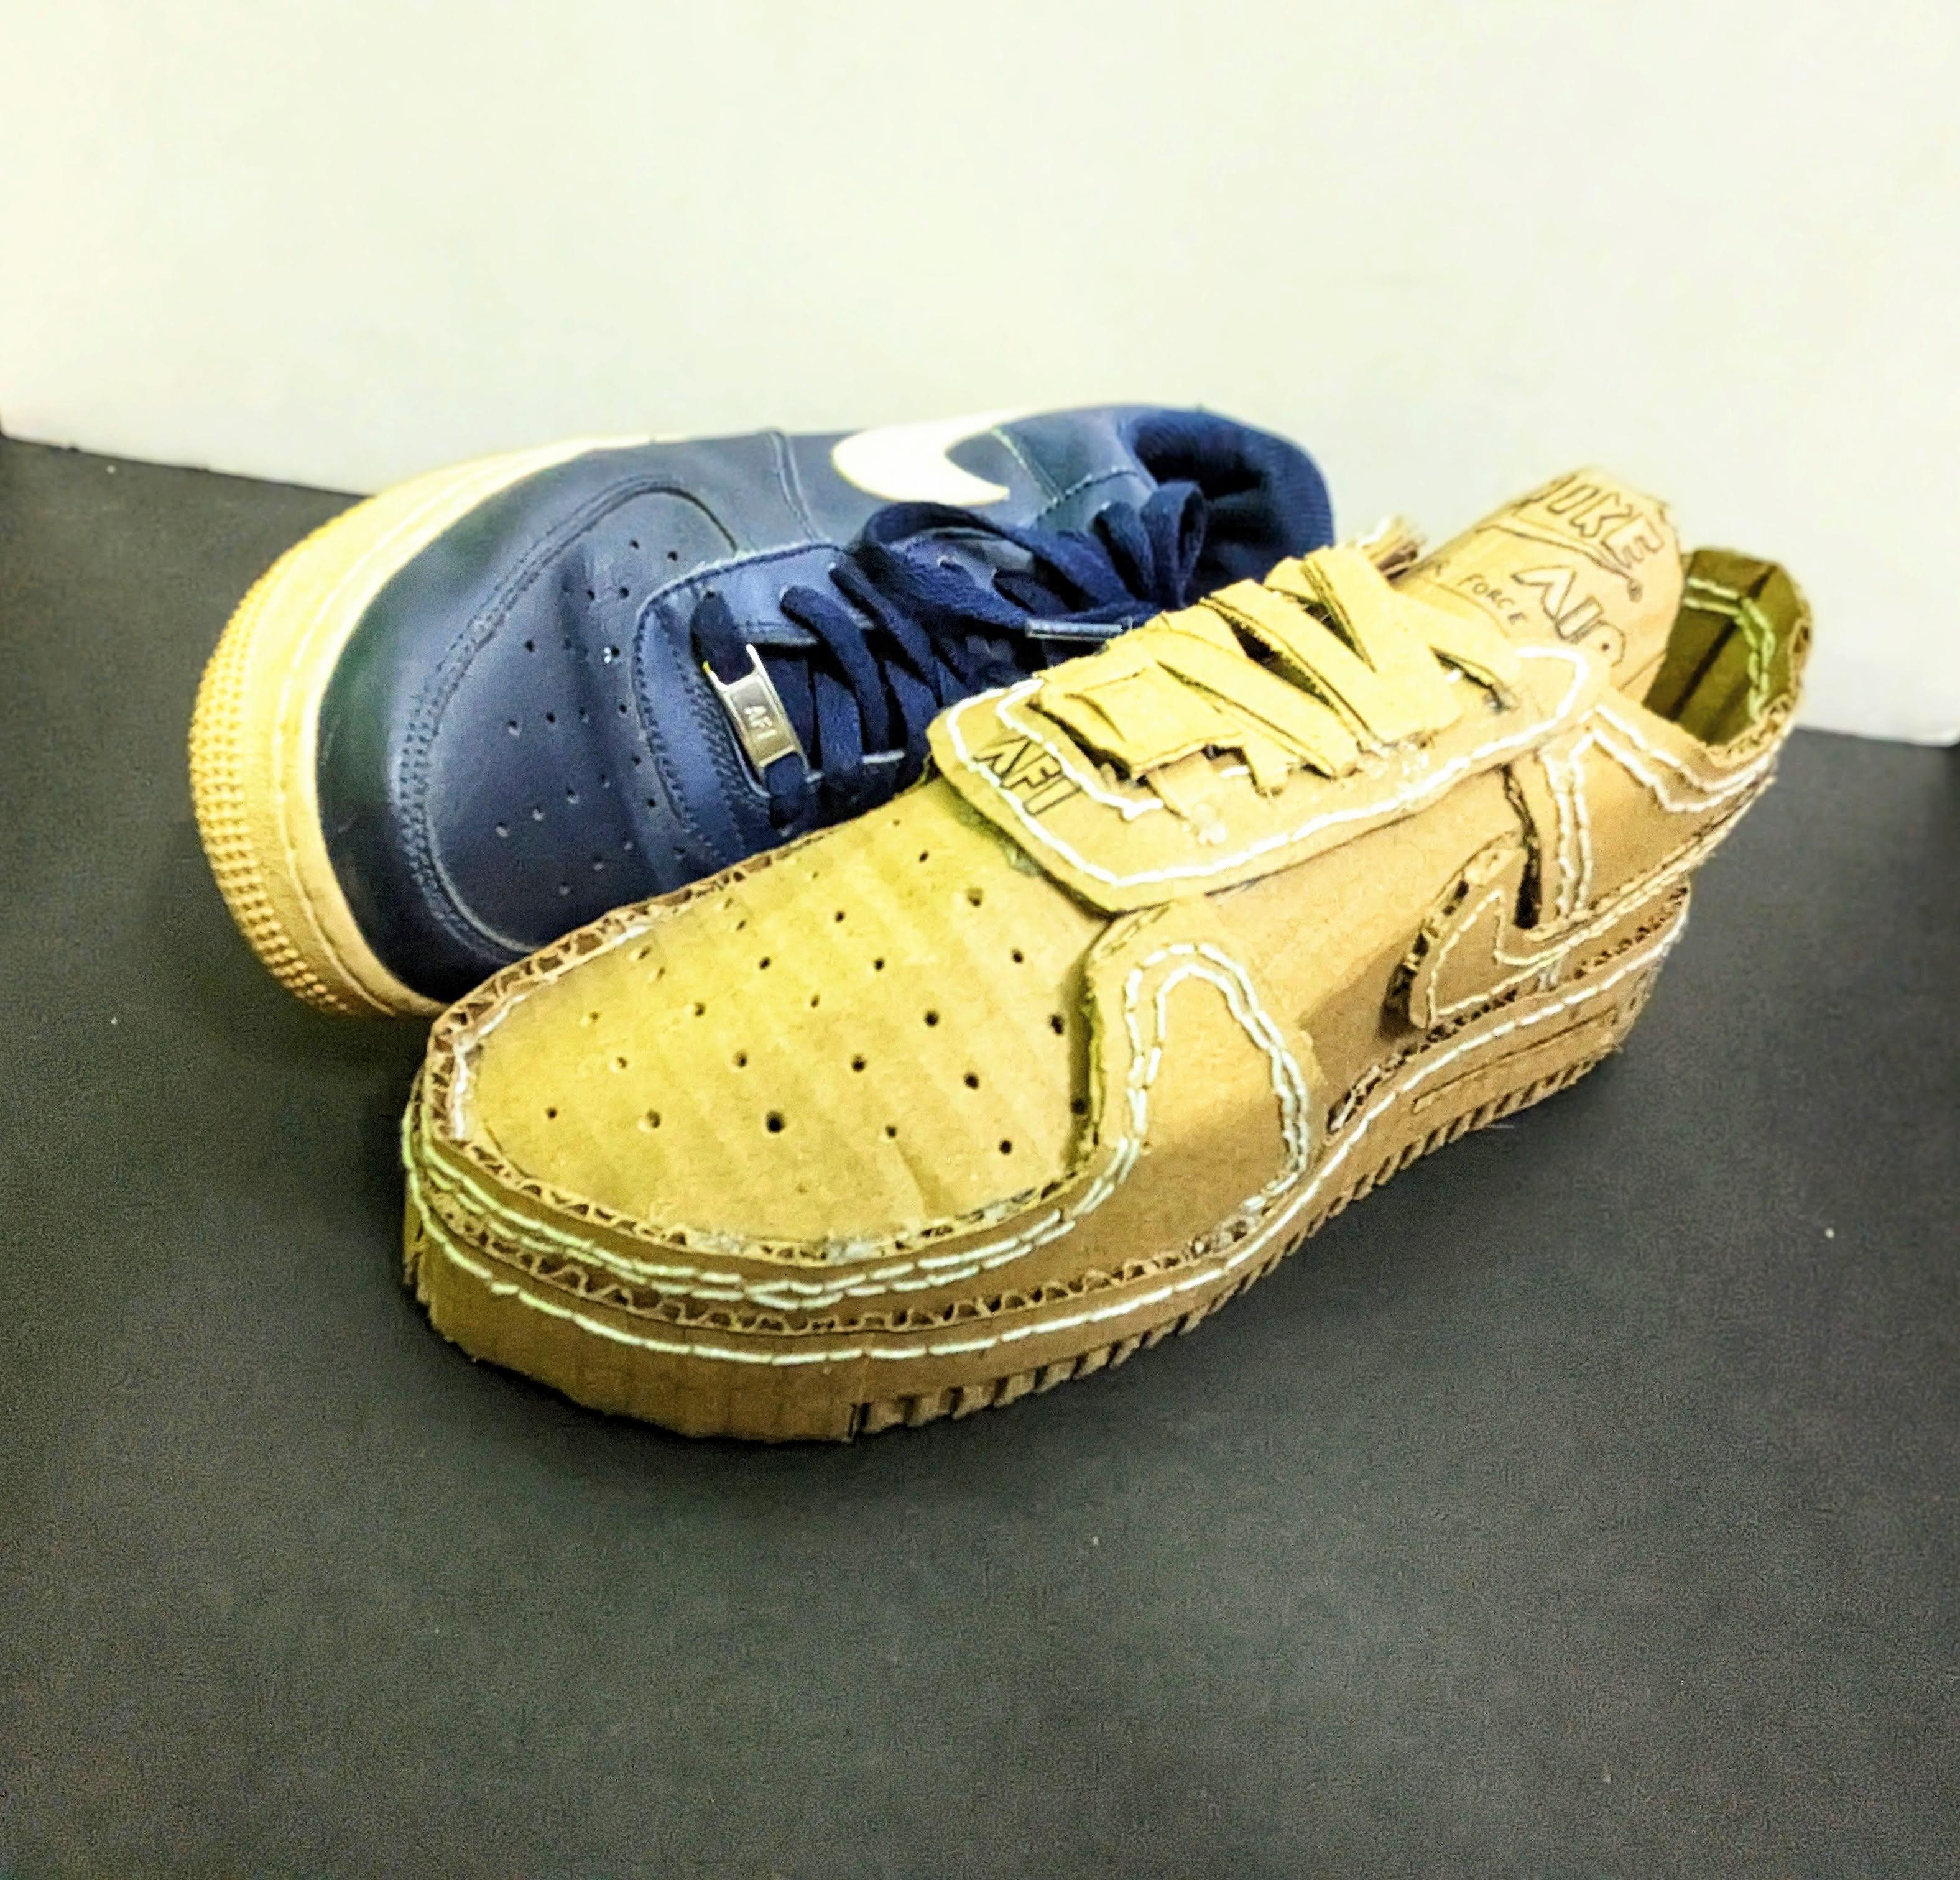
- Determine the optimal position for the joint connection between the back piece and the upper part of the shoe. Ensure proper alignment and symmetry.
- Carefully cut small notches or tabs along the top edge of the back piece and the corresponding edge of the upper part of the shoe. These notches will interlock to form a secure joint.
- Apply a generous amount of glue to both the notched edges of the back piece and the upper part of the shoe.
- Press the notched edges of the back piece and the upper part of the shoe together, firmly interlocking them to create a strong and stable joint connection.
- Hold the jointed pieces together for a few moments to allow the glue to set and bond effectively.
- Add additional glue or reinforcement strips to further strengthen the joint connection, ensuring long-lasting durability.
Shaping the Upper Part
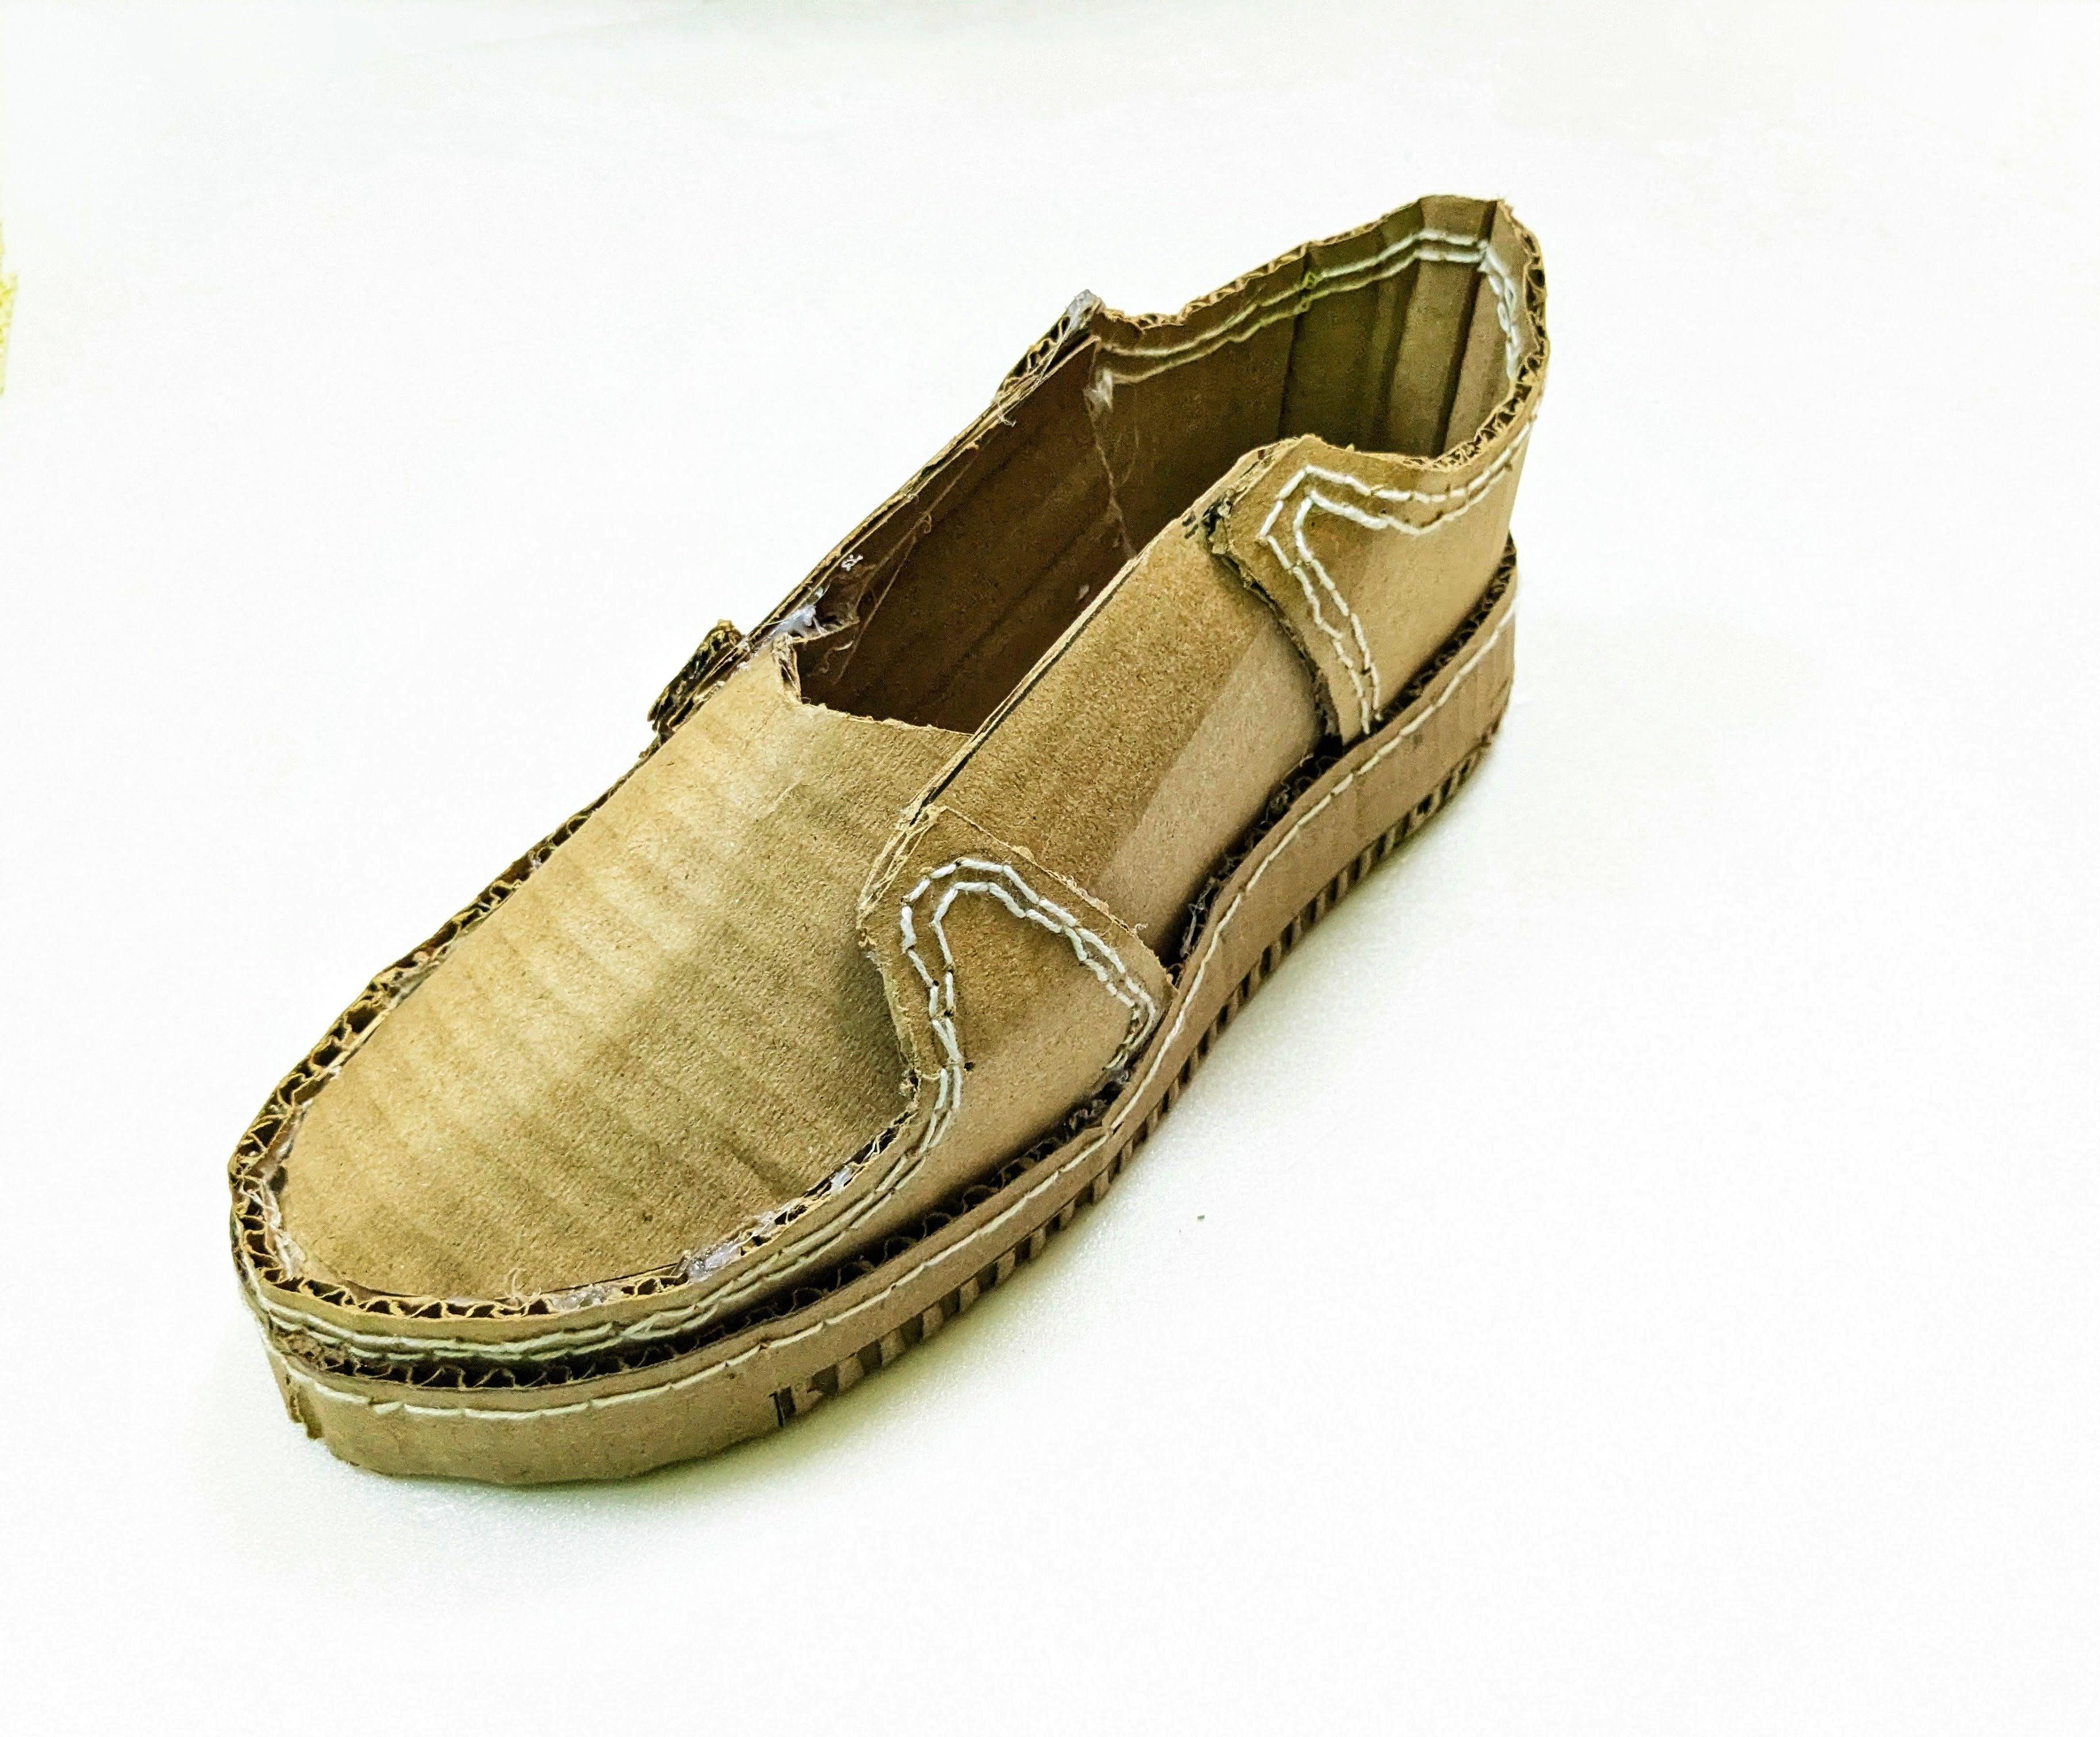


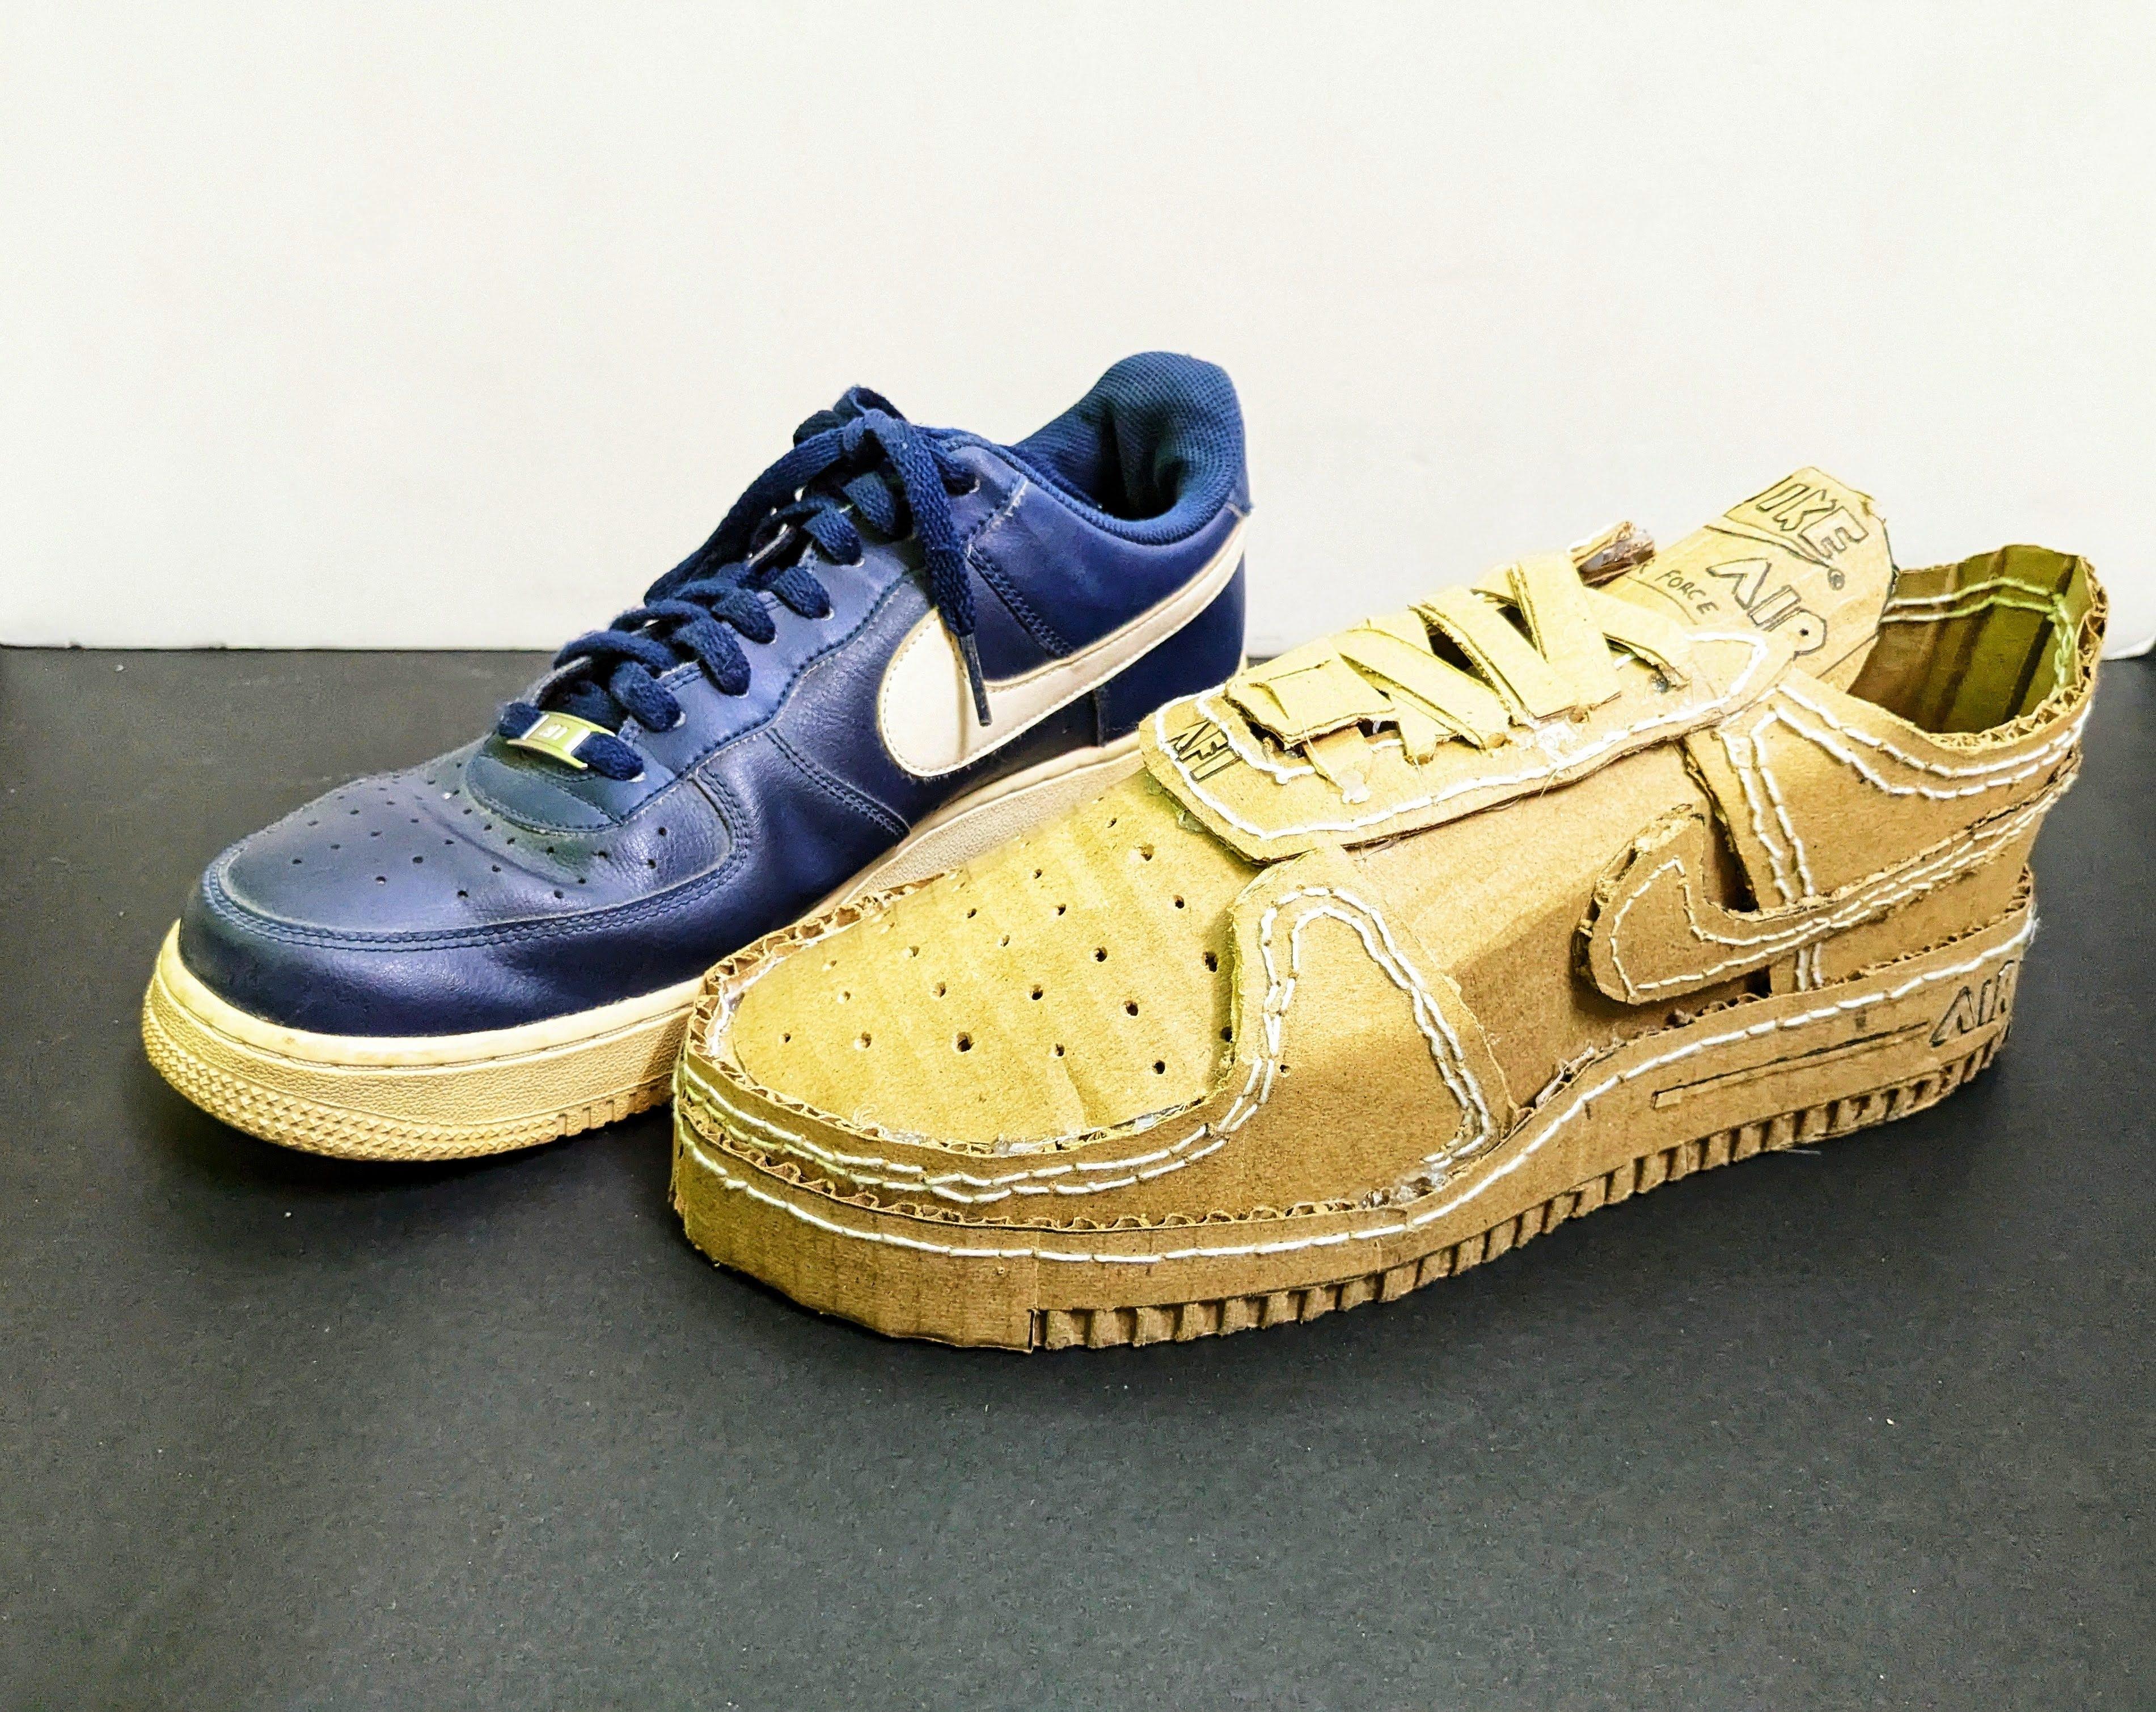
- Now, it's time to add some shape and structure to the upper part of the shoe. This step requires a bit of effort, but the results will be worth it.
- Begin by cutting out a horseshoe-like shape from cardboard. This shape will form the basis for the upper part of the shoe.
- Using both slits and bending techniques, mold the cardboard into a more organic, rounded shape. This process may require some muscle and patience to achieve the desired curvature.
- Apply glue to the top inside border of the shoe sole, then carefully attach the curved cardboard piece. Ensure it is securely glued in place and follows the contour of the sole.
- To reinforce the structure, glue a piece of cardboard with holes in it to the inside of the curved cardboard piece. This will provide additional support and stability to the upper part of the shoe.
Adding the Laces and Nike Logo

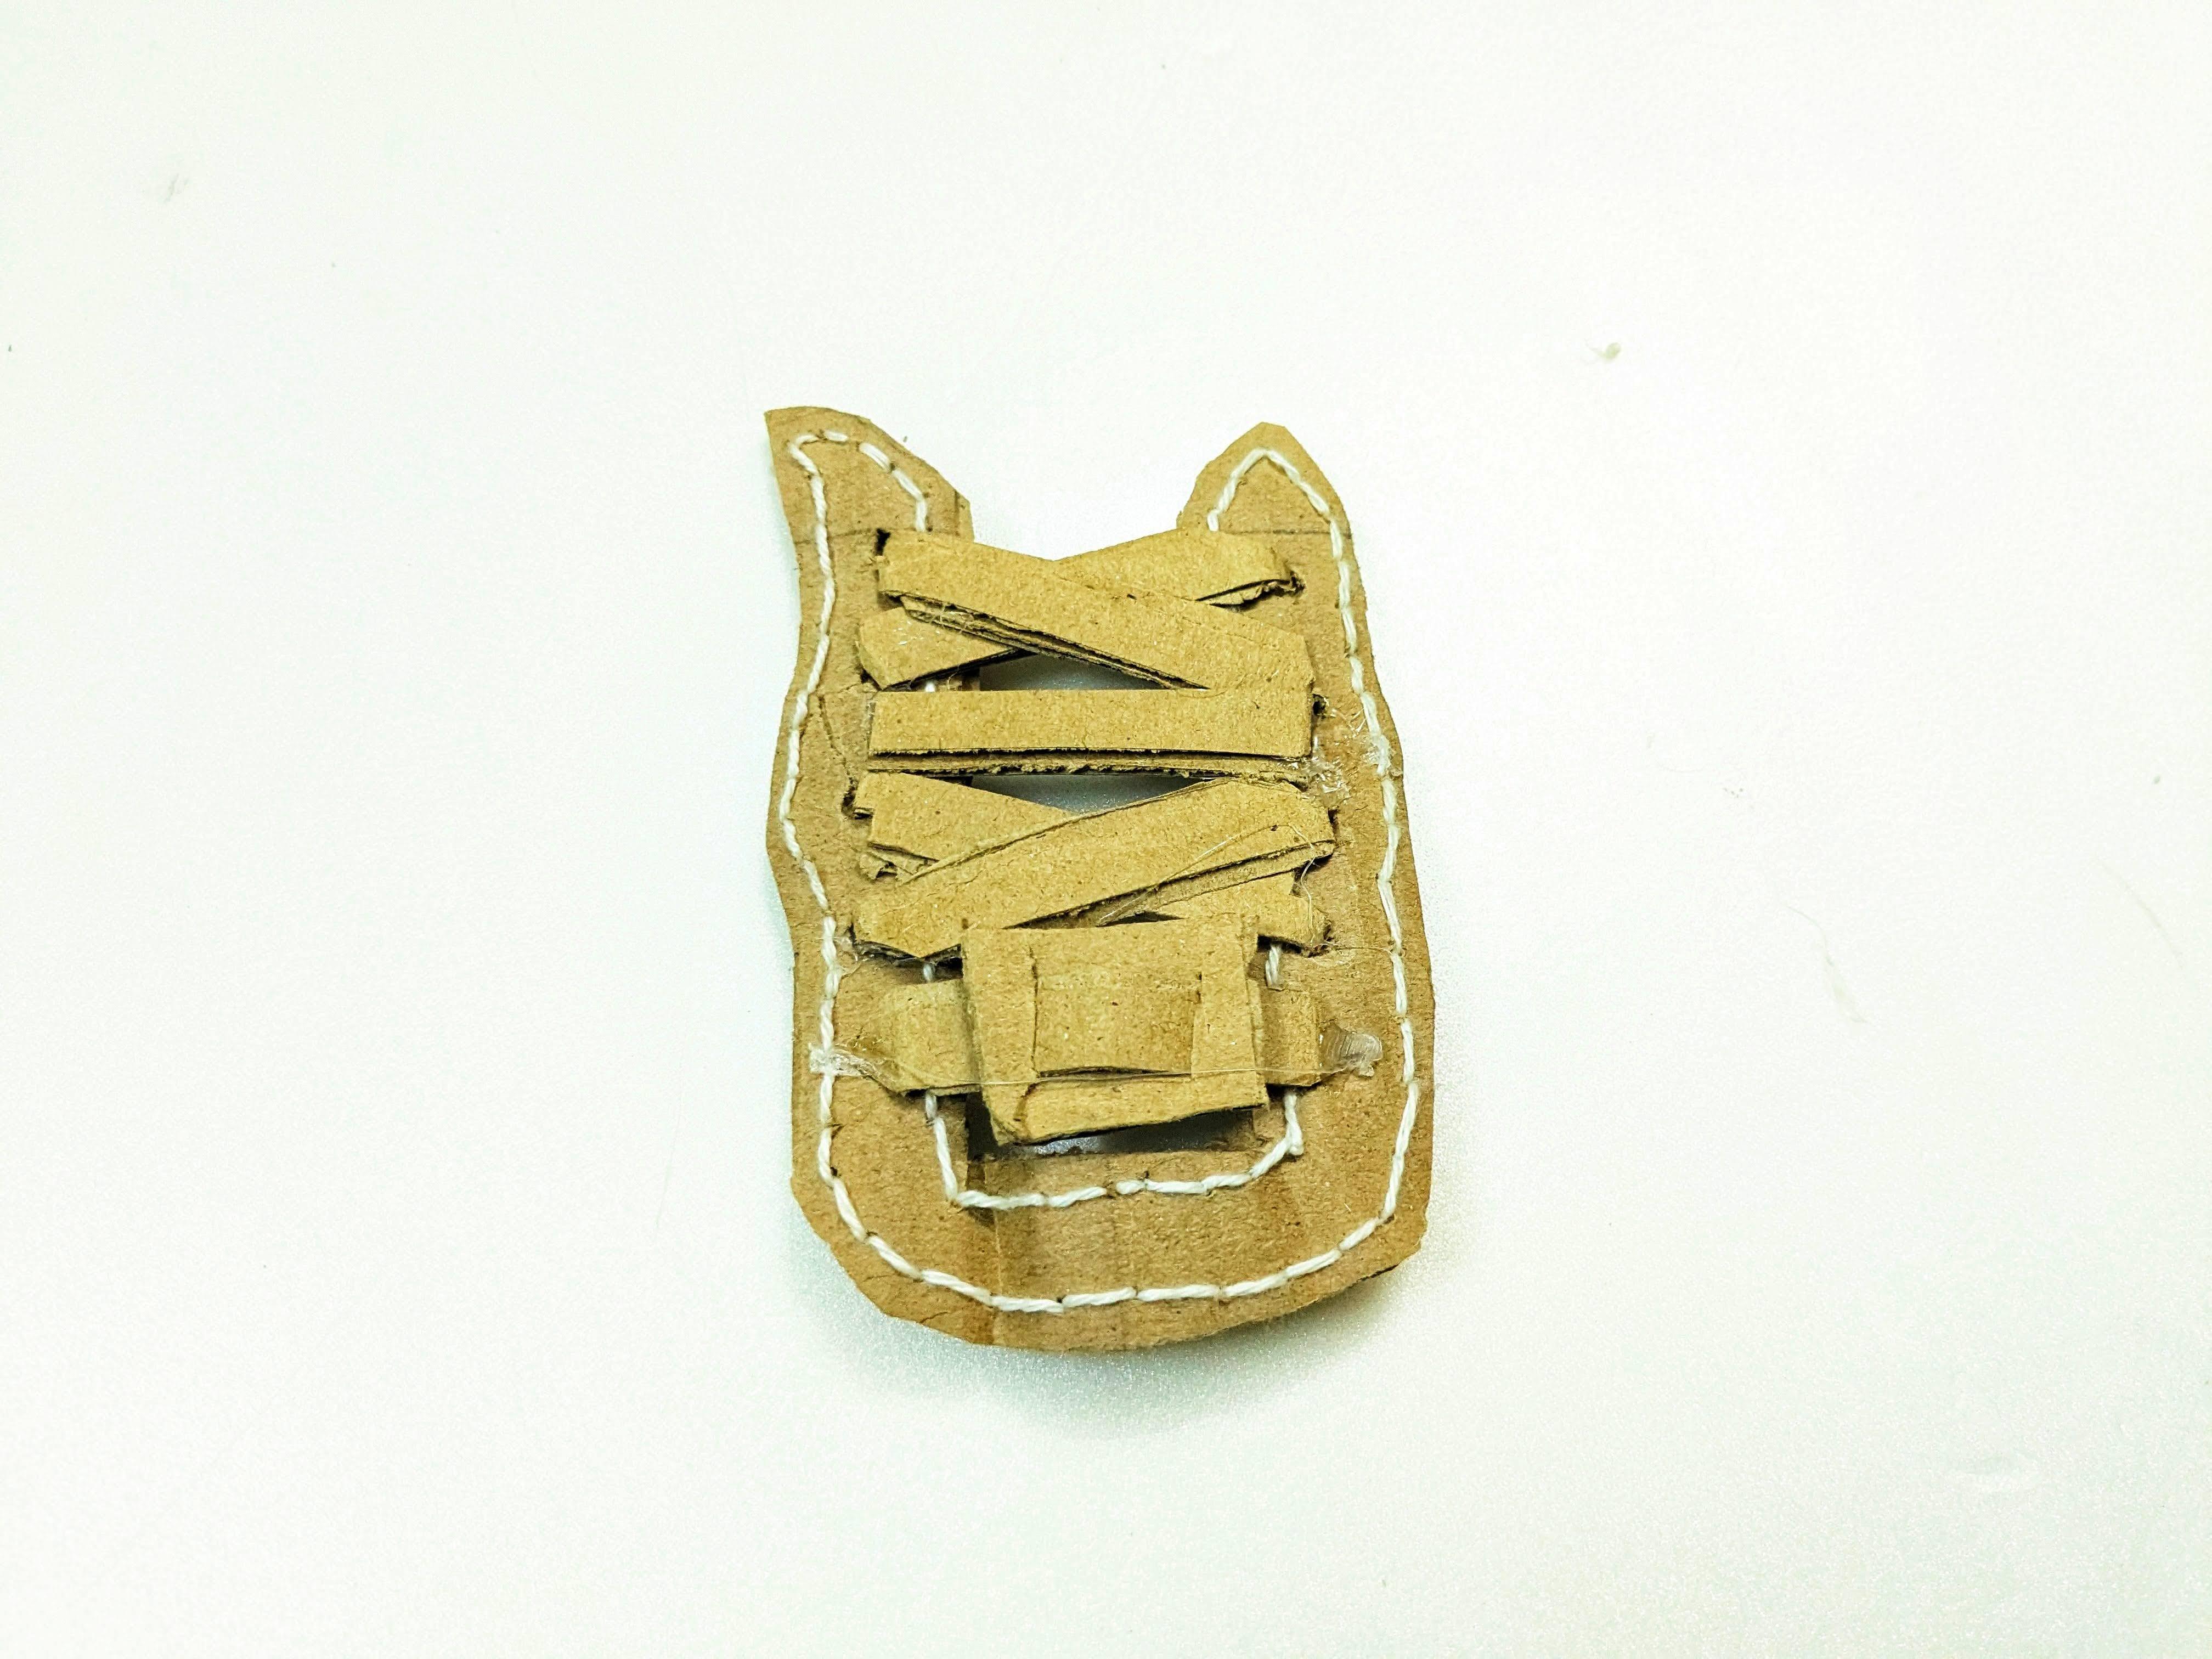


- Cut out a wavy U-shaped part, and after gluing it on the top of the shoe, poke 7 holes in either side.
- Mark the positions for the lace holes along the upper part of the shoe.
- Using a hole punch or a sharp tool, carefully create evenly spaced holes on both sides of the shoe's upper.
- Thread the laces through the holes, starting from the bottom and working your way up.
- Adjust the laces to ensure they are evenly distributed and securely in place.
- Draw or print the Nike logo onto a piece of cardboard.
- Carefully cut out the logo using scissors or a precision knife.
- Use markers, paints, or any other decorating materials to enhance the appearance of the logo.
- Customize the logo to match your personal style or to stay true to the classic design.
- Apply glue to the back of the Nike logo cutout.
- Press the logo firmly onto the side of the shoe, ensuring it adheres securely.
- Hold in place for a few moments to allow the glue to set.
- Make any necessary adjustments to achieve a polished and professional look.
Creating the Tongue
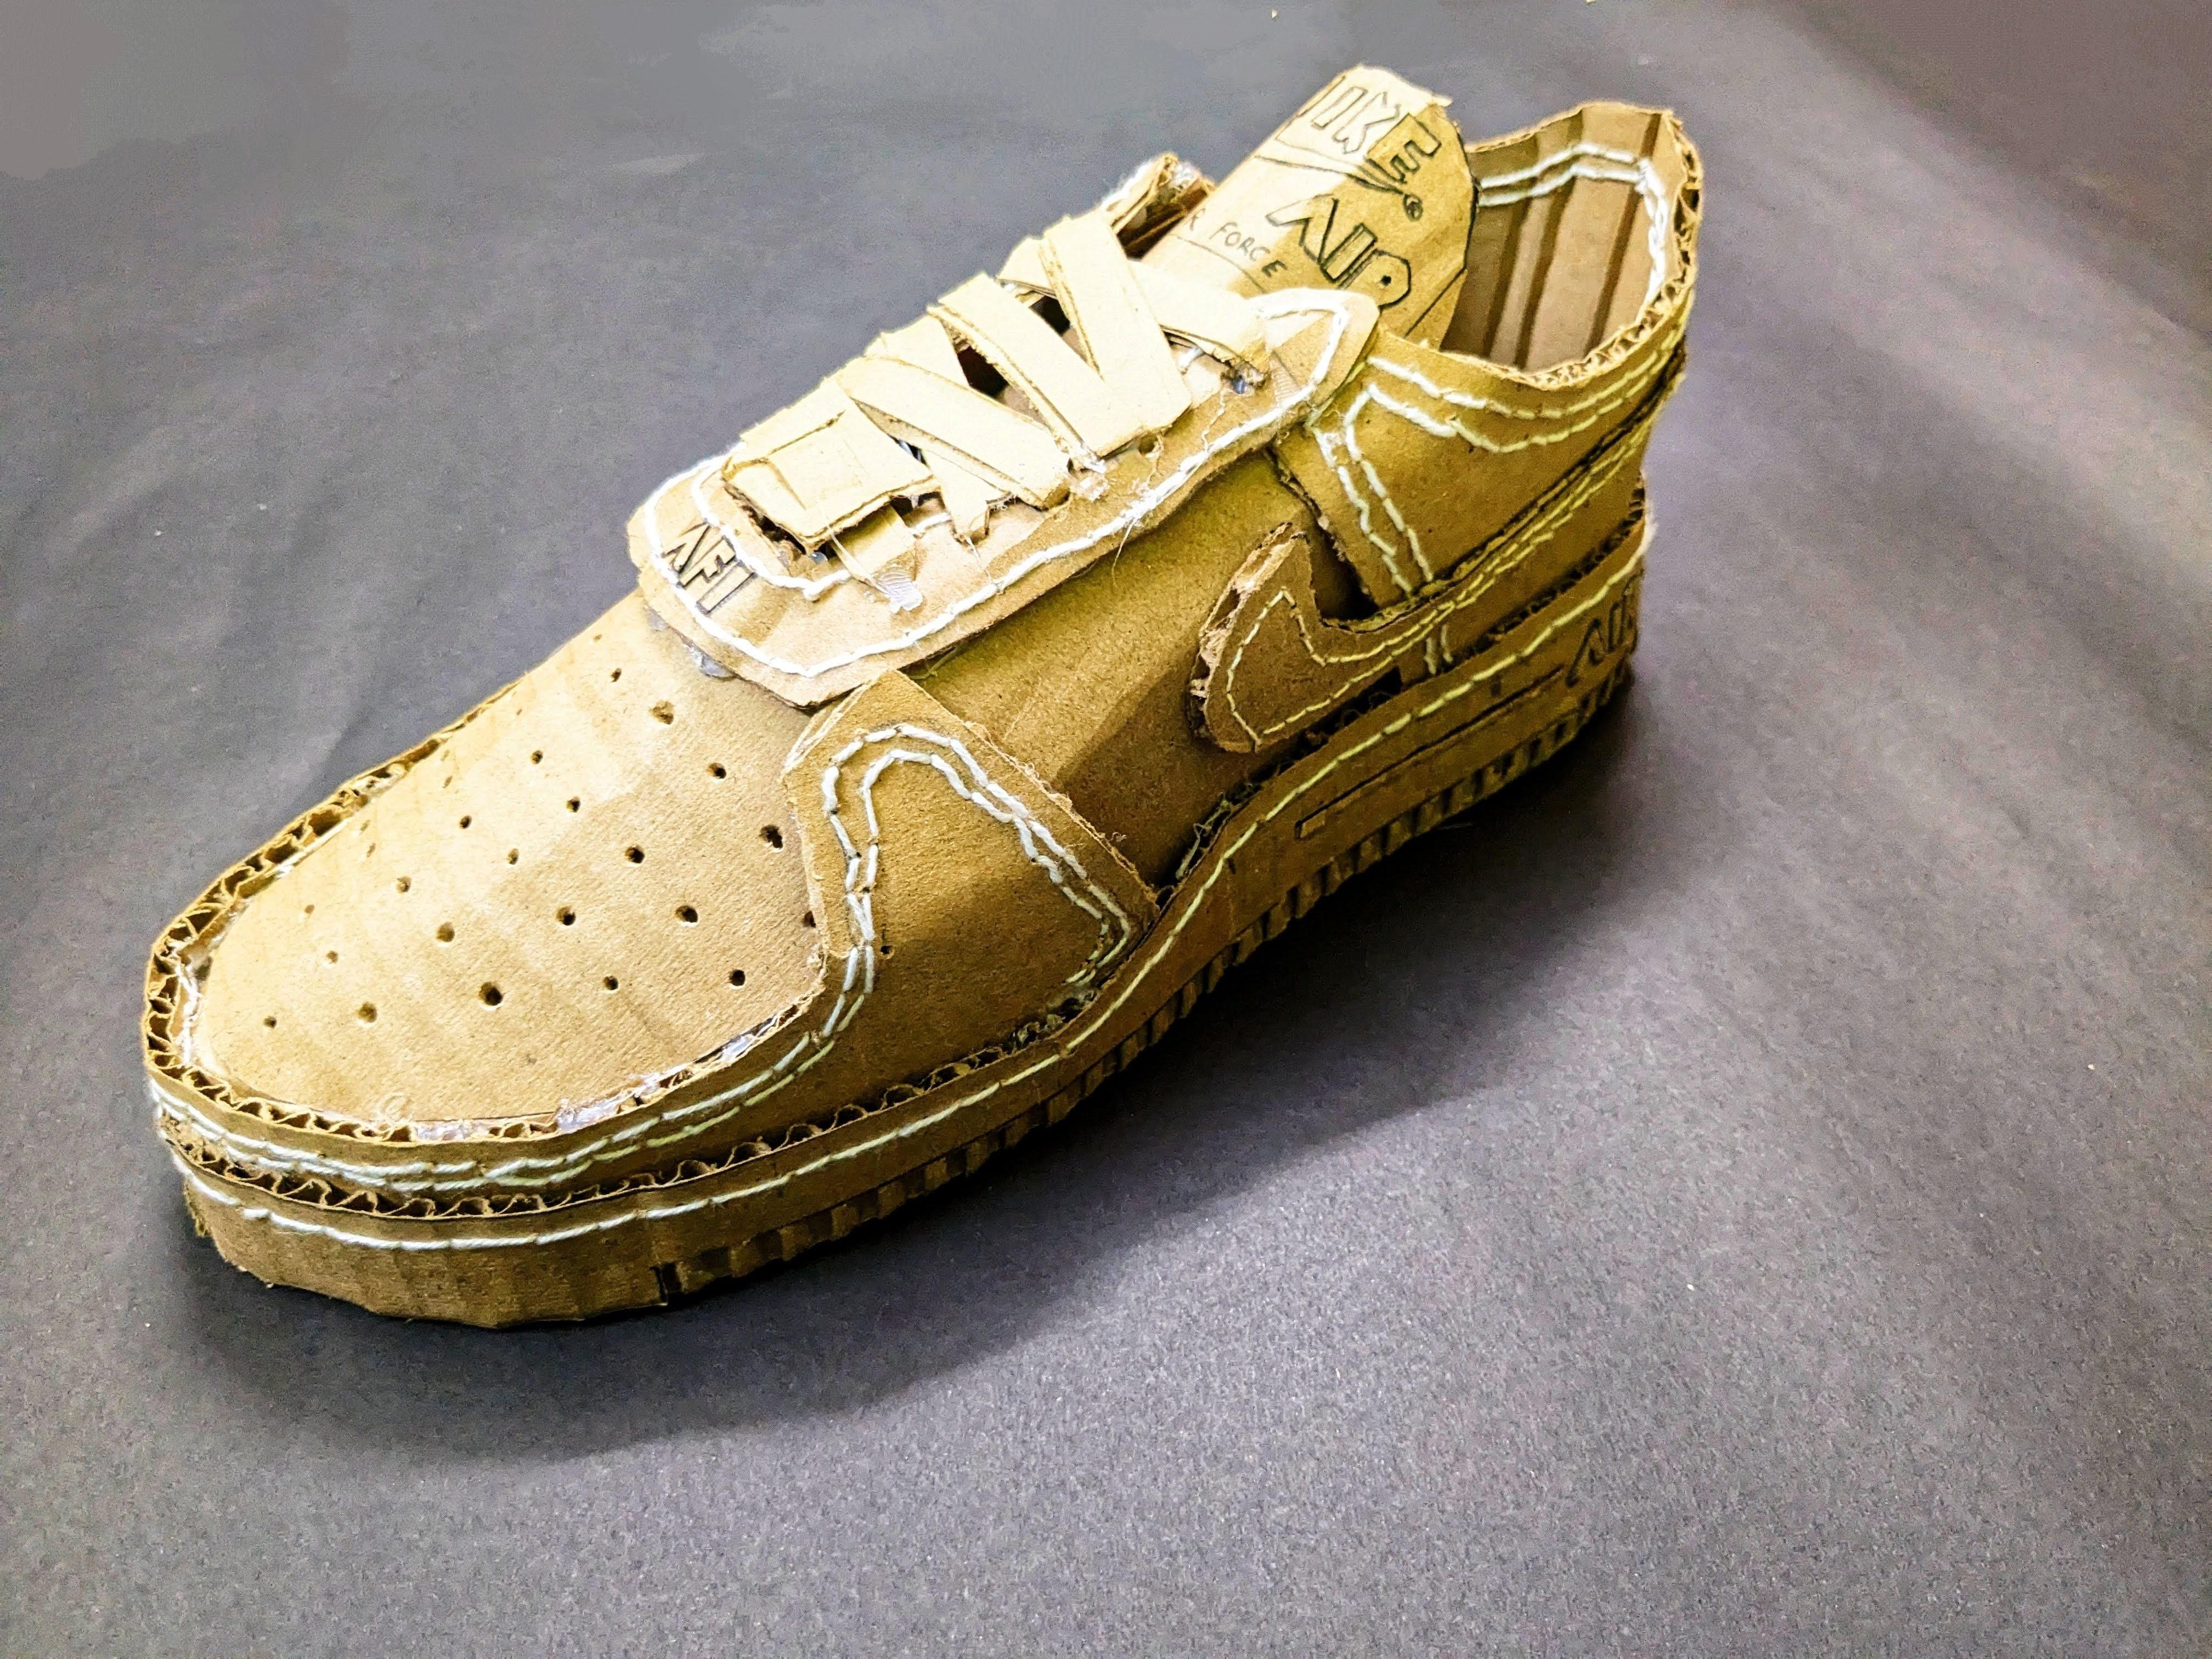


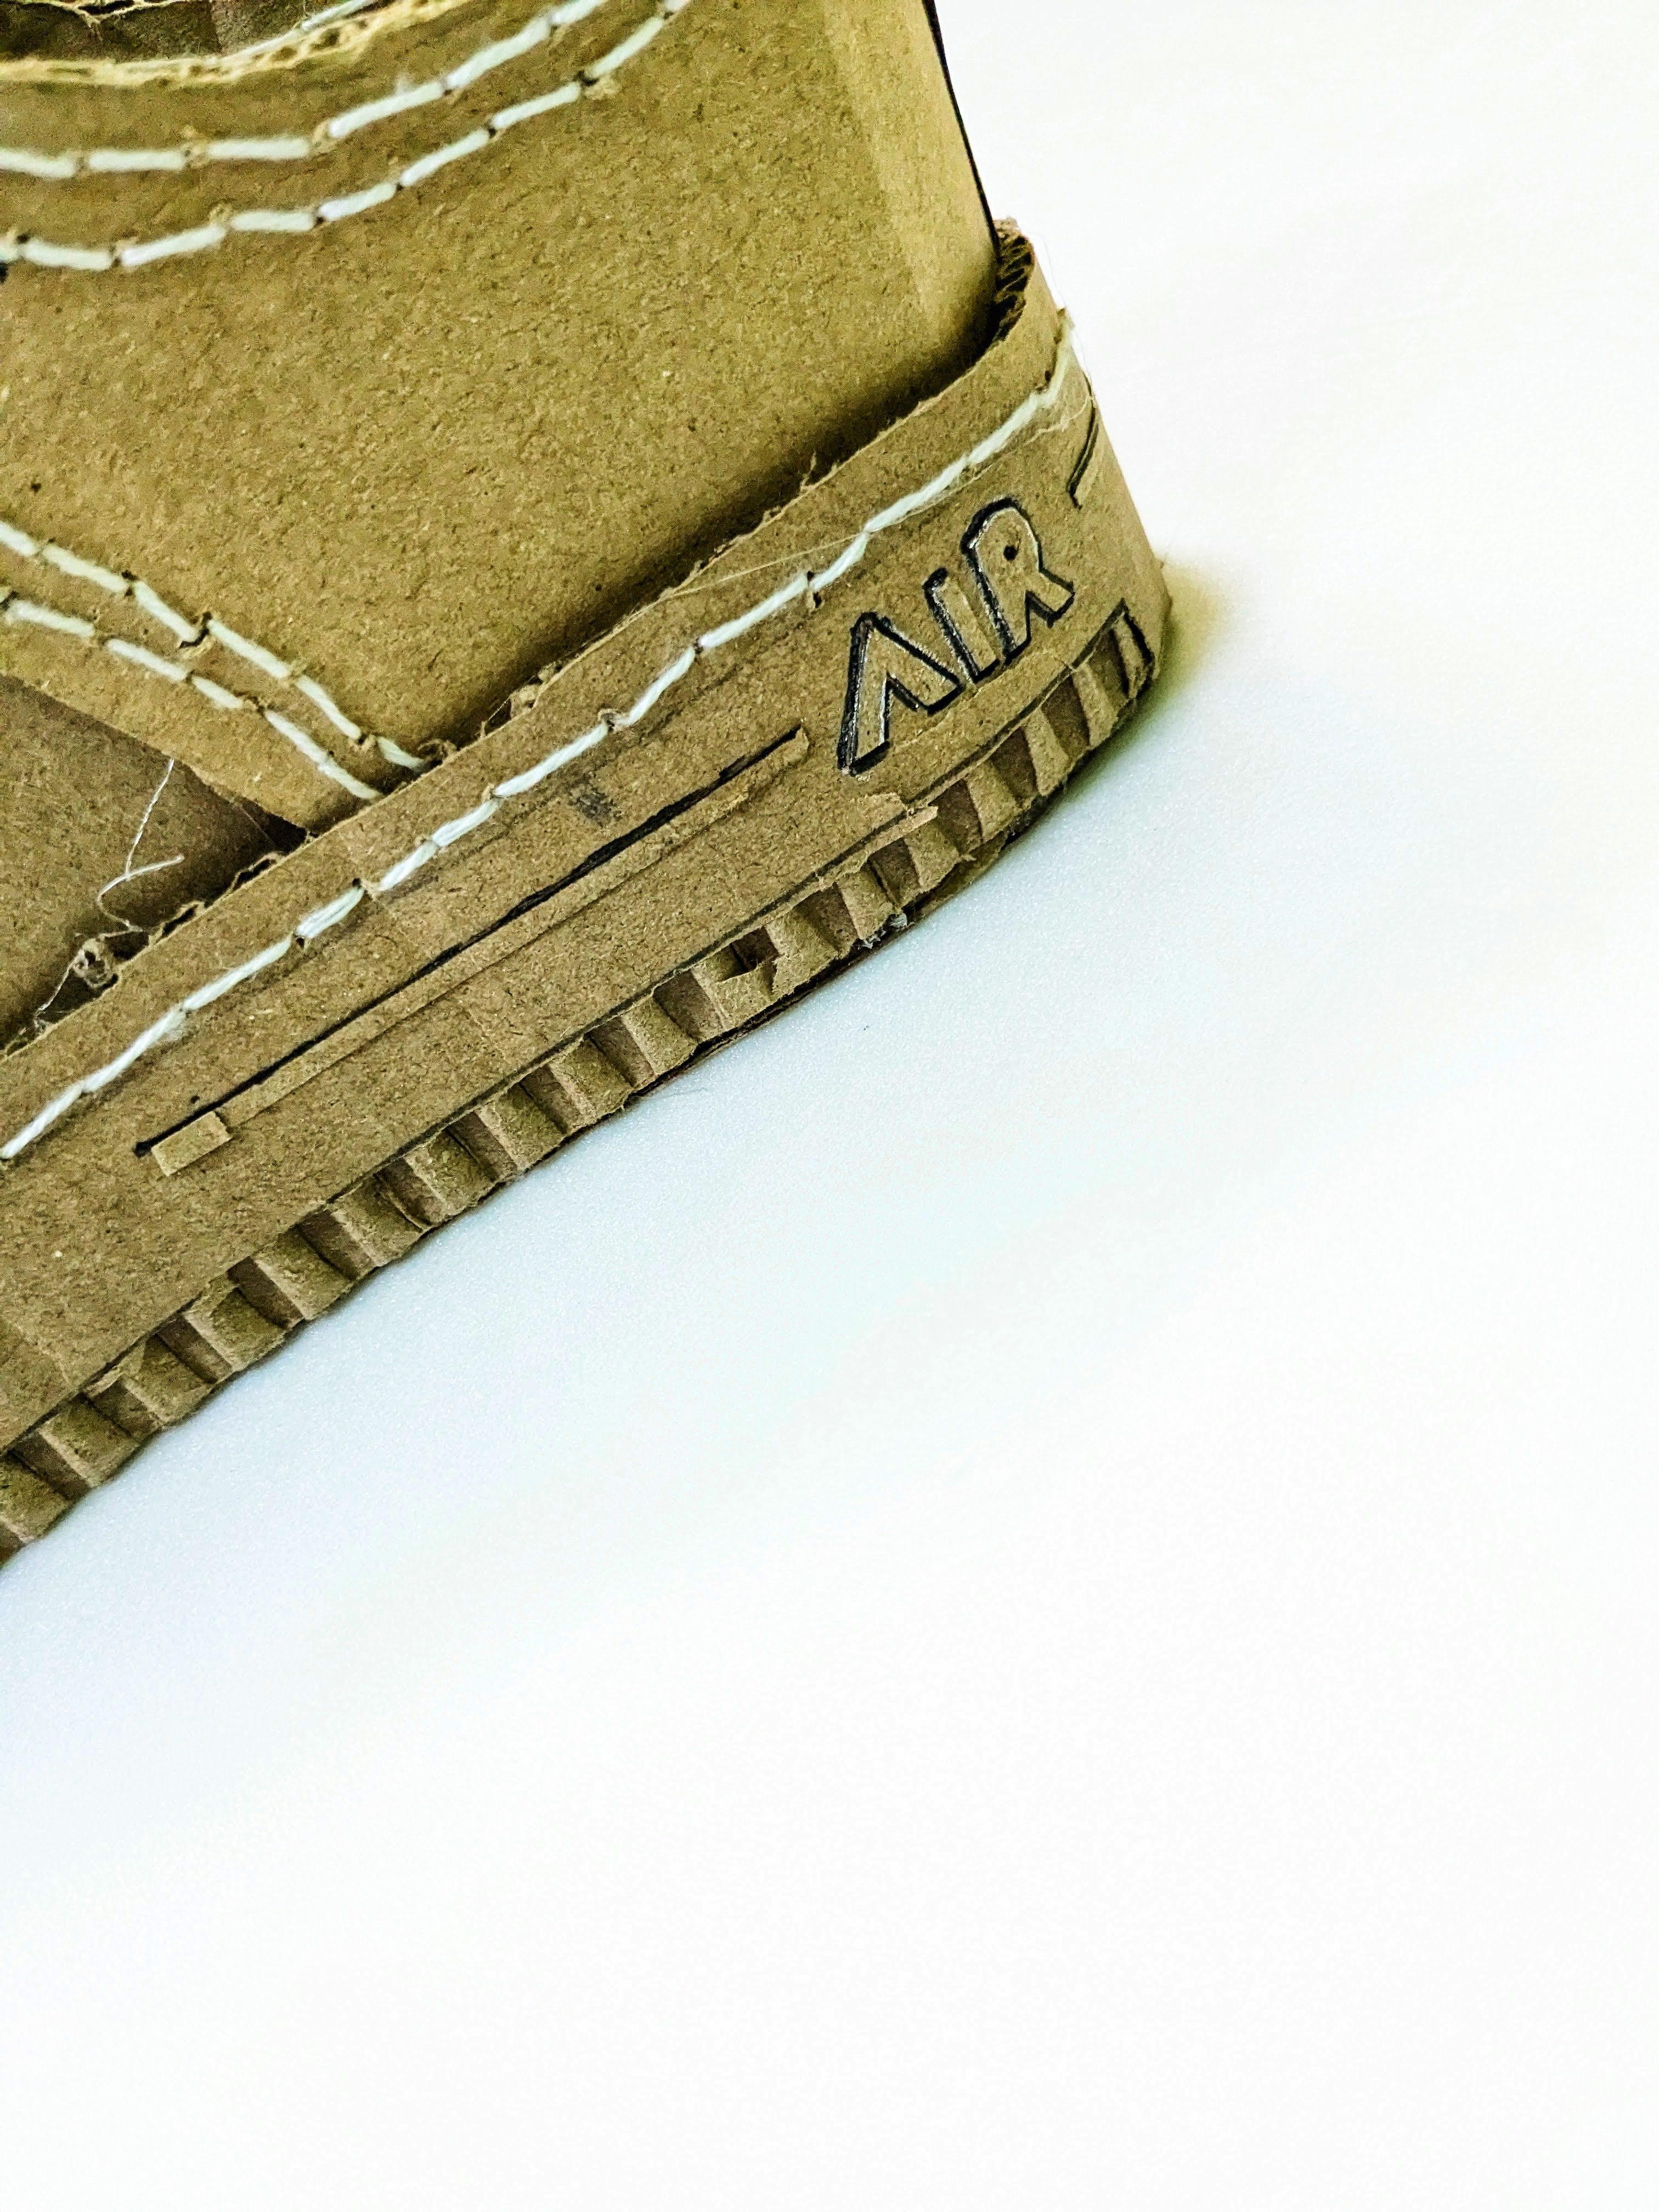
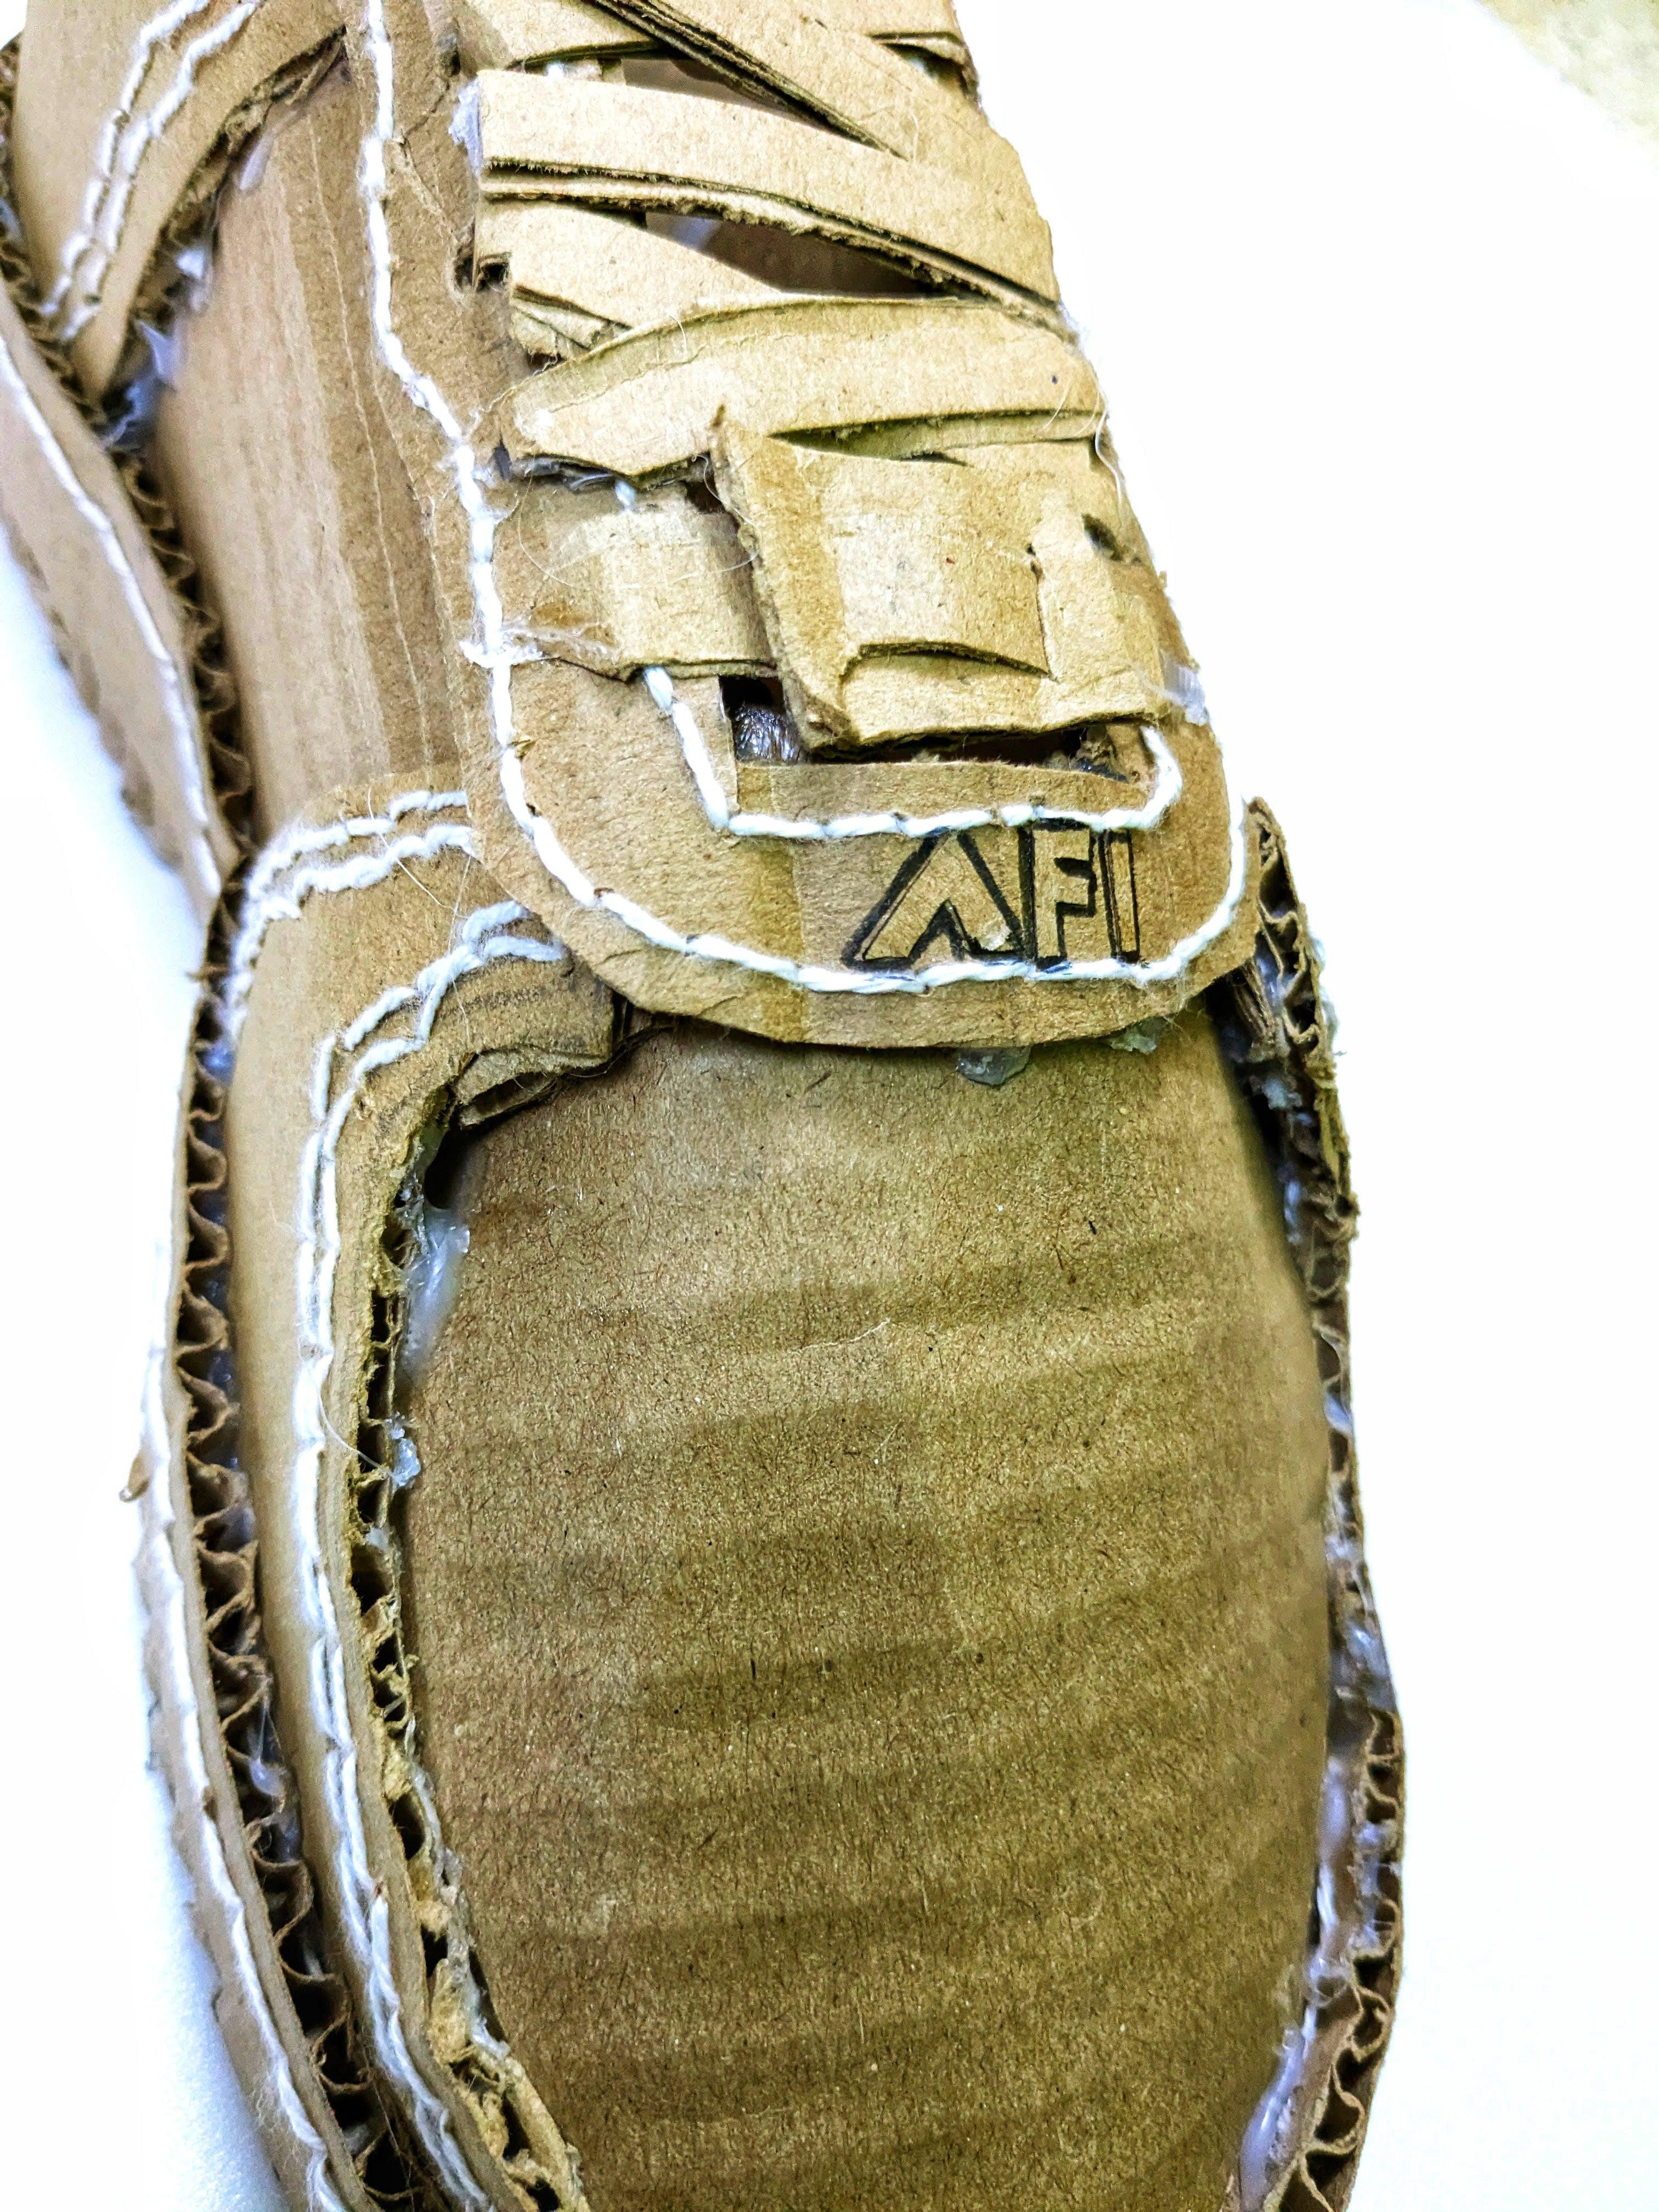
- Measure the space where the tongue will fit between the upper parts of the shoe.
- Cut a rectangular piece of cardboard to the appropriate size, making sure it’s slightly wider at the top for comfort and a better fit.
- Gently bend and curve the cardboard piece to give it a more natural, rounded shape that will fit comfortably over the top of the foot.
- You can use your hands or gently run the cardboard over the edge of a table to achieve the desired curve.
- Apply glue to the bottom edge of the tongue piece.
- Insert the glued edge inside the front of the shoe, positioning it between the upper parts of the shoe.
- Press firmly to ensure the tongue is securely attached and properly aligned.
- If needed, add extra strips of cardboard or additional glue to reinforce the attachment of the tongue.
- By adding the tongue, you complete the upper part of the shoe, enhancing both the comfort and appearance of your cardboard Air Force 1s. This step ensures that your shoes not only look authentic but also fit well, making them more wearable and functional.
- To add extra detail, consider adding a Nike logo or other design elements to the top of the tongue.
- Add little logo at the side like AIR and in front AF1.
Creating the Holes and Final Touches
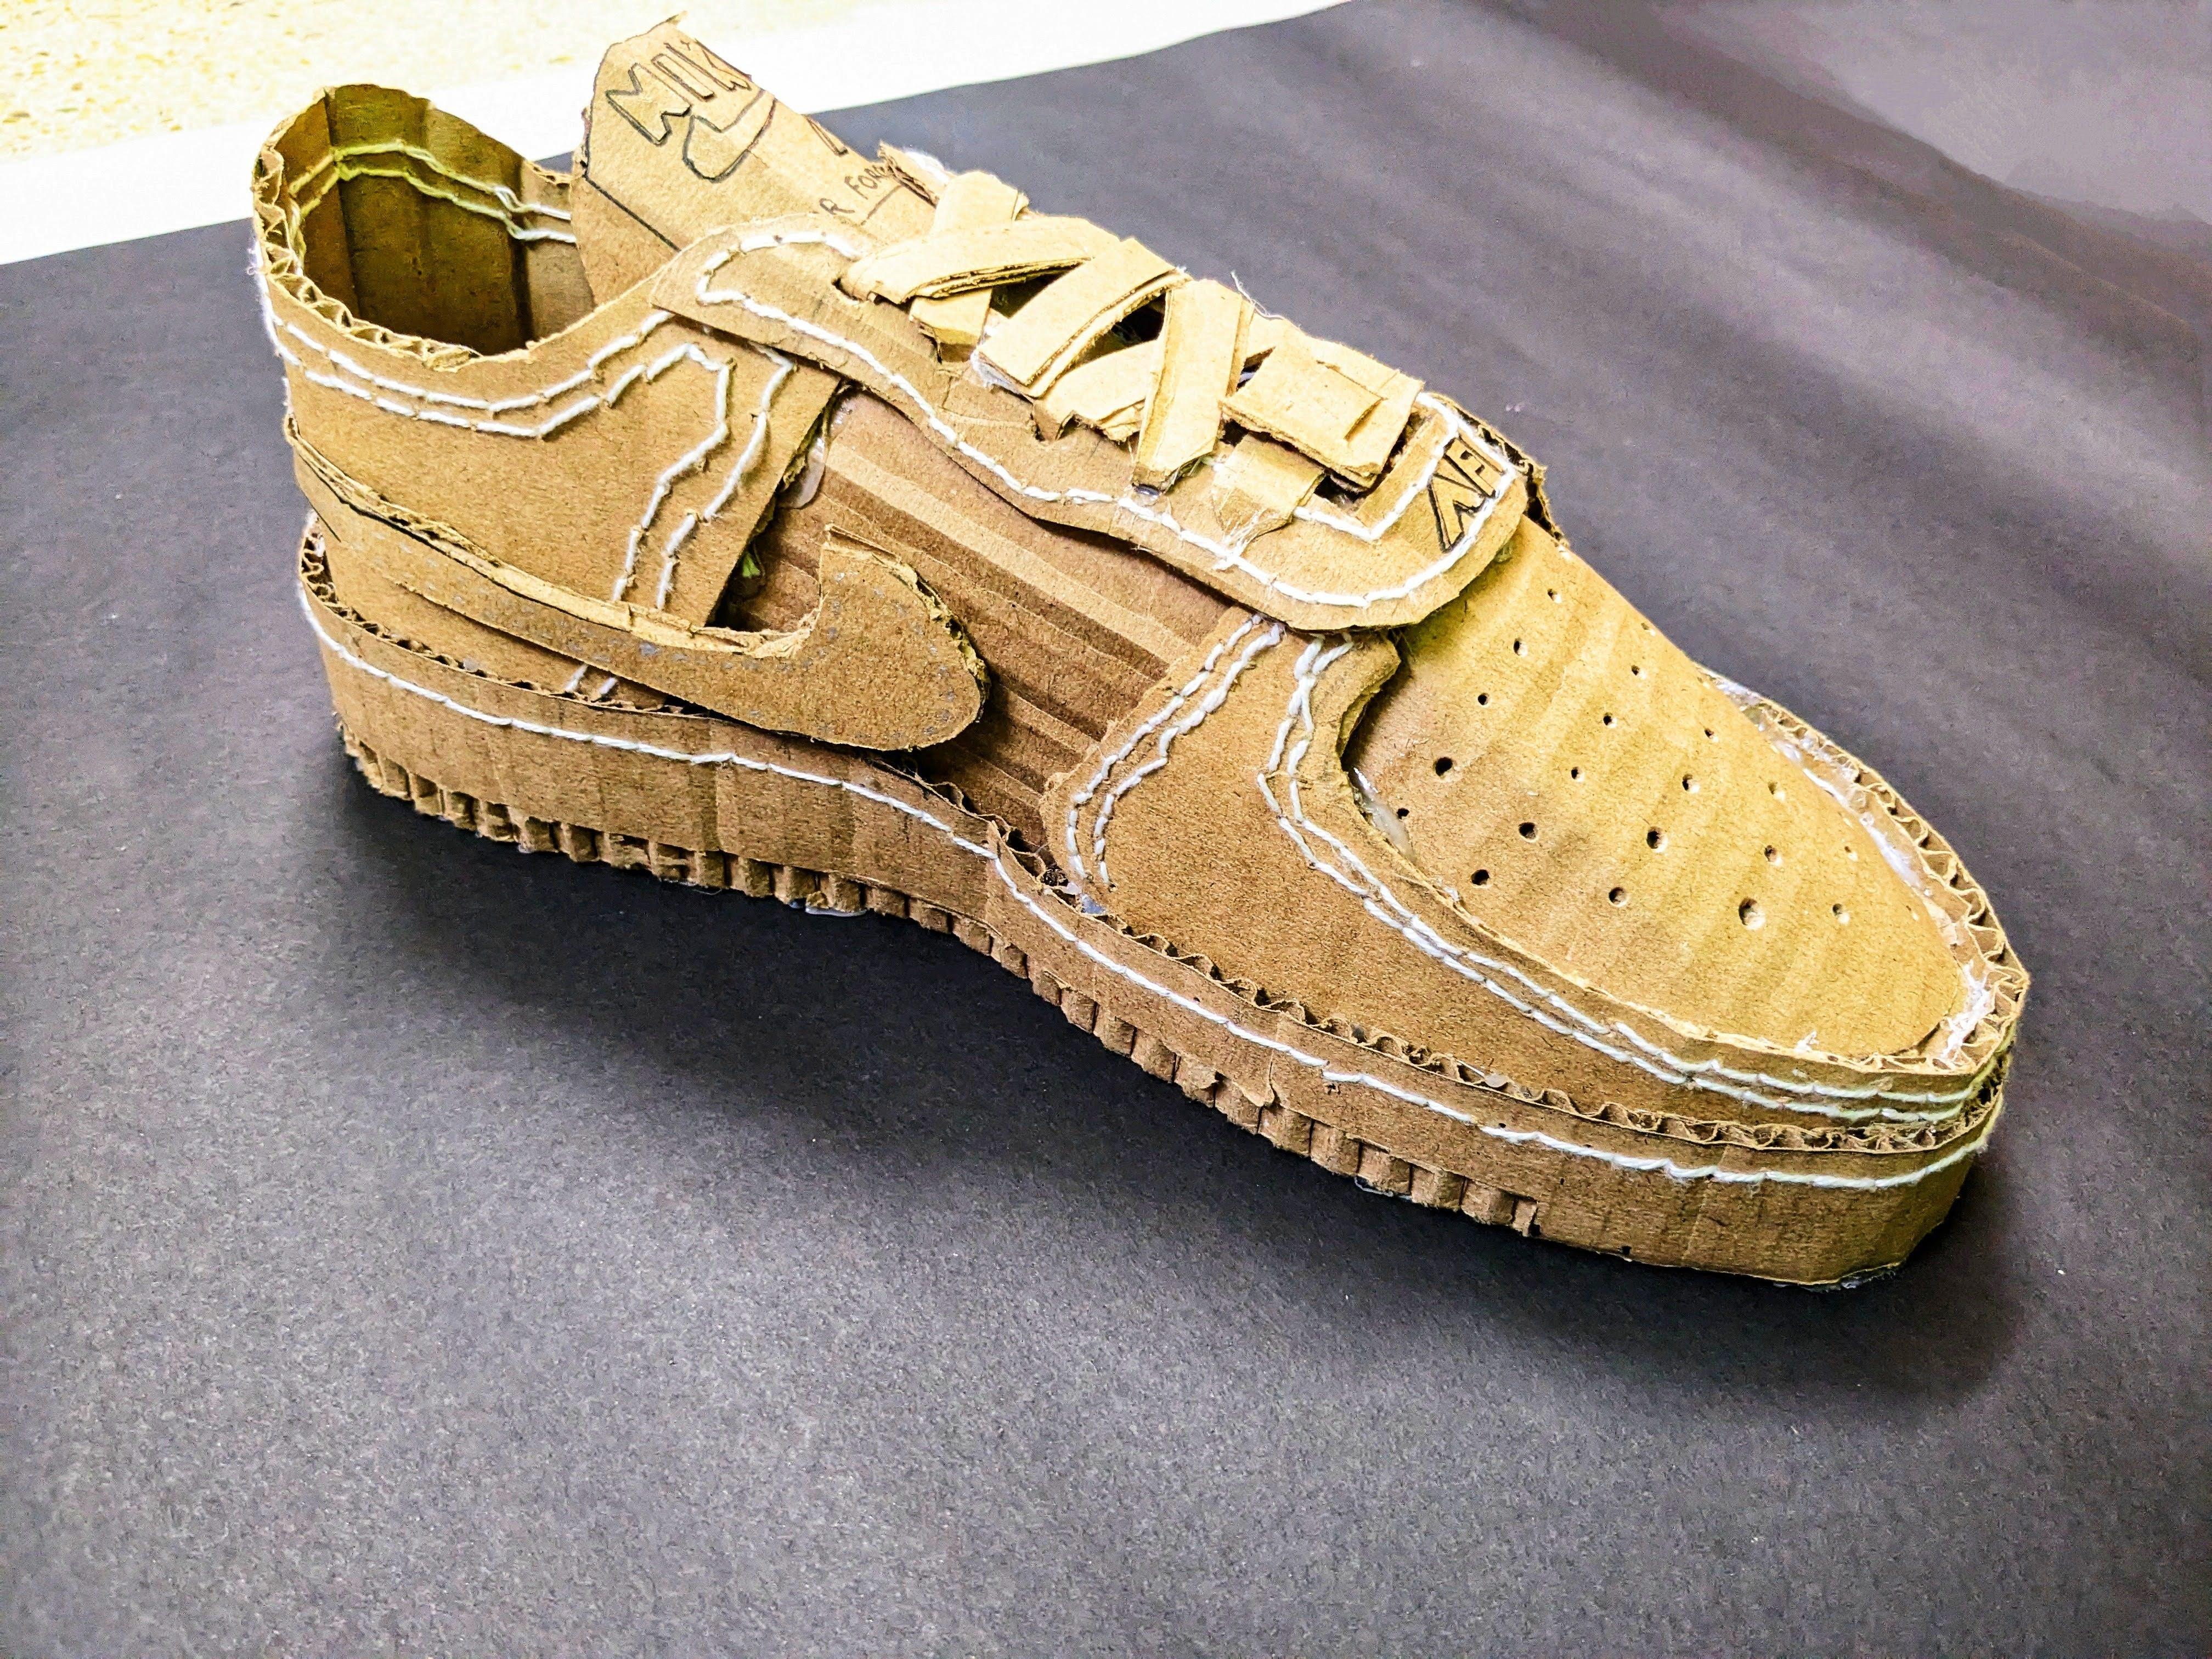
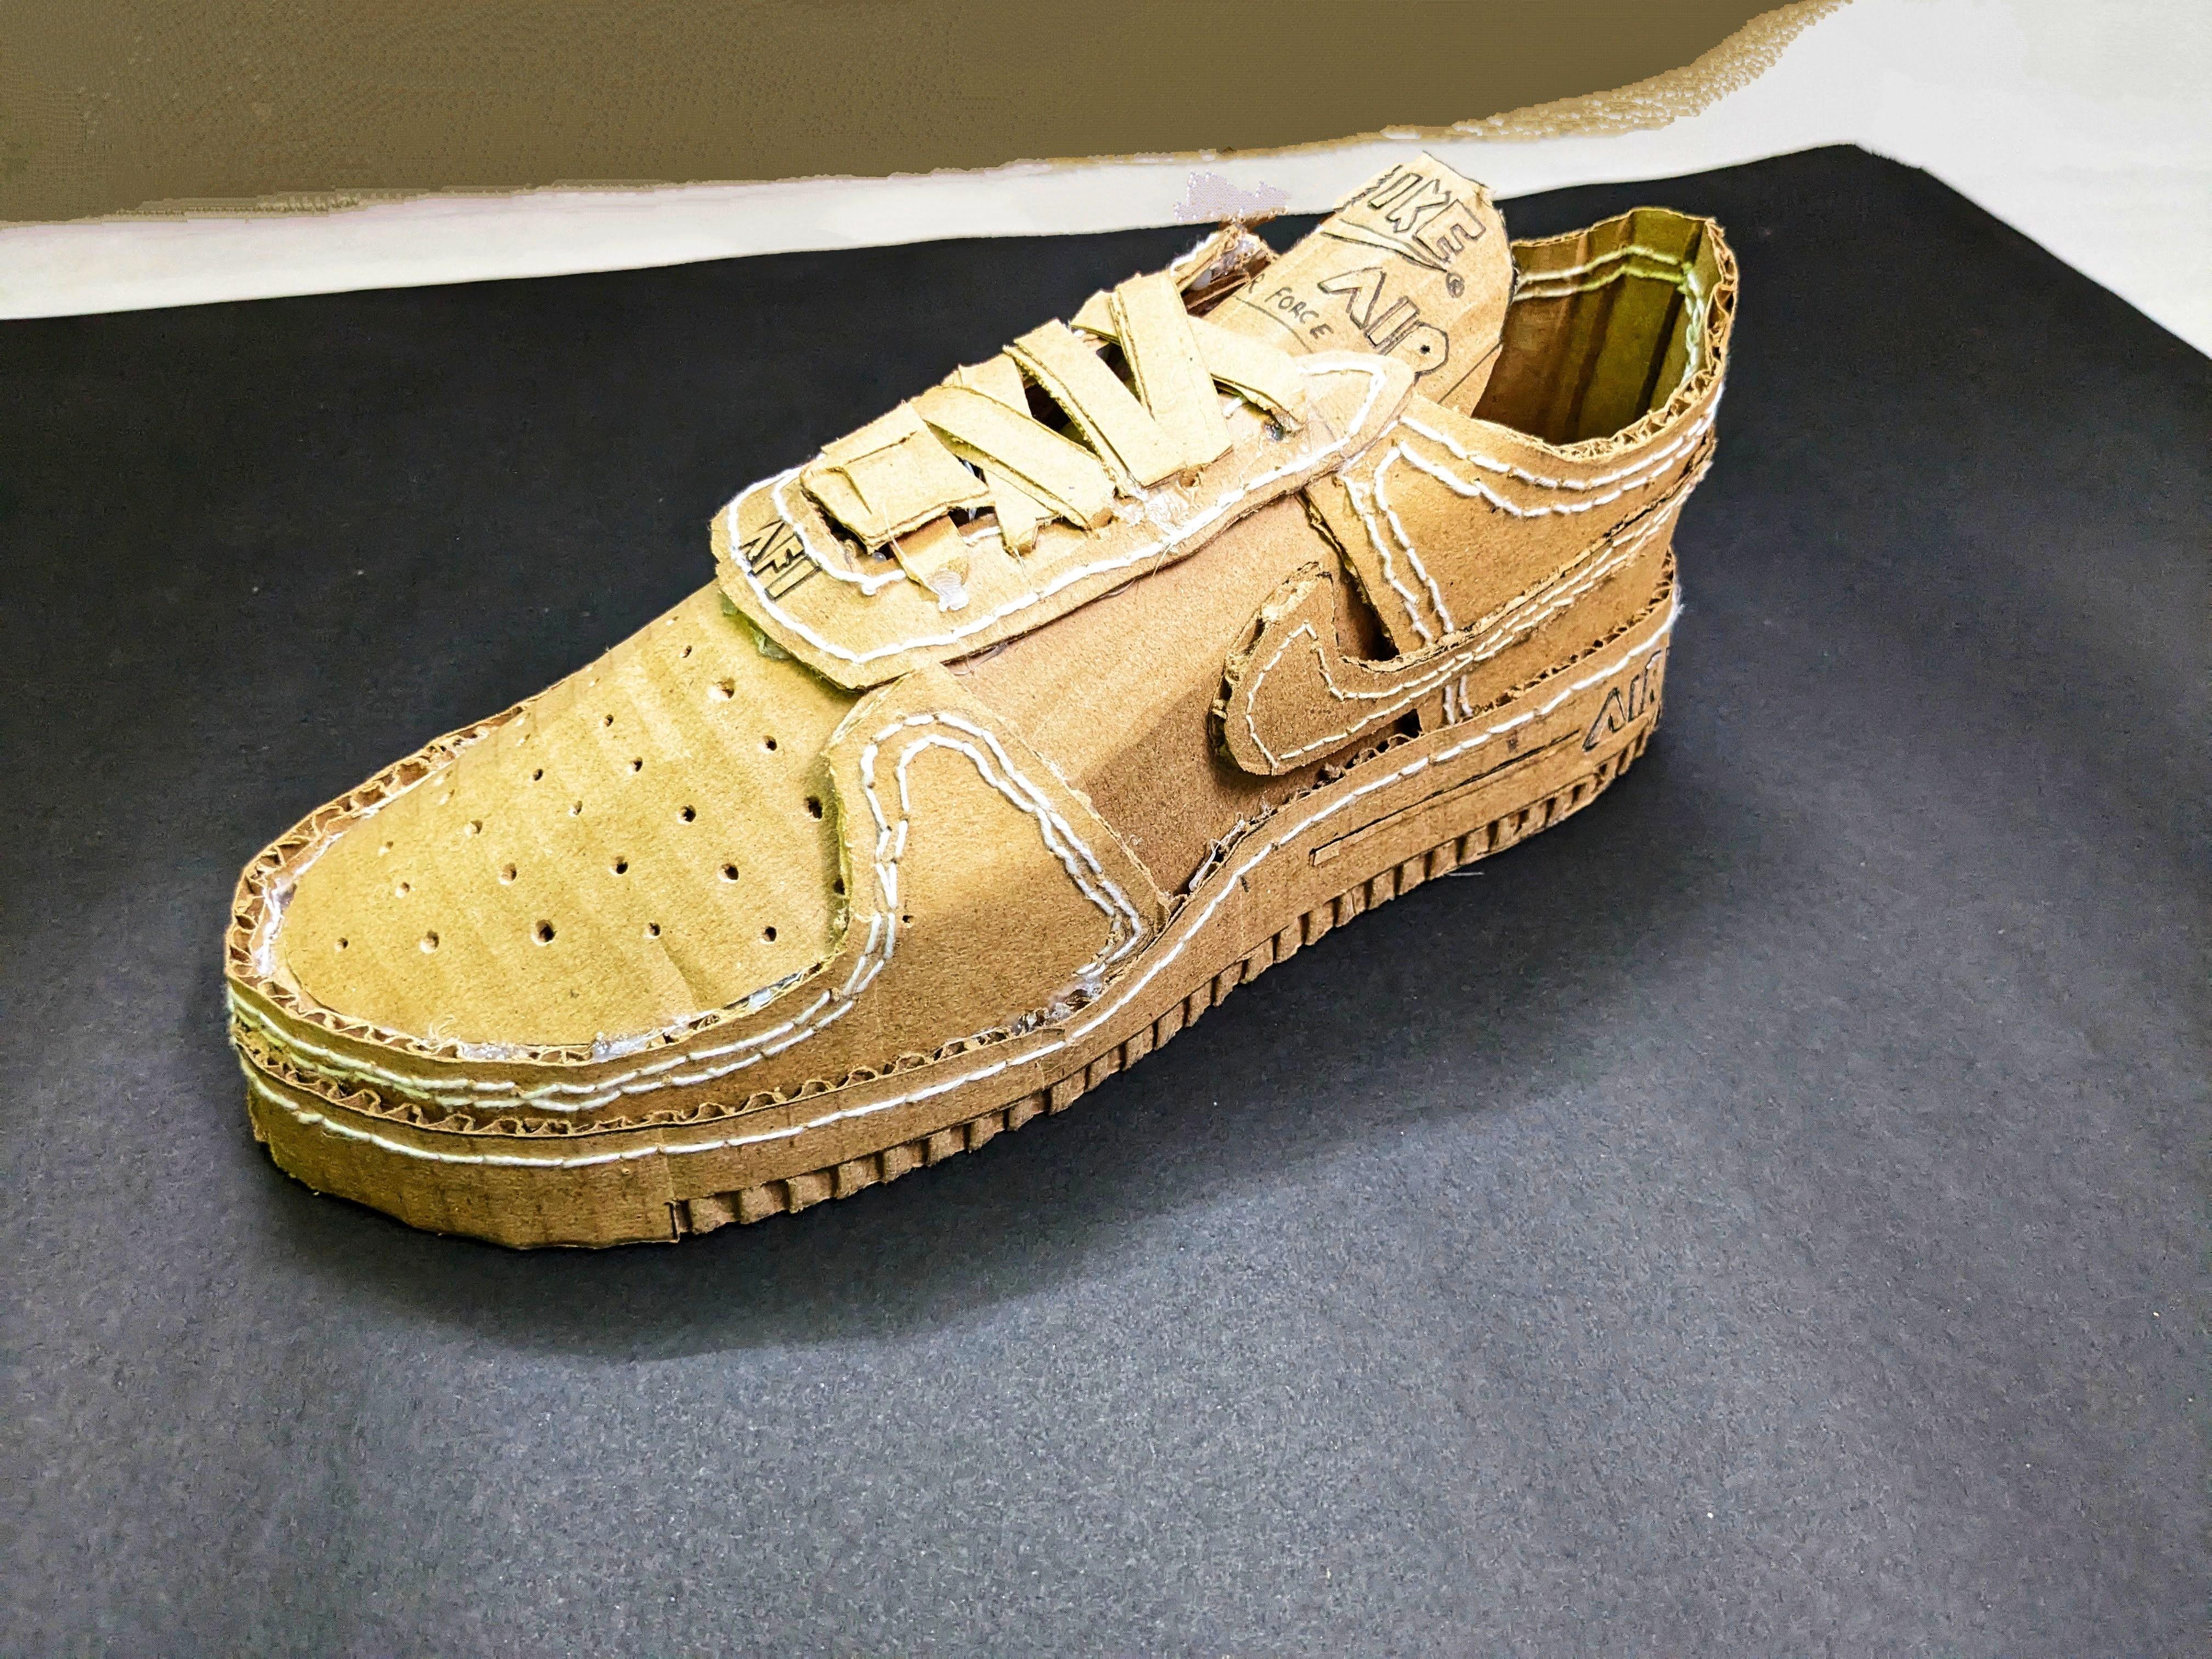

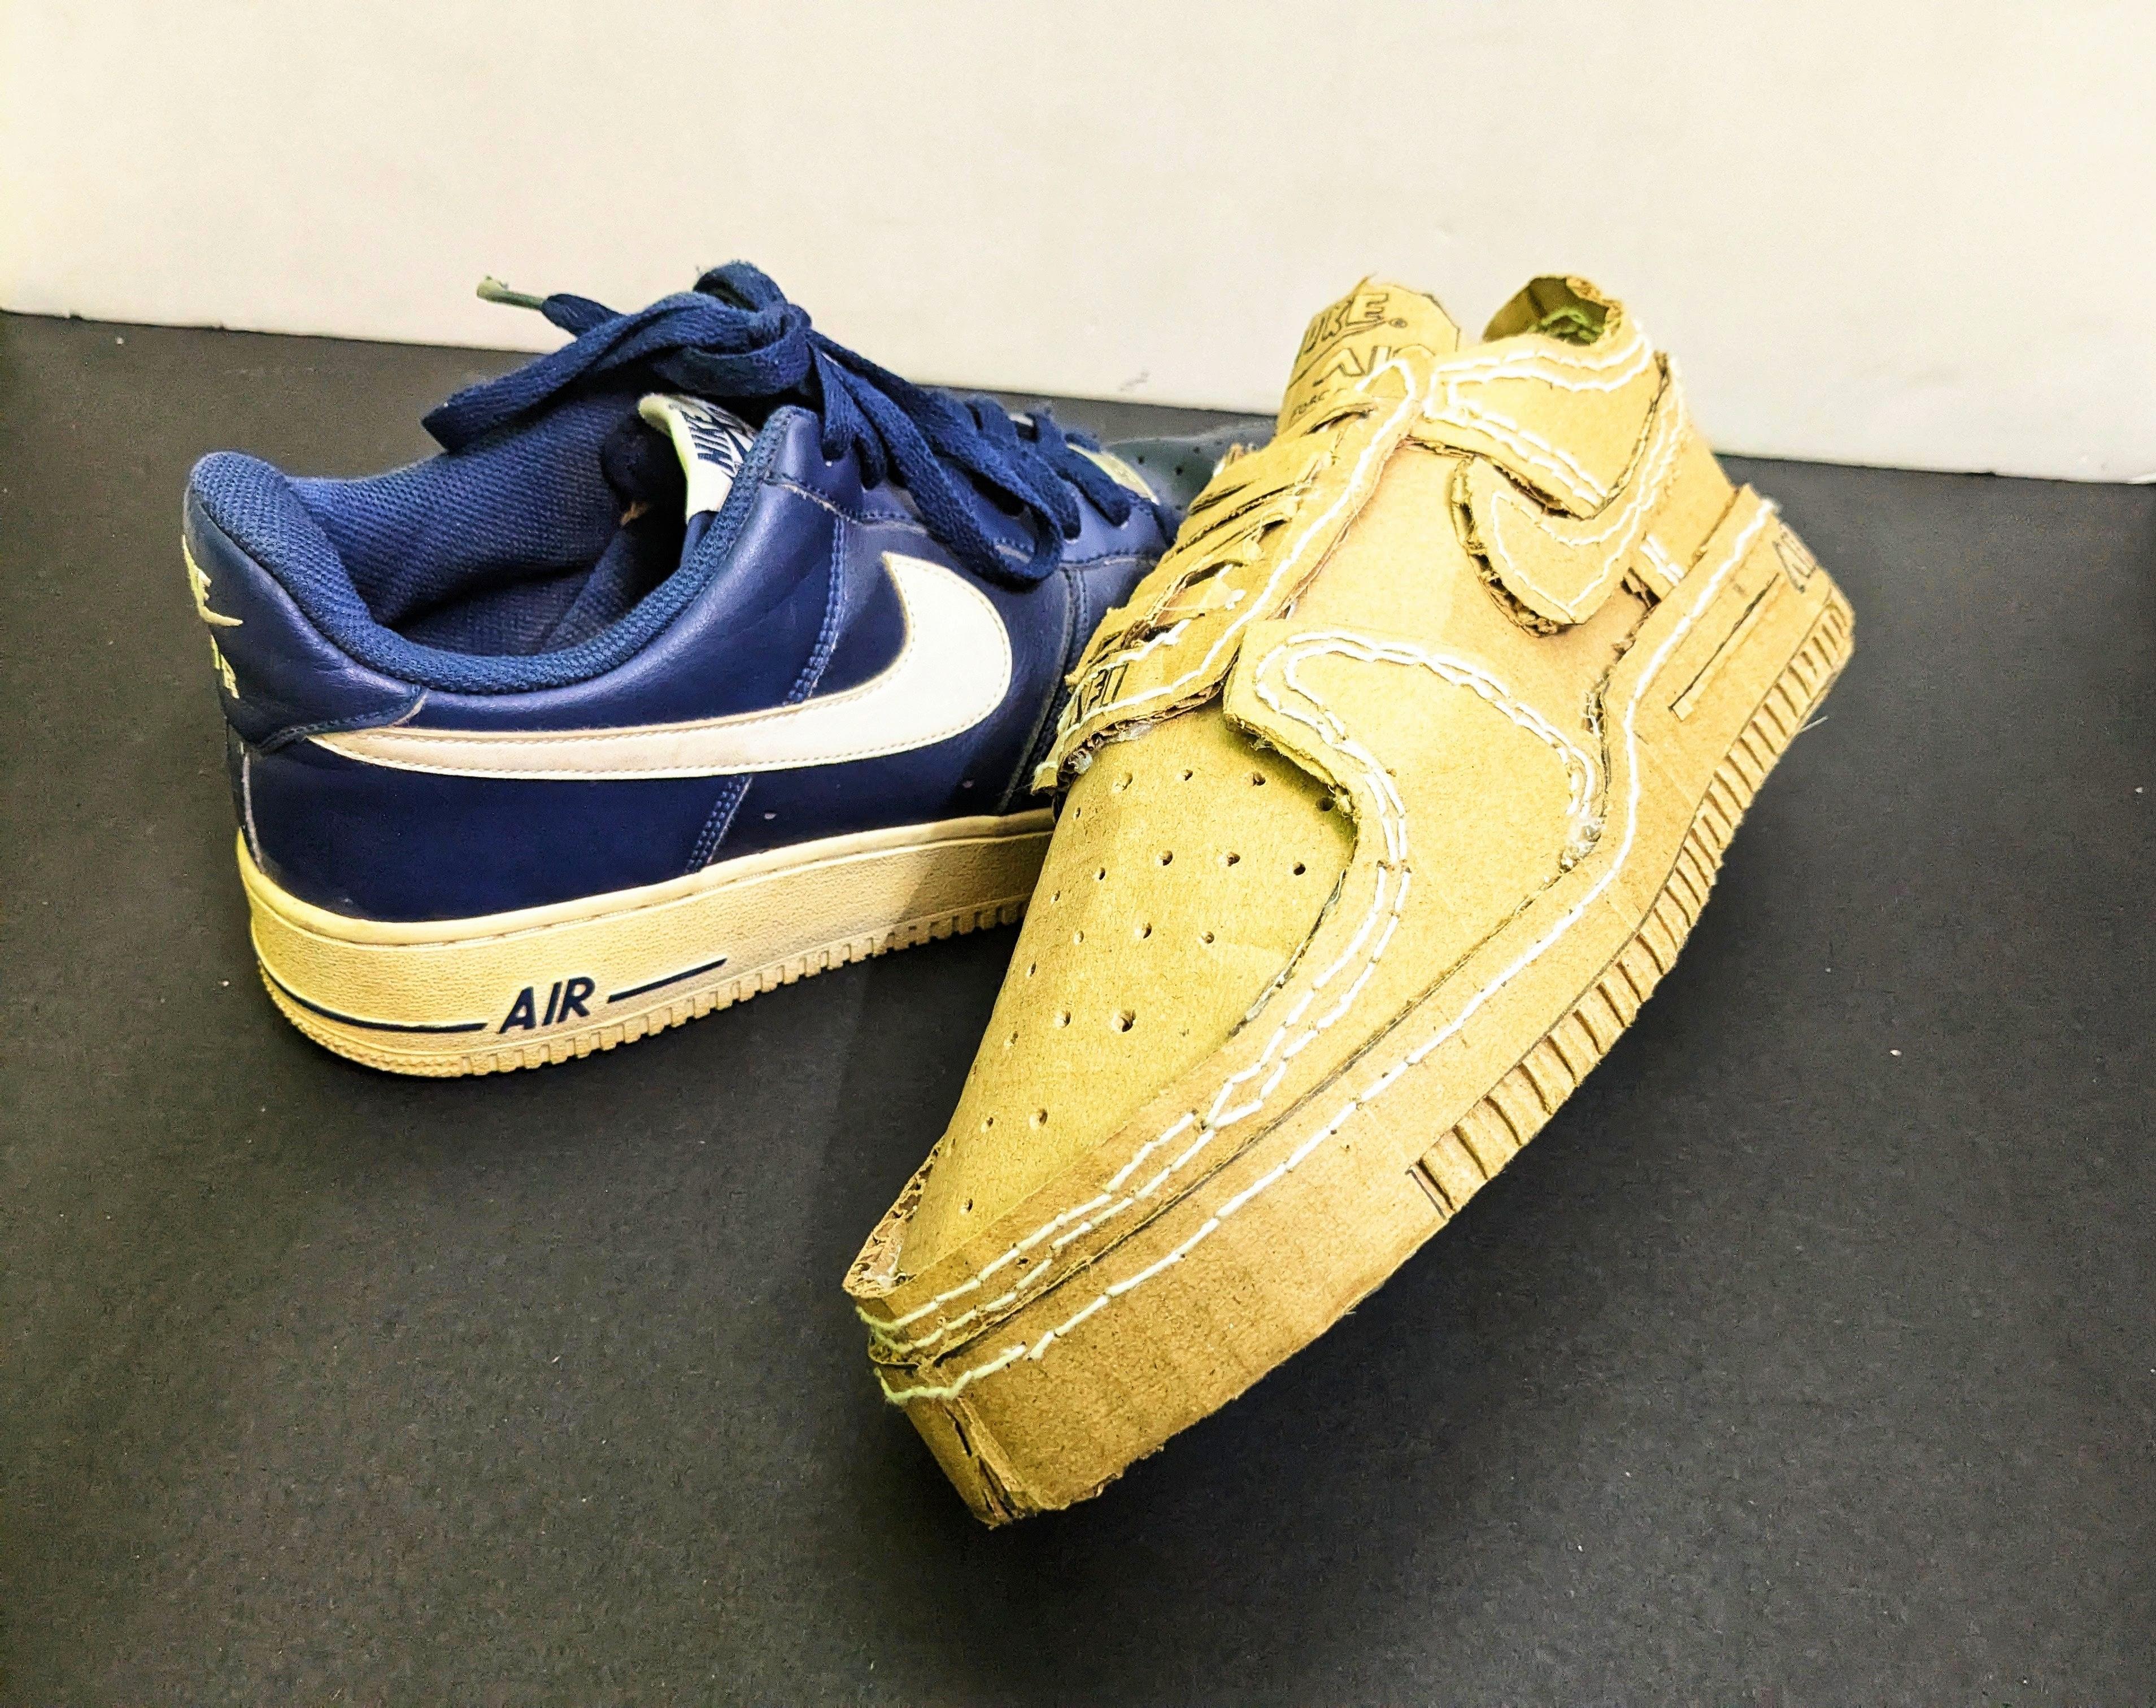
- Using a pencil or marker, mark the positions for the lace holes along both sides of the upper part of the shoe.
- Ensure the holes are evenly spaced and aligned symmetrically on both sides.
- Use a hole punch, awl, or a sharp tool to carefully create the holes where you have marked.
- Make sure the holes are large enough to fit the laces through comfortably but not too large to compromise the structure.
- Use glue to secure any areas that need reinforcement.
- Trim any rough or uneven edges with scissors or a utility knife to give your shoes a clean, finished look.
- Use markers, paints, or other decorating materials to add final details, patterns, or colors to your shoes.
- Customize the shoes to reflect your personal style or to mimic the classic Air Force 1 design.
- Make any final adjustments to ensure the shoes fit well and look polished.
- Allow all glue and decorations to dry completely before wearing your shoes.
- By carefully creating the holes and adding the final touches, you will ensure that your cardboard Air Force 1s are not only functional but also stylish and well-crafted. These steps will enhance the durability and aesthetic appeal of your DIY sneakers, making them a true reflection of sustainable creativity.
Ready to Display or Wear
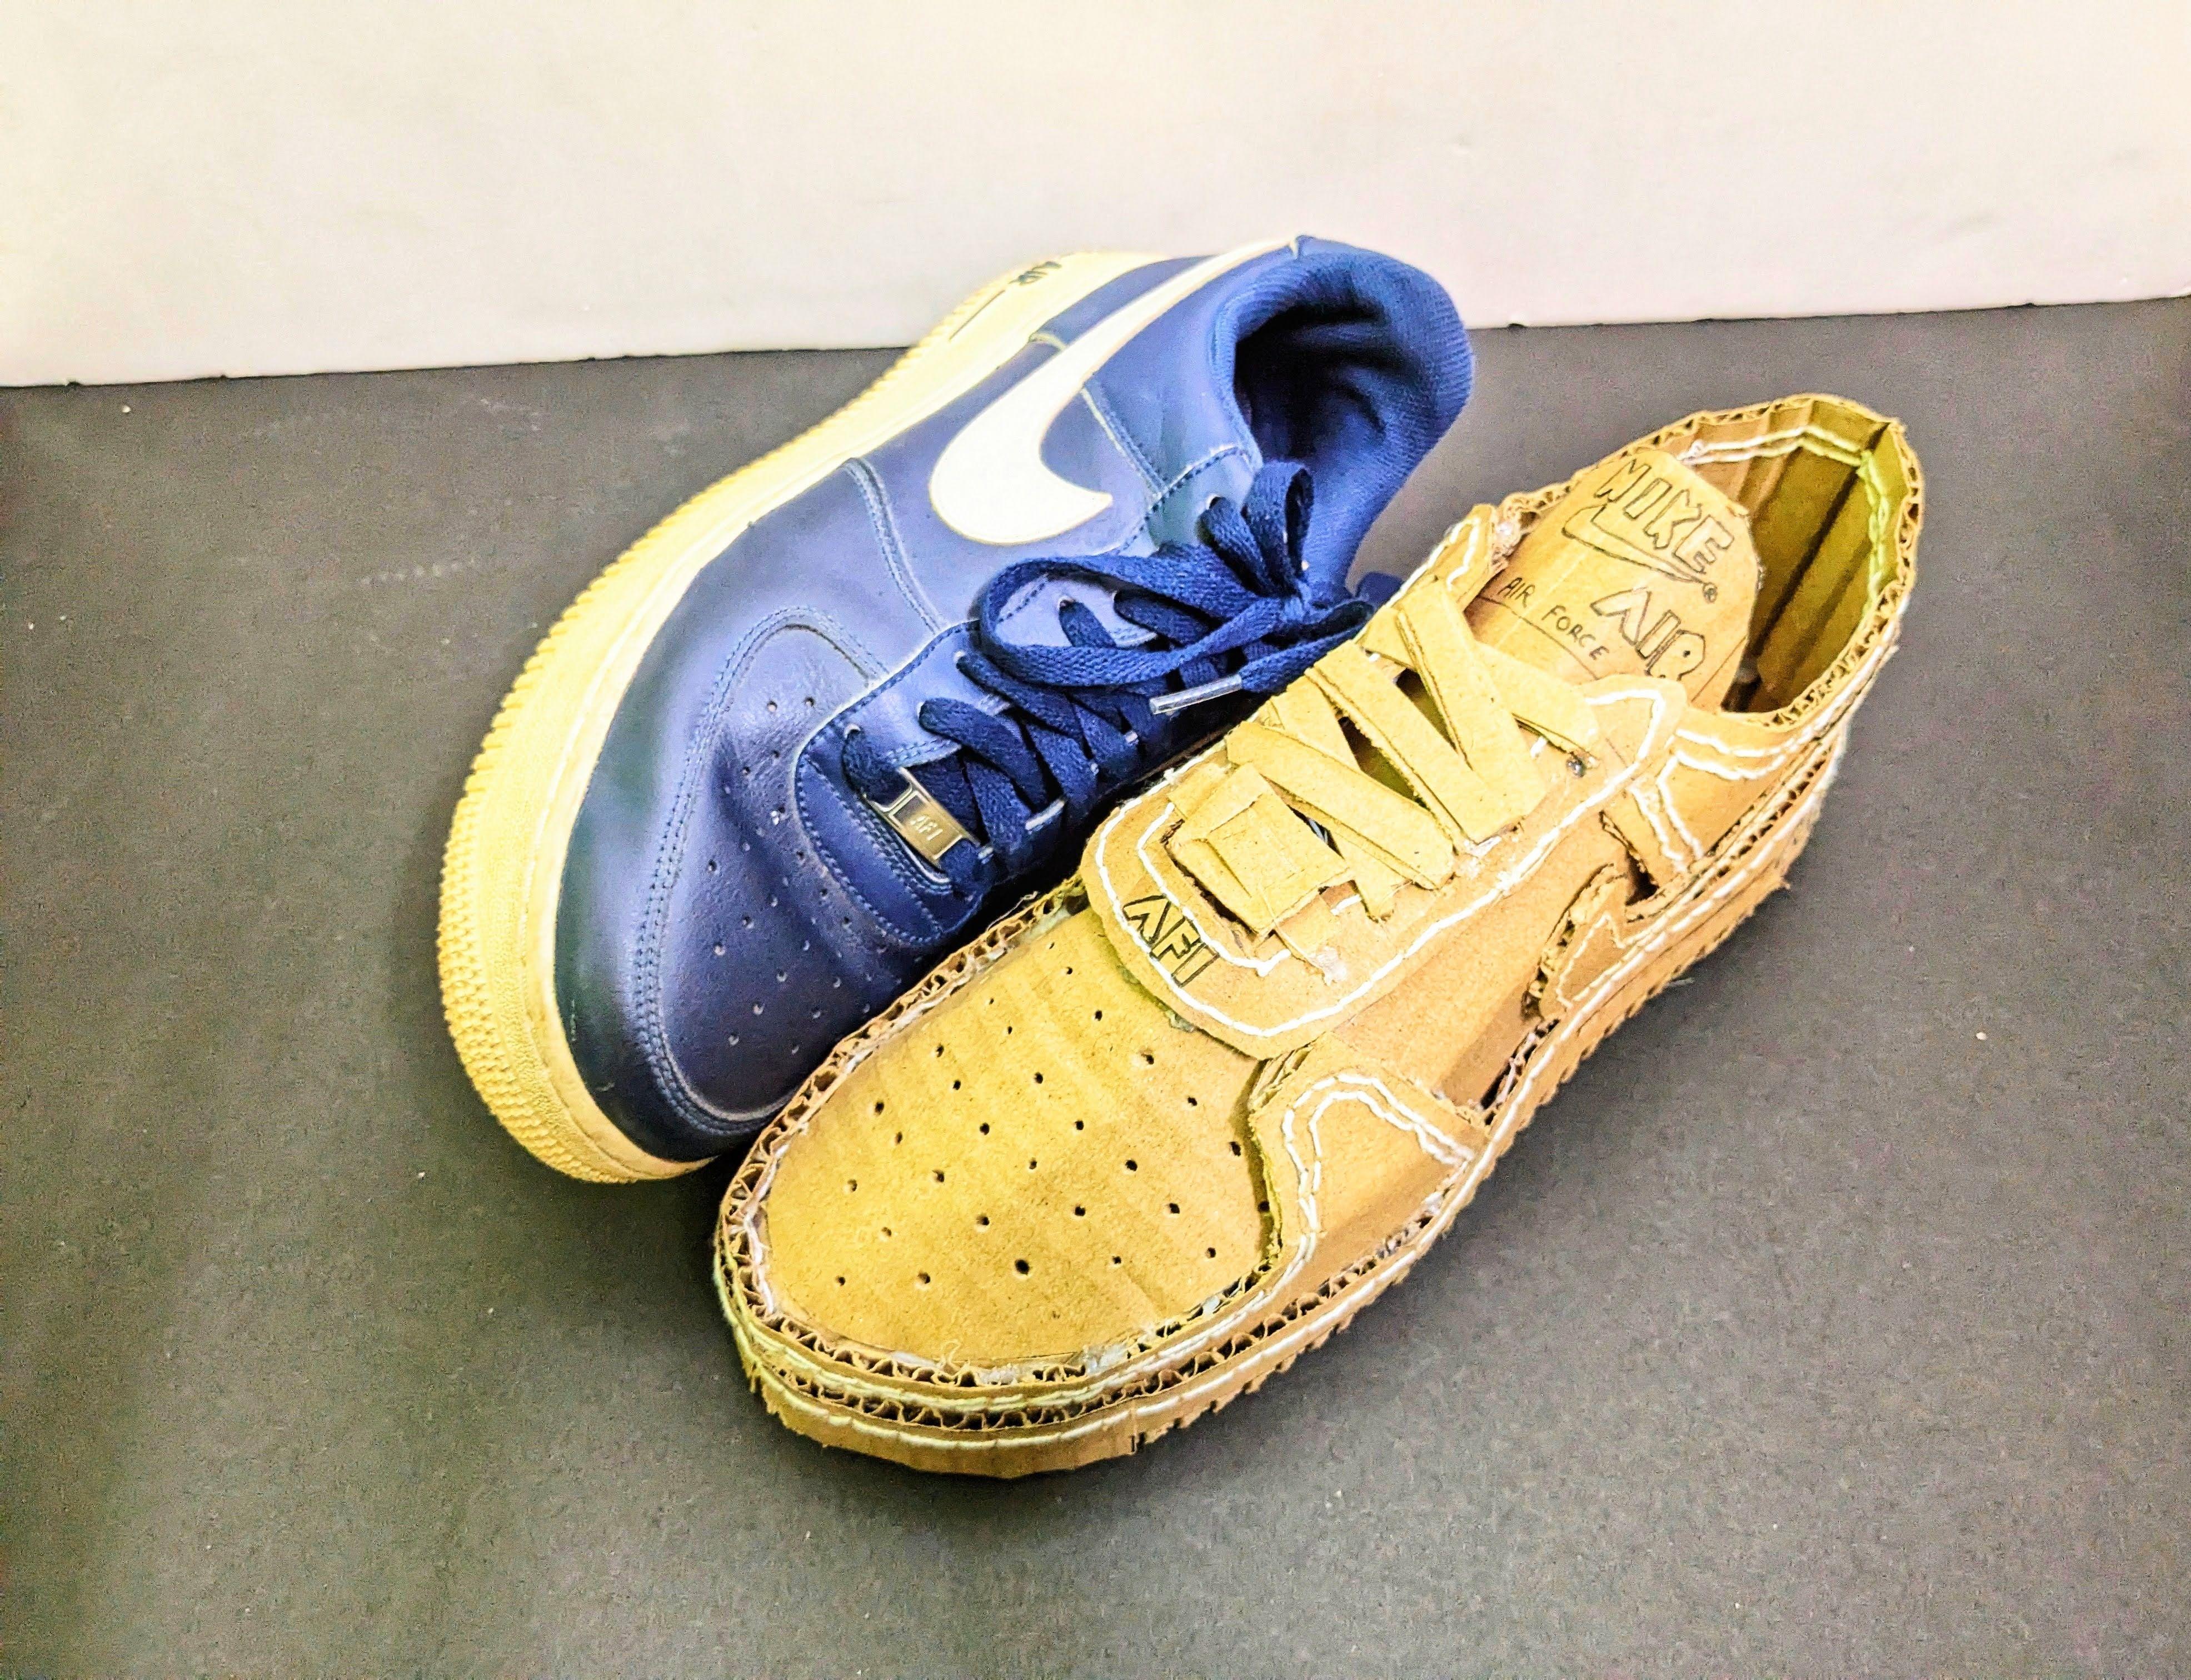


- Ensure all glue is fully dried and all components are securely attached.
- Try on the shoes to ensure they fit comfortably.
- Make any final adjustments to the fit, such as trimming or reshaping any parts that may cause discomfort.
- Wipe off any excess glue or marks from the surface of the shoes.
- Polish the shoes using a clean, dry cloth to give them a finished look.
- Proudly showcase your cardboard Air Force 1s as a testament to your creativity and commitment to sustainability.
- Share your Sneakers with others to inspire them to create their own sustainable designs.
I hope you enjoyed: D