Create Your Own Custom Arcade Inspired 8-Bit Wall Art
by meadormanning in Workshop > 3D Printing
687 Views, 11 Favorites, 0 Comments
Create Your Own Custom Arcade Inspired 8-Bit Wall Art

I've been starting to notice that my feel rather empty, and I decided to change that! This Instructable will walk you through all of the steps of creating custom 8-Bit (Or really any quality) wall art! I decided that I would make Blinky from Pac Man because I love the game and Red is my favorite color :)
Supplies
3D Printing Tools & Supplies:
- CAD software of your choice (I use Fusion 360, but really anything works. Although not required, I do recommend that you use a software that allows you to import and draw on images.)
- FDM 3D Printer
- 3D Printing filament of your choice
Selecting Your Inspiration and Planning Your Design


Find a simple reference image!
For inspiration, I recommend looking at 8 bit versions of any characters/reference images because they will look a lot cleaner than pieces that contain rounded edges. For an example walkthrough I will be using Blinky from Pac-Man.
Measure your wall space and print bed dimensions!
When it comes to making wall art, you must take into account the size of your wall space alongside the size of your printer. I do not recommend making anything that must be cut to fit to your print bed as your art will end up looking choppy when it is assemble
Once you have decided on what you want to make and how big you want to make it, you can move on to creating the design in CAD.
Designing Your Piece

Create a canvas or common scale!
Once you have your CAD software open, you will want to select your reference image and either leave it open to the side, or import it into your software as a canvas. In your CAD software, you should create a new sketch that allows for you to sketch either on the image, or allows you to create a common scale (i.e creating a 240mm/240mm box to represent your build plate).

Create a 3d sketch of your reference image!
Using the sketch tool, you want to trace out the outline of your image to create a nondetailed silhouette of your object, ensuring to leave any details out for now.

Once you have your basic silhouette, you will want to create a new sketch on the top face of the silhouette and trace out the other details of your reference.

Add complex faces into your design!
Once you have the other details sketched onto the top face, you should extrude them into the silhouette, ensuring that any parts of the piece that you want to be sticking farther out then others are extruded in a depth to match (If you want it to be completely 2d then cut all of the holes an equal depth).

After creating your holes, you need to create the objects to fill in the holes. You can do this by either repeating the extrusion and creating new objects, or using the negative space in the piece as a new canvas, and sketching out more detailed parts.

Create a hole in the back of your piece to allow for you to hang it on a nail or hook on your wall.

By the end of this step, you should now have a complete piece of 3d art when all of the pieces are shown together. If you are satisfied with how your art looks, you are ready for fabrication.
Fabrication
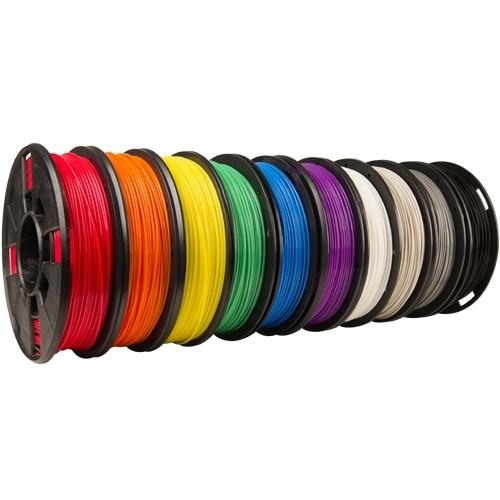
Select filament colors!
Utilizing your reference image, select all of the filament colors that you will need (or paint colors to cover up other colors of filament if you are missing a color).

Export and slice your piece in your slicer!
Once you have your colors selected, export each different colored object as it's own .stl file from your CAD software and open them using your FDM slicer. Once in your slicer, you will want to slice them, and name the .gcode files in an order that you will remember (I recommend including the color in the name so that you don't print something in the wrong color).

Assemble and Enjoy!
Once you have printed all of your pieces, you should assemble them using friction. The parts should have shrank just enough from the printer to fit together and hold their shape using friction, however additional plastic glue may be needed. Once you have assembled your piece, use a nail or something similar to hang your design on your wall!
*If you want to make Blinky I have provided the files for you to make your own, or alter the design!*