Create a Website Using IWeb
by aimeesara in Circuits > Websites
4153 Views, 13 Favorites, 0 Comments
Create a Website Using IWeb

Websites are a very easy way to inform the public about your topic of interest. In this tutorial, we will be creating a fitness website using the iWeb program. You can make a website about any topic of your choosing. With a fitness website, many people upload videos of workouts, post photos of exercises, and present instructions for diets.
Websites are easy to create and can be made as simple or complex as you wish. We will show you how to choose a template, add text and photos, create hyperlinks, create a domain, and upload the website to the domain. We will show you how to create the website step-by-step so that you can follow along easily and become a website creator in no time!
Websites are easy to create and can be made as simple or complex as you wish. We will show you how to choose a template, add text and photos, create hyperlinks, create a domain, and upload the website to the domain. We will show you how to create the website step-by-step so that you can follow along easily and become a website creator in no time!
Materials:

You will only need your computer for this project. On the computer, you will want to have as many images as you want uploaded to your computer and loaded into iPhoto.
Choose a Template
• Open iWeb on your computer.
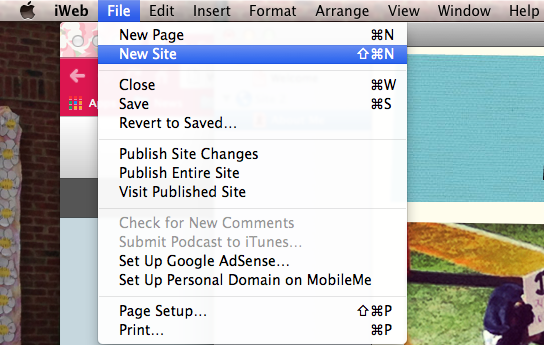
• Choose “file” and then select “New Site” to open a window with multiple website templates.
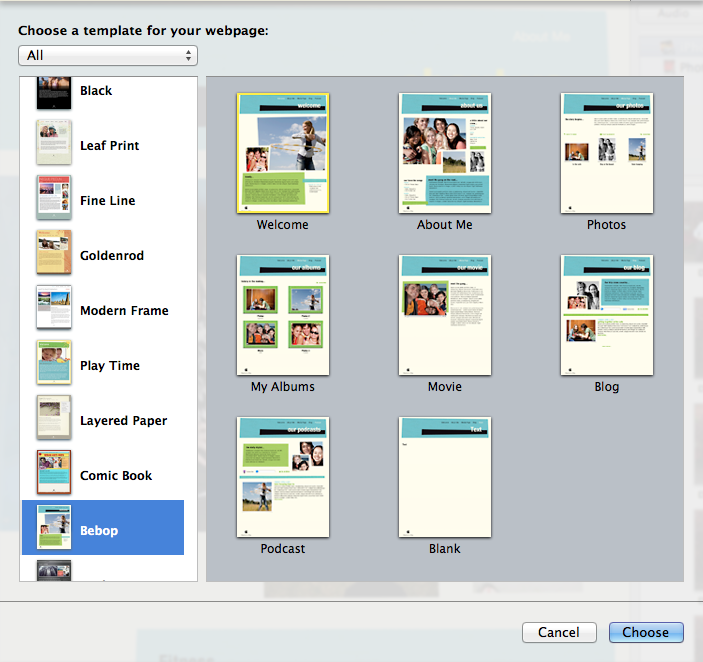
• Choose any template that you like best. (You can preview all of the templates before making a choice.)
• Once you have decided on a template, click the “choose” button on the bottom right.
• Choose “file” and then select “New Site” to open a window with multiple website templates.
• Choose any template that you like best. (You can preview all of the templates before making a choice.)
• Once you have decided on a template, click the “choose” button on the bottom right.
Edit Text
• Click on the text that you would like to change on the template to highlight it.
• You can delete the text completely or type new text.
• To delete an entire text box, simply click anywhere within the box where there are no words and press delete.
To change the font or font size, highlight the desired text.
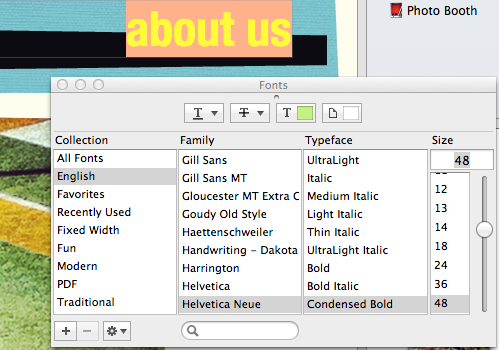
• Choose “fonts” on the bottom toolbar.
• Select desired font and font size from the pop-up window.
To change the font color, highlight the selected text.
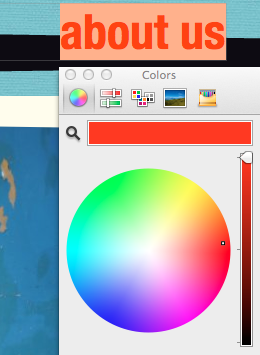
• Select “colors” from the bottom toolbar and choose a color.
• You can also use the color selection to change colors of boxes and shapes from the template.
Add or Remove Pages
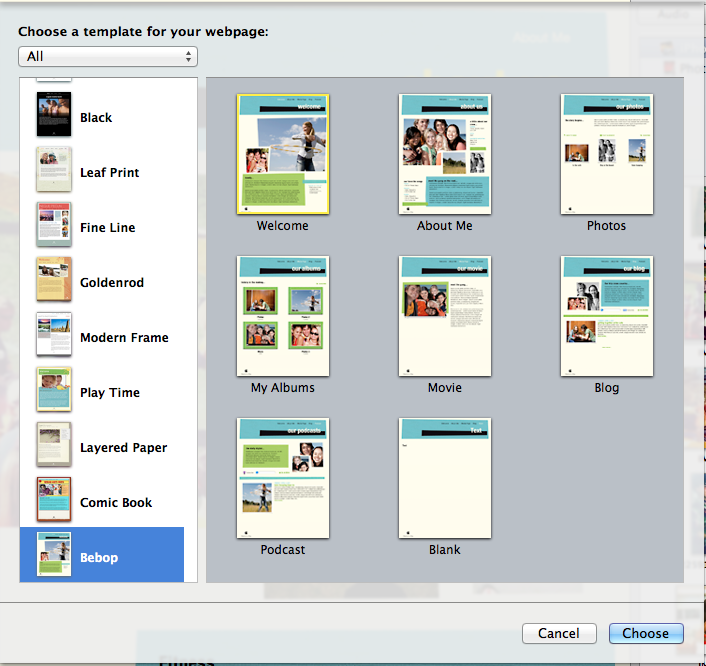
Adding pages is very important so that the website has different tabs and sections. Select the “add page” button on the left of the bottom toolbar.
• Select which of the pages from the template you would like to use.
• Click the “choose” button on the bottom right of the pop-up window.
• The new page will appear below the original page in the site directory.
• Select which of the pages from the template you would like to use.
• Click the “choose” button on the bottom right of the pop-up window.
• The new page will appear below the original page in the site directory.
Add Photos
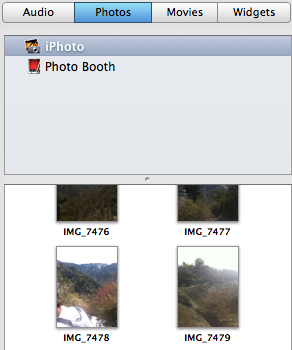

Photos add personality and allow viewers to visualize your topic.
• The iPhoto toolbar on the right of the screen includes all of your photos that you can use for the project.
• To add a photo to the shape of the template photo, simply choose your desired picture from iPhoto and drag it into the place of the old photo.
• If the photo is fit to size, such as a face is cut out from the template, click “edit mask” on the small pop-up window or double click the photo.
o This will allow you to move the picture around the template. You can also make the photo bigger or smaller by using the zoom slider on the mask pop-up.
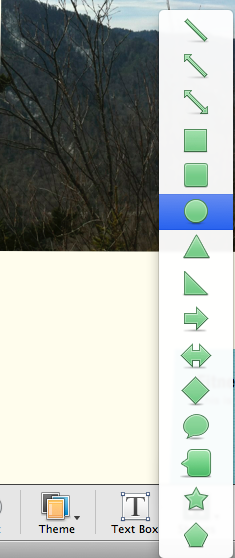
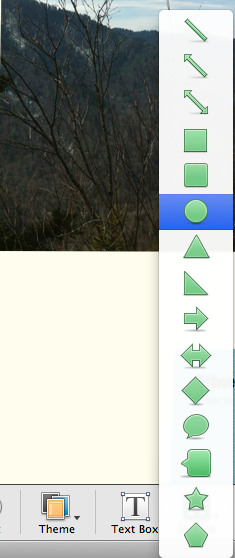
• To add a photo to your own shape, select the “shapes” from the bottom toolbar.
• Pick a shape and it will appear on your page.
• Pull the corners to make it larger or smaller.
• Once again, drag your desired photo from the iPhoto on the right into your shape. You can manipulate the photos using the mask pop-up as well.
Create Hyperlinks
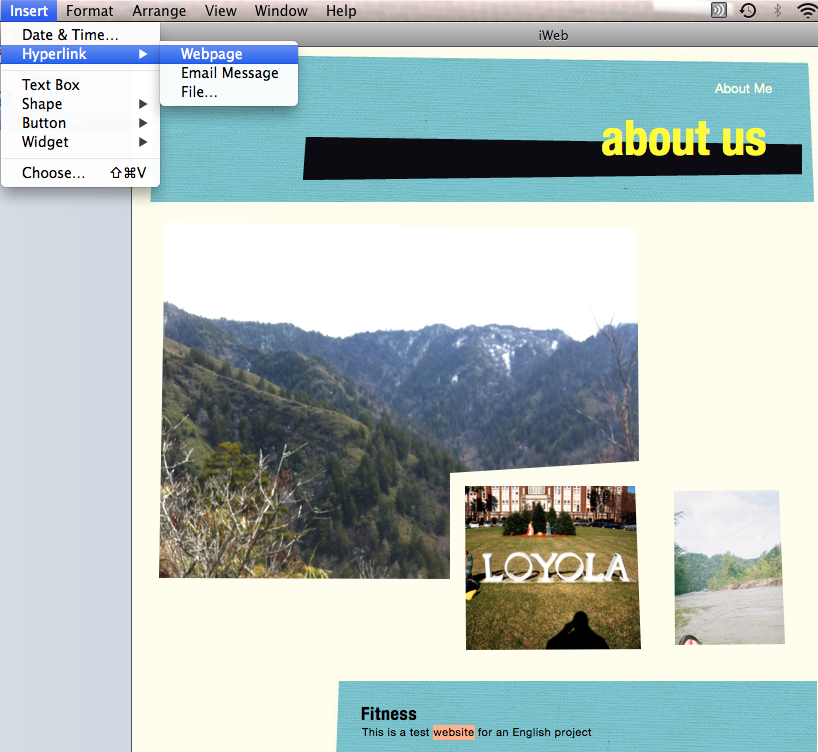
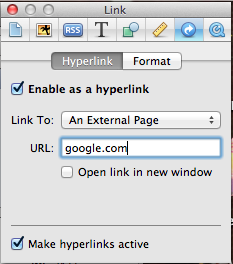
Hyperlinks are texts that serve as links to other pages or websites. You can use a hyperlink to connect to a YouTube page or another trainer’s website.
• Use your Internet browser to go to the desired website.
• Copy the URL of the website to your clipboard.
• Return to iWeb and type in a word or phrase that will become the hyperlink. Highlight the text and select “insert” from the top toolbar.
• Select hyperlink, and then click “website.”
• Paste the URL of the target website into the “URL” section of the pop-up window. Ensure that the “make hyperlinks active” box is checked.
• Then press the enter button on your keyboard.
• *The hyperlinked word will not change color unless it is scrolled over*
• The word that you selected will now connect to the website!
Get an FTP Domain
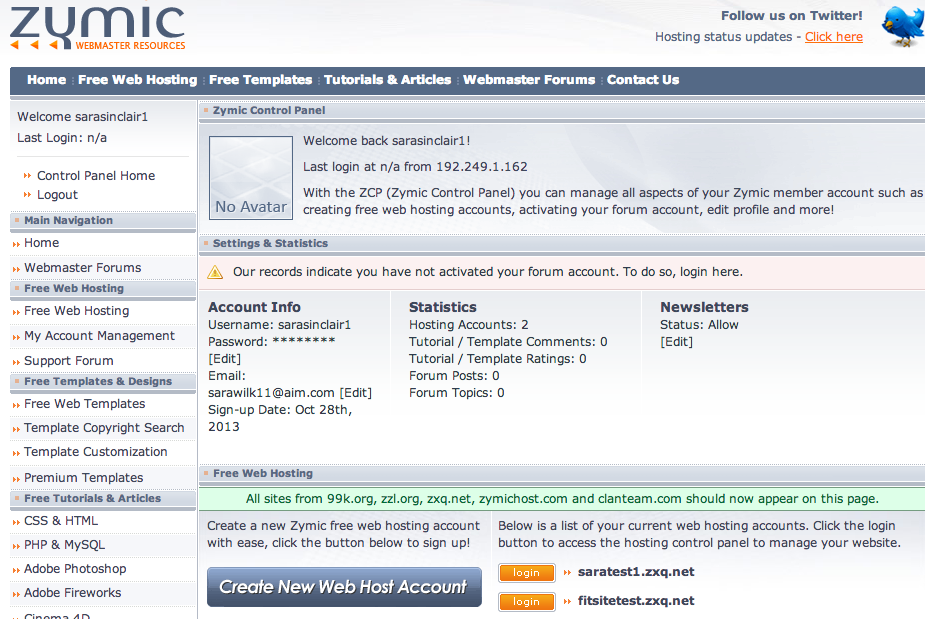

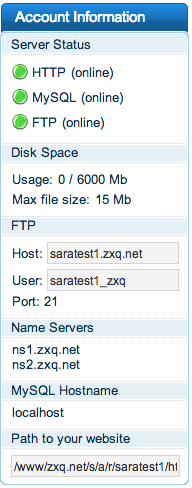
In order to publish the website online, you must use a domain host.Most large domains cost money, usually a yearly amount. There are also many free web hosts available. For this project, we used Zymic.com.
• First, you must create an account just using a username, email address, and password.
• Once the account is created, simply check your email and click the link that is in the confirmation email from zymic and your account is complete.
• From the home page of zymic, click “control panel” on the right hand side of the screen.
• On the control panel, click “create new web host account” on the bottom.
• On the page that comes up, create any website name of your choosing.
• Whatever you type will become the name of the website, such as, “fitnesstime.zxq.net”.
• Then, create a password for the website itself, do not use your host account password.
• Click all boxes on the following page saying that you agree to the policy statements, and enter the Captcha code.
• Once you reach the site confirmation page, do not exit it. Continue on to step 7.
Publish Site to FTP Domain
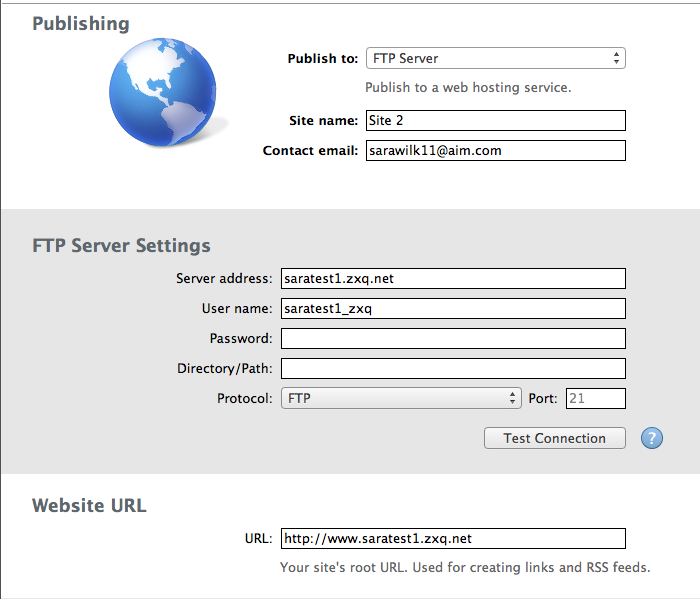
• Return to iWeb.
• Click on the “site” tab on the left toolbar of the site that you wish to publish.
• You will be presented with publishing options.
• Select “publish to FTP server” and name your site, preferably the same name that you chose for your website title and type in your e-mail address.
• For the server address, copy and paste the “host” address from the zymic confirmation page.
• The username will be the same as the user from the confirmation page.
• You can click “test connection” to ensure that everything has been filled in correctly. Type the full website URL into the space provided.
• To finally publish the site, click the button with the green arrow that says “publish site” on the bottom toolbar.
Once iWeb tells you that the website is published, you can visit the site and send the link anywhere you would like!