Create 3D Printable Lithophane in Blender
by kellyegan in Workshop > 3D Printing
24869 Views, 96 Favorites, 0 Comments
Create 3D Printable Lithophane in Blender
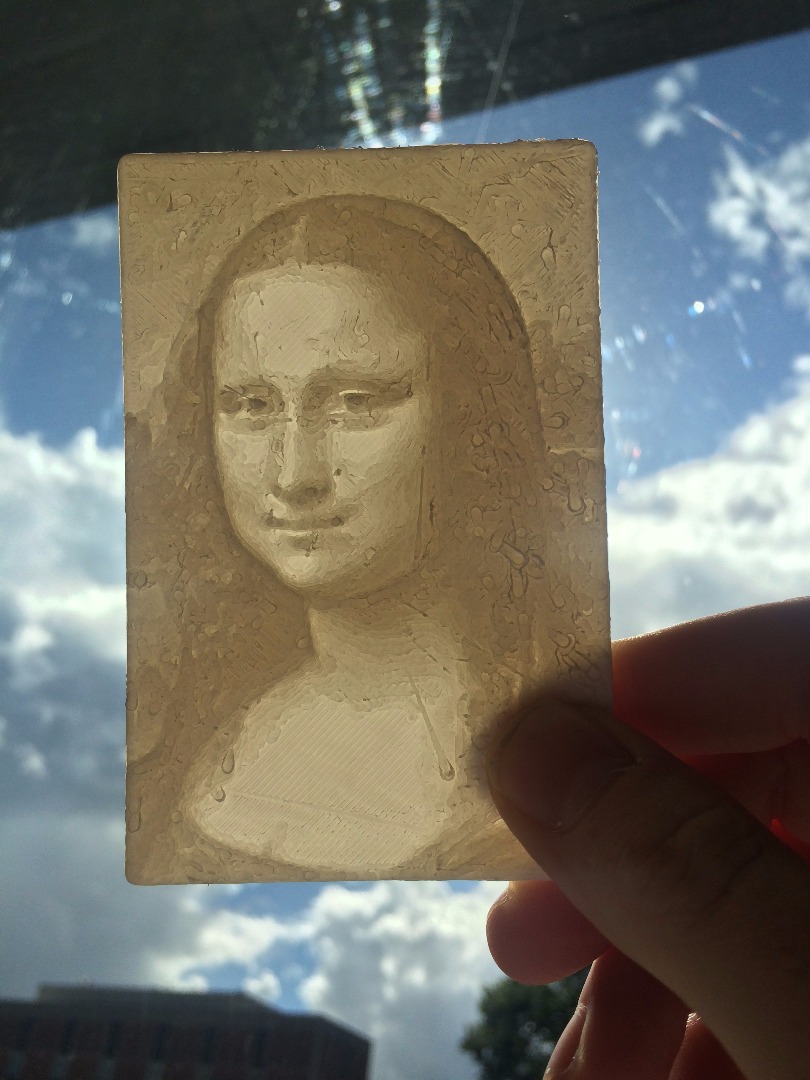
Lithophane are an old technique for making images. Usually they are made from porcelain and molded. They create the image by varying the thickness of a translucent material. When back lit the thicker area appears darker and the thiner lighter.
There a several way to create models for 3D printing lithophane. Here is how to do it in Blender.
This same techinique could all be used to convert digital elevation models into relief maps.
Adjust Your Image
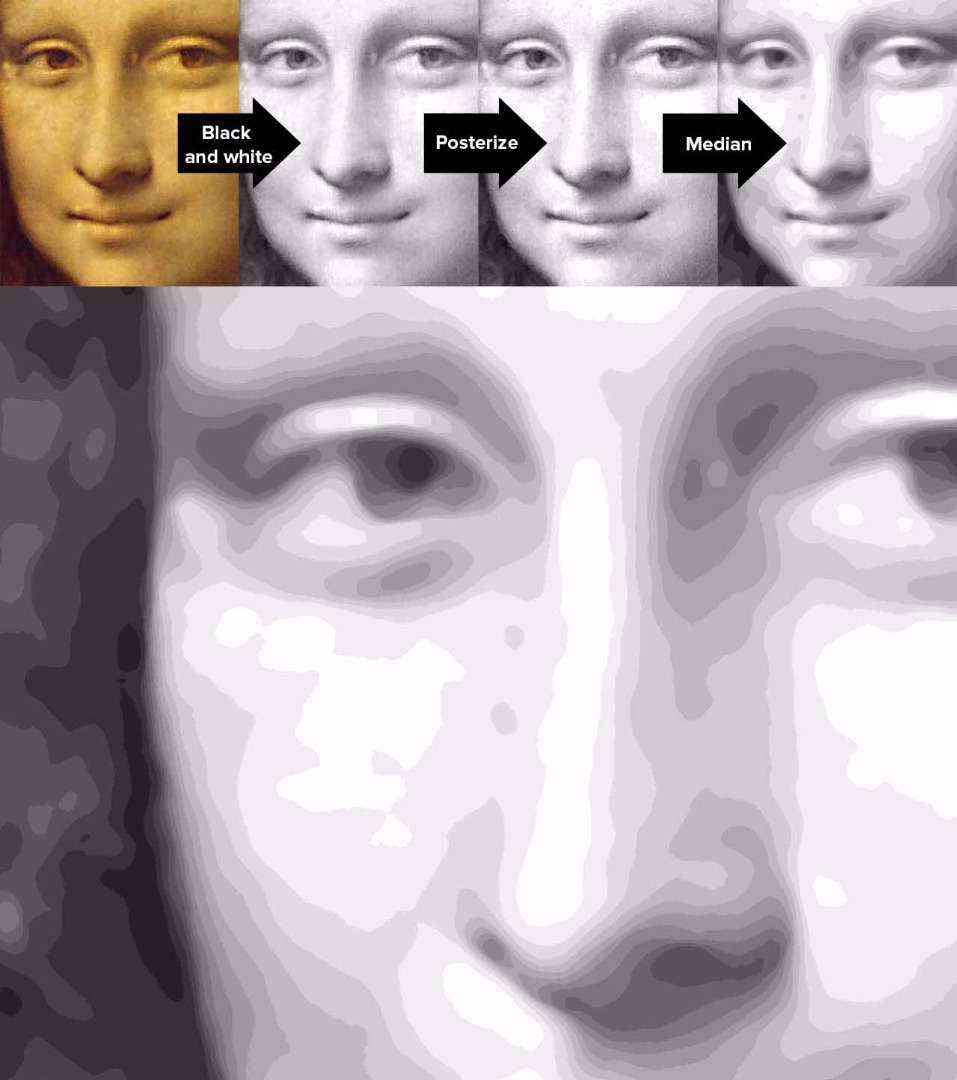
I used Photoshop but the filters I am using are found in GIMP and ImageMagick as well.
You will want your pixel resolution to be slightly greater than the width of the extruded plastic.
Next you should convert your image to black and white.
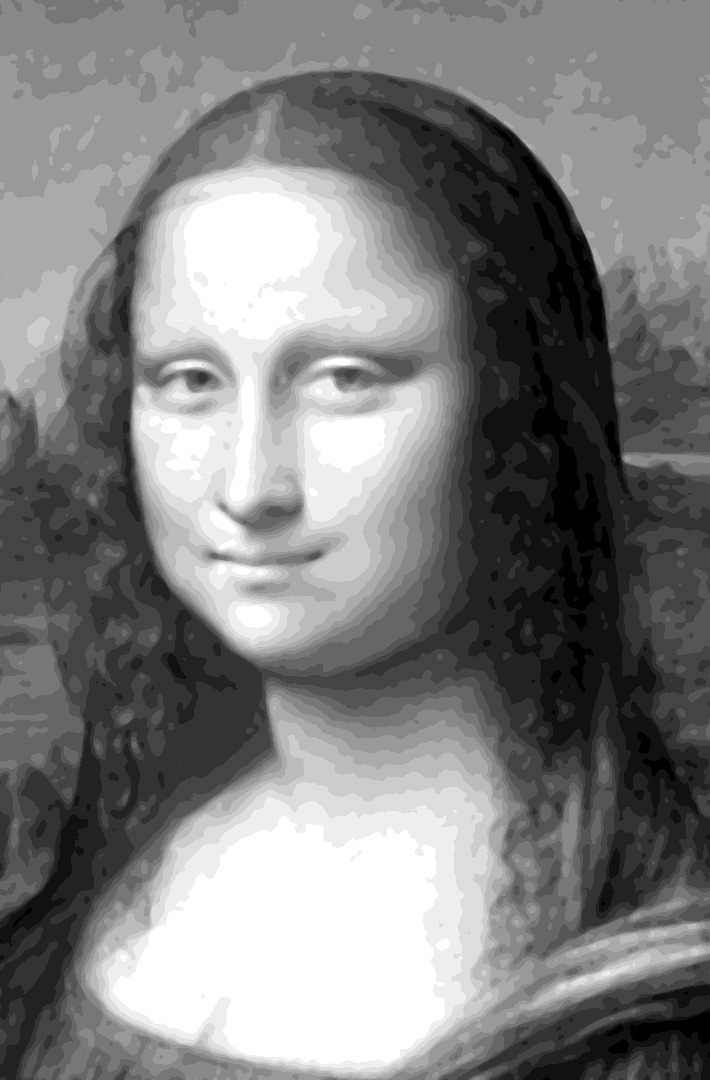
Now that you have the basic image I suggest posterizing it. This will give a good sense of how the image might look once printed. The way the lithograph works is to use the thickness of the plastic to make the image darker or lighter. If you have 5 layers in your print you will have five levels of gray. I plan to have 16 layers of image density so I will posterize to 16 levels.
One thing to keep in mind is that the dynamic range of the image is going to be much less than a jpeg or photographic print because you will never get a true black.
After posterize I run a median filter on the image. This removes tiny dots and specs and smooths the contours of the posterized image. The larger the radius the greater the smoothing but the more detail you will remove. Most like these little specs would be difficult to print well on most 3D printers.
Setup Blender
There are few things that will make things a bit easier getting started.
I won't go through all the adjustments I make to the stock version of Blender file but focus on just those for prepping lithopanes and 3D printing.
Add-ons
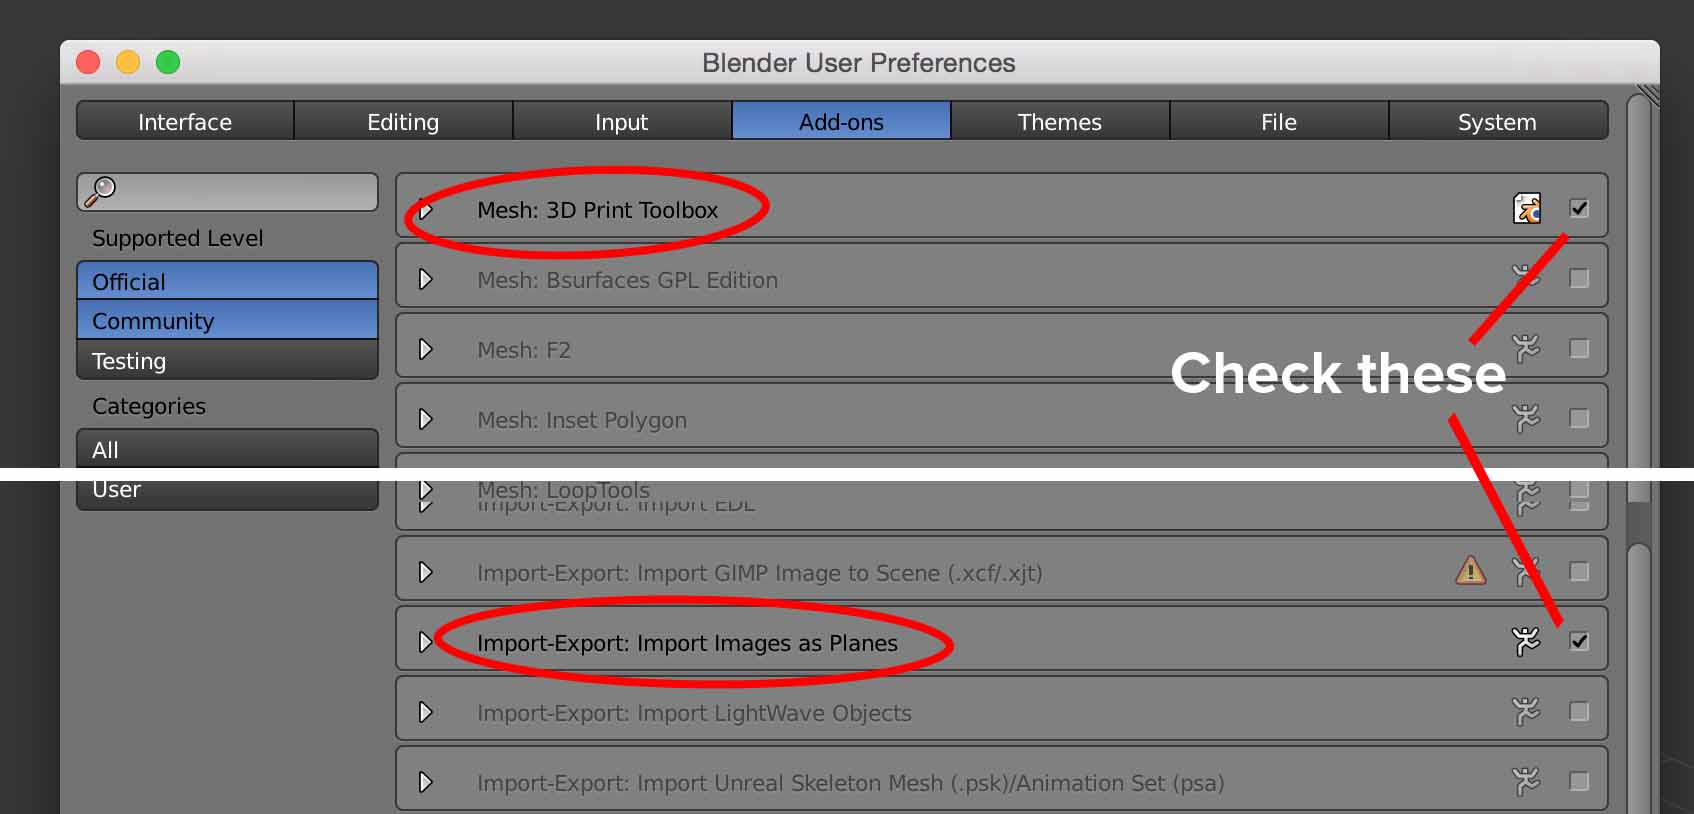
Go to File > User Preferences and then click on the Add-ons tab. We want to turn on:
- Import-Export: Import Images as Planes (search "image")
- Mesh: 3D Printing Toolbox (search "print")
Import image as planes creates a plane the same shape as your source image as well as a UV map and texture. We will use those to create the height displacement.
Units
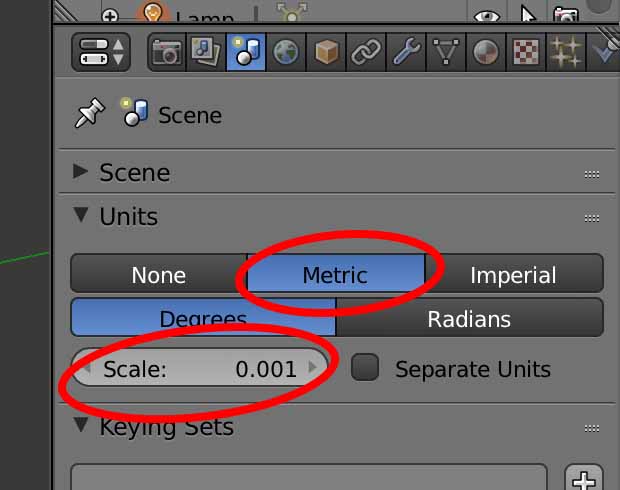
On the Properties panel go to the Scene tab. Under the Units section change the units to Metric and change the scale to 0.001 (one thousandth of a meter). This will set your units to millimeters. Now when you type "1" in a dimension field it will interpret it as a millimeters.
Delete the default cube, light and camera (press 'A' to select all and 'X' to delete.) You won't need them.
Prepare the Mesh
Add the image plane
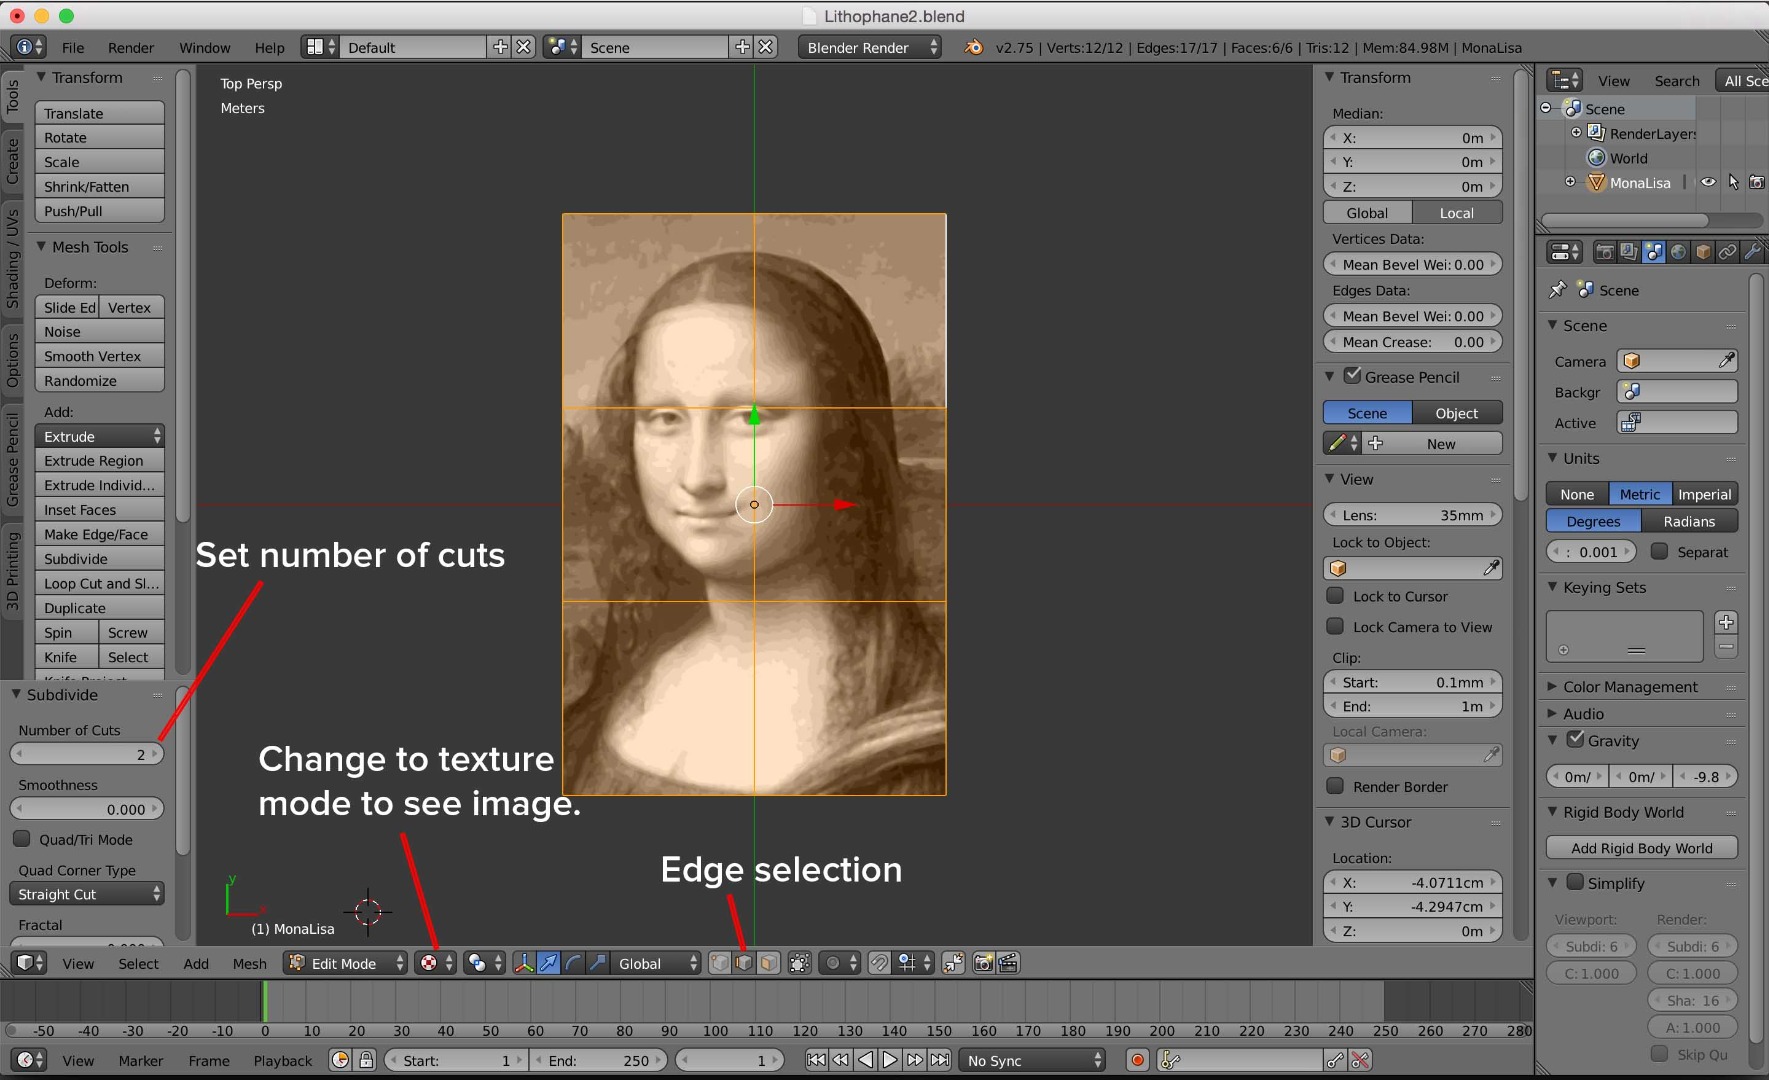
First thing will we do is use the Import Image as Plane add-on we just activated. In the 3D view press "Shift-A" to add a new object to the scene. Under Mesh at the very bottom pick Image as Plane. Use the file picker to chose your edited image. If you want to see the image click on the icon with the sphere in the toolbar at the bottom of the 3D View and choose Texture.
Resize and apply scale
Next you should resize your image to size you want your final print to be. On the right side of the 3D view the Properties panel should be open. If it isn't you can toggle its visibility by pressing "N".
Make sure the plane is selected and then press "S" to scale. If you type a number after pressing "S" it will scale by that amount. I usually start by scaling it up by typing in multiples of 10 until its close. You can check the dimensions in the Transform section of the Properties palette. Hit enter to set the desired size.
At this point I usually apply the scale to the object. This way if you edit the mesh later its parts will also be in the same scale as the object as presented in the scene. Also some tools and modifiers act strangely when the scale of the object isn't 1.0 in all axis. In the drop down menu in the lower left of the 3D view go to Object > Apply > Scale.
Subdividing and extrusion
We want a plane that is divided into faces that are roughly square. First start by switching to Edit mode (with the image plane selected hit Tab). Next we want to switch to #dge selection mode. The three buttons should be in the bottom tool bar of the 3D View. The center one is Edge select.
My image of Mona Lisa is roughly 2 by 3 so I subdivided it vertical once and horizontally twice to get 2 columns and 3 rows. To create vertical subdivisions select the top and bottom edges and press "W". Choose subdivide. You can set the number of cuts in the subdivide section of the tool palette (Press "T" to toggle visibility). To create horizontal subdivisions do the same after selecting the left right and any other vertical edges you just created.
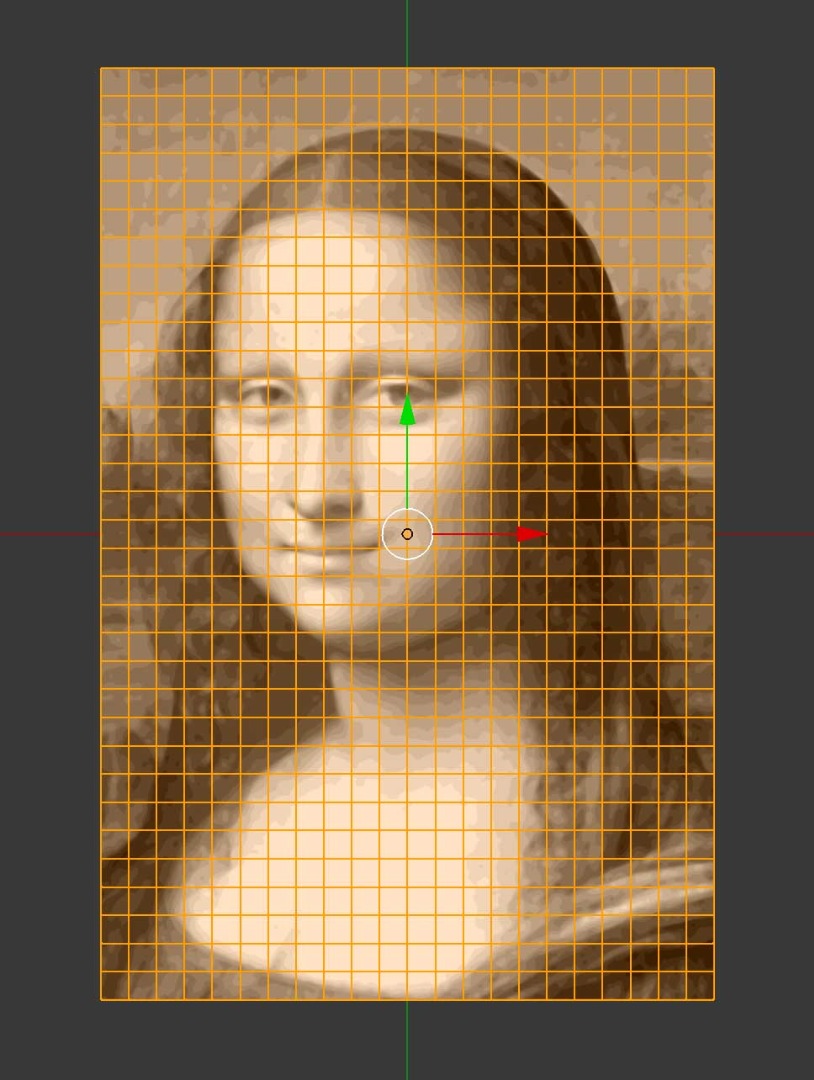
Once you have some large roughly square faces select all edges (press "A") and subdivide again (press "W"). This time max out the number of subdivisions by changing the number of cuts to 10.
Extrusion
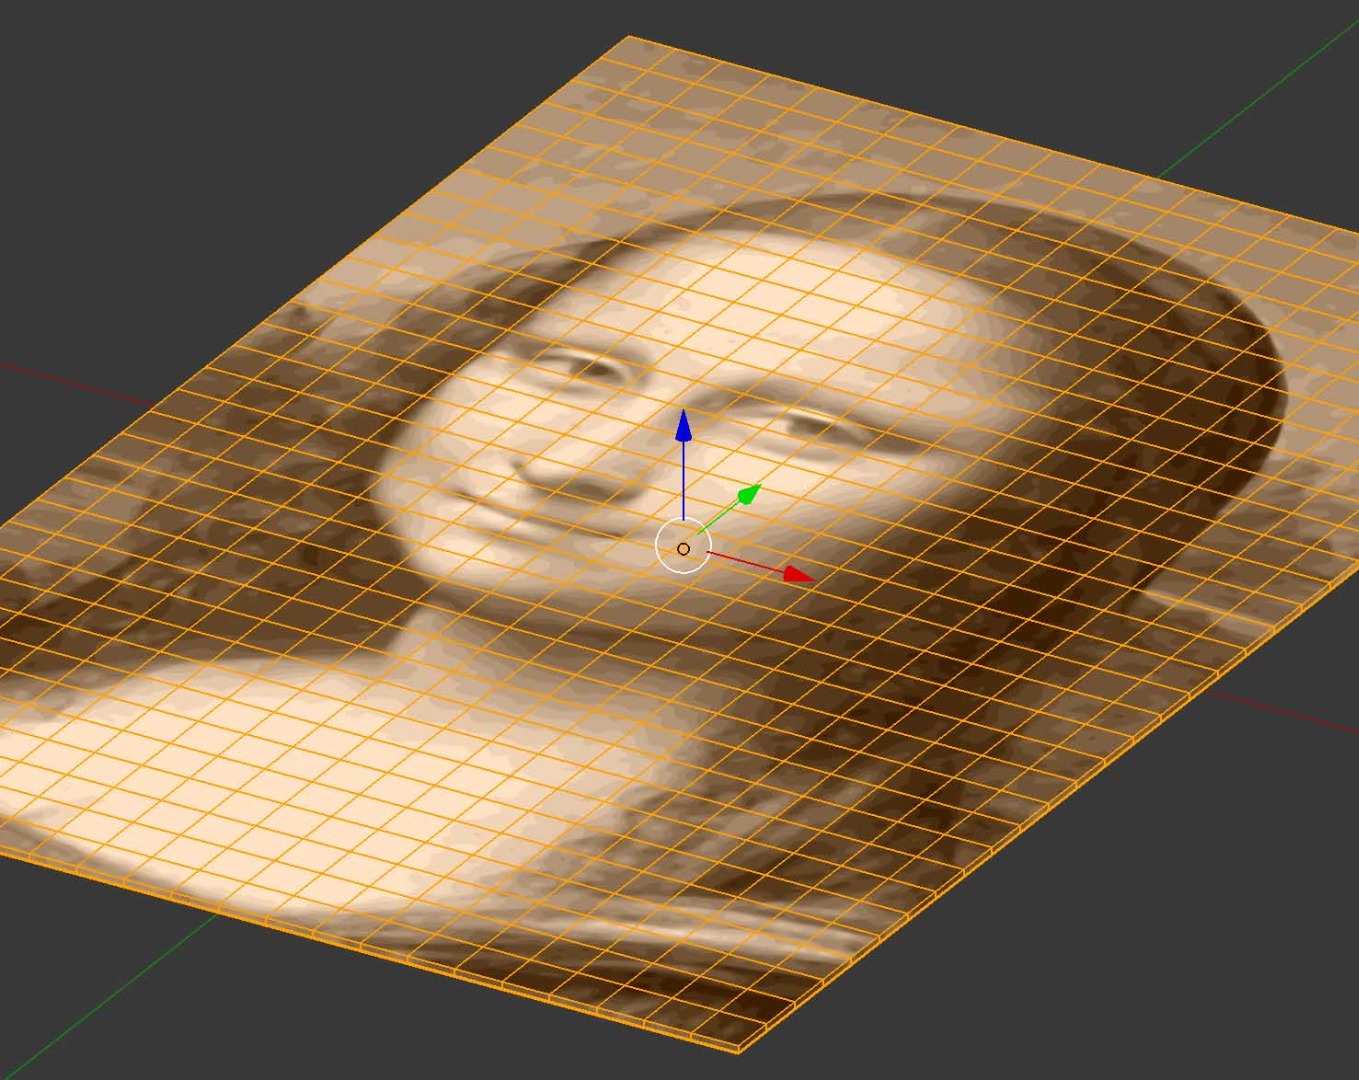
One last step before we move on to modifiers. We need to give the plane a little thickness. While keeping all edges selected press "E" to extrude. Then press ".5" to extrude it half a millimeter. This will be our base thickness.
You can now exit edit mode (press Tab).
Add the Modifiers
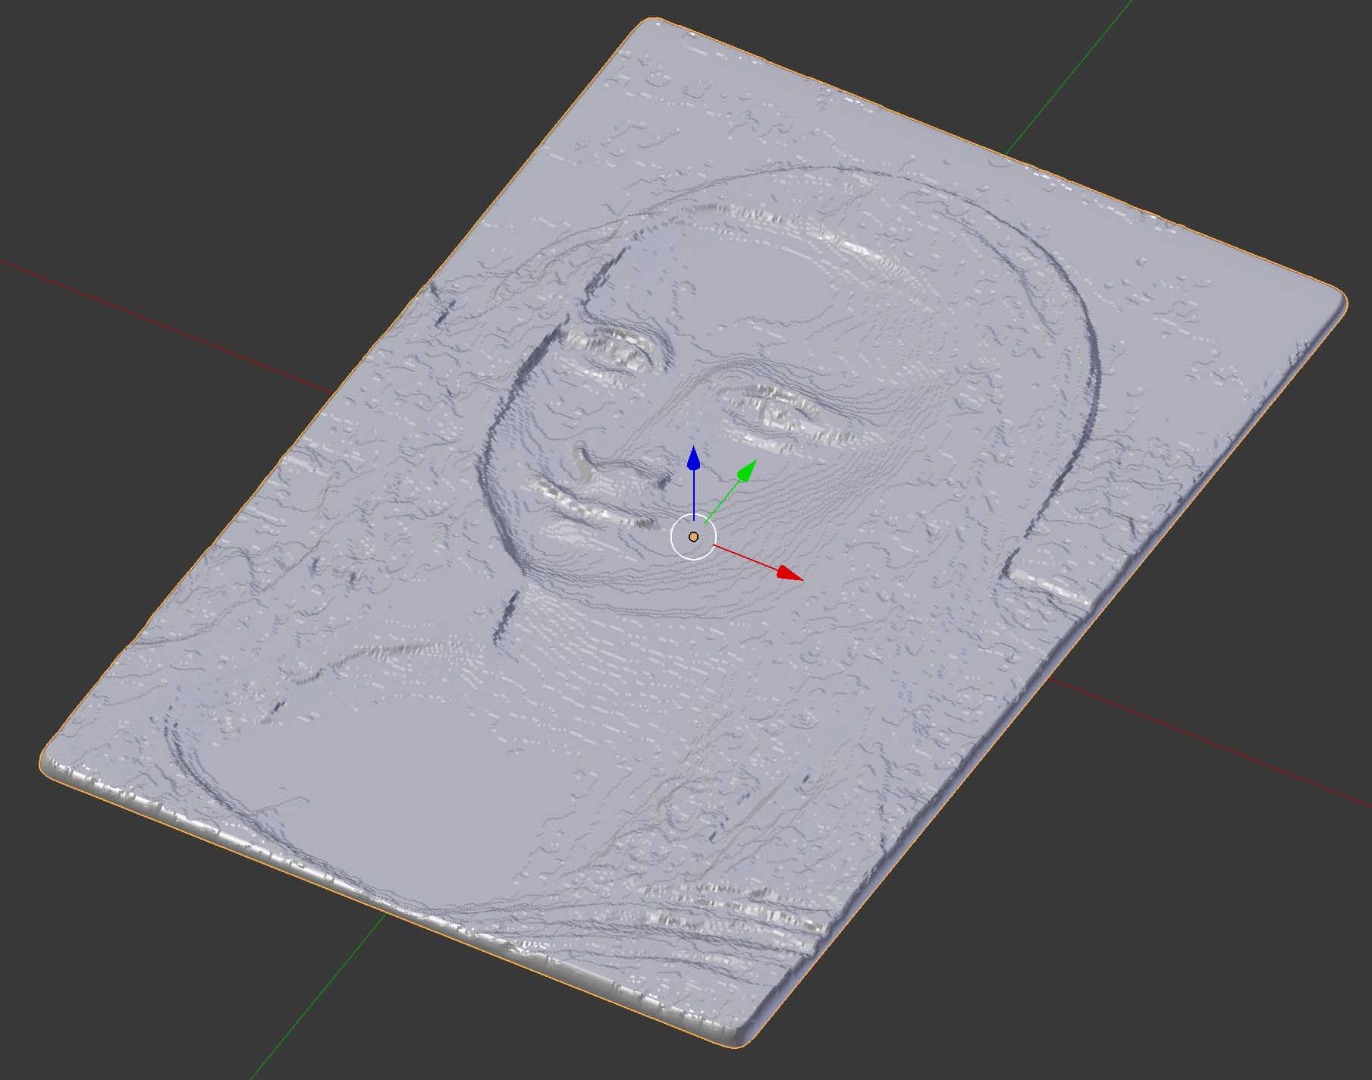
The last step before export is to displace the mesh so that the color values represent the thickness. I turn off texture mode for this step so it is easier to see bumps. You should now be in Object mode (press Tab to toggle).
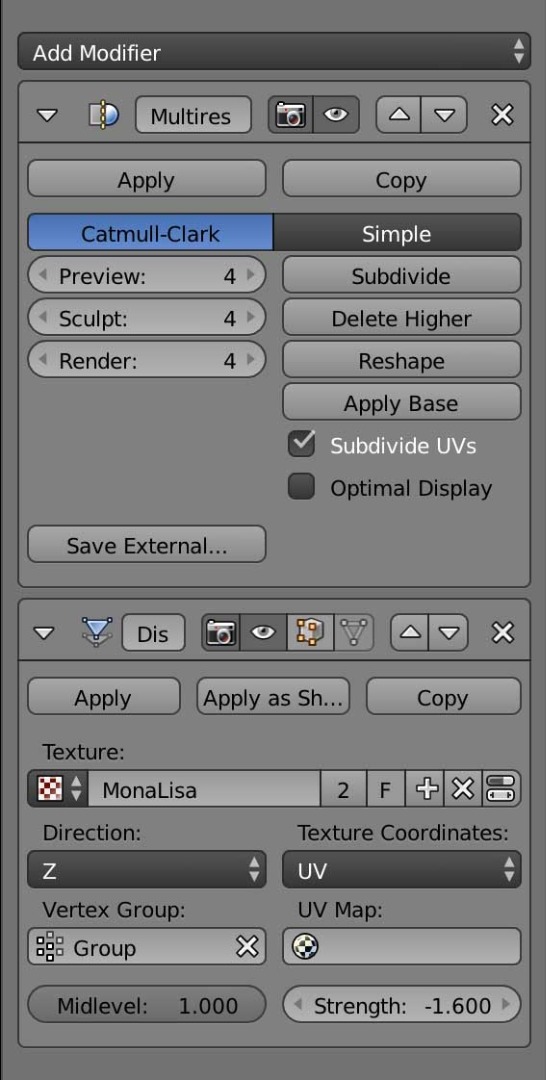
We will add two modifiers: Multiresolution and Displace.
Multiresolution modifier
Click "Add modifier" and choose Multiresolution. This modifiers. will add even more faces to our mesh to get a more smooth transitions between levels. It also tends to round corners. There are several ways to deal with this but the easiest would be to subdivide the model even more before applying this modifier.
At first it does nothing but if you click the subdivide function in the modifiers panel it will add more faces.
Displace modifier
Next click "Add modifier" again and choose Displace. This is the heart of the lithophane. Now we need to set some settings in the modifier.
In the Displace properties set the properties as followed:
- Texture: click the checkered grid to choose the texture that is named after the image you used to create the plane.
- Direction: choose Z as we want it to displace straight up only.
- Texture Coordinates: choose UV this will use the image as it is applied to the plane.
Your lithophane should now have a relief version of your image. If you flip it over however you will notice it is also making the bottom displace as well. Let go back into edit mode to fix this.
Vertex Groups
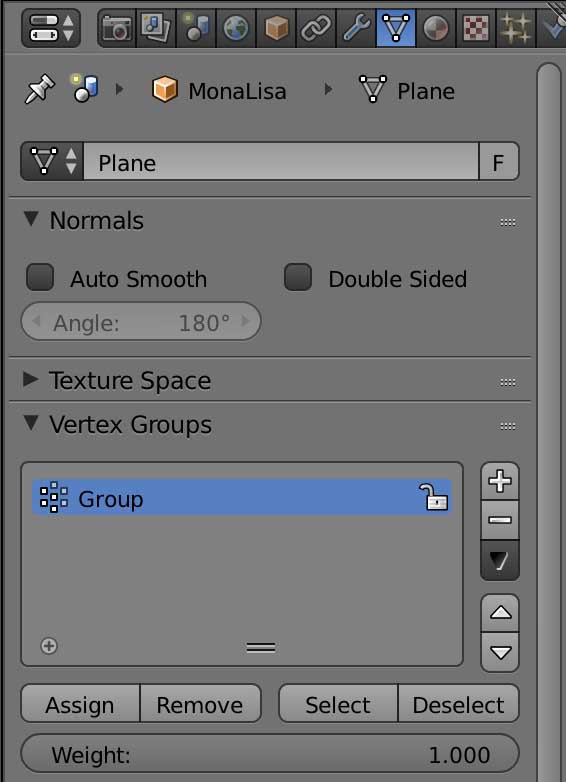
In order to stop the bottom from being affected by the Displace modifier we need to use Vertex groups. The Vertex Group panel is next to the Modifier Panel and looks like a triangle with 3 dots at the corner.
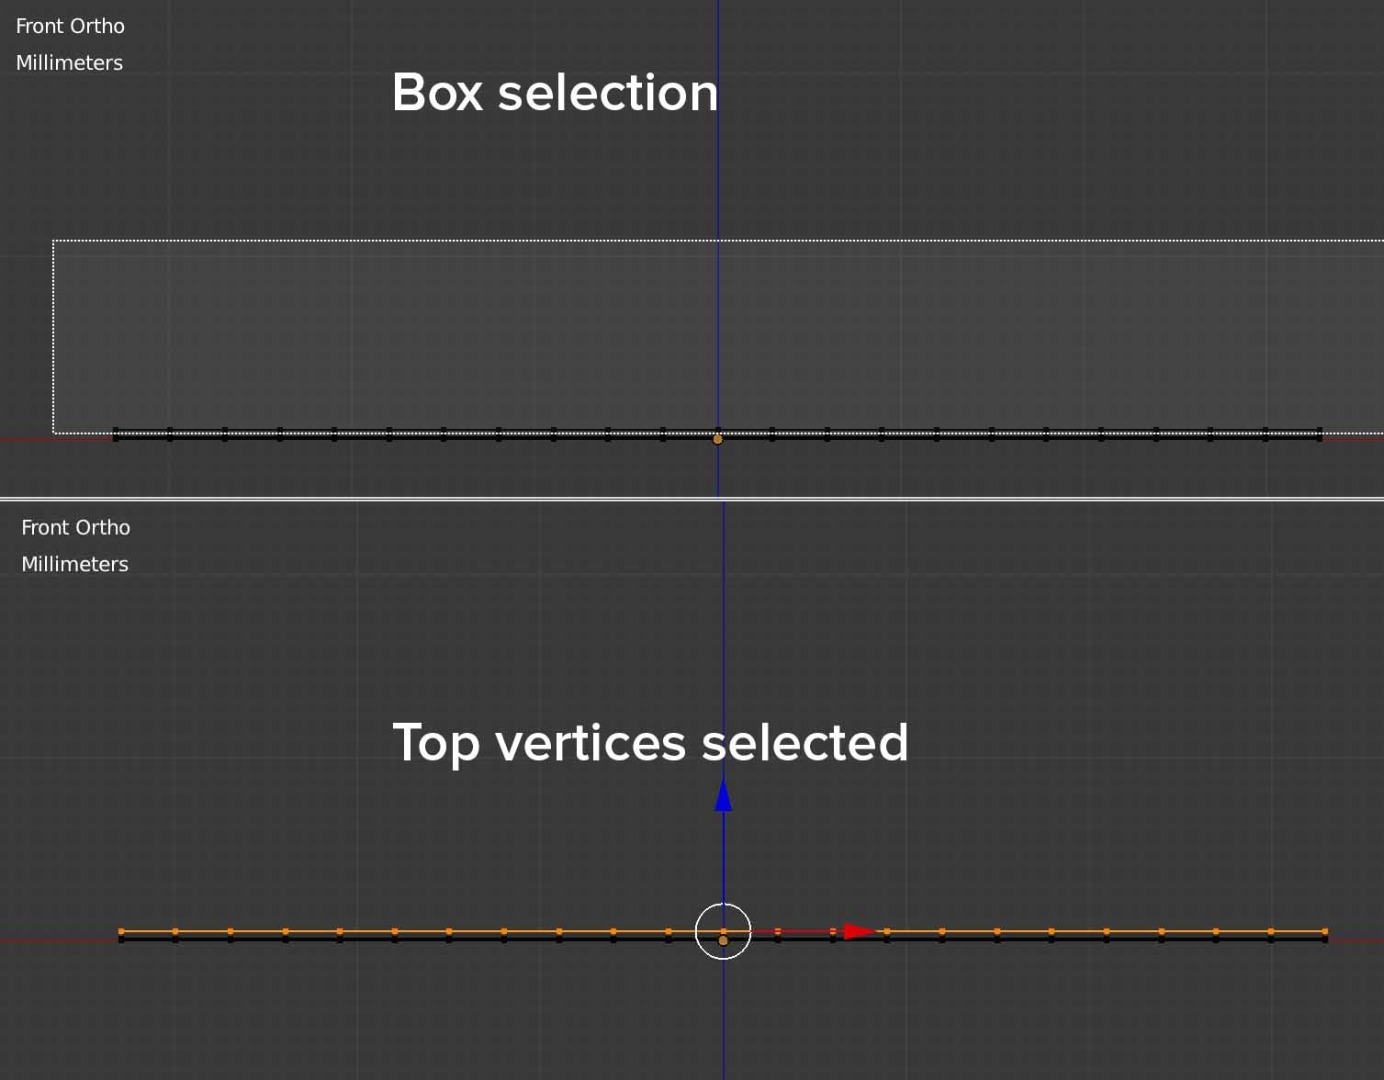
In the 3D view select the plane and go into Edit mode (press Tab). Make sure you are in vertex selection instead of edge selection. Press "Z" to go to wireframe mode. This makes selection easier. Next switch to front view (go to View > Front in the toolbar at the bottom of the 3D view).
Make sure everything is deselected (toggle pressing "A") To select just the top you can press "B" for box selection mode and draw a box that include the top vertices but not the bottom. Once you are sure you have just the top, go to the Vertex Group panel, press the plus sign to create a new group and press Assign to add these vertices. You should now have a Group called "Group".
Returning to the Modifiers panel you can now choose the vertex group in the Displace options and set it to your new Vertex Group. If everything worked the bottom should now look nice and smooth.
Two more settings
- Midlevel: This is the grey level that is considered the midpoint of the displace values. I set mine to 1.0 which is the equivalent of white.
- Strength: The strength is how much to displace the mesh in total. I wanted 16 0.1mm levels so I set this to 1.6.
You should be done. You can export your model as an STL and print!