Crayon Canvas Art
![IMG_0710[1].jpg](/proxy/?url=https://content.instructables.com/F3V/HA39/IHP6PRIA/F3VHA39IHP6PRIA.jpg&filename=IMG_0710[1].jpg)
I love all of the crayon tutorials posted everywhere but I am not a fan of gluing the crayon to the canvas and leaving it there. I would rather have a picture that looks like artwork especially if you are giving it as a gift. My kids and I enjoyed making these and I hope you do too.
Gather Materials
![IMG_0705[1].jpg](/proxy/?url=https://content.instructables.com/F4A/1KO3/IHNB46P9/F4A1KO3IHNB46P9.jpg&filename=IMG_0705[1].jpg)
Materials
- Canvas
- Black Acrylic Paint
- Printout of whatever picture you want
- Crayons
- Heat tool or blow dryer
- Plastic or something to keep the area from getting messy
First gather your materials. Select an image you would like to use for a silhouette. Print it out, then cut it out carefully in order to save the paper outside the image because that is what you will be using.
Preparing Your Picture
![IMG_0706[1].jpg](/proxy/?url=https://content.instructables.com/FJX/SDJX/IHNB46PF/FJXSDJXIHNB46PF.jpg&filename=IMG_0706[1].jpg)
![IMG_0707[1].jpg](/proxy/?url=https://content.instructables.com/F5S/9O8B/IHNB47IF/F5S9O8BIHNB47IF.jpg&filename=IMG_0707[1].jpg)
So the pictures themselves can be tossed out. You will use the outside of the paper (the part you usually throw away).
Paint
![IMG_0708[1].jpg](/proxy/?url=https://content.instructables.com/F81/23LF/IHNB47IG/F8123LFIHNB47IG.jpg&filename=IMG_0708[1].jpg)
Lay the outline flat ( you can tape it down if that helps) and paint.
Once painted they should look like this. Let them dry.
Melt Crayons

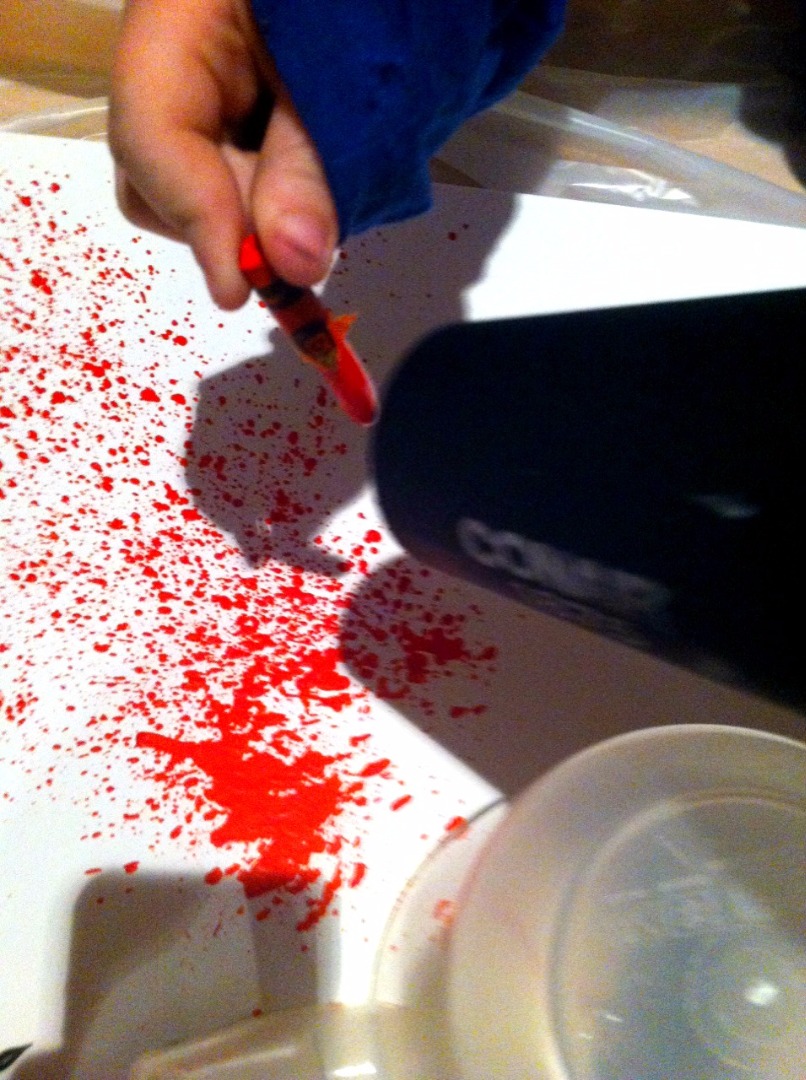
Cover your image, you can use lightly sticky tape, a cup, or plate. Pretty much anything that will let you get close to the image but not allowing any crayon to drip on it.
Now pick the color(s) you would like and use the blow dryer to melt the crayon on the canvas. This does take a few moments to get started and it can get a little messy. If you are doing this with a child make sure they keep their fingers away from the front of the blow dryer as it can be hot. I made me son hold it at the tip above the heat.
Repeat that until you are satisfied with the amount of color. You can use the blow dryer to smooth out the crayon by placing it close to the canvas and letting the colors run together.
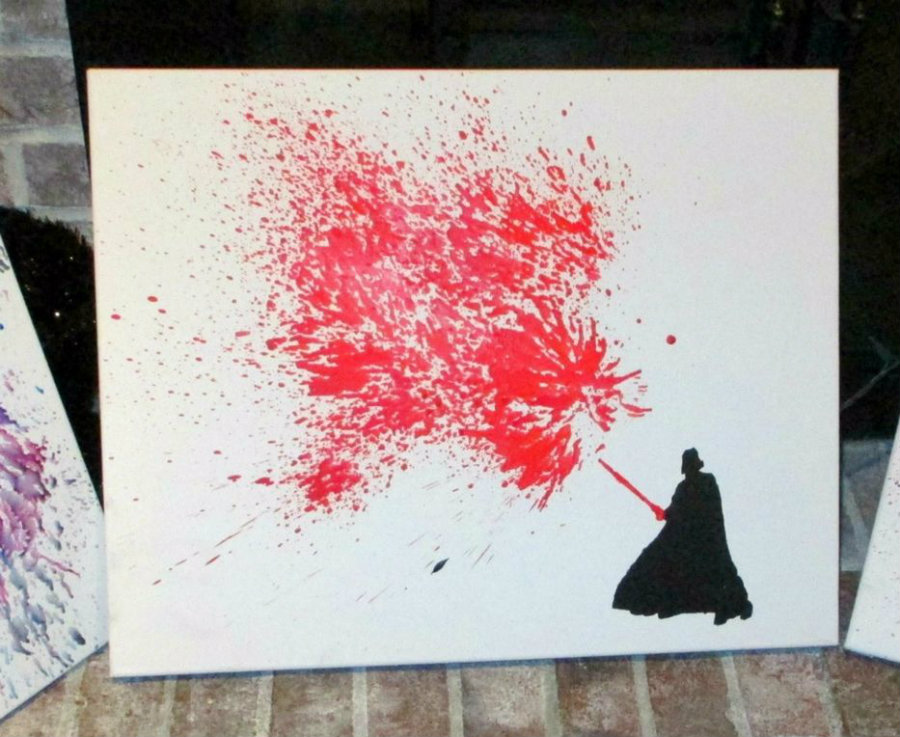
Let Dry and Admire
![IMG_0711[1].jpg](/proxy/?url=https://content.instructables.com/FGM/DD3I/IHP6PSA8/FGMDD3IIHP6PSA8.jpg&filename=IMG_0711[1].jpg)
![IMG_0712[1].jpg](/proxy/?url=https://content.instructables.com/FAO/TBH7/IHP6PSDW/FAOTBH7IHP6PSDW.jpg&filename=IMG_0712[1].jpg)
Let everything dry and that's it. Thank you.