Covid-19 Stats + Raspberry Pi + I2C LCD
by KeithM9 in Circuits > Raspberry Pi
1468 Views, 4 Favorites, 0 Comments
Covid-19 Stats + Raspberry Pi + I2C LCD

So randomly out of the blue one day, I decided to get a few parts I had lying around and make something that would deliver me real time statistics on Covid-19. I did not put much time into making it look nice because why make something permanent when this event is not going to be? Therefore, my display is just mounted to a small cardboard box.
Parts needed:
- Raspberry Pi - any model. I used Raspberry Pi 3A+
- 20x4 I2C LCD Display - no particular brand...but does need the I2C backpack
- Female to female jumper wires - Just 4 of them to connect the I2C to the Pi
https://www.adafruit.com/product/4027
https://www.amazon.com/gp/product/B01GPUMP9C/ref=p...
https://www.amazon.com/gp/product/B01L5ULRUA/ref=p...
These links go directly to the sources I purchased from. Sorry to say that Adafruit is not delivering right now, but Amazon is...just slowly due to their main focus being towards essential items, which these are not. All can be found elsewhere on Amazon and eBay.
You'll obviously need an AC adapter, USB cable, and microSD card to go with all this.
Hardware Setup
![GPIO[1].png](/proxy/?url=https://content.instructables.com/F3Y/OQPG/K8P8TLLG/F3YOQPGK8P8TLLG.png&filename=GPIO[1].png)
Reference the attached pinout picture. It says B+, but it applies to every other Raspberry Pi model that has come after that one as well.
With an I2C backpack attached to the LCD display, this connection only requires 4 wires to work.
Connect GND to any one of the ground pins on the Raspberry Pi: Pin 6, 9, 14, 20, 25, 30, 34, 39. I connected it to pin 6.
Connect VCC to either of the 5 volt pins on the Raspberry Pi: Pin 2, 4. I used pin 4
Connect SDA to pin 3.
Connect SCL to Pin 5.
If you followed my setup, you will end up with all 4 wires in a 2x2 pattern on the GPIO headers.
Your mounting method can be anything you can imagine...or nothing at all. As I said in the intro, this strain of the coronavirus is not going to last forever, so I don't need my setup to neither. If I decide to keep this setup after this event is over, I might turn it into a weather display or something.
I attached a nut and bolt along with nylon spacers to all 4 corners of my Pi 3A+. This is strictly optional. I did this because I sometimes have this on a metal surface, didn't like having my temporary setups on a Pi that is inside of a case, and don't want to risk messing it up because I forgot to remove it from the metal surface before powering it on.
Pi Software Setup

As I said in the intro, it does not matter what Raspberry Pi model you use. I am using this on a Raspberry Pi 3A+ over WiFi but have also tested this on Raspberry Pi 2 on ethernet cable, and Raspberry Pi Zero version 1.3 (the very first Pi Zero with the serial camera connector) with a USB WiFi dongle.
I am not going to type out how to install Raspbian onto a MicroSD card because there are millions of instructions on how to do that. I have a 16GB microSD running Raspbian Buster Lite. On a side note, I almost always use Raspbian Lite because I don't need the other useless software packages in any of my projects. If I install software using apt-get, it will install missing prerequisites.
Connect to a network. Again, there are millions of instructions out there on how to do this, so I will not be going in depth here. You can go wired or wireless, but this will require an internet connection.
Optional, but you could enable SSH to connect using PuTTY. I did.
Update everything then reboot:
sudo apt update
sudo apt upgrade -y
sudo apt dist-upgrade
sudo rpi-update
sudo reboot
This is one setup that I will go through here. Again, there are millions of ways to do this, but the best reference I found is right here: https://www.circuitbasics.com/raspberry-pi-i2c-lcd...
Here are the highlights:
sudo apt install i2c-tools
sudo apt install python-smbus
You will also need to enable I2C
sudo raspi-config
- 5 Interfacing Options
- P5 I2C
Reboot to apply the changes
sudo reboot
Now it's time to see if you did this all correctly so far
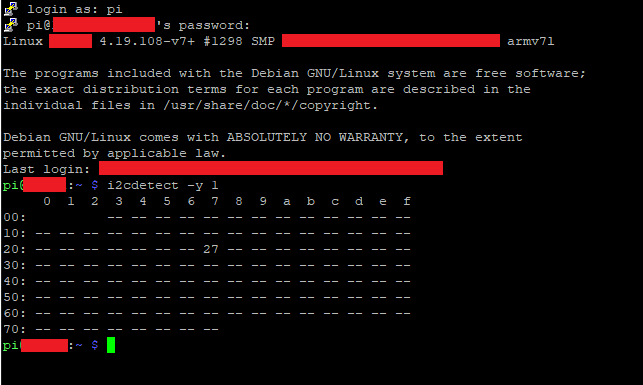
i2cdetect -y 1
If your display is powered up and can be seen by your Raspberry Pi, you will have a chart that comes up. The address for the 20x4 I bought on Amazon and using for this project is 27. Technically this will identify as 0x27 for the python scripts that will come later. I've had that same address show for 2 16x2 displays I also bought on Amazon and one 40x2 I found on eBay.
Python Setup
So now for the complex stuff. I will try to keep it as simple as I can. For starters, I will just be writing files to the home directory.
touch I2C_LCD_driver.py
nano I2C_LCD_driver.py
Paste the below content into your newly created python script.
<p># -*- coding: utf-8 -*-<br># Original code found at:
# <a href="https://gist.github.com/DenisFromHR/cc863375a6e19dce359d"> <a href="https://gist.github.com/DenisFromHR/cc863375a6e19...</a"> https://gist.github.com/DenisFromHR/cc863375a6e19...</a>></p><p>"""
Compiled, mashed and generally mutilated 2014-2015 by Denis Pleic
Made available under GNU GENERAL PUBLIC LICENSE</p><p># Modified Python I2C library for Raspberry Pi
# as found on <a href="http://www.recantha.co.uk/blog/?p=4849"> <a href="http://www.recantha.co.uk/blog/?p=4849"> https://gist.github.com/DenisFromHR/cc863375a6e19...</a>
</a>
# Joined existing 'i2c_lib.py' and 'lcddriver.py' into a single library
# added bits and pieces from various sources
# By DenisFromHR (Denis Pleic)
# 2015-02-10, ver 0.1</p><p>"""</p><p># i2c bus (0 -- original Pi, 1 -- Rev 2 Pi)
I2CBUS = 0</p><p># LCD Address
ADDRESS = 0x27</p><p>import smbus
from time import sleep</p><p>class i2c_device:
   def __init__(self, addr, port=I2CBUS):
      self.addr = addr
      self.bus = smbus.SMBus(port)</p><p># Write a single command
   def write_cmd(self, cmd):
      self.bus.write_byte(self.addr, cmd)
      sleep(0.0001)</p><p># Write a command and argument
   def write_cmd_arg(self, cmd, data):
      self.bus.write_byte_data(self.addr, cmd, data)
      sleep(0.0001)</p><p># Write a block of data
   def write_block_data(self, cmd, data):
      self.bus.write_block_data(self.addr, cmd, data)
      sleep(0.0001)</p><p># Read a single byte
   def read(self):
      return self.bus.read_byte(self.addr)</p><p># Read
   def read_data(self, cmd):
      return self.bus.read_byte_data(self.addr, cmd)</p><p># Read a block of data
   def read_block_data(self, cmd):
      return self.bus.read_block_data(self.addr, cmd)</p><p># commands
LCD_CLEARDISPLAY = 0x01
LCD_RETURNHOME = 0x02
LCD_ENTRYMODESET = 0x04
LCD_DISPLAYCONTROL = 0x08
LCD_CURSORSHIFT = 0x10
LCD_FUNCTIONSET = 0x20
LCD_SETCGRAMADDR = 0x40
LCD_SETDDRAMADDR = 0x80</p><p># flags for display entry mode
LCD_ENTRYRIGHT = 0x00
LCD_ENTRYLEFT = 0x02
LCD_ENTRYSHIFTINCREMENT = 0x01
LCD_ENTRYSHIFTDECREMENT = 0x00</p><p># flags for display on/off control
LCD_DISPLAYON = 0x04
LCD_DISPLAYOFF = 0x00
LCD_CURSORON = 0x02
LCD_CURSOROFF = 0x00
LCD_BLINKON = 0x01
LCD_BLINKOFF = 0x00</p><p># flags for display/cursor shift
LCD_DISPLAYMOVE = 0x08
LCD_CURSORMOVE = 0x00
LCD_MOVERIGHT = 0x04
LCD_MOVELEFT = 0x00</p><p># flags for function set
LCD_8BITMODE = 0x10
LCD_4BITMODE = 0x00
LCD_2LINE = 0x08
LCD_1LINE = 0x00
LCD_5x10DOTS = 0x04
LCD_5x8DOTS = 0x00</p><p># flags for backlight control
LCD_BACKLIGHT = 0x08
LCD_NOBACKLIGHT = 0x00</p><p>En = 0b00000100 # Enable bit
Rw = 0b00000010 # Read/Write bit
Rs = 0b00000001 # Register select bit</p><p>class lcd:
   #initializes objects and lcd
   def __init__(self):
      self.lcd_device = i2c_device(ADDRESS)</p><p>      self.lcd_write(0x03)
      self.lcd_write(0x03)
      self.lcd_write(0x03)
      self.lcd_write(0x02)</p><p>      self.lcd_write(LCD_FUNCTIONSET | LCD_2LINE | LCD_5x8DOTS | LCD_4BITMODE)
      self.lcd_write(LCD_DISPLAYCONTROL | LCD_DISPLAYON)
      self.lcd_write(LCD_CLEARDISPLAY)
      self.lcd_write(LCD_ENTRYMODESET | LCD_ENTRYLEFT)
      sleep(0.2)</p><p>   # clocks EN to latch command
   def lcd_strobe(self, data):
      self.lcd_device.write_cmd(data | En | LCD_BACKLIGHT)
      sleep(.0005)
      self.lcd_device.write_cmd(((data & ~En) | LCD_BACKLIGHT))
      sleep(.0001)</p><p>   def lcd_write_four_bits(self, data):
      self.lcd_device.write_cmd(data | LCD_BACKLIGHT)
      self.lcd_strobe(data)</p><p>   # write a command to lcd
   def lcd_write(self, cmd, mode=0):
      self.lcd_write_four_bits(mode | (cmd & 0xF0))
      self.lcd_write_four_bits(mode | ((cmd << 4) & 0xF0))</p><p>   # write a character to lcd (or character rom) 0x09: backlight | RS=DR<
   # works!
   def lcd_write_char(self, charvalue, mode=1):
      self.lcd_write_four_bits(mode | (charvalue & 0xF0))
      self.lcd_write_four_bits(mode | ((charvalue << 4) & 0xF0))

   # put string function with optional char positioning
   def lcd_display_string(self, string, line=1, pos=0):
    if line == 1:
      pos_new = pos
    elif line == 2:
      pos_new = 0x40 + pos
    elif line == 3:
      pos_new = 0x14 + pos
    elif line == 4:
      pos_new = 0x54 + pos</p><p>    self.lcd_write(0x80 + pos_new)</p><p>    for char in string:
      self.lcd_write(ord(char), Rs)</p><p>   # clear lcd and set to home
   def lcd_clear(self):
      self.lcd_write(LCD_CLEARDISPLAY)
      self.lcd_write(LCD_RETURNHOME)</p><p>   # define backlight on/off (lcd.backlight(1); off= lcd.backlight(0)
   def backlight(self, state): # for state, 1 = on, 0 = off
      if state == 1:
         self.lcd_device.write_cmd(LCD_BACKLIGHT)
      elif state == 0:
         self.lcd_device.write_cmd(LCD_NOBACKLIGHT)</p><p>   # add custom characters (0 - 7)
   def lcd_load_custom_chars(self, fontdata):
      self.lcd_write(0x40);
      for char in fontdata:
         for line in char:
            self.lcd_write_char(line)</p>
The address in that content assumes your LCD address is 0x27. If this is not the case for you, you will need to change it on the line "ADDRESS = 0x27" before you type Ctrl+X to save and exit. Otherwise, just save and exit. This file will need to exist in the same directory as the script that we will use later.
That code was on "https://www.circuitbasics.com/raspberry-pi-i2c-lcd-set-up-and-programming/" just in case it did not paste correctly onto this page.
--------------------------------------------------------------------------------------------------------------------------------------
Now create and edit the main python script:
touch covid19.py
nano covid19.py
Paste the below text into your newly created python script.
<p>import I2C_LCD_driver<br>import socket
import time
import fcntl
import struct
import json
import urllib2</p><p>display = I2C_LCD_driver.lcd()
url = ("http://coronavirus-19-api.herokuapp.com/countries/usa")
data = json.load(urllib2.urlopen(url))</p><p>try:
    while True:
        data = json.load(urllib2.urlopen(url))
        cases = data['cases']
        todaycases = data['todayCases']
        deaths = data['deaths']
        todaydeaths = data['todayDeaths']
        recovered = data['recovered']
        active = data['active']
        critical = data['critical']
        casesperonemillion = data['casesPerOneMillion']
        deathsperonemillion = data['deathsPerOneMillion']
        display.lcd_display_string("COVID-19 Total Stats", 1)
        display.lcd_display_string("Cases: " + str(cases), 2)
        display.lcd_display_string("Deaths: " + str(deaths), 3)
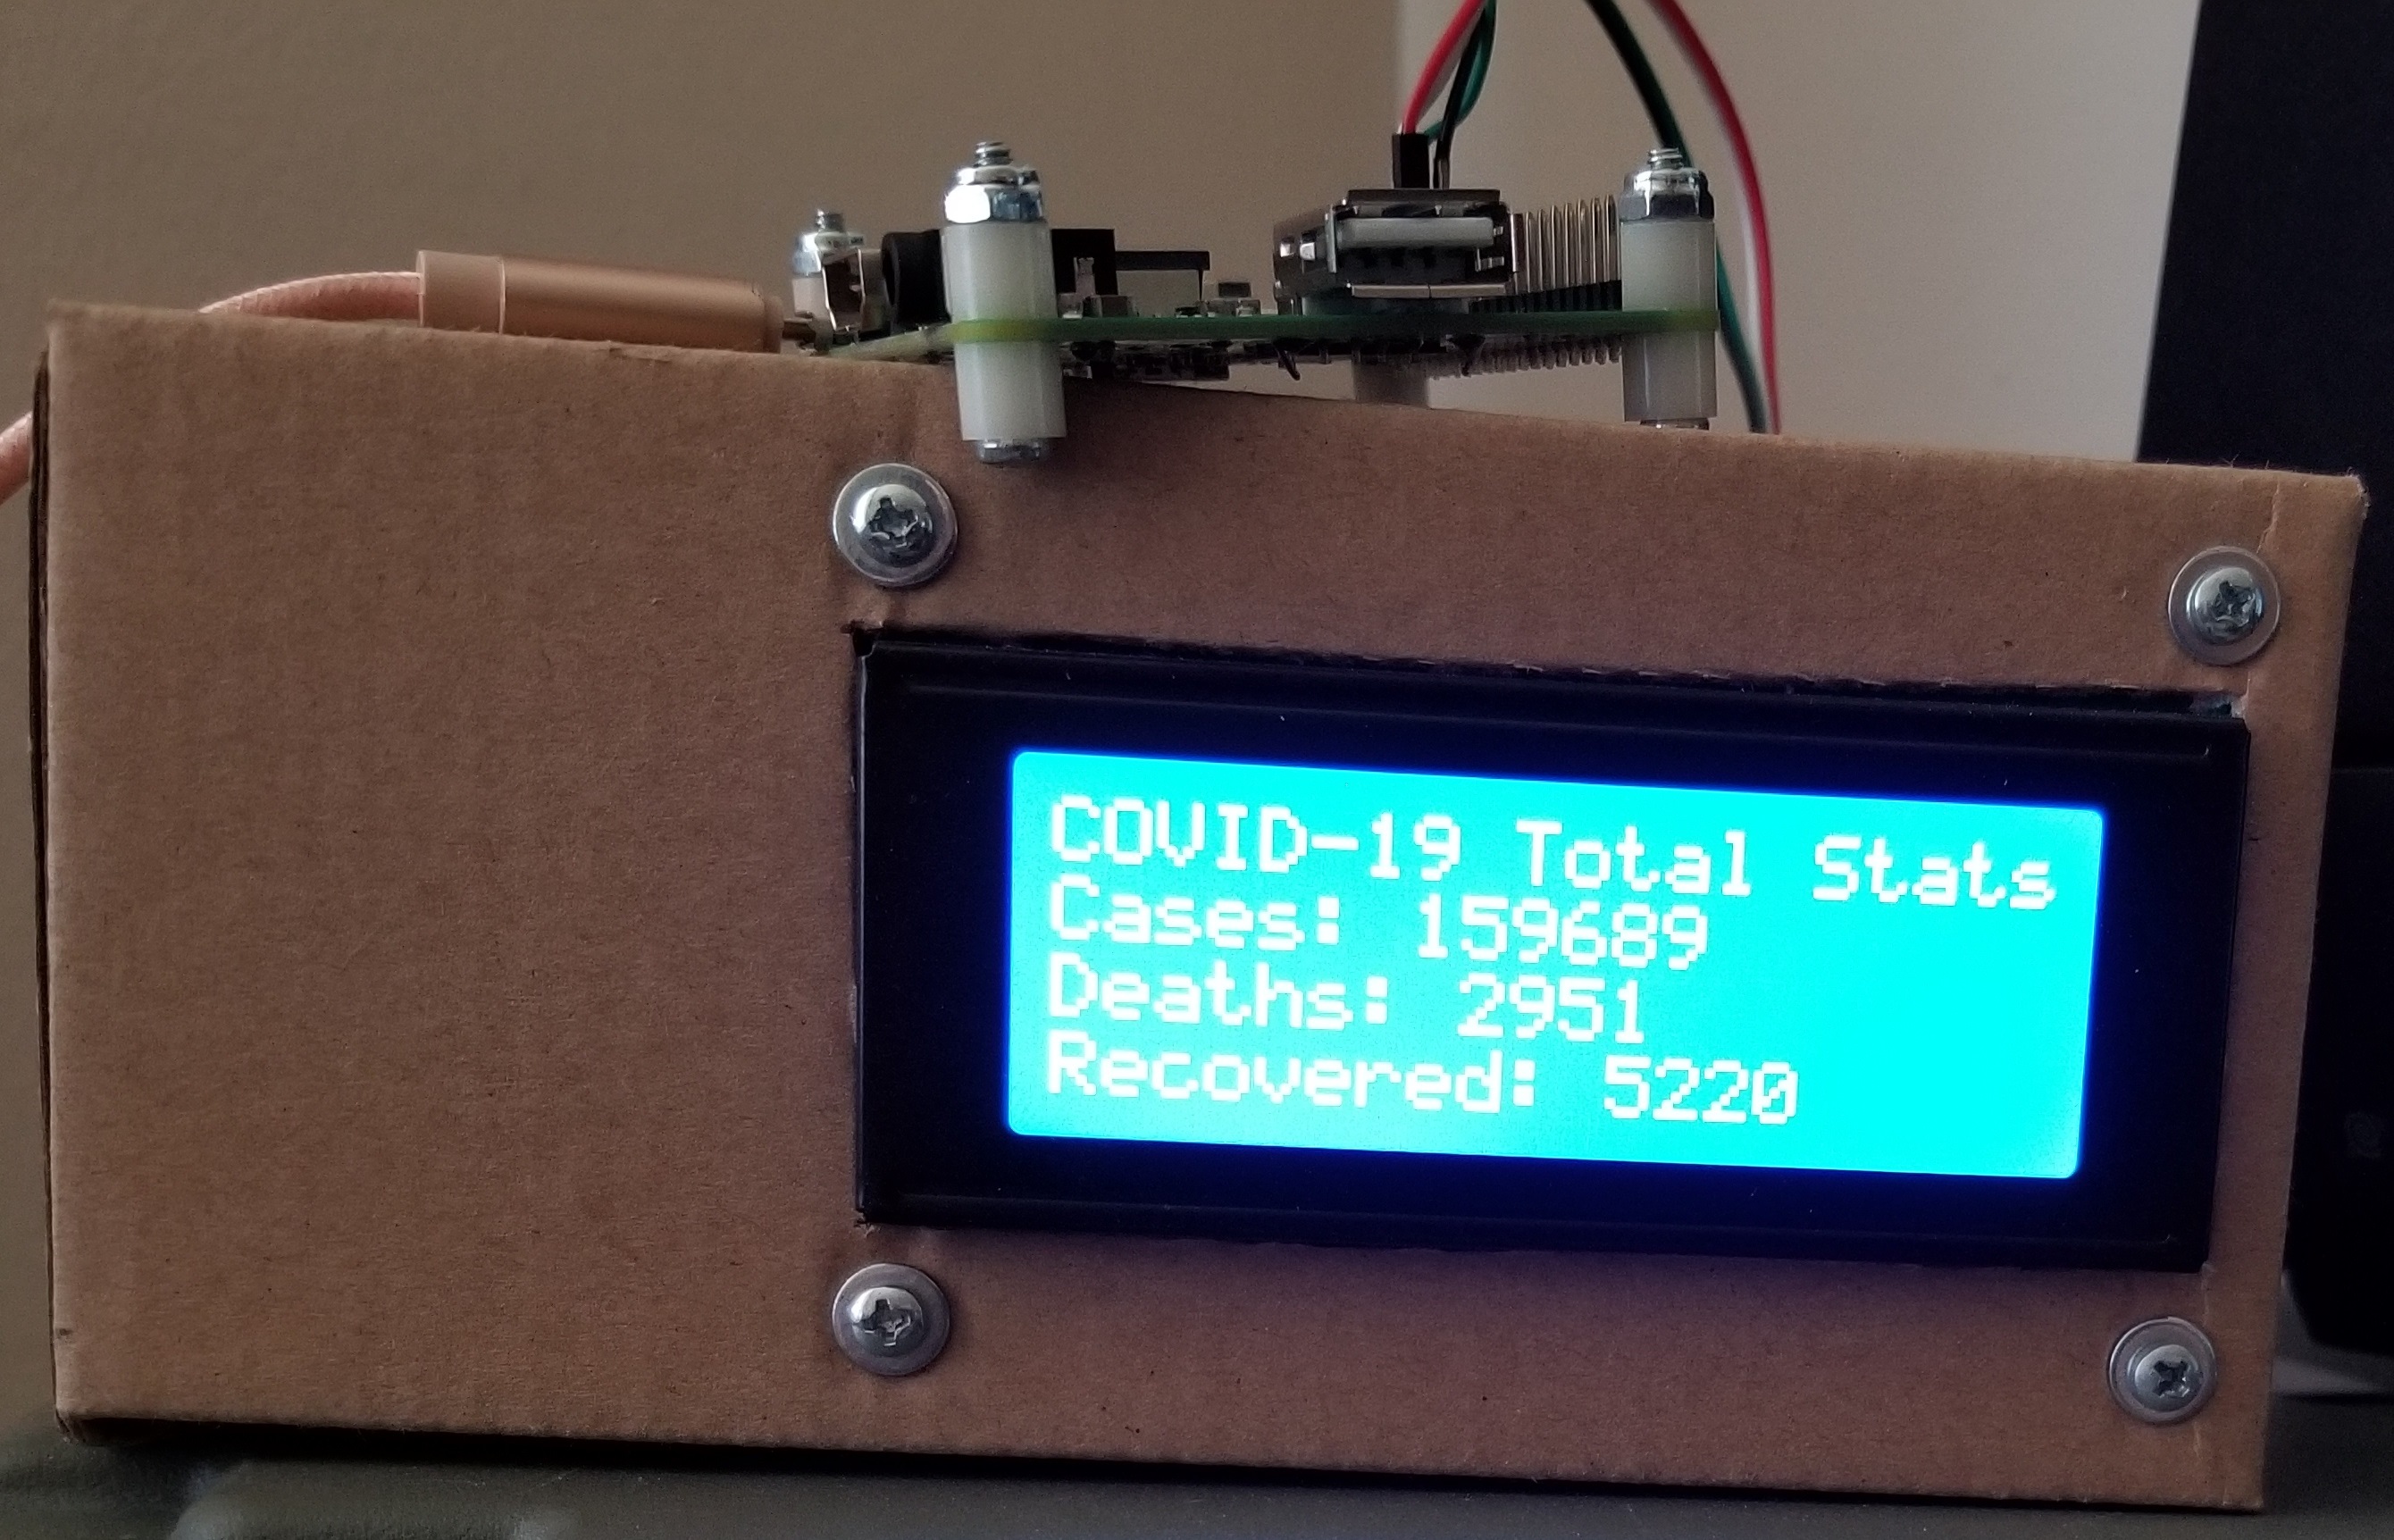
        display.lcd_display_string("Recovered: " + str(recovered), 4)
        time.sleep(30)
        display.lcd_display_string("                    ", 1)
        display.lcd_display_string("                    ", 2)
        display.lcd_display_string("                    ", 3)
        display.lcd_display_string("                    ", 4)
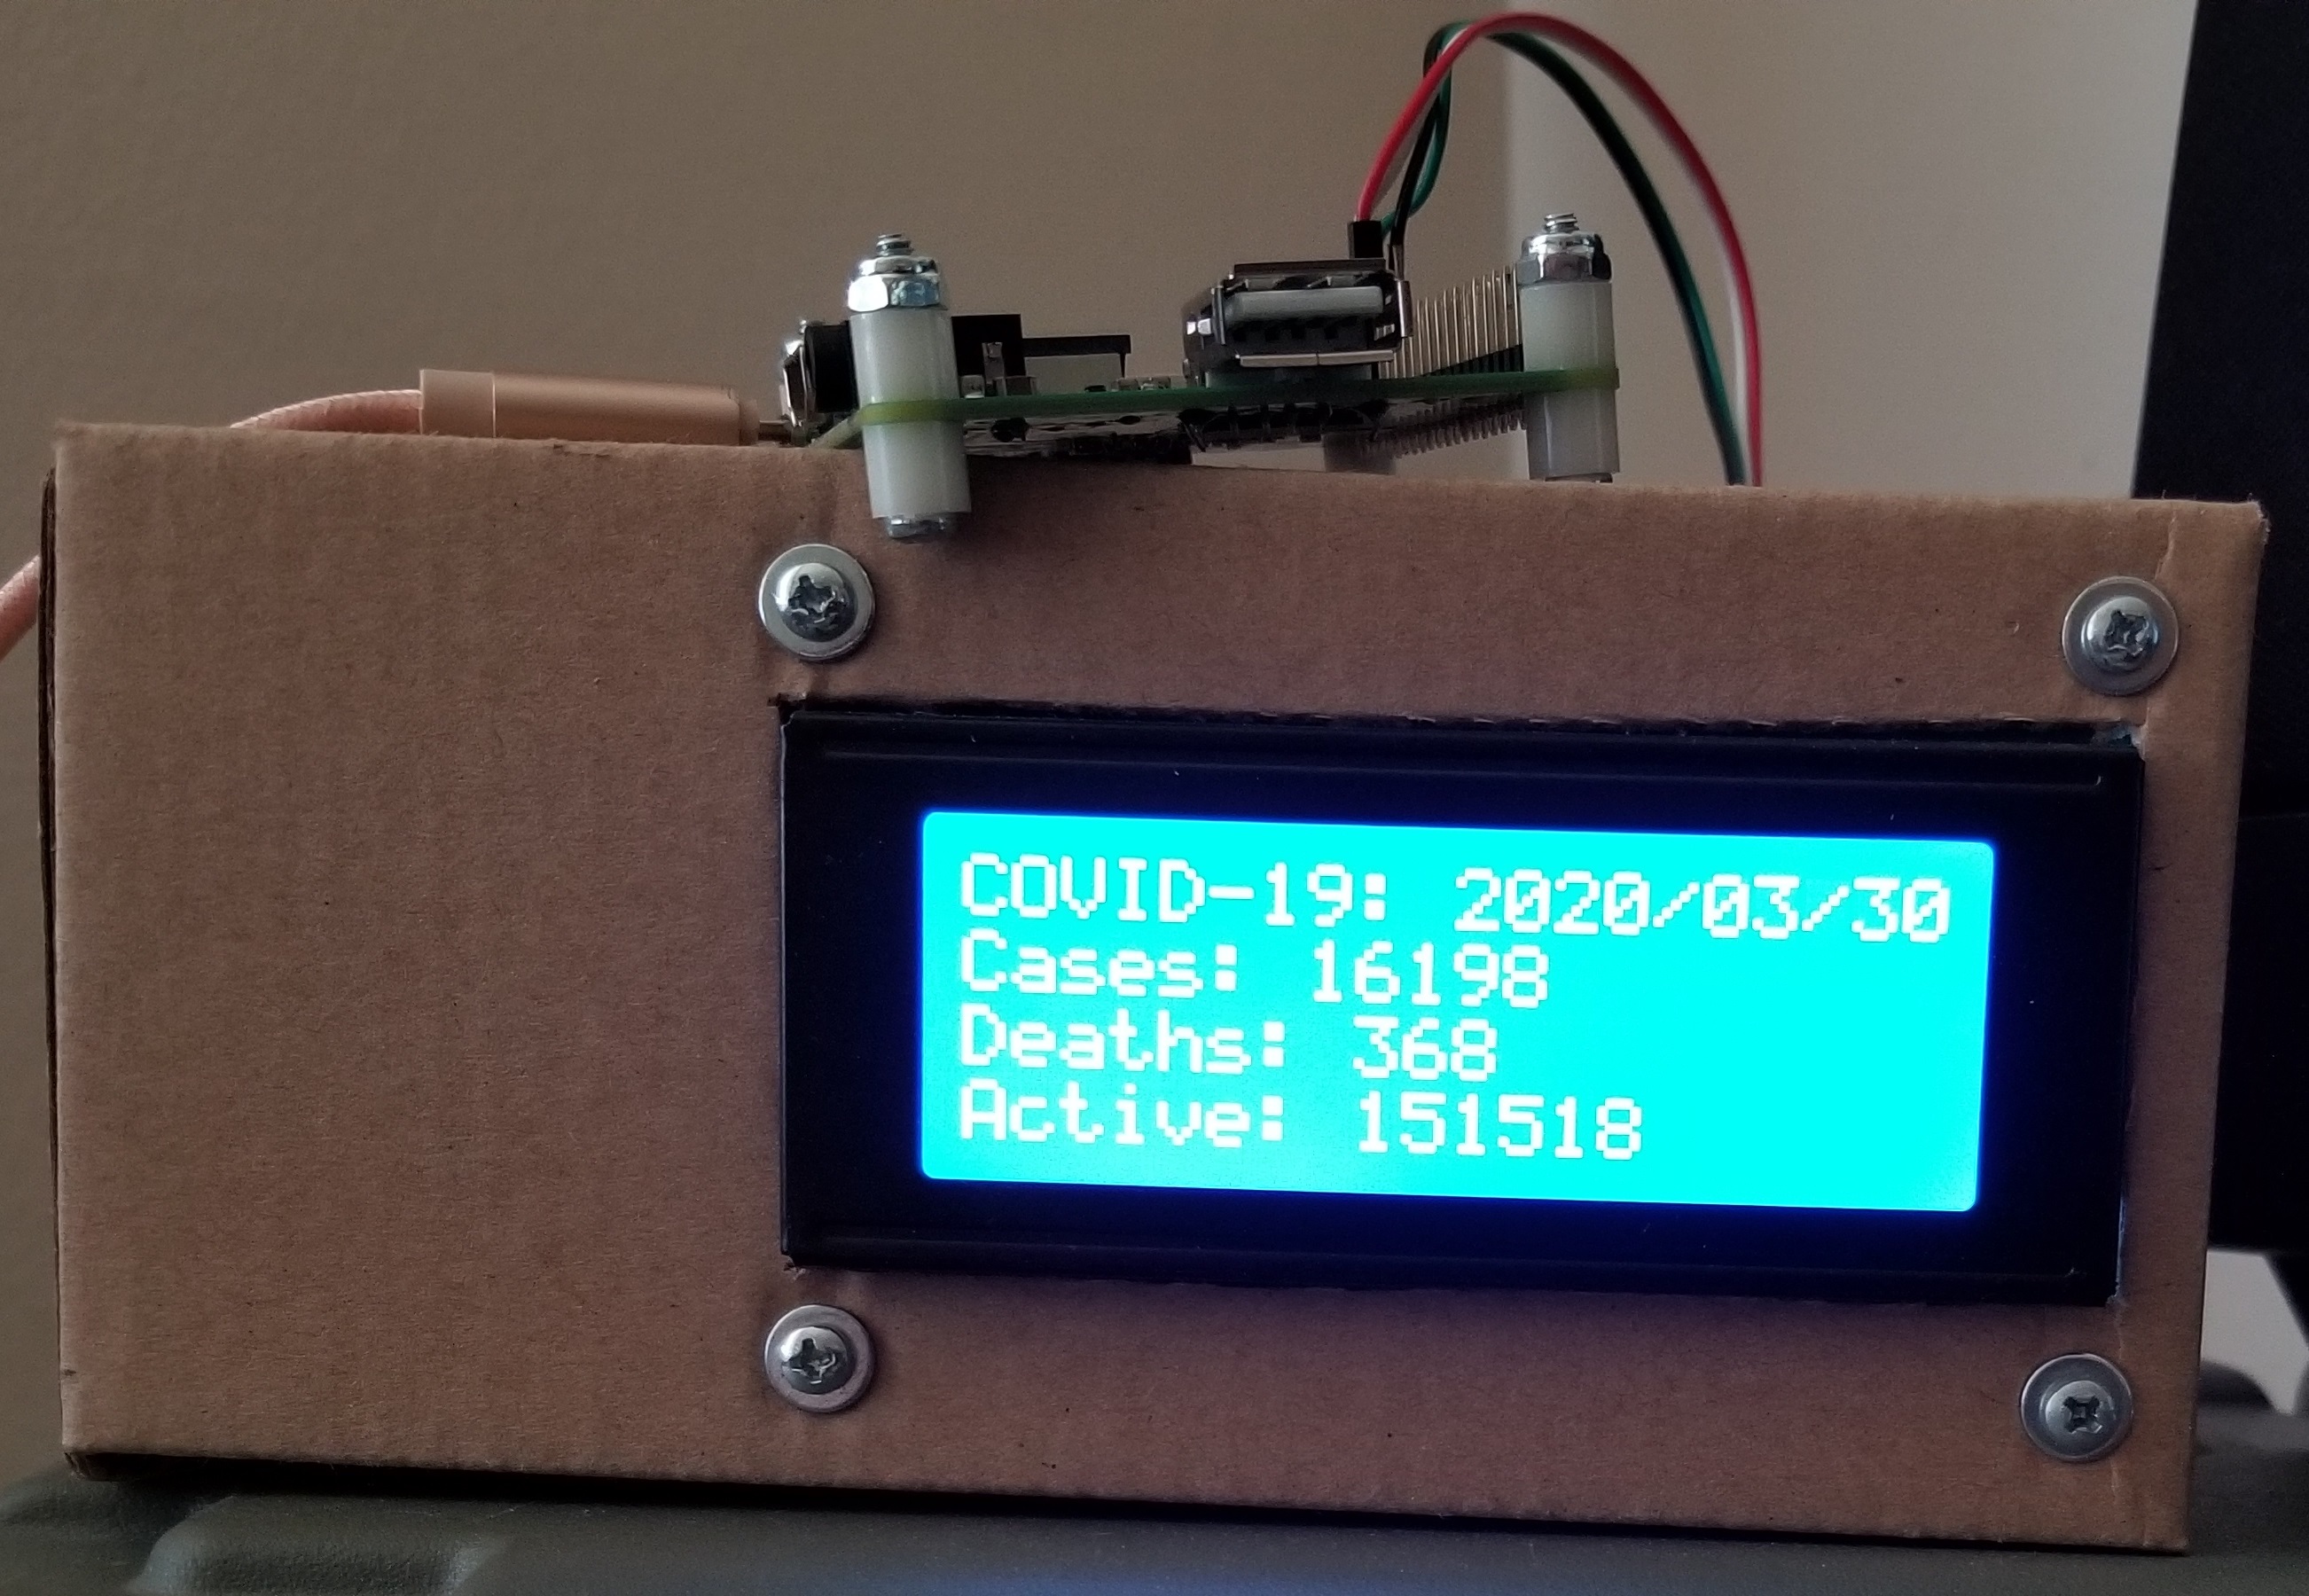
        display.lcd_display_string("COVID-19: " + "%s" %time.strftime("%Y/%m/%d"), 1)
        display.lcd_display_string("Cases: " + str(todaycases), 2)
        display.lcd_display_string("Deaths: " + str(todaydeaths), 3)
        display.lcd_display_string("Active: " + str(active), 4)
        time.sleep(20)
        display.lcd_display_string("                    ", 1)
        display.lcd_display_string("                    ", 2)
        display.lcd_display_string("                    ", 3)
        display.lcd_display_string("                    ", 4)
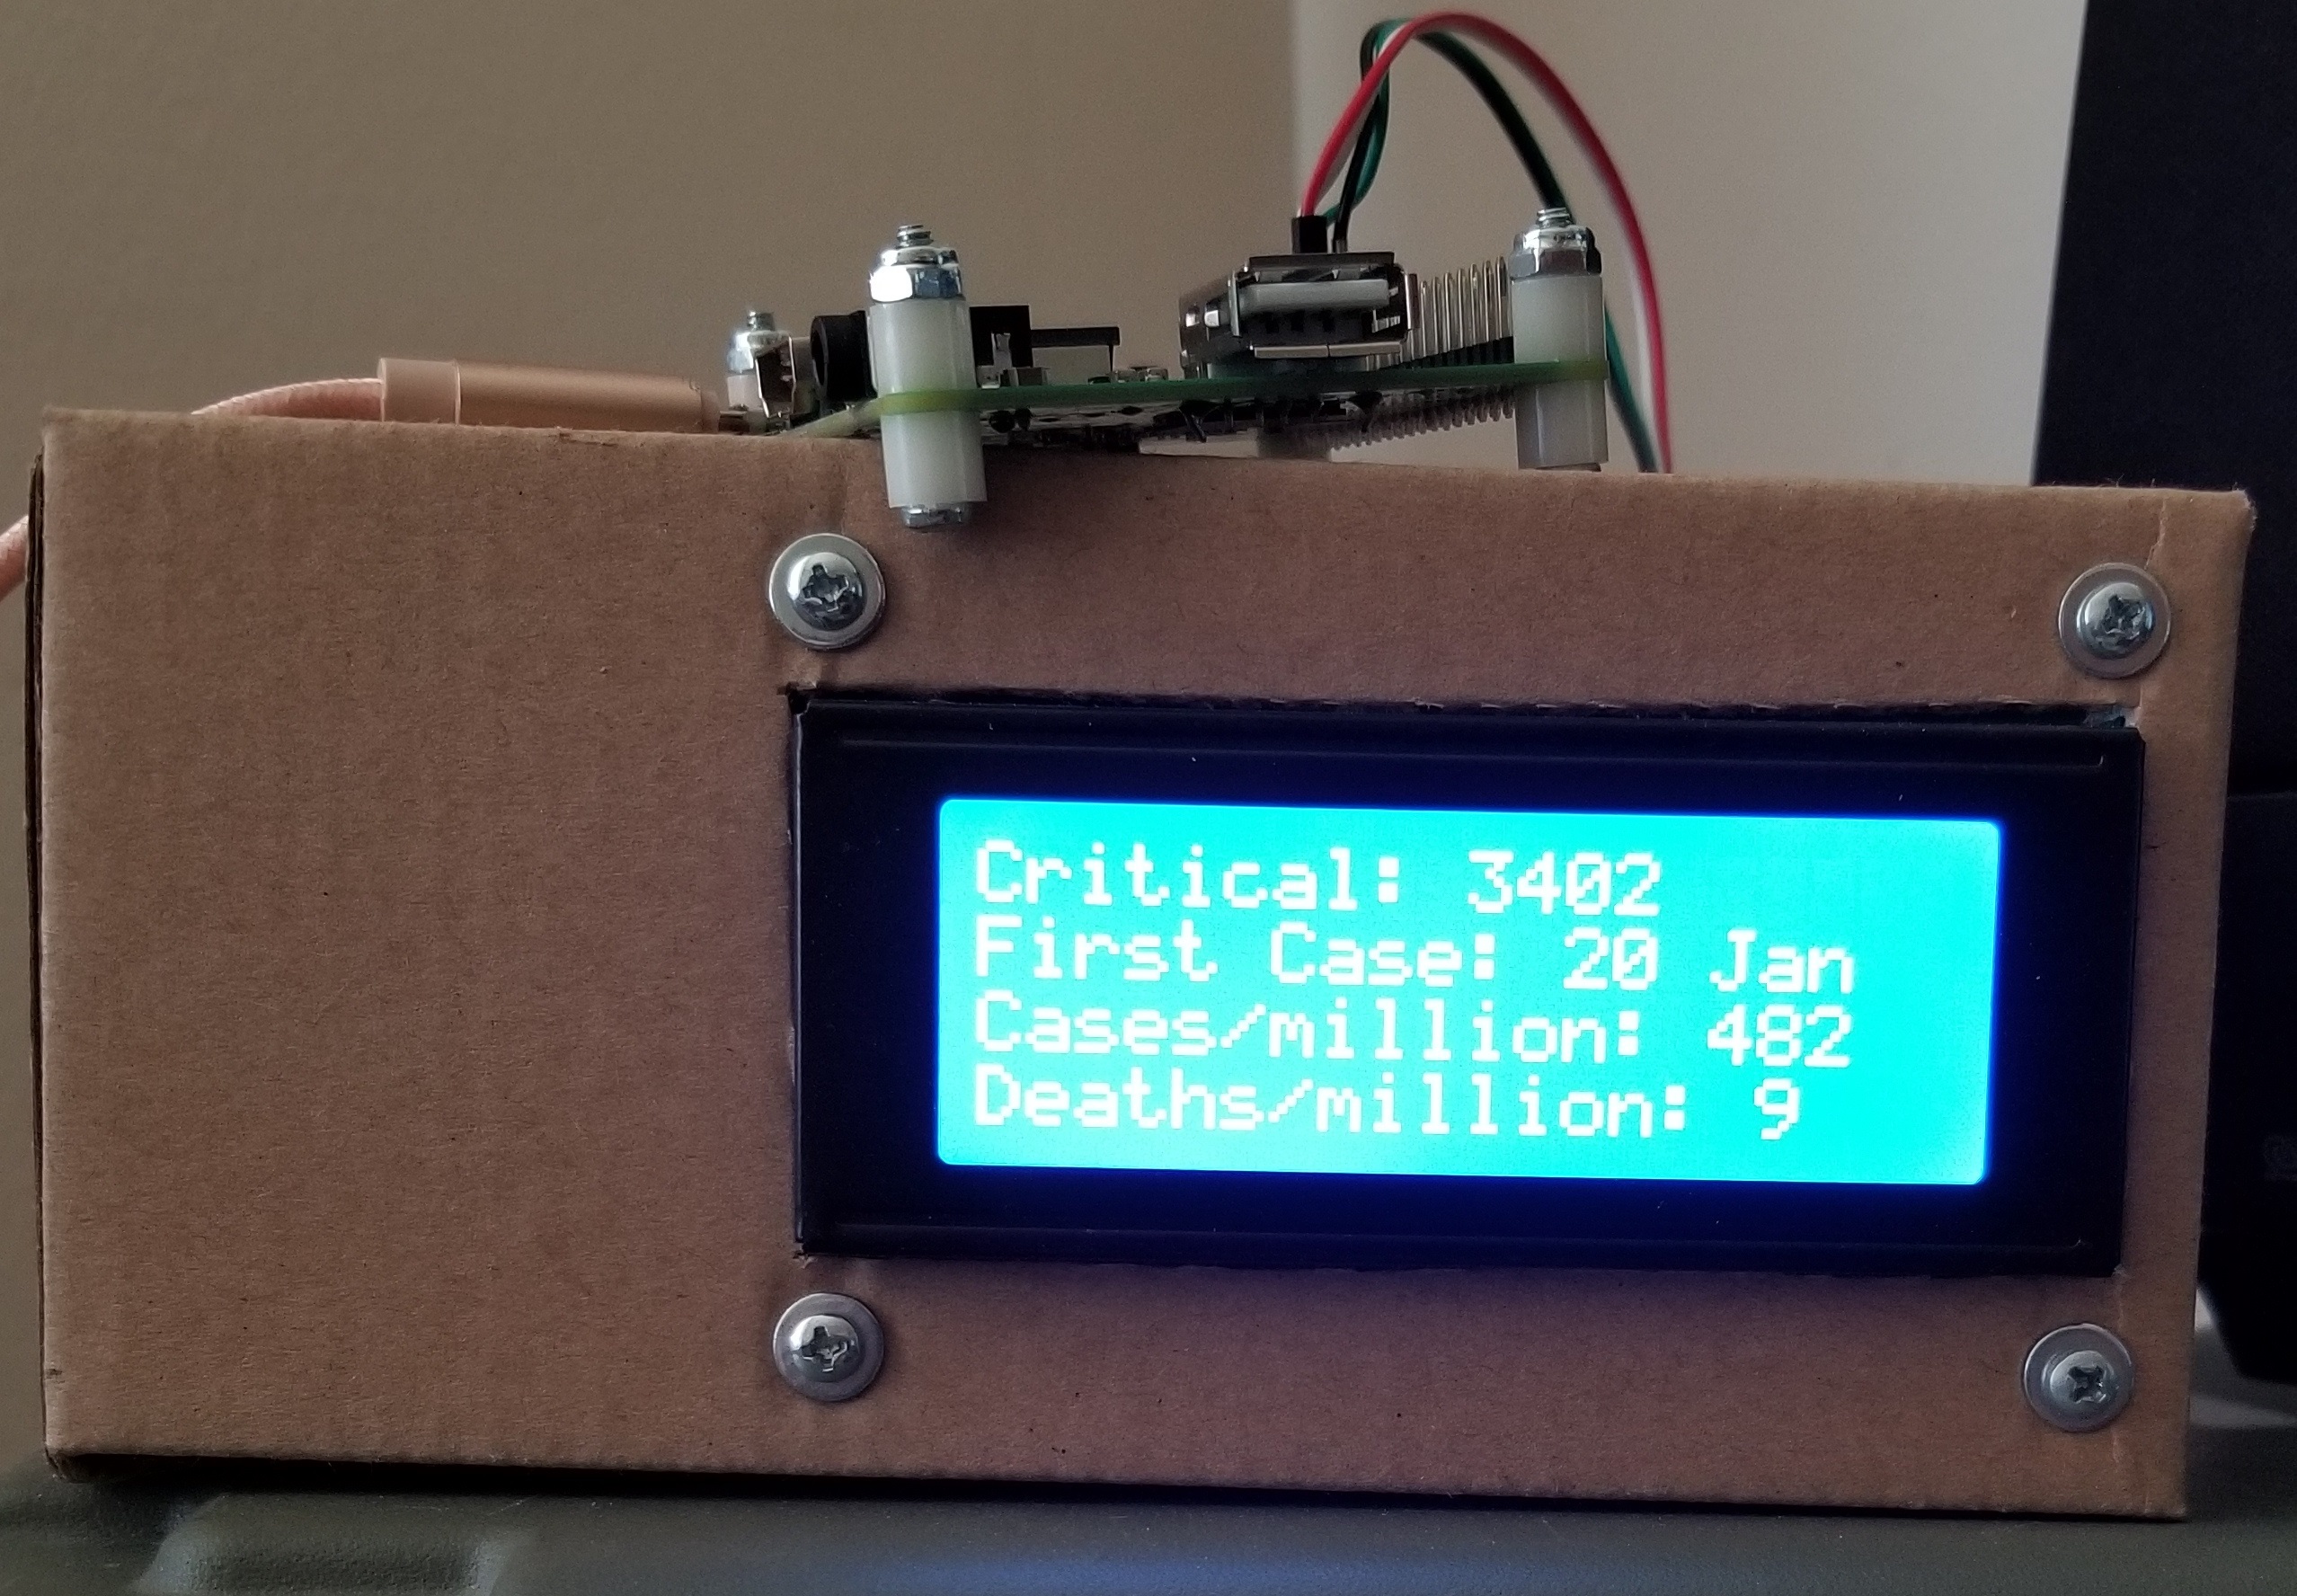
        display.lcd_display_string("Critical: " + str(critical), 1)
        display.lcd_display_string("Cases/million: " + str(casesperonemillion), 3)
        display.lcd_display_string("Deaths/million: " + str(deathsperonemillion), 4)
        time.sleep(10)
        display.lcd_display_string("                    ", 1)
        display.lcd_display_string("                    ", 2)
        display.lcd_display_string("                    ", 3)
        display.lcd_display_string("                    ", 4)
except KeyboardInterrupt:
    print("   Ctrl+C pressed. Updates stoppped.")
    display.lcd_clear()
    display.lcd_display_string("Stopped at " + "%s" %time.strftime("%H:%M:%S"), 1)
    display.lcd_display_string("Cases: " + str(cases), 2)
    display.lcd_display_string("Deaths: " + str(deaths), 3)
    display.lcd_display_string("Recovered: " + str(recovered), 4)</p>
I know this script is pretty messy, but it's effective. It will show current statistics for Covid-19 cases in the United States. The main database is updated every 5 minutes. My script takes 1 minute to completely cycle through 3 pages and will pull updated numbers every time the cycle begins again.
Run Python


Let's begin:
python covid19.py
The first page shows total numbers of cases and deaths since the coronavirus first hit the country. The second page shows those numbers for cases and deaths that occurred only on the current day. The third shows people in critical condition, then cases and deaths per one million people. The second line on the third page used to show the date of the first case in the country, but I had to remove it because the script would sometimes error out and crash citing that line with an error.
There are ways to make this script run automatically, but I will not go into details about that here. I just run mine on command after I SSH connect to it through PuTTY. While it's running, you will not be able to execute any other commands until you press Ctrl+C.
What If I Don't Live in the USA?
This script can be modified to show stats for other countries. As you may see, the URL in my script pulls from an API here: (do not use Internet Explorer to view these pages. It will try to dowload a .json file. I used Chrome)
http://coronavirus-19-api.herokuapp.com/countries/usa
Now visit that same address, but one folder higher
http://coronavirus-19-api.herokuapp.com/countries
This lists the stats for every country. Obviously it will be a nightmare trying to pull API data from this page. So it's best to open the page for your specific country. Our friends in Canada would need to edit the script to this URL:
http://coronavirus-19-api.herokuapp.com/countries/canada
Very important note here. The URL to the API needs to be specific...meaning no spaces in a URL. In web browsing, spaces in a web address are substituted by "%20" and with that said, our friends in countries with 2 part names, like New Zealand for example, would need to replace the URL in this script with:
http://coronavirus-19-api.herokuapp.com/countries/new%20zealand
Final Thoughts
I've done many things with Raspberry Pi and Arduino over the years, but most of what I've built are just replications of other's ideas. This one is almost the same except I compiled pieces from many sources into this setup. Although this setup will not keep you safe and healthy during this tough time, it will surely keep you occupied as you set it up and it will keep you informed afterwards.
If you don't already have these parts, do not stress yourself buying them unless you are serious about building it. As I said before, shipping times are taking longer right now because those efforts are being put towards essential items. I only had these parts already for learning and experimenting. The box mounted display was originally set up to view real time statistics of another Raspberry Pi on my network that is running Pi-Hole. After this Covid-19 event is over, I might turn it into a weather display.
For anyone reading, I want to give a shout out to this instructable:
https://www.instructables.com/id/DIY-Hand-Sanitize...
I haven't tried it yet, but I have those exact ingredients, and I might try it some time.