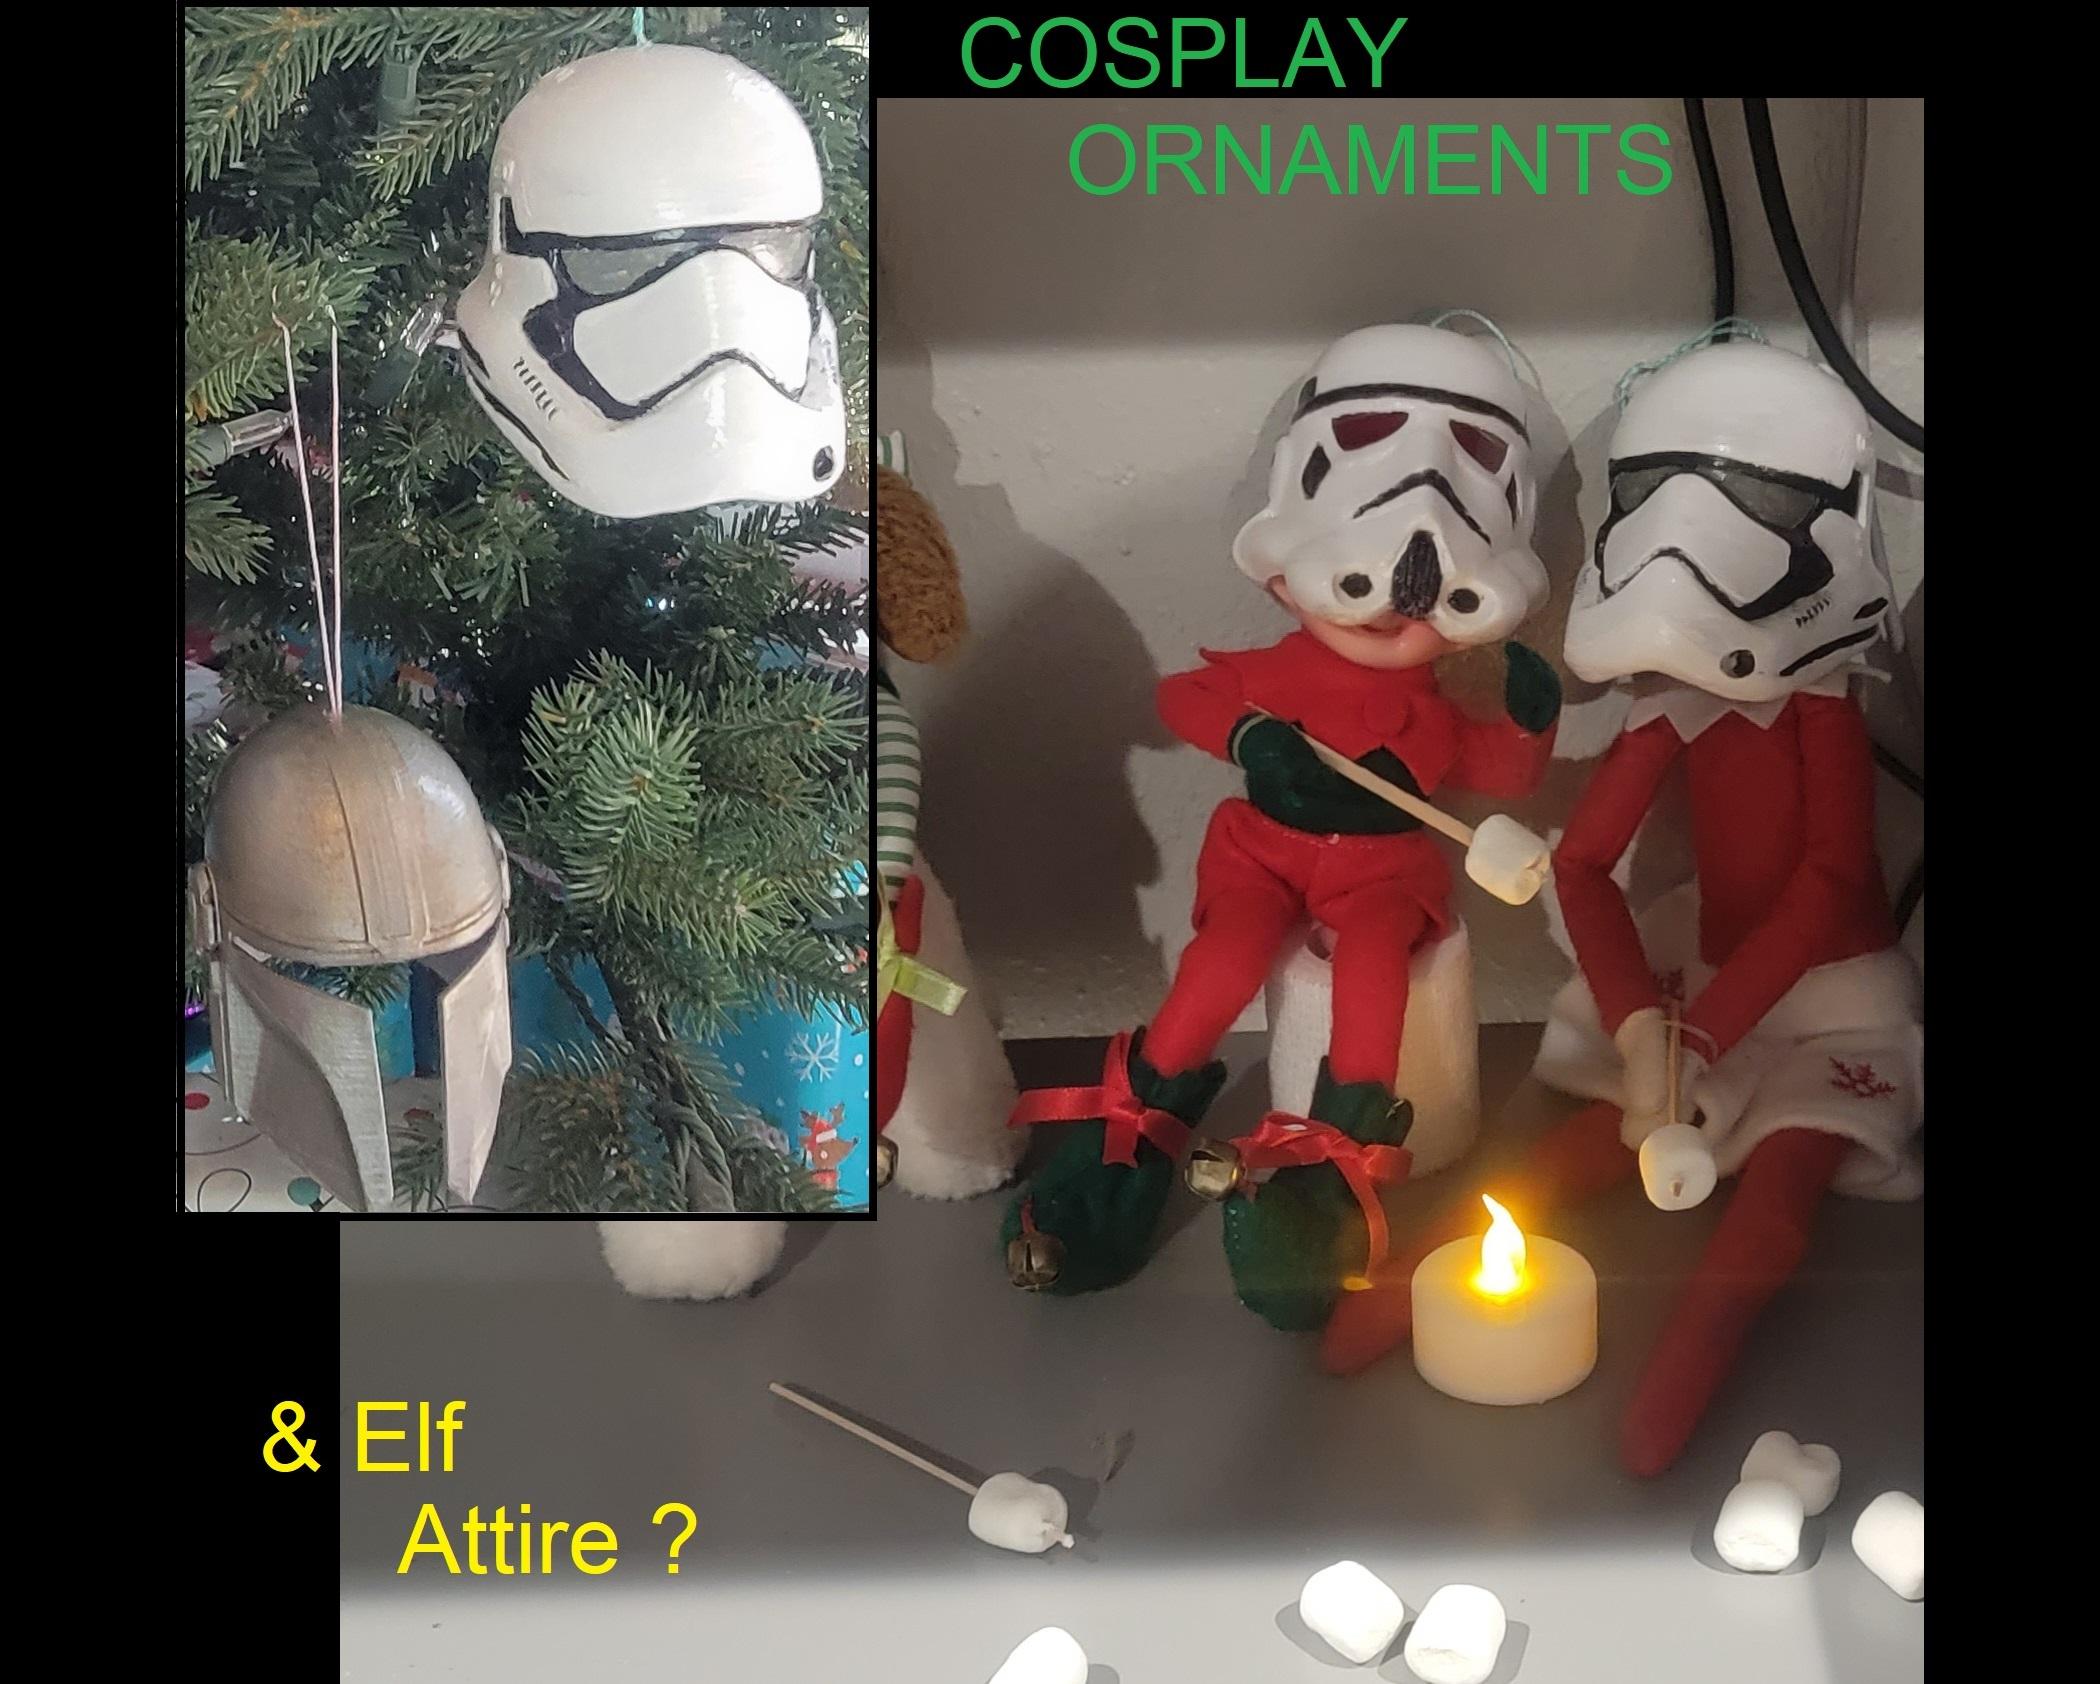
Cosplay Ornaments / Elf Attire?
My plan for this project is to find free helmet designs for 3D Printing and scale them down to make ornaments.
This idea of Cosplay Ornaments started around Halloween. I have a 3D printer and noticed on Social Media a wide variety of 3D Printed helmets and costumes. It was much too close to Halloween to consider attempting to take on such a large project. But, it did make me realize that I should really start thinking about the upcoming Holidays to see if there was anything I wanted to print. Then, it occurred to me. Why not just take the Cosplay Helmets that people were using for their costumes and scale them down to ornament size. So, that is what I have done here.
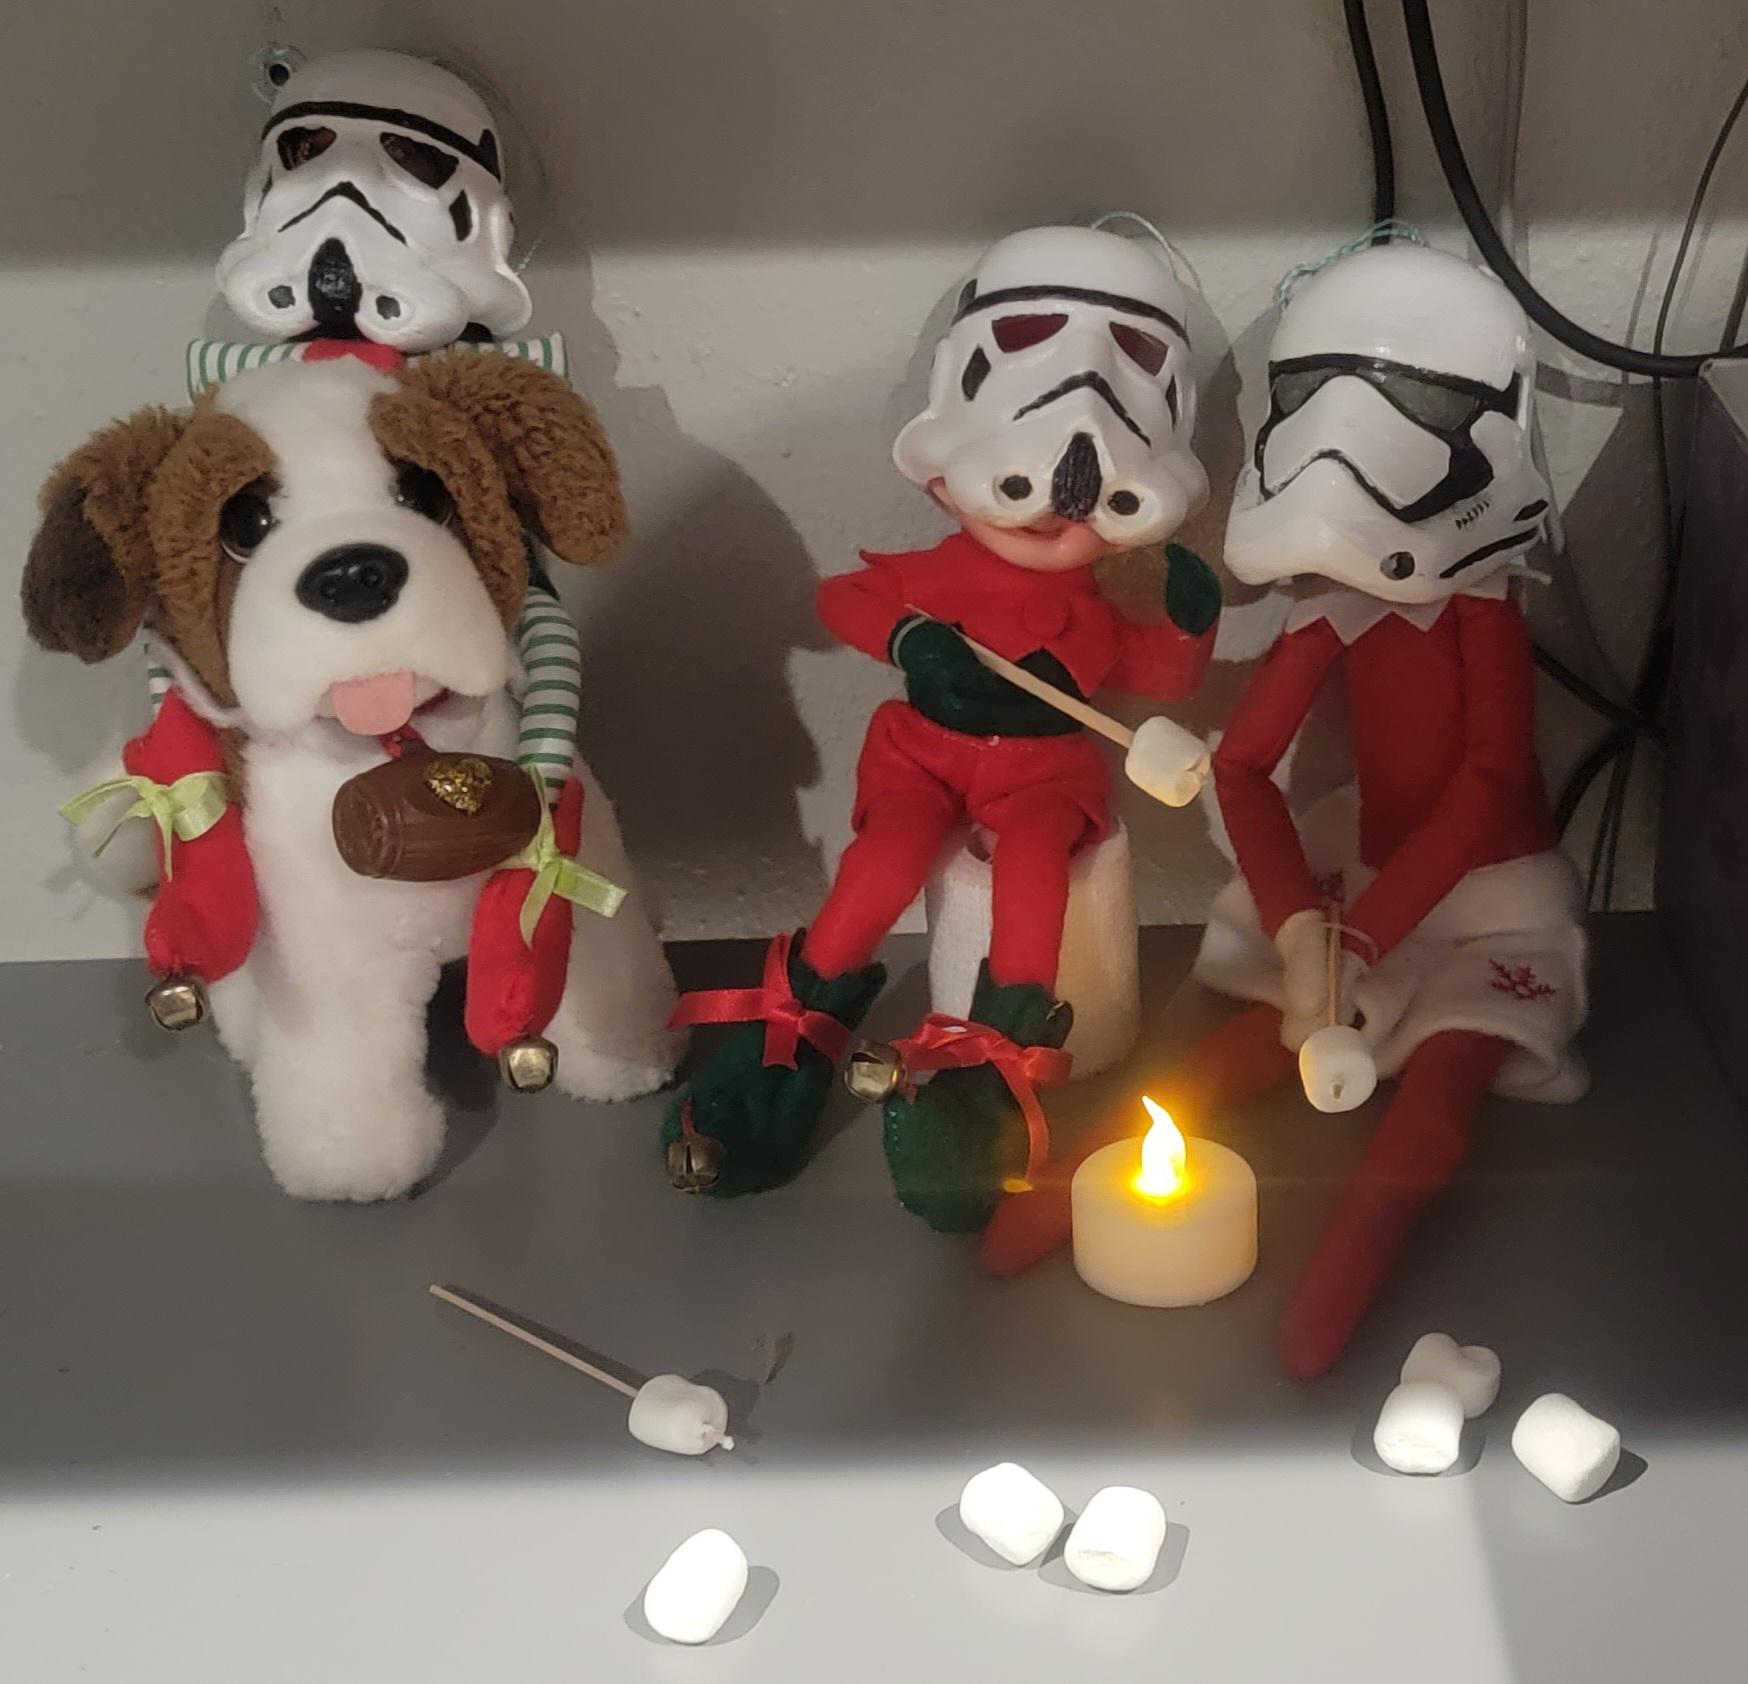
UPDATE: It turns out that our playful Elf “Betty” has decided she likes this, too. She has started playing dress-up each night. She has always been known to play with the kids’ toys and has often been caught in the middle of a silly task. This year, however, she seems to have a fondness for our ability to 3D print whatever comes to mind. Since this has occurred, I have changed the title and pictures of this instructable so that others might also enjoy doing this.
Supplies
3D Printer
Acrylic Paints
The Models
I sat down and started doing a search for "free cosplays .stl" files that were available.
We followed each designer’s licensing requirements and did not modify any of the models that we downloaded. All of these models are amazing. Please consider donating or subscribing to each designer.
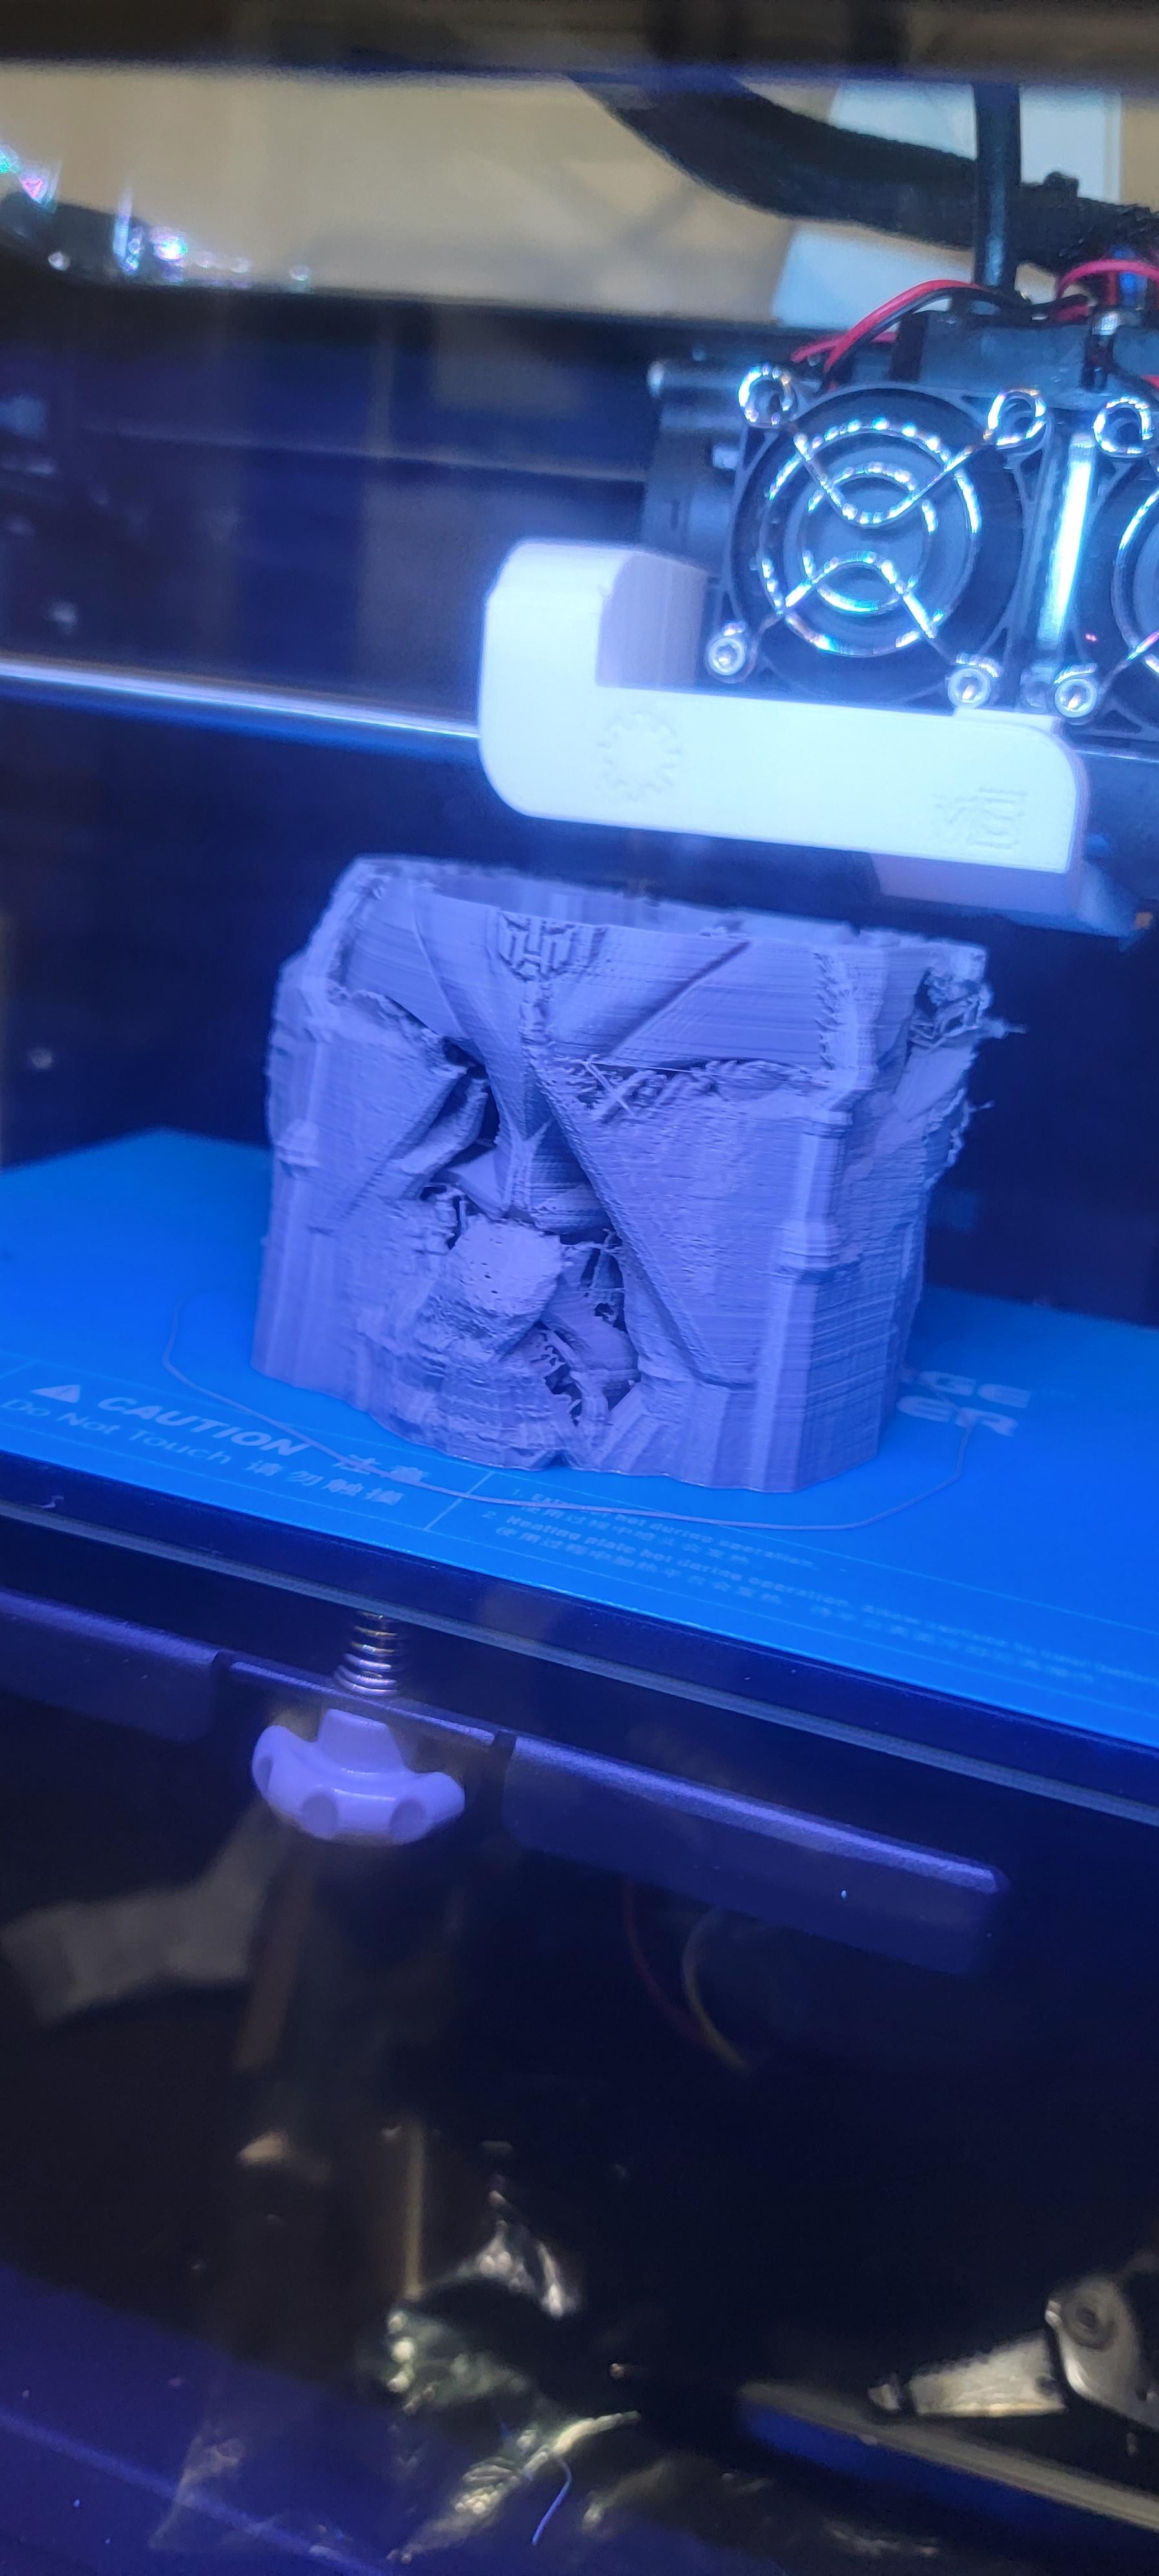
All models were printed in PLA at a 0.12mm layer height with Tree Supports.
Below is a link to each model.
UPDATE: I have updated these model links to include the scaling and notes that should allow the models to be worn by other elves. I have also added the following section on how to size for a head. This should work for sizing these to human head size, as well.
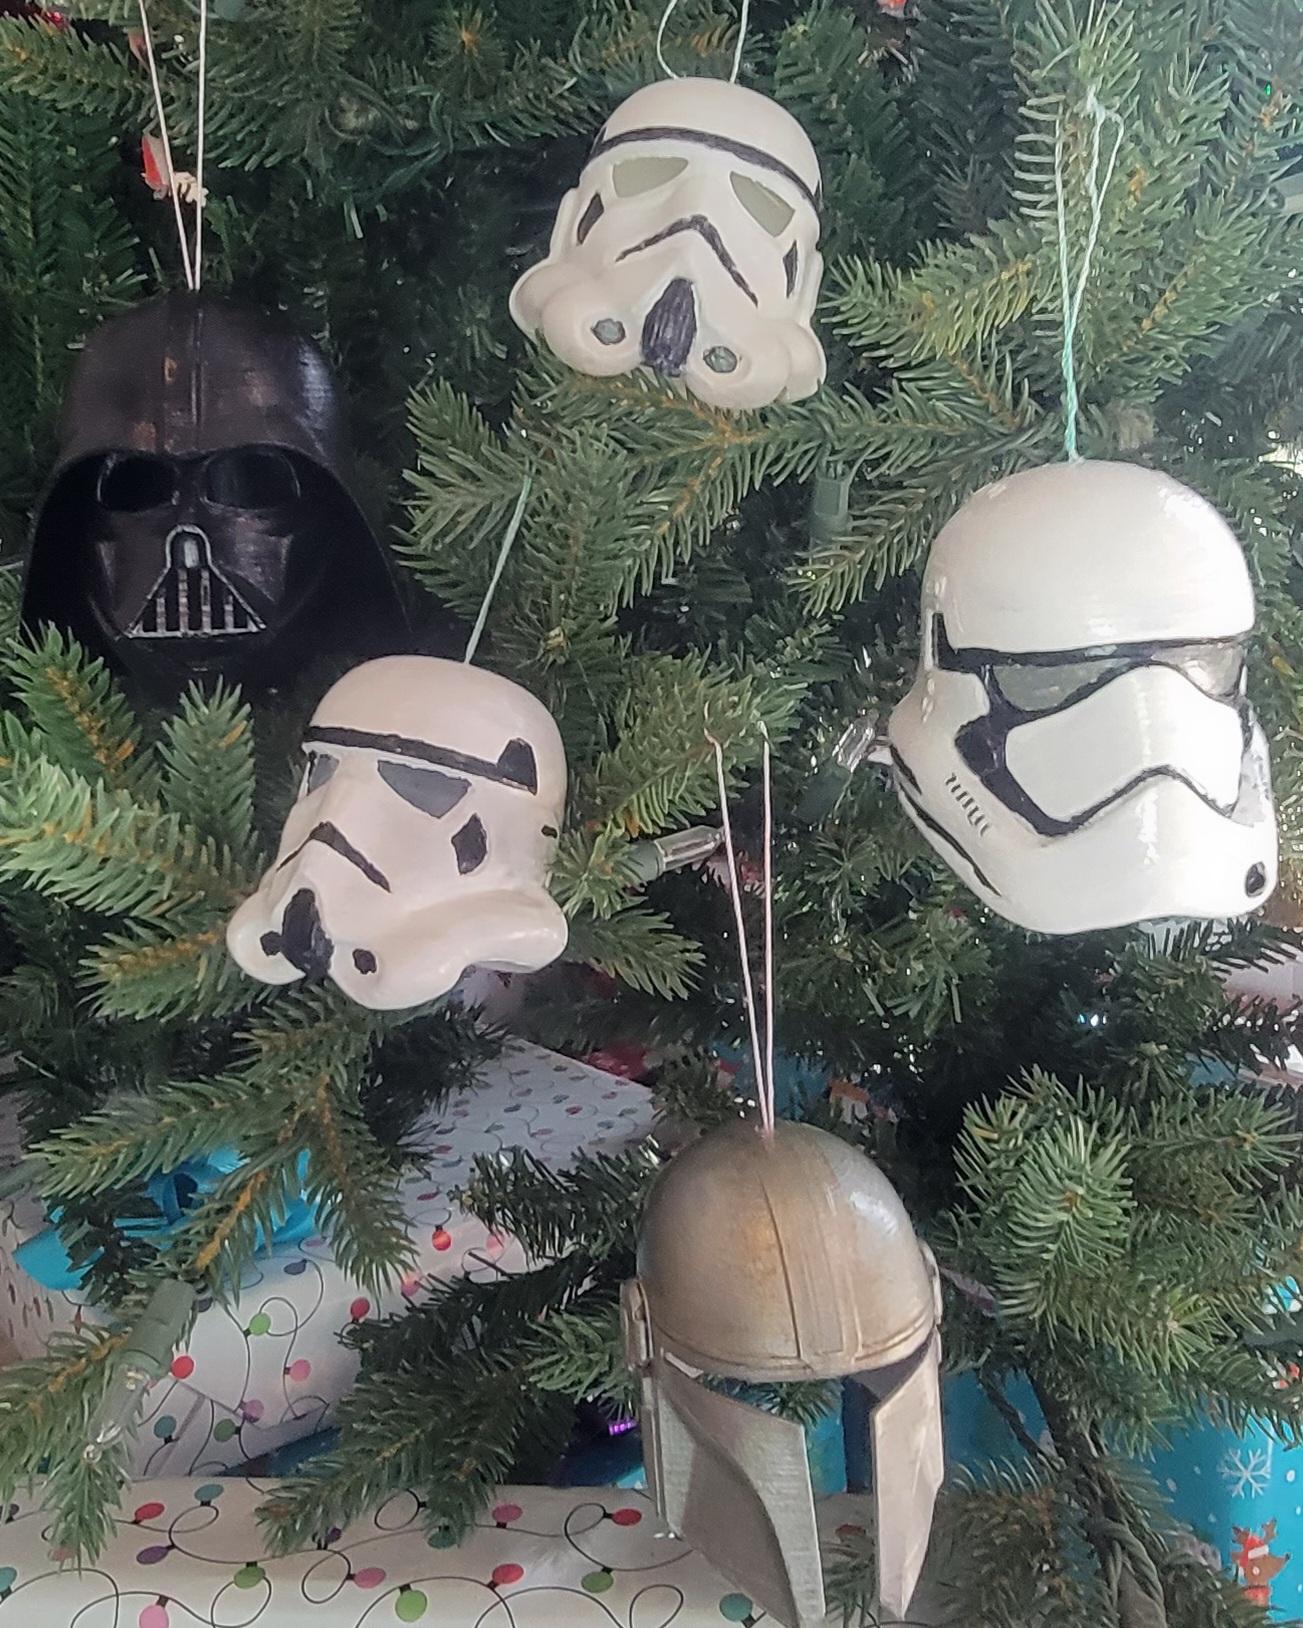
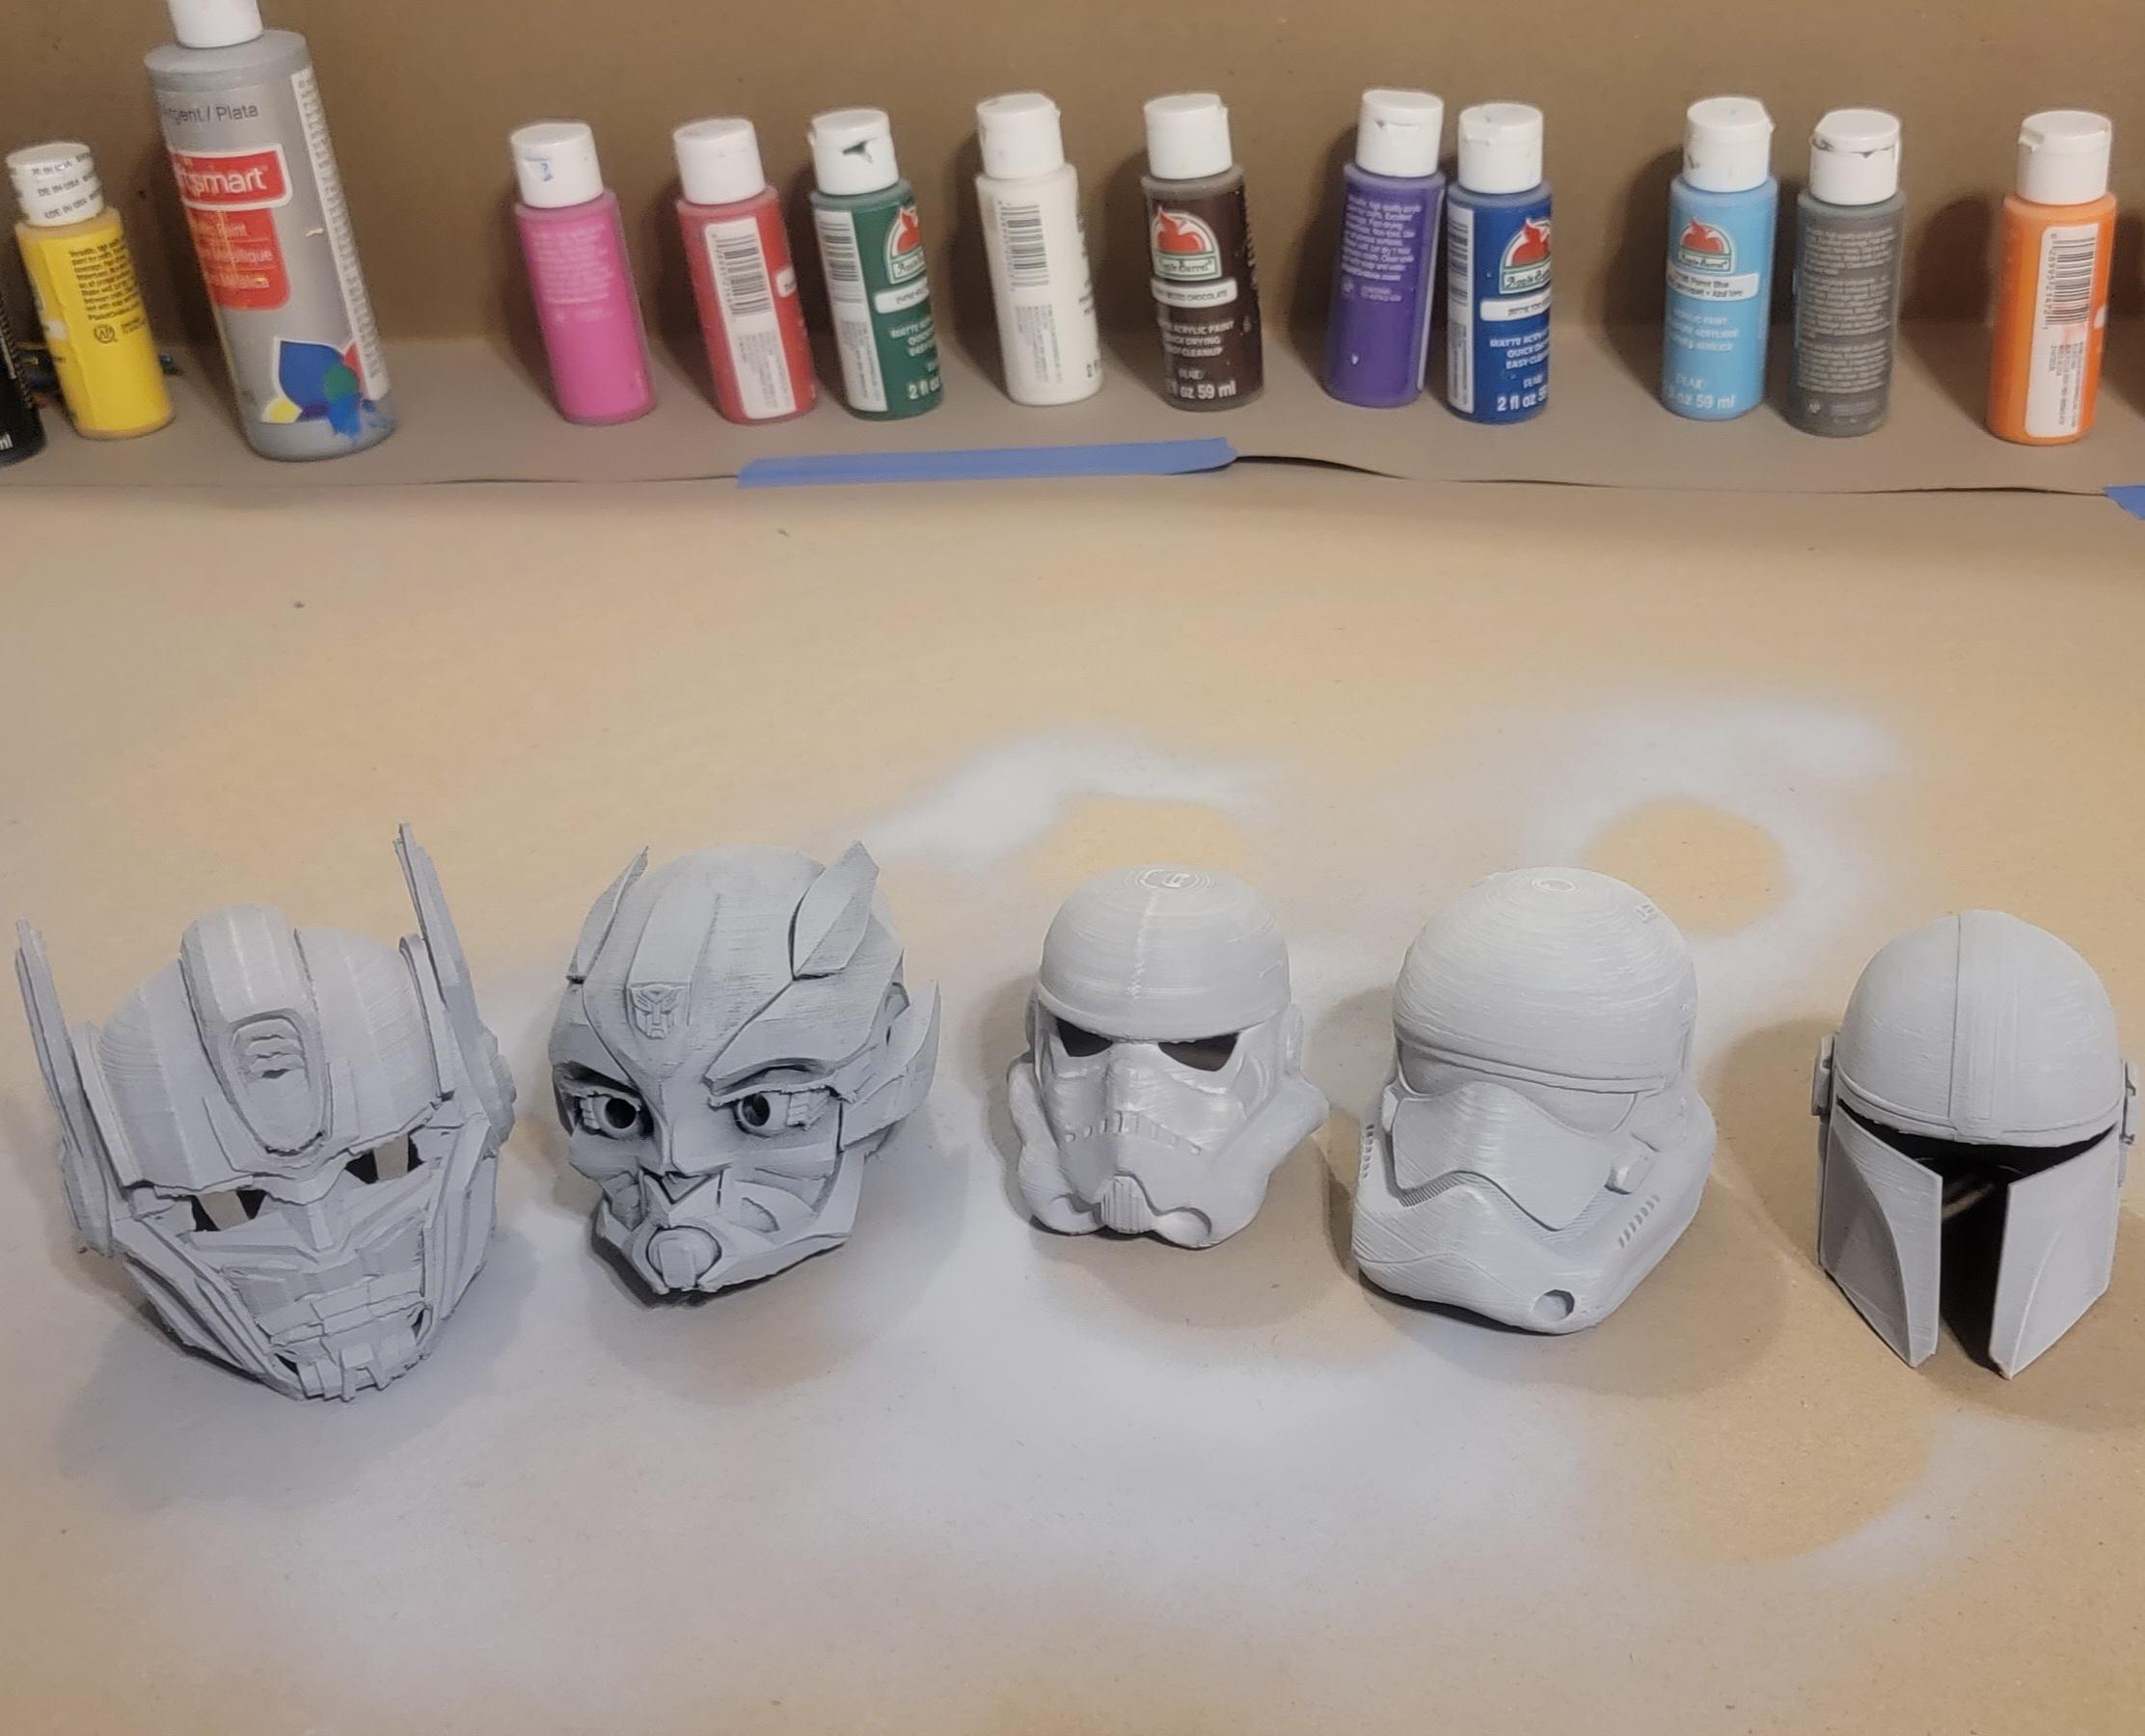
Storm Trooper from A New Hope, by GEOFFRO (Printed scaled down to 21% size)
https://cults3d.com/en/3d-model/fashion/full-scale-stormtrooper-helmet-wearable
Original Measurements:
Opening - W:250mm (19.2%) D:214mm (21.1%) / Interior - W:230mm (20%) D:260mm (16.5%)
Storm Trooper from The Force Awakens, by Rob Pauza (Printed scaled down to 28.5%)
https://www.myminifactory.com/object/3d-print-stormtrooper-helmet-1-1-scale-85783
Original Measurements:
Opening - W:166mm (29%) D:216mm (20%) / Interior - W:172mm (28%) D:218mm (20%)
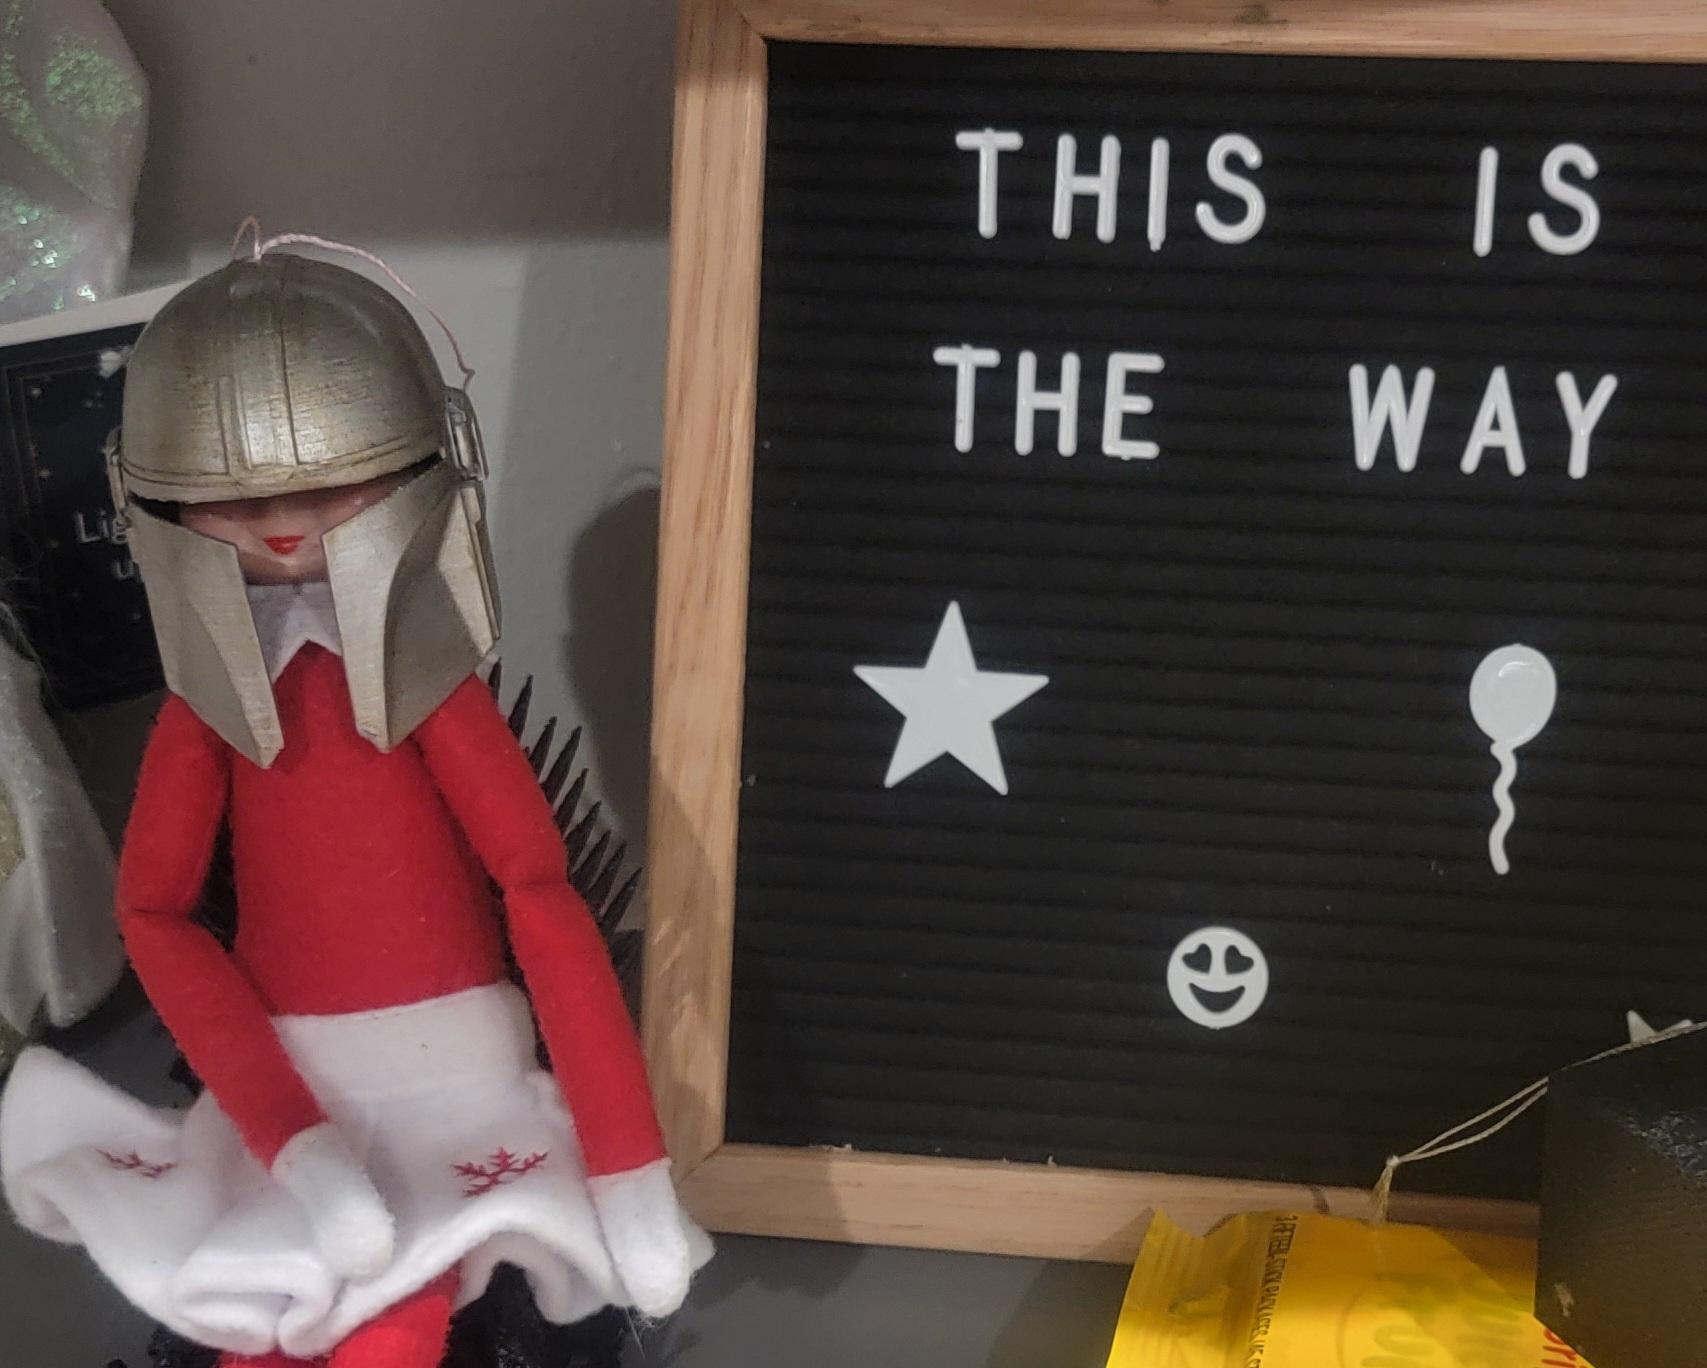
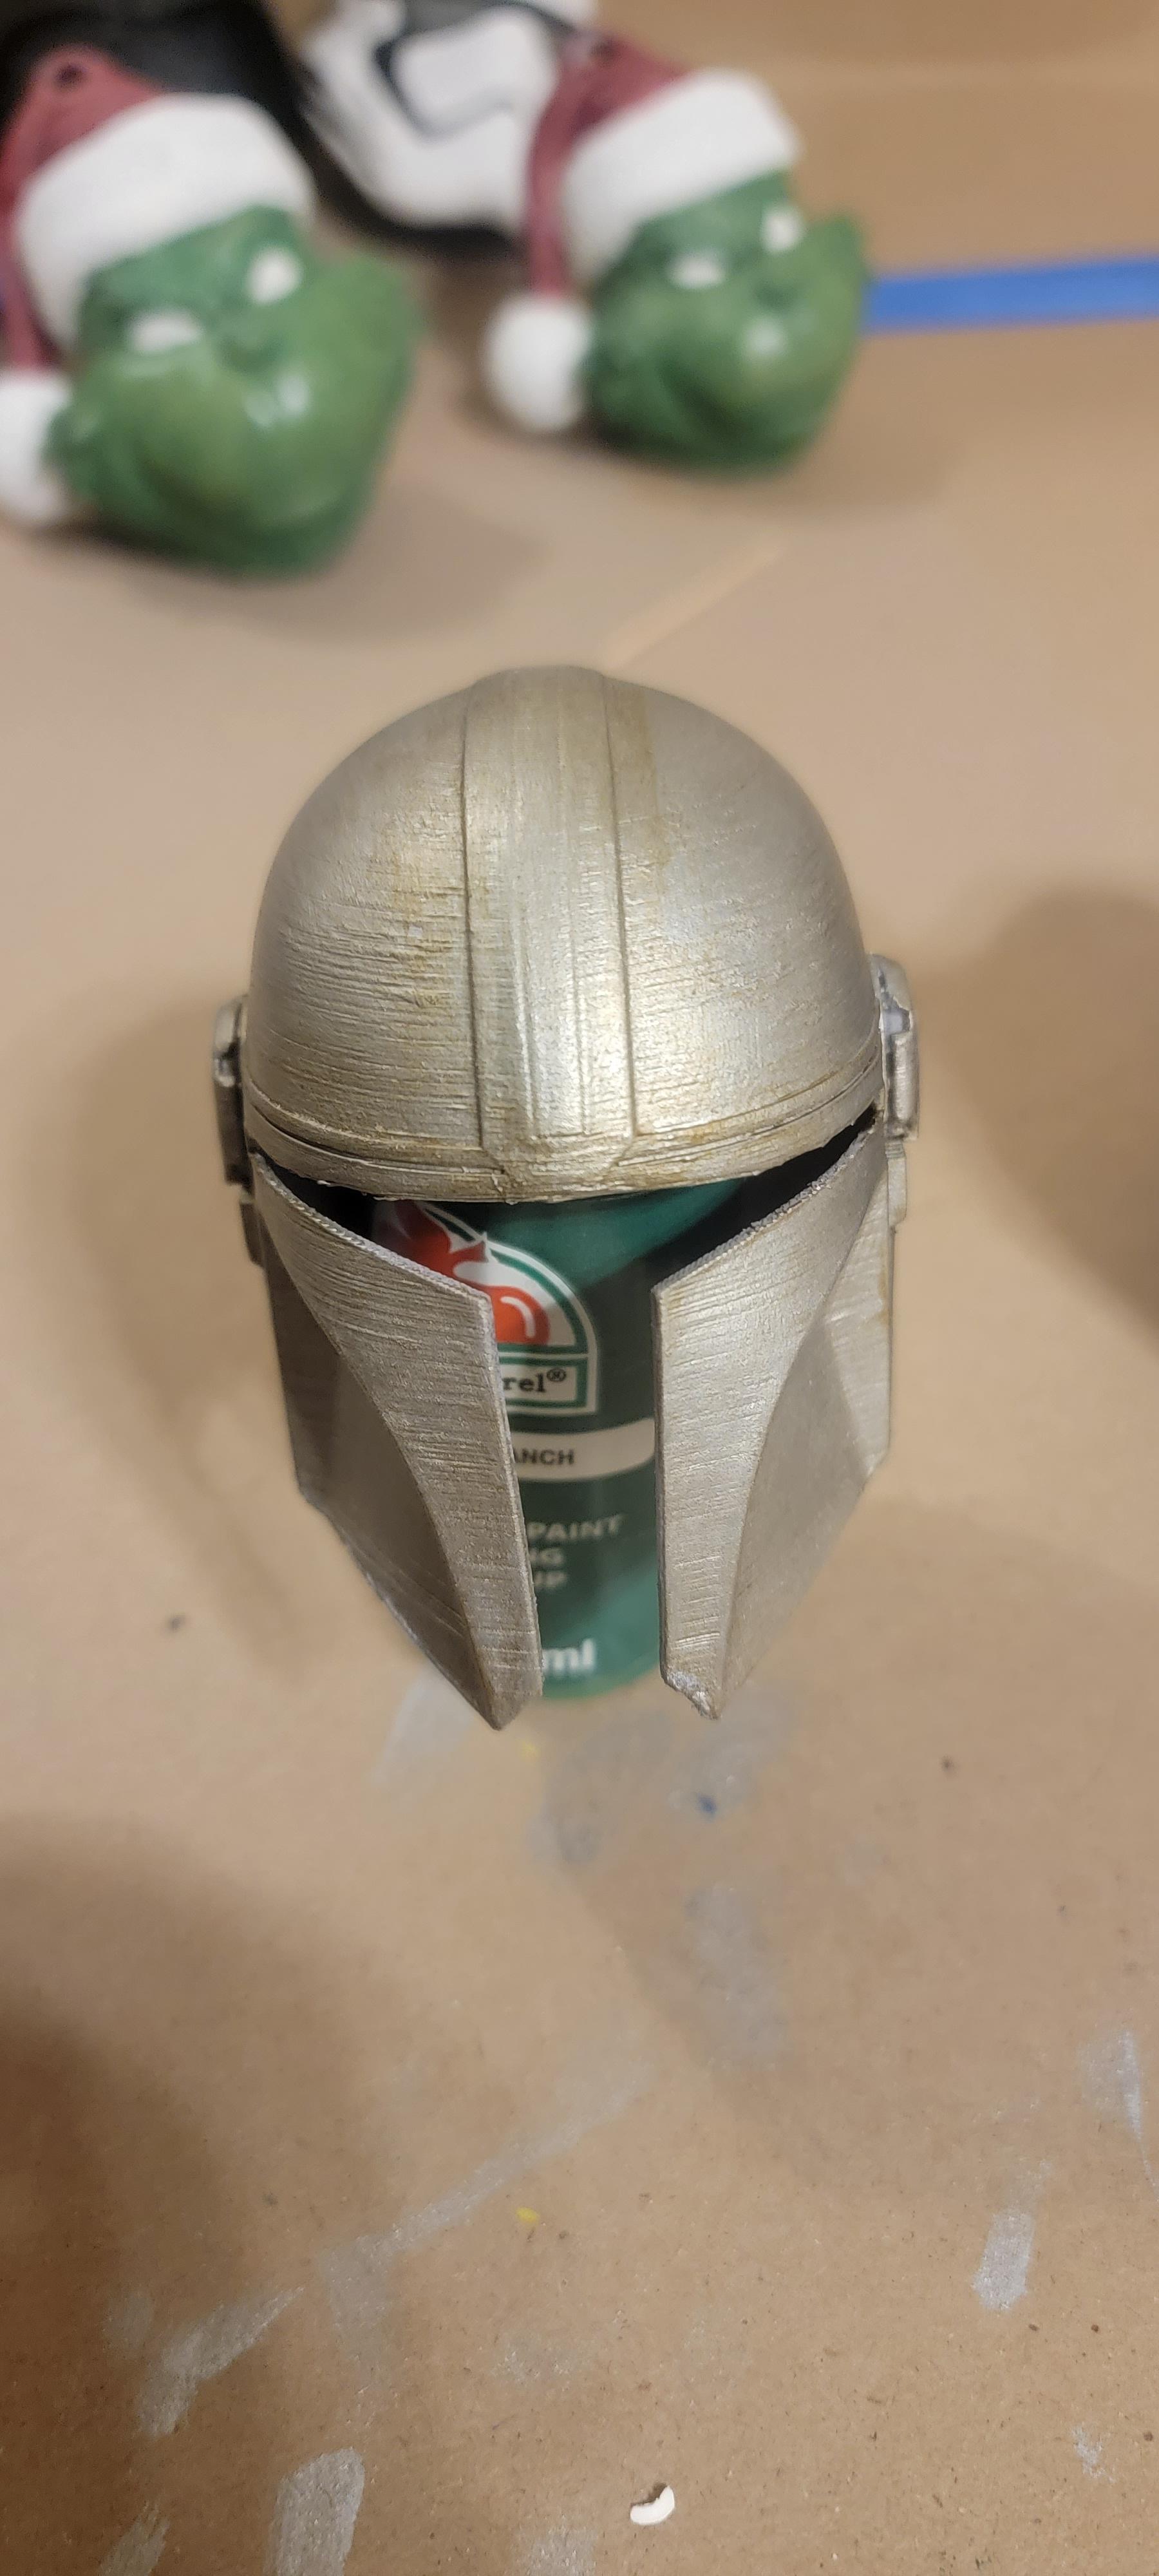
Mandalorian, by TheBrokenNerd83 (Printed scaled down to 27%)
https://www.thingiverse.com/thing:4401649
Original Measurements:
Opening - W:178mm (27%) D:192mm (22.4%) / Interior - W:178mm (27%) D:237mm (24.2%)
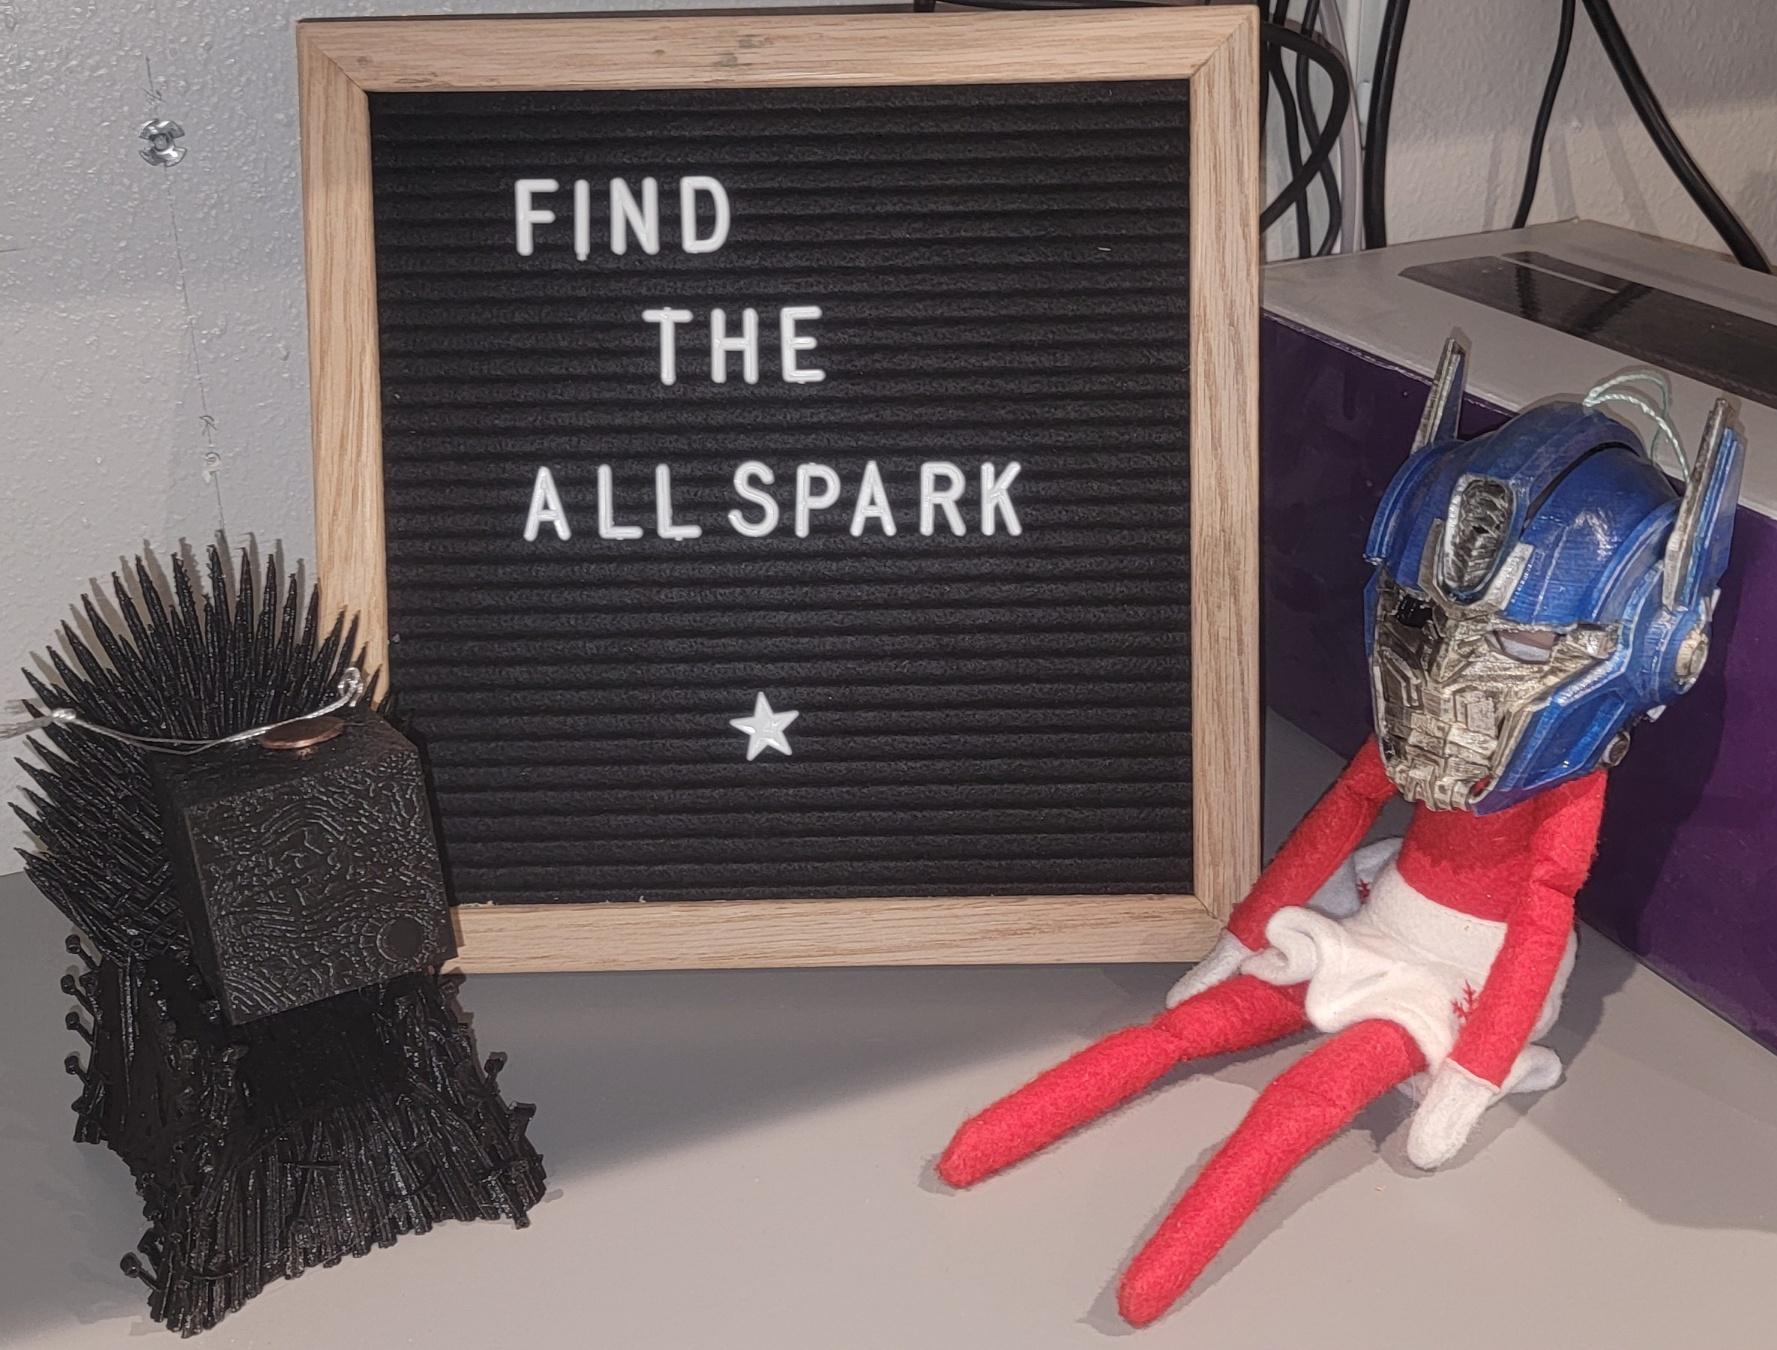
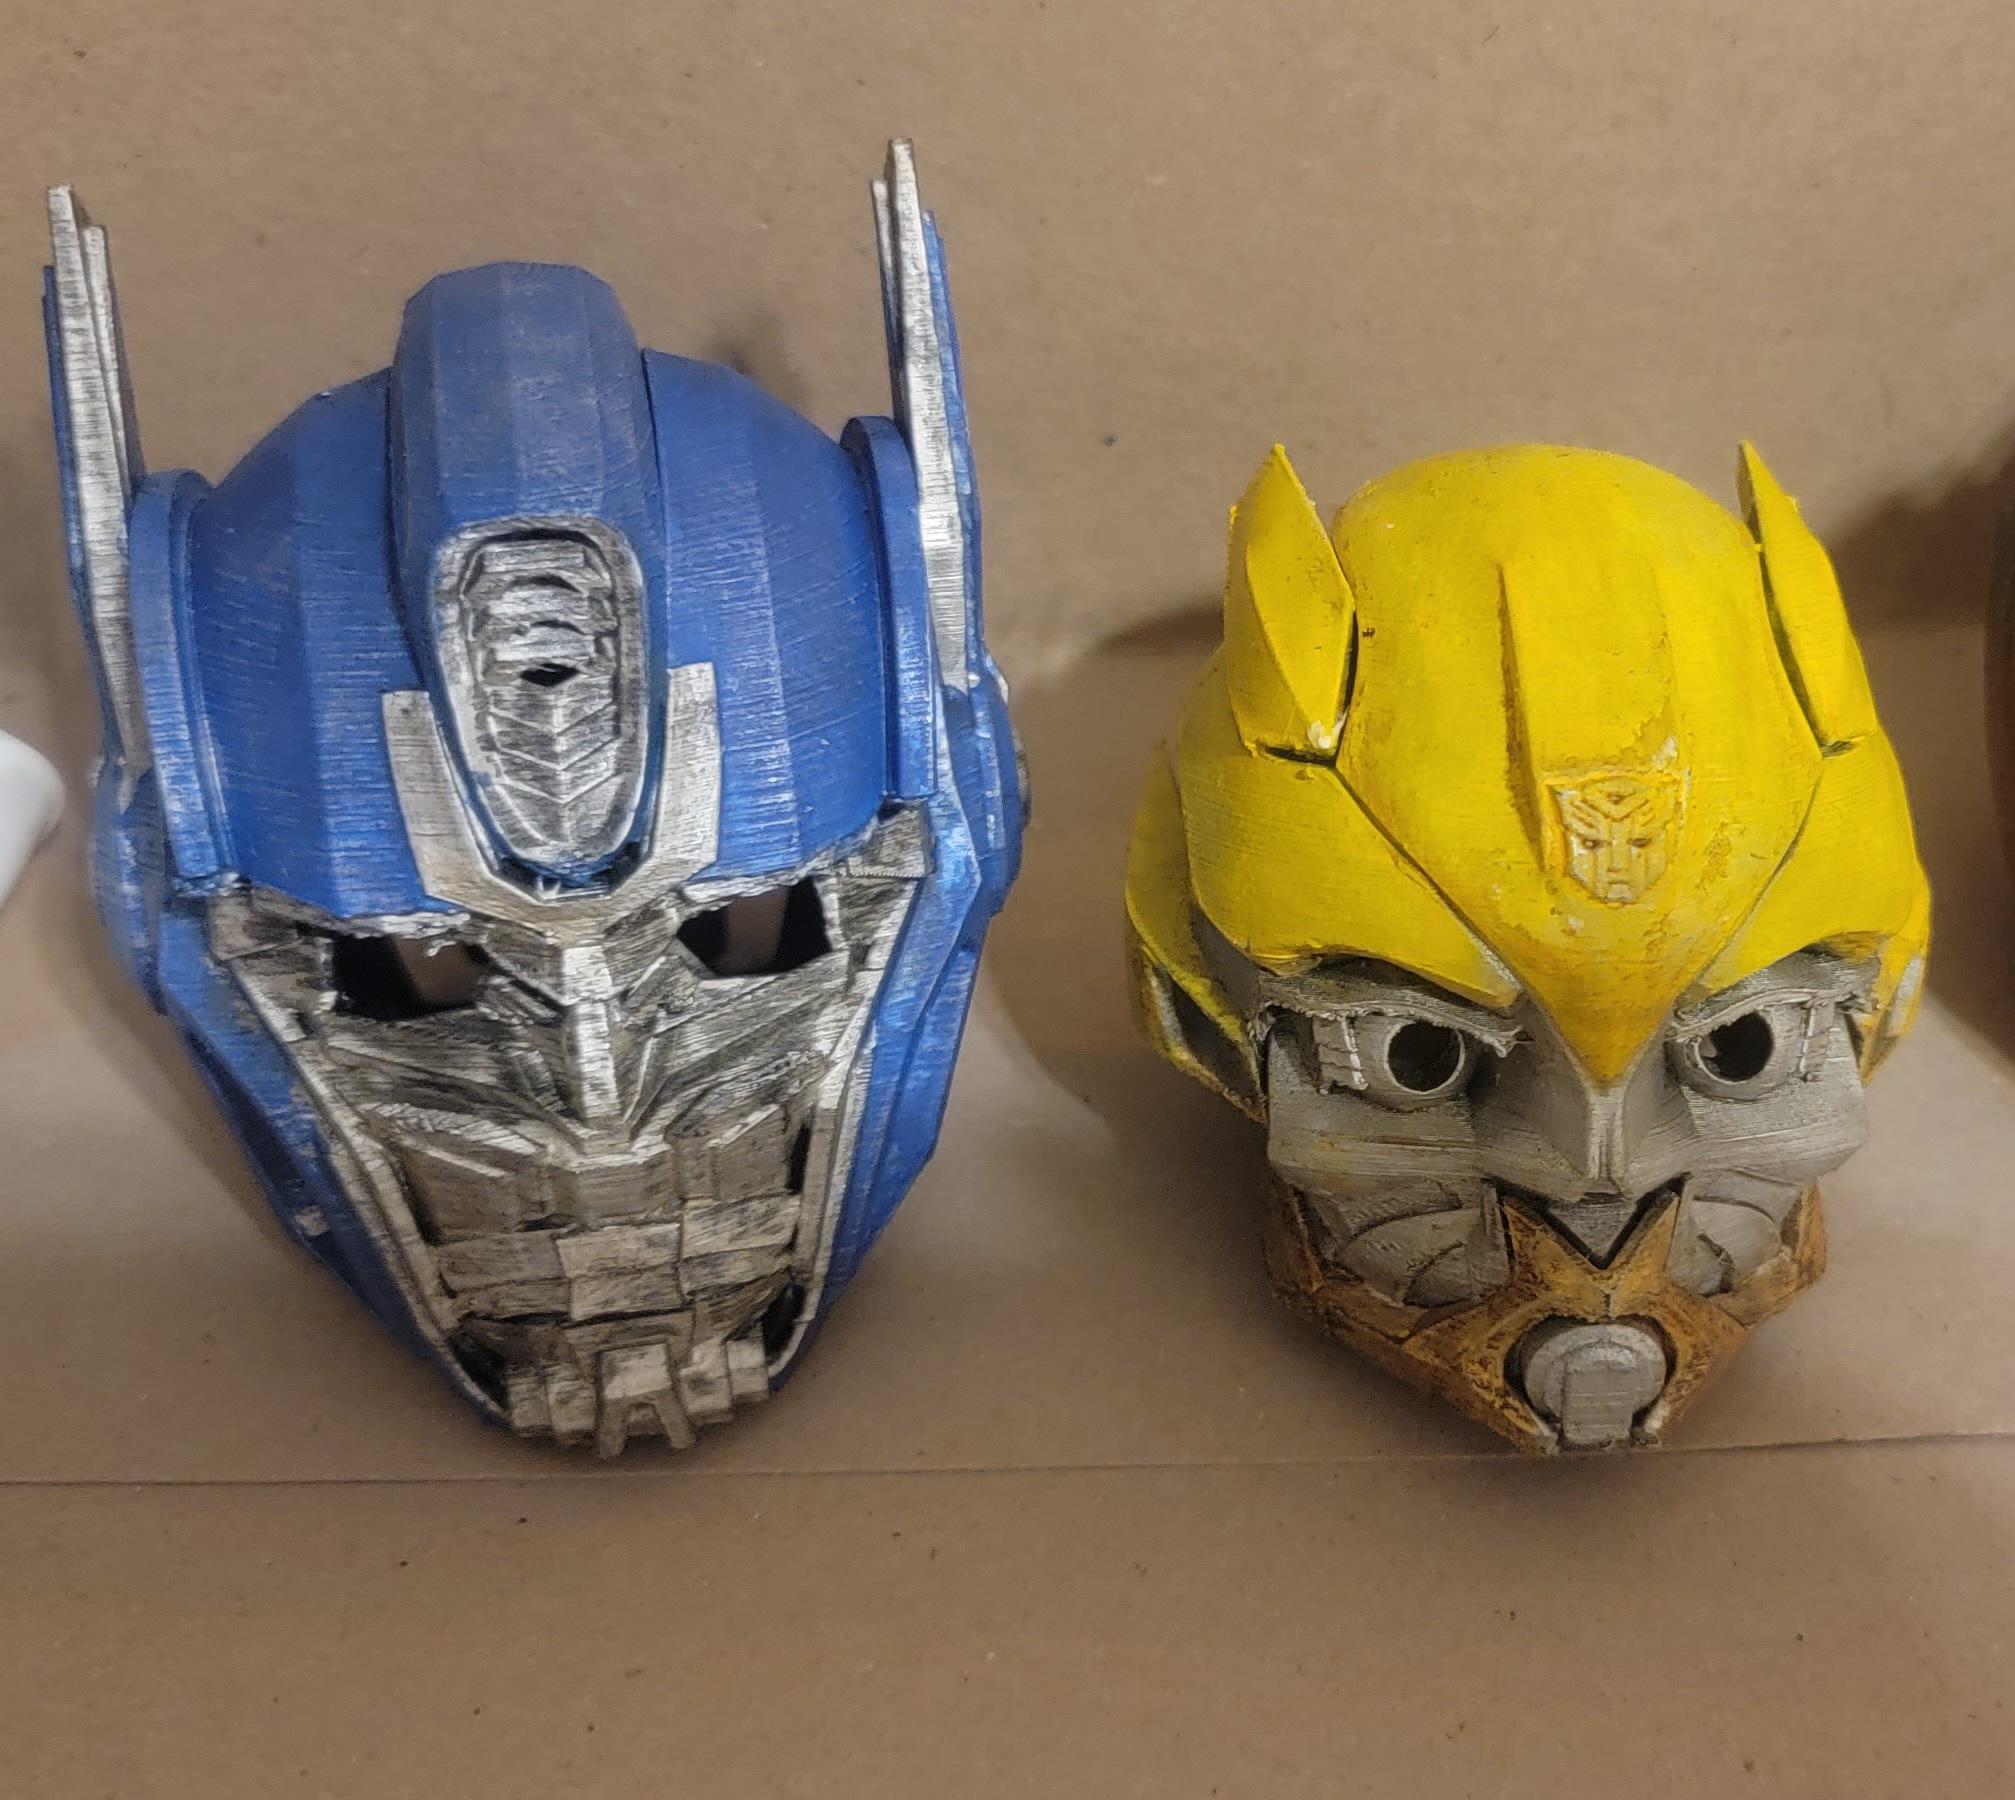
Optimus Prime, by Jace1969 (Printed scaled down to 35%W / 27%D / 27%H)
https://www.printables.com/model/22656-optimus-prime-helmet/files
Original Measurements:
Opening - W:139.1mm (34.5%) D:186mm (23.1%) / Interior - W:143.2mm (33.5%) D:258mm (16.7%)
NOTE: Because there was such a large difference between the Width and Depth Scaling, I chose to not print this model of Optimus Prime in its original proportions.
MODIFICATION: I had to trim the inside Jaw portion to allow the elf head to enter.
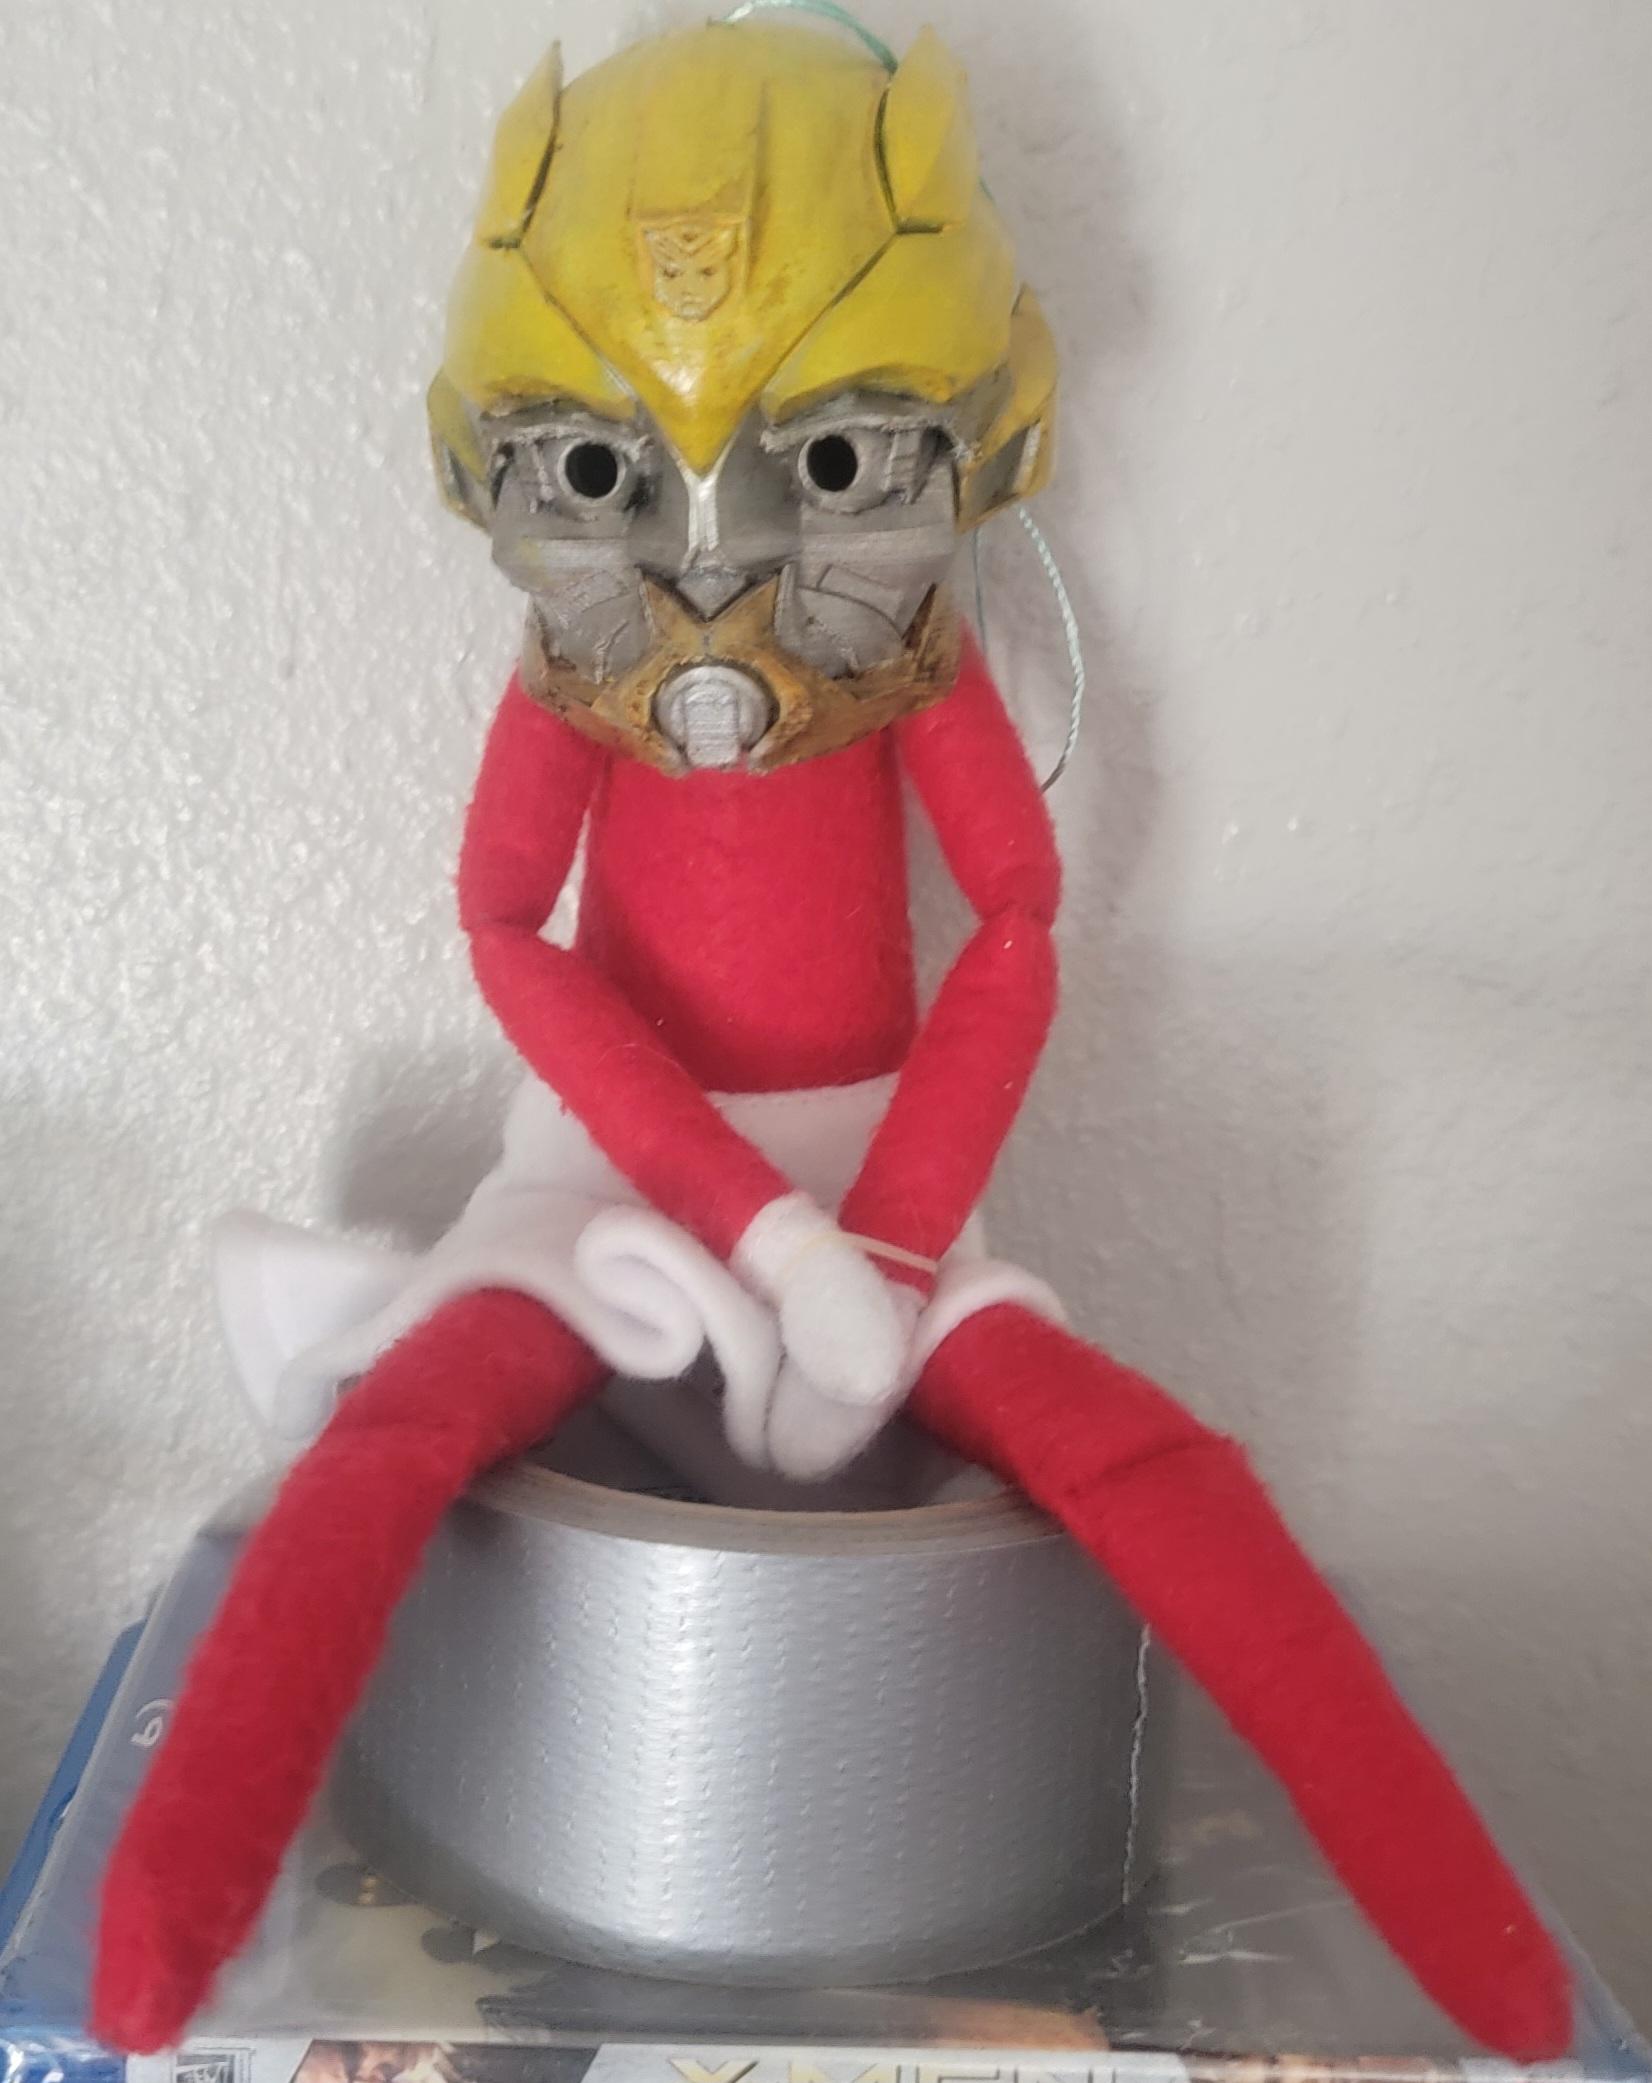
BumbleBee, by Jace1969 (Printed scaled down to 28.1%)
https://www.thingiverse.com/thing:3082571/makes
Original Measurements:
Opening - W:153mm (31.3%) D:LARGE mm (SMALL %) / Interior - W:191mm (25%) D:183mm (23.4%)
Size Note: Original print at 32% didn’t take into consideration the ability to turn the helmet sideways while putting it on. Since the elf head is wider than longer, we can use the head length for our width scaling. This yields: 43mm/153mm=28.1%.
Printing NOTE: Another issue is wall thickness. For the Bumblebee model, when scaled down to 28%, the walls are extra thin and start showing holes. To fix this, I enabled “Thin Walls” in Cura, and set “horizontal expansion” to 0.2mm. This adds 0.4mm to the thickness of the walls. This doesn’t affect the vertical dimension of the model, but that was not an issue for this model.
Sizing for Fit
Doing my best to not touch the elf (you’re not allowed to touch the elf as touch her will take away their magic), I took photos and made estimates of her head. I have since refined my estimates to be about 48mm wide by 43mm front to back.
To properly size the fit, there are 2 areas of consideration. 1) The Collar, or opening, of the helmet where the head must pass through when putting it on. And 2) The internal dimensions of the helmet while it is being worn.
To determine these dimensions, I used Meshmixer. Following are the steps for doing this.
1) Open Meshmixer
2) Select ‘Import’ and choose the .stl file for the model. Depending on the model, this may take 1-2 minutes to open
3) Select ‘Analysis’.
4) Select ‘Measure’.
a. Select ‘Type’ and select the 2nd option, which looks like measuring between 2 objects.
b. Select ‘Direction’ and select the direction that you want to measure.
5) Click an area inside the helmet where it matches where the Forehead or Ears may be positioned. Record this dimension.
6) Select a different ‘Direction’ as before for measuring the other dimension required.
7) Repeat the steps above for measuring the opening.
NOTE: The opening dimensions may not be directly across from each other and the model will need to be rotated to place the opening on one of the X,Y or Z planes. To do this, follow this procedure.
1) Select ‘Edit’
2) Select ‘Transform’
3) Enter a value for ‘Rotate X (or Y or Z)’, to achieve the opening to sit on one of the planes.
4) Select ‘Apply’
5) Take measurements as before
To determine the required scale, measure the person’s head dimensions. Then, calculate and find the largest scale number to make sure that all will fit.
For Example, using the following dimensions from the Storm Trooper, we find:
Opening - Width:250mm (48mm / 250mm = 19.2%)
Opening - Depth:214mm (43mm / 214mm = 21.1%)
Interior - Width:230mm (48mm / 230mm = 20%)
Interior - Depth:260mm (43mm / 260mm = 16.5%)
If we wish to keep the helmet in the same proportions, we would choose the largest scale (21.1%) for printing the model. If we don’t care about the original proportions, we could choose 21.1% for the Depth dimension and 20% for the Width dimension. (And use either for the Height proportion).
Painting and Finishing the Ornaments


For hanging the ornaments, we added a string to the top of the models. This generally required drilling a small hole in the top of the helmet for the string to pass thru. We tied a knot in the bottom of the string to keep it from pulling through. We did this step before painting so that the model’s filament color didn’t show through.
Our painting procedure consisted of the following.
1) Sanding any rough areas before adding primer.
2) Primed with filler primer. This is to assist with filling the layer lines before painting. We applied 2 coats of primer.
3) Lightly sand any problem areas that could be seen.
4) Prime again (if needed)
5) Paint with Acrylic paints. We used a mixture of Air Brush, Paint brushes and Paint pens.
6) Clear Coat. I used this step to get the desired sheen. Some I wanted glossy, some I wanted dull.
HAVE FUN!