Coruna - CPX Running Device
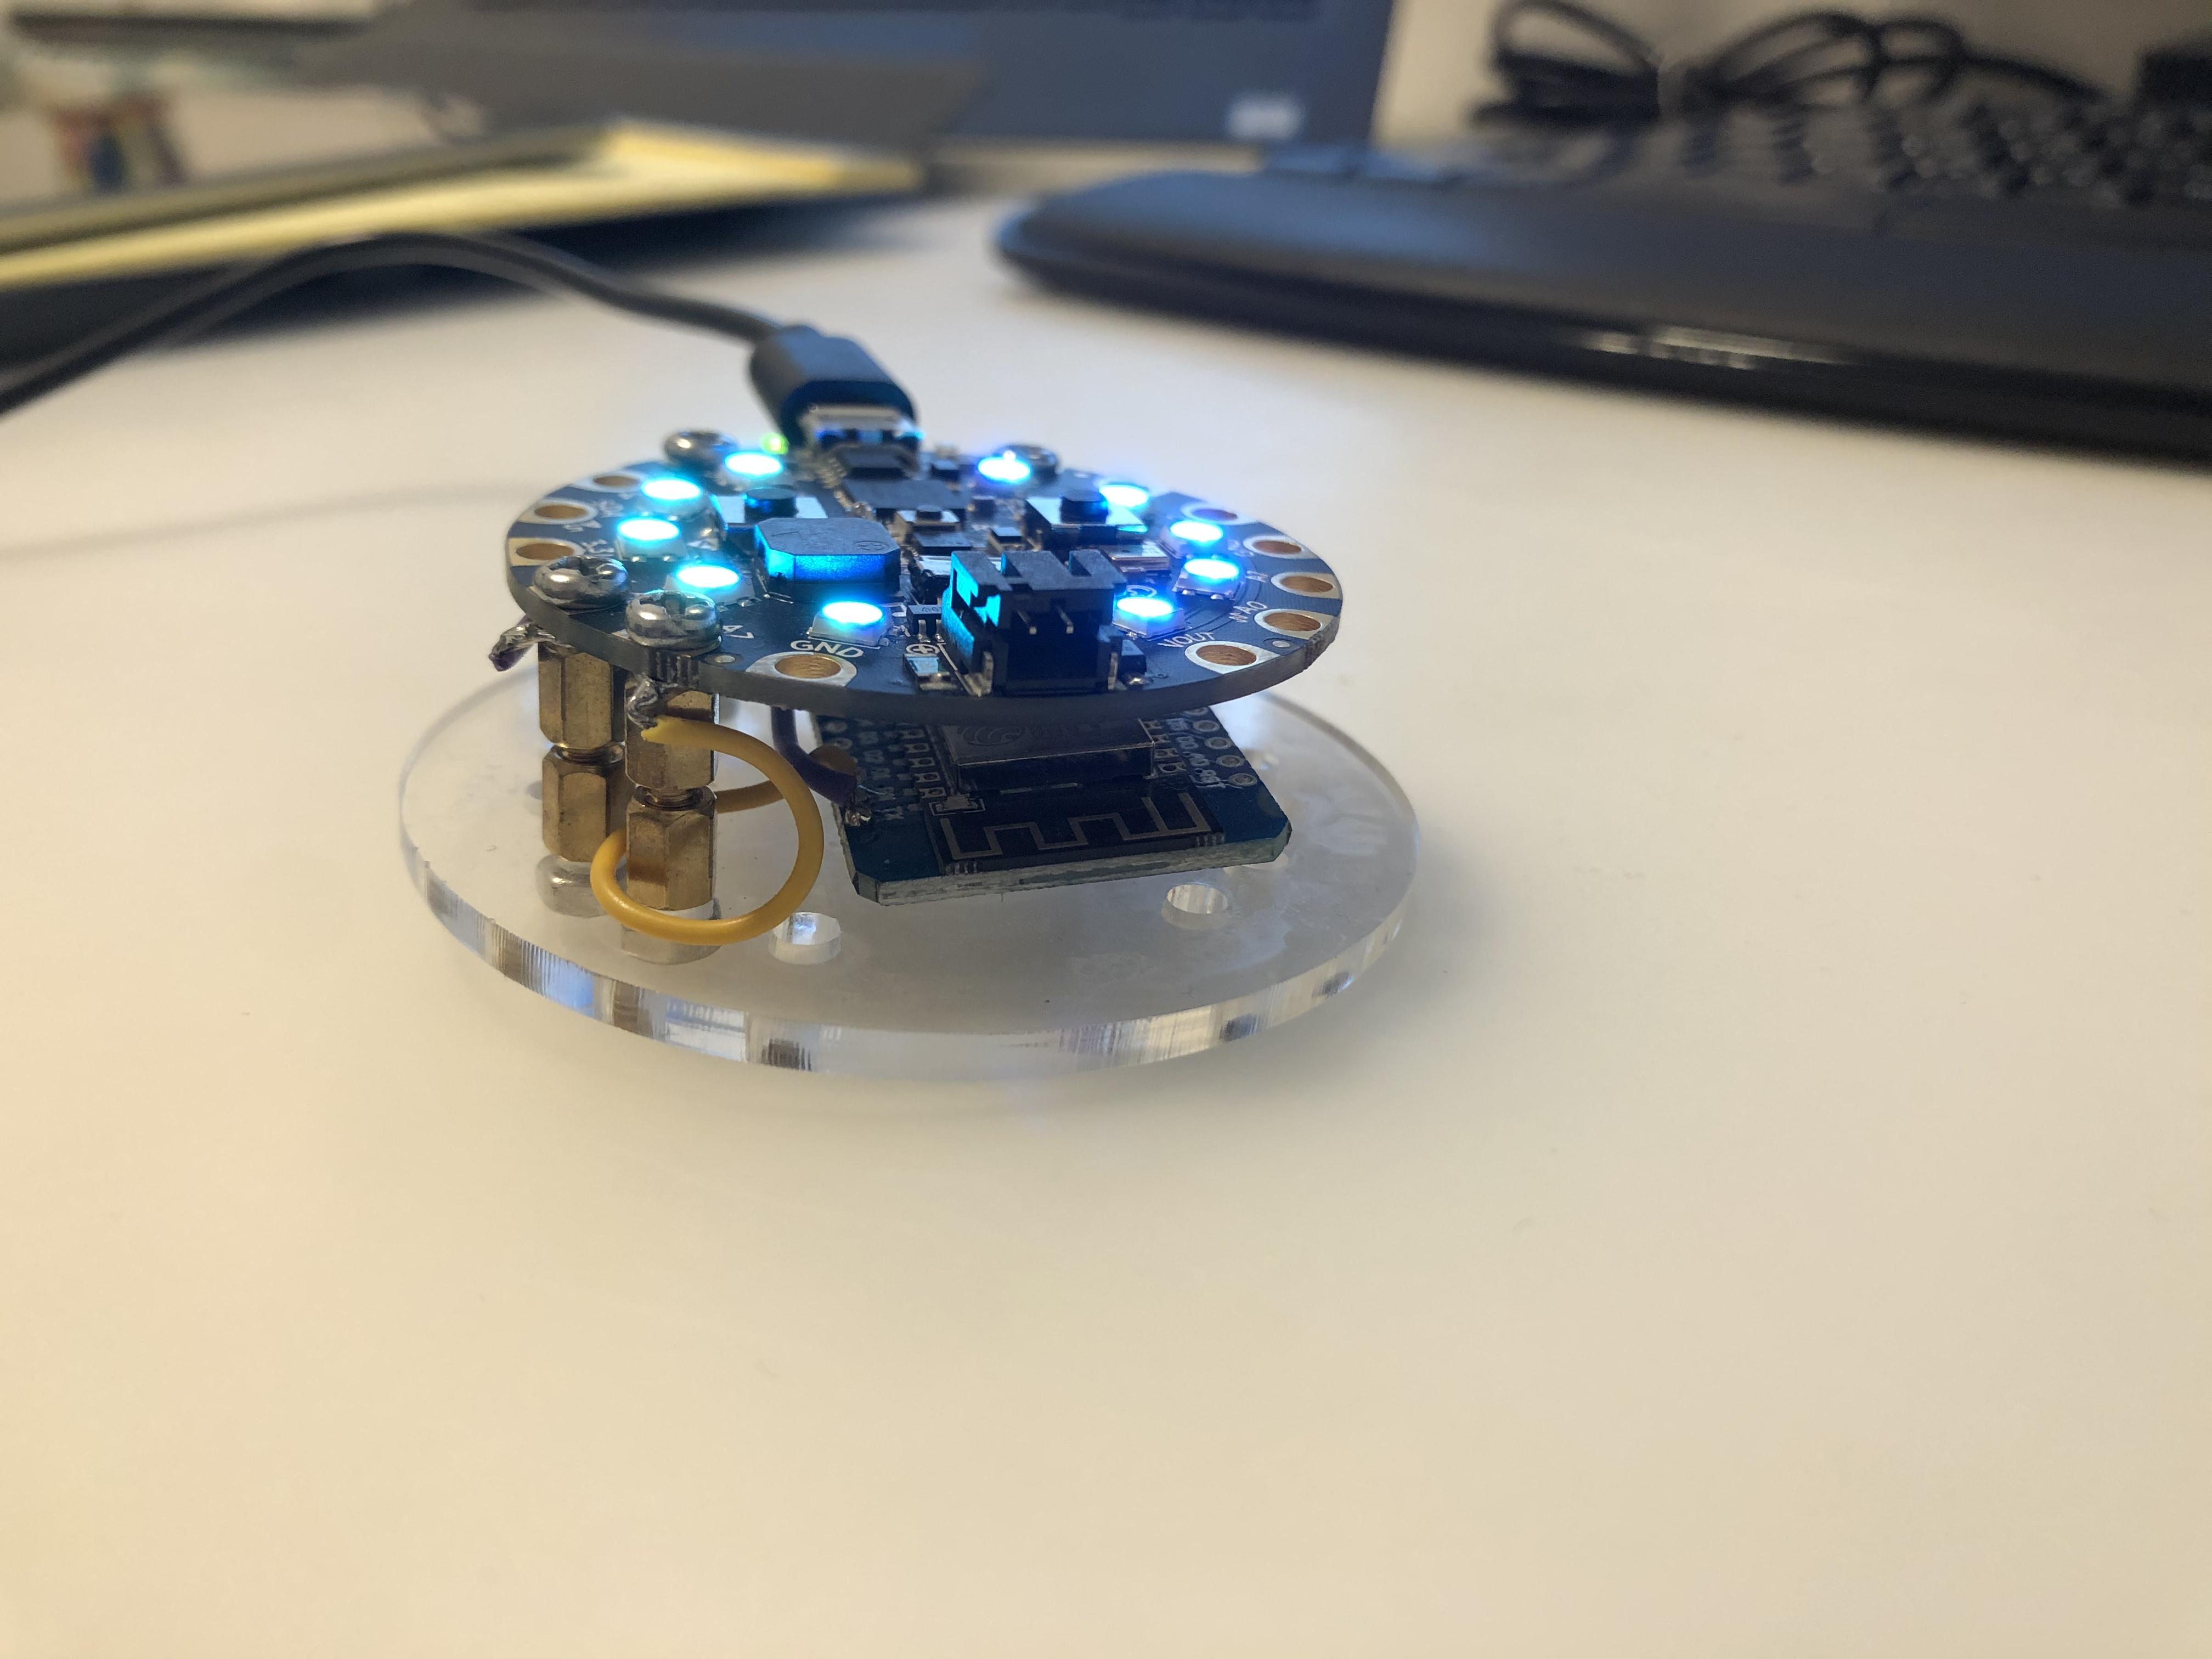
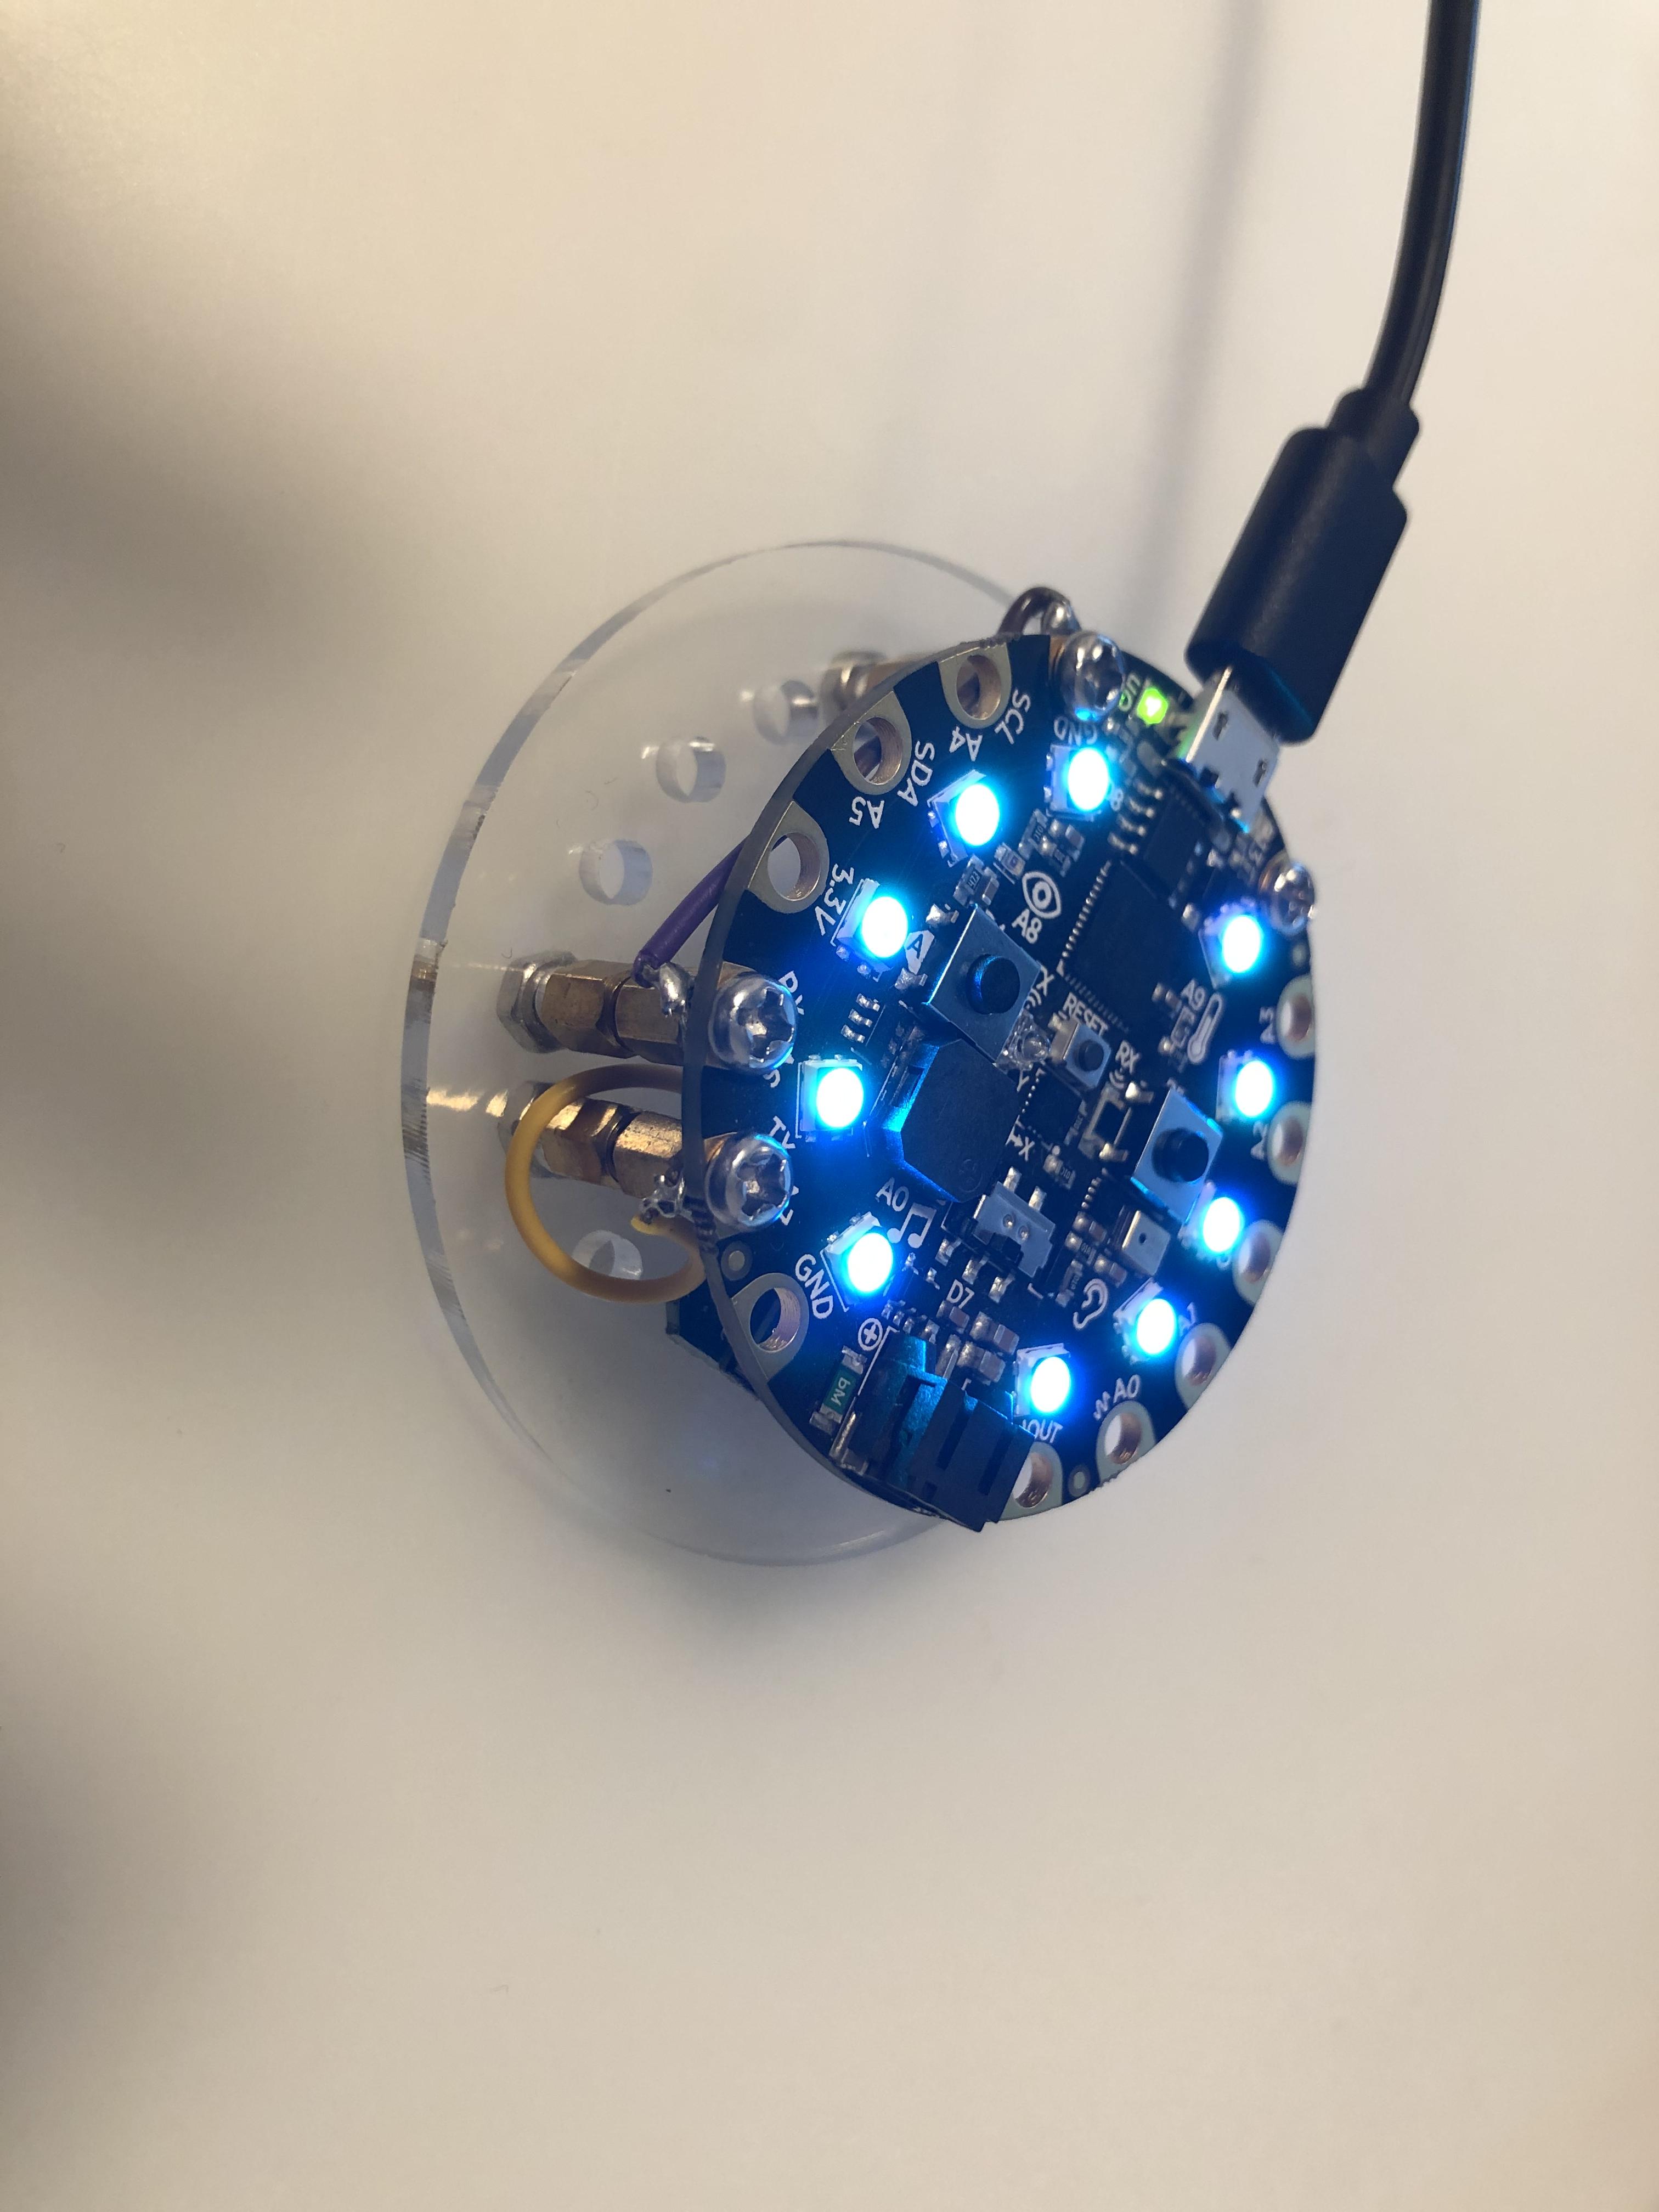
Coruna is a device for runners, walkers any other distance-based sports using CPX, Blynk, and Integromat.
Using a CPX device and a phone that is connected to those two online services it tracks a person's run while supplying the following data: running time, running distance, number of steps, and calories burnt. All this data is stored in a Google Sheet.
In addition, it is able to measure a person's heartbeat, send an SOS SMS in case that one needs any help during his run, and present the current weather in order to determine whether it is a good time for an outdoor run or to investigate performances in different weathers.
Attached is a video that presents the usage of the Blynk app and the CPX in the product. Before starting the run we will measure the heartbeat using the CPX. Then, we will choose the distance that we want and we will start our run. Using its pixels the CPX will present the distance that still remains. If you want you can stop the run and then continue from where you stopped. In addition, using the slider it is possible to see the weather which is determined by your current location. After finishing your run all data will be sent and stored in Google Sheets and a corresponding notification will be sent to your phone. Moreover, if needed it is possible to send a SOS message to a predetermined and configured phone and the CPX will make an alert the will signify that the message was sent successfully.
Downloads
Supplies
CPX (Circuit Playground Express) - https://www.adafruit.com/product/3333
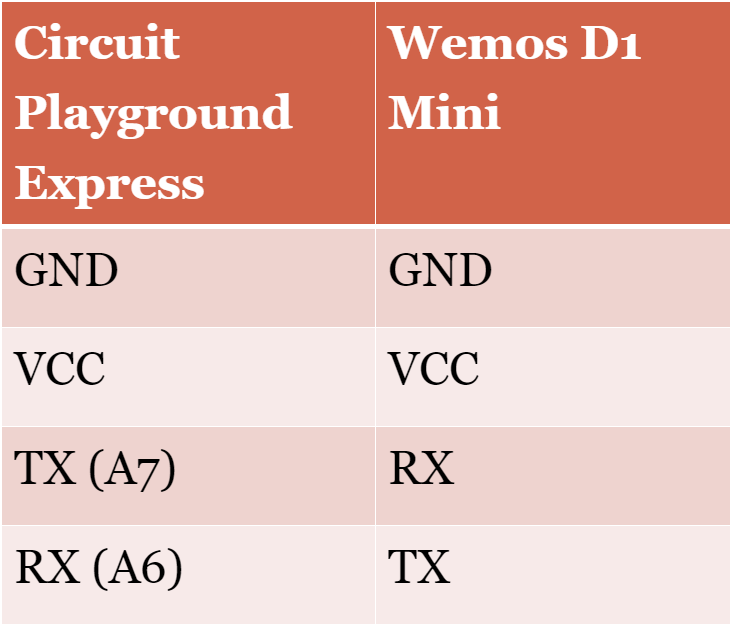
Wemos D1 Mini (Connections table attached) - https://www.zeptotronics.net/product/d1-mini-esp8...
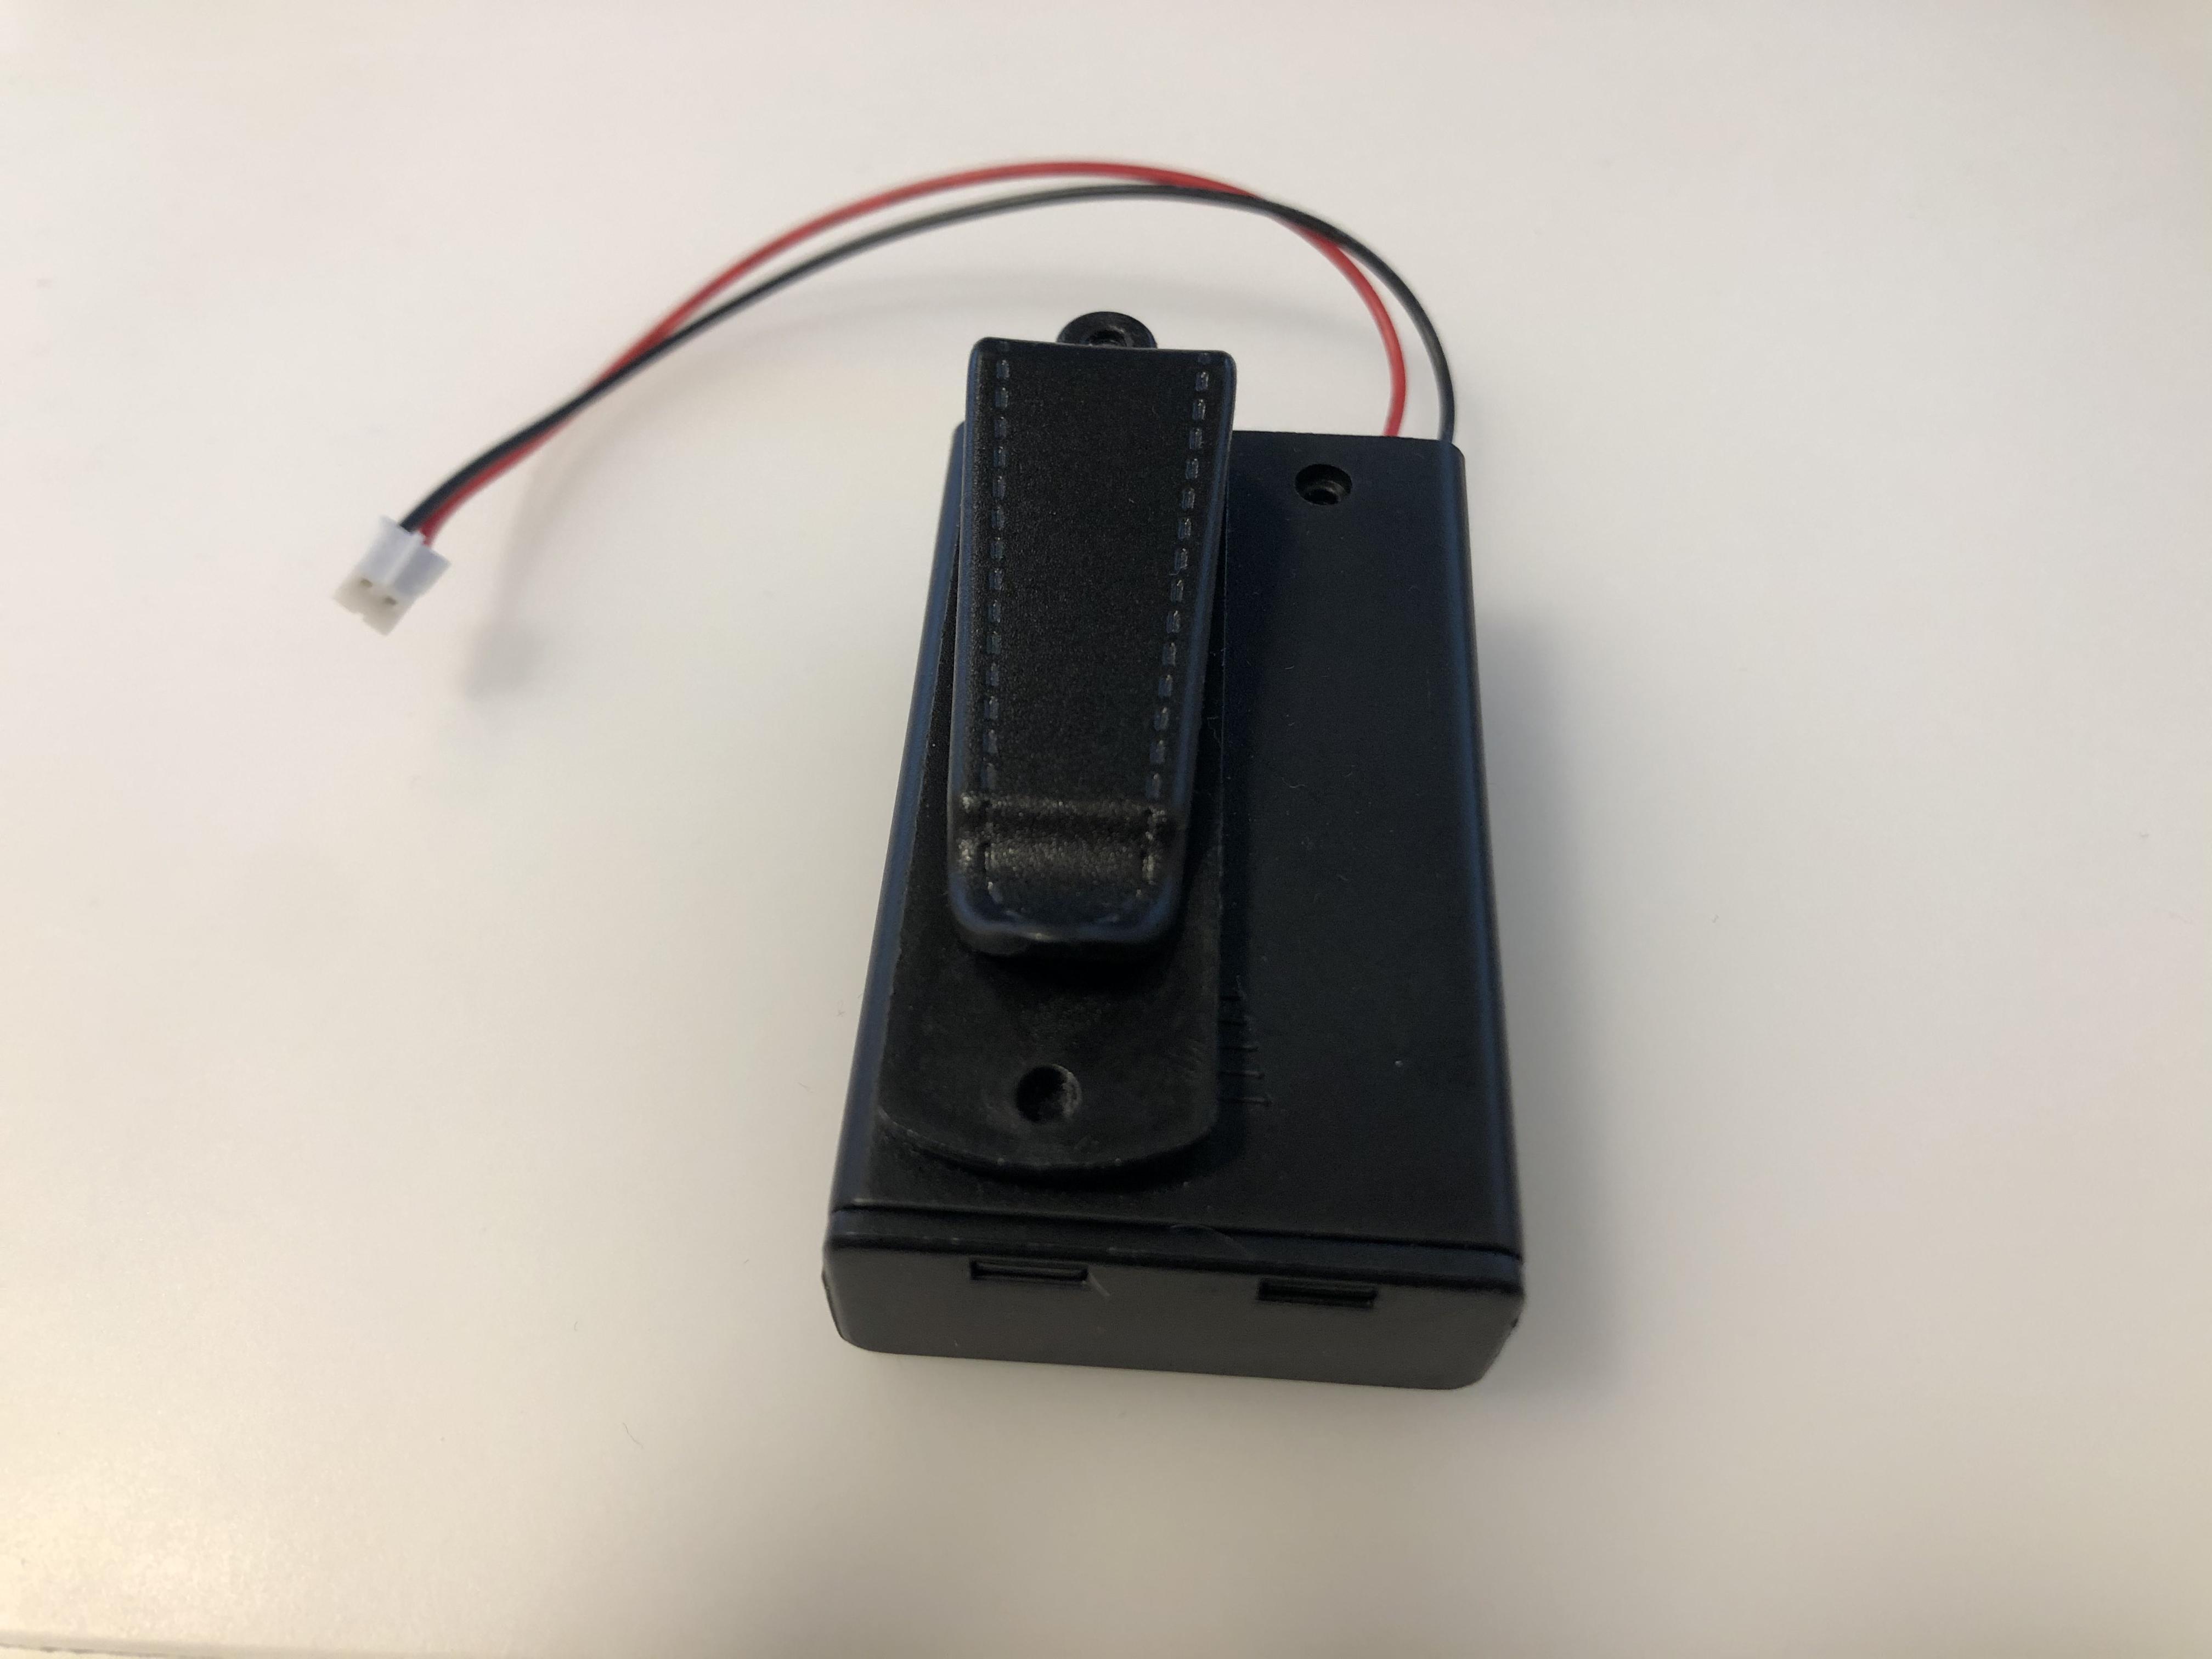
3 x AAA Battery Holder - https://www.adafruit.com/product/727
3 x AAA batteries
Blynk
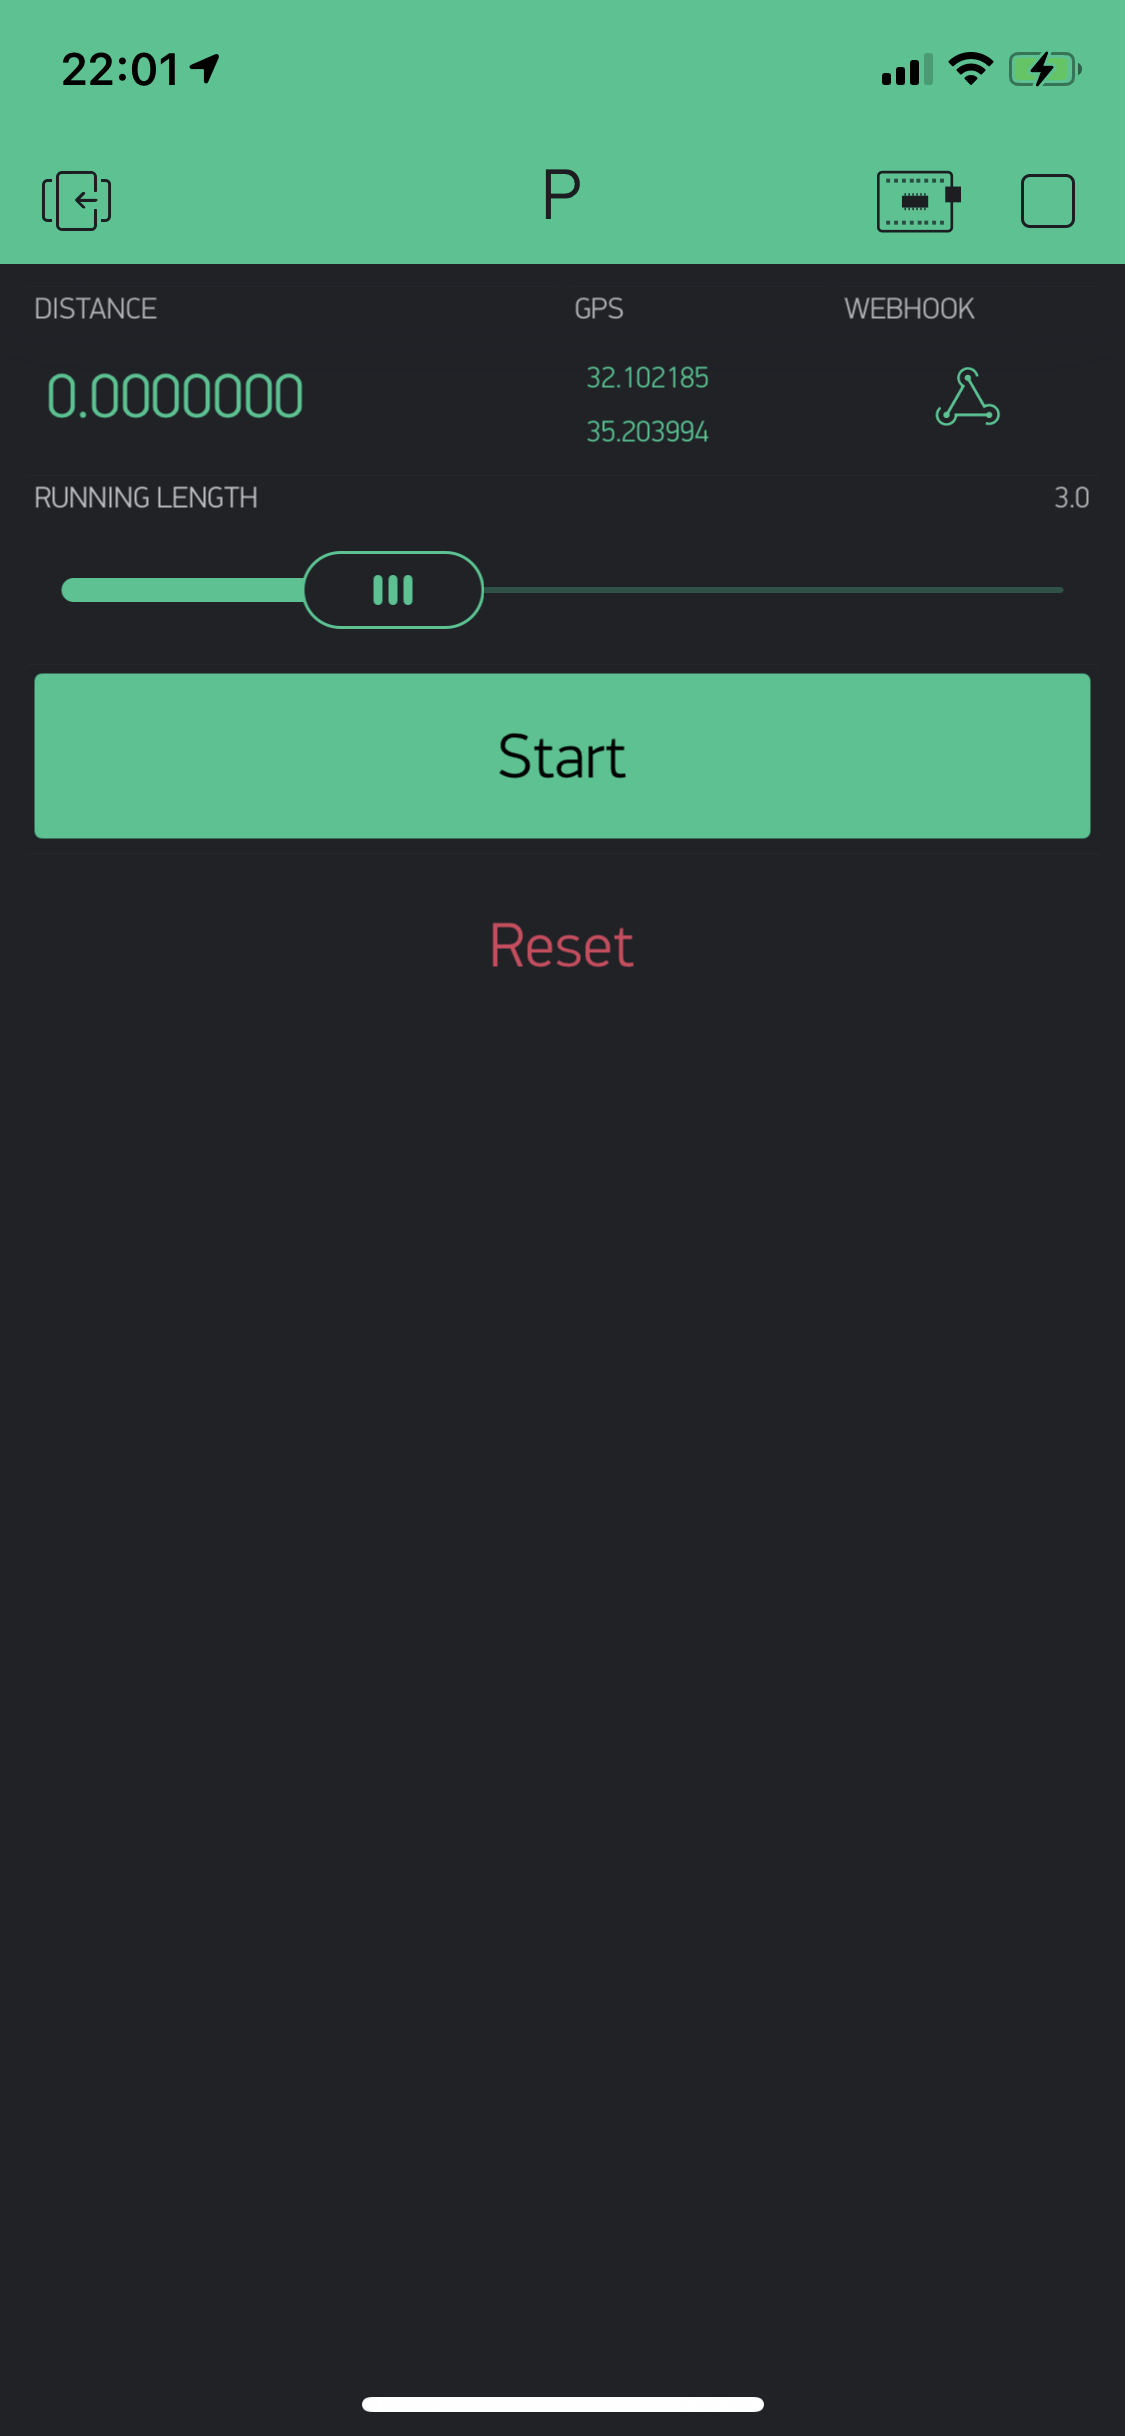
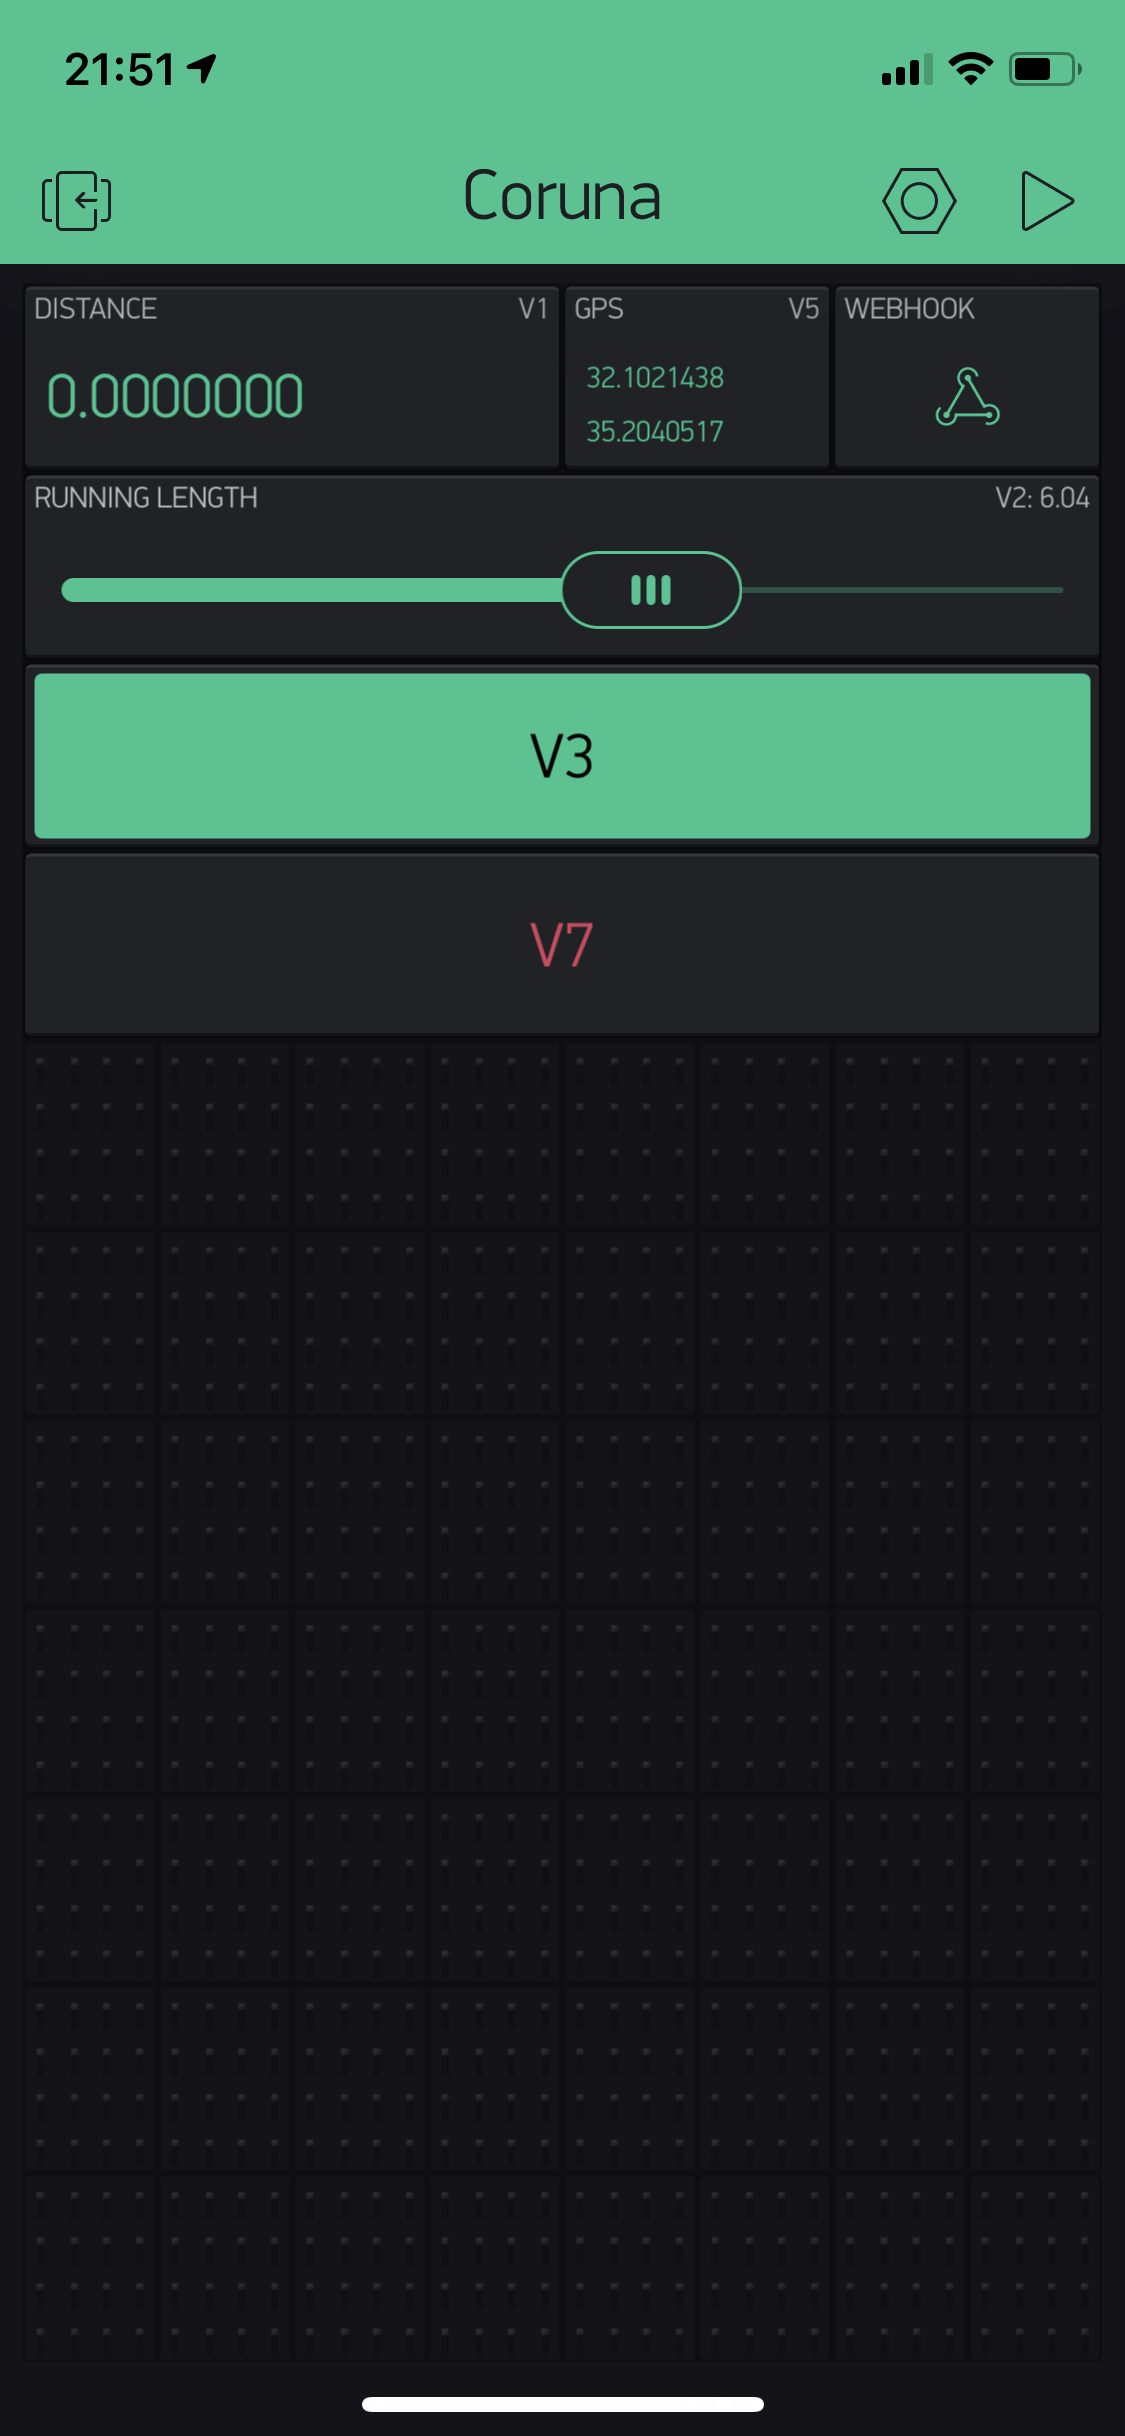
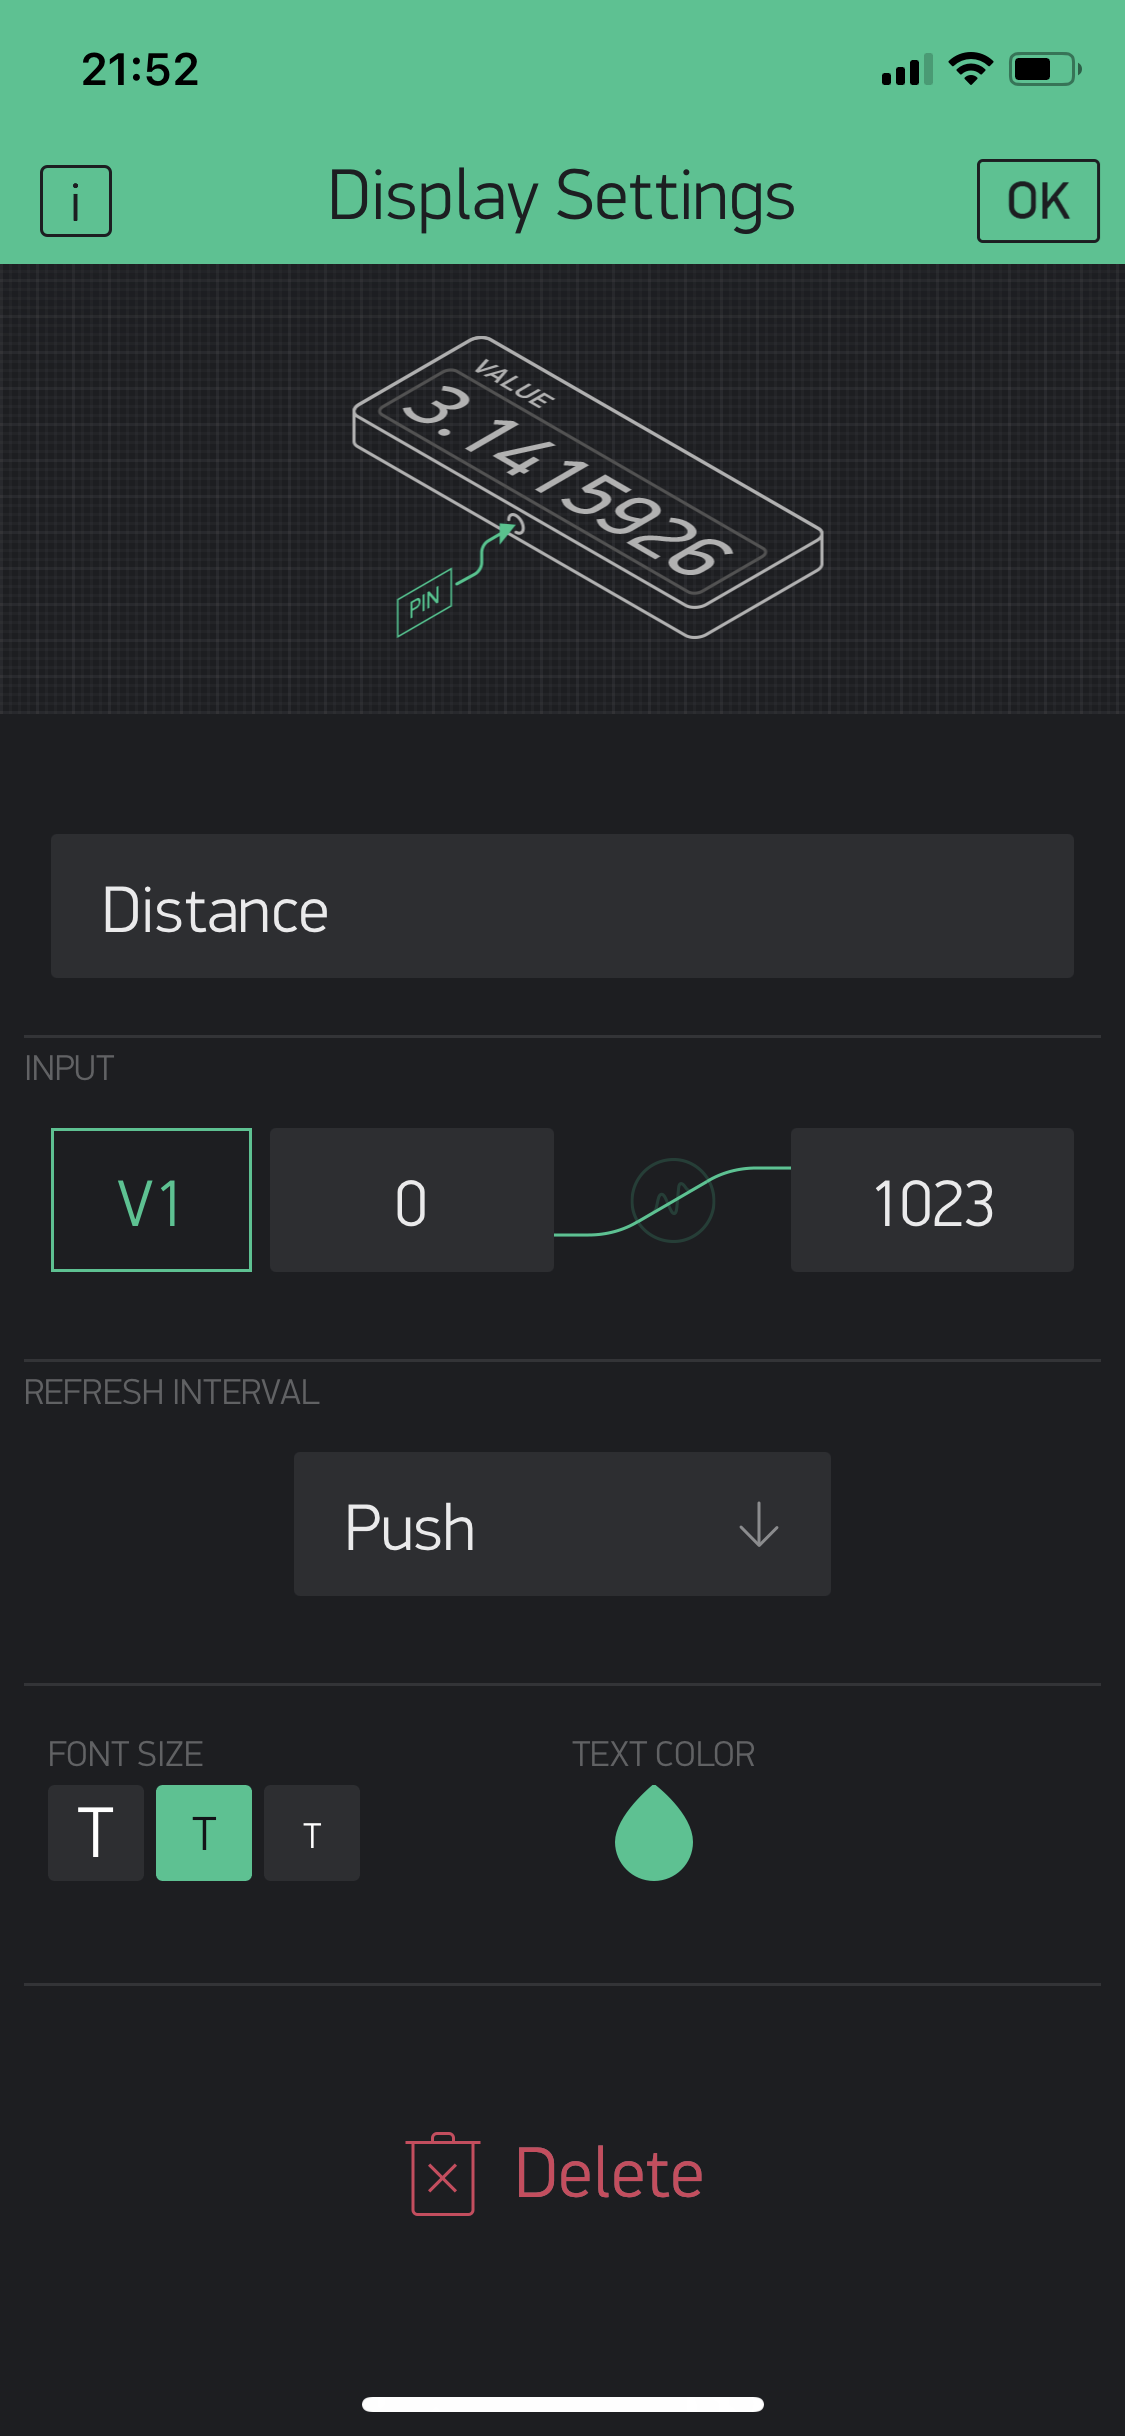
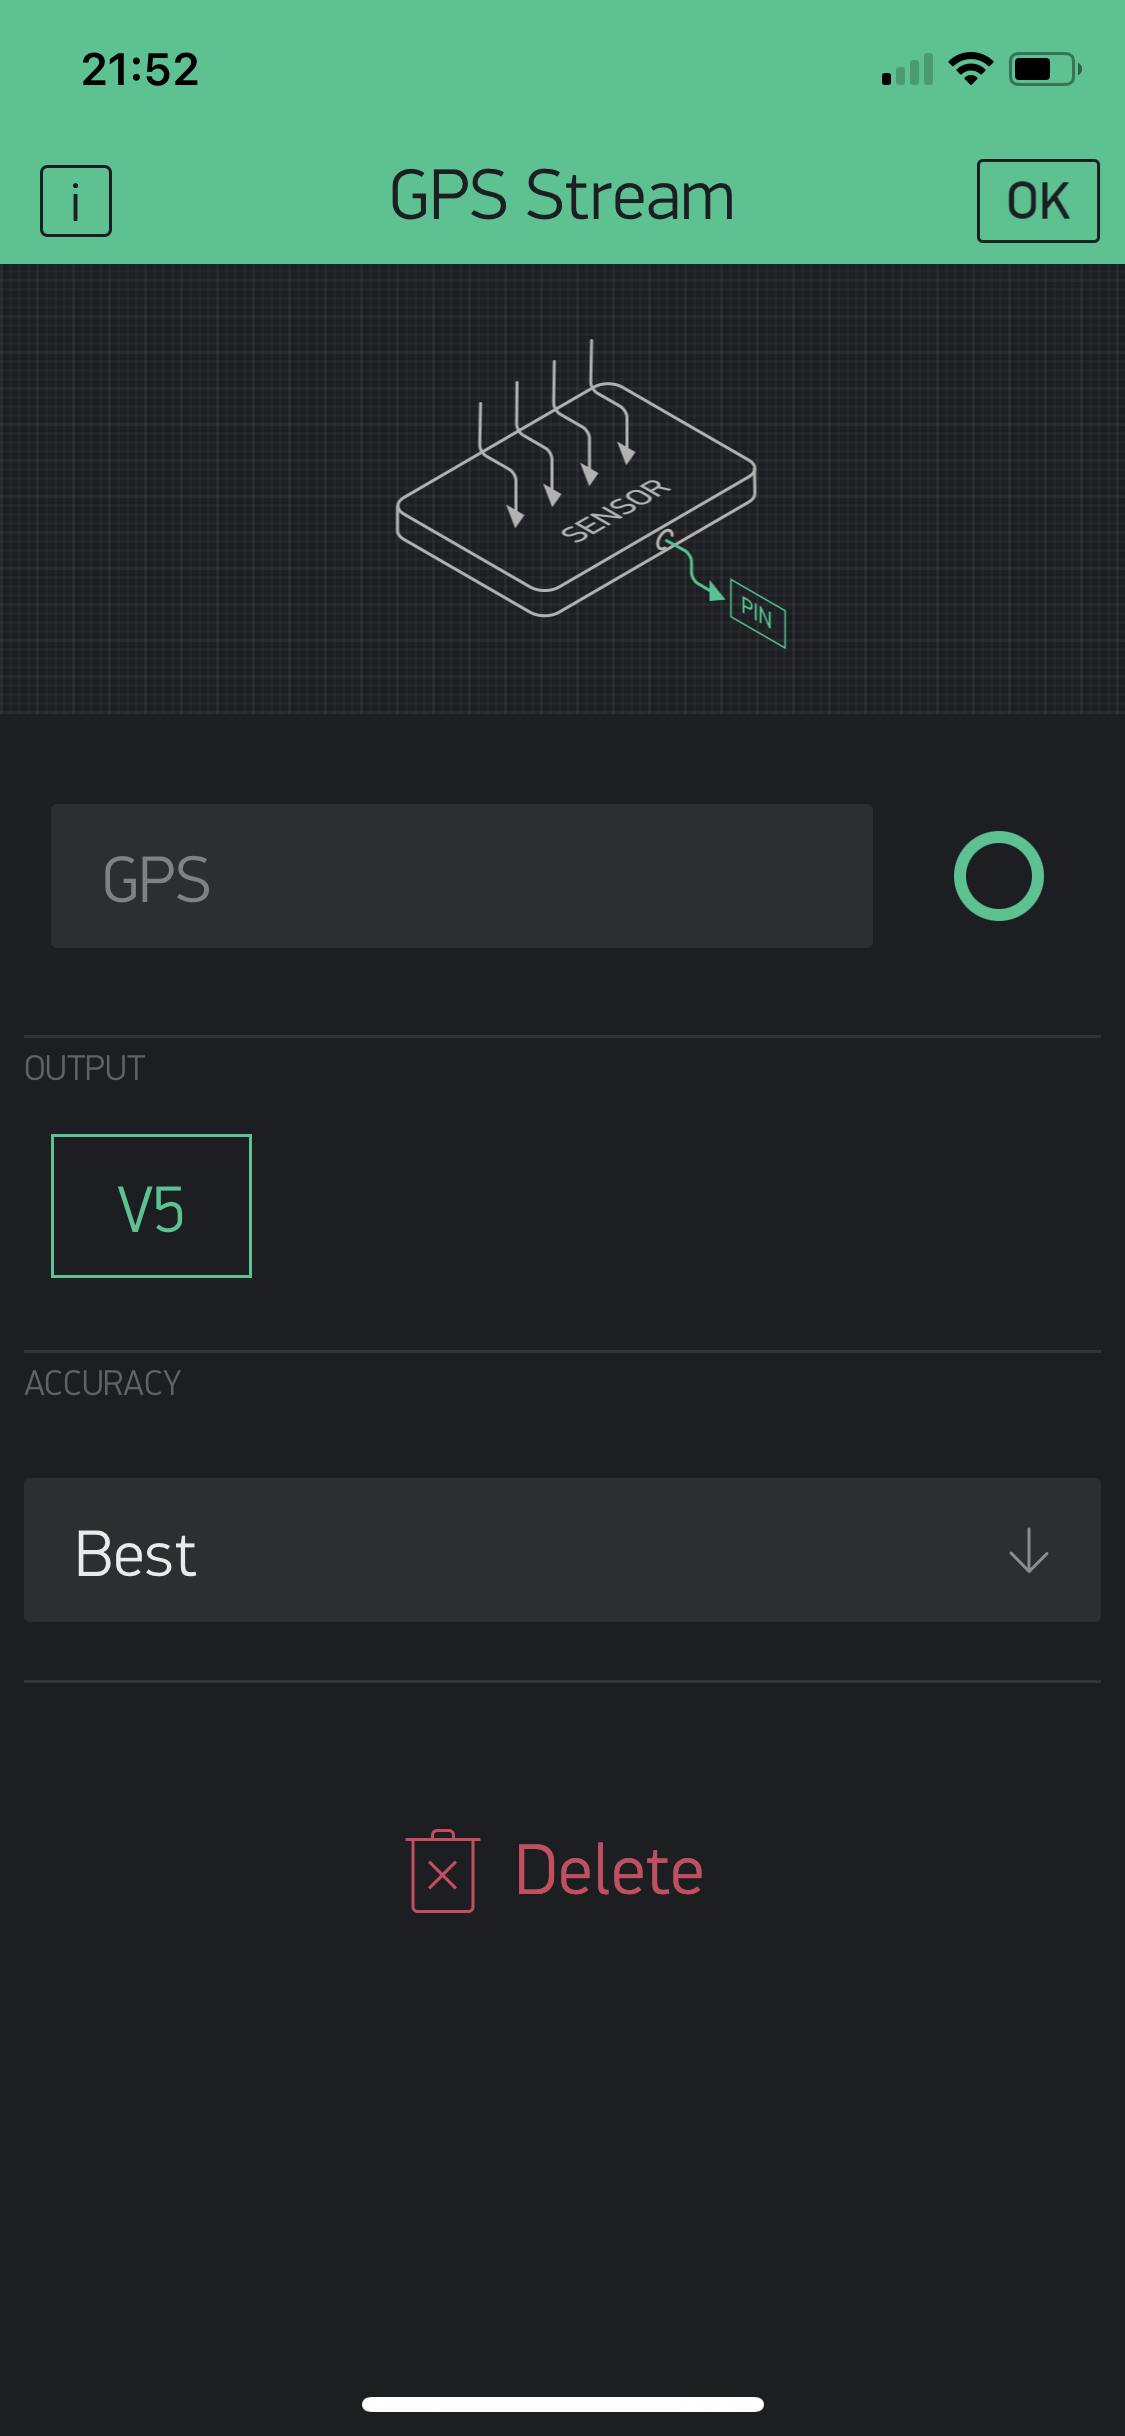
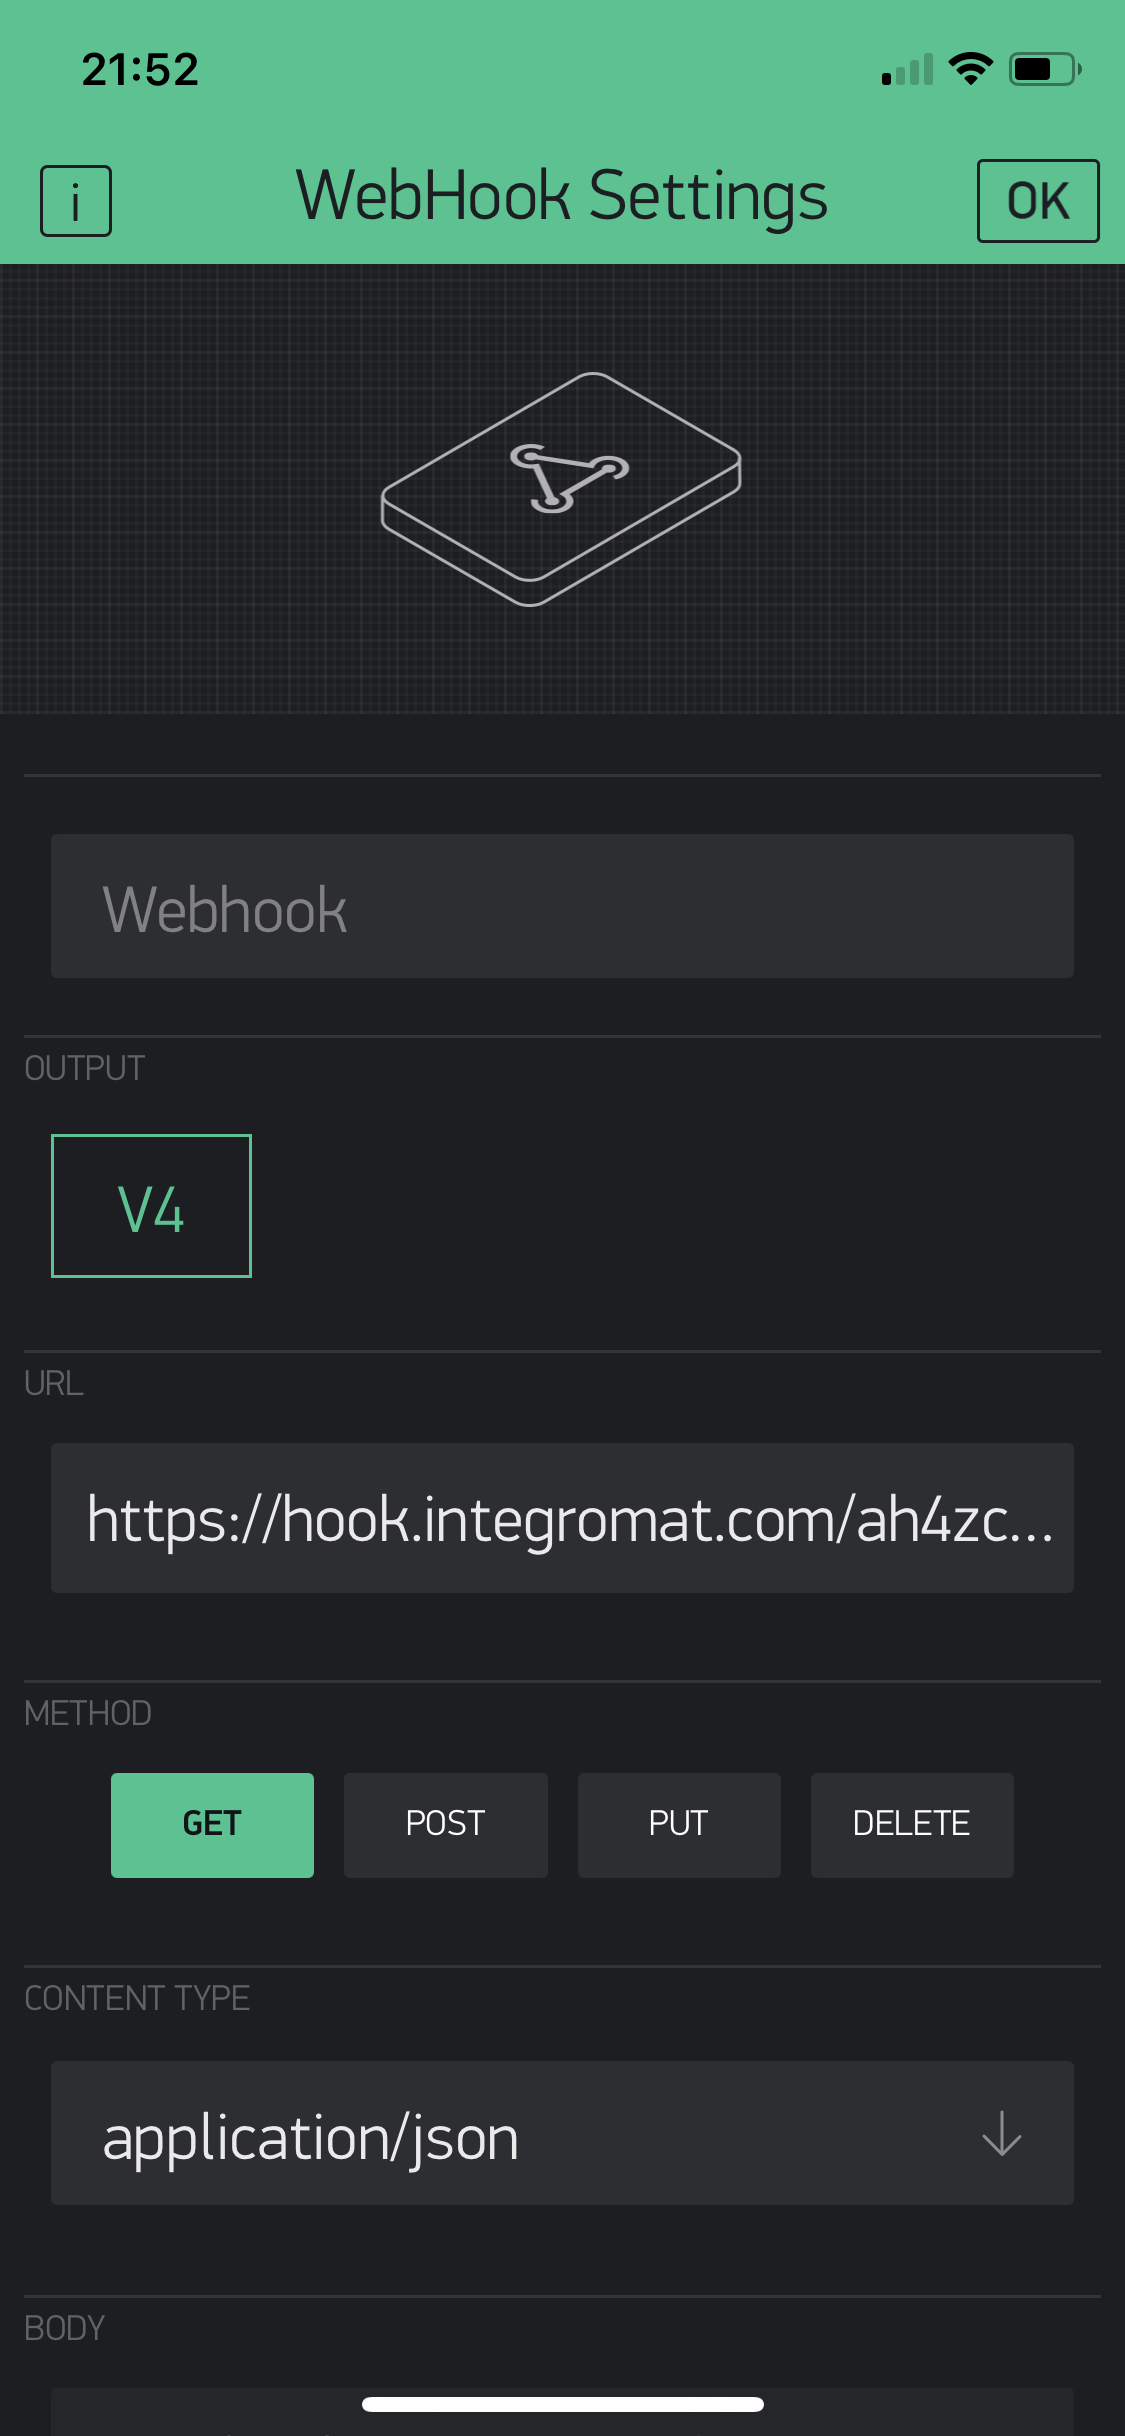
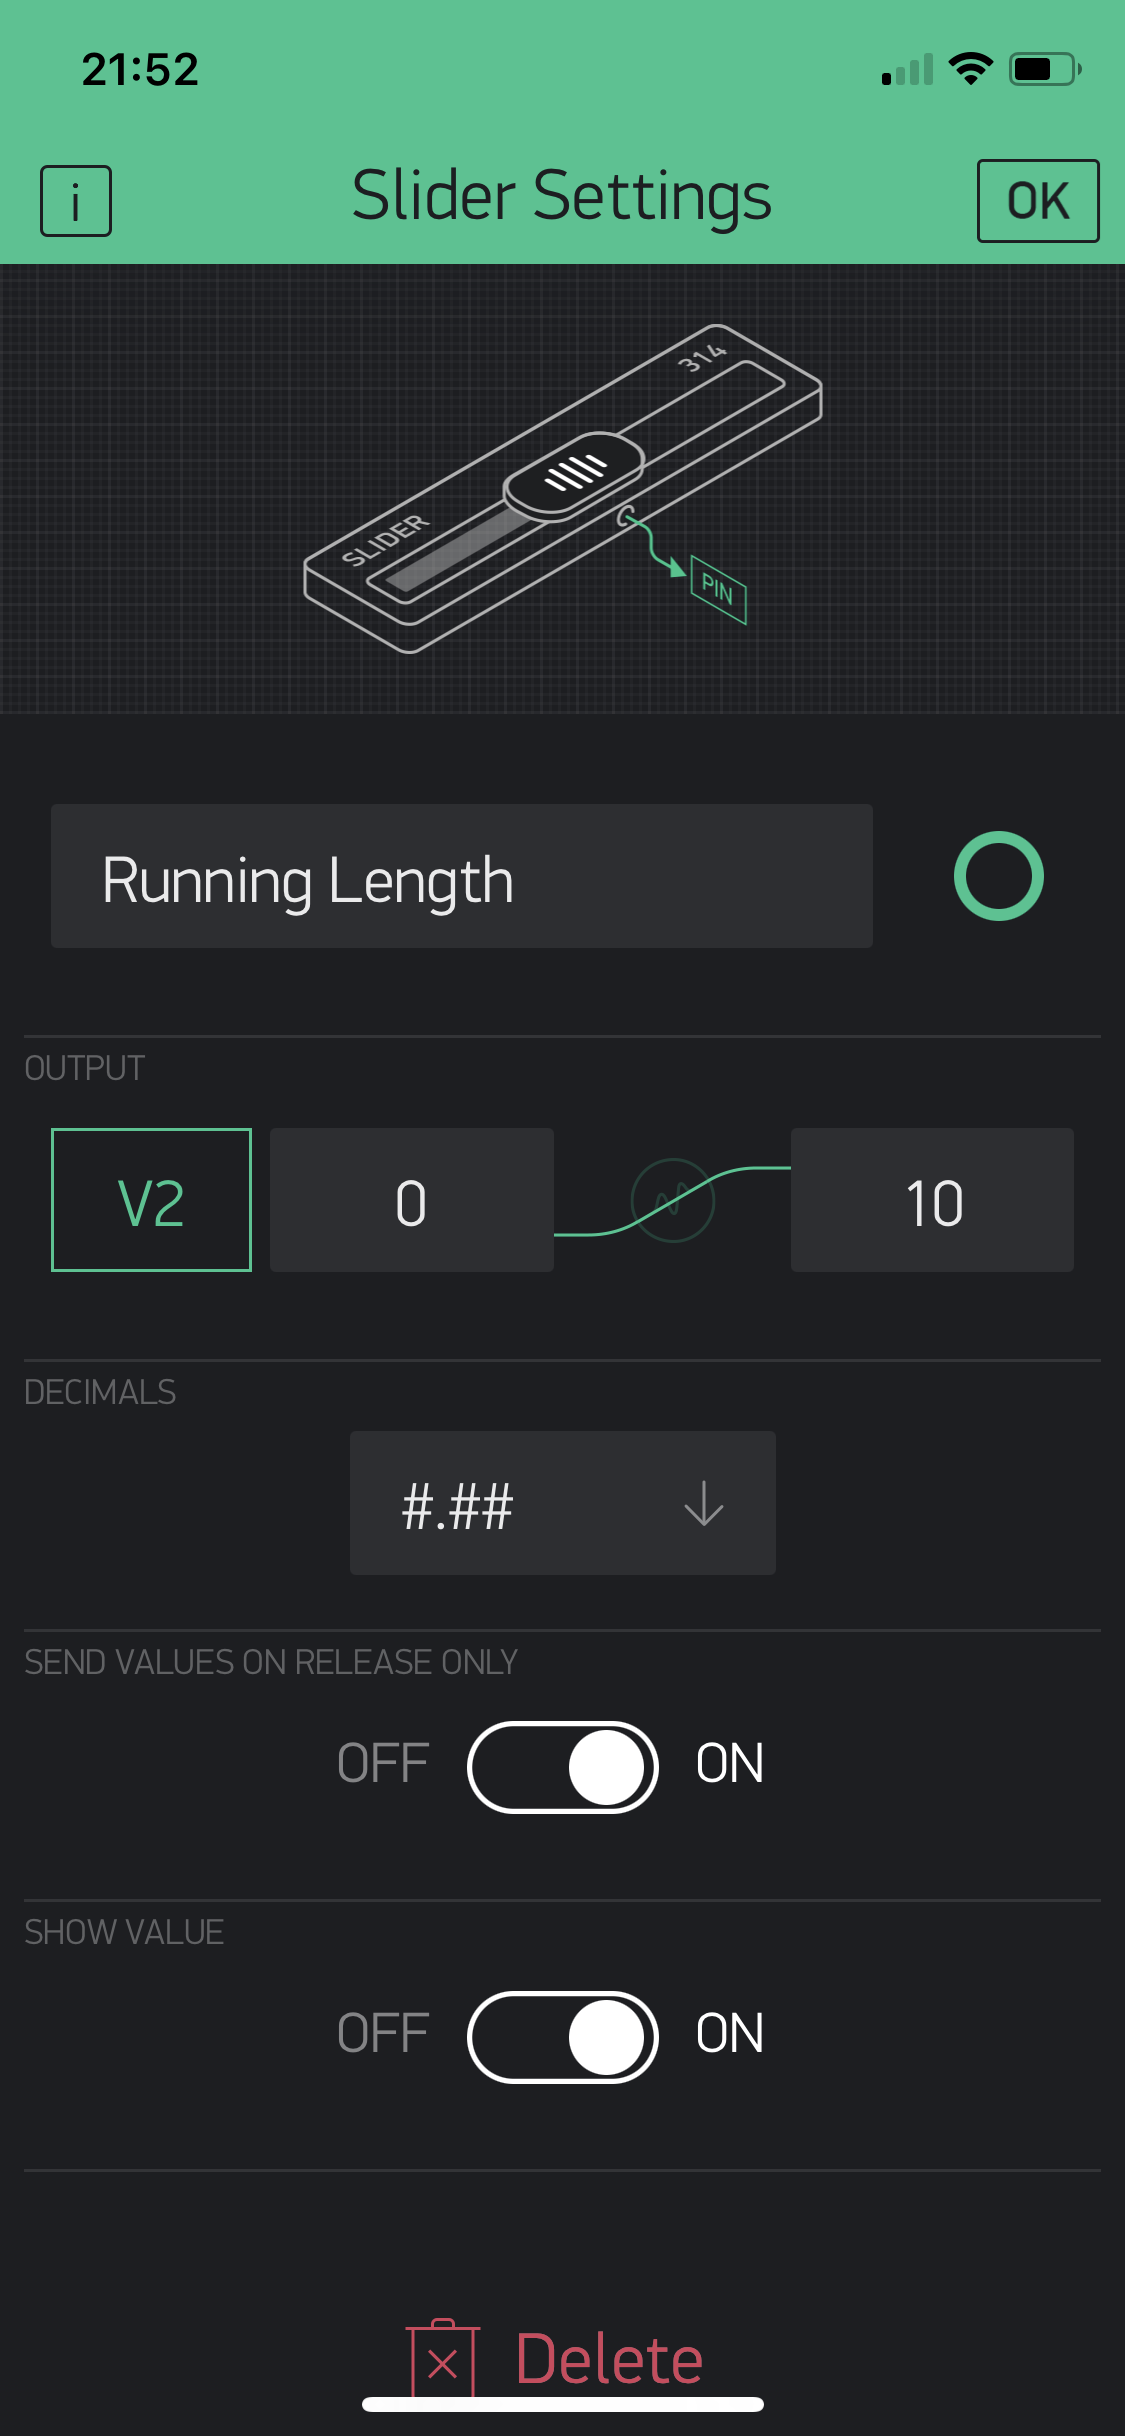
Next, we will build a Blynk (https://blynk.io/) dashboard:
- Download the Blynk app to your smartphone and create an account or log in
- Create a project and choose Arduino MKR 1000 as the device
- Add the following widgets and configure them:
- Value Display
- Configure it to virtual pin V1
- GPS Stream
- Configure it to virtual pin V5
- WebHook
- Configure it to virtual pin V4
- Slider
- Configure it to virtual pin V2
- Limit output to 0-10
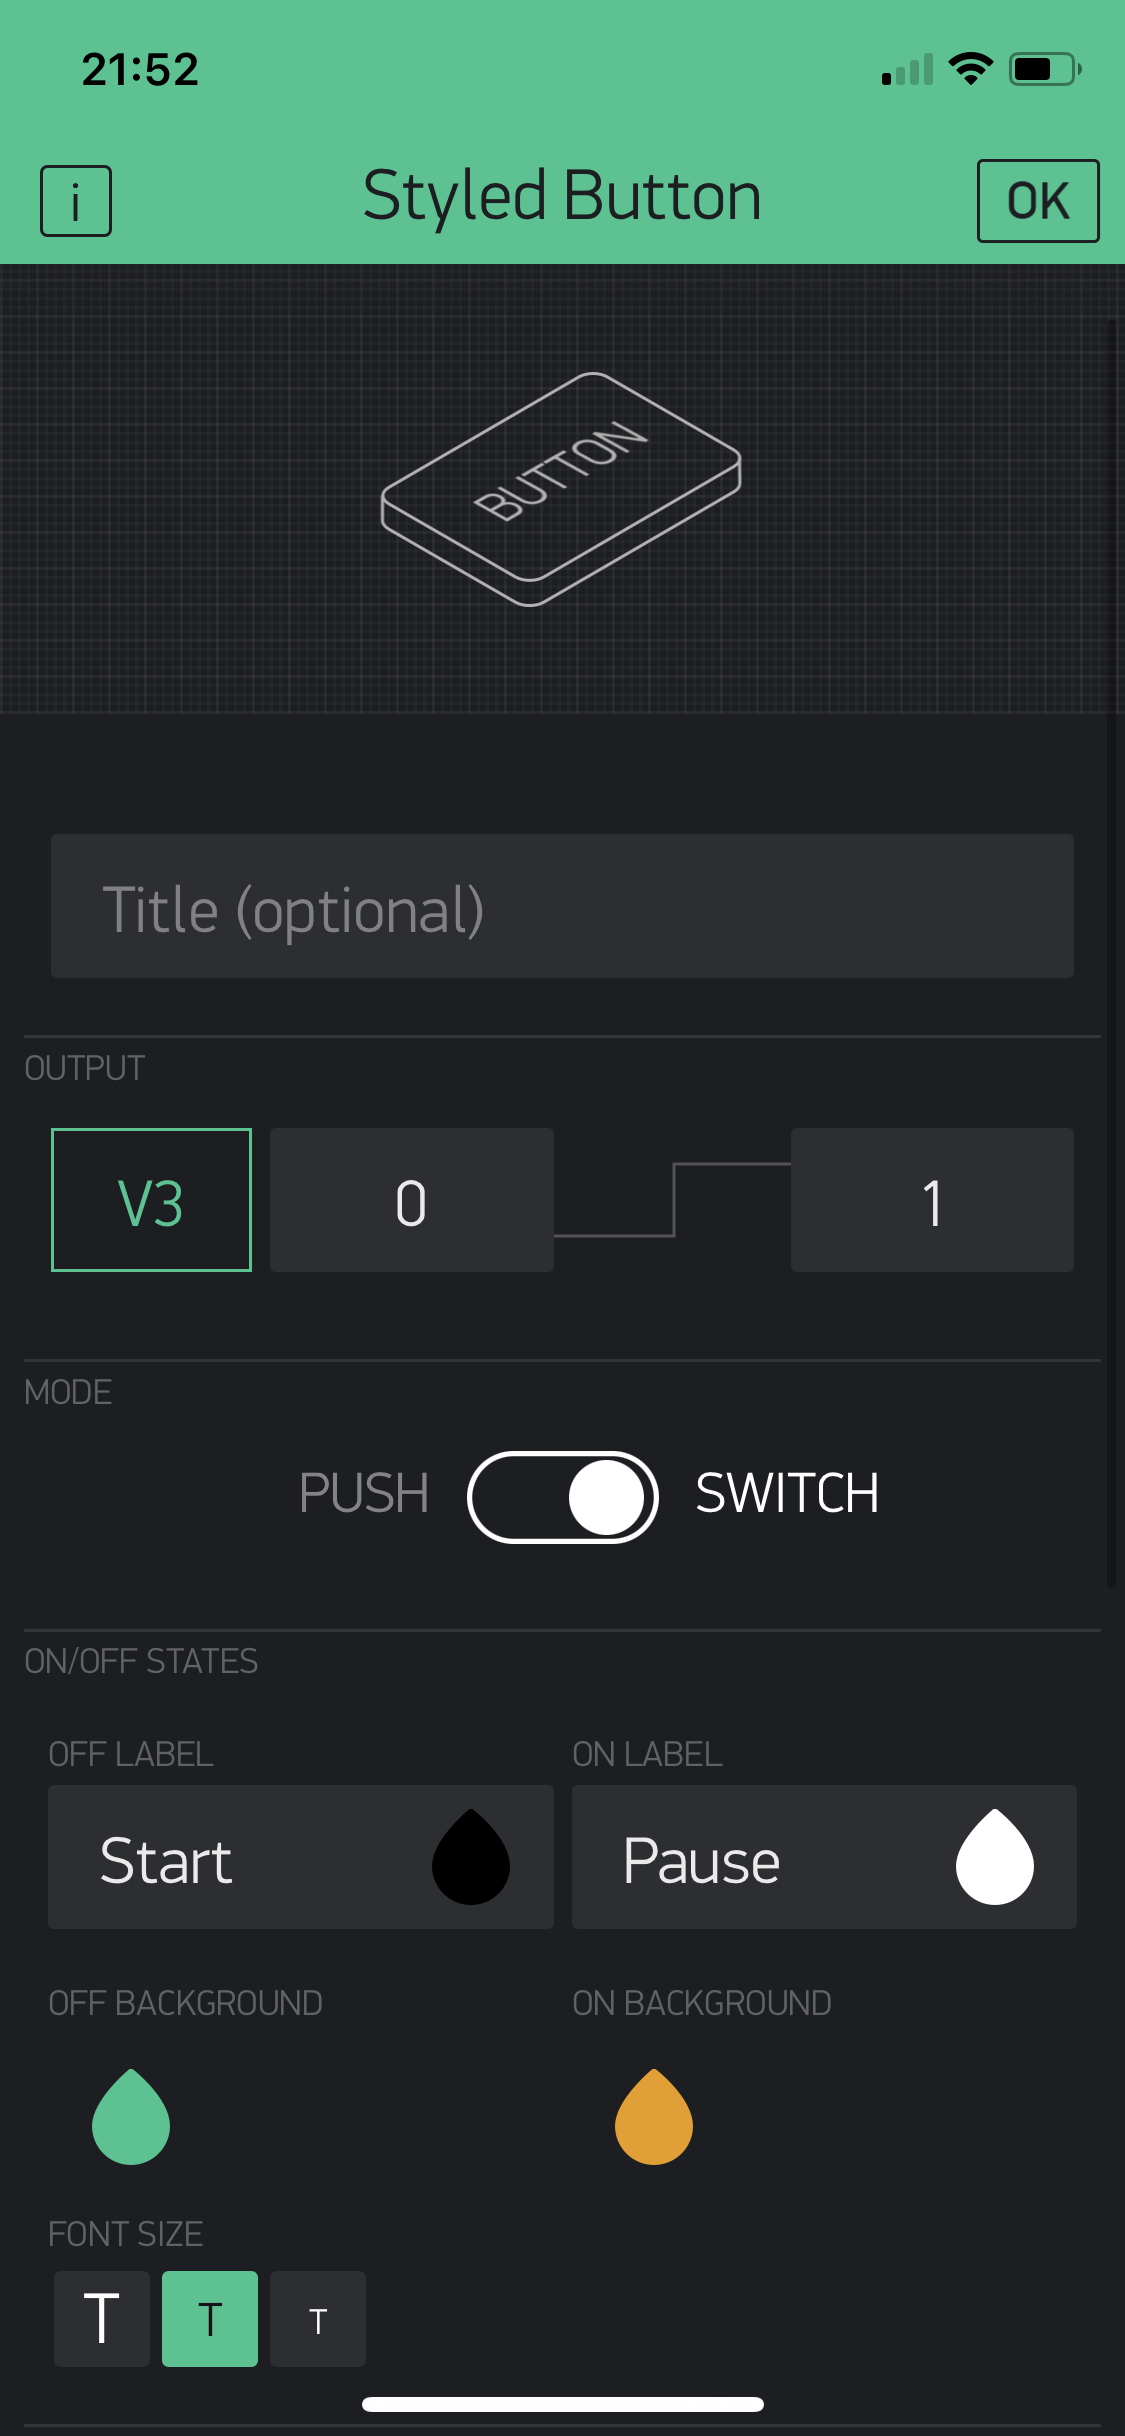
- 1st Styled Button - Start/Pause
- Configure it to virtual pin V3
- Change to Switch instead of Push Mode
- Set Off label "Start" in black color and green background
- Set On label "Pause" in white color and orange background
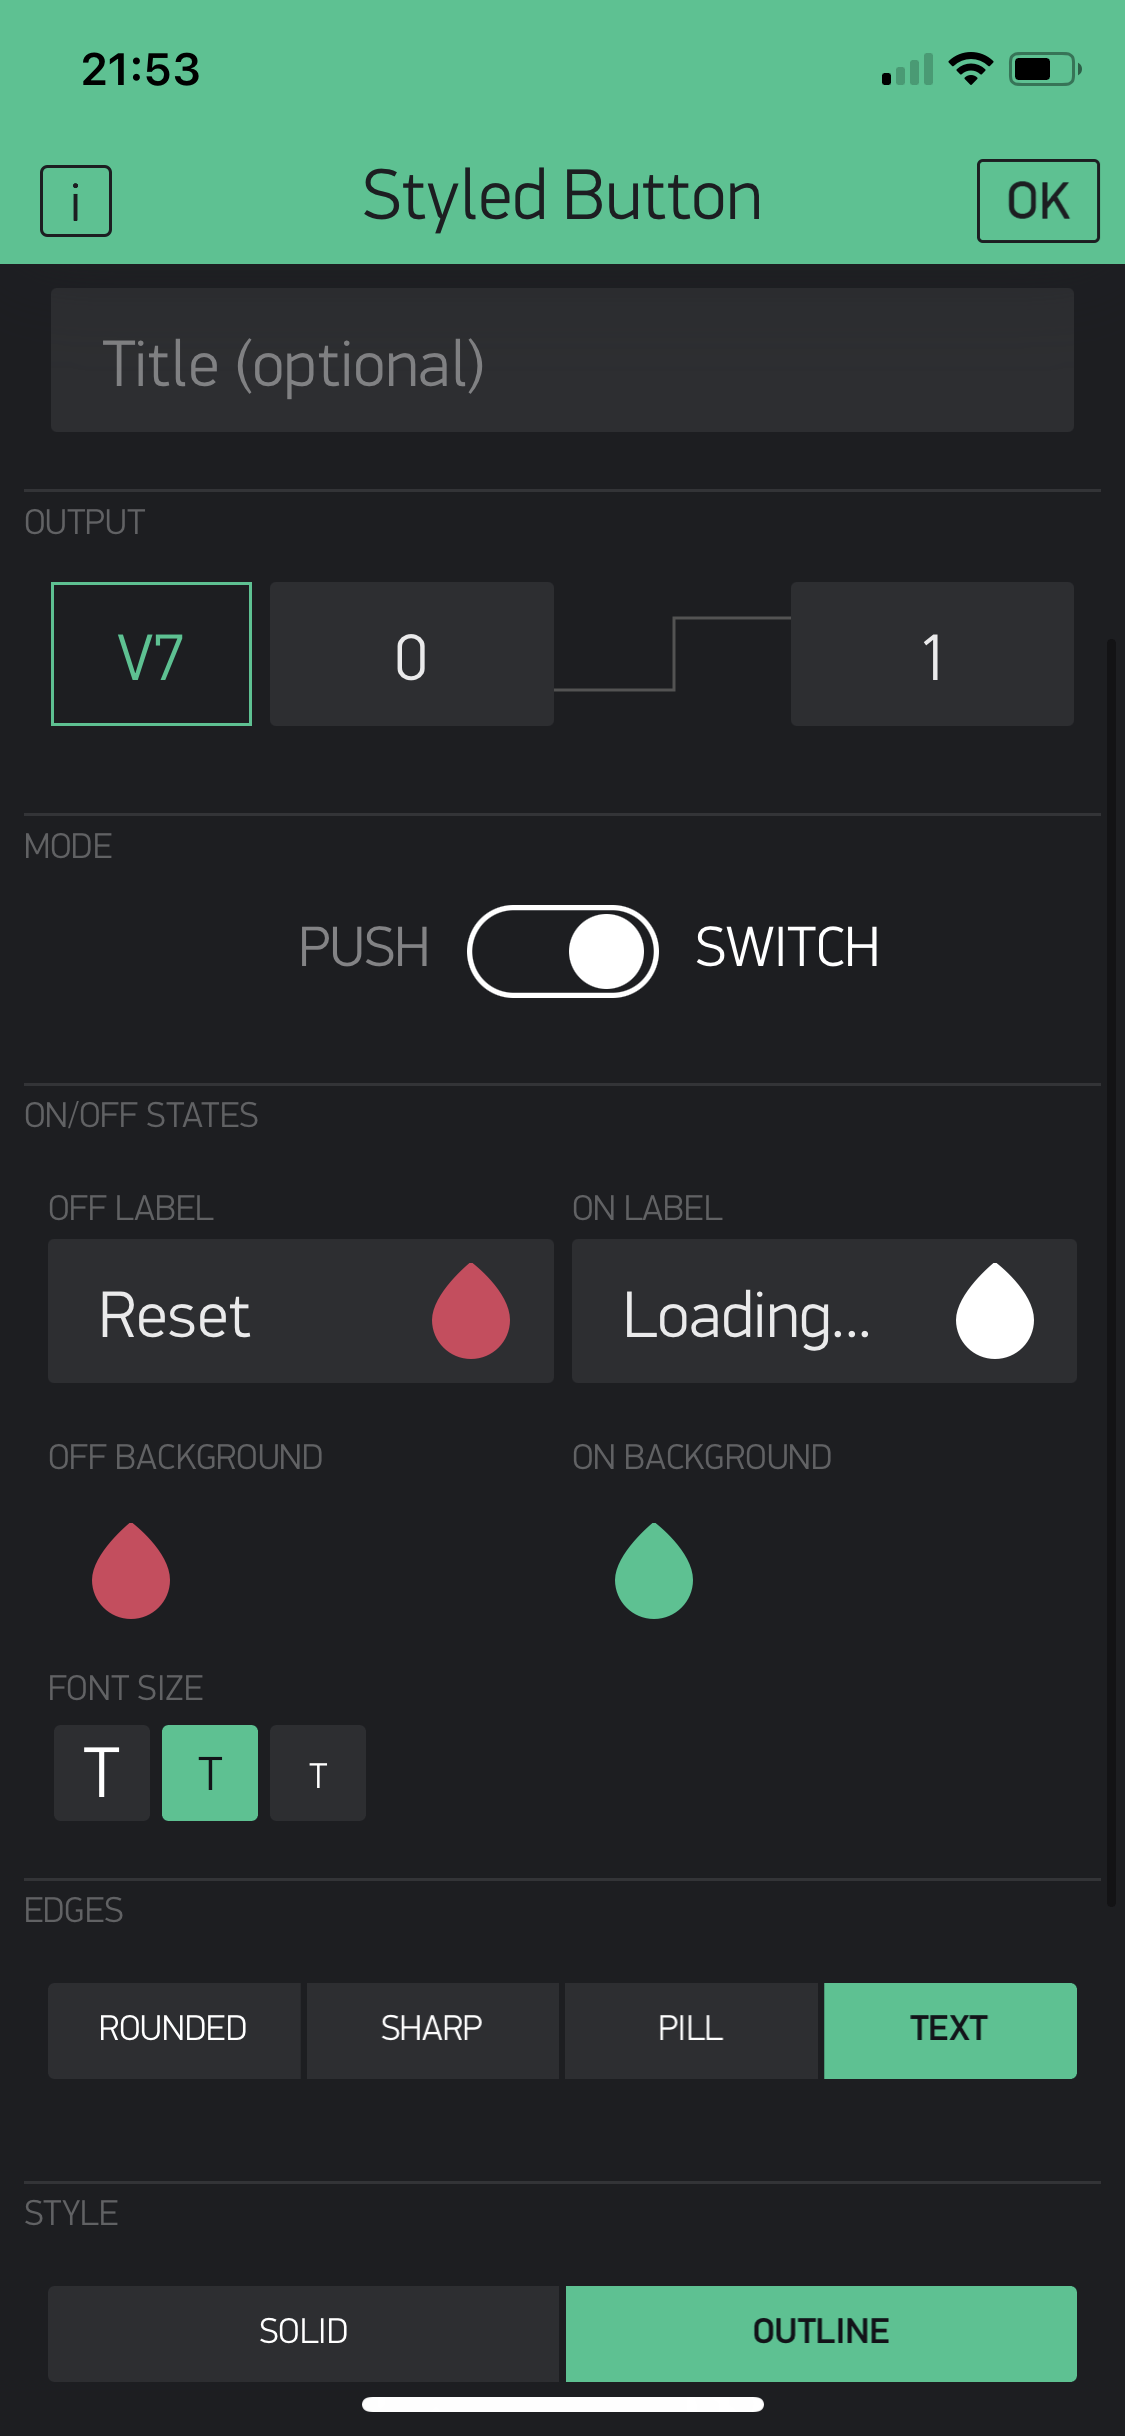
- 2nd Styled Button - Reset
- Configure it to virtual pin V7
- Change to Switch instead of Push Mode
- Set Off label "Reset in red color and black background
- Set On label "Loading..." in white color and black background
- Value Display
For further details:
- Blynk documentation - http://docs.blynk.cc/
- Blynk examples - https://examples.blynk.cc/?board=ESP8266&shield=ES..
Integromat

Next, we will build Integromat scenarios:
- Go to Integromat website https://www.integromat.com/en/
- Sign up or sign in
- Go to Scenarios
- Click on Create a new scenario button
- For the main scenario add Webhooks, Android, Weather, HTTP, and Google Sheets (further details on next step)
- For the second scenario add Android and HTTP (further details in 2 steps)
For further details:
- Integromat help & tutorials - https://support.integromat.com/hc/en-u
Integromat - Main Scenario


The main scenario updates run data on Google Sheet, sends a notification when a run is done, Updates weather, and sends an SMS to the emergency contact
- Webhook - Custom webhook:
- Click on Webhooks and choose Custom webhook
- Click Add, name it, and click Save
- Click on Copy address to clipboard
- Click on Re-determine data structureAdd the following addition to the end of the copied link: ?runningTime=/pin[0]/&totalRunningDistance=/pin[1]/&totalSteps=/pin[2]/&calories=/pin[3]/&lastHeartBeat=/pin[4]/&sendSMS=/pin[5]/&lat=/pin[6]/&long=/pin[7]/example: https://hook.integromat.com/ah4zc8vwybyf842kd46tk...
- Open your browser, paste the link and click enter
- Tools -> Router:
- Connect it to Both Android and Weather (further details down)
- Android - Send text message:
- Add a device and choose it
- Add your SMS recipient
- Copy and paste the following message: Help! Please pick me up! My current location is {{1.lat}} {{1.long}}
- Filter between the router and Android
- Click on the connection
- Click on Set up a filter
- Condition: {{1.sendSMS}}
- Equal to: 1
- Weather - Get current weather
- Location by: coordinates
- Geographic latitude: {{1.lat}}
- Geographic longitude: {{1.long}}
- HTTP - Make a request
- ping blynk-cloud.com the check IP
- Add URL and change [BLYNK_IP] and [AUTH_TOKEN] with your details: http://[BLYNK_IP]/[AUTH_TOKEN]/update/V0?value={{...
- Google Sheets - Add a row
- Mode: Select spreadsheet and sheet
- Choose spreadsheet and sheet
- Values:
- Start Time (A) = {{formatDate(addSeconds(now; "-" + 1.runningTime); "DD.MM.YYYY HH:mm")}}
- End Time (B) = {{formatDate(addSeconds(now; "-" + 1.runningTime); "DD.MM.YYYY HH:mm")}}
- Running Time (C) = {{floor(1.runningTime / 3600)}}:{{floor((1.runningTime % 3600) / 60)}}:{{((1.runningTime % 3600) % 60)}}
- Running Distance (D) = {{1.totalRunningDistance}} km
- Total Steps (E) = {{1.totalSteps}}
- Calories (F) = {{1.calories}}
- Heartbeat (G) = {{1.lastHeartBeat}}
- Outdoor Temperature (H) = {{4.temperature}} °c
- Weather Status (I) = {{4.name}}
- Filter between HTTP and Google Sheets
- Click on the connection
- Click on Set up a filter
- Condition: {{1.runningTime}}
- Not equal to: {{emptystring}}
- Android - Send a push notification
- Choose a device
- Title: Coruna
- Body: You completed a {{1.totalRunningDistance}} km run in {{floor(1.runningTime / 3600)}}:{{floor((1.runningTime % 3600) / 60)}}:{{((1.runningTime % 3600) % 60)}}! Well done! Click for more details on Google Sheet
- Click action: Open URL
- URL: add your Google Sheets URL
Integromat - Second Scenario


The second scenario is sending an SMS notification
- Android - Watch sent SMS
- Add device
- HTTP - Make a request:
- Add URL and change [BLYNK_IP] and [AUTH_TOKEN] with your details: http://[BLYNK_IP]/[AUTH_TOKEN]/update/V6?value=1
- Filter between Android and HTTP
- Condition: {{1.recipient}}
- Equal to: Emergency recipient number from previous step
- Add AND rule
- Condition: {{1.message}}
- Contains: Help!
Measuring Heartbeat and Number of Steps
Another two features that our devices supply is measuring heartbeat and in addition during the run it will measure the number of steps.
The heartbeat measuring is made in the following way:
- Set a green light from the pixel that is closest to the light sensor in the CPX. - Then read the light sensor value every 25ms.
- This will form a graph that is correlated to our heart pulse (since the green light is returned in a different intensity from our finger due to the blood cycle in our body).
- Count every time there is an amplitude as a heartbeat for 15 seconds and multiply the result by 4.
Next measuring the steps is done by using an outside algorithm (https://github.com/adafruit/Circuit_Walker_Sneaker...) that translates the difference in the accelerometer values to indicate when a step is done.
In a situation when the CPX is attached to our body and a step is made, there will be a sudden change in the X, Y, Z values that are returned by the accelerometer.
Notice the attached code for both features in the following step.
CPX Sketch
Locate the attached zip folder at your Arduino folder and use Arduino IDE to edit the following:
- char auth[] = [BLYNK_AUTH_TOKEN]
- char ssid[] = [SSID]
- char pass[] = [PASSWORD]
Connect the CPX and upload the sketch
- Distance is measured using the haversine function from https://stackoverflow.com/questions/365826/calcula...