Cool Staff With Cpx

The modern world requires a lot of concentration and attention from us.
It is no wonder that many people feel distressed from home organization that requires a lot concentration, time and use of many memory cells in the brain.
Luckily we have a lot of technology that can be used to make our life easier.
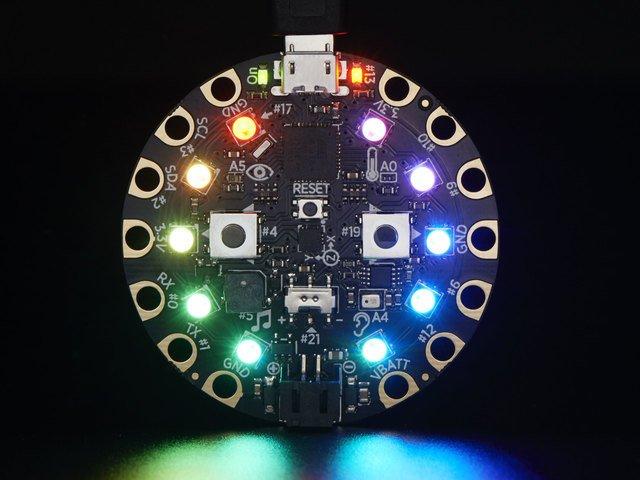
this project was done in IOT course with CPX (adafruit circuit playground express) to make people like home organization more .
In this project scenes 1 and 2 are both use CPX input from the house area and publish across useful Internet platforms.
1.using CPX for checking window cleanliness.
if the window need to be clean a notification will be send to a specific google sheet with table of home tasks.
so you don't need to remember this task and can do it in the best timing for you.
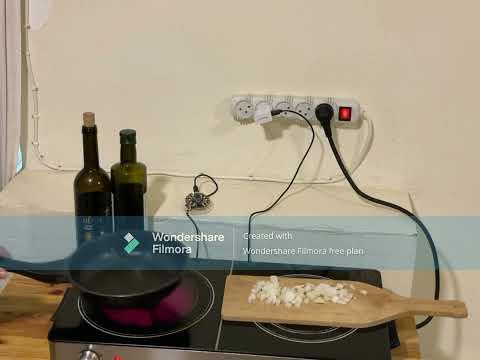
2.Alert that pan has warmed up.
can you angry that the waiting for a pan to warmed up could be considered as 'wasted time'?
its not so convenient check it's stage multiple times with thermometer or guessing it.
with CPX you can do your business next to it and when the pan ready you will be notice it by audio + light alert.
in addition you will get push notification directly into your phone, so you can be all this time in another room.
And scenes 3 and 4 are about events in the virtual world that help a person by diverse alerts.
3.CPX will remind you about important uncompleted tasks in your google sheet table.
all 10 CPX led will be in red if you have uncompleted tasks and green if the table is empty.
4.CPX will play nice audio and light effect to inform you about new post in Facebook group of home organization.
Supplies
for this project you will need:
hardware:
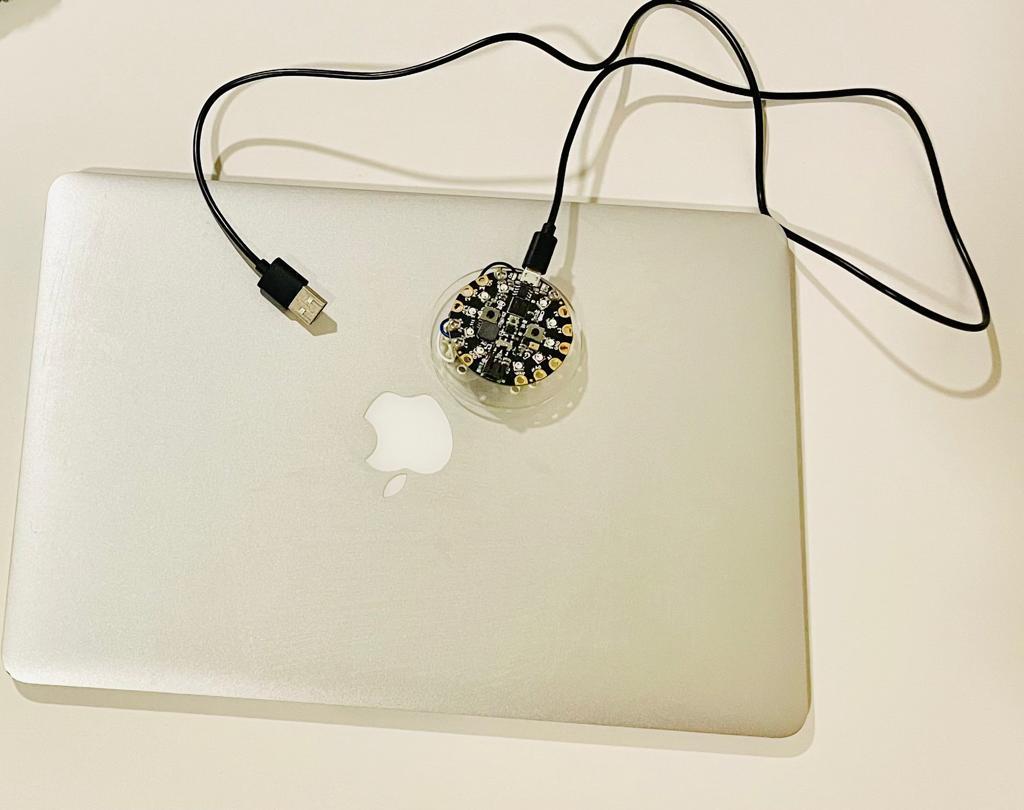
1."CPX", or in other words - "adafruit circuit playground express".
2.USB cable
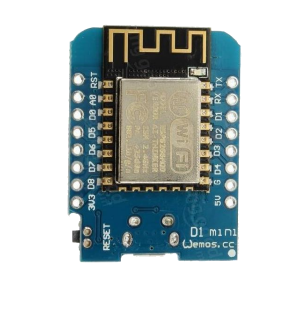
3. ESP8266 connects to the CPX with the internet.
software:
1. Arduino - IDE
2. Blink user
Just Before We Start
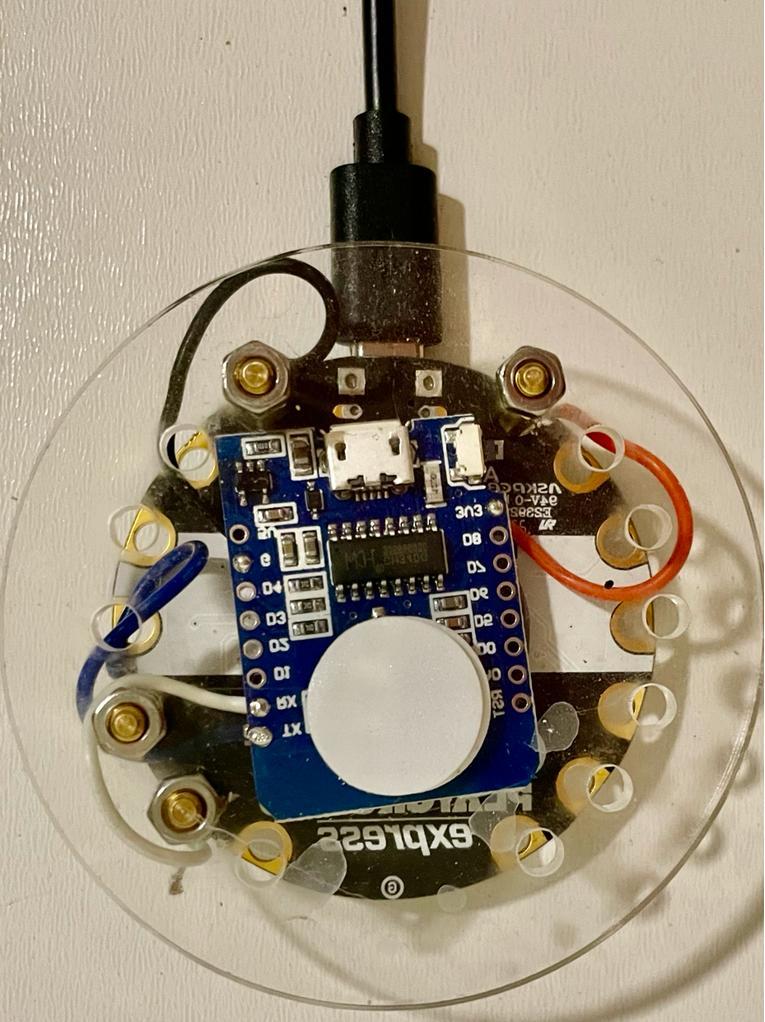
1.conect the ESP8266 to CPX:
- ESP8266 "GNP" to CPX "GNP"
- ESP8266 "VCC" to CPX "VCC"
- ESP8266 "RX" to CPX "TX(A7)"
- ESP8266 "TX" to CPX "RX(A6)"
2. Open account on Blynk platform using the following link: https://blynk.io
3. Open an account on the Integromat platform using the following link: https://www.integromat.com
4. Download driver for ESP8266 in Arduino using the following link:
https://randomnerdtutorials.com/how-to-install-esp8266-board-arduino-ide/
5. Download Arduino IDE using the following link: https://www.arduino.cc/en/Guide
6. Install the SAMD board manager using the following link: http://bit.ly/playground-arduino
Blynk
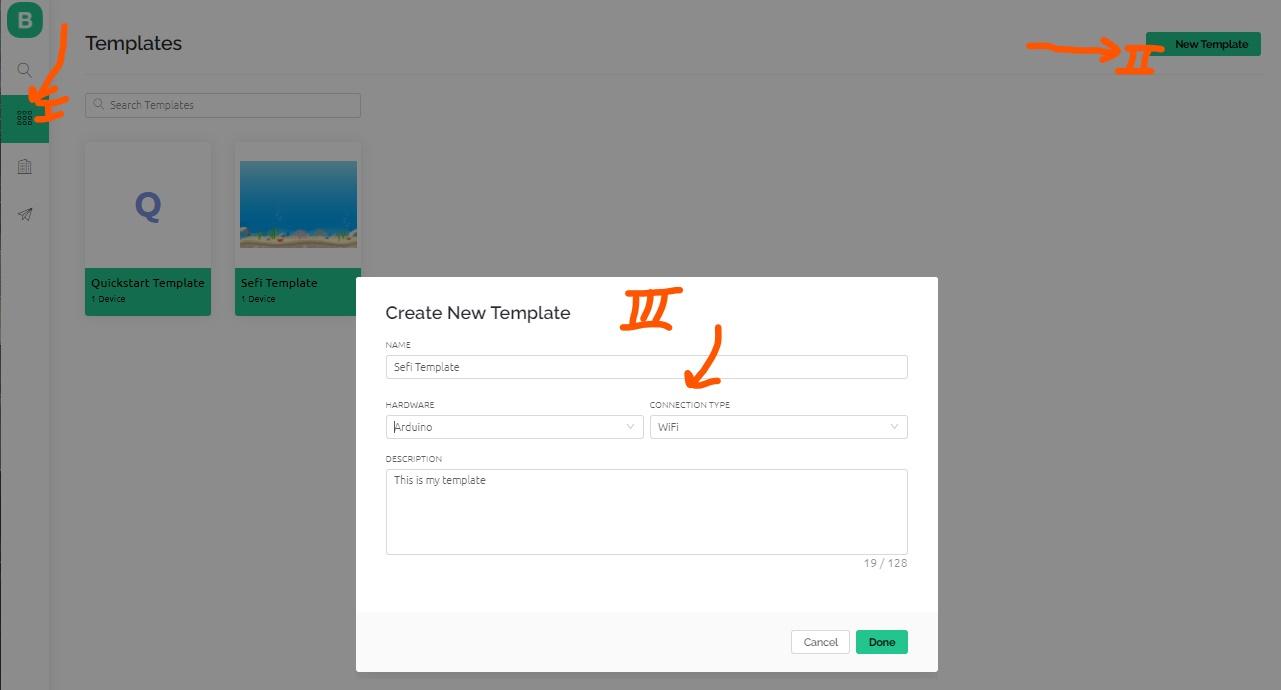

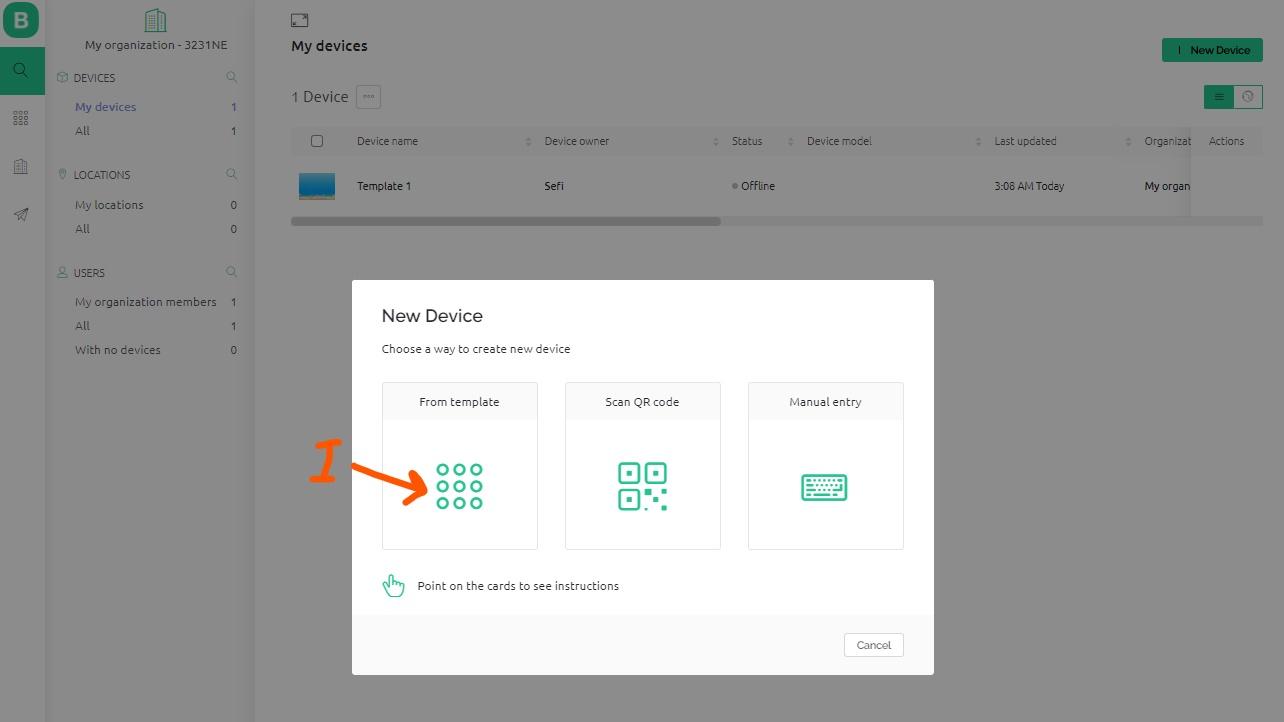
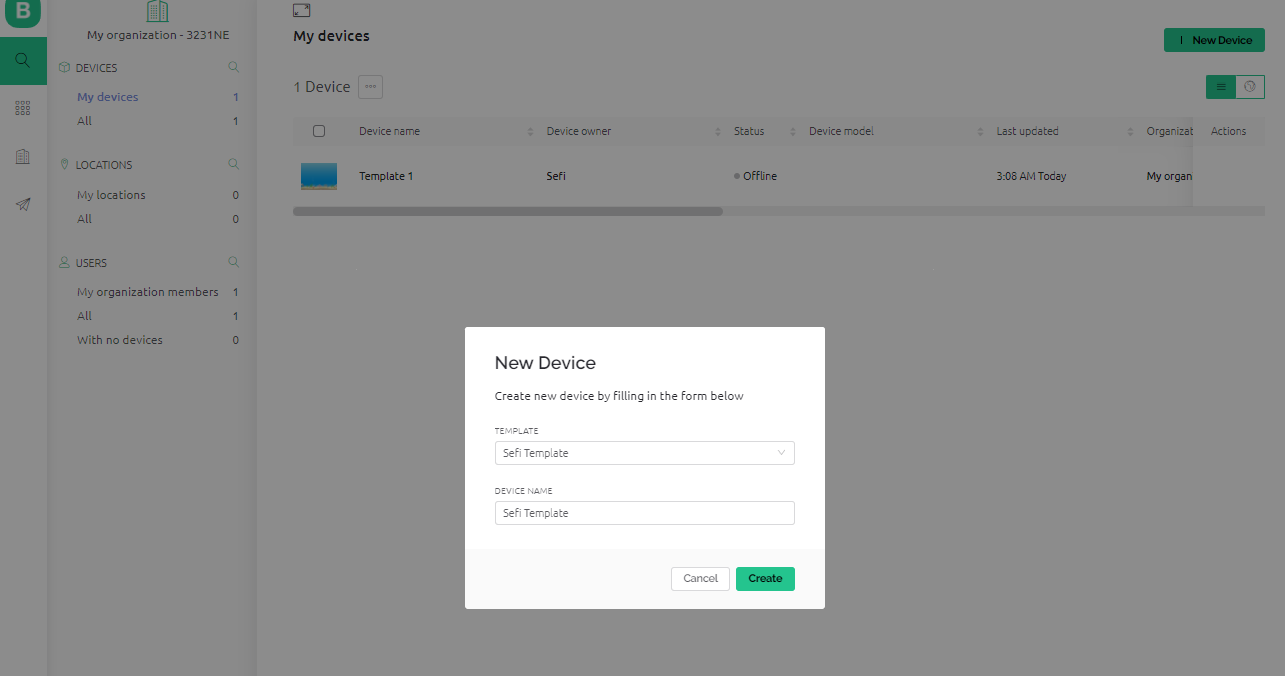
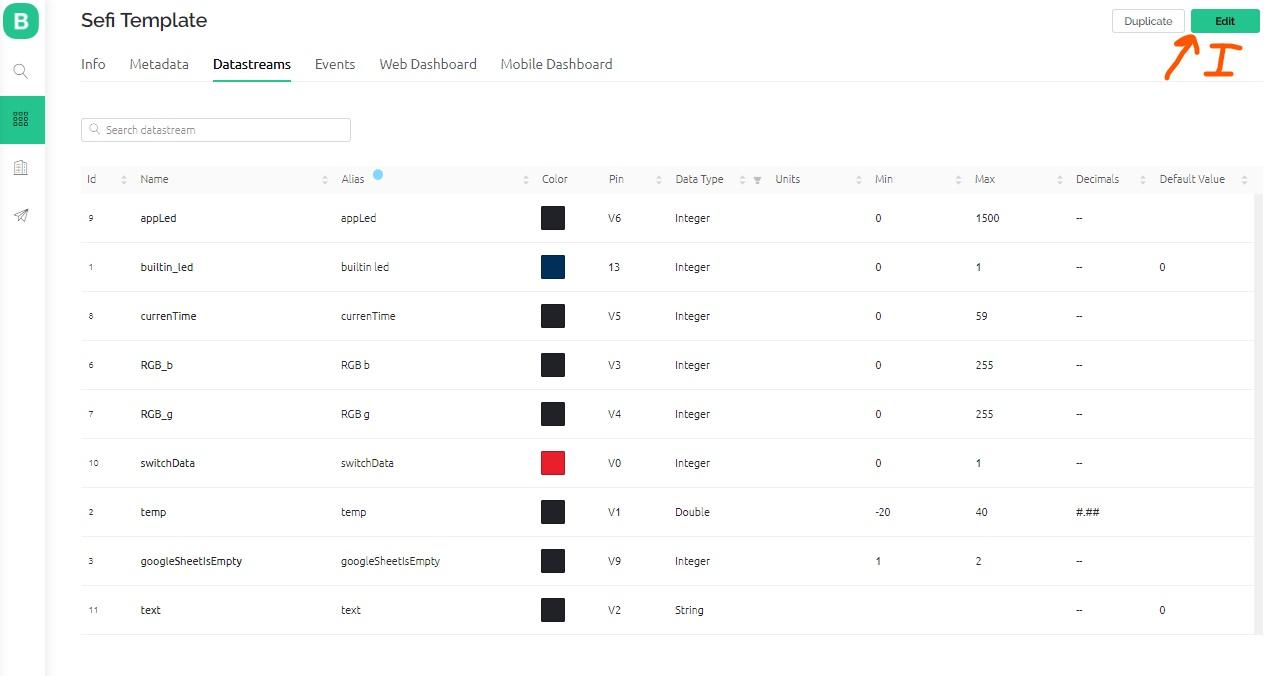
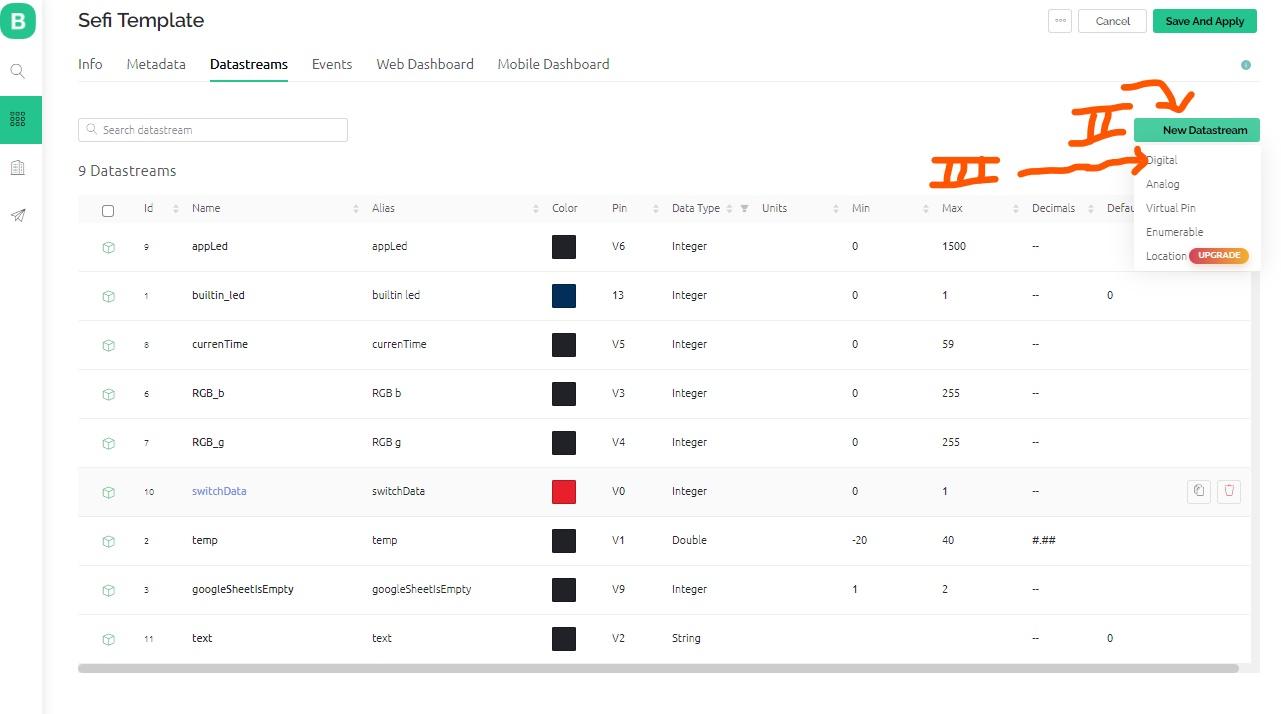
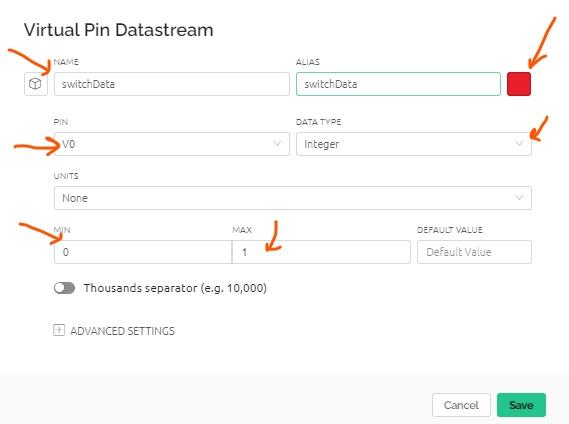
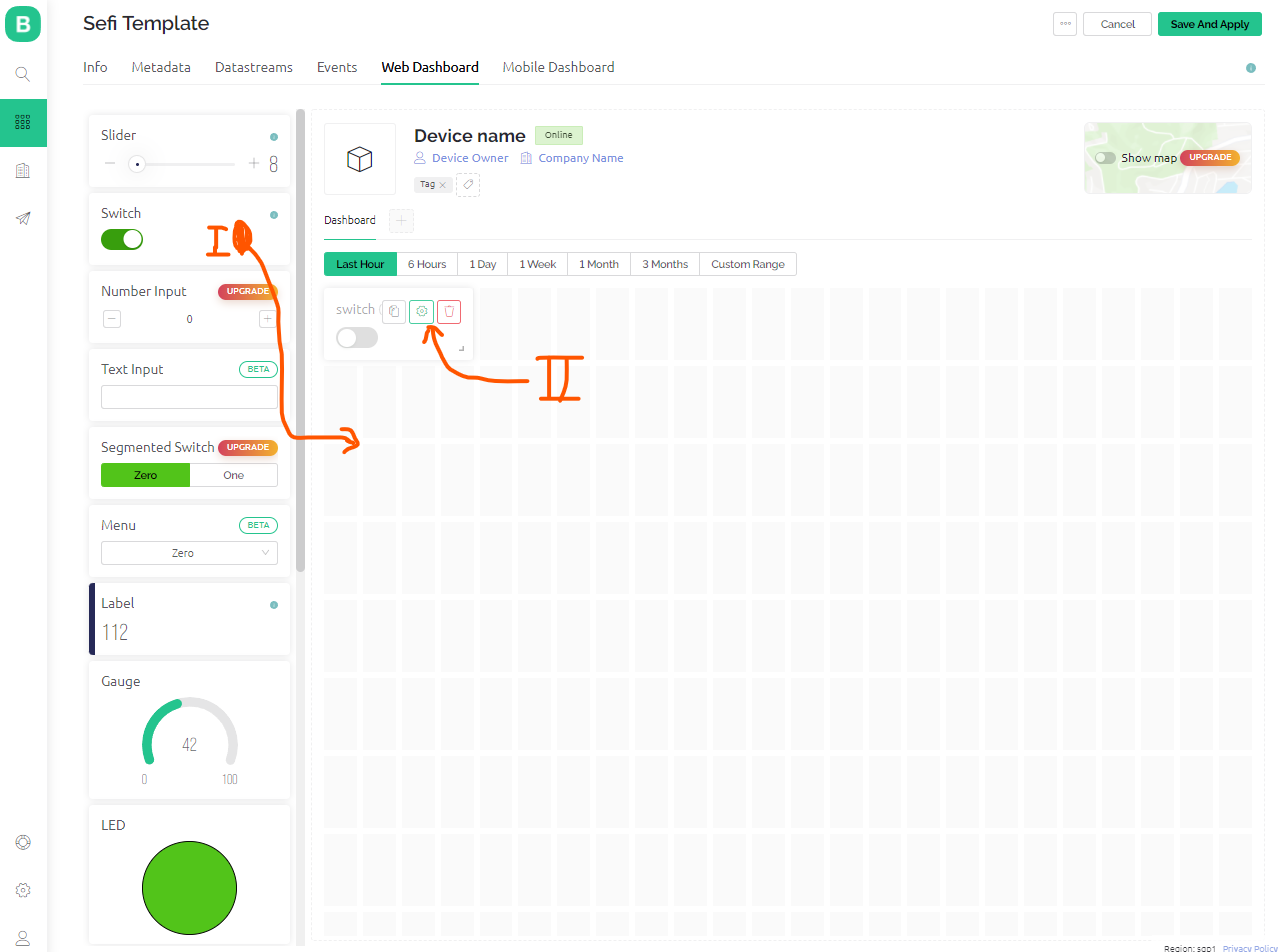
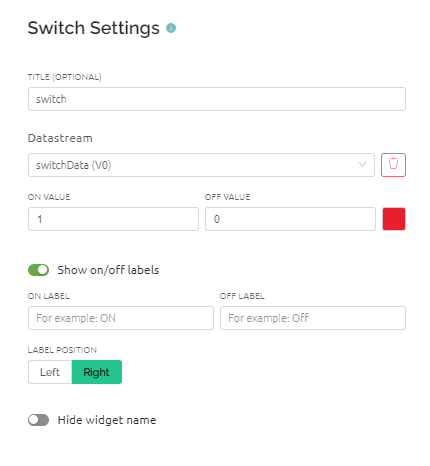
- open your account and go to 'Templates'
- click on "new Template"
- in the opened window fill all necessary fields according to the picture above.
- go to 'Search' and click "new Device" then choose your Template name and Device Name
- go back to 'Templates' -> tab "Datastreams
- click "Edit" then choose "Digital" as New Datastream and fill all necessary fields according to the picture above
- click save and apply
Integromat + Physical Preparation + Code -Scene1-mirror Cleanliness Indicator



Physical preparation:
- put your CPX next to your window near the light which comes through.
Integromat :
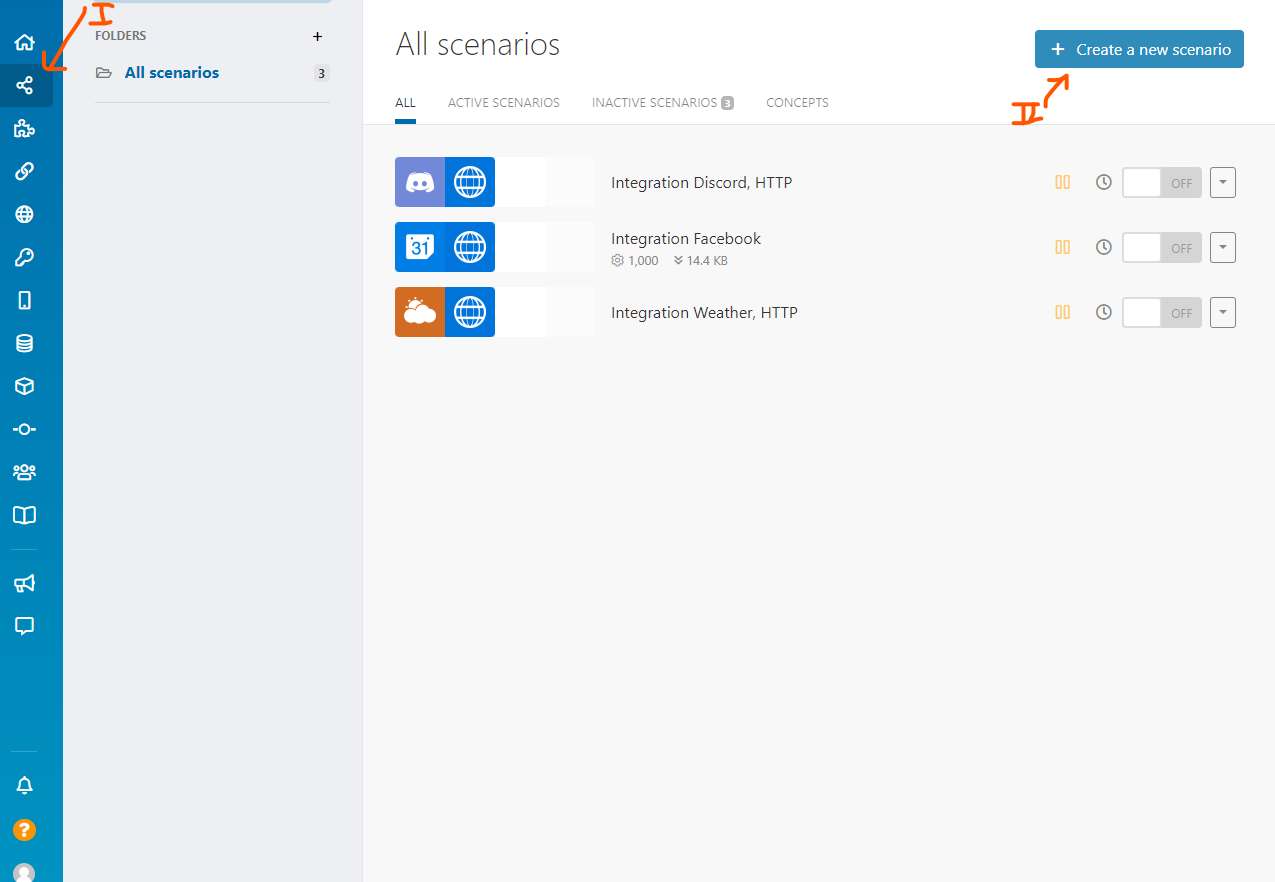
- go to 'Scenarios'
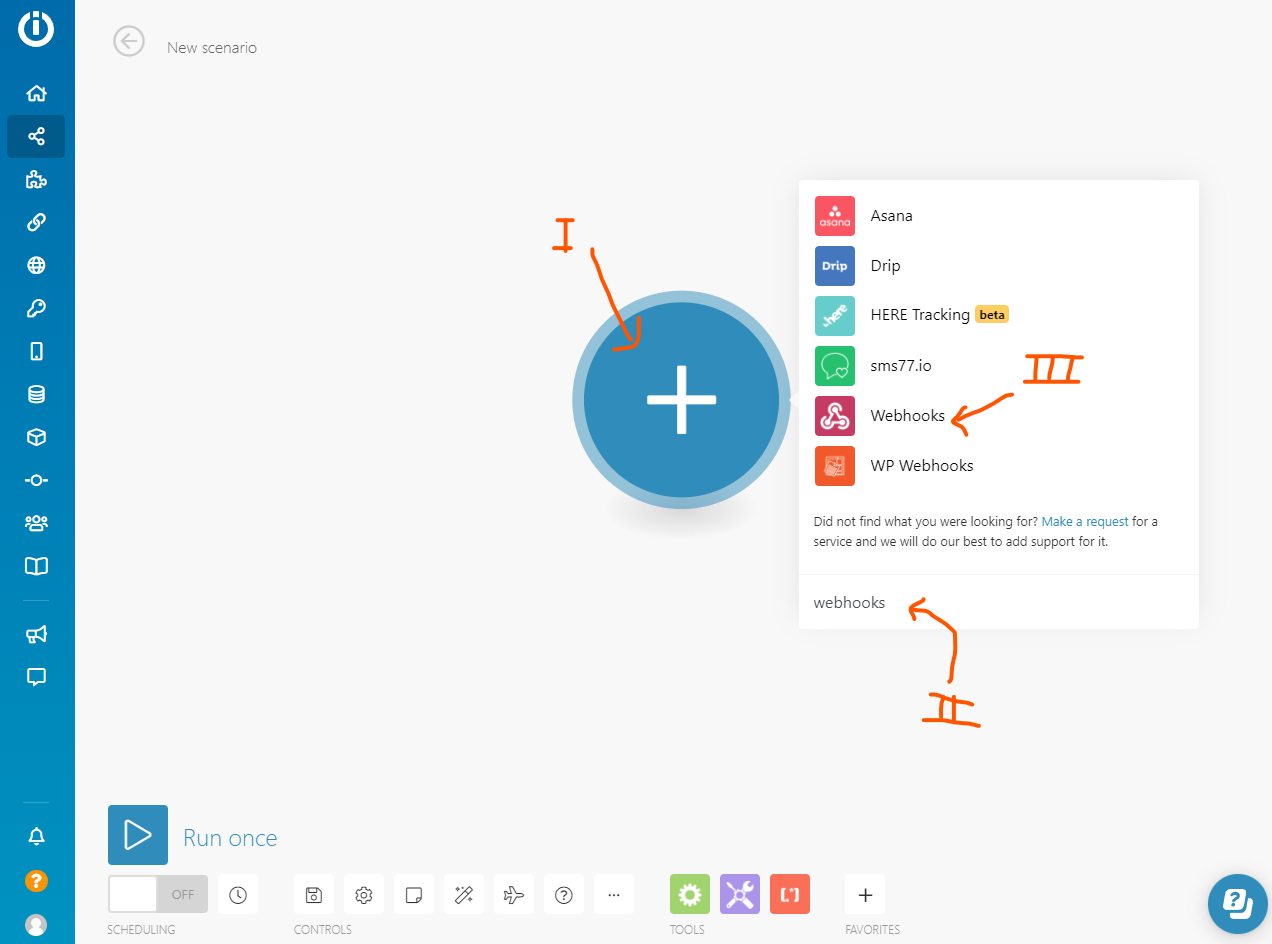
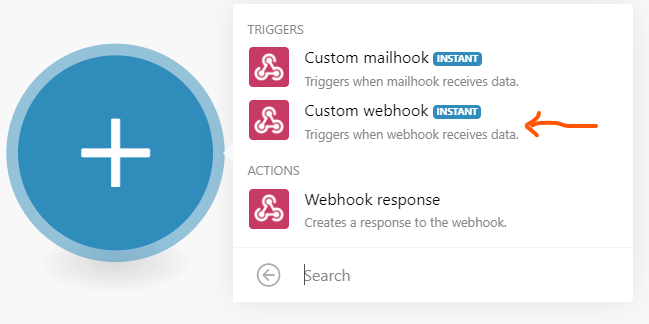
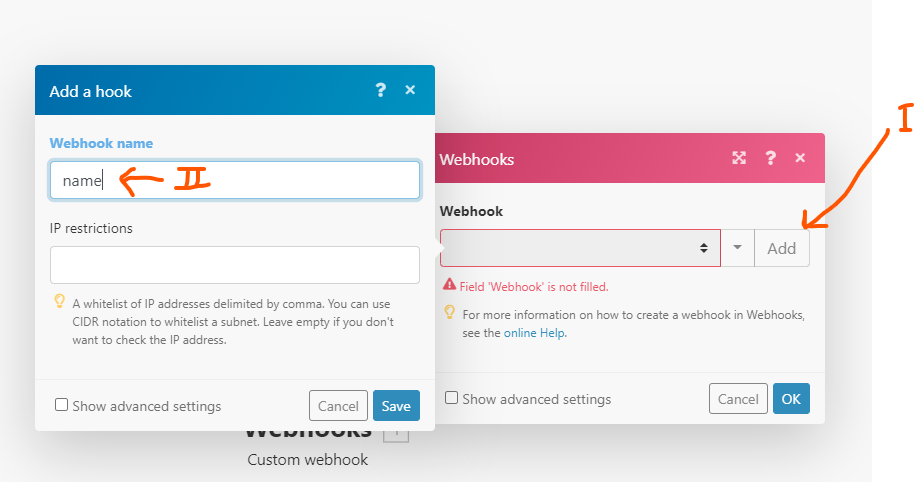
- add "Webhooks" -> "add" -> give it a lovely name
- click 'OK'
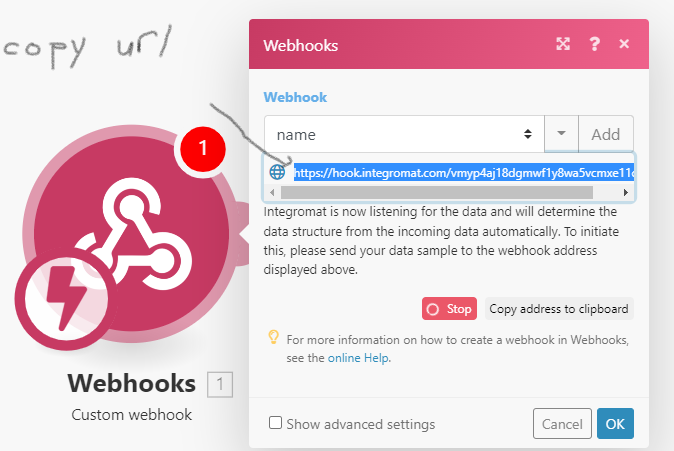
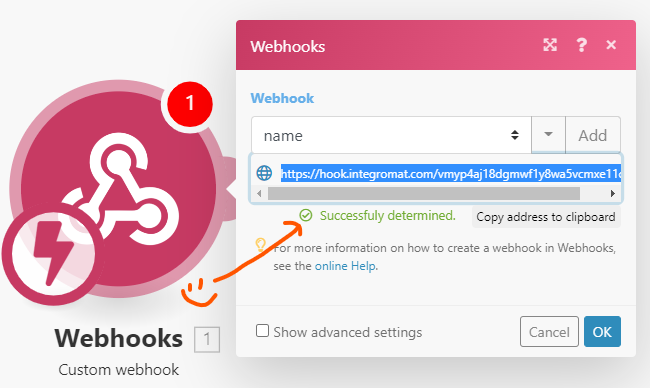
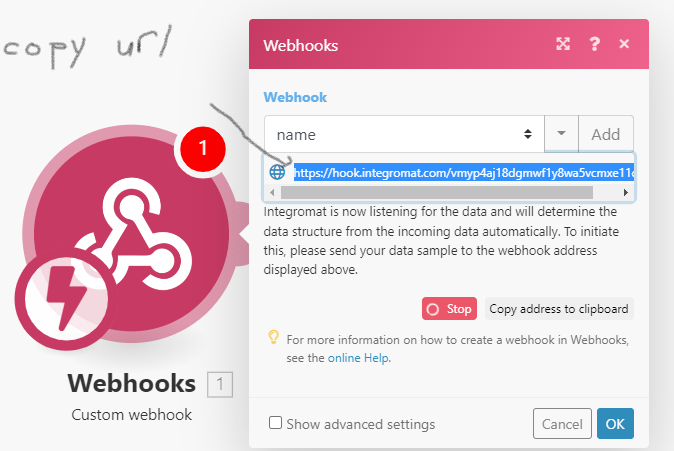
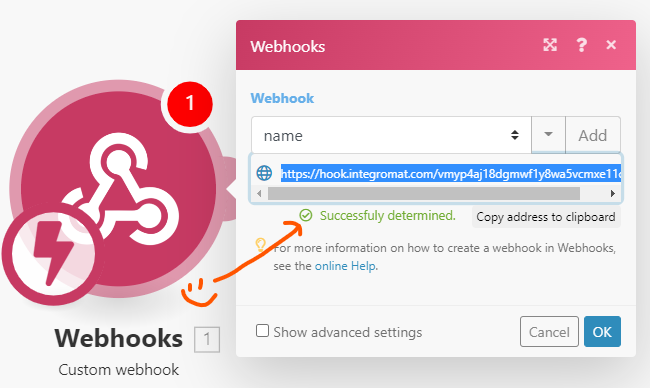
- click the Webhook icon again copy the URL -> click on "Redetermind data structure" -> open new tab and in the HTTP URL filed right:"URL?value=a" ->you shuld see 'Accepted' in body page -> go back to the integromate scene and look for success message
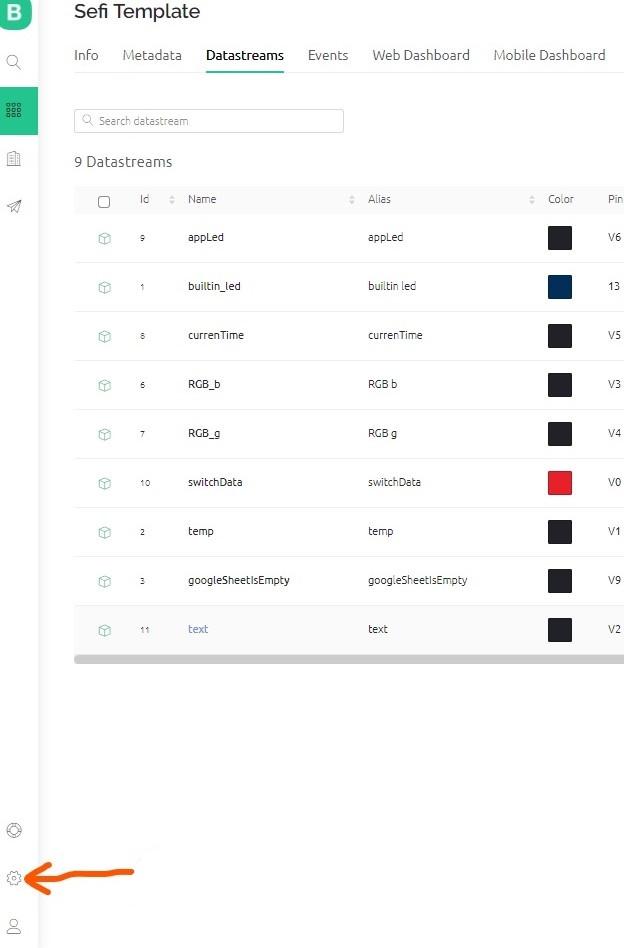
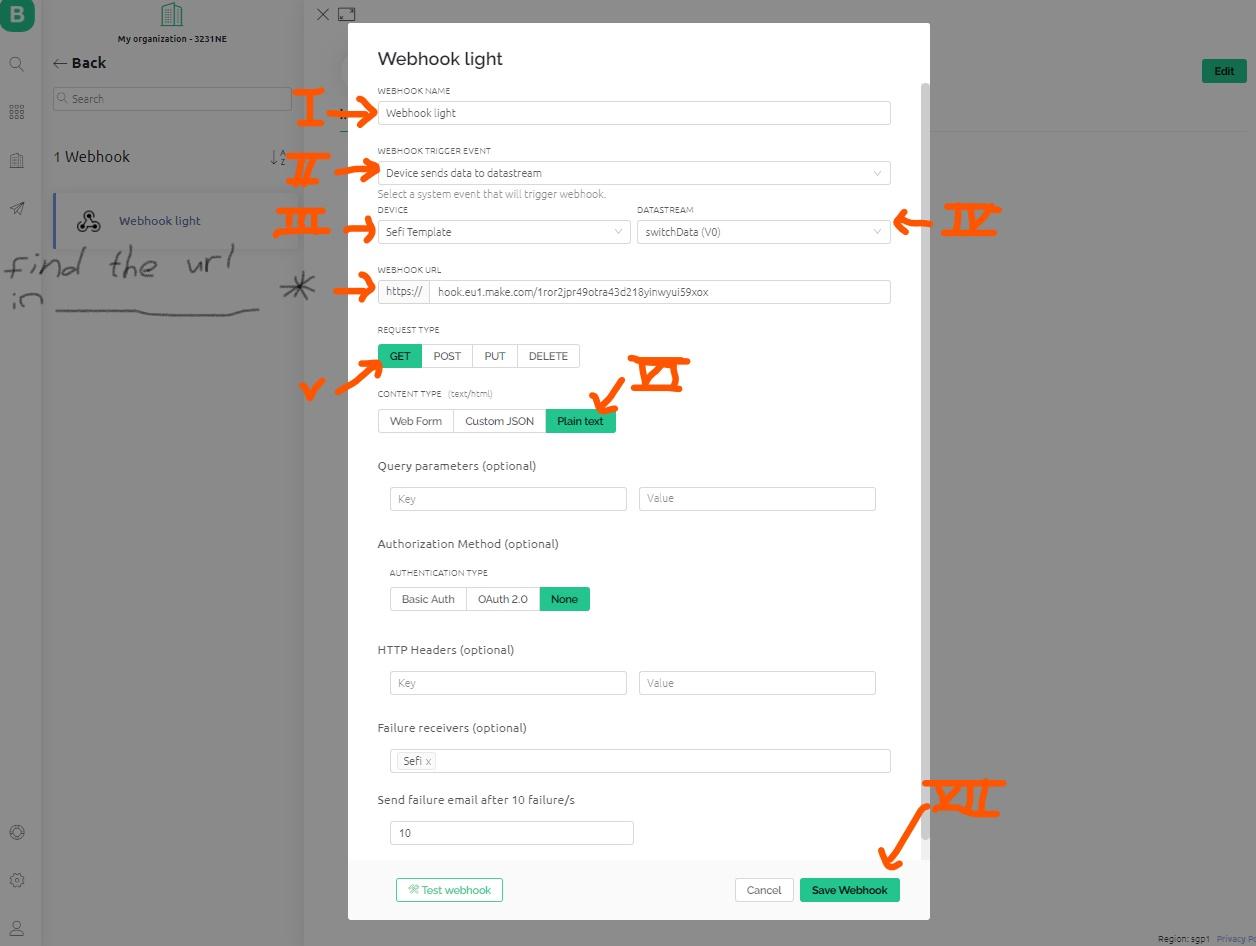
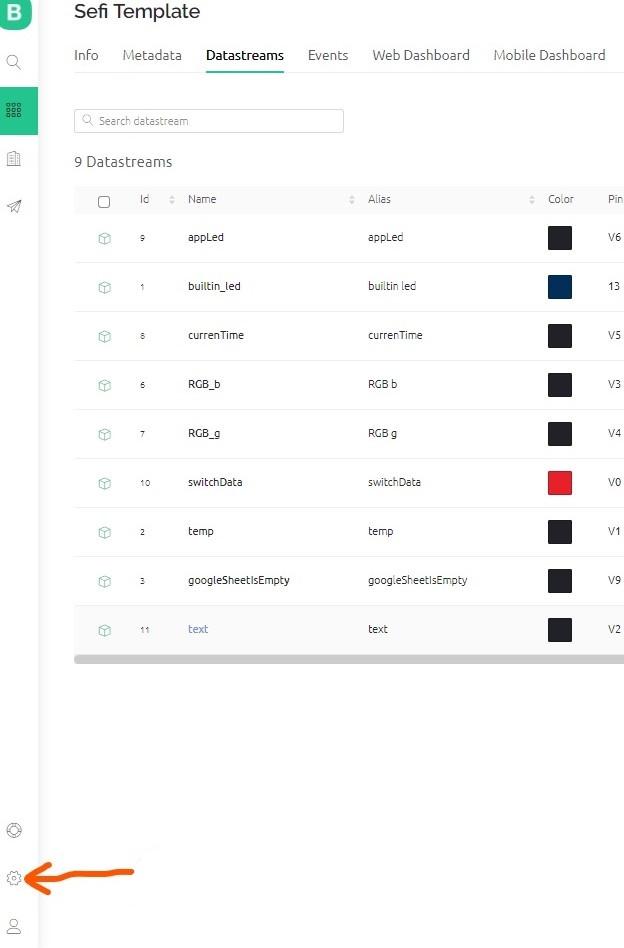
- go back to Blynk -> 'Settings' -> 'Developer: Webhook' -> in "WEBHOOK URL" field put the copyd URL from above. other field fill according to the picture above
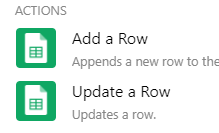
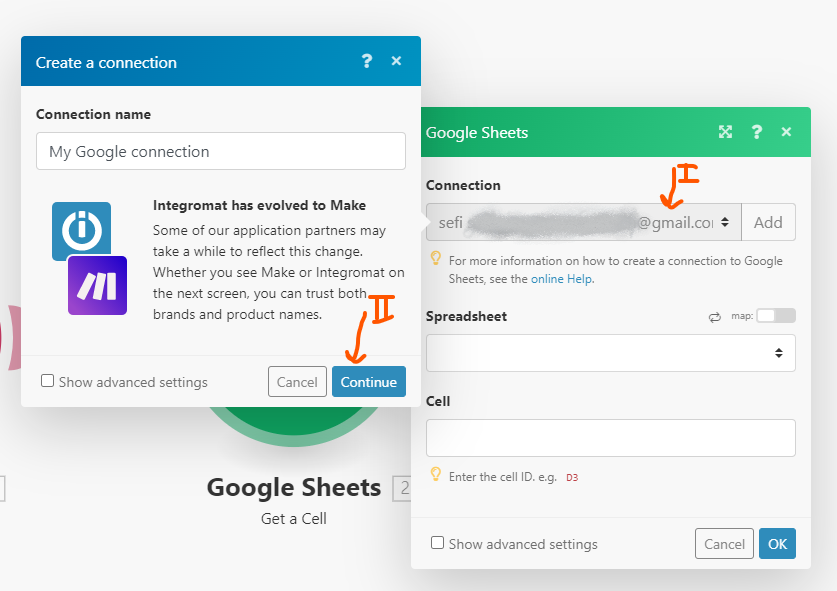
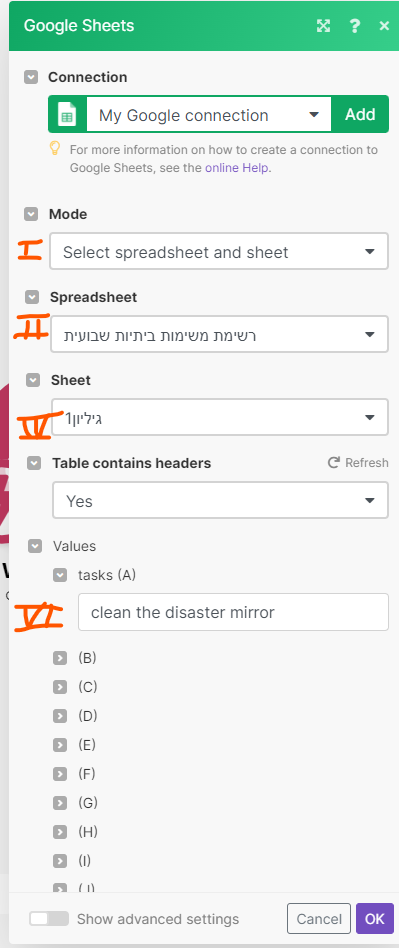
- add "google sheets" -> "Add a Row" -> connect to yours Google account -> write the desire row
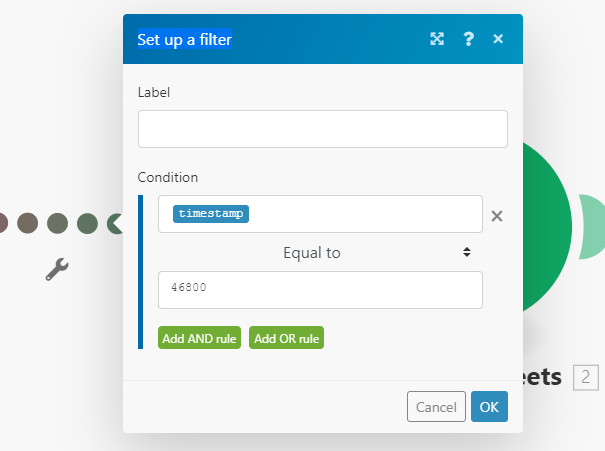
- click on the connection and then 'filter'. copy the information in the picture above and instead "46800" (= 13:00 PM) write the timestemp right for you.(the all idea was CPX use light sensore so its importent to do the prosses once a day in the same hour)
code:
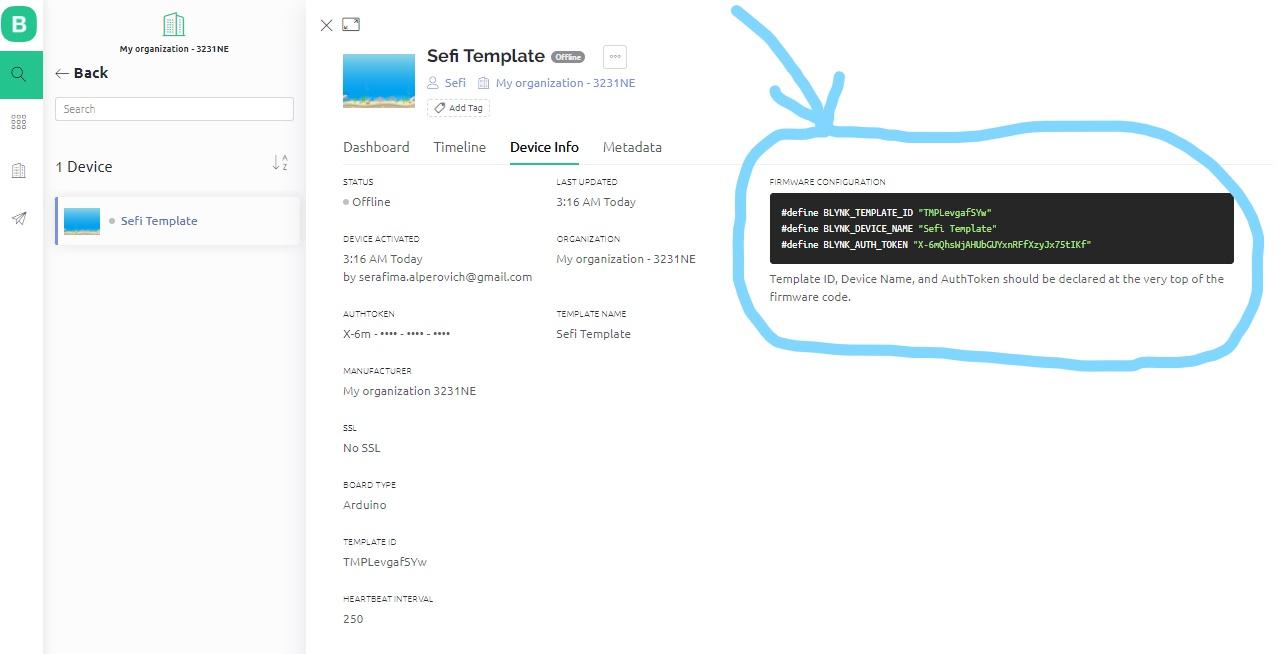
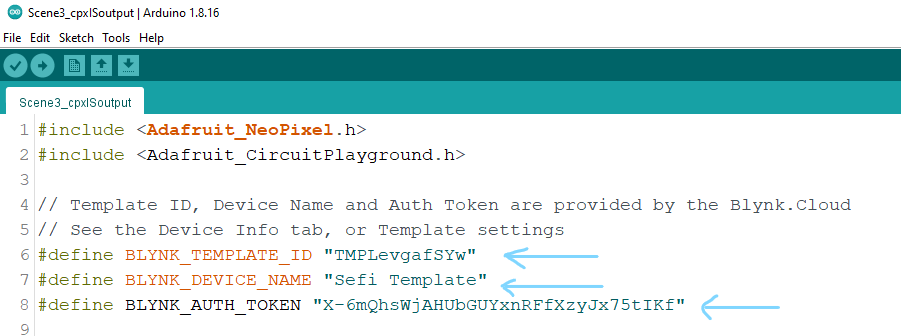
- write all 3 fields from Blynk(see in the picture above) in every code file(Which are attached below) in the ight place
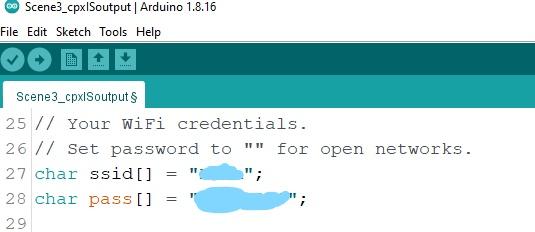
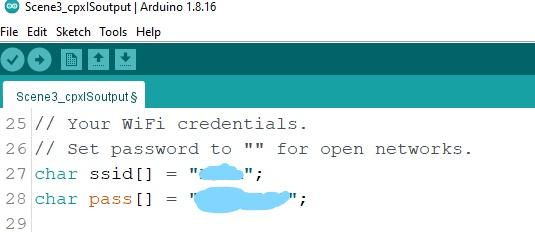
- put in every code file yours wifi name and password
- download it to your CPX
Downloads
Integromat + Physical Preparation + Code -Scene2-cooking Helper

Physical preparation:
- put your CPX next to open stove with clean plan on it , but not too close for safety..
Integromat :
- go to 'Scenarios'
- add "Webhooks" -> "add" -> give it a lovely name
- click 'OK'
- click the Webhook icon again copy the URL -> click on "Redetermind data structure" -> open new tab and in the HTTP URL filed right:"URL?value=a" ->you shuld see 'Accepted' in body page -> go back to the integromate scene and look for success message
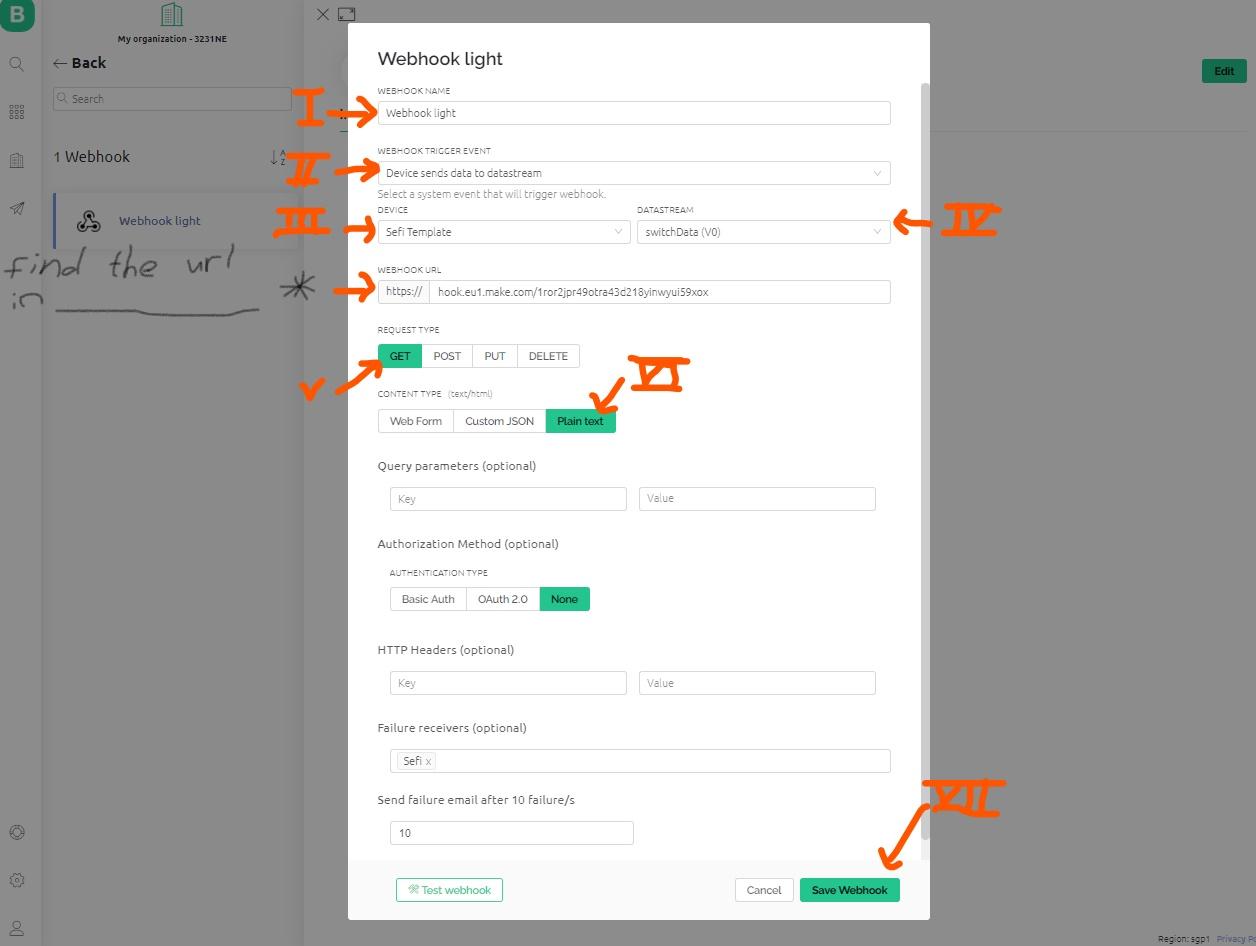
- go back to Blynk -> 'Settings' -> 'Developer: Webhook' -> in "WEBHOOK URL" field put the copyd URL from above. other field fill according to the picture above
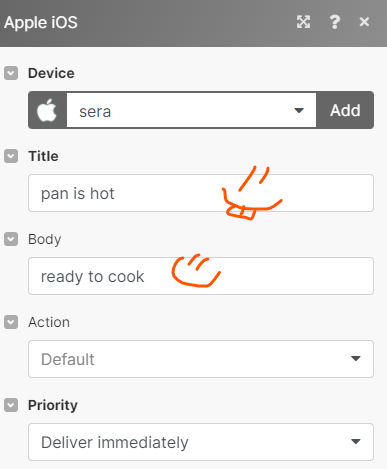
- add "Apple iOS" / "Android" connect it to your device -> "Send a push notification"
code:
- check you environment.in my case: in this distance and 50(c) indicated by the CPX means -> the pan in 120(c). change the Arduino code to the right temperature for you
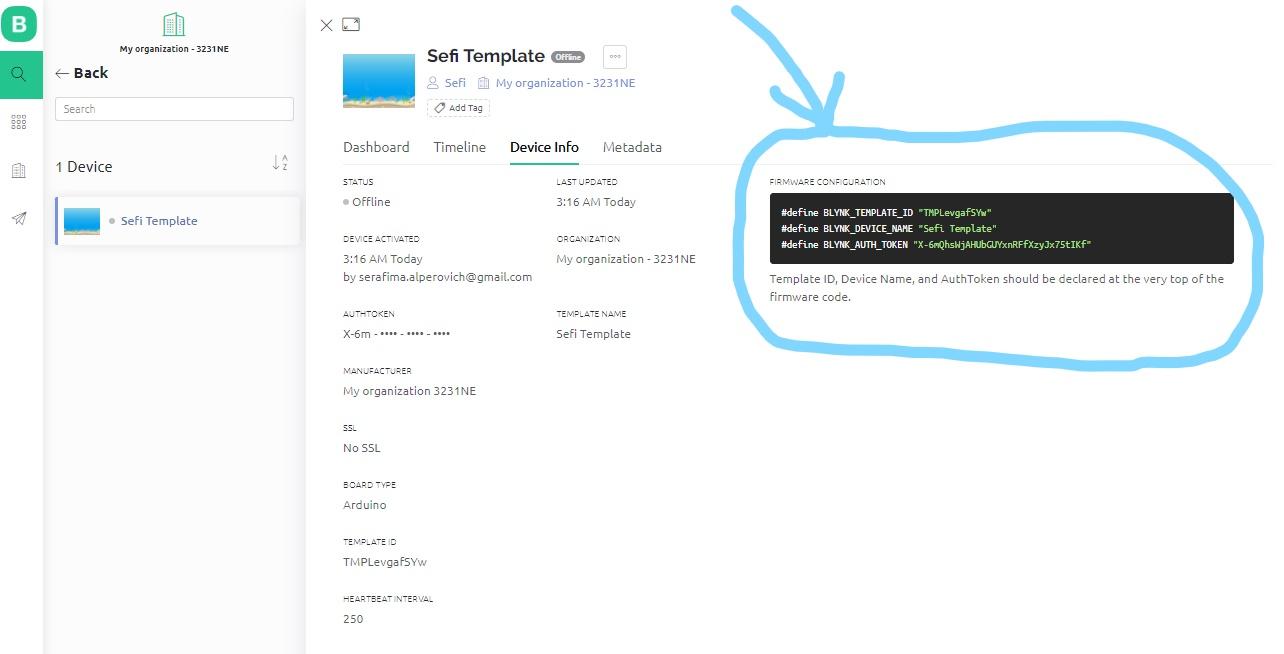
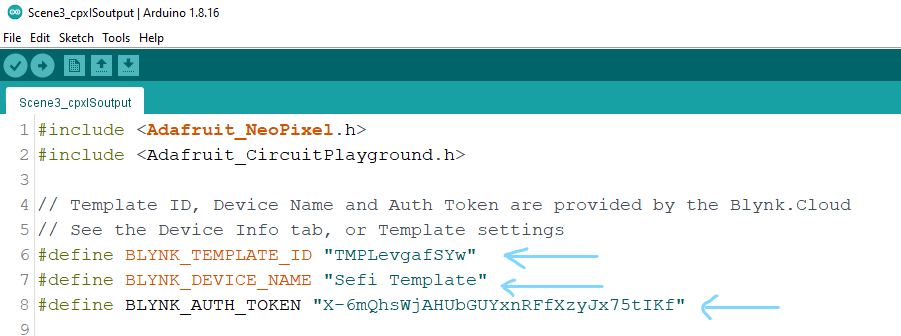
- write all 3 fields from Blynk(see in the picture above) in every code file(Which are attached below) in the ight place
- put in every code file yours wifi name and password
- download it to your CPX
Downloads
Integromat-Scene3 + Code -tasks in Google Sheets
Integromat :
- go to 'Scenarios'
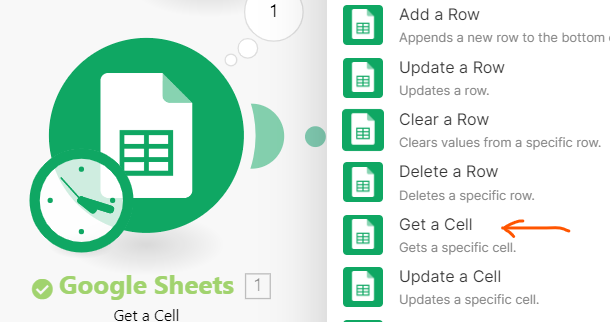
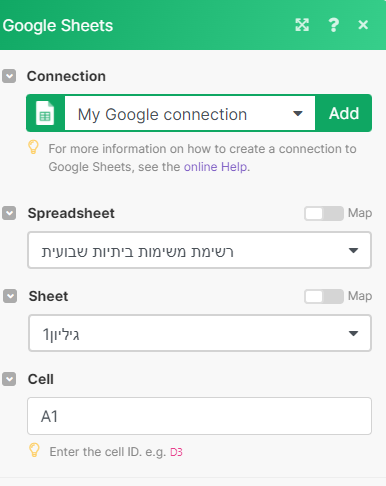
- add "google sheets" -> "Get a Cell" -> connect to yours Google account
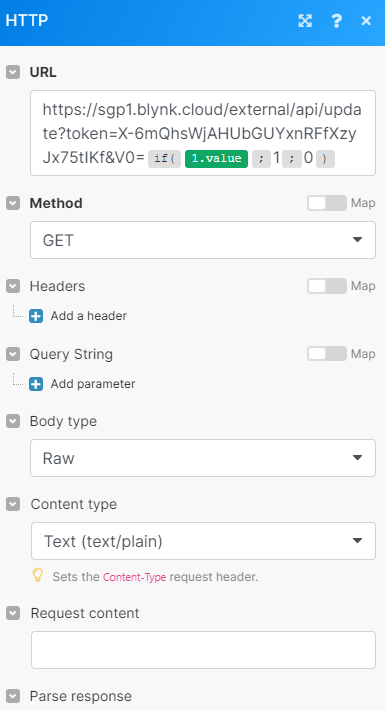
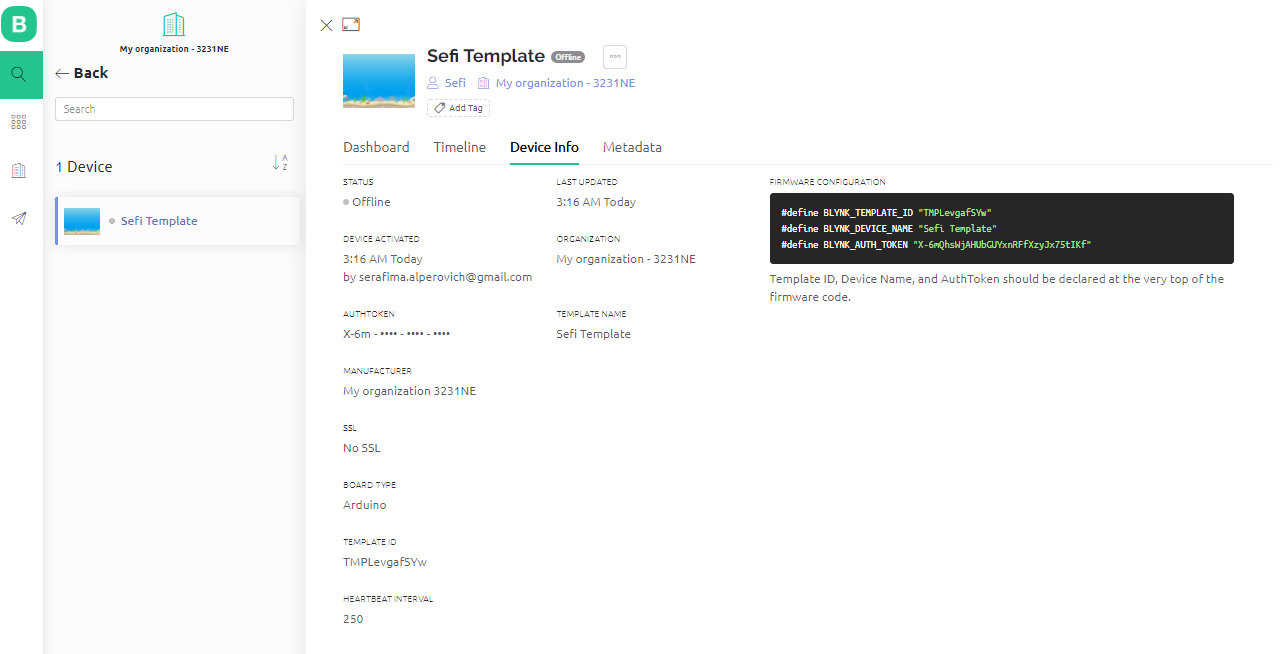
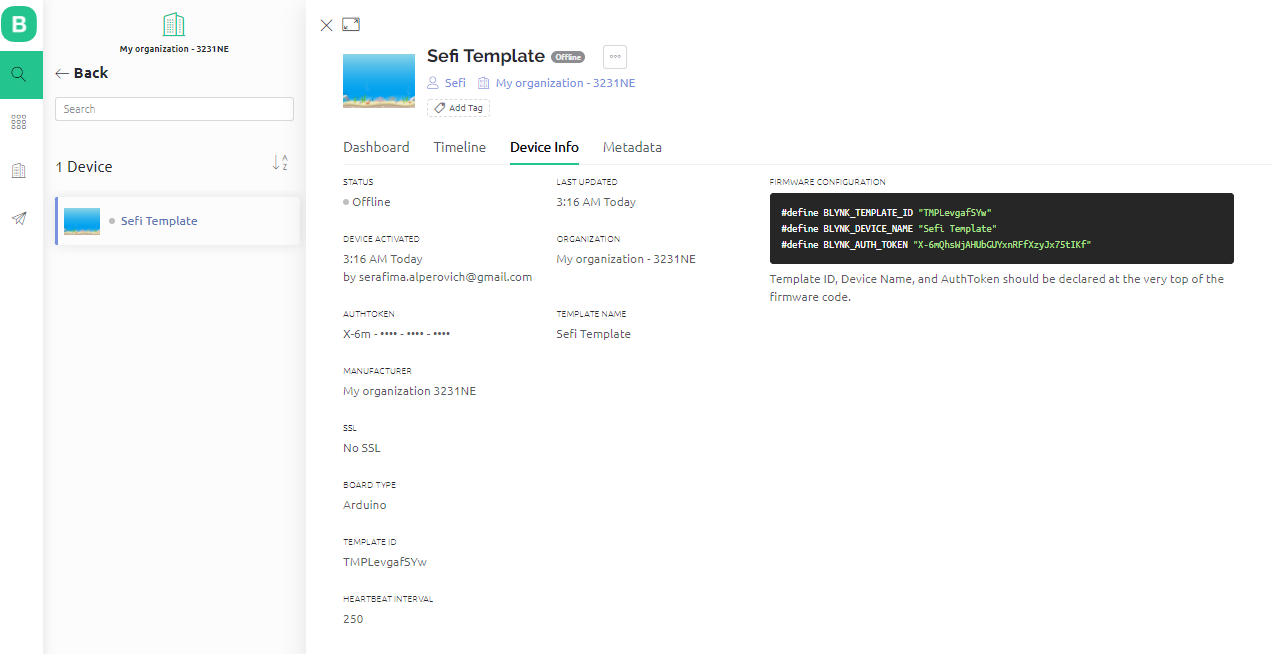
- add "HTTP" -> "Make a request" -> go back to Blynk -> 'Search' -> 'you Tamplate' -> 'Device Info' -> copy the 'token' -> go back to integromate -> in the HTTP URL filed right: "https://sgp1.blynk.cloud/external/api/update?token=the 'token' you just copyd&V0={{if(1.value; 1; 0)}}"
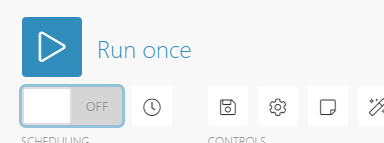
- save the scenario torn the switch 'on' and click 'run'
code:
- write all 3 fields from Blynk(see in the picture above) in every code file(Which are attached below) in the ight place
- put in every code file yours wifi name and password
- download it to your CPX
Downloads
Integromat-Scene4 + Code -facebook
Integromat :
- go to 'Scenarios'
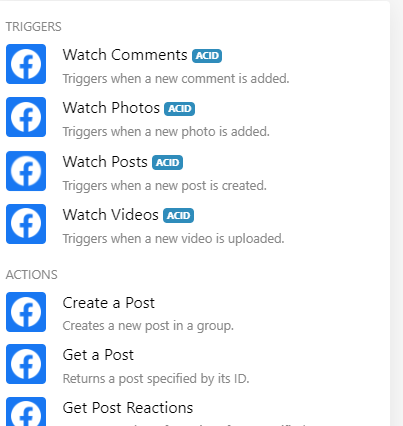
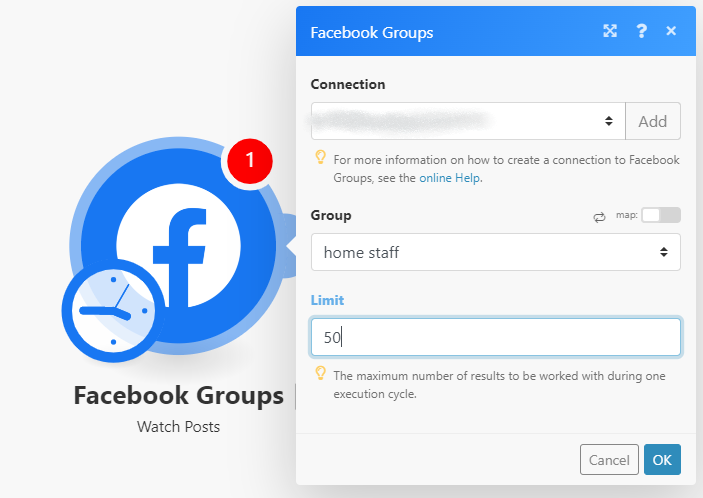
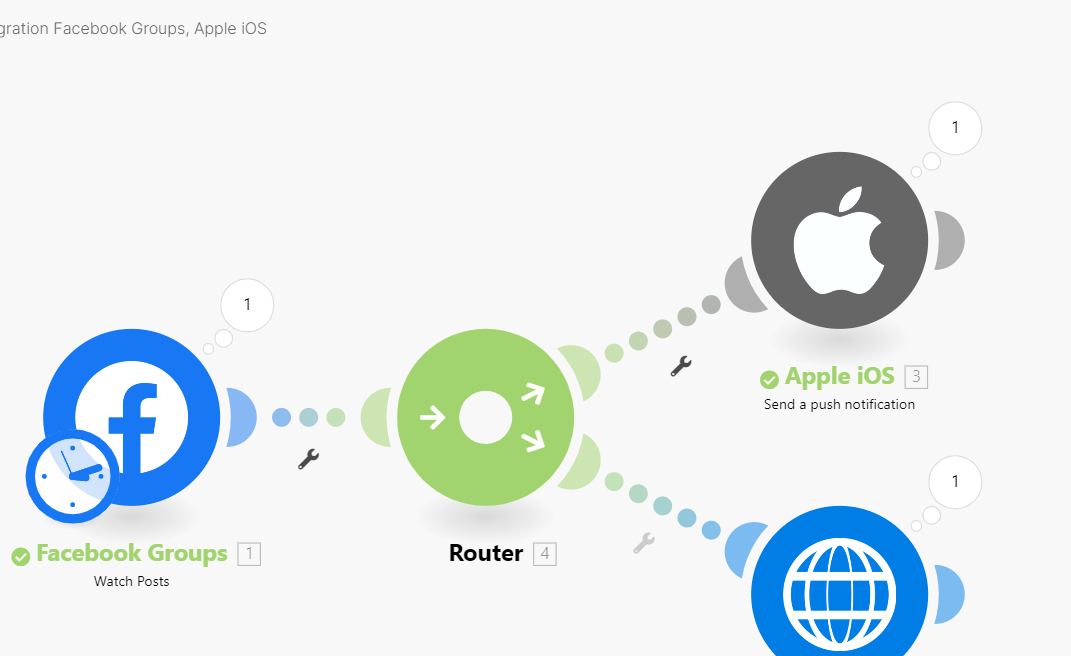
- add "Facebook Groups" -> "Watch Posts" -> connect to yours Facebook account
- get the Facebook group manger permission for using integromat
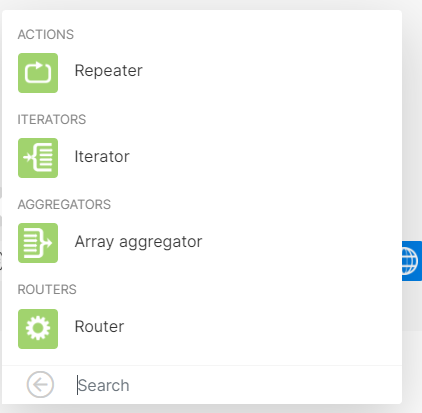
- add "Flow Control" -> "Router" ->
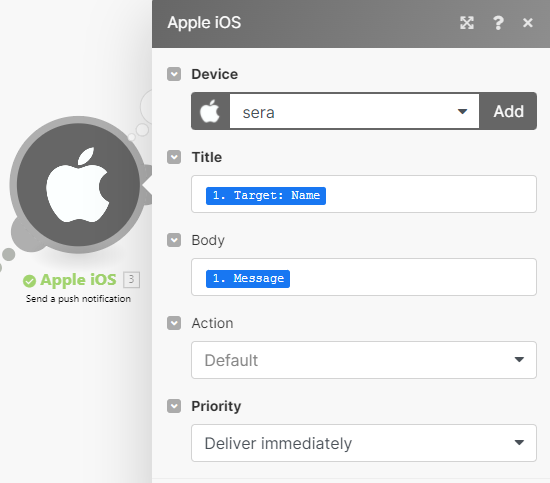
I) add "Apple iOS" / "Android" connect it to your device -> "Send a push notification"
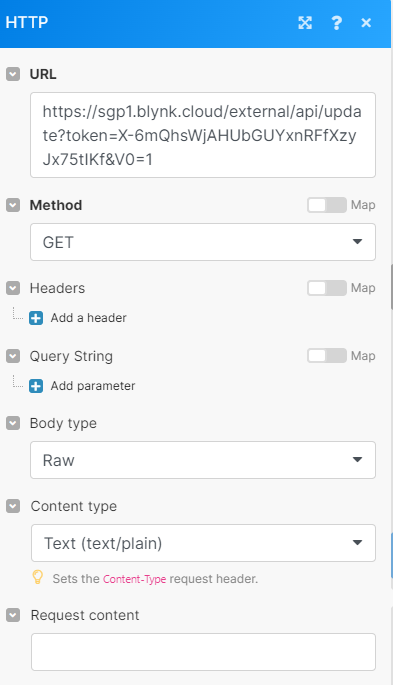
II)add "HTTP" -> "Make a request" -> go back to Blynk -> 'Search' -> 'you Tamplate' -> 'Device Info' -> copy the 'token' -> go back to integromate -> in the HTTP URL filed right:
"https://sgp1.blynk.cloud/external/api/update?token=the 'token' you just copyd&V0=1"
- save the scenario torn the switch 'on' and click 'run'
code:
- write all 3 fields from Blynk(see in the picture above) in every code file(Which are attached below) in the ight place
- put in every code file yours wifi name and password
- download it to your CPX