Converting a Lumix DMC FZ-7 Camera to Infrared
by philslizzy in Circuits > Cameras
11975 Views, 86 Favorites, 0 Comments
Converting a Lumix DMC FZ-7 Camera to Infrared
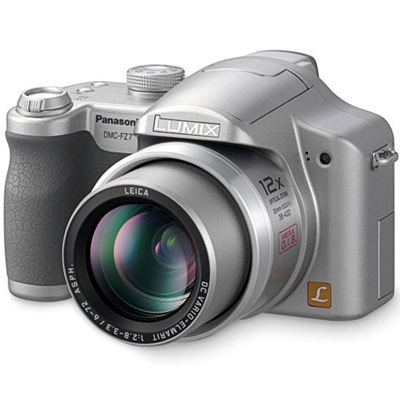
All digital cameras' sensors are capable of seeing infrared, but manufacturers put a filter over the sensor to reduce or eliminate the infrared (and UV) just letting the visible light through. We need to remove the hot filter (variously called 'band pass' filter IR/UV etc). Removing the hot filter is a permanent process and many cameras - including this one - are incapable of taking 'normal' photos afterwards. The Lumix was a spare camera I've not used in a couple of years. You can pick up a used one for about 25GBP.
To know whether it would be an easy process I looked online for instructions but found none. What I did find, however, was a repair manual containing enough information for me to do it. I didn't take photos of this delicate operation, so I present here the actual document that I used - or rather parts of it appropriate to the task. I have written notes to help you.
Tools needed:
Mini Crosshead screwdriver (I used the one from a spectacle repair kit)
Pair of tweezers (I used regular eyebrow tweezers)
A fine paintbrush - size 0 or smaller
Removing the Hot Filter

The service manual is available here if you want the full version: Click on 'Get Manual'
http://elektrotanya.com/panasonic_lumix_dmc-fz7-xx...
Opening the Camera
WARNING
The flash capacitor is capable of giving you quite a jolt if you should touch it. There are warnings in the service manual about it. But the camera has a large plastic covering over the cap terminals and associated circuitry.I had no problem.
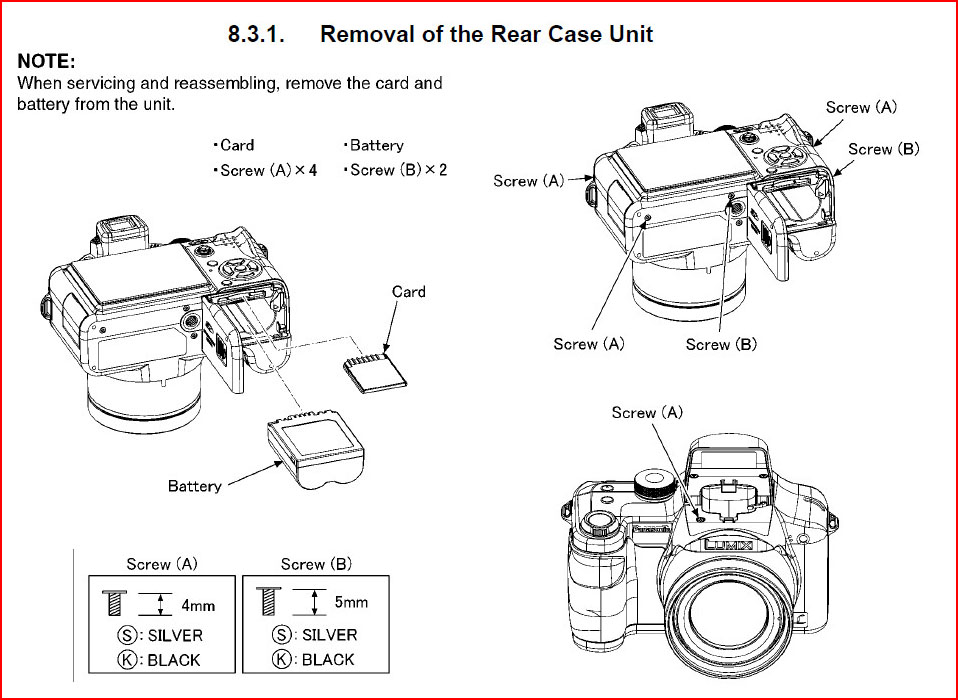
I used an ice cube tray to put the screws in. The manual gives the screws names i.e A, B, C etc. and a brief description - which would be useful if you got them mixed. Put them in the ice cube tray along with a slip of paper with the name.
Taking out screws A and B will allow the back to come off. Two ribbon cables and a power cable hold it on.
Carefully Remove the Back

The ribbon cables should be slid out carefully, the one plugged into the blue socket just slides out. The wide one is locked into position, the real socket is white, the part shown on the detail here in red is actually dark grey. This can be lifted with your fingernail in the direction shown and the ribbon slid out. Because the ribbons twist out, it may be worth marking them with a Sharpie so you know which side goes up. The small cable plug on the top only goes back one way.
Be careful not to kink the ribbons.
The back will remove easily
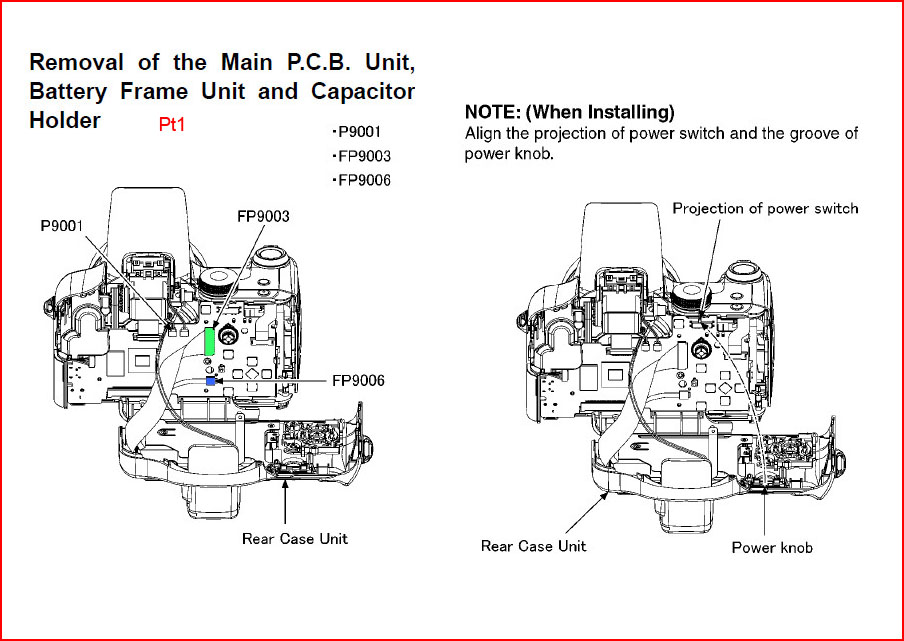
Removing the Main Circuit Board
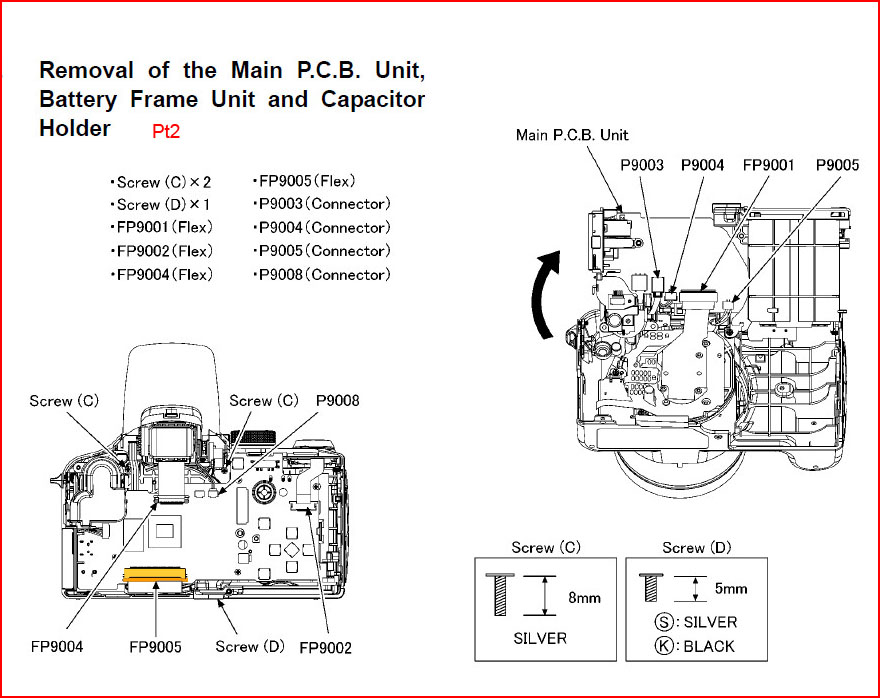

Actually, you don't need to remove it, just flip it up. Take out the screws as shown and slide the ribbon at the bottom out of its socket. In the detail you can see the connector is in two pieces, the dark piece slides off and the ribbon with just drop out. You ought to be able to lift up the board.
The shutter button assembly will need to be moved, this will just slide out.
Removing the CCD Unit and Hot Filter
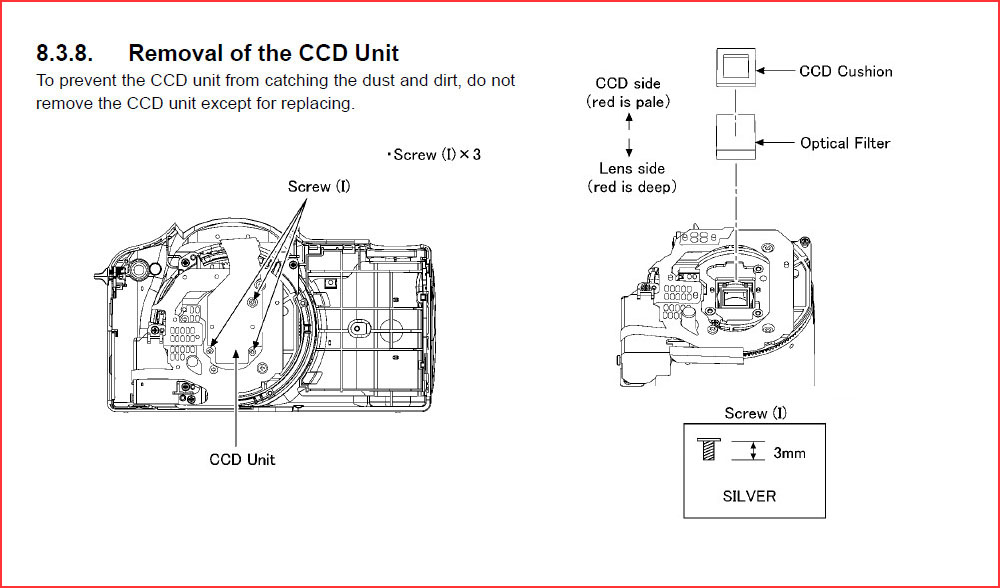
Open the three screws holding the CCD unit in place, it will hinge up. If you look under it you will see the hot filter attached to the CCD with a small rectangle of sponge, pick off the filter (which looks pinkish/blue) and remove the sponge. If any bits have fallen onto the sensor, clean them off with the paintbrush. Put the sensor back in place and screw it back securely.
Re assemble the camera carefully. The shutter button assembly must be put back before the main board is re-positioned as the right hand screw C holds it in position.
Use the tweezers to gently slide the ribbons back into position. I found the LCD ribbon the trickiest (the green one in the diagramme). I found it best to slide a corner in first and then gently ease the other side in, Close the flap to lock it.
So that's it DONE.
Filters and Colour Balance
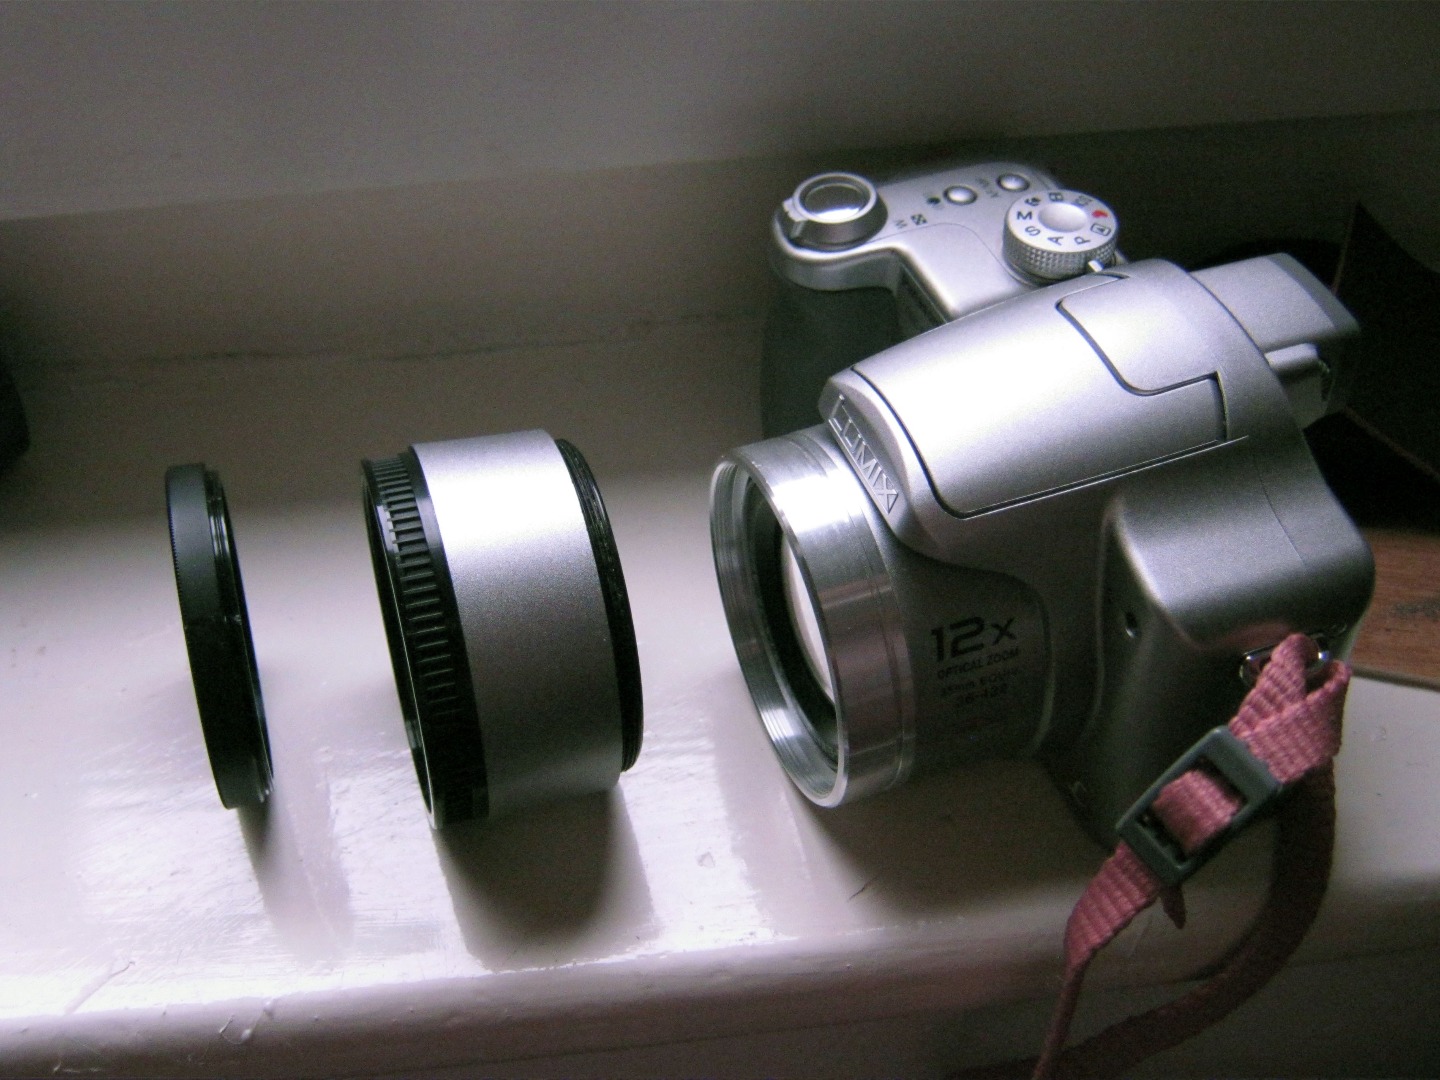
Because the CCD is highly sensitive to IR this is almost all you will see. It is possible to take photos but the colours will be all over the place. You need an Infrared filter. I have two types. One is an R720 type with lets a small amount of red and infrared in the 720nm part of the spectrum. Another is one bought from ebay (search ebay for this item number 172104568092. It's more in the IR spectrum and doesnt let any visible light through. This is my favourite.
Filters are attached using the threaded tube which came with the camera. This allows 52mm filters to be attached. Do not try to attach them directly to the front of the camera as they will stop the lens from working. If you don't have a filter holder you can cobble one together from an old toilet roll core. Make a nice job and share it on instructables!
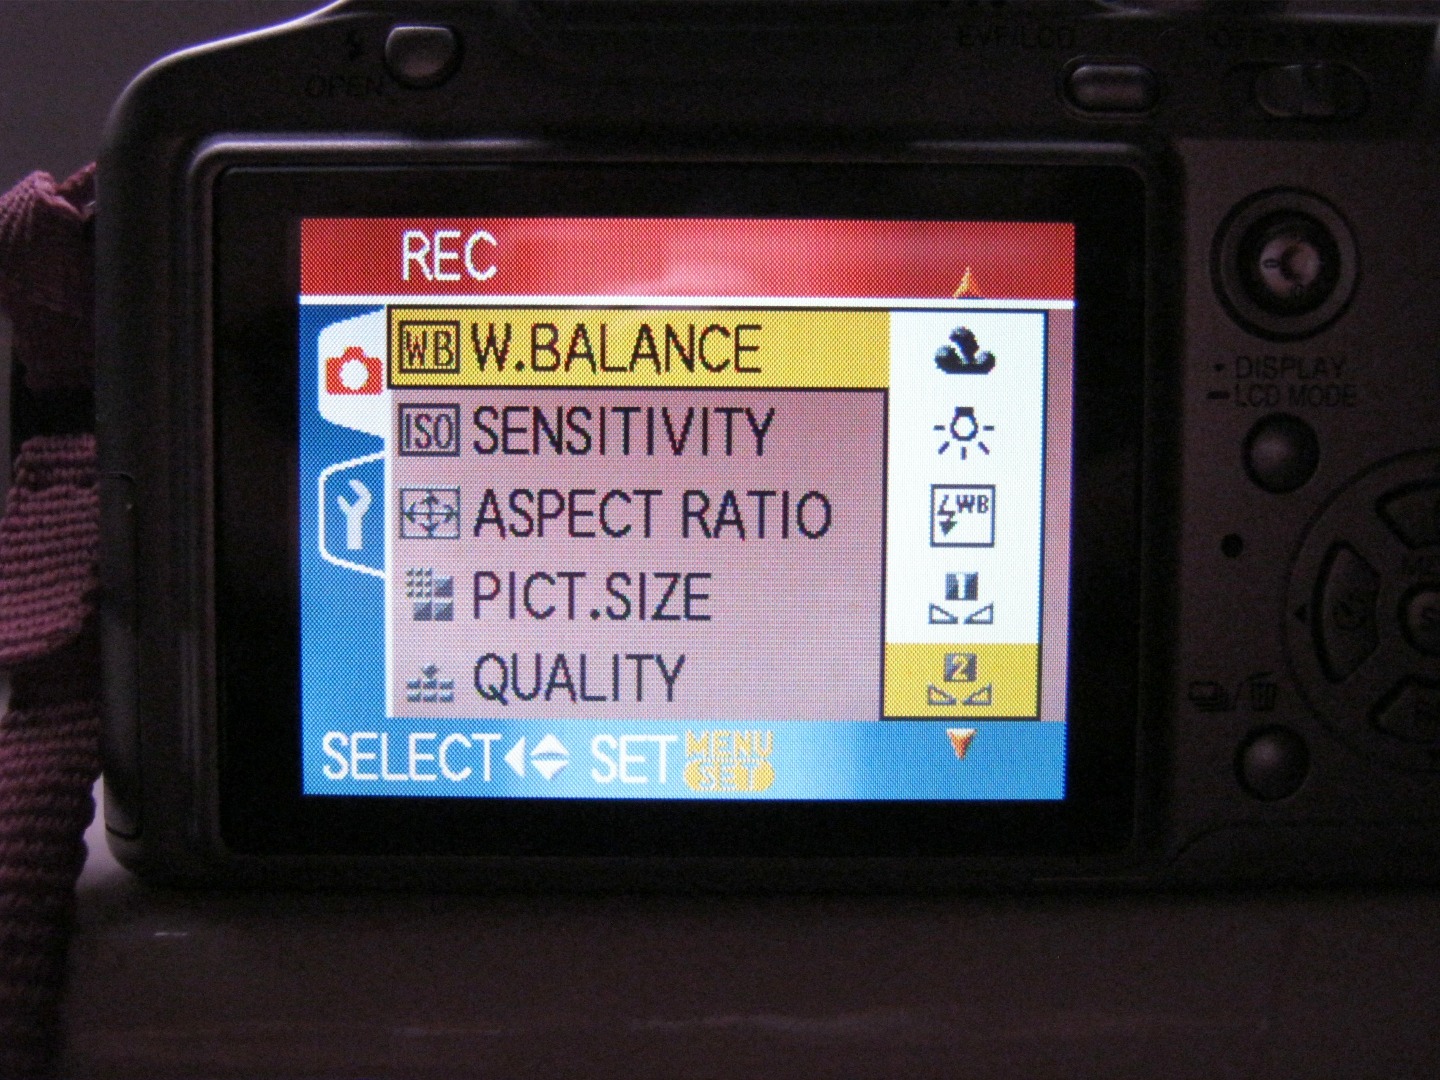
You need to set the colour balance as there are no colours in infrared. Point the camera at a neutral surface - some say green leaves or foliage, select a custom on the menu and grab your balance. I have two custom white balances, one for the IR720 filter and one for the other.
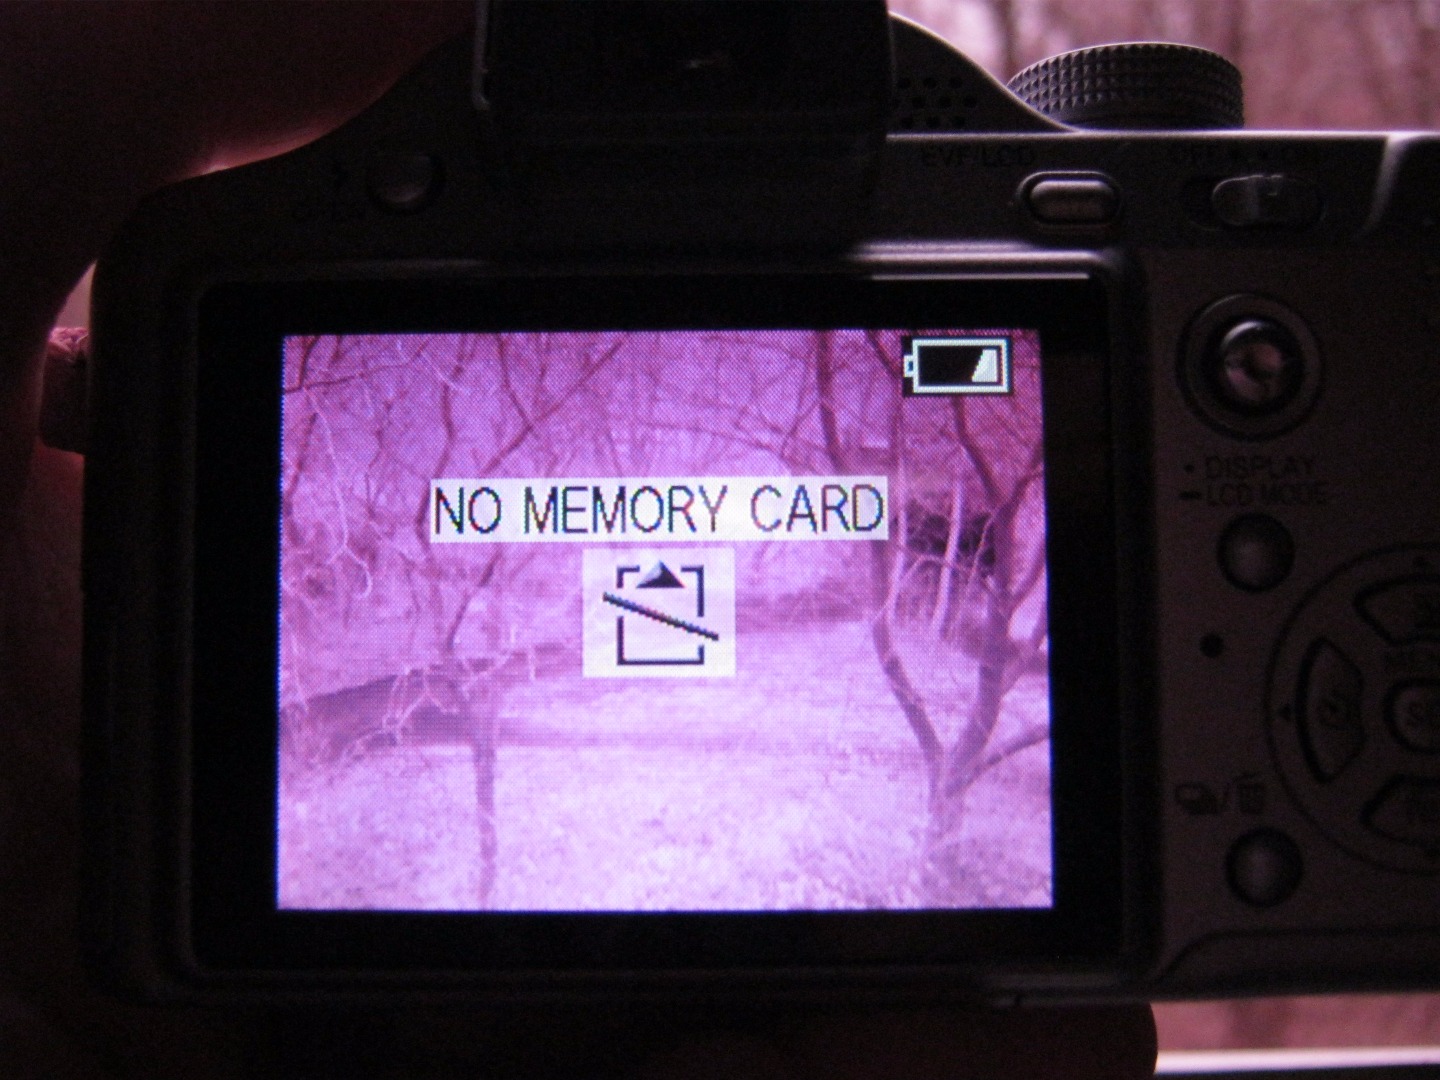
Screw the filter on and look through the camera
Your images will come out predominantly red/magenta
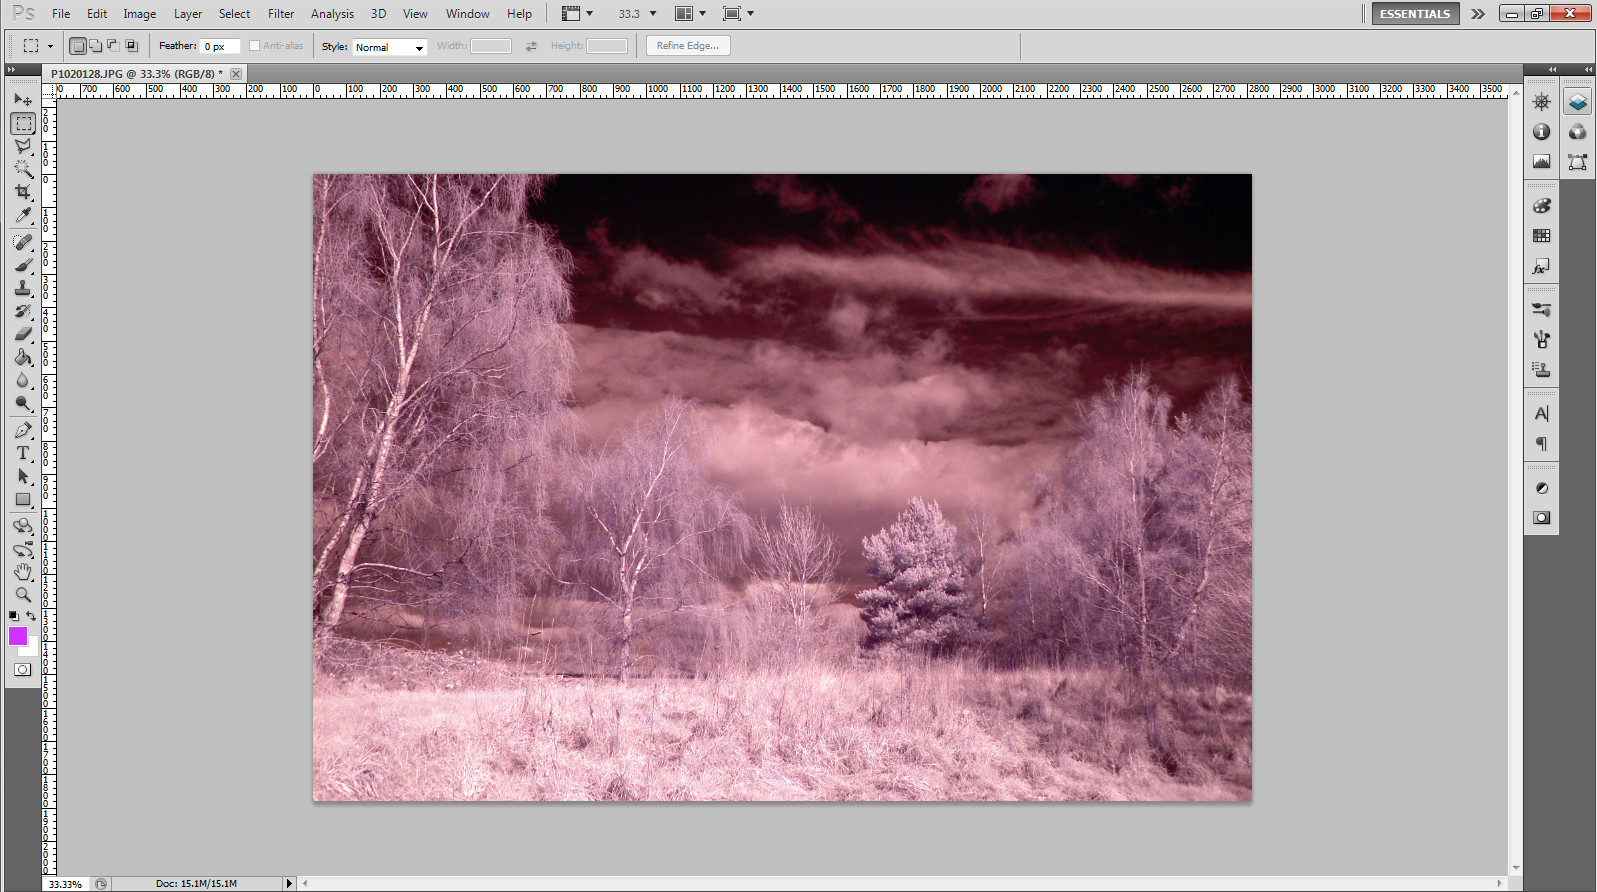
Post Processing
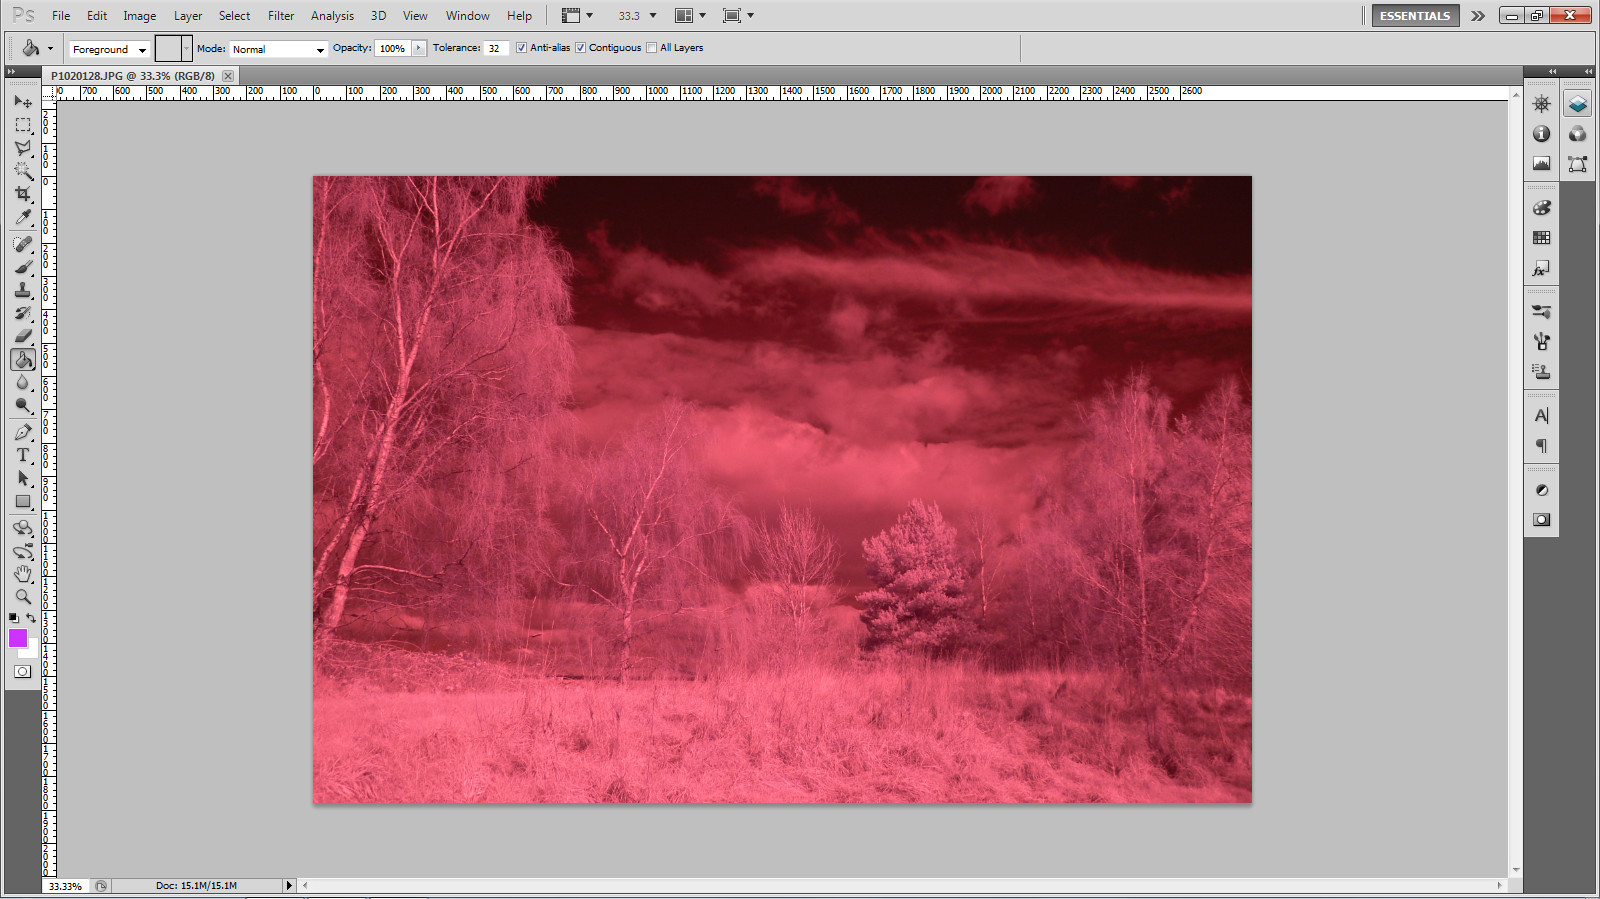
The images will come out in monochrome, although with an overall colour cast. You must convert the images to black and white to be acceptable. False colour processing is possible and there are plenty of resources out there if you look.
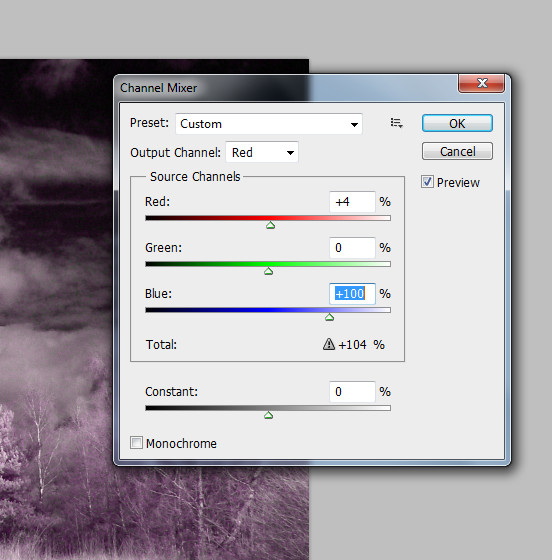
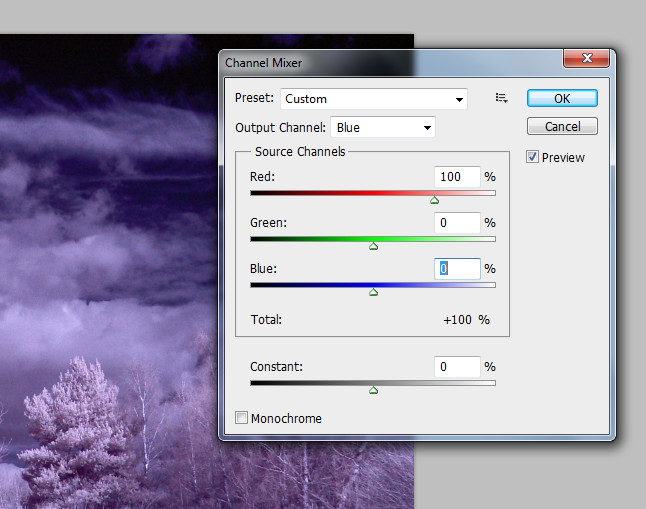
I use Photoshop but Gimp (which is free) will do the job just as well. Open the image and 'adjust' then select 'channels'. The box comes up with the red channel on top. Turn red down to zero and blue up to 100%. Select blue channel then do the reverse, red to 100% and blue to 0. You can see what it does on the image above.
I then selected auto colour. The resulting image pleases me.
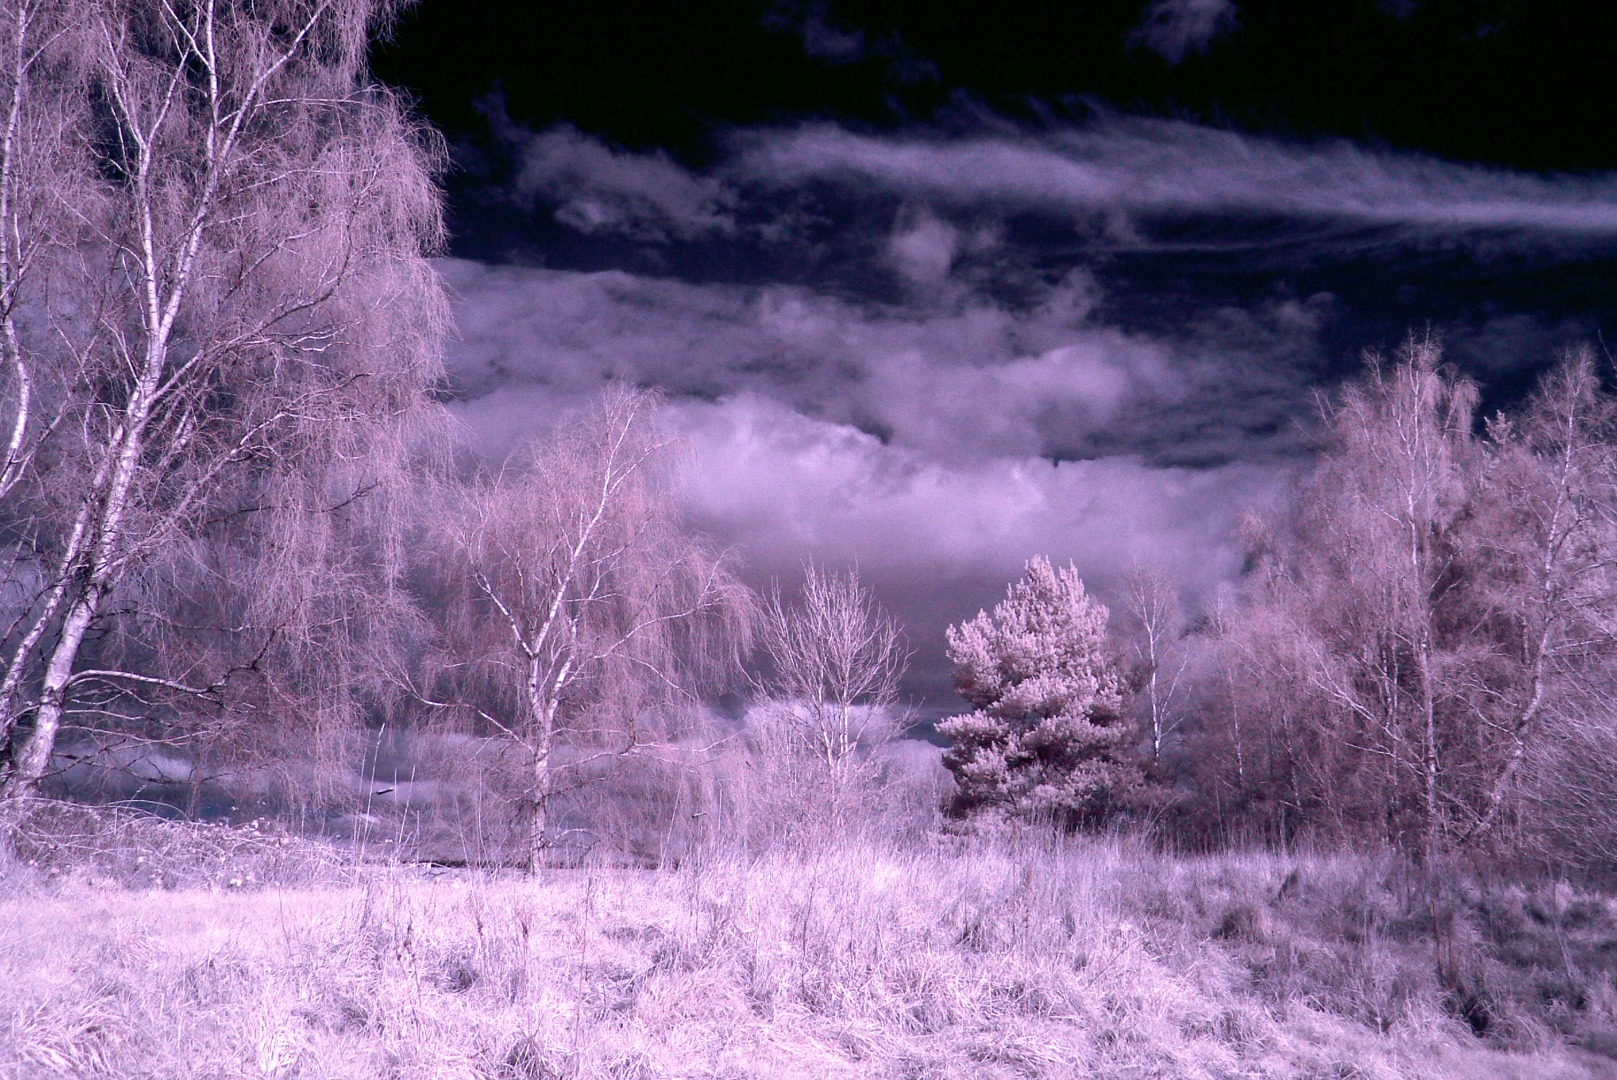
Infrared turns all foliage to white so lovely green landscapes in the summer look like snow covered fields.
Some Samples
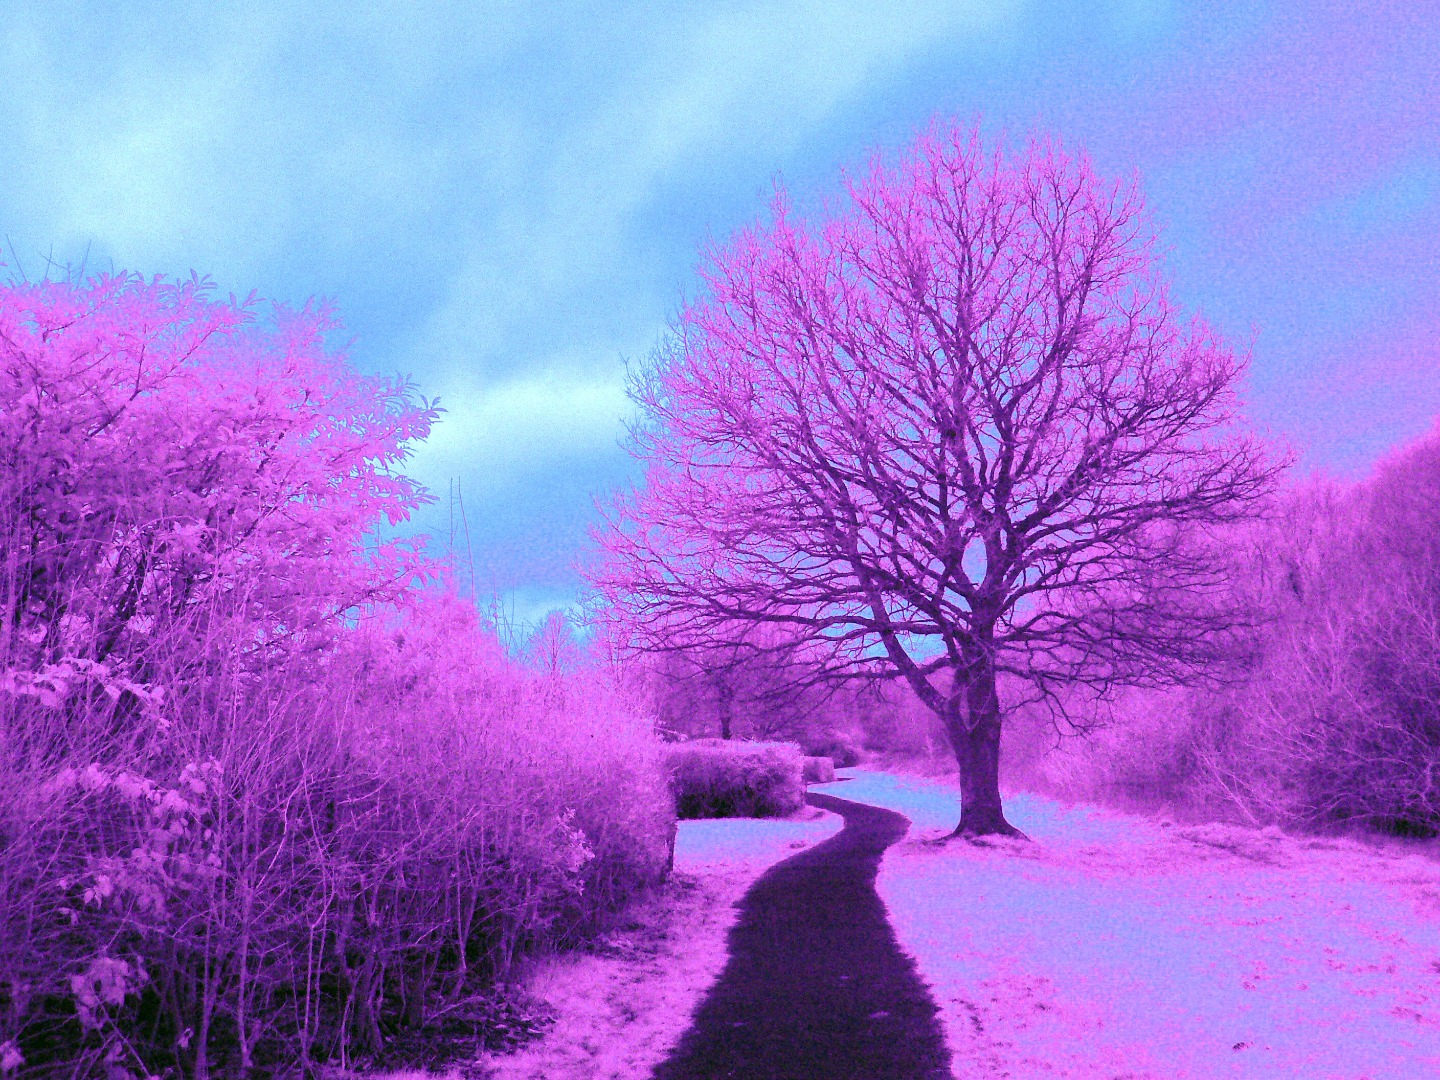
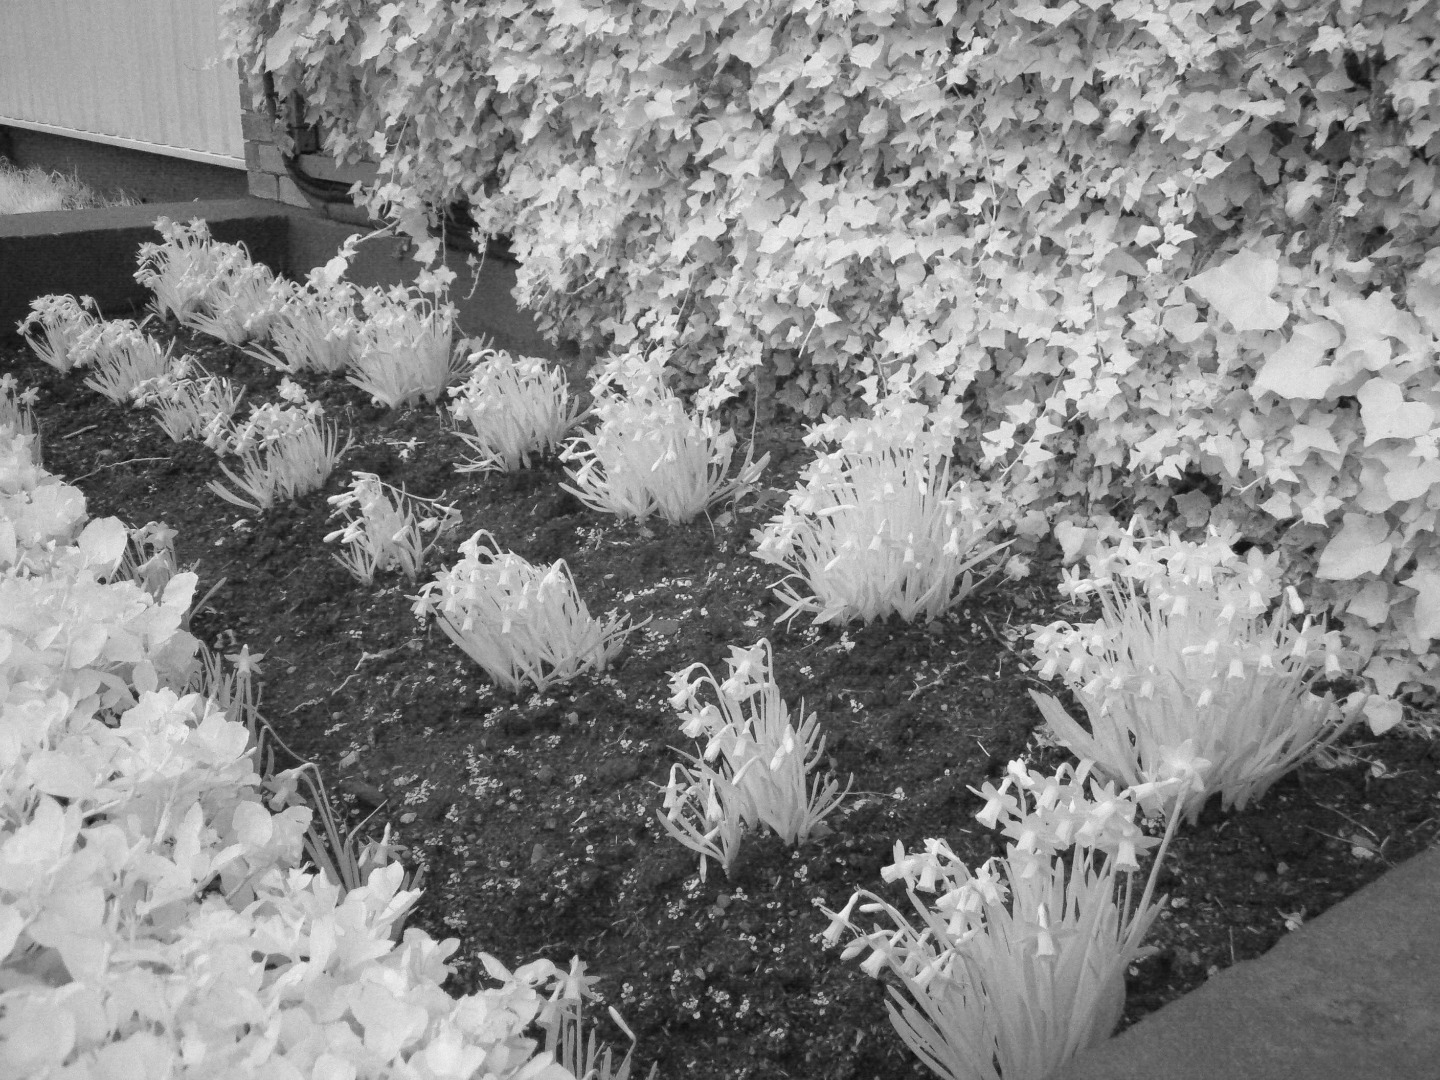
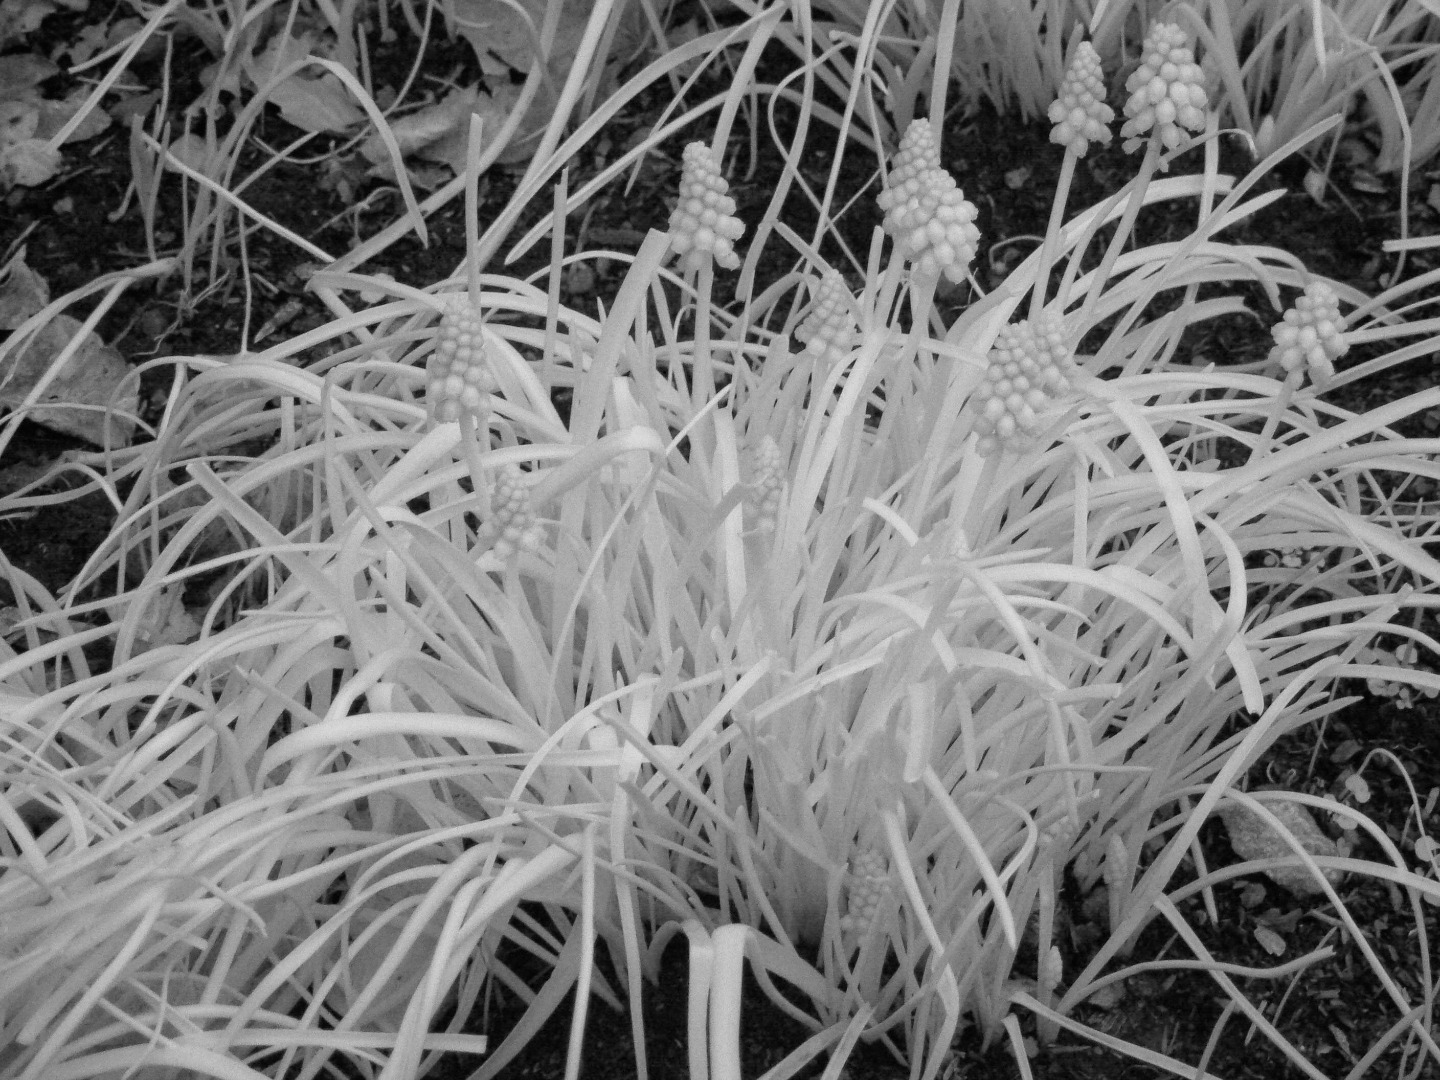
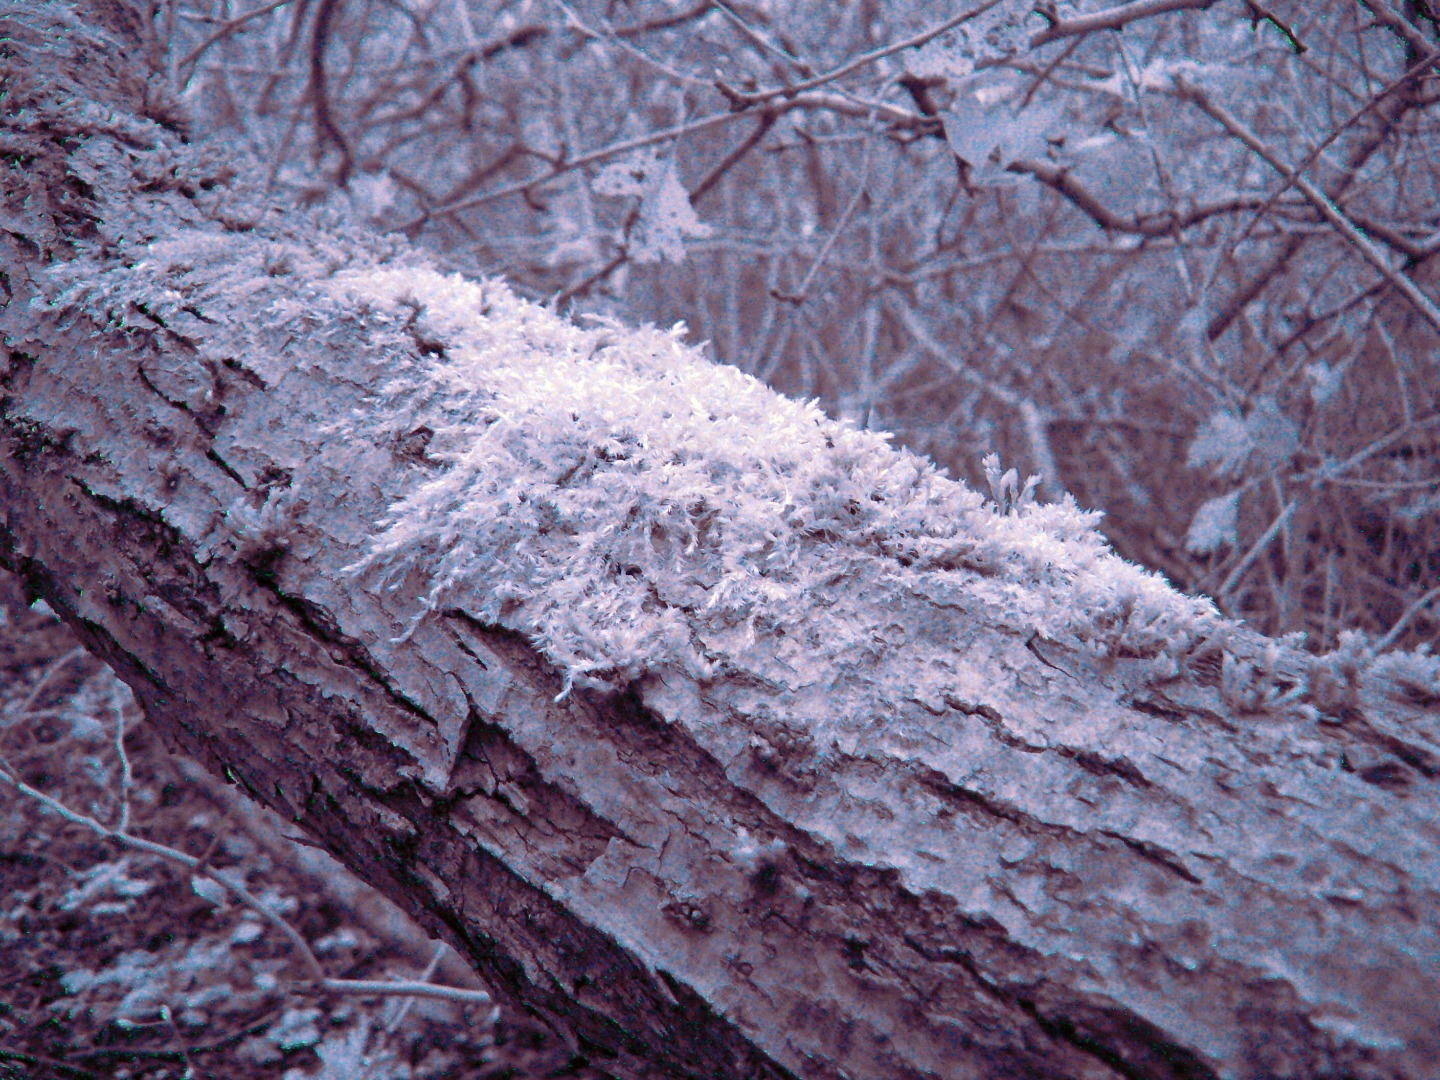
This one above has the red/blue channels reversed as in the last step, then auto tone applied. I like it. The one of the tree has the same but I played with the hue/saturation, the others are how it renders green, the daffodils are white as are the leaves.
Bright sunny days with blue sky and puffy little clouds work best on infrared, skies are black and foliage is white. You can get some great landscapes. I can't wait till simmer.
Do your best!!