Converting Adobe Illustrator Drawings to Gerber Files
by ionwaffle in Design > Digital Graphics
11975 Views, 6 Favorites, 0 Comments
Converting Adobe Illustrator Drawings to Gerber Files
While creating screen printing templates in Adobe Illustrator I realised there are no guides on how to convert a drawing file into gerber format. There are PDF / DXF converters, however, from experience these converters never transfer the entire drawing and change the scaling of the drawing with no way to rectify afterwards.
This method requires:
- Any drawing tool that can export to DXF (Adobe Illustrator)
- Designspark PCB (Free) (https://www.rs-online.com/designspark/pcb-software...
- GerbV (Free) (http://gerbv.geda-project.org/)
I have been using this method to design screens for screen printers, however it should also be transferable to full PCB designs that have been drawn using any package which can export to DXF.
Create Drawing in Adobe Illustrator
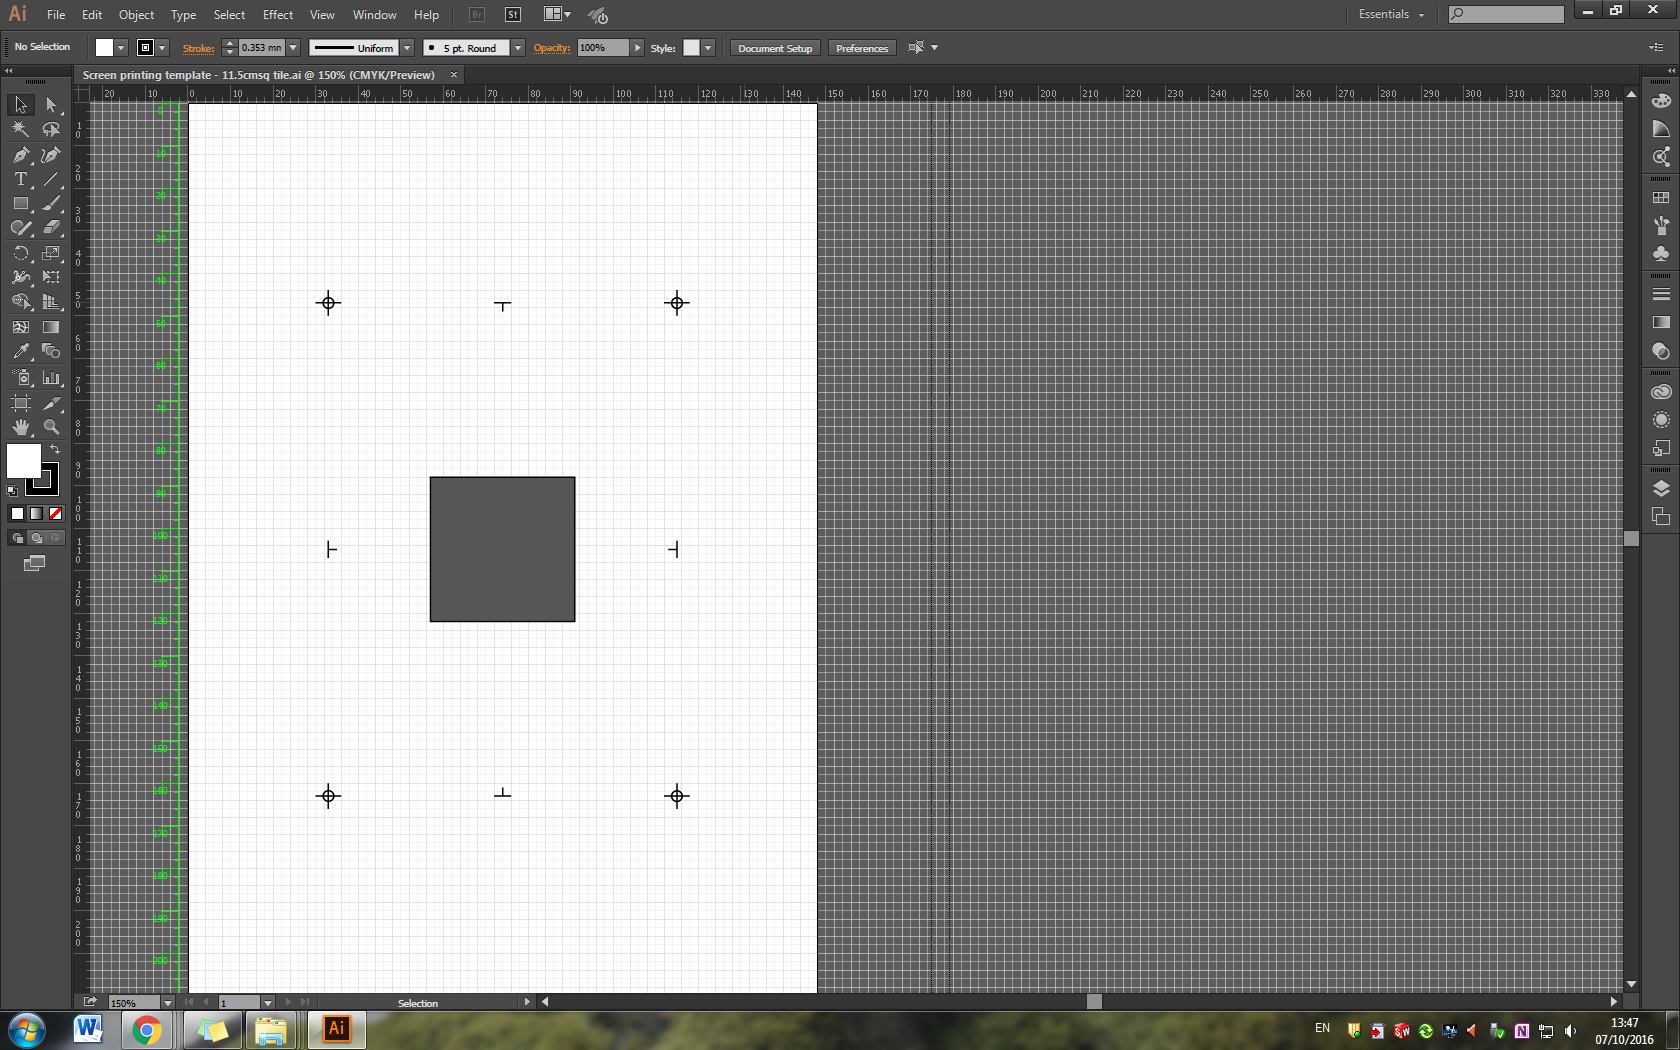
Any CAD software which exports to DXF should work fine with this method.
Export to DXF
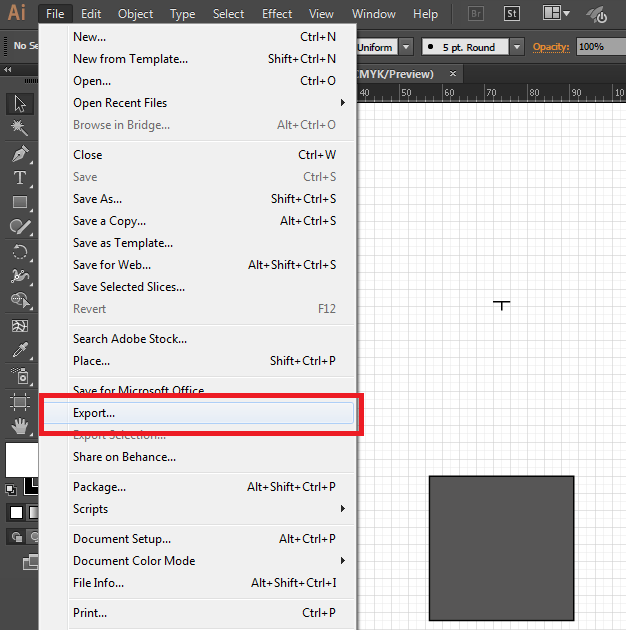
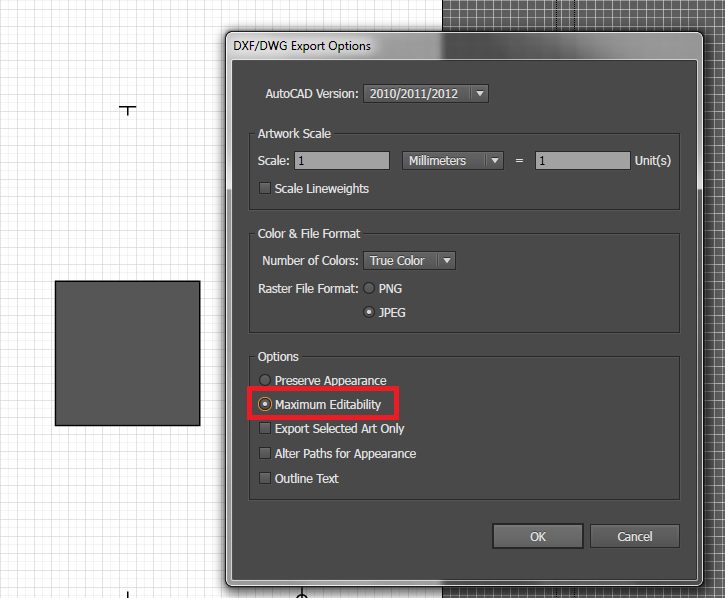
Export the drawing to DXF, ensuring to check the box "Maximum editability"
Create a New PCB in Design Spark
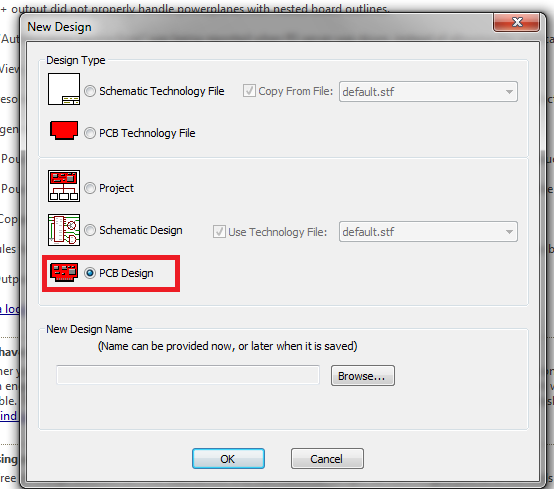
Click on File > New and then PCB Design in Designspark.
After this follow the PCB setup wizard.
- Specify your required PCB Tech -> Select Default
- Define Layers -> Select Applicable (I keep it at the default 2)
- Define Board Size - This will be in Thou so remember to convert your current units
Import DXF File
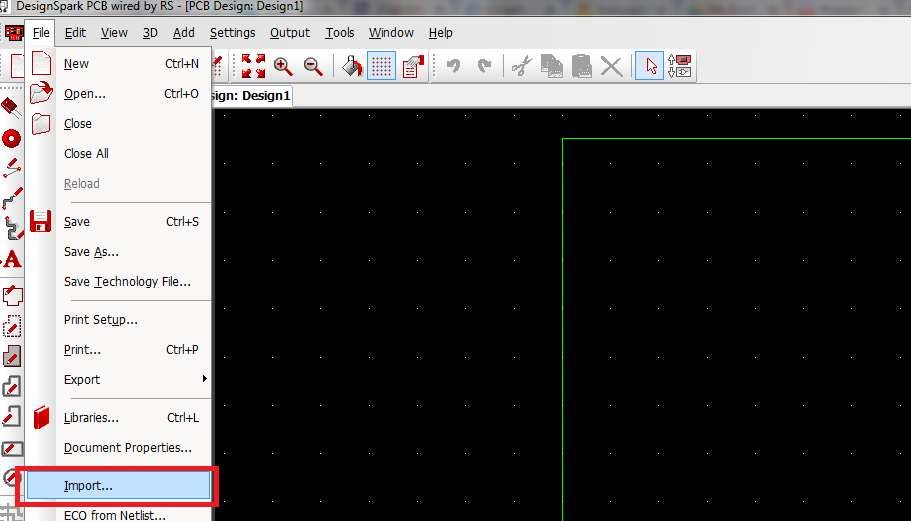
Click on File then Import. Select the exported DXF file.
Select the Correct Layers
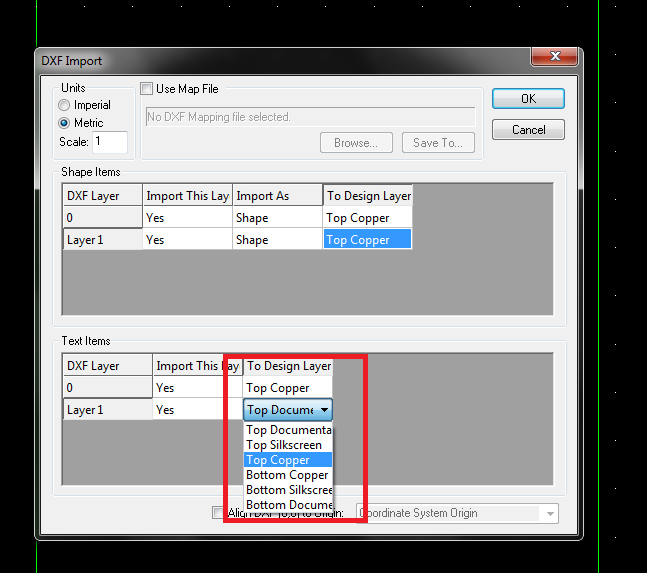
Different DXF files can be imported if needed and images can be assigned to copper tracking etc.
Position Drawing Onto the Board
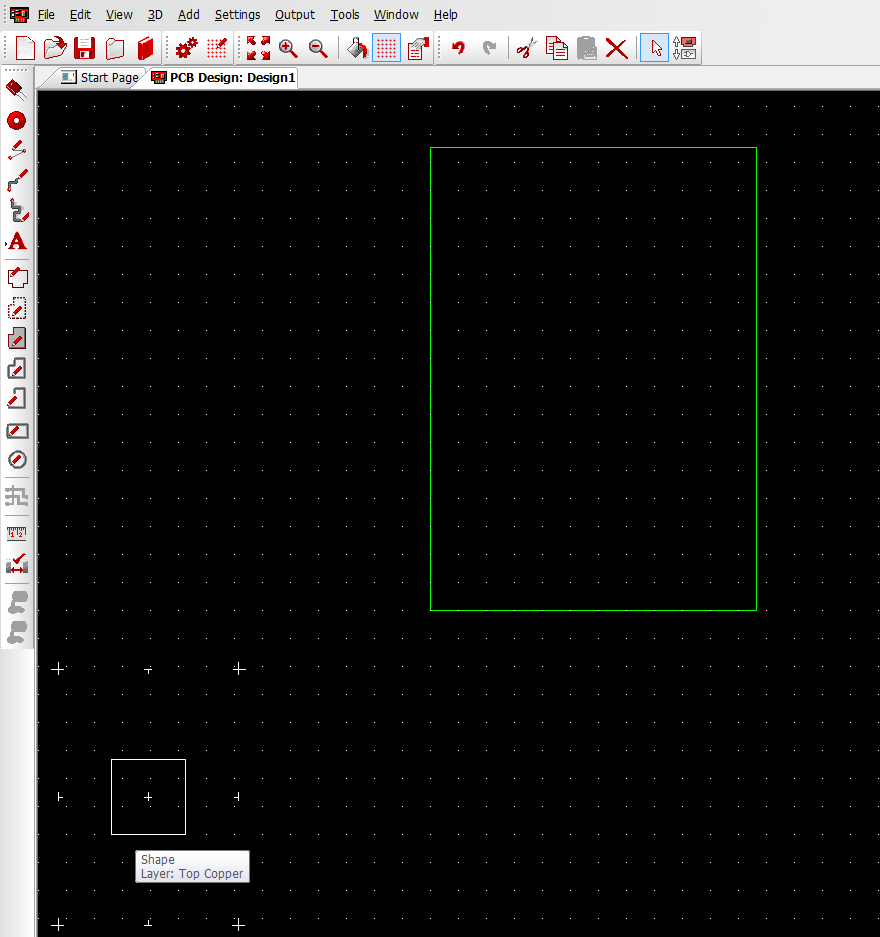
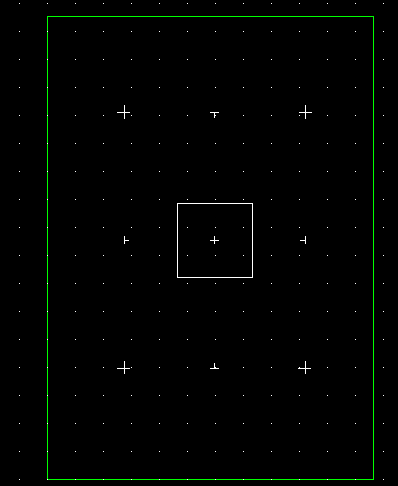
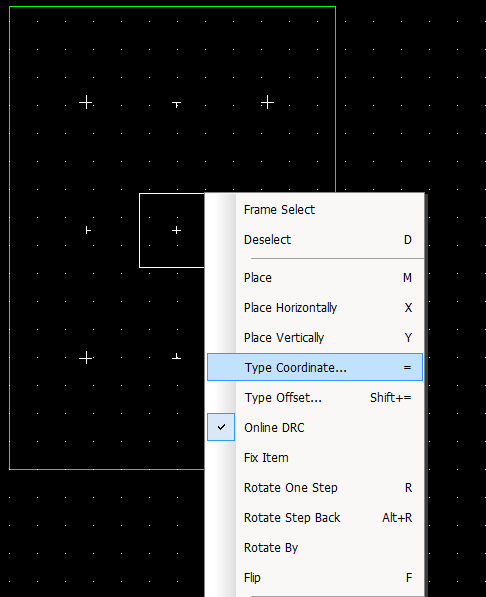
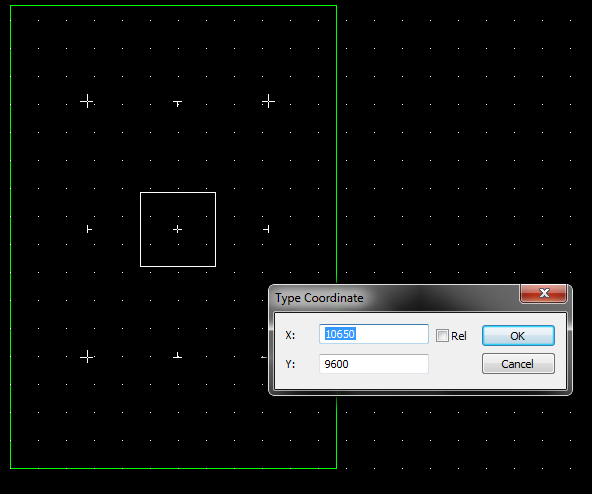
The image can be selected with the mouse tool.
Once selected you can drag the selected portions into place. Right clicking and selecting "Type Coordinates" allows the user to position the image accurately. The measure tool can be used to determine the center of the board.
Add Line Widths and Fill Shapes
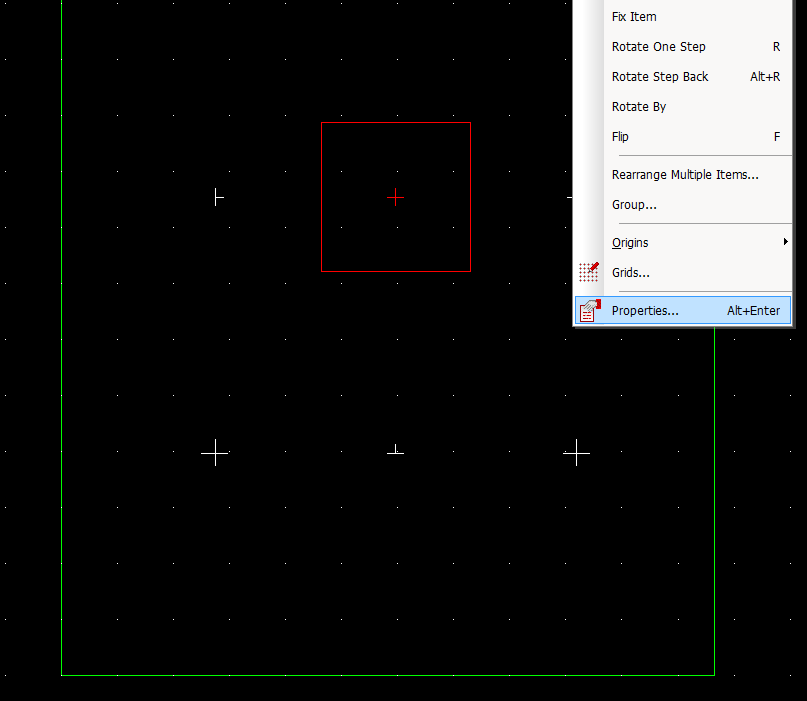
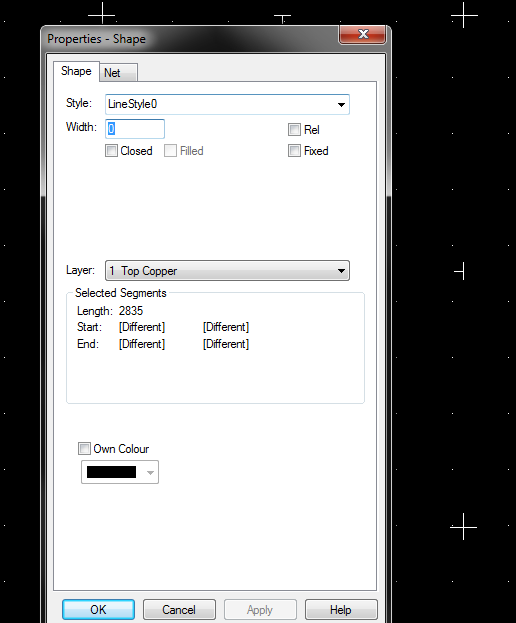
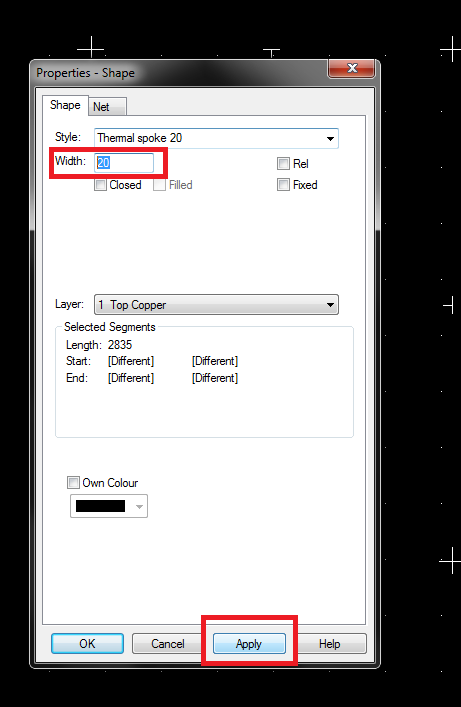
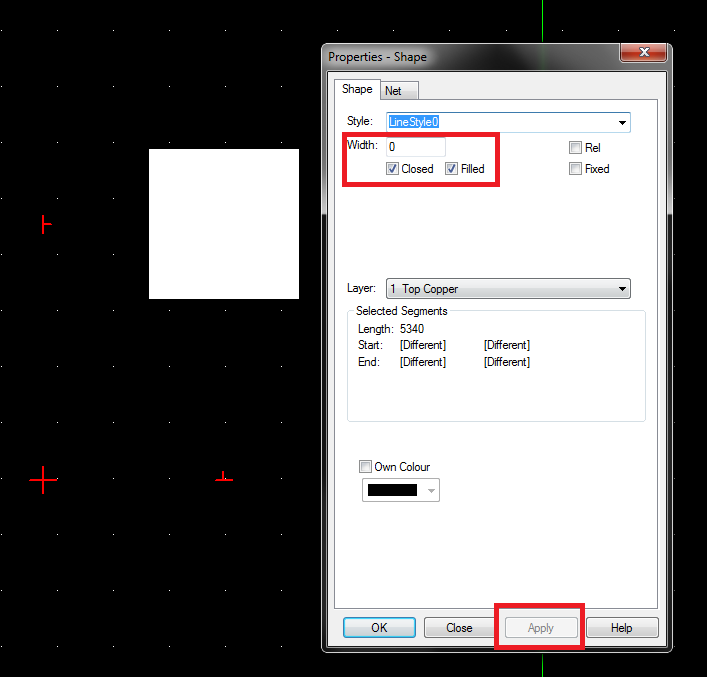
Once imported, the DXF graphics have line widths of 0. For it to appear on the gerber file the line widths should be >0. If designing for a screen printer screen, commands can also be given to fill in shapes.
To change the line width:
- Ctrl and drag to select the sections required
- Right click -> Properties
- Change line width - units are whatever was selected in the PCB design wizard stage (here they are in thou)
- Click Apply > Okay
To fill shapes:
- Ctrl and drag to select the sections required
- Right click -> Properties
- Select Closed and then Fill
- Click Apply > Okay
Check in 3D View
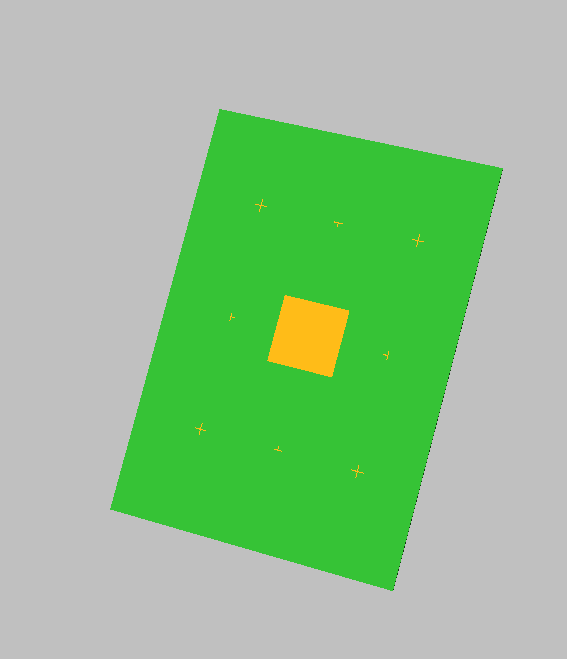
To ensure the image converted has been moved to the correct layers, a check in 3D view should be done.
To check:
- Select 3D on the toolbar at the top
- Select 3D view
It will open a new window and the PCB will be displayed in 3D.
Once done, click file and close to close the 3D view.
Save to Gerber
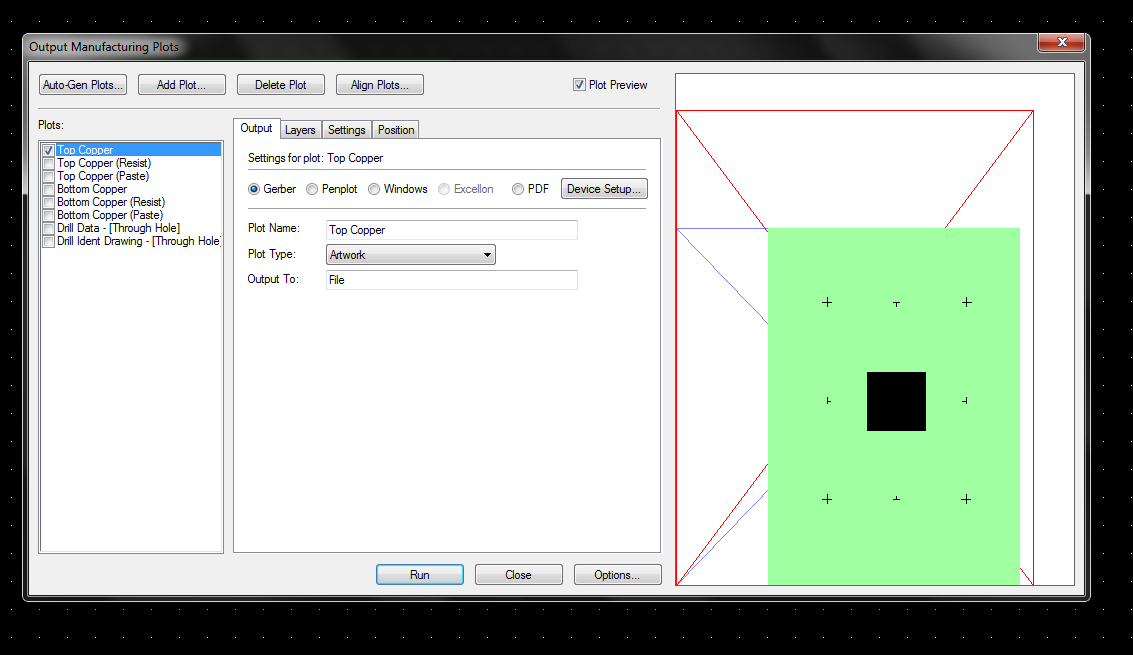
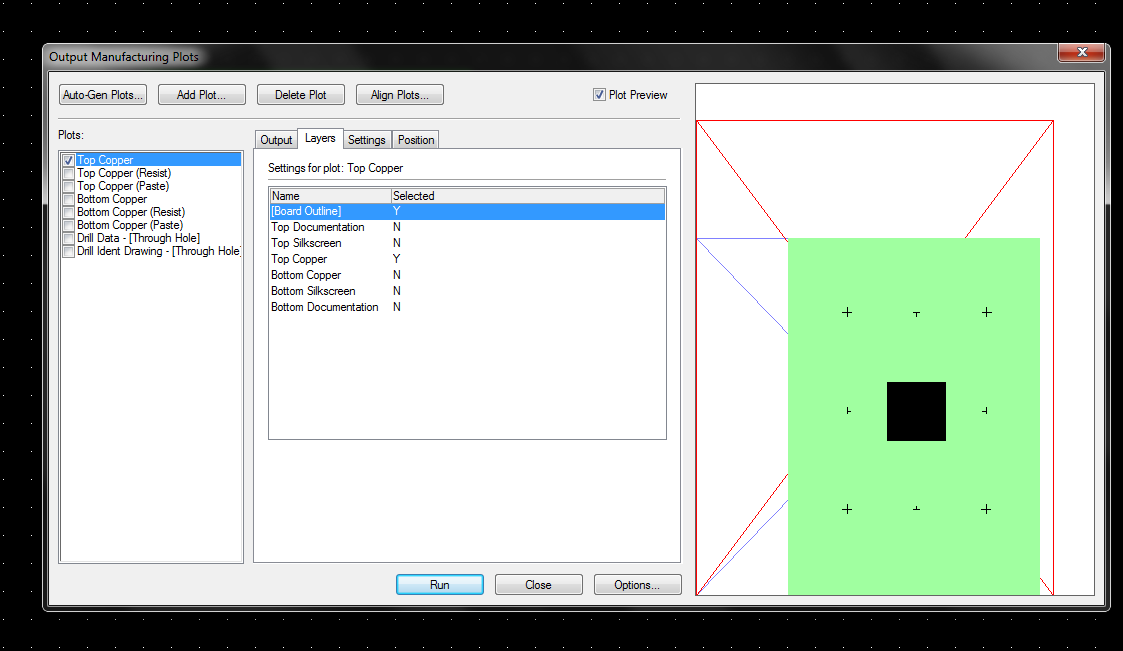
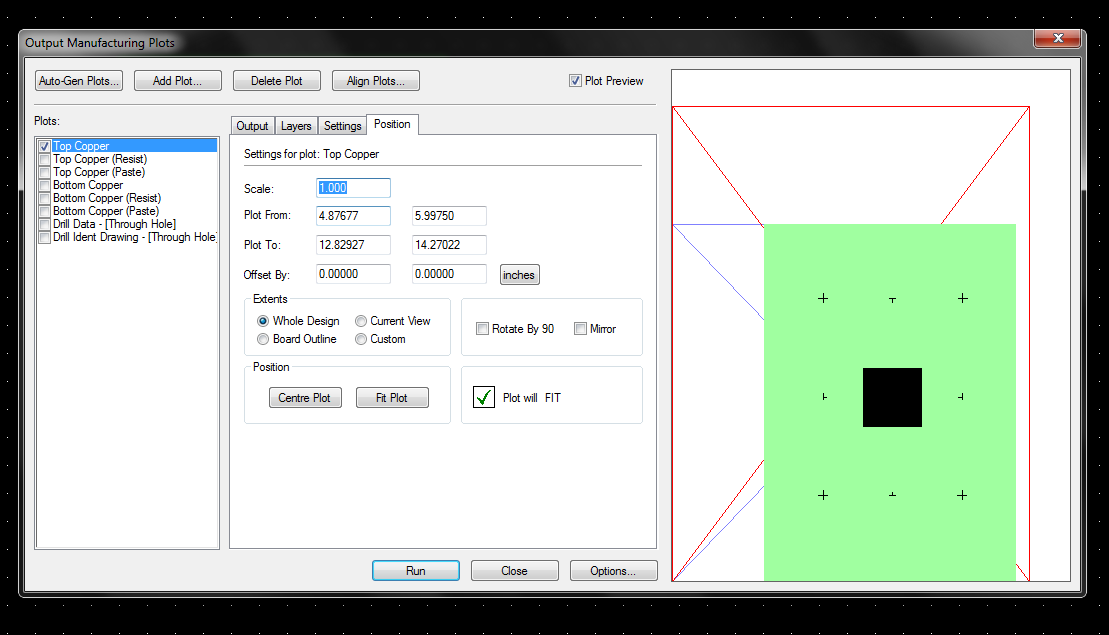
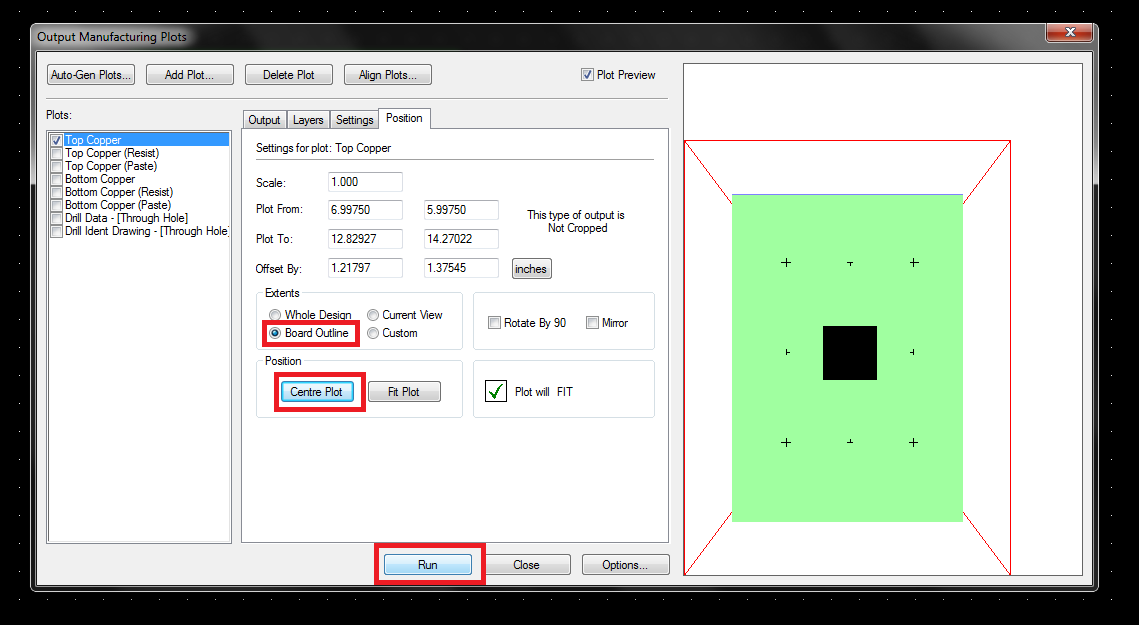
To save the drawing as a gerber plot:
- Save the PCB design
- Press Shift + P to open up the plotting system
- Select the layers that need manufacturing and ensure gerber is selected in Output
- In Layers, board outlines and copper layers can be selected or deselected if needed
In the Position tab:
- Ensure the scale remains at 1.000 (unless needed otherwise)
- In the Extents section, select "Board Outline"
- Select Centre plot
- Click Run
A .txt output file will display and if successful the .gbr file will output in the PCB design location.
Check With a Gerber Viewer Before Manufacturing
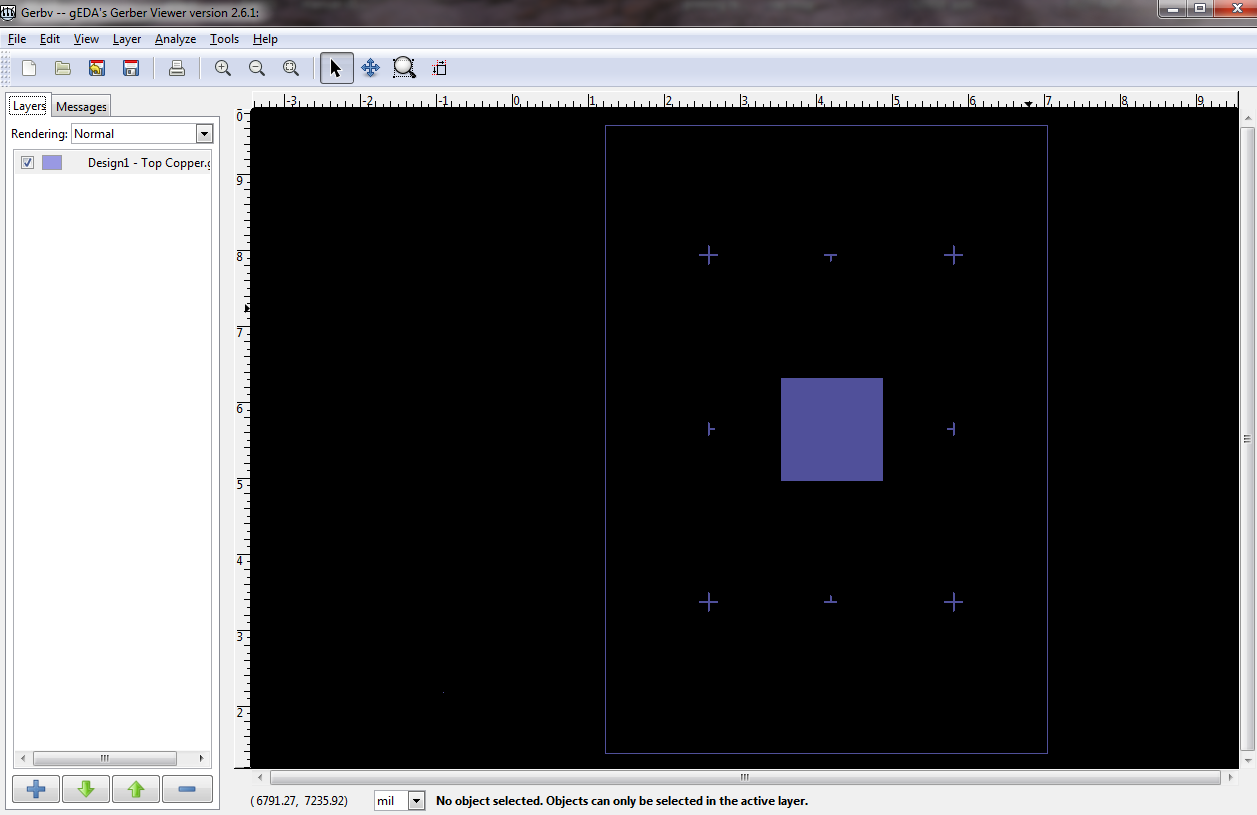
GerbV is one of the better ones - it is free and open source but this can be done with any gerber viewer.
Simply open the viewer and open the outputted .gbr file.
If all is okay then it is ready to send to production. The example in this tutorial is for screens for screen printing, it should also be transferable to circuit boards designed in Adobe Illustrator.